All posts by Barbara99

Meal Planning – Week 1

I am a big believer in meal planning and follow it regularly.  I recommend meal planning for several reasons:

  • Eliminates last minute meal planning – that’s when you leave work with no idea what’s for dinner and, suddenly, as you pass a supermarket with a deli or prepared food section or a fast food outlet and, well, you know the story – that becomes dinner.
  • Saves money and reduces food waste – have a plan in mind for using leftover meat such as ham, turkey, or roast beef. For example, use the leftover meat in sandwiches, casseroles, and/or soups. These are great ways to stretch the food dollar and eliminate food waste.
  • Healthier way to eat – You will eat less pre-packaged foods that often have way too many preservatives, additives, and other unhealthy ingredients. Meal planning means you are in control, to the extent possible, of what is in your food.
  • Less stress – Once you have a plan in place for meals for the week, you don’t have to stress each day over what to make for meals.

The keys to good meal planning are:

  • Make meals with ingredients you know your family will like – doesn’t have to be fancy, new, or creative. Sometimes, the old faithful comfort foods are the best.
  • Make the meal plan on the weekend and formulate the shopping list BEFORE you go to the supermarket and then stick to the plan, avoiding distractions of already-prepared or frozen entrées that supermarkets display to tempt shoppers.
  • Make your To-Do list for the meal preparation for the week – for example, if you are making baked beans on Saturday, get those beans soaking overnight on Friday evening.
  • Read each recipe carefully to ensure you will have all the ingredients and that the method is easy to understand and do-able in the time in which you have to do the food preparation.
  • Watch the supermarket sales flyers. Know your favorite dishes and buy ingredients for them when they are on sale. You’ll be more likely to stick to a meal plan if you already have most or all of the ingredients for a recipe on hand.
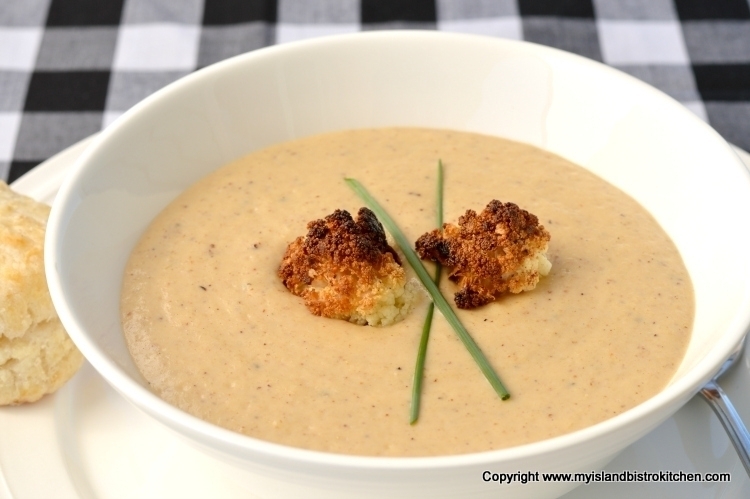
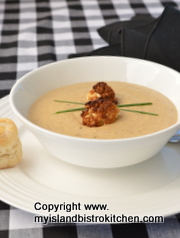
  • Plan around what’s in season. One of my favorite soups is cream of cauliflower which freezes well (provided whole milk, not fat-reduced, is used). I make several batches of this soup each fall when the locally-grown cauliflower is in season. I would not make it, however, in January with imported cauliflower that has traveled thousands of miles for days and is highly priced. Good meal planning needs to take place, on an ongoing basis, throughout the year.

Here is my suggested meal plan for the upcoming week, focusing primarily on dinners with some suggestions for a couple of lunches making the most of a boiled picnic ham. I’ve provided a list of the main ingredients that, for the most part, would probably involve a shopping trip to the supermarket for most. However, as always, read each recipe thoroughly and carefully to create your own shopping list as I have not listed what I consider to be “staple” items like milk, butter, eggs, spices, etc.  Click on the green hotlinks to access the recipes.

MONDAY

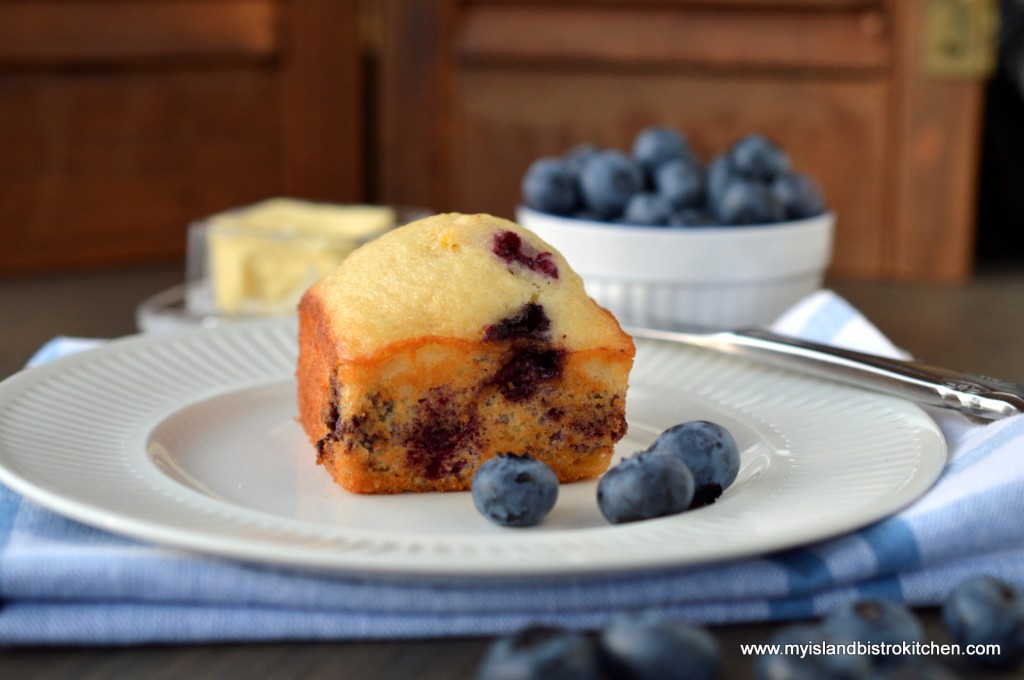
Blueberry Muffins – These are great breakfast or coffee break muffins and they freeze very well.  Nice treat to start off the week!
Shopping List: Blueberries (fresh or frozen), orange juice, orange rind
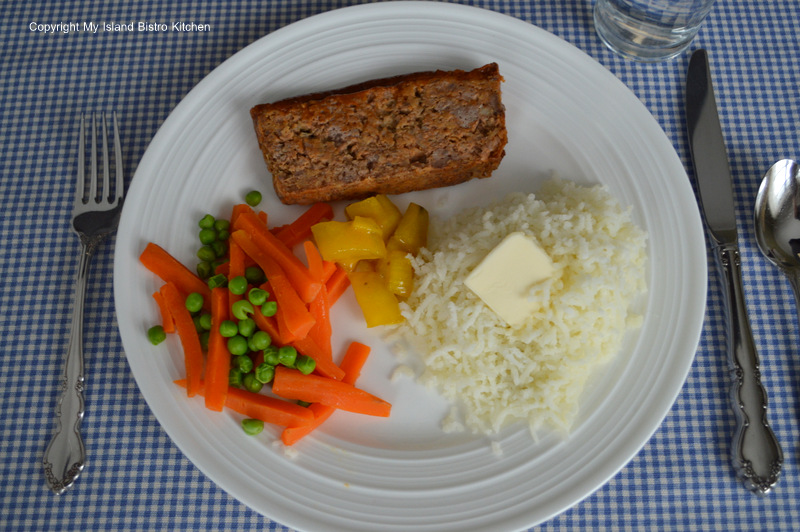
Blueberry Muffins
Blueberry Muffins

Dinner:  Meatloaf
Serve with mashed or riced potatoes and your favorite side of veggies. Homemade mustard pickles go great with meatloaf!

Shopping List: Ground beef, onion, prepared mustard, tomato soup, dry onion soup mix, graham wafer crumbs, fine bread crumbs, garlic powder, vegetables of choice

Meatloaf with Riced Potatoes and Mixed Vegetables

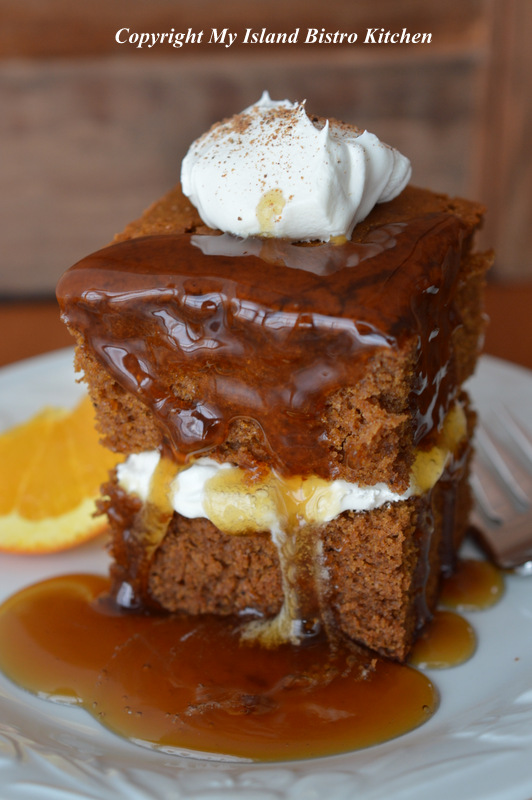
Dessert:  Gingerbread
At least once every winter, I have to have a dose of this yummy comfort food! Drizzle with brown sugar sauce for an extra-special treat!
Shopping List: Applesauce, molasses, coffee

Gingerbread
Gingerbread with Whipped Cream and Brown Sugar Sauce

TUESDAY

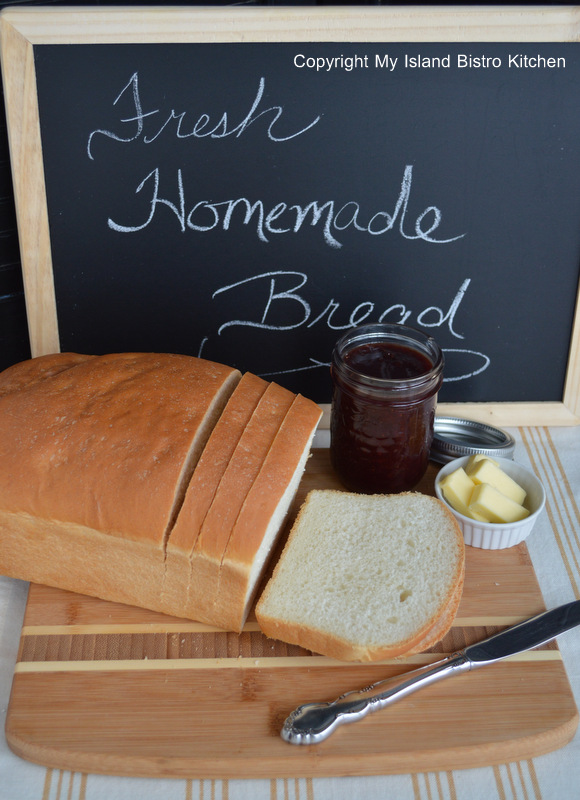
Homemade White Bread – This is always such a treat!  This bread will be super good with the ham sandwiches this week!
Shopping List: All-purpose flour, dry yeast, milk, butter/shortening

White Bread
Homemade White Bread

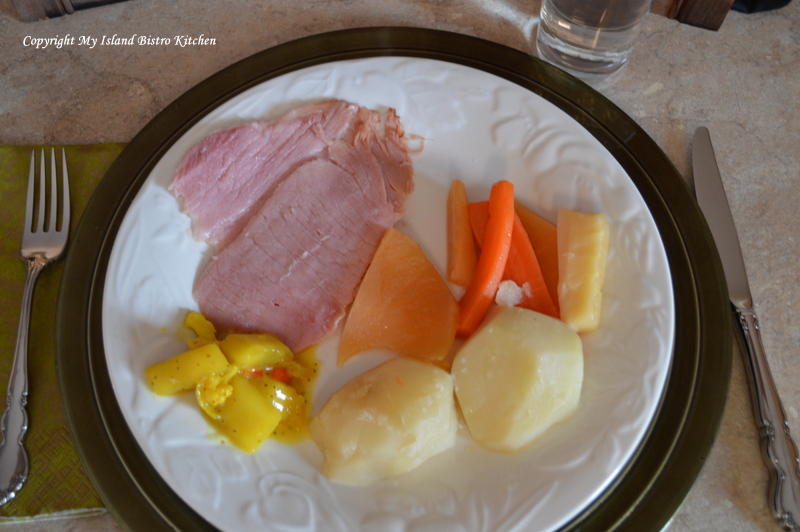
Dinner:  Old-fashioned Boiled Ham Dinner – This is truly dinner-in-a-pot and is my definition of “comfort food”!  The meat and vegetables are all cooked in the same broth in the same pot. Make sure you cook enough veggies for Wednesday night as this always tastes even better the second day. Easy to heat the vegetables in the microwave and, poof, you have two nights’ meals prepared in one effort. You’ll want those mustard pickles or mustard beans with this dinner!
Shopping List: Smoked pork picnic shoulder (ham), parsnips, carrots, rutabaga (turnip), potatoes

Boiled Ham Dinner
Boiled Ham DInner

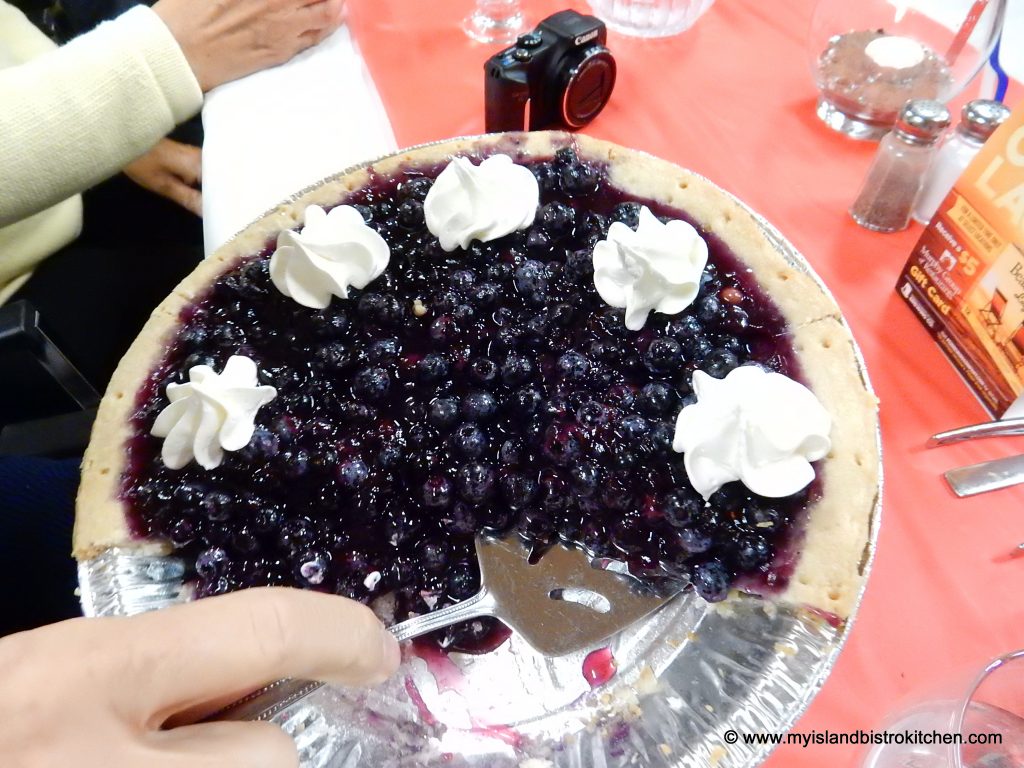
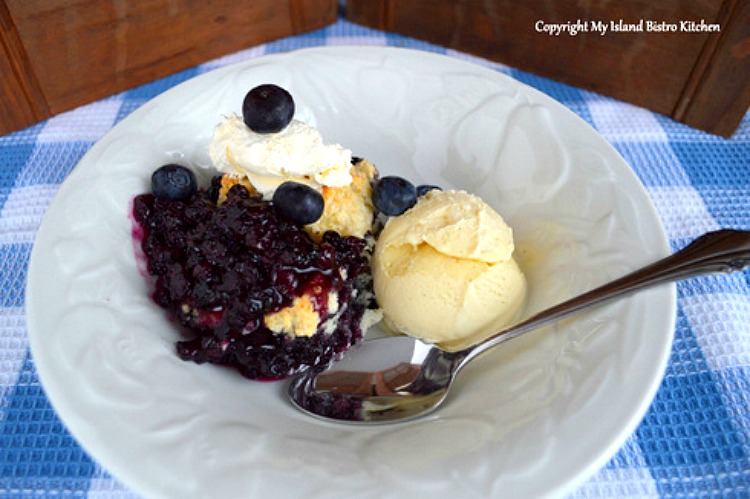
Dessert:  Blueberry Grunt
This is such an incredibly yummy dessert – serve it with your favorite vanilla ice cream!
Shopping List: Blueberries (fresh or frozen) and lemon rind, vanilla ice cream

Blueberry Grunt
Blueberry Grunt

WEDNESDAY

Lunch:  Ham Sandwiches made with homemade white bread!  Don’t forget the mustard!

Dinner:  Leftover boiled ham dinner from Tuesday.

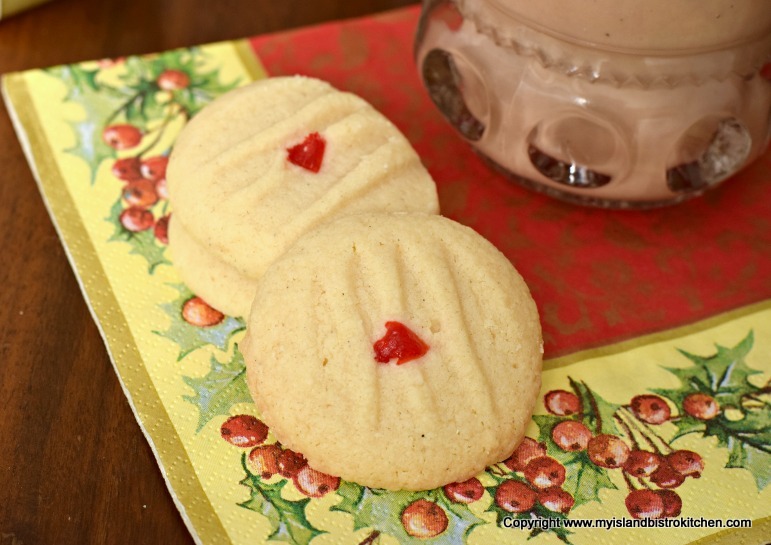
Dessert: Cherry Wink Cookies
Shopping List: Dates, cornflake crumbs, maraschino cherries

Cherry Wink Cookie
Cherry Wink Cookie

THURSDAY

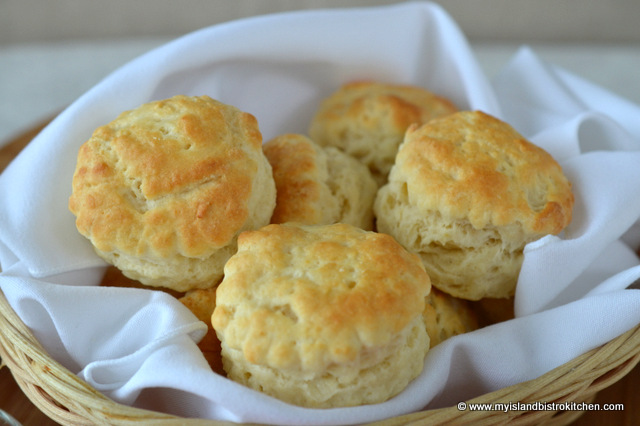
Homemade Tea Biscuits
Shopping list: Whole milk, whipping cream, unsalted butter

Tea Biscuits
Tea Biscuits

Lunch:  Ham Salad Sandwiches

Shopping List: Sweet pickle relish, Dijon mustard, maple syrup, celery, red pepper, mayonnaise, Havarti cheese

Dinner:  Hawaiian Fiesta Casserole – this is a great way to use up left-over cooked ham and stretch its use. Serve these with those tasty biscuits and perhaps a green salad!
Shopping List: Rice, cream of celery soup, sour cream, liquid chicken bouillon, broccoli, canned pineapple chunks, Parmesan cheese, fine bread crumbs, leftover cooked ham, and ingredients for a green salad and dressing

Hawaiian Fiesta Casserole

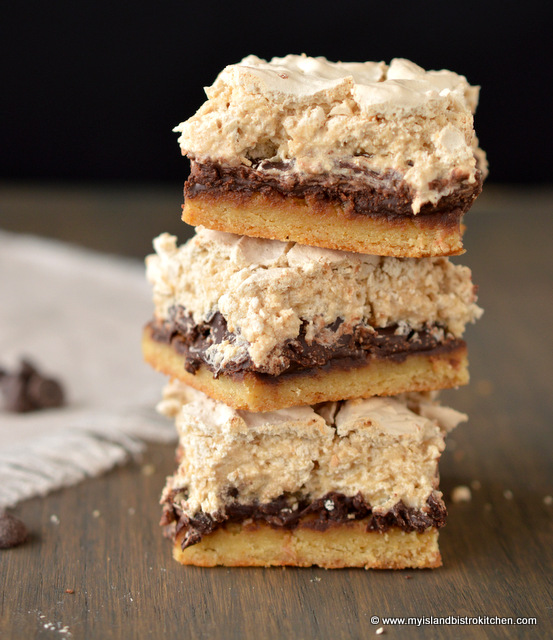
Dessert: Decadent Chocolate Chip Squares
Shopping List:  Chocolate chips and coconut

Decadent Chocolate Chip Squares

FRIDAY

Dinner:  Mac ‘n Cheese with a green salad and homemade tea biscuits
Shopping List: Elbow macaroni, liquid chicken bouillon, cheddar cheese, Parmesan cheese, salad ingredients and dressing

Mac 'n Cheese
My Island Bistro Kitchen Macaroni and Cheese

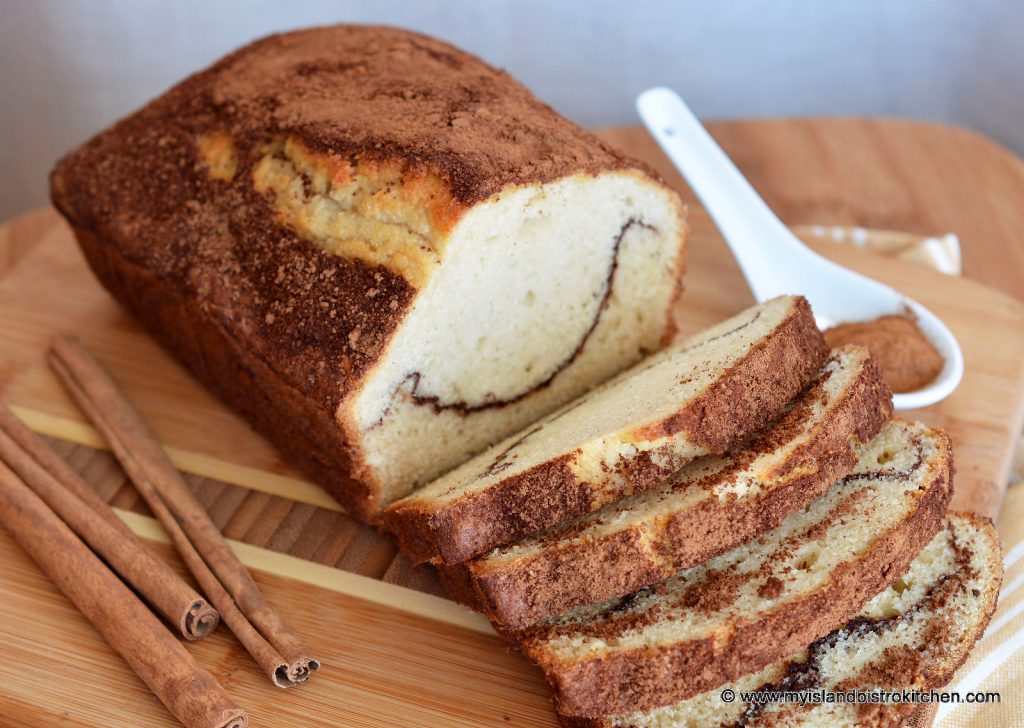
Dessert: Cinnamon Sweet Bread
Shopping List: Staple baking ingredients

Cinnamon Sweet Bread

SATURDAY

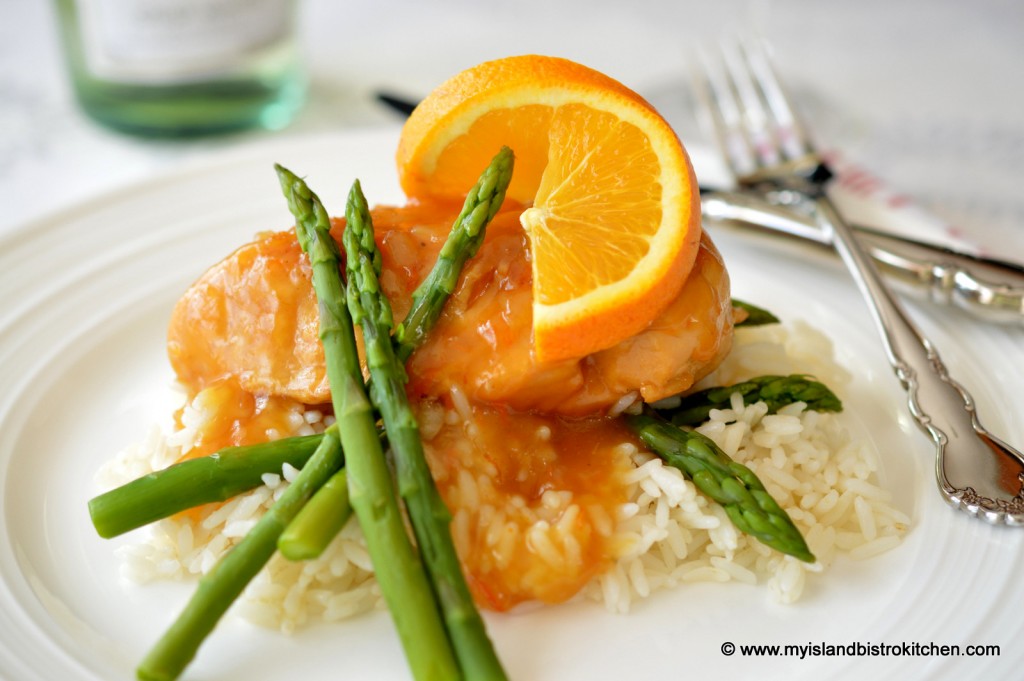
Dinner: Maple-Orange Sauced Chicken Breasts with Rice
An extra special weekend treat!
Shopping List: Boneless skinless chicken breasts, onion, fennel, orange juice, orange rind, chicken stock, maple syrup, orange marmalade, rice

Maple-Orange Sauced Chicken

Dessert: Coconut Cream Pie
One of the best pies going!
Shopping List:  9” pie shell, coconut milk, whole milk or cream, sweetened shredded coconut

Coconut Cream Pie
Coconut Cream Pie

SUNDAY

Sunday Breakfast:  Pancakes

Pancakes
Pancakes

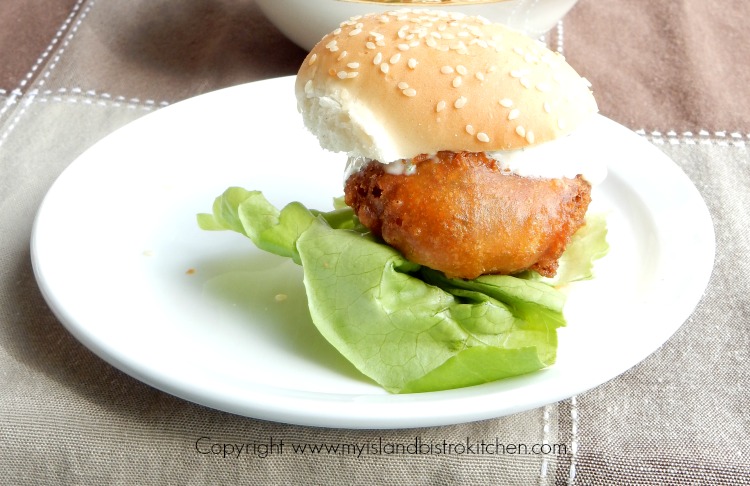
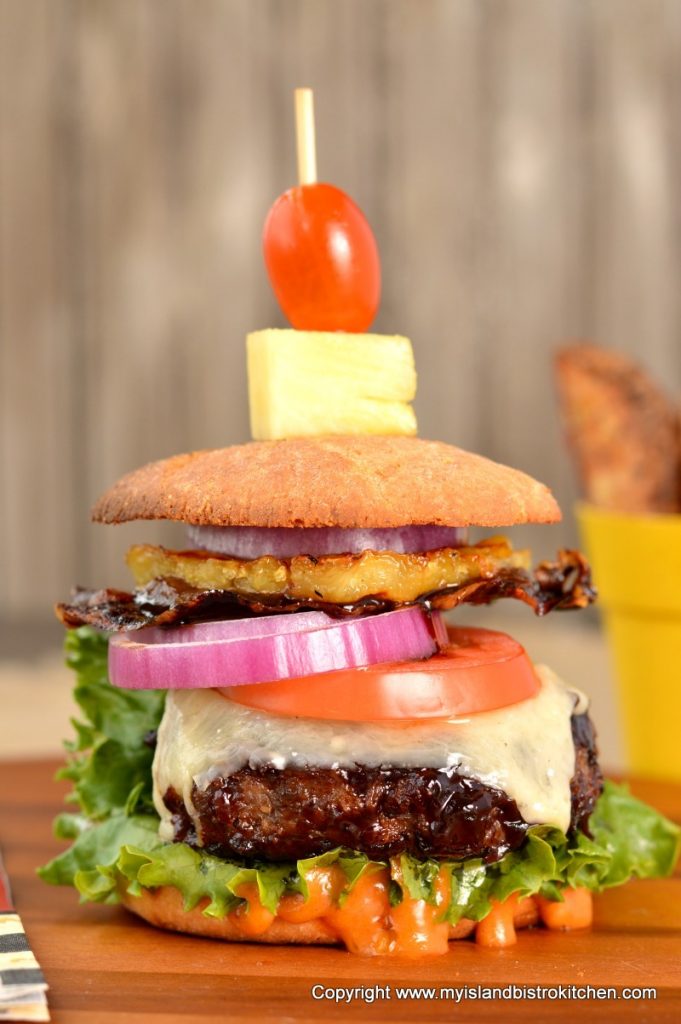
Dinner:  Bistro Burgers with Home Fries
Shopping List: Ground chuck, mayonnaise, maple syrup, ketchup, rhubarb relish, Dijon mustard, sour cream, onion salt, Parmesan cheese, Blueberry BBQ sauce, dry onion soup mix, bread crumbs, Cheddar cheese slices, red onion, tomato, prosciutto, fresh pineapple, bread and butter pickles, hamburger rolls, potatoes (for home fries)

"The Bistro Burger"
“The Bistro Burger”

Dessert: Leftover Coconut Cream Pie

Meal planning can be a challenge, especially with high food prices, ingredient availability (particularly in winter for fresh local ingredients) and, of course, for those who are busy and time-challenged.  However, with having a plan in place and establishing a routine for meal preparation, it is a way to eat better, save money, reduce food waste, and eliminate the stress of last-minute meal preparation that can sometimes result in unhealthy food choices. For those with children, it’s a good way to help them make good food choices and engage them in meal preparation by assigning them tasks to help with the work of making meals.

For my Week 2 Meal Plan, click here.
For my Week 3 Meal Plan, click here.
For my Week 4 Meal Plan, click here.
For my Week 5 Meal Plan, click here.
For my Week 6 Meal Plan, click here.


Twice-baked Potatoes Recipe

Twice-baked Potato
Twice-baked Potato

When you live in Prince Edward Island, Canada, where potatoes are one of the main agricultural crops, you find lots of ways to serve potatoes. Twice-baked potatoes, or stuffed baked potatoes, are one of my all-time favorites.  I make up big batches of these and freeze them so they are always on hand, ready to be popped in the oven for dinner. Continue reading Twice-baked Potatoes Recipe

Gluten-free Brown Sugar Fudge Square

Gluten-free Brown Sugar Fudge Square

If you like brown sugar fudge, you’ll love this Gluten-free Brown Sugar Fudge Square, even if you aren’t gluten-intolerant or on a grain-restrictive diet! With a cake-type base, it’s the fudge icing that makes this square and takes it from plain to yummy. It’s like having cake and candy at the same time!

I use 1-to-1 gluten-free baking flour along with a small amount of coconut flour in this square.  The coconut flour blends well with the shredded coconut in the recipe and gives the square extra flavor.  Super easy square to make.

Gluten-free Brown Sugar Fudge Square

The slightly tricky part is making the icing as it will “set up” very fast.  Make sure you have all the ingredients pre-measured and at hand when you start to make the icing.  It’s essential that the icing sugar be sifted to remove any lumps as there won’t be any time to work out any lumps when beating the icing sugar into the hot butter-sugar mixture. Once the icing starts to thicken, work quickly to spread it over the square.

This square freezes beautifully and is great to have on hand when you just need to have something sweet!

Gluten-free Brown Sugar Fudge Square

[Printable version of recipe follows at end of posting]

Gluten-free Brown Sugar Fudge Square

Ingredients:

Square
½ cup minus 1 tbsp butter, softened at room temperature
1 cup brown sugar, lightly packed
1 extra-large egg (at room temperature for 20 minutes)
½ tsp pure vanilla
1 cup 1-to-1 gluten-free baking flour
2 tbsp coconut flour
1 tsp baking powder
pinch salt
1/3 cup milk
½ cup shredded coconut

Icing
3 tbsp butter, softened at room temperature
¾ cup brown sugar, lightly packed
3 tbsp cream
1 cup sifted icing sugar
1 tsp vanilla

Walnut halves for decoration (optional)

Method:

Preheat oven to 350°F. Grease or, alternatively, line 9” square baking pan with tin foil and spray with cooking oil.

Square:  Cream butter and sugar together.  Add the egg and beat well to combine with butter-sugar mixture.  Beat in vanilla.

Sift the 1-to-1 gluten-free flour, coconut flour, baking powder, and salt together.  Add the dry ingredients and milk to the creamed mixture in three parts (3 parts dry and 2 parts wet) starting and ending with the dry ingredients.  Beat for 1 minute longer on medium speed. Fold in the shredded coconut.  Spread batter evenly in prepared pan.

Bake for 30-32 minutes or until cake tester inserted into center of square comes out clean.  Remove square from oven and place on wire rack to cool completely.

Icing:  When square has cooled, make the icing by combining the butter and brown sugar in a saucepan over medium heat.  Stir until both have melted/dissolved.  Add the cream.  Bring mixture to a boil.  Reduce heat and simmer for 2 minutes, stirring occasionally.  Remove from heat and, with an electric hand mixer, beat in the icing sugar until mixture starts to thicken.  Immediately stir in the vanilla and, working quickly (as this icing will “set up” very fast), spread the icing evenly over square.  Score cutting lines on square and, if desired, place one walnut half on each individual square. Let icing set completely before cutting squares.

Yield: One 9” pan of squares

Gluten-free Brown Sugar Fudge Square

Gluten-free Brown Sugar Fudge Square

Yield: 1 - 9" pan of squares

An old-fashioned fudge square made with gluten-free flour and topped with brown sugar fudge icing.

Ingredients

  • Square
  • ½ cup minus 1 tbsp butter, softened at room temperature
  • 1 cup brown sugar, lightly packed
  • 1 extra-large egg (at room temperature for 20 minutes)
  • ½ tsp pure vanilla
  • 1 cup 1-to-1 gluten-free baking flour
  • 2 tbsp coconut flour
  • 1 tsp baking powder
  • pinch salt
  • 1/3 cup milk
  • ½ cup shredded coconut
  • Icing
  • 3 tbsp butter, softened at room temperature
  • ¾ cup brown sugar, lightly packed
  • 3 tbsp cream
  • 1 cup sifted icing sugar
  • 1 tsp vanilla
  • Walnut halves for decoration (optional)

Instructions

  1. Preheat oven to 350°F. Grease or, alternatively, line 9” square baking pan with tin foil and spray with cooking oil.
  2. Square: Cream butter and sugar together. Add the egg and beat well to combine with butter-sugar mixture. Beat in vanilla.
  3. Sift the 1-to-1 gluten-free flour, coconut flour, baking powder, and salt together. Add the dry ingredients and milk to the creamed mixture in three parts (3 parts dry and 2 parts wet) starting and ending with the dry ingredients. Beat for 1 minute longer on medium speed. Fold in the shredded coconut. Spread batter evenly in prepared pan.
  4. Bake for 30-32 minutes or until cake tester inserted into center of square comes out clean. Remove square from oven and place on wire rack to cool completely.
  5. Icing: When square has cooled, make the icing by combining the butter and brown sugar in a saucepan over medium heat. Stir until both have melted/dissolved. Add the cream. Bring mixture to a boil. Reduce heat and simmer for 2 minutes, stirring occasionally. Remove from heat and, with an electric hand mixer, beat in the icing sugar until mixture starts to thicken. Immediately stir in the vanilla and, working quickly (as this icing will “set up” very fast), spread the icing evenly over square. Score cutting lines on square and, if desired, place one walnut half on each individual square. Let icing set completely before cutting squares.
  6. Copyright My Island Bistro Kitchen
Schema/Recipe SEO Data Markup by Yummly Rich Recipes
https://myislandbistrokitchen.com/2016/12/29/gluten-free-brown-sugar-fudge-square/

Pin Me To Pinterest!

Fudge Squares

Gluten Free Fudge Squares

Turkey Chowder Recipe

Turkey Chowder is the perfect way to use up leftover turkey.  It’s a welcome tummy-warming and tasty chowder for cold winter days and is a real treat after skiing, a long winter walk, snowshoeing, or coasting on the snow-covered hills. Serve with warm rolls or biscuits straight from the oven for an extra special treat. Continue reading Turkey Chowder Recipe

“Just Hear Those Sleigh Bells Jinglin” Tablesetting

Just hear those sleigh bells jinglin’, ring ting tinglin’, to…..This is the song this tablesetting brings to my mind. Set with 222 Fifth’s Andover pattern, this dinnerware features a horse and sleigh in front of an old log cabin.  This dinnerware evokes a very nostalgic setting that is reminiscent of Christmas past.

The border on the outside of each plate is a rust-red shade with ivory pinecones and holly.  The horse and sleigh design is gray on an ivory background. This design appears only on the supper plate.  The dinner plate has a plain center which allows the food to present well on it.

The cereal/soup bowl features only the log cabin design in the bottom of the bowl.

I used an off-white tablescloth and matching napkins to connect to the background in the dinnerware. Holly-berry napkin rings make napkin preparation very easy and add, what I call, jewelry to the table.

It seemed only fitting that the centerpiece for the table should feature a sleigh.

And, of course, who should be in the sleigh but old St. Nick!

And, here is a look at the table all set for dinner!

I added a few small tree candles to draw in that feature from the dinnerware design.

This is a very pretty set of dishes and, keeping the centerpiece simple, they get to be the stars on the table.

Pin Me To Pinterest:

Christmas Tablesetting

To view photos of other Holiday tablesettings from My Island Bistro Kitchen, click on the links below:

Glitz ‘n Glamour New Year’s Eve Tablesetting
The Warmth of the Christmas Light Tablesetting
Christmas Eve Tablesetting and Dinner
A Tartan Holiday Tablesetting
Pretty Poinsettia Tablesetting
Poinsettia Trio Tablesetting
The Holiday Table
The Pink and Green Holiday Table
Christmas at My Island Bistro Kitchen
Purple Tablesetting for the Holidays
Evergreens and Reindeer Christmas Tablesetting
Cupcake Tablescape
Twas The Night Before Christmas

Gluten-free Melting Moments Cookies

Gluten-free Melting Moments

These gluten-free melting moments cookies prove that being on a gluten-free diet does not mean one has to compromise on favorite sweet treats!

I use a 1-to-1 gluten-free baking flour, such as Bob’s Red Mills brand, for these cookies.  I also add a small amount of very finely ground almonds to the batter as this lends a tenderness to the cookie crumb which justifies the name of the cookies because they do melt in the mouth!

Gluten-free Melting Moments

These cookies are very easy to make. Mix up the dough. Pinch off small amounts of the dough and form into small balls. Place on parchment-lined baking sheets and flatten with the tines of a fork. Bake. It’s really no more complicated than that!

Gluten-free Melting Moment Cookie

[Printable recipe follows at end of posting]

Gluten-Free Melting Moments

Ingredients:
½ cup butter, softened at room temperature
¼ cup icing sugar (aka confectioner’s sugar or powdered sugar)
¼ tsp pure vanilla
½ cup 1-to-1 gluten-free baking flour
¼ cup finely ground almonds
¼ cup cornstarch

Method:

Preheat oven to 325°F.  Line baking sheets with parchment paper.

Cream butter.  Add the icing sugar and cream well with the butter.  Mix in vanilla.

In separate bowl, whisk the flour, ground almonds, and cornstarch together. Add to the creamed mixture and blend until well incorporated.

Form dough into small round balls (apx. 5/8 oz dough per ball).  Place balls on prepared baking sheets, about 2“ apart, and flatten each ball with the tines of a fork.  Decorate with small bits of maraschino cherries, if desired.

Bake for approximately 15-18 minutes, just until edges of cookies start to tint a golden tan color. Don’t over-bake. Let cool on baking sheet for 2-3 minutes then transfer cookies to wire rack to cool completely.

Yield:  Apx. 1½ dozen cookies

Gluten-free Melting Moments

Gluten-free Melting Moments Cookies

Yield: Apx. 1 1/2 dozen

These melt-in-your-mouth gluten-free melting moments cookies have a tender crumb and delicate butter and almond flavor.

Ingredients

  • ½ cup butter, softened at room temperature
  • ¼ cup icing sugar (aka confectioner’s sugar or powdered sugar)
  • ¼ tsp pure vanilla
  • ½ cup 1-to-1 gluten-free baking flour
  • ¼ cup finely ground almonds
  • ¼ cup cornstarch

Instructions

  1. Preheat oven to 325°F. Line baking sheets with parchment paper
  2. Cream butter. Add the icing sugar and cream well with the butter. Mix in vanilla.
  3. In separate bowl, whisk the flour, ground almonds, and cornstarch together. Add to the creamed mixture and blend until well incorporated.
  4. Form dough into small round balls (apx. 5/8 oz dough per ball). Place balls on prepared baking sheets, about 2“ apart, and flatten each ball with the tines of a fork. Decorate with small bits of maraschino cherries, if desired.
  5. Bake for approximately 15-18 minutes, just until edges of cookies start to tint a golden tan color. Don’t over-bake. Let cool on baking sheet for 2-3 minutes then transfer cookies to wire rack to cool completely.
Schema/Recipe SEO Data Markup by Yummly Rich Recipes
https://myislandbistrokitchen.com/2016/12/22/gluten-free-melting-moments-cookies/

Pin Me To Pinterest:

Gluten Free Melting Moments
Gluten-free Melting Moments

For other tasty gluten-free cookie recipes, click on the links below:

Gluten Free Lemon-Filled Thumbprint Cookies
Gluten Free Snickerdoodles
Gluten-free Earl Grey Cranberry-Orange Shortbread

Gluten-Free Earl Grey Cranberry-Orange Shortbread

Gluten-Free Shortbread
Gluten-Free Earl Grey Cranberry-Orange Shortbread

These easy-to-make gluten-free Earl Grey Cranberry-Orange Shortbread cookies are brimming with flavor. The ground Earl Grey tea leaves lend a subtle hint of tea flavor as well as add wonderful specks of interest in the cookies.  The addition of the dried cranberries and grated orange rind make these very flavorful and tasty cookies.

Gluten-free Shortbread
Gluten-Free Earl Grey Cranberry-Orange Shortbread

I have been having very good success using 1-to-1 gluten-free baking flour, such as Bob’s Red Mill, for my gluten-free baking.  The addition of finely ground almonds adds both flavor and a layer of tenderness to the shortbread crumb.

Gluten-Free Shortbread
Gluten-Free Earl Grey Cranberry-Orange Shortbread

I use my old coffee grinder to grind the loose tea leaves very finely. This releases their essence which, in turn, infuses the dough with the tea aromatic. Use dried, not fresh or frozen, cranberries for these cookies and make sure they are chopped quite finely.

The dough will be quite soft so form it into a round log shape, wrap it tightly in plastic wrap or waxed paper, and refrigerate it for 2-3 hours before slicing and baking. Refrigerating the dough helps to firm it up enough so that, when sliced with a sharp knife, the slices cut cleanly. Empty cardboard paper towel rolls make great cylinder “sleeves” in which to chill the cookie dough because they help to keep the round shape. Simply slit open the paper towel roll, place the wrapped cookie log inside the “sleeve”, draw the edges of the cylinder together, and secure with tape. Rotate the cookie dough log a couple of times during the chilling process to distribute its weight and help to keep the round shape.

These cookies are a great addition to the menu of anyone on a gluten-free diet. In fact, anyone can enjoy these cookies, regardless whether they have a sensitivity or intolerance to gluten or not – I’ll bet you’d never guess they’re made with gluten-free flour!

Gluten-free Shortbread
Gluten-Free Earl Grey Cranberry-Orange Shortbread

[Printable recipe follows at end of posting]

Gluten-Free Earl Grey Cranberry-Orange Shortbread

Ingredients:

½ cup unsalted butter, softened at room temperature
½ cup sifted icing sugar (aka confectioner’s or powdered sugar)
¾ tsp finely grated orange rind
1/2 tsp pure vanilla
1/8 tsp almond flavoring

¾ cup 1-to-1 gluten-free baking flour
¼ cup finely-ground almonds
1½ tbsp cornstarch
¼ tsp salt
¾ tsp finely ground Earl Grey tea leaves

¼ cup finely chopped dried cranberries

Method:

Cream butter and sugar together until smooth.  Beat in orange rind, vanilla, and almond flavoring.

Whisk flour, ground almonds, cornstarch, salt and ground tea leaves together.  Blend dry ingredients into creamed mixture until just combined.  Stir in cranberries.

Form dough into log approximately 1½” in diameter.  Wrap tightly in wax paper or plastic wrap. Slit open an empty paper towel cardboard cylinder and place cookie log in cylinder.  Draw cylinder sides together and secure with masking tape.  Refrigerate cookie log for 2-3 hours, turning roll every hour or so to distribute the weight of the log and to keep the shape round. (Unbaked cookie logs may be stored for 2-3 days in the refrigerator before baking, provided they are stored in sealed plastic bags or airtight containers.)

Preheat oven to 325°F. Line baking sheets with parchment paper. With a sharp knife, slice cookie log into ¼” thick slices.  Place cookies on prepared baking sheets, spacing the cookies about 1½” apart.  Bake for 20-21 minutes, or until edges of cookies start to tint golden brown, rotating baking sheet half way through the baking.  Let cookies cool on sheets for 3-4 minutes and then transfer to wire rack to finish cooling completely.

Store in airtight container at room temperature for up to 2 weeks or freeze for longer storage.

Yield:  Approximately 24 cookies

Gluten-Free Earl Grey Cranberry-Orange Shortbread

Yield: Apx. 24 cookies

A flavorful gluten-free shortbread cookie infused with a hint of Earl Grey tea and flavored with grated orange rind and dried cranberries.

Ingredients

  • ½ cup unsalted butter, softened at room temperature
  • ½ cup sifted icing sugar (aka confectioner’s or powdered sugar)
  • ¾ tsp finely grated orange rind
  • 1/2 tsp pure vanilla
  • 1/8 tsp almond flavoring
  • ¾ cup 1-to-1 gluten-free baking flour
  • ¼ cup finely-ground almonds
  • 1½ tbsp cornstarch
  • ¼ tsp salt
  • ¾ tsp finely ground Earl Grey tea leaves
  • ¼ cup finely chopped dried cranberries

Instructions

  1. Cream butter and sugar together until smooth. Beat in orange rind, vanilla, and almond flavoring.
  2. Whisk flour, ground almonds, cornstarch, salt and ground tea leaves together. Blend dry ingredients into creamed mixture until just combined. Stir in cranberries.
  3. Form dough into log approximately 1½” in diameter. Wrap tightly in wax paper or plastic wrap. Slit open an empty paper towel cardboard cylinder and place cookie log in cylinder. Draw cylinder sides together and secure with masking tape. Refrigerate cookie log for 2-3 hours, turning roll every hour or so to distribute the weight of the log and to keep the shape round. (Unbaked cookie logs may be stored for 2-3 days in the refrigerator before baking, provided they are stored in sealed plastic bags or airtight containers.)
  4. Preheat oven to 325°F. Line baking sheets with parchment paper. With a sharp knife, slice cookie log into ¼” thick slices. Place cookies on prepared baking sheets, spacing the cookies about 1½” apart. Bake for 20-21 minutes, or until edges of cookies start to tint golden brown, rotating baking sheet half way through the baking. Let cookies cool on sheets for 3-4 minutes and then transfer to wire rack to finish cooling completely.
  5. Store in airtight container at room temperature for up to 2 weeks or freeze for longer storage.
  6. Copyright My Island Bistro Kitchen
Schema/Recipe SEO Data Markup by Yummly Rich Recipes
https://myislandbistrokitchen.com/2016/12/20/gluten-free-earl-grey-cranberry-orange-shortbread/

If you have made this recipe and enjoyed it and/or wish to share it with your friends and family, please do so on social media but be sure to share the direct link to this posting from my website.

Connect with My Island Bistro Kitchen on Social Media

Join the Facebook page for My Island Bistro Kitchen:  https://www.facebook.com/MyIslandBistroKitchen/

Follow “the Bistro” on “X” (formerly Twitter)https://twitter.com/PEIBistro/

See the drool-worthy gallery of mouth-watering food photos from My Island Bistro Kitchen on Instagramhttps://www.instagram.com/peibistro/

Follow “the Bistro” on Pinterest at https://www.pinterest.ca/peibistro/ and pin the Pinterest-ready photo at the end

Pin These Gluten-Free Earl Grey Cranberry-Orange Shortbread Cookies To Pinterest!
Gluten Free Earl Grey Cranberry-Orange Shortbread


Gluten-Free Shortbread
Gluten-Free Earl Grey Cranberry-Orange Shortbread
Looking for more great gluten-free cookie recipes?  Check out these from My Island Bistro Kitchen:

Melting Moments
Snickerdoodles
Lemon-Filled Thumbprint Cookies

Christmas Icebox Cookies Recipe

Icebox Cookies
Christmas Icebox Cookies

Christmas Icebox Cookies are a tradition in my household.  There are many varieties of cookies that beg to be made, shared, and eaten over the holiday period and these are always a perennial favorite.

The richness of the butter and sugar combined with the slight chewiness of the mixed glazed fruit and currants results in a tasty and flavorful cookie. Use finely chopped fruit and the small currants for these delicate cookies.

Christmas Cookies
Christmas Icebox Cookies

Icebox cookies are very easy to make and don’t take any unusual or difficult-to-find ingredients. The dough gets divided into thirds and then each third is formed into a round log shape, wrapped tightly in plastic wrap or waxed paper and refrigerated for at least 3-4 hours before slicing and baking. This is because the dough needs time to firm up enough to be able to cut clean-edge slices.

Plan ahead and save three empty paper towel cardboard cylinders.  Slit up the length of the cylinders, these make great “sleeves” for the cookie logs and help to keep the shape of the logs round, or reasonably so. Secure the cylinders closed with tape.

Make sure to rotate the cylinders every hour or so during the 3-4 hours of dough chilling as this will help to distribute the weight of the dough and aid in keeping the cookie log round. When ready to bake the cookies, simply unwrap the chilled logs and, with a sharp flat-bladed knife, cut the logs into 1/4″ slices, place on parchment-lined baking sheets, and bake for 8-10 minutes. These cookie logs can be made two to three days in advance of baking and kept in the refrigerator so they are a great make-ahead cookie dough.

Icebox Cookies
Christmas Cookies

One of the great things about icebox cookies is that they can be made ahead and frozen, either before or after baking. Store the unbaked cookie logs in sealed bags in the freezer until they are needed. Simply let the dough sit at room temperature for approximately 30 minutes or so before slicing and baking.  They’re also great to have on hand if unexpected guests drop by – you can pop a pan of the cookies in the oven and have your house smell tantalizing while your guests await fresh-from-the-oven cookies!

These make great host/hostess gifts, too, either baked or unbaked. A festive tin filled with these delectable cookies will be a sure hit with anyone.

Icebox Cookies
Christmas Tin of Icebox Cookies

They’re also fun to package in cute little bags. Who doesn’t love to get a bag with homemade cookies inside!

If you wish to let the host/hostess bake the cookies when they so desire, simply wrap a chilled or frozen cookie log decoratively and include the baking instructions.

Christmas Cookies

Sometimes, I’ll enclose a small log of unbaked cookies in a little decorative bag and add a few of the baked cookies just to whet the recipient’s appetite!

Christmas Cookies
Icebox Cookies

These are easy-to-make, flavorful cookies that are very versatile – they look great on sweet trays, are easy to package in boxes, tins, or bags for gifts, and they are also wonderful treats in lunch bags, too!

[Printable recipe follows at end of posting.]

Christmas Icebox Cookies

Ingredients:

1 cup butter, softened at room temperature
1 2/3 cups brown sugar, lightly packed
2 extra large eggs
1 tsp vanilla

3¼ cups all-purpose flour
1 tsp baking powder
1/8 tsp baking soda
¼ tsp salt

1 cup mixed glazed fruit
½ cup currants

Method:

Cream butter and sugar until smooth.  Beat in eggs, one at a time, beating well after each addition.  Stir in vanilla.

Sift flour, baking powder, baking soda, and salt together.  Beat into creamed mixture until dry ingredients are combined.  Stir in cherries and currants until blended into dough.

Divide dough into thirds and shape each portion of dough into three separate logs, each approximately 2” in diameter.  Wrap tightly in wax paper or plastic wrap. Slit open 3 empty paper towel cardboard cylinders and place one cookie log in each cylinder.  Draw cylinder sides together and secure the cylinders with masking tape.  Refrigerate cookie logs for 3-4 hours, turning rolls every hour or so to distribute the weight of the logs and to keep the shape round. (Unbaked cookie logs may be stored for 2-3 days in the refrigerator before baking, provided they are stored in sealed plastic bags or airtight containers.)

Preheat oven to 375°F. Line baking sheets with parchment paper. With a sharp knife, slice cookie logs into ¼” thick slices.  Place cookies on prepared baking sheets, spacing the cookies about 1½” apart.  Bake for 8-10 minutes, until lightly browned.  Let cookies cool on sheets for 3-4 minutes and then transfer to wire rack to finish cooling completely.

Store in airtight container at room temperature for up to 2 weeks or freeze for longer storage.

Unbaked cookie logs may be frozen in tightly sealed bags or containers for up to 2 months.  Remove logs from freezer and let stand at room temperature for 30 minutes or so before slicing and baking as above.

Yield:  Approximately 5½ dozen cookies


Christmas Icebox Cookies Recipe

Yield: Apx. 5 1/2 dozen

Traditional buttery-rich Christmas icebox cookies filled with mixed glazed fruit and currants.

Ingredients

  • 1 cup butter, softened at room temperature
  • 1 2/3 cups brown sugar, lightly packed
  • 2 extra large eggs
  • 1 tsp vanilla
  • 3¼ cups all-purpose flour
  • 1 tsp baking powder
  • 1/8 tsp baking soda
  • ¼ tsp salt
  • 1 cup mixed glazed fruit
  • ½ cup currants

Instructions

  1. Cream butter and sugar until smooth. Beat in eggs, one at a time, beating well after each addition. Stir in vanilla.
  2. Sift flour, baking powder, baking soda, and salt together. Beat into creamed mixture until dry ingredients are combined. Stir in cherries and currants until blended into dough.
  3. Divide dough into thirds and shape each portion of dough into three separate logs, each approximately 2” in diameter. Wrap tightly in wax paper or plastic wrap. Slit open 3 empty paper towel cardboard cylinders and place one cookie log in each cylinder. Draw cylinder sides together and secure the cylinders with masking tape. Refrigerate cookie logs for 3-4 hours, turning rolls every hour or so to distribute the weight of the logs and to keep the shape round. (Unbaked cookie logs may be stored for 2-3 days in the refrigerator before baking, provided they are stored in sealed plastic bags or airtight containers.)
  4. Preheat oven to 375°F. Line baking sheets with parchment paper. With a sharp knife, slice cookie logs into ¼” thick slices. Place cookies on prepared baking sheets, spacing the cookies about 1½” apart. Bake for 8-10 minutes, until lightly browned. Let cookies cool on sheets for 3-4 minutes and then transfer to wire rack to finish cooling completely.
  5. Store in airtight container at room temperature for up to 2 weeks or freeze for longer storage.
  6. Unbaked cookie logs may be frozen in tightly sealed bags or containers for up to 2 months. Remove logs from freezer and let stand at room temperature for 30 minutes or so before slicing and baking as above.
  7. Copyright My Island Bistro Kitchen
Schema/Recipe SEO Data Markup by Yummly Rich Recipes
https://myislandbistrokitchen.com/2016/12/18/christmas-icebox-cookies-recipe/

If you have made this recipe and enjoyed it and/or wish to share it with your friends and family, please do so on social media but be sure to share the direct link to this posting from my website.

Connect with My Island Bistro Kitchen on Social Media

Join the Facebook page for My Island Bistro Kitchen:  https://www.facebook.com/MyIslandBistroKitchen/

Follow “the Bistro” on “X” (formerly Twitter)https://twitter.com/PEIBistro/

See the drool-worthy gallery of mouth-watering food photos from My Island Bistro Kitchen on Instagramhttps://www.instagram.com/peibistro/

Follow “the Bistro” on Pinterest at https://www.pinterest.ca/peibistro/ and pin the Pinterest-ready photo at the end

For more great Christmas cookie recipes, click on the links below:

Classic Raspberry Linzer Cookies
Frypan Cookie Balls
The Rumrunners – Rum and Raisin Cookies
Marvelous Melting Moments
Molasses Spice Cookies
Hearty Hermits
Christmas Fruitcake Drop Cookies
Custard Sandwich Cookies
Cranberry and Eggnog Drop Cookies
The Bistro’s Scotch Cookies
Gluten-free Gumdrop Cookies
Gluten-free Melting Moments
Plum Puff Cookies
Brown Sugar Jam-Filled Cookies

Pin Me To Pinterest:

Icebox Cookies

Icebox Cookies

The Christmas Greens Holiday Tablesetting

I’m going with a green theme for this seasonal Christmas Greens Holiday Tablesetting, drawing the color scheme from the green leaves in my Royal Albert “Lavender Rose” china.

I often like to use a three-piece floral centerpiece featuring one larger arrangement flanked by two smaller satellites.

There is no need to completely replicate the smaller satellites to match the main arrangement entirely. However, the satellites should draw one or more colors and flowers from the central arrangement so that the three arrangements all connect and tie together.

During the Christmas season, I keep buckets of various types of greenery in my garage and then use them in arrangements.  I like to limit the selection of flowers to two to three colors but use different kinds of flowers in the same colors. Here I have used two different kinds of white flowers and two different green flowers.

Floral centerpieces need not cost a lot. I often buy packages of supermarket flowers and use them to build the centerpieces.  Economical containers can often be found in dollar stores.

I also like to use different shapes and textures of greenery, flowers, and berries. They add interest and depth to arrangements.

Adding a pine cone or two always adds interest to Christmas arrangements.

One of the advantages of this style of centerpiece is that various juxtapositions can be used with them on the table – the arrangements can be placed in a straight line, at angles to each other, close together to make it look like one large centerpiece, or spaced apart for distinctly unique pieces.

I’m letting the wood in my table shine in this tablesetting as opposed to covering it with a tablecloth.  I am using a white placemat for each setting. The gold charger plates pick up the gold rim of the china and add an air of elegance to the table.

I like the shape and colors in this china pattern. The shades of pink, lavender, and green in the pattern lend themselves to a wide variety of color options for the tablesetting.

Royal Albert “Lavender Rose” China

A simple pointed pocket fold for the napkin provides a nest for the forks.  This type of fold works particularly well for napkins that, like these, have a motif on one corner.

One sure way to add sparkle to any table is to use glassware with lots of cuts. Sometimes, I mix and match my glassware but, since I am using my formal china in this setting, I decided to use all the same pattern of glassware.

This is the look when all the elements of the tablesetting are put together.  The other great thing about the trio of floral arrangements is that, if the table is larger, there can be more than one larger centerpiece and/or more satellites to extend down the length of the table. It’s the type of centerpiece that is scaleable to the size of the table.

I hope you have enjoyed viewing my Christmas Greens holiday tablesetting.

Connect with My Island Bistro Kitchen on Social Media

Join the Facebook page for My Island Bistro Kitchen:  https://www.facebook.com/MyIslandBistroKitchen/

Follow “the Bistro” on “X” (formerly Twitter)https://twitter.com/PEIBistro/

See the drool-worthy gallery of mouth-watering food photos from My Island Bistro Kitchen on Instagramhttps://www.instagram.com/peibistro/

Follow “the Bistro” on Pinterest at https://www.pinterest.ca/peibistro/ and pin the Pinterest-ready photo at the end

Pin This Christmas Greens Tablesetting to Pinterest!


Christmas Tablesetting
Christmas greens are the focal color in this three-part floral centerpiece for a holiday tablesetting that features Royal Albert “Lavender Rose” china


For more holiday tablescape inspiration, click on the links below:

Glitz ‘n Glamour New Year’s Eve Tablesetting
The Warmth of the Christmas Light Tablesetting
Christmas Eve Tablesetting and Dinner
A Tartan Holiday Tablesetting
Pretty Poinsettia Tablesetting
Poinsettia Trio Tablesetting
The Holiday Table
The Pink and Green Holiday Table
Christmas at My Island Bistro Kitchen
Purple Tablesetting for the Holidays
Evergreens and Reindeer Christmas Tablesetting
Cupcake Tablescape
Twas The Night Before Christmas

Homemade Irish Cream Liqueur Recipe

Irish Cream Liqueur
Homemade Irish Cream Liqueur

Making homemade Irish Cream Liqueur is very easy – it’s a matter of simply combining all the ingredients in a blender and blending on high for 25-30 seconds.  Easy-peasy.

This liqueur will keep, tightly sealed in a sterilized bottle, in the refrigerator for the length of time the fresh cream used in the recipe will stay fresh as noted on the cream carton or bottle.

It’s important to shake the liqueur well before using . This liqueur serves well over ice or mixed with eggnog (1 part liqueur to 2 parts eggnog).  Of course, it can also be used in a multitude of other ways as well, such as a flavorful coffee creamer.

Irish Cream
Homemade Irish Cream Liqueur

Presented in decorative bottles, this liqueur makes a wonderful host or hostess gift.

[Printable recipe follows at end of posting]

Irish Cream Liqueur

Ingredients:

1 cup 18% fresh cream
1 – 300ml can condensed milk
1½ cups whiskey
2½ tbsp chocolate syrup
2 tbsp cold strong brewed coffee
2 tsp pure vanilla
¾ tsp almond flavoring

Method:
Combine all ingredients in blender and blend on high for apx. 25-30 seconds, just until ingredients are blended.  Transfer liqueur to sterilized decorative bottle.  Seal tightly.

Store in refrigerator for the length of time the fresh cream used in the recipe is “best before”.  Shake liqueur well before serving.

To serve, pour liqueur into glass and add ice.

Yield:  Apx. 1 litre

Serving Suggestion:  Pour 1 part liqueur into glass and top with 2 parts eggnog.  Add ice and serve.

Homemade Irish Cream Liqueur Recipe

Yield: Apx. 1 litre

Ingredients

  • 1 cup 18% fresh cream
  • 1 – 300ml can condensed milk
  • 1½ cups whiskey
  • 2½ tbsp chocolate syrup
  • 2 tbsp cold strong brewed coffee
  • 2 tsp pure vanilla
  • ¾ tsp almond flavoring

Instructions

  1. Combine all ingredients in blender and blend on high for apx. 25-30 seconds, just until ingredients are blended. Transfer liqueur to sterilized decorative bottle. Seal tightly.
  2. Store in refrigerator for the length of time the fresh cream used in the recipe is “best before”. Shake liqueur well before serving.
  3. To serve, pour liqueur into glass and add ice.
  4. Copyright My Island Bistro Kitchen
Schema/Recipe SEO Data Markup by Yummly Rich Recipes
https://myislandbistrokitchen.com/2016/12/14/homemade-irish-cream-liqueur-recipe/

Click on this link for my recipe for Irish Cream French Toast.

If you have made this recipe and enjoyed it and/or wish to share it with your friends and family, please do so on social media but be sure to share the direct link to this posting from my website.

Connect with My Island Bistro Kitchen on Social Media

Join the Facebook page for My Island Bistro Kitchen:  https://www.facebook.com/MyIslandBistroKitchen/

Follow “the Bistro” on “X” (formerly Twitter)https://twitter.com/PEIBistro/

See the drool-worthy gallery of mouth-watering food photos from My Island Bistro Kitchen on Instagramhttps://www.instagram.com/peibistro/

Follow “the Bistro” on Pinterest at https://www.pinterest.ca/peibistro/ and pin the Pinterest-ready photo at the end

Pin This Recipe To Pinterest!
Homemade Irish Cream Liqueur


Irish Cream
Homemade Irish Cream Liqueur

Festive Light Fruitcake Recipe

One of my favorite foods to make is the traditional fruitcake – both dark and light versions.  And, I adore the scent in my home as the cakes bake.  I don’t make both dark and light every year. Rather, I make a dark cake one year then, the following year, make a light cake.

Christmas Cake
Light Fruitcake

My Christmas season begins in early November when the first thing done to prepare for the holidays is to make the fruitcake.  Fruitcakes do well with some “ageing” before they are cut – about 3 weeks is the absolute bare minimum a light fruitcake should age and, preferably longer. Dark fruitcakes take several weeks (and some will argue, months) to age and mellow before being cut into and served. This period allows the flavors to blend well and the cake to moisten which, of course, is always aided by a brushing of a weekly “nightcap” of whatever liquor is used in the cake.  I tend to put rum in my dark cakes and brandy in the light fruitcakes.  This libation not only helps to keep the cake moist but it also infuses flavor into the cake as it ages.

Christmas Cake
Light Fruitcake

Apart from their lighter color, light fruitcakes tend to be less rich and not quite as sweet as their dark counterparts.  The wonderful thing about light fruitcakes is that the light-colored batter allows the jewel-toned glazed fruit to show well.  Light fruitcake is both a flavorful and colorful addition to any holiday sweet tray.

Fruitcake
Light Fruitcake

When I posted my recipe awhile back for my dark fruit cake, I offered several tips and hints on how to make fruitcakes.  You can access that information by clicking here. The same tips and hints apply to light fruitcakes.

My version of a light fruitcake is nut-free. I find nuts can sometimes go rancid and can interfere with the nice soft texture of the fruitcake so I have long since dispensed with them in my cakes. As well, for any one with an allergy to nuts, a fruitcake with nuts would be off limits.

Christmas Cake
Jewel-toned Light Fruitcake

[Printable version of recipe follows at end of posting]

Light Fruit Cake

Ingredients:
1 lb golden sultana raisins
6 oz green glazed cherries
6 oz red glazed cherries
4 oz glazed pineapple rings, chopped
¾ lb mixed glazed fruit
¼ lb citron
½ cup brandy
¾ cup flaked coconut
2 tsp finely grated lemon rind
2 tsp finely grated orange rind

1 cup butter, softened at room temperature
1½ cup white sugar
5 large eggs, separated
1 tsp pure vanilla
1 tsp almond flavoring
1 tsp lemon flavoring
½ cup crushed pineapple, drained very well (reserve ¼ cup of the juice)

3¾ cups all-purpose flour (set aside 1 cup of the flour to flour the fruit mixture)
1½ tsp baking powder
¼ tsp salt

¼ cup orange juice
¼ cup freshly-squeezed lemon juice
¼ cup pineapple juice (from the drained crushed pineapple)

Extra brandy for brushing on cake as it ages and for soaking cheesecloth in which to wrap the cake

Method:
In large bowl, combine the raisins, cherries, glazed pineapple, mixed glazed fruit, and citron. Mix well.  Stir in the brandy to coat the fruit.  Cover tightly with plastic wrap. Let stand for about 24 hours to macerate the fruit, stirring occasionally. When ready to mix up the cake, add the coconut and lemon and orange rind.  Stir well.

Prepare 8-inch square fruitcake pan that is 3 inches deep and has a removable bottom:  Lightly spray the bottom and sides of the pan with cooking spray.  Line the pan (bottom and sides), with brown paper or double thickness of parchment paper.  Lightly spray the paper.

Preheat oven to 275°F.

In large bowl of stand mixer and using the paddle attachment, beat the butter until creamy.  Gradually add the sugar and beat until mixture is light and creamy.  Beat in the egg yolks, one at a time, beating well after each addition and scraping the sides of the bowl with a spatula to ensure ingredients are all incorporated. Beat 1 additional minute. Beat in the vanilla, almond, and lemon flavorings.  Stir in the drained crushed pineapple.

Sift together 2¾ cups of the flour, baking powder, and salt.
In measuring cup or small bowl, combine the orange and lemon juices along with the reserved ¼ cup of pineapple juice.

Add the dry and wet ingredients to the beaten butter and sugar mixture in three additions, starting and ending with the flour mixture.  Transfer batter to a very large bowl.

Sprinkle reserved cup of flour over the macerated fruit and toss ingredients lightly and quickly.  Gently fold the fruit mixture into the batter.

In clean bowl, beat the egg whites until stiff but not dry. Gently fold the whipped egg whites into the batter.

Transfer batter by large spoonfuls into the prepared baking pan.  Use a knife to evenly spread the batter in the pan, smoothing the top.  Add a few cherries as decorations to the top of the cake, if desired.

Place small pan of hot water on the lower rack in the oven.  Place fruitcake in center of middle rack and bake for approximately 5 – 5¼ hours or until cake is firm to the touch and cake tester inserted into centre of cake comes out clean. After about an hour or so of baking, loosely tent cake with tin foil to prevent it from browning too much. Remove cake from oven and place on rack.  Let cake cool in pan for about 40 minutes before carefully removing from pan by inverting it on a tea towel and removing the paper.  Carefully turn the cake top side up on to a wire cooling rack.

Let cake cool completely before brushing well with brandy and wrapping in brandy-soaked cheesecloth, followed by plastic wrap and tin foil. Store in a sealed plastic bag in a cool, dry area.  Remove wrapping and brush cake top and sides with brandy once a week for 3-4 weeks as the cake “ages” before cutting and serving.

Yield:  1 – 6 lb, 6½ oz cake

For other Fruitcake, or fruitcake style, recipes from My Island Bistro Kitchen, click on the links below:

Dark Fruitcake
Spirited Dundee Cake
Sultana Cake
Gluten-free Light Fruitcake

If you have made this recipe and enjoyed it and/or wish to share it with your friends and family, please do so on social media but be sure to share the direct link to this posting from my website.

Connect with My Island Bistro Kitchen on Social Media

Join the Facebook page for My Island Bistro Kitchen:  https://www.facebook.com/MyIslandBistroKitchen/

Follow “the Bistro” on “X” (formerly Twitter)https://twitter.com/PEIBistro/

See the drool-worthy gallery of mouth-watering food photos from My Island Bistro Kitchen on Instagramhttps://www.instagram.com/peibistro/

Follow “the Bistro” on Pinterest at https://www.pinterest.ca/peibistro/ and pin the Pinterest-ready photo at the end of this posting to your favorite Pinterest boards!

Tray with slices of light fruitcake and glasses of eggnog in the background
Festive Light Fruitcake

Pin me to Pinterest!

Fruitcake
Festive Light Fruitcake


Christmas Cake
Light Fruitcake

The Bistro’s Beefy Minestrone

Italian Soup
The Bistro’s Beefy Minestrone

Over the years, I have spent some time in Italy and, of course, that always motivates me to do more Italian-inspired cooking like this Minestrone Soup, for example.  It’s very easy to get inspired when travelling to beautiful parts of the world, especially those known for fine cuisine and wines! Continue reading The Bistro’s Beefy Minestrone

Roasted Cream of Cauliflower Soup

Cauliflower Soup
Roasted Cream of Cauliflower Soup

One of my all-time favorite soups is made with the most unlikely vegetable – cauliflower. I first had this soup on a cold, rainy night in a small café in Mahone Bay, Nova Scotia, many years ago. We were looking for light fare and cauliflower was the soup of the day. I must admit, the thoughts of cauliflower in soup was not at all appealing to me but the menu was limited so this is what was ordered. What came to the table was, without a doubt, one of the most palate-pleasing soups I’ve ever had! Rich and creamy with a sprinkle of nutmeg on top and served with a multi-grain bread, this became a soup that I just had to figure out how to make on my own.  So I set about figuring out just what ingredients would have been used to enhance the somewhat blah cauliflower. My recipe is a good replica of that first cauliflower soup I so enjoyed.

Cauliflower Soup
Roasted Cream of Cauliflower Soup

Over the years, I’ve worked on my recipe for the soup. The first thing I do is roast the cauliflower that I sprinkle with nutmeg.  Of all the spices, I find nutmeg complements the cauliflower best. Roasting vegetables deepens their flavor and this, of course, contributes to the overall flavor of the soup. To make life simpler, rather than say the recipe calls for one head of cauliflower (which comes in different sizes), or x cups of florets, I’ve measured the exact weight of cauliflower my recipe takes for optimal results.  This measurement is taken after the main core stalk of the cauliflower has been removed and discarded. For roasting, I break off chunks of the florets instead of breaking off each individual floret.  The small florets would burn in the roasting process and there is a difference between roasting and burnt offerings! It’s important to stir and turn the cauliflower every 10-12 minutes as it roasts to prevent burning and to ensure even roasting of all sides of the florets.  I also find that loosely mashing the roasted cauliflower with a potato masher makes the vegetable easier to purée evenly.

I use a combination of leeks, onion, and garlic to flavor the soup. The addition of a small amount of fresh fennel does add a layer of flavor complexity to this soup but its addition is optional. When I am making this soup at a time when I have fresh fennel in the garden, I use it but I would not buy an expensive fennel bulb out of season for the small amount the recipe calls for.

The base for this soup is chicken stock. I use the liquid chicken bouillon concentrate to make the stock but homemade or canned/boxed stock can certainly be used.

Cool both the cauliflower and the soup mixture to room temperature before puréeing it. I recommend puréeing the mixture in small batches to ensure the mixture is very smooth and free of any lumps or chunks of cauliflower, leeks, or onions.

I also recommend the milk be at room temperature for about 20-30 minutes or so before blending it into the puréed cauliflower mixture to avoid the milk curdling. Use whole milk, not fat-reduced or skim, for this soup – it’s meant to be luxurious, velvety, and soothing to the palate. In fact, a small amount of cream can be substituted for part of the milk in the recipe. This soup freezes well (yes, it really does) but whole milk or a blend of milk/cream needs to be used when freezing cream-based soups successfully. Soups made with fat-reduced or skim milk do not freeze and reheat well as the ingredients tend to separate.

Once the milk is added (slowly) to the puréed mixture, it’s important not to boil it – all it needs is a slow, gentle heating to the point that the cheese will melt.  My recipe calls for a blend of three flavorful cheeses – cheddar, mozzarella, and parmesan.  I buy the bag of pre-shredded cheese with this mixture in it and these three cheeses do complement, not only each other well, but the cauliflower, too.  Stir the soup over low heat just until the cheeses have all melted and blended into the soup. Never boil this soup.

The soup may be served in small appetizer-sized portions for the soup course of a dinner or, in larger portions as a main meal for lunch or a light supper.  Serve this gorgeous-colored soup with homemade biscuits, crusty rolls, rustic or French bread.

Cream of Cauliflower Soup
Roasted Cream of Cauliflower Soup

Roasted Cream of Cauliflower Soup

Ingredients:

1¼ lb cauliflower florets, chopped into chunks of about 7-9 florets   (weighed after large core stalk removed)
2-3 tbsp olive oil
½ tsp ground nutmeg
Salt and pepper

3 tbsp butter
2/3 cup sliced leeks (white and light green parts only)
1/3 cup onion, finely chopped
¾ oz fresh fennel, finely minced (optional)
2 cloves garlic, minced
3 tbsp flour

2¼ cups chicken stock
2 cups whole milk (at room temperature for 20-30 minutes)
Salt and pepper, to taste

1 cup shredded three-cheese blend (cheddar, mozzarella, and Parmesan cheeses)

Method:

Preheat oven to 400°F.

Line a large rimmed baking sheet with tin foil and spray with cooking oil.

In large bowl, toss the cauliflower florets, oil, nutmeg, salt, and pepper.  Spread cauliflower in single layer on prepared baking sheet.  Roast for approximately 40-45 minutes or until cauliflower is very soft, stirring and turning the cauliflower every 10-12 minutes for even roasting.  Cool slightly.  Break florets into small pieces and mash loosely with a potato masher to break down the florets for easier puréeing.

In medium-sized stock pot, melt the butter.  Sauté the leeks, onion, fennel, and garlic over medium heat until leeks and fennel are softened (but not browned), about 7-8 minutes. Sprinkle the flour over the mixture and stir to blend. Slowly whisk in the chicken stock. Bring to a boil, stirring constantly. Reduce heat and simmer 2-3 minutes or until mixture is thickened, stirring constantly. Remove from heat and cool to room temperature.  Purée cooled mixture along with the cauliflower in small batches in food processor or blender until smooth.

Return puréed mixture to stockpot and, over medium-low heat, slowly stir or whisk in the milk.  Add salt and pepper to taste. When mixture is heated (do not boil), stir in 1 cup of three-cheese blend.  Heat, stirring constantly, just until cheese is melted (do not boil).

Ladle into soup bowls and garnish with roasted cauliflower florets.

Yield: 6-7 servings

Roasted Cream of Cauliflower Soup

Yield: 6-7 servings

A rich and velvety-textured cream-based soup made with roasted cauliflower and a blend of three cheeses.

Ingredients

  • 1¼ lb cauliflower florets, chopped into chunks of about 7-9 florets (weighed after large core stalk removed)
  • 2-3 tbsp olive oil
  • ½ tsp ground nutmeg
  • Salt and pepper
  • 3 tbsp butter
  • 2/3 cup sliced leeks (white and light green parts only)
  • 1/3 cup onion, finely chopped
  • ¾ oz fresh fennel, finely minced (optional)
  • 2 cloves garlic, minced
  • 3 tbsp flour
  • 2¼ cups chicken stock
  • 2 cups whole milk (at room temperature for 20-30 minutes)
  • Salt and pepper, to taste
  • 1 cup shredded three-cheese blend (cheddar, mozzarella, and parmesan cheeses)

Instructions

  1. Preheat oven to 400°F.
  2. Line a large rimmed baking sheet with tin foil and spray with cooking oil.
  3. In large bowl, toss the cauliflower florets, oil, nutmeg, salt, and pepper. Spread cauliflower in single layer on prepared baking sheet. Roast for approximately 40-45 minutes or until cauliflower is very soft, stirring and turning the cauliflower every 10-12 minutes for even roasting. Cool slightly. Break florets into small pieces and mash loosely with a potato masher to break down the florets for easier puréeing.
  4. In medium-sized stock pot, melt the butter. Sauté the leeks, onion, fennel, and garlic over medium heat until leeks and fennel are softened (but not browned), about 7-8 minutes. Sprinkle the flour over the mixture and stir to blend. Slowly whisk in the chicken stock. Bring to a boil, stirring constantly. Reduce heat and simmer 2-3 minutes or until mixture is thickened, stirring constantly. Remove from heat and cool to room temperature. Purée cooled mixture along with the cauliflower in small batches in food processor or blender until smooth.
  5. Return puréed mixture to stockpot and, over medium-low heat, slowly stir or whisk in the milk. Add salt and pepper to taste. When mixture is heated (do not boil), stir in 1 cup of three-cheese blend. Heat, stirring constantly, just until cheese is melted (do not boil).
  6. Ladle into soup bowls and garnish with roasted cauliflower florets.
Schema/Recipe SEO Data Markup by Yummly Rich Recipes
https://myislandbistrokitchen.com/2016/11/09/roasted-cream-of-cauliflower-soup/

Did you Know?

You can join the Facebook page for My Island Bistro Kitchen:  https://www.facebook.com/MyIslandBistroKitchen/

Follow “the Bistro” on Twitterhttps://twitter.com/PEIBistro/

See the drool-worthy gallery of mouth-watering food photos from My Island Bistro Kitchen on Instagramhttps://www.instagram.com/peibistro/

Follow “the Bistro” on Pinterest at https://www.pinterest.ca/peibistro/

(and you can pin any of the Pinterest-ready photos below to your favorite Pinterest boards)

Of course, by subscribing to receive an email notification of new posts and recipes, you can be among the first to know when I publish a new post or recipe. Simply enter your name and email address in the Subscription block over on the right-hand side of my home page.

Pin this Cauliflower Soup to Pinterest!

Cauliflower Soup

Cauliflower Soup

For the recipe for the biscuits in the photos, click here.

Famous Island Shellfish Featured at PEI Mussels on the Hill Event

On a lovely Sunday afternoon on a hill in beautiful Clinton, PEI, the 2016 PEI Fall Flavours Culinary Festival came to a conclusion with a finale event featuring one of PEI’s finest shellfish – mussels.

The photo below shows an example of the mussel sock in which mussels grow.

Mussel Sock
Mussels in the Sock in Which They are Grown

According to the PEI Mussel Industry Council of PEI, the Island produces about 45 million pounds of mussels each year. This translates into approximately 80% of the entire mussel production in  Canada. So, it is only fitting that an Island culinary festival would dedicate an entire event to featuring mussels.

Clinton Hills, PEI
Clinton Hills, PEI

The Clinton Hills venue, frequently used for wedding receptions, proved to be a great location for this function which was hosted by guest celebrity chefs Anna and Michael Olson who are no strangers to the PEI Fall Flavours Culinary Festival. Anna and Michael have been a part of the Festival for many years and often host two to three signature events at the Festival each year.

Chef Anna Olson and Chef Michael Olson
Chefs Anna and Michael Olson

The event began with a large campfire upon which the mussels were steamed.

Steaming Mussels on an Open Fire

Yes, those tightly wrapped tinfoil packets contain mussels.

Campfire
Tending the Fire

Everything always tastes better cooked over an open fire! Opening up the tinfoil packets revealed these tasty treats. Three options were available: Mussels steamed in white wine, orange juice, or a Caesar mix, all with aromatics added.

PEI Mussels
Steamed PEI Mussels

Mussels and corn on the cob are a great combo!

Mussels and Corn on the Cob

Chef Anna is checking out the yummy mussels.

Chef Anna Olson
Chef Anna Olson
Serving up the Steamed Mussels and Corn on the Cob

Even chefs, like the rest of us foodies, just have to photograph their food before consuming it!

Chef Anna and Chef Michael Olson

Around the campfire….

Around the Campfire
Around the Campfire

Any good party on PEI will have lively music. The strolling musicians were Mark Haines (fiddle) and Brad Fremlin (accordian).

Island Musicians Mark Haines (left) and Brad Fremlin (right)
Island Musician, Mark Haines

After enjoying the mussels and corn by the campfire, folks moved over to the large tent just outside the event barn.

Clinton Hills, PEI
Mussels on the Hill Event at Clinton Hills, PEI (2016)

The PEI Brewing Company was serving some of their award winning beer.

PEI Beer
PEI Brewing Company Beer

Nova Scotia’s Benjamin Bridge Winery was the 2016 wine sponsor for the PEI Fall Flavours Culinary Festival.  They were pouring their famous Nova 7 wine. One of the great things about culinary festivals is the opportunity to discover new products. I discovered the Nova 7 wine at the PEI Fall Flavours Culinary Festival events in 2015 when Benjamin Bridge was also the wine sponsor.  This wine is an aromatic light-bodied  effervescent wine with a beautiful salmon or light coral color. Look for appealing aromatics with lovely floral and fruit notes in this wine. The Nova 7 is a very versatile wine, perfect for sipping or for pairing with a variety of foods, including seafood which made it a suitable accompaniment to the mussel dishes served at this event.

Nova Scotia Wine
Benjamin Bridge’s Nova 7 Wine

Making my rounds inside the tent, I started with a bowl of delectable homemade mussel chowder.

Mussel Chowder
Mussel Chowder
Chowder
Mussel Chowder

This was followed by yummy mussel fritters served in slider rolls.

Serving Mussel Fritters

I had not had mussel fritters before and these were super tasty!

Mussels
Mussel Fritters

Mussel Fritters in Slider Rolls

Upstairs in the main event barn, lobster poutine was being served. This was one event where you wanted to make sure you left the diet at home!

Poutine
Mussel Poutine

Anna and Michael did a demo of their favorite ways to steam mussels and adding aromatics to enhance the flavor of these tasty morsels. I like when the event also has a learning component to it.

Chefs Anna and Michael Olson at Clinton Hills, PEI (2016)

Wagon rides around the farm were available throughout the afternoon. This was a rather stylish wagon ride with its benches!

Hayride
Hayride at Clinton Hills

If you are a foodie, then I recommend a trip to PEI in September when the whole month is dedicated to culinary events featuring one or more of the Island’s fine foods. It’s a great way to learn about the foods of PEI, try some new foods or new and different ways to serve them, and hear some great local musicians.

To read stories I have written about other PEI Fall Flavours Culinary Festival events, follow these links:

PEI Shellfish Festival (2012)
Farm Day in the City (2012)
Savour Victoria (2012)
Toes, Taps, and Taters (2013)
Lobster Party on the Beach (2013)
Applelicious (2013)
The Great Island Grilled Cheese Challenge (2013)
Feast of the Fathers (2014)
Lamb Luau at Crowbush Cove (2014)
Feast and Frolic Dinner (PEI International Shellfish Festival) (2014)
Beef and Blues (2014)
A Taste of New Glasgow (2015)
Beef ‘n Blues (2015)
Chef on Board (2015)
Cooking with Chefs Anna & Michael Olson in Brudenell, PEI (2015)
Le Festin acadien avec homard/Acadian Feast with Lobster (2016)
The Great Big Barbeque (2016)

Pin to Pinterest!

PEI Fall Flavors Culinary Festival
Chefs Anna and Michael Olson at PEI’s Mussels on the Hill Culinary Event

PEI’s Great Big Barbeque

One of the 2016 signature events for the PEI Fall Flavours Culinary Festival was the Great Big Barbeque.  Hosted by celebrity chef, Mark McEwan, this event was held at the PEI Brewing Company in Charlottetown.

Chef Mark McEwan
Chef Mark McEwan

The Great Big Barbeque was a roving feast with food stations set up around the perimeter of the brewery as well as on the second level.

Roving Among the Food Stations at PEI's Great Big Barbeque
Roving Among the Food Stations at PEI’s Great Big Barbeque

In total, there were nine different food stations each featuring a local Island Chef with a signature dish.

Benjamin Bridge Winery, the 2016 Festival wine sponsor, greeted each patron with a glass of their Nova 7 wine.

Wine
Benjamin Bridge Wine

The PEI Brewing Company was kept busy serving small mugs of their handcrafted Gahan Ale straight from the tank. You can read the story I previously wrote about this brewery by clicking here.

PEI Brewing Company
Gahan Ale fresh from the tank at the PEI Brewing Company
Beer
Locally brewed beer from the PEI Brewing Company

The main event hall was set up with picnic tables.  From here, patrons circulated around the food stations in the order of their choosing.

The Great Big Barbeque at the PEI Brewing Company, Charlottetown, PEI

The Adam MacGregor Band provided lively entertainment for the evening.

Adam MacGregor Band Performing at PEI's Great Big Barbeque
Adam MacGregor Band Performing at PEI’s Great Big Barbeque

Station #1 – PEI Seafood Chowder

Chef Kyle Panton (Simms Corner Steakhouse and Oyster Bar) was kept busy dishing out his award-winning seafood chowder which he served in small glass jars.

Seafood Chowder
Chef Kyle Panton

The chowder was accompanied by homemade biscuits, always a winning combo.

Biscuits
Homemade Biscuits

Station #2 – Lobster Poutine

Chef Brad MacDonald (The Brickhouse Kitchen and Bar) served up a dish featuring Island lobster and potatoes in the form of lobster poutine – hand-cut fries with a lobster veloute and melted cheese curds.

Serving up Lobster Poutine
Poutine
Lobster Poutine

Station #3 – Glasgow Glen Farm’s Grilled Cheese

Jeff McCourt, chef and cheesemaker, from Glasgow Glen Farm in New Glasgow served an open-faced grilled Gouda cheese sandwich with smoked salmon and apple slaw on baguette slices.

Grilled Cheese Sandwich
Glasglow Glen Farm’s Open-faced Grilled Gouda Cheese Sandwich
Adding the Apple Relish
Adding the Apple Slaw
Grilled Cheese Sandwich
Open-faced Grilled Gouda Cheese Sandwich with Smoked Salmon and Apple Slaw on Baguette Slices

Station #4 – PEI Brewing Company Wood Fire Pizza

The brewery has a wood fire brick oven which was kept hopping with fresh made-to-order pizzas.

Wood-fired Brick Oven
Wood-fired Pizza
Pizza
Wood-fired Pizza

Station #5 – Island Striploin with Lobster Béarnaise

Chefs Cody Wallace (Fishbones Oyster Bar and Seafood Grill) and Jordan Dennis (Sobeys West Royalty) teamed up to present grilled PEI beef striploin with lobster béarnaise.

Steak with Lobster Sauce
PEI Beef Striploin with Lobster Béarnaise
Beef Striploin
PEI Beef Striploin with Lobster Béarnaise
Beef Striploin
PEI Beef Striploin with Lobster Béarnaise

Station #6 – Island Beef Burger

The barbeques were kept busy grilling the slider beef burgers which Chef Brock MacDonald (The Gahan House) presented on cornbread brioche with avocado mayo, pickled red onions, and peppercorn blue cheese.

Station #7 – Marinated BBQ Kabobs

A huge barbeque at the brewery’s side door was filled with veggie kabobs consisting of zucchini, peppers, mushrooms, and tomatoes grilled in a smoky Gahan Iron Bridge Brown Ale BBQ sauce. These were the creation of Chef Andrew Cotton (Merchantman Fresh Seafood and Oyster Bar).

Kabobs
Veggie Kabobs
Kabobs
Veggie Kabobs in a Smoky Gahan Iron Bridge Brown Ale BBQ Sauce

Station #8 – Freshly Shucked PEI Oysters

Sous Chef Alexandre Jolin (The Barrington Steakhouse and Oyster Bar) ensured lots of PEI oysters were shucked and ready for patrons.

Oyster Shucking
Shucking the PEI Oysters
Oysters
Raw PEI Oysters Ready for Slurping!

Station # 9 – S’Mores Dessert Bar

This bar was set up so patrons could toast their own marshmallows to make S’Mores.

S'Mores Dessert Bar
S’Mores Dessert Bar

This was a lively and interactive event and the brewery was an ideal location for this casual barbeque. It was great to see so many local Island chefs featured. We have a lot of great things happening on the food scene on PEI and the barbeque offered the opportunity to sample many of them.

Follow these links for stories I have written on other PEI Fall Flavours Culinary Events:

PEI Shellfish Festival (2012)
Farm Day in the City (2012)
Savour Victoria (2012)
Toes, Taps, and Taters (2013)
Lobster Party on the Beach (2013)
Applelicious (2013)
The Great Island Grilled Cheese Challenge (2013)
Feast of the Fathers (2014)
Lamb Luau at Crowbush Cove (2014)
Feast and Frolic Dinner (PEI Int’l Shellfish Festival) (2014)
Beef and Blues (2014)
A Taste of New Glasgow (2015)
Beef ‘n Blues (2015)
Chef on Board (2015)
Cooking with Chefs Anna & Michael Olson in Brudenell, PEI (2015)
Le Festin acadien avec homard/Acadian Feast with Lobster (2016)

Pin Me to Pinterest!

Barbeque
PEI’s Great Big Barbeque

PEI Fall Flavors Event: Le Festin acadien avec homard

September heralds the beginning of the annual PEI Fall Flavours Culinary Festival and what better way to start it off than with a feast featuring lobster and Acadian fare!  Le Festin acadien avec homard  event was held on September 2, 2016, in conjunction with the annual Evangeline Area Agricultural Exhibition and Acadian Festival in Abram-Village in the western part of Prince Edward Island.

The PEI Fall Flavours Culinary Festival features signature events hosted by celebrity chefs and the main events feature one or more of the Island’s locally-produced foods.  If you follow the links at the bottom of this posting, you will find stories and photos from past events that featured Island beef, lamb, lobster, potatoes, etc. I especially like the events that feature both regional fare and entertainment and “Le Festin acadien avec homard” scored high on both counts.  For visitors to PEI (and many do come in September especially for the Fall Flavours Culinary Festival), it’s an opportunity to learn about local culture and sample locally-produced foods.

PEI’s Acadian population in Abram-Village sure knows how to throw a good party with great food and lively entertainment.  A quartet of talented local musicians comprised of Louise Arsenault (fiddle), Hélène Bergeron (keyboard/guitar/stepdancer), Caroline Bernard (singer/keyboard/guitar), and Rémi Arsenault (bass) provided toe-tapping Acadian music throughout the evening.

PEI Musicians Performing at Le Festin acadien avec homard event, Abram-Village, PEI, 2016
Musicians Performing at “Le Festin acadien avec homard” Fall Flavours event, Abram-Village, PEI, 2016

The event was hosted by celebrity chef, Anna Olson, who is no stranger to the PEI Fall Flavours Culinary Festival as she and her husband, Michael, return to the Island annually to participate in the culinary events.

Chef Anna Olson
Chef Anna Olson at “Le Festin acadien avec homard” Fall Flavours Event, Abram-Village, PEI, 2016

Anna hosts three cooking programs on Food Network Canada:  “Bake with Anna Olson“, “Fresh with Anna Olson“, and “Sugar“. Ever the good sport, Anna was put through her paces before MC Georges Arsenault declared she had passed the test to be made an honorary Acadian.  She learned some French and she was taught some stepdancing moves!

Chef Anna Olson
Chef Anna Olson

Here was the menu for the dinner:

Menu for 2016 Le Festin acadien avec homard

Upon arrival in the dining hall, guests were greeted with a complimentary glass of Benjamin Bridge’s Nova 7 wine.

Benjamin-Bridge Wine
Benjamin Bridge Wine

Benjamin Bridge Winery from Gaspereau Valley, Nova Scotia, was this year’s Festival Wine Sponsor as it was in 2015 when I discovered their delightful Nova 7 wine. The Nova 7 is a beautiful light-bodied  effervescent wine with a gorgeous pinkish color, and appealing aromatics with lovely floral and fruit notes. It’s a great wine for sipping or for pairing with a wide range of foods from seafood to spicy foods to desserts. It made a fine accompaniment to the foods served at this dinner.

Benjamin Bridge Wine
Benjamin Bridge Nova 7 Wine

Fresh steamed mussels were served as hors d’oeuvres. According to the Mussel Industry Council of PEI, the Island produces about 45 million pounds of mussels each year. This translates into approximately 80% of the entire mussel production in  Canada. In fact, fresh PEI mussels are shipped to the USA and as far away as Hong Kong, Japan, and Kuwait. It’s very common at PEI gatherings to serve steamed mussels.

PEI Mussels
Steamed PEI Mussels

The dinner was held in a large community hall and served, family style, at long tables.

PEI Fall Flavors Culinary Festival event
“Le Festin acadien avec homard” PEI Fall Flavours Culinary Festival event 2016 in Abram-Vilage, PEI

Servers, in traditional Acadian attire, brought the prepared dishes to each table.

PEI Fall Flavors Culinary Festival
“Le Festin acadien avec homard” PEI Fall Flavours Culinary Festival Event, Abram-Village, PEI, 2016

Guests then passed the dishes, from one to another, around the table, serving themselves.

Lobster Dinner
Serving lobster at “Le Festin acadien avec homard” in Abram-Village, PEI

The four-course dinner began with a bowl of Chicken Fricot, also known as chicken soup. This is a very popular Acadian dish.

Chicken Soup
Chicken Fricot, a popular Acadian soup

The Fricot contains very few ingredients and I believe it is the summer savory that gives this brothy soup its wonderful tasty flavor.  Made only with chicken, onion, potatoes, water, summer savory, salt, and pepper, it’s hard to believe just how tasty this soup really is! It was especially good with the French biscuits that were in baskets on the tables! French biscuits (Galettes blanches) are a cross between a yeast roll and a traditional tea biscuit.

Biscuits
French Biscuits

The second course consisted of two long-time Acadian favorites: Râpure and Acadian Meat Pie.

Acadian Meat Pie and Râpure
Acadian Meat Pie (left) and Râpure (right)

Both are made with simple easy-to-come-by ingredients.  The Râpure is made with pork and/or chicken, onions, potatoes (both mashed and raw grated), eggs, summer savory, coriander, salt and pepper.  The ingredients are mixed together, placed in a greased baking dish and baked in the oven.

Traditionally,  Acadian meat pie was made with pork. Today, however, it is common to have a mixture of meats in the pie – pork, beef, chicken, and/or hare, for example. Again, the ingredients for the pie filling are very basic – the meat, onion, summer savory, cloves, salt and pepper, and some flour for thickening.  The filling is encased in pie pastry and baked in the oven. Molasses is often served with the meat pie. Meat pies are common fare for Acadians on Christmas Eve although, on PEI, the pies are commonly now eaten throughout the year as well.

The third course was Island lobster in the shell served with homemade potato salad.

Shellfish
PEI Lobster

It’s very traditional on PEI to serve potato salad with lobster and this salad was a true old-fashioned homemade PEI potato salad full of flavor.

Salad
Potato Salad

And, for dessert, fresh blueberry pie made with in-season local berries.

Pie
Blueberry Pie

This was a fantastic evening of fabulous food and lively music. I thoroughly enjoyed this event and it was an opportunity for me to try some Acadian foods I had not had before.

Follow these links for other stories I have written on previous Fall Flavours Culinary Festival events:

PEI Shellfish Festival (2012)
Farm Day in the City (2012)
Savour Victoria (2012)
Toes, Taps, and Taters (2013)
Lobster Party on the Beach (2013)
Applelicious (2013)
The Great Island Grilled Cheese Challenge (2013)
Feast of the Fathers (2014)
Lamb Luau at Crowbush Cove (2014)
Feast and Frolic Dinner (PEI Int’l Shellfish Festival) (2014)
Beef and Blues (2014)
A Taste of New Glasgow (2015)
Beef ‘n Blues (2015)
Chef on Board (2015)
Cooking with Chefs Anna & Michael Olson in Brudenell, PEI (2015)

Pin Me to Pinterest!

Lobster
PEI Lobster served at “Le Festin acadien avec homard” PEI Fall Flavors Culinary Festival

Thanksgiving Tablescape

Autumn Tablescape
Thanksgiving Tablesetting

Thanksgiving brings wonderful opportunities for a variety of tablesettings.  The rich colors of autumn provide an endless supply of inspiration for decorating the table. In this tablescape (which does not have to be reserved solely for the Thanksgiving holiday), I am using Victorian English Pottery “Pheasant Woodland” dinnerware that has a distinctive fall theme. It’s one that can be used throughout the entire autumn season.

Fall Dinnerware
Victorian English Pottery Dinnerware

Like a lot of English transferware, this pattern tells a story and has earthy colors; however, I also recognize that it is a busy pattern.  In order for the dinnerware to stand out on the table, it benefits from the use of solid-colored charger plates to frame and “ground” each place setting.  Busy-patterned dinnerware also looks best on solid-colored placemats or tablecloth. When I am using this type of dinnerware, I want it to stand out on the table so I ensure that other elements on the table, including the table covering, don’t compete with it for attention.

To add a punch of color, I have used my plaid napkins encased in natural-toned napkin rings. The orange in the napkins ties in with the shades on the pheasants in the dinnerware pattern. Placing the napkin on the side of the plate (as opposed to across the top of the bowl) allows the dinnerware pattern to be displayed for maximum impact.

Again, because the pattern of the dinnerware is quite busy, I have kept the centerpiece relatively simple – a traditional-styled fall-themed arrangement in the centre flanked by two pillar candles on glass candlesticks. The use of the glass candlesticks keeps the focus on the centerpiece.

Thanksgiving Centerpiece

The colors in the centerpiece correspond to the color scheme of the dinnerware. With this classic style of tablesetting, it is important to maintain the colors of the dinnerware in other elements of the table – for example, the centerpiece, candles, napkins, and charger plates.

The leaf-etched neutral-colored candles blend with the color of the centerpiece urn and the background in the dinnerware.

The candles and their placement add symmetry to a classic tabletop centerpiece. So, only three items in the centerpiece – two candles and the floral centerpiece – to keep it clutter-free.  This is particularly important if the table is not large. I wanted to see some clean white space on the table.

In keeping with the style of this dinnerware, I have used some of my vintage glassware which also blends with the candlesticks. Clear glassware adds life and sparkle to a tablesetting and also gives it an airy look and feel.

I hope you have enjoyed a glimpse of my Thanksgiving tablesetting.

Pin Me to Pinterest!

Victorian English Pottery Pheasant Woodland Dinnerware
Thanksgiving Tablesetting

To view the Bistro’s other Thanksgiving tablesettings, follow these links:

Thanksgiving Tablesetting

Happy Thanksgiving!

Best Pickled Beets Recipe

Pickled Beets
Pickled Beets

I so love pickled beets.  They are something I grew up with and I make them every year.  It’s a bit of a messy job but, oh, are the results so worth it!  I look upon these as vegetable candy!

Pickled beets are really nothing more than cooked beets bottled with a vinegar-sugar-spice syrup. That’s it.

For pickling, I recommend cylinder beets if you can get them. They are long and slender and slice nicely for fitting in to the jars and also for presentation.  Regular ball beets can, of course, be used for pickling and, in fact, that’s all my grandmothers would have used – just the regular garden variety.  However, some of the round beets grow quite large and the slices have to be cut into two or three pieces to get them to fit in the jars and they don’t look quite as nice for presentation….same great taste, though.

Beets take awhile to cook so patience is required for this exercise.  Try to select uniformly-sized ones so they all cook at the same rate. However, if you have a mixture of sizes, place the larger ones in the bottom of the pot and the smaller ones on top.

Don’t peel the beets before they are cooked. Simply remove the leaves, leaving about 1″ stem and the root end intact.  Removing the stem or root end will cause bleeding and the vegetable will lose its vibrant color during the cooking process. The stem ends get removed after cooking and the beets get peeled after they are cooked. In fact, the skins will usually just slip off the cooked beets.

Because these vegetables are a bit messy to deal with, I use a portable burner and cook them outside so there is less chance of beet-spattered walls and counter in my kitchen. They do stain surfaces. I add a couple of teaspoons of cooking oil to the water in which the beets are cooked as I find it helps to prevent them from boiling over.

When the beets are starting to get along with their cooking, start the syrup to cook in a separate smaller stockpot.  The syrup should cook for about 18-20 minutes at a slow boil.  Don’t boil it too rapidly or for too long as it will evaporate and there won’t be enough syrup to fill the jars. This means more syrup has to be made and the syrup needs to go over the hot beets so timing is everything. For instructions on how to make the spice sachet used in the syrup, visit my posting on making mustard pickles. I also recommend that pickling vinegar be used. It will usually have 7% acidity, making it stronger than table vinegar and will help to preserve the beets longer.

You can give the cooked beets a quick rinse under cold running water. It does make them a bit easier to handle. However, they have to be bottled hot so don’t over-do the rinsing. I recommend slicing the hot beets about 1/4″ thick. Pack them well into the hot sterilized jars, leaving about 1″ headroom. Ladle the hot syrup into the filled jars, filling each jar with the syrup to within 1/4″ from the top. Use a non-metal object to remove any air bubbles that may have formed in the jars and add more syrup, if necessary, to fill up the jars to about 1/4″ from the tops. Seal with heated lids and screw on the jar bands just until resistance is met.  For greatest food safety, it is recommended that the filled jars be processed in a hot water bath following your canner manufacturer’s directions for your local altitude.

Traditional PEI Christmas Dinner
Pickled Beets with Roast Turkey Dinner

We enjoy these tasty morsels with cooked dinners such as the traditional Thanksgiving and Christmas turkey dinners as well as with roast beef or pork dinners. They are also good served with cold meats.

Beets
Pickled Beets

[Printable Recipe follows at end of posting]

Best Pickled Beets

 Ingredients:

5 lbs cylinder beets, stem and root ends intact
Boiling water
2 tsp cooking oil

2¾ cups brown sugar
2¾ cups pickling vinegar
1 cup + 3 tbsp water
2¾ tsp pickling spice, tied into a small cheesecloth sachet
2 – 6” cinnamon sticks
¼ tsp salt

Method:
Remove the leaves from the beets, leaving about 1” stem in place.  Rinse under cold water to remove any clay.  In very large stock pot, place the larger beets on the bottom, then the smaller ones. Cover the beets with boiling water and add 2 tsp cooking oil.  Cover and cook over medium-high heat until beets are fork tender.

As beets are nearing the cooked stage, begin making the syrup by combining the sugar, vinegar, water, pickling spice sachet, cinnamon sticks, and salt into a small stockpot. Bring to a boil over medium-high heat.  Reduce heat to medium low and boil, uncovered, slowly for approximately 15-18 minutes.

Remove cooked beets from water, rinse quickly under cold water, peel, and remove and discard stem and root ends. Slice hot beets into ¼” thick slices and pack into sterilized jars, leaving 1” headroom.

Remove and discard the pickling spice sachet and cinnamon sticks from the syrup.  Ladle hot syrup over beets leaving ¼“ headroom.  Using a non-metal object, remove any air bubbles from the jars and add more syrup as necessary to fill jars to about ¼“ from the top. Wipe each jar rim clean with a damp cloth. Seal immediately with heated lids. Screw on jar bands just until resistance is met.

Process filled jars in hot water bath according to canner manufacturer’s directions for the proper time for your local altitude.

Yield:  Apx. 6 pints

For more of my pickle and chow recipes, follow these links:
Mustard Pickles
Bread and Butter Pickles
Green Tomato Chow
Mustard Beans
Dill Pickles

Best Pickled Beets Recipe

Yield: Apx 6 pints

These tasty sweet pickled beets are easy to make, showy in presentation, and are a fine accompaniment to many meals. A Prince Edward Island favorite.

Ingredients

  • 5 lbs cylinder beets, stem and root ends intact
  • Boiling water
  • 2 tsp cooking oil
  • 2¾ cups brown sugar
  • 2¾ cups pickling vinegar
  • 1 cup + 3 tbsp water
  • 2¾ tsp pickling spice, tied into a small cheesecloth sachet
  • 2 – 6” cinnamon sticks
  • ¼ tsp salt

Instructions

  1. Remove the leaves from the beets, leaving about 1” stem in place. Rinse under cold water to remove any clay. In very large stock pot, place the larger beets on the bottom, then the smaller ones. Cover the beets with boiling water and add 2 tsp cooking oil. Cover and cook over medium-high heat until beets are fork tender.
  2. As beets are nearing the cooked stage, begin making the syrup by combining the sugar, vinegar, water, pickling spice sachet, cinnamon sticks, and salt into a small stockpot. Bring to a boil over medium-high heat. Reduce heat to medium low and boil, uncovered, slowly for approximately 15-18 minutes.
  3. Remove cooked beets from water, rinse quickly under cold water, peel, and remove and discard stem and root ends. Slice hot beets into ¼” thick slices and pack into sterilized jars, leaving 1” headroom.
  4. Remove and discard the pickling spice sachet and cinnamon sticks from the syrup. Ladle hot syrup over beets leaving ¼“ headroom. Using a non-metal object, remove any air bubbles from the jars and add more syrup as necessary to fill jars to about ¼“ from the top. Wipe each jar rim with a damp cloth. Seal immediately with heated lids. Screw on jar bands just until resistance is met.
  5. Process filled jars in hot water bath according to canner manufacturer’s directions for the proper time for your local altitude.
Schema/Recipe SEO Data Markup by Yummly Rich Recipes
https://myislandbistrokitchen.com/2016/09/11/best-pickled-beets-recipe/

Pin Me to Pinterest!

Beets
Pickled Beets
Pickled Beets
Pickled Beets