All posts by Barbara99

The Bistro’s Best Deviled Eggs Recipe

The Bistro's Best Devilled Eggs
The Bistro’s Best Deviled Eggs

Deviled Eggs are so tasty and easy to make.  They are perfect for potlucks, picnics, snacks, and even appetizers or hors d’oeuvres.  And, of course, they are often found at many Easter gatherings.  To top it off, Deviled Eggs are showy, too.  I have never taken a plate of these to any function and had any left over! Continue reading The Bistro’s Best Deviled Eggs Recipe

PEI Potato Leek Soup Recipe

PEI Potato Leek Soup

I am not sure which country can, in fact, lay claim to being the originator of Potato Leek Soup.  Some say it is of Welsh origin while others give Ireland credit for this tasty soup.  If you have ever eaten Vichyssoise, a cold version of Potato Leek Soup, you may attribute its origins to France due to its association with Vichy.  Then, of course, there is Tattie and Leekie soup from Scotland. Continue reading PEI Potato Leek Soup Recipe

The Bistro’s Great Nut-free Granola Recipe

The Bistro's Great Nut-Free Granola
The Bistro’s Great Nut-Free Granola

This granola recipe features a tasty mixture of toasted rolled oats, coconut, and dried fruits and berries.  Notably missing in this recipe are any nuts or whole seeds which are often found in granola.  This is intentional.  For anyone who, for any reason, cannot consume nuts or whole seeds, this Nut-free Granola is especially for you! Continue reading The Bistro’s Great Nut-free Granola Recipe

Best Creamy Scalloped Potatoes Recipe

Creamy Scalloped Potatoes
Best Creamy Scalloped Potatoes

One of my very favorite ways to present potatoes is in the form of Scalloped Potatoes.  A mixture of potatoes, onions, and milk along with a bit of seasoning and grated cheese make this a great comfort food dish any time of the year.  My mother often made scalloped potatoes sometime on the weekend and made enough that we’d have leftovers for dinner a day or two later. To this day, I still believe that this is one dish that is better a day or two after it is made as the flavours really settle in. Continue reading Best Creamy Scalloped Potatoes Recipe

Cream of Winter Root Vegetable Soup Recipe

Cream of Winter Root Vegetable Soup

This Creamy Winter Root Vegetable Soup is perfect for those cold winter days when the body and mind crave comfort food.

I make a lot of soups and freeze many of them in single servings so that they are quick and easy to pull out for lunchtime or, for those who are in the workforce, to place in the lunch bag on weekday mornings. The soups arehealthy and nutritious, not to mention tasty.  I like to have a variety of different soups on hand that includes those that are broth-based and hearty vegetable along with those that are cream-based or puréed.

The recipe I am sharing today is a new recipe creation that is a cream-based vegetable soup.  It’s the perfect soup for winter because it uses what we often refer to as winter, or root, vegetables. These are ones that are traditionally harvested late in the fall and they store and keep well over several months – think of potatoes, rutabaga, carrots, and parsnip, for example.

This is an easy soup to make and it blends a number of wonderful flavours that include both celery and leek. It’s very lightly spiced and is a silky smooth soup that I would put in the comfort food category. The great thing about this soup is that none of the nutrients from any of the vegetables is lost.  The vegetables are all cooked in the chicken broth and then the whole mixture is puréed so all of the goodness of the vegetables is maintained.

I find recipes that simply call for ingredients in quantities like a small parsnip or 2 medium-sized potatoes or 1 large carrot are not very helpful, particularly for less experienced cooks.  I have, therefore, tested out this recipe and carefully measured the weights of vegetables to be used for best success.  One of the most used (and most useful) tools in my kitchen is my digital scale and I use it all the time. I highly recommend that every cook invest in a good quality digital scale.

I miss my herb garden in winter. However, dried herbs work really well in this winter soup. Because, for presentation purposes, I don’t want any specks of herbs to appear in this soup, I make a small herb packet out of cheesecloth to contain the herbs while the soup cooks. The cheesecloth has a sufficiently open weave that the soup mixture is infused with the flavour of the herbs as it cooks. It’s very easy to remove and discard the herb packet before the soup is puréed.

Different vegetables take different cooking times so this soup starts with those that take the longest – rutabaga, carrots, parsnip, and celery.  Give them about 15 minutes headstart before adding the leek and let it cook for 10 minutes then add the potatoes which take the least amount of time to cook.

I make good use of my immersion blender for cream and purée soup making. However, you can certainly use either a blender or a food processor to purée the vegetables.  I generally allow the soup to cool for 30-40 minutes before using my immersion blender and, sometimes, if I am in a hurry, I put the soup pot in a sink full of cold water for a few minutes to speed up the cooling process.  I know some people do use their immersion blenders in really hot soup. I recommend you check your instruction manual for your immersion blender to see what it says about using the blender in hot liquids.

I recommend that whole milk be used in this recipe (or, alternatively, you could use a milk-cream blend for a richer soup). I have tested freezing this soup and find it freezes well for me; however, it is very important that at least whole (not skim, or partly skimmed) milk  be used if you intend to freeze any of the soup. Using a fat free or low fat milk will result in the soup breaking down when frozen and it just does not hold its structure when it is reheated. I know that some people frown on freezing puréed and cream soups but I have been freezing them with great success for many, many years.

When making the roux (the butter and flour) for the cream base, make sure you stir the roux while it is blending to prevent it from scorching. Add the milk slowly to the roux, whisking it constantly to prevent lumps from forming. It’s quite unappealing to have lumps in what is supposed to be a silky smooth cream soup.

Adding some shredded cheese to this soup makes a richer soup and certainly enhances the flavour. While a basic cheddar cheese could certainly be used, my preference is to use a shredded cheese blend such as mozzarella, provolone, and parmesan.

Cream of Winter Root Vegetable Soup

Cream of Winter Root Vegetable Soup

Ingredients:
3 cups chicken stock
1 bay leaf
½ tsp dried basil
¼ tsp. dried fennel
1/8 tsp dried marjoram
½ tsp dried parsley
1 clove garlic, minced
5 oz rutabaga, diced
5 oz carrots, sliced
2 oz parsnip, thinly sliced
2 oz celery, sliced
7½ oz leek, white and light green parts only, sliced into ¼“ slices
7 oz potato, diced
2 tbsp butter
2 tbsp flour
1½ cups whole milk
Salt and pepper to taste
¾ cup shredded cheese blend (e.g., mozzarella, provolone, and parmesan)

Method:
Bring chicken stock to a boil in medium-sized soup pot.

Cut small 4”-5” square of finely woven cheese cloth. Make the herb packet by placing the bay leaf, basil, fennel, marjoram, and parsley in the center of the cheese cloth. Gather up ends of cheesecloth, tie tightly with kitchen string, and add the herb packet to the chicken stock along with the garlic, rutabaga, carrots, parsnip, and celery. Bring to a boil then reduce heat to medium low and cook vegetables for 15 minutes.

Add leek and cook 10 minutes then add potatoes and cook vegetables 15 minutes or until vegetables are soft.

Remove from heat and discard the herb packet. Purée mixture until smooth using an immersion blender or food processor.

Melt the butter in separate medium-sized soup pot over medium-low heat. Stir in the flour to make a roux, stirring constantly to blend the two ingredients and to prevent scorching. Gradually whisk in the milk until mixture is smooth. Increase heat to medium and continue to whisk milk mixture until it is thickened to desired consistency then add the puréed vegetable mixture. Stir mixture until heated then add the cheese, stirring until cheese is melted and blended into soup. Add salt and pepper, to taste.
Ladle into soup bowls and garnish with croutons, a sprinkle of parsley, and a drizzle of a good quality finishing olive oil, if desired. Enjoy!

Yield: Apx. 5-6 servings

—————————————————————————-

If you have made this recipe and enjoyed it and/or wish to share it with your friends and family, please do so on social media but be sure to share the direct link to this posting from my website.

Connect with My Island Bistro Kitchen on Social Media

Join the Facebook page for My Island Bistro Kitchen:  https://www.facebook.com/MyIslandBistroKitchen/

Follow “the Bistro” on “X” (formerly Twitter)https://twitter.com/PEIBistro/

See the drool-worthy gallery of mouth-watering food photos from My Island Bistro Kitchen on Instagramhttps://www.instagram.com/peibistro/

Follow “the Bistro” on Pinterest at https://www.pinterest.ca/peibistro/ and pin the Pinterest-ready photo found at the end of this post to your favorite Pinterest boards.

——————————————————————————

Cream of Winter Root Vegetable Soup

Yield: apx. 5-6

Ingredients

  • 3 cups chicken stock
  • 1 bay leaf
  • ½ tsp dried basil
  • ¼ tsp. dried fennel
  • 1/8 tsp dried marjoram
  • ½ tsp dried parsley
  • 1 clove garlic, minced
  • 5 oz rutabaga, diced
  • 5 oz carrots, sliced
  • 2 oz parsnip, thinly sliced
  • 2 oz celery, sliced
  • 7½ oz leek, white and light green parts only, sliced into ¼“ slices
  • 7 oz potato, diced
  • 2 tbsp butter
  • 2 tbsp flour
  • 1½ cups whole milk
  • Salt and pepper to taste
  • ¾ cup shredded cheese blend (e.g., mozzarella, provolone, and parmesan)

Instructions

  1. Bring chicken stock to a boil in medium-sized soup pot.
  2. Cut small 4”-5” square of finely woven cheese cloth. Make the herb packet by placing the bay leaf, basil, fennel, marjoram, and parsley in the center of the cheese cloth. Gather up ends of cheesecloth, tie tightly with kitchen string, and add to the chicken stock along with the garlic, rutabaga, carrots, parsnip, and celery. Bring to a boil then reduce heat to medium low and cook vegetables for 15 minutes.
  3. Add leek and cook 10 minutes then add potatoes and cook vegetables 15 minutes or until vegetables are soft.Remove from heat and discard the herb packet.
  4. Purée mixture until smooth using an immersion blender or food processor.
  5. Melt the butter in separate medium-sized soup pot over medium-low heat. Stir in the flour to make a roux, stirring constantly to blend the two ingredients and to prevent scorching. Gradually whisk in the milk until mixture is smooth. Increase heat to medium and continue to whisk milk mixture until it is thickened to desired consistency then add the puréed vegetable mixture. Stir mixture until heated then add the cheese, stirring until cheese is melted and blended into soup.
  6. Add salt and pepper, to taste.
  7. Ladle into soup bowls and garnish with croutons, a sprinkle of parsley, and a drizzle of a good quality finishing olive oil, if desired. Enjoy!
  8. [Copyright My Island Bistro Kitchen]
Schema/Recipe SEO Data Markup by Yummly Rich Recipes
https://myislandbistrokitchen.com/2016/02/16/cream-of-winter-root-vegetable-soup/

Pin This Photo To Your Favorite Pinterest Board for Later Retrieval!
Cream of Winter Root Vegetable Soup


Cream of Winter Root Vegetable Soup

> Cream of Winter Root Vegetable Soup


Cream of Winter Root Vegetable Soup


Sweet Valentine’s Afternoon Tea

Afternoon teas are a splendid and relaxing way to spend an afternoon and catch up with friends.  Teas are perfect for special events such as birthdays, Easter, Christmas, and Valentine’s Day. For me, though,there doesn’t have to be an occasion or an event to have afternoon tea – I love the experience at any time of the year.  That said, Valentine’s Day is a great time to host an afternoon tea for friends. It’s a gorgeous girly treat! So, come along and have a peek at my afternoon tea before my guests arrive.

My color theme for this year’s Valentine’s Tea is pink and yellow, both cheery colors in the mid-winter. These beautiful tulips were grown here in PEI in the Vanco greenhouses in Mount Albion, not far from Charlottetown.

I am centering the afternoon tea around the coffee table in front of the fireplace. Cozy sofa and chairs invite a relaxing afternoon of conversation while sampling some of my home-baked treats.

I have chosen to use my Royal Albert “Lavender Rose” china for the tea and I love, love, love three-tier servers!

For an afternoon tea, it is not necessary to have several kinds of sandwiches, though that is quite lovely. Two to three varieties are just  fine. Traditional tea sandwiches for my event today include tomato and shaved turkey, and ham and Havarti cheese. I like to use different breads for the sandwiches because it adds variety to the tea plate. Sometimes I cut the sandwiches into different shapes but, today, I have simply used the traditional fingertip sandwich.

Fresh scones straight from the oven are always divine, especially with a light dusting of sugar.

I picked up the jams on a recent trip to England – I am always on the lookout for items suitable for one of my afternoon teas!

Clotted cream and lemon curd, two staples on the tea table! I could eat a jar of lemon curd just on its own!

Tender and flaky scones make a great base for the lemon curd and red berry jam.

The fresher the scones, the better!

The tartness of the lemon curd plays off well against sweet jam.

And, on the sweet plate: Simple custard with a dob of lemon curd served in small stemmed liqueur glasses, lemon spritz shortbread cookies, and pink macarons.

I love the delicate shades of pale yellow and pink together!

The macarons are flavorful, light and airy in texture.

A selection of specialty teas from the teabox allows each guest to choose her favorite!

I find tea always seem to taste so much better out of a china cup and saucer!

And, for the finale, my Dreamy Hawaiian Cupcakes frosted with buttercream twirled into a rose formation.

These festively decorated chocolate-dipped strawberries will be a real hit!

And, a glass of sparkling  wine to accompany the cupcakes and strawberries.

All set for a relaxing afternoon.

Happy Valentine’s Day!

—————————————————————————-

Thank you for visiting “the Bistro” today.  If you enjoyed this posting and recipe, please share it on your social media websites.

Connect with “the Bistro” through the following social media:

Join My Island Bistro Kitchen on Facebook

Follow “the Bistro’s” tweets on Twitter

Follow “the Bistro” on Pinterest

Follow “the Bistro” on Instagram

——————————————————————————

Valentine's Afternoon Tea
Valentine’s Afternoon Tea

Coconut Cream Pie

Coconut Cream Pie
Coconut Cream Pie

Funny how certain foods will evoke great memories. When I was a small child, our family often went to a tiny local restaurant in North Tryon, PEI, on Sunday evenings for dinner.  Simmons’ Restaurant was built and run by Jean and Harold Simmons and they served up really good traditional home-cooked meals.  One of the desserts I most fondly remember from their restaurant was coconut cream pie with mile-high meringue. Every time I have coconut cream pie, I remember Sunday dinners at the Simmons’ restaurant. Continue reading Coconut Cream Pie

Dreamy Hawaiian Cupcakes

Dreamy Hawaiian Cupcake

Today marks my 4th Blogiversary and I’m celebrating with my newly-developed recipe for Dreamy Hawaiian Cupcakes!  These are perfect for any event, any time of the year but, with their pink swirl centers and mile high frosting, I think they would be very suitable for Valentines Day. So, they’re doing double duty as they celebrate my 4th Blogiversary and act as a catalyst for Valentine’s baking.

Dreamy Hawaiian Cupcake

These cupcakes deliver a flavor punch with coconut milk, amaretto, shredded coconut, and maraschino cherries. That’s a flavor combo that’s hard to beat!

Dreamy Hawaiian Cupcakes

In addition to the wonderful flavor, the coconut milk makes these cupcakes lovely and moist. They also have a fine tender crumb which makes them very velvety when you sink your teeth into them.

Here are my tips and recommendations for making cupcakes:

  • Use the best quality ingredients available.  Don’t substitute margarine for the butter or artificial vanilla for pure vanilla in this recipe. Using lesser quality ingredients will affect the quality and taste of the cupcakes.
  • Measure ingredients accurately – that means, for example, spooning the flour into the measuring cup and then leveling it off with the flat side of a knife, without stirring the flour around in the cup or tapping it to shake the flour down into the cup.
  • Use the stated size of eggs – this matters as extra-large eggs (which this recipe calls for) yield more liquid than do large eggs. If you use smaller eggs than the recipe calls for, it will yield a drier cupcake.
  • Resist the urge to add increased amounts of ingredients such as more coconut or cherries than the recipe states as the liquid content in this recipe has been calculated to moisten the dry ingredients accurately. If more dry ingredients, such as extra coconut, are added without increasing the liquid content, the cupcakes will be dry.
  • All the ingredients should be at room temperature as this will help them to blend together better.
  • The eggs should be at room temperature for about 20 minutes or so before using them in this recipe.
  • Soften the butter at room temperature.  Never melt the butter in the microwave to soften it as it will change the properties of the butter.
  • Add the dry and liquid ingredients alternately in three parts, always starting and ending with the dry ingredients.
  • Don’t overbeat the batter as this can make a tough crumb and a heavy, dense cupcake as opposed to a light-textured cupcake. Beat the batter on low speed and just until all the ingredients are incorporated.
  • Grease the top of the cupcake pan as, even if paper cupcake liners are used, there will always be at least one rogue cupcake that will rise up and stick to the top of the pan, making it difficult to remove the cupcake without damaging it.
  • Make sure your oven temperature is accurate and that the oven has been preheated. If the oven temperature is too high, it will dry out the cupcakes; if it is too low, they won’t rise and bake properly.
  • It’s also important not to overbake the cupcakes as that will make them dry. I recommend checking them at about the 14 or 15-minute baking point by either a light finger touch to see if the top of the cupcake is set and if it bounces back from the touch. Alternatively, use a cake tester to insert into the center of a cupcake. If it comes out clean, the cupcakes are baked.
  • Let the cupcakes rest in the cupcake pan for 3-4 minutes to allow them to set then gently remove them from the pan and transfer them to a wire rack to cool completely before decorating.
Dreamy Hawaiian Cupcakes

The frosting consists of two flavors to complement the cupcake flavor – coconut and cherry. Combined, these two recipes will give you ample to frost 12 cupcakes with mile high swirled frosting as shown in the photos.  If, however, that’s just a tad too much frosting for your taste, simply make just one of the frosting recipes.

Dreamy Hawaiian Cupcake

I used Wilton decorating tip 2D for the swirl frosting and the two colors were achieved by filling one side of the decorating bag with white frosting and the other side with the cherry frosting.

Dreamy Hawaiian Cupcakes

Ingredients:

1½ cups all-purpose flour
1½ tsp baking powder
¼ tsp baking soda
½ tsp salt

½ cup butter, room temperature
1 cup granulated sugar
2 extra-large eggs
1 tsp vanilla
1 tbsp Amaretto
½ cup coconut milk
1/3 cup shredded coconut
¼ cup chopped maraschino cherries, well drained and patted dry

Pink food coloring

Method:

Preheat oven to 350°. Grease 12 muffin cups or, alternatively, line each cup with paper cupcake liners.

In medium-sized bowl, combine four dry ingredients. Set aside.

Fit mixer with paddle attachment. Cream butter and sugar until fluffy. Add the eggs, one at a time, beating well after each addition. Add the vanilla and Amaretto.

Add the dry ingredients in three parts alternately with the coconut milk, starting and ending with the dry ingredients.

Remove ½ cup of the batter and add the food coloring to it, just enough to tint the batter pink.

Add the coconut and chopped cherries to the white batter.

Fill each muffin cup about 1/3 full with the white coconut batter. Divide the ½ cup of pink batter between the 12 cupcakes.

Divide the remaining white batter evenly between the 12 cupcakes.Use the tip of a knife to gently swirl the pink batter into the white in each cupcake.

Bake in center of oven for 15-19 minutes or until cupcakes spring back to a light touch or a cake tester inserted into center of a cupcake comes out clean. Cool cupcakes in pan for 3-4 minutes then carefully transfer them to wire rack to cool completely.

Frost and decorate cupcakes as desired. The two frosting recipes provided with this recipe will, combined, easily frost the 12 cupcakes with the amount of swirled frosting shown in the photographs that accompany the cupcake recipe. If less frosting is desired, make only one of the recipes.

Yield: 12 cupcakes
Dreamy Hawaiian Cupcakes
Coconut Frosting

¼ cup butter
¼ cup shortening
1 tbsp coconut milk
¼ tsp almond flavouring
Apx. 2 cups confectioners (powdered) sugar, sifted
Sprinkle of salt (optional)

Beat butter and shortening together. Add coconut milk and almond flavouring. Blend in enough sifted confectioners sugar for desired spreading consistency.

Cherry Frosting

¼ cup butter
¼ cup shortening
1½ tbsp cherry juice
¼ tsp almond flavouring
Apx. 2 cups confectioners (powdered) sugar, sifted
Sprinkle of salt (optional)

Beat butter and shortening together. Add cherry juice and almond flavouring. Blend in enough confectioners sugar for desired spreading consistency.

To achieve dual-colored swirl frosting, fit cake decorating bag with Wilton 2D decorating tip. Fill one side of decorating bag with the white frosting and the other half with the pink frosting. Pipe onto cupcake in swirl motion.

—————————————————————————-

Thank you for visiting “the Bistro” today.  If you enjoyed this posting and recipe, please share it on your social media websites.

Connect with “the Bistro” through the following social media:

Join My Island Bistro Kitchen on Facebook

Follow “the Bistro’s” tweets on Twitter

Follow “the Bistro” on Pinterest

Follow “the Bistro” on Instagram

——————————————————————————

Dreamy Hawaiian Cupcakes

Yield: 12 cupcakes

Rich and decadent cupcakes packed full of coconut flavour and covered in mile-high coconut and cherry frosting

Ingredients

  • 1½ cups all-purpose flour
  • 1½ tsp baking powder
  • ¼ tsp baking soda
  • ½ tsp salt
  • ½ cup butter, room temperature
  • 1 cup granulated sugar
  • 2 extra-large eggs
  • 1 tsp vanilla
  • 1 tbsp Amaretto
  • ½ cup coconut milk
  • 1/3 cup shredded coconut
  • ¼ cup chopped maraschino cherries, well drained and patted dry
  • Pink food coloring
  • Coconut Frosting:
  • ¼ cup butter
  • ¼ cup shortening
  • 1 tbsp coconut milk
  • ¼ tsp almond flavouring
  • Apx. 2 cups confectioners (powdered) sugar, sifted
  • Sprinkle of salt (optional)
  • Cherry Frosting:
  • ¼ cup butter
  • ¼ cup shortening
  • 1½ tbsp cherry juice
  • ¼ tsp almond flavouring
  • Apx. 2 cups confectioners (powdered) sugar, sifted
  • Sprinkle of salt (optional)

Instructions

  1. Preheat oven to 350°. Grease 12 muffin cups or, alternatively, line each cup with paper cupcake liners.
  2. In medium-sized bowl, combine four dry ingredients. Set aside.
  3. Fit mixer with paddle attachment. Cream butter and sugar until fluffy. Add the eggs, one at a time, beating well after each addition. Add the vanilla and Amaretto.
  4. Add the dry ingredients in three parts alternately with the coconut milk, starting and ending with the dry ingredients.
  5. Remove ½ cup of the batter and add the food coloring to it, just enough to tint the batter pink.
  6. Add the coconut and chopped cherries to the white batter.
  7. Fill each muffin cup about 1/3 full with the white coconut batter. Divide the ½ cup of pink batter between the 12 cupcakes. Divide the remaining white batter evenly between the 12 cupcakes. Use the tip of a knife to gently swirl the pink batter into the white in each cupcake.
  8. Bake in center of oven for 15-19 minutes or until cupcakes spring back to a light touch or a cake tester inserted into center of a cupcake comes out clean. Cool cupcakes in pan for 3-4 minutes then carefully transfer them to wire rack to cool completely.
  9. Frost and decorate cupcakes as desired. The two frosting recipes provided with this recipe will, combined, easily frost the 12 cupcakes with lots of swirled frosting. If less frosting is desired, make only one of the recipes.
  10. Coconut Frosting: Beat butter and shortening together. Add coconut milk and almond flavouring. Blend in enough sifted confectioners sugar for desired spreading consistency.
  11. Cherry Frosting: Beat butter and shortening together. Add cherry juice and almond flavouring. Blend in enough confectioners sugar for desired spreading consistency.
  12. To achieve dual-colored swirl frosting, fit cake decorating bag with Wilton 2D decorating tip. Fill one side of decorating bag with the white frosting and the other half with the pink frosting. Pipe onto cupcake in swirl motion.
Schema/Recipe SEO Data Markup by Yummly Rich Recipes
https://myislandbistrokitchen.com/2016/01/18/dreamy-hawaiian-cupcakes/

Pin Me to Pinterest!

Cupcakes
Dreamy Hawaiian Cupcakes


Dreamy Hawaiian Cupcakes

Creamy Coconut Rice Pudding

Creamy Coconut Rice Pudding

There are so many ways to make rice pudding. Some use the stove-top method, others (like me) use the oven. Some bake the rice pudding directly in the oven but I prefer the hot water bath method for reasons explained below.

For rice pudding, I prefer a short grain rice such as Arborio which is what I have used in this pudding. Arborio rice (often used in risotto) is named after the Italian town where it is grown.  What makes it my preference for rice pudding is that, when cooked, it has lovely round pearl-like grains that hold their shape and don’t turn to “mush”.  This rice also has a high starch level and that helps to self-thicken the pudding as it bakes and also contributes to its creamy texture.

Creamy Coconut Rice Pudding

This pudding is true comfort food. The addition of coconut milk gives the pudding a subtle hint of coconut but not so strong that it detracts from the basic flavour we expect to find in an old-fashioned rice pudding.  I think the texture of the coconut milk also helps to keep the custard creamy.

I have used a maple syrup that was infused with cinnamon, nutmeg, and cloves. This does add a bit of discrete flavor to the pudding but, certainly, plain maple syrup would work just fine. I have added a blend of three spices – cardamon, nutmeg, and cinnamon – but again, not in large quantities because I don’t want the pudding to be overly spiced. I just want it to be delicately flavored.

Raisins, a traditional addition to rice puddings, do need to be “plumped” before adding them to the pudding as, otherwise, they don’t become very soft in the custard.  It’s not very pleasing to the palette to bite into hard, dry raisins amidst a soft creamy custard. For this recipe, I have soaked the 1/3 cup of raisins in about 1 tablespoon of Amaretto by placing these two ingredients in a small covered dish for at least 45 minutes.  Shaking the dish periodically helps to ensure that all raisins are coated with the liqueur.  In fact, you could leave them soaking for a couple of hours (the raisins will just be extra happy if you do so!).

Rice pudding custard is actually quite delicate and, for greatest success, it is best if the egg proteins are protected from direct hot heat and from fast baking.  Because the pudding is made with an egg-milk custard, it is therefore, in my opinion, best if it is baked slowly in a hot water bath.  This is simply a method of baking whereby the pudding dish(es) are placed inside a larger pan into which hot water is poured up to about half way on the pudding dishes or even up to the level of the custard in the ramekins. However, the water should not be so deep that the pudding dishes start to float. They need to sit stable in the water as the pudding bakes.

The benefits of baking this pudding in a hot water bath are several. First, the hot water adds steam and moisture to the oven which will prevent the puddings from drying out and cracking on the top as they bake. Second, any custard mixture of milk and eggs has the potential to curdle – that’s when the milk-egg mixture separates from the solids (in this case, the rice and raisins).  Because it is a slower method of baking and the hot water provides an even heat source, the hot water bath method helps to prevent the risk of curdled custard.  The hot water also helps the custard to bake evenly, both its outside edges as well as its center.  Without the hot water baking method, the custard could bake quicker on the outside edges of the pudding than in the center and part of the pudding would be dried out. Lastly, the slow baking combined with an oven of moist heat will help to keep the pudding creamy in texture as opposed to “rubbery”.

I place the 9″x13″x2″ pan with the ramekins in it on the oven shelf and just ever-so-slightly pull the shelf out, just enough that I can safely pour the hot water into the larger baking pan without getting a burn. I find this is a safer method than filling the pan with the hot water and transporting it to the oven. The water needs to be kept at the same level during the baking process so, since it naturally evaporates, you may need to add more hot water as the pudding bakes.

Bake the puddings for approximately 1 hour or until pudding top edges are set, centers are still a little “jiggly”, and the puddings are golden-colored. A knife inserted in or near the centre of the pudding should come out clean if the pudding is done. Don’t overbake the pudding as it will dry out and be less creamy. Remove ramekins from water bath and let them stand on a wire rack to set for approximately 10 minutes before serving.

Adding toasted coconut to the top of this pudding is optional but the crunchiness and flavour are an added touch.  Toasting coconut is simple. The coconut gets spread thinly on a baking sheet and baked in a 350° F oven for about 8-9 minutes. It is important to watch that the coconut does not burn and it should be turned once or twice during the toasting process to ensure even color.

Creamy Coconut Rice Pudding

Ingredients:

1¼ cups cooked Arborio rice
1/3 cup raisins, soaked in 1 tbsp Amaretto
½ cup coconut milk
¾ cup whole milk
1 extra-large egg, lightly beaten
2 tbsp granulated sugar
2 tbsp maple syrup
¼ tsp salt
½ tsp vanilla
1/8 tsp cardamom
1/8 tsp nutmeg
¼ tsp cinnamon

¼ cup shredded coconut (sweetened or unsweetened), toasted (optional)

Method:

In small covered dish, soak raisins in Amaretto for at least 45 minutes to plump them, shaking or stirring occasionally to ensure all raisins are coated with the liqueur.

Cook rice according to package directions.

Preheat oven to 325°F. Grease 6 – ¾-cup size ramekin dishes.

In large bowl, whisk together the coconut and whole milk, egg, sugar, maple syrup, salt, vanilla, and spices. Add rice and raisins and stir gently. Divide mixture between 6 prepared ramekins and place in 9”x13”x2” pan. Pour hot water into pan up to half-way on the sides of the ramekins or even up to about the level of the custard in the dishes. However, make sure the ramekins are not floating in the water.

Bake for approximately 1 hour or until pudding top edges are set, centers are still a little “jiggly” and puddings are golden-colored. A knife inserted in or near the centre of the pudding should come out clean if the pudding is done. Remove ramekins from water bath and let stand on wire rack to set for approximately 10 minutes before serving. To serve, top each with toasted coconut, if desired.

[To toast coconut: Spread coconut on baking sheet and bake in 350° F oven for 8-9 minutes, stirring once or twice, until coconut is lightly tanned in color.]

Yield: 6 servings.

—————————————————————————-

Thank you for visiting “the Bistro” today.  If you enjoyed this posting and recipe, please share it on your social media websites.

Connect with “the Bistro” through the following social media:

Join My Island Bistro Kitchen on Facebook

Follow “the Bistro’s” tweets on Twitter

Follow “the Bistro” on Pinterest

Follow “the Bistro” on Instagram

——————————————————————————

Creamy Coconut Rice Pudding

Serving Size: Apx. 6 servings

A delicate coconut-flavored creamy baked rice pudding with subtle spice flavoring

Ingredients

  • 1¼ cups cooked Arborio rice
  • 1/3 cup raisins, soaked in 1 tbsp Amaretto
  • ½ cup coconut milk
  • ¾ cup whole milk
  • 1 extra-large egg, lightly beaten
  • 2 tbsp granulated sugar
  • 2 tbsp maple syrup
  • ¼ tsp salt
  • ½ tsp vanilla
  • 1/8 tsp cardamom
  • 1/8 tsp nutmeg
  • ¼ tsp cinnamon
  • ¼ cup shredded coconut (sweetened or unsweetened), toasted (optional)

Instructions

  1. In small covered dish, soak raisins in Amaretto for at least 45 minutes to plump them, shaking or stirring occasionally to ensure all raisins are coated with the liqueur.
  2. Cook rice according to package directions.
  3. Preheat oven to 325°F. Grease 6 – ¾-cup size ramekin dishes.
  4. In large bowl, whisk together the coconut and whole milk, egg, sugar, maple syrup, salt, vanilla, and spices. Add rice and raisins and stir gently. Divide mixture between 6 prepared ramekins and place in 9”x13”x2” pan. Pour hot water into pan up to half-way on the sides of the ramekins or even up to about the level of the custard in the dishes. However, make sure the ramekins are not floating in the water.
  5. Bake for approximately 1 hour or until pudding top edges are set, centers are still a little “jiggly” and puddings are golden-colored. A knife inserted in or near the centre of the pudding should come out clean if the pudding is done. Remove ramekins from water bath and let stand on wire rack to set for approximately 10 minutes before serving. To serve, top each with toasted coconut, if desired.
  6. [To toast coconut: Spread coconut on baking sheet and bake in 350°F oven for 8-9 minutes, stirring once or twice, until coconut is lightly tanned in color.]
Schema/Recipe SEO Data Markup by Yummly Rich Recipes
https://myislandbistrokitchen.com/2016/01/17/creamy-coconut-rice-pudding/

Creamy Coconut Rice Pudding

Pin Me to your Favorite Pinterest Boards:

Coconut Rice Pudding

Terms and Conditions of Use of Material on this Food Blog

It’s a new year so it’s a good time for readers to familiarize themselves with the acceptable use of content from this blog.

The “Disclaimers and Terms and Conditions of the Use of Material on this Food Blog” document has been updated effective today, January 13, 2016.

Readers and users of recipes from this website are STRONGLY encouraged to read this document that can be found here and to ensure that they comply with the stated terms and conditions of acceptable use of content from this blog. This document also covers copyright issues as well.

Hawaiian Fiesta Casserole

Hawaiian Fiesta Casserole

I cooked a boiled dinner with ham that I got on a great deal so am fortunate that the ham has a lot of meat on it. You can get my method for making a boiled ham dinner here. After sandwiches and leftovers for a night or two, it was time to find other uses for the rest of the ham and ones that would extend the use of the meat into more servings than simply slicing and plating it. I am not one to throw out food so I always find ways to use up leftovers.

Hawaiian Fiesta Casserole

So, I made what I call a Hawaiian Fiesta Casserole aptly named because, in addition to the ham, it has pineapple, rice, and bright green broccoli florets.  This casserole is not difficult to make but it does take a bit of time, planning, and coordination since the rice and broccoli have to be pre-cooked and the pineapple fried (yes, fried). Continue reading Hawaiian Fiesta Casserole

Glitz ‘n Glamour New Year’s Eve Tablesetting

New Year’s Eve is the perfect occasion to bring on all the bling, glitz, and glamour …. and that includes dressing up the dining table.  I thought you might be interested in taking a peek at how I transformed my dining room from Christmas into an elegant venue for a New Year’s Eve dinner. And, yes, each guest had a glittery and elegant silver or black hat to wear for the evening.

As you can see, the color theme was silver, black and white.

Each place setting was framed by a silver charger plate with a rhinestone edge.

A small glass dessert dish contained silver cola balls at each placesetting.

Silver Cola Balls
Silver Cola Balls

I used one of my napkin ring sets that has a lot of bling to contain the black napkin because, well, there’s no such thing as too much bling on NYE, is there!

I think the napkin looks very stylish and elegant placed diagonally over the edge of the plate and charger. For elegant and sophisticated tablesettings, always use a high quality cloth napkin.

Of course, any “blingy” tablesetting needs lots of glassware to reflect the light. Each placesetting had three glasses – a water glass, a white wine glass, and a champagne flute.  When I am setting an elegant table, I try to make sure the glassware all matches.  For more casual tablesettings, mix-and-match glassware may work but, for formal settings, I use matched glassware. The more cuts there are in the glassware, the more dazzling it is in different lighting situations.

I went with a very simple centerpiece. Two glittery silver pillar candles on medium-height glass candlesticks and a white and deep rose floral arrangement in a small black urn.

For the floral centerpiece, I used bright rose-colored Gerber daisies surrounded by a collar of white carnations with green berry highlights.

With all the white, silver, and glass on the table, I thought the centerpiece needed a bit of bright color to stand out.

Simple yet elegant.

And, of course, there were little Hershey kisses for midnight! It’s all about the little details!

Here’s an overhead view of the table. Once I set a table, I always take a photo as that will quickly let me see what’s out of place and needs adjustment. Amazing how a photograph will reveal what an eye does not always see!

To keep the glitz going, I hung some mirror balls, glittery snowfakes, and glass from my dining room lighting fixture.

These are simply inexpensive ornaments I purchased at a dollar store.  They do the trick!

Glittery snowflakes!

My fireplace mantle featured winter white and black. Tick-tock as we made our way to midnight!

The black lanterns tied in with the black on the table and provided the glow of soft candle light as evening darkness settled in.

The champagne bucket was filled with ice.

And the champagne flutes stood at the ready.

Then, the beverage was poured…..

And, before long, it was the midnight hour!

I hope you have enjoyed this glimpse into my New Year’s Eve dining room.  Best wishes for health, happiness, and prosperity in the new year. Happy New Year, everyone!

To view other seasonal tablesettings, click on the links below:

Christmas Eve Tablesetting and Dinner
Twas the Night Before Christmas
The Warmth of the Christmas Light Tablesetting
A Tartan Holiday Tablesetting
Pretty Poinsettia Tablesetting
Poinsettia Trio Tablesetting
The Holiday Table
The Pink and Green Holiday Table
Christmas at My Island Bistro Kitchen
Purple Tablesetting for the Holidays
Evergreens and Reindeer Christmas Tablesetting
Cupcake Tablescape

—————————————————————————-

Thank you for visiting “the Bistro” today.  If you enjoyed this posting, please share it on your social media websites.

Connect with “the Bistro” through the following social media:

Join My Island Bistro Kitchen on Facebook

Follow “the Bistro’s” tweets on Twitter

Follow “the Bistro” on Pinterest

Follow “the Bistro” on Instagram

——————————————————————————

New Year's Eve Tablesetting
New Year’s Eve Tablesetting

Zesty Cranberry-Orange Sauce

Zesty Cranberry-Orange Sauce

While cranberry sauce is traditionally associated with Thanksgiving and Christmas, I eat it year-round. In fact, I batch cook it and freeze it for use throughout the year.

Each fall, I eagerly await the cranberry harvest on PEI. The photo below was taken on a day that Mikita Farms in Farmington, PEI was wet harvesting their cranberry crop. Produce just does not get any fresher than this!

Freshly-harvested Cranberries from Mikita Farms in Farmington, PEI

In the fall, I buy a huge bag of cranberries for the freezer as I use them in several recipes, including cranberry-orange sauce.

These gems turn into a rich jeweled-toned cranberry sauce.

Zesty Cranberry-Orange Sauce

Any time I am cooking a chicken dinner, chicken pieces, or have a craving for cranberry sauce, I head to the freezer for a small container of the sauce as it just seems to make the meal.

Zesty Cranberry-Orange Sauce

I hope you enjoy my recipe for cranberry-orange sauce.  This is not a sickeningly sweet sauce although you can add a bit more sugar if you have a really sweet tooth!  Adding some apple and orange juice to the sauce gives it an extra flavour boost and both fruits complement the cranberry flavour well.  While the sauce is lovely without the Cointreau, it does add to the flavour of the sauce.

The method I use for the sauce is to make a simple syrup by boiling the sugar and water and then adding the cranberries, apple, and orange juice. I don’t care for runny cranberry sauce so I have learned this tip from my mother: Occasionally stir the sauce as it is cooking but make sure you stir it several times as it cools as this will help to thicken the sauce.

Don’t save this zesty cranberry-orange sauce for the holidays; enjoy it year-round!

Zesty Cranberry-Orange Sauce

Zesty Cranberry-Orange Sauce

Ingredients:

1 cup granulated sugar
1 cup water
2 cups cranberries, fresh or frozen
½ cup apple, finely chopped
1/3 cup orange juice
1 tsp finely grated orange rind
1½ tbsp Cointreau (optional)

Method:

In medium-sized saucepan, bring sugar and water to boil. Boil, uncovered, for 5 minutes over medium-high heat, stirring occasionally.

Add cranberries, apple, and orange juice. Bring to a boil. Cook over medium-low heat, stirring periodically throughout the cooking process for about 15 minutes or until mixture thickens.

Remove saucepan from heat and add orange rind and Cointreau. Stir several times as the sauce cools to help it to thicken.

Store, covered, in refrigerator for up to 5 days or freeze for longer storage.

Yield: Apx. 2 cups.

Zesty Cranberry Orange Sauce

Yield: Apx 2 cups

A mildly tart and flavorful sauce that pairs well with roast turkey and any poultry dishes

Ingredients

  • 1 cup granulated sugar
  • 1 cup water
  • 2 cups cranberries, fresh or frozen
  • ½ cup apple, finely chopped
  • 1/3 cup orange juice
  • 1 tsp finely grated orange rind
  • 1½ tbsp Cointreau (optional)

Instructions

  1. In medium-sized saucepan, bring sugar and water to boil. Boil, uncovered, for 5 minutes over medium-high heat, stirring occasionally.
  2. Add cranberries, apple, and orange juice. Bring to a boil. Cook over medium-low heat, stirring periodically throughout the cooking process for about 15 minutes or until mixture thickens.
  3. Remove saucepan from heat and add orange rind and Cointreau. Stir several times as the sauce cools to help it to thicken.
  4. Store, covered, in refrigerator for up to 5 days or freeze for longer storage.
  5. [Copyright My Island Bistro Kitchen]
Schema/Recipe SEO Data Markup by Yummly Rich Recipes
https://myislandbistrokitchen.com/2015/12/30/zesty-cranberry-orange-sauce/

For other great cranberry sauce recipes from My Island Bistro Kitchen, click on the links below:

Red Wine Cranberry Pear Sauce
Cranberry Rhubarb Sauce
Cranberry Blueberry Sauce

If you have made this recipe and enjoyed it and/or wish to share it with your friends and family, please do so on social media but be sure to share the direct link to this posting from my website.

Connect with My Island Bistro Kitchen on Social Media

Join the Facebook page for My Island Bistro Kitchen:  https://www.facebook.com/MyIslandBistroKitchen/

Follow “the Bistro” on “X” (formerly Twitter)https://twitter.com/PEIBistro/

See the drool-worthy gallery of mouth-watering food photos from My Island Bistro Kitchen on Instagramhttps://www.instagram.com/peibistro/

Follow “the Bistro” on Pinterest at https://www.pinterest.ca/peibistro/ and pin the Pinterest-ready photo found at the end of this post to your favorite Pinterest boards.

Pin Me To Pinterest!
Cranberry Sauce
Cranberry Sauce
Zesty Cranberry-Orange Sauce


Twas The Night Before Christmas Tablesetting

The Dinnerware

Johnson Brothers’ “Twas The Night” dinnerware is classic Johnson Brothers in every way. The dinnerware features nostalgic scenes and text from the classic Christmas story “Twas the Night Before Christmas“.

DSC_0152-001

Made of earthenware, this is a sturdy, durable easy-to-care for set of dinnerware that is both dishwasher and microwave safe.

This tableware has a distinctively pinkish-red and ivory color and, with text from the afore-mentioned Christmas story, it is definitely Christmas-only dinnerware.  For this reason, I have chosen it for Christmas Eve dinner.

Let’s take a look at the intricate pattern on each plate and the bowl.

The dinner plate features the exterior of an old stone house.

The salad plate shows a tree by the fireplace with stockings hung.

The soup bowl shows a full moon in the winter sky over the rooftop.

Even the bottom of the plates has detail.

As those of you who follow the tablesetting part of my food blog will know, I’m a big fan of charger plates, both for their functionality and for the color and elegance they lend to a tablesetting.  However, as I have discovered, not all dinnerware necessarily benefits from the use of charger plates.  This Twas the Night pattern is a prime example of that.  I did try pink chargers under the plates but found the dinnerware too informal and, for my taste, the chargers looked out of place.  This, of course, does not mean a pretty table cannot be set with these dishes.

Glassware

Because this dinnerware is more vintage in design, I have chosen glassware in styles that complement the dishes.  This is dinnerware that allows mix-and-match glassware.  In fact, none of the three vintage glasses are a matched set yet they seem to work in this setting. The stem glasses with red trim give a bit of extra pop of color to the tablesetting and blend in with the red berries in the jars.

Linens and Napkins

It is not often that I set a table without either a full tablecloth, a square, or placemats.  However, for this setting, I have chosen to use a short Christmas runner down the center of my oval table and let the maple wood of my table shine.  I think this complements the informal casual look of this dinnerware.

When selecting napkins, I try to choose them in a color that either matches the background color of the dinnerware or, alternatively, select a color from the pattern.  In this case, I have opted to go with ivory napkins and the fold I have chosen is the rose.

The Rose Napkin Fold

This is a simple-to-do napkin fold.  I like to use this fold when space on the table is limited to display a napkin, when a napkin fold would substantially cover up the dinnerware pattern which is a focal point of the table, or when placement of the napkin would clutter up, or compete with, a simplistic tablescape design.

The rose fold requires either a soup bowl or a cup to contain it and hold it in place.  This method of styling and presenting a napkin is unpretentious yet gives the look and feel that planning and effort have been put into the tablesetting.

Tablescape/Centerpiece

Since my goal with this setting is to keep it very simplistic, I have chosen to use standard glass canning jars of two sizes for the table decor.  You may know these as Mason or Ball brand jars.

In the three larger jars, I have added a base of Epsom salt to resemble snow topped with some faux red berries to symbolize cranberries.  To add a touch of seasonal greenery, I have topped each jar with a few sprigs of fresh greenery.

In each of the smaller jars, I have placed a small white votive candle on a base of Epsom salt.  Just make sure you put the candle in a small votive glass inside the jar to contain the melting wax.

Using an odd number of jars is more pleasing to the eye than if an even number was used.  More (or fewer) jars can be used depending on the length of the table.

Using these glass jars is remaining quite popular and trendy probably because of their versatility.  I think their “home-y” look blends well with the nostalgic tableware that has a homestead, casual look to it.  When I think of homestead, I think of canning fruits and vegetables which is the traditional use of these jars.

This dinnerware is sure to be a conversation piece on the dinner table for many Christmases to come.


To view other Christmas Tablesettings, click on the links below:

Glitz ‘n Glamour New Year’s Eve Tablesetting
The Warmth of the Christmas Light Tablesetting
Christmas Eve Tablesetting and Dinner
A Tartan Holiday Tablesetting
Pretty Poinsettia Tablesetting
Poinsettia Trio Tablesetting
The Holiday Table
The Pink and Green Holiday Table
Christmas at My Island Bistro Kitchen
Purple Tablesetting for the Holidays
Evergreens and Reindeer Christmas Tablesetting
Cupcake Tablescape


Thank you for visiting “the Bistro” today.  If you enjoyed this posting, please share it on your social media websites.

Connect with “the Bistro” through the following social media:

Join My Island Bistro Kitchen on Facebook

Follow “the Bistro’s” tweets on Twitter

Follow “the Bistro” on Pinterest

Follow “the Bistro” on Instagram

——————————————————————————

Tips and Suggestions on Choosing Holiday Wines

Many will buy wine over the holiday season either for their own home entertaining events or for gifts. Sometimes, if you are like me, when I enter the wine section of a store, it can be puzzling to make a selection from the wide array of wines on the market. To gain some insight into making some wine choices this holiday season, I enlisted the help of sommelier Debbie Smith.  In addition to being a sommelier, Debbie also works as a product adviser at the Prince Edward Island Liquor Control Commission at their Oaktree store in Charlottetown. I thought readers of my food blog might also be interested in what I learned so I am sharing the insights.

Readers will note that wine selection is very much based on personal taste and preference. There are as many opinions on wine choices as there are wine drinkers and sommeliers; however, what follows are the views and suggestions of one sommelier in direct response for advice I was personally seeking so are meant as just that — – suggestions one might consider when selecting wines to pair with certain typical holiday foods. It does not mean that other wines not suggested, or named in particular, would not be fine pairings, too. As a further note, prices are in Canadian dollars and are current as of the time of writing in December, 2015. The reason I asked for price points is that I find it useful to know if a wine suggestion is, say, less than $20.00 or more than $50.00 per bottle.

Debbie, a certified sommelier and graduate of the Canadian Association of Professional Sommeliers, has been a sommelier for eight years. Prior to her current position, she worked as a sommelier and wine trainer with the Murphy Hospitality Group in PEI. She became interested in learning more about wine in order to raise the level of service she was providing to patrons in the restaurant industry. Debbie says she was fortunate to work with one of the Island’s first accredited sommeliers who was very enthusiastic about the field and this increased her interest in learning more about wine.

To begin, I asked Debbie if price is an indicator that the more expensive the wine is, the better its quality. Debbie indicates that, while price point can be a general indicator on the quality of wine, it is only part of the equation. She points out that wine preference is such a personal experience, other factors come into play — the occasion, budget, personal preference, and past experience with wine. Debbie points out that the general indicators of a good wine include its complexity, intensity, balance, and finish. So, the more different notes and distinct flavours you can pick up on, identify, and distinguish in the wine and how harmonious the fruit, tannin, acid, body and alcohol level are (with none outshining another) along with how long the flavours and sensations remain in your mouth after you have swallowed will indicate a quality wine.

Food Pairing

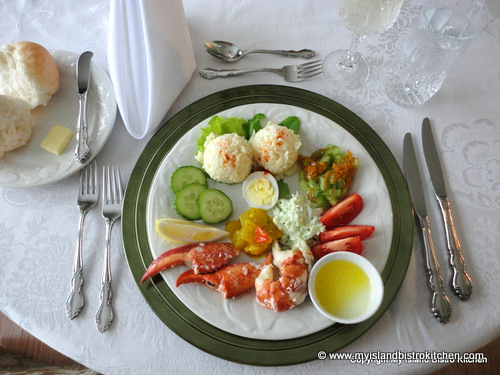
My first question was what general factors should one think of, or consider, when making wine selections for pairing with different foods. Debbie suggests that flavour and intensity are key considerations. For example, the flavours and intensity of the food and wine should match so one does not overpower the other. Since lobster is often served in Prince Edward Island over the holiday season (and is our traditional fare on Christmas Eve), Debbie uses the example of lobster served with a rich creamy sauce pairing well with a rich butter US Chardonnay while lobster served out of the shell with fresh lemon could be paired with a crisp citrusy Sauvignon Blanc from the Loire in France.

I asked, if I was hosting a dinner party, how important it would be to serve a different wine with each course. She says it really isn’t critical and many people focus on pairing a wine with the main course specifically. That said, however, if budget allows, it does contribute to the dining experience if different wines are served with the various courses of the meal.

My next question was, if budget is a concern, is there one general wine she could recommend for a holiday meal. In this scenario, Debbie suggests what she calls “crossover wines”, those that have the ability to pair well with a number of different food styles. Pinot Noir and Chardonnay, for example, are considered versatile wine choices since both can pair well with chicken, pork, salmon, and less marbled cuts of beef like tenderloin. Wines that might fall into this category could include OPI Chardonnay from Argentina ($15.99 CDN$), Arbodeda Chardonnay ($16.99 CDN$), or Chile Cono Sur Pinot Noir ($13.99 CDN$).

To get a little more into specific food and wine pairings for typical holiday foods and events, I asked for Debbie’s advice on what wine would be best to serve in the following scenarios:

Appetizers

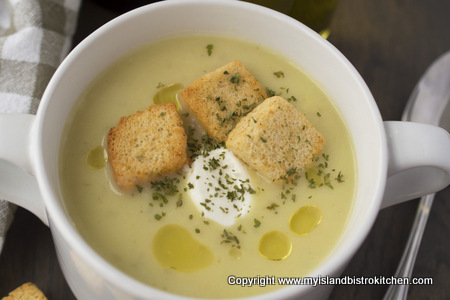
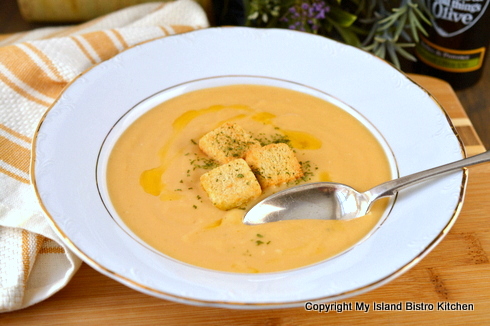
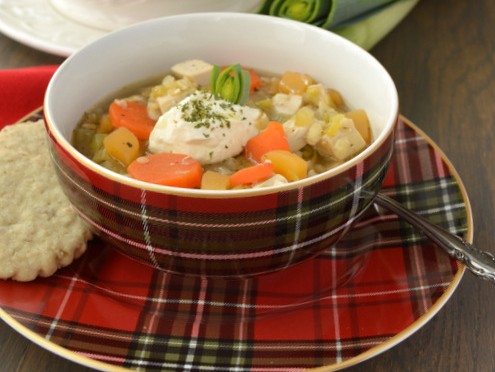
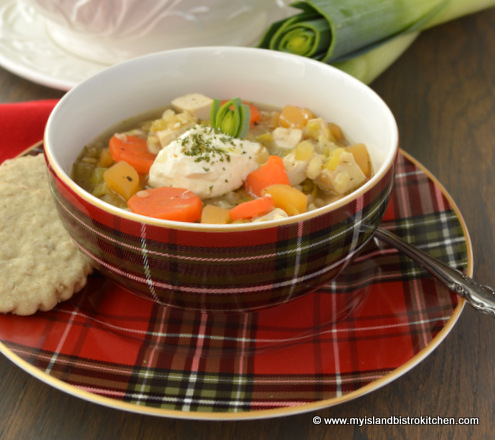
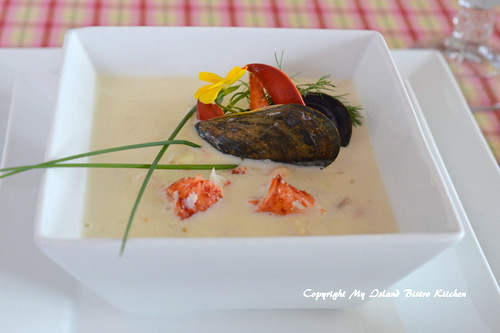
Seafood chowder is a fairly common starter on many menus in the Maritimes over the Christmas holidays so I asked for information specifically on wines that would be suitable to pair with rich seafood chowders. Debbie suggests a wine such as L’Acadie Blanc styles (price points $17-22 CDN$) from the Maritime Provinces because, in her words, ‘what grows together goes together!” White wines from grapes grown in the Maritime Provinces offer crisp acidity and slightly sweet aromas which are an ideal match for a rich cream-based chowder made with the fine seafood from the Atlantic Ocean.

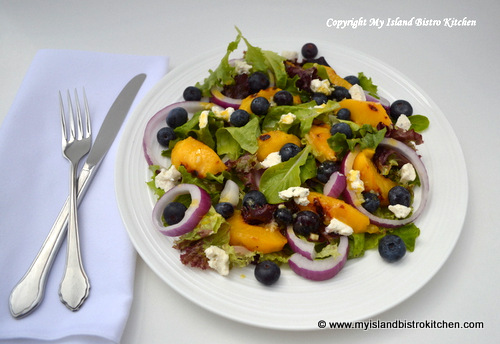
To pair a wine with a green salad, Debbie suggests Vinho Verde styles from Portugal and New Zealand Sauvignon Blanc (price points $14-23 CDN$) because the key is to match the level of acidity when pairing wine successfully with green salads. She suggests that the Sauvignon Blanc often has distinct tropical fruit and grassy aromas with a good acidity level that are perfect complements to a salad. In Debbie’s opinion, the Vinho Verde is a unique style of wine noted for its slight effervescence, vibrant fruit, and refreshing qualities that make it a great pairing with salads. For the green salad course, then, I might consider either Gazela Vihno Verde ($13.60) or Quinta da Aveleda Vihno Verde ($14.50).

Traditional Roast Turkey Dinner

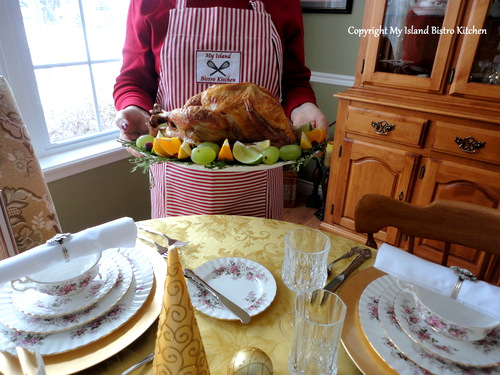
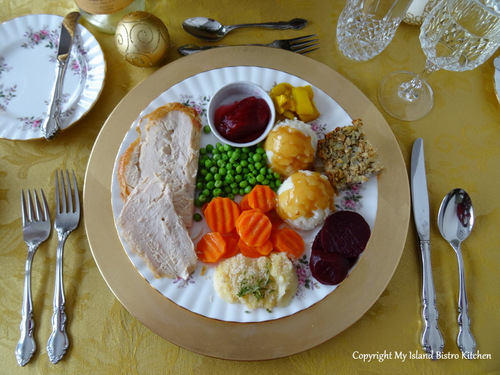
There is no need to break the budget for a good wine to complement the traditional roast turkey dinner. Debbie suggests an off dry Riesling from either Canada or Germany and several can be purchased for under $20 (CDN$). She suggests, because the dinner itself can be heavy, choosing something light to moderate in alcohol that has high acidity to balance the richness and add a bit of sweetness to match the cranberry and yams on the table. For this course, then, I might consider Beaujolais Nouvalle ($18.99-20.99) or a wine produced in St. Catherine’s in my home province of PEI – Matos Gamay Noir ($16.95).

Holiday Desserts

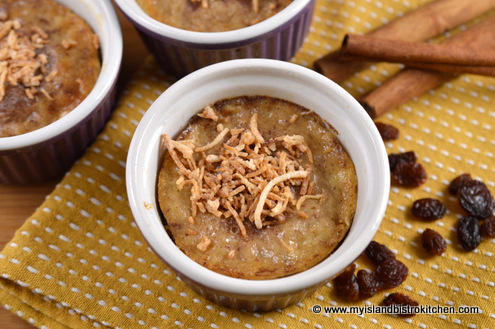
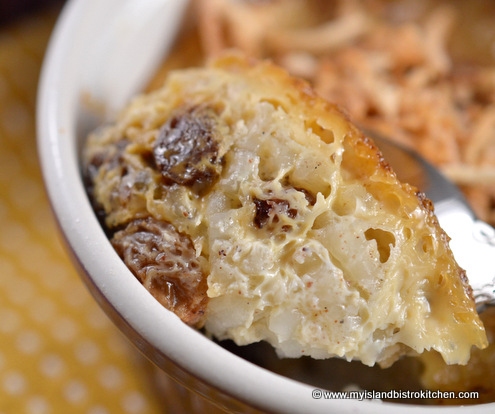
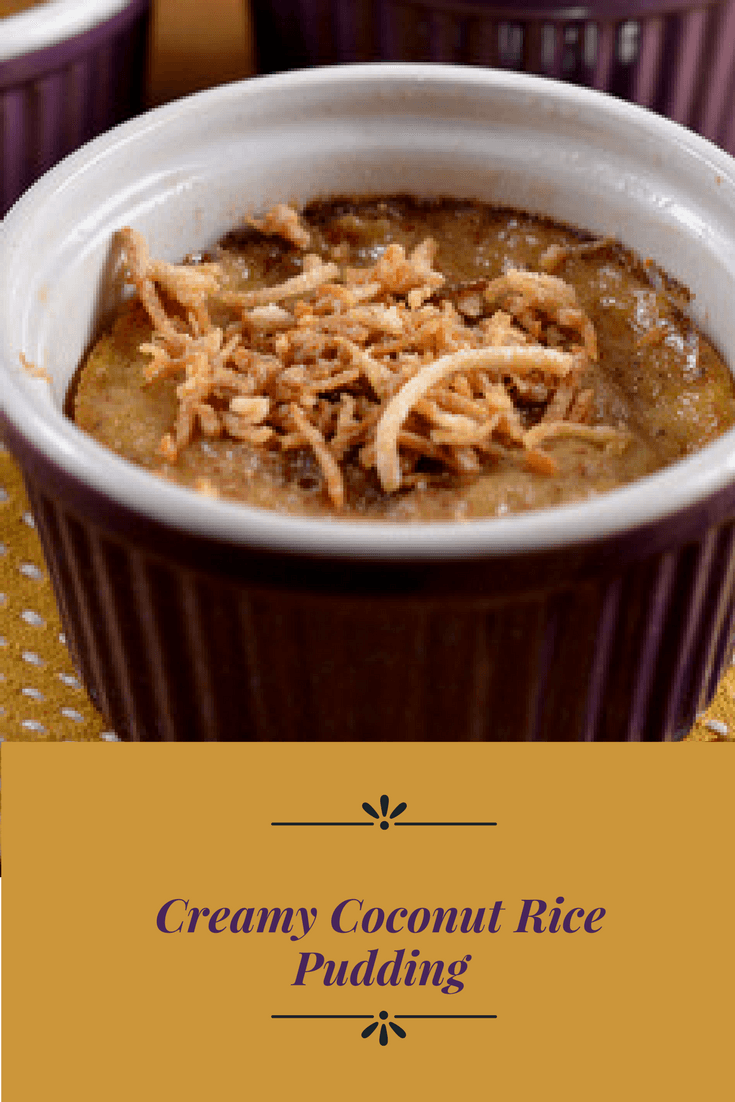
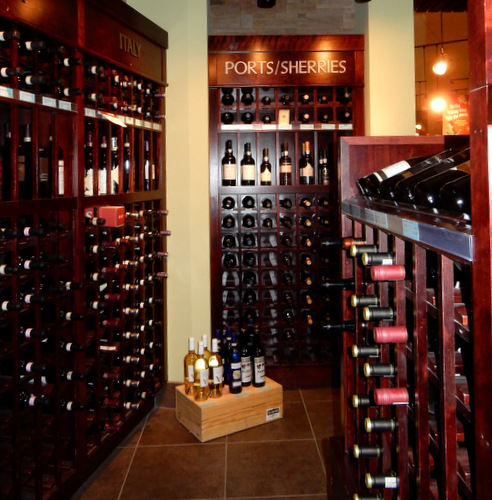
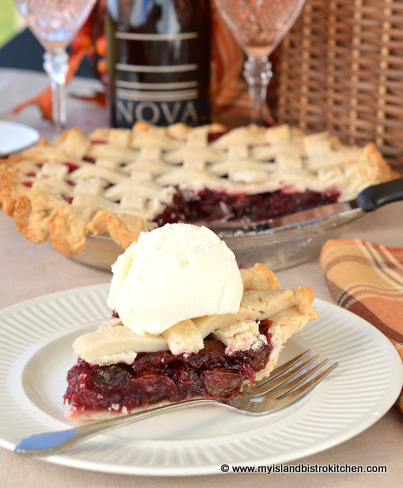
Desserts over the Christmas season can often be rich and heavy. For many of us, that might include traditional plum pudding. For this course, Debbie suggests choosing a wine that is as sweet as the dessert. She recommends a slightly chilled tawny port from Portugal because the port is full of flavours of caramel, apricot, plum, and raisins which would complement the similar flavours in the pudding. Ports tend to be slightly more pricey so this option would require me to be prepared to pay $30 or more (CDN$)

Acadian Meat Pies

For many families, particularly those of Acadian descent, it would not be Christmas without the traditional meat pie. For this repast, our sommelier’s suggestion is to choose a wine that is rich, savoury, and spicy to complement the similar flavours in the pie. Cote du Rhone and Grancha Syrah Mouvedere (GSM) blends from France and Australia would, in Debbie’s opinion, be good choices and they range from $15-30 (CDN$) or, for a truly Acadian experience, one might try Baco Noir, Machel Foch, and other wines produced in the Atlantic Canada region.

Brunches

I was curious to know what a sommelier might suggest as a wine accompaniment for a brunch. While recognizing that a brunch might have a number of different items on the menu, Debbie suggests a sparkling wine or, indeed, a Champagne to accompany croissants, pancakes, and even muffins because of the buttery yeast flavours in these foods. If bacon is on the menu, she suggests light oak Chardonnays with butterscotch and vanilla flavours would play well with the salty smoky qualities of the bacon. If steak and eggs are on the menu, a Merlot that has notes of black cherry, green pepper, and minerals might be considered. And, if spicy sausage is a featured menu item, a chilled Beaujolais red berry with low tannins to offer a good contrast to the spice and heat in the meat would be a good pairing.

Wine and Cheese Parties

These two make a fine pair! The cheese is meant to bring out the character of the wine and the wine, for its part, enhances the depth and flavour in the cheese. Debbie claims that Gewurtraminer, with its sweet and fruity components and balancing acidity, offers the most opportunity for successful pairing. This is because the combination of sweetness and salt is pleasing to the palate. So, considerations could include Pelee Island Gewurtraminer from Canada ($12.99 CDN$) or France’s Wolfberger Vin D’Alsace Gewurtraminer for $18.99 (CDN$).

If goat cheese is being served, Sauvignon Blanc would be a suitable choice with its natural high acidity which tends to pair very well with the tart flavours commonly found in various goat cheeses. Selection suggestions could include Matua Sauvignon Blanc ($19.99 CDN$) from New Zealand or Paul Mas Sav Blanc Single Vineyard Collection for $15.99 (CDN$) from France.

For stronger flavoured cheese (like Gorgonzola, for example) Debbie recommends Coltibuono Chianti Classico from Italy ($22.95 CDN$) with its earthy notes and good acidity or the full-bodied Red Guitar Tempranillo and Granacha blend from Spain ($15.99 CDN$).

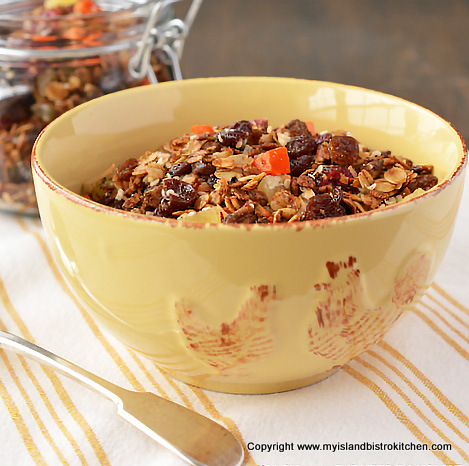
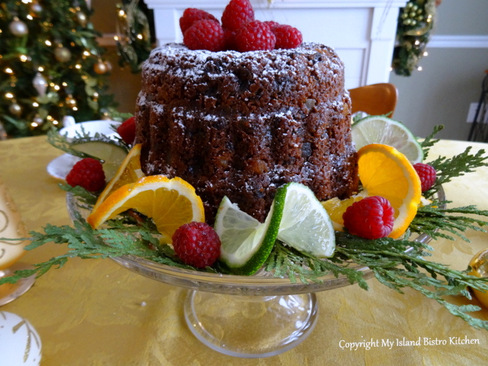
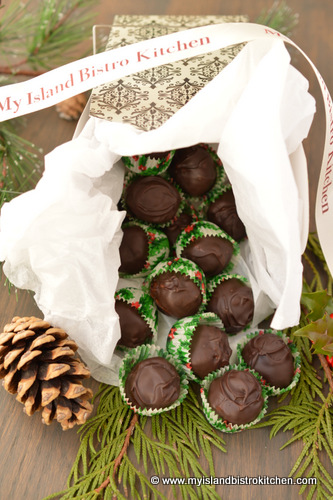
Sipping Wine to Pair with Fruitcake, Chocolate and Other Sweet Treats

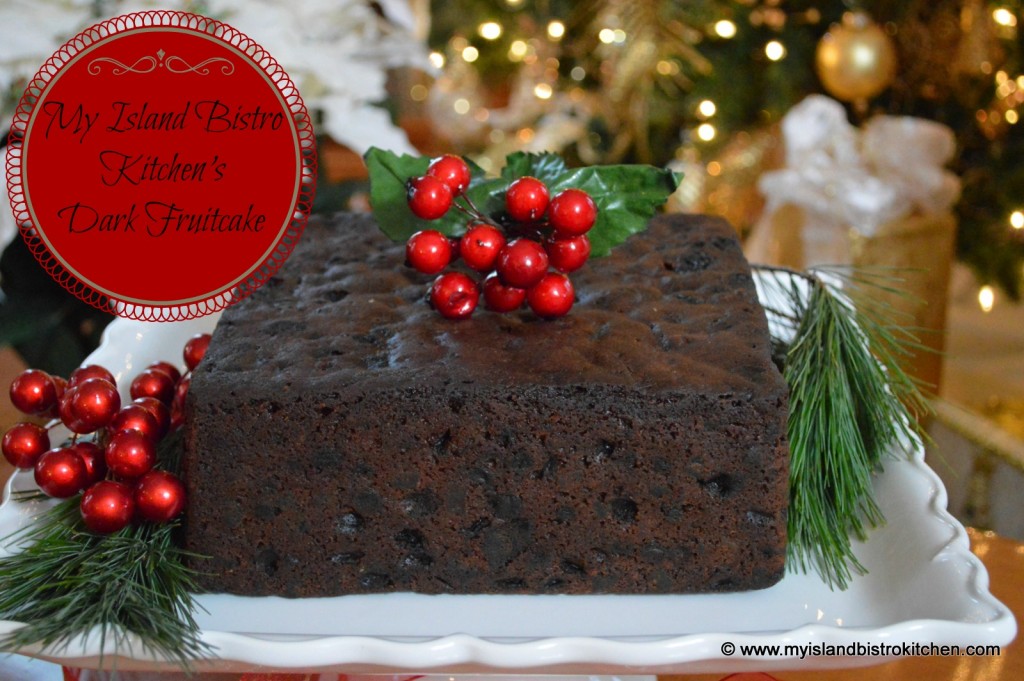
The sommelier suggests choosing a wine that blends sweetness with some acidity for the sweet treats we often associate with Christmas. Either Apothic Red Blend from the US ($16.99 CDN$), Criollo – a chocolate raspberry liqueur from South America ($19.99 CDN$) or, if you have the budget, Cockburn 20-year old tawny Port would make a fine pairing for chocolate but is a bit on the pricey side at $42.99 (CDN$).

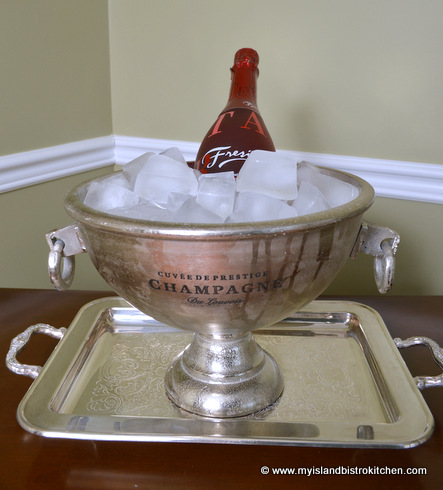
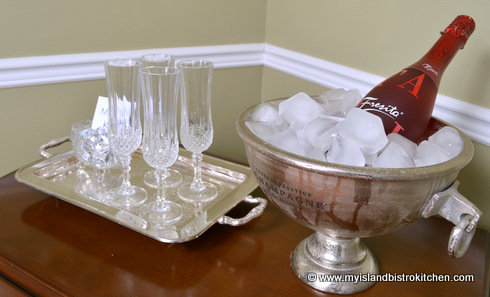
New Years Eve Celebrations

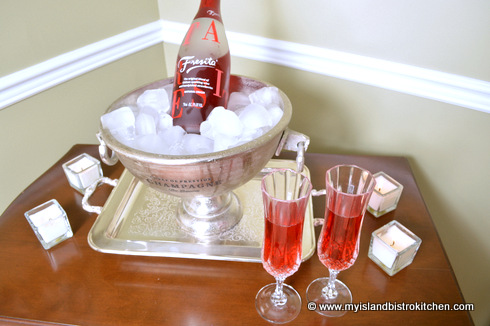
For many, it is not New Years Eve unless there is a glass of bubbly and some of the champagnes can be pricey. However, there are many choices at different price points and these include the modestly priced La Marca Prosecco from Italy at $17.99 (CDN$), Benjamin Bridge Brut from Canada at $44.95 (CDN$) and the more expensive Bollinger Brut Champagne Special Reserve NV from France at $74.98 (CDN$).

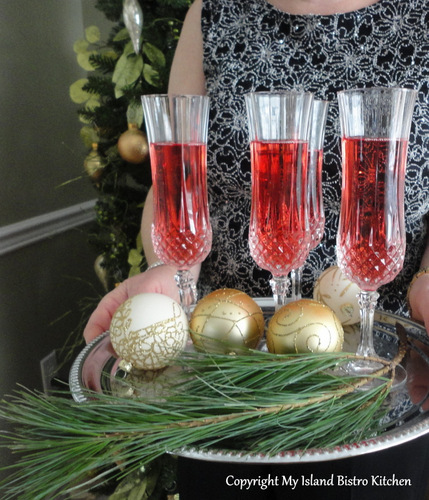
But, if champagne is not your beverage of choice and you still want something a little sparkly with some effervescence, you might consider Benjamin Bridge Nova 7 from Canada priced at $24.99 (CDN$) or Jost Vineyards’ Selkie Frizzante $19.95 CDN$) also from Canada. Patrons of the PEI Fall Flavours Culinary Festival will recognize the Benjamin Bridge name since this winery was the official wine sponsor of the 2015 festival and their wines, including the fabulous Nova 7, were served at many of the culinary events. The Nova 7 will be my choice for New Year’s Eve celebrations this year.

Optimal Serving Temperatures for Wines

The temperature of the wine is important to savour its true qualities. If you are not sure of the optimal serving temperatures for various wines, here are the recommended serving temperatures, according to the sommelier:

White wines: Full bodied 11°C; Light-bodied 9°C
Red wines: Full-bodied 18°C; Light-to-medium-bodied 12-15°C
Rosé wines: 5°C
Sparkling wines: 6°C
Champagnes: 6-7°C (8°C for vintage champagne)

Wine as Host/Hostess Gifts

Wine is often chosen as a host/hostess gift but it is sometimes a quandary to know what wine to select, especially if you don’t know the recipient’s tastes so I asked Debbie for her recommendation if one is faced with this scenario. She recommends either a Pinot Grigo, such as Gabbiano from Italy currently priced at $14.99 (CDN$), or Norton Privada Malbec for $24.95 (CDN$). Malbec, at the time of writing, is a trendy favourite.

Before we concluded our discussion on wine and food pairings, I asked Debbie if there are any new or up-and-coming wines or regions we should know about. She says that, although New Zealand has been producing wines since the 1800s, it has really come in to its own as a wine region within the last 20 years, particularly with wines such as Kim Crawford. In fact, New Zealand will be the featured wine country for the 2016 Festival of Wines Prince Edward Island to be held May 27-28th at the Eastlink Centre in Charlottetown. And, of course, our own three PEI wineries, along with a number of others in New Brunswick and Nova Scotia, here on Canada’s East Coast, are proof that our cool climate is also very suitable for growing a number of different kinds of grapes that produce fine wine.

To finish off, I asked Debbie some “quick snapper” questions.

1. What wine(s) will be on your 2015 Christmas table and why that particular choice? I will be serving two wines at this year’s dinner. The first is Dr Heidemanns Bergwilier Riesling Kabinett ($24.99 CDN$) from Mosel region in Germany because this is a dry Riesling with notes of black currant and apricot with a structured finish which makes it a wonderful pairing with turkey. The second wine is Gabriel Liogier Vacqueyras ($26.89 CDN$), a red wine from France that is full bodied and a bit spicy, making it a perfect pairing with both roasted vegetables and turkey.

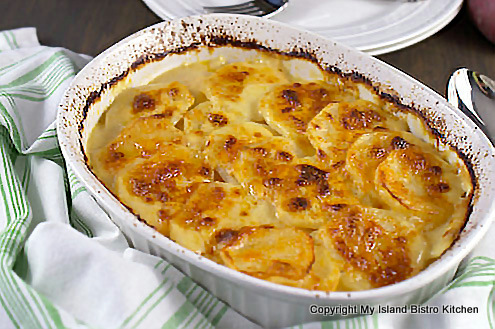
2. What is your personal favourite food and wine combo? Growing up in rural PEI, my favourite meal will always be meat and potatoes so my choices would be Barolo, Amarone, or Cabernet Sauvignon which are full bodied red wines with good tannin levels that all match the texture and intensity of beef.

3. What is the one wine you’d recommend people try this holiday season and why? I’d suggest Jolie-Pitt Perrin Cotes du Provence Rose Mirval from France because it has such beautiful white cherry and dried peach accents with a refreshing finish. It would be a treat after all the rich dinners and desserts we indulge ourselves with over the holidays. It currently sells for $30.95 (CDN$). I’d also suggest Mark West Pinot Noir at $18.99 (CDN$) which is smooth and subtle with toasty oak and espresso notes.

4. What’s the number one question you get asked as a sommelier/product advisor during the holiday season? I am often asked to provide food and wine pairing information and suggestions but, during the holiday season, the most common question is “What do I buy my boss/friend/co-worker who knows everything about wine?” My response to the question is: “I would choose some more interesting styles and grape varieties and in particular I would choose one one of the following: KWV Cathedral Cellars Pinotage from South Africa ($20.99 CDN$) with its aromas of sweet fruit, black pepper and cedar or De Bortoli Noble One Botrytis Semillon from Australia ($30.99 CDN$) with its layers of intense botrytis fruit including citrus, marmalade, and hints of butterscotch, or Firesteed Pinot Noir from Oregon in the US ($24.99 (CDN$).

5. If you were abandoned on an island and could have only one bottle of wine with you, what would it be? Cristal 2007. It retails for $295 (CDN$) but would be worth the price to celebrate my rescue! It’s truly an amazing product.

6. If you had to give one piece of advice for pairing wines with meals, in general, what would it be?It’s your palate so drink what pleases you. In general, I think making sure the intensity and textures of the food and wine are equal are the most important (factors to consider).”

My thanks to sommelier Debbie Smith for taking the time to assist me with wine selections to pair with holiday foods I will be serving this year. Sommeliers and in-store product advisers are great resources and can help with wine selections so don’t hesitate to seek them out with your specific questions as I have done. They are trained to help in the way Debbie assisted me with my wine-related questions.

—————————————————————————-

Thank you for visiting “the Bistro” today.  If you enjoyed this posting, please share it on your social media websites.

Connect with “the Bistro” through the following social media:

Join My Island Bistro Kitchen on Facebook

Follow “the Bistro’s” tweets on Twitter

Follow “the Bistro” on Pinterest

Follow “the Bistro” on Instagram

——————————————————————————

A Tartan Holiday Tablesetting

Christmas Tablesetting
Tartan Holiday Tablesetting

I am not sure why but a red plaid pattern evokes thoughts of Christmas for me.  As I have discovered, red tartan dishes lend themselves well to setting a beautiful holiday table.

Christmas Dinnerware
Red Plaid Dinnerware

Dinnerware

The dishes I have chosen for a holiday dinner are by designers Colin + Justin. Apart from the dynamic look, there are several things I like about this dinnerware pattern.

First, the dinnerware has the look and feel of fine  china, complete with gold-colored trim, but is actually easier to care for since the dishes are both dishwasher and microwave safe.  Second, they can work effectively either in a formal or informal tablesetting. In fact, I’d suggest they are quite contemporary in look and design and could easily transition from breakfast/brunch to lunch to dinner. And, third, they don’t scream Christmas which means they can be used throughout the fall and winter months.  With their dark color, they would be a bit heavy for spring and summer, in my view, but I would certainly use them from October to March.

Holiday Dinnerware
Red Tartan Dinnerware Placesetting

The dinner plate has a white center so food will still stand out against the plate. I’m a big fan of white plates for food presentation! This dinnerware gives the benefit of a nice plaid border against the white center.

The salad plate is a full tartan design. The dinnerware has the versatility of allowing for an exchange of a plain red, green, or white plate with the plaid salad plate for added contrast to the setting or to change it up for different occasions.

The bowl is white inside so the soup color certainly stands out.

DSC_0239

Linens

The dinnerware with its bright red and green plaid has a somewhat heavy look to it so it needs some bright white neutral contrast on the table for it to stand out.  For this reason, I have chosen to use large plain white placemats as the base for each place setting.  The white connects to the center of the dinner plates and bowls – always try to connect the linens somehow to the dinnerware pattern.  If, for example, I had chosen red or green placemats or a full tablecloth in either of these heavier colors, the dinnerware pattern would have been lost and would not have stood out. And, sometimes, I just want to see the maple wood in my table and placemats allow for that. The placemats are also in keeping with the contemporary look of this setting.

Christmas Tablesetting
Red Plaid Tablesetting

If you are not knacky with napkin folding, or simply don’t have time, using napkin rings is an easy alternative solution.  I think of napkin rings as the jewelry on the table.

Napkin Rings
Poinsettia Napkin Ring

I bought these beautiful poincettia napkin rings on an after-Christmas sale last year and think they go particularly well with this dinnerware.  With their deep red color, they need a bright white napkin for their color to pop. The white napkin, of course, connects to the white placemat.

Apart from the speed and ease of threading a napkin through a ring, napkin ring-folded napkins can be placed in various locations at a placesetting — to the left-hand side beside the fork, in front of the plate if space allows, or laid across the plate or atop a soupbowl (as I have done in this setting) if table space is at a premium or you simply want to add some pizzazz to the top of a placesetting.

Centerpiece/Tablescape

For the tablescape, I pulled in colors from the dinnerware.

Table centerpiece
Easy-to-construct Table Centerpiece

I have opted for a relatively simple and easy-to-construct centerpiece – two faux green kissing (or pomander) balls on high glass pillar candlesticks surrounded by greenery, holly berries from outside my front door, Christmas balls, and pinecones to fill in some empty spaces.

Since I am not a huge fan of taper candles that can easily tip with a guest’s knee jerk against the table, I have chosen to use a series of small white votives interspersed along the edges of the centerpiece. They add a lovely upward glow to the kissing balls which are the focal point of the tablescape.

One of the things I am doing this season in my tablesettings is trying to use existing product and props in my centerpieces as opposed to buying more or always opting to use fresh flowers.  As lovely as fresh flowers are, they do require some work and, if I want to set my table well ahead of an event as my time allows, it’s easier if I use other options for centerpieces. Additionally, if you already have suitable props, it’s a more economical option.

Glassware

Because this dinnerware is quite modern, I am using extra-tall and very contemporary wine glasses.  The height of the glasses complements the high centerpiece as well as the dinnerware.

Christmas Tablesetting
Red Plaid Christmas Tablesetting

I hope you have enjoyed my contemporary tablesetting using red tartan dinnerware.  Happy Holidays!

To view other Christmas and New Year’s Tablesettings, click on the links below:

Glitz ‘n Glamour New Year’s Eve Tablesetting
Twas the Night Before Christmas
The Warmth of the Christmas Light Tablesetting
Christmas Eve Tablesetting and Dinner
Pretty Poinsettia Tablesetting
Poinsettia Trio Tablesetting
The Holiday Table
The Pink and Green Holiday Table
Christmas at My Island Bistro Kitchen
Purple Tablesetting for the Holidays
Evergreens and Reindeer Christmas Tablesetting
Cupcake Tablescape

—————————————————————————-

Thank you for visiting “the Bistro” today.  If you enjoyed this posting, please share it on your social media websites.

Connect with “the Bistro” through the following social media:

Join My Island Bistro Kitchen on Facebook

Follow “the Bistro’s” tweets on Twitter

Follow “the Bistro” on Pinterest

Follow “the Bistro” on Instagram


PIN ME TO PINTEREST!

Christmas Tablesetting
A Tartan Tablesetting for Christmas


The Warmth of the Christmas Light Tablesetting

I love setting beautiful tables any time of the year but the Christmas season lends itself so well to many creative tablesetting options.  Sometimes, I have many more ideas than I have need to create new tablescapes!

Today, I am veering off the traditional color theme one might ordinarily expect to see on a Christmas table though I have incorporated some red and green into the design.

The Dishes

The dinnerware I have chosen is manufactured by Royal Stafford in England. The pattern is called “Christmas Home”.

These earthenware dishes are durable and not nearly so fragile as fine bone china.  The dinnerware is both microwaveable and dishwasher safe so, for this reason, the dishes are a suitable option for everyday use during the holiday season or they can be dressed up for a Christmas dinner as I have done here.

The predominant black/gray color may not be what one would think of first for Christmas dinnerware.  However, look closer and you can see the black/gray makes a lovely frame for the heartwarming scene on the dishes. It really makes the red and green pop in the pattern.

As soon as I examined the scene, I knew my tablescape would draw its inspiration from the glow of light in the windows of the dinnerware pattern and I have called this tablesetting the “Warmth of the Christmas Light“.  I like how the nostalgic pattern in the dishes tells its own story.

Charger Plates

I have a wide collection of charger plates and use them frequently in my tablesettings.  They are as functional as they are decorative.  They are functional as they help to keep each placesetting clean.  If a morsel of food escapes a plate, the charger plate (as opposed to a fine tablecloth or wood table) catches it.  Charger plates also allow for the elements of each placesetting to be coralled in an orderly fashion.  From a decorative point of view, chargers add a touch of class, elegance, and color to a finely set table.  Charger plates are very inexpensive and I have chosen basic black to complement the black and white dishes and the black lanterns in the tablescape.

Linens

When the dinnerware pattern is busy, I recommend choosing a plain tablecloth that matches the background color in the dishes.  In this case, I have selected one of my white Irish linen tablecloths because the background in the dinnerware is white.  The blank white canvas of the tablecloth allows for the elements of the tablescape to stand out.

I am a big fan of cloth napkins and, in particular, plain napkins.  Plain linens are very important if the dinnerware has a busy pattern so neither competes with the other.  The plain napkins help to ground the patterned dinnerware. To use patterned napkins and tablecloth with this dinnerware would make it very cluttered to the eye. To add some brightness to the tablescape and to tie in with the hints of red in the dinnerware and the bow on the lantern, I have chosen red napkins.

Candlestick Napkin Fold

In keeping with my theme of the warmth of Christmas light, the napkin fold I have selected is the freestanding candlestick. This is a very easy-to-do napkin fold and a stiff napkin is required.  The red napkins I have used have white trim on the edges so, when rolled into a candle shape, the white resembles candle drippings. If you find this napkin fold too tall for your liking, the napkins can always be laid across each place setting where they will appear as simple, elegantly rolled napkins.

Centerpiece

For the centerpiece on this table, I have used two black lanterns along with red pillar candles.  I like to use props I already have and incorporate them into different table settings.  The black lanterns blend well with the color of the dinnerware and are continuing the theme of light. I have dressed up the taller of the lanterns with a swag in colors complementary to the dinnerware along with a perky red bow. The lanterns also provide a safe place for the candles yet still allow them to add light to the tablescape.  Some faux red berries and pine cones complete the look.

Glassware

To complement the nostalgic dinnerware, I have opted to use very traditional glassware of about average height for stemware.

I hope you have enjoyed my “Warmth of the Christmas Light” tablesetting that features Royal Stafford’s “Christmas Home” dinnerware.

To view other Christmas and New Years Tablesettings, click on the links below:

Glitz ‘n Glamour New Year’s Eve Tablesetting
Twas the Night Before Christmas
Christmas Eve Tablesetting and Dinner
A Tartan Holiday Tablesetting
Pretty Poinsettia Tablesetting
Poinsettia Trio Tablesetting
The Holiday Table
The Pink and Green Holiday Table
Christmas at My Island Bistro Kitchen
Purple Tablesetting for the Holidays
Evergreens and Reindeer Christmas Tablesetting
Cupcake Tablescape

—————————————————————————-

PIN ME TO PINTEREST!

Christmas Tablesetting
Warmth of the Christmas Light Tablesetting

Thank you for visiting “the Bistro” today.  If you enjoyed this posting, please share it on your social media websites.

Connect with “the Bistro” through the following social media:

Join My Island Bistro Kitchen on Facebook

Follow “the Bistro’s” tweets on Twitter

Follow “the Bistro” on Pinterest

Follow “the Bistro” on Instagram

——————————————————————————