As I write this post, schools on PEI are about to start for another year. It, therefore, seems fitting that I would start my new series, “On the Sandwich Board” at the start of a new school year when sandwiches will be prepped in many households where there are children of school age.
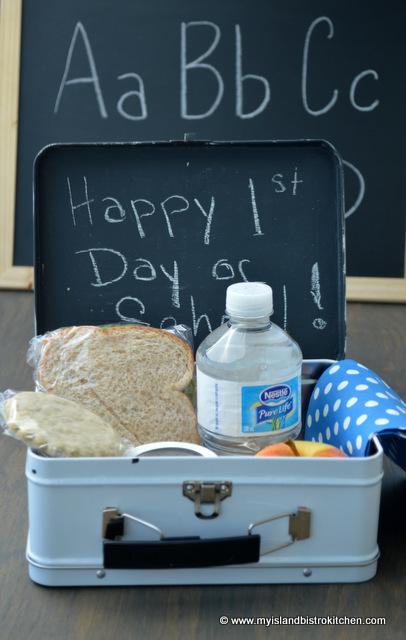
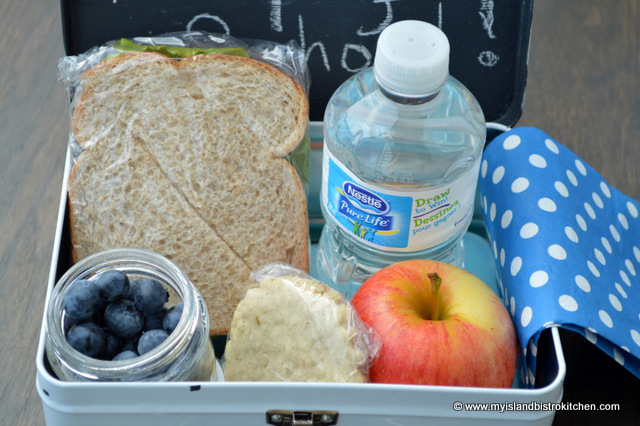
School Lunch: Tuna Salad Sandwich, Apple, Blueberries, and an Oatcake
Over the next while, I will periodically be presenting recipes for sandwiches, wraps, rolls, etc. Hopefully, they will be of use, or inspiration, for those who either find themselves preparing school or work lunches or simply enjoy sandwich-style meals at any time.
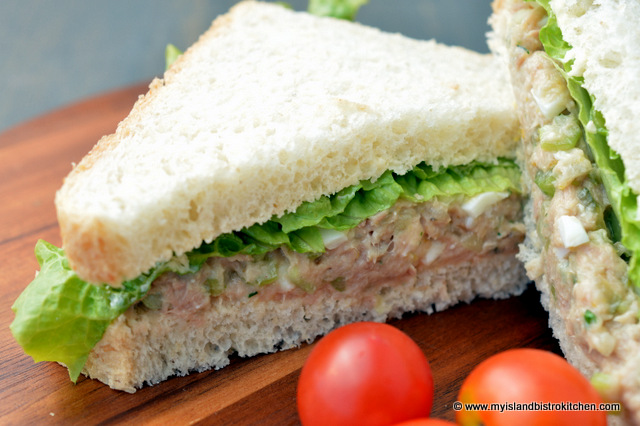
Tuna Salad Sandwich
The kick-off sandwich is Tuna Salad. A tuna sandwich was commonly found in my lunchbox when I was in school, although the sandwich contained little more than the tuna and mayonnaise and perhaps a little celery. It’s a healthy and filling sandwich but does need to be kept cold. Therefore, be sure to enclose a re-usable lunchbag-sized ice pack (similar to the ones in the photo below), with the sandwich if it is to be transported for consumption some hours later. These ice packs come in various sizes and shapes.
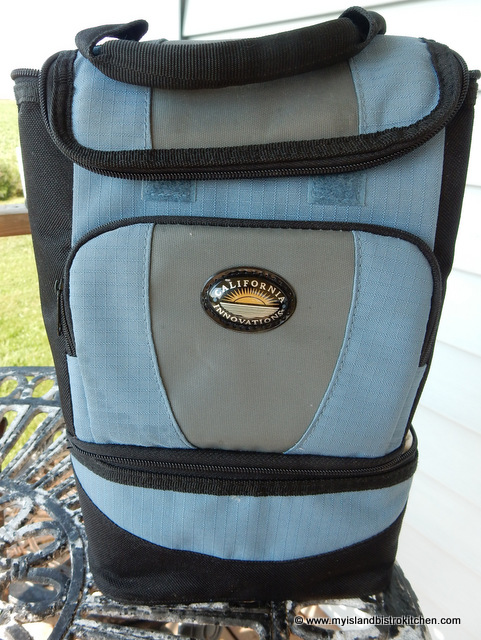
As much as I like the old-fashioned tin lunchbox like the one in my photo above, I recommend using an insulated lunch bag (like the sample in the photo below) for foods, like tuna sandwiches, that need to be kept cold. It’s also a good idea to freeze a bottle of water overnight and put it in the lunchbox or bag, too, to help keep the sandwich cold and to provide a cold drink at lunchtime.
Insulated Lunch Bag
I like tuna but find it needs a bit of “spark” to give it flavor. There are a number of ingredients in this sandwich recipe but each one contributes to the flavor complexity. I have used the smallest can of tuna on the market in my area but this recipe is easily doubled should you choose to use a larger can. The 85g size of can makes one big, thick sandwich or two more moderately-sized sandwiches. I hope you enjoy it.
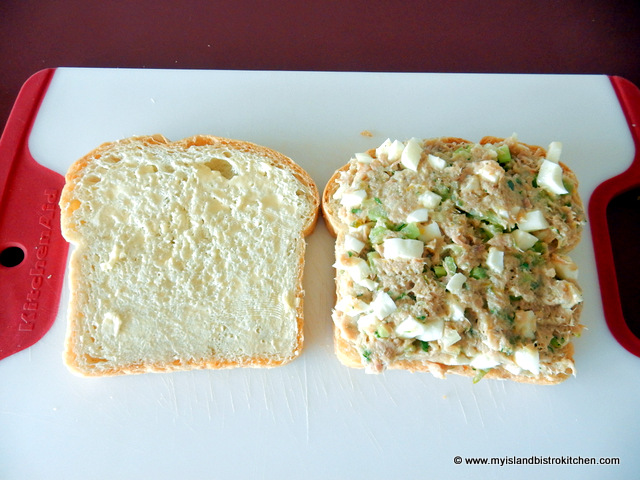
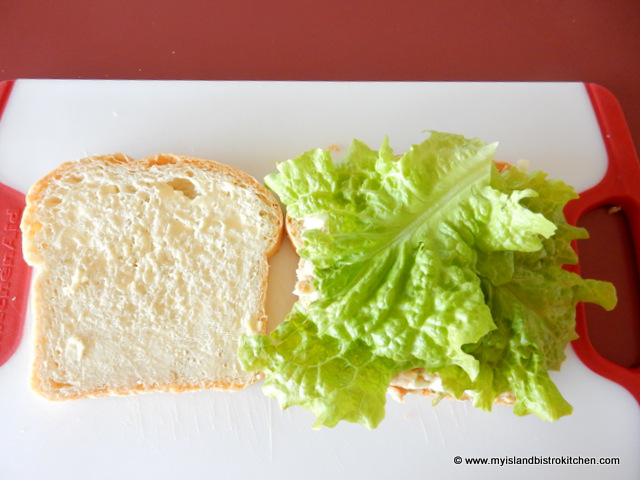
In small bowl, combine all ingredients, except the egg. Mix well. Gently fold in chopped egg. Spread mixture on buttered bread slice.
Top with leafy lettuce, then second slice of buttered bread.
Yield:1 – 2 sandwiches
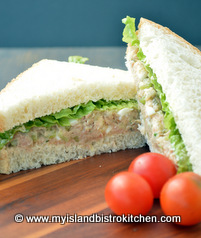
Tuna Salad Sandwich
If you have made this recipe and enjoyed it and/or wish to share it with your friends and family, please do so on social media but be sure to share the direct link to this posting from my website.
Connect with My Island Bistro Kitchen on Social Media
Follow “the Bistro” on Pinterest at https://www.pinterest.ca/peibistro/ and pin the Pinterest-ready photo found at the end of this post to your favorite Pinterest boards.
In small bowl, combine all ingredients, except the egg. Mix well. Gently fold in chopped egg. Spread on buttered bread slice, top with leafy lettuce, then second slice of bread.
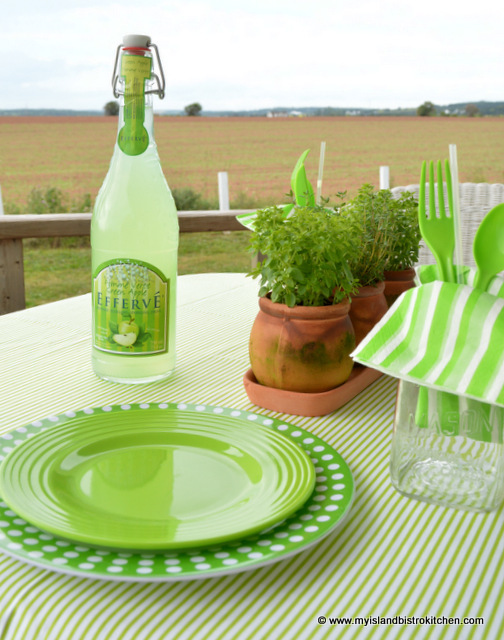
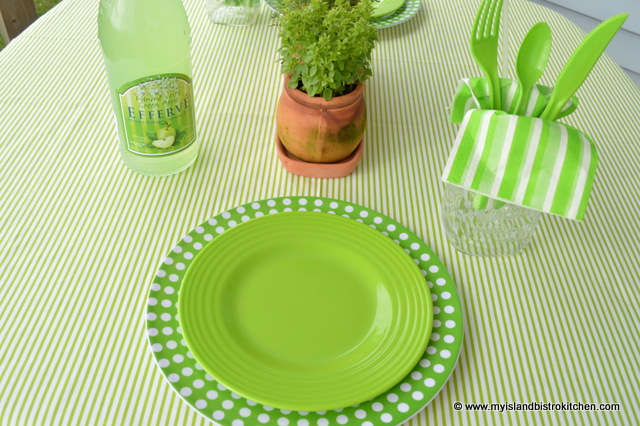
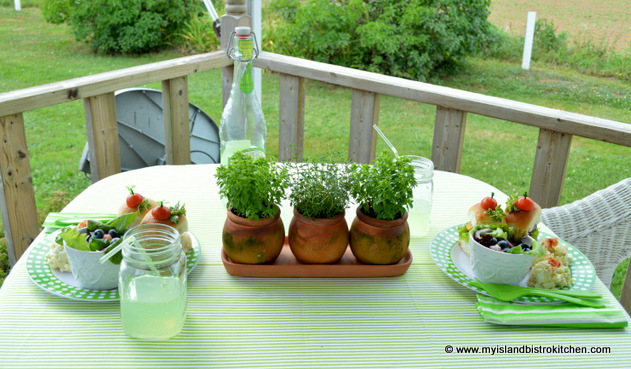
I so love a good picnic! My color theme for today’s picnic is lime green, one of my favorite summertime colors.
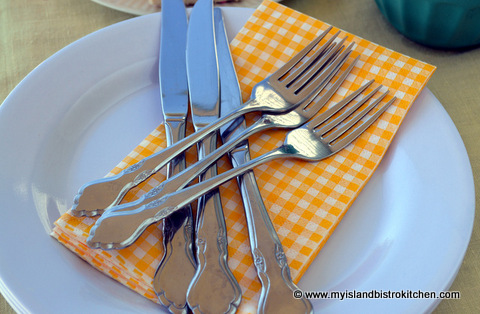
The dishes, cutlery, and napkins are all simply dollar store specials! If you are a regular follower to my blog, you will have heard me say before that you don’t need expensive dishes for lovely outdoor dining. Check out your local dollar stores but do so early in the season as these do tend to be items that get snatched up quickly. Unbreakable, these are great picnic basket staples and they are so much more sturdy (and classy) than paper plates.
Even though this table is set for two, it is very easy to prepare this setup for multiple settings.
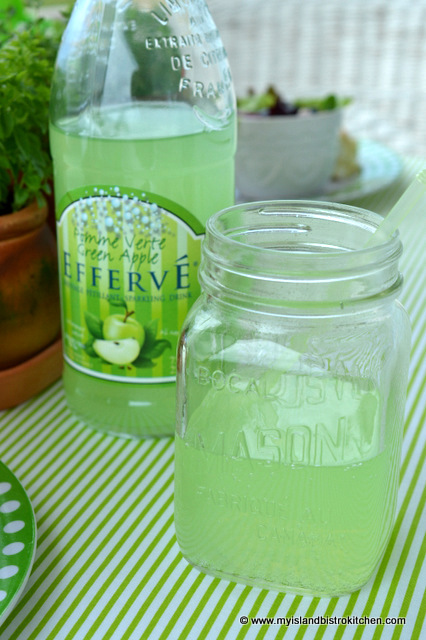
Glasses are simply Mason jars into which I have placed the napkins and plastic cutlery – a good idea if you are setting the table and it’s a bit breezy – this keeps everything in its place.
I found this lime-green colored beverage and knew it would fit in with one of my summertime picnics! Sometimes I draw my color theme inspiration for a picnic from just one simple item like this drink.
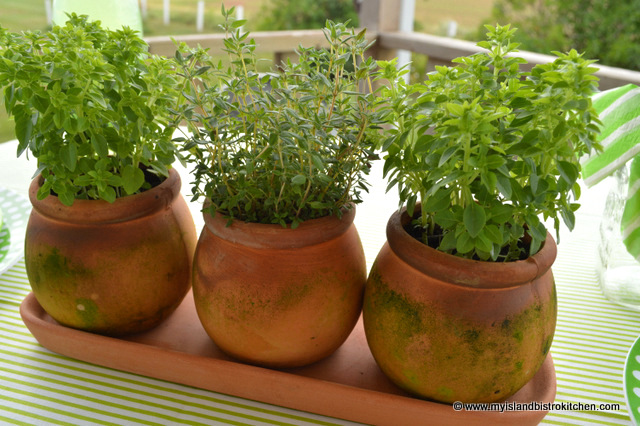
I grow a lot of herbs every summer and, this year, grew several in pots. This terracotta trio is another dollar store find. I think they look very Tuscan with their tinge of moss green color that has appeared over the summer as they’ve ‘aged’ out in the weather. This was all that was needed for a table centerpiece for an impromptu picnic.
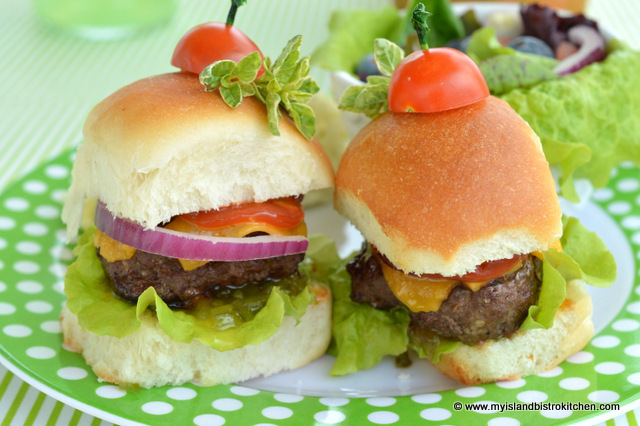
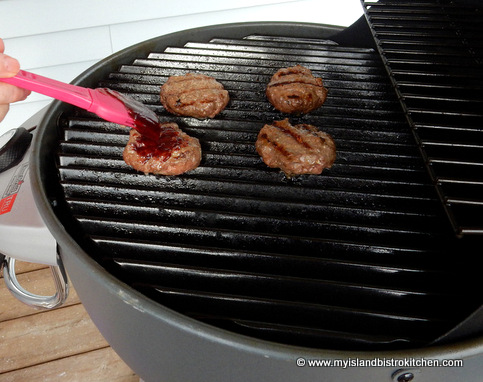
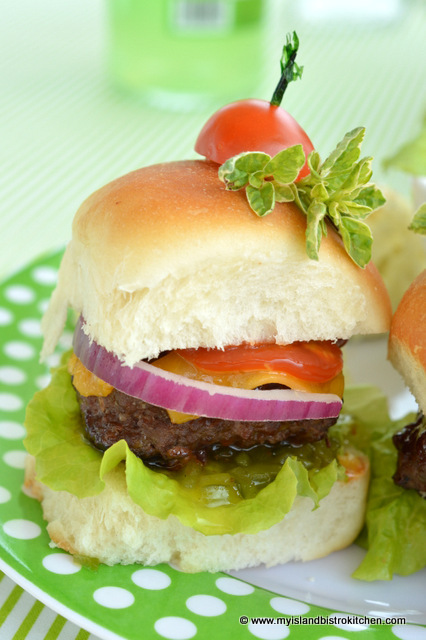
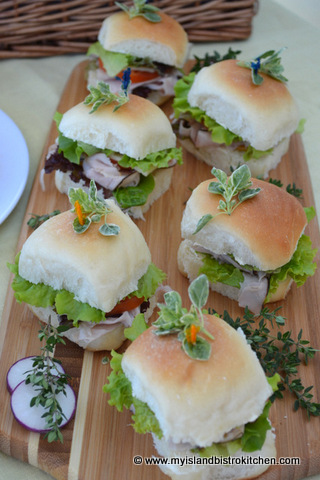
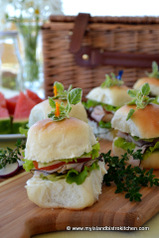
I had made a batch of pan rolls and shaped them suitably so they could be used for slider buns for the grilled hamburgers.
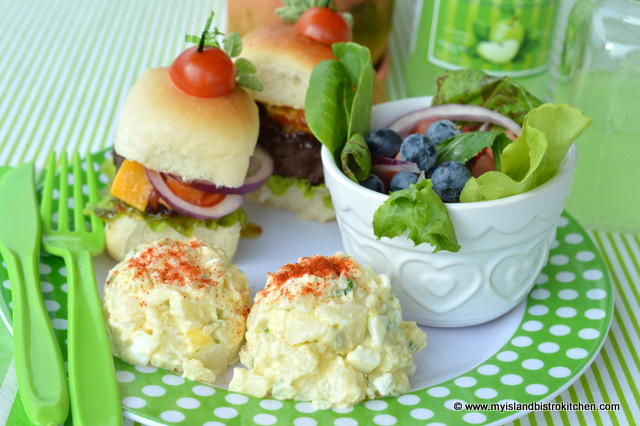
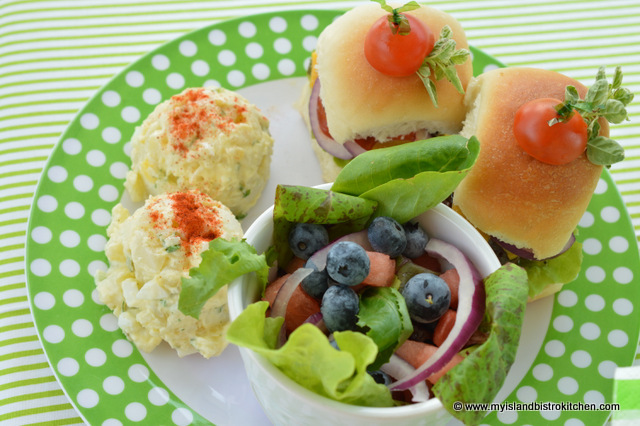
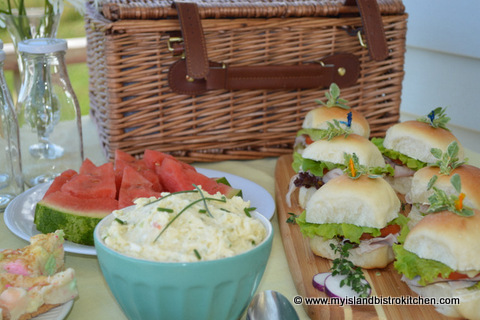
The menu for today’s picnic was simple and tasty. Slider cheeseburgers, homemade potato salad, and a green salad.
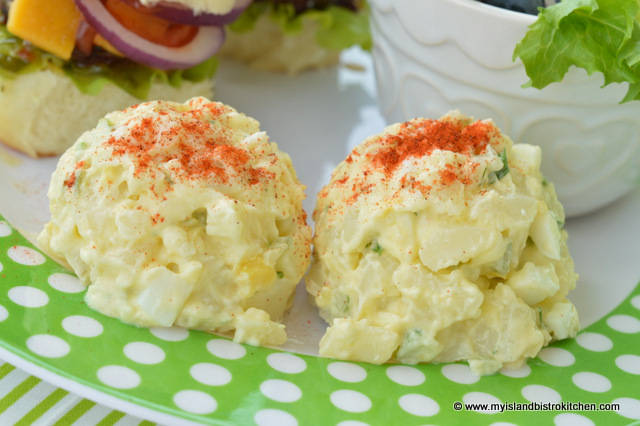
I most often mash the potatoes for my potato salad because the salad is easy to scoop and it plates well as the salad stays in perfect mounds on the plate. However, for casual picnic fare, I often like a slightly more rustic, jagged look to my salad so have cubed the potatoes and eggs. The salad mounds actually stayed in place quite well when plated.
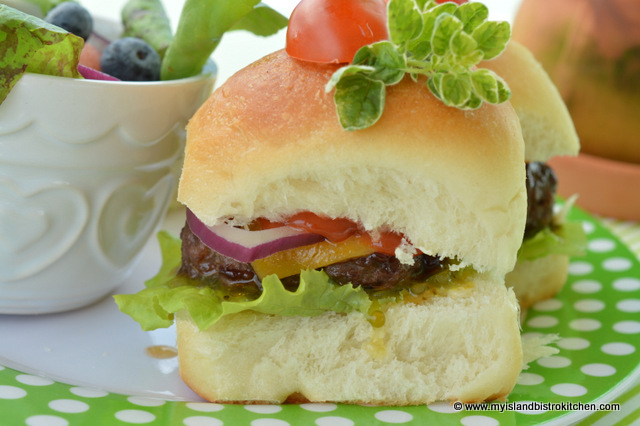
I love slider burgers! Today’s burgers have a lime green lettuce leaf, ADL Cheddar Cheese, fresh Island tomato, a red onion ring, and the usual burger condiments. When adding tomatoes to slider burgers, try to find smaller sized tomatoes so the slices don’t have to be cut or don’t overpower the burger. For sliders, everything should be proportionately balanced. To dress up the burgers, I’ve topped each burger with a cherry tomato half along with a sprig of oregano from our garden. Sometimes, it doesn’t take a lot to take a burger from plain to dressy!
One of my favorite summertime green salads starts with a mix of salad greens topped with cubed watermelon, fresh PEI high bush blueberries, and red onion rings drizzled with a blueberry vinaigrette.
A colorful and tasty summertime picnic!
Are picnics part of your summer?
—————————————————————————-
Thank you for visiting “the Bistro” today. If you enjoyed this posting , please share it on your social media websites.
Connect with “the Bistro” through the following social media:
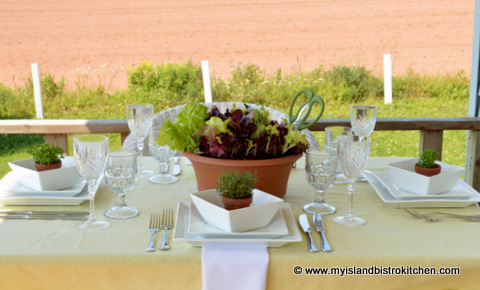
Late summer is a great time for alfresco dining. I have pulled this tablesetting together very easily by using a pot of lettuce I had growing and some tiny pots of herbs.
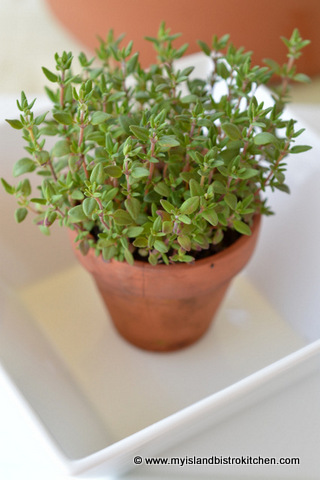
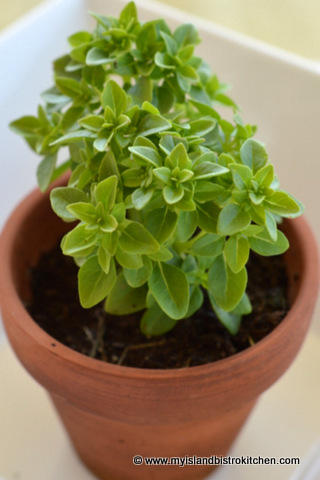
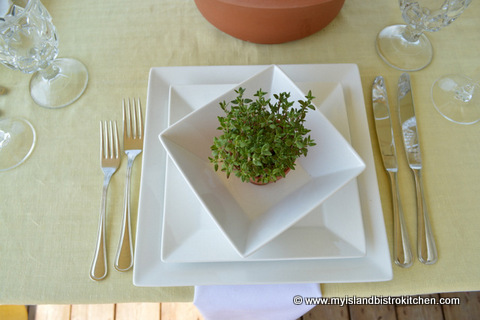
A simple plain pale yellow tablecloth makes a great summery canvas for this tablesetting. You can never go wrong with basic white dinnerware and white napkins. This is my square set of dishes and the bowls make ideal holders for the little terracotta pots of herbs that I placed at each setting. The herbs add a bright touch of green and tie in with the lettuce centerpiece. Plus, the herbs can be clipped and added to the salad!
Thyme
If you are so inclined, you can give each guest a pot of herbs to take home after your dinner party.
Basil
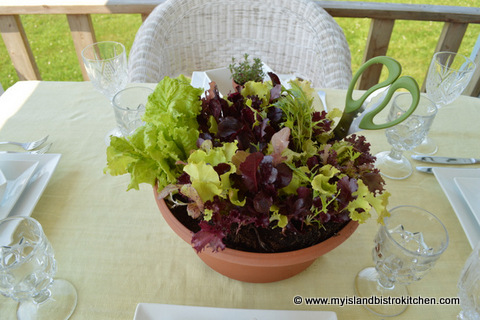
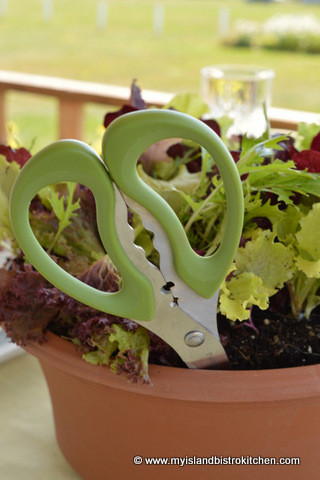
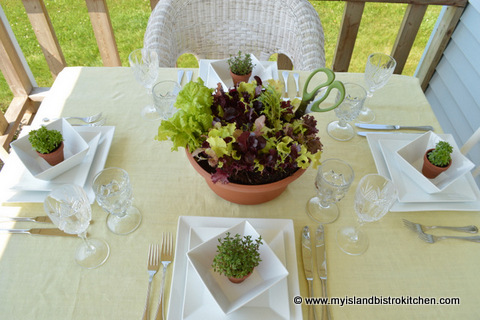
Floral centerpieces are not always necessary for tablesettings. In this setting, I am using a pot of lettuce and allowing each guest to cut his or her own lettuce and make individual salads. This always makes a great conversation piece and adds some fun to the event. I grow a number of these pots of lettuce over the summer and, if I am short on time or don’t have flowers for a centerpiece, I can always use the makings of the salad course as my table centerpiece!
Lettuce Centerpiece
Don’t forget to include the scissors in the centerpiece so guests can “harvest” the greens for their salads!
A simple and casual summer placesetting.
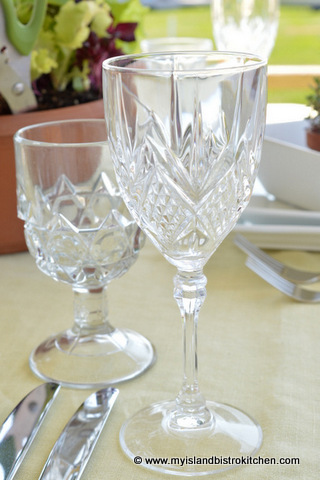
With casual alfresco dining, it’s easy to mix and match crystal pieces.
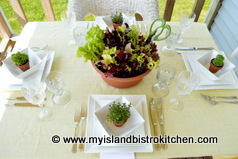
And, here’s an overhead view of the table; clean, simple lines with splashes of green for color.
I hope you have enjoyed my fresh greens and herbs tablesetting. Is alfresco dining a part of your summer?
—————————————————————————-
Thank you for visiting “the Bistro” today. If you enjoyed this posting , please share it on your social media websites.
Connect with “the Bistro” through the following social media:
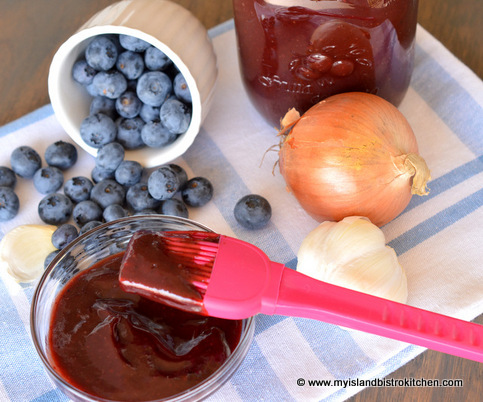
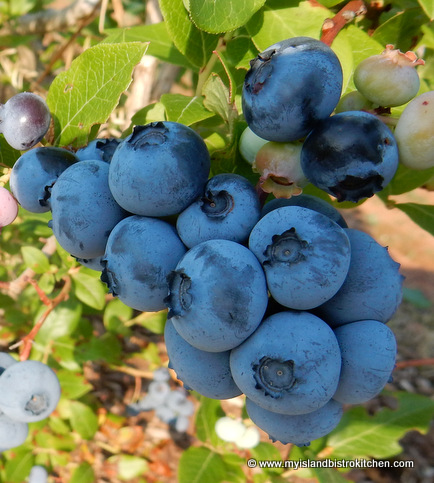
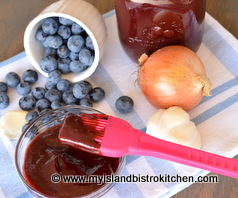
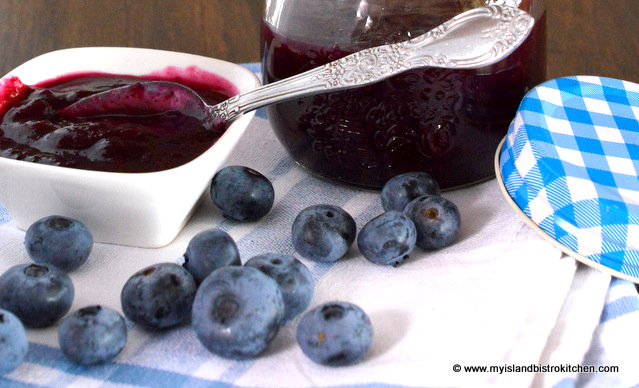
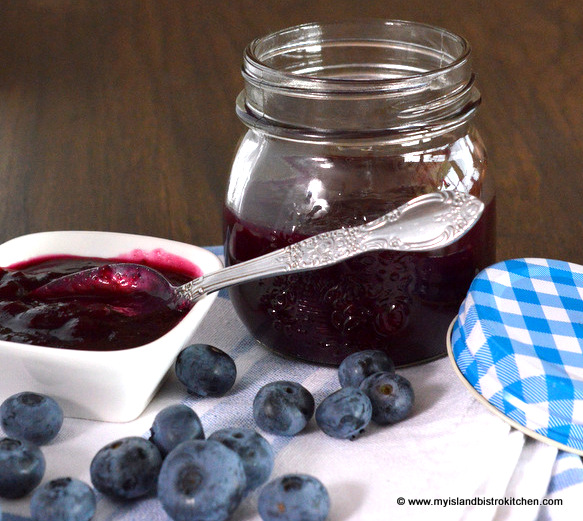
With the abundance of local blueberries in season and available locally, I try to maximize my use of them. So, today, I am introducing my recipe for blueberry barbeque sauce made with high bush blueberries picked at Tryon U-Pick Blueberries in North Tryon, PEI.
High Bush Blueberries
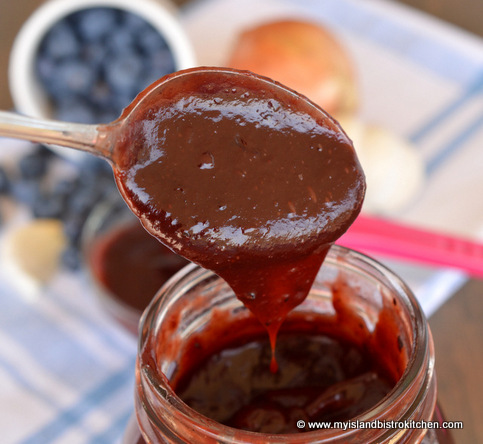
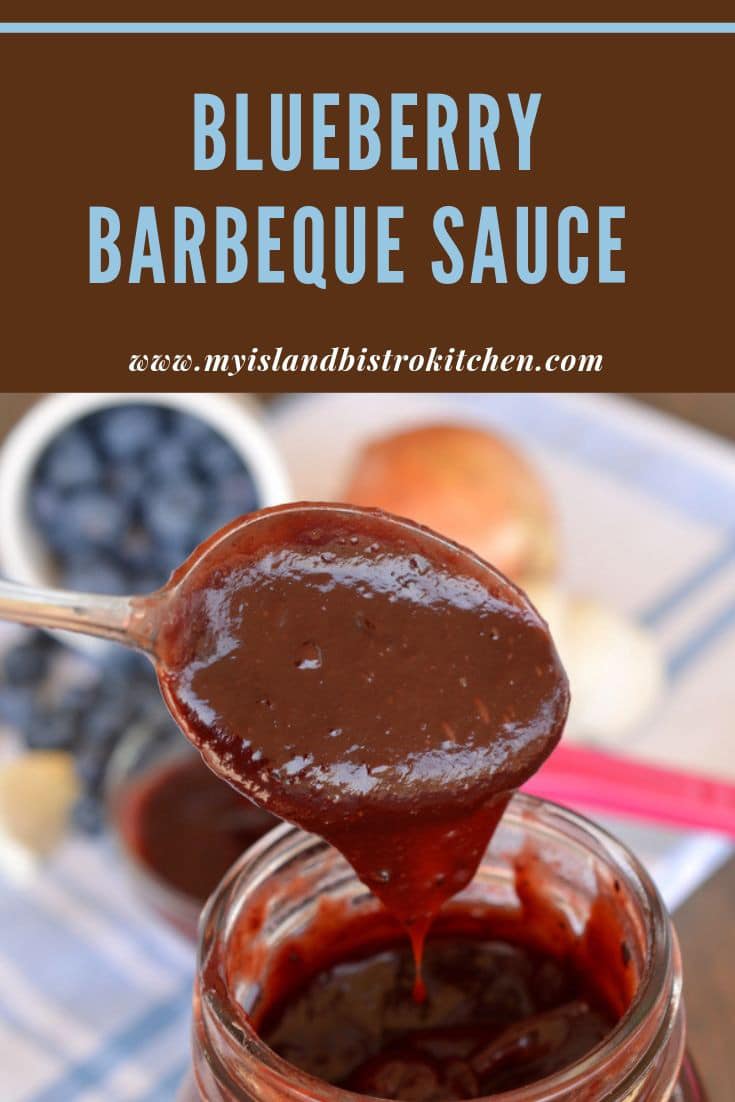
As well as being tasty, this sauce is a lovely deep rich color.
Blueberry Barbeque Sauce
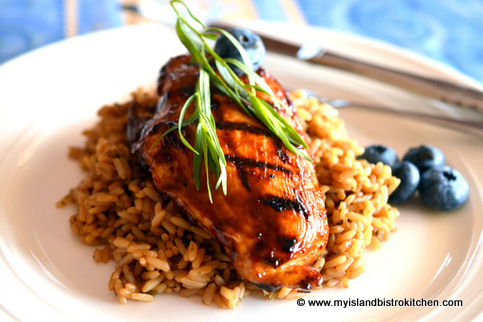
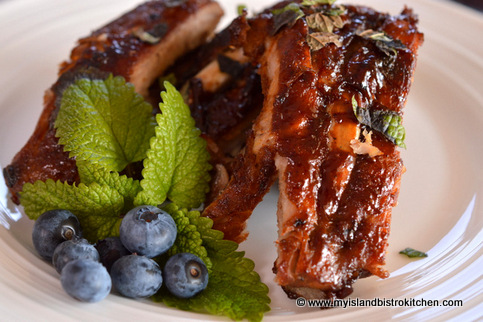
This sauce is very versatile and can be used in the same recipes and on the same foods as any barbeque sauce. It is particularly good brushed on grilled chicken, pork chops, ribs, and burgers.
Blueberry Barbeque Sauce on Grilled Chicken BreastBlueberry Barbeque Sauce on Pork RibsBlueberry Barbeque Sauce on Burgers
Adding some blueberry balsamic vinegar to the sauce deepens the blueberry flavour. I used a chipotle and lemongrass infused maple syrup to add flavour complexity but plain maple syrup also works well.
Blueberry Barbeque Sauce
Ingredients:
1-2 tbsp olive oil ½ cup onion, chopped 5-6 garlic cloves, chopped 2 cups high-bush blueberries ½ cup ketchup ¼ cup blueberry balsamic vinegar 3 tbsp pineapple juice ½ cup brown sugar 2 tbsp maple syrup 1 tbsp liquid chicken bouillon 1 tbsp Dijon mustard 2 tsp lemon juice 1 tsp paprika ½ tsp cardamom ½ tsp cayenne ¼ tsp allspice 1/8 tsp ground ginger Salt and pepper to taste
1 tsp cornstarch 1 tbsp pineapple juice
Method:
Heat oil in saucepan. Add onion and sauté for 2-3 minutes then add garlic. Sauté, stirring constantly to prevent burning, for a further 1-2 minutes.
Add the blueberries, ketchup, balsamic vinegar, pineapple juice, brown sugar, maple syrup, chicken bouillon, mustard, lemon juice, and spices. Bring mixture to the boiling point then reduce heat to medium-low. Cook, stirring occasionally, for about 20 minutes.
In small bowl, mix 1 tsp cornstarch with 1 tbsp pineapple juice until smooth. Add 1-2 tsp of the hot mixture. Stir and add to the hot mixture in the saucepan. Cook, stirring regularly, until mixture is thickened to desired consistency.
Purée sauce till smooth in blender, food processor, or with an immersion blender.
Yield: Apx. 2¼ cups
Blueberry Barbeque Sauce
—————————————————————————-
Thank you for visiting “the Bistro” today. If you enjoyed this posting and recipe, please share it on your social media websites.
Connect with “the Bistro” through the following social media:
A tasty barbeque sauce that blends nicely with grilled chicken, pork chops, ribs, and burgers
Ingredients
1-2 tbsp olive oil
½ cup onion, chopped
5-6 garlic cloves, chopped
2 cups high-bush blueberries
½ cup ketchup
¼ cup blueberry balsamic vinegar
3 tbsp pineapple juice
½ cup brown sugar
2 tbsp maple syrup
1 tbsp liquid chicken bouillon
1 tbsp Dijon mustard
2 tsp lemon juice
1 tsp paprika
½ tsp cardamom
½ tsp cayenne
¼ tsp allspice
1/8 tsp ground ginger
Salt and pepper to taste
1 tsp cornstarch
1 tbsp pineapple juice
Instructions
Heat oil in saucepan. Add onion and sauté for 2-3 minutes then add garlic. Sauté, stirring constantly to prevent burning, for a further 1-2 minutes.
Add the blueberries, ketchup, balsamic vinegar, pineapple juice, brown sugar, maple syrup, chicken bouillon, mustard, lemon juice, and spices. Bring mixture to the boiling point then reduce heat to medium-low. Cook, stirring occasionally, for about 20 minutes.
In small bowl, mix 1 tsp cornstarch with 1 tbsp pineapple juice until smooth. Add 1-2 tsp of the hot mixture. Stir and add to the hot mixture in the saucepan. Cook, stirring regularly, until mixture is thickened to desired consistency.
Purée sauce till smooth in blender, food processor, or with an immersion blender.
There are so many ways to use blueberries, including an endless stream of desserts.
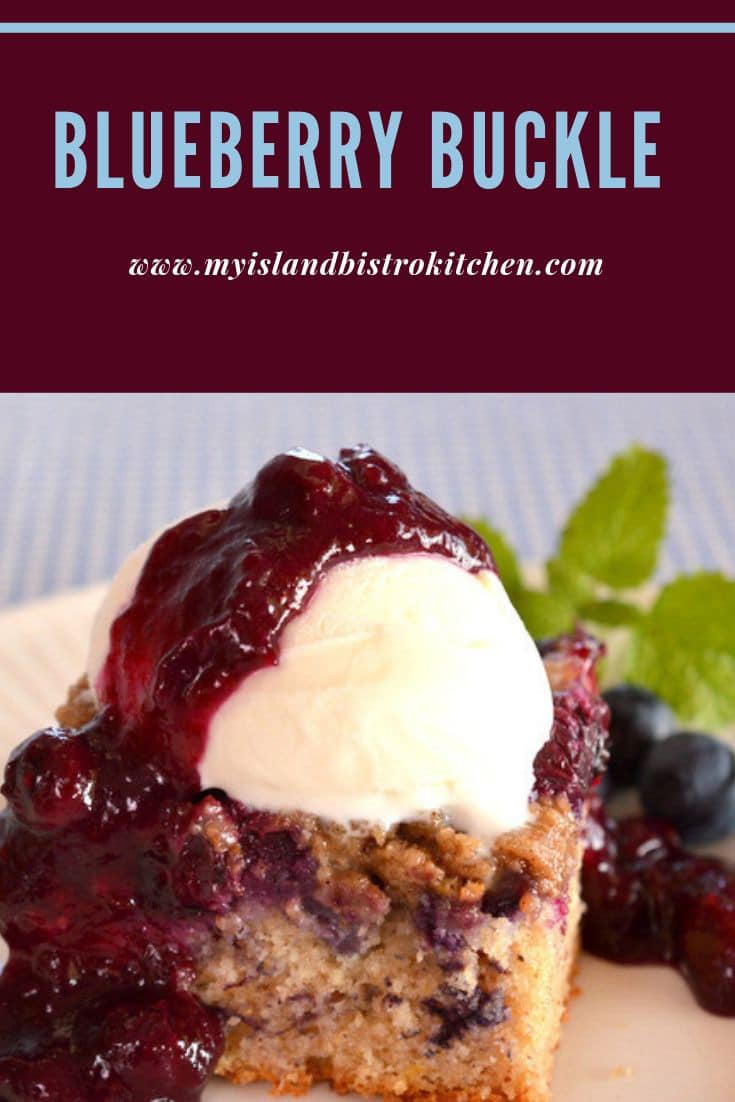
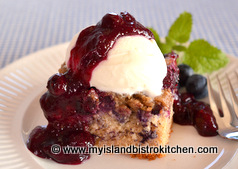
Blueberry Buckle
Today, I am featuring Blueberry Buckle using high bush blueberries that I picked at the Tryon Blueberries U-Pick in North Tryon, PEI.
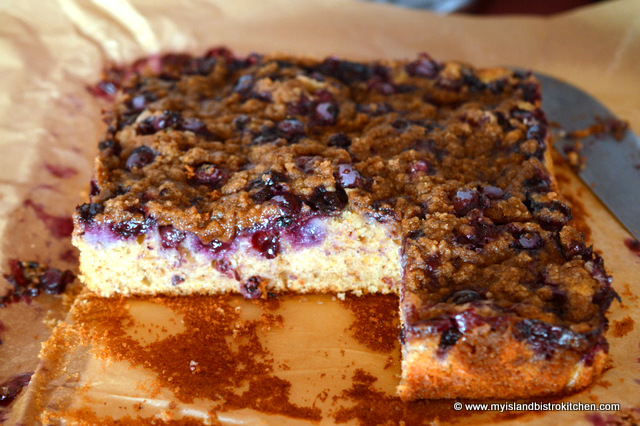
Blueberry Buckle consists of three parts: A cake base, a sprinkle of fruit, and a streusel topping. The origin of the name “Blueberry Buckle” is not definitively known. However, it seems it may have something to do with the cake base rising up around the blueberries and meeting with the streusel ingredients that, together, form a crumpled or buckled looking appearance on the dessert top. Whether that’s truth or fiction, this is a tasty dessert!
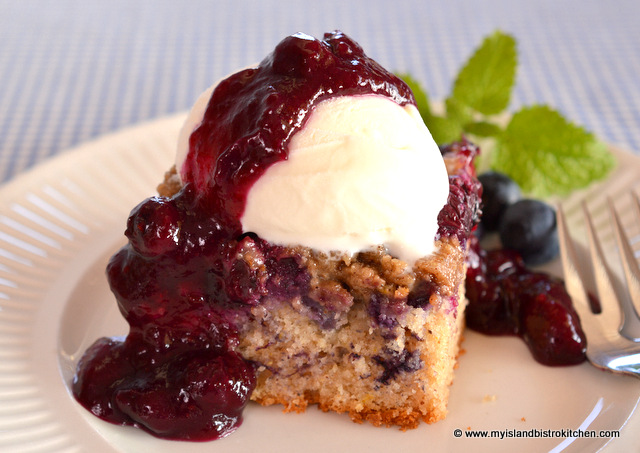
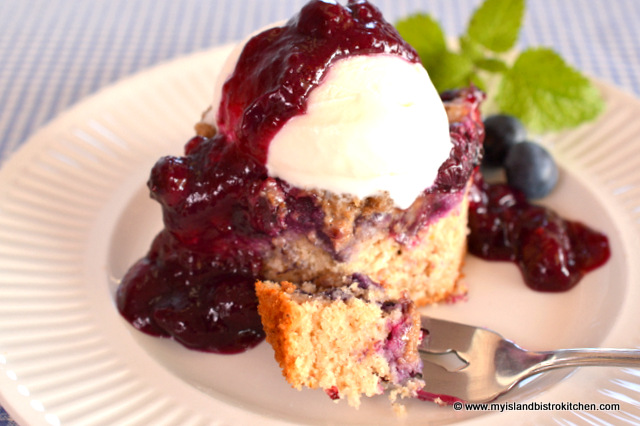
A Blueberry Buckle is very similar to a coffeecake. It is a dense cake with a moist crumb that can be served either warm or cool (i.e., at room temperature). It can also be served plain, just as it is, with its streusel topping or, alternatively, dressed up with ice cream, whipped cream, and/or drizzled with a sauce. I often serve it with brown sugar sauce or sometimes with vanilla ice cream and drizzled with blueberry sauce, as I have today. I call this blueberry overload! I maximize the use of fresh local blueberries when they are available.
Blueberry Buckle with Vanilla Ice Cream Drizzled with Blueberry Sauce
While Buckles can be made with other fruits, the most common one is made with blueberries. This dessert also freezes well so it’s a handy one to have on hand in the freezer. When I am using it from its frozen state, I take the buckle out of the freezer and allow it to thaw at room temperature, then heat it for just a few seconds in the microwave. Tastes like it is fresh from the oven!
[Printable recipe follows at end of posting]
Blueberry Buckle
Streusel Topping:
1/3 cup brown sugar, packed ¼ cup flour ½ tsp cinnamon 3 tbsp butter
Cake Batter:
½ cup butter, softened ½ cup granulated sugar 1 extra-large egg 2 tbsp orange juice ¾ tsp vanilla 1½ cup all-purpose flour 2¼ tsp baking powder ¼ tsp salt ¼ tsp cloves ½ tsp nutmeg 1½ tsp grated orange rind ½ cup milk
2 cups high-bush blueberries
Method:
Grease or line an 8” square pan with parchment paper. Preheat oven to 350°F.
Prepare the streusel topping by mixing the brown sugar, flour, and cinnamon together. Using a pastry blender, cut in the butter until mixture resembles coarse oatmeal. Set aside.
In large bowl, cream the butter and add the sugar. Beat until mixture is smooth.
Add the egg, orange juice, and vanilla. Beat until smooth.
In separate bowl, whisk together the flour, baking powder, salt, cloves, nutmeg, and grated orange rind. Add the dry ingredients to the liquid mixture along with the milk in three parts, starting and ending with the dry ingredients (i.e., three additions of the dry ingredients alternated with two additions of milk).
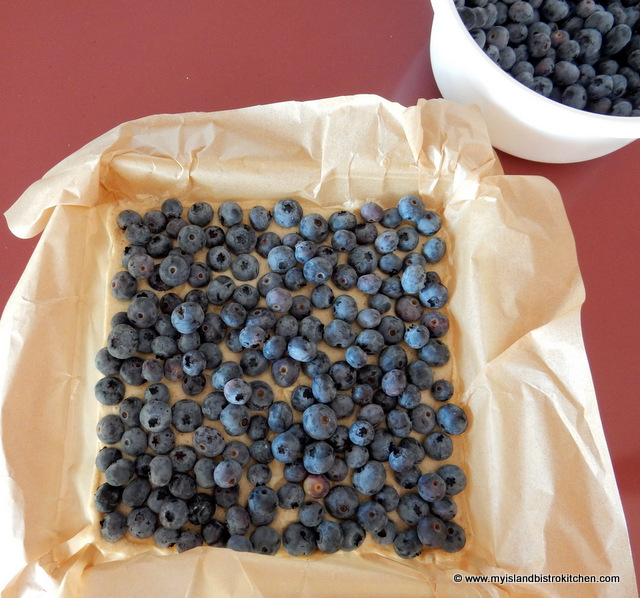
Spread batter in prepared pan.
Sprinkle mixture evening with the blueberries.
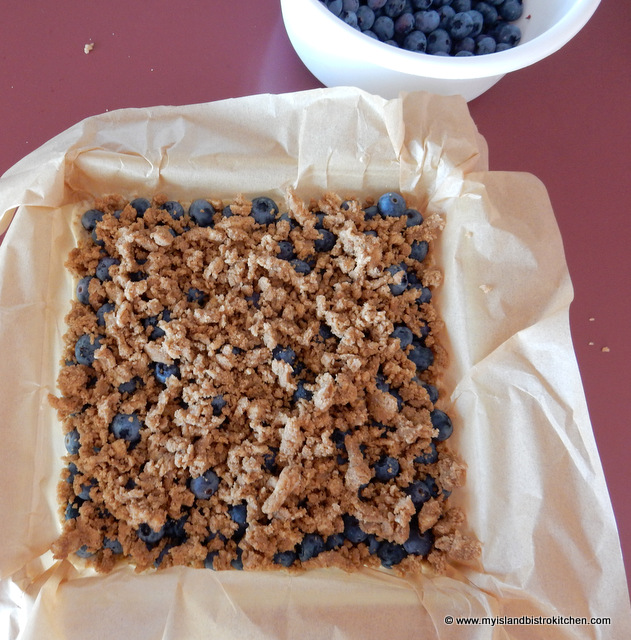
Sprinkle the streusel topping over entire mixture.
Bake for 40-45 minutes or until cake tester inserted into center of cake comes out clean. Do not overbake as cake will become dry.
Serve plain or add a dollop of ice cream and, if desired, drizzle with blueberry sauce.
Blueberry Sauce
Yield: 9 servings
Here is my recipe for the blueberry sauce I used over this Blueberry Buckle.
Blueberry Sauce
Blueberry Sauce
Ingredients:
¾ cup granulated sugar 1 tbsp cornstarch Pinch salt 1/8 tsp nutmeg 1/8 tsp cinnamon 1 tsp grated orange rind 2 tbsp orange juice 1/3 cup water 2 cups high bush blueberries
1½ tbsp butter ¼ tsp vanilla
Method:
Combine sugar, cornstarch, salt, nutmeg, cinnamon, orange rind, orange juice, and water in medium-sized saucepan. Heat to boiling point then add blueberries and reduce heat to medium low. Cook mixture, stirring regularly, until thickened to desired consistency. Remove from heat and stir in butter and vanilla. Serve warm over ice cream or pudding. Refrigerate unused sauce.
Yield: Apx. 1¾ cups
If you have made this recipe and enjoyed it and/or wish to share it with your friends and family, please do so on social media but be sure to share the direct link to this posting from my website.
Connect with My Island Bistro Kitchen on Social Media
Follow “the Bistro” on Pinterest at https://www.pinterest.ca/peibistro/ and pin the Pinterest-ready photo found at the end of this post to your favorite Pinterest boards.
PIN ME TO PINTEREST!
For other great blueberry desserts from My Island Bistro Kitchen, click on the links below.
An old-fashioned coffeecake-like dessert studded with blueberries and covered with a streusel topping. Best served with vanilla ice cream drizzled with blueberry sauce.
Grease or line an 8” square pan with parchment paper. Preheat oven to 350°F.
Streusel Topping:
Prepare the streusel topping by mixing the brown sugar, flour, and cinnamon together. Using a pastry blender, cut in the butter until mixture resembles coarse oatmeal. Set aside.
Cake Batter:
In large bowl, cream the butter and add the sugar. Beat until mixture is smooth.
Add the egg, orange juice, and vanilla. Beat until smooth.
In separate bowl, whisk together the flour, baking powder, salt, cloves, nutmeg, and grated orange rind. Add the dry ingredients to the liquid mixture along with the milk in three parts, starting and ending with the dry ingredients (i.e., three additions of the dry ingredients alternated with two additions of milk).
Spread batter in prepared pan.
Sprinkle mixture evening with the blueberries.
Sprinkle the streusel topping over entire mixture.
Bake for 40-45 minutes or until cake tester inserted into center of cake comes out clean. Do not overbake as cake will become dry.
Serve plain or add a dollop of ice cream and, if desired, drizzle with blueberry sauce.
Blueberry Sauce:
Combine sugar, cornstarch, salt, nutmeg, cinnamon, orange rind, orange juice, and water in medium-sized saucepan. Heat to boiling point then add blueberries and reduce heat to medium low. Cook mixture, stirring regularly, until thickened to desired consistency. Remove from heat and stir in butter and vanilla. Serve warm over ice cream or pudding. Refrigerate unused sauce.
Recipe Notes
Yield:9 servings and apx. 1¾ cups blueberry sauce.
[Copyright My Island Bistro Kitchen]
—————————————————————————-
Thank you for visiting “the Bistro” today. If you enjoyed this posting and recipe, please share it on your social media websites.
Connect with “the Bistro” through the following social media:
Grease or line an 8” square pan with parchment paper. Preheat oven to 350°F.
Prepare the streusel topping by mixing the brown sugar, flour, and cinnamon together. Using a pastry blender, cut in the butter until mixture resembles coarse oatmeal. Set aside.
In large bowl, cream the butter and add the sugar. Beat until mixture is smooth.
Add the egg, orange juice, and vanilla. Beat until smooth.
In separate bowl, whisk together the flour, baking powder, salt, cloves, nutmeg, and grated orange rind. Add the dry ingredients to the liquid mixture along with the milk in three parts, starting and ending with the dry ingredients (i.e., three additions of the dry ingredients alternated with two additions of milk).
Spread batter in prepared pan.
Sprinkle mixture evening with the blueberries.
Sprinkle the streusel topping over entire mixture.
Bake for 40-45 minutes or until cake tester inserted into center of cake comes out clean. Do not overbake as cake will become dry.
Serve plain or add a dollop of ice cream and, if desired, drizzle with blueberry sauce.
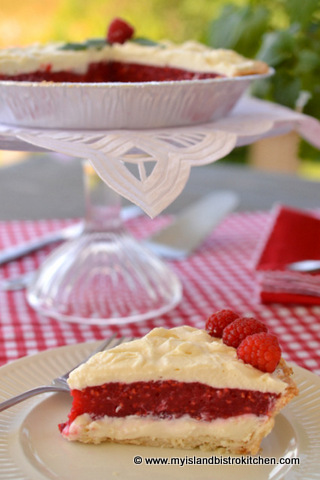
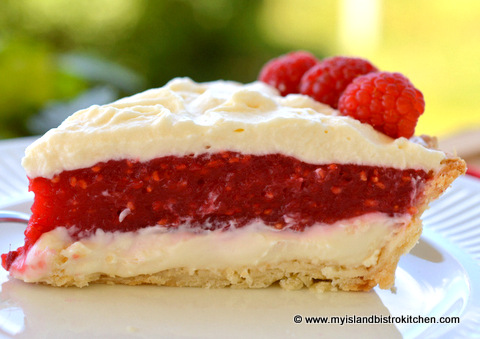
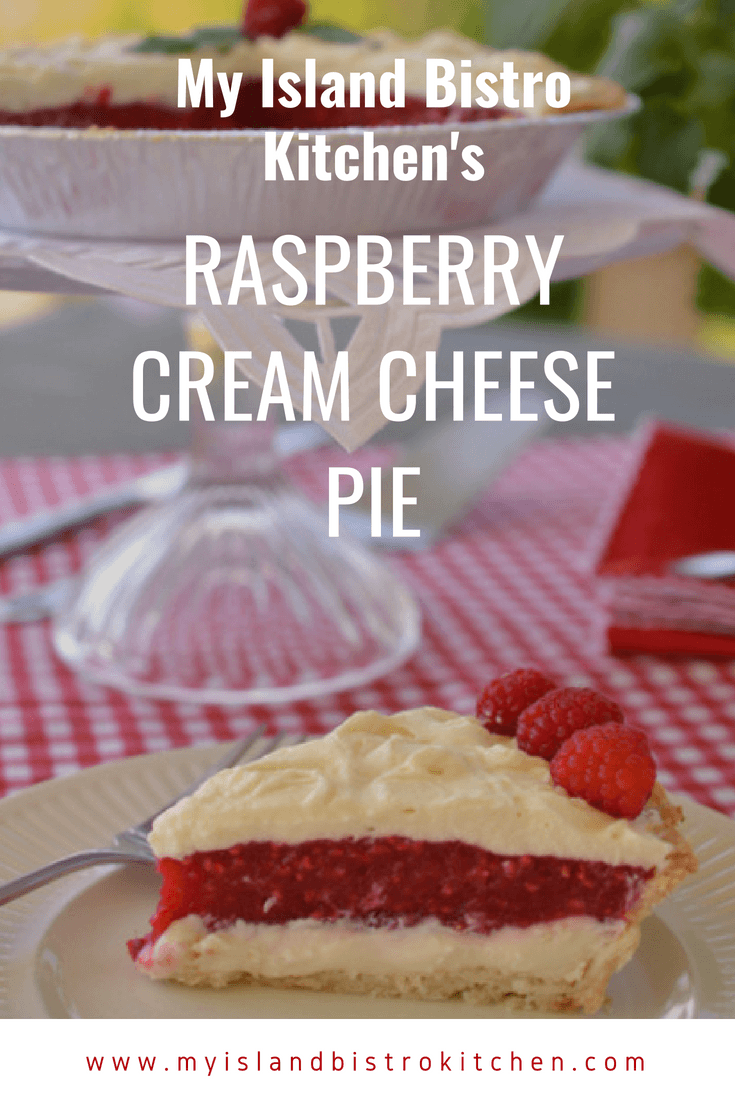
It’s summer berry pie time and that means it’s Raspberry Cream Cheese Pie time!
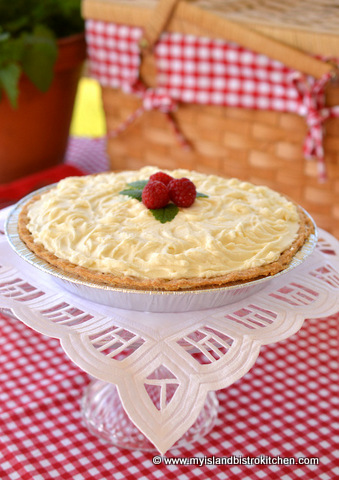
Raspberry Cream Cheese Pie
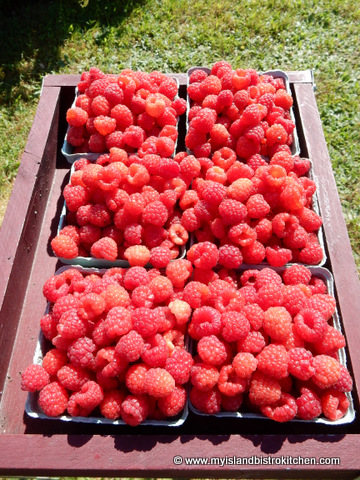
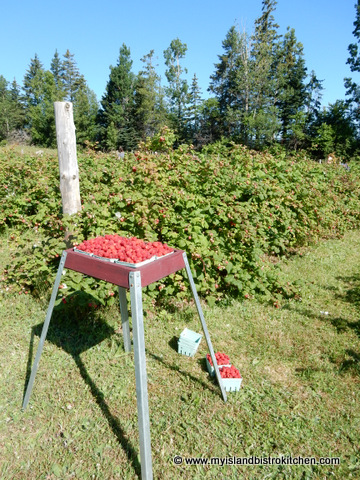
As I write this post in August, the raspberries are in full swing on Prince Edward Island so today’s posting is all about raspberries!
I never mind picking raspberries because there is no bending or crouching involved so it’s not hard on the legs or back.
These glorious and perfectly-shaped tasty red berries are versatile and can be used in many ways.
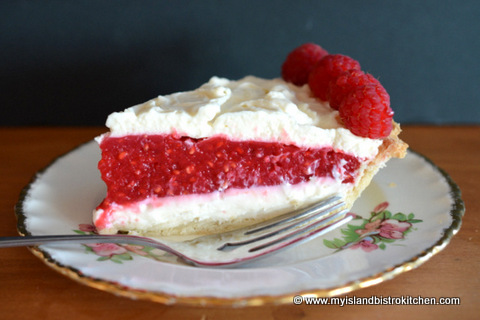
Raspberry Cream Cheese Pie
One of my favorite ways to use raspberries is in a raspberry cream cheese pie. It’s a cross between a pie and a cheesecake – the best of both worlds.
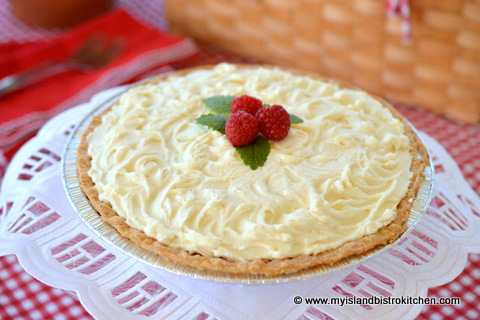
Raspberry Cream Cheese Pie
This pie is not difficult to make although it does take a bit of time. It’s also the type of pie that is best eaten the day it is made. I like to use the real whipping cream for the topping but Cool Whip works just fine, too. Sometimes, I like to just pipe the whipped cream around the outer edge of the pie because it allows the rich red raspberry filling to show which, of course, doesn’t happen if the entire top of the pie is completely covered in whipped cream. Alternatively, I sometimes don’t put any whipped cream on the pie top, preferring instead to simply drop a dollop of whipped cream on each pie serving as it is plated. Any of the three versions works just fine.
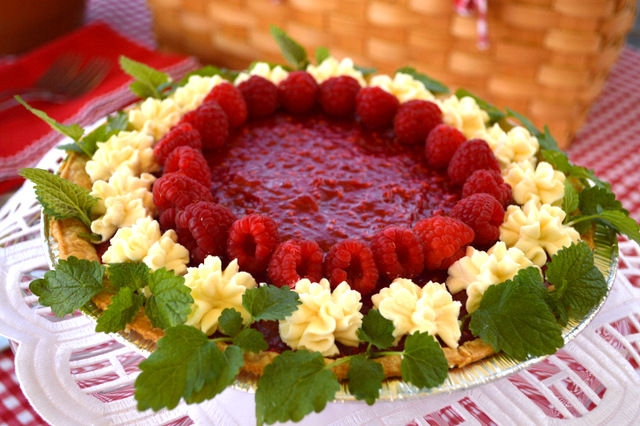
Raspberry Cream Cheese Pie
For my pastry recipe, hints, and tips on making pie pastry, clickhere.
Raspberry Cream Cheese Pie
Ingredients:
9” baked pie shell
6 oz. cream cheese, softened 3 tbsp sugar 1½ tbsp milk ½ tsp vanilla
3½ tbsp cornstarch ¾ cup granulated sugar Dash salt 2½ cups fresh raspberries 3 tbsp pineapple juice 1½ tsp lemon juice ½ tbsp butter
1 cup whipping cream 1 tsp. vanilla 2 tbsp sugar
Method:
In small bowl, beat the cream cheese, sugar, milk, and vanilla. Spread over bottom of pie shell. Refrigerate for at least one hour.
In small bowl, combine the cornstarch, sugar, and salt together. In medium-sized saucepan, combine the raspberries, pineapple juice, lemon juice, and cornstarch-sugar mixture. Cook and stir over medium-low heat until mixture is thickened. Remove from heat and stir in the butter. Let mixture cool to room temperature then spread over chilled cream cheese base. Refrigerate for at least one hour to allow pie to set.
Beat whipping cream and vanilla until soft peaks form then slowly beat in the sugar. Pipe on to pie in decorative design or, alternatively, completely cover chilled pie with the whipped cream. Refrigerate until use. This pie is best eaten the day it is made. (Note: Cool Whip can be substituted for the whipped cream, if desired.)
Yield: One 9” pie.
—————————————————————————-
If you have made this recipe and enjoyed it and/or wish to share it with your friends and family, please do so on social media but be sure to share the direct link to this posting from my website.
Connect with My Island Bistro Kitchen on Social Media
Follow “the Bistro” on Pinterest at https://www.pinterest.ca/peibistro/ and pin the Pinterest-ready photo found at the end of this post to your favorite Pinterest boards.
You may also enjoy my Traditional Double-crusted Raspberry Pie – clickherefor the recipe.
A delectable and flavorful raspberry pie with a layer of cream cheese and a topping of whipped cream. Always a showstopper.
Ingredients
9” baked pie shell
6 oz. cream cheese, softened
3 tbsp sugar
1½ tbsp milk
½ tsp vanilla
3½ tbsp cornstarch
¾ cup granulated sugar
Dash salt
2½ cups fresh raspberries
3 tbsp pineapple juice
1½ tsp lemon juice
½ tbsp butter
1 cup whipping cream
1 tsp. vanilla
2 tbsp sugar
Instructions
In small bowl, beat the cream cheese, sugar, milk, and vanilla. Spread over bottom of pie shell. Refrigerate for at least one hour.
In small bowl, combine the cornstarch, sugar, and salt together. In medium-sized saucepan, combine the raspberries, pineapple juice, lemon juice, and cornstarch-sugar mixture. Cook and stir over medium-low heat until mixture is thickened. Remove from heat and stir in the butter. Let mixture cool to room temperature then spread over chilled cream cheese base. Refrigerate for at least one hour to allow pie to set.
Beat whipping cream and vanilla until soft peaks form then slowly beat in the sugar. Pipe on to pie in decorative design or, alternatively, completely cover chilled pie with the whipped cream. Refrigerate until use. Pie is best eaten the day it is made. (Note: Cool Whip can be substituted for the whipped cream, if desired.)
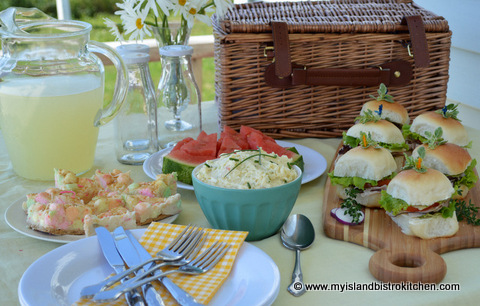
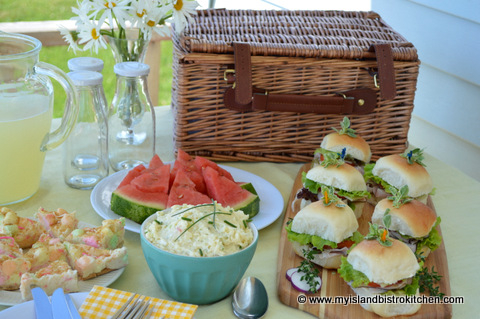
There are so many options for picnics that can range from very impromptu casual style to more elaborate events. Today, it was about 30C on Prince Edward Island so the theme for the day was casual….very casual.
I had made a batch of pan rolls yesterday and shaped them into the perfect size and shape for slider sandwiches. These are so easy to pull together and they are very tasty. Essentially, for each one, all I used was some black forest ham, a slice of tomato, some JJ Stewart beermustard sauce, slices of cheddar and havarti cheese, and lettuce from our own garden.
Ham, Cheese, and Tomato Sliders
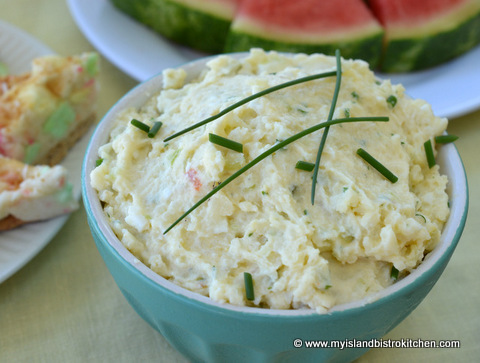
Of course, a bowl of the quintessential all-time favorite picnic salad – potato salad – provided a great side dish to the sliders and it’s always a hit. Just make sure to keep this salad refrigerated.
Potato Salad
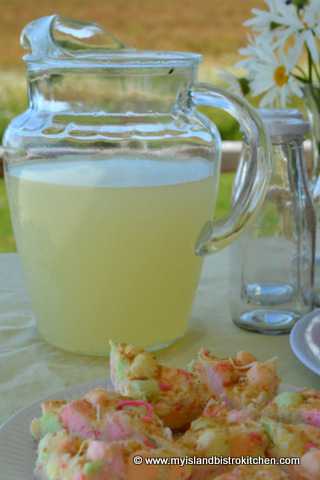
A tall pitcher of cold, refreshing lemonade proved to be a thirst-quenching drink on this hot afternoon.
Lemonade
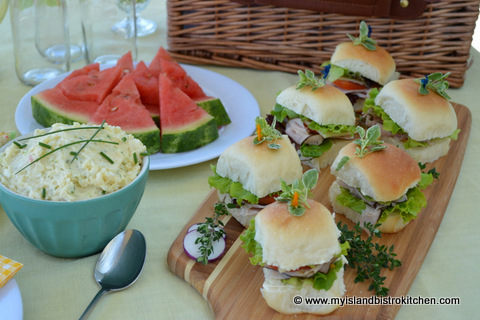
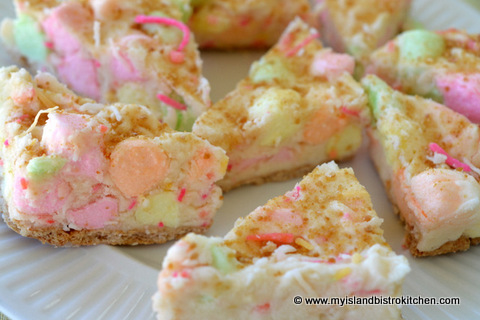
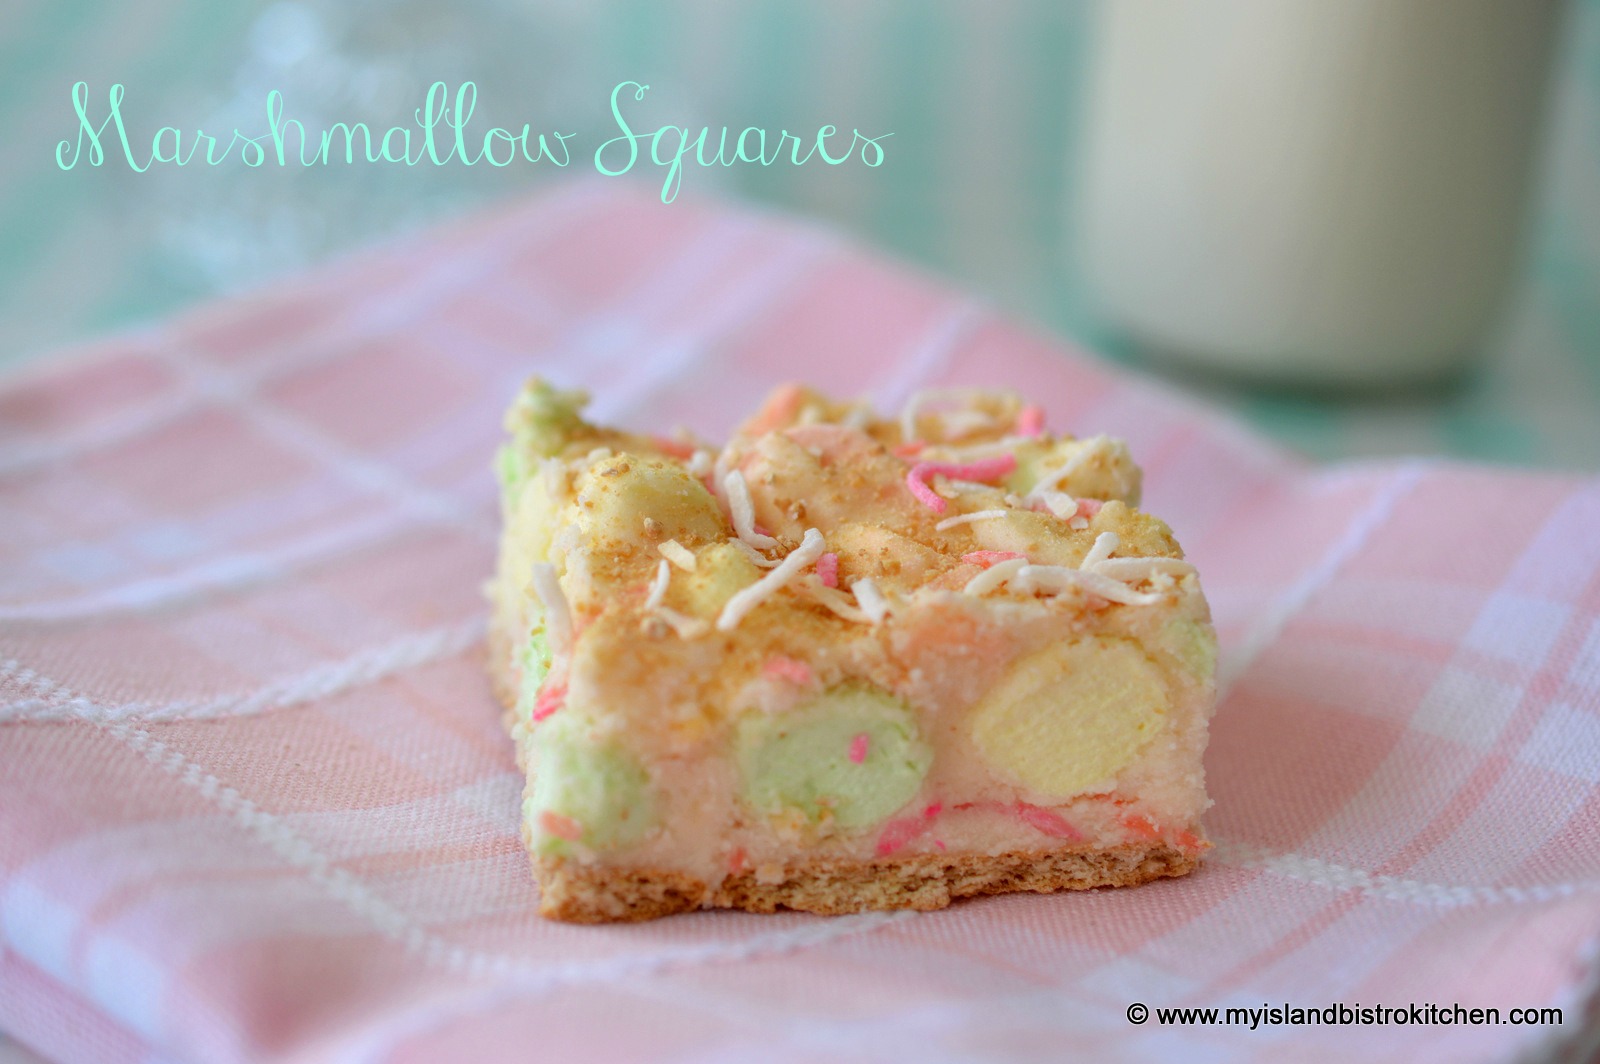
Dessert was simply colorful marshmallow squares. Nice and summery as well as yummy!
Marshmallow Squares
And, juicy watermelon always goes great on a hot summer day and it adds such a splash of color to the table.
When it is so hot, I like to keep meal prep to the minimum and go with very simplistic foods and ones that can be prepared early in the day and refrigerated until use. This picnic menu is so easy to set up buffet style whether it is for 3-4 people or several more.
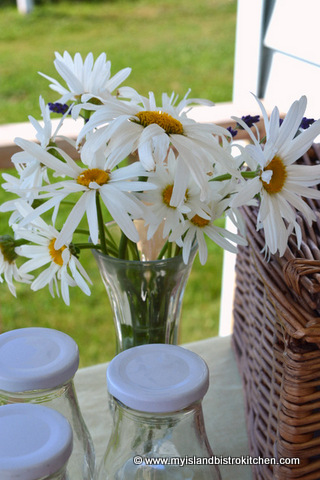
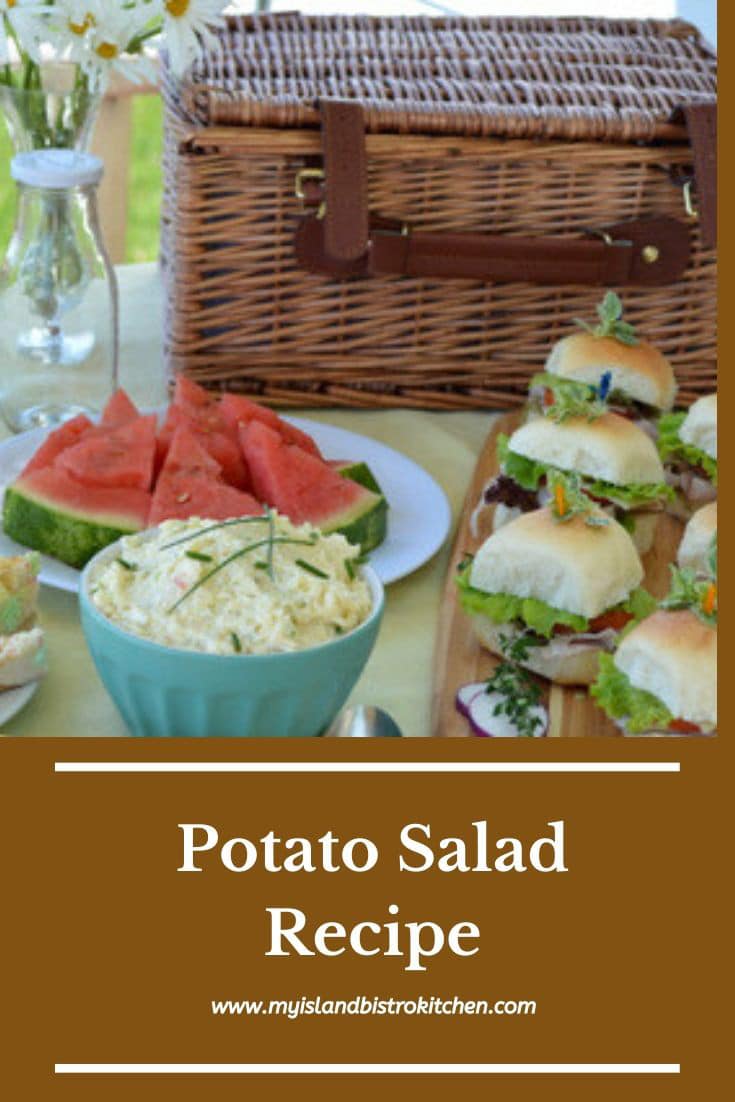
While picnics don’t necessarily require table centerpieces, they can take a picnic from mundane to wow with very little effort. Today, I simply walked to the nearest flowerbed and picked some daisies which, with their yellow centers, fit in with my summery yellow color theme. I think daisies go very well with wicker picnic baskets!
—————————————————————————-
Thank you for visiting “the Bistro” today. If you enjoyed this posting, please share it on your social media websites.
Connect with “the Bistro” through the following social media:
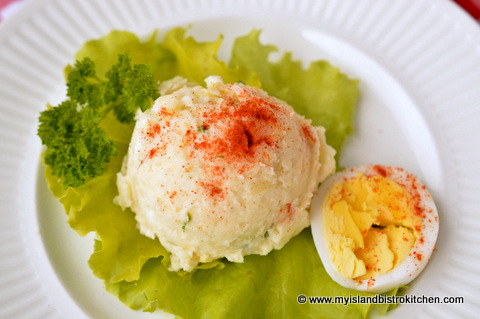
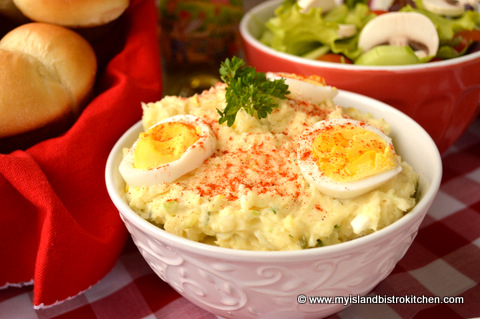
One of the most popular salads in PEI in summer is the traditional potato salad. There are several variations to this salad and, of course, the jury is still out on whether the potatoes should be diced or mashed! While the quantities of ingredients may vary somewhat and certain different seasonings may be added to potato salad, the same basic essential ingredients in most salads will be potato, egg, celery, onion, salad dressing, salt and pepper. So long as you have these common ingredients, you can make a basic potato salad. Of course, I think PEI potatoes make the best salad (but, then again, I may be just a wee bit biased on that front)!
Potato Salad
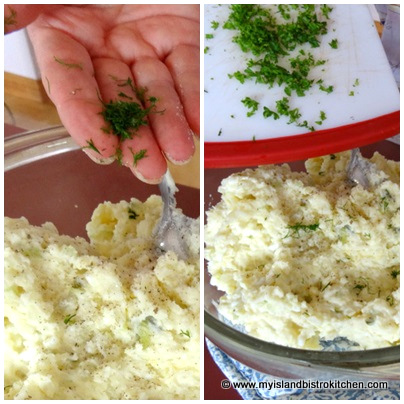
I like to use a combination of homemade and bought salad dressing as I find the flavors play well off each other – I use about 50/50 of each. However, I have made the salad with just one type of salad dressing and it turned out fine. I also like to add a bit of sour cream, sweet pickle relish, and prepared mustard. The latter two ingredients give a bit of ‘punch’ to the salad. The key, of course, is not to over-do the addition of any seasonings because the potatoes need to ‘star’ and we don’t want to do anything to detract from their flavor. In summer when I have fresh herbs in the garden, I like to add just a tiny bit of chopped fresh dill and some parsley.
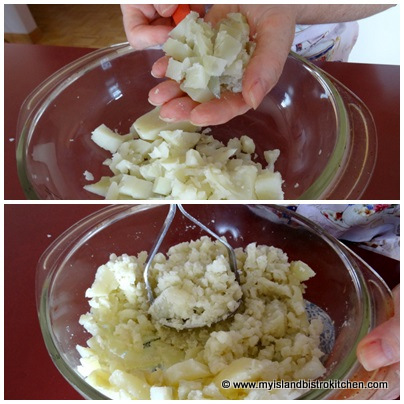
The traditional style of potato salad is to cube/dice the potato and egg as shown in the photo below.
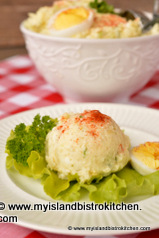
However, my preference is to mash the potato and egg, particularly if I am looking for good plating presentation. This is because the mashed potato salad fits well into the bowl of an ice cream scoop and, therefore, looks lovely on a plate. However, if you are looking for a more rustic style potato salad, then the cubed/diced potato style is the way to go. This is purely a personal preference because, let’s face it, if you use the same ingredients, it will all taste the same! All that will be different will be the texture and appearance.
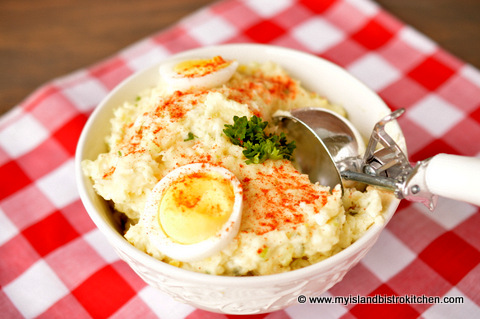
Potato Salad
As to how much salad dressing to use, this will depend on several factors so the amount I have given in my recipe below is a guide. For example, the quality of the potatoes (how dry or moist they are), the thickness of the salad dressing, and/or the consistency of the sour cream can all influence how much salad dressing is needed. As well, you may find that cubing/dicing the potatoes may take a different amount of salad dressing than do mashed potatoes. Lastly, it is personal preference as to how moist the salad should be. It should not be ‘soupy’ but there should be enough salad dressing to hold/bind the salad together. I tend to like my potato salad quite moist. I recommend starting with a good one-half of the salad dressing called for in the recipe and then adding more to reach the consistency you desire.
Plan to make the potato salad several hours ahead of when it is needed. Refrigerate it for at least three hours or more to allow the flavours to blend.
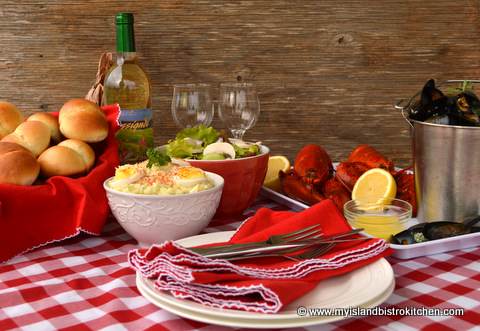
Potato salad is very versatile. It often is served as a traditional side dish for picnics and barbeques. It goes great with cold cuts, lobster, grilled pork chops, barbequed chicken, sandwiches of all kinds, and the list goes on. In my household, potato salad always has to accompany a feed of PEI lobster!
Potato Salad Is A Great Picnic Side Dish
The recipe below is my own personal potato salad recipe. I hope you enjoy it.
Potato Salad
My Island Bistro Kitchen’s PEI Potato Salad
Ingredients:
1½ lbs PEI potatoes 2 hard boiled eggs ¼ cup celery, finely chopped 2½ tbsp onion, finely chopped ⅔ cup salad dressing (apx.) 2 tbsp sour cream 3 tsp. sweet relish 2 tsp. prepared mustard ¼ tsp sugar Salt and pepper, to taste ¼ tsp fresh dill, chopped (optional) 1½ tsp fresh parsley, chopped (optional)
Method:
Cook potatoes, skins on, in pot of boiling water just until potatoes are fork tender. Drain. Let potatoes cool enough to handle. Peel. Cube or mash potatoes, as desired, into medium-sized bowl.
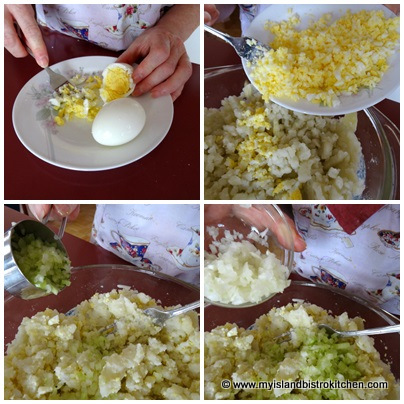
Mash or dice eggs. Add to potato.
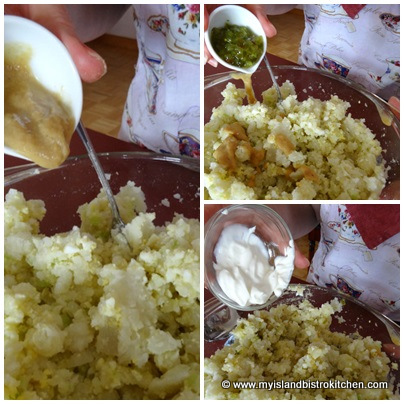
Add the celery, onion, mustard, sweet relish, sour cream, salad dressing, and sugar.
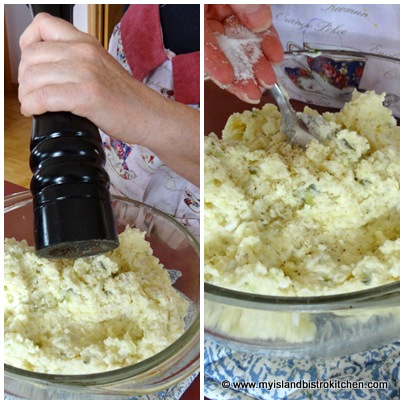
Note – Add about ½ the salad dressing to start, then continue to add enough salad dressing to reach desired consistency. Mix well. Season with salt and pepper.
Add fresh dill and parsley, if desired.
Cover and refrigerate for at least 3 hours to allow flavors to blend. Serve salad on a bed of lettuce. Refrigerate unused salad immediately.
Yield:5-6 servings (2 scoops salad per serving)
—————————————————————————-
Thank you for visiting “the Bistro” today. If you enjoyed this posting and recipe, please share it on your social media websites.
Connect with “the Bistro” through the following social media:
A moist and tasty potato salad that is the perfect accompaniment to any lobster feed, barbeque, or picnic
Ingredients
1½ lbs PEI potatoes
2 hard boiled eggs
¼ cup celery, finely chopped
2½ tbsp onion, finely chopped
2/3 cup salad dressing (apx.)
2 tbsp sour cream
3 tsp. sweet relish
2 tsp. prepared mustard
¼ tsp sugar
Salt and pepper, to taste
¼ tsp fresh dill, chopped (optional)
1½ tsp fresh parsley, chopped (optional)
Instructions
Cook potatoes, skins on, in pot of boiling water just until potatoes are fork tender. Drain. Let potatoes cool enough to handle. Peel. Cube or mash potatoes, as desired, into medium-sized bowl.
Mash or dice eggs. Add to potato. Add the celery, onion, mustard, sweet relish, sour cream, salad dressing, and sugar. Note – Add about ½ the salad dressing to start, then continue to add enough salad dressing to reach desired consistency. Mix well. Season with salt and pepper. Add fresh dill and parsley, if desired.
Cover and refrigerate for at least 3 hours to allow flavors to blend. Serve salad on a bed of lettuce. Refrigerate unused salad immediately.
With its beginnings in 2003, Food Day Canada has grown and evolved. Today, it is a country-wide initiative designed to showcase how a delectable entire meal can be made using Canadian-produced food. It’s a tangible and visible way to celebrate the wonderful variety of foods produced in Canada and recognize our farmers, fishers, other food producers, chefs and, indeed, those of us who are home cooks bringing locally-produced food to our tables on a regular basis. I like to use fresh locally-produced food products which have not traveled days to reach us and, at the same time, it gives me the opportunity to put dollars into the hands of local food producers to keep the local food movement alive and sustainable.
Preparing a meal using Canadian food items is no great challenge for me since I use local food products every day of the year. In summer, our garden is the source of much of the food we eat. Off season, I patronize my local farmers market in Charlottetown. We have a number of farmers who grow produce year-round in their greenhouses so it’s great to have that ready source of local, fresh produce. If you follow my blog regularly, you will have read stories I have written on several PEI food producers.
Living in PEI, I have lots of choices of foods that are representative of the Island. For my 2015 Food Day Canada menu, I have chosen items from both land and sea and, as a tribute to our Island potato industry, am featuring potato salad, an all-time favorite summertime dish on PEI. Potato salad is often found at backyard barbeques, picnics, and other summer get-togethers across the Island. You can get my recipe here.
My Island Bistro Kitchen’s PEI Potato Salad
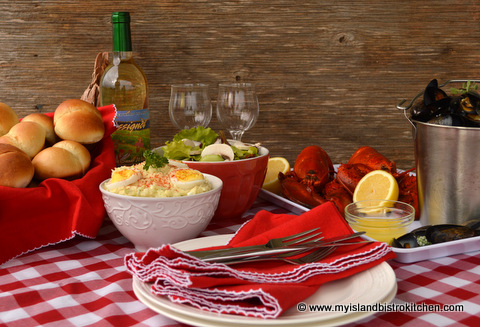
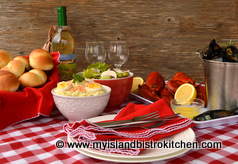
So, today, I am happy to share with you the menu I have prepared and photographs of the PEI foods that are on my table for Food Day Canada 2015 along with the sources of the products. This is my version of a typical down home PEI lobster supper.
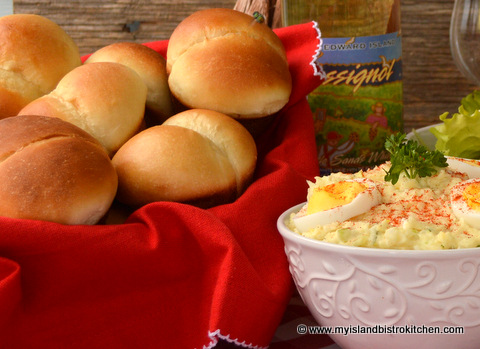
Food Day Canada Menu 2015 Starter PEI Mussels steamed in apple juice, garlic, and a medley of fresh herbs and dipped in melted butter Fresh Homemade Rolls
Main PEI Lobster in the Shell PEI Potato Salad Green Garden Salad with Cranberry-Pear Vinaigrette
Dessert Glazed Strawberry Pie with Whipped Cream
Wine Pairing Little Sands White Wine, Rossignol Estate Winery, Little Sands, PEI
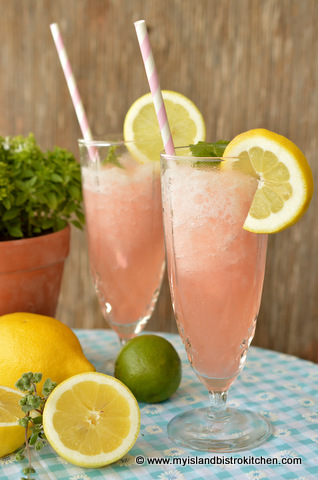
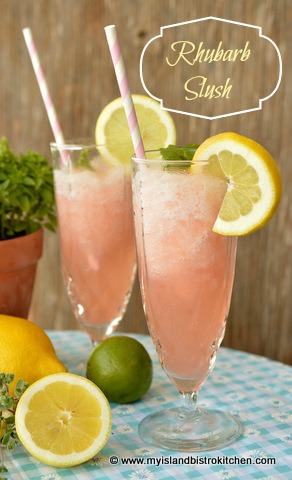
Pre-dinner Beverage: Product and Source: Rhubarb Slush made with rhubarb from our garden
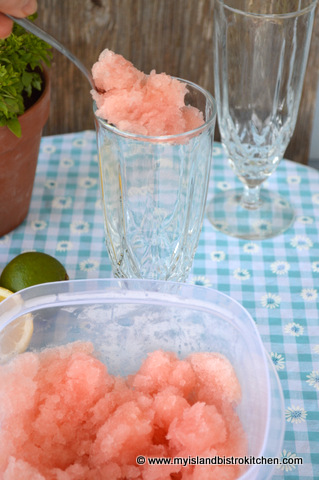
Rhubarb Slush is my latest drink creation and it is my signature drink for summer 2015. It’s very tasty and refreshing on a hot summer day. We have a large rhubarb patch and it’s another way to use the rhubarb.
Rhubarb Slush
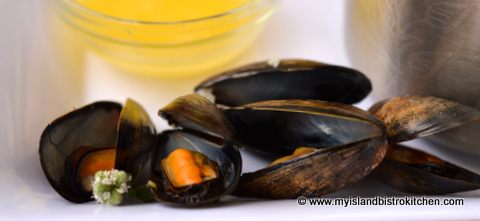
Starter Products & Sources: Mussels – Prince Edward Aqua Farms Inc., Springbrook, PEI Butter – Amalgamated Dairies Limited (ADL), Summerside, PEI
Mussels are one of the main products harvested from PEI waters. While they are used in different ways such as in chowders and even salads, they are most often steamed and eaten right out of the shell, dipped in good PEI hot melted butter.
PEI Mussels
Today, I simply steamed the mussels in a small amount of apple juice, some garlic, and a small handful of mixed herbs from my herb garden. The key to good steamed mussels is to use as little liquid as possible to steam them as too much liquid dilutes their flavor.
PEI Mussels
I made a fresh batch of rolls this morning and, with a good slather or ADL butter, they make a lovely accompaniment to the mussels.
Main Products & Sources: Lobster – Fished off of Tignish, PEI, and sourced through MR Seafood in Charlottetown, PEI
Butter – Amalgamated Dairies Limited (ADL), Summerside, PEI Potatoes– Jewell Produce, York, PEI Lettuce – From my own garden Tomatoes– Vankampen Greenhouse, Charlottetown, PEI English Cucumber – Schurman Family Farm, Spring Valley, PEI (these are the absolute best flavored cucumbers I have ever tasted!)
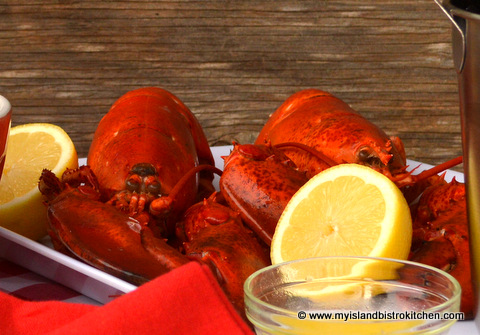
We are truly blessed on PEI to have fine quality lobster. The lobsters on my table today were fished off the shores of Tignish in the western part of the province. One of my favorite places to buy fresh seafood is at MR Seafood on Thompson Drive in Charlottetown and that’s where these were purchased. Lobster may be eaten hot or cold. My preference is to eat the lobster meat cold but dipped in melted butter.
PEI Lobster
The potatoes that I used to make the potato salad came from Jewell’s Produce in York, PEI, just outside Charlottetown.
My Island Bistro Kitchen’s Potato Salad
Our lettuce has been very slow to grow this year but I was able to get enough from the garden to make a green salad for our dinner.
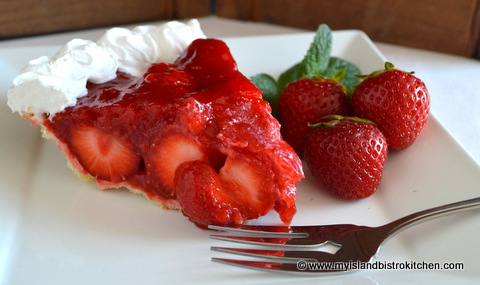
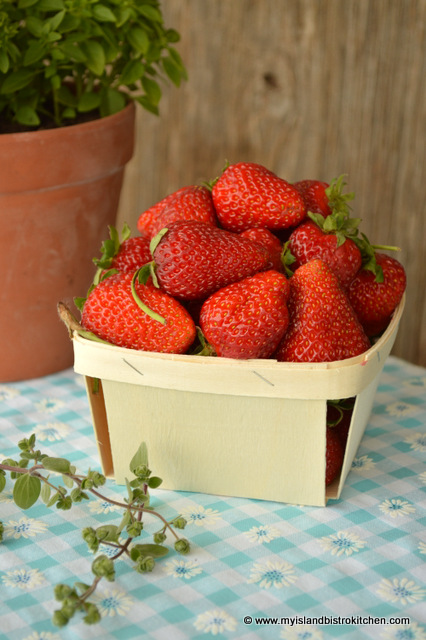
Dessert Product and Source: Strawberries from the Schofield Farm in Lady Fane, PEI
Strawberries are nearing the end of their season here on PEI but, as a finale to the strawberry season, I am including my glazed strawberry pie for dessert.
Glazed Strawberry Pie
Wine Pairing My wine of choice for today is Little Sands White Wine that comes from Rossignol Estate Winery in Little Sands in the Eastern part of PEI. Rossignol is PEI’s oldest winery. Click here to read the story I previously wrote about my visit to this winery.
So, this is how I am celebrating Food Day Canada 2015. What Canadian-produced foods are on your table today?
——————————————————————————–
Thank you for visiting “the Bistro” today. If you enjoyed this posting , please share it on your social media websites.
Connect with “the Bistro” through the following social media:
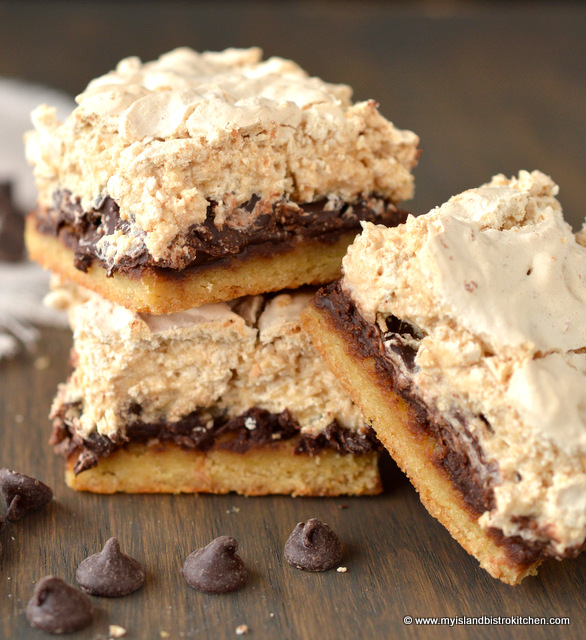
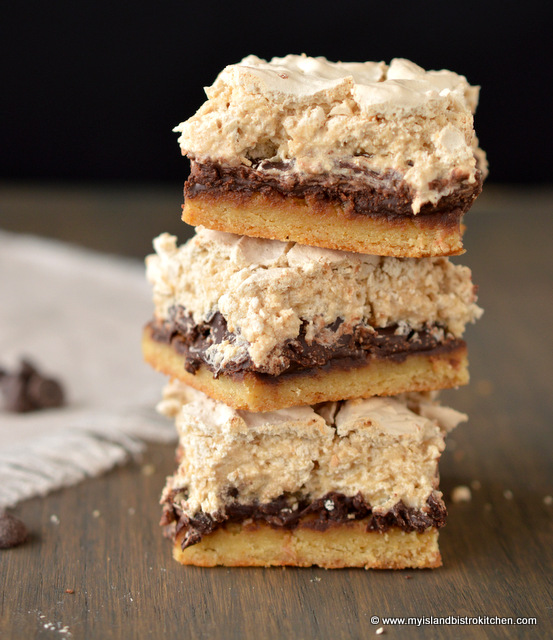
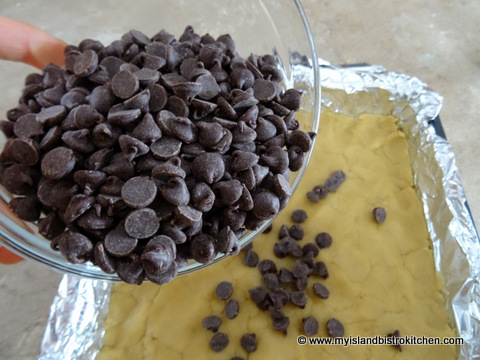
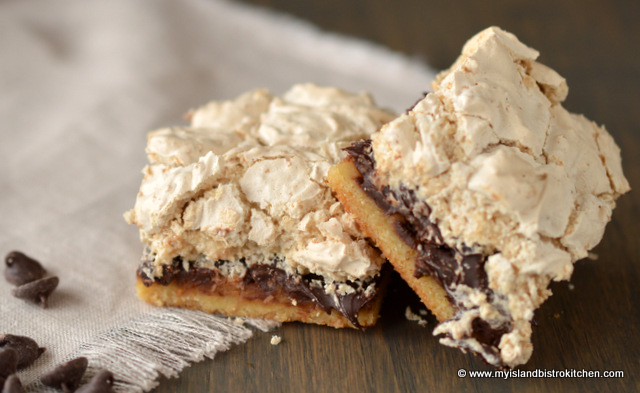
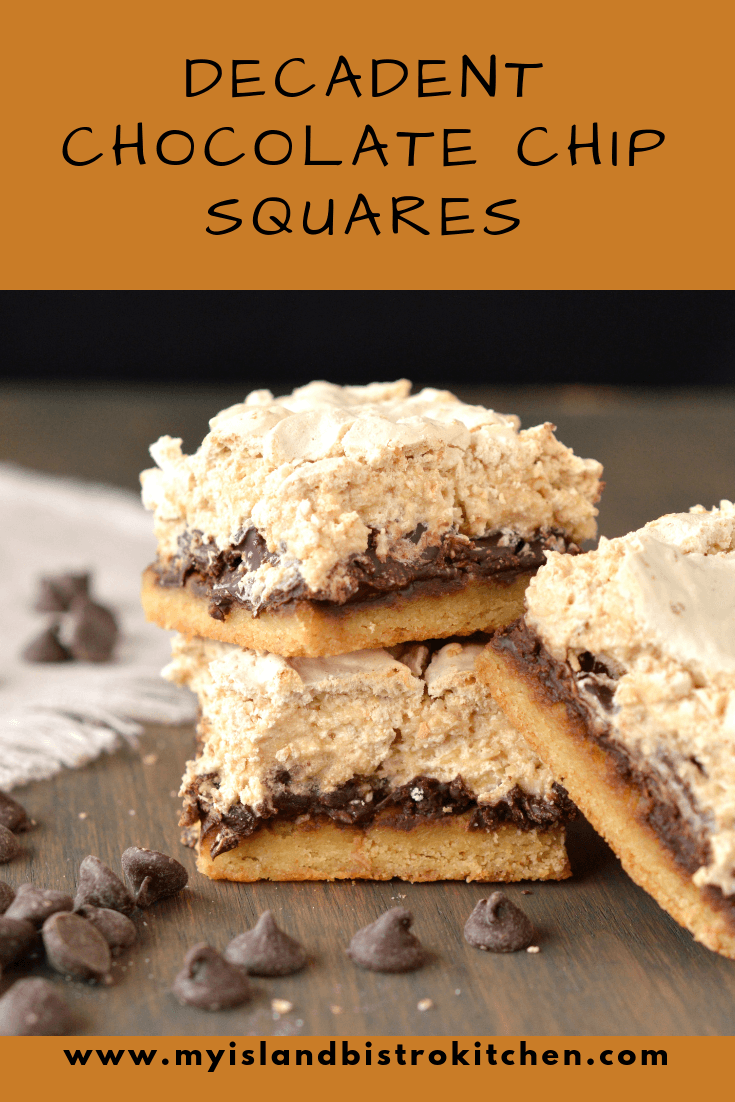
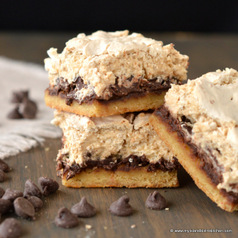
This is one of my most favorite squares! I have been making this recipe for years. It’s good any time of the year and is often found in my summer picnic basket. With its rich, gooey chocolate center and a slightly crunchy topping, it’s a real treat for sure, especially for chocolate lovers.
Decadent Chocolate Chip Squares
Decadent Chocolate Chip Squares
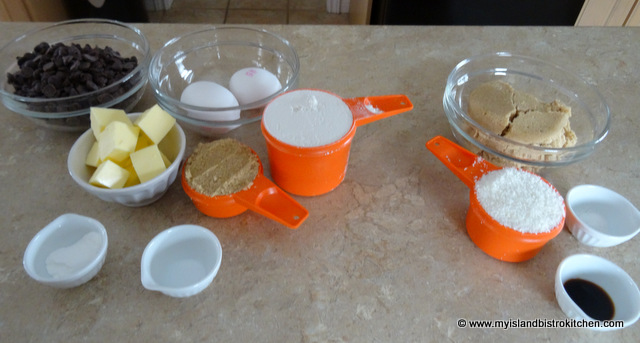
Ingredients:
Base:
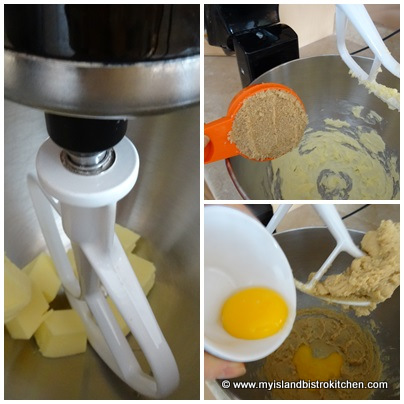
1 cup all-purpose flour 1 tsp baking powder Pinch salt ⅓ cup butter, softened ⅓ cup brown sugar, packed 2 egg yolks
10 oz. chocolate chips
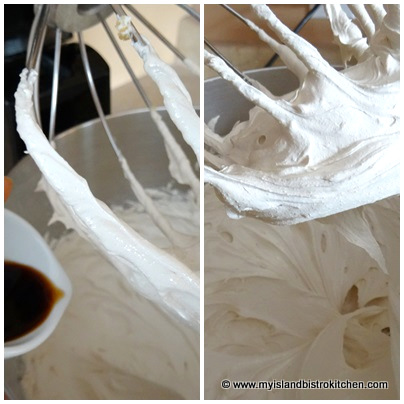
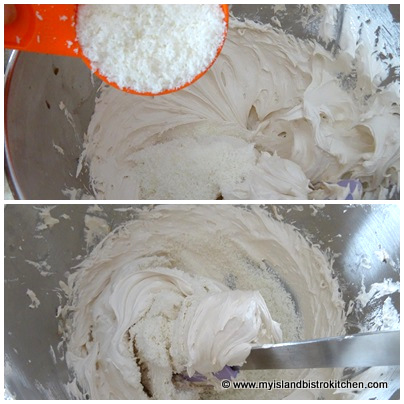
Topping: 2 egg whites, beaten stiff ⅛ tsp cream of tartar 1 cup brown sugar, lightly packed 1 tsp vanilla ½ cup macaroon coconut
Method:
Assemble ingredients.
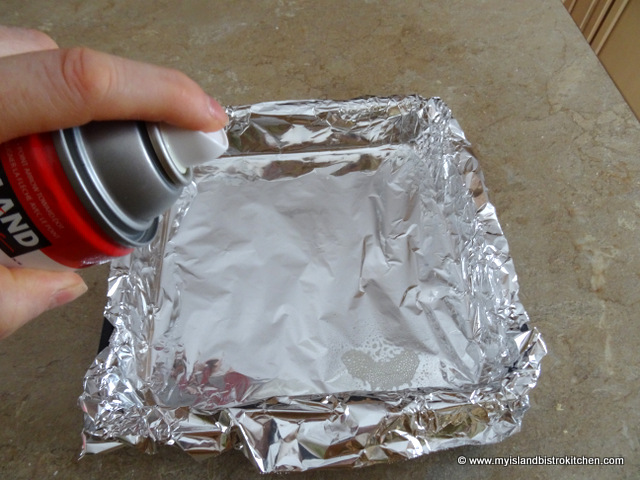
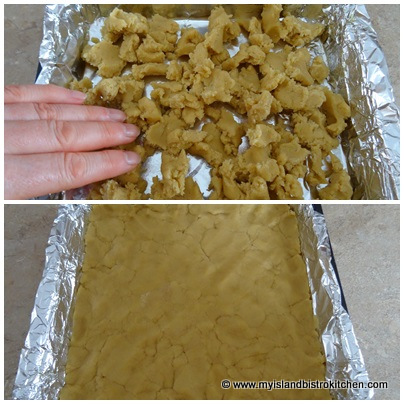
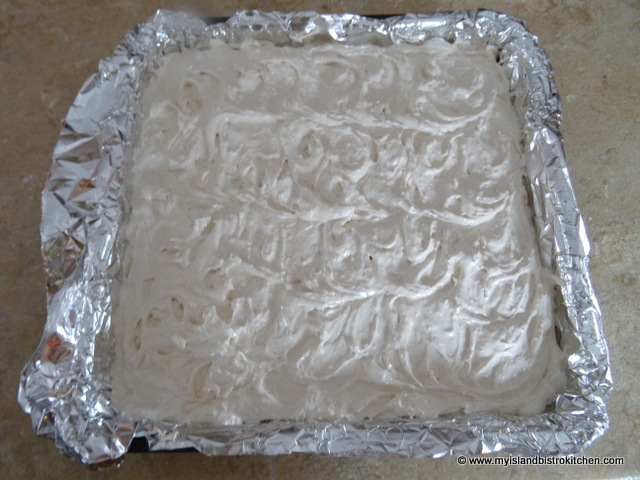
Prepare 9” square pan by lining with tin foil and spraying with cooking oil.
Preheat oven to 350°F.
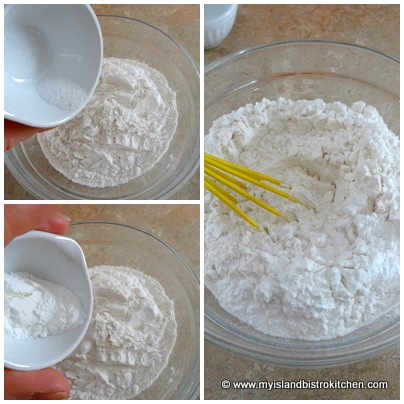
Base: In small bowl, whisk together the flour, baking powder, and salt. Set aside.
Cream butter and brown sugar together. Add egg yolks, one at a time, beating well after each addition.
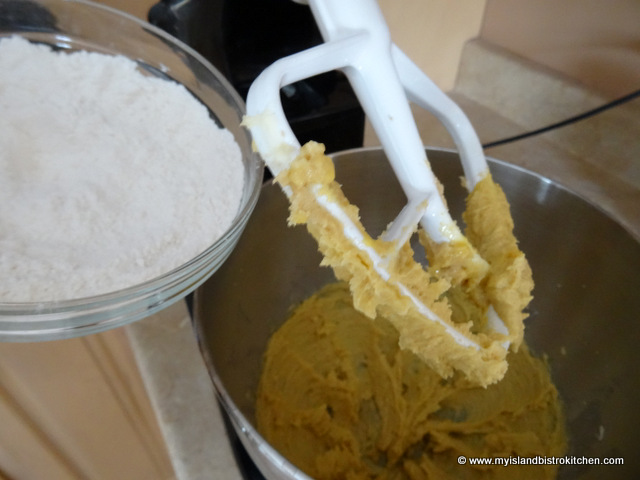
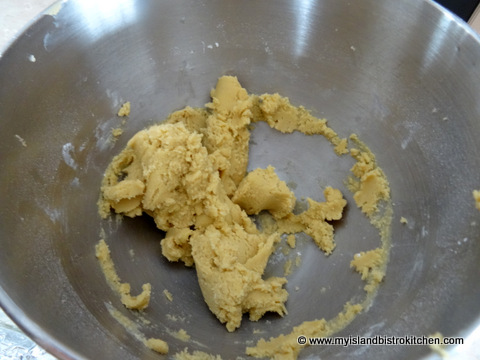
Add dry ingredients and stir just until dry ingredients are incorporated.
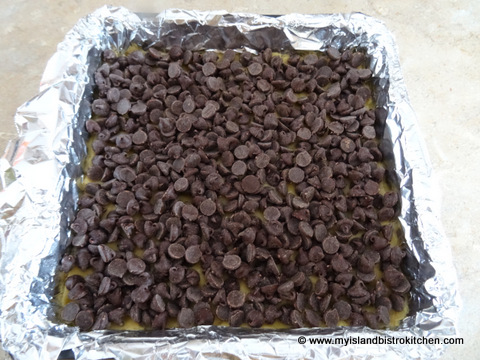
Evenly press dough into prepared pan.
Evenly sprinkle the chocolate chips over the dough. Set aside.
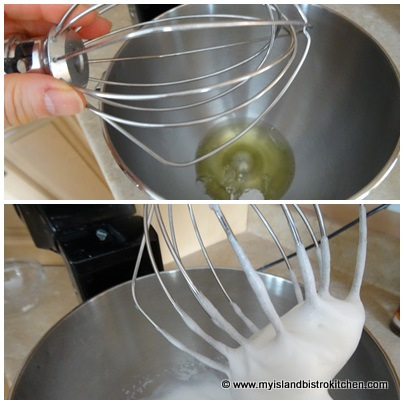
Topping: In clean mixer bowl, beat the two egg whites with the cream of tartar until soft peaks form.
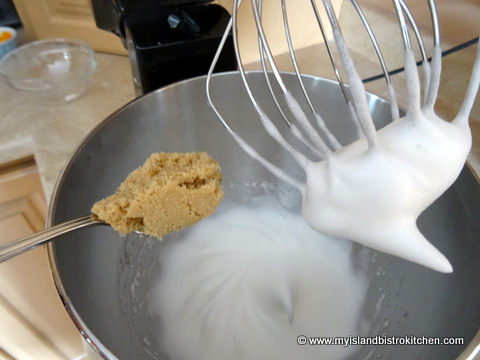
Beat in the brown sugar, adding a tablespoon at a time.
Add the vanilla.
Fold in the coconut.
Spread the topping evenly over the chocolate chips.
Bake for 30-35 minutes or until topping is browned. Remove from oven and place pan on wire cooling rack. Let cool completely. Lift tin foil and square from the pan and cut into squares.
Prepare 9” square pan by lining with tin foil and spraying with cooking oil.
Preheat oven to 350°F.
Base:
In small bowl, whisk together the flour, baking powder, and salt. Set aside.
Cream butter and brown sugar together. Add egg yolks, one at a time, beating well after each addition. Add dry ingredients and stir just until dry ingredients are incorporated.
Evenly press dough into prepared pan. Evenly sprinkle the chocolate chips over the dough. Set aside.
Topping:
In clean mixer bowl, beat the two egg whites with the cream of tartar until soft peaks form. Beat in the brown sugar, adding a tablespoon at a time. Add the vanilla. Fold in the coconut.
Spread the topping evenly over the chocolate chips.
Bake for 30-35 minutes or until topping is browned. Remove from oven and place pan on wire cooling rack. Let cool completely. Lift tin foil and square from the pan and cut into squares.
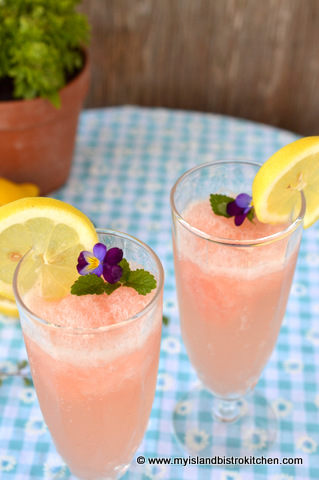
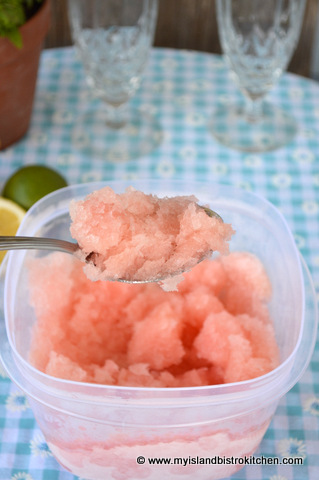
I love to develop summertime drinks! This recipe uses rhubarb as the base for this tasty slush drink. The addition of a mix of freshly squeezed citrus juices, sweet pineapple juice, and frozen lemonade concentrate make this a flavorful beverage. This is an alcoholic beverage as it uses gin. There is no fixed ratio of slush to soda but I generally fill a tall glass about a third to half full of the slush and top it up with a clear soda such as lemon-lime. Serve with a lemon wheel or wedge and it’s a refreshing drink on a hot summer day.
Rhubarb Slush
I do have some tips to share for making this slush:
• Use the the brightest red rhubarb stalks you can find as this will give the slush color. • Use freshly-squeezed citrus fruit juices, not bottled (fresh is always best!). • Strain the citrus juices twice to remove all traces of seeds and fruit pulp. • Chill the rhubarb and citrus juices, pineapple juice, simple syrup, and gin. The colder the ingredients are to start with, the quicker and better the freezing process for the slush. • Plan ahead to make this slush as it will take at least 2-3 days for it to reach the optimal “slush” stage. • Stir the slush 2-3 times during the freezing process to ensure ingredients remain mixed during the freezing stage. It will not freeze rock hard solid as it’s not meant to. • For best results, store the slush in a tightly sealed container deep in a deep freeze (as opposed to a refrigerator’s freezer compartment). Otherwise, the slush may remain in a fairly liquid form and not freeze, and stay frozen, at the slush stage. • Once mixed with the cold soda, serve immediately as the slush melts quickly.
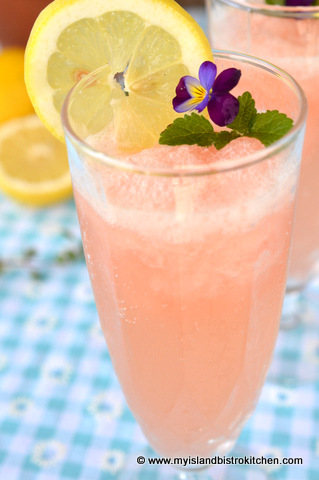
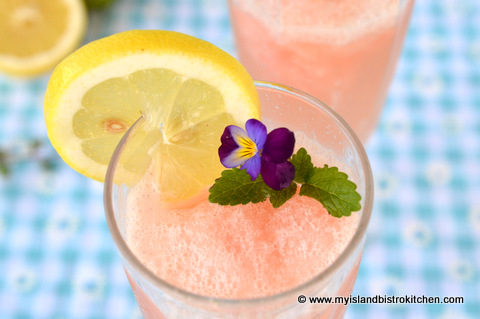
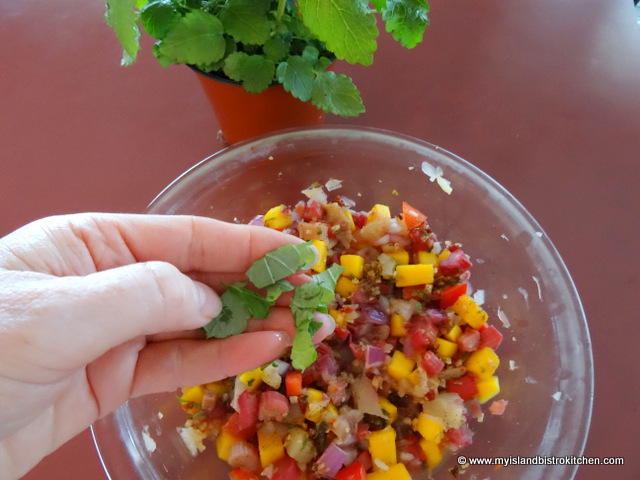
This is a pale, pastel drink that is packed full of flavour. Sometimes, I add some lemon balm leaves and edible pansies to add color and interest to the drink. I think this would make a lovely bridal shower signature drink.
Rhubarb Slush
Rhubarb Slush
Ingredients:
1½ cups water 1½ cups sugar
3 cups rhubarb, chopped into ½” chunks (enough to yield 1 cup rhubarb juice) ⅔ cup water
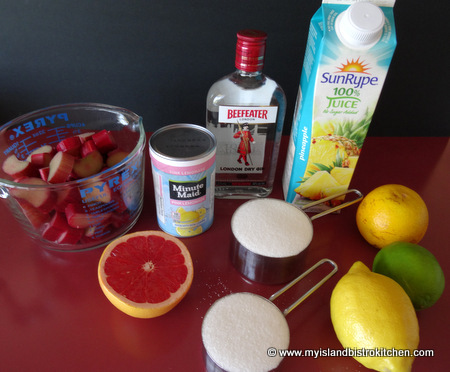
Juice of ½ pink grapefruit Juice of 1 orange Juice of 1 lemon Juice of 1 lime 1¼ cups pineapple juice, chilled ½ can frozen pink lemonade concentrate, slightly thawed
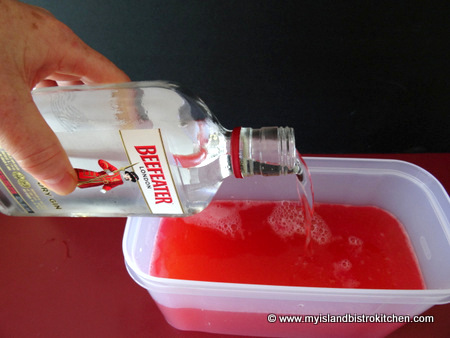
1 – 375 ml bottle gin (I used Beefeater London Dry Gin), chilled
Method:
Assemble ingredients.
Ingredients for Rhubarb Slush
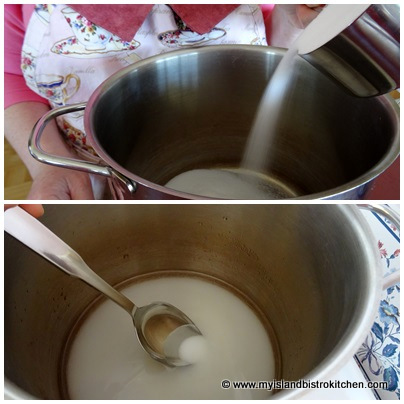
In medium-sized saucepan, combine the 1½ cups water and 1½ cup sugar to make a traditional simple syrup. Over high heat, bring to a boil then reduce to medium-low heat and boil gently for approximately 4-5 minutes, stirring occasionally, until sugar has completely dissolved and liquid is clear. Remove from heat and let cool to room temperature, then chill.
Making the Simple Syrup
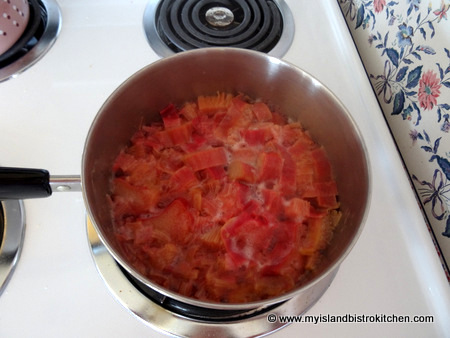
In medium-sized saucepan combine the rhubarb and 2/3 cup water.
Bring to a boil over medium-high heat then reduce to medium low and cook gently for about 10 minutes until rhubarb is broken down into a soft sauce-like consistency.
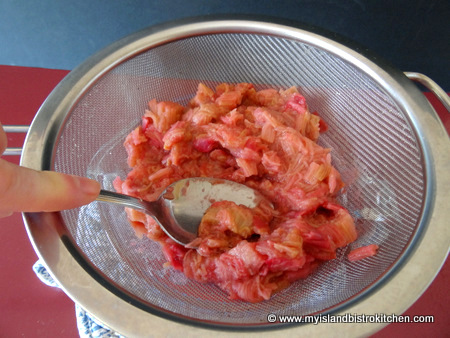
Pour rhubarb and its liquid into a fine sieve/strainer placed over a bowl or large measuring cup.
Let juice drip from rhubarb, periodically pressing the rhubarb pulp with the back of a large spoon to extract as much juice as possible. This should yield 1 cup of rhubarb juice. Chill. Discard rhubarb pulp.
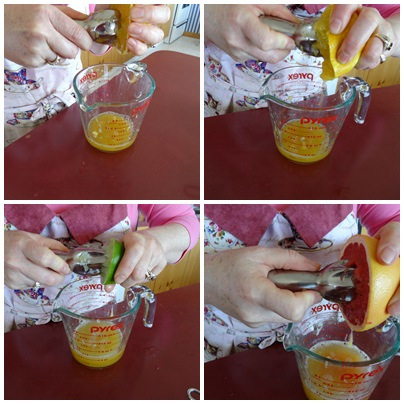
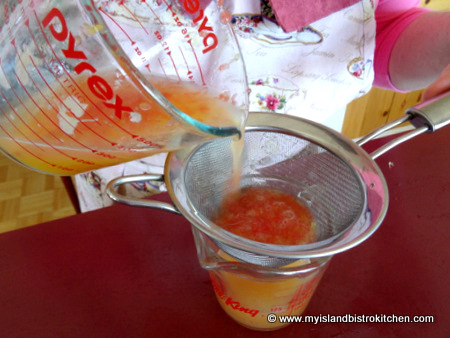
Prepare the citrus juices and strain twice to remove any seeds and pulp. Chill.
Squeezing Citrus JuicesStraining the Citrus Juices
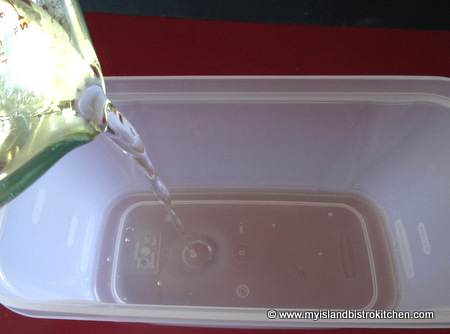
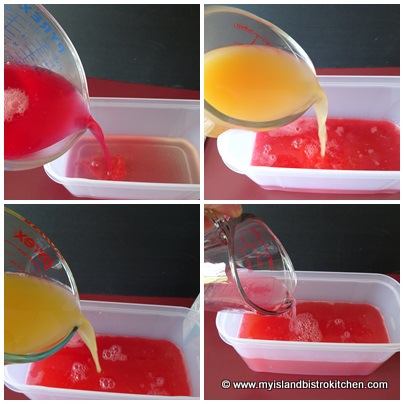
Into a freezable container that can hold at least 7 cups of liquid, pour the cooled simple syrup of sugar and water.
Add the chilled rhubarb, citrus, and pineapple juices along with the semi-thawed lemonade concentrate and the gin. Stir well.
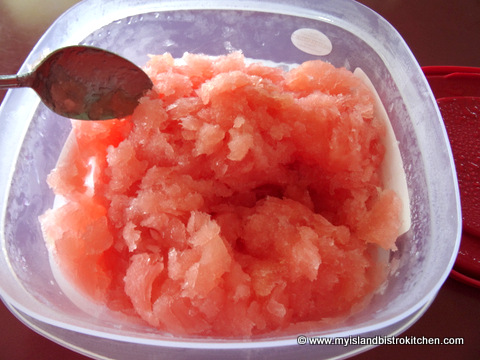
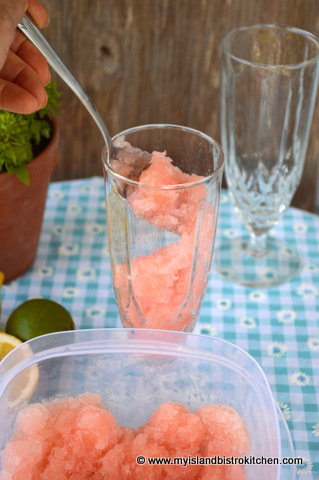
Place airtight cover on container. Freeze in the coldest part of the deep freeze, stirring 2-3 times during the freezing process. Be patient as this will take 2-3 days for it to reach the desired slush consistency.
Slush Starting to FreezeSlush Freezing
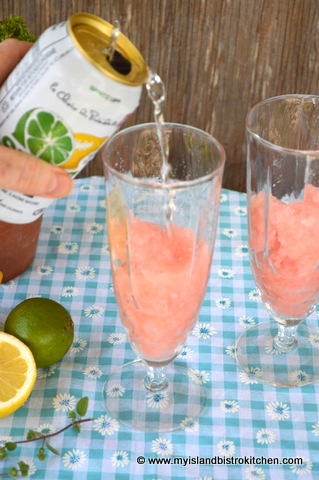
To serve, fill a tall glass about a third to one-half full of slush and top up with a clear soda, such as lemon-lime.
Garnish with a lemon wheel or wedge and serve immediately. Decorate with a sprig of lemon balm and/or an edible pansy, if desired.
Yield:Apx. 7+ cups
Note:There may be some slight variations in colors between different photos in this posting due to different lighting used.
3 cups rhubarb, chopped into ½” chunks (enough to yield 1 cup rhubarb juice)
2/3 cup water
Juice of ½ pink grapefruit
Juice of 1 orange
Juice of l lemon
Juice of 1 lime
1¼ cups pineapple juice, chilled
½ can frozen pink lemonade concentrate, slightly thawed
1 – 375 ml bottle gin (I used Beefeater London Dry Gin), chilled
Instructions
Assemble ingredients.
In medium-sized saucepan, combine the 1½ cups water and 1½ cup sugar to make a traditional simple syrup. Over high heat, bring to a boil then reduce to medium-low heat and boil gently for approximately 4-5 minutes, stirring occasionally, until sugar has completely dissolved and liquid is clear. Remove from heat and let cool to room temperature, then chill.
In medium-sized saucepan combine the rhubarb and 2/3 cup water. Bring to a boil over medium-high heat then reduce to medium low and cook gently for about 10 minutes until rhubarb is broken down into a soft sauce-like consistency.
Pour rhubarb and its liquid into a fine sieve/strainer placed over a bowl or large measuring cup. Let juice drip from rhubarb, periodically pressing the rhubarb pulp with the back of a large spoon to extract as much juice as possible. This should yield 1 cup of rhubarb juice. Chill. Discard rhubarb pulp.
Prepare the citrus juices and strain twice to remove any seeds and pulp. Chill.
Into a freezable container that can hold at least 7 cups of liquid, pour the simple syrup of sugar and water. Add the chilled rhubarb, citrus, and pineapple juices along with the semi-thawed lemonade concentrate and the gin. Stir well.
Place airtight cover on container. Freeze in the coldest part of the deep freeze, stirring 2-3 times during the freezing process. Be patient as this will take 2-3 days for it to reach the desired slush consistency.
To serve, fill a tall glass about one-third to one-half full of slush and top up with a clear soda, such as lemon-lime. Garnish with a lemon wheel or wedge and serve immediately.
I am always developing ideas for ways I can make use of rhubarb. We have a long-established rhubarb patch at the end of the garden that always produces large beautiful red stalks. It was planted circa 1993-94 and is the German Wine variety. Because of its rich red color, it lends itself to colorful dishes. While we freeze lots of rhubarb for winter usage, I try to make good use of it while it is fresh. There’s just something so satisfying in being able to go to the garden to pick a few stalks of rhubarb just as I need them for a dish I am making.
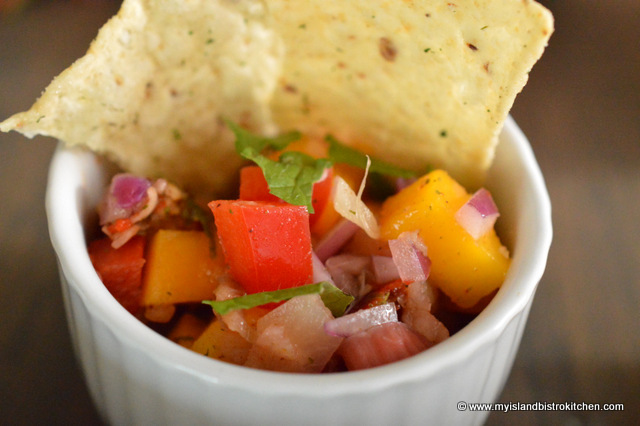
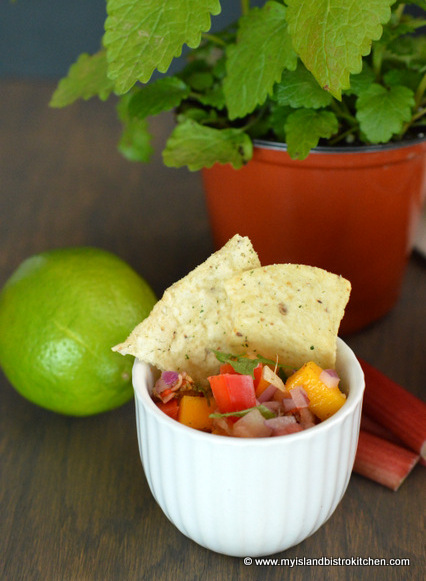
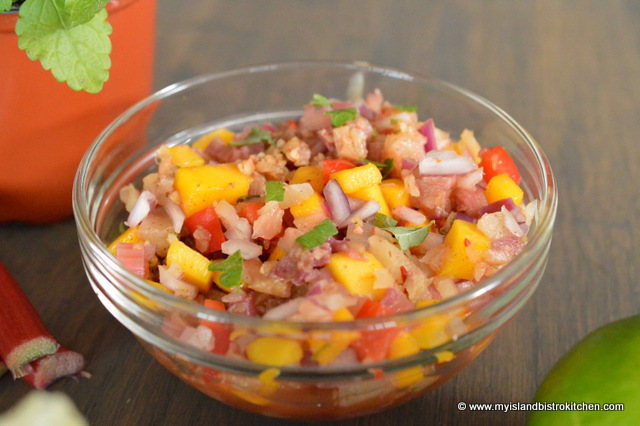
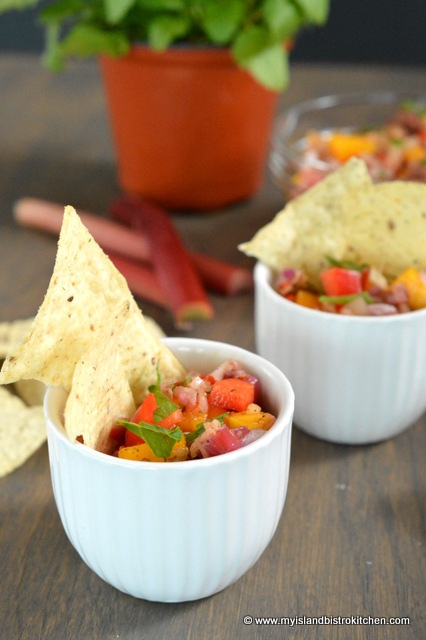
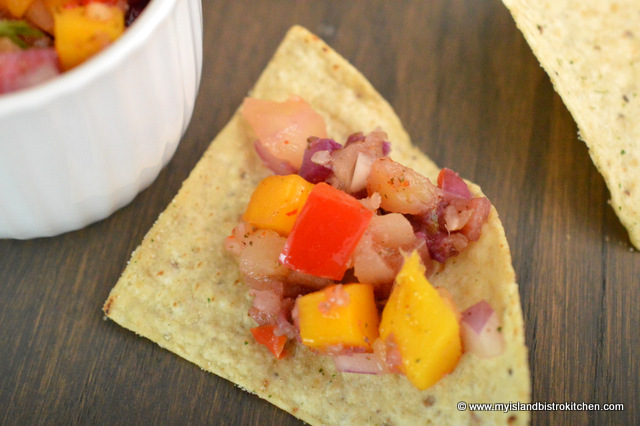
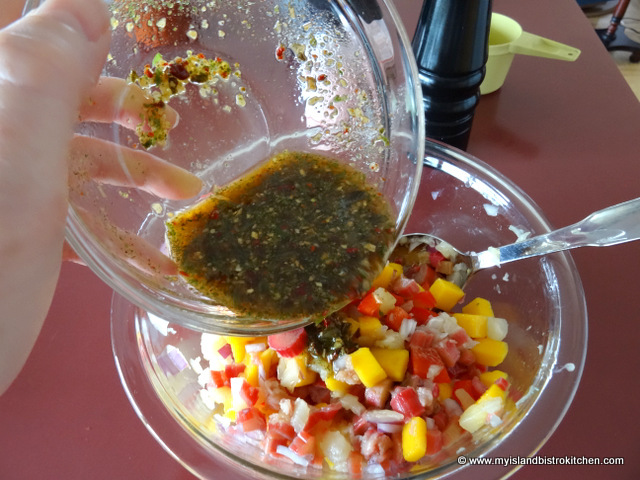
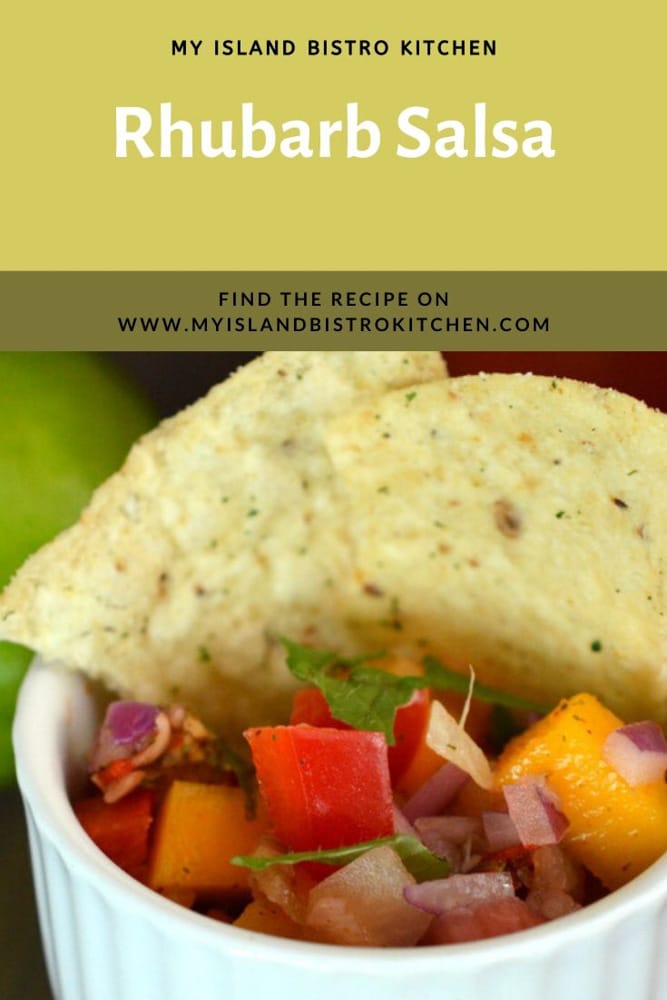
Rhubarb Salsa
Today, I am sharing the recipe I developed for rhubarb salsa. As you know, there has to be some kind of base for the salsa – something that gives it its bulk, if you will. For example, in many salsas, that tends to be a tomato base. In my recipe, which is a sweet salsa, I am using rhubarb as the base. Use young, thin rhubarb stalks for this recipe.
Rhubarb Salsa
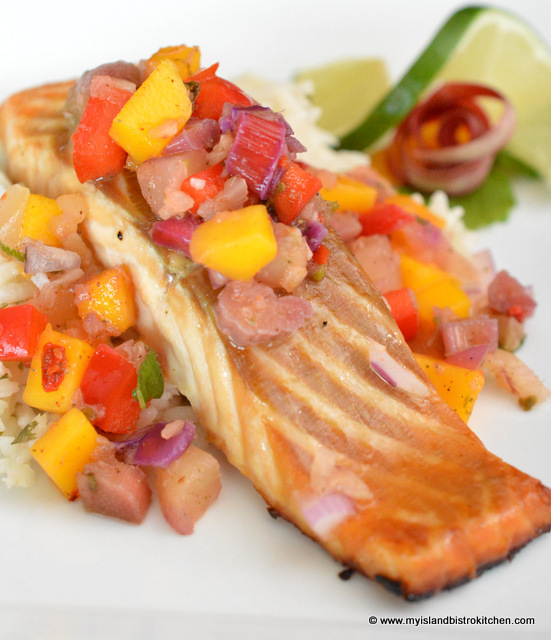
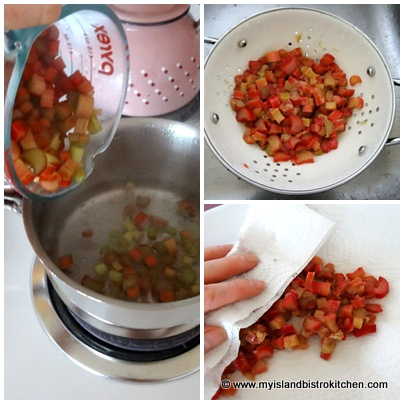
Rhubarb cooks quickly and can fast become sauce in which case in loses its shape. For this recipe, cook the rhubarb for only about 1 minute (or even less) and then quickly rinse it with cold water to immediately stop the cooking process. The rhubarb should be fork tender and still able to hold its diced shape and not be mushy. Because rhubarb does lose some of its bright color when cooked, I have added some highly colourful fruits and vegetables to make the salsa attractive – i.e., chopped mango, crushed pineapple, red pepper, and red onion.
Rhubarb Salsa
For sweetener, I have used maple syrup and you can use either plain syrup or a flavoured or infused version. Any flavour of dry salsa seasoning available can be used. Likewise, any flavour of balsamic vinegar can be used, even a traditional white balsamic. I typically use a honey ginger balsamic vinegar which is available from our local Liquid Gold and All Things Olive store here in Charlottetown as this vinegar flavour works quite well with the other ingredients in this salsa.
Rhubarb Salsa
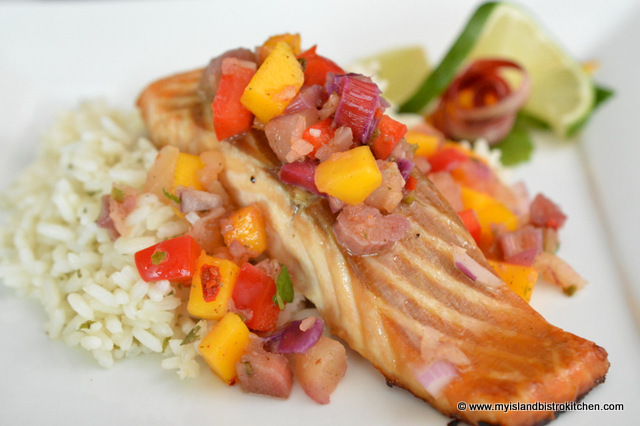
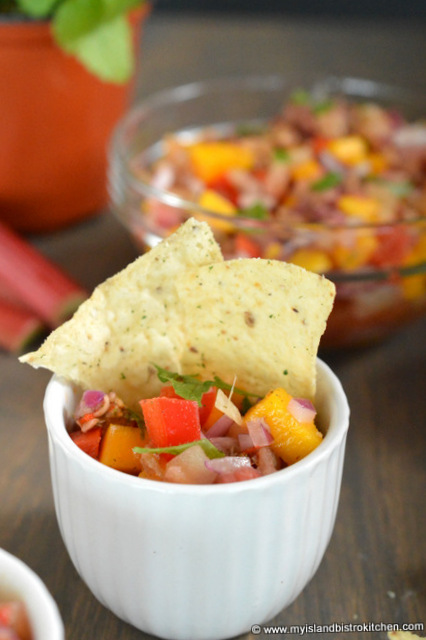
This salsa can be used on nachos or as a topping for fish, pork, or chicken. It adds color and flavour to many dishes.
Rhubarb Salsa on Salmon
Rhubarb Salsa
Ingredients:
2 cups rhubarb, finely diced ⅔ cup canned crushed pineapple (with juice) ⅓ cup red onion, diced ¾ cup mango, diced ¼ cup red pepper, diced Juice of ½ lime 1 tbsp maple syrup 1 tbsp honey ginger balsamic vinegar Zest of ½ lime Dry salsa seasoning mix of choice and of amount to taste preference Salt and pepper, to taste 1 – 2 tbsp chopped fresh lemon balm or cilantro leaves, to taste (optional)
Method:
Assemble ingredients.
Bring 1 cup of water to boil in pot. Add diced rhubarb and cook over medium heat for apx. 1 minute. Drain and immediately rinse rhubarb under cold water to stop the cooking process. Drain well and gently pat rhubarb dry with paper towel.
Combine crushed pineapple, onion, mango, and red pepper in bowl. Add the cooled rhubarb. Stir gently, trying not to break up the rhubarb.
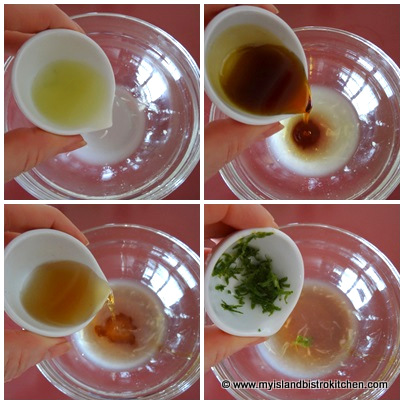
In small bowl, whisk together the lime juice, maple syrup, vinegar, lime zest, salt and pepper.
Stir in the dry salsa seasoning mix in an amount according to personal taste preference.
Pour over fruit and vegetables and stir gently.
If desired, add chopped lemon balm or cilantro leaves.
Refrigerate salsa at least 20 minutes before serving. Store in sealed container for up to two to three days in refrigerator.
Serve with nachos or as a topping on fish, pork, or chicken.
Tasty rhubarb-based salsa. Use on nachos or as a topping on fish, pork, or chicken
Course Snack
Cuisine Canadian
Keyword rhubarb salsa, salsa
My Island Bistro KitchenBarbara99
Ingredients
2cupsrhubarb, finely diced
⅔cupcanned crushed pineapple (with juice)
⅓cupred onion, diced
¾cupmango, diced
¼cupred pepper, diced
Juice of ½ lime
1tbspmaple syrup
1tbspbalsamic vinegar of choice
Zest of ½ lime
Dry salsa seasoning mix of choice and of amount to taste preference
Salt and pepper, to taste
1– 2 tbsp chopped fresh lemon balm or cilantro leaves, to taste (optional)
Instructions
Assemble ingredients.
Bring 1 cup of water to boil in pot. Add diced rhubarb and cook over medium heat for apx. 1 minute. Drain and immediately rinse rhubarb under cold water to stop the cooking process. Drain well and gently pat rhubarb dry with paper towel.
Combine crushed pineapple, onion, mango, and red pepper in bowl. Add the cooled rhubarb. Stir gently, trying not to break up the rhubarb.
In small bowl, whisk together the lime juice, maple syrup, vinegar, lime zest, salt and pepper.
Stir in the dry salsa seasoning mix.
Pour over fruit and vegetables and stir gently.
If desired, add chopped lemon balm or cilantro leaves.
Refrigerate salsa at least 20 minutes before serving. Store in sealed container for up to two to three days in refrigerator.
Serve with nachos or as a topping on fish, pork, or chicken.
Thank you for visiting “the Bistro” today. If you enjoyed this posting and recipe, please share it on your social media websites.
Connect with “the Bistro” through the following social media:
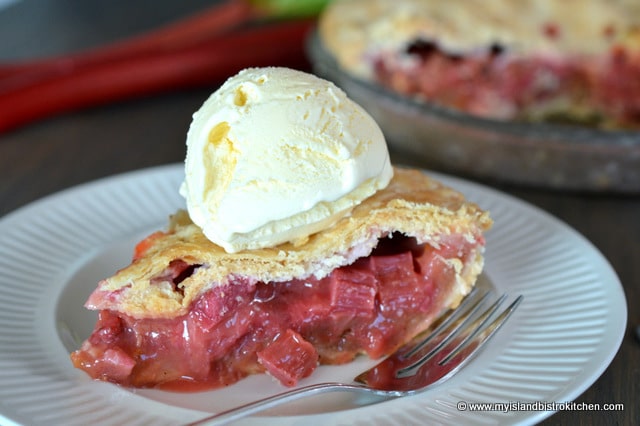
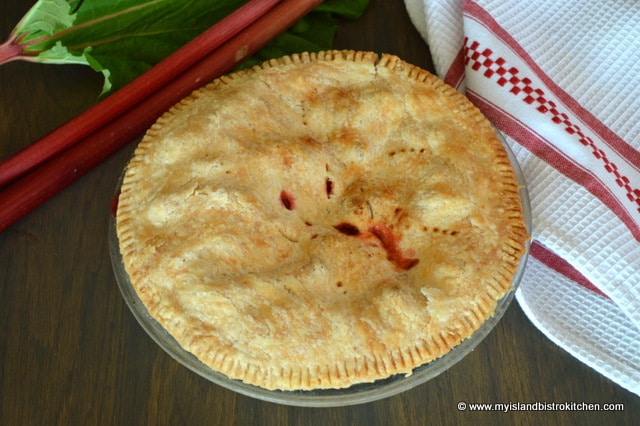
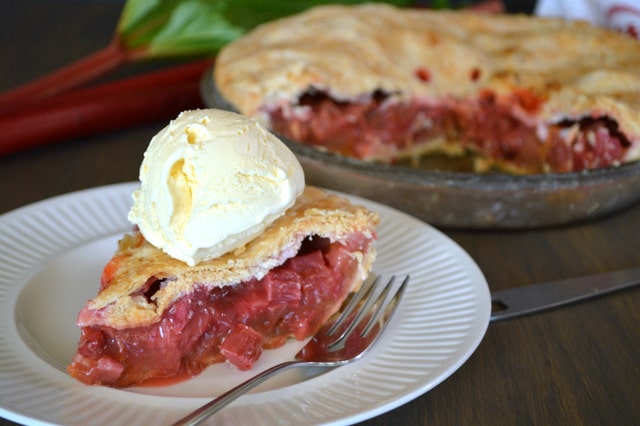
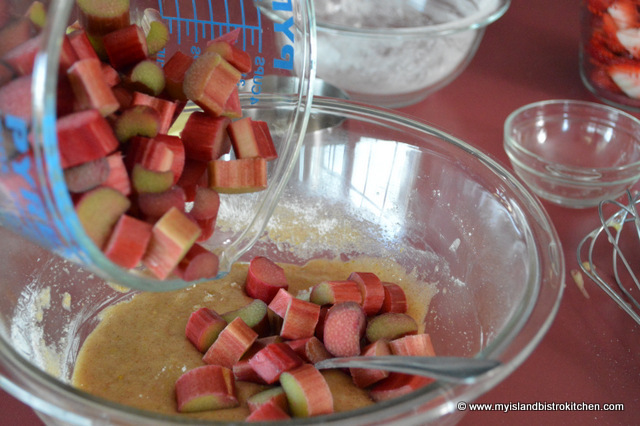
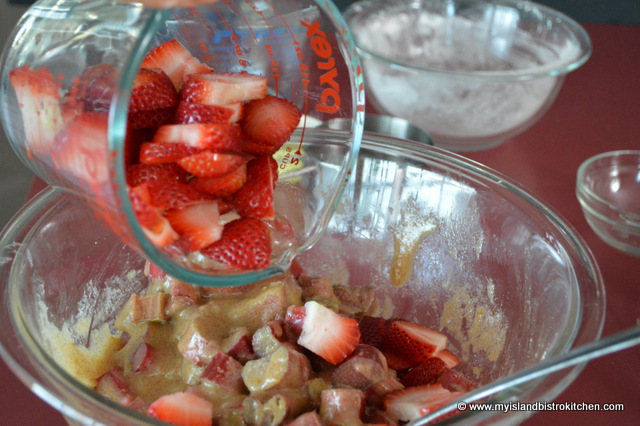
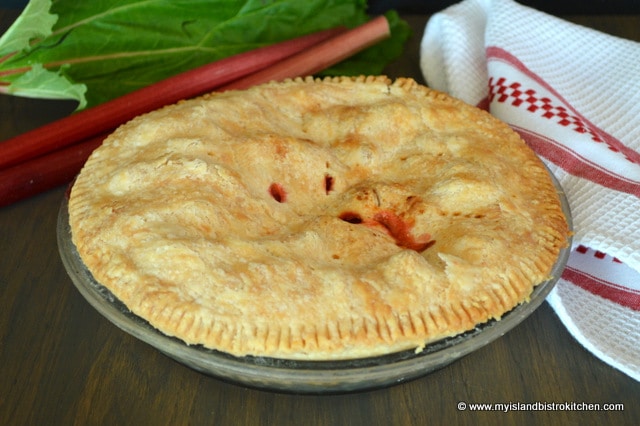
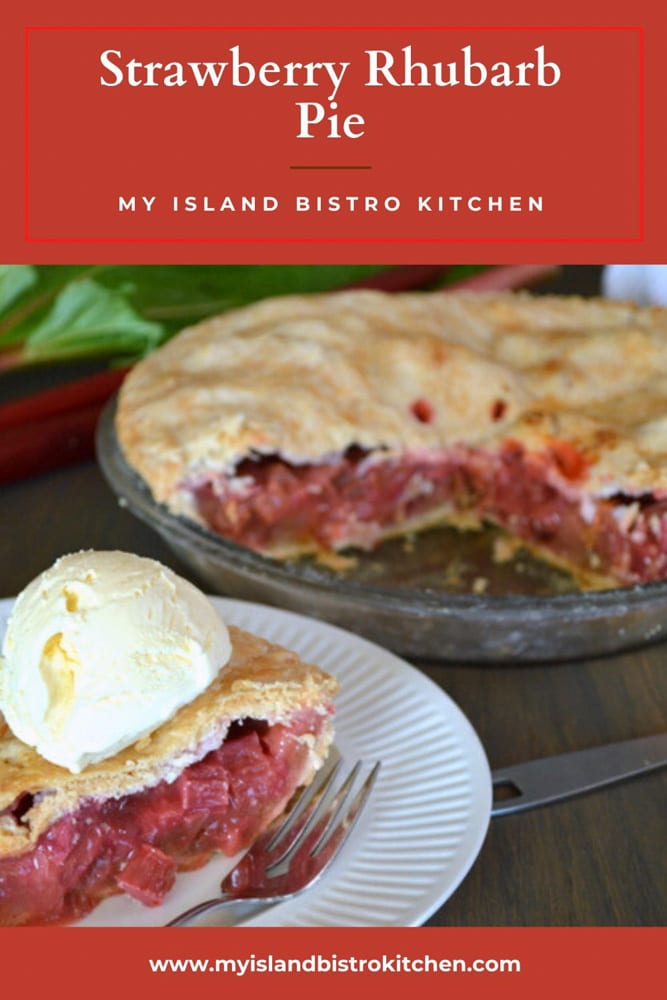
Strawberries and rhubarb are always a winning combination as their flavors and textures play off well against each other. On PEI, there is a very short window of opportunity to have both fresh rhubarb and Island strawberries available at the same time. So, if you are lucky enough to have both available, now is the time to make this delicious Strawberry Rhubarb Pie!
While it is possible to use frozen rhubarb in the strawberry rhubarb pie recipe I am sharing, the strawberries do need to be fresh, not frozen, since frozen berries will release too much moisture into the pie filling.
Strawberry-Rhubarb Pie
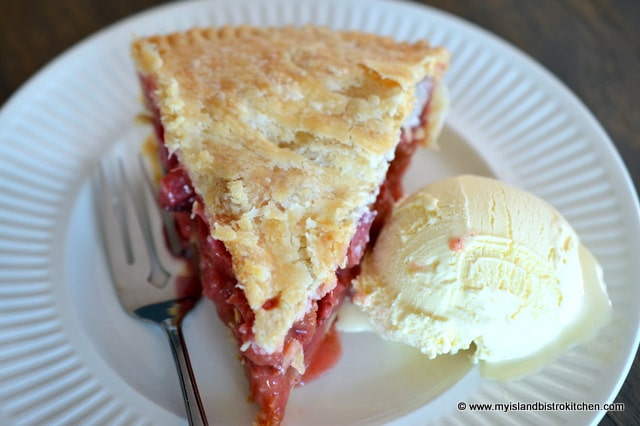
Lightly spiced, this pie is a summertime treat, especially when served with a scoop of high-quality French vanilla ice cream. This is a double crust pie and you can find my pastry recipe by clicking here.
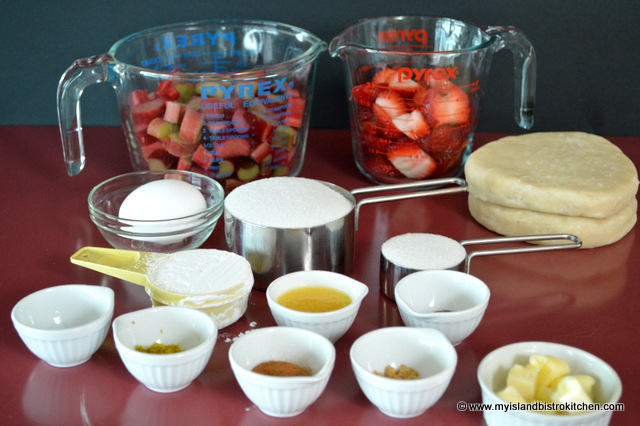
1¼ cups white sugar ¼ cup cornstarch ¼ tsp salt 1 tsp cinnamon ¼ tsp ginger Pinch nutmeg 1½ tsp grated orange rind 1 egg, lightly beaten 1 tbsp orange juice 1 tbsp butter cut into pieces
Method:
Assemble ingredients.
Preheat oven to 425°F.
Grease 9” pie plate. Roll out pastry and line pie plate, trimming pastry to fit.
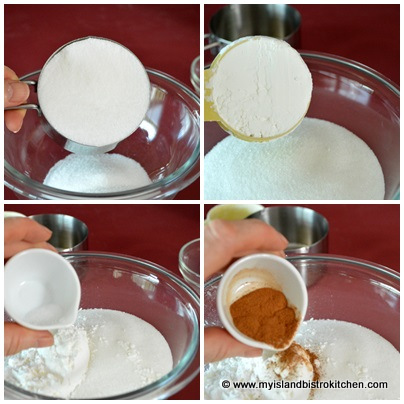
In small bowl, mix sugar, cornstarch, salt, spices, and grated orange rind.
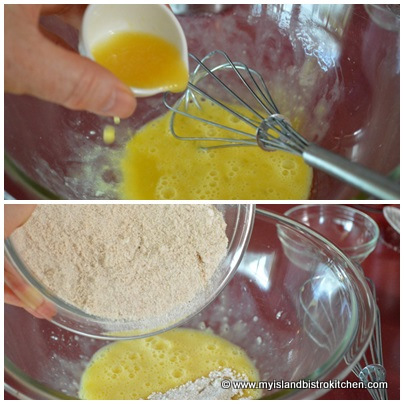
In separate bowl, beat egg with orange juice. Blend in dry ingredients.
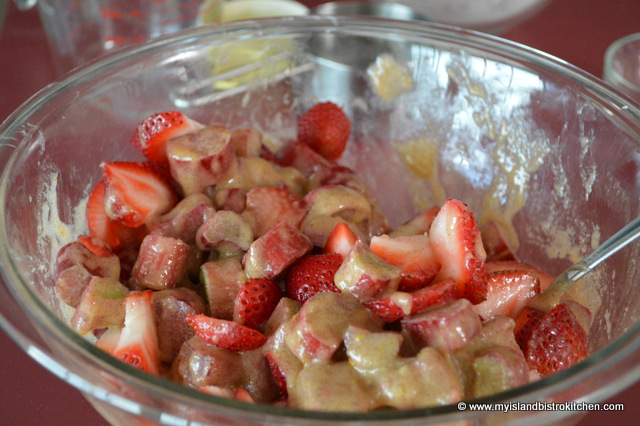
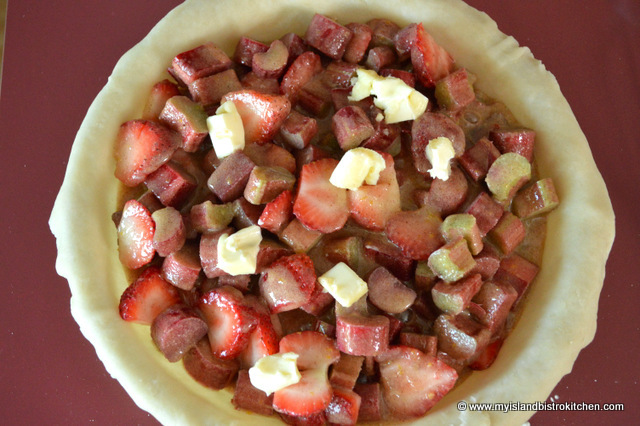
Add rhubarb and strawberries and stir gently to mix.
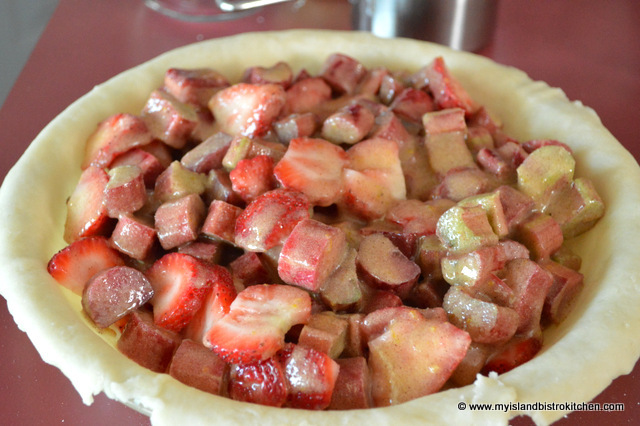
Transfer filling to prepared pie crust.
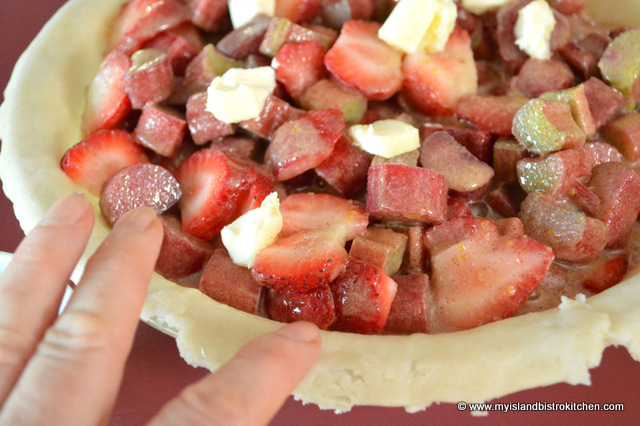
Dot with butter.
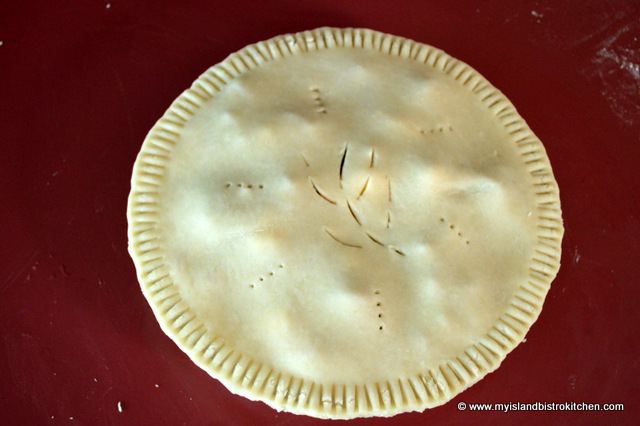
Dampen edges of pie pastry with a finger dipped in water.
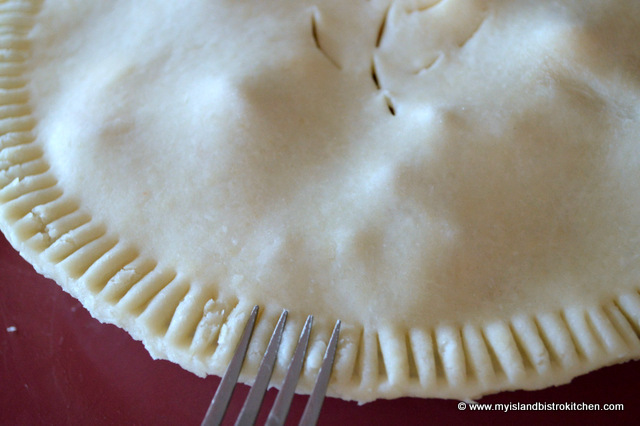
Roll out remaining pastry for top crust. Place over filling and trim to fit. Crimp or press edges of pastry together with fork tines to seal.
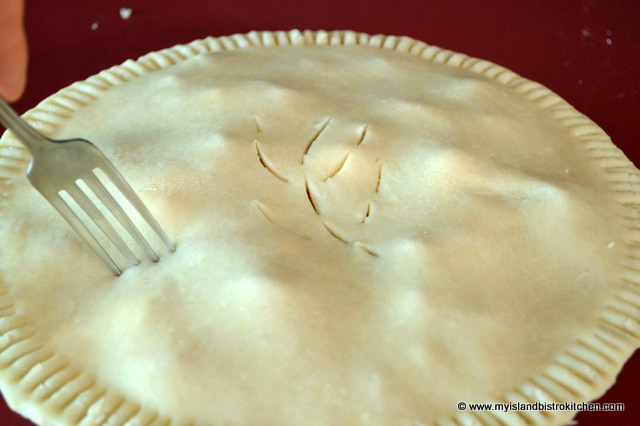
Cut slits in top of pastry and prick with fork tines in several places to allow steam to escape as the pie bakes.
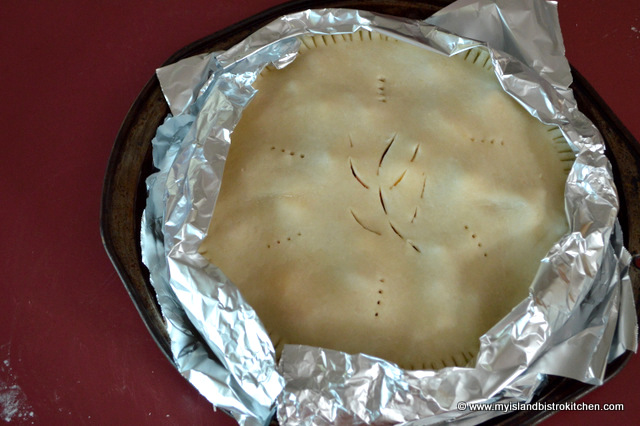
Circle edge of pie with a collar of tin foil to prevent over-browning. Remove this collar after 35 minutes of baking to allow edges to bake and brown.
Place pie on rimmed baking sheet to catch any drips. Bake 15 minutes at 425°F then decrease temperature to 375°F and bake for approximately 45 minutes longer or until pastry is golden brown and fruit is cooked.
Remove pie from oven and cool completely before slicing and serving.
A lightly spiced double-crusted pie that combines two of summer's best flavours.
Ingredients
Pastry for 2-crust 9” pie
3 cups rhubarb, cut into ½” pieces
1½ cups fresh strawberries, sliced
1¼ cups white sugar
¼ cup cornstarch
¼ tsp salt
1 tsp cinnamon
¼ tsp ginger
Pinch nutmeg
1½ tsp grated orange rind
1 egg, lightly beaten
1 tbsp orange juice
1 tbsp butter cut into pieces
Instructions
Assemble ingredients. Preheat oven to 425°F.
Grease 9” pie plate. Roll out pastry and line pie plate, trimming pastry to fit.
In small bowl, mix sugar, cornstarch, salt, spices, and grated orange rind.
In separate bowl, beat egg with orange juice. Blend in dry ingredients. Add rhubarb and strawberries and stir gently to mix. Transfer filling to prepared pie crust. Dot with butter.
Dampen edges of pie pastry with a finger dipped in water. Roll out remaining pastry for top crust. Place over filling and trim to fit. Crimp or press edges of pastry together with fork tines to seal. Cut slits in top of pastry and prick with fork tines in several places to allow steam to escape as the pie bakes.
Circle edge of pie with a collar of tin foil to prevent over-browning. Remove this collar after 35 minutes of baking to allow edges to bake and brown.
Place pie on rimmed baking sheet to catch any drips. Bake 15 minutes at 425°F then decrease temperature to 375°F and bake for approximately 45 minutes longer or until pastry is golden brown and fruit is cooked.
Remove pie from oven and cool completely before slicing and serving.
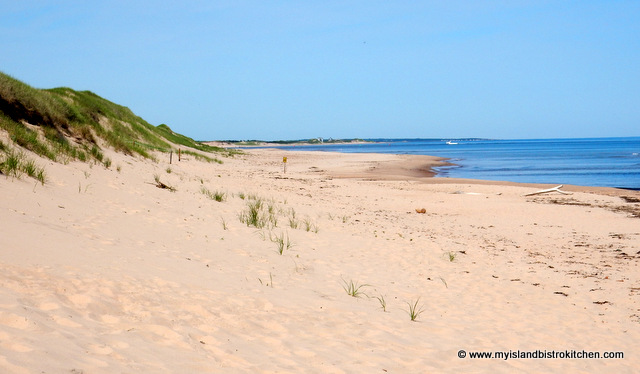
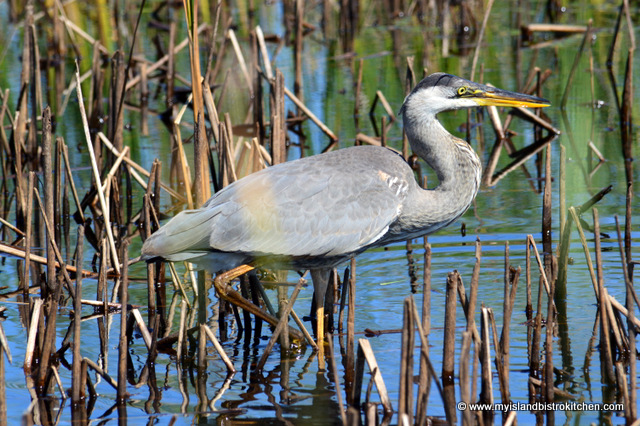
One of our usual Canada Day traditions is to go on a red-themed picnic. This year, we headed East to the Greenwich National Park, not far from St. Peter’s Bay. I have been to this park several times before and am always awestruck by its natural beauty. Before I share photos of our Canada Day picnic, I thought you might like to see photos of the beauty that is Greenwich.
Greenwich National Park, PEI (Blue Heron in Foreground)
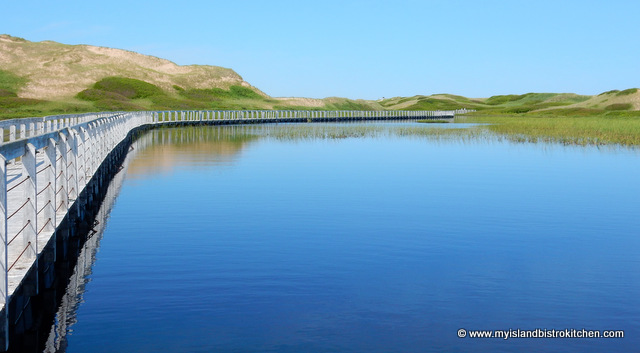
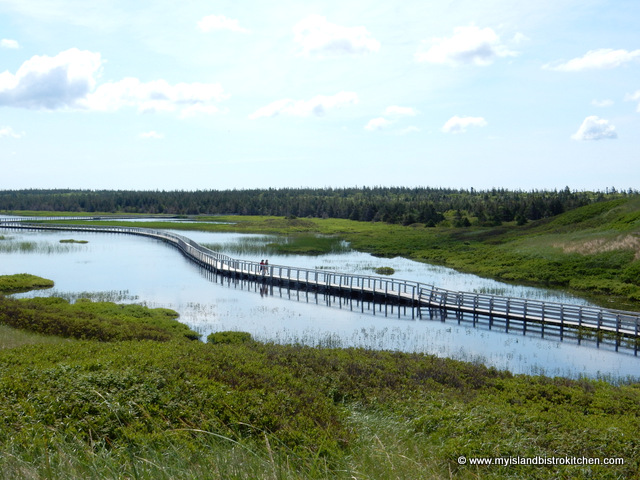
From the parking lot, the trek on the path through the fields and woods and out over the floating boardwalk to the magnificent beach and back is about 5 km. It’s mostly flat terrain (except for a very short jaunt through the woods) and, for the most part, easy walking.
Boardwalk at Greenwich National Park, PEI
The only hitch is that you have to share nature with the mosquitoes on the walk on the trail through the field and the woods to reach the boardwalk so, if you head to Greenwich, be sure to bring along some insect repellent to make the experience more enjoyable. Depending on the weather, some sunscreen is also advised. It’s also a good idea to bring along some water to stay hydrated.
The pink sand dunes of Greenwich National Park, PEI
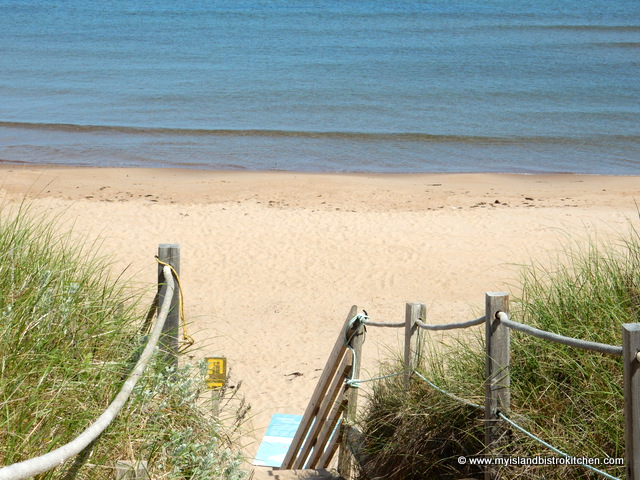
The photo you see above is a typical scene along the floating boardwalk at Greenwich National Park. The pink sand dune in the background is all the work of Mother Nature. At the end of the boardwalk, you arrive at the magnificent beach shown in the photos below.
Entering the beach from the end of the floating boardwalk at Greenwich National Park, PEI
You won’t find a finer beach anywhere than this one at Greenwich. I always refer to it as the perfect, unblemished jewel amongst our system of national parks on the Island.
Beach at Greenwich National Park, PEI
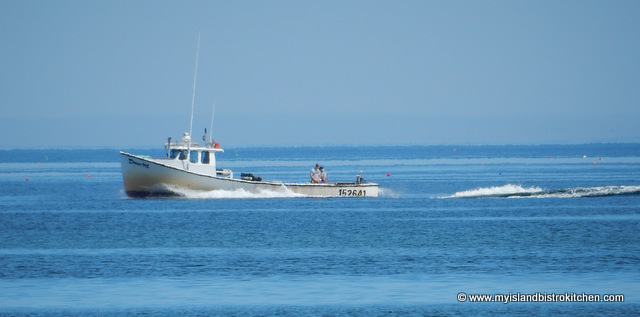
During lobster fishing season, and from the vantage of this beautiful beach, it’s not uncommon to see the fishing boats returning from the Gulf of St. Lawrence to the nearby harbour with their catch of the day.
Fishing boat returning to port with the day’s catch
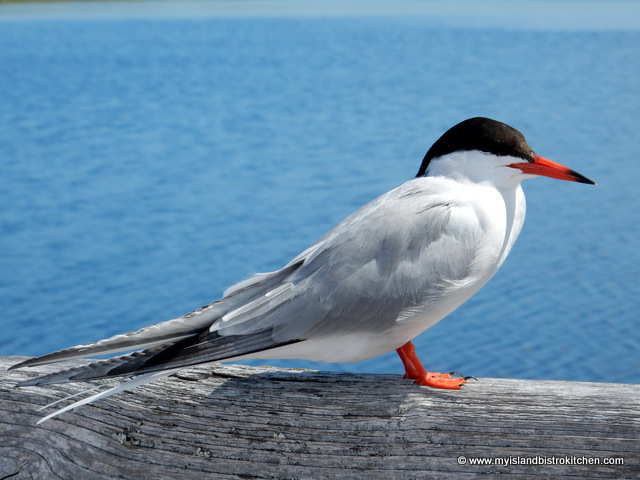
Apart from the scenery, one of the wonderful aspects of Greenwich National Park is the variety of wildlife and birds. Some, like the Common Tern below, are quite willing to pose for photos!
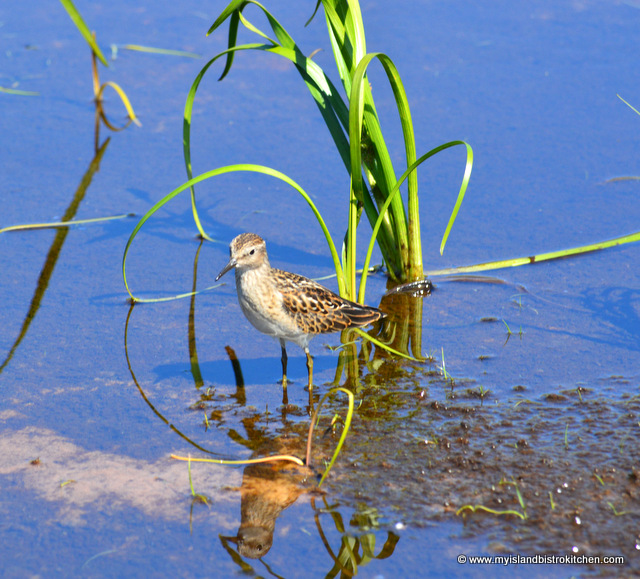
The little Sandpiper below chose a lovely natural backdrop for its portrait!
Blue herons, common to PEI, are often seen in and around the waters between the sand dunes at Greenwich.
Blue Heron at Greenwich National Park, PEI
These are but a few of the many different kinds of birds often sighted at Greenwich so a leisurely walk on the boardwalk between the dunes offers a great opportunity for bird enthusiasts.
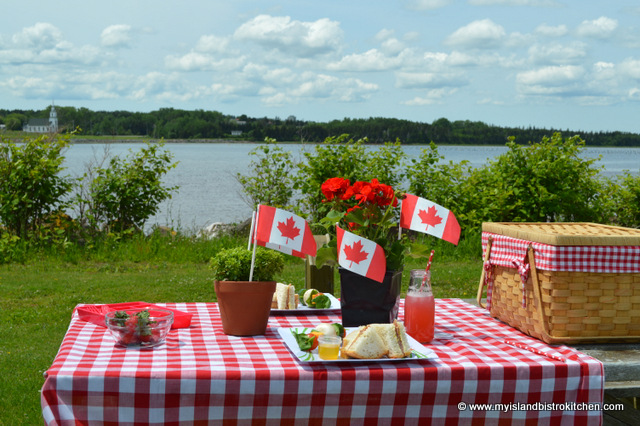
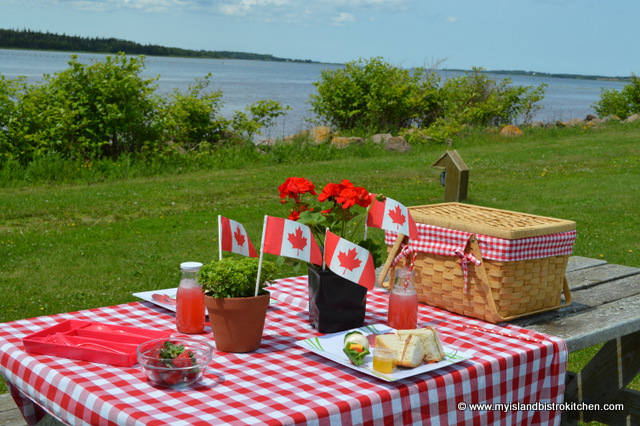
By the time we had finished our morning hike through Greenwich, we had worked up an appetite. I had packed a simple picnic lunch and made sure it was stowed in an insulated cooler with lots of ice packs because temperatures soared to 28°C on Wednesday. I use my traditional non-insulated picnic basket (shown in the photo below) to transport non-perishables.
On the way to Greenwich through St. Peter’s Bay, I had noticed a small park with picnic tables by the water. I thought, even though the lighting for photography may not have been the best, this would be a good spot for our picnic.
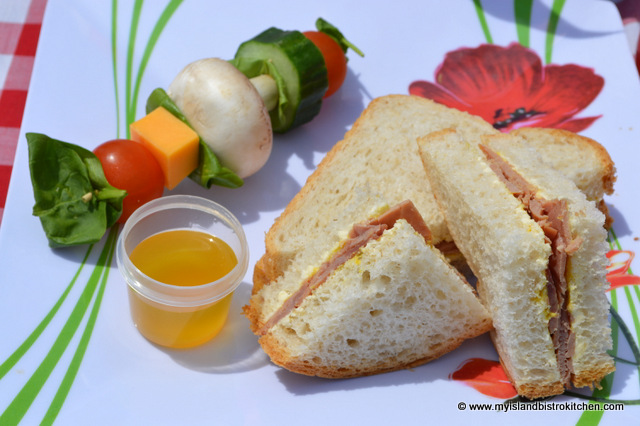
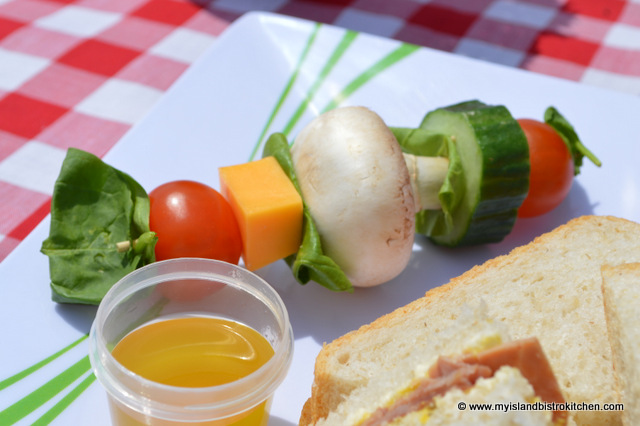
My picnic menu was not elaborate and was quick and easy to pull together. Ham sandwiches on oat bran bread were the main feature accompanied by salad on a stick with small individual containers of vinaigrette for dipping the vegetables.
Any combination of vegetables and cheese can be selected for threading on to the skewers. This is a simple way to serve salad ingredients and can be prepared before leaving home. It also cuts down on the number of containers of ingredients that need to be transported to the picnic site as well as dirty salad bowls to have to bring back home. I try to pack as minimally and efficiently as I can because I’m never certain how far I might be parked from the picnic table site.
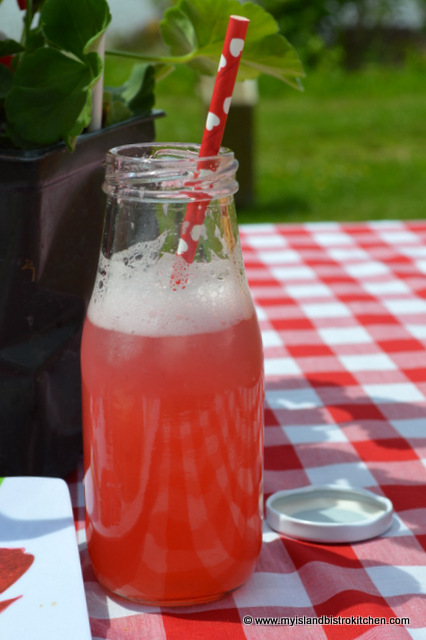
I had just made a fresh batch of rhubarb cordial so that was our red beverage which I served in these cute little glass milk bottles along with red and white straws.
I brought along some fresh strawberries for a light dessert (are you seeing the red theme I have going on here!)
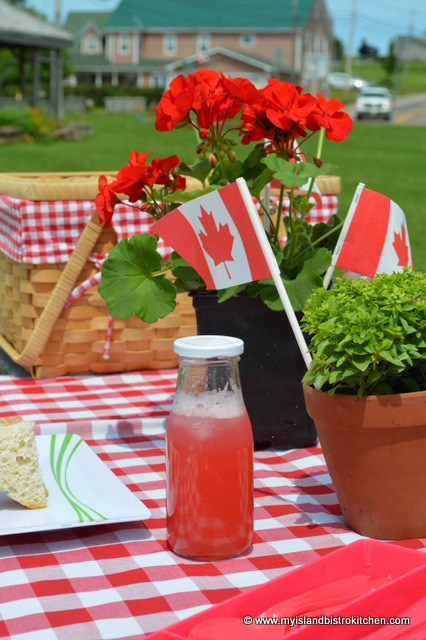
I had stopped at Jewel’s Country Market on my way East and picked up this gorgeous red geranium which made a great centerpiece, especially when decked with mini Canada flags. I had taken along one of my small potted herbs which could also be used as a centerpiece because I wasn’t certain I would be able to find a red geranium. Yes, even on a picnic, I like to see a nicely set table. 🙂
I like small pots of herbs because I can use them in many ways and, while we do have a small in-ground herb garden, I also keep a number growing in pots over the summer. The benefit of having some herbs in pots is that they can be transported to wherever they are needed. I often use them as table centerpieces because, as well as being decorative, they can also be clipped and used to flavour food. In the case of our picnic, the basil was used to flavour the vinaigrette.
This was how we celebrated Canada Day 2015. I hope you have enjoyed this brief photo tour of PEI’s Greenwich National Park, a unique natural treasure we Islanders are lucky to have in our midst. If you live on PEI, or have the opportunity to visit the Island, I hope you will travel to Greenwich and experience its beauty for yourself.
To view previous postings of our Canada Day celebrations in years past, click on the following links: 2012, 2013, and 2014.
If you enjoyed this posting, please share it on your social media sites.
——————————————————————————–
Thank you for visiting “the Bistro” today. Connect with “the Bistro” through the following social media:
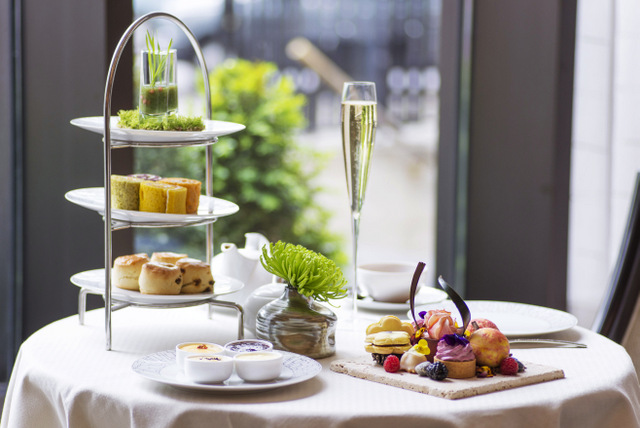
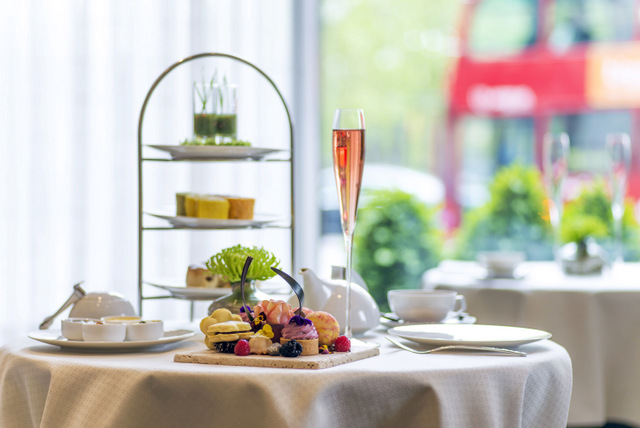
Scents of Summer Afternoon Tea (Photo courtesy of the Intercontinental London Park Lane Hotel)
I was recently in London and, of course, a visit to London for me without having afternoon tea would not be complete! On each visit, I aim to have tea at a different venue.
My travels this visit took me to the Intercontinental London Park Lane Hotel which occupies a prominent and historic location near London’s Hyde Park, in the heart of Mayfair. Afternoon tea at the Park Lane is served in the Wellington Lounge which occupies the former site of 145 Piccadilly that was Her Majesty the Queen’s former childhood home. This location remained her home until 1937 when the family moved to Buckingham Palace. The home itself was destroyed during war. Between 1968-1975, the Intercontinental London Park Lane Hotel was constructed on the site.
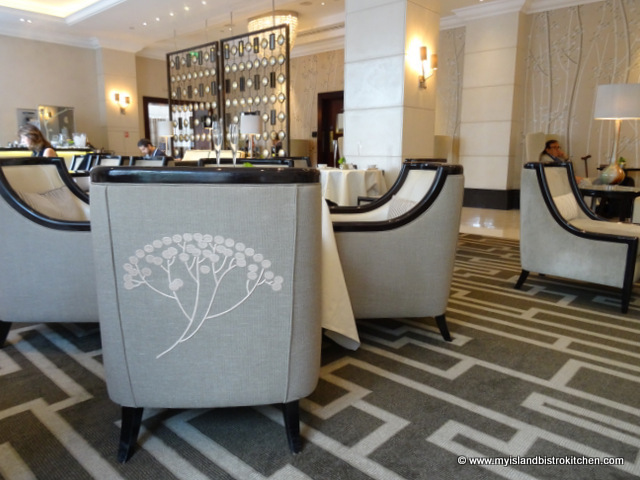
The Wellington Lounge of the Park Lane, in its taupe and white hues, is elegant and sophisticated, yet casual. Comfy chairs invite a time of leisure lingering over tea. Three menu options are available for afternoon tea: The Market Garden Tea, the Royal Tea, and a seasonal tea which changes regularly throughout the year. We experienced the new “Scents of Summer” Afternoon Tea that boasts a menu inspired by the beauty of British summer time. The menu had only been introduced four days prior to our arrival and will be available throughout the summer season until September 27, 2015.
Scents of Summer Afternoon Tea (Photo Courtesy of Intercontinental London Park Lane Hotel)
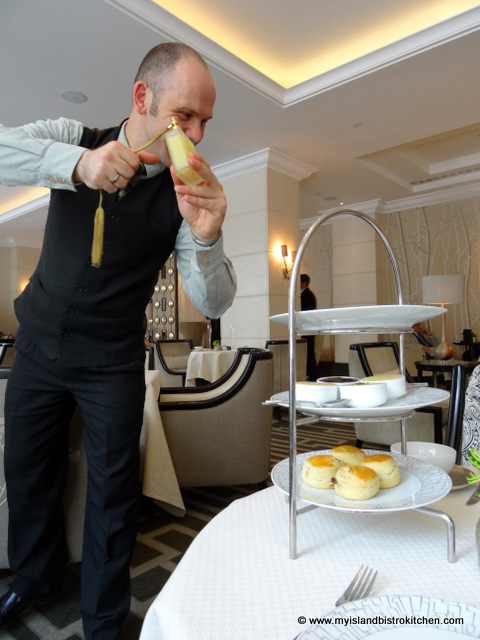
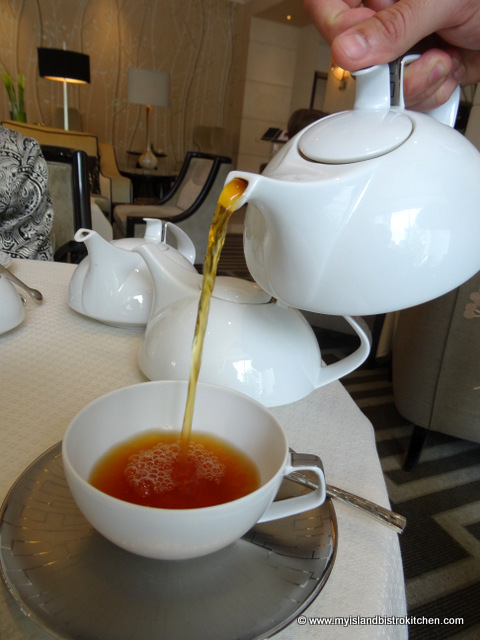
Our afternoon tea was as much a treat for all the senses as it was for the palette. Unhurried, my Mom and I spent a most enjoyable three hours savoring the creativity of Executive Chef Ashley Wells and Edward Bodenham of British Family Perfumers, Floris London. We found the servers to be knowledgeable, attentive, and accommodating without being intrusive. Rather than simply delivering the customary three-tier server with all the food on it at once, the Scents of Summer was served in individual courses. For each course, Luigi, Senior Associate, Tea and Coffee Expert, explained the food, the best order in which to consume items, and suggested appropriate tea pairings to complement the food.
We first began with a palette cleanser of rose pearl wheatgrass, bushe berries, gooseberry, and citrus mist. This grass-based starter, served on a small tuft of grass, was a tribute to the earth.
Palette Cleanser: Rose pearl wheatgrass, bushe berries, gooseberry, and citrus mist
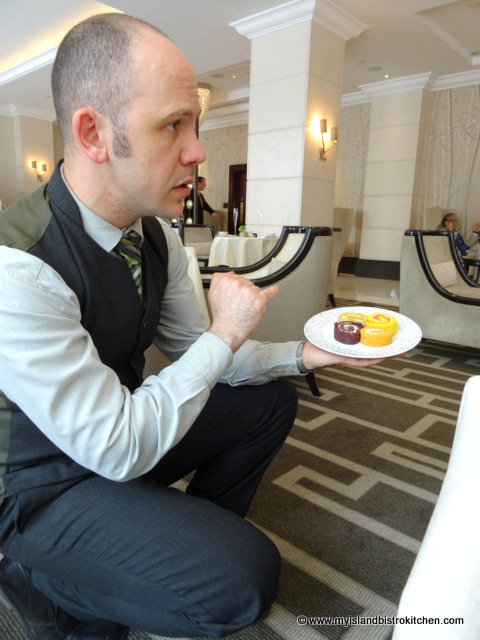
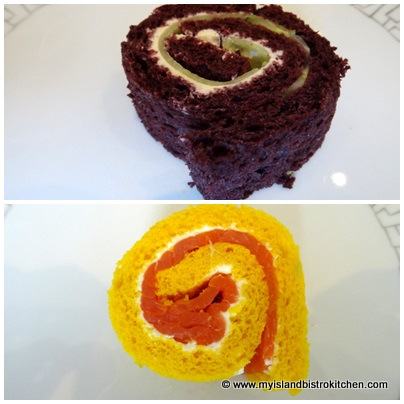
This was followed by a selection of four different, colourful, and tasty pinwheel/scroll sandwiches presented on the plate in a design that resembled the shape of a butterfly.
Pinwheel/Scroll Sandwiches
Luigi recommended the order in which to most effectively consume the pinwheels starting with a light rose-pickled cucumber and Mascarpone on Peruvian bread followed by the more hearty salmon and Bergamot served on lemon bread.
We then progressed on to a slightly spicy pink peppercorn and thyme chicken pinwheel on tomato bread and, finally, the honey roast pumpkin with crumbled feta on spinach bread.
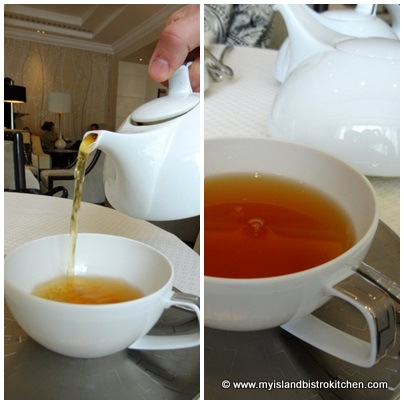
The tea we enjoyed with this course was Second Flush Darjeeling which some claim to be the ‘champagne of tea’.
Second Flush Darjeeling Tea to Accompany Sandwich Course
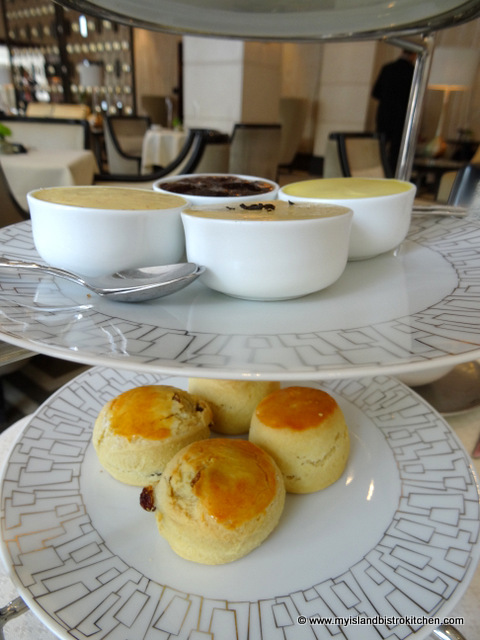
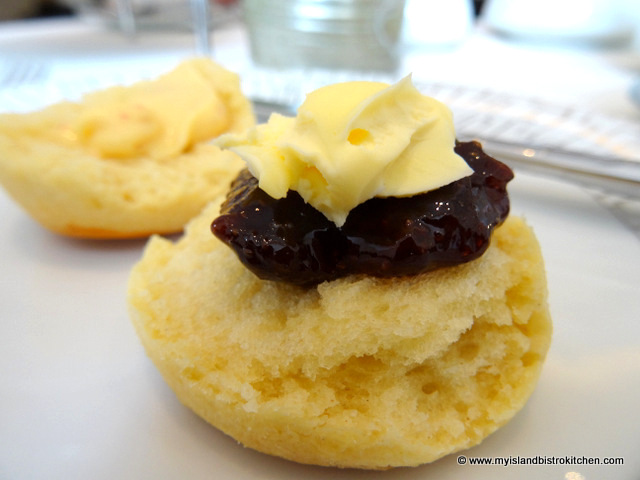
The server plates were deftly removed and were replaced with the elements of the course that featured scones. Dainty buttermilk scones, fresh and still warm from the oven, were brought to the table and placed on the server along with small dishes of Devon clotted cream, wild strawberry jam, lemon curd with pink peppercorn, and Bergamot-infused Earl Grey butter.
Scones Course
This was accompanied by a spritz of a citrus-based spray as a “sensory” introduction to the scones course.
The scones – two plain and two sultana — were the most tender scones I have ever tasted!
Luigi recommended to first spread the jam on the scone half, then top it with the clotted cream. Literally, these scones melted in the mouth!
The recommendation of tea to pair with the scones was a full body Earl Grey Assam Tea. I must admit I have never been an Earl Grey tea fan and I usually put milk in my tea. However, Luigi recommended no milk and I found this tea was indeed a fine complement to the scones course.
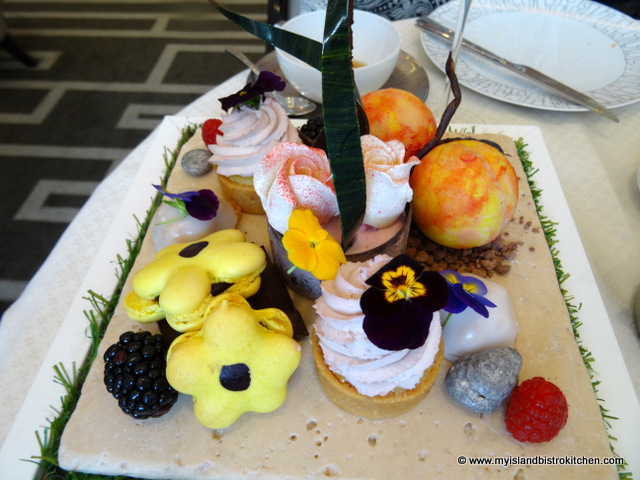
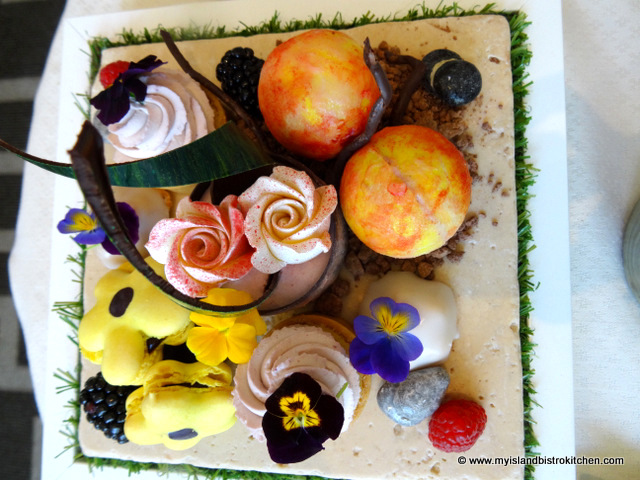
Then came the pièce de résistance – the selection of sweet indulgences. Truly, these were nothing short of a work of art in the presentation that was only surpassed by the sublime melange of flavors, scents, and tastes.
Again, Luigi expertly explained each item on the tray, offering suggestions for the order in which to partake. He also recommended that the palette be cleansed and refreshed via the fresh summer berries or chocolate “pebbles” in between consuming each sweet so that the true flavors of each could be fully appreciated.
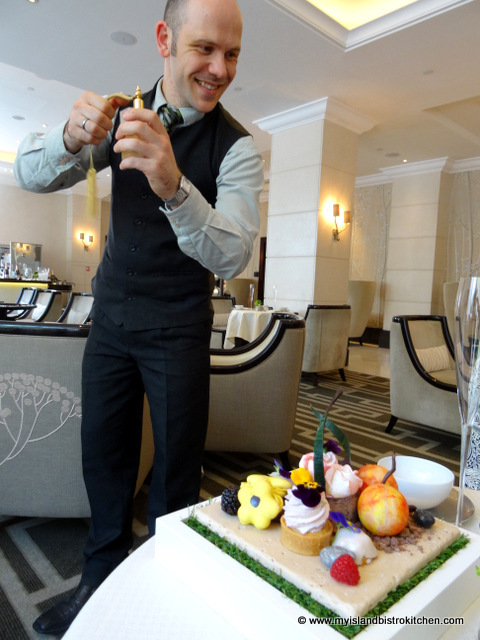
Everything you see on the tray in the photo above was edible, including the very realistic looking pebbles and the fresh pansies. A quick spritz of a floral spray with top notes leaning into Jasmine scents set the stage reminiscent of an English country garden in summer.
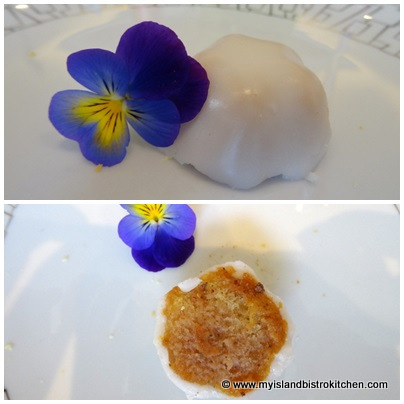
We first sampled the petite Jasmine Tea Cake which was delicately flavored and ever-so-tasty.
Jasmine Tea Cake
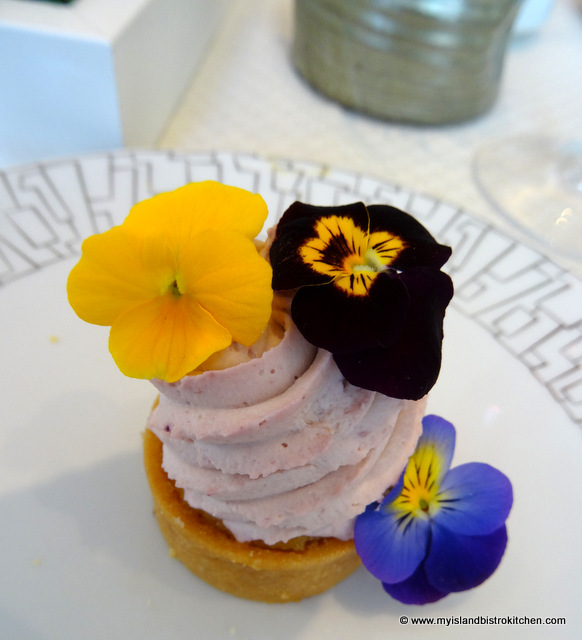
We next savoured the luscious Violet Cream and Grapefruit Tart.
Violet Cream and Grapefruit Tart
Then, we moved on to the Bergamot and blackcurrant flower macarons which were ever so light, delicately chewy, and yet airy. For those who are connoisseurs of French macarons, they know that it is a skill to achieve the perfect macaron and these certainly fell within that category.
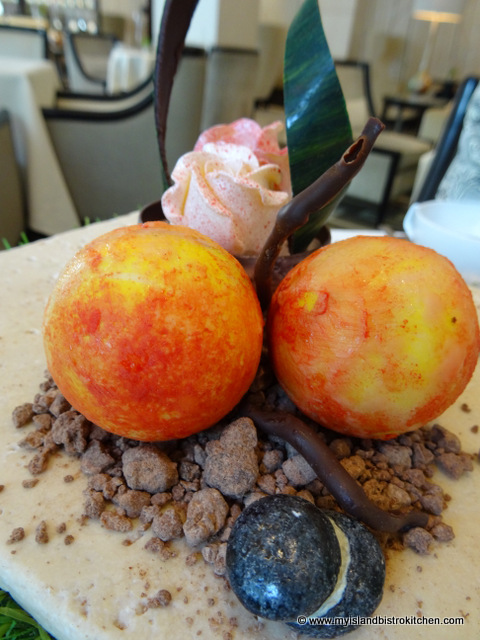
This was followed by the Peach Melba mousse encased in chocolate to create a realistic looking peach that could have just been picked from a tree.
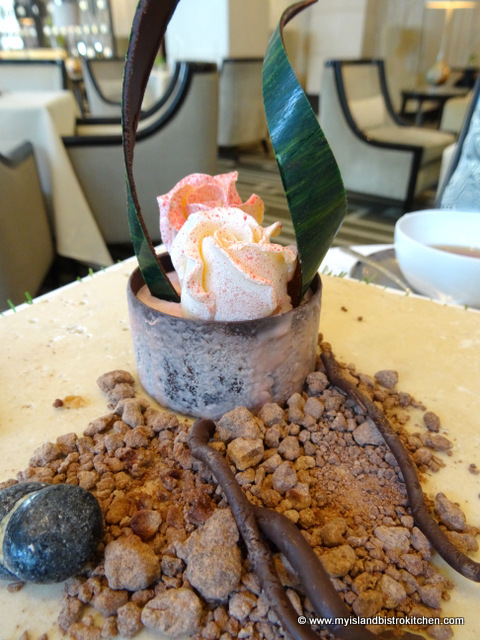
The grand finale, the “Flower Pot”, was designed to be shared between two people. This consisted of rose water and pink peppercorn jelly with wild strawberry mousse served in a chocolate Terracotta pot and decorated with chocolate roses.
The tea recommended for this course was the #1 Park Lane Signature Tea which proved itself a wonderful accompaniment to the desserts.
A glass of Moët & Chandon berry floral Rosé was served with the dessert course.
Overall, I was highly impressed with the calibre of food and level of service and hospitality at the Intercontinental London Park Lane’s Wellington Lounge. I found the Scents of Summer Afternoon Tea included traditional tea items like the scones but also stepped it up a notch with the creativity of the choice of bread, and ingredients in, the sandwich pinwheels/scrolls and the selection of sweets that comprised the dessert course. We quite enjoyed having the food served in courses as opposed to simply having a standard three-tier server delivered to the table with sandwiches, scones, and sweets all on it. It lent an element of surprise and anticipation to the experience which was relaxing and unhurried. I was also impressed with the expert advice on tea pairing with each course which I felt added to the quality experience.
If you are in London this summer and go to only one afternoon tea, I recommend the Scents of Summer at the Intercontinental London Park Lane Hotel.
If you are in London this summer and go to only one afternoon tea, I recommend the Scents of Summer at the Intercontinental London Park Lane Hotel. Great thought and care has been taken with the creation of this afternoon tea menu. We spent a most relaxing and enjoyable afternoon over tea at the Park Lane and it was one of the highlights of our 2015 visit to London. Now, if I could just justify another trip to London, I would go in December to experience their holiday tea which Chef Wells is already designing. Based on his Scents of Summer creation, I can only imagine how extraordinary the Christmas afternoon tea will be.
The Scents of Summer afternoon tea experience costs ₤45 + gratuity (generally about 15%) which, at the time of writing totals approximately $100. (CDN) per person.
The Intercontinental London Park Lane Hotel is located at One Hamilton Place, Park Lane, London, England, W1J 7QY (Tel: +44(0)20 7409 3131. Reservations are required for afternoon tea which is served from 1:00pm – 5:00pm daily. For more information, visit the hotel’s website.
My thanks to the Park Lane for the opportunity to experience their Scents of Summer Afternoon Tea and for the fine hospitality. My afternoon tea at the Intercontinental London Park Lane Hotel was complimentary for the purpose of conducting a review of the new Scents of Summer offering. However, this in no way influenced my opinions of the afternoon tea experience. All opinions expressed in this review are purely my own.
To read my reviews of afternoon tea at the Georgian Room at Harrods and at The Orangery at Kensington Palace, click here.
———————————
Thank you for visiting “the Bistro” today. Connect with “the Bistro” through the following social media:
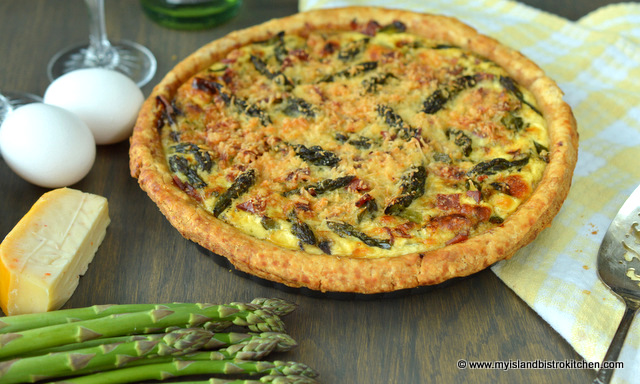
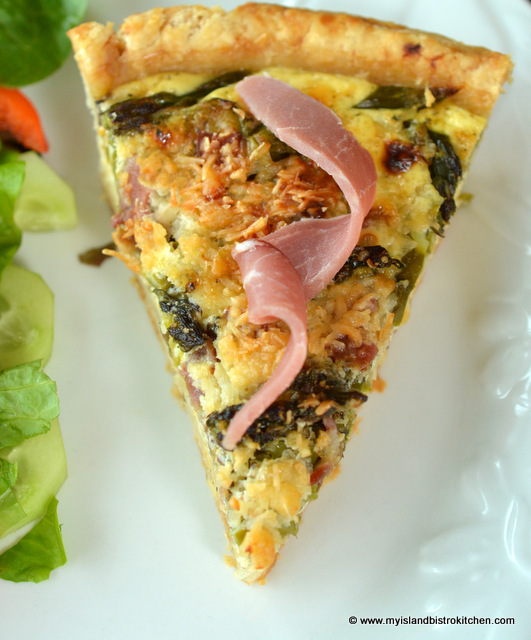
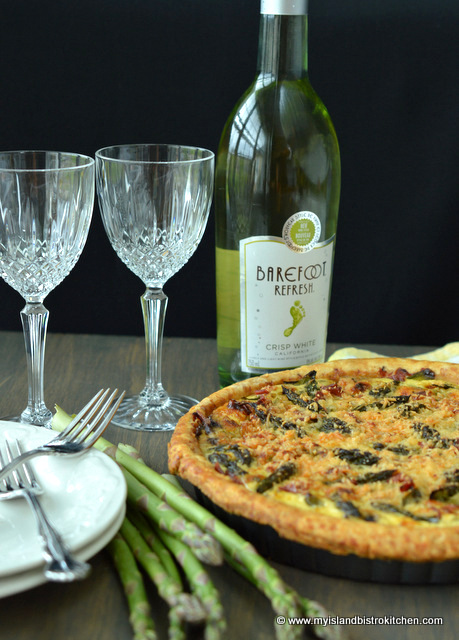
One of the first local veggies to appear on PEI each year is asparagus. This vegetable is very versatile and is often used not only for its earthy flavor but also for its presentation. With its long straight stems with a texture tip end, asparagus turns a bright green color when cooked so it plates well and makes a meal attractive.
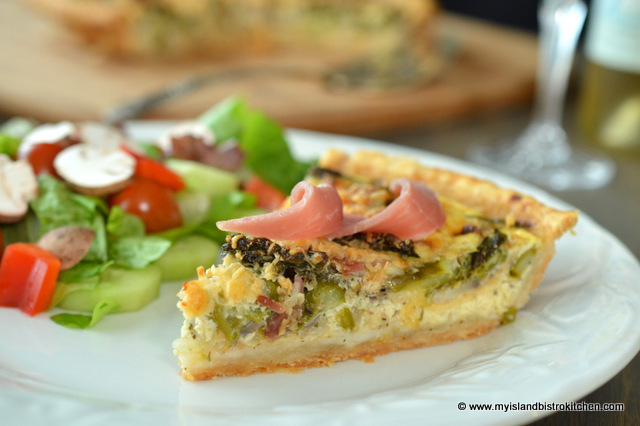
This year, I created an asparagus quiche that can be eaten warm or at room temperature which makes it a good buffet or picnic food. Pair it with a good green salad and it is suitable for brunch, lunch, or an informal supper.
What makes a quiche flavorful (in addition to the primary ingredient(s)) is the egg-milk filling. The contributing factors to the flavor depend on what cheese blend is used and the choice of herbs and spices. In fact, I often use my basic quiche filling and change up the cheeses and seasonings and end up with a brand new quiche.
I recommend using at least whole milk (or, if you want to make it really rich, either cream or blend) in a quiche. Using skim or partly skim milk will not give the creamy texture that is characteristic of quiches and I find the no-fat/low fat milk makes a more runny filling.
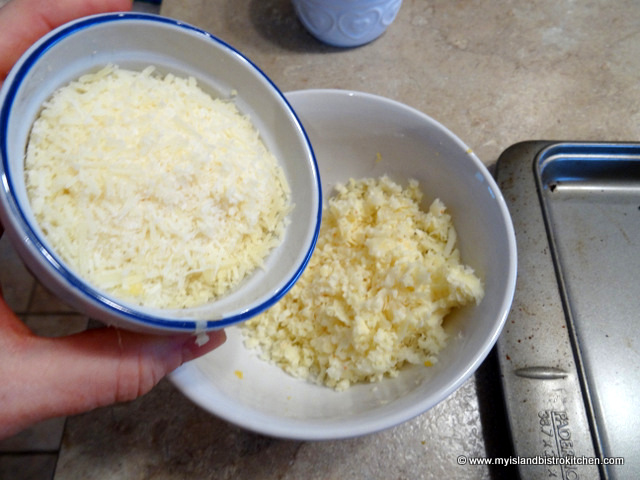
For the asparagus quiche, I chose to use a blend of six cheeses: Onion and red pepper Gouda from PEI’s Glasgow Glen Farm in New Glasgow, marble cheddar cheese from Summerside’s ADL Dairy, mozzarella and a three cheese blend of Parmesan-Romano-Asiago from Kraft. I chose to lightly season the filling with dried dill, basil, garlic powder, and just a hint of nutmeg. Now, you don’t have to use all six cheeses. The quiche is quite tasty with just a cheddar-mozzarella mix of cheeses. But, the six-cheese blend steps it up a notch and makes a lovely rich quiche!
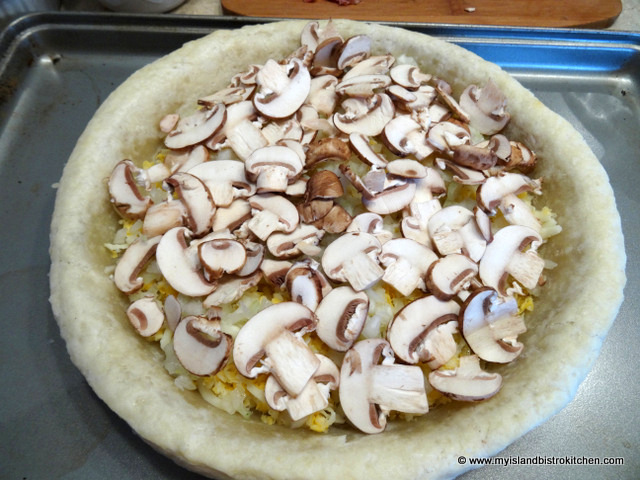
I used cremini mushrooms because of their flavor which pairs really well with the earthy flavor of the asparagus. However, white button mushrooms would also be fine. Add a bit of onion and you have the makings of a tasty quiche. Adding the prosciutto is optional to this quiche but it adds a taste dimension.
I always par-bake my pie shells – usually 10-12 minutes in all that is required. Be sure to lightly fork-prick the shell bottom and sides so the shell doesn’t rise up with an air bubble underneath. I also line the shell with parchment paper and place a layer of beans on top to help keep the shell flat during par-baking. This process is often referred to as “blind baking“. I make my own pastry because I love making pastry but a frozen pie shell would work fine, too.
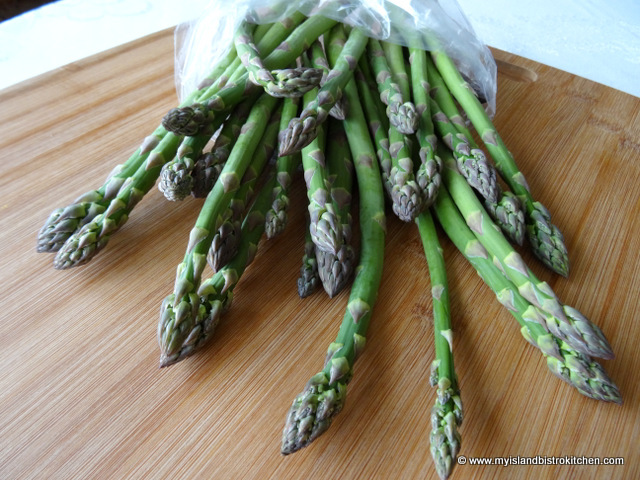
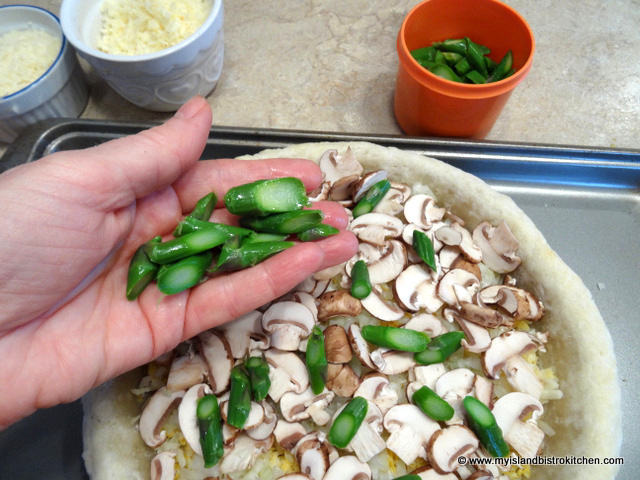
Asparagus cooks super quick and it is easy to overcook it and end up with limp, soggy asparagus. For this recipe, the asparagus only needs to be par-cooked by placing it in boiling water for 2 minutes then quickly rinsing it under cold water to stop the cooking process. Be sure to let the asparagus drain well and cool completely before slicing it into 1/2″ – 1” diagonal pieces.
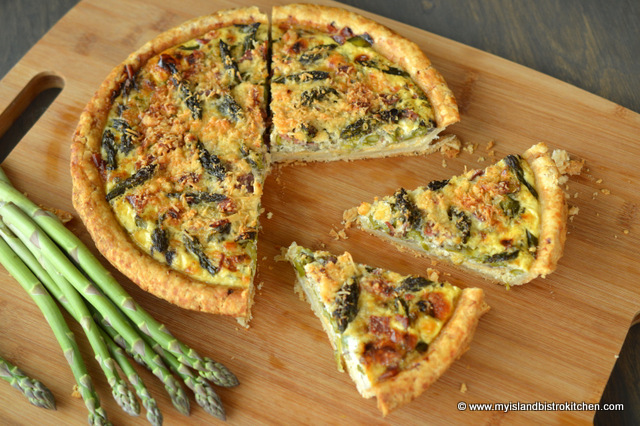
Asparagus Quiche
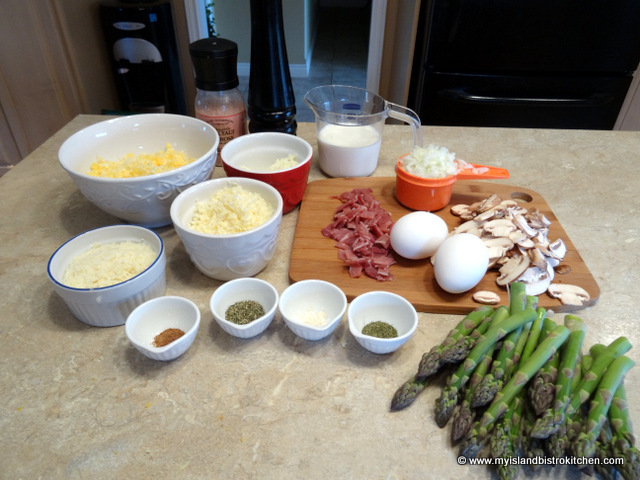
Ingredients:
1 – 9” pie shell, partially baked 1½ cups fresh asparagus, par-boiled and sliced diagonally into ½” – 1” pieces (apx. 6 oz after the woody ends have been snapped off) ½ cup onion, finely chopped 3 oz. cremini mushrooms, sliced 2 extra-large eggs, beaten ¾ cup whole milk or cream ¼ tsp dried dill ¾ tsp. dried basil ¼ tsp. garlic powder Pinch nutmeg Salt and pepper, to taste 3 oz. grated cheddar cheese 2 oz. shredded Parmesan-Romano-Asiago mix 2 oz. grated Gouda 1 oz. grated mozzarella 2 oz. prosciutto, chopped or shredded into bite-size pieces
Instructions:
Assemble ingredients.
Preheat oven to 425°F.
With fork tines, lightly prick the bottom and sides of the pie crust and bake for 10 minutes. Remove from oven and set aside while preparing quiche ingredients.
In pot of boiling salted water (you only need a small amount of water, not a full pot), steam asparagus spears for 2 minutes. Drain and immediately rinse under cold water to stop the cooking process. Drain well and let cool before cutting into ½” – 1-inch diagonal pieces. Reserve the tip ends of the asparagus, about ½ cup, for top of quiche.
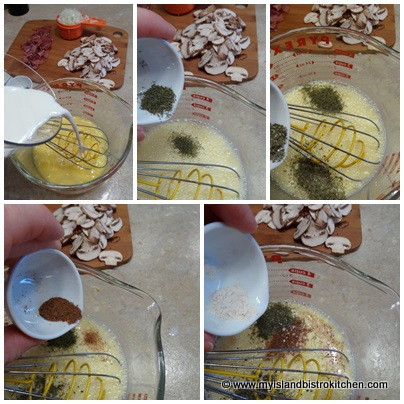
In medium-sized bowl, beat the eggs. Whisk in the milk. Add the dill, basil, garlic powder, nutmeg, salt, and pepper. Mix well.
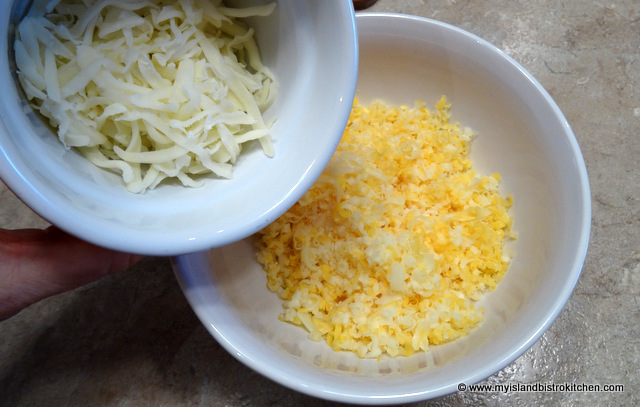
In separate bowl, combine the cheddar and mozzarella cheeses together.
Sprinkle cheese over bottom of par-baked pie shell.
Sprinkle onion on top of the cheese.
Add the sliced mushrooms and then the asparagus pieces.
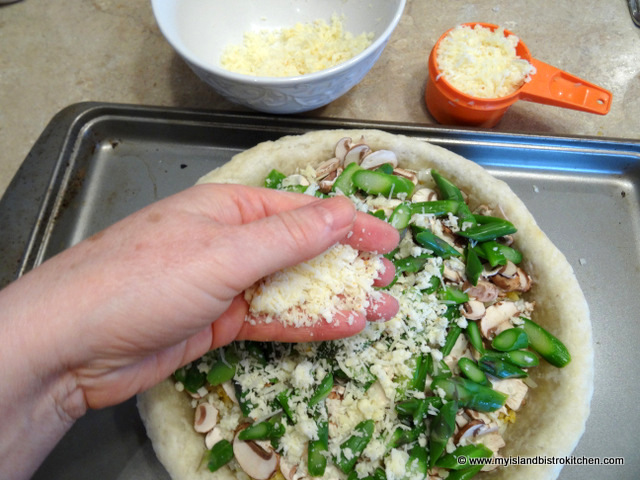
In small bowl, combine the Parmesan-Romano-Asiago cheese mix with the Gouda.
Set aside ⅔ cup of the cheese for the top of the quiche. Sprinkle remaining cheese over vegetables.
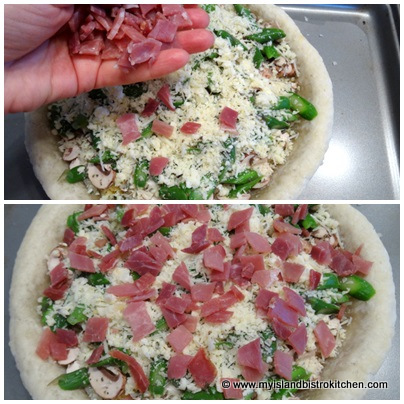
Next, sprinkle on the prosciutto.
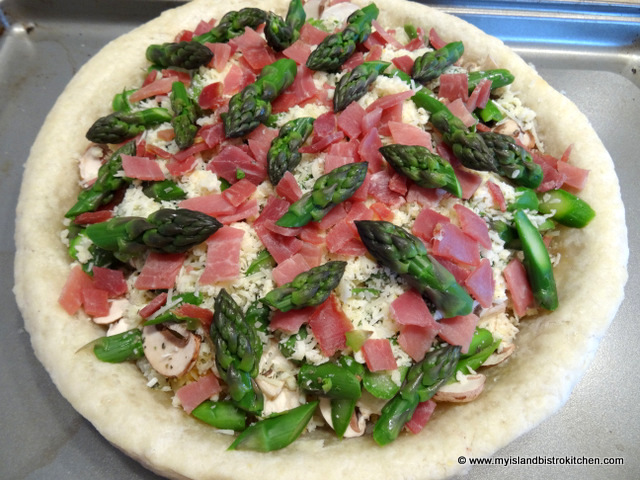
Arrange the ½ cup of reserved asparagus tips on top in desired design.
Pour the milk-egg mixture over the cheese and vegetables.
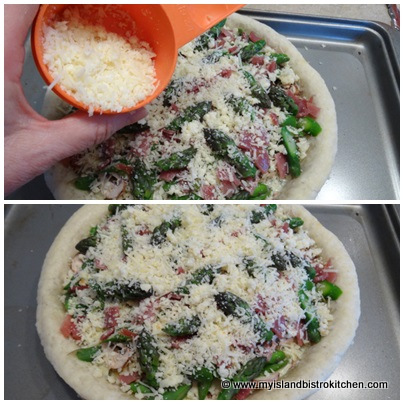
Sprinkle the remaining ⅔ cup of cheese over the entire quiche.
Place quiche on baking sheet on rack positioned in the middle of the oven. Bake for 5 minutes then immediately reduce the heat to 375°F. Bake for approximately 50-55 minutes or until knife inserted into centre of quiche comes out clean and centre is set.
Let quiche stand for 15-20 minutes before slicing and serving. May be served warm or at room temperature.
Yield:6-8 servings
———————————
Thank you for visiting “the Bistro” today. Connect with “the Bistro” through the following social media:
A delicious quiche featuring fresh asparagus and a blend of cheeses
Ingredients
1 – 9” pie shell, partially baked
1½ cups fresh asparagus, parboiled and sliced diagonally into ½” – 1” pieces (apx. 6 oz after ends have been snapped off)
½ cup onion, finely chopped
3 oz. cremini mushrooms, sliced
2 extra-large eggs, beaten
¾ cup whole milk or cream
¼ tsp dried dill
¾ tsp. dried basil
¼ tsp. garlic powder
Pinch nutmeg
Salt and pepper, to taste
3 oz. grated cheddar cheese
1 oz. grated mozzarella
2 oz. shredded Parmesan-Romano-Asiago mix
2 oz. grated Gouda
2 oz. prosciutto, chopped or shredded into bite-size pieces
Instructions
Preheat oven to 425°F.
With fork tines, lightly prick the bottom and sides of the pie crust and bake for 10 minutes.
Remove from oven and set aside while preparing quiche ingredients.
In pot of boiling salted water (you only need a small amount of water, not a full pot), steam asparagus spears for 2 minutes. Drain and immediately rinse under cold water to stop the cooking process. Drain well and let cool before cutting into ½” – 1-inch diagonal pieces. Reserve the bud ends of the asparagus, about ½ cup for top of quiche.
In medium-sized bowl, beat the eggs. Whisk in the milk. Add the dill, basil, garlic powder, nutmeg, salt, and pepper. Mix well.
In separate bowl, combine the cheddar and mozzarella cheeses together. Sprinkle cheese over bottom of par-baked pie shell.
Sprinkle onion on top of the cheese.
Add the sliced mushrooms and then the asparagus pieces.
In small bowl, combine the Parmesan-Romano-Asiago cheese mix with the Gouda. Set aside 2/3 cup of the cheese for the top of the quiche and sprinkle remaining cheese over the vegetables.
Next, sprinkle on the prosciutto. Arrange the ½ cup of reserved asparagus tips on top of quiche in desired design.
Pour the milk-egg mixture over the cheese and vegetables.
Sprinkle the remaining 2/3 cup of cheese over the entire quiche.
Place quiche on baking sheet on rack positioned in the middle of the oven. Bake for 5 minutes then immediately reduce the heat to 375°F. Bake for approximately 50-55 minutes or until knife inserted into centre of quiche comes out clean and centre is set.
Let quiche stand for 15-20 minutes before slicing and serving. May be served warm or at room temperature.
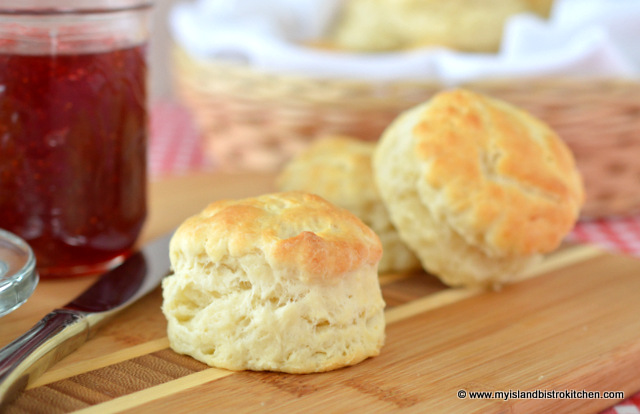
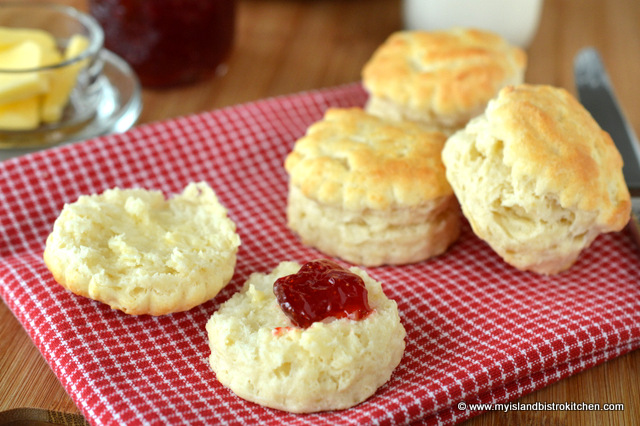
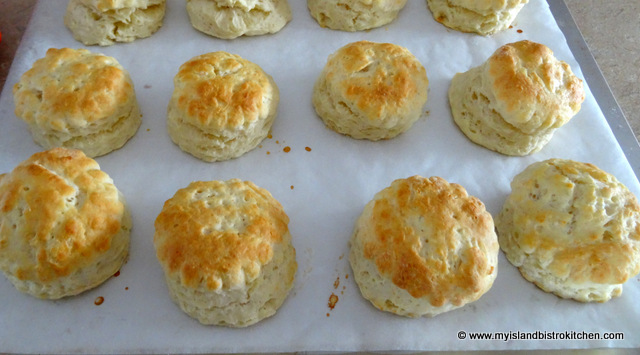
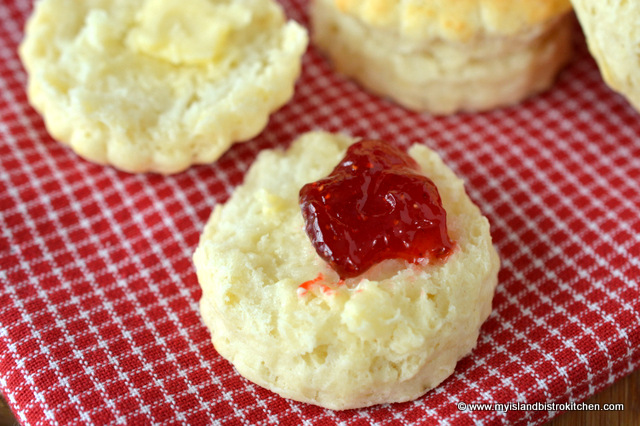
Do you love the smell of tea biscuits baking in the oven? It’s one of my favorite kitchen scents.
My first recollection of biscuits dates back to visiting a grandmother. She made the best biscuits, added a good slather of peanut butter to the warm, fresh-out-of-the-oven biscuits, and served them with a tall glass of cold milk to a wee gal patiently sitting on a high stool at her elbow by the cupboard. I suspect her biscuit recipe was just made from memory and wasn’t written or recorded anywhere. Isn’t it funny how some foods remind us of certain people and bring back great recollections!
Biscuits are not hard to make and they require only pantry staple ingredients — essentially, flour, leavening, salt, shortening/butter, and liquid – usually dairy (i.e., milk, whipping cream, or buttermilk). What makes biscuit recipes differ is usually the quantity of ingredients used, the type of dairy used as liquid and, sometimes, there will be some additions to the basic ingredients – for example, some recipes call for cream of tartar, a small amount of sugar, or even an egg.
I often hear people say they can’t make biscuits because they always turn out hard as bricks. I suspect this is quite likely due to over-kneading the dough. Biscuit dough should be kneaded as little as possible, just enough to gather up the dough and have it hold together to cut out the biscuits. Usually, only 8-10 kneads is all that is required. I have published lots of tips and hints for making biscuits in a post containing my Buttermilk Biscuit recipe which you can access by clicking here. If you are new to biscuit making or have experienced issues with making satisfactory biscuits in the past, you may find some of the hints and tips in that post useful.
Texture of biscuit
The dough can be rolled out with a rolling pin or simply patted to the desired thickness, which is what I do. I find about 1″ thick dough yields a good depth of biscuit. I use a 2″ crinkled-edge cookie cutter for mine but a straight edge cutter works just as well.
Over the years, I have tried many biscuit recipes, some yielding good results, others not so much. As the old saying goes, if you can’t find something already suitable, develop your own so that’s what I have done to create my own biscuit recipe that has come from many kitchen testing trials to arrive at the right selection and amount of ingredients to yield the flavour and texture I was looking for.
[Printable recipe follows at end of post]
My Island Bistro Kitchen’s Tea Biscuits
Ingredients:
2¼ cups all-purpose flour 1 tbsp sugar 4 tsp baking powder ¾ tsp salt ½ tsp cream of tartar ¼ cup cold unsalted butter ⅔ cup whipping cream ¾ cup whole milk
1-2 tbsp milk for brushing on top of biscuits
Method:
Assemble ingredients.
Preheat oven to 425°F. Line large baking sheet with parchment paper.
In large bowl, whisk together the flour, sugar, baking powder, salt, and cream of tartar.
Using a pastry cutter, cut in the butter until mixture resembles coarse crumbs. Make a well in the center of the ingredients.
In large measuring cup, mix together the whipping cream and milk. Pour into well in dry ingredients. Mix together just until flour mixture is incorporated. Do not overmix. Mixture will be a soft, moist batter.
Let batter stand in bowl for just a minute or so then turn out onto a floured surface. Knead dough 8-10 times, just until it holds together enough to cut out the biscuits. Do not over-knead.
Roll or pat to desired thickness – I suggest about 1” thick will yield a good depth of finished biscuit.
Using a 2” round floured cookie cutter, cut out biscuits. Dip the cookie cutter in flour before cutting out each biscuit.
Gather up remaining dough, pat down to about 1” thick, and cut out the rest of the biscuits.
Using a small spatula, transfer the biscuits to prepared baking sheet, placing them about 2” apart. If desired, prick tops of biscuits with fork tines and lightly brush with milk.
Bake for 14-16 minutes or until lightly browned on top.
Preheat oven to 425°F. Line baking sheet with parchment paper.
In large bowl, whisk together the flour, sugar, baking powder, salt, and cream of tartar.
Using a pastry cutter, cut in the butter until mixture resembles coarse crumbs.
Make a well in the center of the ingredients.
In large measuring cup, mix together the whipping cream and milk. Pour into well in dry ingredients. Mix together just until flour mixture is incorporated. Do not overmix. Mixture will be a soft, moist batter.
Let batter stand in bowl for just a minute or so, then turn out onto a floured surface.
Knead dough 8-10 times. Do not over-knead.
Roll or pat to desired thickness, about 1” thick.
Using a floured 2” round cookie cutter, cut out biscuits. Dip cutter in flour before cutting out each biscuit.
Gather up remaining dough, pat down to about 1” thick, and cut out biscuits.
Using a small spatula, transfer the biscuits to prepared baking sheet, placing them about 2” apart. If desired, prick tops of biscuits with fork tines and lightly brush with milk.
Bake for 14-16 minutes or until lightly browned on top.
If you have made this recipe and enjoyed it and/or wish to share it with your friends and family, please do so on social media but be sure to share the direct link to this posting from my website.
Connect with My Island Bistro Kitchen on Social Media
Follow “the Bistro” on Pinterest at https://www.pinterest.ca/peibistro/ and pin the Pinterest-ready photo at the end of this posting to your favorite Pinterest boards!
I can find endless uses for cranberries – they are one of my favorite berries. The berries in today’s recipe came from Mikita Farms in Farmington, near Souris, PEI. You can see the photos of them wet harvesting the cranberries last fall by clicking here. I bought a huge bag of cranberries because they freeze really well and I make a multitude of recipes with them throughout the year.
In this recipe, I use the cranberries in pancakes. I have combined and blended four key ingredients in this recipe to give the pancakes a rich flavour – eggnog, mashed banana, grated orange rind, and cranberries. The berries can either be fresh or frozen. I simply chop the berries in half before stirring them into the pancake batter.
Cranberry-Banana Pancakes
Ingredients:
1 extra large egg 2½ tbsp cooking oil ½ cup eggnog ½ cup whole milk ½ tsp vanilla 2 tbsp mashed banana 1 cup flour 1 tbsp baking powder 2½ tbsp sugar ¼ tsp salt ¼ tsp cinnamon ⅛ tsp nutmeg 1½ tsp grated orange rind ¾ cup chopped cranberries, fresh or frozen
Method:
Assemble ingredients.
In medium-sized bowl, whisk together the egg, oil, eggnog, milk, and vanilla. Add the mashed banana.
In separate bowl, combine flour, baking powder, salt, sugar, cinnamon, nutmeg, and grated orange rind.
Whisk the dry ingredients together to mix thoroughly.
Stir flour mixture into wet ingredients. Stir just until combined.
Stir in cranberries.
Let batter sit for apx. 5 minutes before cooking pancakes. Batter will be lumpy.
Heat non-stick frying pan over medium-high heat. Use paper towel to lightly grease pan with oil.
Pour apx. ⅓ cup of batter into hot frying pan and cook pancakes until surface bubbles appear and the top appears dry and set. Gently lift the edge of a pancake – if it is lightly browned, flip the pancakes over with a wide spatula. Cook 1-2 minutes until pancake is lightly browned underneath.
Transfer pancakes to a heatproof plate or cookie sheet and place in oven set to warming temperature to keep pancakes warm while cooking remaining pancakes.
Serve with a pat of butter, maple syrup, or your favourite topping and fresh fruit.
In medium-sized bowl, whisk together the egg, oil, eggnog, milk, and vanilla. Add the mashed banana.
In separate bowl, combine flour, baking powder, salt, sugar, cinnamon, nutmeg, and grated orange rind. Mix well.
Stir flour mixture into wet ingredients. Stir just until combined. Stir in cranberries. Let batter sit for apx. 5 minutes before cooking pancakes. Batter will be lumpy.
Heat non-stick frying pan over medium-high heat. Use paper towel to lightly grease pan with oil.
Pour apx. 1/3 cup of batter into hot frying pan and cook pancakes until surface bubbles appear and the top appears dry and set. Gently lift the edge of a pancake – if it is lightly browned, flip the pancakes over with a wide spatula. Cook 1-2 minutes until pancake is lightly browned underneath.
Transfer pancakes to a heatproof plate or cookie sheet and place in oven set to warming temperature to keep pancakes warm while cooking remaining pancakes.
Serve with a pat of butter, maple syrup, or your favourite topping and fresh fruit.
Today, I am sharing a sweet treat with you. In fact, it’s so sweet, it’s almost more like candy than it is a square. This No-Bake Marshmallow Square is one of the easiest squares to make and it requires few ingredients and no cooking or baking. Continue reading Marshmallow Squares→
(Mostly) PEI and Maritime Food – Good Food for a Good Life!