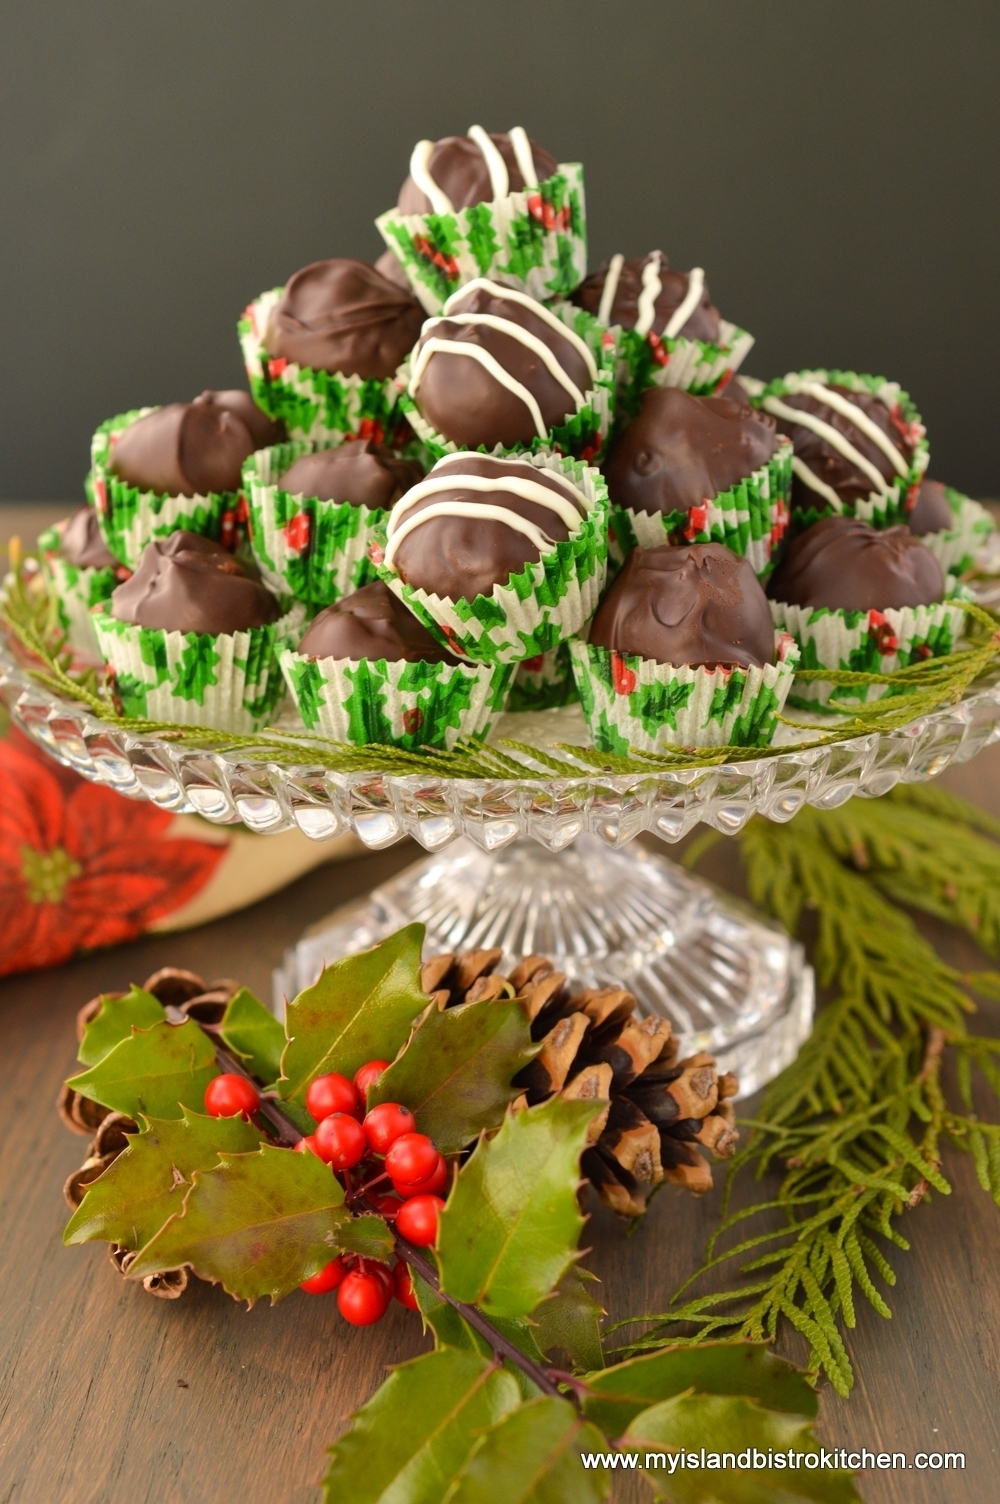
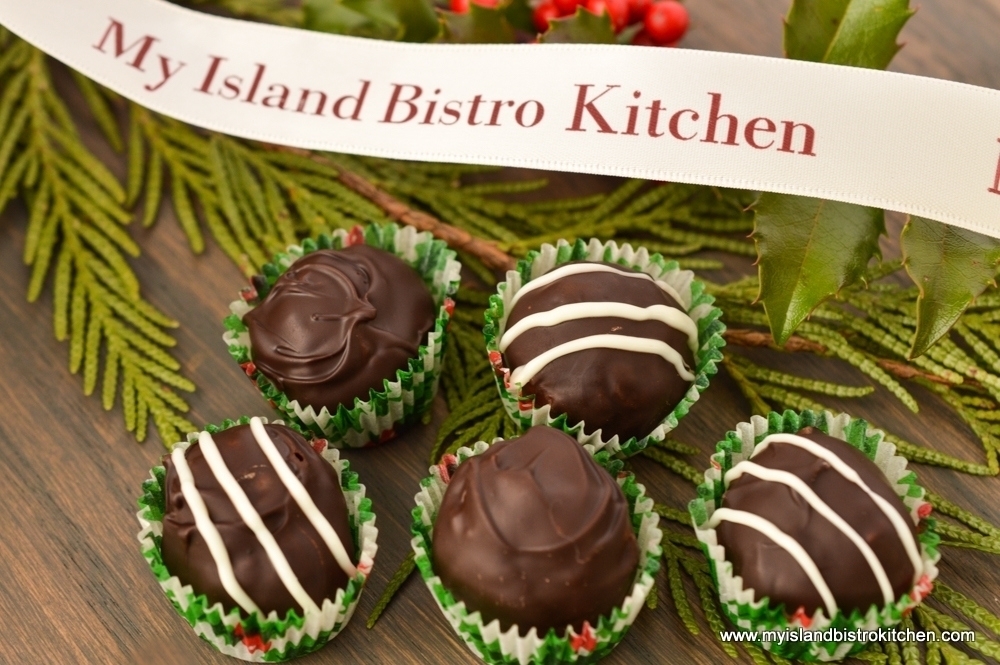
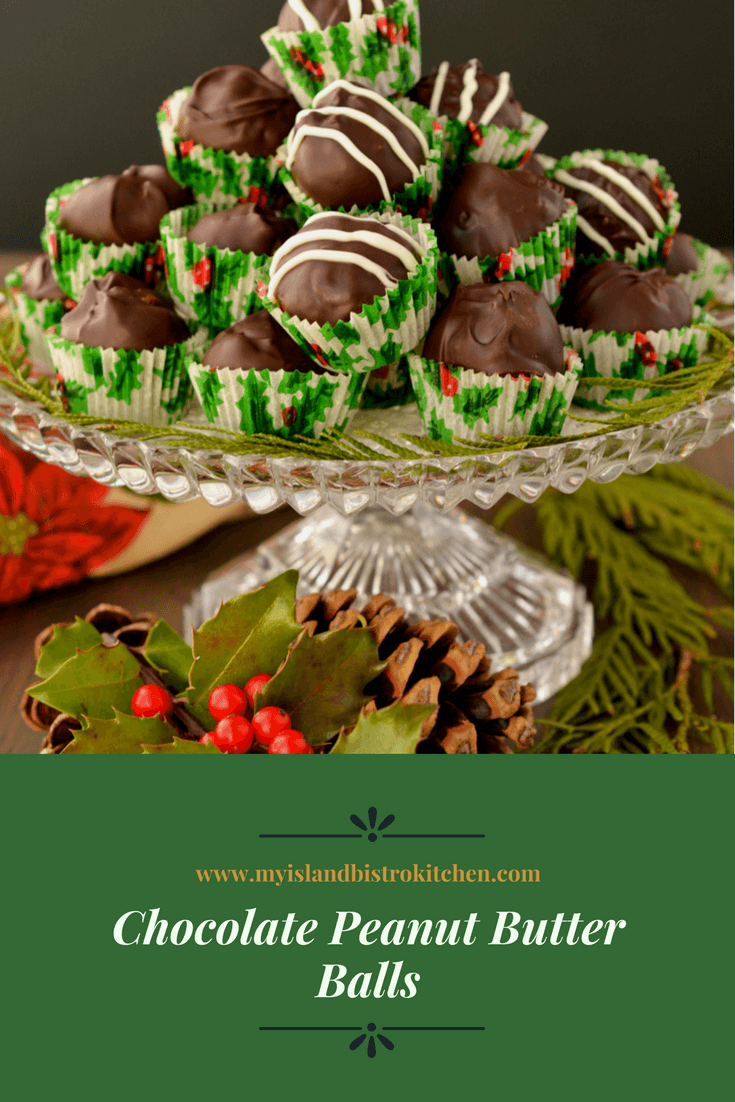
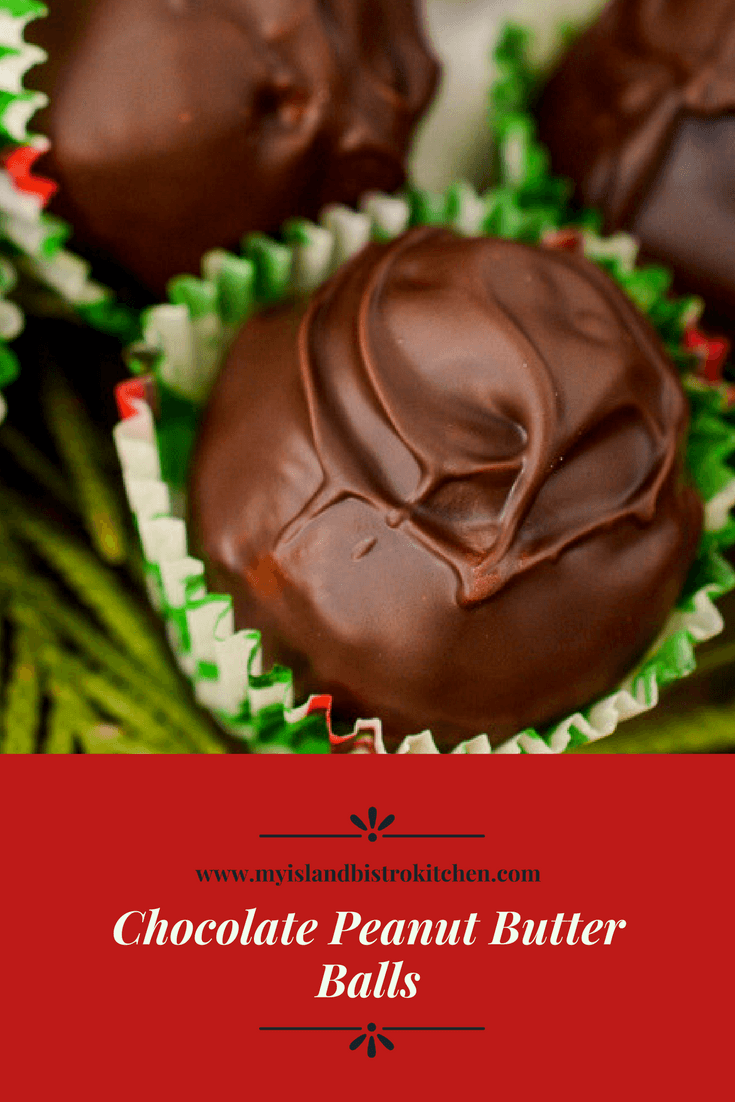
Chocolate Peanut Butter Balls are a Christmas treat in my neck of the woods and, for many, it isn’t Christmas unless there is a batch or two of these delectable homemade confections. They are one food item that just never seems to go out of style. And, they are addicting! Who can stop at just one!
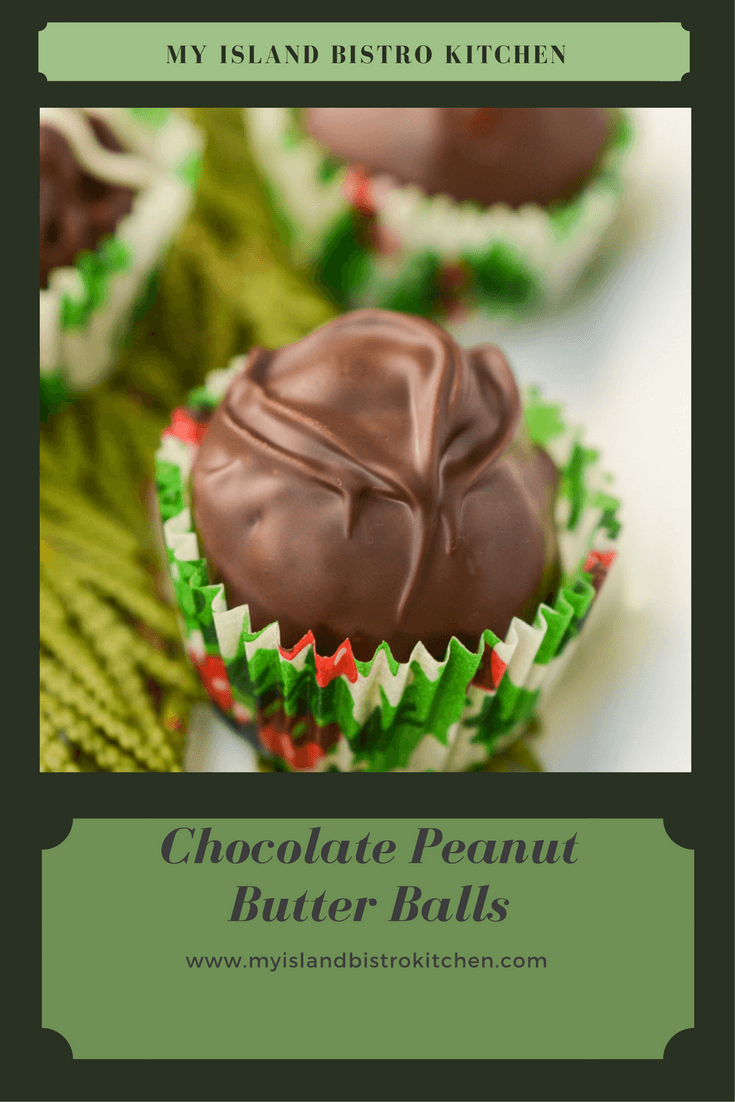
Chocolate Peanut Butter Ball
These balls are not difficult to make and only take very basic ingredients. They are, however, a bit time consuming to make because the peanut butter and butter must be melted then mixed in with the icing sugar (which you may know as confectioner’s sugar or powdered sugar) and crisp rice cereal. Then the balls need to be formed from the mixture, chilled, and then individually dipped in melted chocolate and chilled again. It’s critical that the icing sugar be sifted (and before it is measured). No matter how soft and fluffy the icing sugar may seem, there are always little lumps/clumps that will not mix in as well as if the sugar is sifted. Take the time to do this step.
Chocolate Peanut Butter Balls
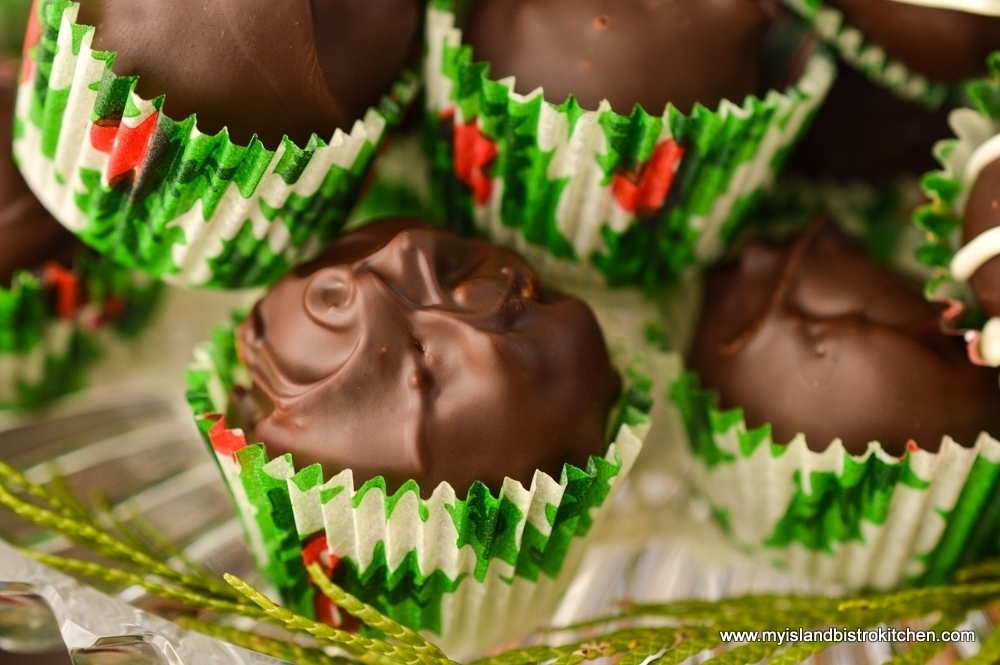
It’s important that the balls not be formed too large as they will get larger in size when dipped in chocolate. The size to aim for would be the size of a chocolate truffle that would fit nicely inside a paper candy cup so form the mixture into ½” inch balls. They may look small at this stage but they’ll get bigger once dipped in chocolate. These confections are meant to be 1-2 bites and they are rich!
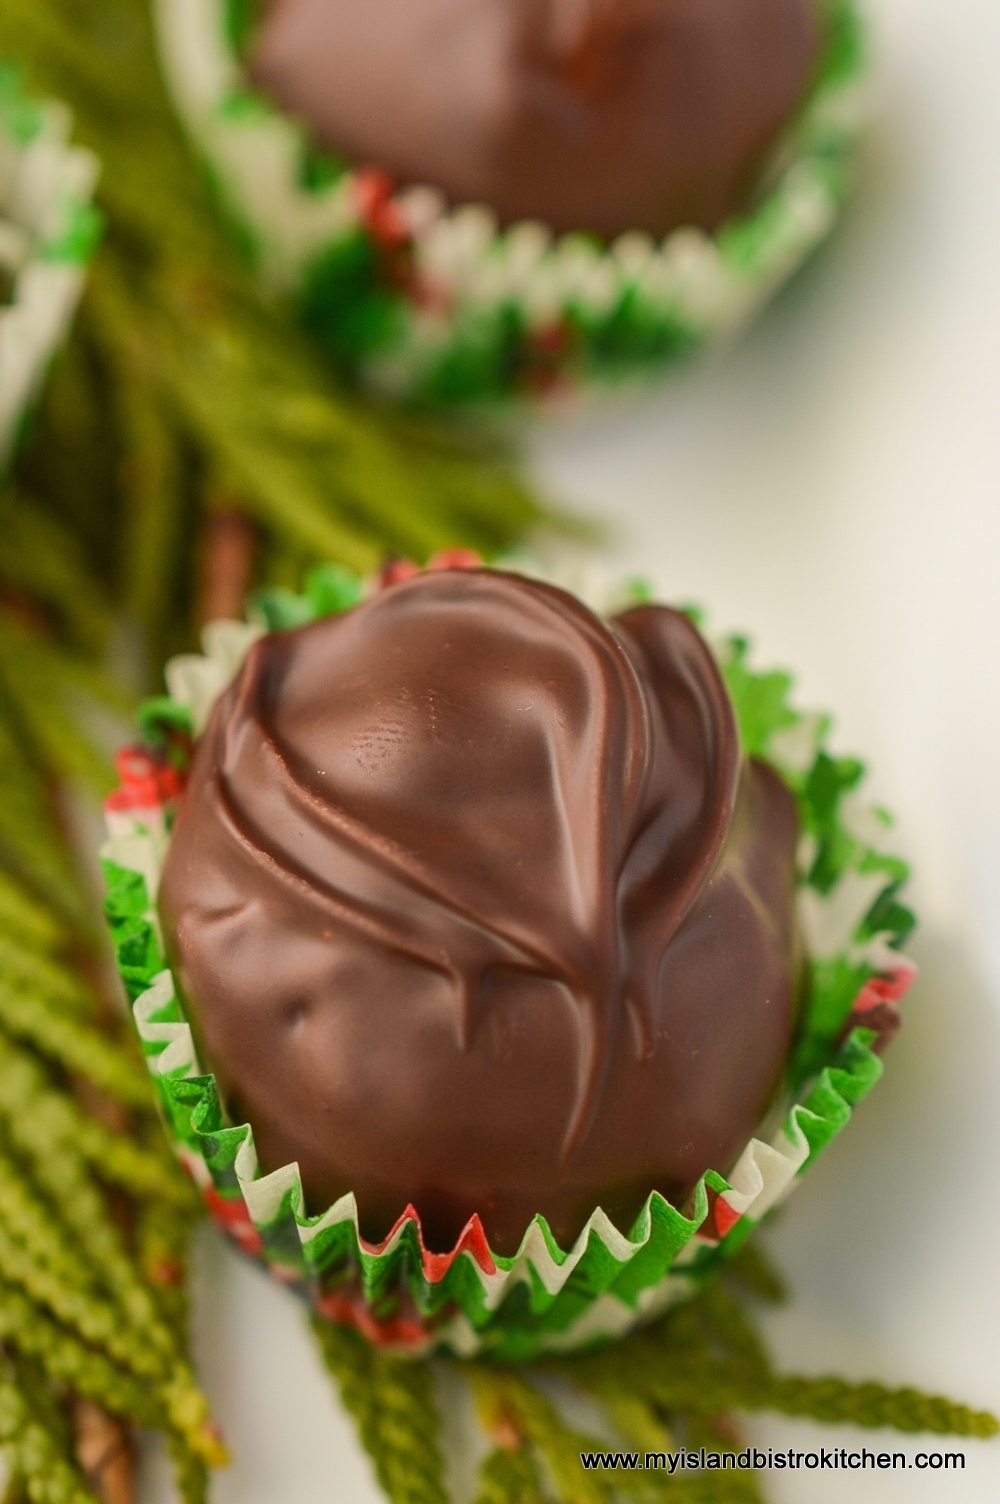
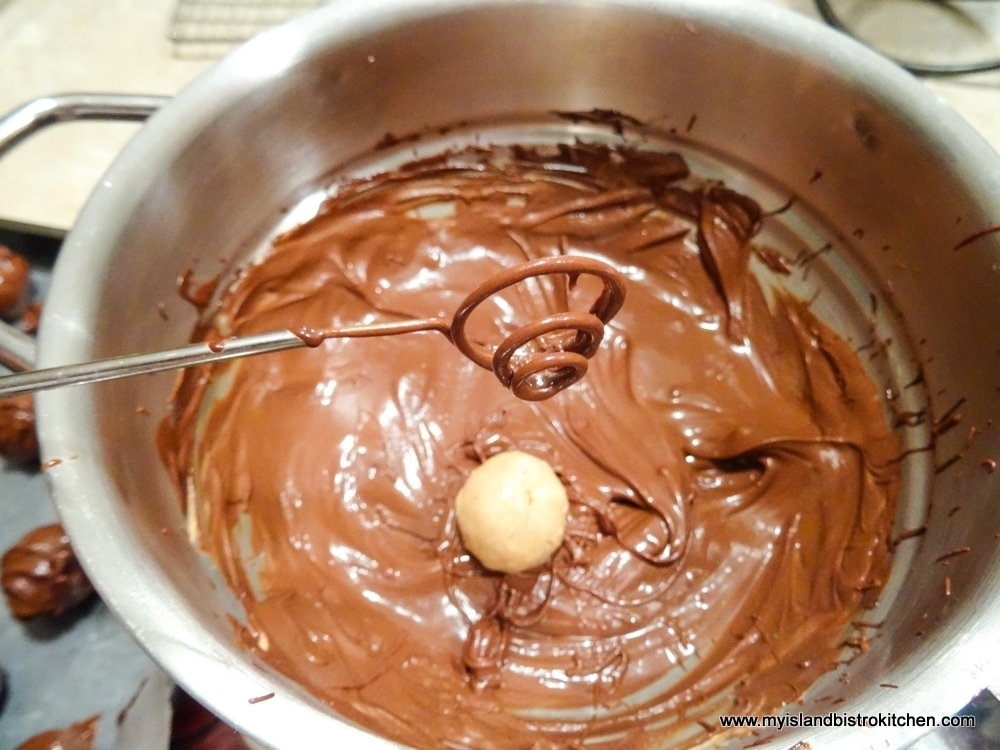
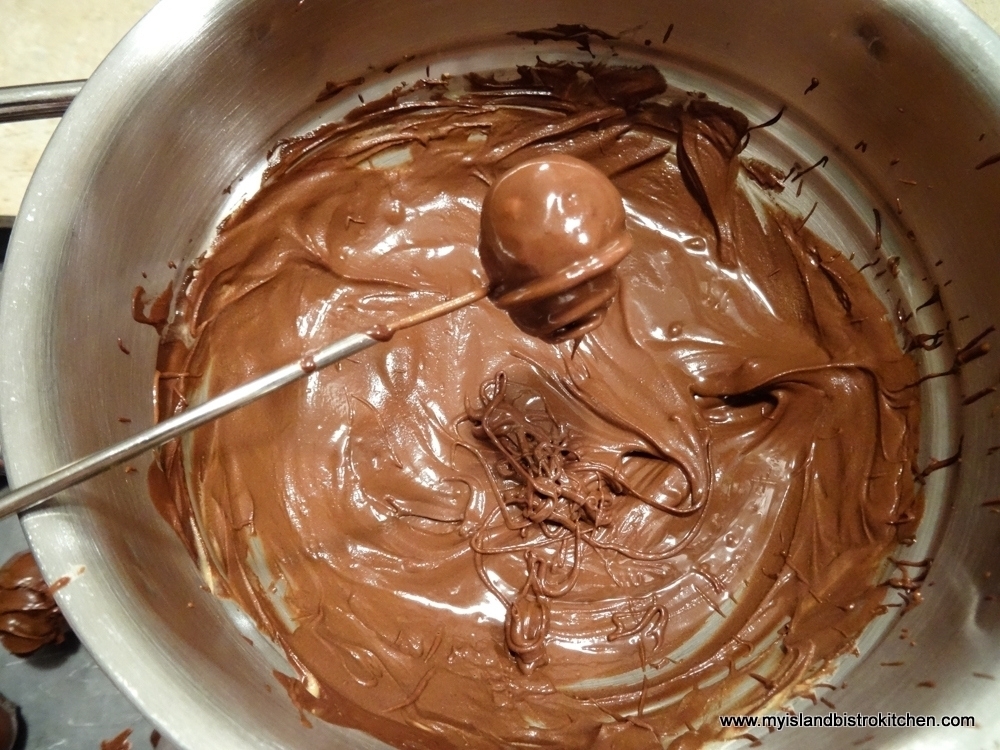
A teaspoon can be used to twirl the balls around in the chocolate and to swirl the tops; however, my preference is to use a spiral swirl candy dipper.
Spiral Swirl Candy Dipper
I find it is much more efficient, the excess chocolate can be dripped off the balls with a gentle tap or two of the swirl dipper tool on the side of the pot, and the tops of the balls are automatically swirled attractively when the balls drop from the candy dipper tool.
Using a spiral swirl candy dipper to coat chocolate peanut butter balls
Various kinds of chocolate can be used in which to dip the balls. Semi-sweet chocolate chips are the norm; however, white chocolate can be used as can peanut butter chips for the ultimate peanut butter flavor. Sometimes, I will mix the semi-sweet chocolate chips with the peanut butter chips and this makes a lovely coating as well. Melted chocolate in contrasting colors can be used, if desired, to decorate the tops of the balls.
Chocolate Peanut Butter Balls
Store the balls between layers of waxed paper in an airtight container in the refrigerator. These balls freeze well.
[Printable recipe follows at end of posting]
Chocolate Peanut Butter Balls
Ingredients: 1 cup smooth peanut butter ¼ cup + 1 tbsp butter ½ tsp vanilla 2¼ cups sifted icing sugar (apx. ½ pound) 1½ cups crisp rice cereal
10 oz semi-sweet chocolate chips, white chocolate, or peanut butter chips (or a combination of all three)
Method: Line two large rimmed baking sheets with wax paper. Set aside.
Combine peanut butter and butter in small saucepan. Melt the butters over medium-low heat, stirring frequently to prevent scorching. Remove from heat and stir in vanilla.
In large heat-proof bowl, combine the icing sugar and rice cereal. Pour the melted peanut butter and butter mixture over the cereal and icing sugar. Mix ingredients with large spoon or hands until all of the icing sugar has been fully incorporated.
Pinch off bits of the mixture and form into ½” balls. Place balls on one of the prepared baking sheets. Refrigerate for about 30 minutes, or until firm.
Melt half of the chocolate in the top of a double boiler or heat proof bowl over a pot of simmering (not boiling) water. Using a teaspoon, or a spiral swirl candy dipper, dip the balls into the chocolate and swirl to coat. If using the spiral swirl dipper, gently tap the dipper tool on the side of the chocolate pot to remove any excess chocolate from the dipped balls. Transfer dipped balls to the second prepared baking sheet. Melt remaining chocolate as needed to complete the dipping process. Refrigerate for 30 minutes. Store balls between layers of wax paper in airtight container. Keep refrigerated or freeze for longer storage.
A tasty confection that combines peanut butter, butter, icing sugar, and crisp rice cereal formed into balls dipped in decadent chocolate
Course Snack
Cuisine American
My Island Bistro KitchenMy Island Bistro Kitchen
Ingredients
1cupsmooth peanut butter
1/4 cup + 1 tbspbutter
1/2tspvanilla
2 1/4cupssifted icing sugar (apx. 1/2 pound)
1 1/2cupscrisp rice cereal
10ozsemi-sweet chocolate, white chocolate, or peanut butter chips (or a combination of all three)
Instructions
Line two large rimmed baking sheets with wax paper. Set aside.
Combine peanut butter and butter in small saucepan. Melt the butters over medium-low heat, stirring frequently to prevent scorching. Remove from heat and stir in vanilla.
In large heat-proof bowl, combine the icing sugar and rice cereal. Pour the melted peanut butter and butter mixture over the cereal and icing sugar. Mix ingredients with large spoon or hands until all of the icing sugar has been fully incorporated.
Pinch off bits of the mixture and form into ½” balls. Place balls on one of the prepared baking sheets. Refrigerate for about 30 minutes, or until firm.
Melt half of the chocolate in the top of a double boiler or heat proof bowl over a pot of simmering (not boiling) water. Using a teaspoon, or a spiral swirl candy dipper, dip the balls into the chocolate and swirl to coat. If using the spiral swirl dipper, gently tap the dipper tool on the side of the chocolate pot to remove any excess chocolate from the dipped balls. Transfer dipped balls to the second prepared baking sheet. Melt remaining chocolate as needed to complete the dipping process. Refrigerate for 30 minutes. Store balls between layers of wax paper in airtight container. Keep refrigerated or freeze for longer storage.
Yield: Apx. 50-55 balls
Recipe Notes
Copyright My Island Bistro Kitchen
If you have made this recipe and enjoyed it and/or wish to share it with your friends and family, please do so on social media but be sure to share the direct link to this posting from my website.
Connect with My Island Bistro Kitchen on Social Media
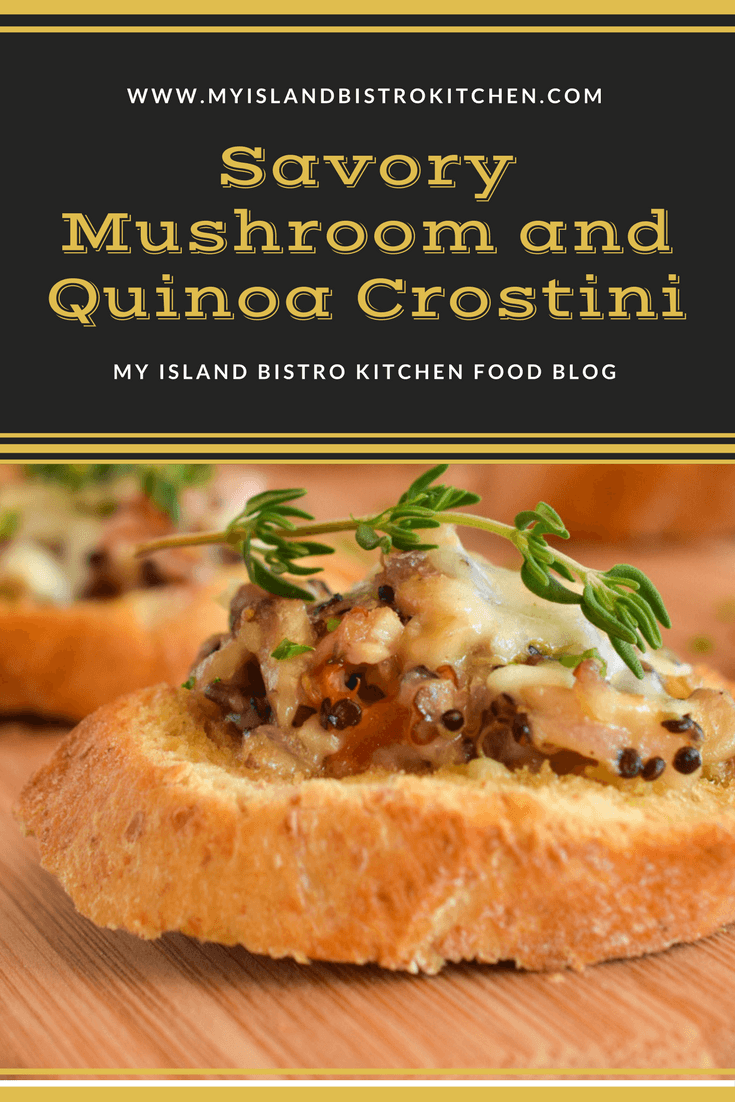
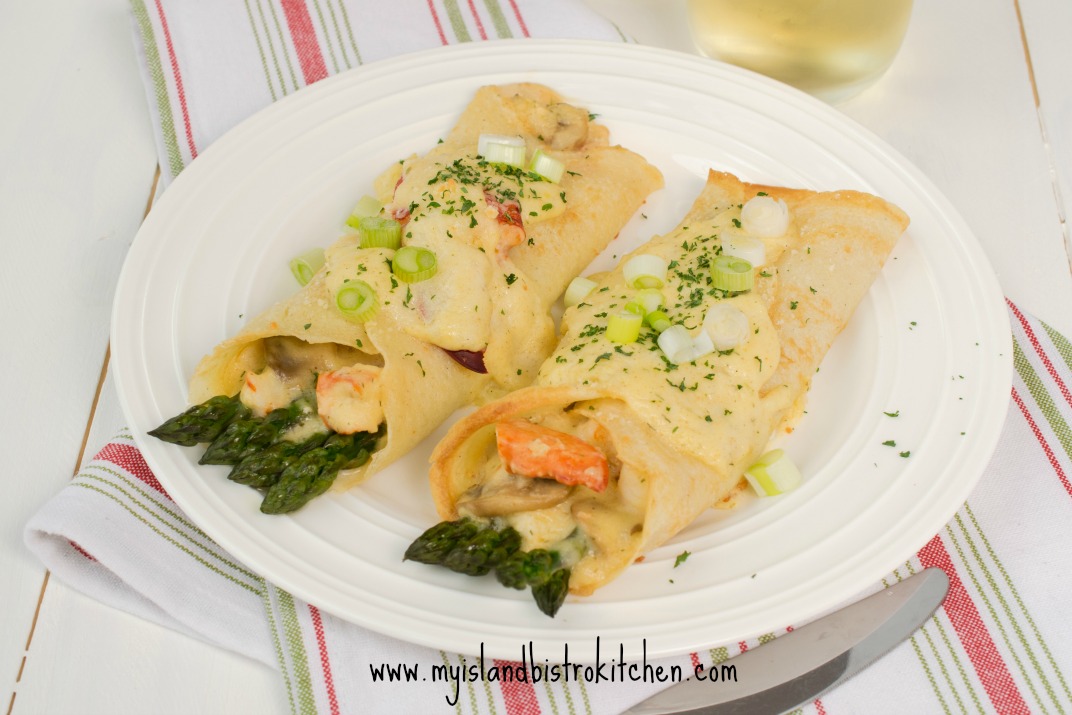
If you are like me, you are always on the hunt for tasty little appetizers or hors d’oeuvres to serve at functions.
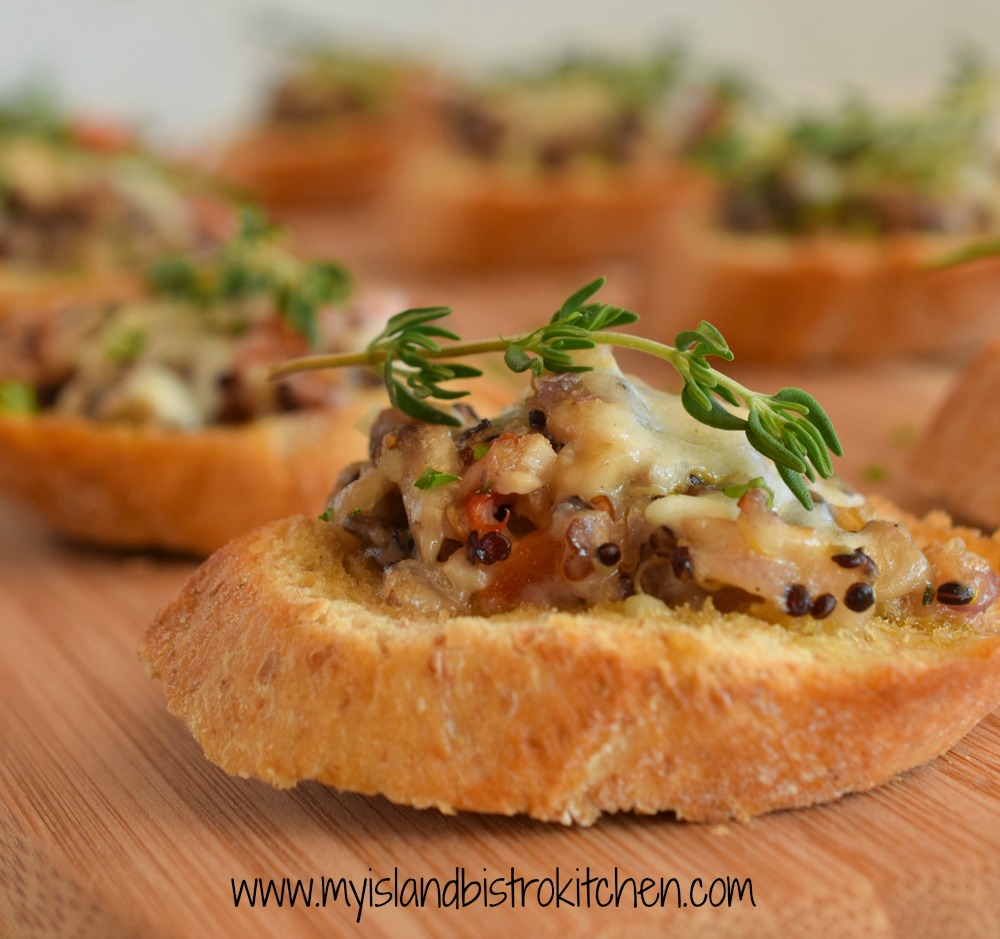
Savory Mushroom and Quinoa Crostini
These savory little toasts are packed full of flavor. Red onion, garlic, mushrooms, and red pepper are sautéed in butter and seasoned with nutmeg, summer savory, and thyme. The seasoned and sautéed vegetables are combined with cooked quinoa added for texture and visual appeal along with Parmesan cheese for additional flavor. The ingredients are bound together with chicken stock, cream, and maple syrup to add a touch of sweetness.
Spooned on to olive-oiled baguette slices, each crostini is topped with grated cheddar cheese. For mine, I used a locally produced cheese – Appletree Smoked Cheddar Cheese produced in PEI by COWS Creamery.
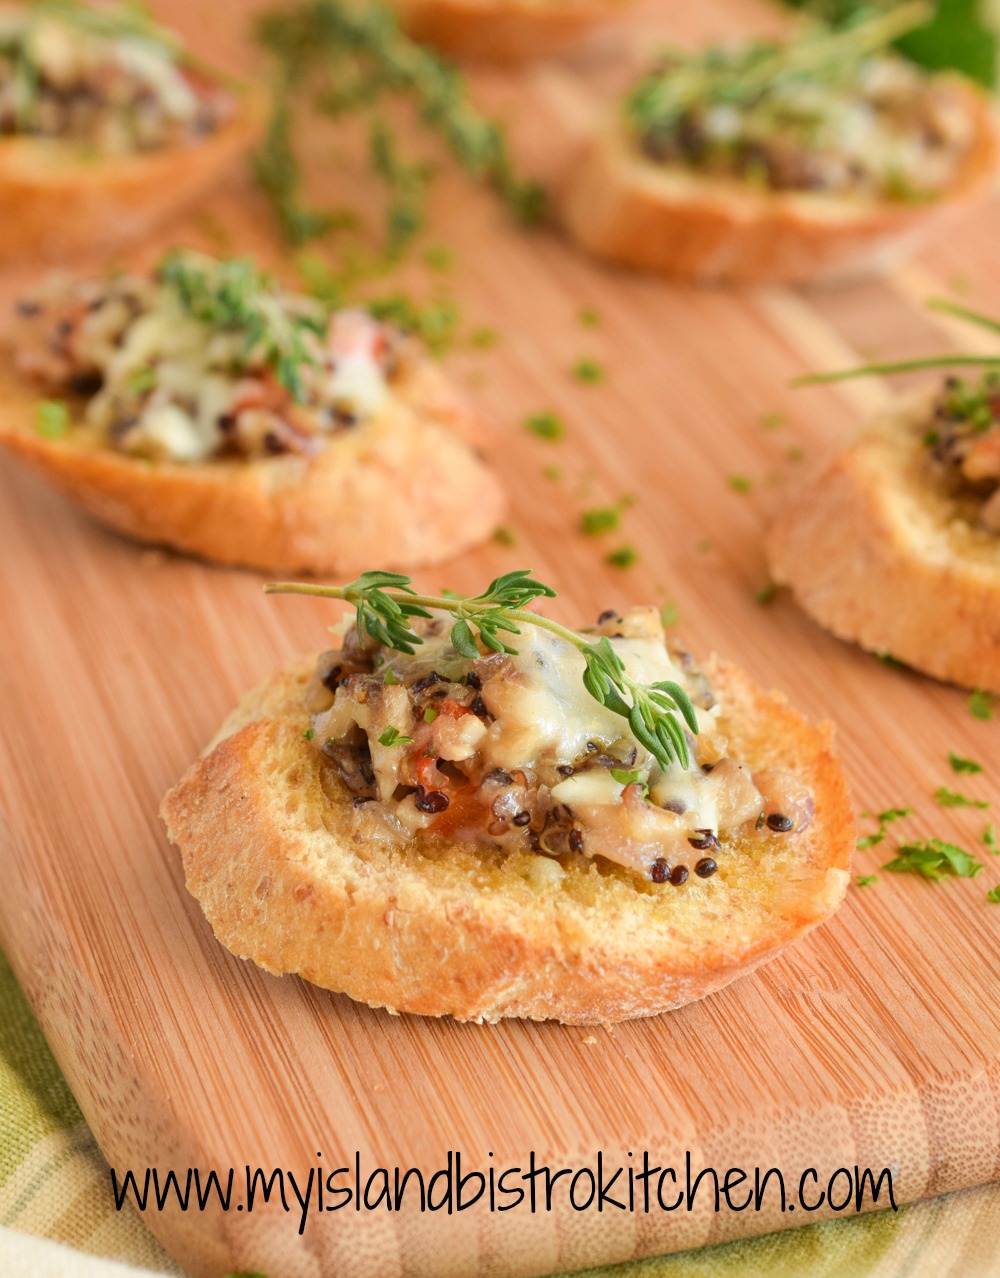
Savory Mushroom and Quinoa Crostini Hors d’oeuvres
These hors d’oeuvres are easily made into a gluten-free version. Simply use a gluten-free baguette and ensure that all other ingredients are gluten-free. One important factor to keep in mind with hors d’oeuvres is to ensure that they can easily be eaten with grace by guests – that means no huge chunks of ingredients that can pull apart when chewed into. Hors d’oeuvres should be able to be eaten with the use of only one hand. While the mushrooms could be sliced, instead of chopped, for this hors d’oeuvre, they would need to be very small mushroom slices.
4 tsp chicken stock 2 tbsp heavy cream 2 tsp pure maple syrup ¼ cup cooked quinoa 4 tsp finely grated Parmesan cheese Salt and pepper, to taste
¼ cup grated Cheddar cheese
Fresh herbs for garnish
1 French baguette Olive Oil for brushing on baguette slices
Method:
Over medium heat, melt butter in saucepan. Add onions and garlic and sauté for 1 minute. Add the mushrooms and sauté for 3-4 minutes, stirring frequently. Add the red pepper, nutmeg, summer savory, and thyme. Sauté for an additional 1-2 minutes, stirring frequently.
In small bowl, combine the chicken stock, cream, and maple syrup. Add the quinoa, Parmesan cheese, and sautéed vegetables. Season with salt and pepper to taste and combine all ingredients well.
Slice baguette into 16 slices between ¼” and ½” thick. Brush each slice with small amount of olive oil. Divide mixture evenly between the 16 slices. Sprinkle with grated cheddar cheese. Place crostini on baking sheet and broil for 1-2 minutes or just until cheese has melted. Garnish with fresh herbs. Serve hot.
These easy-to-prepare savory little toasts are packed full of flavor. Featuring mushrooms, quinoa, cheese, and select seasonings, these tasty bites are sure to be a favorite hors d'oeuvre at your next gathering.
Over medium heat, melt butter in saucepan. Add onions and garlic and sauté for 1 minute. Add the mushrooms and sauté for 3-4 minutes, stirring frequently. Add the red pepper, nutmeg, summer savory, and thyme. Sauté for an additional 1-2 minutes, stirring frequently.
In small bowl, combine the chicken stock, cream, and maple syrup. Add the quinoa, Parmesan cheese, and sautéed vegetables. Season with salt and pepper to taste and combine all ingredients well.
Slice baguette into 16 slices about 1/2" thick. Brush each slice with small amount of olive oil. Divide mixture evenly between the 16 slices. Sprinkle with grated Cheddar cheese. Place slices on baking sheet and broil for 1-2 minutes or just until cheese has melted. Garnish with fresh herbs. Serve hot.
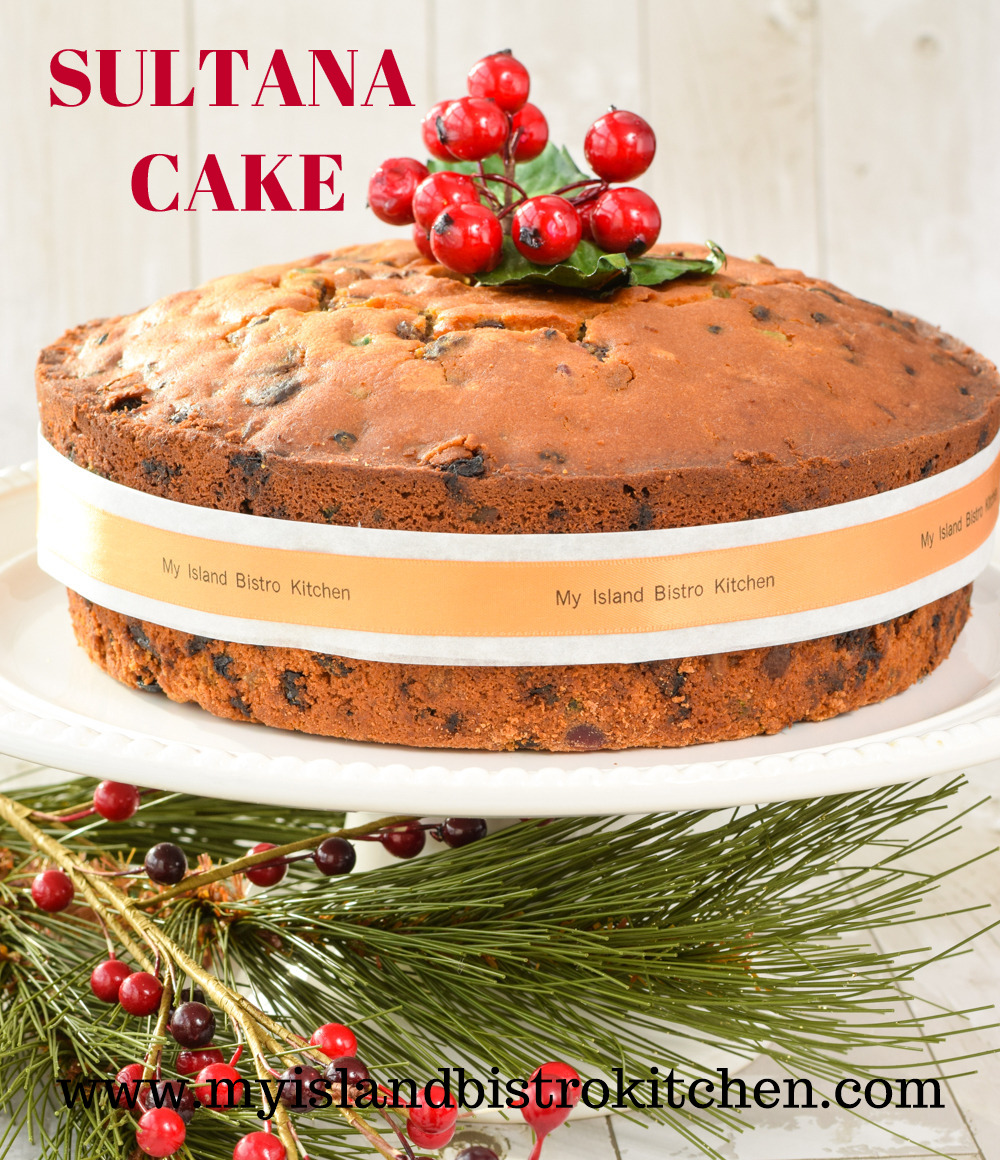
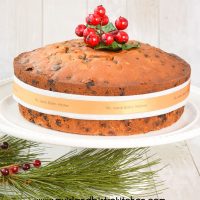
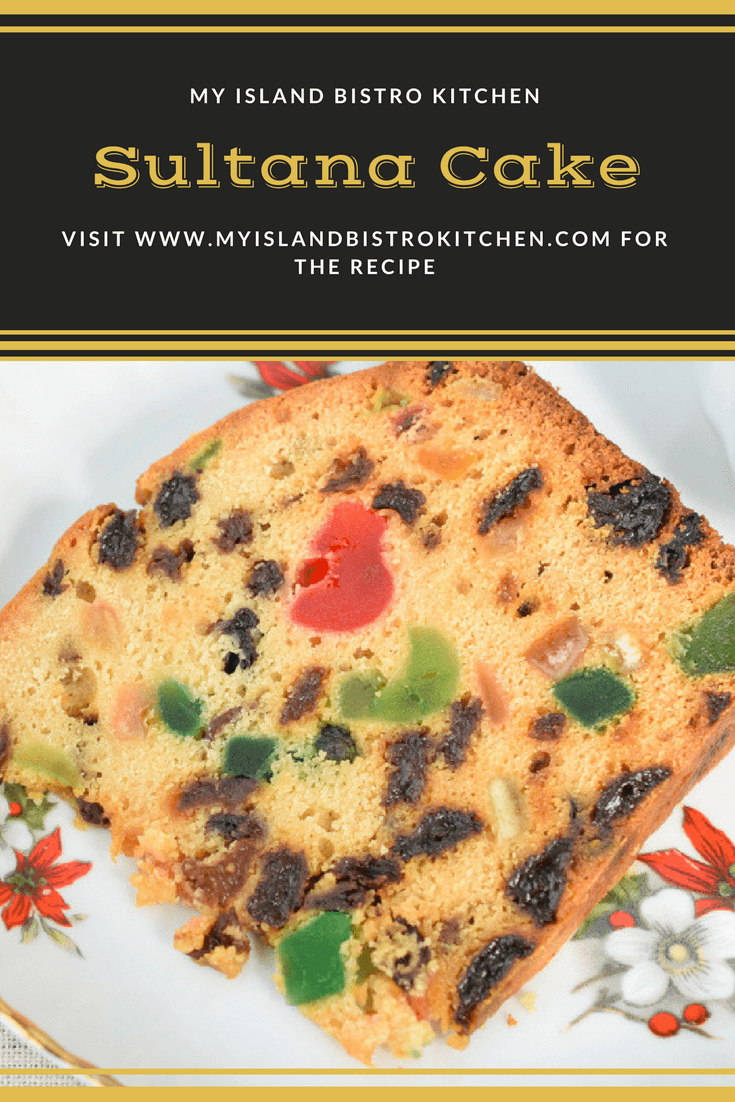
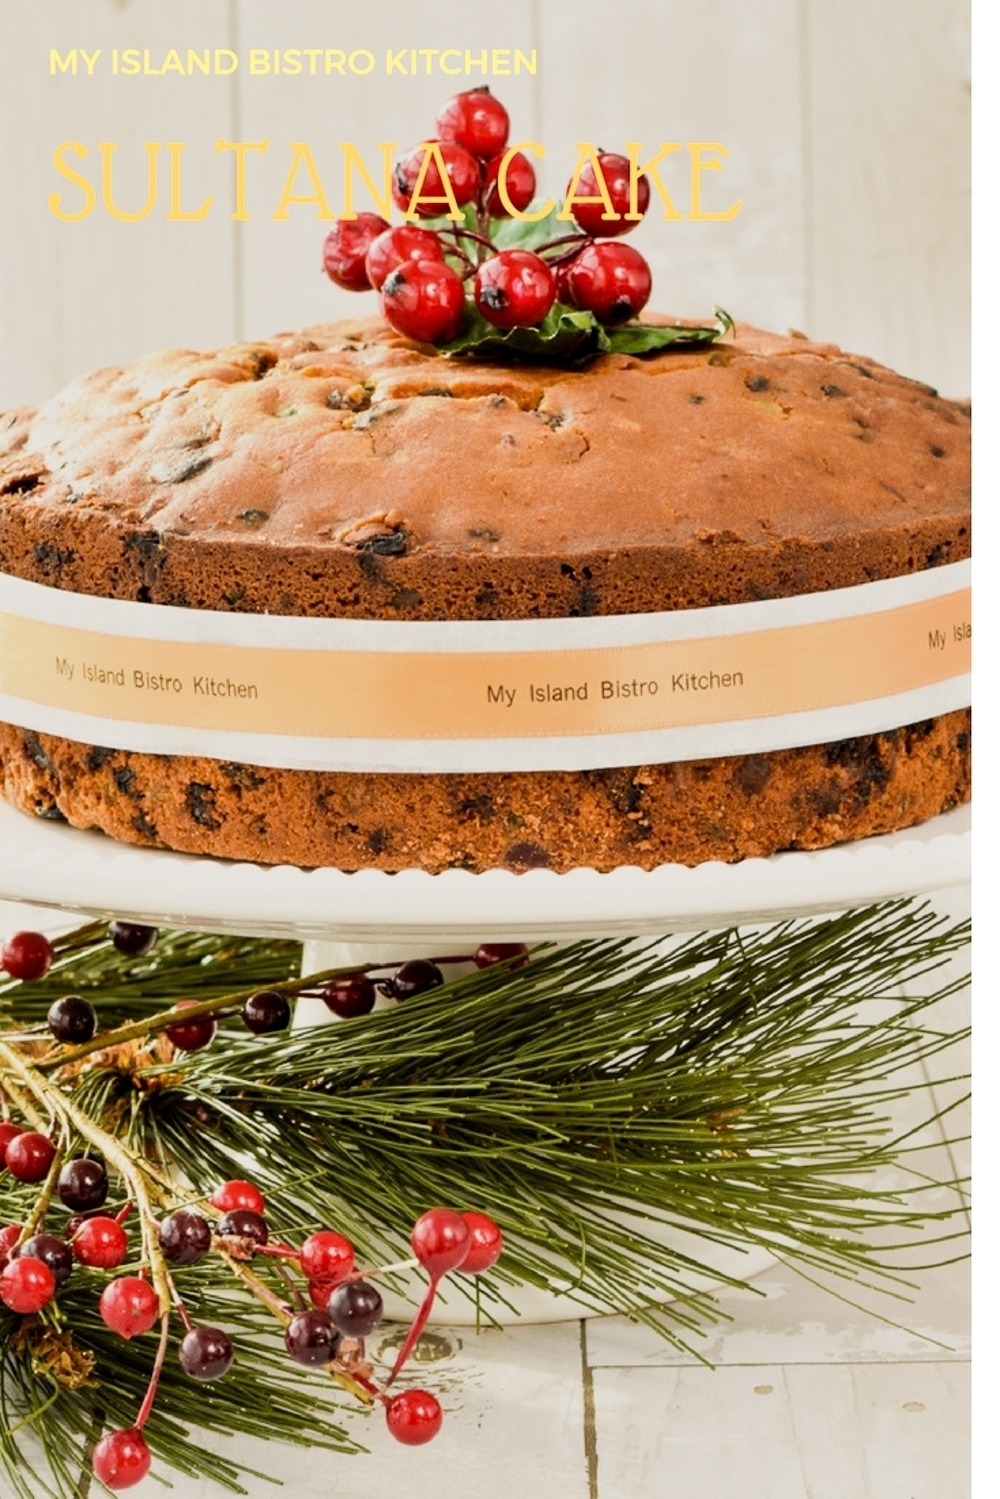
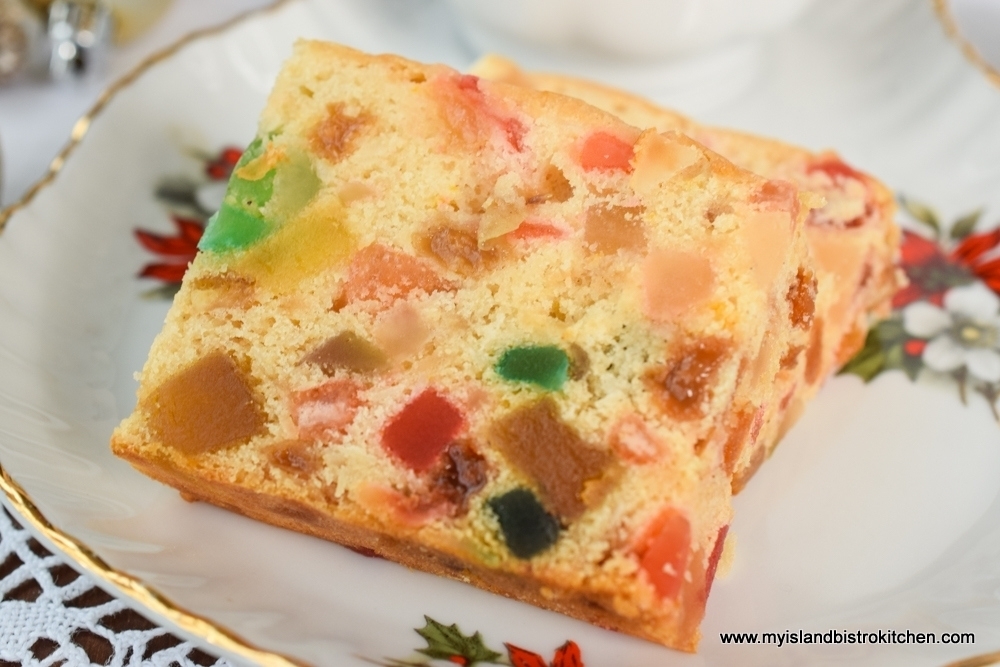
Sultana Cake, believed to be of British/Scottish origins, is so named because sultana raisins are the main ingredient. Often served at tea time, this unfrosted cake is a cross between a war cake, a Dundee cake, and a fruitcake. More sweet than a war cake and definitely less rich than a traditional fruitcake, this is a hearty, stick-to-the-ribs, kind of cake. Unlike a fruitcake, liquor is not common in a Sultana Cake.
Traditionally, I believe, Sultana Cake only had the raisins and maybe some nuts in it. My recipe, however, is slightly more luxurious with the addition of currants along with some glazed cherries and mixed fruit though the raisins are still the main ingredient.
Sultana Cake
This is a much easier and quicker cake to make than is a fruitcake. There is no need to soak the fruit in liquor for a day or two before making the cake. Essentially, the raisins, currants, glazed cherries, and mixed fruit are dredged with 1/2 cup of the flour just before they are added to the batter to prevent them from dropping to the bottom of the cake during baking. I like to add some grated orange and lemon rind for extra flavour.
The butter should be softened at room temperature (not microwaved) for about 45 minutes or so before creaming. Microwaving the butter changes its consistency and it is more liquified. Butter that is softened naturally at room temperature is much creamier and fluffs better when beaten with the sugar. Yes, that lovely fluffy texture of the butter and sugar is what results in a soft even crumb in cakes.
The eggs and milk should be at room temperature for about 30 minutes or so before mixing in to the batter. The eggs need to be at roughly the same room temperature as the butter. If the eggs are cold and hit the soft warm butter, guess what? The eggs harden the butter again and this will un-do all the lovely creaming that has been done and will affect the cake’s texture, creating a dense hard crumb. The same holds true for the milk which also needs to be at room temperature to allow it to blend smoothly into the butter-sugar-egg mixture. Ever see cold milk poured into the cake batter that immediately looks lumpy or curdled? This can result in uneven baked products.
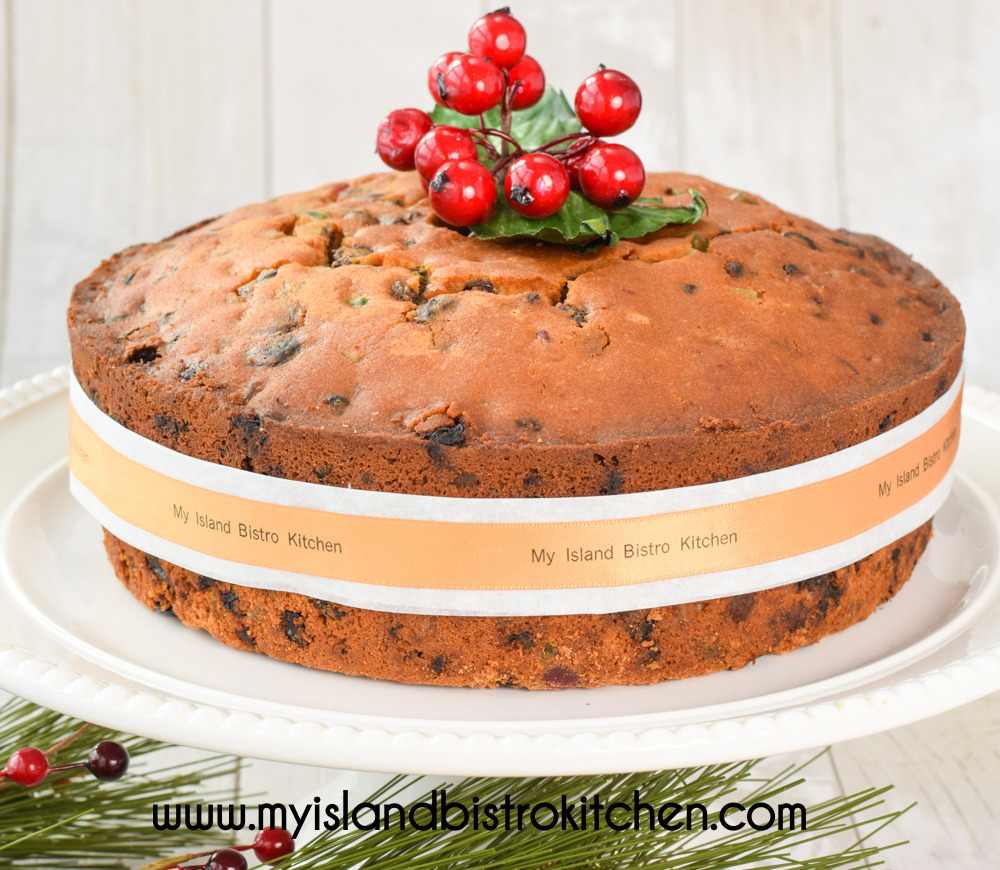
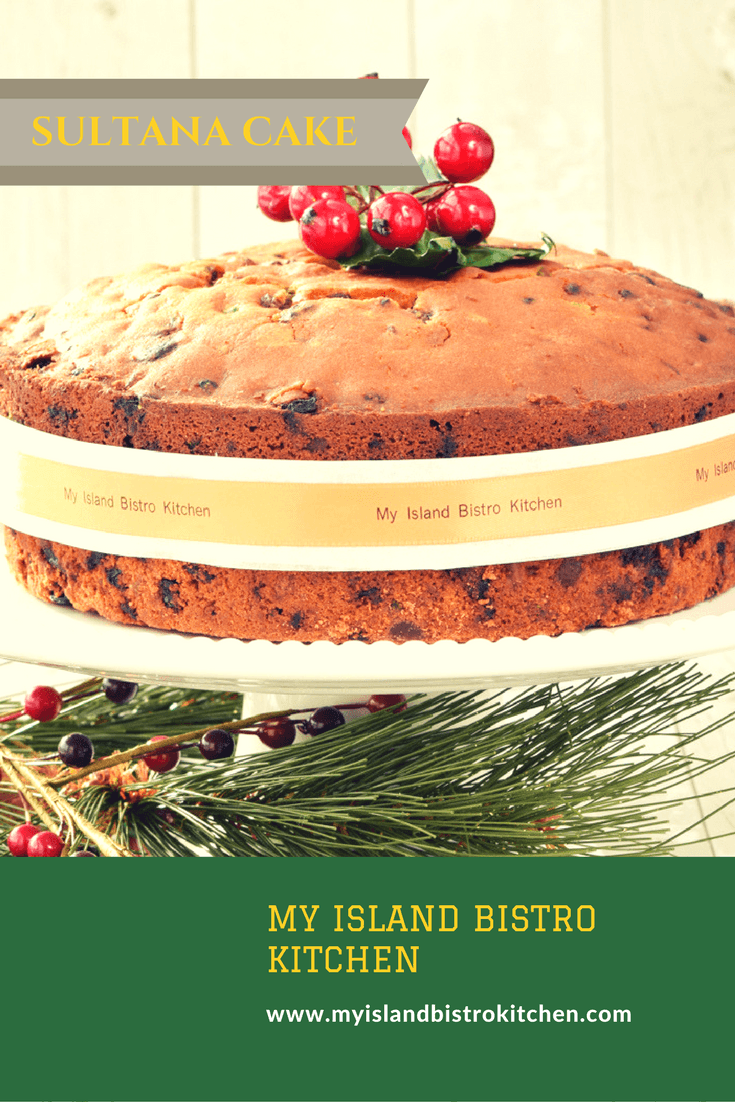
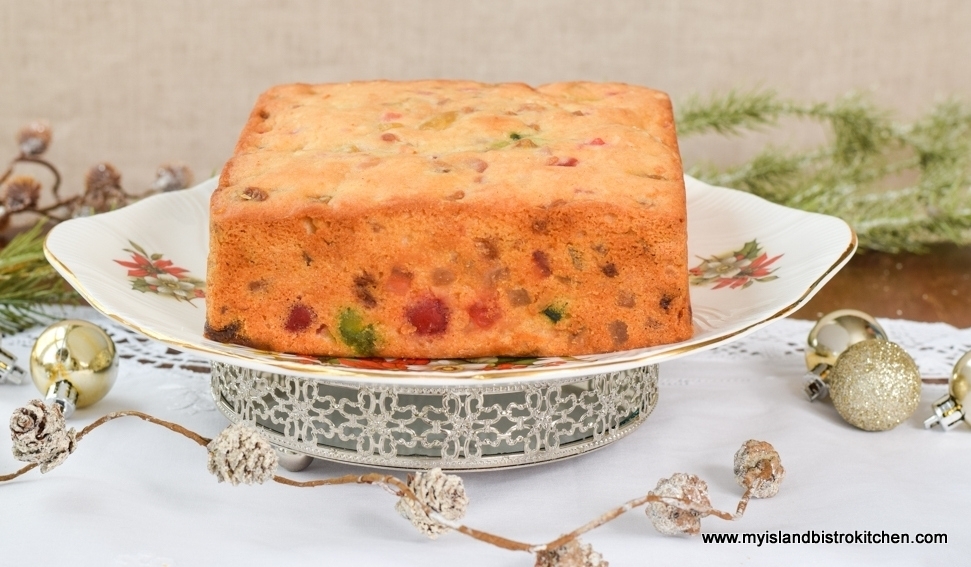
Sultana Cakes are traditionally made in round baking pans. My recipe calls for a 10″ round tube (funnel) pan that is 4″ deep. It has a 16-cup capacity so there is adequate room for the cake to expand as it bakes. Tube pans are great for dense cakes as they provide more uniform baking. With dense cakes, like Sultana Cake, it is sometimes difficult to get the outer edges of the cake and the center evenly baked at the same time. Removing the “center” of the cake eliminates this problem. Some pans have a removable bottom and these are very useful when it comes to removing the cake from the pan. I line the bottom of the pan with a layer of parchment and then spray the sides of the pan with cooking spray.
Placing a small pan of water on the bottom shelf, or floor, of the oven while the cake bakes helps to keep the cake moist. If the cake starts to brown too much, loosely tent it with tin foil.
Sultana Cake
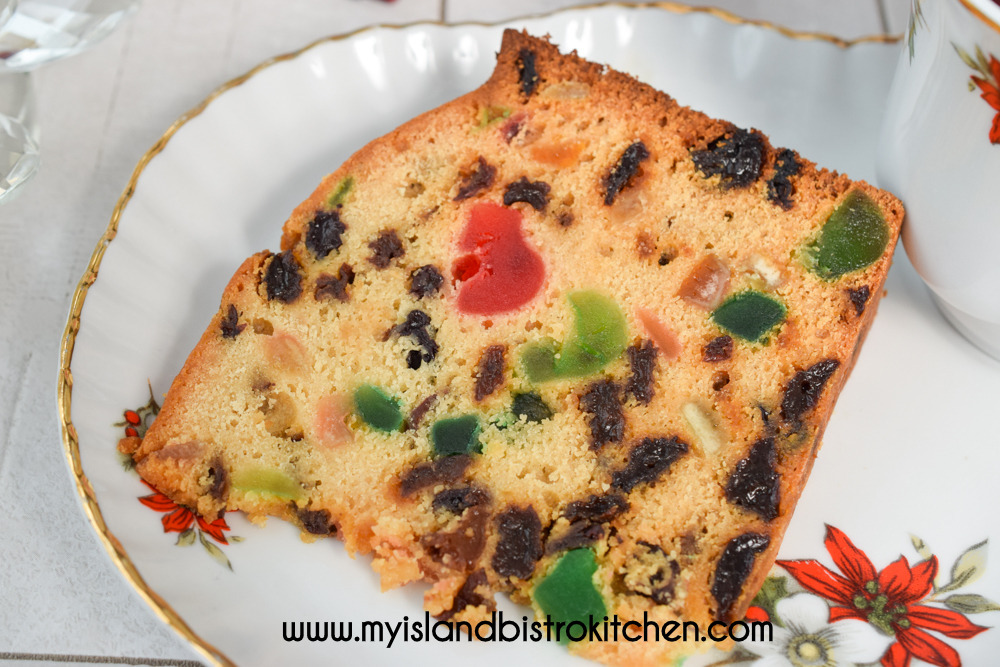
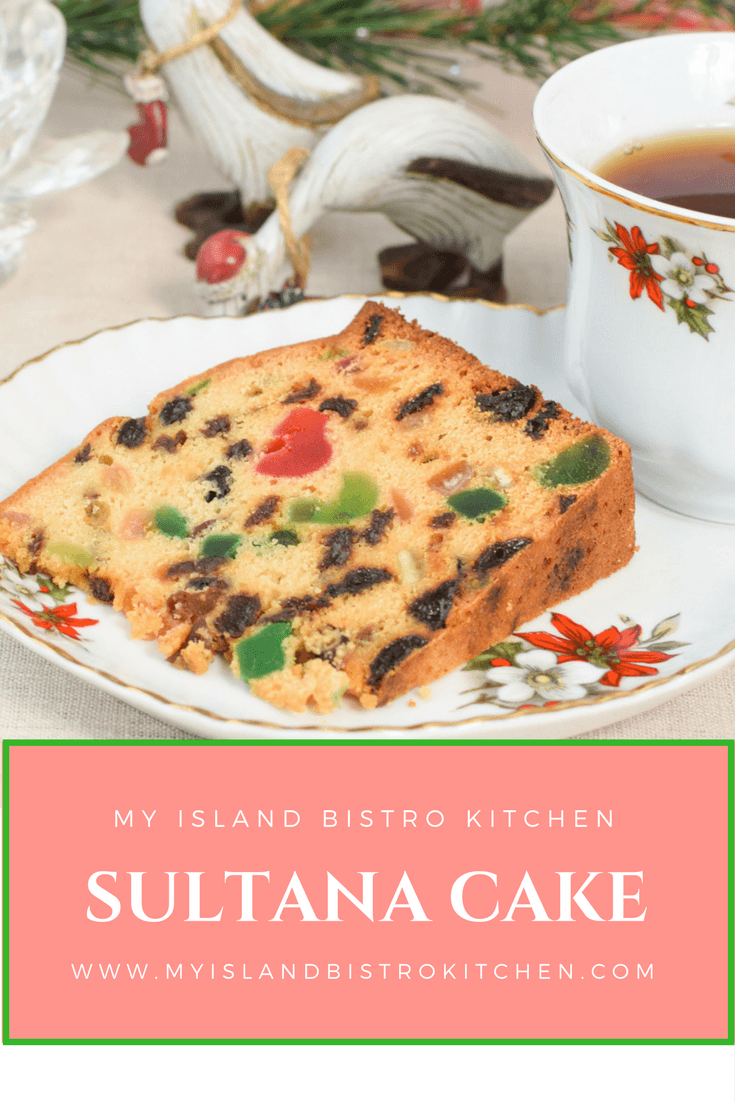
Unlike a fruitcake that needs several weeks of ageing and mellowing before serving so that the flavours are deepened, a Sultana Cake does not need to age. That said, I usually do wrap and leave my Sultana Cake for 48-72 hours before cutting.
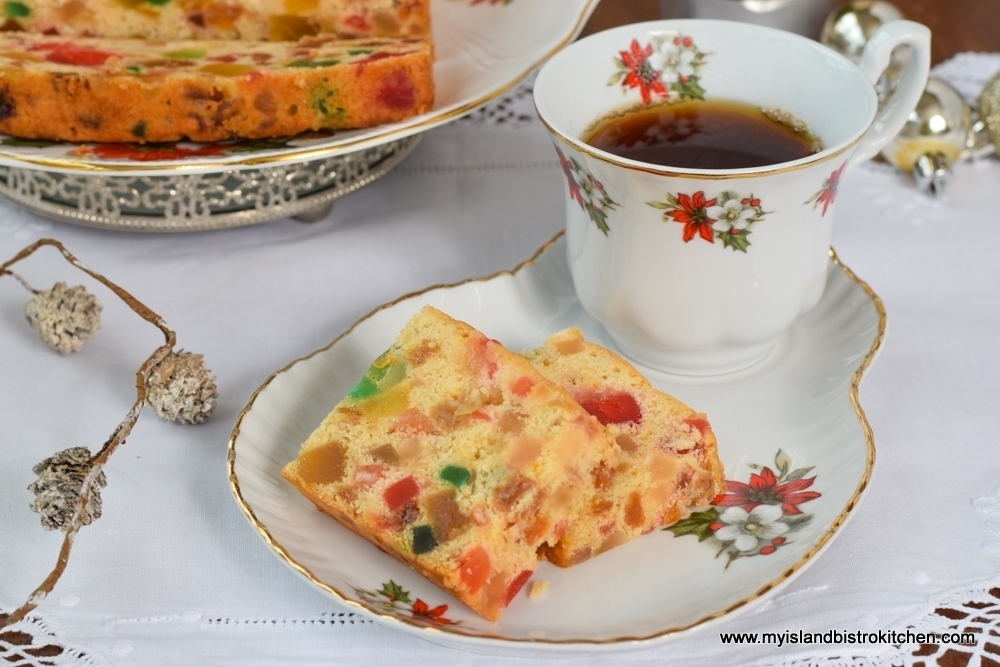
This is a delightful anytime cake although I often make it around Christmas. It’s a perfect alternative for anyone who finds fruitcake just a little too rich for their palate. It’s especially nice with a lovely cup of tea.
This cake freezes very well.
Sultana Cake
[Printable recipe follows at end of posting]
Sultana Cake
Ingredients:
1 lb sultana raisins ¼ lb currants 8 oz red and green glazed cherries 8 oz. mixed glazed fruit
1 cup unsalted butter, room temperature 1¾ cups brown sugar packed 5 large eggs, room temperature 1 tbsp vanilla 1 tsp lemon flavoring 1½ tsp grated orange rind 1½ tsp grated lemon rind
3½ cups all-purpose flour (reserve ½ cup for dredging the fruit) 1¼ tsp baking powder ¾ tsp salt
1 cup milk, room temperature
Method:
Preheat oven to 325°F. Spray 4” deep 10” round tube (funnel) pan with cooking spray and line bottom with parchment paper.
In large bowl, mix the raisins, currants, glazed cherries, and mixed fruit. Dredge with ½ cup of the flour called for in the recipe. Set aside.
Cream the butter and sugar until light and fluffy. Add the eggs, one at a time, beating well after each addition. Beat at medium-high speed for one additional minute. Add the vanilla and lemon flavoring and mix well. Add the grated orange and lemon rind. Mix well.
Sift remaining 3 cups of flour, baking powder, and salt together. Add to the creamed mixture alternately with the milk, beginning and ending with the dry ingredients. Beat at medium-high speed for 1 additional minute. Add the floured fruit mixture and stir just until ingredients are combined.
Spoon batter into prepared pan, using knife to smooth top. Place small pan of hot water on lower shelf, or floor, of oven to provide moisture to the cake as it bakes. Bake cake in center of middle rack for approximately 2½ hours or until cake tester inserted in or near centre of cake comes out clean. Let cake cool in pan for about 30 minutes before carefully removing from pan by inverting it on a tea towel and removing the paper. Carefully turn the cake top side up on to a wire cooling rack.
Less sweet than a fruitcake, this Sultana Cake, enhanced with glazed fruit, is moist and flavorful.
My Island Bistro KitchenMy Island Bistro Kitchen
Ingredients
1lbsultana raisins
¼lbcurrants
8ozred and green glazed cherries
8oz.mixed glazed fruit
1cupunsalted butter,room temperature
1¾cupsbrown sugar, packed
5large eggs,room temperature
1tbspvanilla
1tsplemon flavoring
1½tspgrated orange rind
1½tspgrated lemon rind
3½cupsall-purpose flour(reserve ½ cup for dredging the fruit)
1¼tspbaking powder
¾tspsalt
1cupmilk,room temperature
Instructions
Preheat oven to 325°F. Spray 4” deep 10” round tube (funnel) pan with cooking spray and line bottom with parchment paper.
In large bowl, mix the raisins, currants, glazed cherries, and mixed fruit. Dredge with ½ cup of the flour called for in the recipe. Set aside.
Cream the butter and sugar until light and fluffy. Add the eggs, one at a time, beating well after each addition. Beat at medium-high speed for one additional minute. Add the vanilla and lemon flavoring and mix well. Add the grated orange and lemon rind. Mix well.
Sift remaining 3 cups of flour, baking powder, and salt together. Add to the creamed mixture alternately with the milk, beginning and ending with the dry ingredients. Beat at medium-high speed for 1 additional minute. Add the floured fruit mixture and stir just until ingredients are combined.
Spoon batter into prepared pan, using knife to smooth top. Place small pan of hot water on lower shelf, or floor, of oven to provide moisture to the cake as it bakes. Bake cake in center of middle rack for approximately 2½ hours or until cake tester inserted in or near centre of cake comes out clean. Let cake cool in pan for about 30 minutes before carefully removing from pan by inverting it on a tea towel and removing the paper. Carefully turn the cake top side up on to a wire cooling rack.
Recipe Notes
[Copyright My Island Bistro Kitchen]
If you have made this recipe and enjoyed it and/or wish to share it with your friends and family, please do so on social media but be sure to share the direct link to this posting from my website.
Connect with My Island Bistro Kitchen on Social Media
Follow “the Bistro” on Pinterest at https://www.pinterest.ca/peibistro/ and pin the Pinterest-ready photo found at the end of this post to your favorite Pinterest boards.
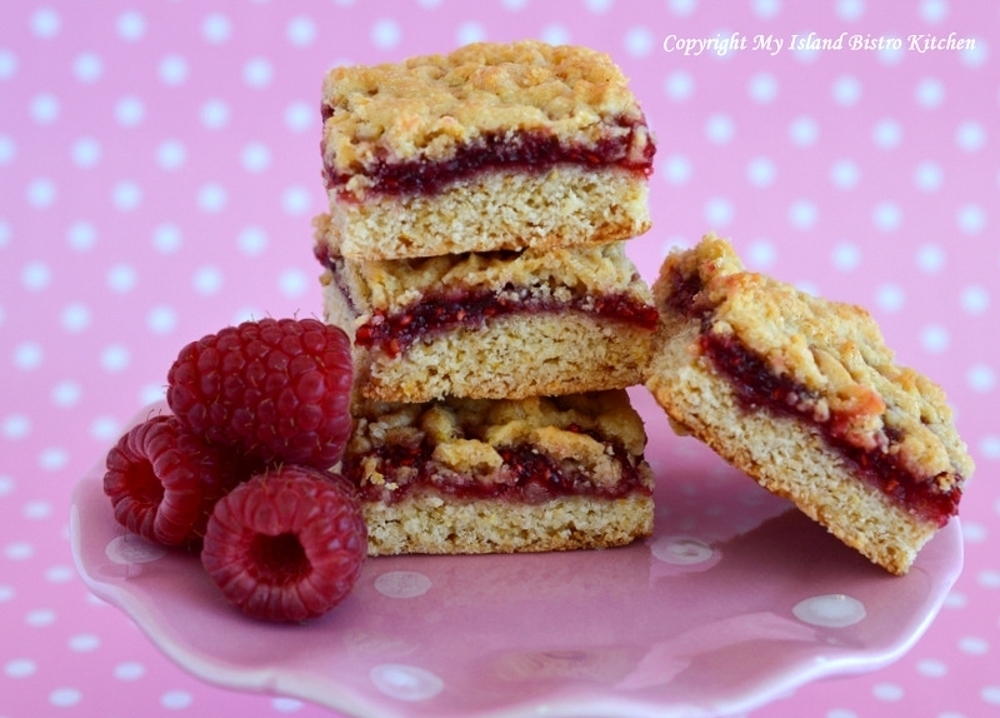
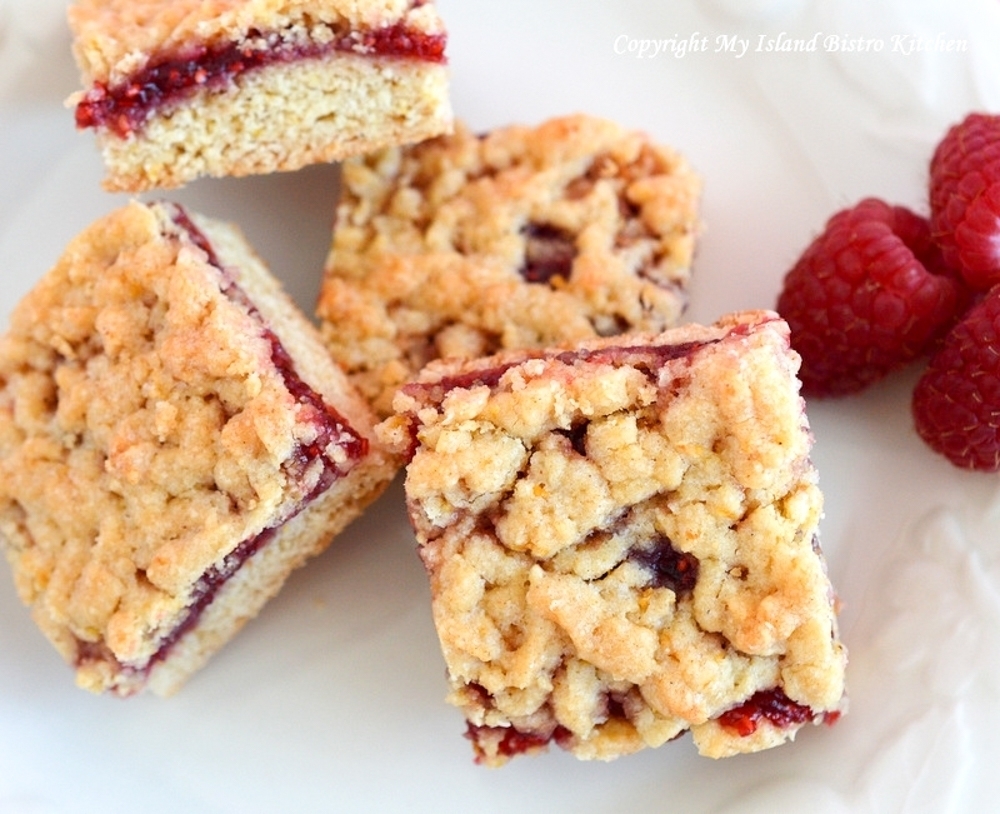
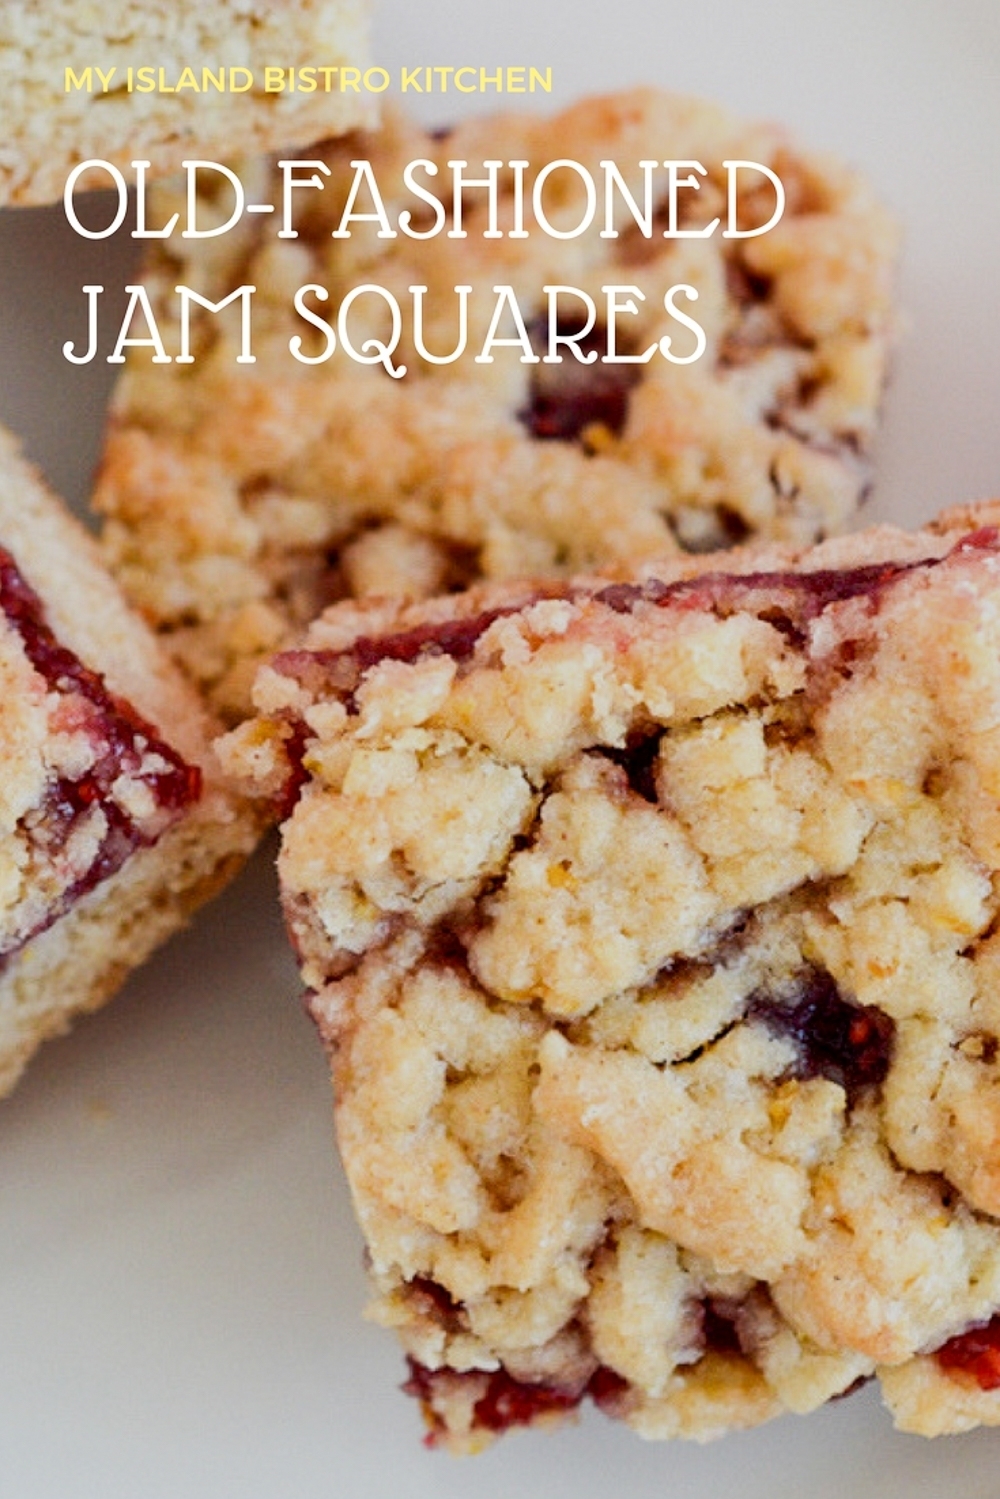
Jam Squares are an old-fashioned favourite that I grew up with. They are easy to make and only take common ingredients. While any kind of jam may be used, they are most showy when red jam, such as raspberry, is chosen. They are a treat at any time and look especially good on sweet trays for special events.
Jam Squares
[Printable Recipe follows at end of posting]
Old-Fashioned Jam Squares
Ingredients:
1/3 cup butter 1 egg 1 tsp vanilla ½ tsp almond flavoring ½ cup white sugar 1 cup + 2 tbsp all-purpose flour 1 tsp baking powder ¼ tsp salt ¼ tsp cinnamon ⅛ tsp cardamom Finely grated rind of 1 lemon ½ cup raspberry jam
Method:
Preheat oven to 350°.
Assemble ingredients.
Prepare 8”x8” pan by lining with parchment paper.
With electric mixer, beat butter well in medium-sized bowl. Beat in egg, vanilla, and almond flavouring.
Sift sugar, flour, baking powder, salt, cinnamon, and cardamom together. Stir in grated lemon rind. Add to butter-egg mixture and blend thoroughly.
Shape dough into a small oblong shape. Cut off about one-third of the dough and place in freezer for 15 minutes.
Meanwhile, press remaining dough into prepared pan. Place pan in freezer for 15 minutes.
Remove both the reserved dough and the pan from the freezer. Evenly spread the ½ cup raspberry preserves over dough in pan.
Using a grater, grate the reserved dough evenly over the jam.
Bake for 35 minutes or until topping on square is lightly golden in color.
Let square cool completely in pan before removing and cutting into 16 squares.
Jam Squares take only common ingredients. While any kind of jam may be used, they are most showy when red jam is chosen.
Course Snack
Cuisine Canadian
Keyword jam, jam square, squares
My Island Bistro KitchenBarbara99
Ingredients
1/3cupbutter
1egg
1tspvanilla
½tspalmond flavoring
½cupwhite sugar
1cup+ 2 tbsp all-purpose flour
1tspbaking powder
¼tspsalt
¼tspcinnamon
⅛tspcardamom
Finely grated rind of 1 lemon
½cupraspberry jam
Instructions
Preheat oven to 350°.
Assemble ingredients.
Prepare 8”x8” pan by lining with parchment paper.
With electric mixer, beat butter well in medium-sized bowl. Beat in egg, vanilla, and almond flavouring.
Sift sugar, flour, baking powder, salt, cinnamon, and cardamom together. Stir in grated lemon rind. Add to butter-egg mixture and blend thoroughly.
Shape dough into a small oblong shape. Cut off about one-third of the dough and place in freezer for 15 minutes.
Meanwhile, press remaining dough into prepared pan. Place pan in freezer for 15 minutes.
Remove both the reserved dough and the pan from the freezer. Evenly spread the ½ cup raspberry preserves over dough in pan.
Using a grater, grate the reserved dough evenly over the jam.
Bake for 35 minutes or until topping on square is lightly golden in color.
Let square cool completely in pan before removing and cutting into 16 squares.
Recipe Notes
Copyright My Island Bistro Kitchen
If you have made this recipe and enjoyed it and/or wish to share it with your friends and family, please do so on social media but be sure to share the direct link to this posting from my website.
Connect with My Island Bistro Kitchen on Social Media
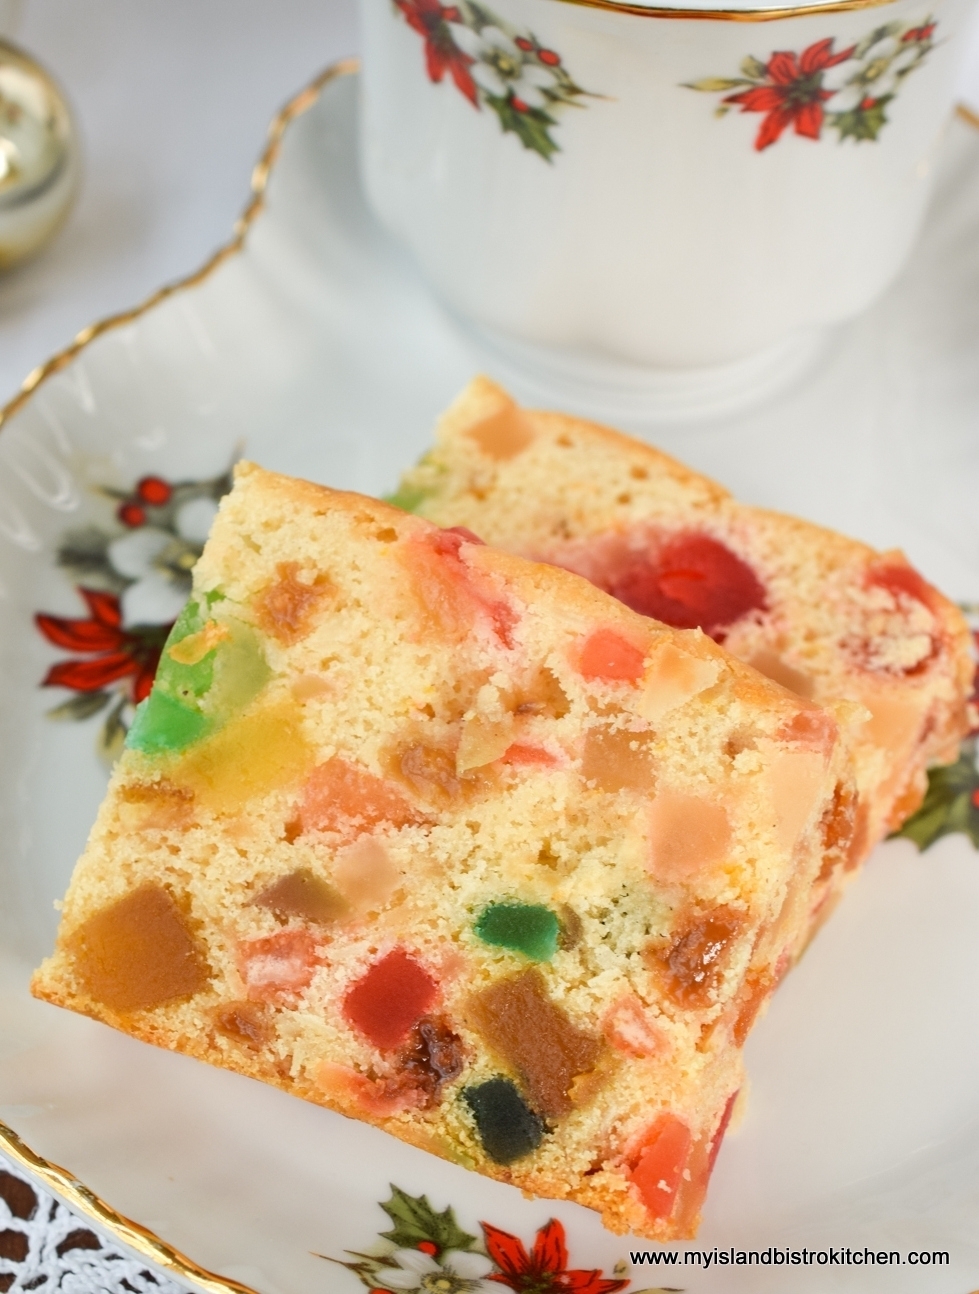
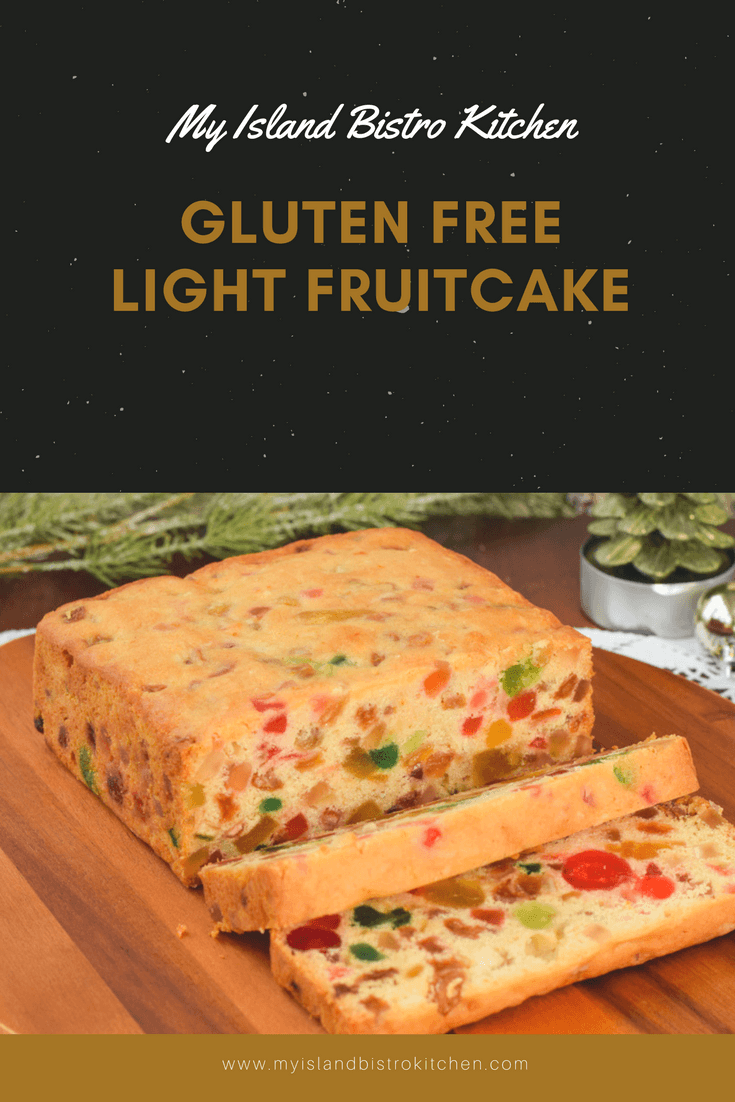
This posting contains my newly-developed recipe for gluten free light fruitcake.
This cake is so tasty that it’s hard to tell it is actually gluten free! The flours I use in this recipe are the one-to-one gluten free flour along with almond flour and coconut flour that add lovely flavour and texture to the cake batter.
Gluten Free Light Fruitcake
As always, ensure that all ingredients (not just the flours) called for in the recipe are indeed gluten free and have not been cross contaminated with products containing gluten.
Gluten Free Light Fruitcake
Rather than rewrite all the tips I have for making fruitcakes, I am directing readers to my previous postings for dark fruitcake and light fruitcake. While these two recipes are for regular fruitcakes that are not gluten free, the tips I have provided in those postings apply equally to this gluten free version of a fruitcake.
Gluten Free Light Fruitcake
[Printable recipe follows at end of posting]
Gluten-Free Light Fruitcake
Ingredients:
¼ lb golden sultana raisins 1½ oz green glazed cherries 2½ oz red glazed cherries 1½ oz glazed pineapple rings, chopped 3 oz mixed glazed fruit 2 tbsp citron 3 tbsp brandy 3 tbsp flaked coconut ½ tsp finely grated lemon rind ½ tsp finely grated orange rind
¼ cup butter, softened at room temperature 1/3 cup granulated sugar 2 large eggs, separated ¼ tsp pure vanilla ¼ tsp almond flavoring ¼ tsp lemon flavoring 3 tbsp applesauce
1½ tbsp orange juice 1 tbsp lemon juice 2 tbsp brandy
Few glazed cherries for cake top decoration (optional) Extra brandy for brushing on cake as it ages and for soaking cheesecloth in which to wrap the cake
Method:
In medium-sized bowl, combine the raisins, cherries, glazed pineapple, mixed glazed fruit, and citron. Mix well. Stir in the three tablespoons of brandy to coat the fruit. Cover tightly with plastic wrap. Let stand for about 24 hours to macerate the fruit, stirring occasionally. When ready to mix up the cake, add the coconut and grated lemon and orange rind. Stir well.
Prepare 6-inch square fruitcake pan that is at least 2¼” deep and has a removable bottom: Lightly spray the bottom and sides of the pan with cooking spray. Line the pan (bottom and sides), with brown paper or double thickness of parchment paper. Lightly spray the paper.
Preheat oven to 275°F.
In medium-sized bowl, and using an electric hand mixer, beat the butter until creamy. Gradually add the sugar and beat until mixture is light and creamy. Separate eggs and set aside the whites. Add the egg yolks to the creamed butter and sugar, one at a time, beating well after each addition and scraping the sides of the bowl with a spatula to ensure ingredients are all incorporated. Beat 1 additional minute. Beat in the vanilla, almond, and lemon flavorings. Stir in the applesauce.
Remove 3 tbsp of the one-to-one gluten free flour from the ¾-cup called for in the recipe and set aside to flour the fruit. Sift the remaining one-to-one gluten free flour, almond flour, and coconut flour together with the baking powder, xanthan gum, and salt.
In measuring cup or small bowl, combine the orange and lemon juices along with the two tablespoons of brandy.
Add the dry and wet ingredients to the beaten butter-sugar-egg mixture in three additions, starting and ending with the flour mixture. Transfer batter to a larger bowl, big enough to accommodate the amount of fruit to be added.
Sprinkle reserved 3 tablespoons of the one-to-one gluten free flour over the macerated fruit to which the coconut and grated lemon and orange rind have been added. Toss ingredients lightly and quickly. Gently fold the fruit mixture into the batter.
In clean bowl with clean beaters, beat the egg whites until stiff but not dry. Gently fold the whipped egg whites into the batter.
Transfer batter by large spoonfuls into the prepared baking pan. Use a knife to evenly spread the batter in the pan, smoothing the top. Add a few glazed cherries as decorations to the top of the cake, if desired.
Place small pan of hot water on the lower rack in the oven. Place fruitcake in center of middle rack and bake for approximately 1¼ – 1½ hours, or until cake is firm to the touch and cake tester inserted into centre of cake comes out clean. After about 35-40 minutes or so of baking, loosely tent cake with tin foil to prevent it from browning too much. When cake is baked, remove from oven and place on rack. Let cake cool in pan for about 40 minutes before carefully removing from pan by inverting it on to a tea towel and removing the paper. Carefully turn the cake, top side up, on to a wire cooling rack.
Let cake cool completely before brushing well with brandy and wrapping in brandy-soaked cheesecloth, followed by plastic wrap and tin foil. Store in a sealed plastic bag in a cool, dry area. Remove wrapping and brush cake top and sides with brandy once a week for 2-3 weeks, as the cake “ages”, before cutting and serving. After cake has aged 2-3 weeks, it is recommended to refrigerate the cake or, if not using in near future, freeze it.
Yield: 1 – 2 lb cake (apx. weight)
NOTE: As always, ensure that all ingredients used in the recipe are, in fact, gluten free.
A gluten free light fruitcake that is studded with a mixture of brandy-soaked glazed fruit baked within a batter made with gluten free one-to-one flour, almond flour, and coconut flour.
Ingredients
¼ lb golden sultana raisins
1½ oz green glazed cherries
2½ oz red glazed cherries
1½ oz glazed pineapple rings, chopped
3 oz mixed glazed fruit
2 tbsp citron
3 tbsp brandy
3 tbsp flaked coconut
½ tsp finely grated lemon rind
½ tsp finely grated orange rind
¼ cup butter, softened at room temperature
1/3 cup granulated sugar
2 large eggs, separated
¼ tsp pure vanilla
¼ tsp almond flavoring
¼ tsp lemon flavoring
3 tbsp applesauce
¾ cup one-to-one gluten-free flour
1½ tbsp almond flour
1 tbsp coconut flour
¾ tsp baking powder
¼ tsp xanthan gum
Pinch salt
1½ tbsp orange juice
1 tbsp lemon juice
2 tbsp brandy
Few glazed cherries for cake top decoration (optional)
Extra brandy for brushing on cake as it ages and for soaking cheesecloth in which to wrap the cake
Instructions
In medium-sized bowl, combine the raisins, cherries, glazed pineapple, mixed glazed fruit, and citron. Mix well. Stir in the three tablespoons of brandy to coat the fruit. Cover tightly with plastic wrap. Let stand for about 24 hours to macerate the fruit, stirring occasionally. When ready to mix up the cake, add the coconut and grated lemon and orange rind. Stir well.
Prepare 6-inch square fruitcake pan that is at least 2¼” deep and has a removable bottom: Lightly spray the bottom and sides of the pan with cooking spray. Line the pan (bottom and sides), with brown paper or double thickness of parchment paper. Lightly spray the paper.
Preheat oven to 275°F.
In medium-sized bowl, and using an electric hand mixer, beat the butter until creamy. Gradually add the sugar and beat until mixture is light and creamy. Separate eggs and set aside the whites. Add the egg yolks to the creamed butter and sugar, one at a time, beating well after each addition and scraping the sides of the bowl with a spatula to ensure ingredients are all incorporated. Beat 1 additional minute. Beat in the vanilla, almond, and lemon flavorings. Stir in the applesauce.
Remove 3 tbsp of the one-to-one gluten free flour from the ¾-cup called for in the recipe and set aside to flour the fruit. Sift the remaining one-to-one gluten free flour, almond flour, and coconut flour together with the baking powder, xanthan gum, and salt.
In measuring cup or small bowl, combine the orange and lemon juices along with the two tablespoons of brandy.
Add the dry and wet ingredients to the beaten butter-sugar-egg mixture in three additions, starting and ending with the flour mixture. Transfer batter to a larger bowl, big enough to accommodate the amount of fruit to be added.
Sprinkle reserved 3 tablespoons of the one-to-one gluten free flour over the macerated fruit to which the coconut and grated lemon and orange rind have been added. Toss ingredients lightly and quickly. Gently fold the fruit mixture into the batter.
In clean bowl with clean beaters, beat the egg whites until stiff but not dry. Gently fold the whipped egg whites into the batter.
Transfer batter by large spoonfuls into the prepared baking pan. Use a knife to evenly spread the batter in the pan, smoothing the top. Add a few glazed cherries as decorations to the top of the cake, if desired.
Place small pan of hot water on the lower rack in the oven. Place fruitcake in center of middle rack and bake for approximately 1¼ - 1½ hours, or until cake is firm to the touch and cake tester inserted into centre of cake comes out clean. After about 35-40 minutes or so of baking, loosely tent cake with tin foil to prevent it from browning too much. When cake is baked, remove from oven and place on rack. Let cake cool in pan for about 40 minutes before carefully removing from pan by inverting it on to a tea towel and removing the paper. Carefully turn the cake, top side up, on to a wire cooling rack.
Let cake cool completely before brushing well with brandy and wrapping in brandy-soaked cheesecloth, followed by plastic wrap and tin foil. Store in a sealed plastic bag in a cool, dry area. Remove wrapping and brush cake top and sides with brandy once a week for 2-3 weeks, as the cake “ages”, before cutting and serving. After cake has aged 2-3 weeks, it is recommended to refrigerate the cake or, if not using in near future, freeze it.
Notes
NOTE: As always, ensure that all ingredients used in the recipe are, in fact, gluten free.
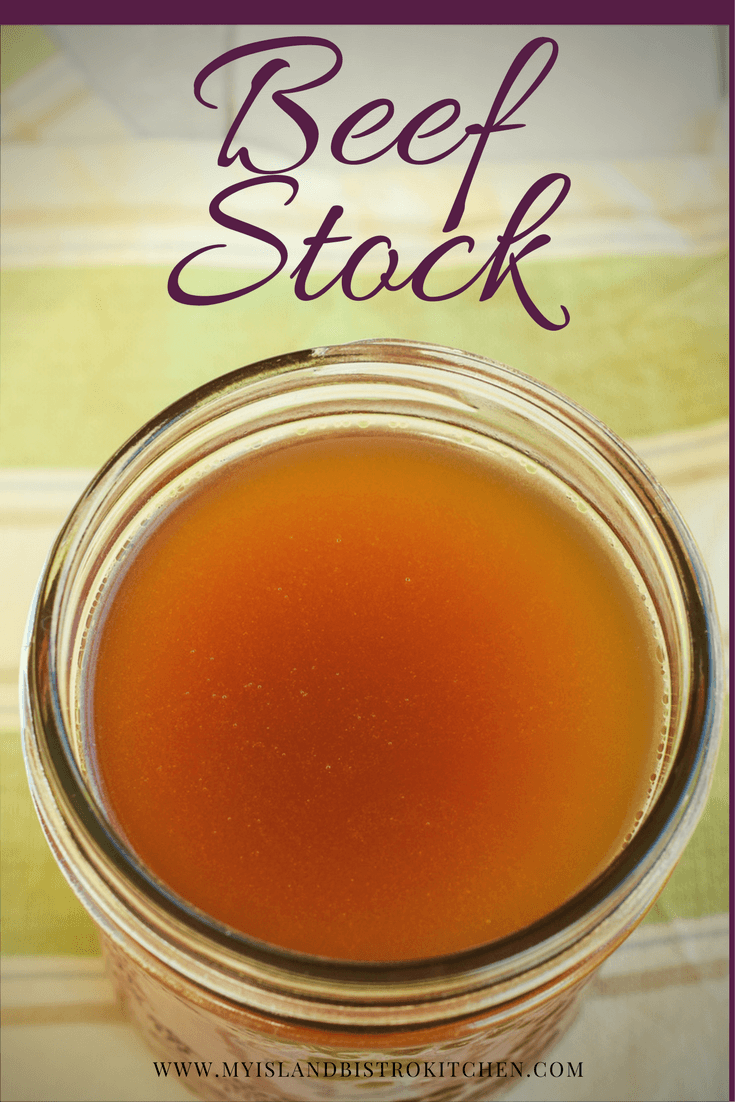
Beef stock and beef broth are terms often used interchangeably. However, there is actually a difference between the two. True beef stock is made principally with bones and water and little to no seasoning. It typically simmers for hours on the stove. Beef stock is nutrient dense, protein rich, and a good source of minerals and gelatin. Traditional beef broth, on the other hand, is usually made mainly with meat (though some bones may be included) and it often has additional flavorings (from vegetables, herbs, and spices) added to it. Beef broth typically simmers for less time than a true beef stock and is, therefore, a lighter product.
It seems the theory is that stock, made from the bones, is more pure and versatile than broth. This is because the unseasoned stock can be used in more dishes in which seasoning can then be added, unique to each dish as it is made. I actually like the soup, sauce, or casserole base (i.e., the stock/broth) to already have some seasoning in it to start with and I don’t experience any issues with my already-seasoned stock/broth in any recipe I am making. I like the extra flavour boost the seasoned stock/broth gives to dishes. So, regardless what it is technically called, what follows is my recipe for beef stock/broth (or a combination or modification thereof). Plan to make this on a day when you will be home for the day as this stock/broth will take 6-8 hours to simmer slowly.
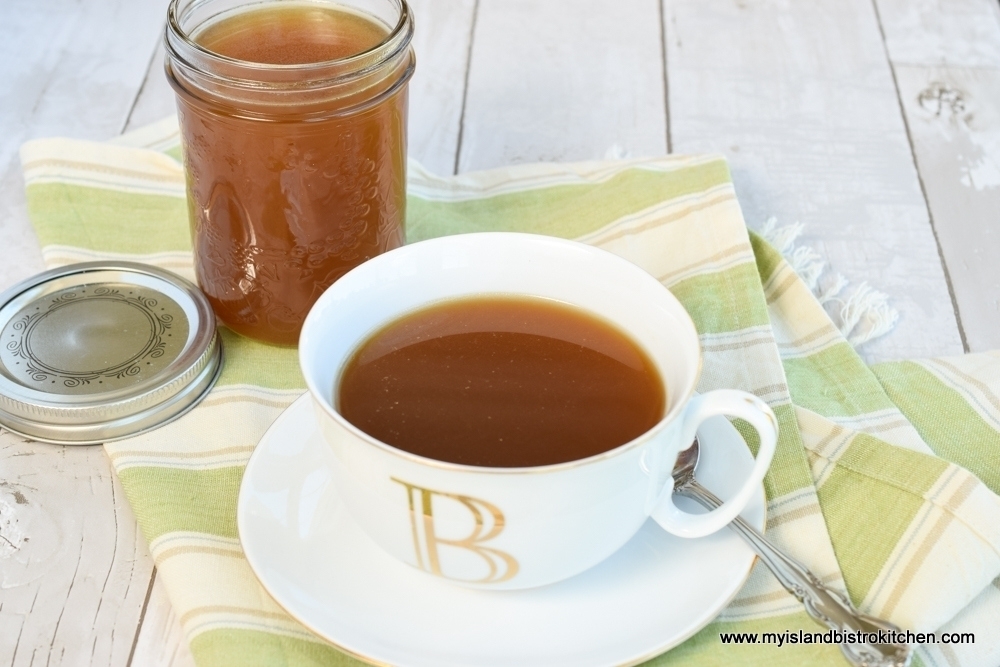
Beef Stock/Broth
A good stock/broth is a handy staple to have on hand in the cook’s kitchen (or freezer). Of course, if it is made as a broth with some seasonings, it can be used as a drink and is particularly useful in situations where one must follow a clear liquid diet. But, the stock/broth can be used as the base for soups, sauces, braised dishes, and gravies and it can also be used when called for in a host of recipes and other dishes. With a homemade stock/broth, you know what is in it, there are no preservatives, and the amount of salt can be controlled. I find that a lot of commercially-made stocks and broths are way too salty for my taste.
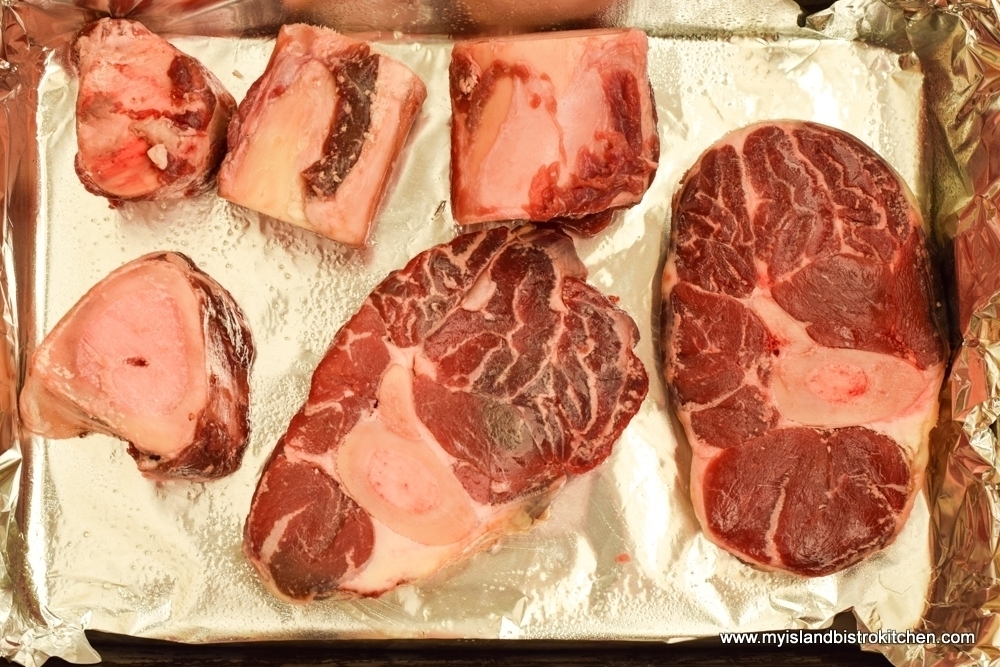
So, about 5 pounds of meaty bones with marrow from the local butcher will be needed for my recipe. By “meaty bones”, I am referring to bones that still have some meat on them. In fact, I like to include a couple of bones that have a substantial amount of meat on them as this, in my opinion, deepens the flavour of the stock/broth. Marrow is the fatty gelatin-like matter found in the cavity of large bones. If you tell your butcher you are making stock/broth, he or she will know what product you are looking for – i.e., beef bones with marrow – ribs, shanks, knuckle bones, and so forth. I call my butcher a couple of days in advance to ensure that the butcher shop will have the right product and amount set aside for me and I always ask that the meaty bones be cut into 2” – 3” thick chunks so they are easier to handle in both the roasting and simmering processes. The photo below shows a sampling of the bones/meat I typically use in my stock/broth.
Beef Bones for Stock/Broth
I like lots of deep flavor and color in my beef stock/broth. One way to get this is to roast the meaty bones. The roasting process will caramelize the meaty bones and this will yield a rich brown-colored stock/broth. Roast the bones at a high temperature (450°F) for about 30 minutes then brush some tomato paste over them and return them to the oven to roast for about 30 minutes longer.
Because I like lots of flavour in my stock/broth, I add some aromatic and flavourful vegetables – carrots, leek, parsnips, onion, celery, mushrooms, and a hefty dose of garlic. There is no need to peel the vegetables (except for the rutabaga that often has a wax coating). Just make sure they are very well washed. You want all the flavour and colour you can get from the vegetables, some of which is contained in the skins/peelings which will later be discarded anyway once the stock/broth is cooked and strained.
Celery is a big flavour agent in this stock/broth and that’s why, in addition to the three stalks of celery called for in the recipe, the celery leaves and the base of the three stalks are used to intensify the flavour. Any kind of mushrooms can be used in the stock/broth. Portobellos would be my first choice because of their earthy flavour and deep colour which will contribute to the colour of the stock/broth. I have, however, made great stock with the simple white button mushrooms which, of course, are more economical than Portobellos. Toss the vegetables with olive oil and add them to the roaster during the last 30 minutes of the roasting bones. It’s important to ensure these don’t burn or char so keep an eye on them and turn the veggies, if necessary, as they roast.
Once the bones and veggies are roasted, transfer them to a large stock pot. Don’t discard all those lovely brown bits and scrapings left in the roasting pan! Simply add a small amount of water to the pan (or you can use a bit of red wine, if you wish), place the roaster over medium heat, and scrape those bits up and transfer them to the stockpot, too. There is a lot of valuable flavour in those scrapings, too good to lose.
Fresh herbs can, of course, be used in this recipe but I have given amounts for dried herbs because we don’t all have access to quality fresh herbs year-round. Even though this stock will be strained, I still like to gather up all the herbs and spices into a bouquet garni because it corrals them and keeps the stock cleaner. To make the bouquet garni, cut an 8” square of double layer of cheesecloth, place the herbs and spices in the center, gather up the cheesecloth, and tie it with string. Add this lovely aromatic sachet to the stock pot. As the stock/broth simmers, it will be infused by the herbs and spices. Add the cold water, vinegar, bay leaves, and sea salt. The vinegar will draw the gelatin, nutrients, and minerals from the bones through the slow simmering process. Because only a small amount of vinegar is used, it will not leave a negative taste to the stock/broth.
Beef Stock/Broth
Bring the ingredients almost, but not quite, to the boiling point over medium-high heat. It’s critical that this stock NEVER boil – that will make it cloudy and the look you’re aiming for is a translucent liquid. Reduce the heat to a low simmer. The temperature of the liquid should reach and stay around the 200°F point. A candy thermometer is useful to verify the heat from time to time as the stock/broth simmers. If the temperature of the liquid dips below 200°F, simply increase the heat just a bit to bring the temperature back up to the simmering point. If it exceeds 200°F, drop the heat back. It’s okay if you see tiny bubbles forming but they should not break the surface of the liquid. The other tip to a translucent stock/broth is not to stir it as it is simmering. This will stir everything up and can cause clouding to occur, resulting in a murky stock/broth. While a cloudy broth will not affect its flavour, a translucent broth is more eye appealing.
As the mixture is simmering, you will notice some fat from the bones rising to the surface. Periodically take a large spoon and skim this fat away and discard it. Don’t cover the stockpot while the stock/broth is simmering as it is more difficult to keep the liquid at the simmering point if it is covered. Also, some reduction of the liquid is required in order to achieve desired flavour. If you find that too much of the stock/broth is evaporating too quickly, reduce the heat and add a bit more cold water to ensure all the ingredients are submerged in the liquid. However, be cautious about adding too much water as it will dilute the flavour of the stock/broth.
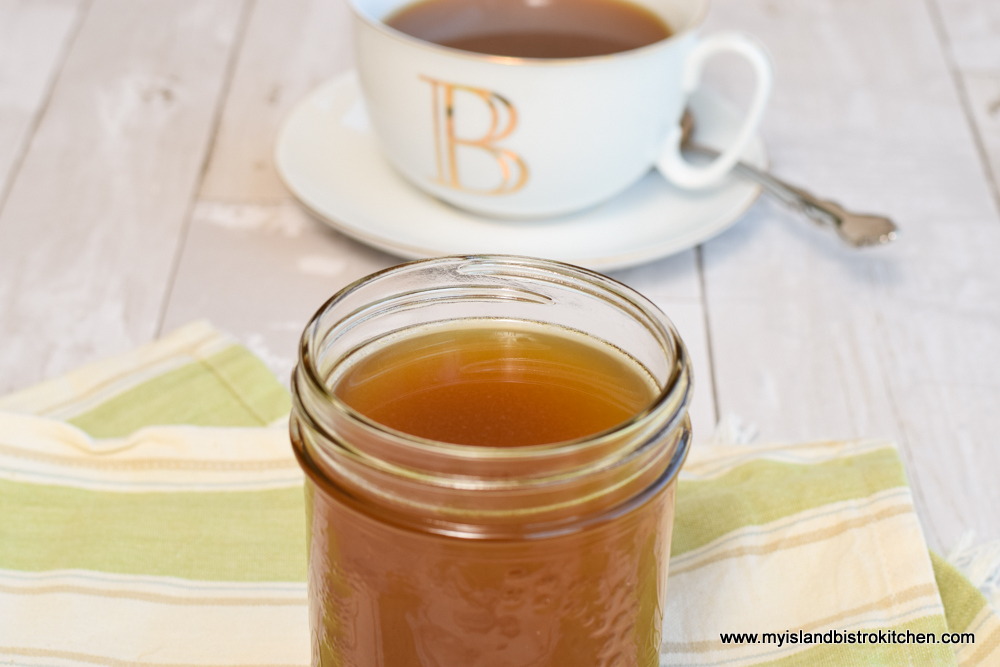
Beef Stock/Broth
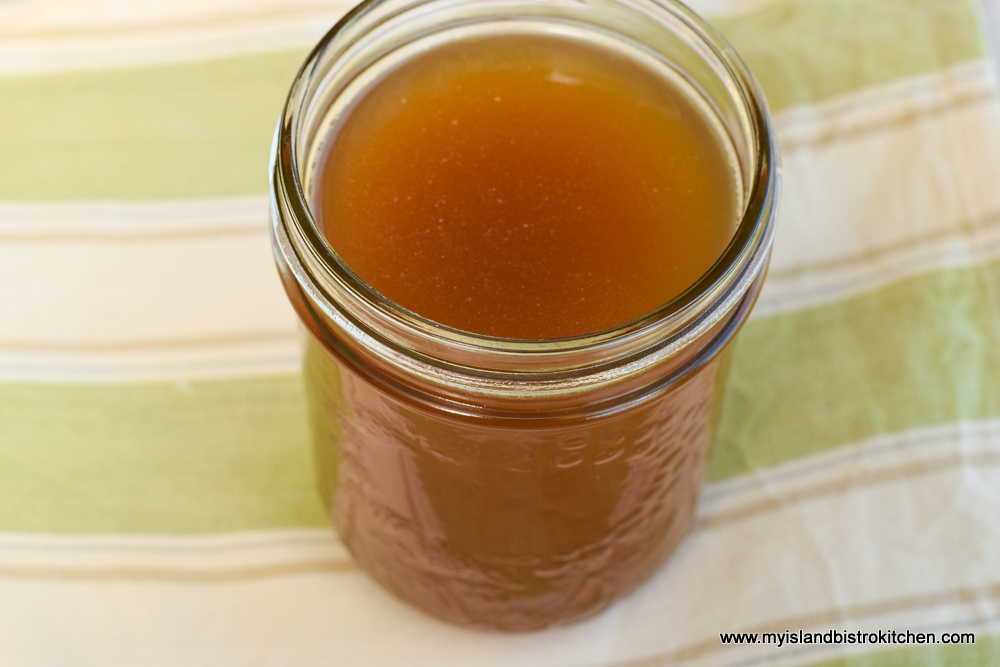
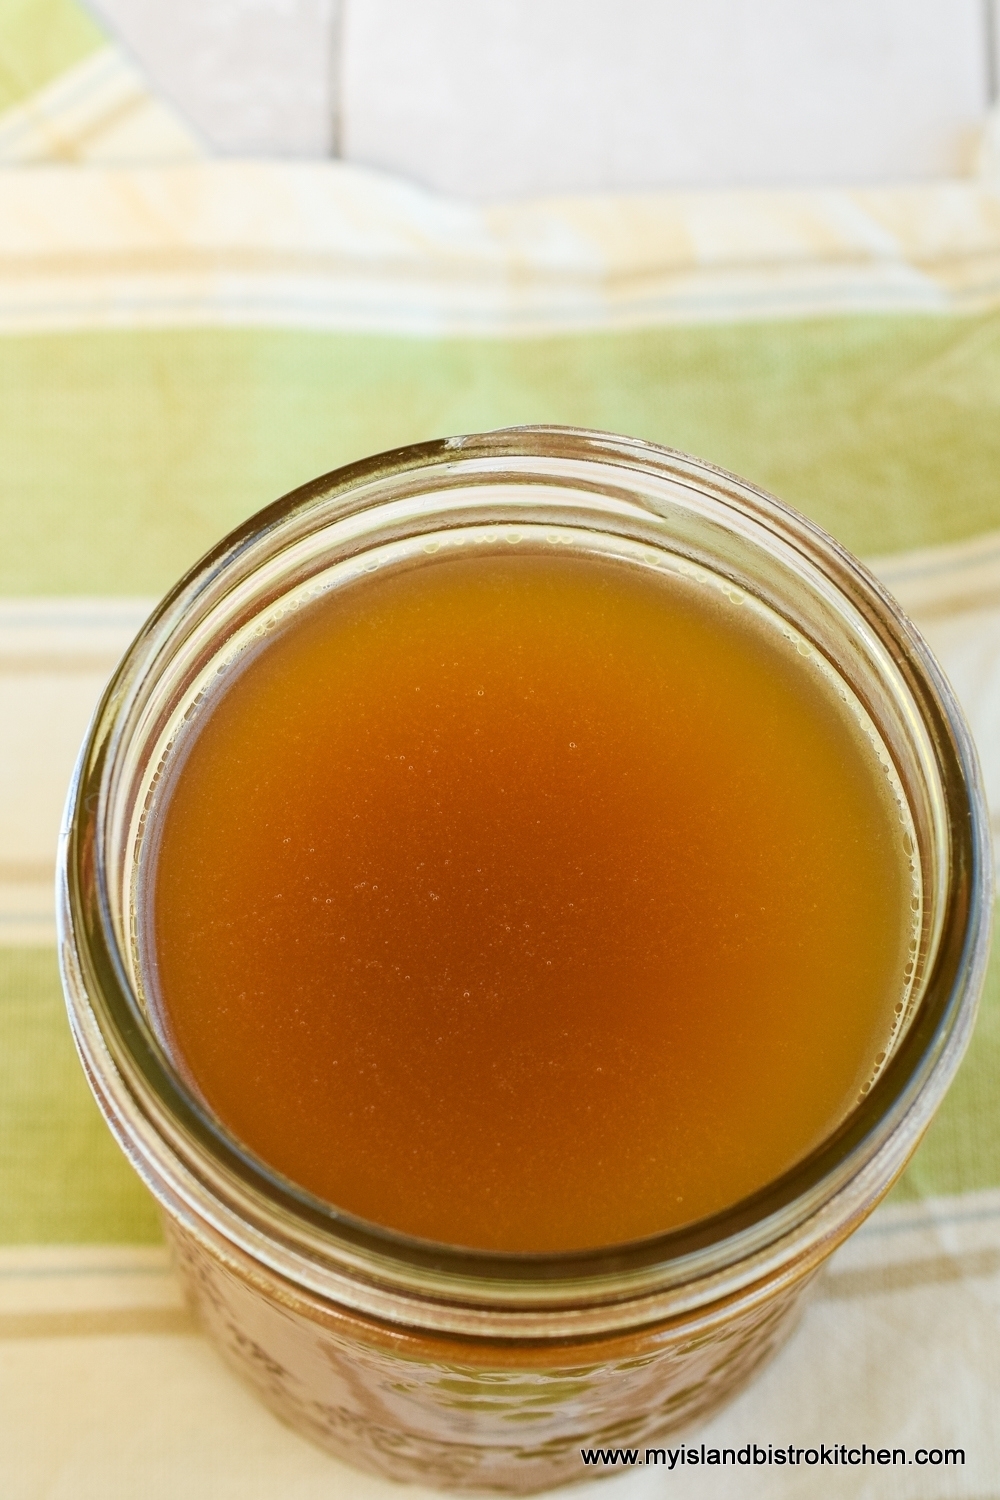
Once the stock/broth has simmered for 6-8 hours, remove it from the heat and strain it. To do this, line a large colander with a double layer of damp cheesecloth. Place the colander over a clean stock pot and pour the stock/broth into the colander. Discard the bones, vegetables, and bouquet garni. Place the stockpot containing the strained stock/broth in a large sink filled with ice water to cool it quickly. Skim off any further solidified fat as the stock/broth cools. If you are super particular about having a totally clear stock/broth, free of all impurities, I recommend straining it twice through a colander lined with damp cheesecloth. The stock/broth in the photos in this posting were strained once. Some tiny impurities are visible. They don’t bother me but a second straining of the stock/broth would remove them. Place the strained stock in the refrigerator to chill completely then remove any remaining solidified fat. For more intense flavored stock/broth, it can be placed back on the stove at medium-low heat and reduced to one-half, yielding a stronger, more concentrated flavour but there will obviously be less quantity.
So, apart from the necessity to use the right ingredients in the stock/broth, the three big tips I have for making a clear, high quality stock/broth are: 1) Don’t boil it; 2) Don’t stir it; and 3) Don’t cover it while it simmers. Basically, put the ingredients in a large stockpot, get the liquid to the simmering point and let it do its thing.
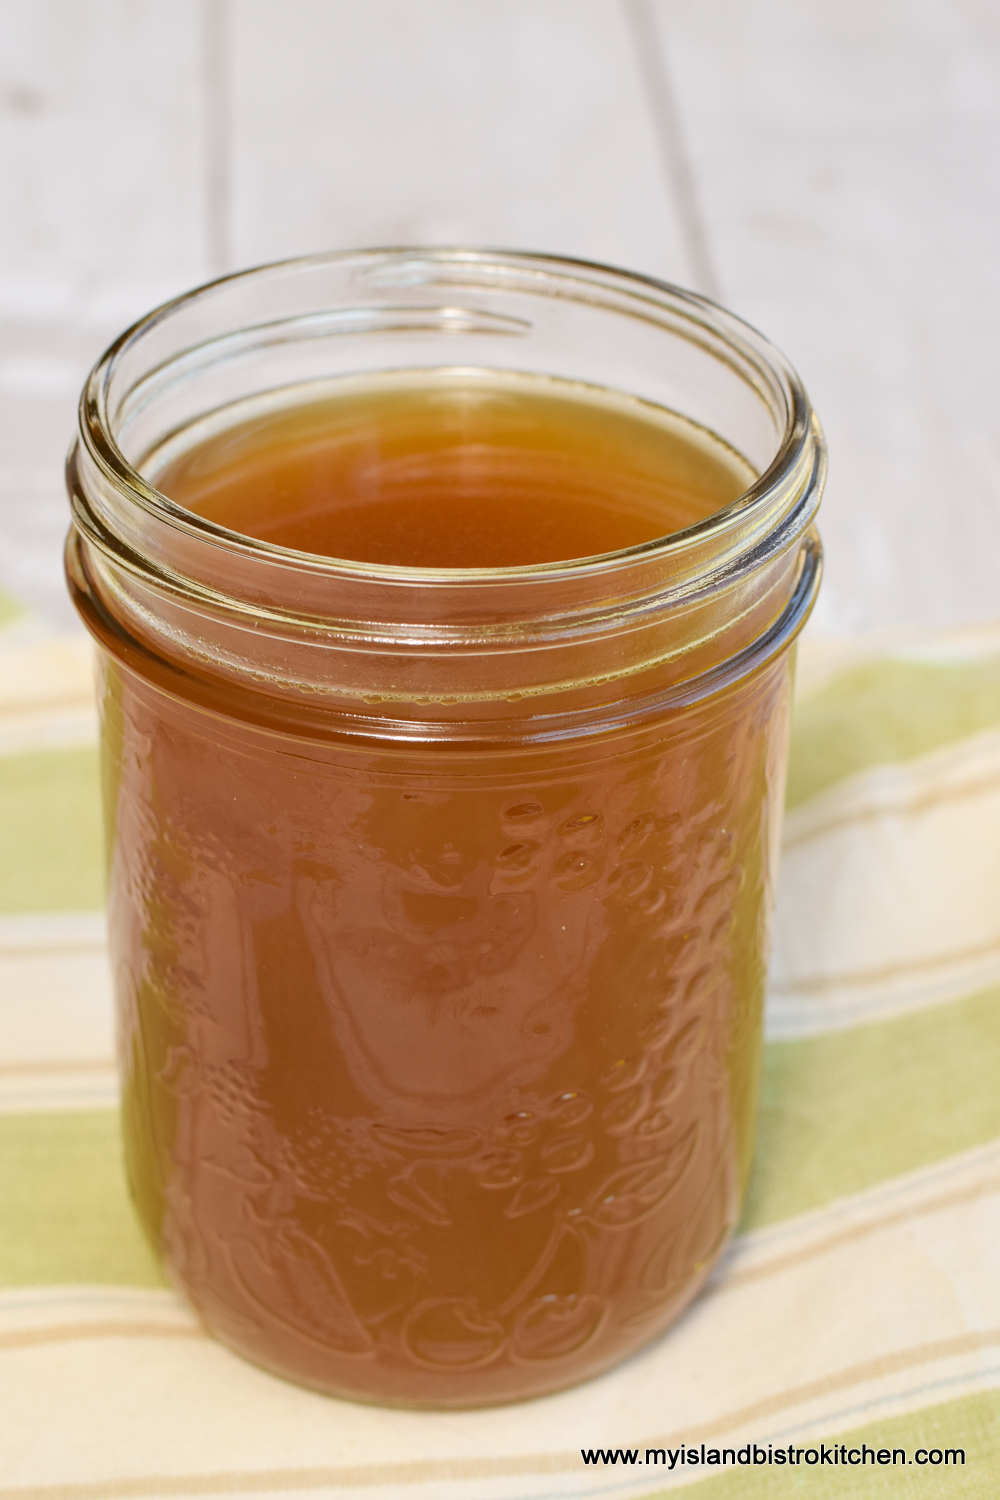
Beef Stock/Broth
This stock/broth will keep in the refrigerator for up to three days or it can be frozen, at this point, in containers of desired size. I usually freeze and label mine in different quantities based on what recipe I intend using it in. I will often freeze some stock/broth in ice cube containers and use them for flavoring dishes, like rice or steamed vegetables, where smaller amounts may be needed. So, regardless whether the ingredients and method used in this recipe are technically a “broth” or a “stock”, I use this tasty product in any recipe calling for either beef stock or beef broth.
[Printable recipe follows at end of posting]
Homemade Beef Stock/Broth
Ingredients:
5 lbs meaty beef bones with marrow (shank, ribs, knuckle bones) Olive oil 1 – 5 oz/156ml can tomato paste
2 large carrots, unpeeled and halved, cut into 3” chunks 1 large leek, light and white parts only, halved 2 parsnips, unpeeled, cut into 2” chunks 1 large onion, unpeeled, halved 11 oz rutabaga, peeled, cut into ½” slices and halved 1 head garlic (containing apx. 9-10 cloves) 3 large celery ribs (with leaves and base of stalks included), cut into 3” chunks 6 oz mushrooms, halved
12 cups cold water 1½ tbsp cider vinegar 2 bay leaves 1½ tsp fine sea salt
Method:
Preheat oven to 450°F. Grease large roasting pan. In large bowl, toss meaty bones with olive oil to lightly coat. Place bones in roaster and roast for 30 minutes.
Place carrots, leek, parsnips, onion, rutabaga, garlic, celery, and mushrooms in a large bowl and add enough olive oil to lightly coat.
Remove bones from oven, turn, and brush them with tomato paste. Add the olive-oil coated vegetables to the roasting pan and return the roaster to the oven. Roast for another 30 minutes, turning the vegetables once or twice to ensure they do not burn. Transfer roasted bones and vegetables to a large stockpot. Add a small amount of water (or a bit of red wine) to roasting pan, place it over medium heat, and stir scrapings left from the roasting process. Pour into stock pot with the bones and vegetables.
Using a small 8” square of double cheese cloth, gather the herbs and spices together in the center and tie up cheesecloth to make a bouquet garni. Drop the sachet in to the stock pot. Add the cold water, vinegar, bay leaves, and sea salt.
Bring mixture to just below the boiling point over medium high heat. DO NOT BOIL. Reduce heat to a low simmer (liquid temperature should reach and remain around the 200°F point) and let stock simmer, uncovered, for 6-8 hours. If liquid evaporates too much and too quickly, reduce the heat and add a bit more water (e.g., 1 cup or so). Periodically, skim the fat, as it forms, from the surface of the stock as it simmers. Do not stir mixture as it simmers as this may create a cloudy stock/broth.
Prepare a large colander with a double layer of damp cheesecloth. Place colander over large clean stock pot and pour the stock/broth mixture into the colander to strain it. Discard bones, vegetables, and bouquet garni. Place stockpot containing the strained stock/broth in large sink filled with ice water to cool the stock quickly. Remove and discard any solidified fat. Place strained stock in refrigerator to chill completely then remove any remaining solidified fat from the chilled stock/broth.
Use stock/broth immediately or store, covered, in refrigerator for up to 3 days. Alternatively, pour stock/broth into containers of desired size and freeze for future use.
Yield: Apx. 10 cups (depending on amount of evaporation and reduction that has occurred).
NOTE: Strained stock/broth may be reheated over medium-low heat and reduced to one-half. This will yield a stronger flavored and more concentrated product but, naturally, there will be less quantity.
Straining the stock/broth twice through a cheesecloth-lined colander will yield a clearer broth, free of any impurities.
2 large carrots, unpeeled and halved, cut into 3” chunks
1 large leek, light and white parts only, halved
2 parsnips, unpeeled, cut into 2” chunks
1 large onion, unpeeled, halved
11 oz rutabaga, peeled, cut into ½” slices and halved
1 head garlic (containing apx. 9-10 cloves)
3 large celery ribs (with leaves and head of stalks included), cut into 3” chunks
6 oz mushrooms, halved
1 tbsp dried parsley
1½ tsp mixed peppercorns
1 tsp dried thyme
1 tsp dried oregano
1 tsp dried rosemary
1 tsp dried basil
6 whole allspice
4 whole cloves
12 cups cold water
1½ tbsp cider vinegar
2 bay leaves
1½ tsp fine sea salt
Instructions
Preheat oven to 450°F. Grease large roasting pan. In large bowl, toss meaty bones with olive oil to lightly coat. Place bones in roaster and roast for 30 minutes.
Place carrots, leek, parsnips, onion, rutabaga, garlic, celery, and mushrooms in a large bowl and add enough olive oil to lightly coat.
Remove bones from oven, turn, and brush them with tomato paste. Add the olive-oil coated vegetables to the roasting pan and return the roaster to the oven. Roast for another 30 minutes, turning the vegetables once or twice to ensure they do not burn. Transfer roasted bones and vegetables to a large stockpot. Add a small amount of water (or a bit of red wine) to roasting pan, place it over medium heat, and stir scrapings left from the roasting process. Pour into stock pot with the bones and vegetables.
Using a small 8” square of double cheese cloth, gather the herbs and spices together and tie up cheesecloth to make a bouquet garni. Drop the sachet in to the stock pot. Add the cold water, vinegar, bay leaves, and sea salt.
Bring mixture to just below the boiling point over medium high heat. DO NOT BOIL. Reduce heat to a low simmer (liquid temperature should reach and remain around the 200°F point) and let stock simmer, uncovered, for 6-8 hours. If liquid evaporates too much and too quickly, reduce the heat and add a bit more water (e.g., 1 cup or so). Periodically, skim the fat, as it forms, from the surface of the stock as it simmers. Do not stir mixture as it simmers as this may create a cloudy stock/broth.
Prepare a large colander with a double layer of damp cheesecloth. Place colander over large clean stock pot and pour the stock/broth mixture into the colander to strain it. Discard bones, vegetables, and bouquet garni. Place stockpot containing the strained stock/broth in large sink filled with ice water to cool the stock quickly. Remove and discard any solidified fat. Place strained stock in refrigerator to chill completely then remove any remaining solidified fat from the chilled stock/broth.
Use stock/broth immediately or store, covered, in refrigerator for up to 3 days. Alternatively, pour stock/broth into containers of desired size and freeze for future use.
Notes
Strained stock/broth may be reheated over medium-low heat and reduced to one-half. This will yield a stronger flavored and more concentrated product but, naturally, there will be less quantity.
Straining the stock/broth twice through cheesecloth-lined colanders will yield a clearer broth, free of any impurities.
Be sure to read the accompanying blog post to this recipe as it contains additional information and tips on making beef stock/broth.
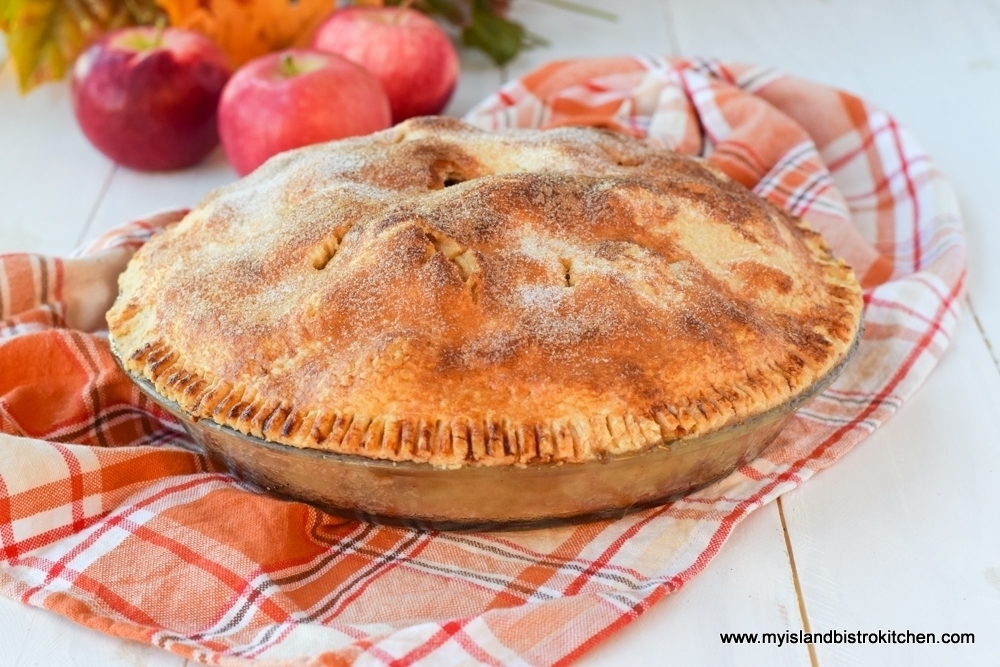
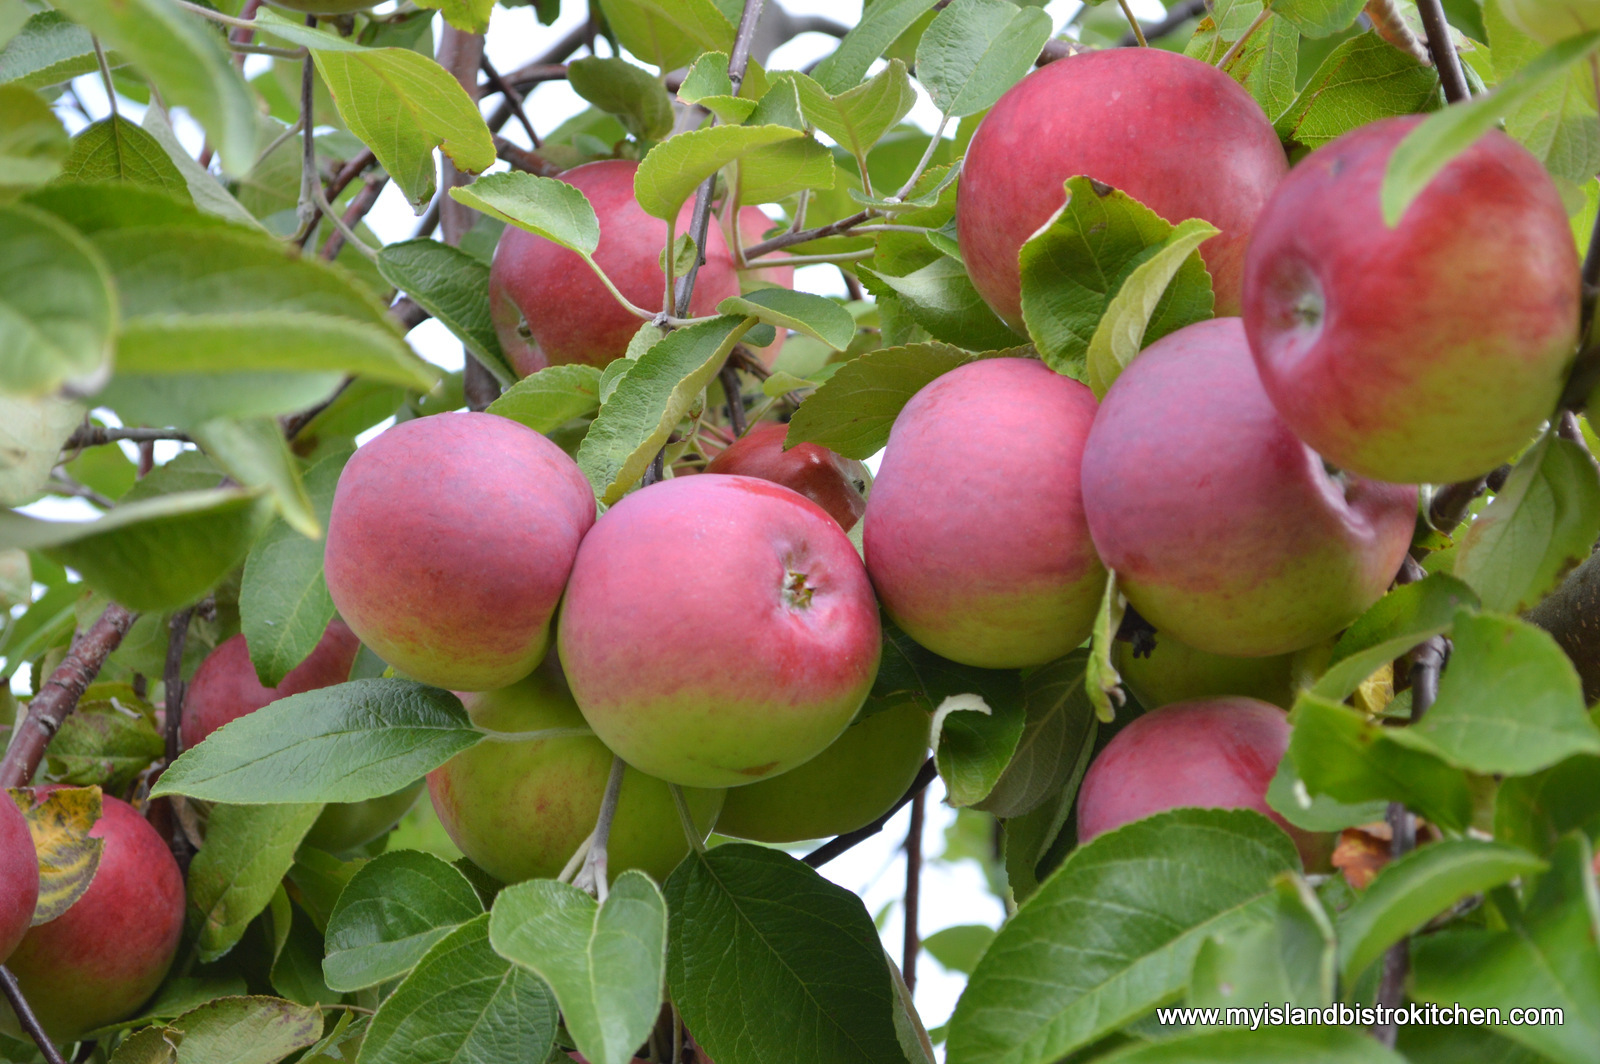
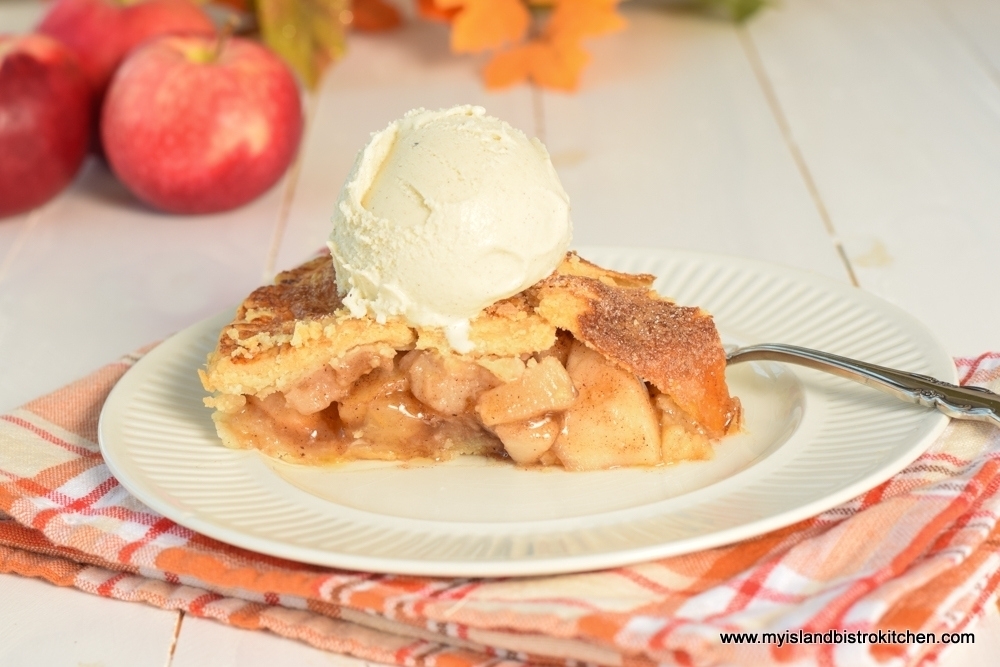
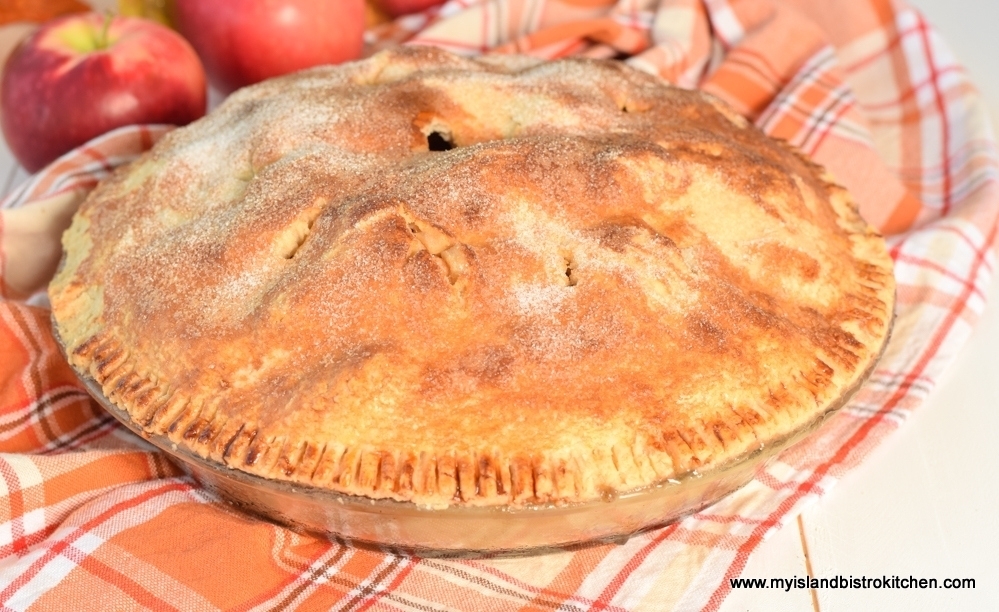
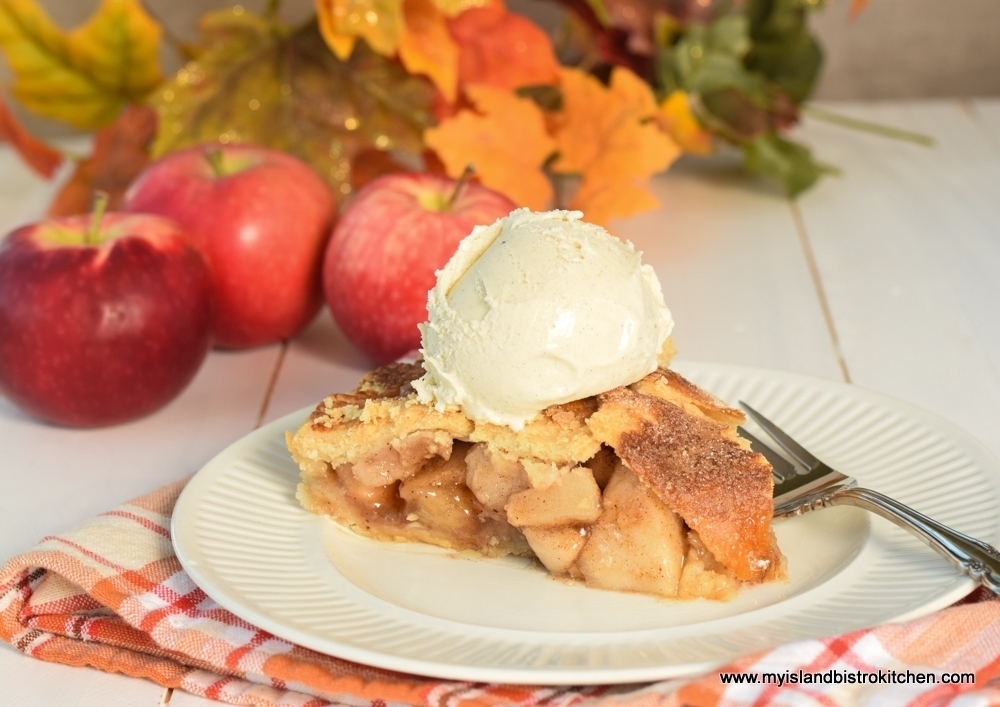
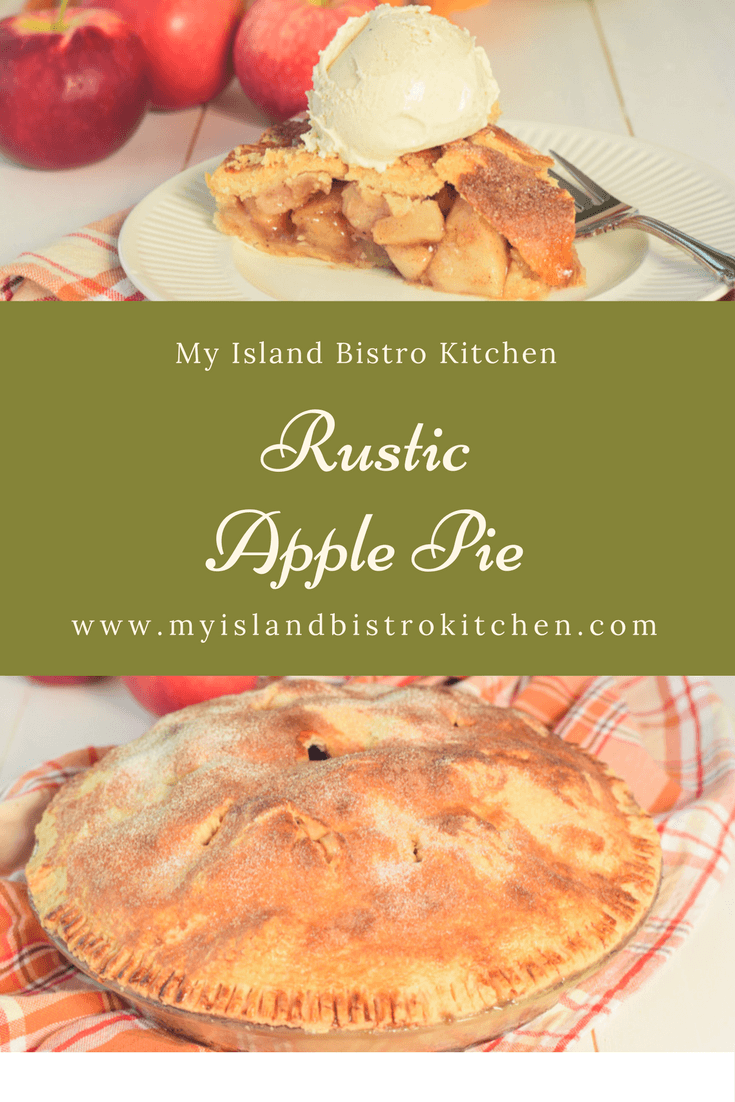
There is something warm, inviting, and nostalgic about walking into a kitchen to the tantalizing scent of an apple pie baking. In my opinion, one of the best desserts is homemade apple pie, especially when topped with a nice round scoop of high-quality vanilla ice cream! Fall is a great time to make apple pies (and some extras for the freezer) because the apples are so fresh and there is a great selection. The house smells so divine while the apple pie bakes!
Apples
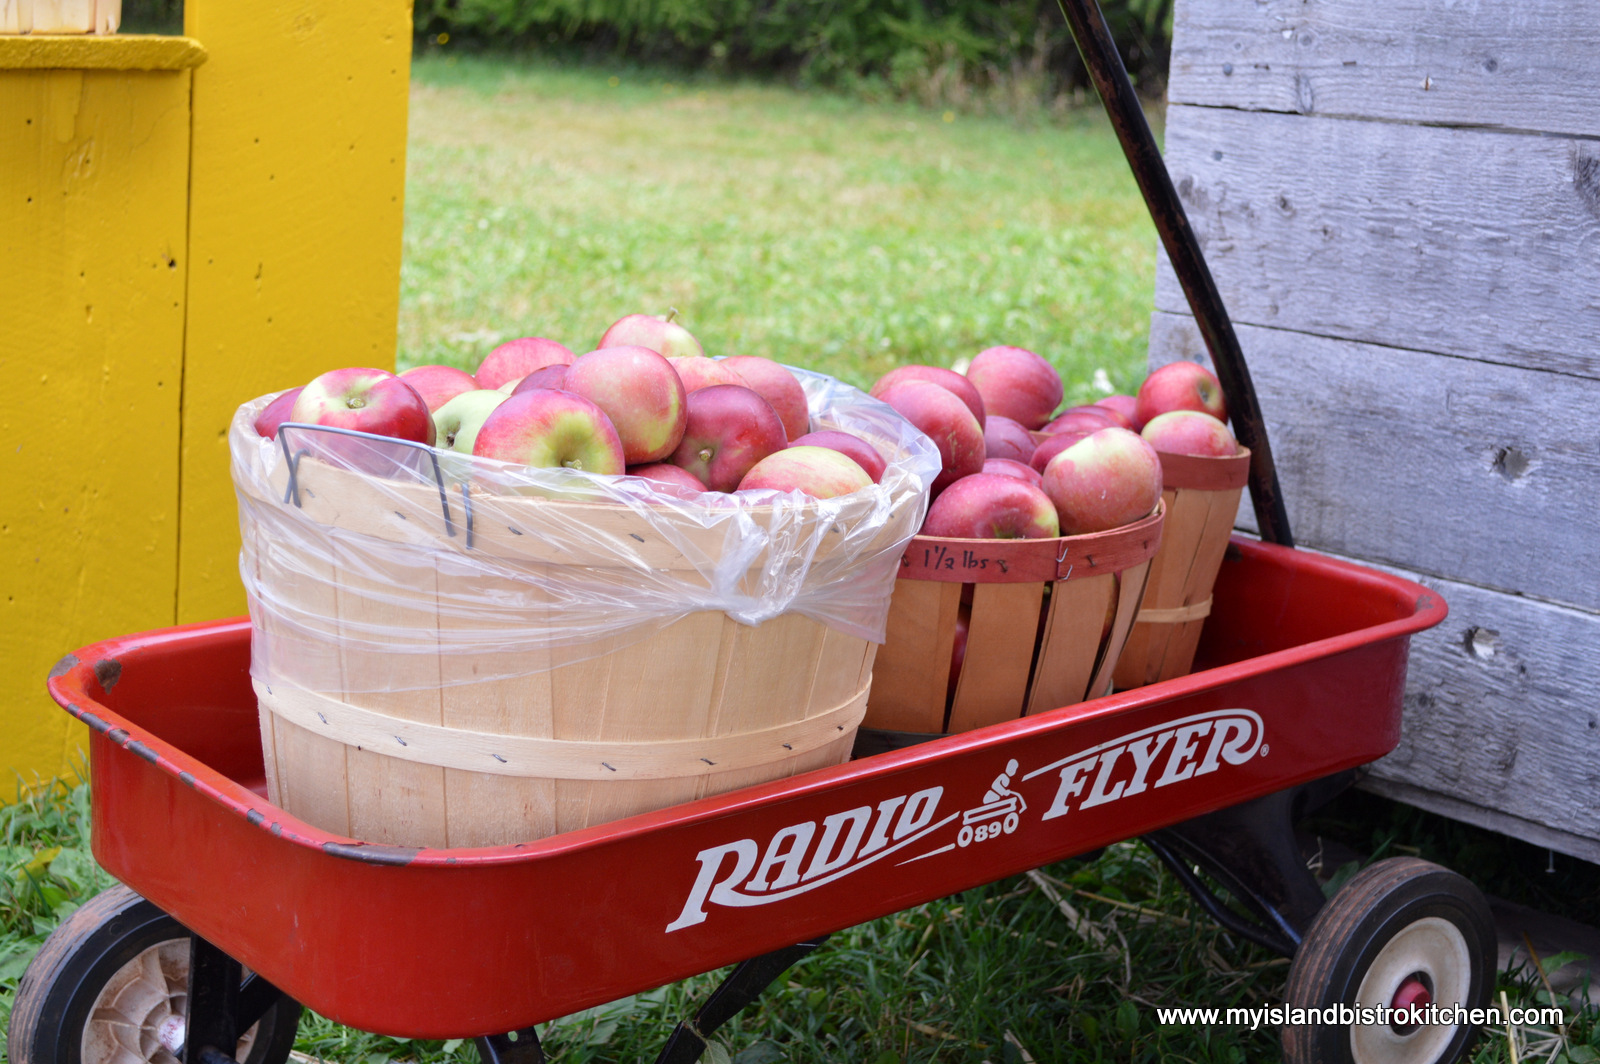
One of my favorite fall rituals is to go picking apples. I love being out in the middle of an orchard on a crisp, sunny autumn day surrounded by trees heavy laden with gorgeous big apples. Typically, we make the annual trek to Arlington Orchards, west of Summerside, to pick a supply of apples. It’s fun to load up some apple baskets into one of the orchard’s little red flyer wagons and strike off through the orchards. They have many different varieties of apples from which to choose.
The Apple Wagon
I like making pastry and baking pies and have been doing so since I was about 11 years old. I watched my mother and grandmother make pies and as soon as I could mix the dough and handle a rolling pin, I was off and running! And, apple pie just happens to be one of my favorites to make. For my pie pastry recipe and tips and hints on making pastry, click here.
Not all apples are suitable for making pies. Some (like MacIntosh variety) are just too soft and, essentially, become apple sauce while the pie cooks. Soft flesh apples that have no crunch when you bite into them are not suitable for pies. It is important to choose apples that have good structure – i.e., those that will cook well but, at the same time, hold their shape. A slice of a good apple pie will reveal the apple slices still in tact and recognizable.
Apple Pie
My favorite apples for pies are Cortlands, Spartans, Honeycrisps, Lobos, and Pippins. The one thing each of these apples has in common is crisp texture which makes them ideal choices for pies because they don’t break down in the baking process. I also like to use more than one kind of apple in my pies because each brings its own flavor and characteristics and, in my opinion, a blend of different apple varieties with various degrees of sweetness, tartness, and juiciness will result in a pie with a great depth of flavor. Cortlands are a bit tart and quite juicy and, of these five varieties, perhaps has the least crisp texture which means it will soften the most in the pie and that will help to bind the filling . Honeycrisps have a sweet-tart flavor and are quite aromatic which gives the pie that lovely scent while it is baking. Spartans are juicy and have an ideally balanced sweet-tart apple flavor. Lobos are a bit tangy and Pippins have juicy flesh, are very aromatic, and reveal a balance of sweetness and acidity. A combination of any three of these apples will yield a tasty pie. Some apples of each variety can, of course, be used in the pie if you have them.
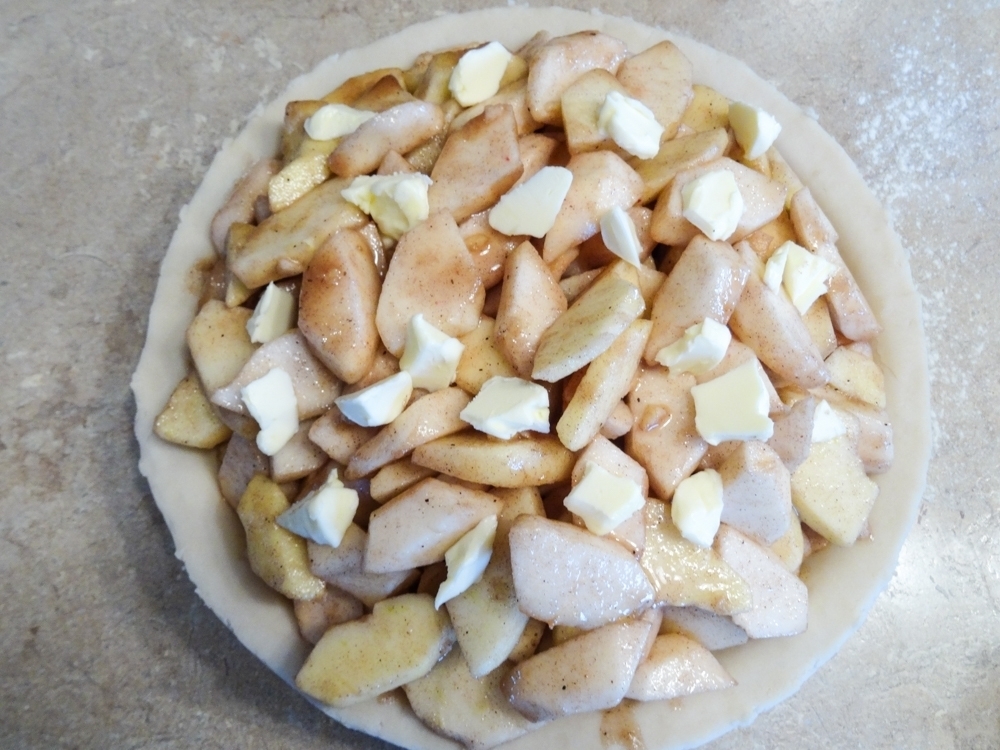
For this 9” pie, 3½ pounds of apples are needed. It may look like a lot but the apples will settle as the pie bakes and the pie looks more impressive if it has some depth to it.
Apple Pie Under Construction
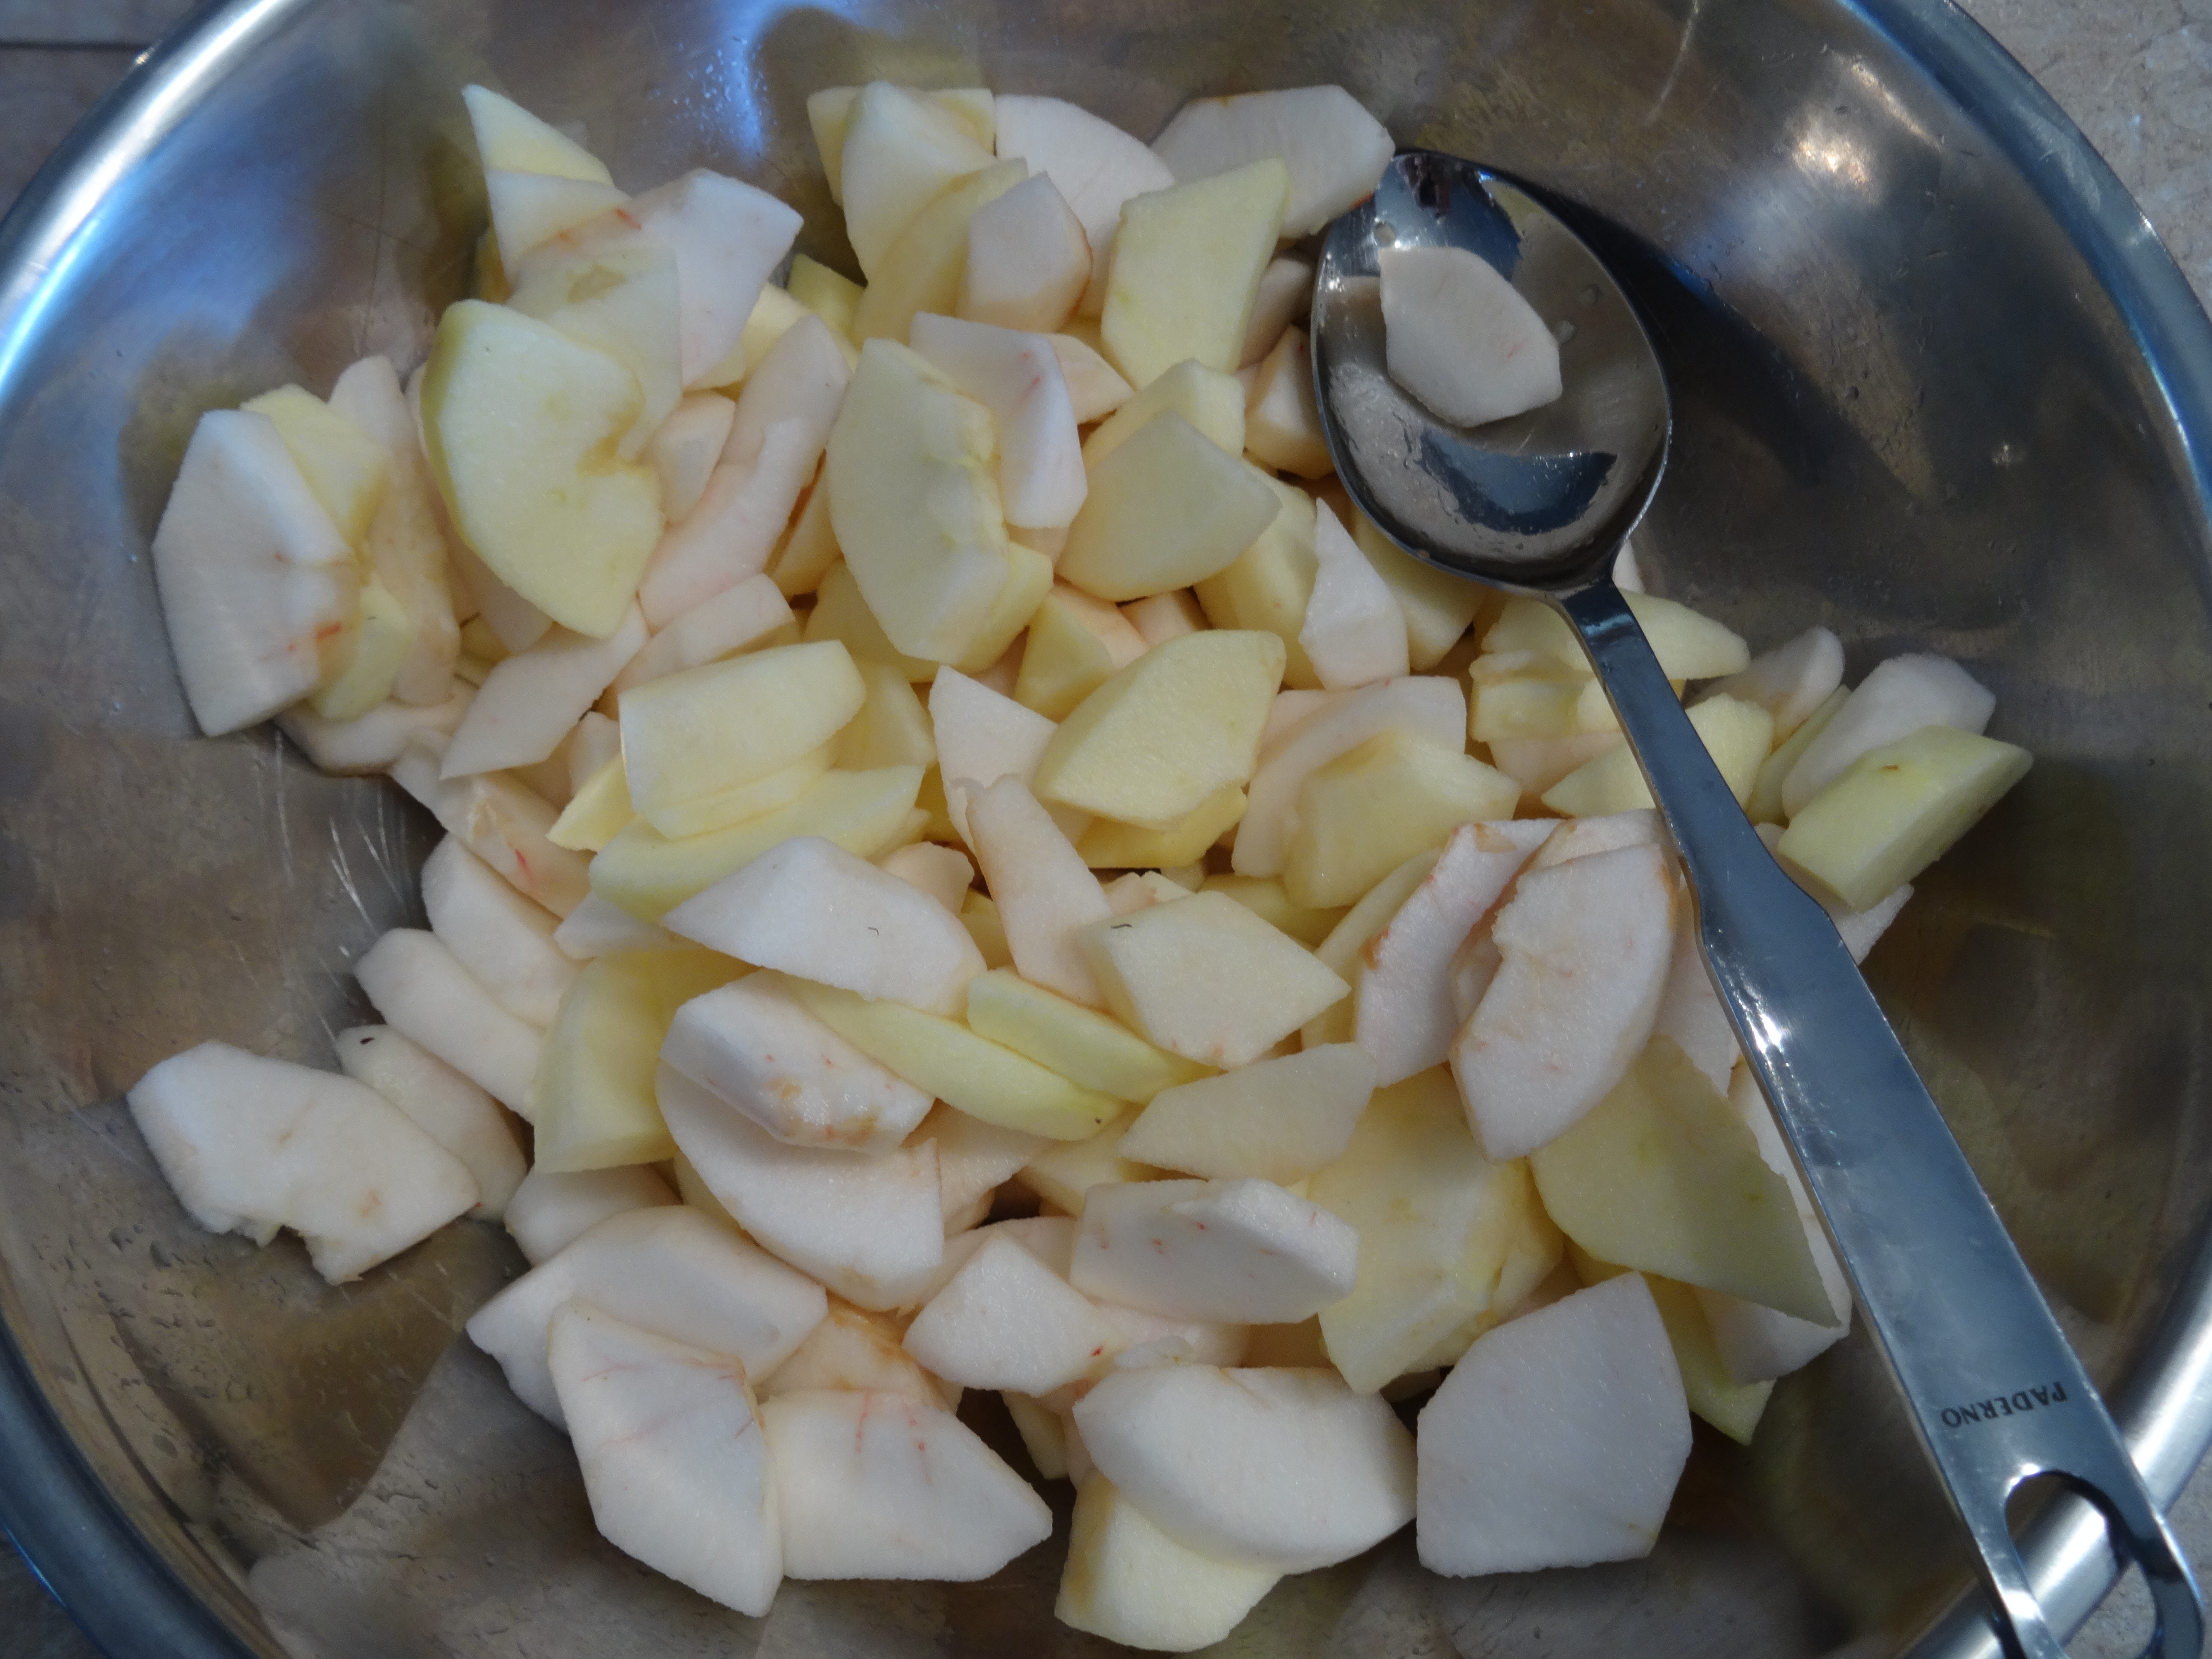
I peel, core, and quarter the apples when preparing them for pies. I then slice each quarter, horizontally, into slices about ¼” thick and toss them with a tablespoon of lemon juice to keep them from turning brown.
Apples Sliced for Pie
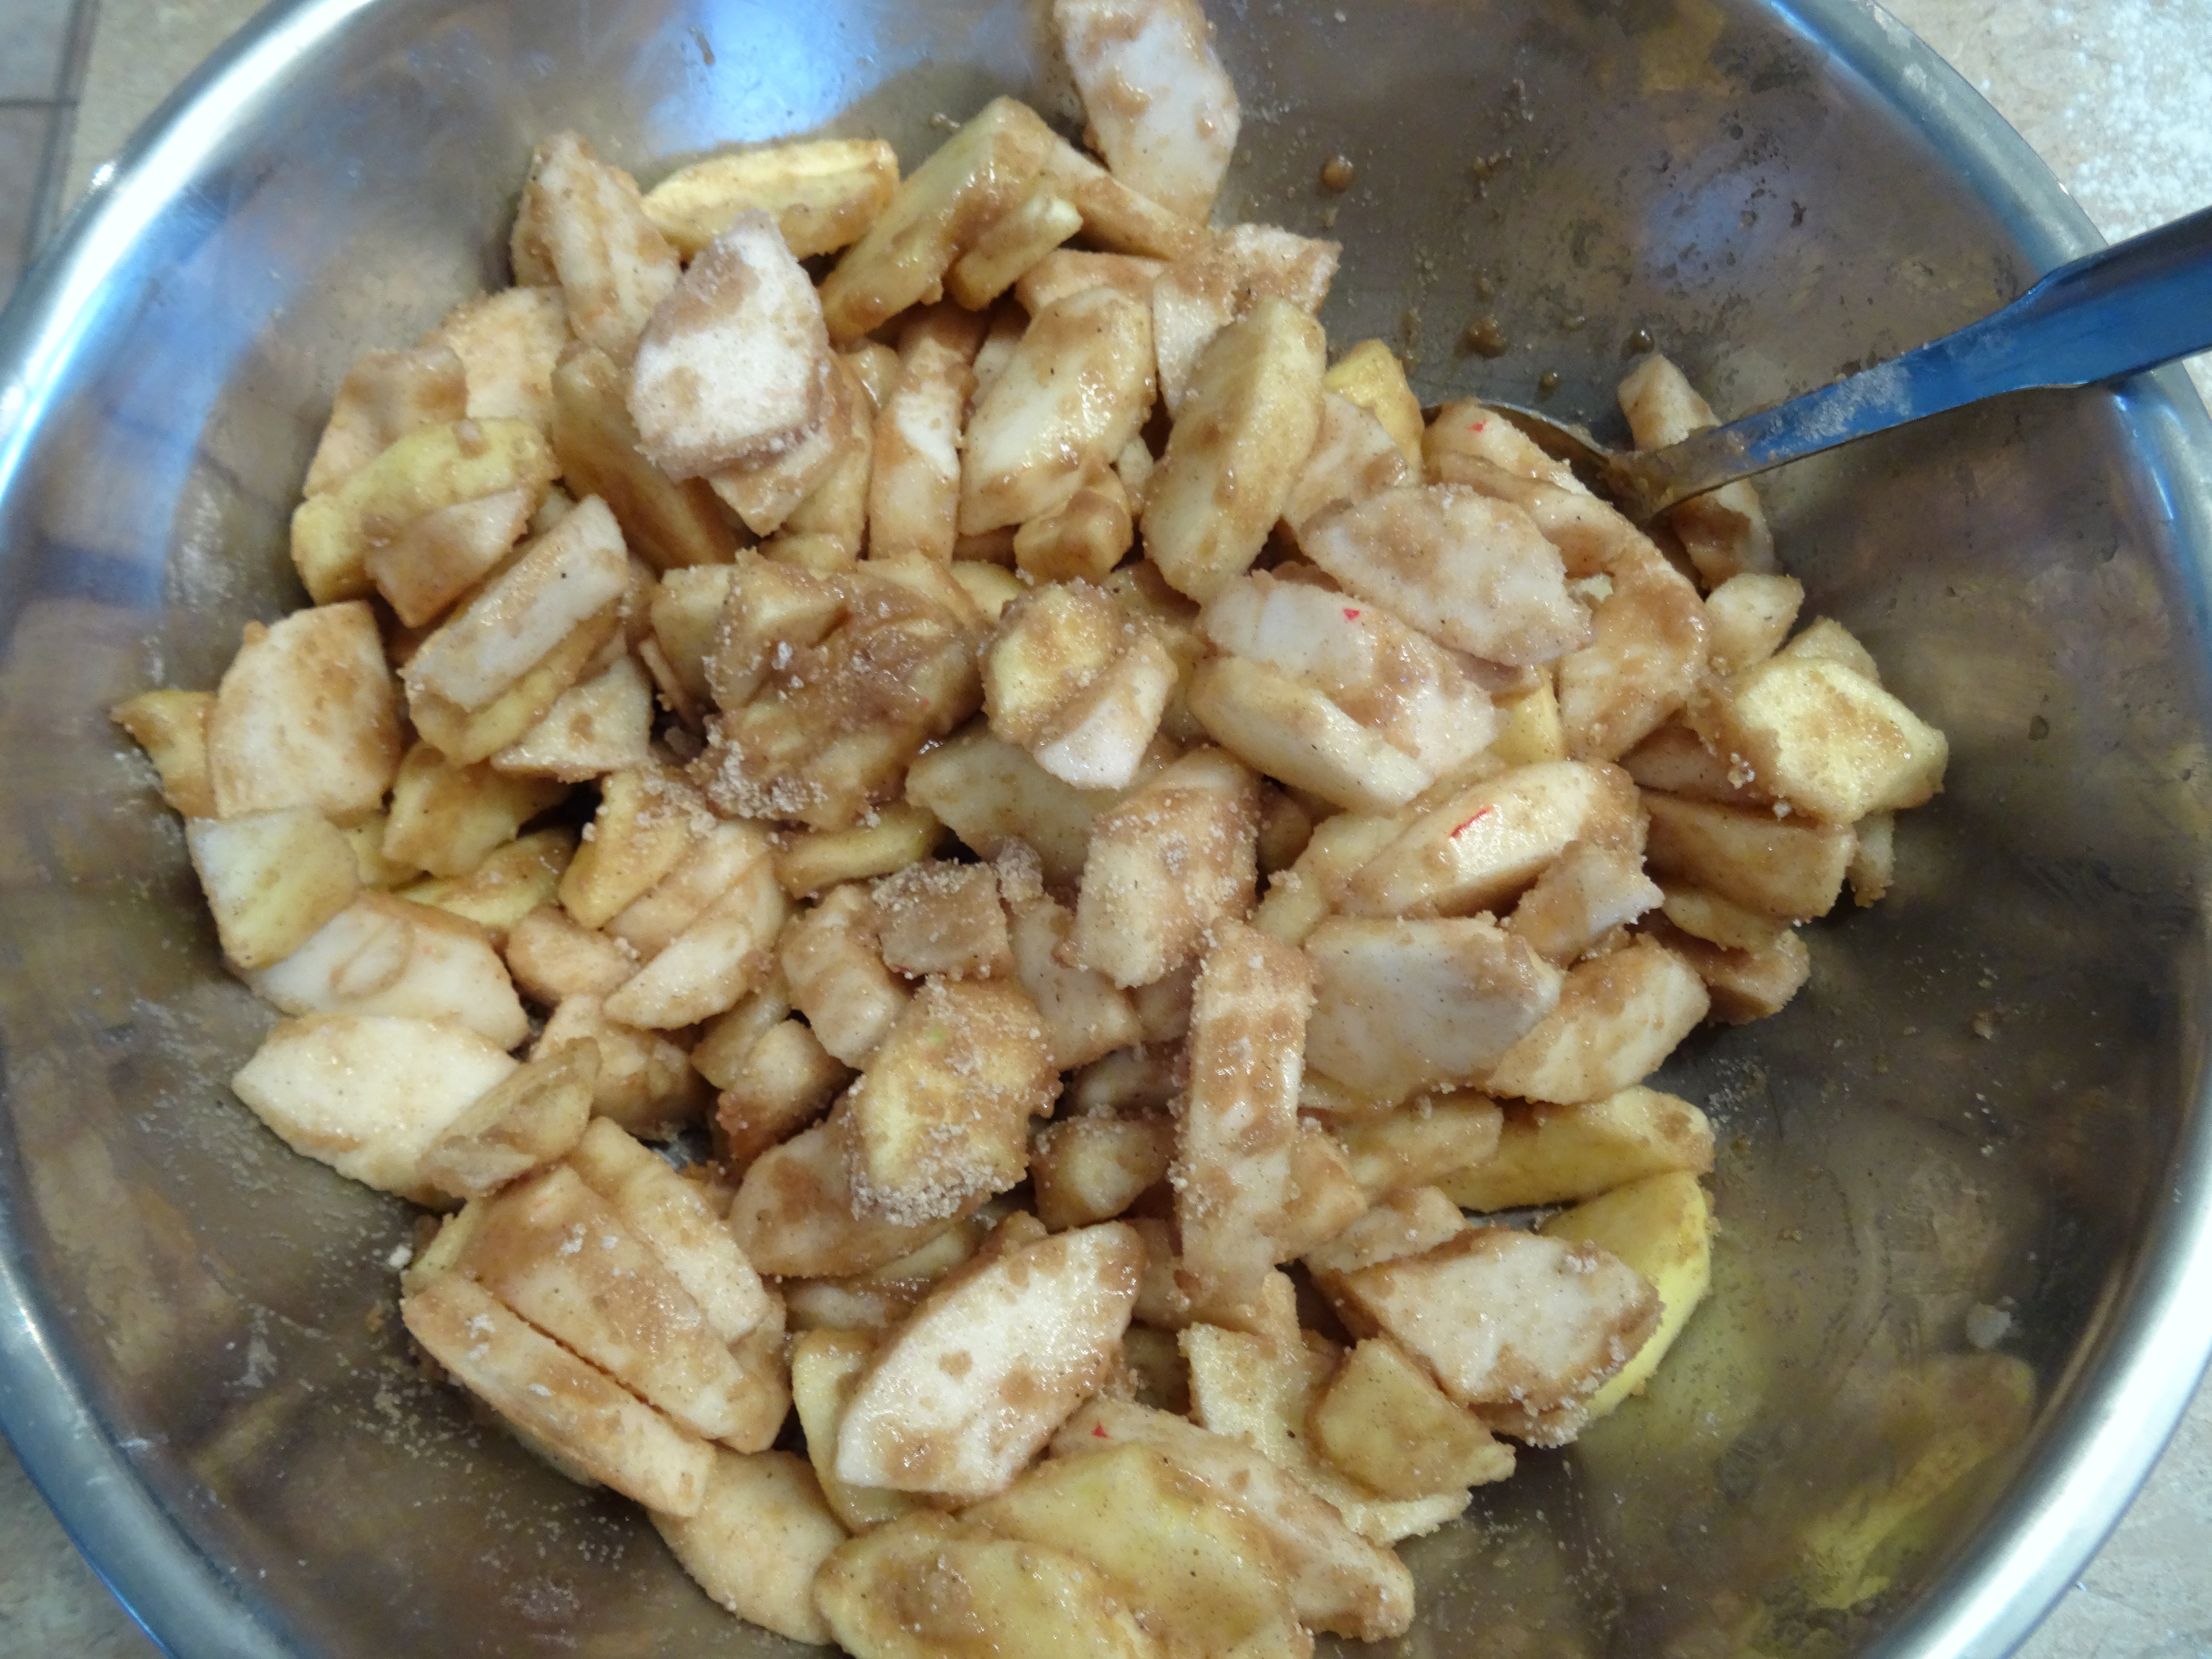
A perfect blend of spices is necessary to enhance the flavor of the pie. I use cinnamon, nutmeg, allspice, and cloves. It is important that just the right amounts of spices be used because they are meant to enhance, not dominate or mask, the flavour of the apples. Because apples are juicy, some thickening agent needs to be added to the pie – either all-purpose flour or cornstarch works for this. I like to use a blend of brown and granulated sugars in my pie. I find the addition of brown sugar gives a deeper flavour and an enhanced color to the pie filling.
Apples mixed with spices for pie
Mix the sugars, spices, a bit of salt, and the thickening agent (flour or cornstarch) together in a small bowl then toss the dry ingredients with the prepared apples to coat them. Immediately transfer the apples to the pie plate fitted with the bottom crust pastry, ensuring that they are arranged so that any gaps are filled in. Dot with some pieces of cold butter.
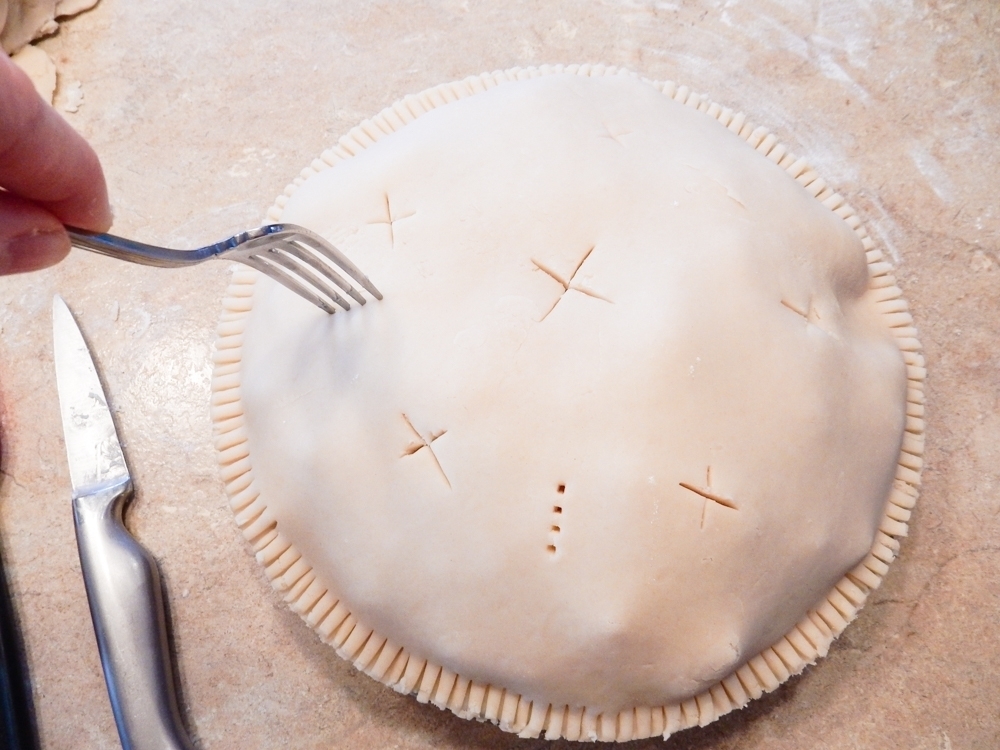
Once the top crust pastry has been placed over the apples, be sure to cut slits in the pastry to allow the steam to escape as the pie bakes. I also use the tines of a fork to prick the pie pastry in various places. It’s important that the steam have an escape valve as, otherwise, it may cause a soggy pie crust if it is trapped inside with the filling.
Venting the Apple Pie
I don’t always brush an egg wash on the top crust of the pie but, for a more rustic looking pie, it does give a nice finish and appearance as it browns well. If the pie browns too quickly before the apples are cooked, simply loosely tent a piece of tin foil over it.
I recommend placing the unbaked pie in the refrigerator for 30 minutes to allow the filling to settle and to chill the crust to prevent shrinkage during baking.
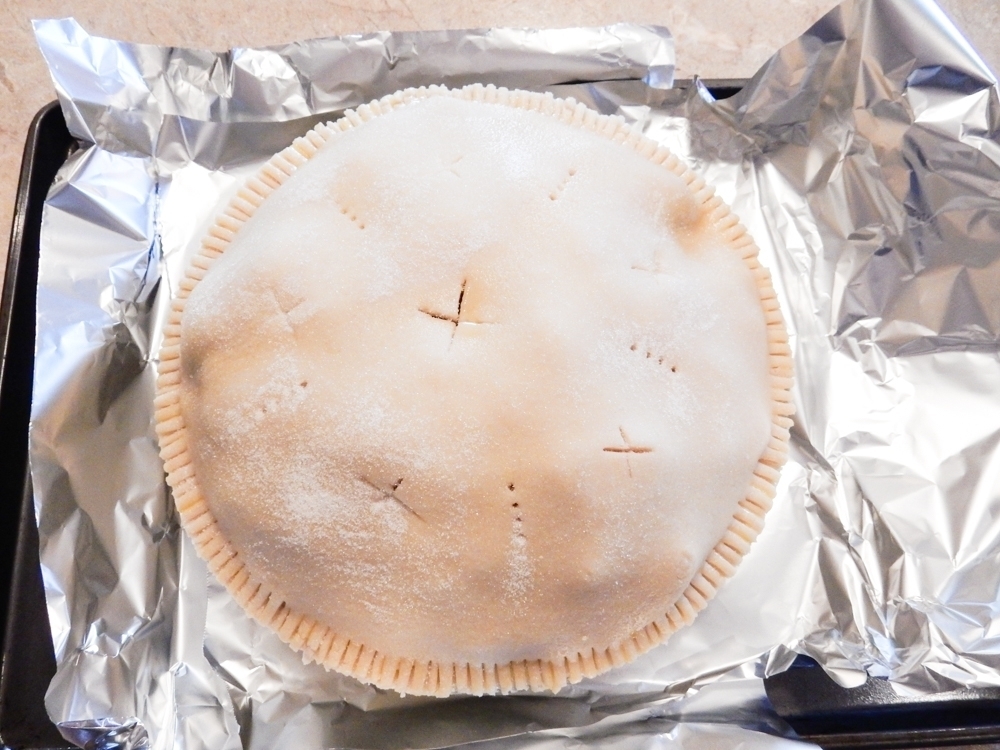
Fruit pies are known for bubbling out as they bake, even if they are well vented. I think, so long as they aren’t too messy, some filling that has escaped to the top pie crust just makes the pie look like a good homemade pie and it really doesn’t bother me too much at all. However, the one thing I do not like is a messy oven to clean after the juices of a pie have boiled out. For this reason, I recommend placing the pie on a rimmed cookie sheet lined with tin foil. If the pie does boil out, it’s on the disposable tin foil making clean-up easy.
Apple Pie Ready for the Oven
For this pie, I pre-heat the oven to 425°F and bake the pie at this temperature for 10 minutes, then reduce the heat to 400°F for the remainder of the baking time. Be patient. This pie will take at least 50 minutes (maybe a bit longer) to bake. To check for doneness, carefully insert a fork into the center slit of the pie – the apples should be fork tender, not baked to mush, but not too firm that they will taste somewhat raw in the pie.
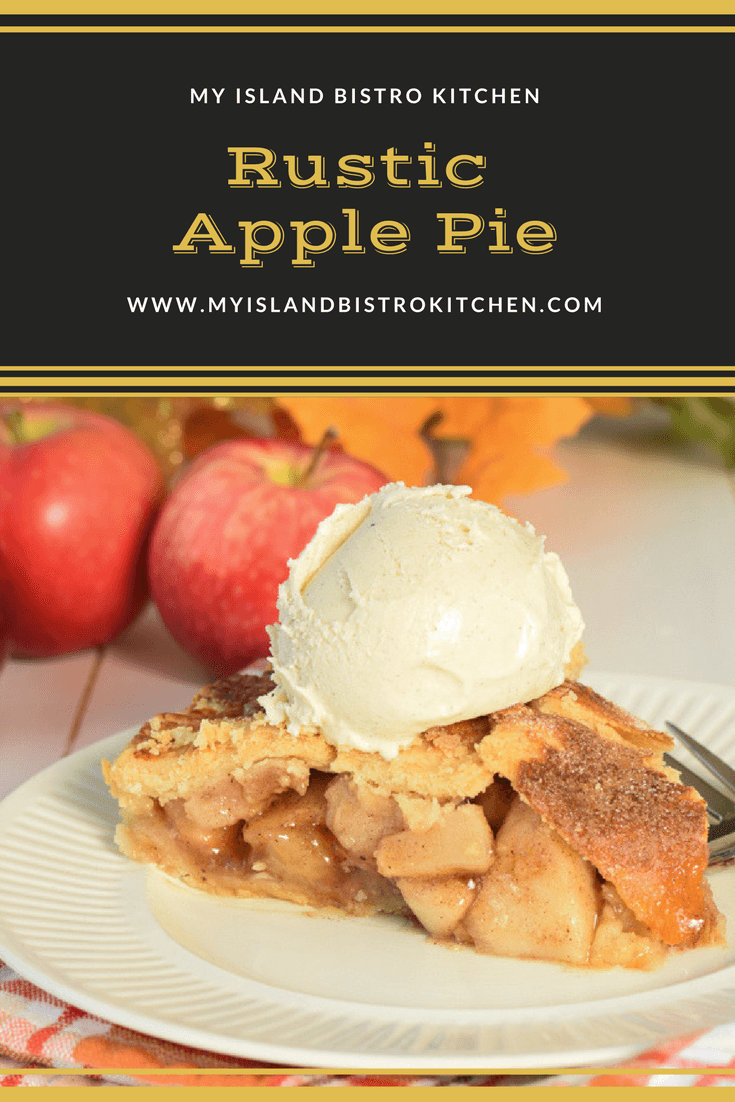
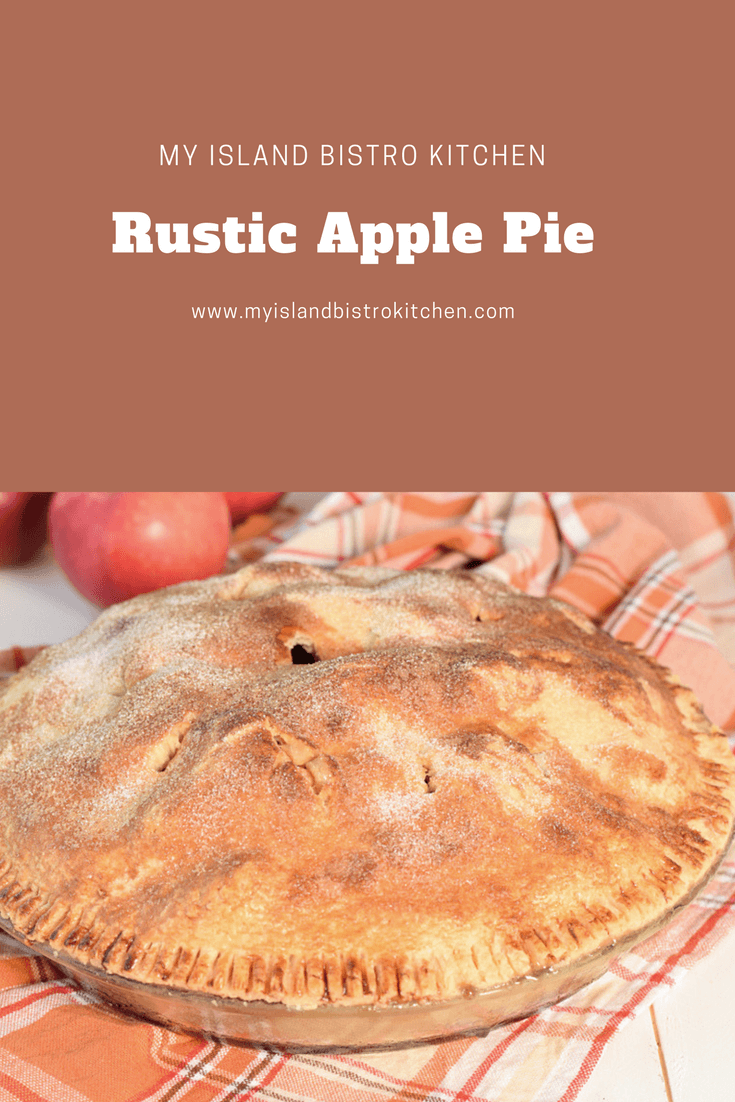
Rustic Apple Pie
What follows is the apple pie recipe I have been making for many, many years. I hope you enjoy it!
Rustic Apple Pie
[Printable recipe follows at end of posting]
Rustic Apple Pie
Ingredients:
3½ lbs apples, peeled, cored, and sliced ¼“ thick (any combination of Spartans, Cortlands, Pippins, Honeycrisps, Lobos) 1 tbsp lemon juice
Pastry for double crust 9” pie
2/3 cup granulated sugar 1/3 cup brown sugar, lightly packed ¼ cup all-purpose flour or cornstarch 1¼ tsp cinnamon ¼ tsp nutmeg ¼ tsp allspice 1/8 tsp cloves 1/8 tsp salt 2 tbsp butter, chopped into small pieces
1 large egg yolk + 1 tbsp milk Apx. ½ tbsp granulated sugar
Method:
Prepare apples, place in large bowl, and toss gently with the lemon juice. Set aside.
Roll pastry for bottom crust to approximately 1/8” thickness. Transfer to pie plate and trim pastry flush with edge of pie plate.
In small bowl, combine the flour or cornstarch, sugars, spices, and salt together. Mix into prepared apples.
Arrange the sliced apples in the pie plate, taking care to ensure that any gaps are filled in. Top with small pieces of butter.
Prepare pastry for the top crust in the same manner as for the bottom crust. Brush edges of bottom crust along pie plate edge with a bit of water to moisten. Transfer pastry to the top of pie filling. Trim excess pastry from the pie plate edge. Press the edge of the pastry all around the pie plate rim with tines of fork to adhere top crust to bottom crust. Cut slits in top of pie pastry to allow steam to escape as pie bakes. For additional venting, prick the pie in several places with tines of a fork.
In small bowl, lightly beat the egg yolk and milk together. With a pastry brush, lightly brush the pie with the egg-milk mixture. Sprinkle with granulated sugar.
Place pie in refrigerator for 30 minutes to allow filling to settle and to chill pastry to reduce shrinkage while it bakes.
Preheat oven to 425°F.
Transfer pie to oven. Bake at 425°F for 10 minutes then reduce heat to 400°F. Bake for another 40 minutes then test with fork inserted into slit in center of pie to determine if apples are cooked. Apples should be fork-tender when pie is done. If not done, return pie to oven and check every 5 minutes until apples are fork tender. If pie browns too quickly before it is cooked, loosely tent pie with tin foil. Remove pie from oven and transfer to cooling rack.
A classic apple pie made with a combination of sweet and tart apples and a perfect blend of spices.
Ingredients
3½ lbs apples, peeled, cored, and sliced ¼“ thick (any combination of Spartans, Cortlands, Pippins, Honeycrisps, Lobos)
1 tbsp lemon juice
Pastry for double crust 9” pie
2/3 cup granulated sugar
1/3 cup brown sugar, lightly packed
¼ cup all-purpose flour or cornstarch
1¼ tsp cinnamon
¼ tsp nutmeg
¼ tsp allspice
1/8 tsp cloves
1/8 tsp salt
2 tbsp butter, chopped into small pieces
1 large egg yolk + 1 tbsp milk
Apx. ½ tbsp granulated sugar
Instructions
Prepare apples, place in large bowl, and toss gently with the lemon juice. Set aside.
Roll pastry for bottom crust to approximately 1/8” thickness. Transfer to pie plate and trim pastry flush with edge of pie plate.
In small bowl, combine the flour or cornstarch, sugars, spices, and salt together. Mix into prepared apples.
Arrange the sliced apples in the pie plate, taking care to ensure that any gaps are filled in. Top with small pieces of butter.
Prepare pastry for the top crust in the same manner as for the bottom crust. Brush edges of bottom crust along pie plate edge with a bit of water to moisten. Transfer pastry to the top of pie filling. Trim excess pastry from the pie plate edge. Press the edge of the pastry all around the pie plate rim with tines of fork to adhere top crust to bottom crust. Cut slits in top of pie pastry to allow steam to escape as pie bakes. For additional venting, prick the pie in several places with tines of a fork.
In small bowl, lightly beat the egg yolk and milk together. With a pastry brush, lightly brush the pie with the egg-milk mixture. Sprinkle with granulated sugar.
Place pie in refrigerator for 30 minutes to allow filling to settle and to chill pastry to reduce shrinkage while it bakes.
Preheat oven to 425°F.
Transfer pie to oven. Bake at 425°F for 10 minutes then reduce heat to 400°F. Bake for another 40 minutes then test with fork inserted into slit in center of pie to determine if apples are cooked. Apples should be fork-tender when pie is done. If not done, return pie to oven and check every 5 minutes until apples are fork tender. If pie browns too quickly before it is cooked, loosely tent pie with tin foil. Remove pie from oven and transfer to cooling rack.
If you are looking for a gluten-free apple pie, you may enjoy my recipehere.
If you have made this recipe and enjoyed it and/or wish to share it with your friends and family, please do so on social media but be sure to share the direct link to this posting from my website.
Connect with My Island Bistro Kitchen on Social Media
Follow “the Bistro” on Pinterestat https://www.pinterest.ca/peibistro/ and pin the Pinterest-ready photo found at the end of this post to your favorite Pinterest boards.
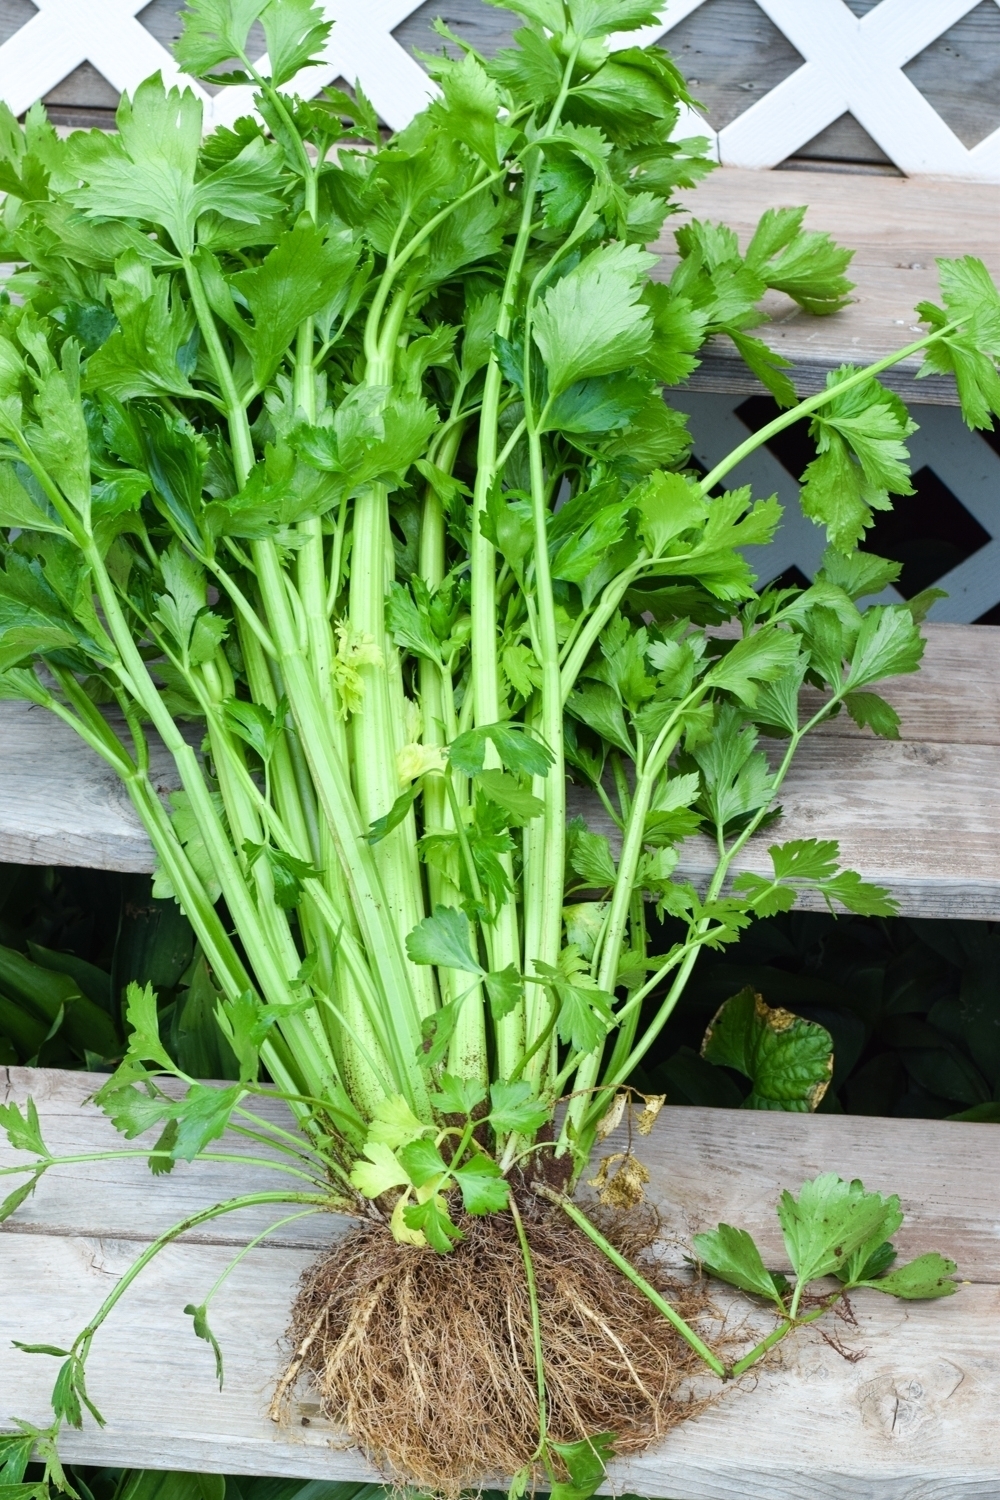
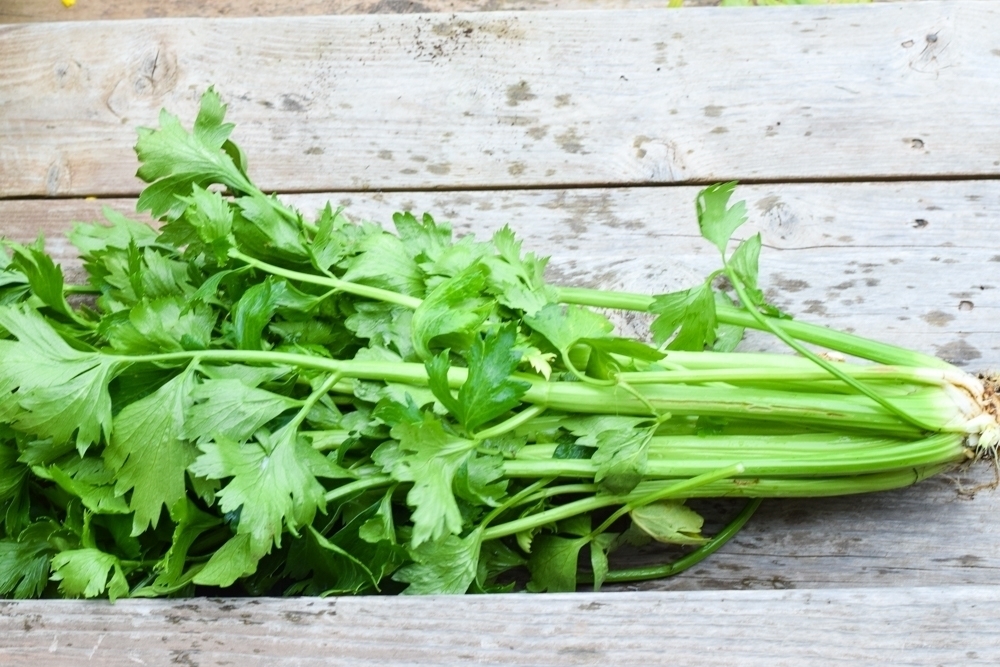
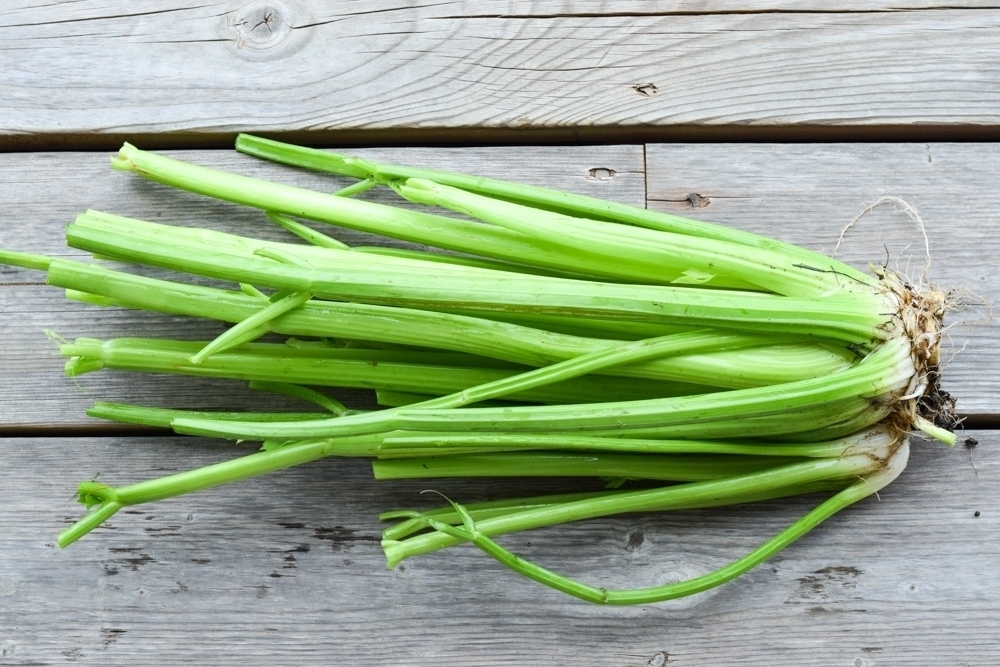
Every year we try to grow two or three new vegetables in our garden. Here, on PEI, we have a very short growing season and so, whatever we grow, must be suitable to that climate. One day, in late June, I was at John’s Greenhouses in Summerside and they had trays of very healthy looking celery starter plants. On a lark, I bought a tray of six plants and transplanted them. Never, in my wildest imagination, could I have contemplated how well they would grow! With leaves on stalks intact, they grew to be 30″ tall. The celery had a nice crisp bite to it but, seriously, how much celery could we eat raw?
CeleryCeleryCelery
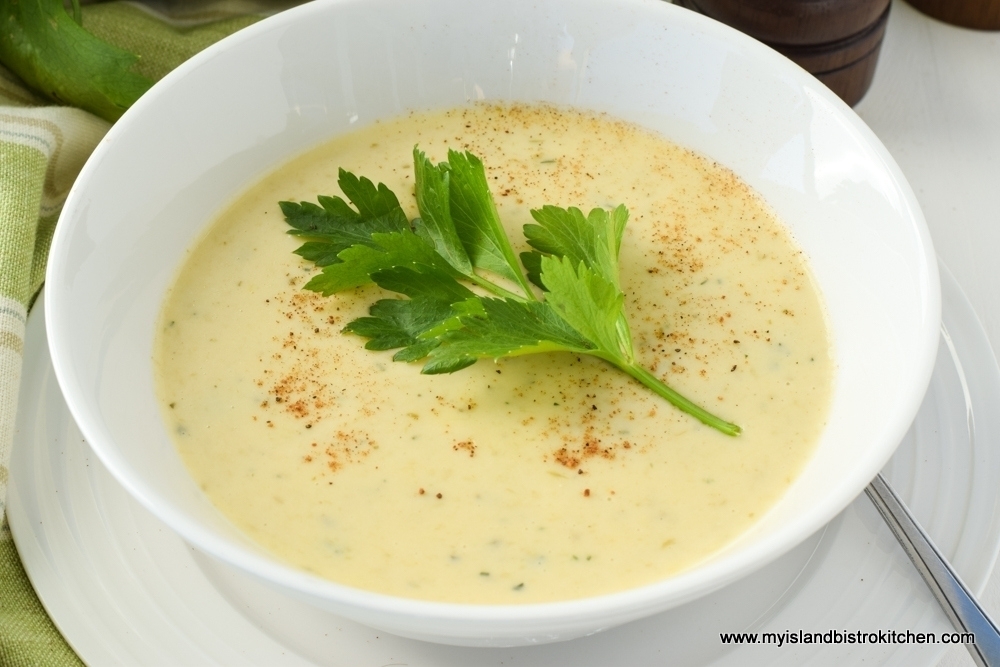
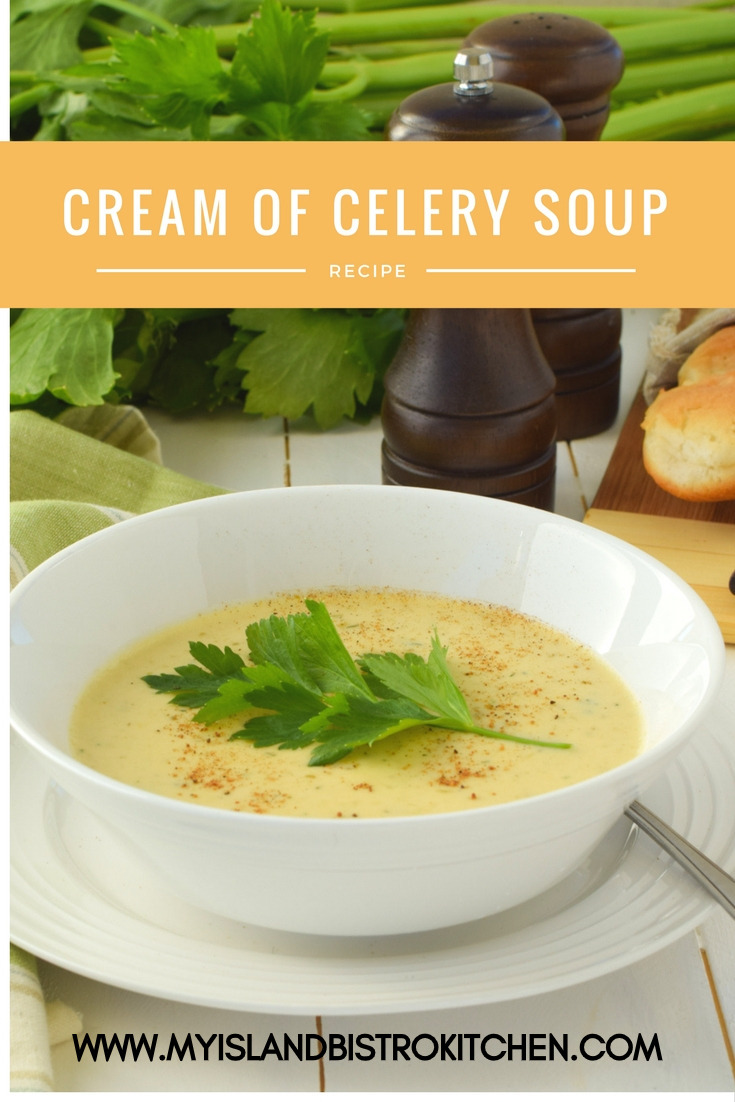
I began thinking about what I could do with the celery and how I could process it into something else. Thus was born my recipe for Cream of Celery Soup which has now elevated itself to one of my favorite cream-based soups.
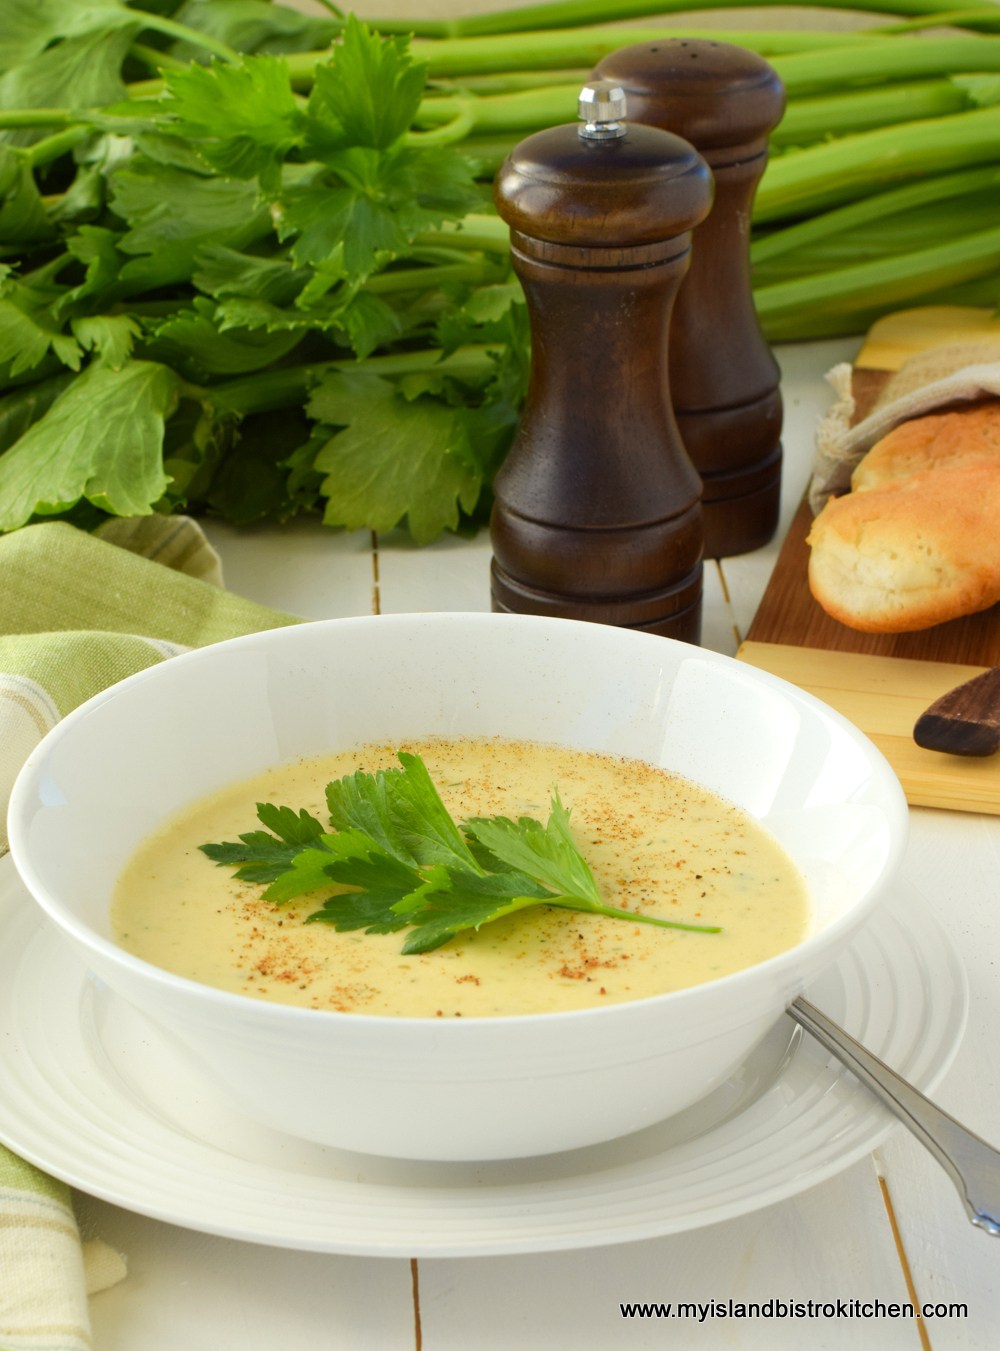
Cream of Celery Soup
I have made and tested this recipe several times (well, you know, we did have a lot of celery in the garden!), adjusting the ingredient amounts and perfecting the method. This process results in me publishing a recipe for a tasty soup I am delighted with. It also enables me to share my lessons learned and tips for successfully making this soup.
Ingredients
Use the freshest celery you can find for this recipe. Chop it finely because celery takes a long time to soften during cooking – the smaller the pieces, the faster it will cook. I use both onions and leeks in this recipe as they each contribute their own unique flavor to the soup. They may come from the same family but their unique flavour qualities add levels of complexity and depth to the celery soup. Always use freshly minced garlic in this recipe – it will have more flavour than a bottled version. Either chicken or vegetable stock may be used as a base in this soup. I typically use chicken stock.
To get that silky smooth texture for which great cream soups are known, use a combination of whole milk and cream (18% MF). Fat-reduced and skim milks do not do well in this soup. This soup can be made entirely with whole milk but using cream for a portion of the dairy content in the soup will yield a richer and smoother soup. Also, this soup will freeze well if whole milk and cream are used. In fact, I make this soup as part of my batch-cooking menu and freeze it in individual portions. It’s great for work lunches.
I add shredded cheddar cheese to this soup. Celery and cheese have long been great partners so why not pair them in a soup. I also add a couple of tablespoons of grated Parmesan cheese to the soup as well.
I love my herb garden and make good use of it. It’s important to choose herbs for this soup that will pair well with the other ingredients. I have chosen dill, parsley, and either rosemary or thyme. Only add these to the late stage reheating of the soup, after it has been puréed, and the milk and cream added. Softer stemmed herbs such as dill and parsley tend to wilt and become discolored if they are overcooked. While the more woody rosemary or thyme can withstand a bit more heat, I tend to add them all at the same time, near the end of the cooking process. The amount of seasoning is always a personal preference. My strategy in herb usage is that they should enhance, not overpower, the dish. I recommend using the amounts I have indicated in the recipe the first time you make the soup – the herb quantities indicated are considered modest amounts. Then, the next time you make the soup, adjust the quantities of the herbs according to your personal preference.
Method
Celery takes a long time to soften during cooking. Melt the butter in the saucepan and give the celery the benefit of a head start of about 5 minutes cooking before adding the onions, leeks, potato, and garlic. Cook the vegetables until they are softened – about 15 minutes. Then, add the thickener (regular or gluten-free flour) followed by the liquid stock (chicken or vegetable) and continue to cook the mixture for 30-35 minutes. The goal is to ensure the vegetables are thoroughly cooked and softened and that time has been allotted for the flavors to blend.
The mixture needs to be puréed until smooth, either in a blender or food processor or, alternatively, via an immersion blender. I typically use the blender for this and I let the soup cool for about 30-40 minutes or so before putting the hot mixture into the jar of the blender. I have learned the importance of blending part of the mixture first and then adding the remainder of the mixture while continuing to purée it as, otherwise, it is very difficult to get a smooth soup. Because celery has a “stringy” component to it and because, sometimes, no matter how much blending, there can always be little bits of the vegetables that have not puréed completely smooth, I recommend straining the puréed mixture through a medium mesh wire sieve into a clean stockpot to get rid of any unpuréed residue. This will result in a smoother textured soup.
Once the puréed mixture is transferred to a clean stock pot and the milk/cream blended in and heated, the cheeses and fresh herbs can be added.
Never boil a cream soup; instead, gently heat it just until the cheeses have melted.
Serving
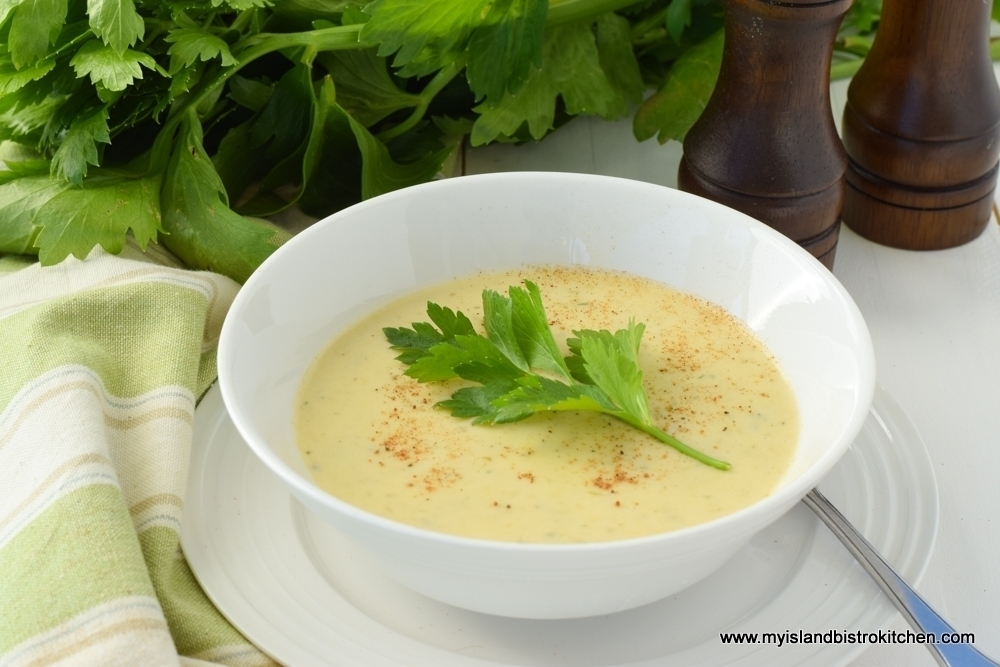
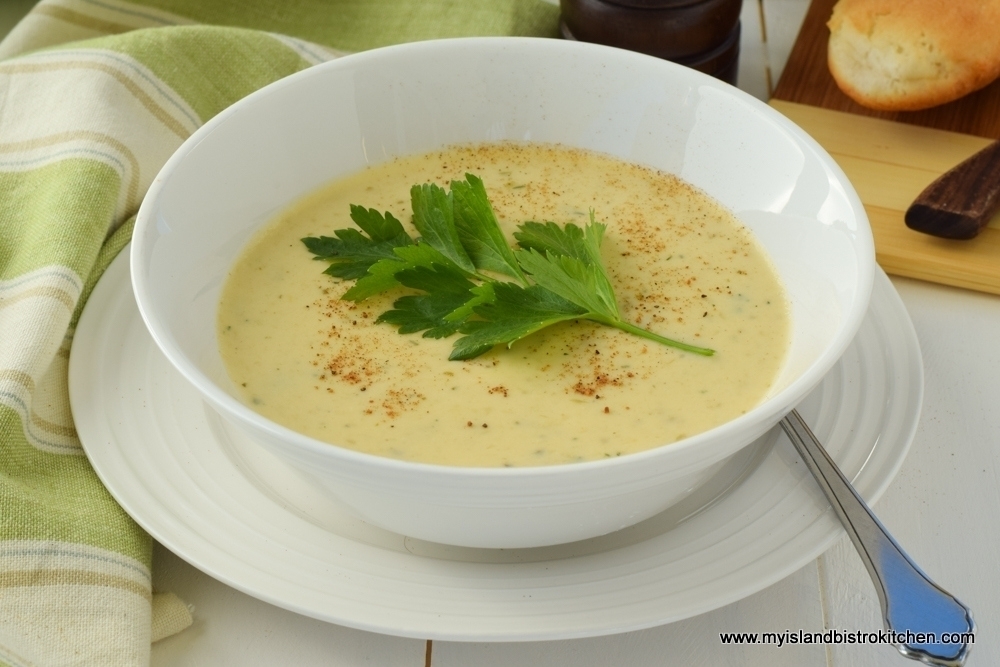
This soup should be served hot. It can be garnished with croutons, slivered almonds, croutons, fresh herbs, or a sprig of celery leaves. Serve it in small quantities as a starter to a meal or in larger bowls as a tasty lunch or light supper. The soup is great served with homemade biscuits, rolls, or bread.
Making this cream-based soup is a great way to make use of fresh celery.
[Printable recipe follows at end of posting]
Cream of Celery Soup
Homemade Cream of Celery Soup
Ingredients:
¼ cup + 1 tbsp butter 8 oz celery, chopped fine (apx 2 cups) 2½ oz leek (white and green parts only), sliced thin (apx. 1 cup) 2 oz onion, finely chopped (apx. ½ cup) 4 oz potato, peeled and diced 3 cloves of garlic, minced 1/3 cup flour (to make it gluten-free, use 1/3 cup of 1-to-1 gluten-free flour)
2 cups warm chicken stock 2/3 cup whole milk 2/3 cup 18% cream Salt and pepper, to taste
Celery leaf, croutons, or slivered almonds for garnish (optional) Sprinkle of nutmeg for garnish (optional)
Method:
Melt butter in saucepan over medium heat. Add the celery and cook for 5 minutes, stirring frequently. Reduce heat to just below medium and add the leek, onion, potato, and garlic. Cook until vegetables are soft, about 15 minutes, stirring often.
Sprinkle flour onto vegetables and stir for approximately 1 minute. Add chicken stock. Cover. Bring to a boil. Add the bay leaf. Cover and reduce heat to simmer and cook for 30-35 minutes, stirring frequently to prevent scorching. Cool for 30-40 minutes. Remove bay leaf. Transfer mixture to blender or food processor, starting with a good half of the mixture, puréeing, and then adding in the remainder and continuing to purée until smooth. Strain puréed mixture through medium mesh wire sieve, into clean stock pot, to remove any bits of ingredients that have not completely puréed.
Add milk, cream, salt, and pepper to the mixture. Heat over medium heat. Do not boil. Add the grated cheddar and parmesan cheeses along with the fresh herbs. Stir until cheese melts. Ladle into soup bowls and garnish with a sprig of celery leaf, croutons, or slivered almonds and a sprinkle of nutmeg.
Yield: 5 cups, approximately 4-5 servings (1 to 1¼ cup/serving)
Delicious homemade Cream of Celery Soup with layers of flavor. Perfect as a starter to a meal or for a light lunch or supper.
Ingredients
¼ cup + 1 tbsp butter
8 oz celery, chopped fine (apx 2 cups)
2½ oz leek (white and green parts only), sliced thin (apx. 1 cup)
2 oz onion, finely chopped (apx. ½ cup)
4 oz potato, peeled and diced
3 cloves of garlic, minced
1/3 cup flour (to make it gluten-free, use 1/3 cup of 1-to-1 gluten-free flour)
2 cups warm chicken stock
2/3 cup whole milk
2/3 cup 18% cream
Salt and pepper, to taste
1 cup grated cheddar cheese
2 tbsp finely grated Parmesan cheese
¾ tsp fresh dill, minced
1 tsp fresh parsley, finely chopped
¼ tsp thyme or rosemary, finely chopped
Celery leaf, croutons, or slivered almonds for garnish (optional)
Sprinkle of nutmeg for garnish (optional)
Instructions
Melt butter in saucepan over medium heat. Add the celery and cook for 5 minutes, stirring frequently. Reduce heat to just below medium and add the leek, onion, potato, and garlic. Cook until vegetables are soft, about 15 minutes, stirring often.
Sprinkle flour onto vegetables and stir for approximately 1 minute. Add chicken stock. Cover. Bring to a boil. Add the bay leaf. Cover and reduce heat to simmer and cook for 30-35 minutes, stirring frequently to prevent scorching. Cool for 30-40 minutes. Remove bay leaf. Transfer mixture to blender or food processor, starting with a good half of the mixture, puréeing, and then adding in the remainder and continuing to purée until smooth. Strain puréed mixture through medium mesh wire sieve, into clean stock pot, to remove any bits of ingredients that have not completely puréed.
Add milk, cream, salt, and pepper to the mixture. Heat over medium heat. Do not boil. Add the grated cheddar and parmesan cheeses along with the fresh herbs. Stir until cheese melts. Ladle into soup bowls and garnish with a sprig of celery leaf, croutons, or slivered almonds and a sprinkle of nutmeg.
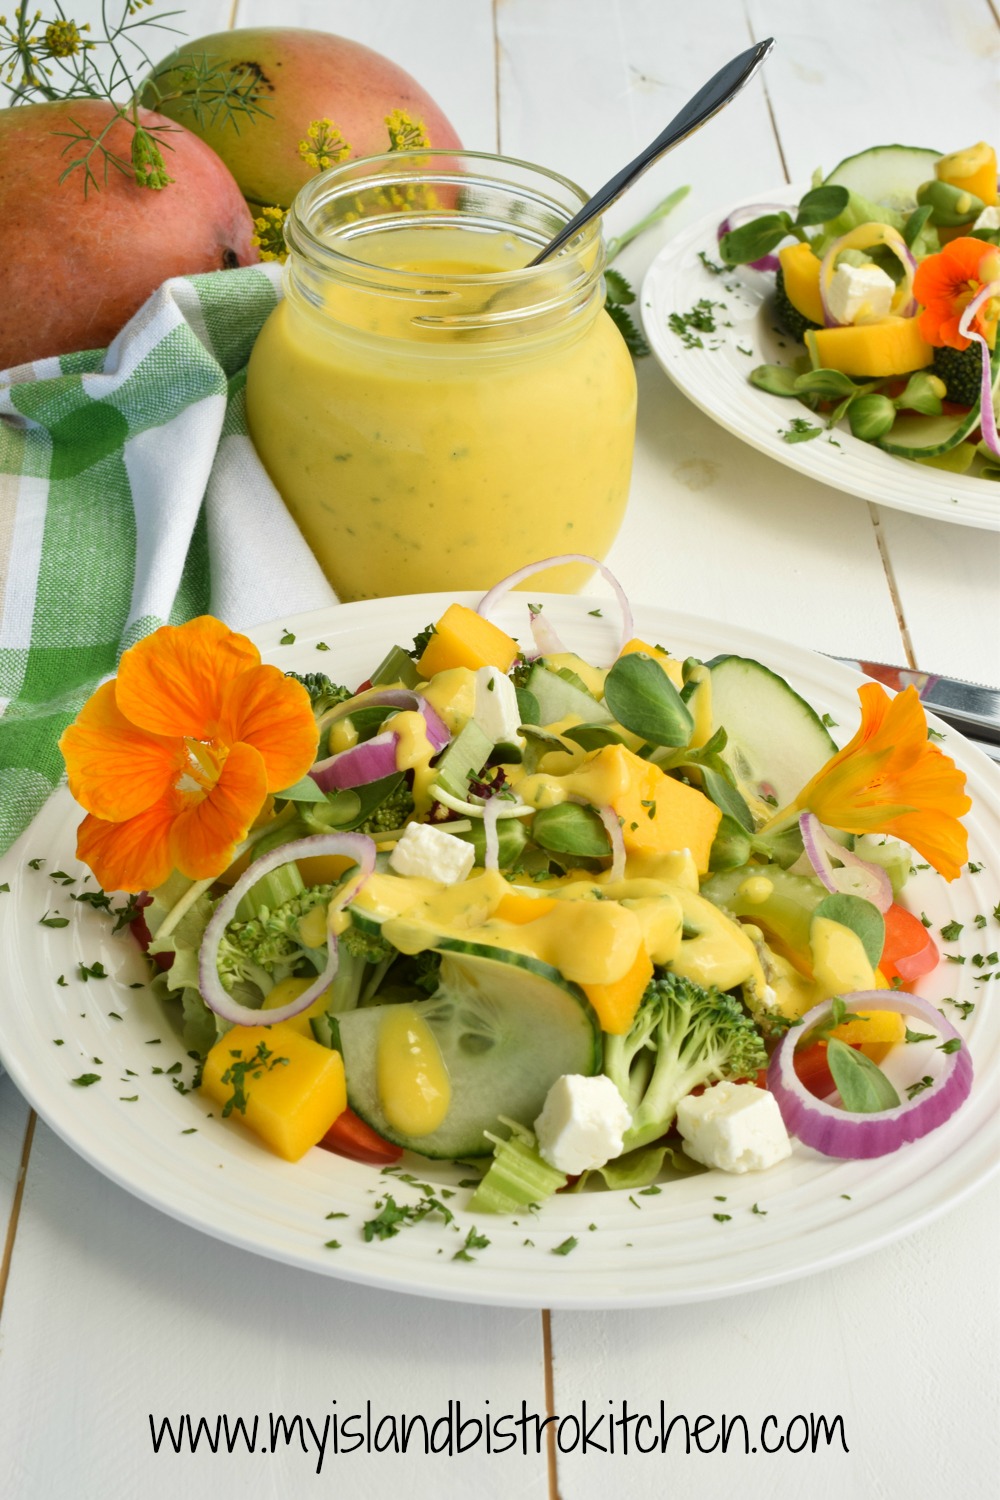
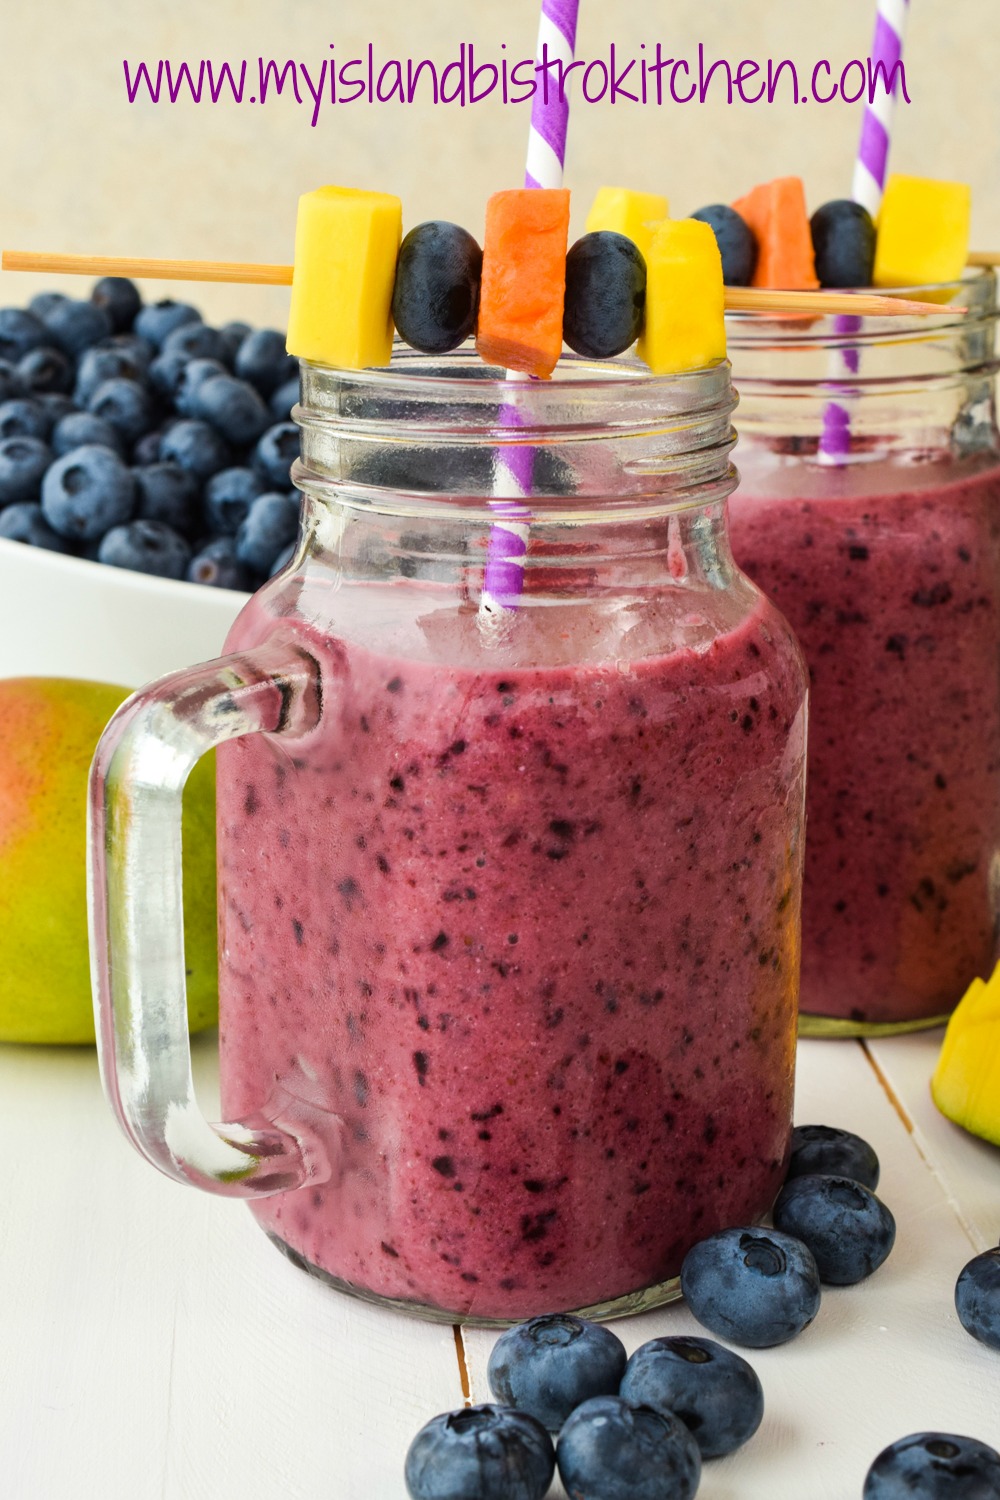
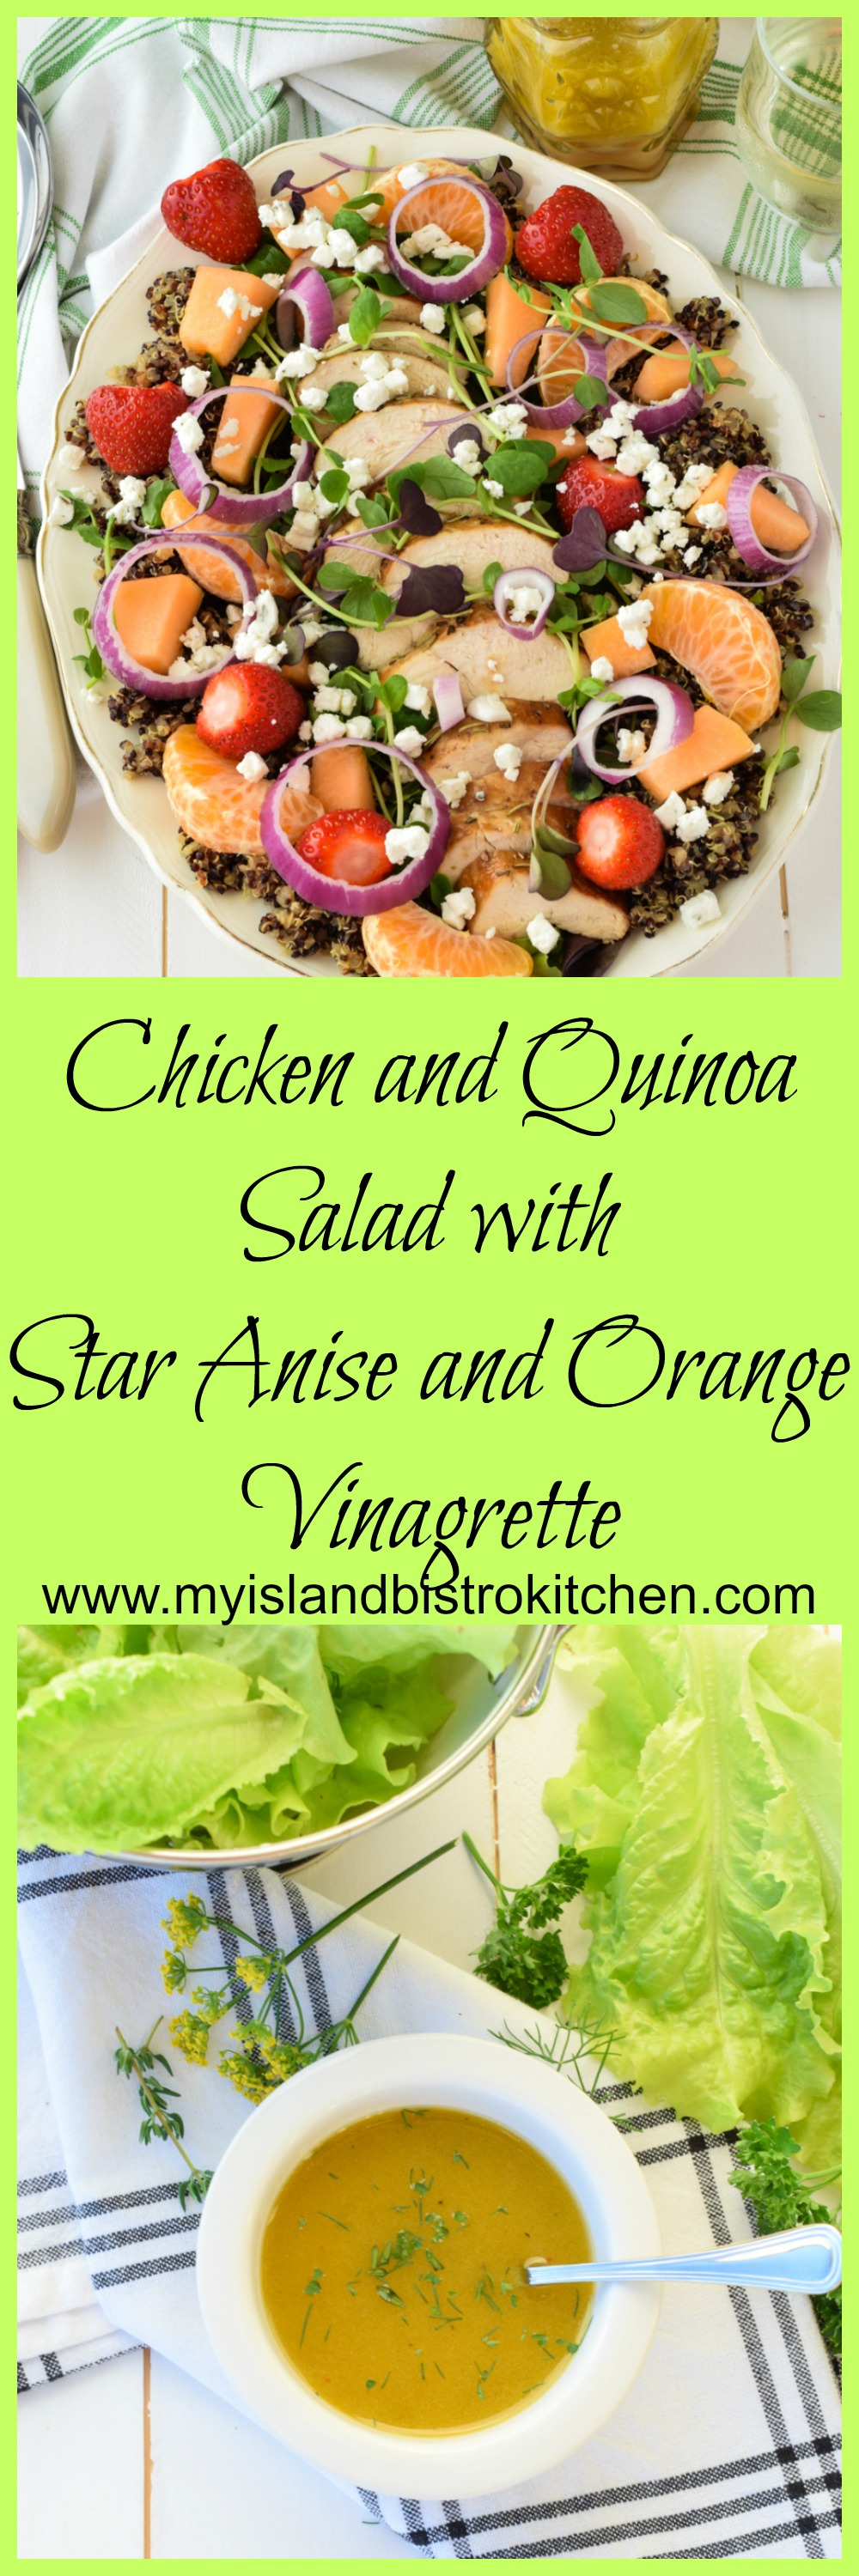
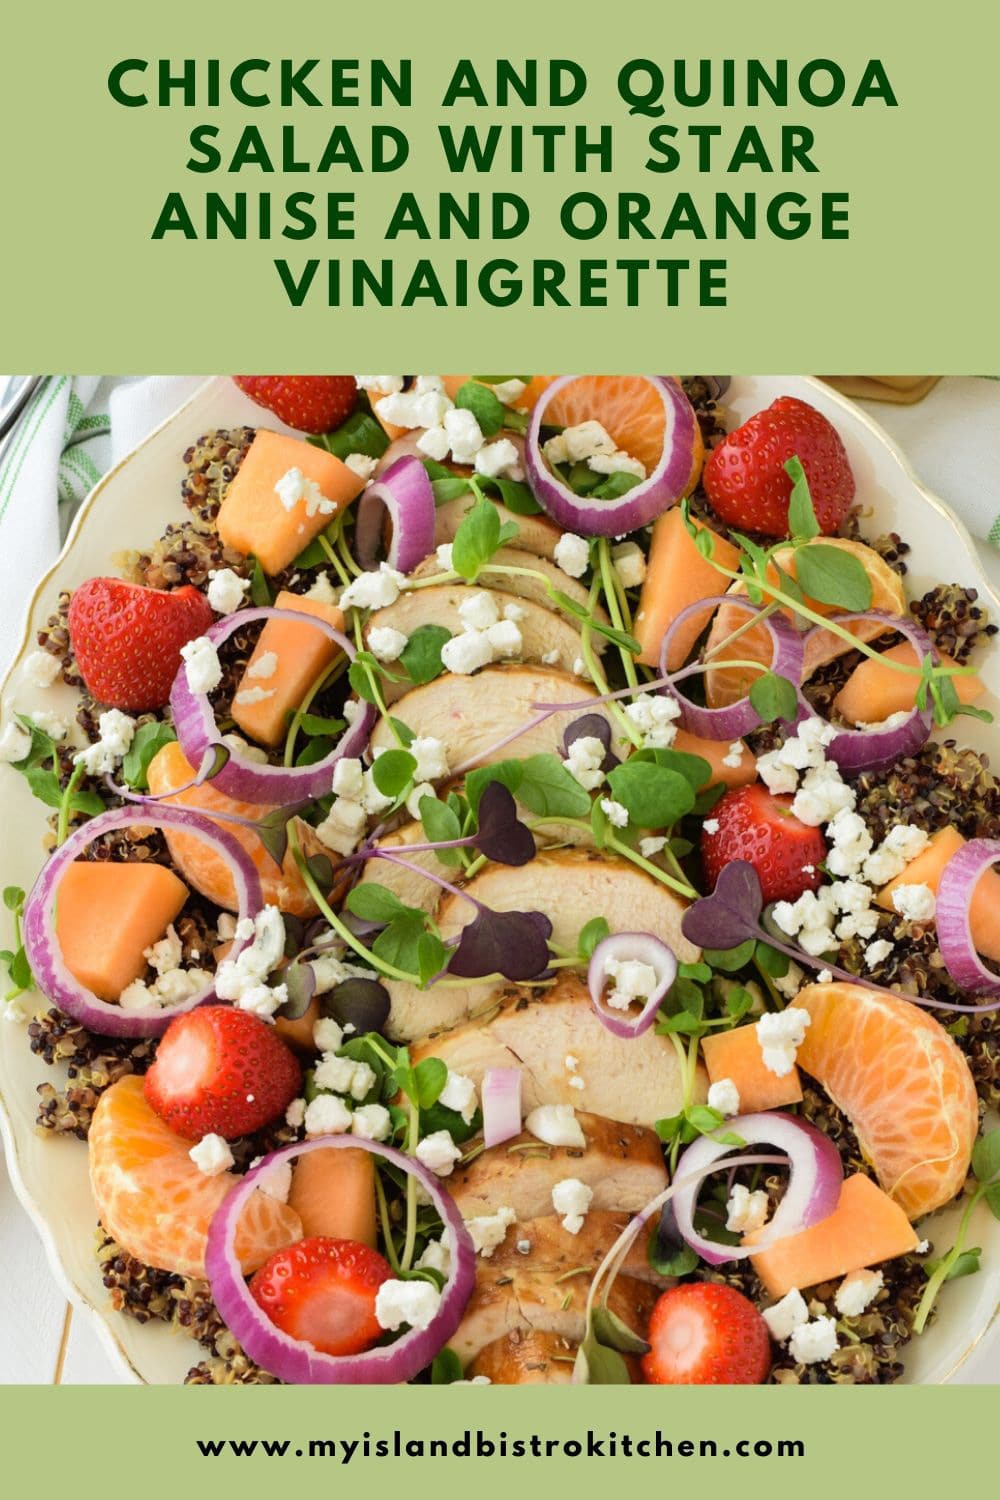
Salads are a big part of our diet, especially in the summer and early fall when we eat from our garden and, this year, my go-to recipe has been this delicious Mango Salad Dressing which, I must admit, I eat like candy! It is lusciously smooth, bright colored, and has a lovely flavor that complements many different kinds of salads.
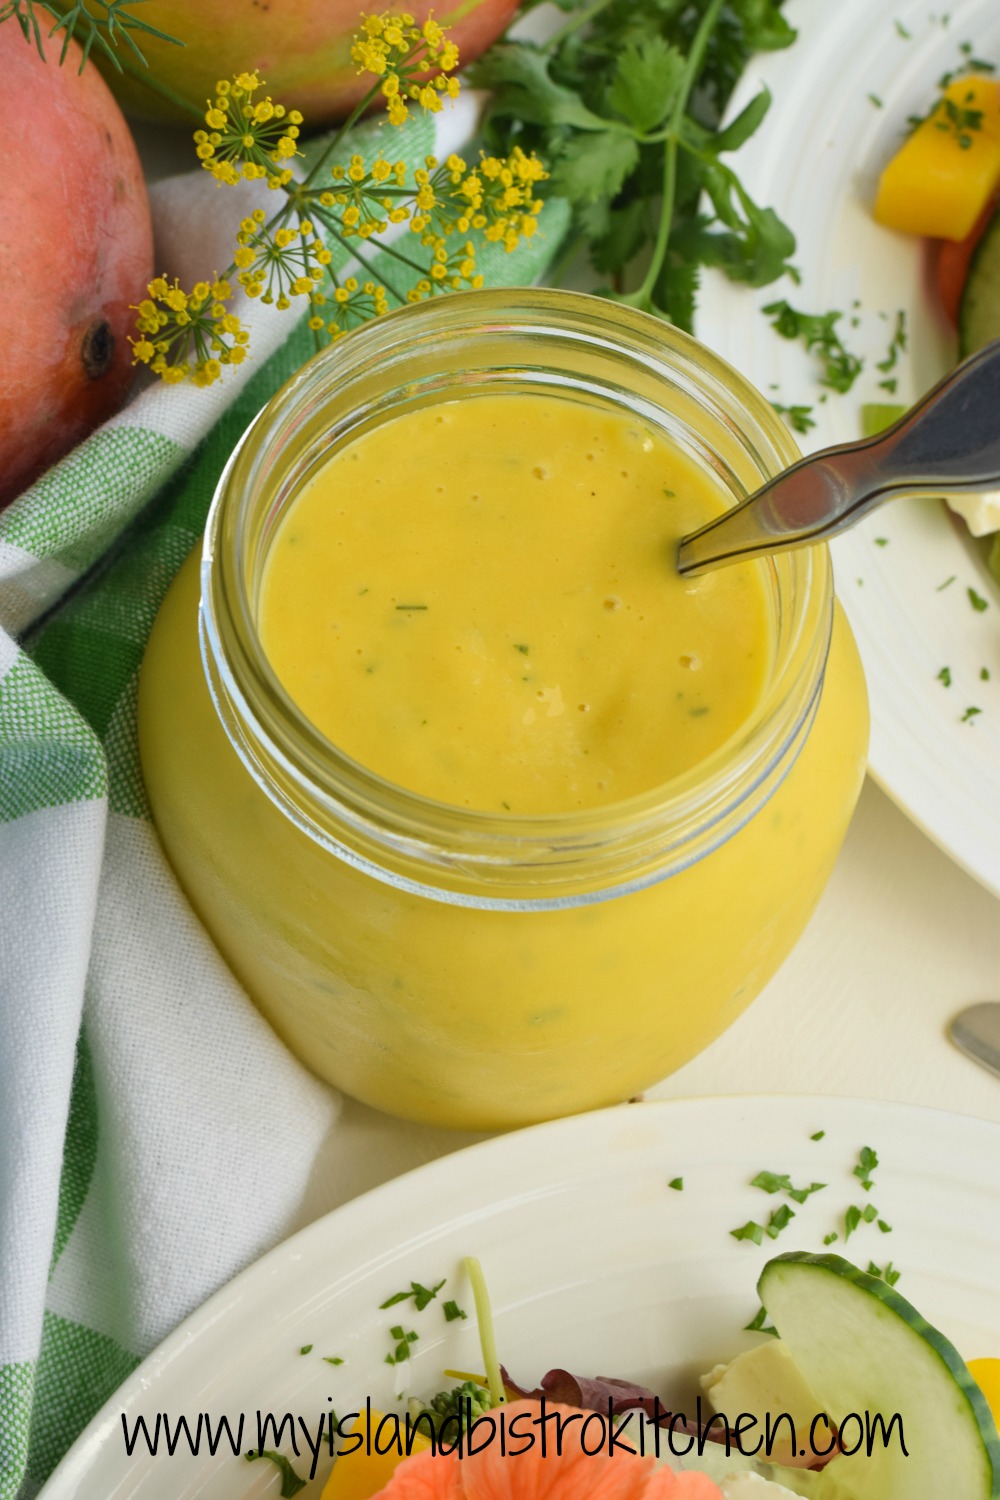
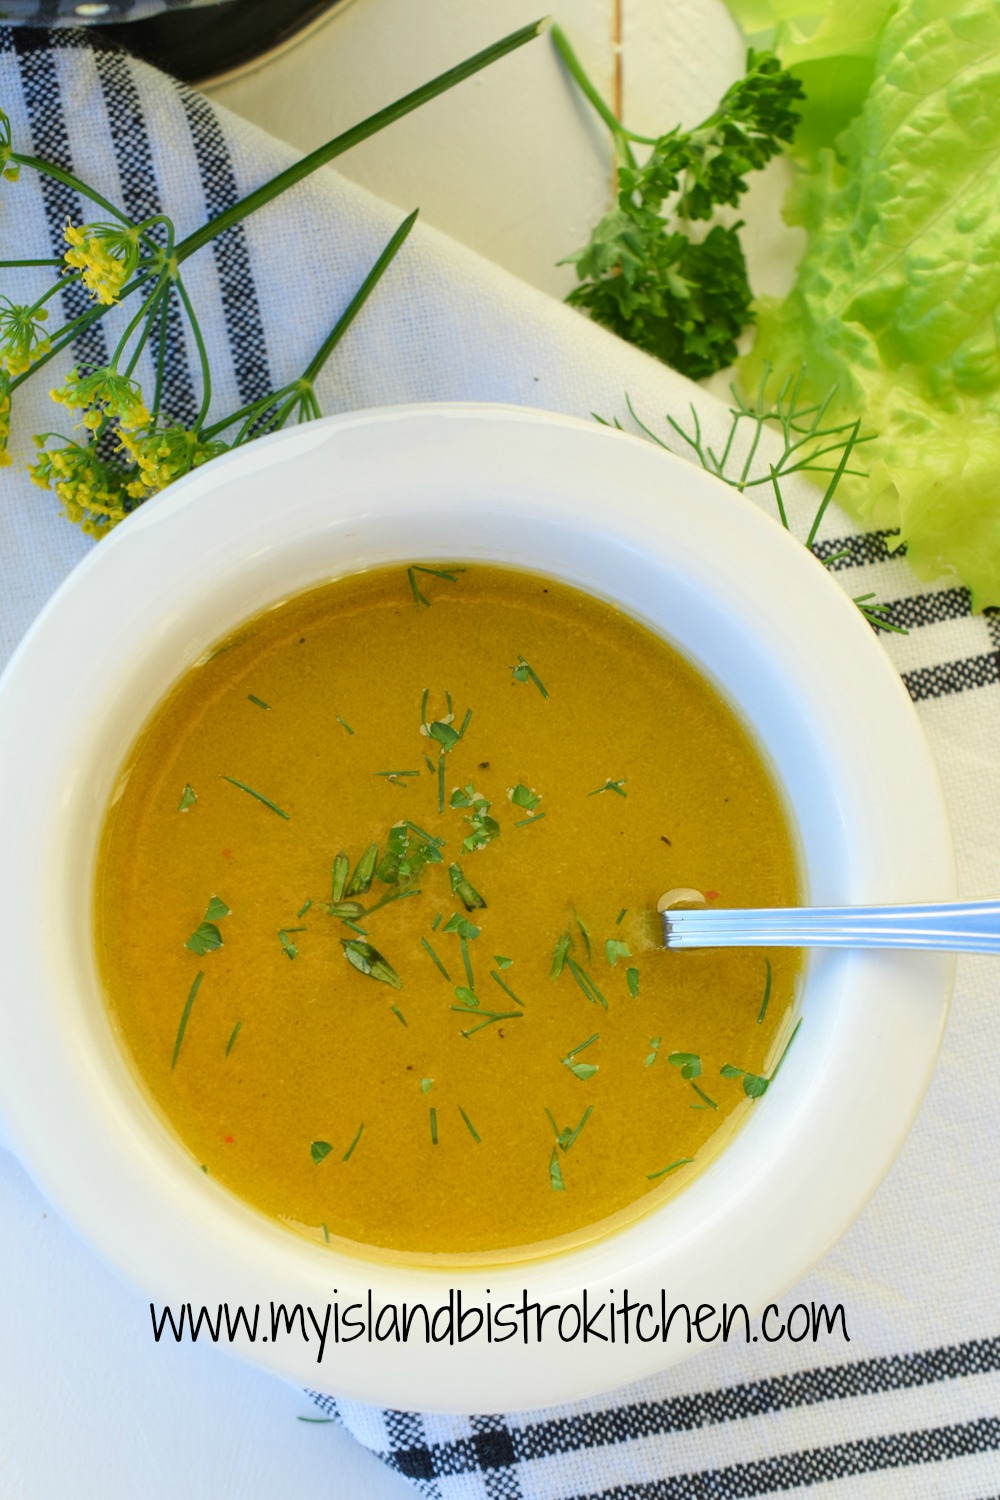
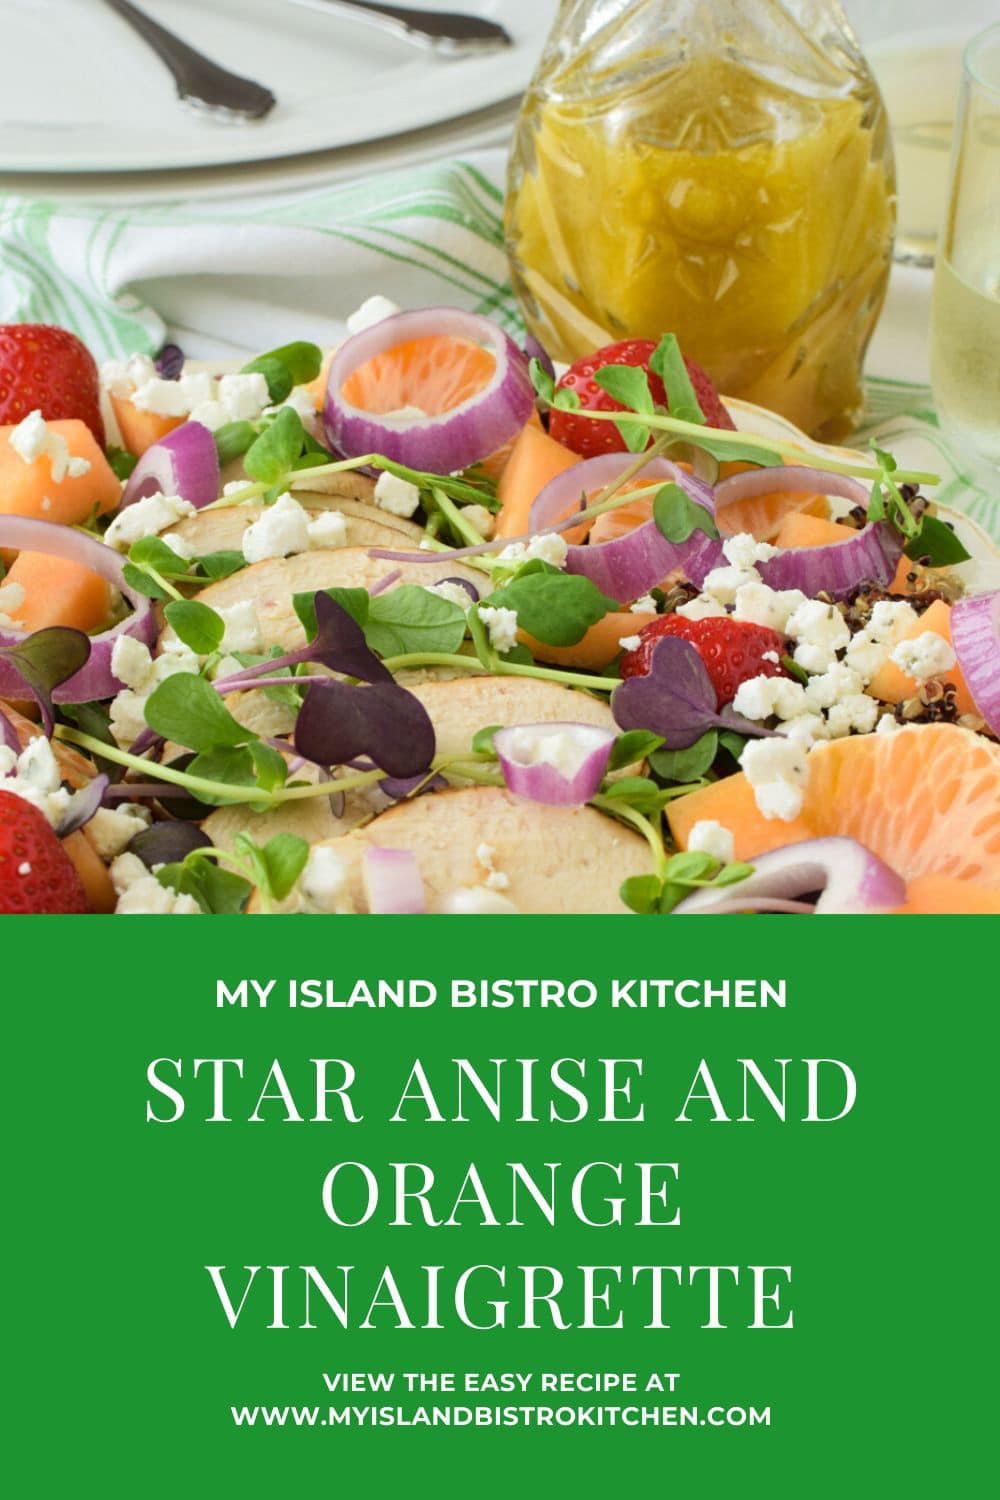
Mango Salad Dressing
Mango Salad Dressing is very easy to make, especially if you have a blender as all the ingredients get puréed. A little sweet with a little citrus tang would be how I would describe this yummy dressing.
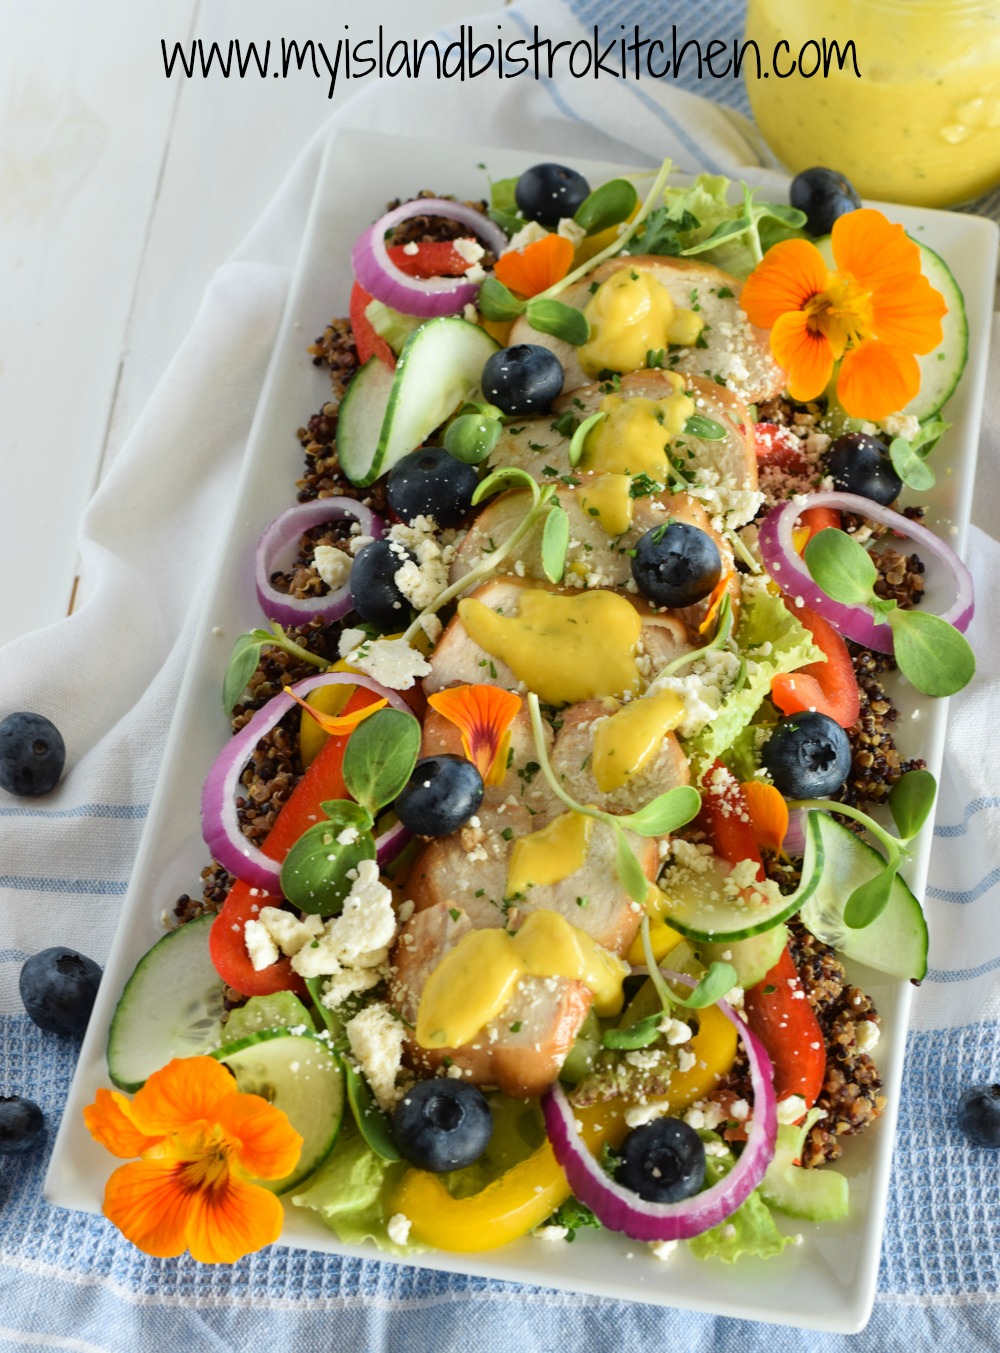
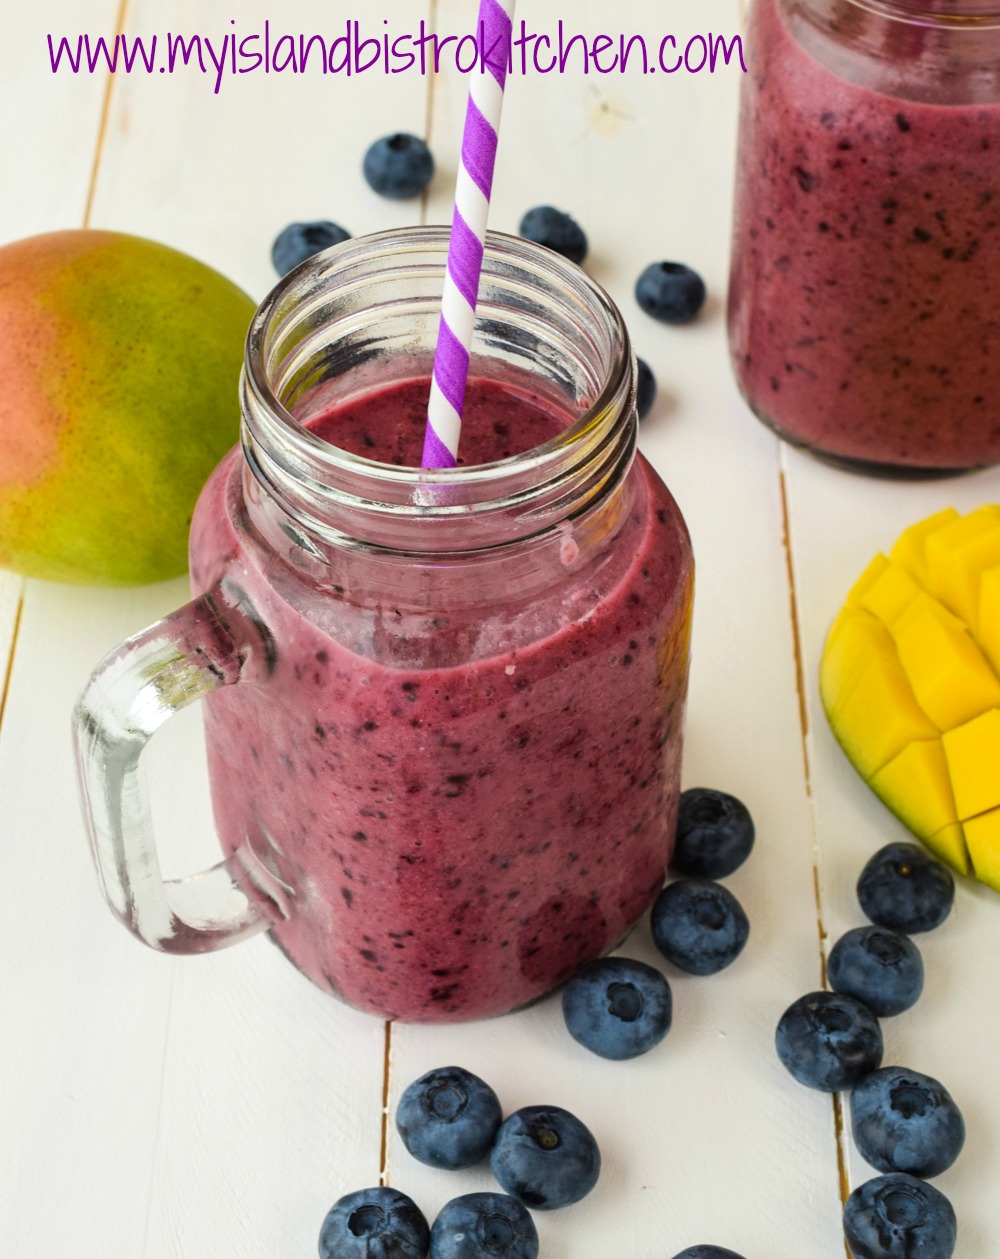
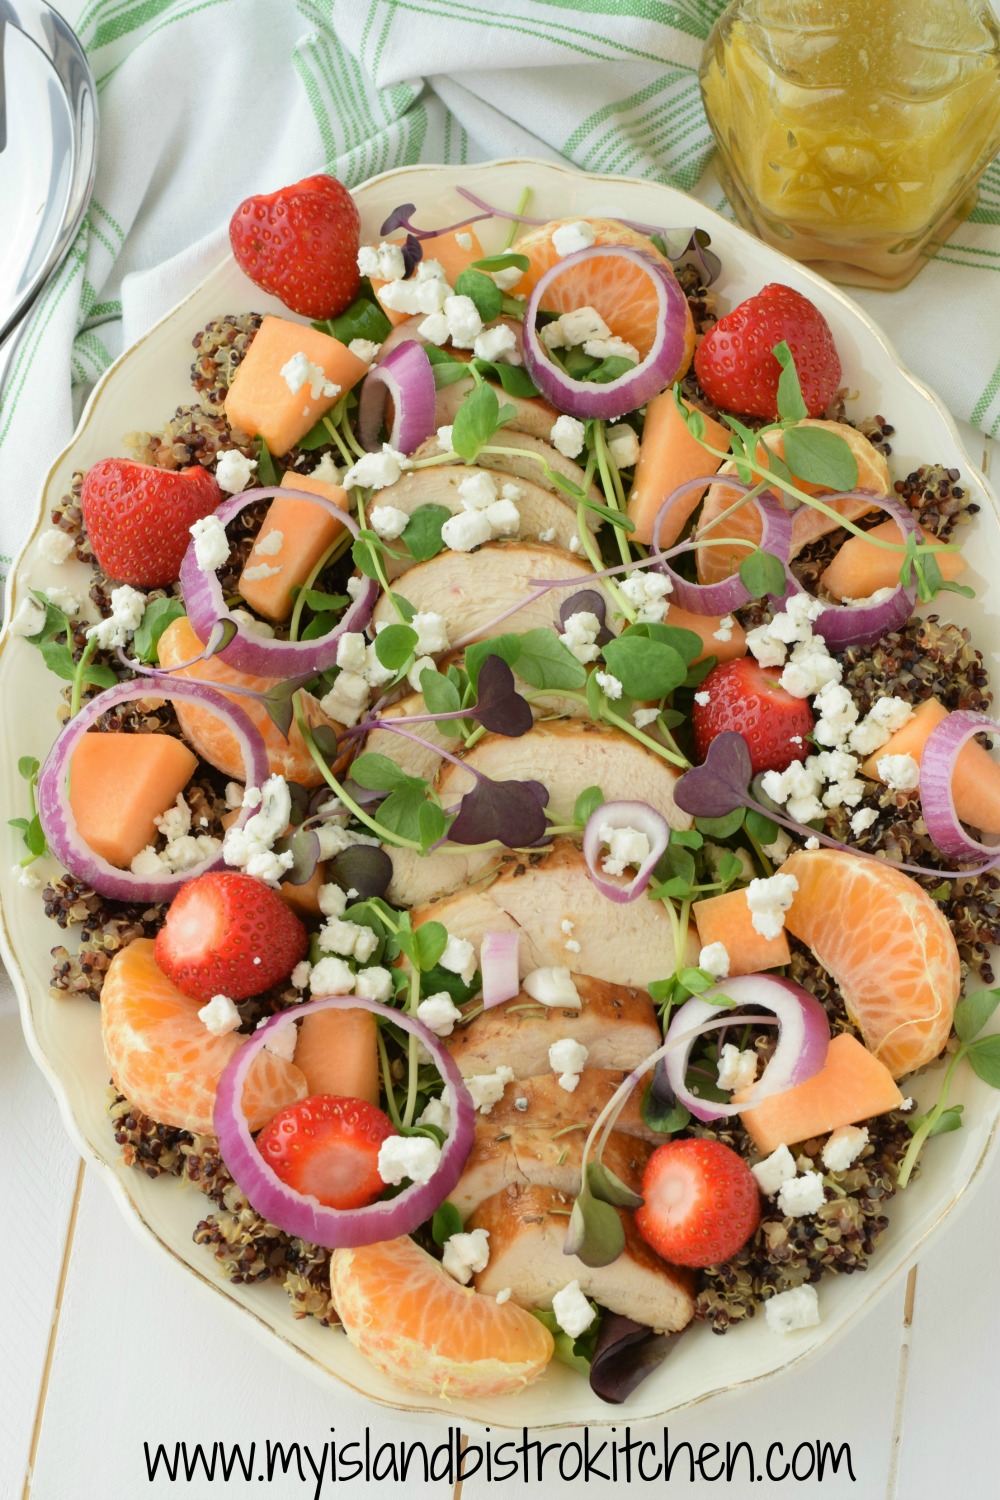
This bright yellow attractive dressing works well on a traditional garden salad.
Mango Salad Dressing
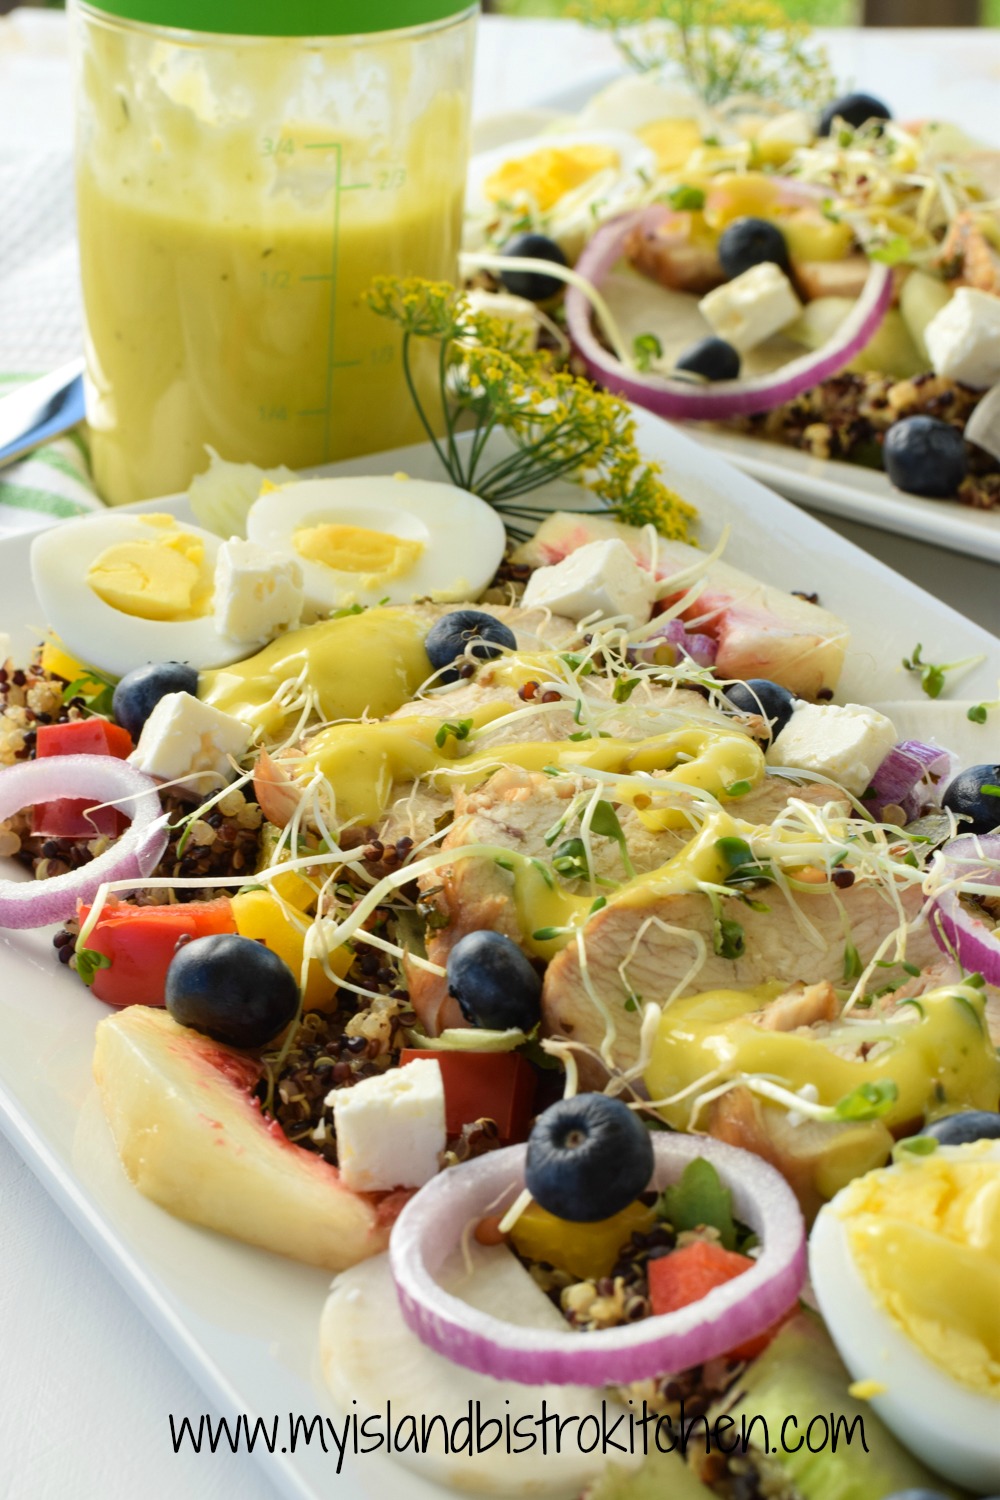
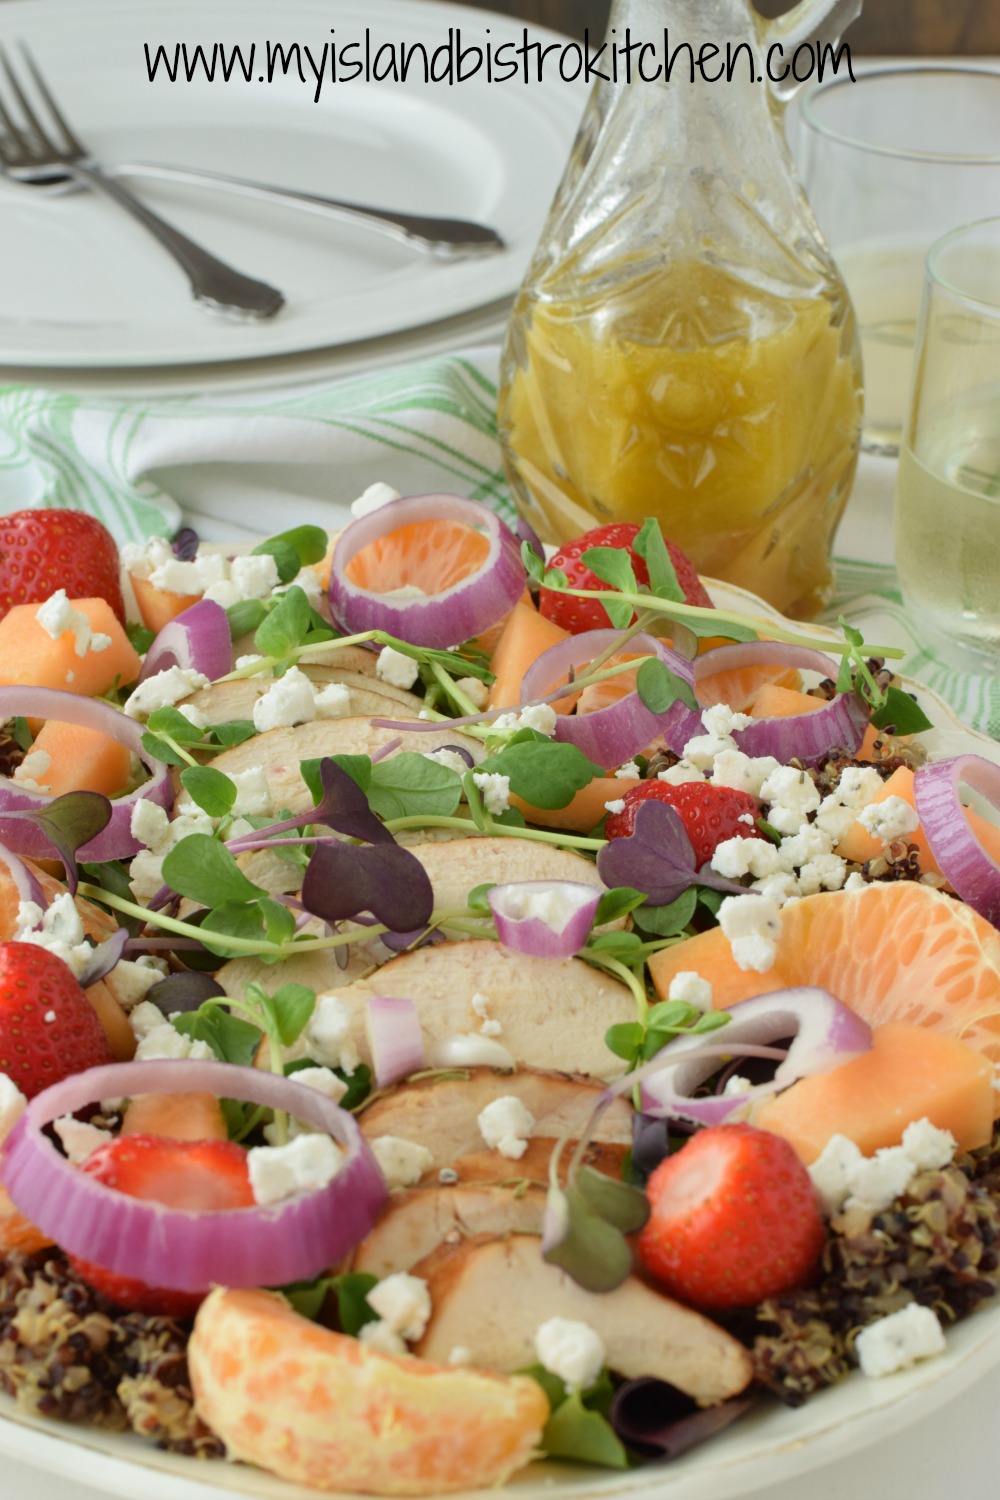
The appetizing Mango Salad Dressing is especially good on salads where cold chicken or turkey slices and quinoa or rice are added.
Mango Salad Dressing on Chicken and Quinoa Salad
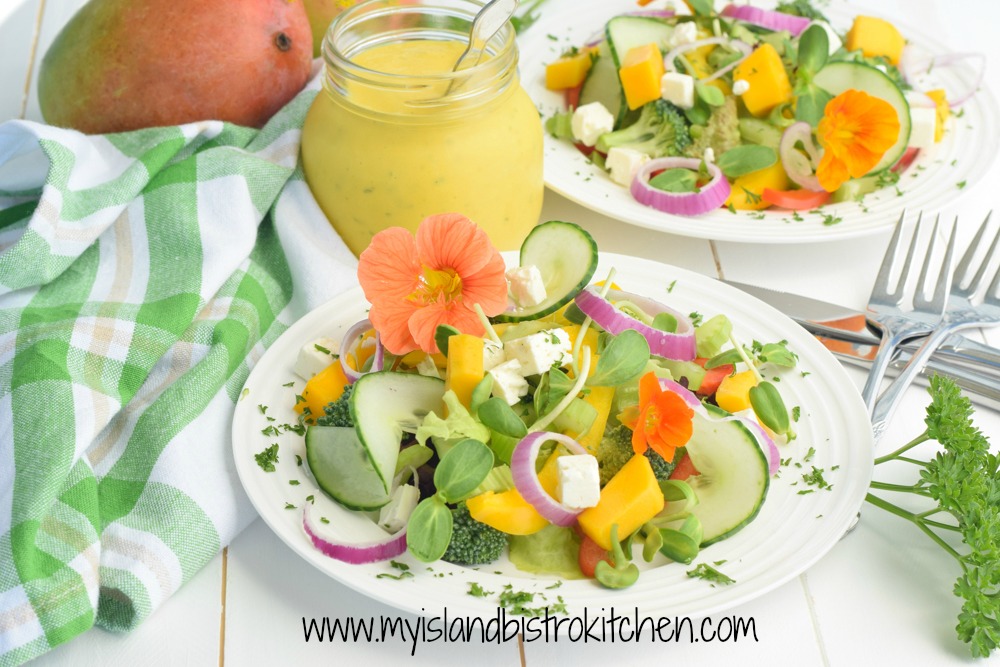
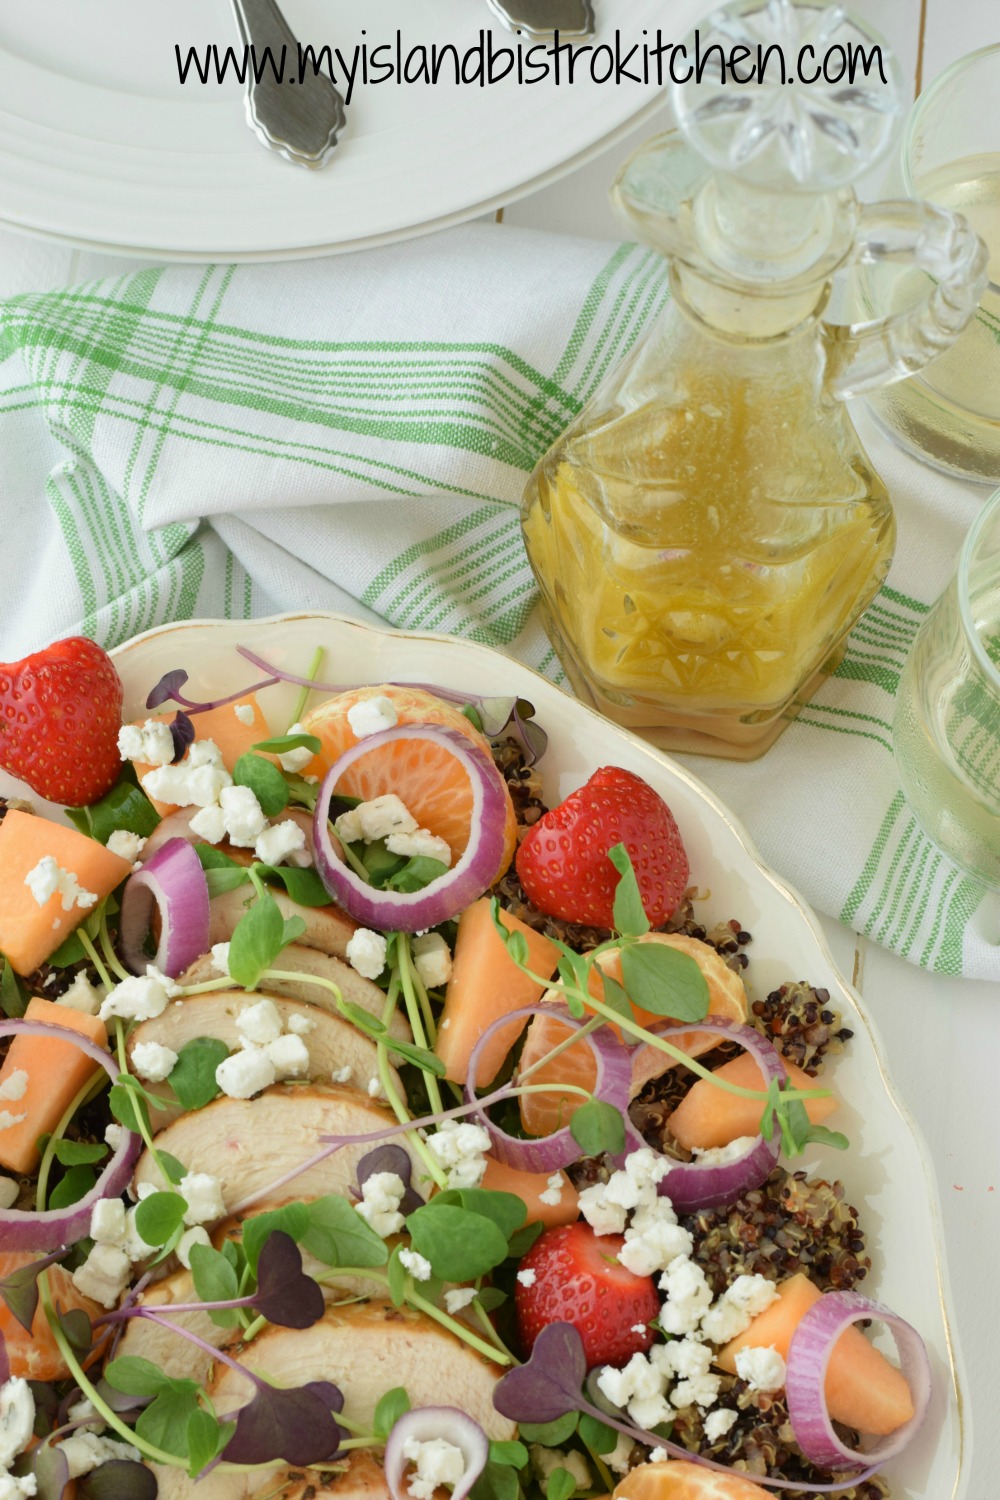
It’s also tasty on salads that have a mix of both fruits and vegetables.
Mango Dressing
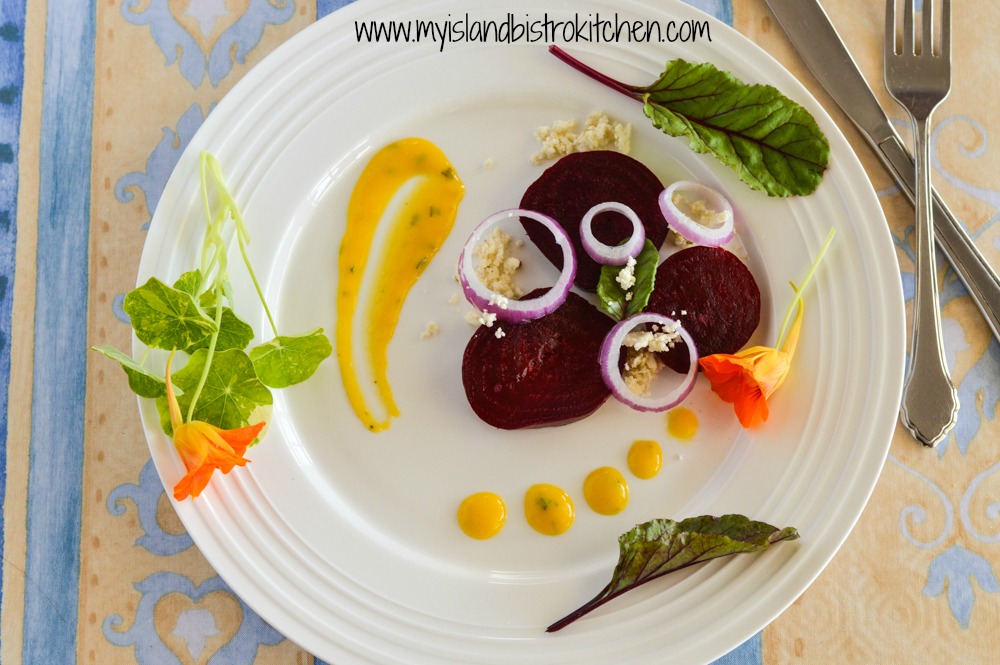
And, because of its showy color (as well as its taste, of course!), it is a lovely complement to a stylized starter salad such as the roasted beet and feta cheese salad shown in the photo below. It has a somewhat thick consistency so stays in place when applied to a salad or plate. It adds spectacular color (and flavor) to many different salad combinations.
Beet and Feta Salad with Mango Salad Dressing
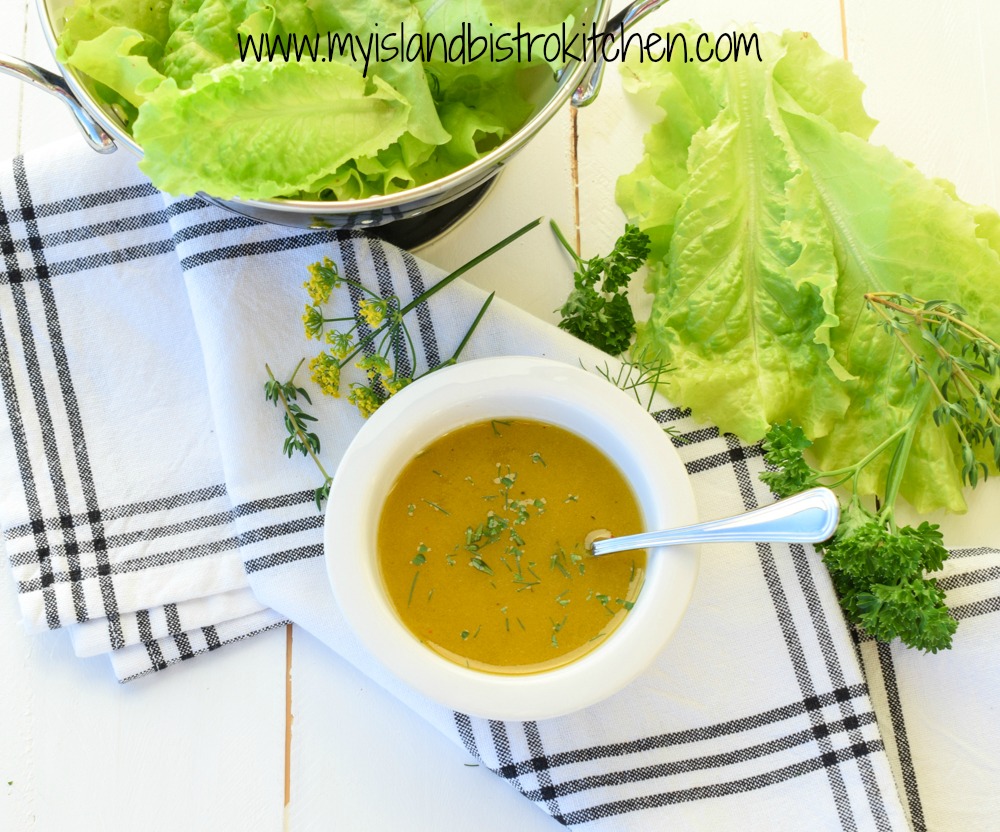
A little tropical, a little citrusy, a little sweet, and just a little spicy depending on how much garlic and what combination of fresh herbs are used, this colorful Mango Salad Dressing is a versatile addition to have in your repertoire of salad dressings.
Mango Salad Dressing
[Printable recipe follows at end of posting]
Mango Salad Dressing
Ingredients:
1 cup diced mango (about ¾ of a mango) 1 tbsp + 1 tsp white wine vinegar or sherry vinegar ¼ cup orange juice ½ tbsp lime juice 2 tsp honey 2-3 cloves of garlic, minced 2 tbsp red onion, finely chopped 2 tsp Dijon mustard ½ tsp fresh parsley, finely chopped ½ tsp fresh dill, finely chopped 1 tsp fresh cilantro, finely chopped 1/3 cup olive oil Salt and pepper, to taste
Method:
Place mango and vinegar, along with orange and lime juices, in blender. Purée until smooth. Add honey, garlic, red onion, mustard, and fresh herbs and pulse until mixture is just blended. With blender running, slowly add the olive oil in steady stream. Season with salt and pepper to taste. Transfer salad dressing to serving vessel if using immediately or, for later use, to a bottle with airtight cap. Refrigerate for up to 4 days. Serve chilled.
A delicious easy-to-make dressing for salads. As tasty as it is showy, this mango dressing is a little sweet and a little citrusy. Perfect complement to many salad variations.
Ingredients
1 cup diced mango (about ¾ of a mango)
1 tbsp + 1 tsp white wine vinegar or sherry vinegar
¼ cup orange juice
½ tbsp lime juice
2 tsp honey
2-3 cloves of garlic, minced
2 tbsp red onion, finely chopped
2 tsp Dijon mustard
½ tsp fresh parsley, finely chopped
½ tsp fresh dill, finely chopped
1 tsp fresh cilantro, finely chopped
1/3 cup olive oil
Salt and pepper, to taste
Instructions
Place mango and vinegar, along with orange and lime juices, in blender. Purée until smooth. Add honey, garlic, red onion, mustard, and fresh herbs and pulse until mixture is just blended. With blender running, slowly add the olive oil in steady stream. Season with salt and pepper to taste. Transfer salad dressing to serving vessel if using immediately or, for later use, to a bottle with airtight cap. Refrigerate for up to 4 days. Serve chilled.
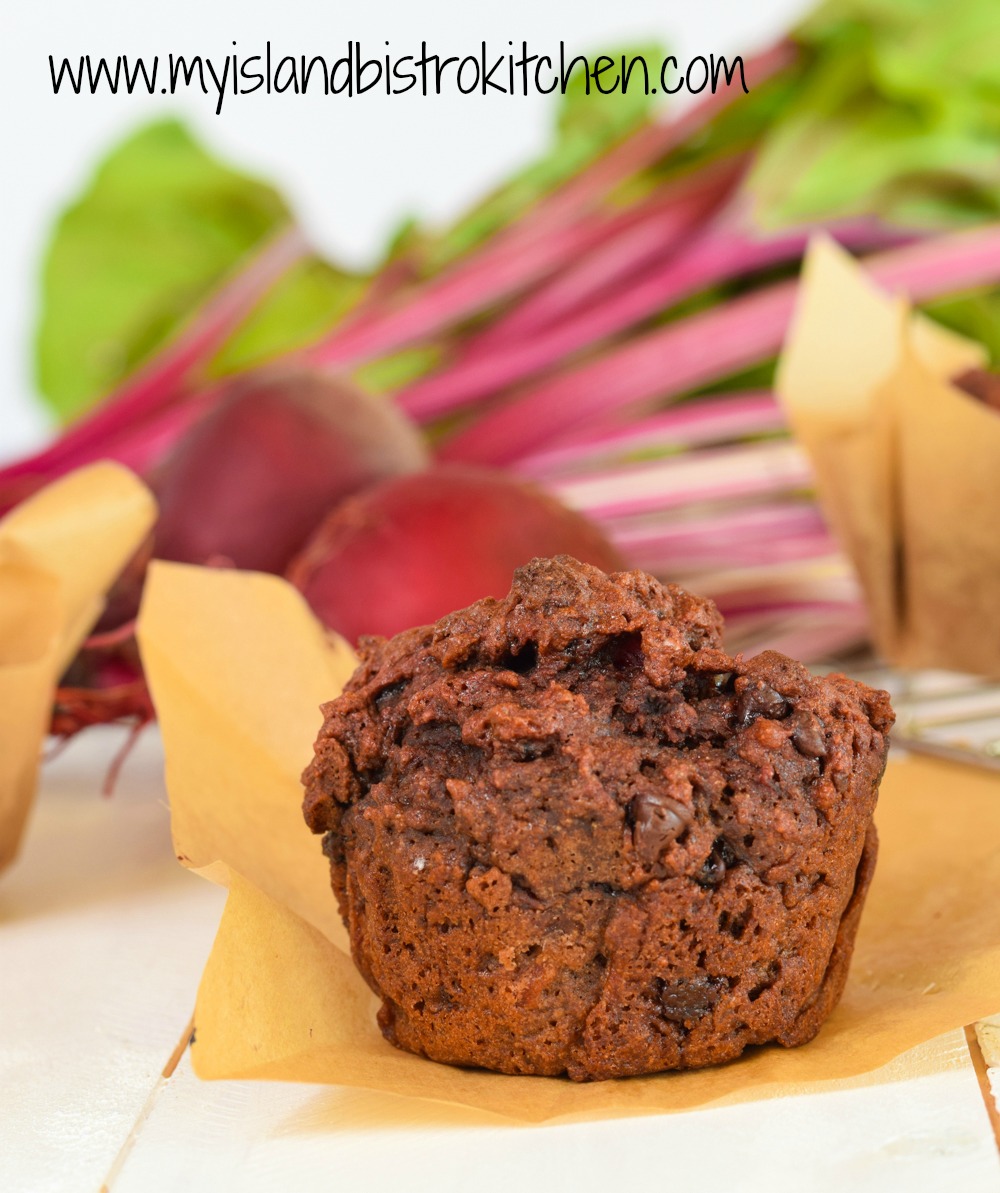
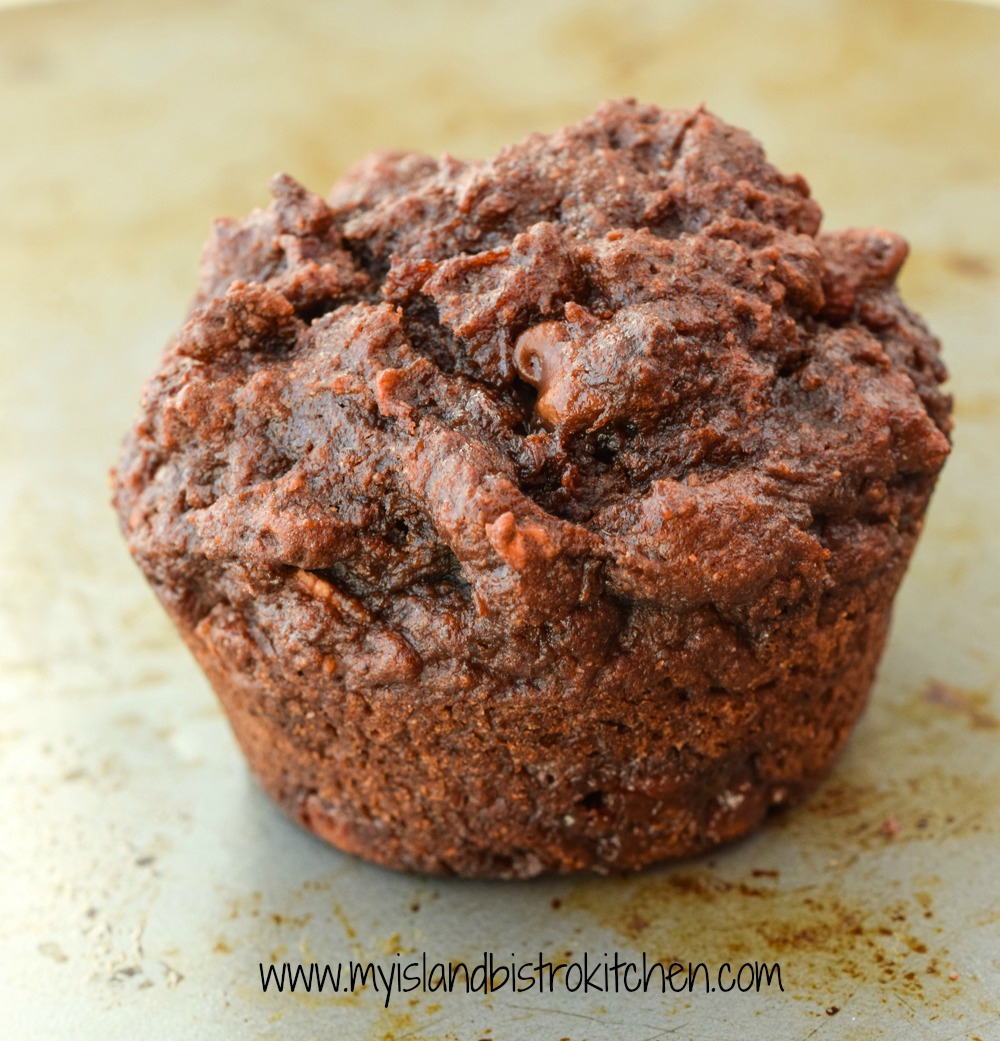
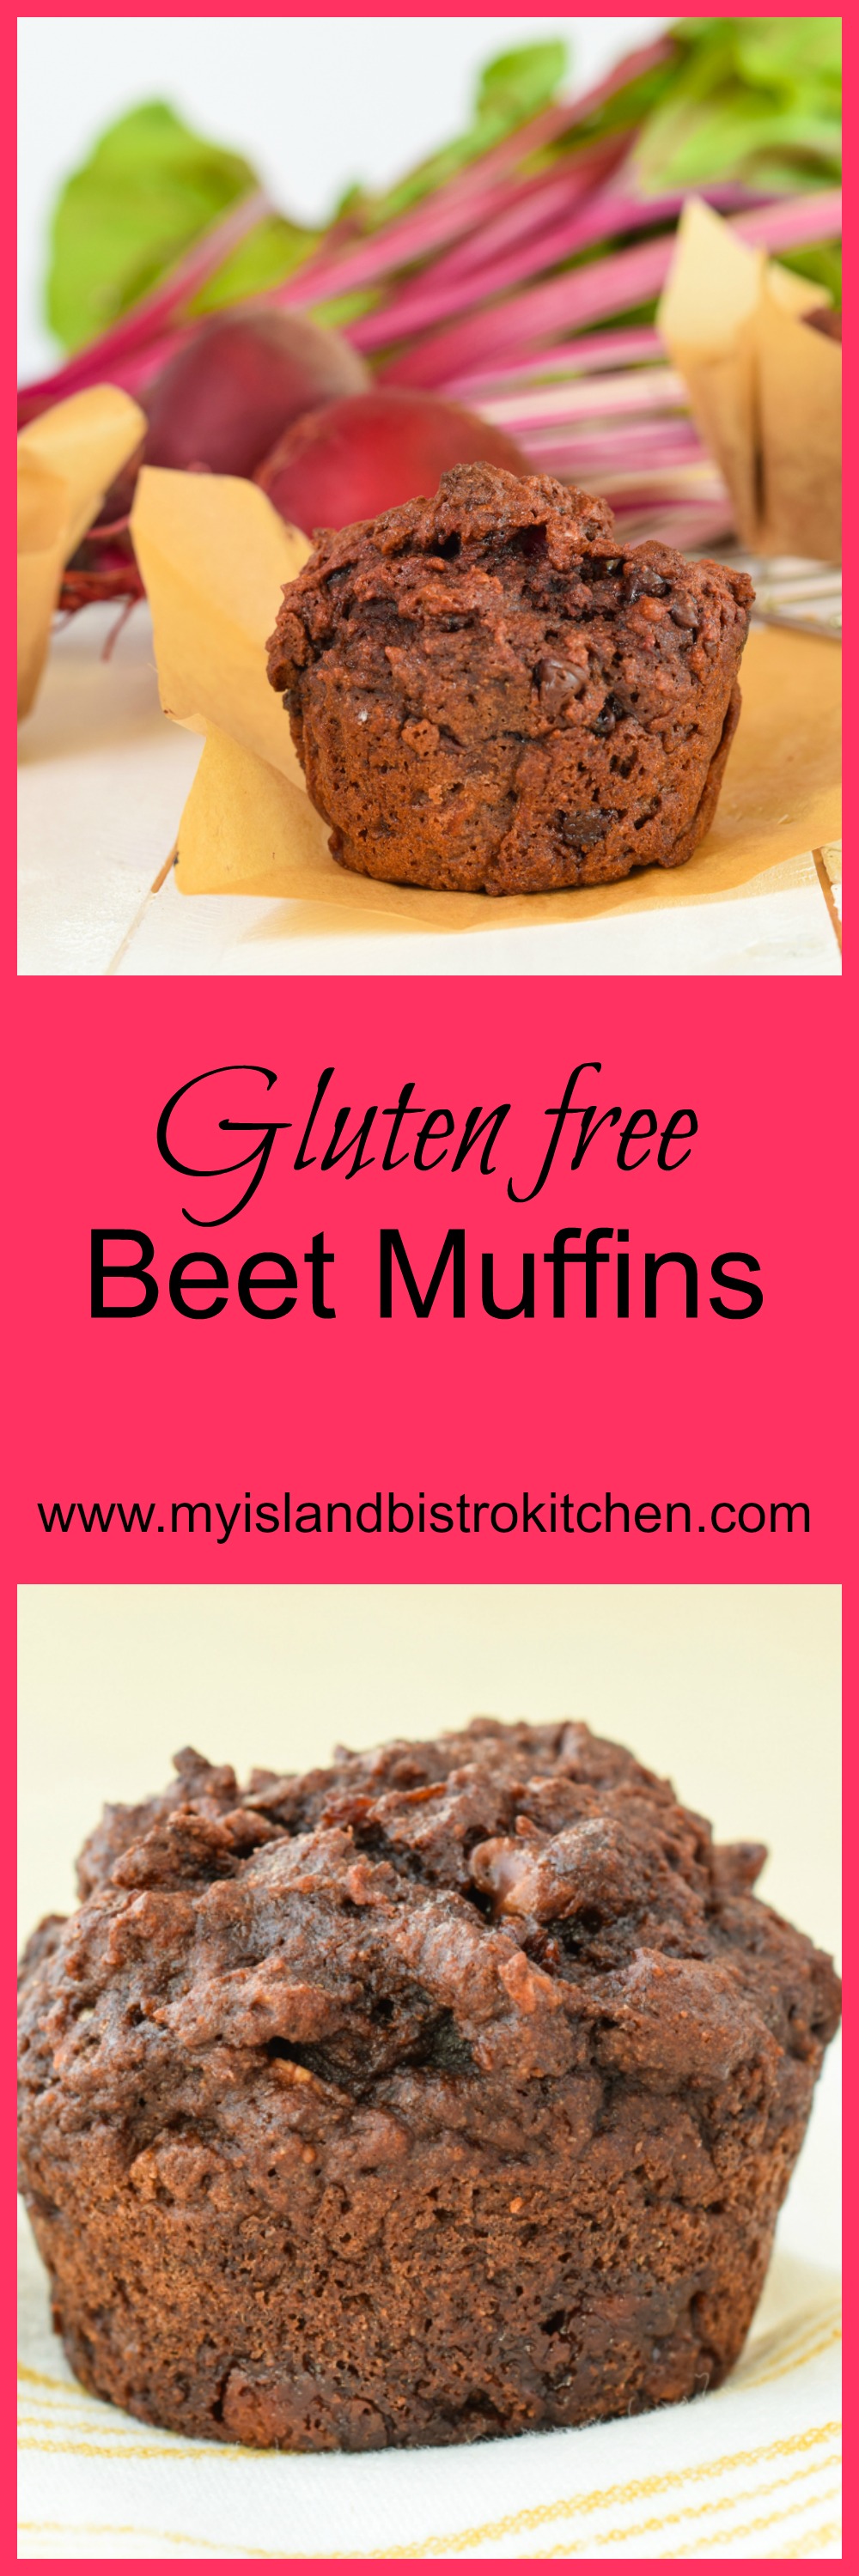
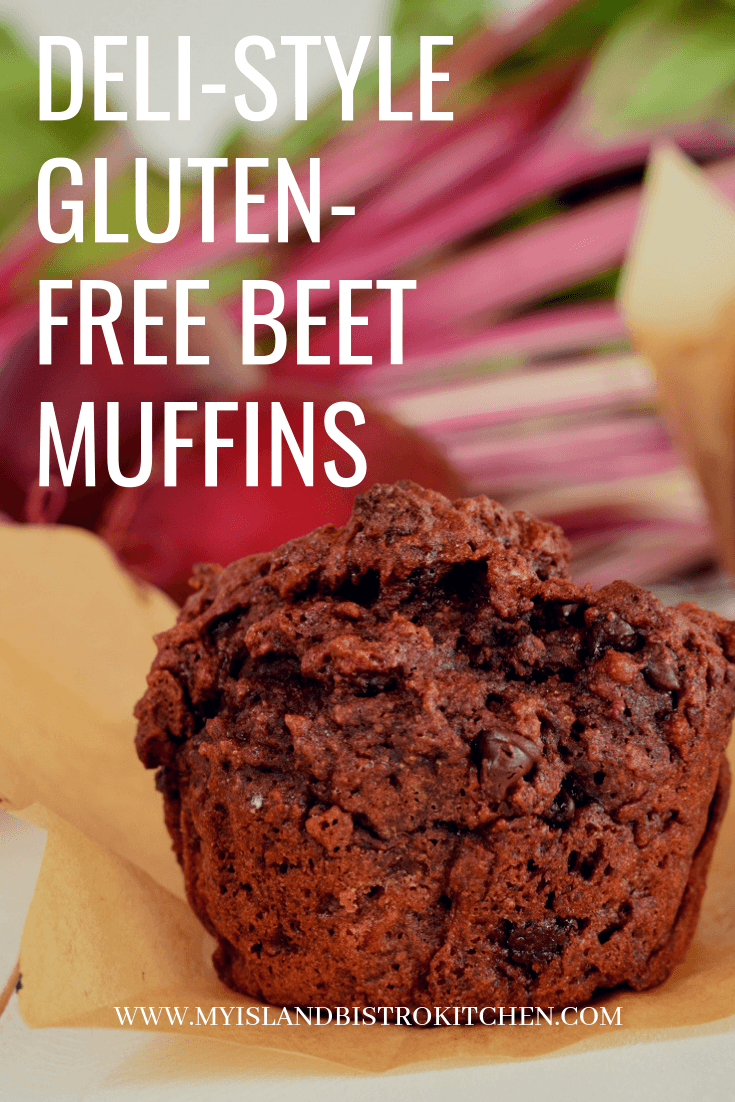
We have all heard of carrot muffins and don’t think twice about including the carrot vegetable into baked goods. What is less commonly heard of is the use of beets for the same purpose. Today, I am sharing my newly-created and tested recipe for deli-style gluten-free beet muffins which are moist and packed full of wonderful flavor. This is definitely in the category of “don’t knock it till you’ve tried it“!
Beets
Our garden did extremely well this year and our beets, in particular, grew very well….to the point that we had way more than what we could eat fresh or pickled. I am always looking to add new gluten-free muffins to my recipe repertoire so, with an abundance of beets available, I figured this was a good time to experiment with them and I am very pleased with the results. These deli-style gluten-free beet muffins have undergone several testings, in different ovens, and have produced consistently good results to the point that I am ready to publish my recipe here on my website.
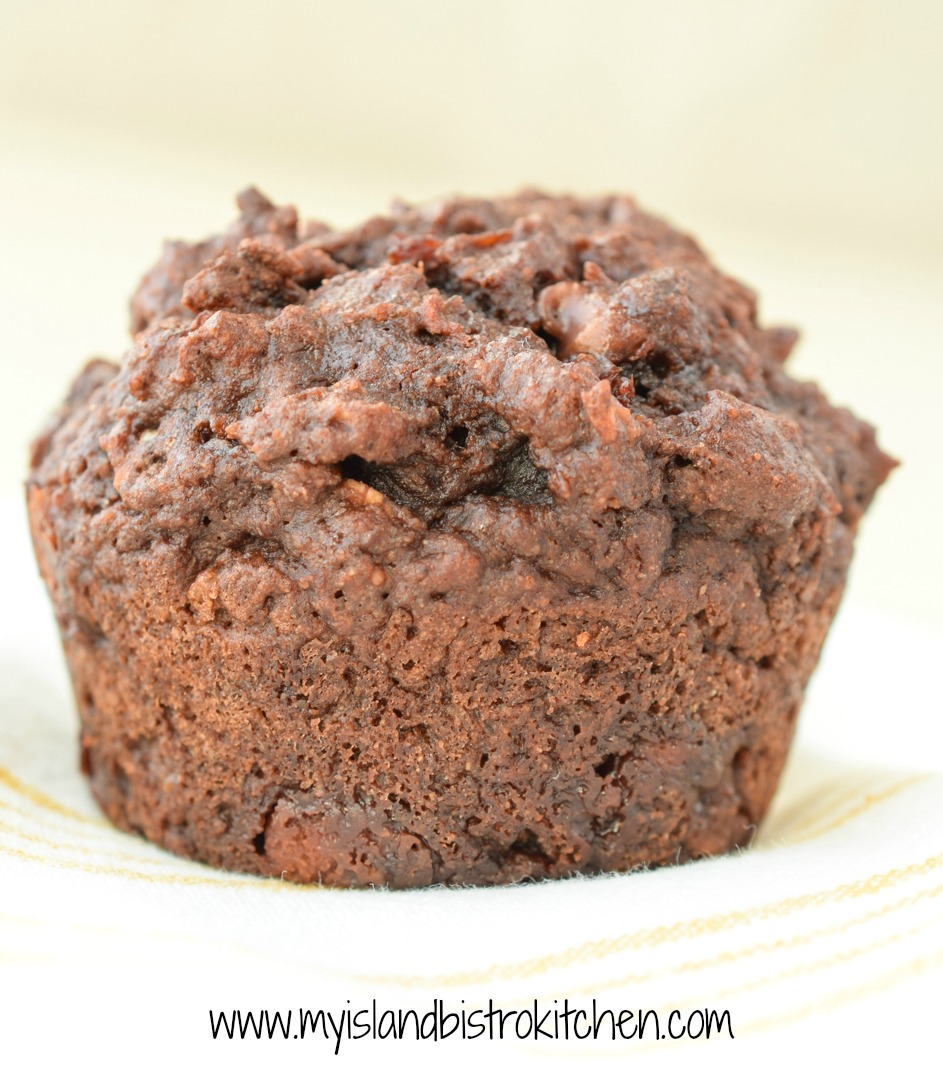
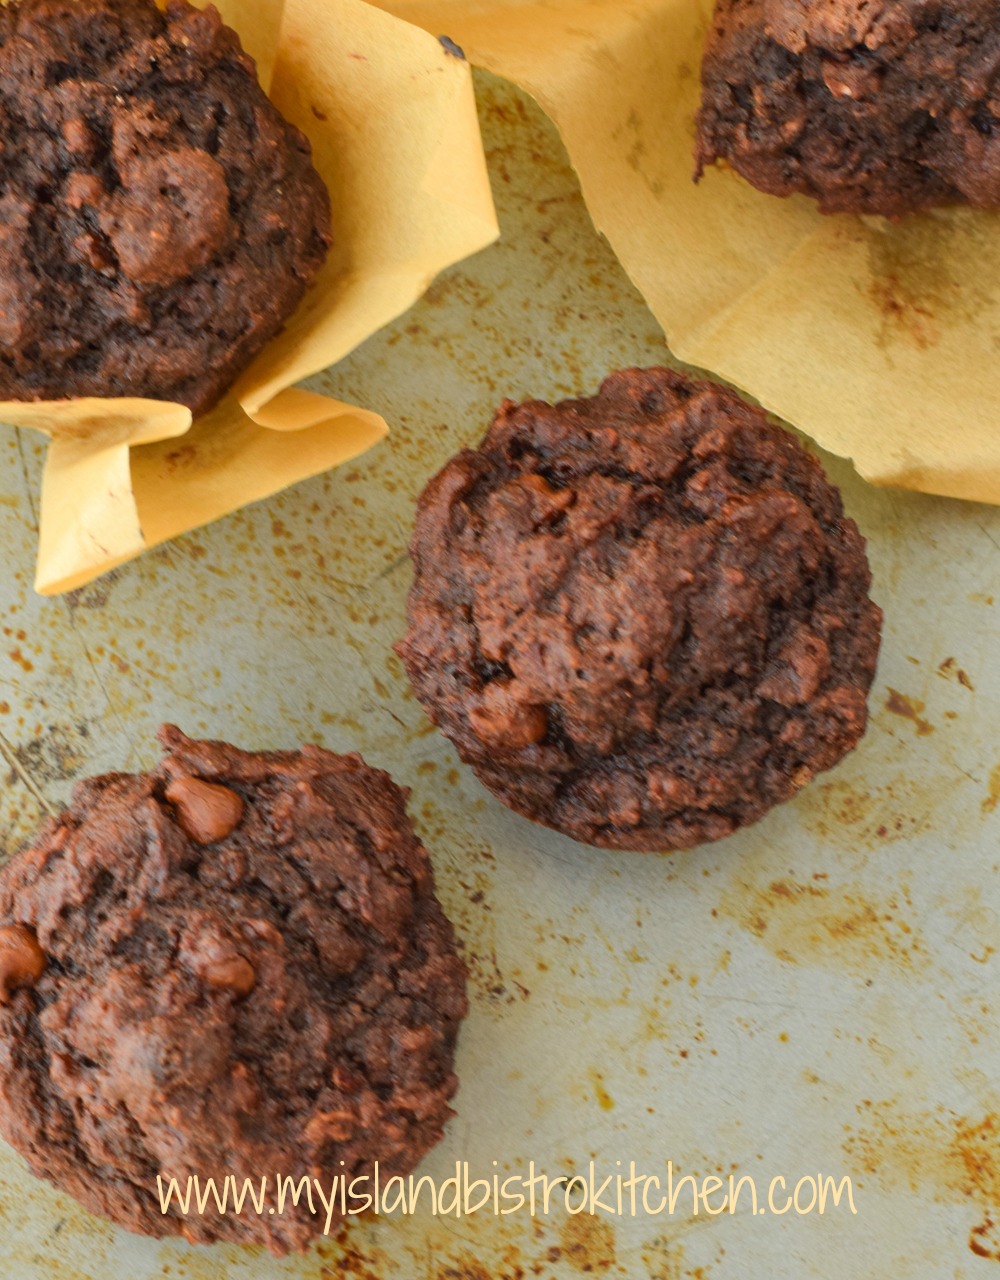
Gluten-Free Beet Muffin
For those of you who follow a gluten-free diet, you are likely aware that it is often difficult to get good quality baked goods that reasonably replicate gluten baked goods and that are appetizing and tasty. I have been doing a lot of experimenting with gluten-free recipe creation over the past while and am having very good results, particularly with muffins. I love a muffin for coffeebreak at work every day and I absolutely detest any muffin with a flat top! I expect my muffins to resemble deli-style muffins – those that are beautifully raised, with the dome top, and are a reasonably good sized muffin.
Gluten-free Beet Muffins
In order to get that deli-style muffin, I have learned that gluten-free muffins take more leavening. This is probably due to the properties in the gluten-free flours and they obviously must take more leavening. I find some gluten-free flours produce baked goods that have a “gritty” texture to them while others will result in a “gummy” textured product, and still others can have an offputting taste that is just not very appetizing. I have come up with a flour mixture blend that alleviates these issues and I attribute a lot of that to my use of small amounts of almond and coconut flours in my baked products. These flours cannot be used cup-for-cup substitutions for all-purpose flours because they react to liquid differently and, hence, the use of them in any quantity requires modifications to the liquid content in a recipe. However, small amounts of them can be used and I find they do enhance both the texture and certainly the flavor of baked goods like cookies and muffins.
Gluten-free Beet Muffin
The other thing I have learned about gluten-free baking is that the addition of several flavor enhancers greatly improves the flavor of the baked product. This is where the use of yogurt, vegetables (such as beets), maple syrup, cocoa, and so forth come in. For this beet muffin recipe, I use a thick Mediterranean-style/Greek yogurt. Many recipes will call for the use of plain yogurt and that certainly works in this muffin recipe. However, I have also tested it with coconut and lavender (yes, lavender!) flavored yogurts and both are very good in these muffins. Don’t substitute regular yogurt for the thick Mediterranean-style yogurt in this recipe as the regular yogurt will be too watery and will change the ratio of wet-to-dry ingredients in the muffins.
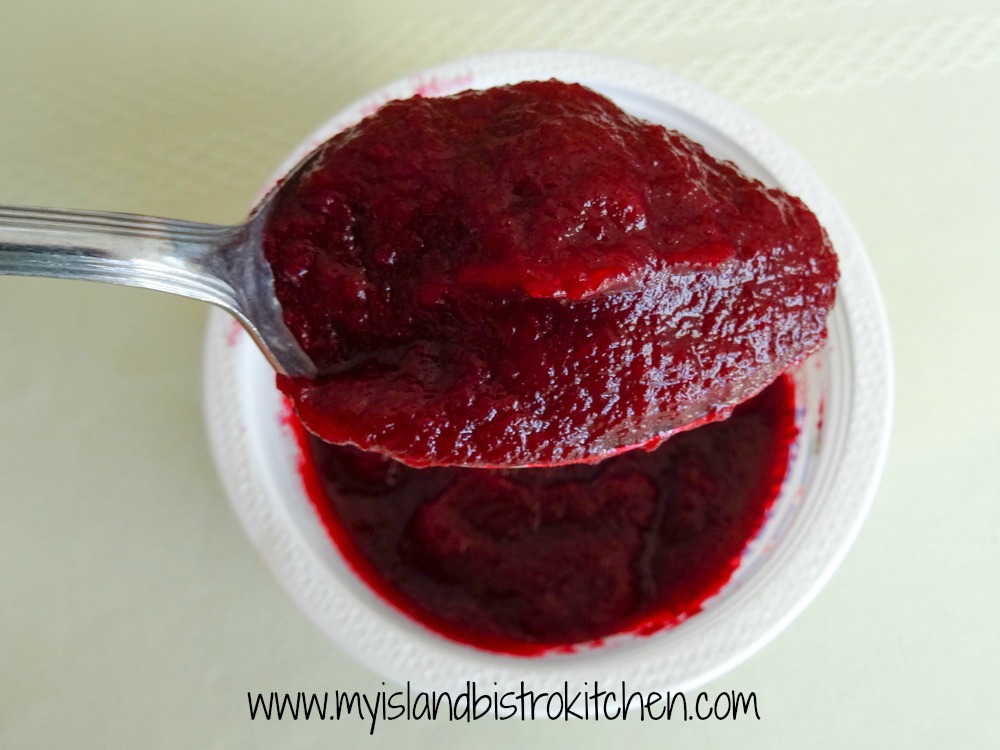
For this recipe, I incorporate beets in two ways – as a purée and in shredded form. The purée should be of the consistency of applesauce or baby food and should look like this.
Beet Purée
A small food processor or blender works well for the purée but I often use my immersion blender. If the beets are soft enough, the immersion blender will work. I use my tall 2-cup measuring cup when using the immersion blender to purée these beets as it contains any splatters – you really do see how red beets can be if you find splatters on the wall!
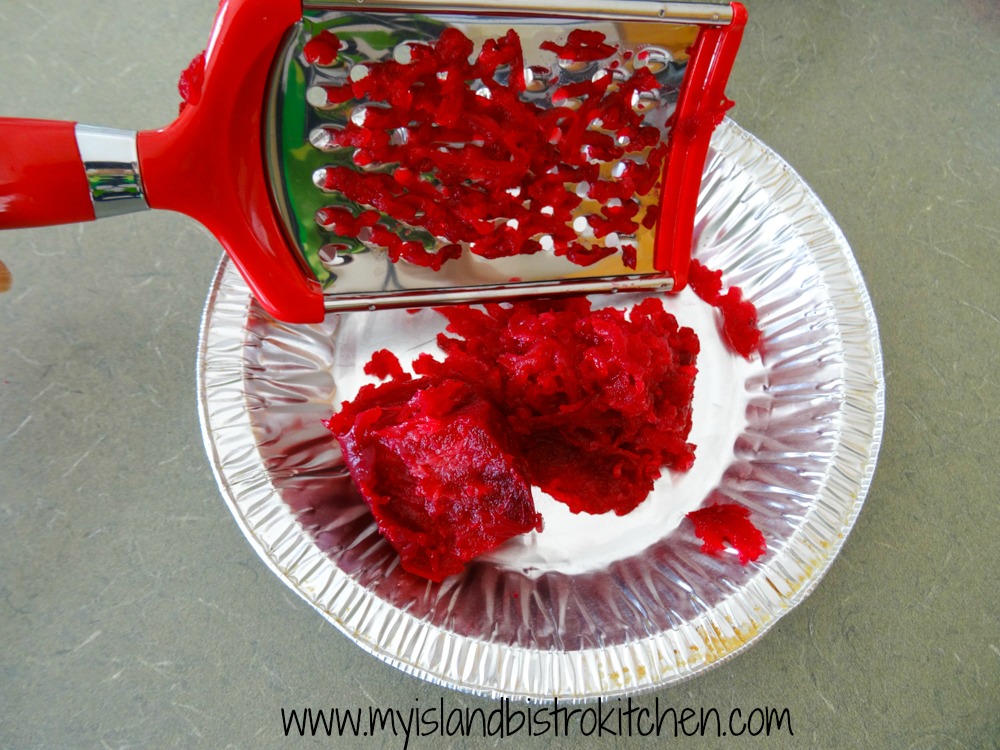
To shred the remaining beet(s) required for the recipe, I use a simple shredder like the one shown in the photo below. As you can see, the beets are shredded rather coarsely.
Shredded Cooked Beets
Some recipes call for shredded uncooked beets to be used in muffins; however, these muffins only take about 20 minutes to bake and, since beets are firm and take a while to cook I find, to ensure the beets are cooked in the muffins, I have better success using cooked beets in this recipe. Both the beet purée and shredded beets give these muffins flavor and moisture.
Gluten-free Beet Muffins
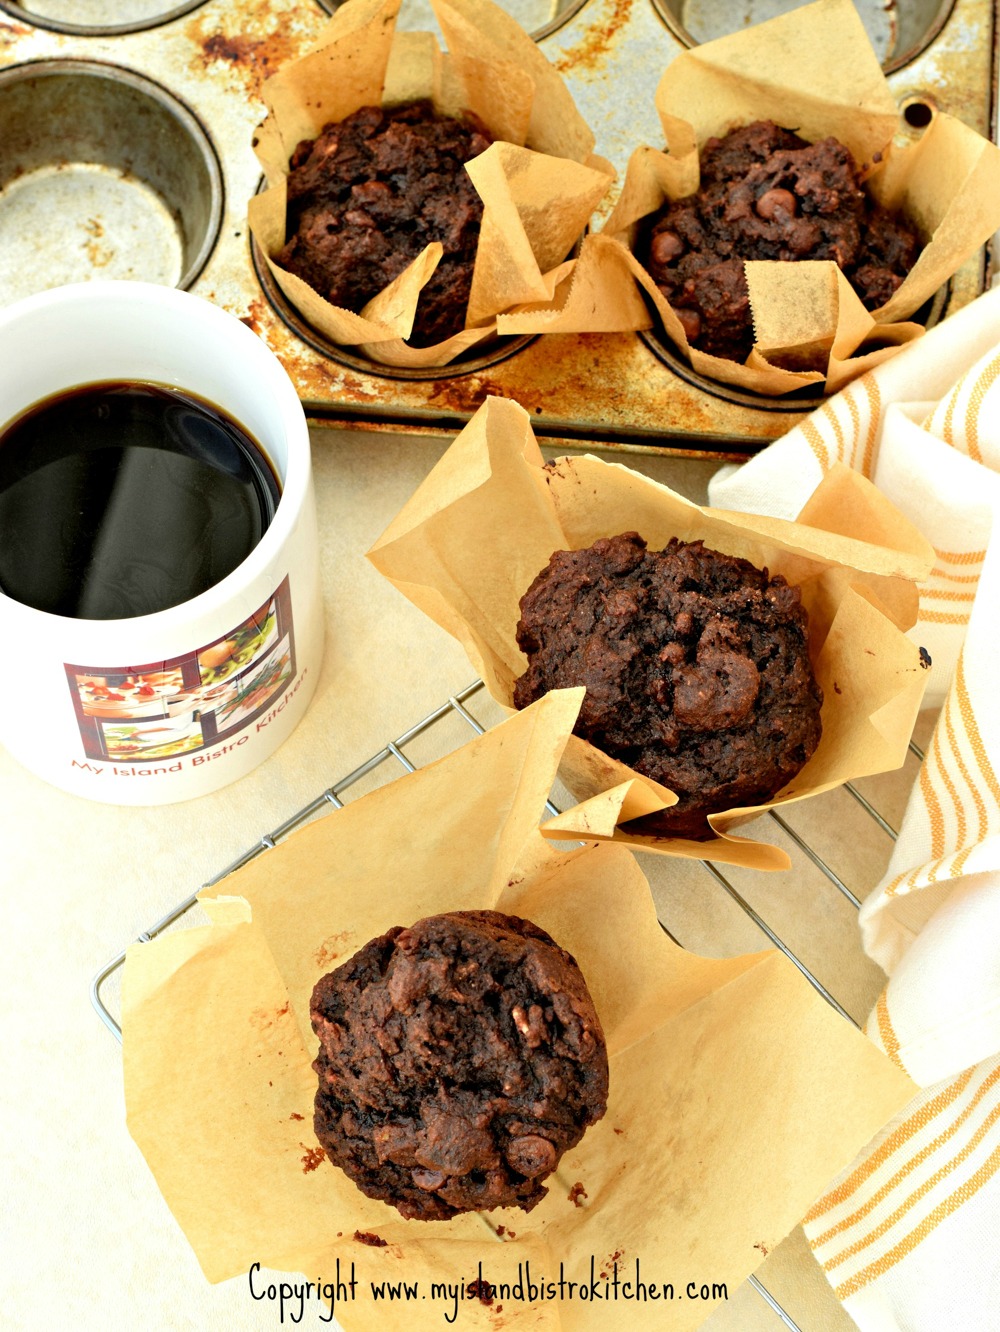
I love chocolate so have incorporated some cocoa and chocolate chips into the muffins as both add lovely flavor to the baked product.
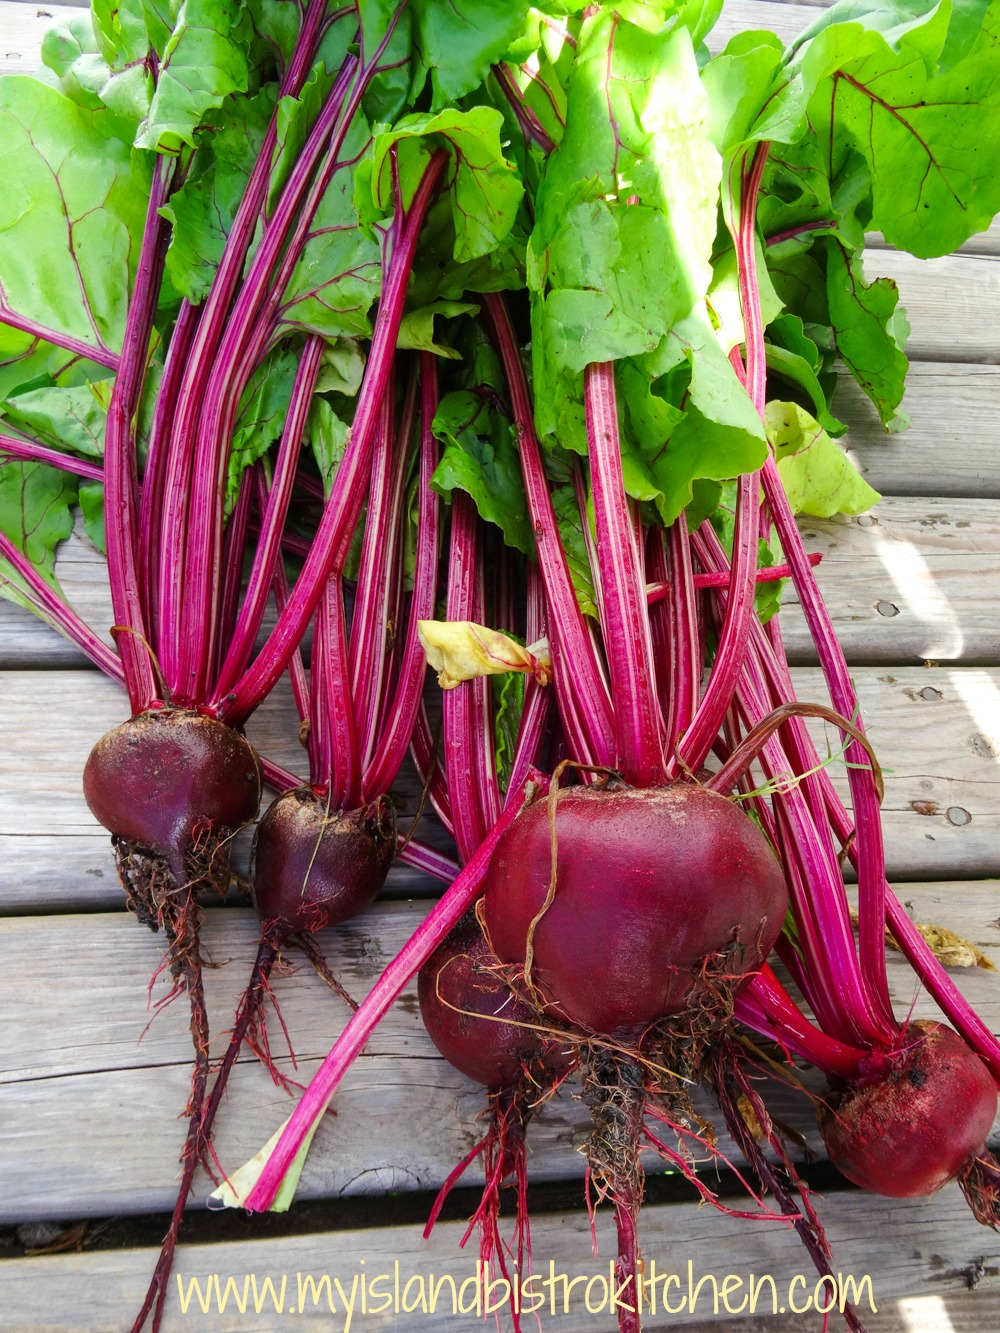
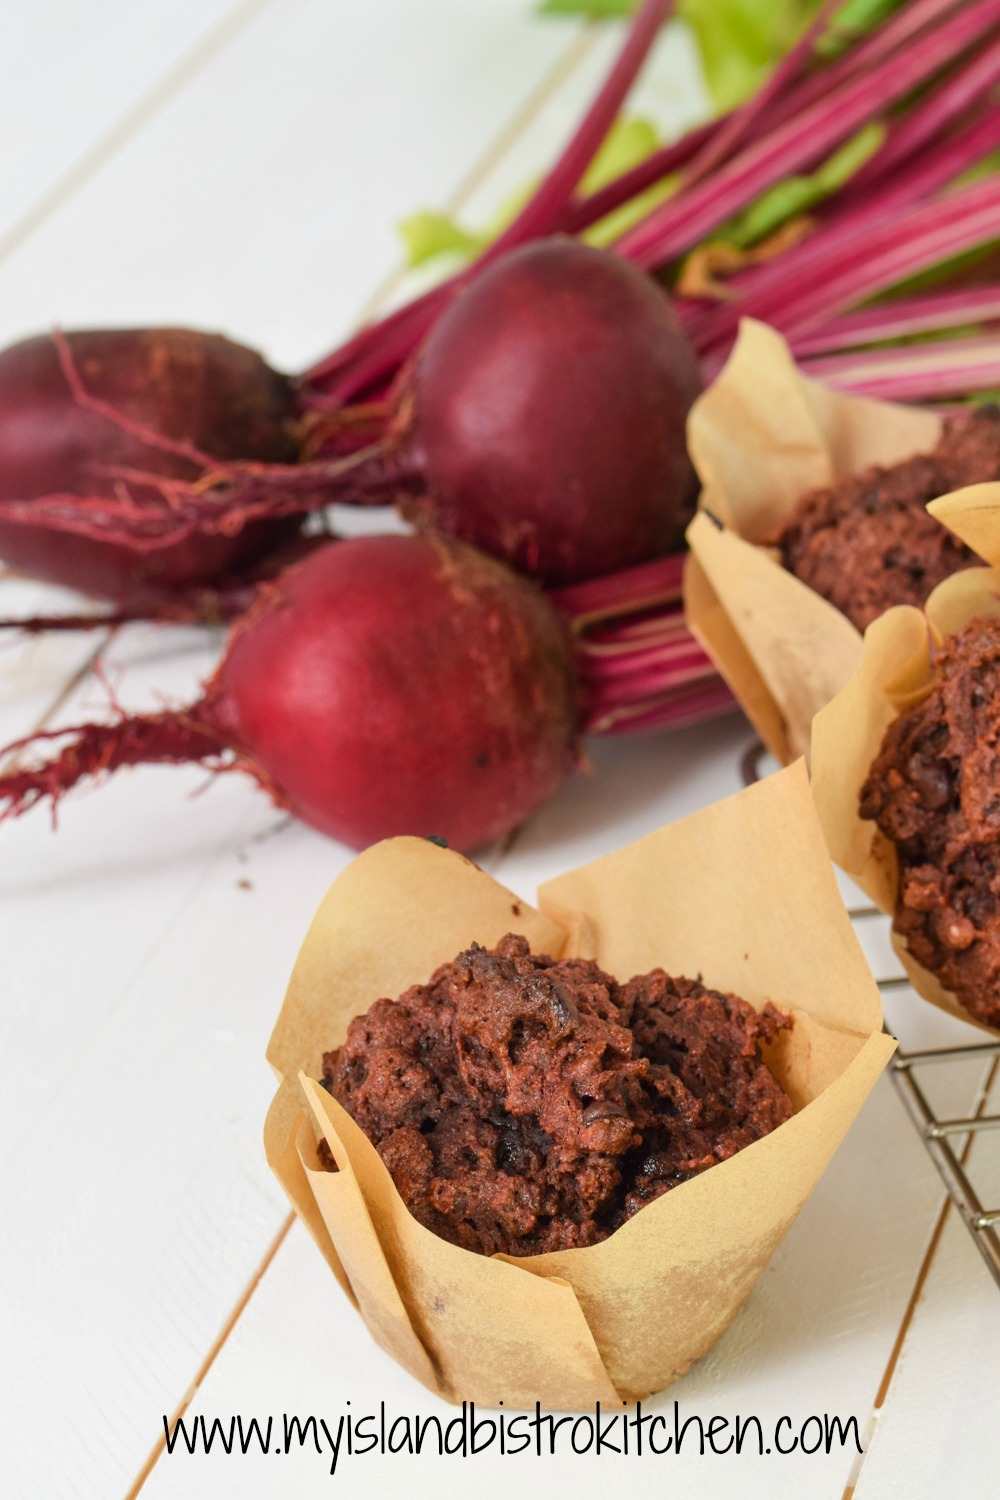
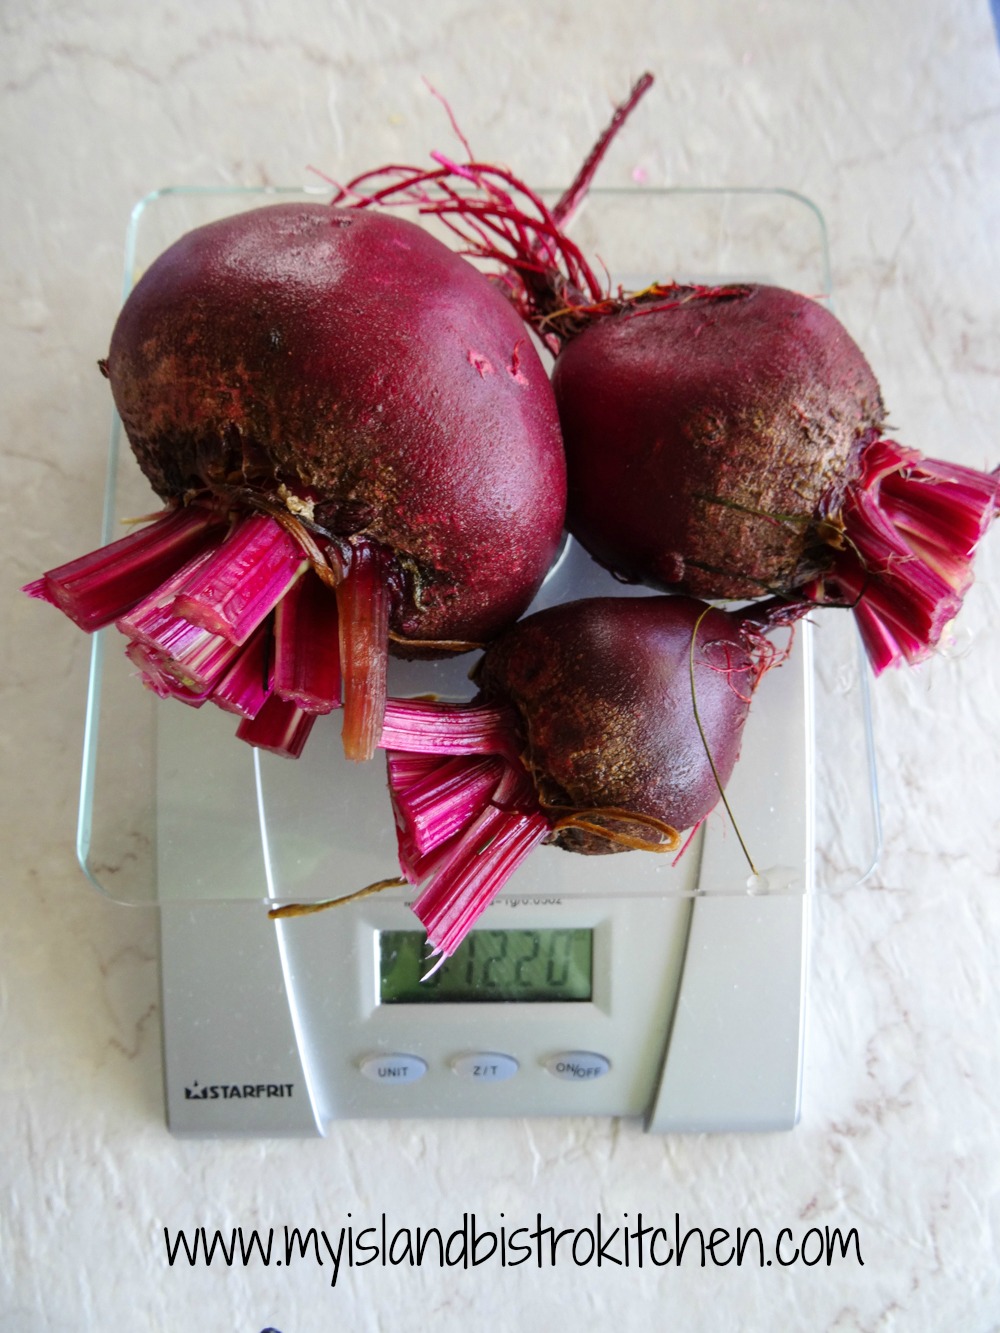
While I cook the beets especially for these muffins, if you happen to have cooked too many beets for another purpose, these muffins would be a good way to use the left-over beets. Three-quarters of a pound of beets (weighed after leaves removed) are required for this recipe. The ones in the photo below are from our garden so, as you can see, they are of varying sizes! Just know that the bigger beet is going to take longer to cook to fork-tender state. Don’t split the beets before they are cooked as they will bleed and their goodness will be poured down the drain.
Beets
As always, make sure that all the ingredients called for in the recipe are gluten free.
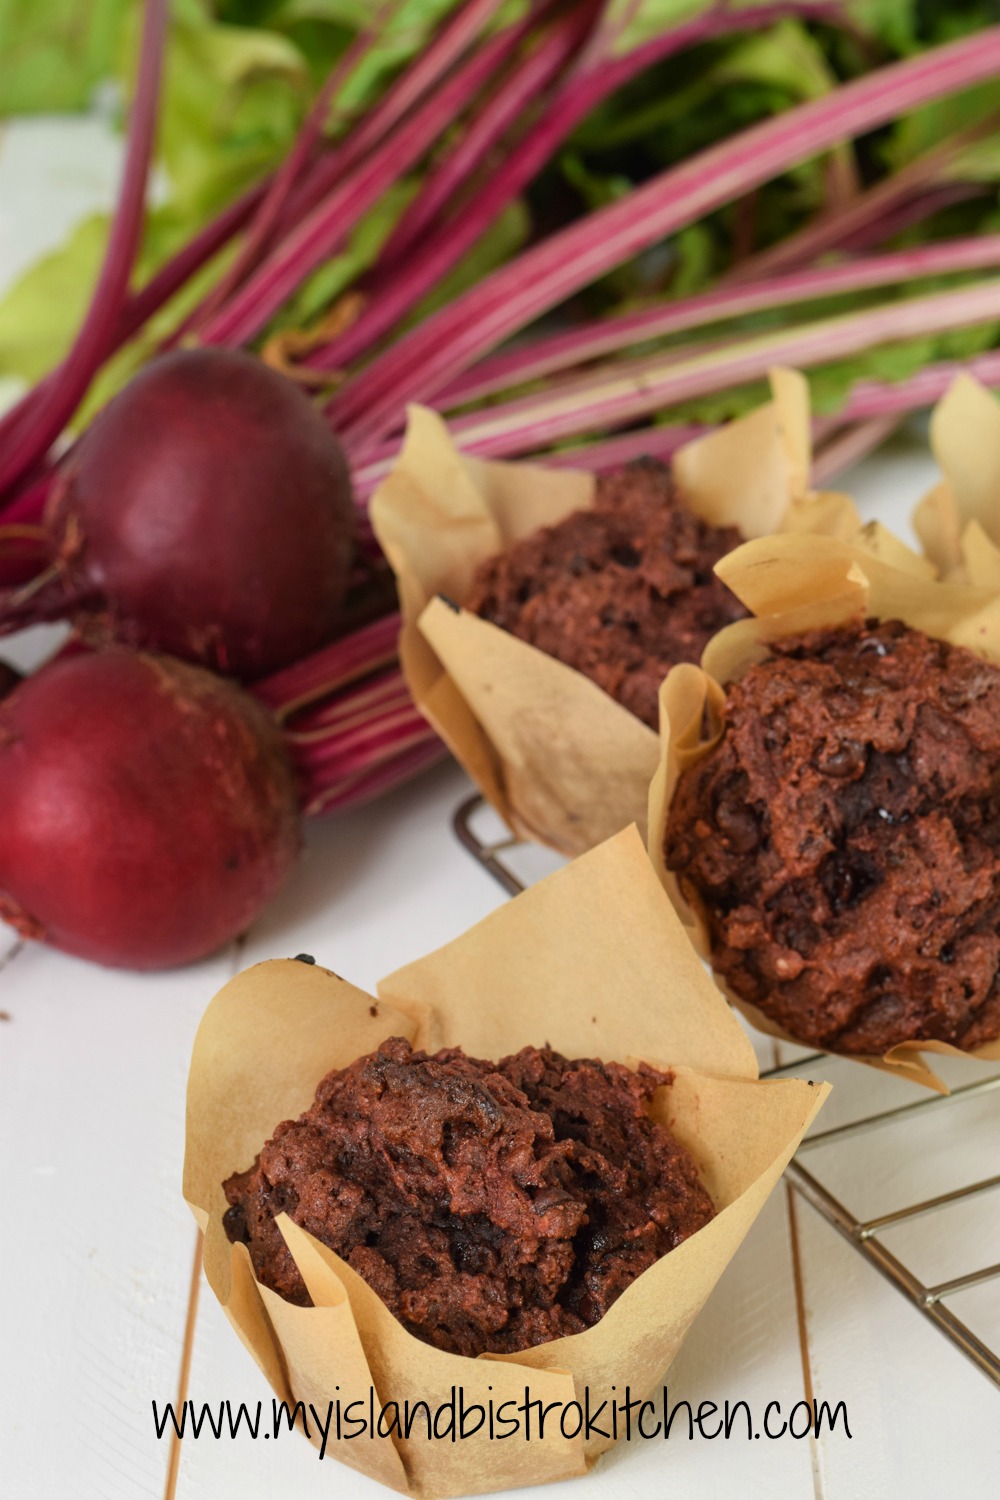
Gluten-free Beet Muffins
These are great muffins to make in the summer and fall when you have fresh beets in the garden or can access them at local farmers markets or roadside farm market stands. These muffins freeze well.
[Printable recipe follows at end of posting]
Gluten-Free Beet Muffins
Ingredients:
¾ lb beets
1 cup gluten-free all-purpose flour (or gluten-free one-to-one flour) 1/3 cup gluten-free oat flour ¼ cup almond flour ¼ cup coconut flour 2 tbsp arrowroot starch 1¼ tsp xanthan gum ¼ cup gluten-free small flake rolled oats 5½ tsp baking powder ½ tsp baking soda ½ tsp salt 2 tbsp ground chia seeds 1/3 cup cocoa Scant 2/3 cup brown sugar, lightly packed ¾ tsp cinnamon
2 extra-large eggs, room temperature, lightly beaten ½ cup almond milk or whole milk ¼ cup coconut oil, melted and cooled 1/3 cup Mediterranean-style/Greek yogurt (plain, coconut, or lavender flavor) 4 oz beet purée (see method below) 2 tbsp maple syrup 1½ tsp vanilla ½ cup shredded cooked beets
½ cup chocolate chips (optional)
Method:
Remove leaves, leaving about 1½“ stems along with the roots on the beets. Wash beets. Cook beets in boiling salted water until fork tender. Let beets cool enough to handle, then peel. Loosely chop 4 oz beets into a small food processor or a blender and purée until smooth (an immersion blender may also be used). Consistency of puréed beets should be similar to apple sauce or baby food. Shred remaining beets to fill ½ cup measuring cup.
Preheat oven to 450°F.
Use muffin tins with cups that have ½-cup holding capacity. Prepare muffin tins by greasing or spraying each muffin cup with cooking oil, ensuring the top of the muffin tin is also well greased. Alternatively, line with parchment paper cups.
In large bowl, combine the dry ingredients by whisking very well. Make a well in the middle of the dry ingredients and set aside.
In separate bowl, or large measuring cup, whisk together the lightly beaten eggs, almond or whole milk, coconut oil, yogurt, beet purée, maple syrup, vanilla, and shredded beet.
Pour wet ingredients into well in the dry ingredients. Combine just until dry ingredients are barely incorporated. Do not overmix. Gently stir in the chocolate chips, if using.
Spoon batter into prepared muffin tins, filling almost to the muffin cup rim. Let batter sit for 5 minutes before baking.
Transfer muffins to oven and immediately reduce heat to 400°F. Bake 20-22 minutes or until muffins are just firm to the touch and a cake tester inserted into the center of a muffin comes out clean.
Let muffins rest in muffin cups for 5-7 minutes then gently remove from pan and transfer to wire rack to cool completely.
1/3 cup Mediterranean-style/Greek yogurt (plain, coconut, or lavender flavor)
4 oz beet purée (see method below)
2 tbsp maple syrup
1½ tsp vanilla
½ cup shredded cooked beets
½ cup chocolate chips (optional)
Instructions
Remove leaves, leaving about 1½“ stems along with the roots on the beets. Wash beets. Cook beets in boiling salted water until fork tender. Let beets cool enough to handle, then peel. Loosely chop 4 oz beets into a small food processor or a blender and purée until smooth (an immersion blender may also be used). Consistency of puréed beets should be similar to apple sauce or baby food. Shred remaining beets to fill ½ cup measuring cup.
Preheat oven to 450°F.
Use muffin tins with cups that have ½-cup holding capacity. Prepare muffin tins by greasing or spraying each muffin cup with cooking oil, ensuring the top of the muffin tin is also well greased. Alternatively, line with parchment paper cups.
In large bowl, combine the dry ingredients by whisking very well. Make a well in the middle of the dry ingredients and set aside.
In separate bowl, or large measuring cup, whisk together the lightly beaten eggs, almond or whole milk, coconut oil, yogurt, beet purée, maple syrup, vanilla, and shredded beet.
Pour wet ingredients into well in the dry ingredients. Combine just until dry ingredients are barely incorporated. Do not overmix. Gently stir in the chocolate chips, if using.
Spoon batter into prepared muffin tins, filling almost to the muffin cup rim. Let batter sit for 5 minutes before baking.
Transfer muffins to oven and immediately reduce heat to 400°F. Bake 20-22 minutes or until muffins are just firm to the touch and a cake tester inserted into the center of a muffin comes out clean.
Let muffins rest in muffin cups for 5-7 minutes then gently remove from pan and transfer to wire rack to cool completely.
For as long as I can remember, peach marmalade has been part of our family’s pantry of preserves. As a small child, I remember the yearly ritual of my great grandmother (who we always knew as “Gram”) making peach marmalade. And a ritual it was.
Peaches
The Ontario baskets of peaches were highly anticipated each August and we would pick up a basket for Gram, carefully inspecting each peach to ensure it was free of blemishes (lest we hear about it) and ensuring we had one of the large baskets with just the right amount of peaches in it. We would hunt down the best orange we could find (it had to be juicy and, at that time, that was hard to find in August when oranges were out of season), and a small bottle of red maraschino cherries. We would ensure Gram had all the supplies and she would carefully and tediously get the pulp prepared for the revered peach marmalade. Then, the following day, she and my grandmother would spend the day together making this special marmalade, slowly cooking and gently stirring it over the wood stove. I think my great grandmother savored every minute of its production as much, I suspect, as eating the actual marmalade.
Peach Marmalade
You see, in my great grandmother’s day (she was born in 1883), peach marmalade was considered a luxury and was not the type of preserve that just anyone in our area made. My ancestors of the day would have been familiar with strawberry, raspberry, blackberry, black currant, and pumpkin jams but that would have been about the extent of the repertoire of preserving. These would have been items that would have been grown locally on their farms or, in the case of raspberries and blackberries, probably along the roadsides near their homes.
Peaches
Where my great grandmother got the recipe for peach marmalade, I have no idea but my best guess is probably in the local newspaper. This marmalade would have been cooked on an old wood stove and I always marvel at how the cooks of the day were able to produce what they did because the heat was not easy to control. Today, when I think of myself in comparison to my great grandmother, I have a completely computerized stove that produces consistent and accurate heat all the time.
Peach Marmalade
The recipe I use today is a modified version of my great grandmother’s which was passed down to me with the list of three ingredients (peaches, oranges, and maraschino cherries) and a method that was somewhat vague on the details. The batch that my great grandmother made was more than three times the size of the one I make. Here’s how the instructions read: “Over the peaches and oranges, put white sugar. Let stand overnight. In the morning, add a bottle of maraschino cherries cup up. Also add the juice and boil slowly on back of stove until thick. Then bottle.” If you weren’t someone who had some experience making jams and marmalades, this would not have been much to go on. For example, how much sugar? Those with experience will know that, as a general rules of thumb and in the absence of any information to the contrary, it is typically, cup for cup, sugar-to-fruit pulp but, for an inexperienced cook, I suspect most would not have a clue about the amount of sugar needed for a successful batch of the marmalade.
Over the years, I have adapted this recipe and certainly cut it down in size as I don’t need the amount of jam that 24 peaches would make! I also don’t let the peaches sit overnight in the sugar because I don’t think it is necessary and I think it would discolor the peaches. I also add a bit of lemon to my marmalade, have defined how many cherries are needed, and have omitted the cherry juice because I think it discolors the wonderful peach color of the marmalade. The other ingredient I have added is Peach Schnapps. My teetotaler great grandmother would be horrified as I can confidently state she would not have had such a liqueur in her house! Anyhoo…….
Peach Marmalade
I am not sure how my great grandmother, a widow living alone by this time, would have eaten up this much peach marmalade but a new batch was made annually. Whether she ate it with homemade bread toasted over her wood stove or whether she served it in a small custard dish with biscuits for a light tea/supper, I am not certain. All I know is that, up until the time she died at the age of 99, the peach marmalade was made every year. After she was no longer able to participate in its production, my grandmother made it on her own so my great grandmother would continue to enjoy it. After my great grandmother passed away, however, my grandmother did not continue the annual tradition of making the peach marmalade.
Peach Marmalade
I can’t say that making peach marmalade is an annual tradition with me. I do, however, make it many years and I always think of my two grandmothers and their tradition with this marmalade.
Peach Marmalade
Making this marmalade will take a little time as it has to simmer on the stove for about an hour or so. Don’t overcook it (it does not need 2 hours of cooking like my great-grandmother’s instructions said) as it will become too thick and lose its spreading quality and wonderful color (it will become very dark). The marmalade can be made without the Peach Schnapps, of course. The liqueur, however, does deepen the peach flavor a bit. Don’t go overboard on the liqueur as it not only will be too intense but the liquid content will alter the consistency of the marmalade. If you choose not to include the liqueur, you may wish to add a half teaspoon of almond extract, although that is not mandatory either.
Ensure the jars are sterilized before filling with the marmalade. Leave about 1/4″ headroom in each jar. Ensure they are properly sealed with heated lids. I recommend that the jars be processed in a canner with a hot water bath for 10 minutes, following the canner manufacturer’s instructions.
Peach Marmalade
[Printable recipe follows at end of posting]
Peach Marmalade
Ingredients:
7 large peaches, washed Zest of orange 1 medium-sized orange, seeded and chopped into small pieces Zest of ½ lemon ½ medium-sized lemon, seeded and chopped into small pieces 1/3 cup maraschino cherries, finely chopped 1½ tbsp Peach Schnapps (optional) or ½ tsp almond flavoring Granulated sugar equal to amount of fruit pulp
Method:
Plunge peaches in boiling water for about 1 minute to loosen skin. Peel. Halve the peaches and remove and discard stones. Dice the peaches into small pieces, about ½“ in size. Add the chopped orange and lemon along with the orange and lemon zest. Measure the amount of the peach pulp, orange, and lemon. Add an equal amount of sugar. For example, if the total amount of the pulp equals 4 cups, add 4 cups of sugar.
Place 2-3 freezer-safe saucers in freezer.
Place pulp and sugar into a medium-sized stockpot. Stir. Bring mixture to a boil over medium-high heat, stirring frequently to prevent scorching. Reduce heat and simmer until mixture thickens and peaches are translucent, stirring occasionally. This could take about an hour, a little more or less*. To test for doneness, place a small amount of marmalade on chilled saucer and swirl saucer around. Let marmalade sit, untouched, for about a minute, then gently push your finger through the marmalade. If the marmalade holds its shape (i.e., does not run back together after the finger has been removed from the marmalade), it is set and ready to bottle. If not, continue to cook mixture, repeating the “chill” test about every 3 minutes or so (always removing the pot from the heat while conducting the chill test) until the marmalade passes the “chill” test. Do not overcook as it will result in a very thick marmalade, dark in color.
Remove pot from heat and skim off any foam that may still remain on the marmalade. Stir in cherries and Peach Schnapps (or almond flavoring). Using a canning funnel, pour marmalade into sterilized jars, leaving about ¼” headroom in each jar. Wipe the jar rims with a clean cloth. Seal jars with heated lids and fingertip-tightened ring bands. Process in boiling water canner, following canner manufacturer’s directions, for 10 minutes. Remove jars from hot water to cooling rack. Listen for the “pop” or “ping” sound as the bottles seal over the next few hours. The lids of properly sealed jars will curve downward. Refrigerate any jars that do not have lids curved downward and use within 1 month.
Yield: Apx. 5 half-pints
*Note that it is difficult to give a precise cooking time for the marmalade since various factors, including the pectin level of the fruit and heat level of stove, can vary significantly and may affect cooking and marmalade-setting times. This is why the “chill” test is the recommended method for determining marmalade setting. It is recommended that the first “chill” test be conducted somewhere around the 45-50 minute point in the cooking process. It does not necessarily mean that the marmalade will be done in that timeframe and more than one “chill” test may need to be performed.
Delicious peach marmalade made with fresh peaches, orange, lemon, maraschino cherries, and a splash of Peach Schnapps. Serve on toast, biscuits, or dolloped onto vanilla custard for a tasty dessert.
Ingredients
7 large peaches, washed
Zest of orange
1 medium-sized orange, seeded and chopped into small pieces
Zest of ½ lemon
½ medium-sized lemon, seeded and chopped into small pieces
1/3 cup maraschino cherries, finely chopped
1½ tbsp Peach Schnapps (optional) or ½ tsp almond flavoring
Granulated sugar equal to amount of fruit pulp
Instructions
Plunge peaches in boiling water for about 1 minute to loosen skin. Peel. Halve the peaches and remove and discard stones. Dice the peaches into small pieces, about ½“ in size. Add the chopped orange and lemon along with the orange and lemon zest. Measure the amount of the peach pulp, orange, and lemon. Add an equal amount of sugar. For example, if the total amount of the pulp equals 4 cups, add 4 cups of sugar.
Place 2-3 freezer-safe saucers in freezer.
Place pulp and sugar into a medium-sized stockpot. Stir. Bring mixture to a boil over medium-high heat, stirring frequently to prevent scorching. Reduce heat and simmer until mixture thickens and peaches are translucent, stirring occasionally. This could take about an hour, a little more or less*. To test for doneness, place a small amount of marmalade on chilled saucer and swirl saucer around. Let marmalade sit, untouched, for about a minute, then gently push your finger through the marmalade. If the marmalade holds its shape (i.e., does not run back together after the finger has been removed from the marmalade), it is set and ready to bottle. If not, continue to cook mixture, repeating the “chill” test about every 3 minutes or so (always removing the pot from the heat while conducting the chill test) until the marmalade passes the “chill” test. Do not overcook as it will result in a very thick marmalade, dark in color.
Remove pot from heat and skim off any foam that may still remain on the marmalade. Stir in cherries and Peach Schnapps (or almond flavoring). Using a canning funnel, pour marmalade into sterilized jars, leaving about ¼” headroom in each jar. Wipe the jar rims with a clean cloth. Seal jars with heated lids and fingertip-tightened ring bands. Process in boiling water canner, following canner manufacturer’s directions, for 10 minutes. Remove jars from hot water to cooling rack. Listen for the “pop” or “ping” sound as the bottles seal over the next few hours. The lids of properly sealed jars will curve downward. Refrigerate any jars that do not have lids curved downward and use within 1 month.
Yield: Apx. 5 half-pints
*Note that it is difficult to give a precise cooking time for the marmalade since various factors, including the pectin level of the fruit and heat level of stove, can vary significantly and may affect cooking and marmalade-setting times. This is why the “chill” test is the recommended method for determining marmalade setting. It is recommended that the first “chill” test be conducted somewhere around the 45-50 minute point in the cooking process. It does not necessarily mean that the marmalade will be done in that timeframe and more than one “chill” test may need to be performed.
Smoothies are such a great and tasty way to eat fruit and yogurt, making them healthy choices. And, they are very filling. They are great for breakfast, summer barbeques, as a transportable breakfast-on-the-go, or just anytime as a nutritional drink.
Blueberry and Tropical Fruit Smoothie
I am not far from Tryon Blueberries U-Pick, a high bush blueberry farm in central PEI and, when they are in season, I have a steady diet of these blueberries.
High Bush Blueberries
I freeze a quantity of them for use in smoothies throughout the year.
High Bush Blueberries
Basically, any fruit you like can be combined into a smoothie. For this recipe, I have chosen to feature the local blueberries but I also add in some other fruits that pair particularly well with blueberries. These include mango, papaya, and banana. The great thing about smoothies is that they can be made with fresh or frozen fruits. I often bag up fruits when they are in season locally and freeze them in just the right sized portions for smoothies. This makes it quick and easy to prepare the smoothies which is great because, as we all know, if something is overly laborious, well….it often just does not happen.
Blueberry and Tropical Fruit Smoothie
Smoothies are so easy to make. A blender is needed for this recipe. Simply combine all the ingredients into the blender and process the mixture until desired smoothness is reached.
For sweetener, I use 2 tablespoons of pure maple syrup. This natural liquid sweetener blends better than sugar. Reduce the amount of maple syrup if you like a less sweet drink. I also add in about 1 1/2 tablespoons of ground chia seeds. Whole chia seeds may be used but the ground seeds make for a smoother drink and are a better alternative for those who can’t easily digest seeds. Chia is loaded with good health benefits like fibre, omega 3 fats, protein, vitamins, and minerals.
Blueberry and Tropical Fruit Smoothie
The yogurt I have used in this smoothie is a Mediterranean-style lavender yogurt. Lavender pairs very well with blueberries. Don’t be put off by this flavor thinking it will be like perfume. This yogurt is very gently flavored with lavender and it is not at all strong in either the lavender flavor or scent. It does, however, add a subtle layer of flavor to the smoothie. Plain vanilla yogurt can, of course, be substituted but, if the lavender yogurt is available, I recommend giving it a try.
Blueberry and Tropical Fruit Smoothie
Any kind of fruit juice can be used in this smoothie. I have made it with plain orange juice which is very good but it is super tasty if made with a mango-citrus blend of juice or a tropical fruit juice. If possible, I try to add juice that has the flavor of at least one or more of the fruits I am blending into the smoothie. I don’t add any ice cubes to this smoothie because I find they can dilute the flavor. Make sure the fruit juice is good and cold and the smoothie will be just the right temperature for drinking without adding any ice.
Garnishes are optional but they do dress up the smoothie. If using garnishes, choose fruits that are in the smoothie as I have done here with the blueberries, mango, and papaya.
Blueberry and Tropical Fruit Smoothie
This smoothie recipe will yield approximately 4 cups which is about two good servings or, for smaller portions, four 1-cup servings are possible. This really is a meal in a glass – it provides servings of fruit, yogurt, and liquid content. This smoothie is best served as soon as it is made because it has banana in it and it can produce quite a strong flavor if left to sit and it can take over and become the predominant flavor in the drink.
[Printable recipe follows at end of posting]
Blueberry and Tropical Fruit Smoothie
Ingredients:
1 2/3 cups fruit juice (e.g., mango-citrus, orange juice, etc.) 1½ cups high bush blueberries (fresh or frozen) ½ cup mango, coarsely chopped (fresh or frozen) ½ cup papaya, coarsely chopped (fresh or frozen) ½ large banana, sliced ½ cup Mediterranean-style lavender yogurt (or plain yogurt) 2 tbsp maple syrup 1½ tbsp ground chia seeds
Method:
Combine all ingredients, in order given, in blender and process until well blended and smooth. Pour into glasses. Garnish with skewer of fresh blueberries, mango, and papaya. Serve immediately.
Kickstart your day with this super tasty blueberry and tropical fruit smoothie made with lavender yogurt and mango-citrus fruit juice
Ingredients
1 2/3 cups fruit juice (e.g., mango-citrus, orange juice, etc.)
1½ cups high bush blueberries (fresh or frozen)
½ cup mango, coarsely chopped (fresh or frozen)
½ cup papaya, coarsely chopped (fresh or frozen)
½ large banana, sliced
½ cup Mediterranean-style lavender yogurt
2 tbsp maple syrup
1½ tbsp ground chia seeds
Instructions
Combine all ingredients, in order given, in blender and process until well blended and smooth. Pour into glasses. Garnish with skewer of fresh blueberries, mango, and papaya. Serve immediately.
Mussels are a favorite shellfish of mine and, while I love them steamed in various different broths, today I am presenting them in the form of Mussel Chowder and I’m sharing my own personal recipe. Continue reading My Island Bistro Kitchen’s PEI Mussel Chowder→
Chicken and Quinoa Salad with Star Anise and Orange Vinaigrette
We grow a garden and live out of it in the summer. Lots of different varieties of lettuce are grown and so salads are an almost daily part of our menu. On hot summer days, I love to make what I call a main meal salad like this Chicken and Quinoa Salad with Star Anise and Orange Vinaigrette.
Lettuce from our Garden
I simply take a meat platter and lay a layer of mixed greens down the center bordered by a row of quinoa along both sides of the lettuce bed. I often marinate and cook chicken breasts then slice them for salads as I have done here. I use whatever fruit I have on hand or that is in season to make a colorful and healthy salad. It could be strawberries, mango, melons, oranges or mandarins, blueberries, peaches, raspberries, and so forth. Add some red onion rings, crumbled feta cheese, and top with crunchy pea and radish shoots and you have a very colorful, appetizing, and healthy dinner.
Chicken and Quinoa Salad with Star Anise and Orange Vinagrette
What makes the salad super tasty is the vinaigrette.
Star Anise and Orange Vinaigrette
For this recipe, start with 3 tablespoons of orange juice and bring it to a boil over medium heat. Reduce the heat and add a small star anise pod and simmer for 2-3 minutes. Remove from heat and let the juice cool. This allows the star anise to infuse the juice with a lovely subtle layer of licorice flavor. Discard the star anise and mix the vinaigrette ingredients in a small jar and shake vigorously. If adding fresh herbs, only add them at the time of serving as, otherwise, they become quite limp and wilted.
Star Anise and Orange Vinaigrette
Now, I don’t tend to measure the ingredients for the salad itself. I go to the garden and pick a couple of handfuls of different kinds of lettuce. For a main meal serving for two, I cook 1/2 cup of quinoa and a large chicken breast. For the fruits, just add as many of each kind as you like and the same for the pea and radish shoots. I don’t grow these shoots – I get them from Just A Little Farm in Bonshaw. You can click here to read the story I wrote about this farm. Jessica grows the most amazing produce and her pea and radish shoots are so lovely crisp and fresh!
Chicken and Quinoa Salad with Star Anise and Orange Vinaigrette
This recipe will yield a generous main meal for two or, if serving as a starter, it could serve 4-6.
[Printable Recipe Follows at end of Posting]
Orange and Star Anise Vinaigrette
Ingredients: 3 tbsp orange juice 1 small star anise pod ¼ cup olive oil 1 tbsp red wine vinegar 2 tsp Dijon mustard 2 tsp liquid honey ¼ tsp garlic salt Salt and pepper, to taste Fresh herbs (e.g., parsley, thyme, dill), chopped
Method:
In small saucepan, bring orange juice to boiling point over medium heat. Reduce heat to simmer and add the star anise pod. Simmer for 2-3 minutes. Remove from heat and cool completely, allowing the star anise to infuse the orange juice. Remove and discard star anise after orange juice has cooled.
Combine all ingredients, except the fresh herbs, in a small jar. Shake vigorously. Add the chopped herbs at time of serving.
Chicken and Quinoa Salad with Star Anise and Orange Vinaigrette
Yield: Scant 1/2 cup
A tasty vinaigrette with subtle undertones of licorice flavor. Perfect accompaniment to any salad but especially good with Chicken and Quinoa Salad
Ingredients
3 tbsp orange juice
1 small star anise pod
¼ cup olive oil
1 tbsp red wine vinegar
2 tsp Dijon mustard
2 tsp liquid honey
¼ tsp garlic salt
Salt and pepper, to taste
Fresh herbs (e.g., parsley, thyme, dill), chopped
Instructions
In small saucepan, bring orange juice to boiling point over medium heat. Reduce heat to simmer and add the star anise pod. Simmer for 2-3 minutes. Remove from heat and cool completely, allowing the star anise to infuse the orange juice. Remove and discard star anise after orange juice has cooled.
Combine all ingredients, except the fresh herbs, in a small jar. Shake vigorously. Add the chopped herbs at time of serving.
Summer just would not be summer without ice cream and what better way to enjoy it than to combine two of the season’s best flavors – strawberry and rhubarb – into homemade Strawberry Rhubarb Ripple Ice Cream!
I have been making ice cream for a long time. I have an electric churn that has been in the family for probably close to 50 years. I keep thinking that, one of these days, I will have the custard made and the motor will give out on the churn. But, amazingly, it always works! It’s not fancy but it does the job. There are various types and styles of ice cream makers on the market today but I like my old faithful electric churn. It may look rusty on the outside from all the contact it has had over many years with rock salt that sloshes around with ice in the bucket but the canister is in perfect condition and the churn still makes great smooth ice cream!
Electric Ice Cream Maker
It usually takes about 20-25 minutes for the ice cream to churn. The ice cream will come out of the canister quite soft textured but placing it in the deep freeze for about 3 hours will result in it firming up very well.
Homemade Churned Ice Cream
I use the traditional custard method for making ice cream. It’s amazing how such basic, simple ingredients can turn out such a delectable treat. Milk/cream, sugar, egg yolks, and vanilla form the standard base for the custard and then other flavorings may be added.
Strawberry Rhubarb Ripple Ice Cream
The trick to making homemade ice cream is to use the good stuff! Yes, the real cream, whipping cream, and whole milk. This will give the custard the rich base and the ice cream its smooth texture. While granulated sugar can be used, my preference is to use the super-fine caster sugar as there is no grit at all to it. I always make my custard the night before I churn the ice cream and place it in the refrigerator overnight as it gives the flavors time to develop as they “mix and mingle” and the custard needs to be very cold to start the churning. In fact, I put the churn canister and beaters in the freezer for an hour or so before churning so they are cold as well.
Strawberry Rhubarb Ripple Ice Cream
One ingredient I add to this particular ice cream recipe is strawberry balsamic vinegar – yes, vinegar goes in this recipe but not just any vinegar and not a lot of it. One tablespoon of high quality strawberry balsamic will deepen and enhance the strawberry flavor and, no, it will not leave a lingering vinegar taste in the ice cream. If you have rose water, the addition of just 1 1/2 teaspoons will give a hint of floral flavor. Don’t over-do the rose water or it will start to taste like perfume. All this small addition is doing is adding a subtle layer of flavoring.
Use the freshest ingredients you can – i.e., make this ice cream when the local rhubarb and strawberries are available as they have the best flavor.
Fresh From the Field PEI Strawberries
Choose the reddest stalks of rhubarb you can find. This recipe does not call for any artificial food coloring (and I don’t use any) so the pink color comes naturally from the red rhubarb and strawberries. Each batch I make has a slightly different tint of pink to it depending on the quality of the strawberries and rhubarb.
Rhubarb
I recommend reading through the recipe a couple of times before starting to make the ice cream to organize the prep work and to be sure you have all the required ingredients and understand the method and the sequence for preparing the ingredients.
I have made this Strawberry Rhubarb Ice Cream both rippled (shown in the photo at the beginning of this posting) using some of the strawberry-rhubarb purée to weave through the ice cream and plain (shown in the ice cream cones in the photo below) where I incorporate all of the purée into the custard. The ice cream is good either way. This homemade ice cream freezes rock solid hard so I recommend removing it from the freezer 7-10 minutes before using as, otherwise, it will be difficult to scoop.
Strawberry Rhubarb Ice Cream Plain (no rippling/marbling)
Strawberry Rhubarb Ice Cream makes a great sundae, especially if you drizzle it with crushed strawberries or strawberry-rhubarb sauce.
Strawberry Rhubarb Ice Cream Sundae
And, it makes dandy milkshakes. Simply combine 3 scoops of the strawberry rhubarb ice cream in a blender with 1/4 cup milk per serving. Blend until smooth and serve in fancy tall glasses with colorful straws and a strawberry garnish.
Strawberry Rhubarb Milkshake
Oh, this is a special treat on a hot summer day!
Strawberry Rhubarb Milkshake
Homemade ice cream sandwiches are also a wonderful summer treat. I use my gluten-free snickerdoodle cookies for these sandwiches because they are a lovely soft-textured cookie.
Strawberry Rhubarb Ice Cream Sandwiches
For these sandwiches, freeze the ice cream in a 9×13 baking pan lined with tin foil. Fill the pan with the ice cream to a depth of 3/4″ to 1″ thick. Place in freezer for a couple of hours then remove the ice cream from the pan and cut round circles of the ice cream with a cookie cutter that is slightly smaller than the cookie size.
Strawberry Rhubarb Ice Cream Sandwiches
[Printable recipe follows at end of posting]
Strawberry Rhubarb Ripple Ice Cream
Ingredients:
10 oz strawberries, chopped 1 tbsp strawberry balsamic vinegar (optional but recommended) 3 tbsp caster sugar 1½ tsp rose water (optional)
1 lb rhubarb, chopped 2 tbsp orange juice 2 tbsp water 3 tbsp caster sugar
1 cup whipping cream (36%) 1 cup half-and-half or coffee cream (at least 18%) 1 cup whole milk Scant ¾ cup caster sugar 4 extra-large egg yolks 1/8 tsp fine sea salt 2 tsp vanilla
Method:
Place chopped strawberries in small bowl and sprinkle with 3 tbsp caster sugar, balsamic vinegar, and rose water. Set aside.
Place chopped rhubarb in small saucepan and add the 2 tbsp orange juice, 2 tbsp water and 3 tbsp caster sugar. Cover and cook over medium heat for 7-10 minutes, until rhubarb is softened. Remove from heat and strain through medium mesh wire sieve. Reserve the rhubarb pulp and transfer to heat-proof bowl.
Return the strained rhubarb juice to saucepan and cook over medium heat until juice is reduced to about 1/3 cup. Pour the syrup over the reserved rhubarb pulp. Let cool to room temperature.
Transfer the strawberries and cooled rhubarb mixture to a blender and purée until very smooth. Strain mixture through medium mesh sieve, squeezing as much juice as possible out of the rhubarb by gently pressing it down with the back of a spoon. This should yield approximately 2⅔ – 3 cups purée. Discard any remaining pulp. Cool strained mixture in refrigerator.
In heavy bottomed saucepan, over medium-high heat, bring whipping cream, half-and-half, and whole milk to the scalding point (small bubbles should start to appear around the edges of the mixture) – 180°F, stirring constantly to prevent scorching. Do not boil. Transfer mixture to top of double boiler.
In bottom of double boiler, bring about 2” of water to the simmer point (around 200°F). Maintain the water at this simmer point over medium-low heat. Place top of double boiler containing the milk over the simmering water.
In bowl, whisk the egg yolks, sugar and salt together until pale and creamy. Gradually add about ¾ cup of the hot milk mixture to the egg mixture and whisk to blend well. Pour the egg mixture into the remaining hot milk mixture in top of double boiler, whisking continuously. Cook over the simmering water, stirring constantly until the mixture coats the back of a wood spoon or reaches a temperature of 175°F on a candy thermometer. Do not allow mixture to boil.
Set large clean bowl in a sink of cold water filled to about half the depth of the bowl. Pour the custard mixture through a wire sieve into the bowl to remove any bits of egg that may have coagulated. Stir in the vanilla.
Set aside about ½ cup of the puréed strawberry-rhubarb mixture and whisk the remaining puréed fruit mixture into the custard until it is well blended. Chill, covered, in refrigerator for at least 3 hours or more (can be chilled overnight and up to 24 hours).
Churn custard in ice cream maker according to manufacturer’s directions. Transfer about a third of the ice cream to an airtight freezer container. Drizzle half of the reserved purée over the ice cream. Repeat the process with another layer of ice cream and purée and ending with a layer of the ice cream. With the thin blade of a knife, or using a wooden skewer, swirl the purée through the ice cream to incorporate it in a marble effect. Do not overmix or the ripple/marble effect will be lost. Cover container tightly and allow ice cream to freeze for at least 3 hours, or until very firm, before serving.
Yield: Apx. 1 quart
Note 1: This ice cream will freeze rock solid hard. Recommend removing ice cream from freezer 7-10 minutes before serving. Note 2: This ice cream may be made without the rippling effect. Simply incorporate all of the strawberry-rhubarb purée into the custard instead of reserving ½ cup for the rippling/marbling.
Delectable old-fashioned homemade ice cream combines two of summer's best flavors - strawberry and rhubarb.
Ingredients
10 oz strawberries, chopped
1 tbsp strawberry balsamic vinegar (optional but recommended)
3 tbsp caster sugar
1½ tsp rose water (optional)
1 lb rhubarb, chopped
2 tbsp orange juice
2 tbsp water
3 tbsp caster sugar
1 cup whipping cream (36%)
1 cup half-and-half or coffee cream (at least 18%)
1 cup whole milk
Scant ¾ cup caster sugar
4 extra-large egg yolks
1/8 tsp fine sea salt
2 tsp vanilla
Instructions
Place chopped strawberries in small bowl and sprinkle with 3 tbsp caster sugar, balsamic vinegar, and rose water. Set aside.
Place chopped rhubarb in small saucepan and add the 2 tbsp orange juice, 2 tbsp water and 3 tbsp caster sugar. Cover and cook over medium heat for 7-10 minutes, until rhubarb is softened. Remove from heat and strain through medium mesh wire sieve. Reserve the rhubarb pulp and transfer to heat-proof bowl.
Return the strained rhubarb juice to saucepan and cook over medium heat until juice is reduced to about 1/3 cup. Pour the syrup over the reserved rhubarb pulp. Let cool to room temperature.
Transfer the strawberries and cooled rhubarb mixture to a blender and purée until very smooth. Strain mixture through medium mesh sieve, squeezing as much juice as possible out of the rhubarb by gently pressing it down with the back of a spoon. This should yield approximately 2 2/3 – 3 cups purée. Discard any remaining pulp. Cool strained mixture in refrigerator.
In heavy bottomed saucepan, over medium-high heat, bring whipping cream, half-and-half, and whole milk to the scalding point (small bubbles should start to appear around the edges of the mixture) - 180°F, stirring constantly to prevent scorching. Do not boil. Transfer mixture to top of double boiler.
In bottom of double boiler, bring about 2” of water to the simmer point (around 200°F). Maintain the water at this simmer point over medium-low heat. Place top of double boiler containing the milk over the simmering water.
In bowl, whisk the egg yolks, sugar and salt together until pale and creamy. Gradually add about ¾ cup of the hot milk mixture to the egg mixture and whisk to blend well. Pour the egg mixture into the remaining hot milk mixture in top of double boiler, whisking continuously. Cook over the simmering water, stirring constantly until the mixture coats the back of a wood spoon or reaches a temperature of 175°F on a candy thermometer. Do not allow mixture to boil.
Set large clean bowl in a sink of cold water filled to about half the depth of the bowl. Pour the custard mixture through a wire sieve into the bowl to remove any bits of egg that may have coagulated. Stir in the vanilla.
Set aside about ½ cup of the puréed strawberry-rhubarb mixture and whisk the remaining puréed fruit mixture into the custard until it is well blended. Chill, covered, in refrigerator for at least 3 hours or more (can be chilled overnight and up to 24 hours).
Churn custard in ice cream maker according to manufacturer’s directions. Transfer about a third of the ice cream to an airtight freezer container. Drizzle half of the reserved purée over the ice cream. Repeat the process with another layer of ice cream and purée and ending with a layer of the ice cream. With the thin blade of a knife, or using a wooden skewer, swirl the purée through the ice cream to incorporate it in a marble effect. Do not overmix or the ripple/marble effect will be lost. Cover container tightly and allow ice cream to freeze for at least 3 hours, or until very firm, before serving.
Notes
Note 1: This ice cream will freeze rock solid hard. Recommend removing ice cream from freezer 7-10 minutes before serving.
Note 2: This ice cream may be made without the rippling effect. Simply incorporate all of the strawberry-rhubarb purée into the custard instead of reserving ½ cup for the rippling/marbling.
If you like cookies that are super tasty but not overly sweet then you will like these gluten free snickerdoodle cookies. They sport a lovely soft crumb texture and have superb flavor with the cardamon and nutmeg in the cookies and then the cinnamon-sugar mixture in which they are rolled.
I have been doing a lot of recipe development and testing for gluten free baked goods and have developed several cookie recipes that are suitable for those that have gluten sensitivity or intolerance. In my view, there is no need for those following a gluten-free diet to be deprived of some fine tasting baked products.
Gluten Free Snickerdoodle Cookies
This snickerdoodle cookie recipe does not take any unusual or difficult-to-find ingredients. It calls for gluten free all-purpose flour and a small amount of almond flour. The almond flour adds both flavor and a lovely texture to baked products. It is not an inexpensive flour, by any means, but fortunately not a lot of it is needed to achieve great results.
When using gluten free flours and xanthan gum, it is very important that they be combined very well before incorporating them into the batter. I recommend sifting these products along with the leavening and any spices together into a large bowl and then whisk them really well.
The snickerdoodle cookie dough will be very soft when all ingredients are mixed in. Cover the dough and place it in the refrigerator for 40-60 minutes to allow it to firm up so it will be easier to form the cookie balls.
Gluten Free Snickerdoodle Cookies
I’m a big fan of digital scales for my kitchen work. I like the look of uniform cookies so I often use the scales to ensure that the same amount of dough goes into each cookie. I use approximately 20grams, or about 3/4 ounce, of dough for each cookie. Roll the cookie balls in the cinnamon-sugar mixture and place them on the prepared cookie sheets (parchment lined), spacing them at least 2 1/2 inches apart. Do not flatten the cookie balls – they will automatically flatten as they bake. These cookies usually bake in about 10 minutes. Snickerdoodles are great picnic cookies as they travel well.
Gluten Free Snickerdoodle Cookies
Because of their soft texture, they are an ideal choice for homemade ice cream sandwiches.
Snickerdoodle Ice Cream Sandwiches
And, of course, they are always a popular choice for the cookie jar or lunch box. These cookies freeze really well and are great to have on hand.
[Printable recipe follows at end of posting]
Gluten-free Snickerdoodle Cookies
Ingredients:
½ cup butter, softened at room temperature 6 tbsp granulated sugar 6 tbsp brown sugar 1 extra-large egg ½ tsp vanilla ¼ tsp almond flavoring ¼ tsp lemon flavoring
1 1/3 cup gluten-free all-purpose flour ¼ cup almond flour ¼ tsp xanthan gum ¼ tsp salt ½ tsp baking powder ½ tsp baking soda ½ tsp cream of tartar ¼ tsp cardamom 1/8 tsp nutmeg
1 tbsp granulated sugar 1 tsp cinnamon
Method:
Preheat oven to 375°F. Line two cookie sheets with parchment paper. Set aside.
In bowl of stand mixer, cream butter with 6 tbsp granulated sugar and 6 tbsp brown sugar. Beat in the egg and vanilla along with the almond and lemon flavorings.
In separate bowl, sift together the next 9 dry ingredients then whisk the mixture several times to ensure the ingredients are well incorporated. Mix into creamed mixture until well blended. Cover and place dough in refrigerator for 40-60 minutes to firm. Shape into balls using about 20g, or about .75 oz, of dough. Mix the remaining tablespoon of sugar with the cinnamon in small bowl. Roll cookie balls in sugar mixture and place on prepared cookie sheets, spacing cookies at least 2½ inches apart. Do not flatten cookie balls. Bake for approximately 10-12 minutes. Remove from oven and let cool on cookie sheet for 3-4 minutes then transfer to wire rack to cool completely. These cookies freeze well.
Yield: Apx. 2 dozen
These cookies are supremely good with a glass of cold milk.
A gluten free version of an old-fashioned favorite cookie, lightly spiced with cardamon and nutmeg, and rolled in cinnamon sugar. A cookie jar favorite for sure!
Ingredients
½ cup butter, softened at room temperature
6 tbsp granulated sugar
6 tbsp brown sugar
1 extra-large egg
½ tsp vanilla
¼ tsp almond flavoring
¼ tsp lemon flavoring
1 1/3 cup gluten-free all-purpose flour
¼ cup almond flour
¼ tsp xanthan gum
¼ tsp salt
½ tsp baking powder
½ tsp baking soda
½ tsp cream of tartar
¼ tsp cardamom
1/8 tsp nutmeg
1 tbsp granulated sugar
1 tsp cinnamon
Instructions
Preheat oven to 375°F. Line two cookie sheets with parchment paper. Set aside.
In bowl of stand mixer, cream butter with 6 tbsp granulated sugar and 6 tbsp brown sugar. Beat in the egg and vanilla along with the almond and lemon flavorings.
In separate bowl, sift together the next 9 dry ingredients then whisk the mixture several times to ensure the ingredients are well incorporated. Mix into creamed mixture until well blended. Cover and place dough in refrigerator for 40-60 minutes to firm. Shape into balls using about 20g, or about .75 oz, of dough. Mix the remaining tablespoon of sugar with the cinnamon in small bowl. Roll cookie balls in sugar mixture and place on prepared cookie sheets, spacing cookies at least 2½ inches apart. Do not flatten cookie balls. Bake for approximately 10-12 minutes. Remove from oven and let cool on cookie sheet for 3-4 minutes then transfer to wire rack to cool completely. These cookies freeze well.
I love rhubarb and use it in a multitude of ways. Being a lover of lemon curd, I figured I would also like rhubarb curd so I set about developing and testing a recipe for it. This delightful creamy curd can be used in the same ways as lemon curd – sandwiching cakes together, spreading on scones, filling cookies, eclairs, macarons, and tarts, stirring into (or topping on) Greek yogurt for quick parfaits, and, well, its uses are only limited by your imagination!
Rhubarb Curd and Coconut Yogurt Parfait
Rhubarb curd is made with only five (5) ingredients – rhubarb, orange (juice and zest), sugar, eggs, and butter. The recipe I am including with this posting is the result of several testings. Here are my tips for successfully making rhubarb curd.
Rhubarb
Rhubarb Patch
Either fresh or frozen rhubarb can be used for this recipe; however, I always advocate for fresh. Try to select the reddest stalks you can find and ones that are blemish free.
Rhubarb
Orange Juice and Zest
Wash the orange really well in hot, soapy water and scrub it with a vegetable brush. Rinse the orange well and dry it before zesting.
Use a citrus fruit zester to zest the orange. This should yield about 2 teaspoons of zest. This zesting process will release the aromatic oils from the orange that will enhance the flavor of the curd. When zesting the orange, take care only to remove the thin outside orange skin of the fruit and not the underlying white pith which is bitter.
Cut the orange in half and squeeze it to extract the juice. Alternatively, bottled orange juice may also be used.
Eggs
I have tested this curd using various amounts and combinations of eggs -i.e., different sized eggs, egg yolks only, and combining egg yolks with some egg white.
Eggs
While all combinations I tried were acceptable, I found that my preference is to use 3 extra-large egg yolks combined with one medium-sized whole egg. I always keep three sizes of eggs in my refrigerator – extra-large, large, and medium – because I use different sizes in different recipes and various combinations of egg sizes in recipes. I find adding a bit of egg white to the curd gives a bit more fluidity and makes it more silky smooth. Making the curd with only egg yolks tends to result in slightly thicker textured curd that has a more gelatin-like consistency which is not quite as satiny smooth as can be achieved by adding a bit of egg white. It’s still tasty but just not as creamy. The photo below is of a curd made with egg yolks only.
Rhubarb Curd
Adding a whole extra-large egg adds too much liquid to the curd but I found that the addition of a medium-sized egg is perfect as there is just enough white in the medium egg to give the curd that little bit of fluidity without making it overly runny. The photo below is of a curd made with 3 extra-large egg yolks and 1 whole medium-sized egg.
Rhubarb Curd
I like the rhubarb curd to be soft but not overly runny or too thick – it should more or less stay in place when a dollop of it is added to the top of yogurt or dropped on to a scone or biscuit, for example.
Rhubarb Curd
The problem that often occurs with adding an egg white to a curd is that the white, or parts of it, can coagulate before being fully incorporated into the curd meaning the white goes from liquid form to a solid. Egg whites cook faster than the yolks so, no matter how much stirring, there can still be little bits of the coagulated egg white in the curd because, once the white has turned into solid mass, it can’t be liquified again. This is easily remedied, however, by straining the cooked curd through a fine wire mesh sieve to remove any little bits of egg white remaining. You would think the thickened curd would not drip through the sieve but, amazingly, it does! Don’t skip this step.
Sugar
This curd is best made with caster sugar which you may know by any of the following names: Fruit sugar, instant dissolving sugar, berry sugar, or super fine sugar. This sugar is extra fine. It dissolves much faster than granulated sugar and is commonly used in making simple syrups used in cocktails because it leaves no “gritty” texture. Regular granulated sugar may be used but, if a pure silky smooth curd is the goal, I recommend using the caster sugar.
Method
Making rhubarb curd takes time. I do not recommend making the rhubarb curd in a pot directly over the heat source because it is very easy to scorch the curd with the amount of sugar in it. My preference is to use a double boiler. If you don’t have one of these sets of pots, simply set a heatproof bowl over a pot of simmering water.
It’s very important that the top pot/bowl in the double boiler not touch the water in the bottom pot. The curd cooks from the steam heating the top saucepan of the boiler, not by contact with water. About 2” of water in the bottom of the pot is all that is required. Heat this water to the simmering point (around 200°F) and do not let it boil as this will cook the eggs in the curd too fast. This is when curdling can occur and the mixture will become lumpy and lose its smooth texture. The water should be kept at this 200°F temperature throughout the cooking process. (Note that temperatures for the simmering water may need to be adjusted according to altitude. The important thing is that the water not boil.)
I add the orange zest at the beginning of the cooking process because that’s when I think the zest can do the most to enhance the flavor of the curd. Simply stir the orange zest into the sugar in the top of the double boiler then whisk in the rhubarb juice. Mix the egg yolks and the whole egg together in a small bowl, using a fork to lightly break them up. Whisk the eggs and softened butter into the sugar-juice mixture. Place this pot/heatproof bowl on top of the pot of simmering water.
The mixture needs to be stirred regularly as it cooks. A whisk or a wooden spoon can be used to stir the curd. Be patient. This cooking process can easily take 20-25 minutes for the curd to thicken. Resist the urge to increase the heat to hurry the cooking process along. The curd, when cooked, will coat the back of a wooden spoon. However, the most accurate test is to use a candy thermometer – the curd is cooked when the temperature reaches 170°F.
The curd needs to be strained through a very fine wire mesh sieve to remove any bits of the coagulated egg white along with the orange zest. The zest has done its duty by releasing flavor into the curd. There is no harm in leaving the zest in the curd; however, if the goal is to have a perfect silky finish to the curd, strain out the zest.
Color and Texture
The color of the cooked curd will not be a vibrant red as was the rhubarb juice to start. The color becomes a paler salmon pink/soft orange color because of the addition of the eggs which dilutes the ruby red color of the rhubarb juice. The texture of the perfectly cooked curd should be silky smooth and very creamy, and the curd should bear a slightly glossy sheen. The rhubarb curd will thicken slightly more as it cools. A true curd does not have any thickening agent (e.g., flour or cornstarch) added to it. The egg yolks are what naturally thickens the curd.
Rhubarb Curd
Storage
Transfer the strained curd to a hot sterilized jar. Immediately place a piece of plastic wrap on the exposed surface of the curd in the jar, pressing it gently to ensure it is in direct contact with the entire surface of the curd. This will prevent a skin from forming on the curd as it cools. Let the curd cool to room temperature then remove the plastic wrap, cover tightly with jar lid, and store in the refrigerate for up to a week.
Rhubarb Curd Spread on Muffins
[Printable recipe follows at end of posting]
Rhubarb Curd
Ingredients:
10 oz rhubarb, chopped into ½” chunks 2 tbsp orange juice
2/3 cup caster sugar 2 tsp orange zest 3 extra-large egg yolks, room temperature 1 whole medium egg, room temperature 3 tbsp unsalted butter, softened
Method:
Place chopped rhubarb and orange juice in medium-sized saucepan. Cover. Bring to a boil over medium-high heat. Immediately reduce heat to medium-low and cook, stirring occasionally, until rhubarb is soft and mushy (about 5-8 minutes). Remove from heat and strain through fine wire mesh sieve to extract the rhubarb juice, squeezing as much juice as possible out of the rhubarb by gently pressing it down with the back of a spoon. This should yield approximately ½ cup rhubarb juice. Cool. Discard the strained pulp.
In bottom of double boiler, bring about 2” of water to the simmer point (around 200°F). Maintain the water at this simmer point over medium-low heat. Place sugar in top of double boiler or heat-proof bowl. Mix in the orange zest. Whisk the ½ cup rhubarb juice into sugar.
In small bowl, lightly beat the 3 egg yolks and the whole egg together with a fork, just enough to break up the yolks and blend with the whole egg. Whisk the eggs into the sugar and rhubarb juice mixture. Add the soft butter. Place this pot or bowl over the simmering water. Stir the mixture continuously as it cooks until it is thickened and the temperature of the mixture registers 170°F on a candy thermometer. Be patient as this may take 20-25 minutes. Make sure the water in the bottom of the boiler does not boil and stays only at the simmer point.
Remove curd from heat and strain through a mesh strainer to remove any of the egg white that may have coagulated as well as the orange zest. Pour strained curd into a sterilized jar. Place a piece of plastic wrap directly on the surface of the curd to prevent it from forming a skin on top. Cool at room temperature. Remove plastic wrap. Cover jar tightly and refrigerate for up to 1 week.
Yield: Apx. 1 cup
*caster sugar may also be known as fruit sugar, berry sugar, super fine sugar, or instant dissolving sugar. Note: Altitude may affect the temperature at which the water reaches the simmering point. The important thing is that the water in the bottom of the double boiler does not boil or touch the top of the double boiler/heatproof bowl during the cooking of the curd.
A delightful creamy smooth rhubarb curd that is perfect for spreading on muffins, scones, or biscuit or adding to yogurt parfaits
Ingredients
10 oz rhubarb, chopped into ½” chunks
2 tbsp orange juice
2/3 cup caster sugar*
2 tsp orange zest
3 extra-large egg yolks, room temperature
1 whole medium egg, room temperature
3 tbsp unsalted butter, softened
*caster sugar may also be known as fruit sugar, berry sugar, super fine sugar, or instant dissolving sugar
Instructions
Place chopped rhubarb and orange juice in medium-sized saucepan. Cover. Bring to a boil over medium-high heat. Immediately reduce heat to medium-low and cook, stirring occasionally, until rhubarb is soft and mushy (about 5-8 minutes). Remove from heat and strain through fine wire mesh sieve to extract the rhubarb juice, squeezing as much juice as possible out of the rhubarb by gently pressing it down with the back of a spoon. This should yield approximately ½ cup rhubarb juice. Cool. Discard the strained pulp.
In bottom of double boiler, bring about 2” of water to the simmer point (around 200°F). Maintain the water at this simmer point over medium-low heat. Place sugar in top of double boiler or heat-proof bowl. Mix in the orange zest. Whisk the ½ cup rhubarb juice into sugar.
In small bowl, lightly beat the 3 egg yolks and the whole egg together with a fork, just enough to break up the yolks and blend with the whole egg. Whisk the eggs into the sugar and rhubarb juice mixture. Add the soft butter. Place this pot or bowl over the simmering water. Stir the mixture continuously as it cooks until it is thickened and the temperature of the mixture registers 170°F on a candy thermometer. Be patient as this may take 20-25 minutes. Make sure the water in the bottom of the boiler does not boil and stays only at the simmer point.
Remove curd from heat and strain through a mesh strainer to remove any of the egg white that may have coagulated as well as the orange zest. Pour strained curd into a sterilized jar. Place a piece of plastic wrap directly on the surface of the curd to prevent it from forming a skin on top. Cool at room temperature. Remove plastic wrap. Cover jar tightly and refrigerate for up to 1 week.
Notes
Note: Altitude may affect the temperature at which the water reaches the simmering point. The important thing is that the water in the bottom of the double boiler does not boil or touch the top of the double boiler/heatproof bowl during the cooking of the curd.
In an earlier posting, I shared my recipe for the regular gluten version of Queen Elizabeth Cake to coincide with Queen Elizabeth II’s actual birthday on April 21st. Today, I have a special treat for my food blog followers who must follow a gluten-free diet! I have adapted my regular version of this cake to make it gluten-free. It has passed my testing standards so I am pleased to share the recipe for this wonderfully moist and tasty Queen Elizabeth Cake that is made with very simple, basic ingredients. In fact, I’d even go so far as to suggest that it would be quite difficult to be able to tell that this version is gluten-free and, in my view, it certainly rivals its gluten version cousin in taste, texture, and overall quality.
I am timing the original publication of this gluten-free Queen Elizabeth Cake recipe with the annual Trooping of the Colour celebrations celebrated in London in June of each year. The Trooping of the Colour, a major military ceremony filled with pomp and pageantry, is often referred to as the Queen’s Birthday Parade. This tradition is said to have started in 1748 when then King George II decided to combine his birthday parade with the annual spring military parade in June because he apparently felt his actual November birthday was too cold to have a birthday parade. This tradition has endured since then, regardless when the reigning monarch’s actual birthday is and this event is considered the official celebration of the sovereign’s birthday. Held annually on a Saturday in June, the Queen attends, arriving by horse and carriage from Buckingham Palace and traveling along the Mall to the Horse Guard’s Parade behind Whitehall.
The colorful display of pageantry involves several hundred officers and men, horses, and bands. The Queen takes the salute and inspects the troops dressed in ceremonial uniform. “Colours” refers to the regimental flags of the various troops and the colours correspond to the colours and insignia of the uniforms of the soldiers of the different units. The colours (flags) served a purpose on the battlefields as they provided a rallying or gathering point for troops and hence the title “trooping of the colours”.
London Pagentry
So, thus ends the brief history lesson! Now, on to the Gluten-free Queen Elizabeth Cake, believed to have been named for either the Queen Mother or the reigning monarch, Queen Elizabeth II. When I earlier shared my recipe for the gluten version of this cake, I conducted some research to try and determine the origins of the cake and its name. Click here to read the information I was able to find about the different stories about the naming of this cake.
The texture of the gluten-free Queen Elizabeth Cake, like the gluten version, is somewhat dense and owes its lovely moist texture to the cooked dates. The combination of coconut and almond flours with the gluten-free 1-to-1 baking flour are the key to this cake’s texture. The almond and coconut flours really do provide a pleasing flavor to the cake.
Gluten-free Queen Elizabeth Cake
The following hints may be of use when making this cake:
This is a single layer cake. Use an 8” square baking pan to ensure this cake has a good height. A 9” square pan may be used but the cake will lack depth and more closely resemble a square as opposed to a cake. I find gluten-free flours take more leavening than gluten flours do and, even at that, it can still be difficult to get baked goods to rise to the height of a similar recipe that calls for gluten flour products. Grease the pan or line it with parchment paper or greased tin foil. Leaving an overhang of extra parchment paper or tin foil over the edge of the pan will make it easier to lift the entire baked cake from the pan and facilitate its cutting.
Let the date mixture cool completely at room temperature before incorporating it with the dry ingredients. If it is mixed with the dry ingredients while the mixture is either hot or warm, it may result in a “gummy” texture or soggy cake.
Mix the wet and dry ingredients using the rule of 3 parts dry and 2 parts wet ingredients, starting and ending with the dry ingredients.
Mix the ingredients well but don’t beat them as this may create a “tough crumb” cake.
Use cream to make the topping. I used 35% cream which gives a luxurious topping but 18% cream may also be used.
Start checking the cake for doneness at the point where the cake has been baking for 25 minutes then, if it is not baked, check it every 3-4 minutes after. The cake will be done when the cake tester, inserted into the center of the cake, comes out completely clean and dry.
When the cake tests almost baked (about 5 minutes before it is expected to come out of the oven), start making the topping. It needs to go on the warm cake that will go back in the oven for 3-4 minutes after the topping has been added.
The topping, like making homemade fudge, can set up really fast. Don’t leave it unattended. Stir the ingredients as they boil gently for the 3 minutes. Watch it carefully and, if you see if starting to “set up” and thicken really fast (even if it is before the 3 minutes of boiling is up), remove it from the stove and quickly stir in the vanilla and coconut. The mixture should be of the consistency that it can be poured from the saucepan and spread over the cake with a knife. If it becomes too thick, it will be too sugary and won’t be of spreading consistency. It will also become brittle and crack.
[Printable version of the recipe follows at end of posting]
Gluten-Free Queen Elizabeth Cake
Ingredients:
¾ cup dates, chopped (apx. 4¼ oz) ¾ tsp baking soda ¾ cup boiling water
¾ cup of 1-to-1 gluten free baking flour 1/3 cup almond flour 2½ tbsp coconut flour 1 tsp baking powder 1/8 tsp salt ¾ tsp cinnamon ¼ tsp nutmeg Pinch allspice ¼ cup butter, softened at room temperature 2/3 cup granulated sugar 1 extra large egg ¼ tsp orange extract ¾ tsp vanilla
Topping: 2½ tbsp melted butter ½ cup brown sugar 2¼ tbsp cream ¾ tsp vanilla ½ cup shredded coconut
Method: Cake: Place dates and soda in medium-sized saucepan. Add the boiling water. Simmer for about 4-5 minutes then cool completely at room temperature.
Position oven rack in centre of oven and preheat oven to 350°F. Grease 8” baking pan or line with parchment paper (or even greased tin foil).
Sift 1-to-1 gluten free baking flour, almond flour, coconut flour, baking powder, salt, and spices together. Set aside.
In bowl of stand mixer, cream the butter and sugar. Beat in the egg, orange extract, and vanilla. Transfer mixture to cooled dates. Stir well.
Transfer one-third of the sifted dry ingredients to the mixer bowl. Beat in one-half of the wet ingredients. Add another third of the dry ingredients. Blend well. Mix in the remainder of the wet ingredients. Finish by incorporating the remaining dry ingredients. Mix well to combine. Don’t overmix.
Spread batter evenly in prepared baking pan. Transfer to preheated oven and bake for approximately 25-30 minutes or until a cake tester inserted into center of cake comes out clean. Remove the cake from the oven. Increase oven temperature to 400°F to prepare for browning of cake’s topping.
Topping: About 5 minutes before the cake is due to be removed from the oven, begin to prepare the cake topping. In medium-sized saucepan, melt the butter. Blend in the brown sugar and cream. Bring to a boil over medium heat and boil for 3 minutes, stirring regularly to prevent scorching. Remove from heat and quickly stir in the vanilla and coconut. Pour and spread this mixture evenly over the warm cake and return it to the oven to brown slightly for 3-4 minutes. Remove cake from oven and place on wire rack to cool completely before cutting and serving.
Yield: 1 – 8” single layer cake
This cake is suitable as a snacking cake, dessert, tea cake, or even a picnic cake. The cake freezes well.
The Queen Elizabeth Cake pairs particularly well with a good cup of tea. My recommendation for a tea pairing would be an Earl Grey blend. The citrus notes in this black tea complement the sweetness of the cake. Earl Grey tea has a high concentration of tannins which makes it a suitable tea to cleanse the mouth after each bite of the cake so that each bite of this moist and flavorful cake is as equally tasty as the first!
A moist and tasty gluten-free cake featuring dates, spices, and a toffee-like topping.
Ingredients
¾ cup dates, chopped (apx. 4¼ oz)
¾ tsp baking soda
¾ cup boiling water
¾ cup of 1-to-1 gluten free baking flour
1/3 cup almond flour
2½ tbsp coconut flour
1 tsp baking powder
1/8 tsp salt
¾ tsp cinnamon
¼ tsp nutmeg
Pinch allspice
¼ cup butter, softened at room temperature
2/3 cup granulated sugar
1 extra large egg
¼ tsp orange extract
¾ tsp vanilla
Topping:
2½ tbsp melted butter
½ cup brown sugar
2¼ tbsp cream
¾ tsp vanilla
½ cup shredded coconut
Instructions
Cake:
Place dates and soda in medium-sized saucepan. Add the boiling water. Simmer for about 4-5 minutes then cool completely at room temperature.
Position oven rack in centre of oven and preheat oven to 350°F. Grease 8” baking pan or line with parchment paper (or even greased tin foil).
Sift 1-to-1 gluten free baking flour, almond flour, coconut flour, baking powder, salt, and spices together. Set aside.
In bowl of stand mixer, cream the butter and sugar. Beat in the egg, orange extract, and vanilla. Transfer mixture to cooled dates. Stir well.
Transfer one-third of the sifted dry ingredients to the mixer bowl. Beat in one-half of the wet ingredients. Add another third of the dry ingredients. Blend well. Mix in the remainder of the wet ingredients. Finish by incorporating the remaining dry ingredients. Mix well to combine. Don’t overmix.
Spread batter evenly in prepared baking pan. Transfer to preheated oven and bake for approximately 25-30 minutes or until a cake tester inserted into center of cake comes out clean. Remove the cake from the oven. Increase oven temperature to 400°F to prepare for browning of cake’s topping.
Topping:
About 5 minutes before the cake is due to be removed from the oven, begin to prepare the cake topping. In medium-sized saucepan, melt the butter. Blend in the brown sugar and cream. Bring to a boil over medium heat and boil for 3 minutes, stirring regularly to prevent scorching. Remove from heat and quickly stir in the vanilla and coconut. Pour and spread this mixture evenly over the warm cake and return it to the oven to brown slightly for 3-4 minutes. Remove cake from oven and place on wire rack to cool completely before cutting and serving.
Springtime in Prince Edward Island on Canada’s east coast means it’s lobster season so it’s a great time to make these delectable lobster and asparagus crepes that combine two of the season’s special treats!
The opening of the spring lobster season is a huge deal in PEI. On opening day — the day when fishers head out to sea with boats laden with traps — hundreds of Islanders gather at fishing ports around the province to see the fishers off. Naturally, mouths are watering for the first taste of lobster from the cold Atlantic waters, a taste that is usually satisfied a day or two after traps are set and the “first haul” of lobsters is brought ashore.
Eve of Setting Day in the Fishing Village of North Rustico, PEI, CanadaEarly Morning Gathering in French River, PEI, to Watch Parade of Lobster Boats on Setting Day
These are so worth the wait!
Fresh Catch of the Day – PEI Lobsters
While I adore lobster straight out of the shell and served with homemade potato salad, I like creating recipes incorporating this tasty seafood as an ingredient. Asparagus is the first vegetable of springtime on PEI and, for the crepes I am featuring in this posting, I am using asparagus as a complimentary ingredient to the lobster. The earthy undertones of the asparagus pair particularly well with lobster, especially when some mushrooms and a rich cheese sauce are added. Choose small mushrooms, either white button or the cremini variety, for this recipe.
For the filled crepe recipe, try to choose the freshest available asparagus spears that are a uniform size. I tend to choose medium-sized spears. I find that spears that are pencil thin tend to cook up too quickly and become somewhat limp. Thick spears tend to have less flavor because they have gotten too old before they have been harvested. They may also have a somewhat unpleasant woody texture. The key thing to remember about steaming the asparagus is not to overcook it because it will go limp and loose its vibrant green color.
Fresh Asparagus
The crepes for this recipe may be made ahead (by a few hours or even a day or two) and stored between layers of plastic wrap in a tightly sealed bag in the refrigerator. Following the steps I have laid out for this recipe will help organize the process of preparing the filling and steaming the asparagus so that everything is timed to be ready at the same time for the crepe assembly.
I am quite lucky here on the Island as my local fish market, MR Seafoods, in Charlottetown sells lobster already out of the shell which means they have done the work of removing the meat from the shell and then disposing of the shells. I find this is a quick and convenient way for me to get lobster meat for a recipe.
These crepes can be baked in au gratin dishes, a 7″x11″ baking pan or on a parchment-lined baking sheet which is the way the ones in the photos in this posting were baked. I wanted to ensure that the asparagus would remain intact and clearly visible when the crepes were plated so, by baking them on a rimmed cookie sheet, nothing disturbed the asparagus which could have happened if they were scrunched into a tight baking dish such as an au gratin.
Lobster and Asparagus Crepes
As always, I recommend reading the recipe through a couple of times to ensure a good understanding of the method of preparation and that all the ingredients and cooking utensils and cookware needed to prepare the dish are available.
[Printable recipe follows at end of posting]
Lobster and Asparagus Crepes
Ingredients:
Crepes: 2 large eggs 1 cup flour (to make gluten-free, use 1 cup of 1-to-1 gluten-free flour) 1/8 tsp salt 1 cup whole milk 2 tbsp melted butter
Sauce: ¼ cup butter 1 shallot, finely minced (about 1 tbsp) ¼ cup flour (to make gluten-free, use ¼ cup of 1-to-1 gluten-free flour) ½ tsp granulated garlic ¼ tsp dried dill 1/8 tsp paprika 1/8 tsp nutmeg 1 cup chicken or vegetable stock 1 cup whole milk or half-and-half 2 extra-large egg yolks, lightly broken up with a fork 2 tbsp dry white wine or cooking sherry 1 cup grated cheese mixture (e.g., mozzarella, provolone, and parmesan) Salt and pepper, to taste
Filling: 2-3 teaspoons butter 1 cup mushrooms, thinly sliced
8 oz cooked lobster meat, cut into small chunks 40 asparagus spears
Garnish: 3-4 green onions (white and light green parts only) and/or fresh herbs for garnish (optional)
Method:
Step 1 – Make the crepes. In large measuring cup or bowl and using an immersion blender, beat the eggs lightly. Combine the flour and salt and beat in to the egg alternately with the milk, starting and ending with the flour (3 additions of flour and 2 additions of milk). Beat in the melted butter and beat an additional 30 seconds, or until batter is smooth. Cover with plastic wrap and refrigerate batter for 1 hour.
Over medium heat, melt apx. 1½ tsp butter in a 8” non-stick skillet with sloped sides. Using a ¼-cup measuring cup, scoop up batter. Pour the batter in to the heated skillet while quickly swirling and tilting the pan to ensure batter distributes evenly and completely over the bottom of the pan. Return pan to heat and cook crepe until top loses its gloss, tiny bubbles start to appear, and the edges of the crepe start to slightly curl. Gently lift an edge of the crepe with the tip of a fork and grab the crepe with fingers and flip it over. Cook the second side of the crepe for 15-20 seconds. Flip the crepe onto a clean tea towel. Repeat for remaining crepes, adding small amounts of butter to the pan, if necessary, to keep the crepes from sticking to the pan.
Step 2 –Make the sauce. In medium-sized saucepan, melt the butter over medium heat. Sauté the shallot until softened and transparent. In small bowl, whisk the flour, granulated garlic, dill, paprika, and nutmeg together. Stir flour mixture into the butter and shallot and cook until frothy. Whisk in the chicken (or vegetable stock) and milk (or half-and-half). Cook sauce, until mixture is smooth and heated (but not boiling) and is starting to thicken, stirring constantly to prevent scorching. Stir 2-3 tablespoons of the hot mixture into the egg yolks then pour egg mixture into the sauce. Cook over medium-low heat, stirring constantly until mixture is thickened. Stir in white wine or cooking sherry. Add the cheese mixture. Continue to cook over low heat, stirring until mixture is smooth and cheese is melted. Season with salt and pepper to taste. Remove approximately 3/4 cup of the sauce and set aside.
Step 3 – Make the filling. Preheat oven to 350°F. In medium-sized skillet, melt 2-3 teaspoons of butter over medium heat. Add the mushrooms and sauté for 3-5 minutes, stirring frequently to prevent mushrooms from scorching. While mushrooms are sautéing, steam the asparagus in a tall pot with a small amount of boiling water for approximately 2 minutes. Drain and immediately transfer the asparagus to a bowl of ice cold water to stop the cooking process. Swish the asparagus in the cold water for just a few seconds then drain in a colander. This will also help keep the asparagus its vibrant green color. Remove mushrooms from heat and combine with the lobster meat. Add the reserved ¾ cup of sauce and stir gently to coat mushrooms and lobster meat.
Step 4:Assemble the crepes. Line 9”x13” rimmed baking sheet with parchment paper. Lay out 8 crepes on work surface. Place 5 asparagus spears in the centre of each crepe, extending the asparagus tips by about ½” beyond the edge of the crepe. Divide the lobster and mushroom filling mixture between the 8 crepes by placing filling down the center line of each crepe on top of the asparagus. Gently fold crepe over filling, first one side and then overlapping the opposite side over the first. Using large pastry scraper or flat spatula, carefully transfer each crepe to the prepared baking sheet. Pour the remaining sauce over crepes to cover, leaving both ends of the crepes uncovered. Alternatively, the crepes may be baked in either 4 individual greased au gratin dishes or one oblong 7”x11” baking pan. However, baking the crepes on a baking sheet allows the asparagus tips to stay perfectly intact and attractively visible when plated.
Bake for 15-18 minutes, or until hot and bubbly. Remove from oven and, if desired, sprinkle with chopped green onions and/or chopped fresh herbs such as parsley or chives.
Serving Suggestion: Serve with favorite green salad.
Delectable crepes filled with fresh asparagus, succulent chunks of lobster, and sautéed mushrooms in a rich cheese sauce.
Ingredients
Crepes:
2 large eggs
1 cup flour (to make gluten-free, use 1 cup of 1-to-1 gluten-free flour)
1/8 tsp salt
1 cup whole milk
2 tbsp melted butter
Sauce:
¼ cup butter
1 shallot, finely minced (about 1 tbsp)
¼ cup flour (to make gluten-free, use ¼ cup of 1-to-1 gluten-free flour)
½ tsp granulated garlic
¼ tsp dried dill
1/8 tsp paprika
1/8 tsp nutmeg
1 cup chicken or vegetable stock
1 cup whole milk or half-and-half
2 extra-large egg yolks, lightly broken up with a fork
2 tbsp dry white wine or cooking sherry
1 cup grated cheese mixture (e.g., mozzarella, provolone, and parmesan)
Salt and pepper, to taste
Filling:
2-3 teaspoons butter
1 cup mushrooms, thinly sliced
8 oz cooked lobster meat, cut into small chunks
40 asparagus spears
Garnish:
3-4 green onions (white and light green parts only) and/or fresh herbs for garnish (optional)
Instructions
Step 1 - Make the crepes. In large measuring cup or bowl and using an immersion blender, beat the eggs lightly. Combine the flour and salt and beat in to the egg alternately with the milk, starting and ending with the flour (3 additions of flour and 2 additions of milk). Beat in the melted butter and beat an additional 30 seconds, or until batter is smooth. Cover with plastic wrap and refrigerate batter for 1 hour.
Over medium heat, melt apx. 1½ tsp butter in a 8” non-stick skillet with sloped sides. Using a ¼-cup measuring cup, scoop up batter. Pour the batter in to the heated skillet while quickly swirling and tilting the pan to ensure batter distributes evenly and completely over the bottom of the pan. Return pan to heat and cook crepe until top loses its gloss, tiny bubbles start to appear, and the edges of the crepe start to slightly curl. Gently lift an edge of the crepe with the tip of a fork and grab the crepe with fingers and flip it over. Cook the second side of the crepe for 15-20 seconds. Flip the crepe onto a clean tea towel. Repeat for remaining crepes, adding small amounts of butter to the pan, if necessary, to keep the crepes from sticking to the pan.
Step 2 - Make the sauce. In medium-sized saucepan, melt the butter over medium heat. Sauté the shallot until softened and transparent. In small bowl, whisk the flour, granulated garlic, dill, paprika, and nutmeg together. Stir flour mixture into the butter and shallot and cook until frothy. Whisk in the chicken (or vegetable stock) and milk (or half-and-half). Cook sauce, until mixture is smooth and heated (but not boiling), and is starting to thicken, stirring constantly to prevent scorching. Stir 2-3 tablespoons of the hot mixture into the egg yolks then pour egg mixture into the sauce. Cook over medium-low heat, stirring constantly until mixture is thickened. Stir in white wine or cooking sherry. Add the cheese mixture. Continue to cook over low heat, stirring until mixture is smooth and cheese is melted. Season with salt and pepper to taste. Remove approximately 3/4 cup of the sauce and set aside.
Step 3 - Make the filling. Preheat oven to 350°F. In medium-sized skillet, melt 2-3 teaspoons of butter over medium heat. Add the mushrooms and sauté for 3-5 minutes, stirring frequently to prevent mushrooms from scorching. While mushrooms are sautéing, steam the asparagus in a tall pot with a small amount of boiling water for approximately 2 minutes. Drain and immediately transfer the asparagus to a bowl of ice cold water to stop the cooking process. Swish the asparagus in the cold water for just a few seconds then drain in a colander. This will also help keep the asparagus its vibrant green color. Remove mushrooms from heat and combine with the lobster meat. Add the reserved ¾ cup of sauce and stir gently to coat mushrooms and lobster meat.
Step 4: Assemble the crepes. Line 9”x13” rimmed baking sheet with parchment paper. Lay out 8 crepes on work surface. Place 5 asparagus spears in the centre of each crepe, extending the asparagus tips by about ½” beyond the edge of the crepe. Divide the lobster and mushroom filling mixture between the 8 crepes by placing filling down the center line of each crepe on top of the asparagus. Gently fold crepe over filling, first one side and then overlapping the opposite side over the first. Using large pastry scraper or flat spatula, carefully transfer each crepe to the prepared baking sheet. Pour the remaining sauce over crepes to cover, leaving both ends of the crepes uncovered. Alternatively, the crepes may be baked in either 4 individual greased au gratin dishes or one oblong 7”x11” baking pan. However, baking the crepes on a baking sheet allows the asparagus tips to stay perfectly intact and attractively visible when plated.
Bake for 15-18 minutes, or until hot and bubbly. Remove from oven and, if desired, sprinkle with chopped green onions and/or chopped fresh herbs such as parsley or chives.
Notes
Serving Suggestion: Serve with favorite green salad
There are different versions of thumbprint cookies. Some are rolled in crushed nuts, others in granulated sugar, and still others in coconut. Some are filled with jam and others with lemon curd. I use lemon curd as the filling and roll my thumbprint cookies in coconut to complement the coconut flour used in these gluten-free cookies. The coconut toasts lovely as the cookies bake.
I find that using only a gluten-free all-purpose flour in baking results in a somewhat underwhelming flavor for my taste. That’s why I often add some almond and/or coconut flour to my baked products. Either or both contribute flavor and I think produce better textured products.
As I tested this newly-developed recipe, I found that a hint of cardamon gives a subtle and pleasing flavor to the cookies. Somewhere between a one-quarter teaspoon and a half teaspoon is about the right amount so….either a heaping 1/4 teaspoon or a scant 1/2 teaspoon of cardamon will work. The cardamon pairs well with the lemon curd used as a filling/topping on the thumbprints.
Gluten-free Lemon-filled Thumbprint Cookies
Because some gluten-free flours, like coconut flour for example, absorb a lot of liquid, I use one whole extra-large egg as well as the yolk from one large egg to ensure there is enough moisture in the cookie dough. I generally have three different sizes of eggs in my refrigerator (extra large, large, and medium), especially when I am doing gluten-free baking. This is because sometimes two extra-large eggs would be too much but more than one is needed. That’s when I use either large or medium-sized eggs to supplement the egg content in gluten-free baking or, sometimes as in the case with these cookies, I just use a certain size of egg yolk because that is all that is needed. Save the white from the large egg in this recipe as it will be needed to make the egg wash in which to dip each ball before rolling in coconut. This egg wash adheres the coconut to the cookies.
Gluten-free Lemon-filled Thumbprint Cookies
The cookie dough benefits from being chilled for about 30 minutes in the refrigerator before being formed into balls that are about 1″ in diameter. This allows the dough to firm up and makes the shaping of the cookie balls easier. For these cookies, I use 3/4 oz of dough. I recommend the use of a digital kitchen scale to weigh out portions of the dough to ensure uniformity of size in cookies. You can, of course, “eyeball” the amount of dough for each ball but, if you want perfectly uniform cookies, I recommend weighing the dough, at least for the first 2-3 cookie balls to get a sense of how much dough is needed for each cookie.
Gluten-free Lemon-filled Thumbprint Cookies
These cookies have a soft tender crumb and are not too sweet. The lemon curd adds tremendous flavor and texture to the cookies. Click here for my recipe for the lemon curd. To make the indent in each cookie for the curd, use either the tip of your thumb, the round end of a wooden spoon, or the round bowl of a ¼ tsp measuring spoon. Gently press an indent into the center of each cookie, pressing about half-way down through the cookie. Bake the cookies and, as soon as they come out of the oven, immediately fill each cookie with about 1 teaspoonful of lemon curd. If lemon curd is not to your taste, simply use your favorite jam as the filling.
Gluten-free Lemon-filled Thumbprint Cookies
Ingredients:
½ cup butter ½ cup granulated sugar 1 extra large egg 1 large egg yolk (save the egg white for the egg wash) 1 tsp vanilla ¼ tsp almond flavoring
1 cup all-purpose gluten-free flour ½ cup almond flour ¼ cup coconut flour 1¾ tsp xanthan gum 1/8 tsp baking soda ¼ tsp baking powder ¼ tsp salt Scant ½ tsp cardamom
3 oz flaked coconut 1 large egg white beaten with 1 tbsp water
Apx. ½ cup lemon curd
Method:
Line baking sheet with parchment paper.
Using the paddle attachment in the bowl of stand mixer, cream the butter. Gradually add the sugar. Beat well. Add the egg and extra egg yolk. Beat. Mix in the vanilla and almond flavoring.
In separate bowl, combine the flours, xanthan gum, baking soda, baking powder, salt, and cardamom. Whisk together very well. Blend into the butter-sugar-egg mixture. Mix well. Cover bowl with plastic wrap and chill dough for 30 minutes in refrigerator.
Preheat oven to 350°F. Place coconut in one small bowl and the beaten egg white and water mixture into a second bowl. Pinch off pieces of the dough and roll into balls, approximately 1” in diameter (if you weigh the dough, each piece should weigh ¾ oz.) Dip each cookie ball in the egg white wash then roll in the coconut. Place cookies on prepared baking sheet, arranging them about 2” apart. Using thumb tip, end of wooden spoon, or the round bowl of a ¼ tsp measuring spoon, gently press an indent into the center of each cookie. Bake for 20-22 minutes. Immediately fill each cookie with about 1 teaspoonful of lemon curd as soon as the cookies come out of the oven. If indents are not clearly defined in each cookie, gently reform them using one of the afore-mentioned methods. Transfer cookies to wire rack to cool completely. Store in airtight container. If desired, add a light dusting of confectioner’s sugar to the cookies just at the time of serving.
Yield: Apx. 22 cookies
Note: Jam of choice may be substituted for the lemon curd, if desired.
A delightful gluten-free cookie with a soft tender crumb and a decadent topping of lemon curd.
Ingredients
½ cup butter
½ cup granulated sugar
1 extra large egg
1 large egg yolk (save the egg white for the egg wash)
1 tsp vanilla
¼ tsp almond flavoring
1 cup all-purpose gluten-free flour
½ cup almond flour
¼ cup coconut flour
1¾ tsp xanthan gum
1/8 tsp baking soda
¼ tsp baking powder
¼ tsp salt
Scant ½ tsp cardamom
3 oz flaked coconut
1 large egg white beaten with 1 tbsp water
Apx. ½ cup lemon curd
Instructions
Line baking sheet with parchment paper.
Using the paddle attachment in the bowl of stand mixer, cream the butter. Gradually add the sugar. Beat well. Add the egg and extra egg yolk. Beat. Mix in the vanilla and almond flavoring.
In separate bowl, combine the flours, xanthan gum, baking soda, baking powder, salt, and cardamom. Whisk together very well. Blend into the butter-sugar-egg mixture. Mix well. Cover bowl with plastic wrap and chill dough for 30 minutes in refrigerator.
Preheat oven to 350°F. Place coconut in one small bowl and the beaten egg white and water mixture into a second bowl. Pinch off pieces of the dough and roll into balls, approximately 1” in diameter (if you weigh the dough, each piece should weigh ¾ oz.) Dip each cookie ball in the egg white wash then roll in the coconut. Place cookies on prepared baking sheet, arranging them about 2” apart. Using thumb tip, end of wooden spoon, or the round bowl of a ¼ tsp measuring spoon, gently press an indent into the center of each cookie. Bake for 20-22 minutes. Immediately fill each cookie with about 1 teaspoonful of lemon curd as soon as the cookies come out of the oven. If indents are not clearly defined in each cookie, gently reform them using one of the afore-mentioned methods. Transfer cookies to wire rack to cool completely. Store in airtight container.
Notes
Note: Jam of choice may be substituted for the lemon curd, if desired.
Recipe for Lemon Curd here: https://myislandbistrokitchen.com/2017/04/14/luscious-lemon-curd/