Ever wonder about the history of old vintage recipes? I so wish that accurate records existed about the origins of some of the old nostalgic recipes like the one for Queen Elizabeth Cake, for example. Continue reading Queen Elizabeth Cake Recipe
Category Archives: Recipes
Luscious Lemon Curd
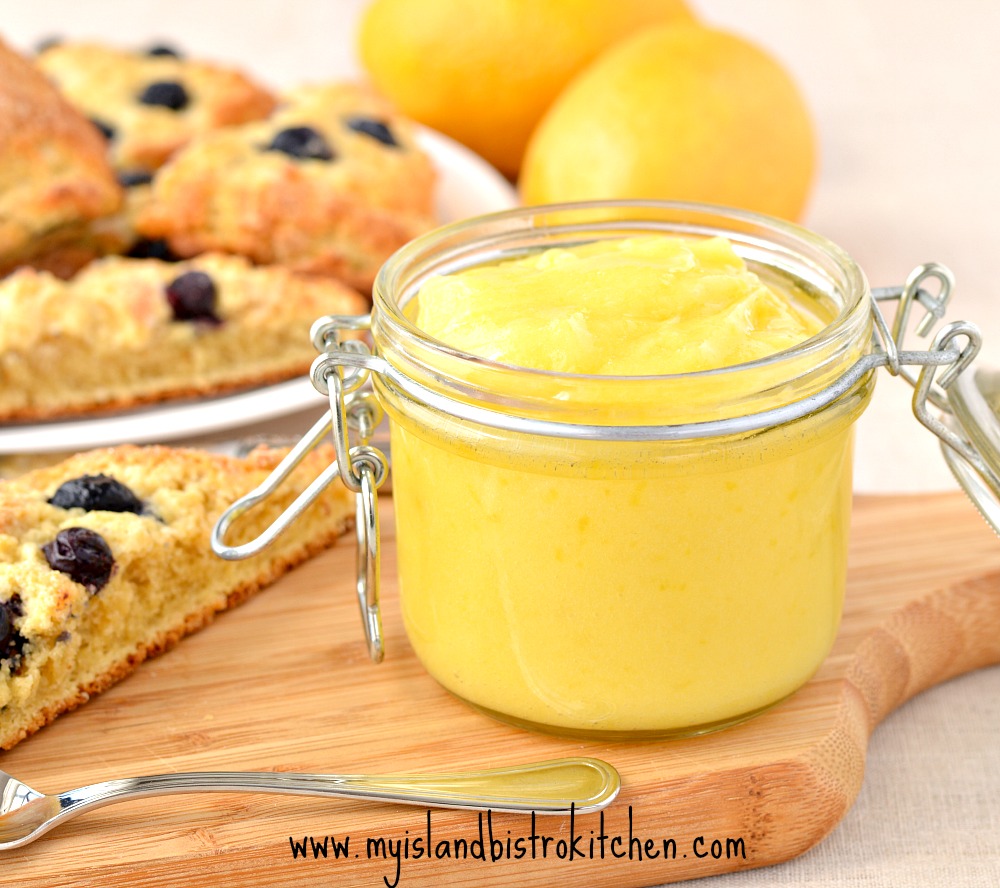
I adore lemon curd – luscious lemon curd – that wonderful balance of lemon’s acidity and tartness with the sweetness of sugar. I love it so much that it’s a staple in my refrigerator. Continue reading Luscious Lemon Curd
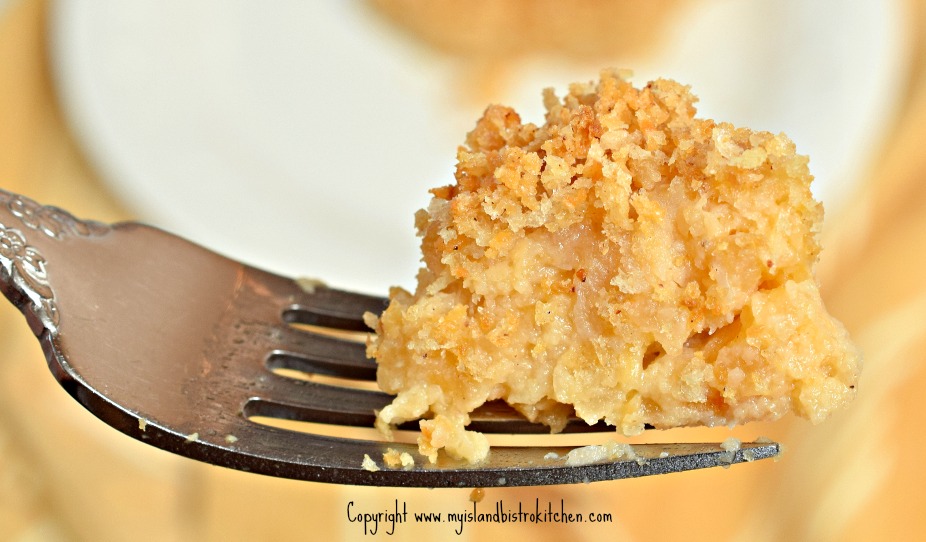
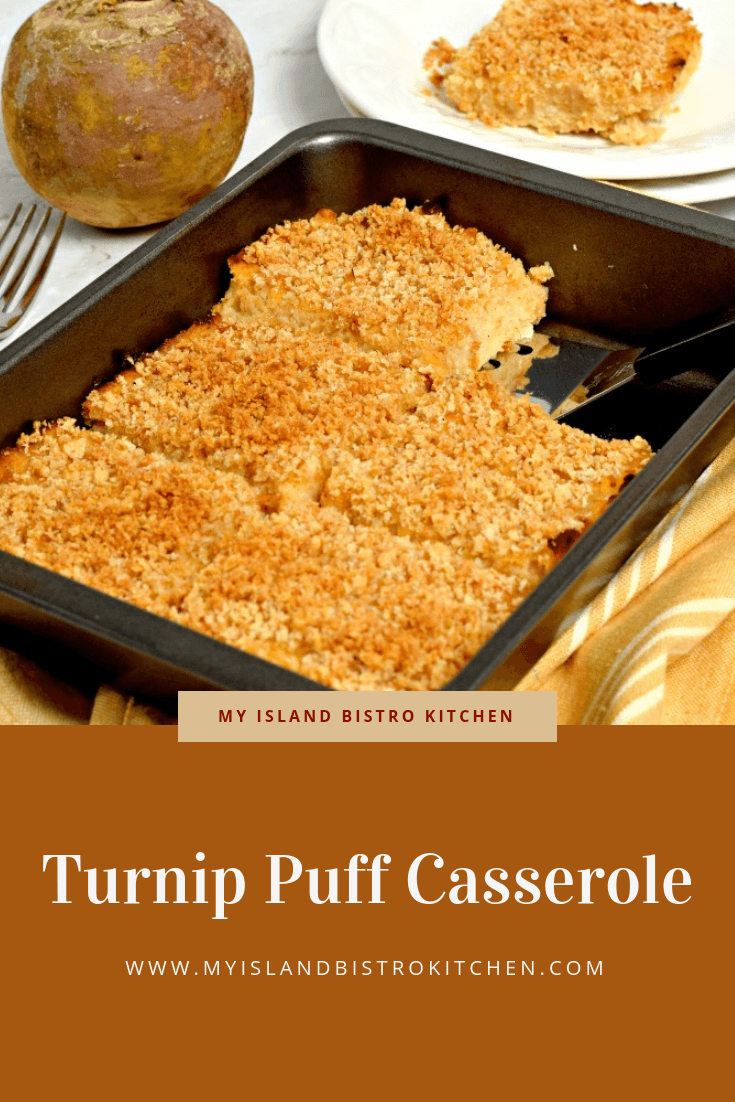
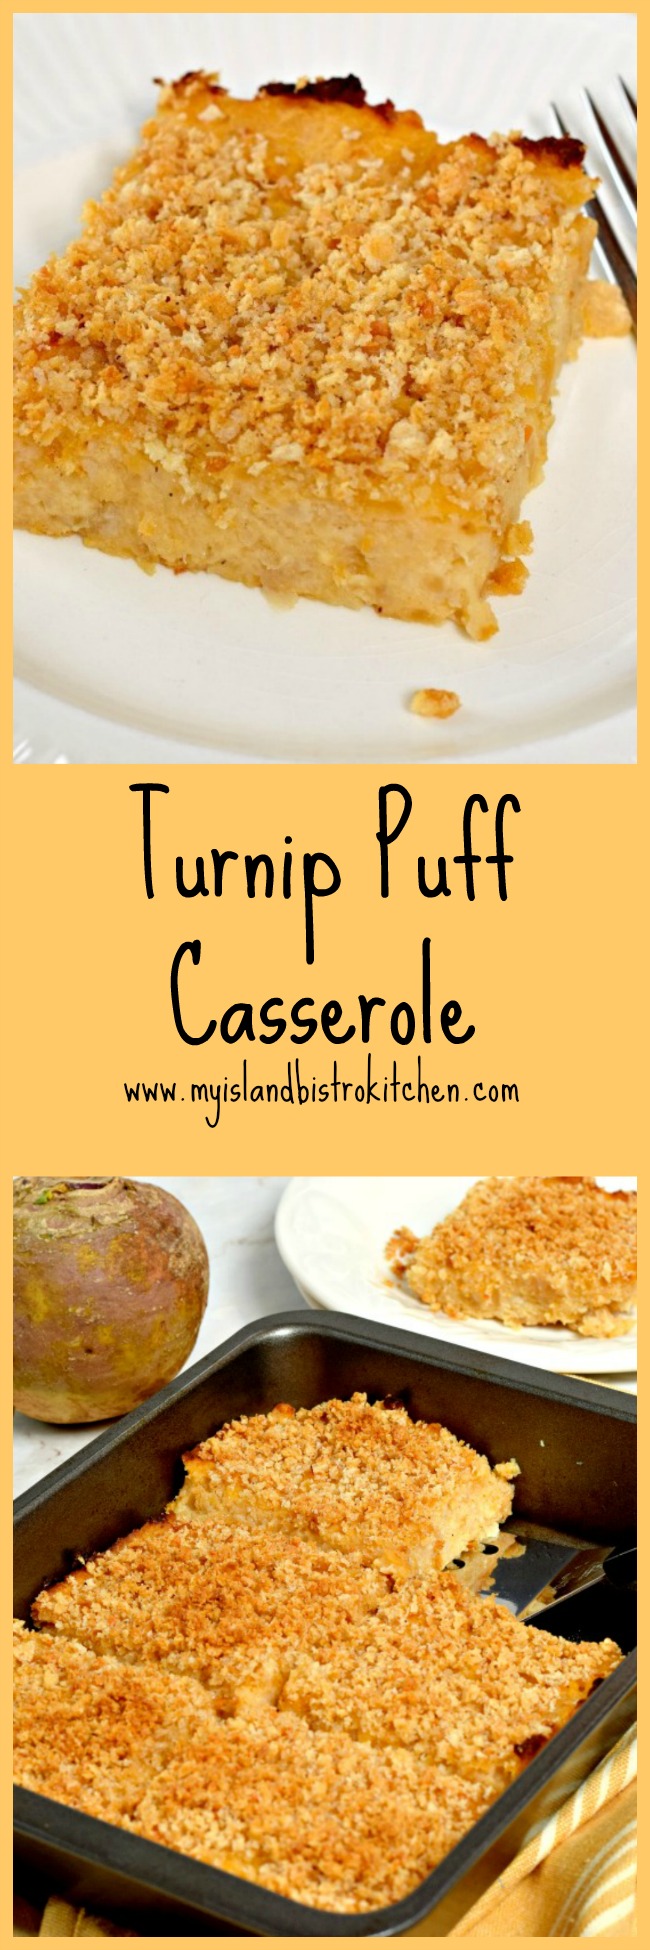
Turnip Puff Casserole
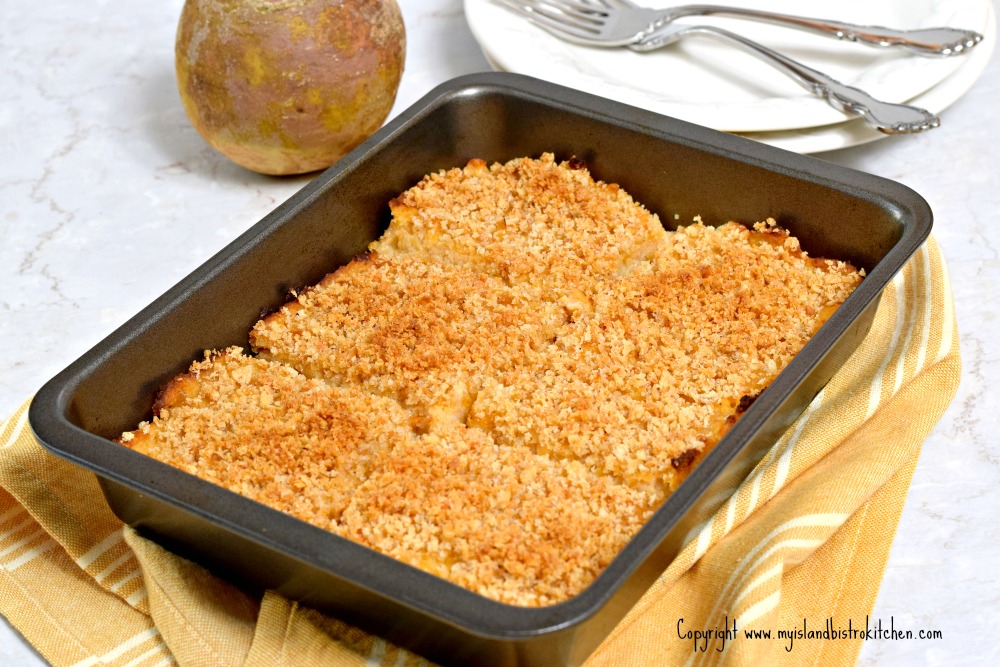
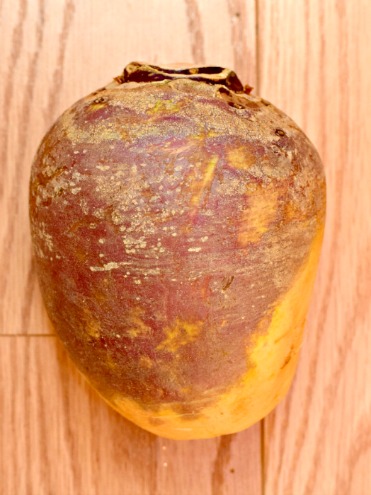
This turnip puff casserole is really a rutabaga puff casserole because, in fact, it is actually made with rutabaga, not turnip. However, all my life, I have known the root vegetable in the photo below as a “turnip”. Besides, I think turnip puff casserole sounds better than rutabaga puff casserole!
Now, even though turnips and rutabagas are kissing cousins in the mustard plant family, there are some key differences between the two.
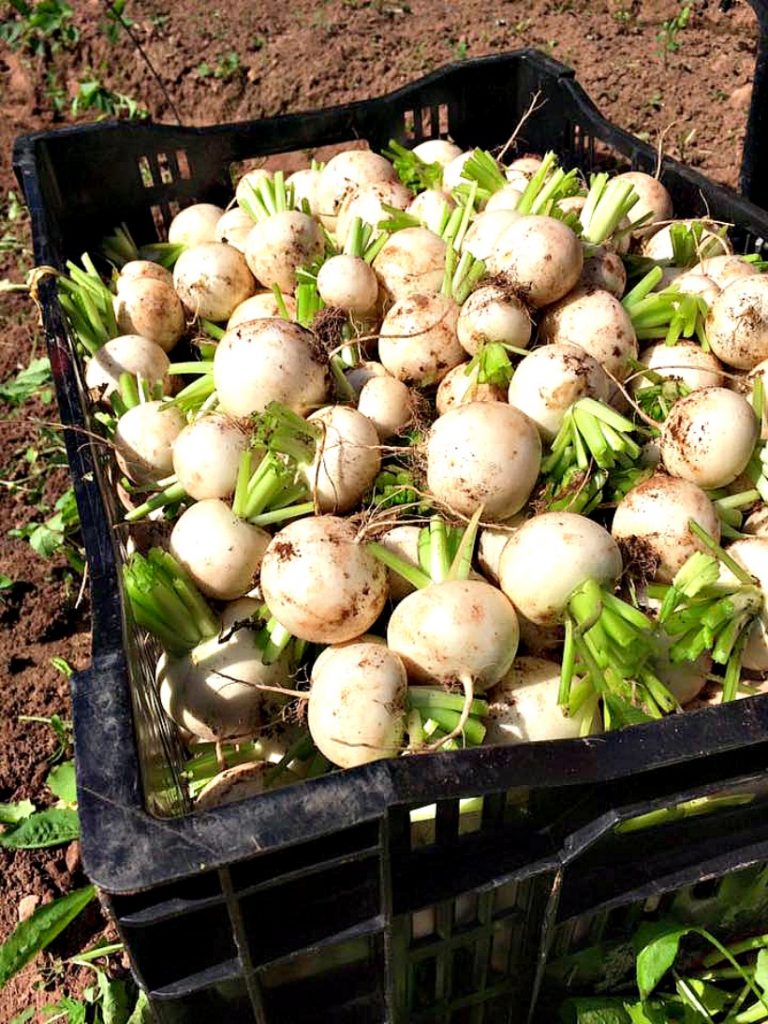
Turnips (shown in the photo above) are much smaller than rutabagas. They are usually anywhere from 2″ – 4″ in diameter compared to the much larger rutabagas that are typically 6″ or even more in diameter.
Rutabagas are much sweeter and turnips more bitter. Rutabagas have yellow flesh whereas turnips have white flesh. Rutabagas will have thicker outer skins than turnips and their exterior color will have a purple top and yellowy-beige bottom whereas turnips will have a white or white/purple outer skin. Rutabagas require much longer to grow and are more tolerant to cold than are turnips which is why you will often see turnips advertised as “summer” turnips. Because of their tolerance for the cold, rutabagas are often referred to as a “cold crop” and my grandparents always claimed the rutabagas (that they referred to as turnips) were no good until there had been a good frost before they were harvested. In fact, my grandmother always said the earlier they were harvested in the fall, the more bitter they were which is why, in the fall, she always added a small amount of sugar to the cooked rutabaga as she mashed it.
We often serve the golden-colored mashed rutabaga as a side vegetable to many meals but, sometimes (especially for special occasions), it’s nice to kick this side dish up a notch which is what I do when I make this turnip puff casserole. A rutabaga weighing approximately 1 lb, 7 oz will be required for this recipe. To the cooked rutabaga that is mashed really well to the texture of purée, I add some applesauce and brown sugar for sweetener, some onion to make it just a little bit savory, along with some cheese to boost the flavor. A hint of nutmeg and garlic provide additional flavor. An egg is added to bind the ingredients together and baking powder is added for leavening – hence the “puff” part of this side dish.
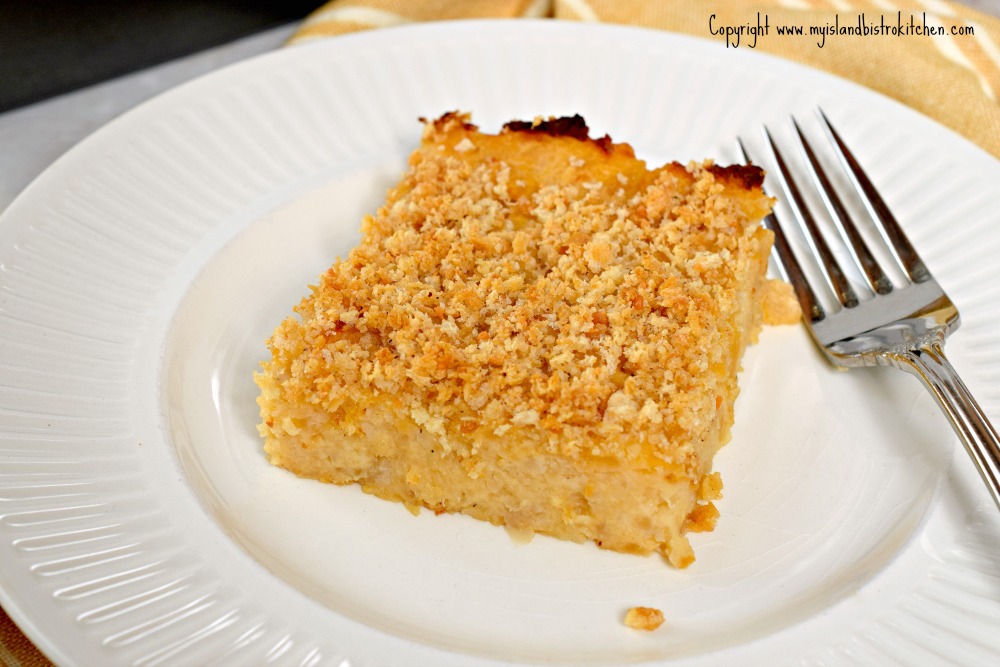
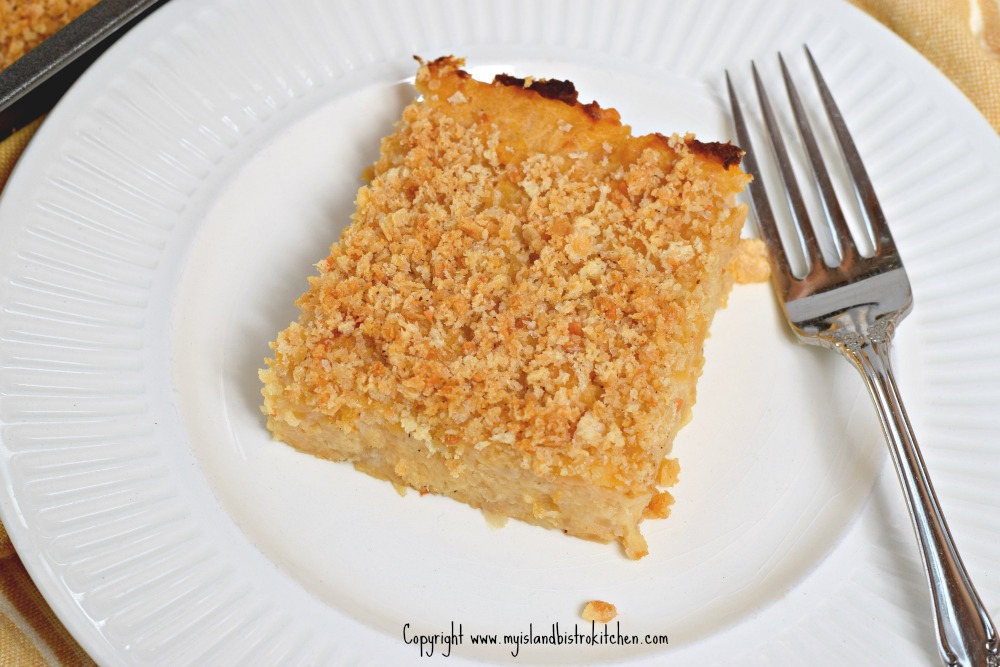
Now, I call this a “casserole” and, for photo demonstration purposes, have photographed a piece of it as a stand-alone on a plate. However, this is not a casserole I would make as a main meal entrée. Rather, it is a vegetable side dish so, instead of serving a scoop of mashed rutabaga with dinner, I cut out pieces of this casserole and serve it alongside other vegetables such as potatoes, carrots, and peas.
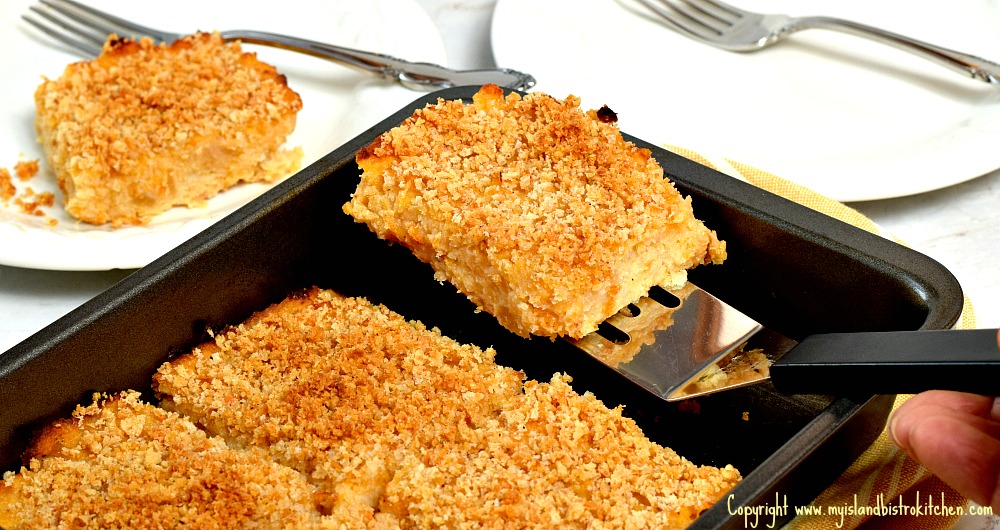
A casserole or baking pan with about a 1.5-quart capacity (or slightly less) is required for this casserole. I find the 6″x8″ baking pan that I have for my toaster oven works perfectly. I would not use a deep casserole dish for this recipe as it would not cut out well for serving purposes so use a shallow baking pan. This recipe will provide six standard-sized serving portions, the size shown in the photographs. If you are serving several other side vegetables for a dinner, or serving this buffet-style, smaller pieces may suffice…..but it’s tasty so don’t be surprised if there are requests for second helpings!
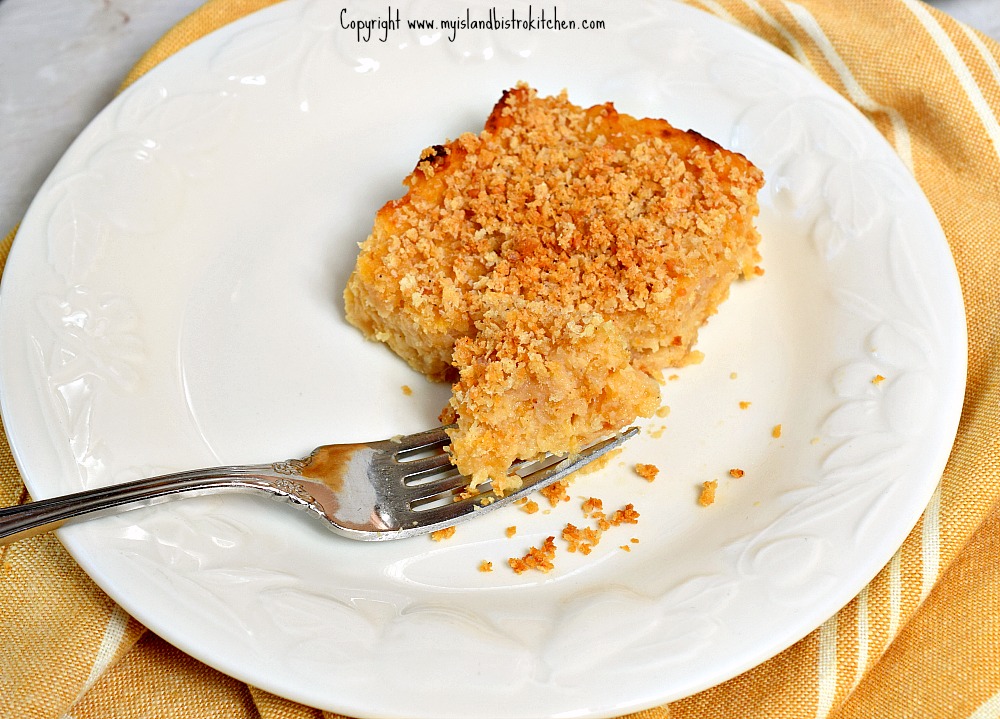
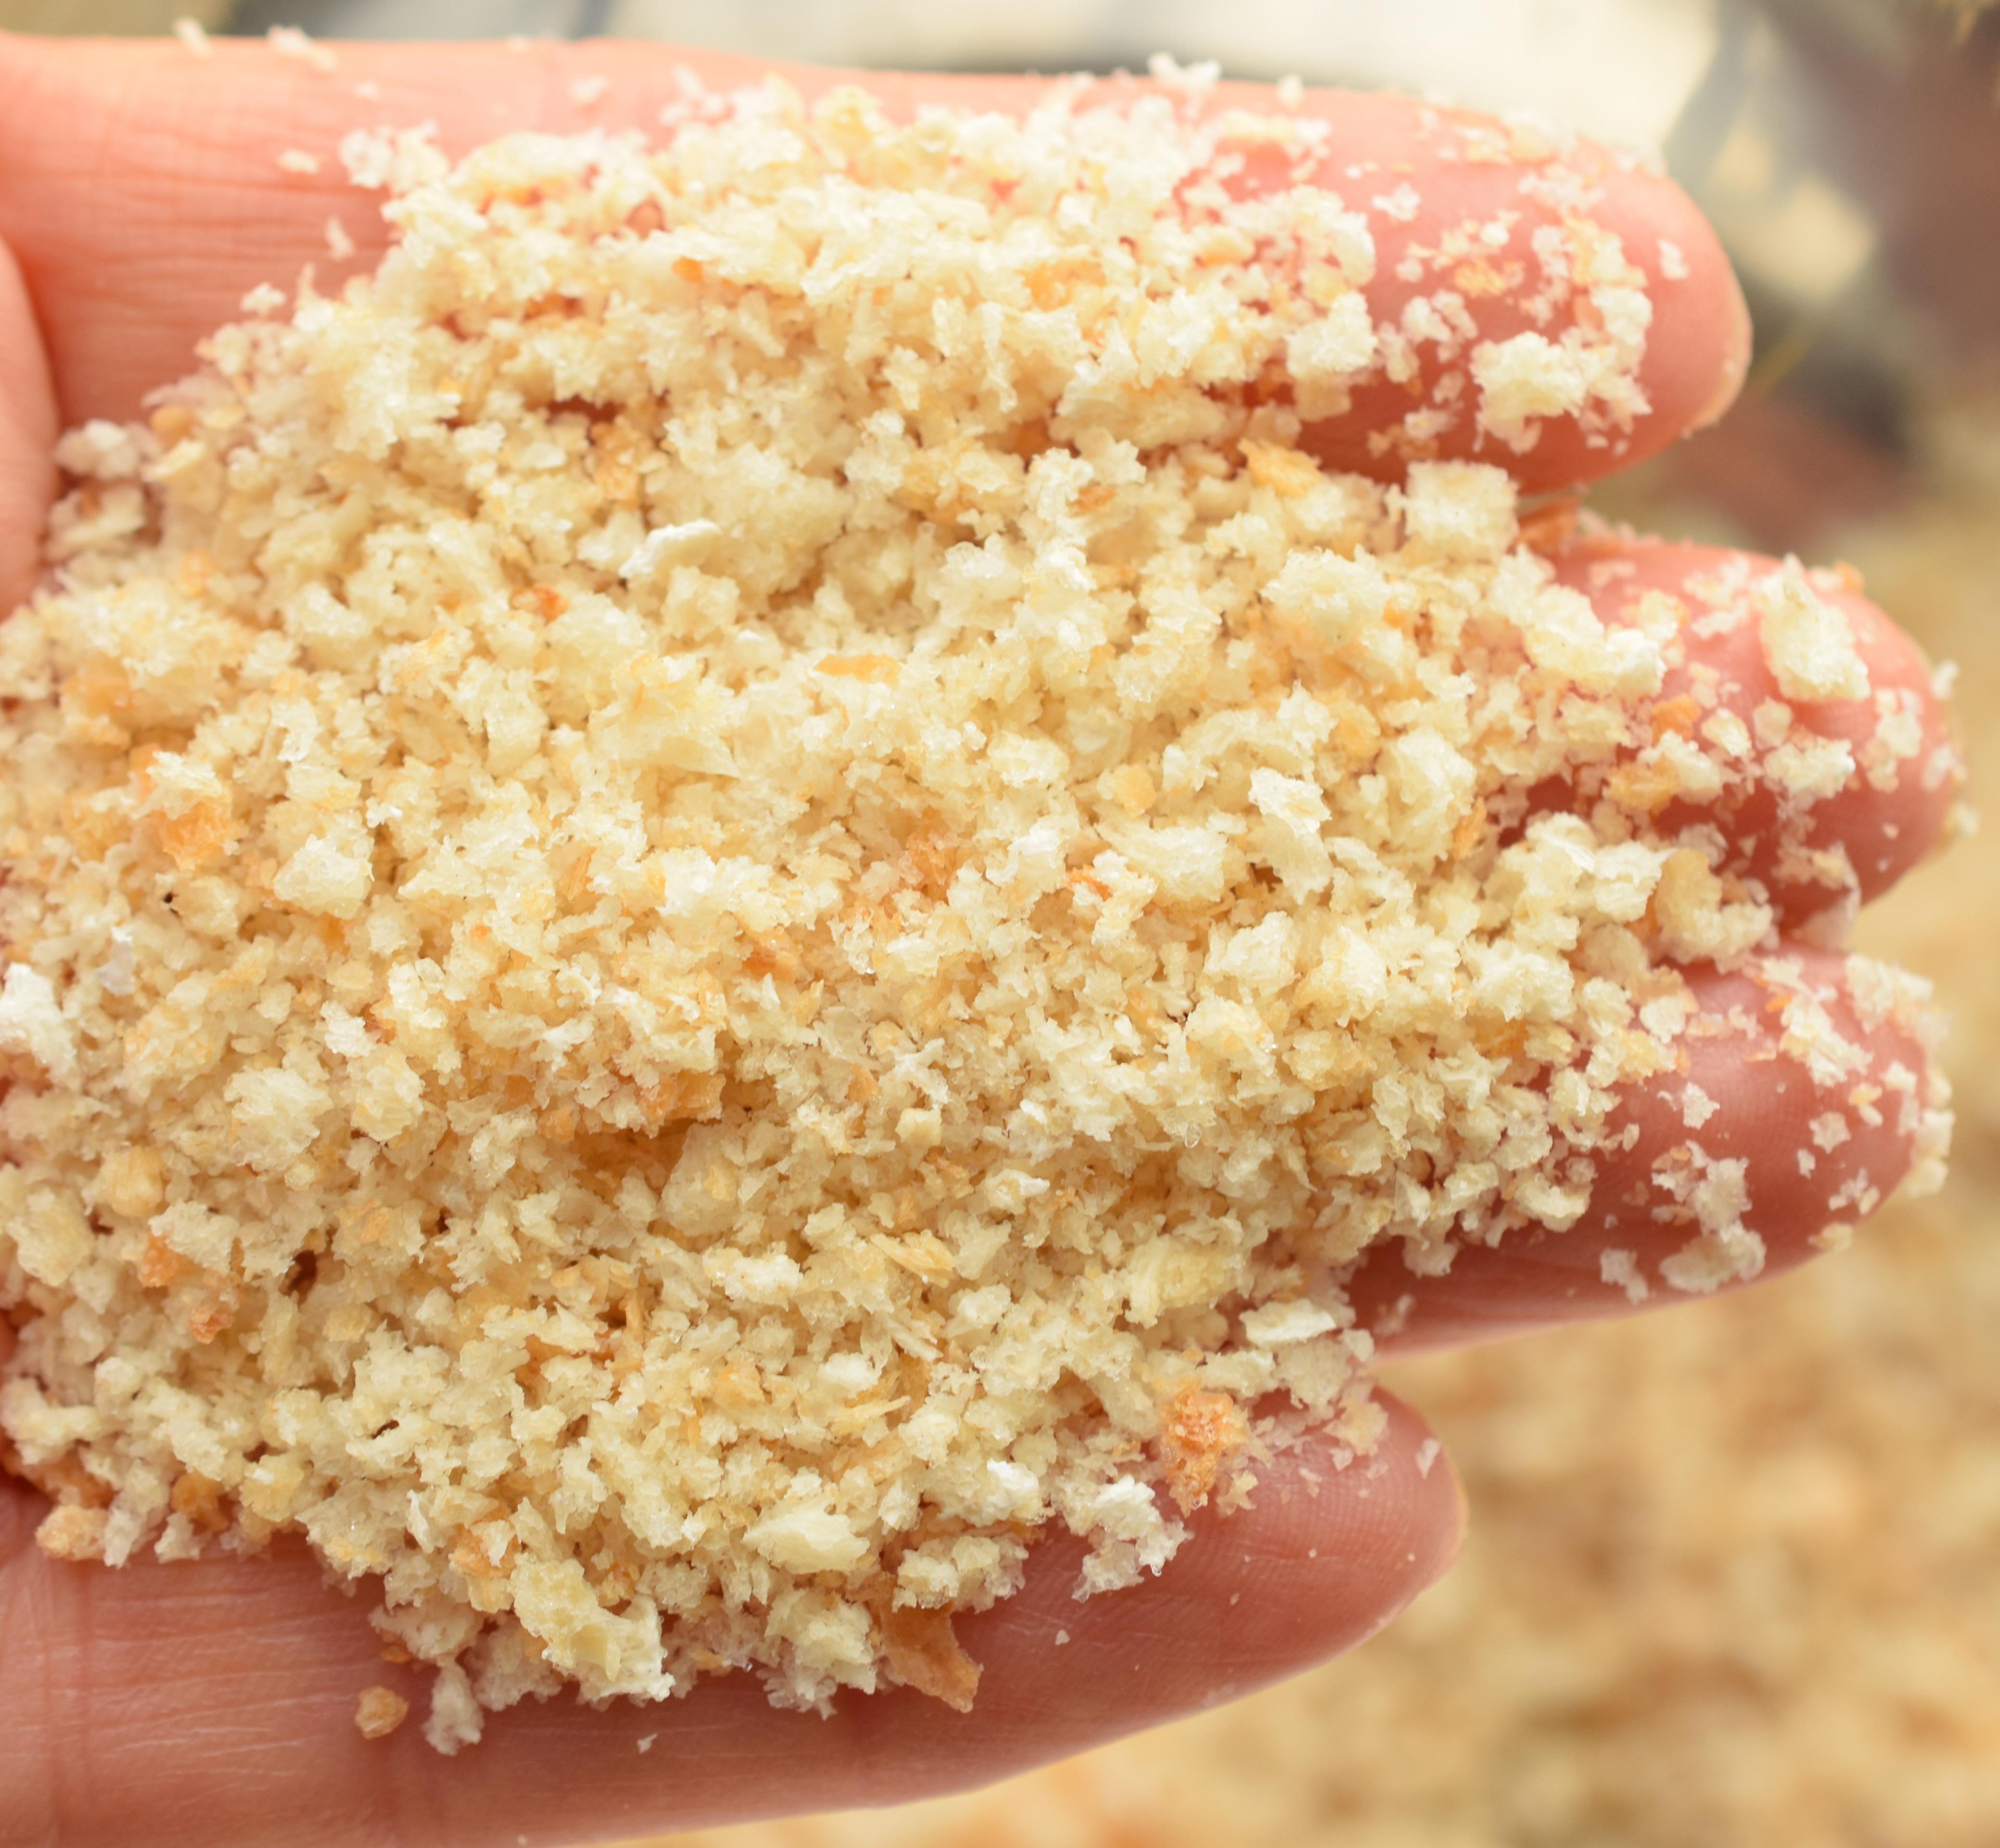
For the breadcrumb topping, I use crumbs that are not super fine as are found in commercial boxes or bags of crumbs. These are ones I crumb (in the food processor) from bread crusts and they are the consistency as shown in the photo below – not super-fine but not overly chunky.
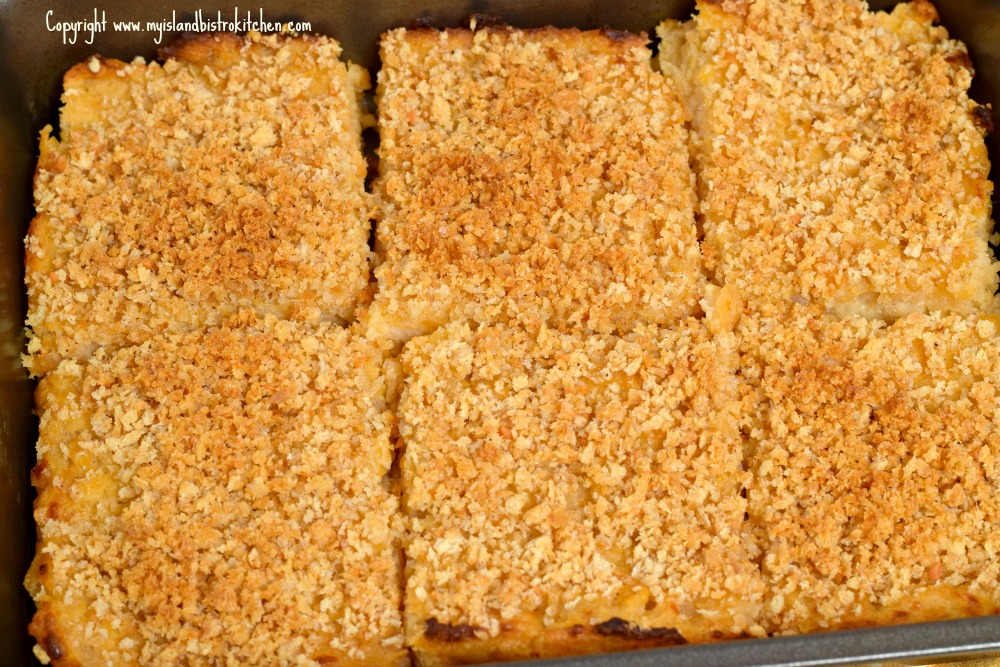
Bake this casserole in the oven for 30-35 minutes, just until the breadcrumb topping is lightly browned. Let stand for about 10 minutes before cutting into squares and serving.
This recipe is easily adapted to be gluten-free — simply replace the breadcrumbs called for in the recipe with those that are gluten-free and use gluten-free all purpose flour.
While this dish may be served at any time of the year, it is especially good at Easter, Thanksgiving, and Christmas with roast poultry, beef, or pork. This casserole may be made several hours in advance and refrigerated until needed.
[Printable Recipe Follows at end of Posting]
Turnip Puff Casserole
Ingredients:
2 cups warm cooked, mashed rutabaga (pre-cooked rutabaga weight apx. 1 lb 7 oz)
1/3 cup applesauce
1 tbsp grated onion
2 tbsp butter, softened
1 extra-large egg, lightly beaten
2 tbsp brown sugar
¼ tsp nutmeg
1/8 tsp garlic salt
¾ tsp baking powder
1 tbsp all-purpose flour (or gluten-free all-purpose flour)
2 tbsp finely grated Parmesan cheese
2 tbsp finely grated cheddar cheese
Salt and Pepper, to taste
½ cup fine bread crumbs
2 tsp finely grated Parmesan cheese
Pinch nutmeg
1½ tbsp melted butter
Method:
Preheat oven to 350°F. Grease a 6”x8” baking pan.
In medium-sized saucepan, combine the mashed rutabaga, applesauce, grated onion, butter, and egg. Mix well.
In small bowl, combine the brown sugar, nutmeg, garlic salt, baking powder, flour, Parmesan and cheddar cheese, and salt and pepper, to taste. Stir well into the rutabaga mixture. Transfer to prepared baking pan.
In small bowl, combine the bread crumbs, Parmesan cheese, and nutmeg with the melted butter. Sprinkle crumbs over rutabaga mixture. Bake, uncovered, for approximately 30-35 minutes, until lightly browned.
Serve hot as a side dish to any hot meal in which turnip/rutabaga would typically be served.
Yield: Apx. 6 servings
If you have made this recipe and enjoyed it and/or wish to share it with your friends and family, please do so on social media but be sure to share the direct link to this posting from my website.
Connect with My Island Bistro Kitchen on Social Media
Join the Facebook page for My Island Bistro Kitchen: https://www.facebook.com/MyIslandBistroKitchen/
Follow “the Bistro” on “X” (formerly Twitter): https://twitter.com/PEIBistro/
See the drool-worthy gallery of mouth-watering food photos from My Island Bistro Kitchen on Instagram: https://www.instagram.com/peibistro/
Follow “the Bistro” on Pinterest at https://www.pinterest.ca/peibistro/ and pin the Pinterest-ready photo found at the end of this post to your favorite Pinterest boards.
Turnip Puff Casserole
A vegetable side dish made with rutabaga purée, applesauce, cheese, and light seasonings. Perfect accompaniment to roast turkey, beef, or pork.
Ingredients
- 2 cups warm cooked, mashed rutabaga (pre-cooked rutabaga weight apx. 1 lb 7 oz)
- 1/3 cup applesauce
- 1 tbsp grated onion
- 2 tbsp butter, softened
- 1 extra-large egg, lightly beaten
- 2 tbsp brown sugar
- ¼ tsp nutmeg
- 1/8 tsp garlic salt
- ¾ tsp baking powder
- 1 tbsp all-purpose flour (or gluten-free all purpose flour)
- 2 tbsp finely grated Parmesan cheese
- 2 tbsp finely grated cheddar cheese
- Salt and Pepper, to taste
- ½ cup fine bread crumbs
- 2 tsp finely grated Parmesan cheese
- Pinch nutmeg
- 1½ tbsp melted butter
Instructions
- Preheat oven to 350°F. Grease a 6”x8” baking pan.
- In medium-sized saucepan, combine the mashed rutabaga, applesauce, grated onion, butter, and egg. Mix well.
- In small bowl, combine the brown sugar, nutmeg, garlic salt, baking powder, flour, Parmesan and cheddar cheese, and salt and pepper, to taste. Stir well into the rutabaga mixture. Transfer to prepared baking pan.
- In small bowl, combine the bread crumbs, Parmesan cheese, and nutmeg with the melted butter. Sprinkle crumbs over rutabaga mixture. Bake, uncovered, for approximately 30-35 minutes, until lightly browned. Serve hot as a side dish to any hot meal in which turnip/rutabaga would typically be served.
- [Copyright My Island Bistro Kitchen]
Schema/Recipe SEO Data Markup by Yummly Rich Recipes
https://myislandbistrokitchen.com/2017/03/23/turnip-puff-casserole/
Bistro Style Potato Patties

It’s inevitable, when you live in Prince Edward Island, that you’ll eat a lot of potatoes and find creative ways in which to serve them, including these PEI Potato Patties. That’s because there are lots and lots of spuds grown on our little Island with the rich red soil on Canada’s east coast. Continue reading Bistro Style Potato Patties
Rethink Beef Global Recipe Swap Campaign: Moussaka
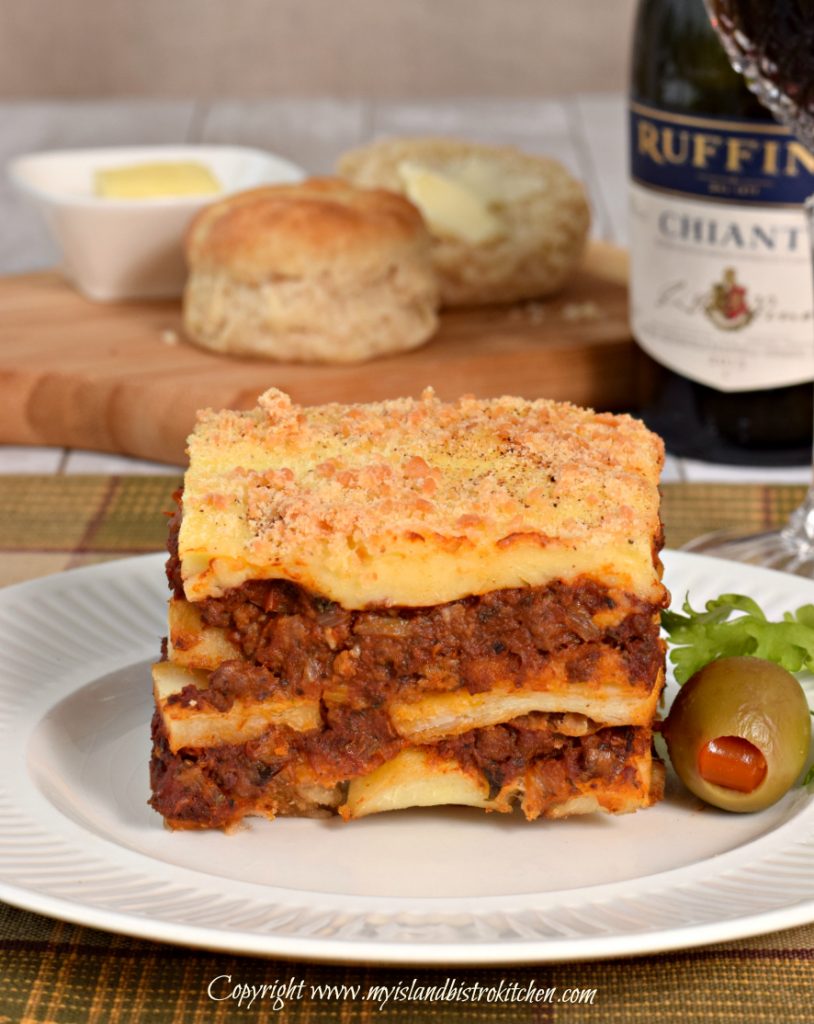
I have been invited by www.thinkbeef.ca to participate, as one of ten food bloggers from across Canada, in the Rethink Beef Global Recipe Swap Campaign to promote recipes using ground beef. Each blogger was asked to develop a recipe (using ground beef) that is inspired by his or her cultural background or a culinary adventure experienced. Each blogger was paired with another and the two exchanged their own recipe for the other to try. This posting involves showcasing my own recipe as well as a recipe from my swap partner, Jason Lee, who writes the blog, “Shut Up and Eat”.
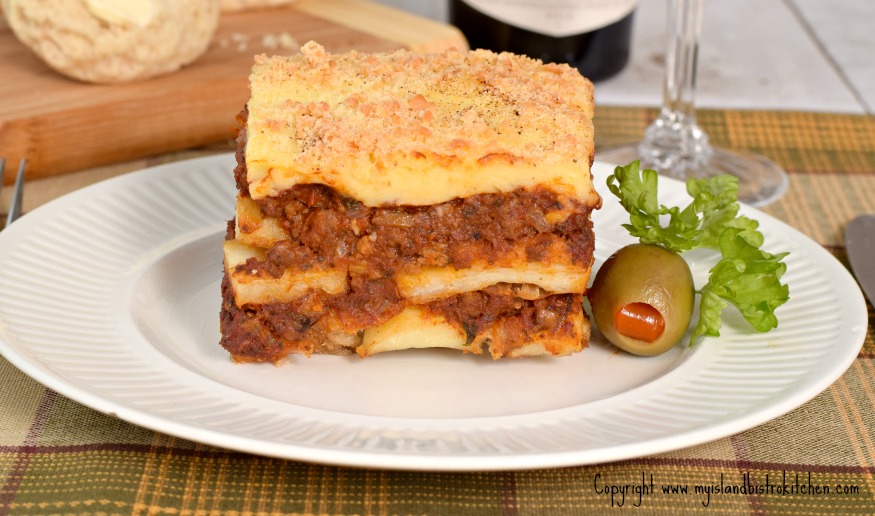
I frequently use ground beef in recipes and am never at a loss to come up with meal ideas to use this versatile meat. The recipe I have chosen is Moussaka. This is a one-dish meal typically characterized by ground meat, eggplant, and tomato sauce with a white sauce on top. So, I will begin with a discussion on why I chose Moussaka to feature ground beef, followed by some hints and tips on making this Greek-inspired dish, and will end with my experience cooking my recipe swap partner’s Beef and Coriander Dumplings inspired by his Chinese heritage. This posting has two recipes from two different cultures but both use ground beef as the main ingredient. Continue reading Rethink Beef Global Recipe Swap Campaign: Moussaka
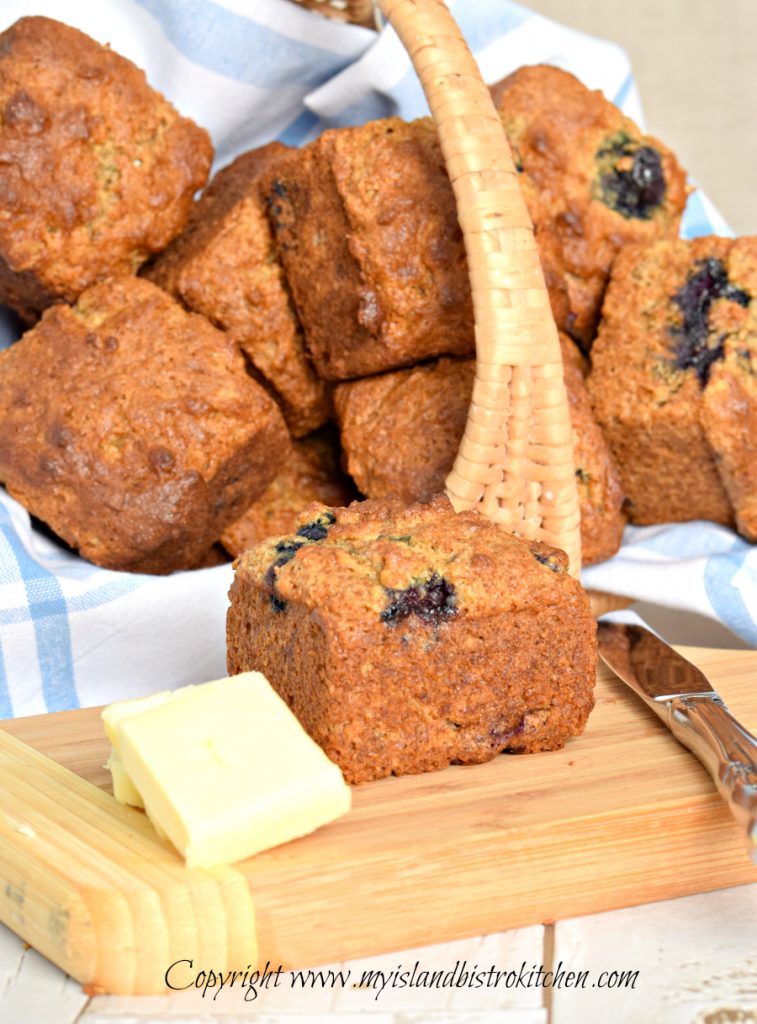
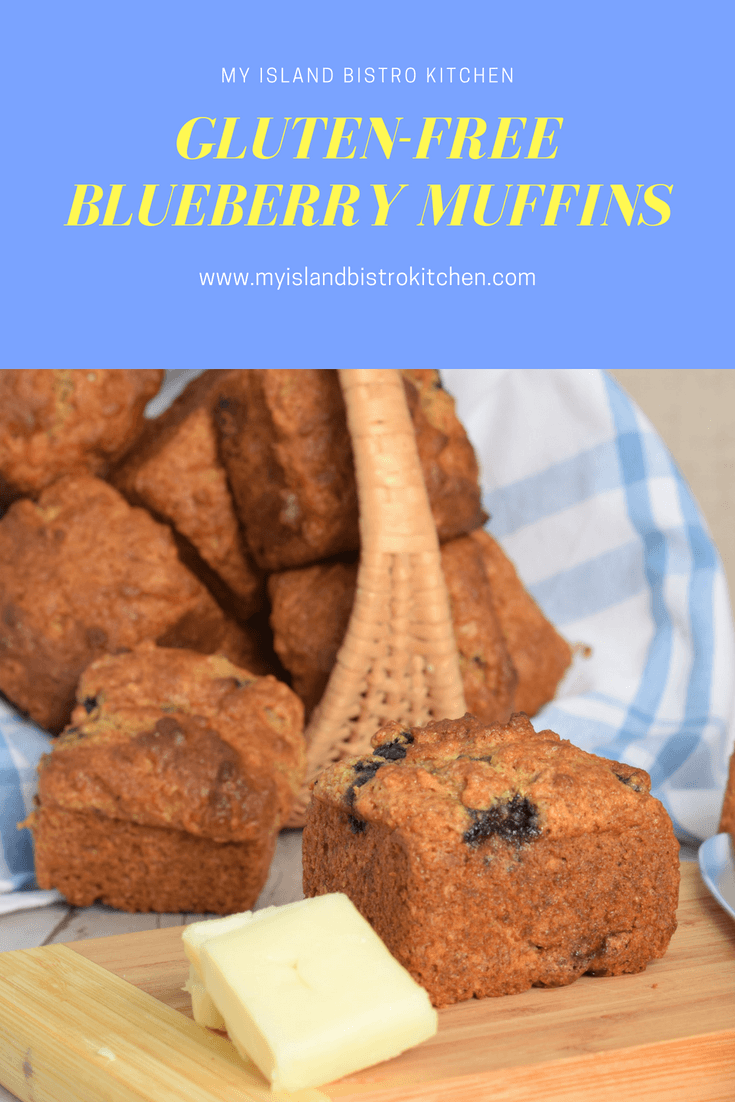
Gluten-free Blueberry Muffins
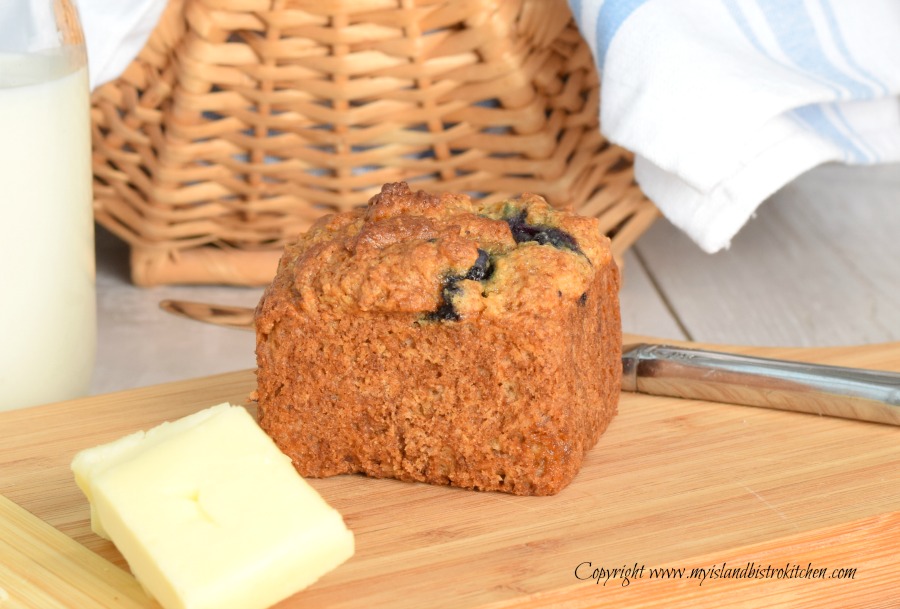
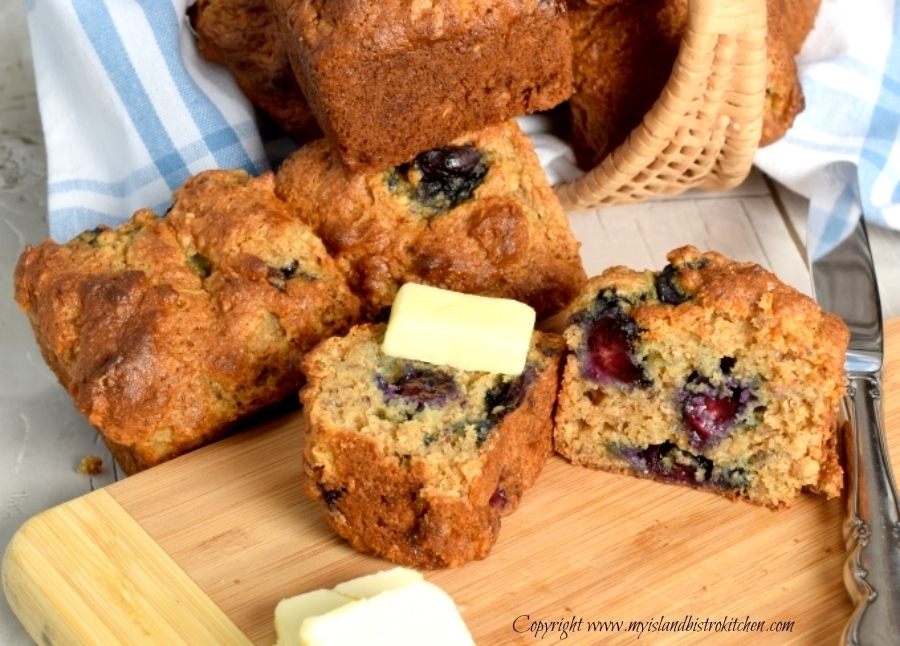
Blueberry muffins are a favorite and, while I have a “go-to” recipe for blueberry muffins that calls for regular gluten flour, I did not have one that was gluten-free. So, I set about developing one of my own and this is the result. My aim was to create a bistro, or deli-style, muffin and I am pleased with the end result.
I have discovered several things about gluten-free muffin making. First, some gluten-free flours have a “grainy”, or an almost “gritty”, texture to them and this will come through in the baked item. Some flours can result in, what I would describe as, gummy texture products. Hence, not all gluten-free flours yield good textured muffins. And, in my view, some gluten-free flours just don’t have a pleasing taste. Second, I find gluten-free flours seem to react differently than gluten flours to leavening. And, third, it often takes more ingredients and flavor boosters to end up with a tasty muffin that, as closely as possible, replicates a regular muffin. The remedies? It often takes a combination of more than one gluten-free flour to arrive at a satisfactory result. I add more leavening to my gluten-free muffins than I would usually add to gluten muffins to get that lovely gentle dome shape on the top that is so desired in muffin making. I bump up the spices and other flavorings (e.g., orange juice, maple syrup, orange rind, and applesauce) to get deep appetizing flavor.
My favorite gluten-free flours to use in muffins are a combination of coconut flour, almond flour, and gluten-free oat flour. I use these in combination with gluten-free all-purpose flour. I find that, if I use just the gluten-free all-purpose flour for the recipe’s entire flour content, the muffins often lack sufficient structure, flavor, and I sometimes detect a grainy/gritty texture. Adding a combination of other flours with different textures tends to solve this problem for me. The coconut and almond flours add beautiful flavor to baked foods. The addition of some potato starch and xanthan gum also helps with structure and crumb texture. With the availability of bulk food stores, it is easy and convenient to purchase just the amounts of specialty flours and starches called for in recipes rather than having to buy large, expensive bags of them. It’s also a better way to ensure fresher product.
My gluten-free blueberry muffin recipe calls for either eggnog, almond milk, or whole milk. I have tested this recipe with all three products and had equally good results but must say that the eggnog makes the richest muffins with the most pleasing and complex flavor. However, to make the muffins dairy-free, by all means, use almond milk – it works very well. The recipe calls for maple syrup and plain works fine. I had some lavender and chai infused maple syrup on hand and, since the lavender plays well with blueberries, it added a layer of pleasing flavor complexity. Some recipes just do require a layering of flavors and, sometimes, one might think that such a small amount of an ingredient called for could be left out of the recipe with no notice; however, I believe all called-for ingredients in a recipe contribute to the end result, even if they are just playing small supporting roles and are not the main star of the recipe.
This recipe for blueberry muffins makes one dozen muffins and the muffin cup size should be one-half cup capacity. I like to use my square muffin tins for many muffin recipes. Apart from simply liking the shape, the square muffins are easy to wrap, store, and freeze. Several times a year, I go on a muffin-making frolic, making different kinds of muffins for the freezer. I will bag up different varieties and freeze them so they are quick and easy to pull out for weekday coffeebreaks at work. If a muffin does not freeze well, it will not get added to my repertoire of batch-making muffins. These blueberry muffins freeze very well.
To get the desired dome-shaped muffin, the muffins need to start out in a relatively high oven temperature – i.e., 450F. Using the high temperature to begin the baking process allows the outside of the muffin to quickly set while still allowing the inside to continue to rise. This also gives that nice soft muffin top. As soon as I place the muffins in the oven, I drop the temperature back to 400F.
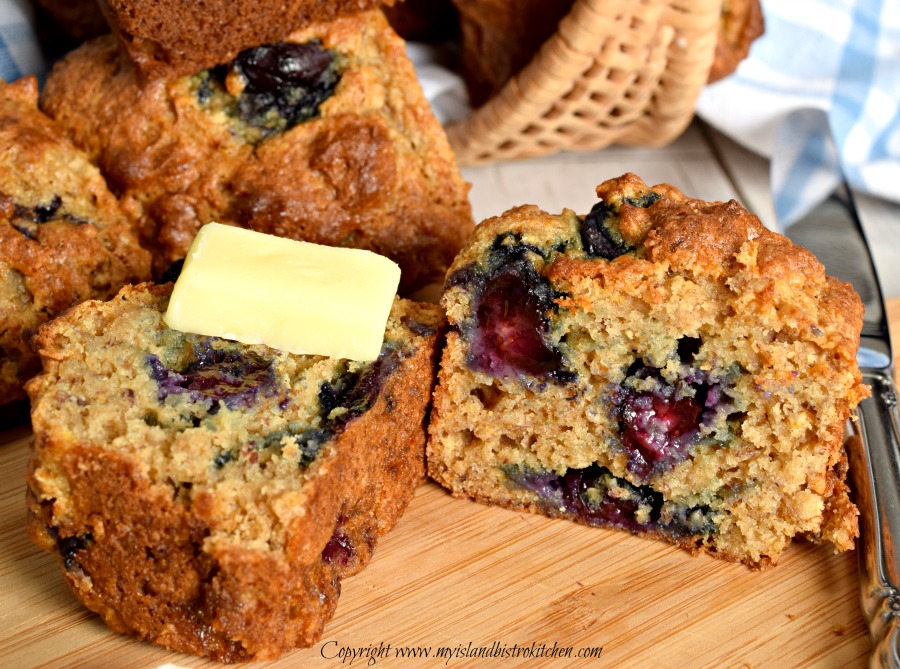
The texture of a good muffin should have a loose, coarse interior crumb, like those shown in the photograph above. Do not overmix muffin batter as this will cause the muffins to be tough, rubbery, and somewhat heavy. Stir only until the dry ingredients are just barely incorporated. In fact, in muffins in which I am adding fruit (which gets added last, using the “folding” technique), I don’t completely incorporate all the dry ingredients to the wet because, when the fruit is folded in, the dry ingredients will get further incorporated then. The batter should be lumpy, not smooth.
Muffins will quickly dry out if they are overbaked. I have found, in my oven, that about 20 minutes bakes these muffins perfectly but, as every oven is a bit different, I suggest checking the muffins at about the 16-17 minute mark and, just as soon as they spring back to a light finger touch, insert a cake tester or toothpick into the center of a muffin – if it comes out clean, the muffins are done. Let the baked muffins rest in the baking tin for 5-7 minutes, then transfer them to a wire rack to finish cooling.
[Printable recipe follows at end of posting]
The Bistro’s Gluten-free Blueberry Muffins
Ingredients:
1 cup gluten-free all-purpose flour
1/3 cup coconut flour
1/3 cup almond flour
¼ cup gluten-free oat flour
2 tbsp potato starch
1½ tsp xanthan gum
¼ cup gluten-free large flake rolled oats
5½ tsp baking powder
½ tsp baking soda
½ tsp salt
½ tsp cinnamon
¼ tsp nutmeg
¼ tsp allspice
1½ tbsp ground flax seed
2/3 cup brown sugar, lightly packed
1 tbsp finely grated orange rind
2 large eggs (room temperature), lightly beaten
2/3 cup eggnog, almond milk, or whole milk
½ cup vegetable oil
¼ cup orange juice
1½ tsp vanilla
2 tbsp maple syrup, plain or flavor-infused (e.g., lavender and chai)
1/3 cup applesauce
1 cup blueberries, fresh or frozen
Method:
Preheat oven to 450°F.
Use muffin tins with cups that have ½-cup holding capacity. Prepare muffin tins by greasing or spraying each muffin cup with cooking oil, ensuring the top of the muffin tin is also well greased.
In large bowl, combine the dry ingredients and grated orange rind by whisking very well. Make a well in the middle of the dry ingredients and set aside.
In separate bowl, or large measuring cup, whisk together the lightly beaten eggs, eggnog (or almond or whole milk), oil, orange juice, vanilla, maple syrup, and applesauce.
Pour wet ingredients into well in the dry ingredients. Combine just until dry ingredients are barely incorporated. Do not overmix. Gently fold in the blueberries.
Spoon batter into prepared muffin tins, filling almost to the muffin cup rim. Let batter sit for 5 minutes before baking.
Transfer muffins to oven and immediately reduce heat to 400°F. Bake 18-20 minutes or until muffins are just firm to the touch and a cake tester inserted into the center of a muffin comes out clean.
Let muffins rest in muffin cups for 5-7 minutes then gently remove from pan and transfer to wire rack to cool completely.
Yield: Apx. 12 muffins
The Bistro's Gluten-free Blueberry Muffins
These flavor-packed deli-style gluten-free blueberry muffins are light and moist with a tender crumb.Hard to believe they are gluten free!
Ingredients
- 1 cup gluten-free all-purpose flour
- 1/3 cup coconut flour
- 1/3 cup almond flour
- ¼ cup gluten-free oat flour
- 2 tbsp potato starch
- 1½ tsp xanthan gum
- ¼ cup gluten-free large flake rolled oats
- 5½ tsp baking powder
- ½ tsp baking soda
- ½ tsp salt
- ½ tsp cinnamon
- ¼ tsp nutmeg
- ¼ tsp allspice
- 1½ tbsp ground flax seed
- 2/3 cup brown sugar, lightly packed
- 1 tbsp finely grated orange rind
- 2 large eggs (room temperature), lightly beaten
- 2/3 cup eggnog, almond milk, or whole milk
- ½ cup vegetable oil
- ¼ cup orange juice
- 1½ tsp vanilla
- 2 tbsp maple syrup, plain or flavor-infused (e.g., lavender and chai)
- 1/3 cup applesauce
- 1 cup blueberries, fresh or frozen
Instructions
- Preheat oven to 450°F.
- Use muffin tins with cups that have ½-cup holding capacity. Prepare muffin tins by greasing or spraying each muffin cup with cooking oil, ensuring the top of the muffin tin is also well greased.
- In large bowl, combine the dry ingredients and grated orange rind by whisking very well. Make a well in the middle of the dry ingredients and set aside.
- In separate bowl, or large measuring cup, whisk together the lightly beaten eggs, eggnog (or almond or whole milk), oil, orange juice, vanilla, maple syrup, and applesauce.
- Pour wet ingredients into well in the dry ingredients. Combine just until dry ingredients are barely incorporated. Do not overmix. Gently fold in the blueberries.
- Spoon batter into prepared muffin tins, filling almost to the muffin cup rim. Let batter sit for 5 minutes before baking.
- Transfer muffins to oven and immediately reduce heat to 400°F. Bake 18-20 minutes or until muffins are just firm to the touch and a cake tester inserted into the center of a muffin comes out clean.
- Let muffins rest in muffin cups for 5-7 minutes then gently remove from pan and transfer to wire rack to cool completely.
Notes
Please be sure to read the entire blog posting that accompanies this recipe as it contains several tips and hints on making gluten-free muffins.
Schema/Recipe SEO Data Markup by Yummly Rich Recipes
https://myislandbistrokitchen.com/2017/03/01/gluten-free-blueberry-muffins/
For other great gluten-free muffin recipes from My Island Bistro Kitchen, click on the links below:
Gluten-free Banana Date Muffins
Deli-style Gluten-Free Rhubarb Granola Muffins
The Ultimate Gluten-free Zucchini Date Muffins
Gluten-Free Pumpkin-Mincemeat Muffins
Deli-Style Gluten-Free Beet Muffins
Pin Me to Pinterest!

Chicken and Mushroom Crepes
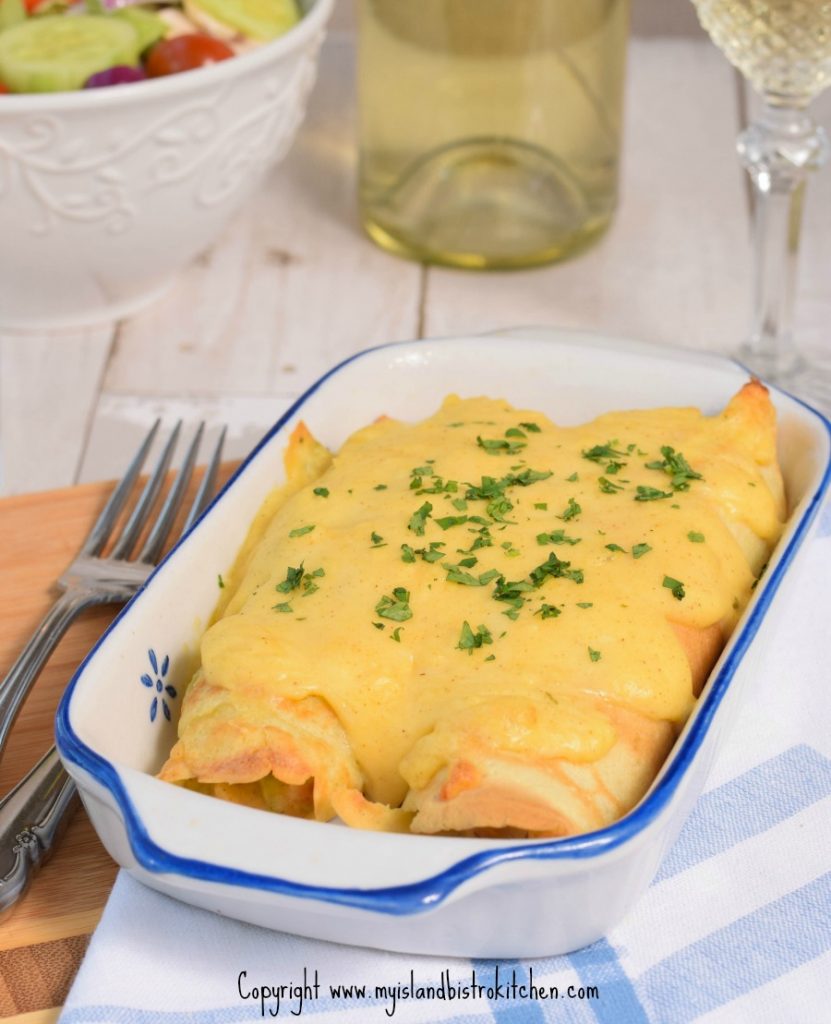
Crepes filled with delectable fillings are one of my favorite meals. Chicken and Mushroom Crepes with Cheese Sauce are a real treat and a lot easier to make than one might think. At one time considered the fare of stylish restaurants and bistros, they can actually be very easily made at home. Continue reading Chicken and Mushroom Crepes
Ham Lentil Soup Recipe
Today, I am sharing my newly-developed recipe for Ham Lentil Soup that is made from a leftover ham bone, broth, and ham. Continue reading Ham Lentil Soup Recipe
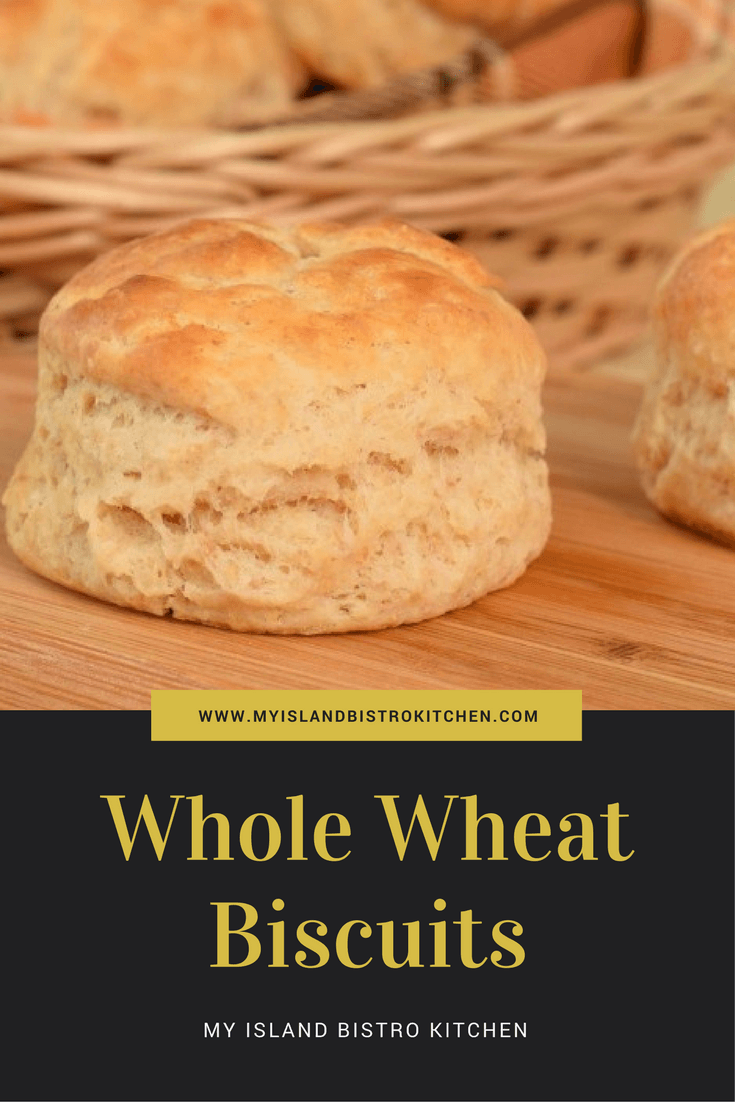
Whole Wheat Biscuits Recipe
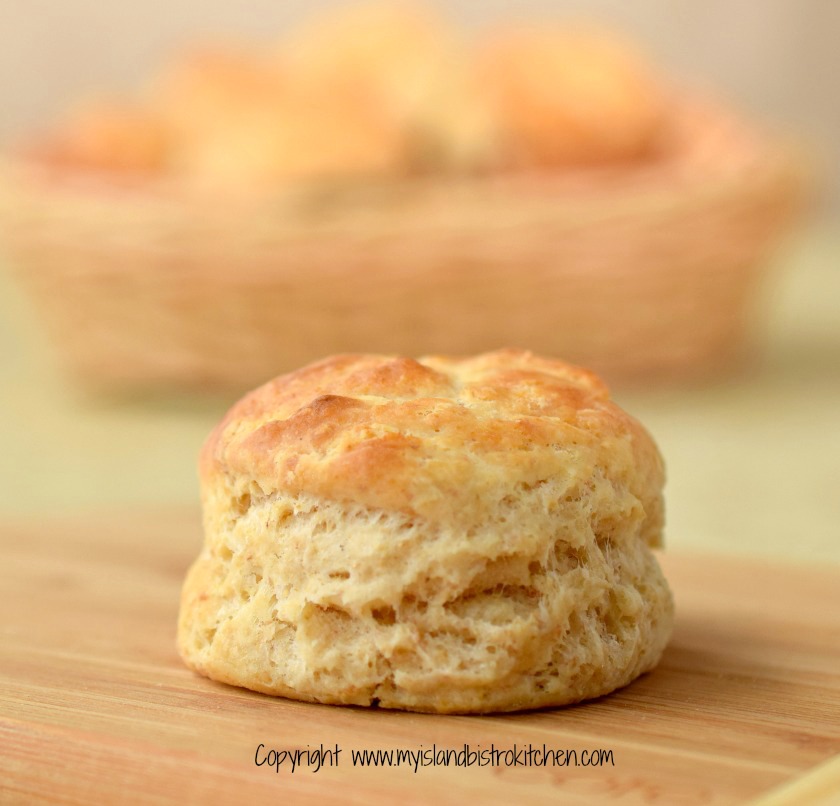
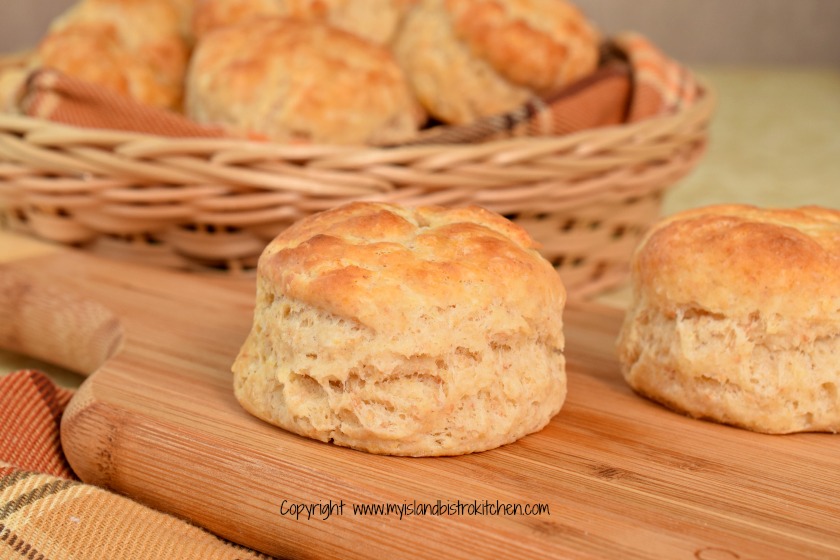
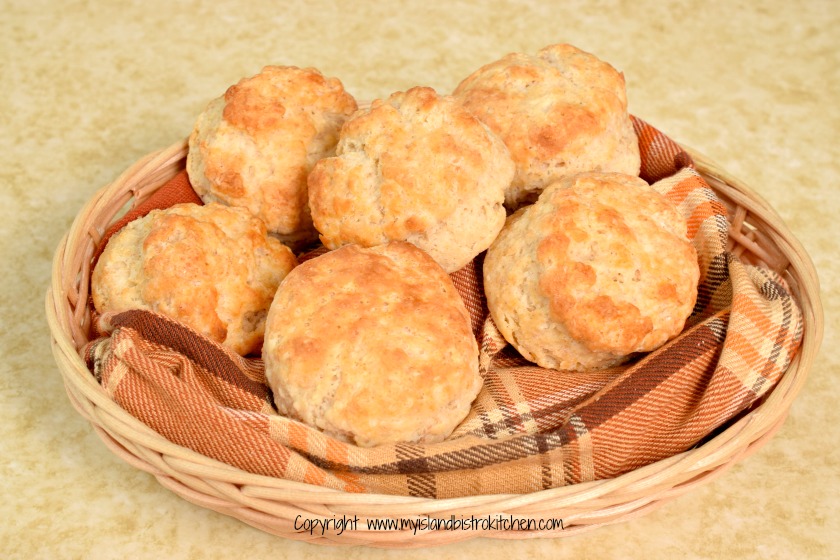
For me, one of the hallmarks of a wonderful homemade meal is a fresh batch of tender and flavorful whole wheat biscuits on the table! These are particularly good with baked beans (especially when the biscuits are slathered with molasses!) or, well, just about anything! Biscuits are a form of a quick bread so they don’t take long to whip up and, best of all, they only call for pantry staples like flour, baking powder, salt, butter, milk and sometimes a small amount of sugar.
My recipe calls for a combination of flours – 1 1/4 cups of all-purpose flour and 3/4 cup whole wheat flour. I find that using all whole wheat flour does not yield the tender texture that can be achieved by blending all-purpose flour with the whole wheat. Shortening or butter can be used as the fat for biscuits; however, nothing beats butter for flavor!
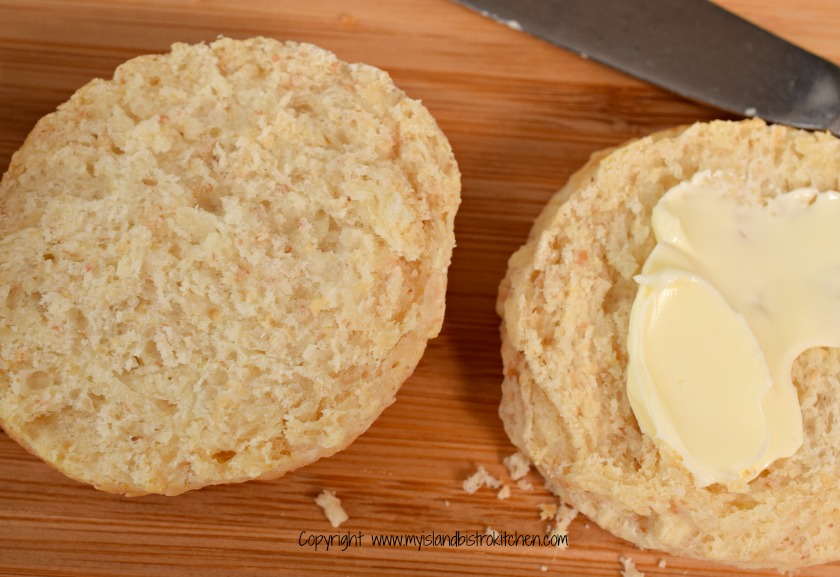
These biscuits have a different flavor and texture than my standard white biscuits and these are made with buttermilk (or sour milk) instead of with whipping cream and whole milk (click here for the recipe for my white tea biscuits). They are two distinctly different types of biscuits. The whole wheat ones are slightly more “rustic” while the white biscuits are very refined. I tend to make the whole wheat biscuits to serve alongside a more rustic meal like beans, chili, and stews, for example. My regular “go-to” standard biscuits are the white tea biscuits and, for sure, they are the ones I use for afternoon teas because of their light, tender crumb.
My hints for making biscuits are –
- Use cold ingredients. In fact, it’s a good idea to put the flour mixture in the refrigerator for about an hour or so so that it is cold to start with.
- Use cold butter or even frozen butter which is what I use. That cold butter will give flaky tenderness to the biscuits. The butter can be cut into the flour mixture with a pastry cutter but my preference is to hold a grater (with large holes) over the flour and grate the butter right into the flour. Stop and give the mixture a stir after grating some butter to integrate and distribute it and then keep on grating the rest of the butter. This helps to ensure that the butter gets incorporated right into the cold flour. If you grate the butter into a separate bowl, it will tend to clump together, especially as you transfer it to the flour mixture.
- Only mix the liquid and dry ingredients as minimally as possible and do so gently and with a fork. Over-mixing will result in over-developing the flour’s gluten and yield tough biscuits. Just mix enough that the flour is incorporated and the batter starts to pull away from the sides of the bowl.
- Let the batter rest in the bowl for 1-2 minutes. This allows the ingredients to settle (they need to get to know each other!).
- Turn the batter out on to a lightly floured surface. Knead the mixture 8-10 times only. Do NOT over-knead as over-working the dough will “stir up” the gluten in the flours and will yield dense, tough biscuits. After kneading, little bits of the butter should still be visible in the dough. With biscuits, you are not “blending” ingredients but, rather, are simply barely mixing them just enough so that the dough sticks together.
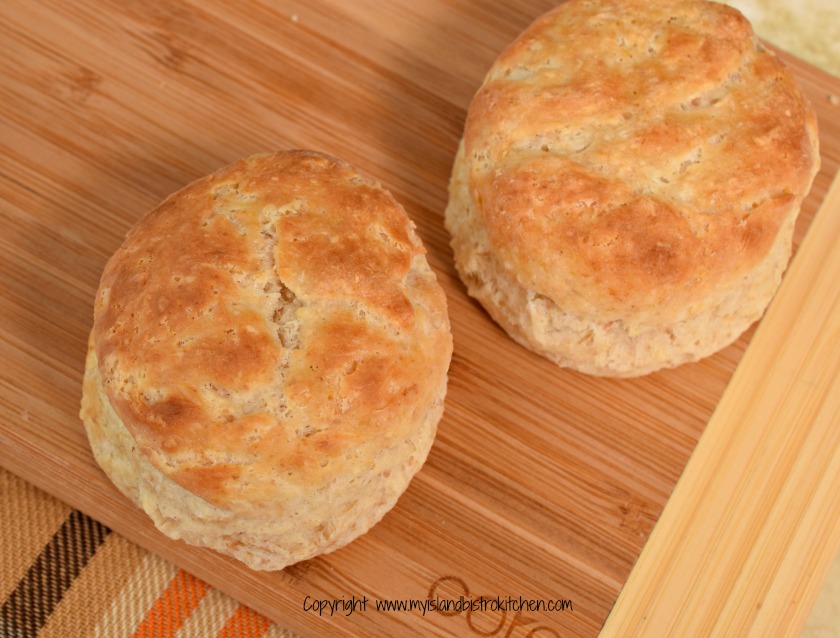
- Use a rolling pin, or simply pat the dough to about 1″ thickness. Use desired size of biscuit cutter. A good, general size cutter for biscuits is a 2″ cutter. Flour the cutter before cutting each biscuit and cut the biscuits as close together as possible to minimize the amount of dough that will have to be gathered up and patted down again for the next cutting – remember, the goal is to minimize the amount of “working the dough” that happens . Make sure the cutter is sharp-edged and do not twist the cutter when cutting out the biscuits. Cut straight down into the dough. Twisting the cutter while cutting the biscuits can be a cause of biscuits unevenly rising and hence spreading during the baking process – that’s when they lose their shape and go downhill to the point that they may look like a ski slope!
- Once the first cut of biscuits is made from the dough, gather up the remaining bits and pat it down to 1″ thickness and continue to cut out remaining biscuits. Again, resist the urge to knead the dough any more than absolutely necessary to pull it together.
- Bake the biscuits in a hot oven (450F) until they start to turn golden brown on top, about 14-16 minutes, generally.
Biscuits are best served slightly warm so make them just before the meal.
[Printable recipe follows at end of posting]
Whole Wheat Biscuits
Ingredients:
1¼ cups all-purpose flour
¾ cup whole wheat flour
4 tsp baking powder
1 tsp salt
1 tbsp granulated sugar
6 tbsp cold, unsalted butter, cut into small chunks
1 cup buttermilk or sour milk*
1-2 tbsp milk for brushing tops of biscuits
Method:
Preheat oven to 450°F. Line baking sheet with parchment paper.
In large bowl, whisk together the flours, baking powder, salt, and sugar.
Grate cold (or frozen) butter over flour in bowl, or use a pastry cutter to cut in the butter until mixture resembles coarse crumbs.
Make a well in the center of the ingredients. Pour milk into well in dry ingredients. Using a fork, mix ingredients together just until flour mixture is incorporated. Do not overmix. Mixture will be a soft, moist batter.
Let batter rest in bowl for 1-2 minutes then turn out onto a floured surface. Knead dough 8-10 times. Do not over-knead.
Roll or pat dough to desired thickness, about 1” thick. Using a 2” floured round cookie cutter, cut out biscuits, re-flouring cutter before cutting out each biscuit. Gather up remaining dough, pat down to about 1” thick and cut out biscuits.
Using a small spatula, transfer the biscuits to prepared baking sheet, placing them about 1” to 1½ “ apart. Prick tops of biscuits with fork tines and lightly brush with milk, if desired. Bake for 14-16 minutes or until lightly browned on top. Remove from oven and let cool on baking sheet for 3-4 minutes then transfer to wire rack.
Biscuits may also be placed close together in a greased baking pan with sides. Baking the biscuits in this manner will yield soft-sided biscuits.
*To sour milk, place 1 tbsp white vinegar in a measuring cup. Add enough milk to make 1 cup. Stir. Let stand for 5 minutes to sour.
Yield: Apx. 12-13 – 2” biscuits

Whole Wheat Biscuits Recipe
Delicious easy-to-make classic whole wheat biscuits that are tender and flavorful.
Ingredients
- 1¼ cups all-purpose flour
- ¾ cup whole wheat flour
- 4 tsp baking powder
- 1 tsp salt
- 1 tbsp granulated sugar
- 6 tbsp cold, unsalted butter, cut into small chunks
- 1 cup buttermilk or sour milk*
- 1-2 tbsp milk for brushing tops of biscuits
Instructions
- Preheat oven to 450°F. Line baking sheet with parchment paper.
- In large bowl, whisk together the flours, baking powder, salt, and sugar. Grate cold (or frozen) butter over flour in bowl, or use a pastry cutter to cut in the butter until mixture resembles coarse crumbs. Make a well in the center of the ingredients.
- Pour milk into well in dry ingredients. Using a fork, mix ingredients together just until flour mixture is incorporated. Do not overmix. Mixture will be a soft, moist batter. Let batter rest in bowl for 1-2 minutes then turn out onto a floured surface. Knead dough 8-10 times. Do not over-knead.
- Roll or pat dough to desired thickness, about 1” thick. Using a 2” floured round cookie cutter, cut out biscuits, re-flouring cutter before cutting out each biscuit. Gather up remaining dough, pat down to about 1” thick and cut out biscuits.
- Using a small spatula, transfer the biscuits to prepared baking sheet, placing them about 1” to 1½ “ apart. Prick tops of biscuits with fork tines and lightly brush with milk, if desired. Bake for 14-16 minutes or until lightly browned on top. Remove from oven and let cool on baking sheet for 3-4 minutes then transfer to wire rack. Biscuits may also be placed close together in a greased baking pan with sides. Baking the biscuits in this manner will yield soft-sided biscuits.
- *To sour milk, place 1 tbsp white vinegar in a measuring cup. Add enough milk to make 1 cup. Stir. Let stand for 5 minutes to sour.
- Copyright My Island Bistro Kitchen
Schema/Recipe SEO Data Markup by Yummly Rich Recipes
https://myislandbistrokitchen.com/2017/02/07/whole-wheat-biscuits-recipe/
If you have made this recipe and enjoyed it and/or wish to share it with your friends and family, please do so on social media but be sure to share the direct link to this posting from my website.
Connect with My Island Bistro Kitchen on Social Media
Join the Facebook page for My Island Bistro Kitchen: https://www.facebook.com/MyIslandBistroKitchen/
Follow “the Bistro” on “X” (formerly Twitter): https://twitter.com/PEIBistro/
See the drool-worthy gallery of mouth-watering food photos from My Island Bistro Kitchen on Instagram: https://www.instagram.com/peibistro/
Follow “the Bistro” on Pinterest at https://www.pinterest.ca/peibistro/ and pin the Pinterest-ready photo found at the end of this post to your favorite Pinterest boards.
You may also enjoy these other Biscuit recipes from My Island Bistro Kitchen:
Tea Biscuits
Buttery Buttermilk Biscuits
Rustic Oat Bran Biscuits
Pin This Whole Wheat Biscuit Recipe To Pinterest!
The Bistro’s Beef Pot Pie
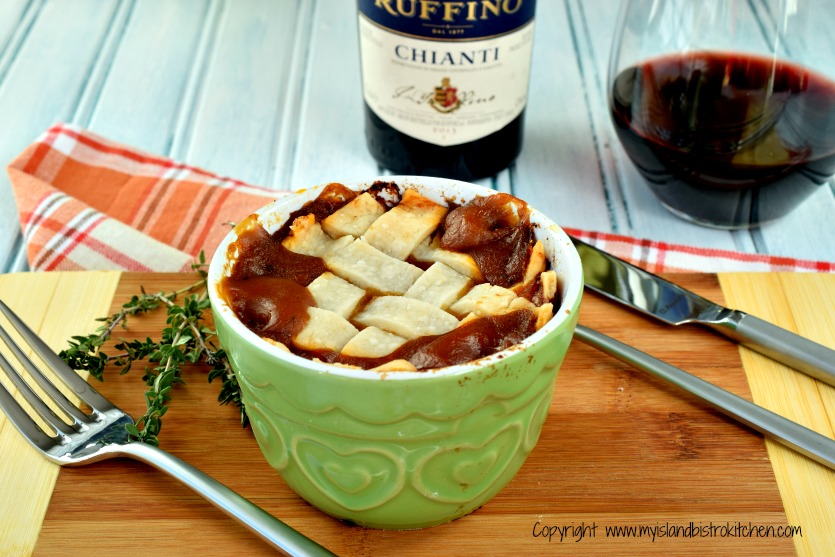
I am a huge fan of cooking with the intent of having leftovers for several meals. It’s great to have cold leftover turkey, ham, or roast beef but, after a couple of days, well, it can get a little monotonous. I don’t like to throw out food so the alternative is to find other creative ways to use the leftovers and stretch the food budget. Sometimes, as in the case of a large family, perhaps the leftovers don’t span far enough unless they are used in a way that extends them.
So, whether it’s a case of having leftover meat you’re tired of or not having enough left to plate as straight cold meat slices to make another meal, my recipe for Beef Pot Pie will be the answer for leftover roast beef. Just make sure you make an extra 1 1/3 cups of gravy when preparing that roast beef dinner so you will have enough gravy to make this recipe. Continue reading The Bistro’s Beef Pot Pie
Twice-baked Potatoes Recipe
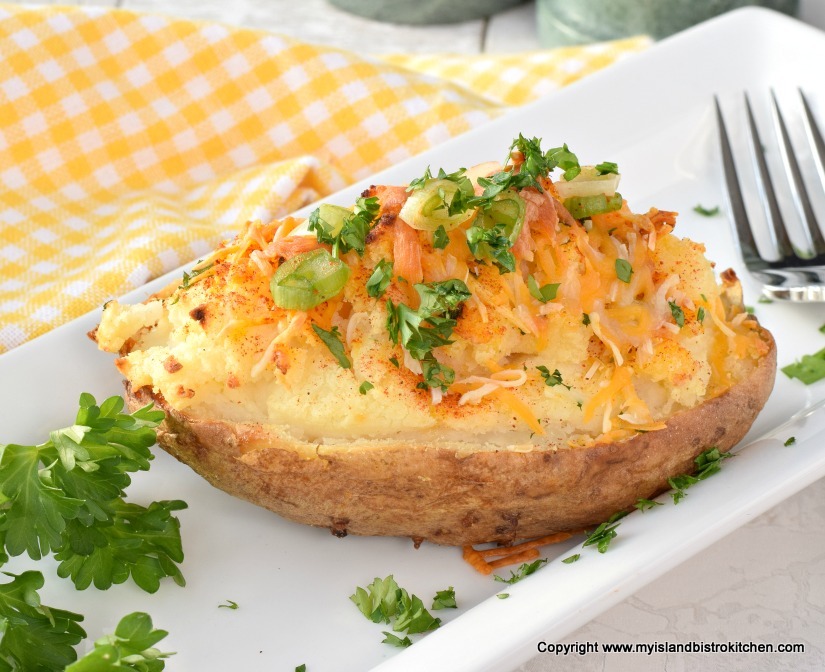
When you live in Prince Edward Island, Canada, where potatoes are one of the main agricultural crops, you find lots of ways to serve potatoes. Twice-baked potatoes, or stuffed baked potatoes, are one of my all-time favorites. I make up big batches of these and freeze them so they are always on hand, ready to be popped in the oven for dinner. Continue reading Twice-baked Potatoes Recipe
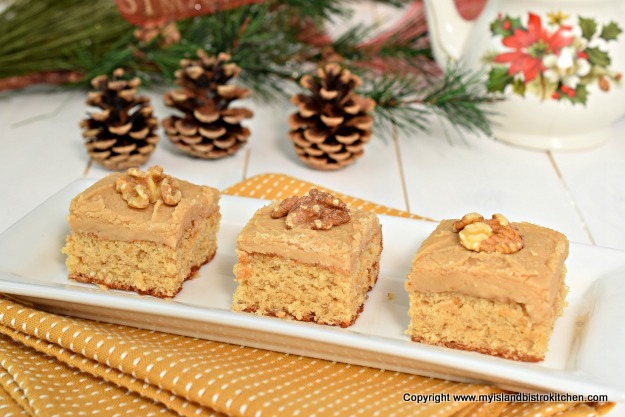
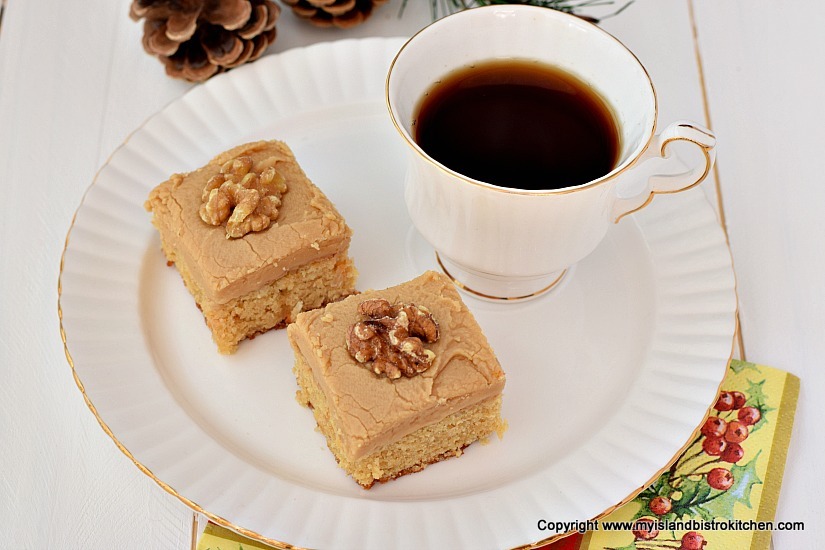
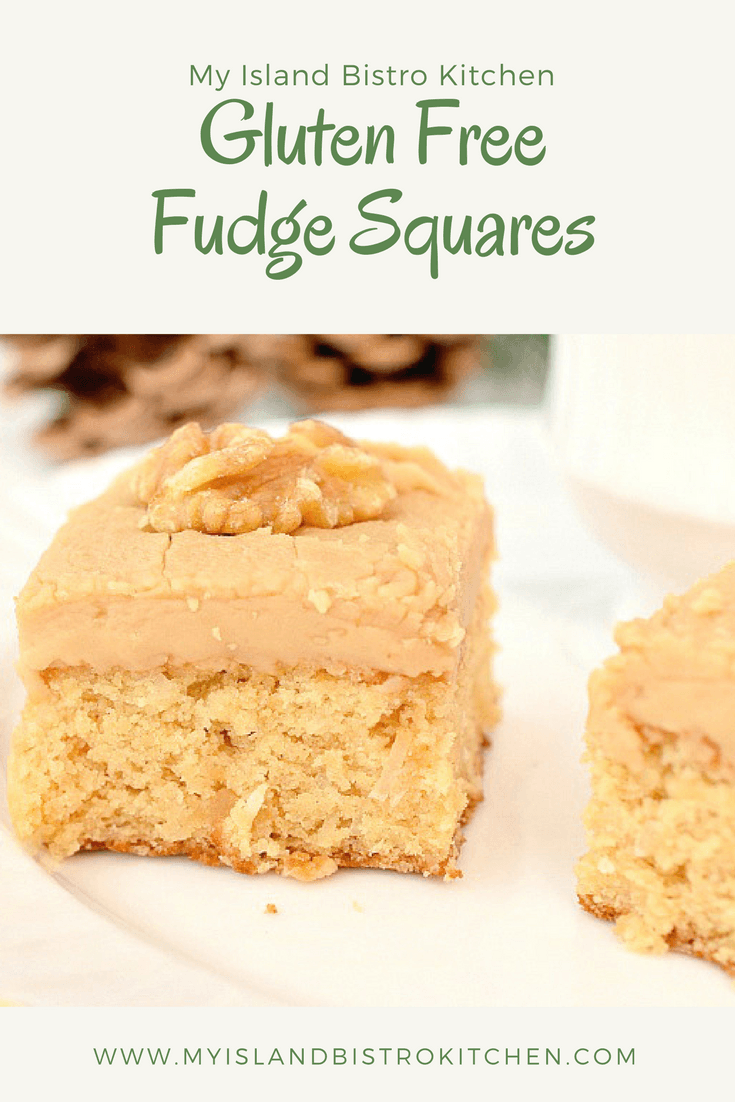
Gluten-free Brown Sugar Fudge Square
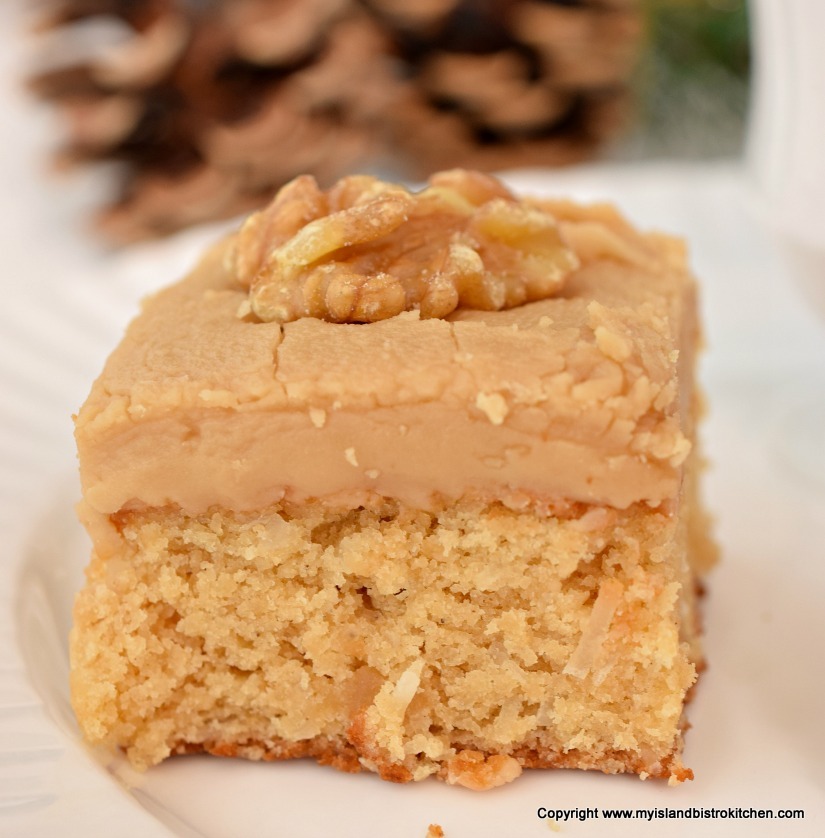
If you like brown sugar fudge, you’ll love this Gluten-free Brown Sugar Fudge Square, even if you aren’t gluten-intolerant or on a grain-restrictive diet! With a cake-type base, it’s the fudge icing that makes this square and takes it from plain to yummy. It’s like having cake and candy at the same time!
I use 1-to-1 gluten-free baking flour along with a small amount of coconut flour in this square. The coconut flour blends well with the shredded coconut in the recipe and gives the square extra flavor. Super easy square to make.

The slightly tricky part is making the icing as it will “set up” very fast. Make sure you have all the ingredients pre-measured and at hand when you start to make the icing. It’s essential that the icing sugar be sifted to remove any lumps as there won’t be any time to work out any lumps when beating the icing sugar into the hot butter-sugar mixture. Once the icing starts to thicken, work quickly to spread it over the square.
This square freezes beautifully and is great to have on hand when you just need to have something sweet!
[Printable version of recipe follows at end of posting]
Gluten-free Brown Sugar Fudge Square
Ingredients:
Square
½ cup minus 1 tbsp butter, softened at room temperature
1 cup brown sugar, lightly packed
1 extra-large egg (at room temperature for 20 minutes)
½ tsp pure vanilla
1 cup 1-to-1 gluten-free baking flour
2 tbsp coconut flour
1 tsp baking powder
pinch salt
1/3 cup milk
½ cup shredded coconut
Icing
3 tbsp butter, softened at room temperature
¾ cup brown sugar, lightly packed
3 tbsp cream
1 cup sifted icing sugar
1 tsp vanilla
Walnut halves for decoration (optional)
Method:
Preheat oven to 350°F. Grease or, alternatively, line 9” square baking pan with tin foil and spray with cooking oil.
Square: Cream butter and sugar together. Add the egg and beat well to combine with butter-sugar mixture. Beat in vanilla.
Sift the 1-to-1 gluten-free flour, coconut flour, baking powder, and salt together. Add the dry ingredients and milk to the creamed mixture in three parts (3 parts dry and 2 parts wet) starting and ending with the dry ingredients. Beat for 1 minute longer on medium speed. Fold in the shredded coconut. Spread batter evenly in prepared pan.
Bake for 30-32 minutes or until cake tester inserted into center of square comes out clean. Remove square from oven and place on wire rack to cool completely.
Icing: When square has cooled, make the icing by combining the butter and brown sugar in a saucepan over medium heat. Stir until both have melted/dissolved. Add the cream. Bring mixture to a boil. Reduce heat and simmer for 2 minutes, stirring occasionally. Remove from heat and, with an electric hand mixer, beat in the icing sugar until mixture starts to thicken. Immediately stir in the vanilla and, working quickly (as this icing will “set up” very fast), spread the icing evenly over square. Score cutting lines on square and, if desired, place one walnut half on each individual square. Let icing set completely before cutting squares.
Yield: One 9” pan of squares
Gluten-free Brown Sugar Fudge Square
An old-fashioned fudge square made with gluten-free flour and topped with brown sugar fudge icing.
Ingredients
- Square
- ½ cup minus 1 tbsp butter, softened at room temperature
- 1 cup brown sugar, lightly packed
- 1 extra-large egg (at room temperature for 20 minutes)
- ½ tsp pure vanilla
- 1 cup 1-to-1 gluten-free baking flour
- 2 tbsp coconut flour
- 1 tsp baking powder
- pinch salt
- 1/3 cup milk
- ½ cup shredded coconut
- Icing
- 3 tbsp butter, softened at room temperature
- ¾ cup brown sugar, lightly packed
- 3 tbsp cream
- 1 cup sifted icing sugar
- 1 tsp vanilla
- Walnut halves for decoration (optional)
Instructions
- Preheat oven to 350°F. Grease or, alternatively, line 9” square baking pan with tin foil and spray with cooking oil.
- Square: Cream butter and sugar together. Add the egg and beat well to combine with butter-sugar mixture. Beat in vanilla.
- Sift the 1-to-1 gluten-free flour, coconut flour, baking powder, and salt together. Add the dry ingredients and milk to the creamed mixture in three parts (3 parts dry and 2 parts wet) starting and ending with the dry ingredients. Beat for 1 minute longer on medium speed. Fold in the shredded coconut. Spread batter evenly in prepared pan.
- Bake for 30-32 minutes or until cake tester inserted into center of square comes out clean. Remove square from oven and place on wire rack to cool completely.
- Icing: When square has cooled, make the icing by combining the butter and brown sugar in a saucepan over medium heat. Stir until both have melted/dissolved. Add the cream. Bring mixture to a boil. Reduce heat and simmer for 2 minutes, stirring occasionally. Remove from heat and, with an electric hand mixer, beat in the icing sugar until mixture starts to thicken. Immediately stir in the vanilla and, working quickly (as this icing will “set up” very fast), spread the icing evenly over square. Score cutting lines on square and, if desired, place one walnut half on each individual square. Let icing set completely before cutting squares.
- Copyright My Island Bistro Kitchen
Schema/Recipe SEO Data Markup by Yummly Rich Recipes
https://myislandbistrokitchen.com/2016/12/29/gluten-free-brown-sugar-fudge-square/
Pin Me To Pinterest!

Turkey Chowder Recipe
Turkey Chowder is the perfect way to use up leftover turkey. It’s a welcome tummy-warming and tasty chowder for cold winter days and is a real treat after skiing, a long winter walk, snowshoeing, or coasting on the snow-covered hills. Serve with warm rolls or biscuits straight from the oven for an extra special treat. Continue reading Turkey Chowder Recipe
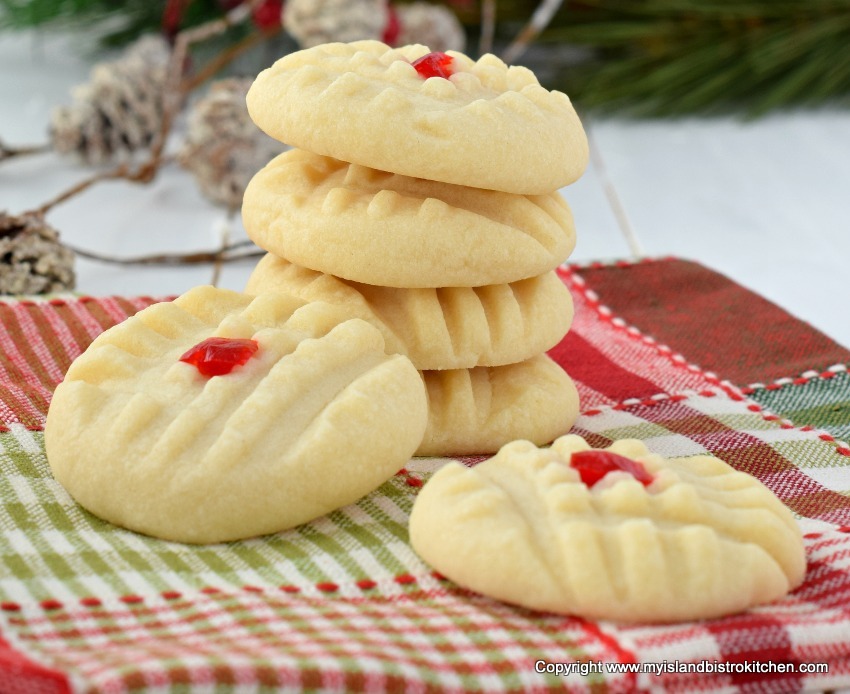
Gluten-free Melting Moments Cookies
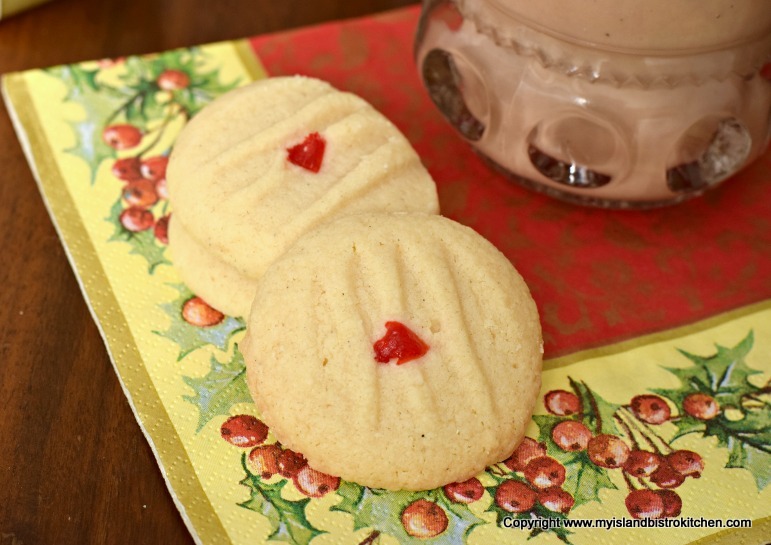
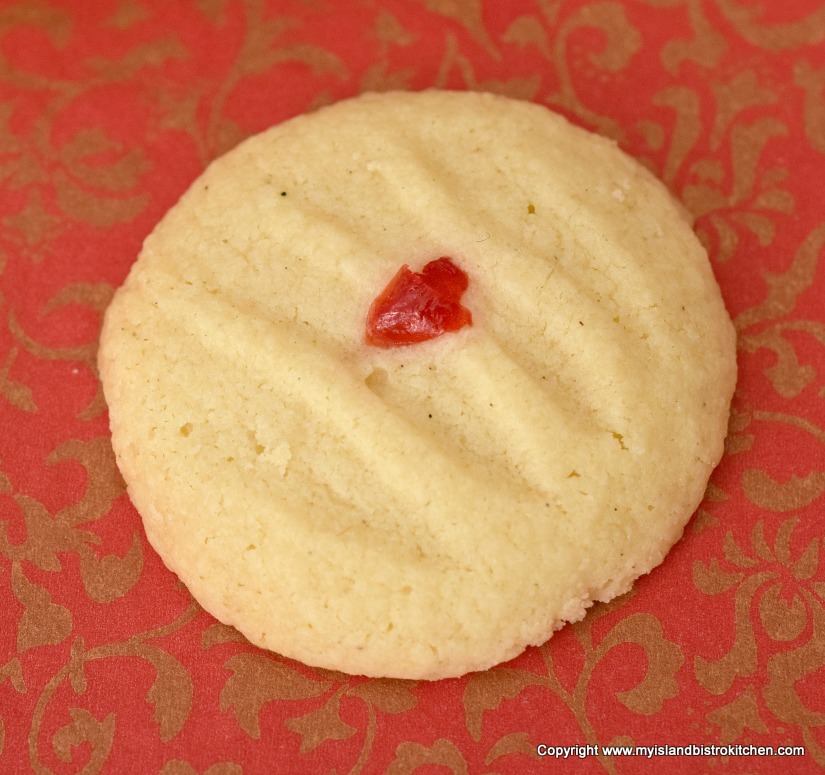
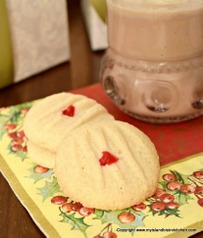
These gluten-free melting moments cookies prove that being on a gluten-free diet does not mean one has to compromise on favorite sweet treats!
I use a 1-to-1 gluten-free baking flour, such as Bob’s Red Mills brand, for these cookies. I also add a small amount of very finely ground almonds to the batter as this lends a tenderness to the cookie crumb which justifies the name of the cookies because they do melt in the mouth!
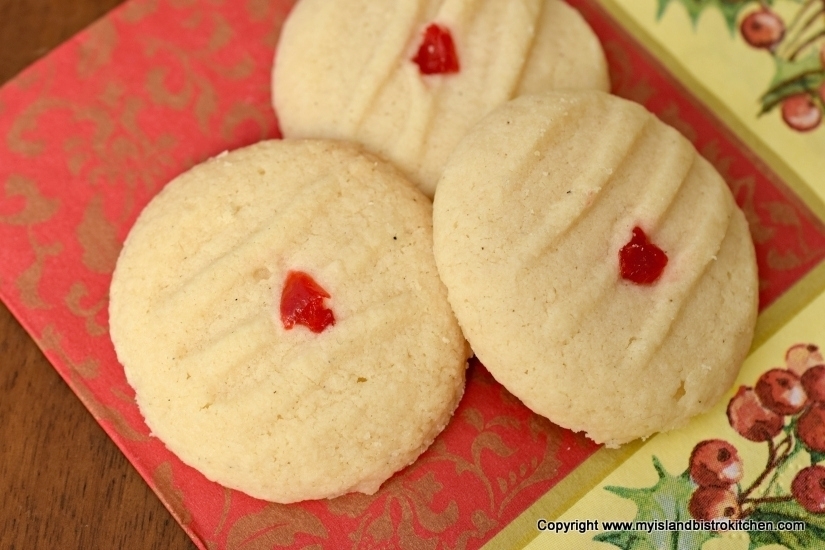
These cookies are very easy to make. Mix up the dough. Pinch off small amounts of the dough and form into small balls. Place on parchment-lined baking sheets and flatten with the tines of a fork. Bake. It’s really no more complicated than that!
[Printable recipe follows at end of posting]
Gluten-Free Melting Moments
Ingredients:
½ cup butter, softened at room temperature
¼ cup icing sugar (aka confectioner’s sugar or powdered sugar)
¼ tsp pure vanilla
½ cup 1-to-1 gluten-free baking flour
¼ cup finely ground almonds
¼ cup cornstarch
Method:
Preheat oven to 325°F. Line baking sheets with parchment paper.
Cream butter. Add the icing sugar and cream well with the butter. Mix in vanilla.
In separate bowl, whisk the flour, ground almonds, and cornstarch together. Add to the creamed mixture and blend until well incorporated.
Form dough into small round balls (apx. 5/8 oz dough per ball). Place balls on prepared baking sheets, about 2“ apart, and flatten each ball with the tines of a fork. Decorate with small bits of maraschino cherries, if desired.
Bake for approximately 15-18 minutes, just until edges of cookies start to tint a golden tan color. Don’t over-bake. Let cool on baking sheet for 2-3 minutes then transfer cookies to wire rack to cool completely.
Yield: Apx. 1½ dozen cookies

Gluten-free Melting Moments Cookies
These melt-in-your-mouth gluten-free melting moments cookies have a tender crumb and delicate butter and almond flavor.
Ingredients
- ½ cup butter, softened at room temperature
- ¼ cup icing sugar (aka confectioner’s sugar or powdered sugar)
- ¼ tsp pure vanilla
- ½ cup 1-to-1 gluten-free baking flour
- ¼ cup finely ground almonds
- ¼ cup cornstarch
Instructions
- Preheat oven to 325°F. Line baking sheets with parchment paper
- Cream butter. Add the icing sugar and cream well with the butter. Mix in vanilla.
- In separate bowl, whisk the flour, ground almonds, and cornstarch together. Add to the creamed mixture and blend until well incorporated.
- Form dough into small round balls (apx. 5/8 oz dough per ball). Place balls on prepared baking sheets, about 2“ apart, and flatten each ball with the tines of a fork. Decorate with small bits of maraschino cherries, if desired.
- Bake for approximately 15-18 minutes, just until edges of cookies start to tint a golden tan color. Don’t over-bake. Let cool on baking sheet for 2-3 minutes then transfer cookies to wire rack to cool completely.
Schema/Recipe SEO Data Markup by Yummly Rich Recipes
https://myislandbistrokitchen.com/2016/12/22/gluten-free-melting-moments-cookies/
Pin Me To Pinterest:

For other tasty gluten-free cookie recipes, click on the links below:
Gluten Free Lemon-Filled Thumbprint Cookies
Gluten Free Snickerdoodles
Gluten-free Earl Grey Cranberry-Orange Shortbread
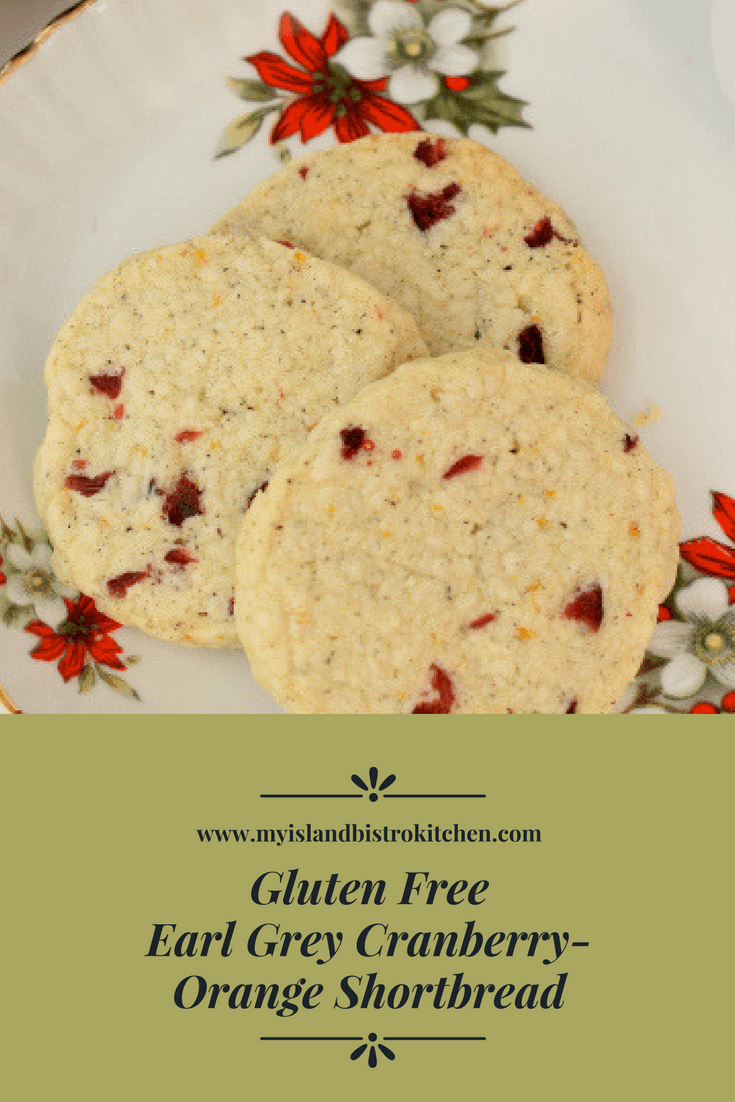
Gluten-Free Earl Grey Cranberry-Orange Shortbread
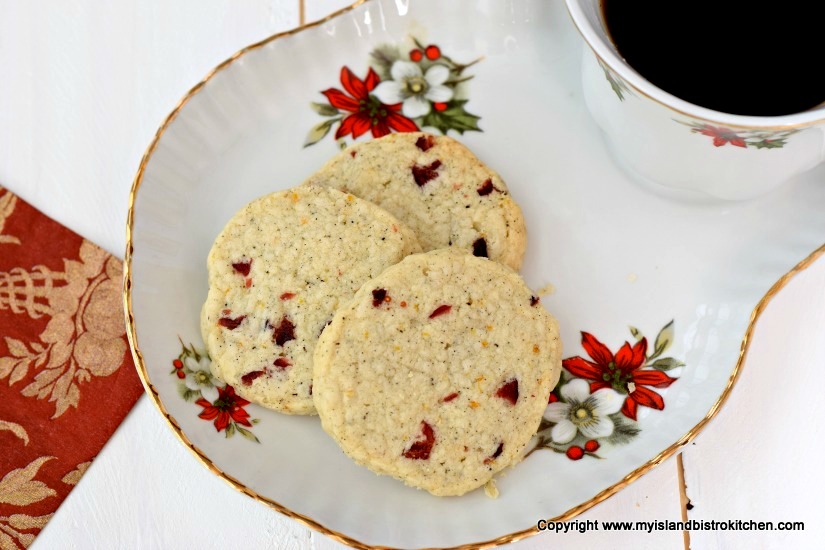
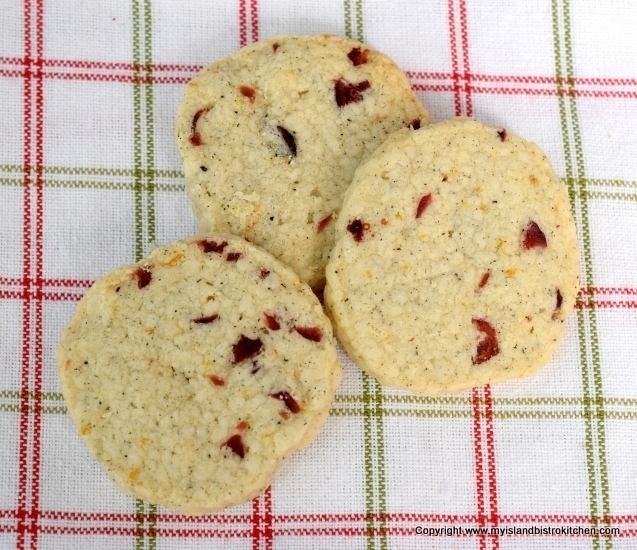
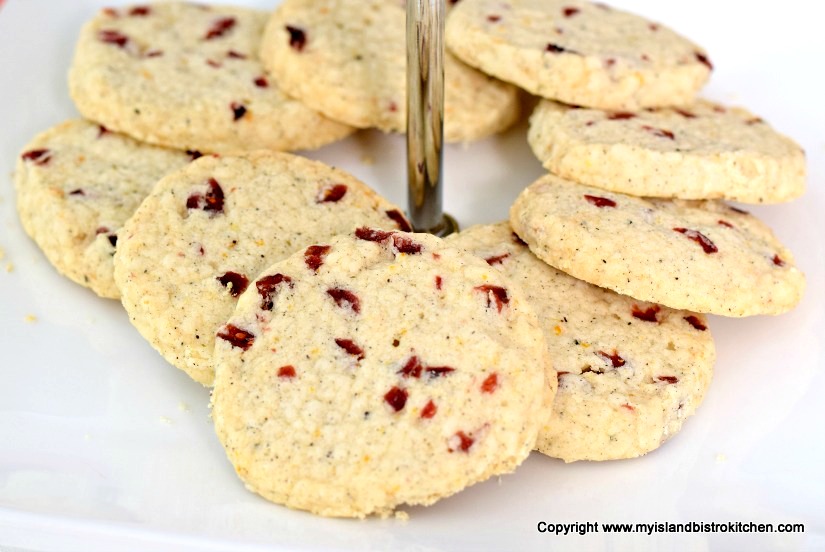
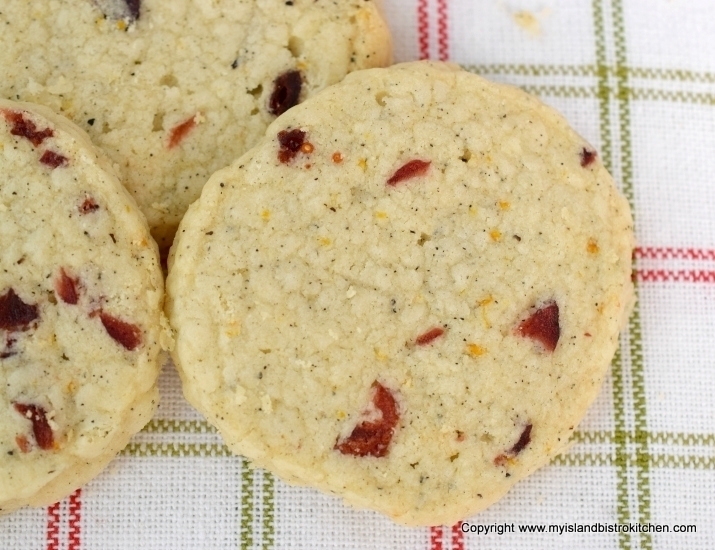
These easy-to-make gluten-free Earl Grey Cranberry-Orange Shortbread cookies are brimming with flavor. The ground Earl Grey tea leaves lend a subtle hint of tea flavor as well as add wonderful specks of interest in the cookies. The addition of the dried cranberries and grated orange rind make these very flavorful and tasty cookies.
I have been having very good success using 1-to-1 gluten-free baking flour, such as Bob’s Red Mill, for my gluten-free baking. The addition of finely ground almonds adds both flavor and a layer of tenderness to the shortbread crumb.
I use my old coffee grinder to grind the loose tea leaves very finely. This releases their essence which, in turn, infuses the dough with the tea aromatic. Use dried, not fresh or frozen, cranberries for these cookies and make sure they are chopped quite finely.
The dough will be quite soft so form it into a round log shape, wrap it tightly in plastic wrap or waxed paper, and refrigerate it for 2-3 hours before slicing and baking. Refrigerating the dough helps to firm it up enough so that, when sliced with a sharp knife, the slices cut cleanly. Empty cardboard paper towel rolls make great cylinder “sleeves” in which to chill the cookie dough because they help to keep the round shape. Simply slit open the paper towel roll, place the wrapped cookie log inside the “sleeve”, draw the edges of the cylinder together, and secure with tape. Rotate the cookie dough log a couple of times during the chilling process to distribute its weight and help to keep the round shape.

These cookies are a great addition to the menu of anyone on a gluten-free diet. In fact, anyone can enjoy these cookies, regardless whether they have a sensitivity or intolerance to gluten or not – I’ll bet you’d never guess they’re made with gluten-free flour!
[Printable recipe follows at end of posting]
Gluten-Free Earl Grey Cranberry-Orange Shortbread
Ingredients:
½ cup unsalted butter, softened at room temperature
½ cup sifted icing sugar (aka confectioner’s or powdered sugar)
¾ tsp finely grated orange rind
1/2 tsp pure vanilla
1/8 tsp almond flavoring
¾ cup 1-to-1 gluten-free baking flour
¼ cup finely-ground almonds
1½ tbsp cornstarch
¼ tsp salt
¾ tsp finely ground Earl Grey tea leaves
¼ cup finely chopped dried cranberries
Method:
Cream butter and sugar together until smooth. Beat in orange rind, vanilla, and almond flavoring.
Whisk flour, ground almonds, cornstarch, salt and ground tea leaves together. Blend dry ingredients into creamed mixture until just combined. Stir in cranberries.
Form dough into log approximately 1½” in diameter. Wrap tightly in wax paper or plastic wrap. Slit open an empty paper towel cardboard cylinder and place cookie log in cylinder. Draw cylinder sides together and secure with masking tape. Refrigerate cookie log for 2-3 hours, turning roll every hour or so to distribute the weight of the log and to keep the shape round. (Unbaked cookie logs may be stored for 2-3 days in the refrigerator before baking, provided they are stored in sealed plastic bags or airtight containers.)
Preheat oven to 325°F. Line baking sheets with parchment paper. With a sharp knife, slice cookie log into ¼” thick slices. Place cookies on prepared baking sheets, spacing the cookies about 1½” apart. Bake for 20-21 minutes, or until edges of cookies start to tint golden brown, rotating baking sheet half way through the baking. Let cookies cool on sheets for 3-4 minutes and then transfer to wire rack to finish cooling completely.
Store in airtight container at room temperature for up to 2 weeks or freeze for longer storage.
Yield: Approximately 24 cookies
Gluten-Free Earl Grey Cranberry-Orange Shortbread
A flavorful gluten-free shortbread cookie infused with a hint of Earl Grey tea and flavored with grated orange rind and dried cranberries.
Ingredients
- ½ cup unsalted butter, softened at room temperature
- ½ cup sifted icing sugar (aka confectioner’s or powdered sugar)
- ¾ tsp finely grated orange rind
- 1/2 tsp pure vanilla
- 1/8 tsp almond flavoring
- ¾ cup 1-to-1 gluten-free baking flour
- ¼ cup finely-ground almonds
- 1½ tbsp cornstarch
- ¼ tsp salt
- ¾ tsp finely ground Earl Grey tea leaves
- ¼ cup finely chopped dried cranberries
Instructions
- Cream butter and sugar together until smooth. Beat in orange rind, vanilla, and almond flavoring.
- Whisk flour, ground almonds, cornstarch, salt and ground tea leaves together. Blend dry ingredients into creamed mixture until just combined. Stir in cranberries.
- Form dough into log approximately 1½” in diameter. Wrap tightly in wax paper or plastic wrap. Slit open an empty paper towel cardboard cylinder and place cookie log in cylinder. Draw cylinder sides together and secure with masking tape. Refrigerate cookie log for 2-3 hours, turning roll every hour or so to distribute the weight of the log and to keep the shape round. (Unbaked cookie logs may be stored for 2-3 days in the refrigerator before baking, provided they are stored in sealed plastic bags or airtight containers.)
- Preheat oven to 325°F. Line baking sheets with parchment paper. With a sharp knife, slice cookie log into ¼” thick slices. Place cookies on prepared baking sheets, spacing the cookies about 1½” apart. Bake for 20-21 minutes, or until edges of cookies start to tint golden brown, rotating baking sheet half way through the baking. Let cookies cool on sheets for 3-4 minutes and then transfer to wire rack to finish cooling completely.
- Store in airtight container at room temperature for up to 2 weeks or freeze for longer storage.
- Copyright My Island Bistro Kitchen
Schema/Recipe SEO Data Markup by Yummly Rich Recipes
https://myislandbistrokitchen.com/2016/12/20/gluten-free-earl-grey-cranberry-orange-shortbread/
If you have made this recipe and enjoyed it and/or wish to share it with your friends and family, please do so on social media but be sure to share the direct link to this posting from my website.
Connect with My Island Bistro Kitchen on Social Media
Join the Facebook page for My Island Bistro Kitchen: https://www.facebook.com/MyIslandBistroKitchen/
Follow “the Bistro” on “X” (formerly Twitter): https://twitter.com/PEIBistro/
See the drool-worthy gallery of mouth-watering food photos from My Island Bistro Kitchen on Instagram: https://www.instagram.com/peibistro/
Follow “the Bistro” on Pinterest at https://www.pinterest.ca/peibistro/ and pin the Pinterest-ready photo at the end
Pin These Gluten-Free Earl Grey Cranberry-Orange Shortbread Cookies To Pinterest!

Looking for more great gluten-free cookie recipes? Check out these from My Island Bistro Kitchen:
Melting Moments
Snickerdoodles
Lemon-Filled Thumbprint Cookies
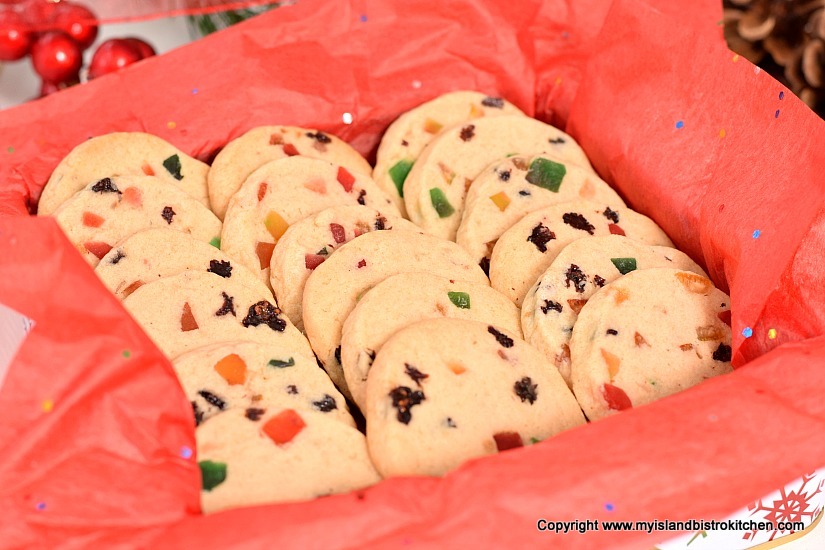
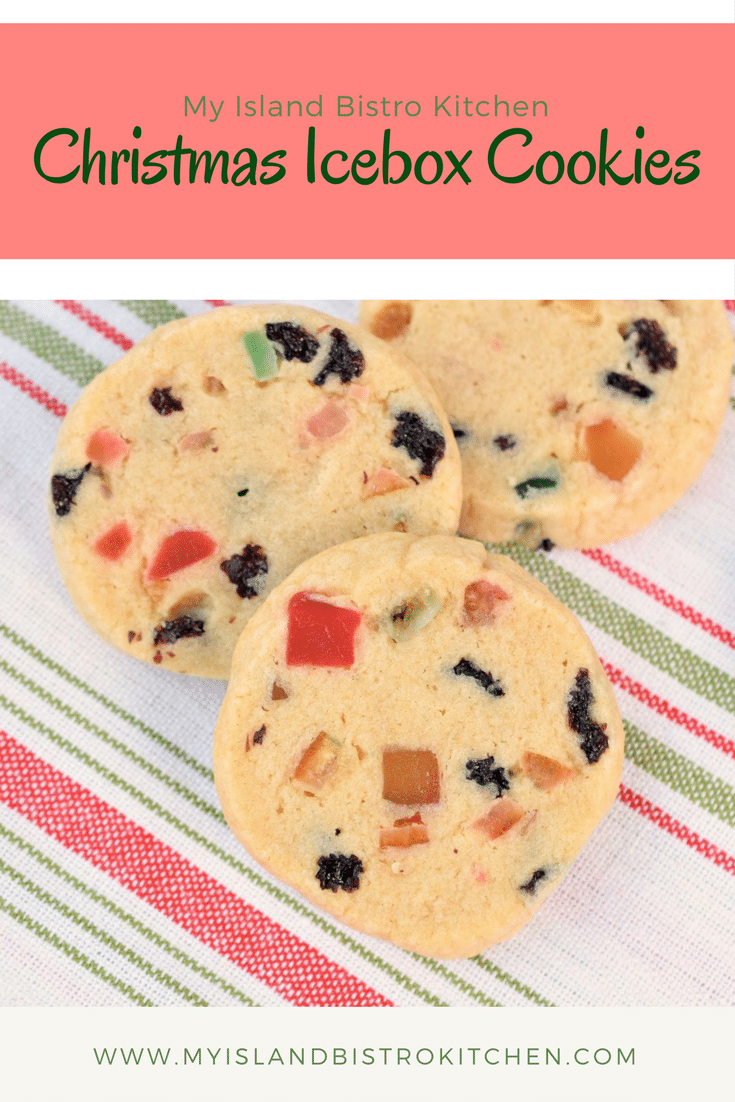
Christmas Icebox Cookies Recipe
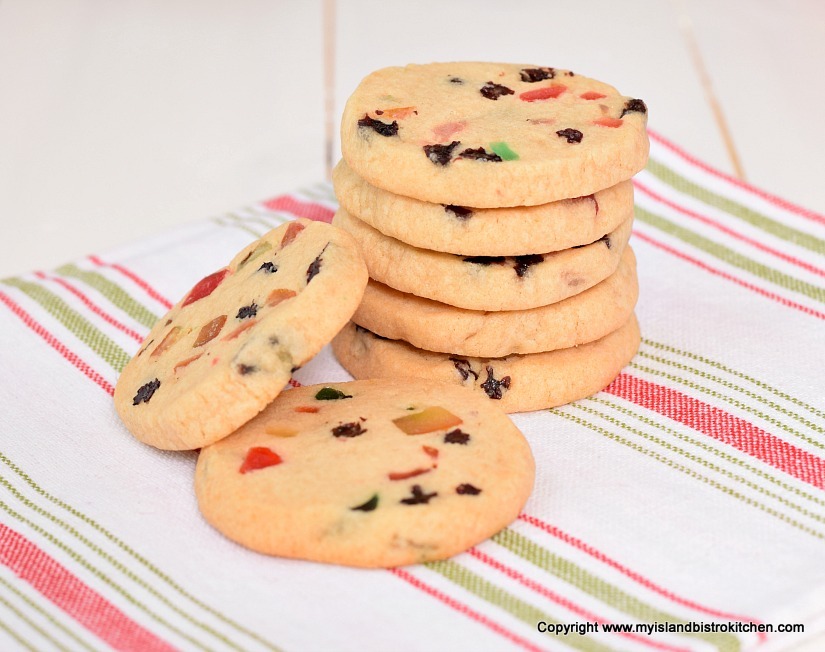
Christmas Icebox Cookies are a tradition in my household. There are many varieties of cookies that beg to be made, shared, and eaten over the holiday period and these are always a perennial favorite.
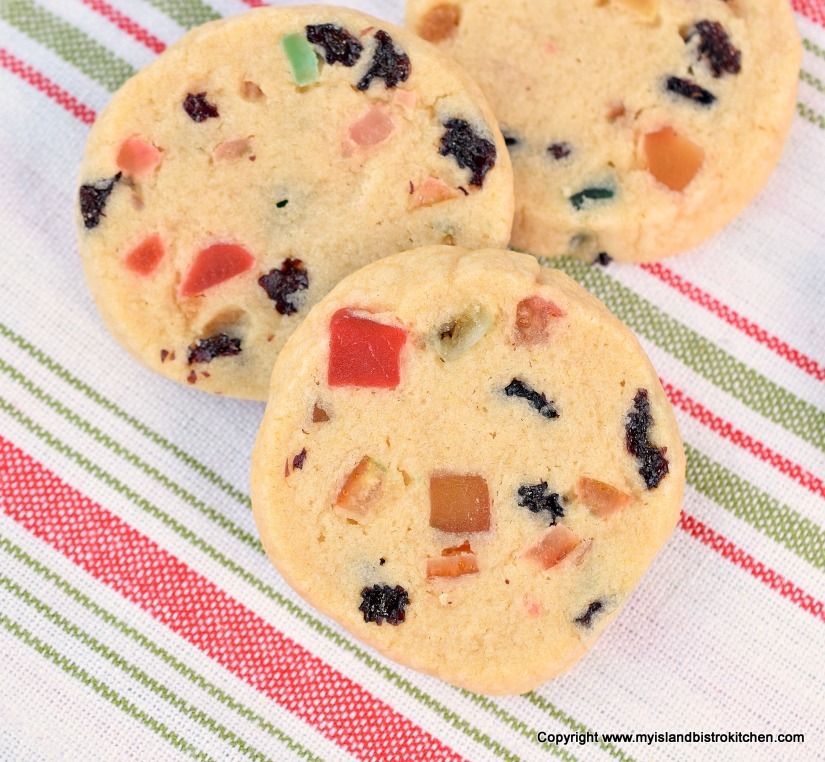
The richness of the butter and sugar combined with the slight chewiness of the mixed glazed fruit and currants results in a tasty and flavorful cookie. Use finely chopped fruit and the small currants for these delicate cookies.
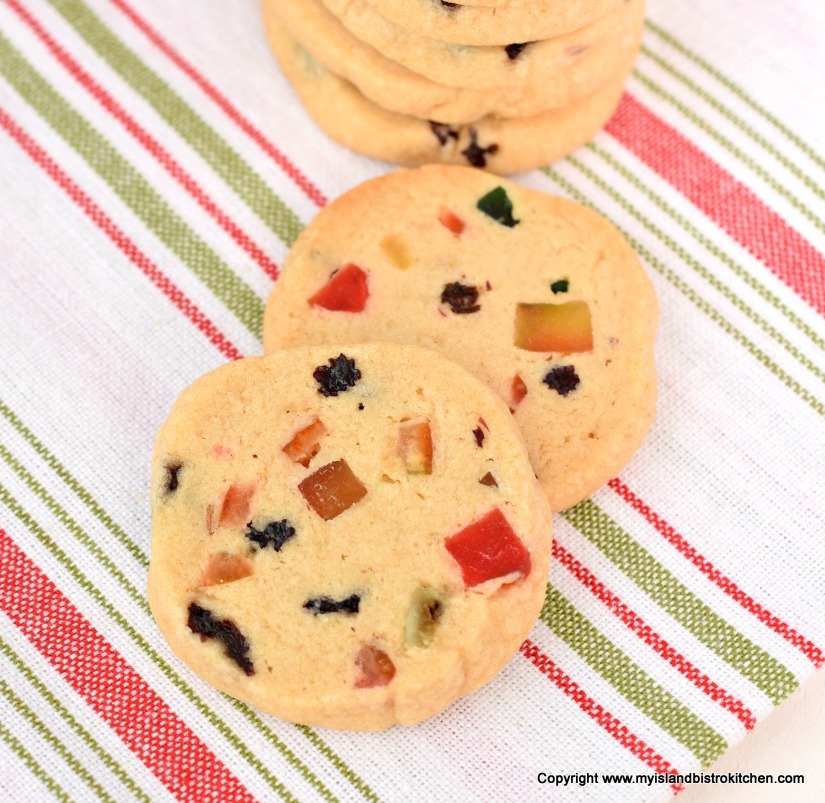
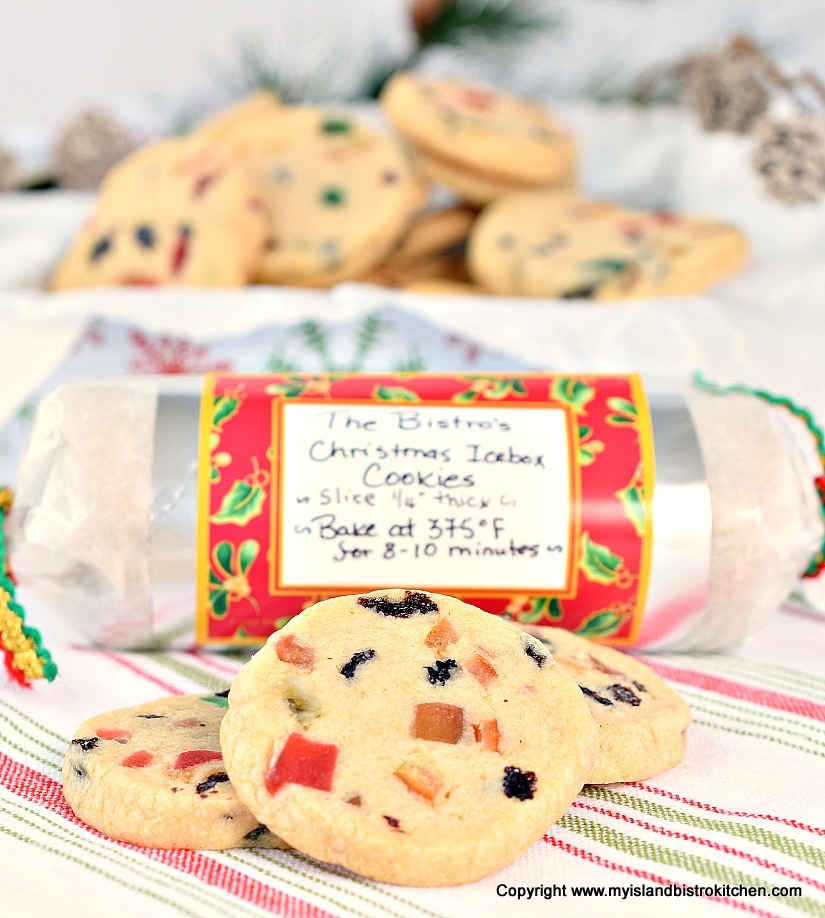
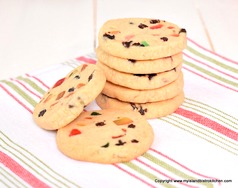
Icebox cookies are very easy to make and don’t take any unusual or difficult-to-find ingredients. The dough gets divided into thirds and then each third is formed into a round log shape, wrapped tightly in plastic wrap or waxed paper and refrigerated for at least 3-4 hours before slicing and baking. This is because the dough needs time to firm up enough to be able to cut clean-edge slices.
Plan ahead and save three empty paper towel cardboard cylinders. Slit up the length of the cylinders, these make great “sleeves” for the cookie logs and help to keep the shape of the logs round, or reasonably so. Secure the cylinders closed with tape.
Make sure to rotate the cylinders every hour or so during the 3-4 hours of dough chilling as this will help to distribute the weight of the dough and aid in keeping the cookie log round. When ready to bake the cookies, simply unwrap the chilled logs and, with a sharp flat-bladed knife, cut the logs into 1/4″ slices, place on parchment-lined baking sheets, and bake for 8-10 minutes. These cookie logs can be made two to three days in advance of baking and kept in the refrigerator so they are a great make-ahead cookie dough.
One of the great things about icebox cookies is that they can be made ahead and frozen, either before or after baking. Store the unbaked cookie logs in sealed bags in the freezer until they are needed. Simply let the dough sit at room temperature for approximately 30 minutes or so before slicing and baking. They’re also great to have on hand if unexpected guests drop by – you can pop a pan of the cookies in the oven and have your house smell tantalizing while your guests await fresh-from-the-oven cookies!
These make great host/hostess gifts, too, either baked or unbaked. A festive tin filled with these delectable cookies will be a sure hit with anyone.
They’re also fun to package in cute little bags. Who doesn’t love to get a bag with homemade cookies inside!
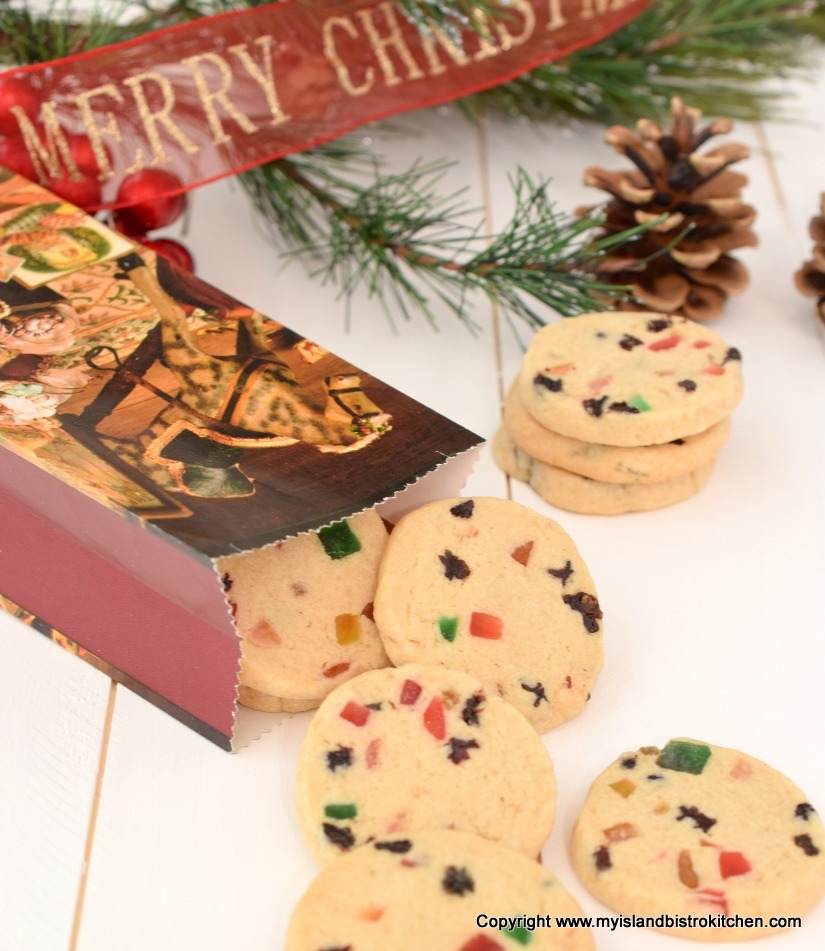
If you wish to let the host/hostess bake the cookies when they so desire, simply wrap a chilled or frozen cookie log decoratively and include the baking instructions.
Sometimes, I’ll enclose a small log of unbaked cookies in a little decorative bag and add a few of the baked cookies just to whet the recipient’s appetite!
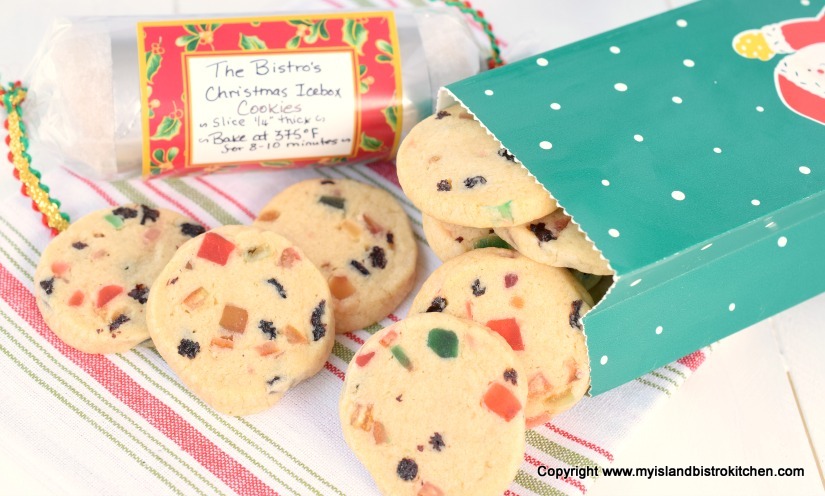
These are easy-to-make, flavorful cookies that are very versatile – they look great on sweet trays, are easy to package in boxes, tins, or bags for gifts, and they are also wonderful treats in lunch bags, too!
[Printable recipe follows at end of posting.]
Christmas Icebox Cookies
Ingredients:
1 cup butter, softened at room temperature
1 2/3 cups brown sugar, lightly packed
2 extra large eggs
1 tsp vanilla
3¼ cups all-purpose flour
1 tsp baking powder
1/8 tsp baking soda
¼ tsp salt
1 cup mixed glazed fruit
½ cup currants
Method:
Cream butter and sugar until smooth. Beat in eggs, one at a time, beating well after each addition. Stir in vanilla.
Sift flour, baking powder, baking soda, and salt together. Beat into creamed mixture until dry ingredients are combined. Stir in cherries and currants until blended into dough.
Divide dough into thirds and shape each portion of dough into three separate logs, each approximately 2” in diameter. Wrap tightly in wax paper or plastic wrap. Slit open 3 empty paper towel cardboard cylinders and place one cookie log in each cylinder. Draw cylinder sides together and secure the cylinders with masking tape. Refrigerate cookie logs for 3-4 hours, turning rolls every hour or so to distribute the weight of the logs and to keep the shape round. (Unbaked cookie logs may be stored for 2-3 days in the refrigerator before baking, provided they are stored in sealed plastic bags or airtight containers.)
Preheat oven to 375°F. Line baking sheets with parchment paper. With a sharp knife, slice cookie logs into ¼” thick slices. Place cookies on prepared baking sheets, spacing the cookies about 1½” apart. Bake for 8-10 minutes, until lightly browned. Let cookies cool on sheets for 3-4 minutes and then transfer to wire rack to finish cooling completely.
Store in airtight container at room temperature for up to 2 weeks or freeze for longer storage.
Unbaked cookie logs may be frozen in tightly sealed bags or containers for up to 2 months. Remove logs from freezer and let stand at room temperature for 30 minutes or so before slicing and baking as above.
Yield: Approximately 5½ dozen cookies
Christmas Icebox Cookies Recipe
Traditional buttery-rich Christmas icebox cookies filled with mixed glazed fruit and currants.
Ingredients
- 1 cup butter, softened at room temperature
- 1 2/3 cups brown sugar, lightly packed
- 2 extra large eggs
- 1 tsp vanilla
- 3¼ cups all-purpose flour
- 1 tsp baking powder
- 1/8 tsp baking soda
- ¼ tsp salt
- 1 cup mixed glazed fruit
- ½ cup currants
Instructions
- Cream butter and sugar until smooth. Beat in eggs, one at a time, beating well after each addition. Stir in vanilla.
- Sift flour, baking powder, baking soda, and salt together. Beat into creamed mixture until dry ingredients are combined. Stir in cherries and currants until blended into dough.
- Divide dough into thirds and shape each portion of dough into three separate logs, each approximately 2” in diameter. Wrap tightly in wax paper or plastic wrap. Slit open 3 empty paper towel cardboard cylinders and place one cookie log in each cylinder. Draw cylinder sides together and secure the cylinders with masking tape. Refrigerate cookie logs for 3-4 hours, turning rolls every hour or so to distribute the weight of the logs and to keep the shape round. (Unbaked cookie logs may be stored for 2-3 days in the refrigerator before baking, provided they are stored in sealed plastic bags or airtight containers.)
- Preheat oven to 375°F. Line baking sheets with parchment paper. With a sharp knife, slice cookie logs into ¼” thick slices. Place cookies on prepared baking sheets, spacing the cookies about 1½” apart. Bake for 8-10 minutes, until lightly browned. Let cookies cool on sheets for 3-4 minutes and then transfer to wire rack to finish cooling completely.
- Store in airtight container at room temperature for up to 2 weeks or freeze for longer storage.
- Unbaked cookie logs may be frozen in tightly sealed bags or containers for up to 2 months. Remove logs from freezer and let stand at room temperature for 30 minutes or so before slicing and baking as above.
- Copyright My Island Bistro Kitchen
Schema/Recipe SEO Data Markup by Yummly Rich Recipes
https://myislandbistrokitchen.com/2016/12/18/christmas-icebox-cookies-recipe/
If you have made this recipe and enjoyed it and/or wish to share it with your friends and family, please do so on social media but be sure to share the direct link to this posting from my website.
Connect with My Island Bistro Kitchen on Social Media
Join the Facebook page for My Island Bistro Kitchen: https://www.facebook.com/MyIslandBistroKitchen/
Follow “the Bistro” on “X” (formerly Twitter): https://twitter.com/PEIBistro/
See the drool-worthy gallery of mouth-watering food photos from My Island Bistro Kitchen on Instagram: https://www.instagram.com/peibistro/
Follow “the Bistro” on Pinterest at https://www.pinterest.ca/peibistro/ and pin the Pinterest-ready photo at the end
For more great Christmas cookie recipes, click on the links below:
Classic Raspberry Linzer Cookies
Frypan Cookie Balls
The Rumrunners – Rum and Raisin Cookies
Marvelous Melting Moments
Molasses Spice Cookies
Hearty Hermits
Christmas Fruitcake Drop Cookies
Custard Sandwich Cookies
Cranberry and Eggnog Drop Cookies
The Bistro’s Scotch Cookies
Gluten-free Gumdrop Cookies
Gluten-free Melting Moments
Plum Puff Cookies
Brown Sugar Jam-Filled Cookies
Pin Me To Pinterest:
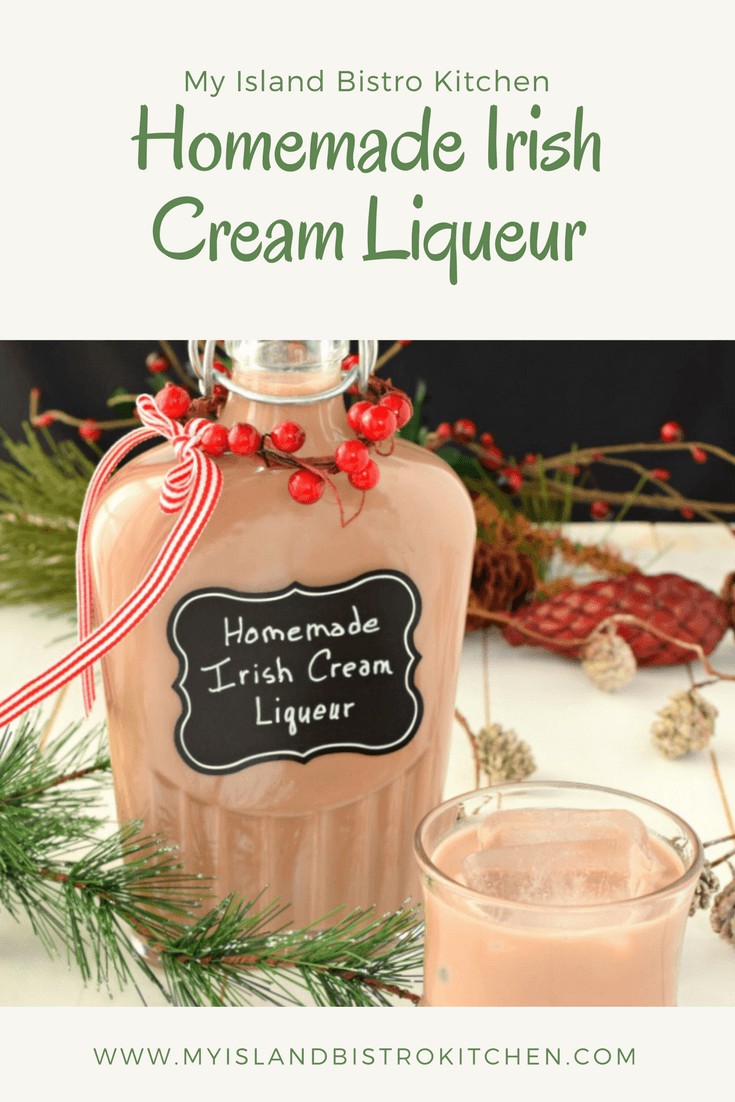
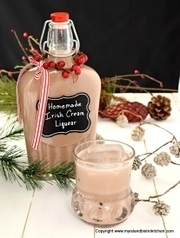
Homemade Irish Cream Liqueur Recipe
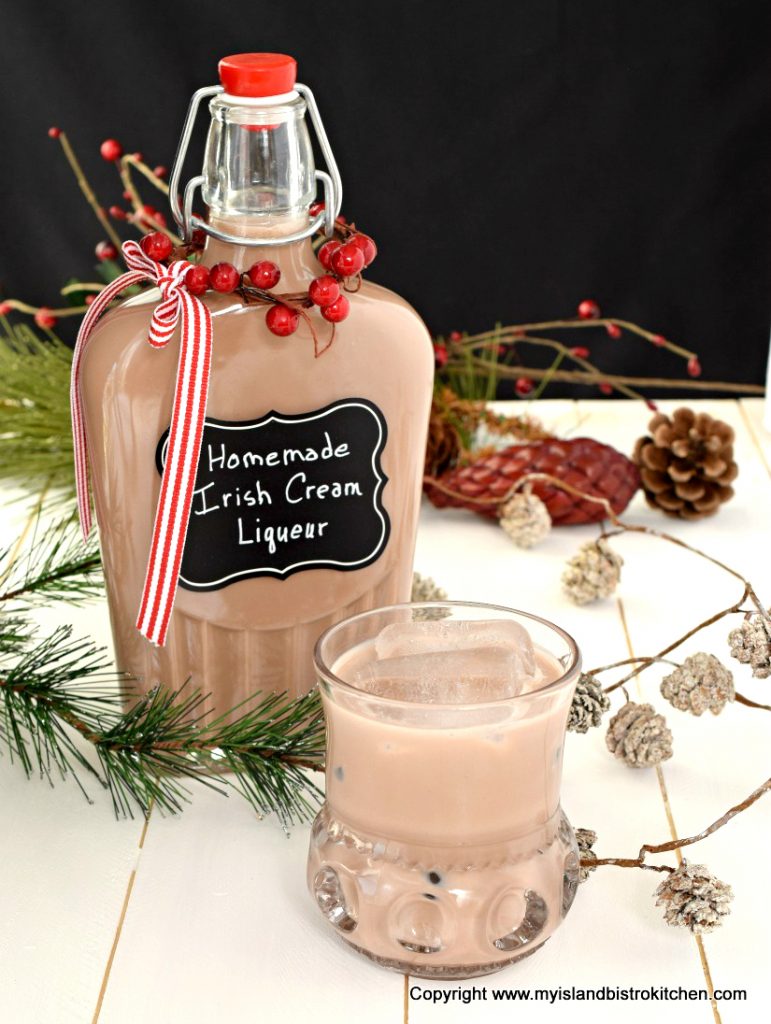
Making homemade Irish Cream Liqueur is very easy – it’s a matter of simply combining all the ingredients in a blender and blending on high for 25-30 seconds. Easy-peasy.
This liqueur will keep, tightly sealed in a sterilized bottle, in the refrigerator for the length of time the fresh cream used in the recipe will stay fresh as noted on the cream carton or bottle.
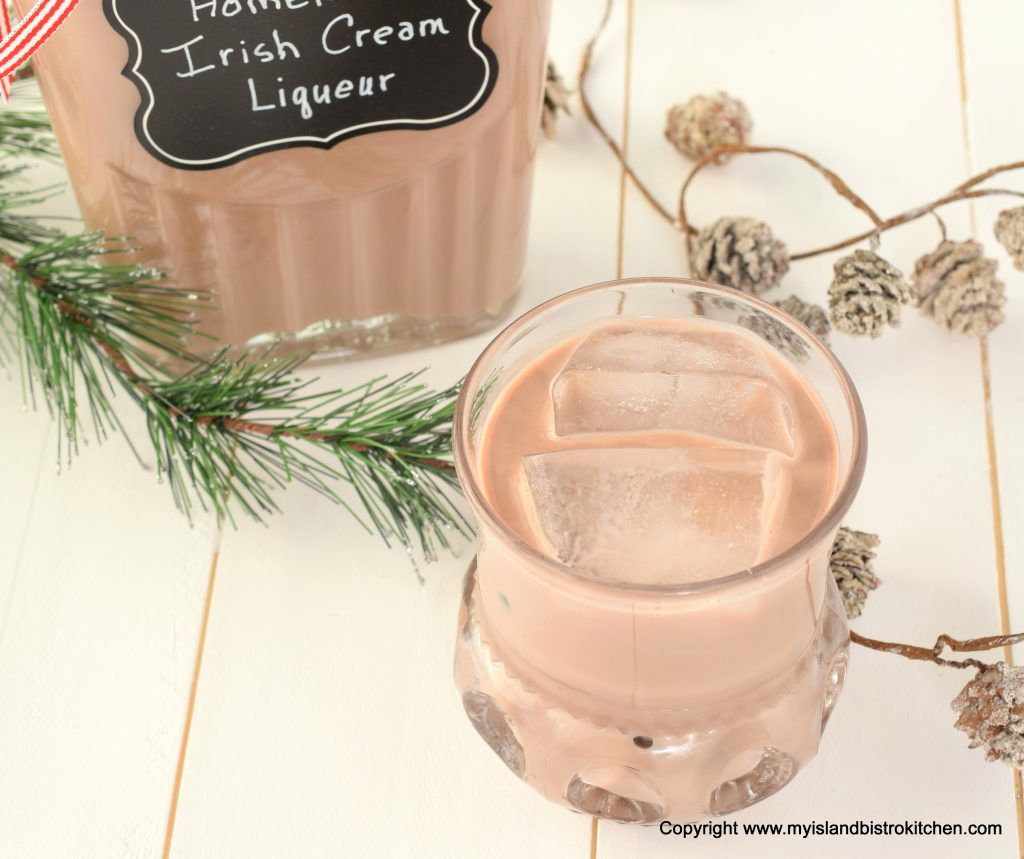
It’s important to shake the liqueur well before using . This liqueur serves well over ice or mixed with eggnog (1 part liqueur to 2 parts eggnog). Of course, it can also be used in a multitude of other ways as well, such as a flavorful coffee creamer.
Presented in decorative bottles, this liqueur makes a wonderful host or hostess gift.
[Printable recipe follows at end of posting]
Irish Cream Liqueur
Ingredients:
1 cup 18% fresh cream
1 – 300ml can condensed milk
1½ cups whiskey
2½ tbsp chocolate syrup
2 tbsp cold strong brewed coffee
2 tsp pure vanilla
¾ tsp almond flavoring
Method:
Combine all ingredients in blender and blend on high for apx. 25-30 seconds, just until ingredients are blended. Transfer liqueur to sterilized decorative bottle. Seal tightly.
Store in refrigerator for the length of time the fresh cream used in the recipe is “best before”. Shake liqueur well before serving.
To serve, pour liqueur into glass and add ice.
Yield: Apx. 1 litre
Serving Suggestion: Pour 1 part liqueur into glass and top with 2 parts eggnog. Add ice and serve.
Homemade Irish Cream Liqueur Recipe
Ingredients
- 1 cup 18% fresh cream
- 1 – 300ml can condensed milk
- 1½ cups whiskey
- 2½ tbsp chocolate syrup
- 2 tbsp cold strong brewed coffee
- 2 tsp pure vanilla
- ¾ tsp almond flavoring
Instructions
- Combine all ingredients in blender and blend on high for apx. 25-30 seconds, just until ingredients are blended. Transfer liqueur to sterilized decorative bottle. Seal tightly.
- Store in refrigerator for the length of time the fresh cream used in the recipe is “best before”. Shake liqueur well before serving.
- To serve, pour liqueur into glass and add ice.
- Copyright My Island Bistro Kitchen
Schema/Recipe SEO Data Markup by Yummly Rich Recipes
https://myislandbistrokitchen.com/2016/12/14/homemade-irish-cream-liqueur-recipe/
Click on this link for my recipe for Irish Cream French Toast.
If you have made this recipe and enjoyed it and/or wish to share it with your friends and family, please do so on social media but be sure to share the direct link to this posting from my website.
Connect with My Island Bistro Kitchen on Social Media
Join the Facebook page for My Island Bistro Kitchen: https://www.facebook.com/MyIslandBistroKitchen/
Follow “the Bistro” on “X” (formerly Twitter): https://twitter.com/PEIBistro/
See the drool-worthy gallery of mouth-watering food photos from My Island Bistro Kitchen on Instagram: https://www.instagram.com/peibistro/
Follow “the Bistro” on Pinterest at https://www.pinterest.ca/peibistro/ and pin the Pinterest-ready photo at the end
Pin This Recipe To Pinterest!
Steamed Carrot Pudding Recipe
This Carrot Pudding is an old-fashioned steamed pudding made with very plain, simple ingredients – it doesn’t get much more plain than grated carrots and shredded potato! Continue reading Steamed Carrot Pudding Recipe
Marvelous Melting Moments Recipe
How can a cookie with only 6 simple ingredients taste this good!!! Well, they’re not called Marvelous Melting Moments without good reason. One bite of these sweet temptations and, from the rich, tender crumb of the cookie, you’ll find they quickly melt in your mouth. Continue reading Marvelous Melting Moments Recipe
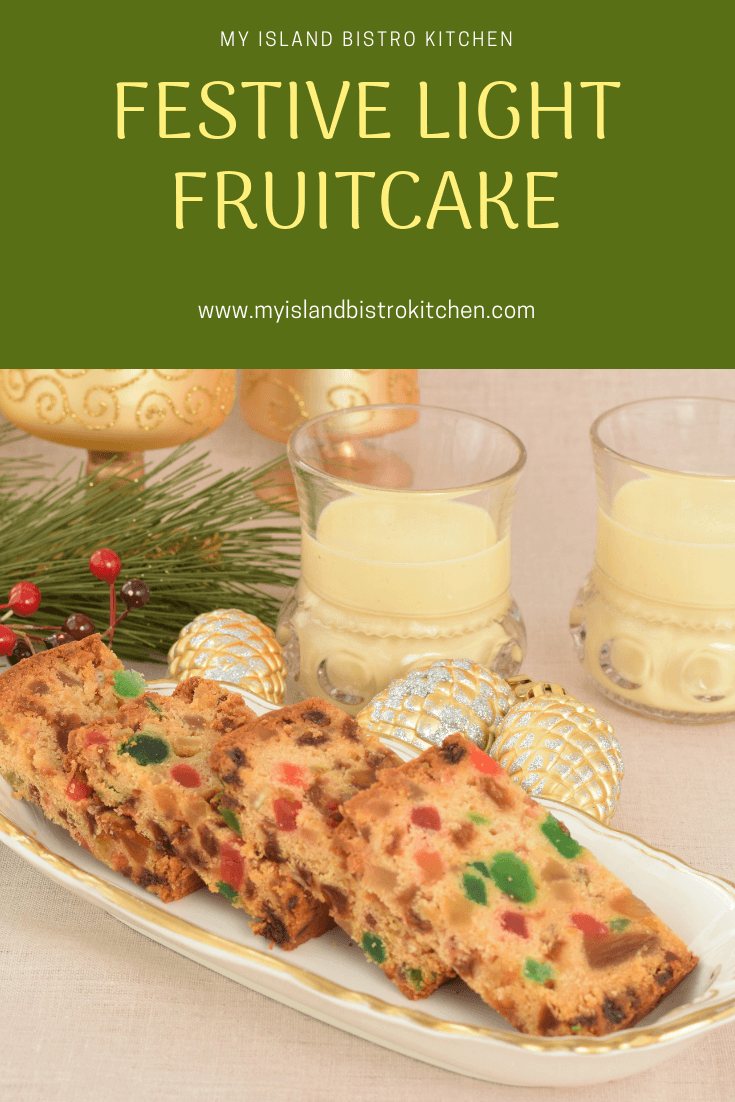
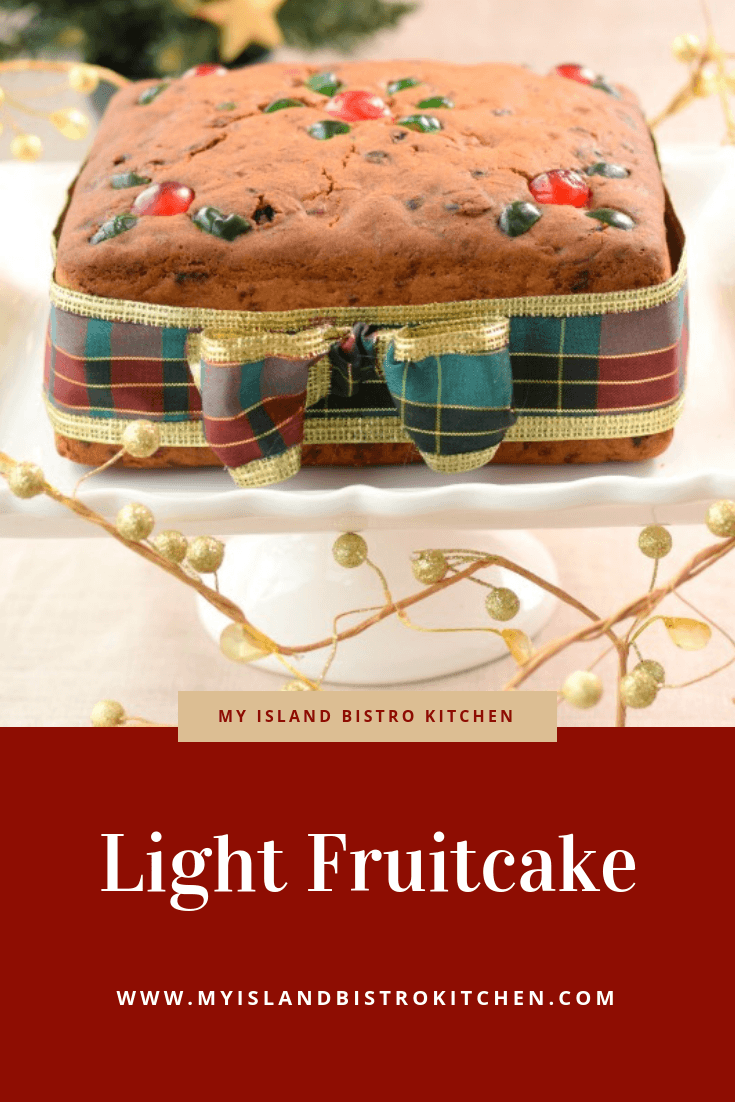
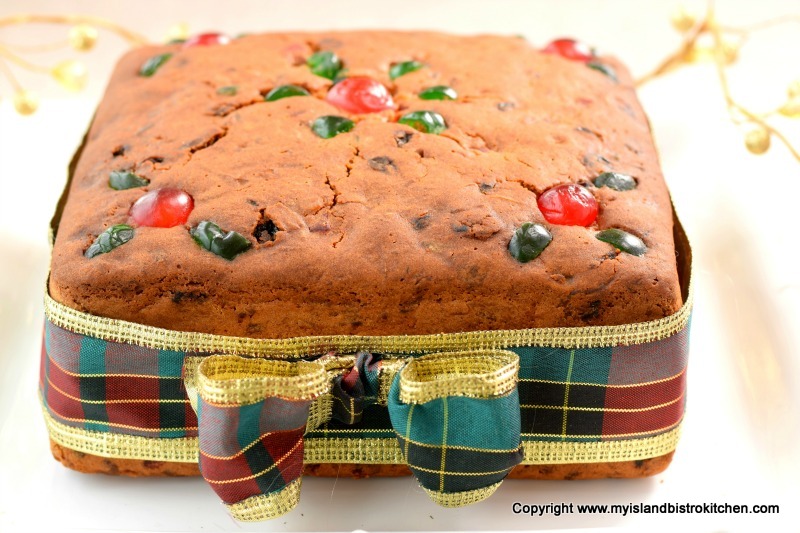
Festive Light Fruitcake Recipe

One of my favorite foods to make is the traditional fruitcake – both dark and light versions. And, I adore the scent in my home as the cakes bake. I don’t make both dark and light every year. Rather, I make a dark cake one year then, the following year, make a light cake.
My Christmas season begins in early November when the first thing done to prepare for the holidays is to make the fruitcake. Fruitcakes do well with some “ageing” before they are cut – about 3 weeks is the absolute bare minimum a light fruitcake should age and, preferably longer. Dark fruitcakes take several weeks (and some will argue, months) to age and mellow before being cut into and served. This period allows the flavors to blend well and the cake to moisten which, of course, is always aided by a brushing of a weekly “nightcap” of whatever liquor is used in the cake. I tend to put rum in my dark cakes and brandy in the light fruitcakes. This libation not only helps to keep the cake moist but it also infuses flavor into the cake as it ages.
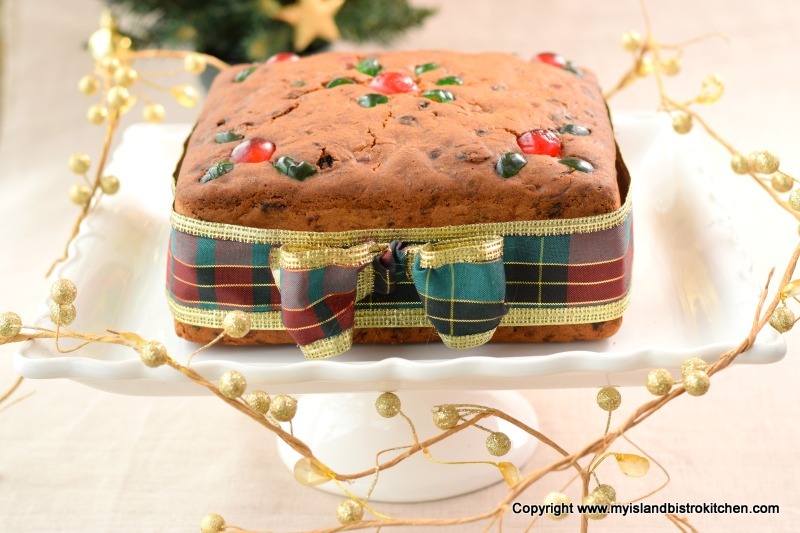
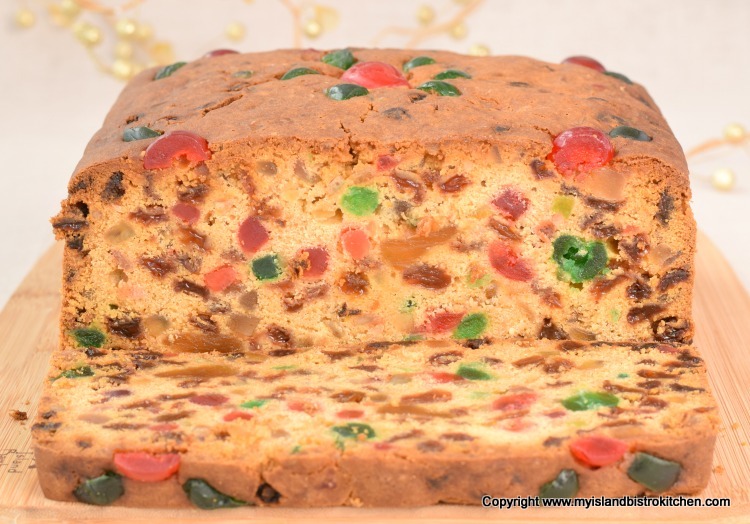
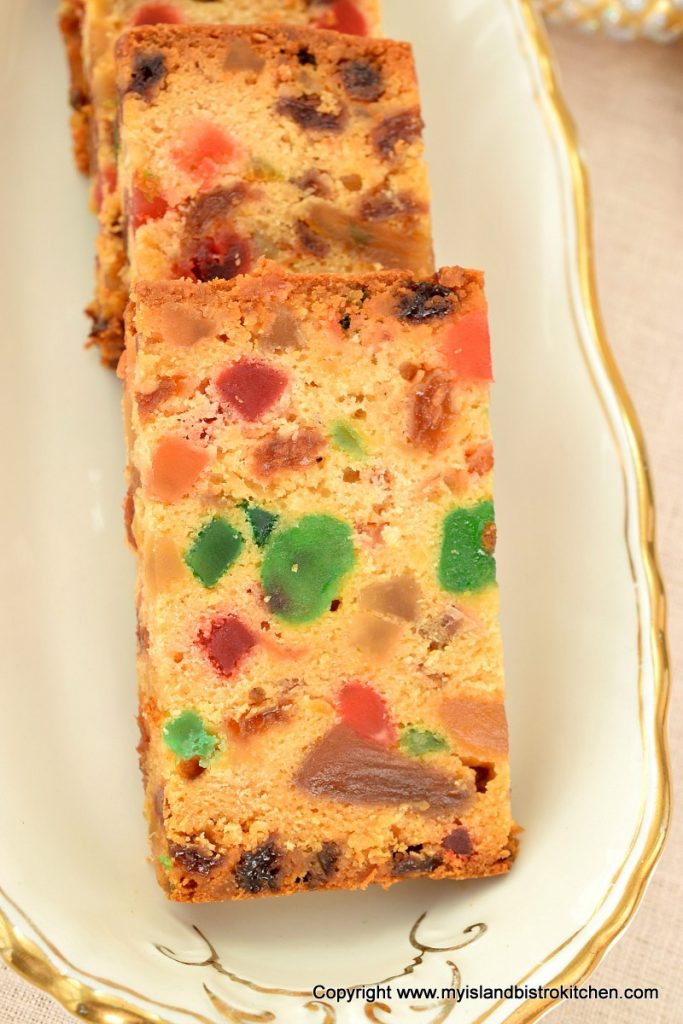
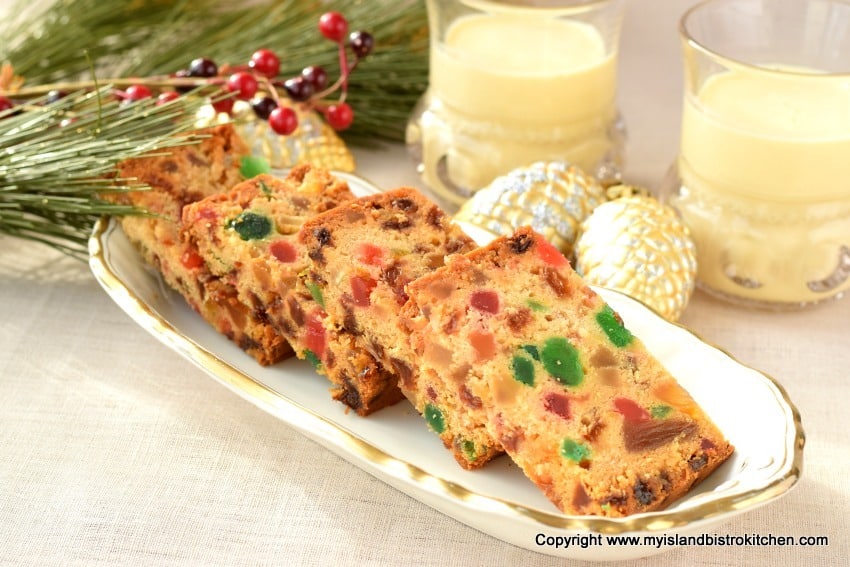
Apart from their lighter color, light fruitcakes tend to be less rich and not quite as sweet as their dark counterparts. The wonderful thing about light fruitcakes is that the light-colored batter allows the jewel-toned glazed fruit to show well. Light fruitcake is both a flavorful and colorful addition to any holiday sweet tray.
When I posted my recipe awhile back for my dark fruit cake, I offered several tips and hints on how to make fruitcakes. You can access that information by clicking here. The same tips and hints apply to light fruitcakes.
My version of a light fruitcake is nut-free. I find nuts can sometimes go rancid and can interfere with the nice soft texture of the fruitcake so I have long since dispensed with them in my cakes. As well, for any one with an allergy to nuts, a fruitcake with nuts would be off limits.
[Printable version of recipe follows at end of posting]
Light Fruit Cake
Ingredients:
1 lb golden sultana raisins
6 oz green glazed cherries
6 oz red glazed cherries
4 oz glazed pineapple rings, chopped
¾ lb mixed glazed fruit
¼ lb citron
½ cup brandy
¾ cup flaked coconut
2 tsp finely grated lemon rind
2 tsp finely grated orange rind
1 cup butter, softened at room temperature
1½ cup white sugar
5 large eggs, separated
1 tsp pure vanilla
1 tsp almond flavoring
1 tsp lemon flavoring
½ cup crushed pineapple, drained very well (reserve ¼ cup of the juice)
3¾ cups all-purpose flour (set aside 1 cup of the flour to flour the fruit mixture)
1½ tsp baking powder
¼ tsp salt
¼ cup orange juice
¼ cup freshly-squeezed lemon juice
¼ cup pineapple juice (from the drained crushed pineapple)
Extra brandy for brushing on cake as it ages and for soaking cheesecloth in which to wrap the cake
Method:
In large bowl, combine the raisins, cherries, glazed pineapple, mixed glazed fruit, and citron. Mix well. Stir in the brandy to coat the fruit. Cover tightly with plastic wrap. Let stand for about 24 hours to macerate the fruit, stirring occasionally. When ready to mix up the cake, add the coconut and lemon and orange rind. Stir well.
Prepare 8-inch square fruitcake pan that is 3 inches deep and has a removable bottom: Lightly spray the bottom and sides of the pan with cooking spray. Line the pan (bottom and sides), with brown paper or double thickness of parchment paper. Lightly spray the paper.
Preheat oven to 275°F.
In large bowl of stand mixer and using the paddle attachment, beat the butter until creamy. Gradually add the sugar and beat until mixture is light and creamy. Beat in the egg yolks, one at a time, beating well after each addition and scraping the sides of the bowl with a spatula to ensure ingredients are all incorporated. Beat 1 additional minute. Beat in the vanilla, almond, and lemon flavorings. Stir in the drained crushed pineapple.
Sift together 2¾ cups of the flour, baking powder, and salt.
In measuring cup or small bowl, combine the orange and lemon juices along with the reserved ¼ cup of pineapple juice.
Add the dry and wet ingredients to the beaten butter and sugar mixture in three additions, starting and ending with the flour mixture. Transfer batter to a very large bowl.
Sprinkle reserved cup of flour over the macerated fruit and toss ingredients lightly and quickly. Gently fold the fruit mixture into the batter.
In clean bowl, beat the egg whites until stiff but not dry. Gently fold the whipped egg whites into the batter.
Transfer batter by large spoonfuls into the prepared baking pan. Use a knife to evenly spread the batter in the pan, smoothing the top. Add a few cherries as decorations to the top of the cake, if desired.
Place small pan of hot water on the lower rack in the oven. Place fruitcake in center of middle rack and bake for approximately 5 – 5¼ hours or until cake is firm to the touch and cake tester inserted into centre of cake comes out clean. After about an hour or so of baking, loosely tent cake with tin foil to prevent it from browning too much. Remove cake from oven and place on rack. Let cake cool in pan for about 40 minutes before carefully removing from pan by inverting it on a tea towel and removing the paper. Carefully turn the cake top side up on to a wire cooling rack.
Let cake cool completely before brushing well with brandy and wrapping in brandy-soaked cheesecloth, followed by plastic wrap and tin foil. Store in a sealed plastic bag in a cool, dry area. Remove wrapping and brush cake top and sides with brandy once a week for 3-4 weeks as the cake “ages” before cutting and serving.
Yield: 1 – 6 lb, 6½ oz cake
For other Fruitcake, or fruitcake style, recipes from My Island Bistro Kitchen, click on the links below:
Dark Fruitcake
Spirited Dundee Cake
Sultana Cake
Gluten-free Light Fruitcake
If you have made this recipe and enjoyed it and/or wish to share it with your friends and family, please do so on social media but be sure to share the direct link to this posting from my website.
Connect with My Island Bistro Kitchen on Social Media
Join the Facebook page for My Island Bistro Kitchen: https://www.facebook.com/MyIslandBistroKitchen/
Follow “the Bistro” on “X” (formerly Twitter): https://twitter.com/PEIBistro/
See the drool-worthy gallery of mouth-watering food photos from My Island Bistro Kitchen on Instagram: https://www.instagram.com/peibistro/
Follow “the Bistro” on Pinterest at https://www.pinterest.ca/peibistro/ and pin the Pinterest-ready photo at the end of this posting to your favorite Pinterest boards!
Pin me to Pinterest!