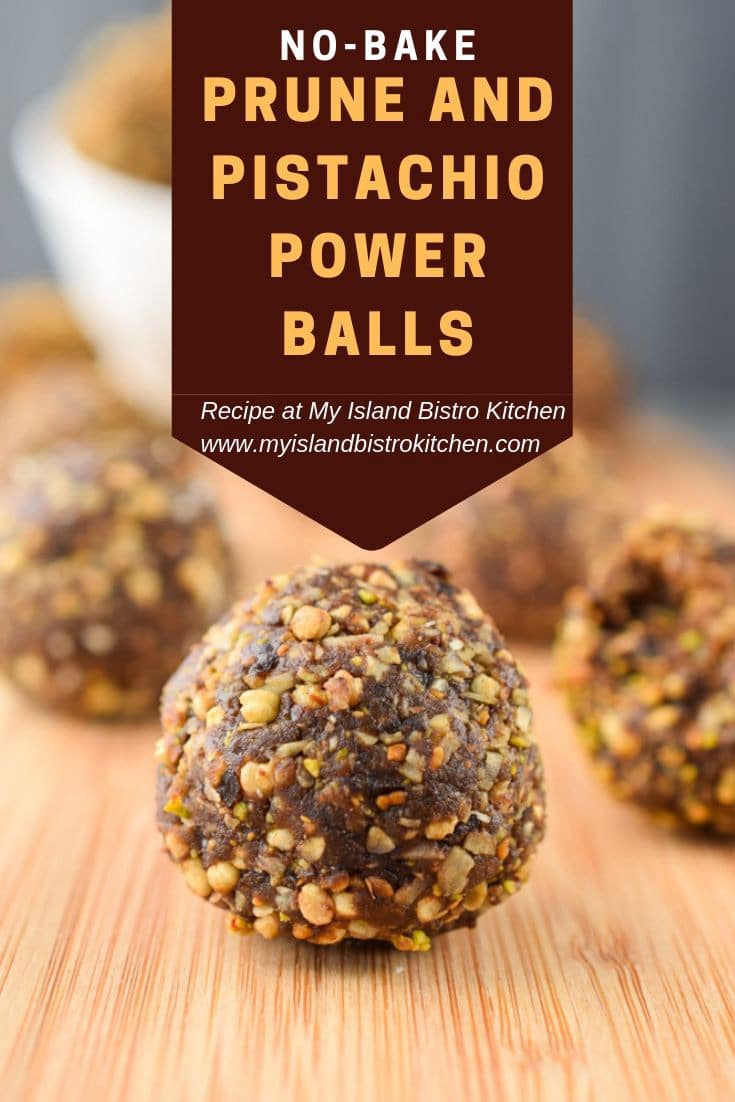
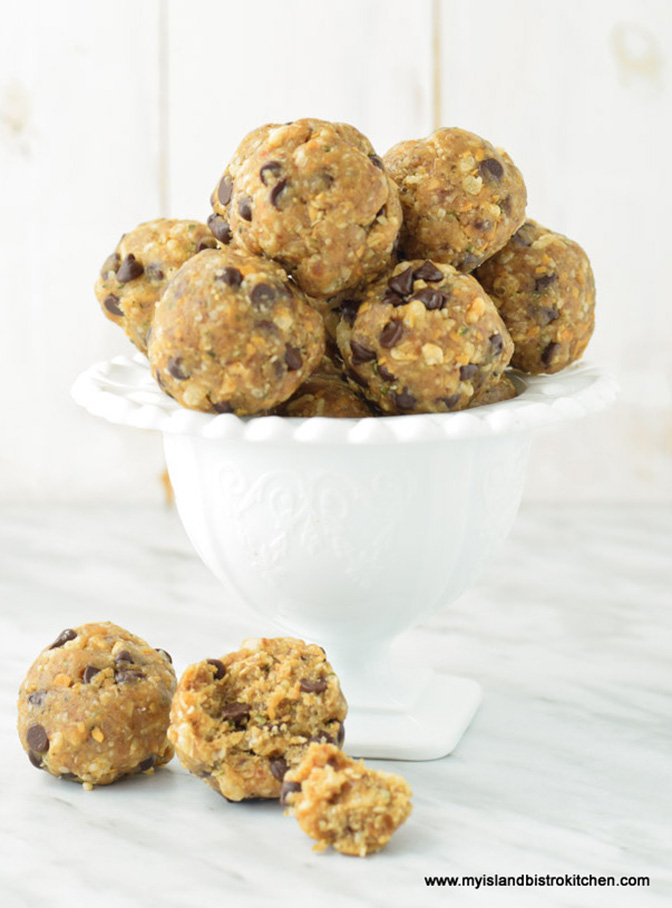
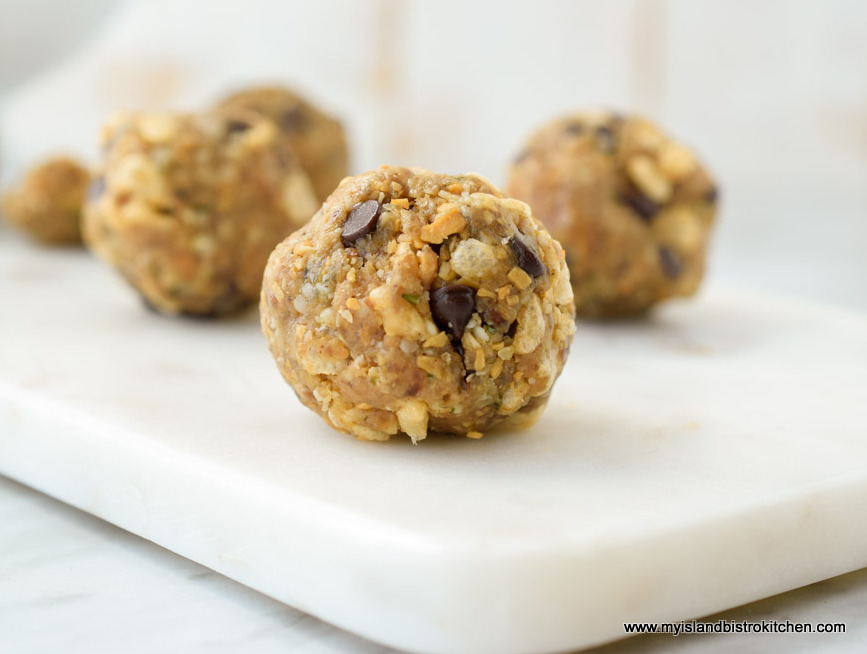
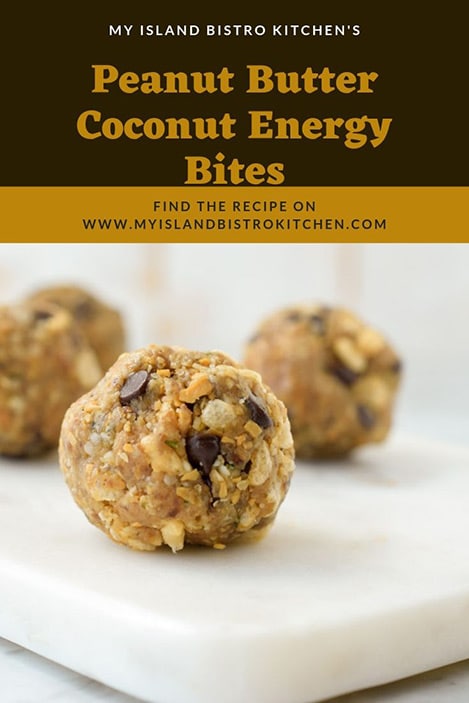
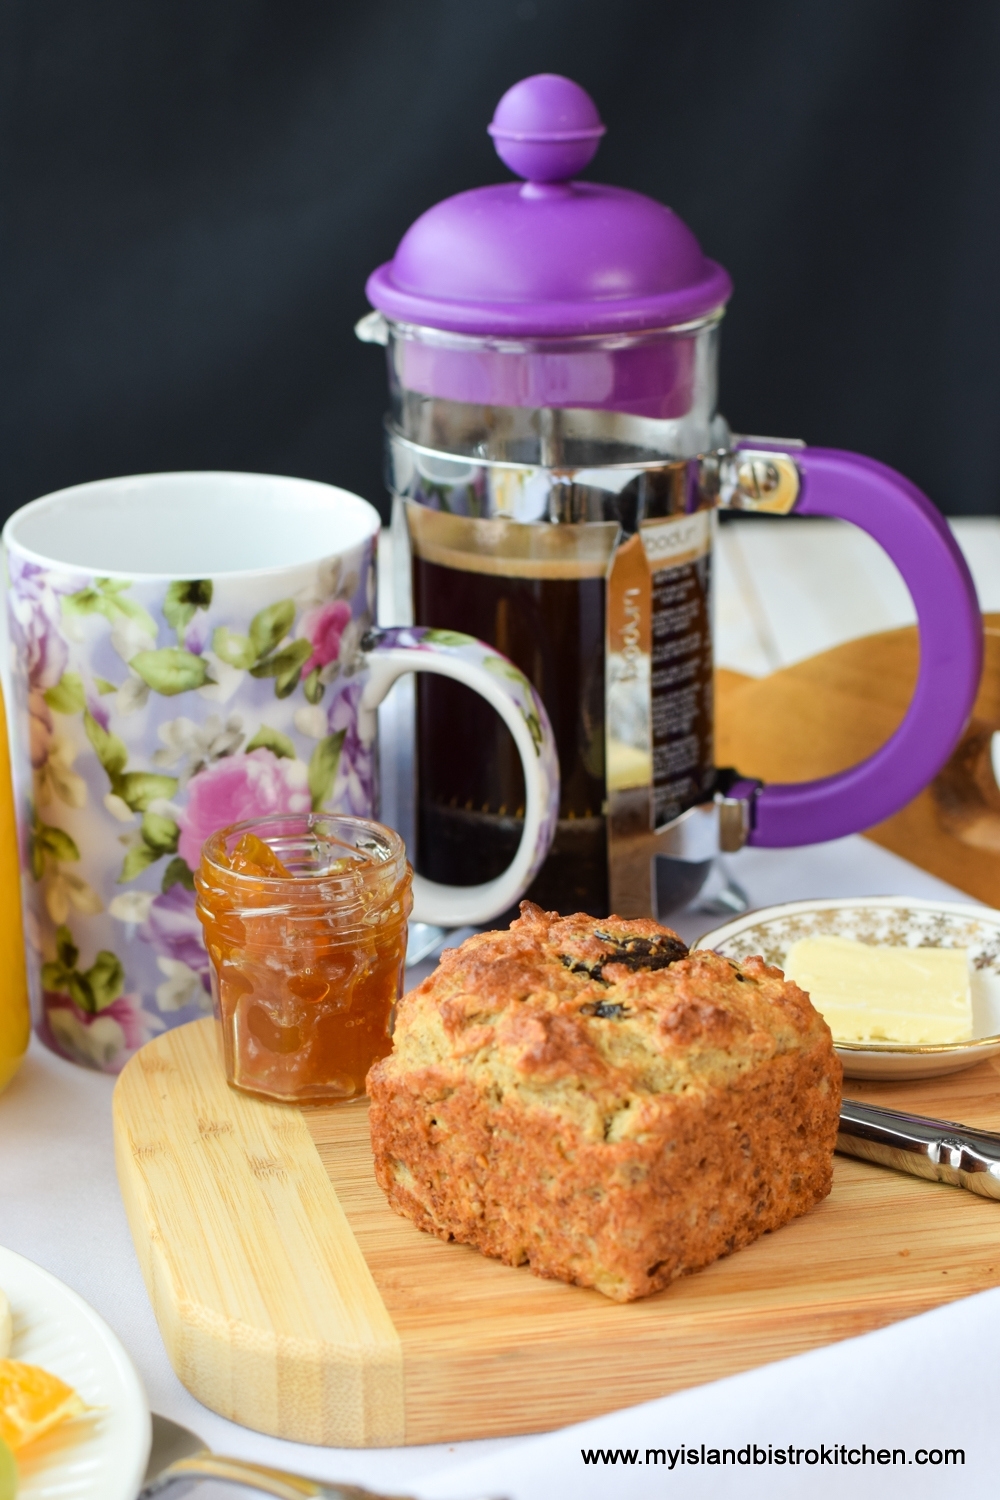
Power balls (sometimes called energy balls, energy bites, or bliss balls) are a super tasty, portable, and convenient on-the-go snack. They are great for the lunch bags and they are the perfect pre- or post-workout snack.
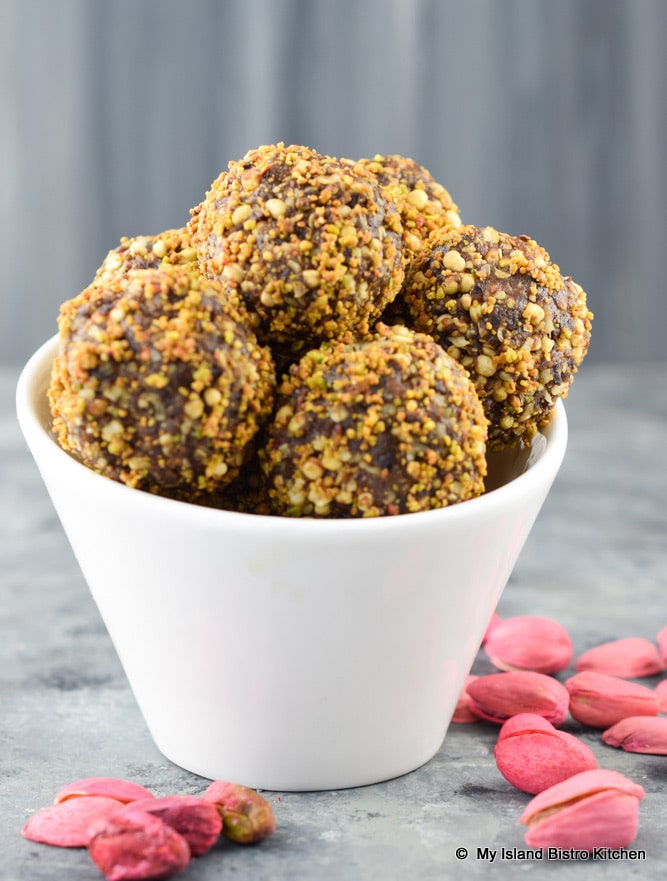
Made with a blend of carefully selected ingredients, these tasty Prune and Pistachio Power Balls provide a great energy boost, particularly during the mid-afternoon slump when energy typically starts to wane for many.
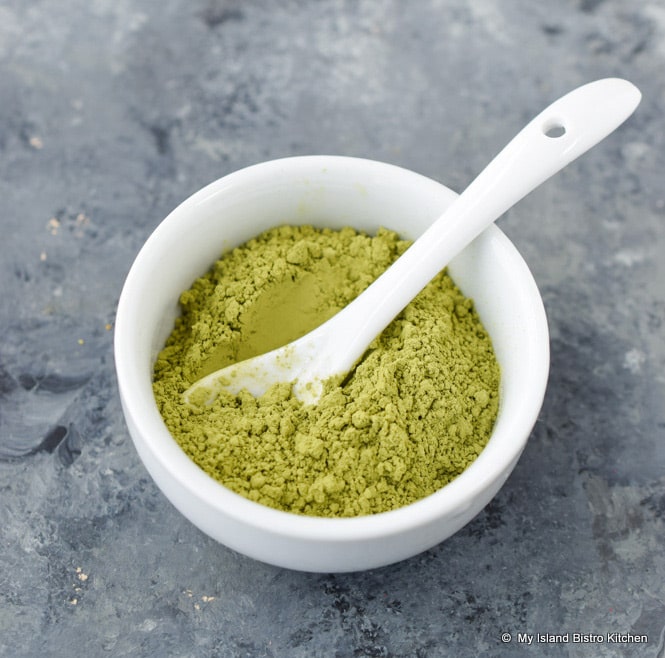
Apart from the usual pantry staples, I bought all of the ingredients for the balls at my local bulk food store. It’s an ideal store for recipes like this one that call for small amounts of ingredients, such as green tea matcha powder, that some people might not have in their cupboards.
Green Tea Matcha Powder
It saves money, too, since you only need to buy what the specific recipe calls for and, in some cases, the ingredients might not be ones the home cook would use up if an entire package or bottle had to be purchased.
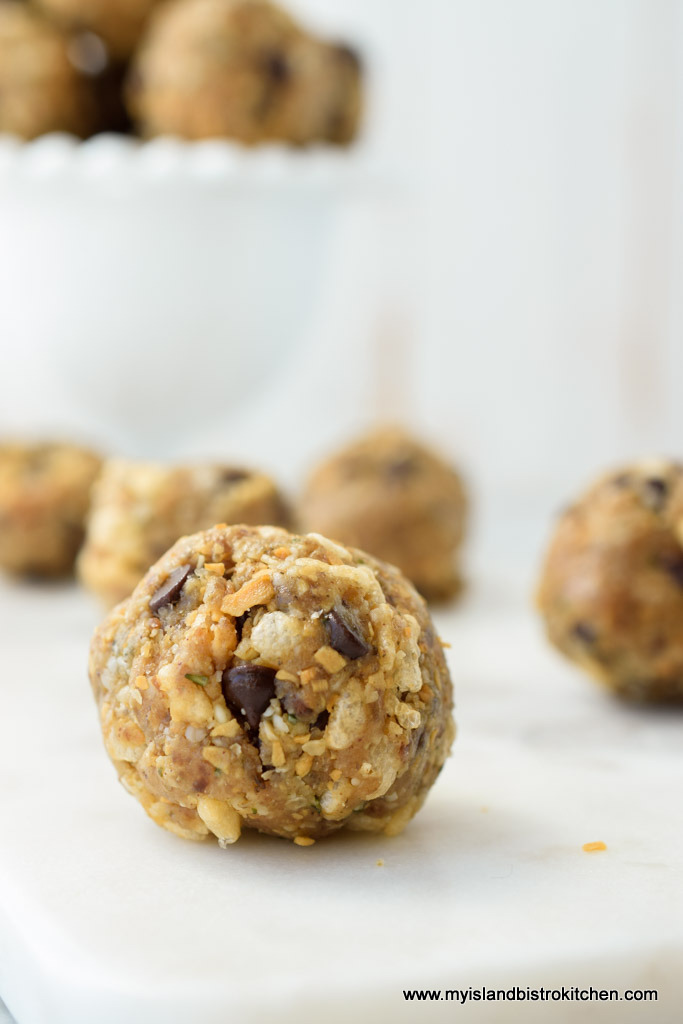
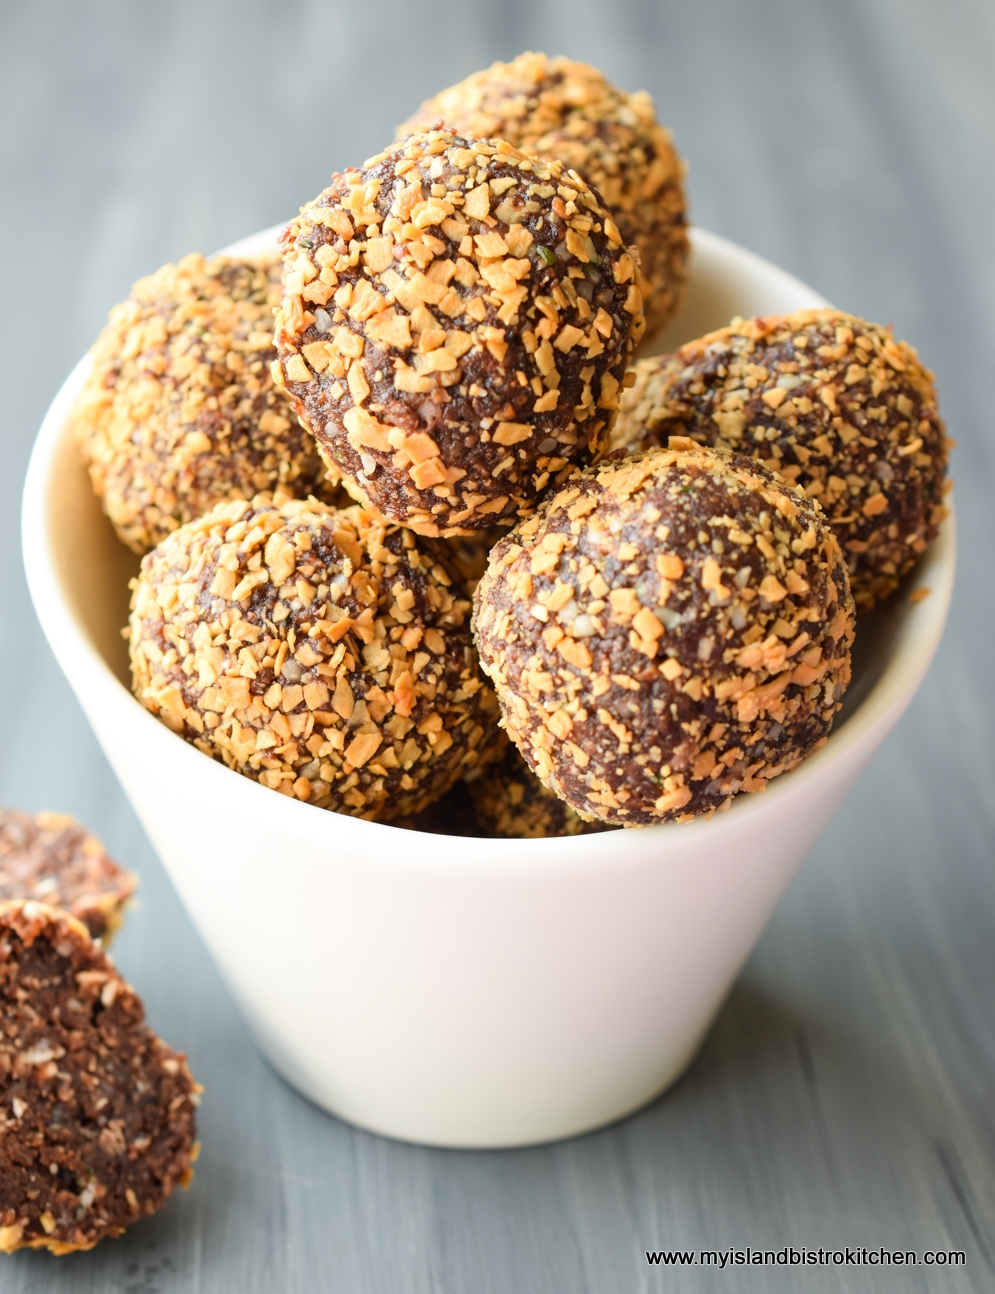
Prune and Pistachio Power Balls
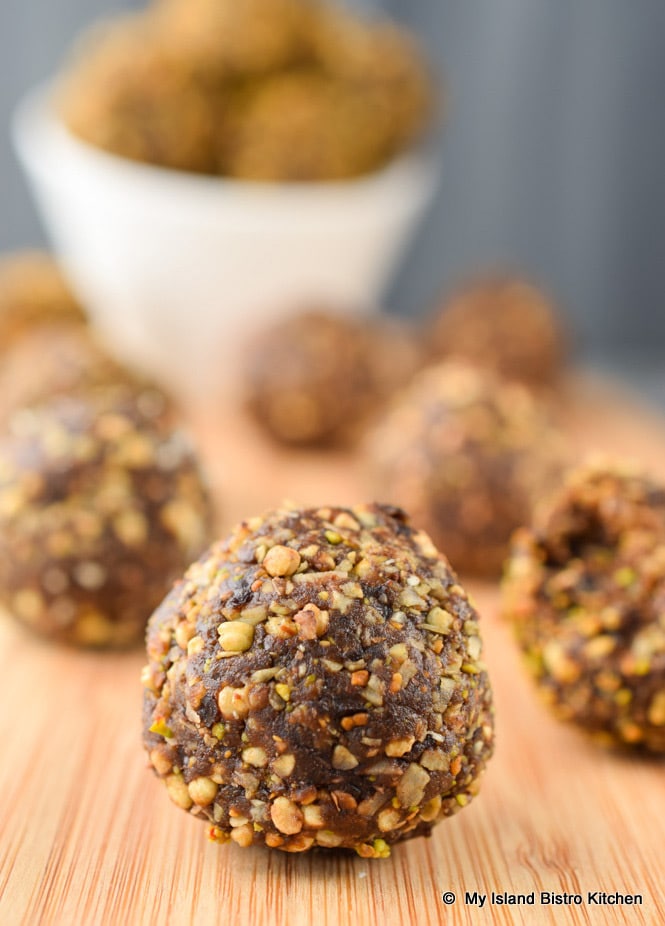
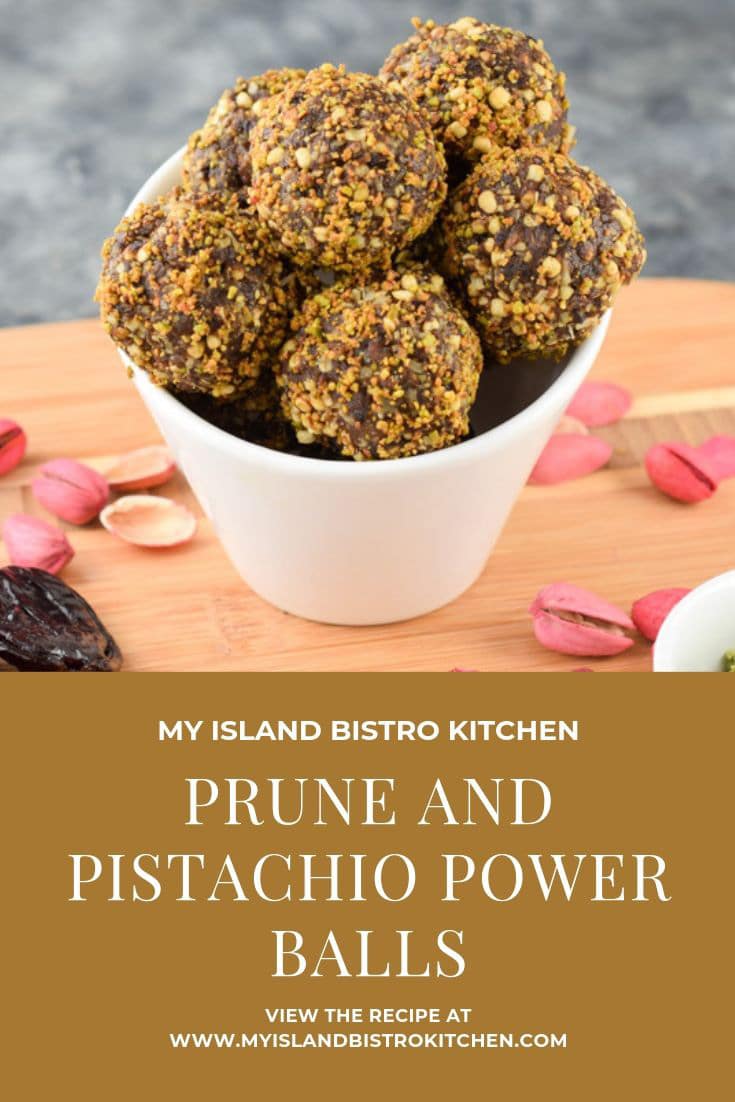
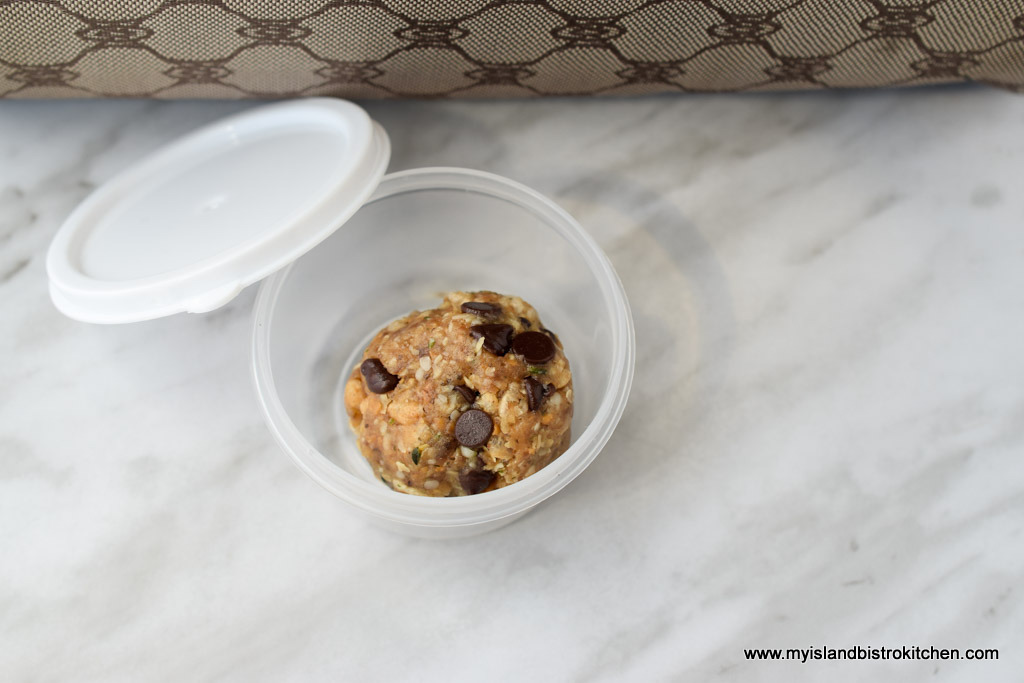
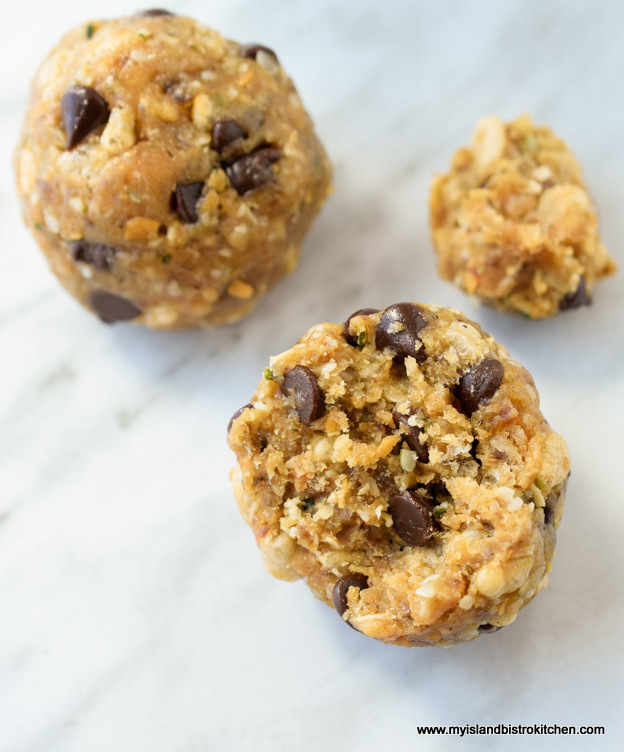
These power balls freeze well and are great to have in the freezer for on-the-go snacks. Check out my posting for Peanut Butter Coconut Energy Bites for an explanation of the four main sets of ingredients typically found in these types of balls. In that posting, you will also find my tips for making energy balls.
Prune and Pistachio Power Balls
[Printable Recipe Follows at end of Posting]
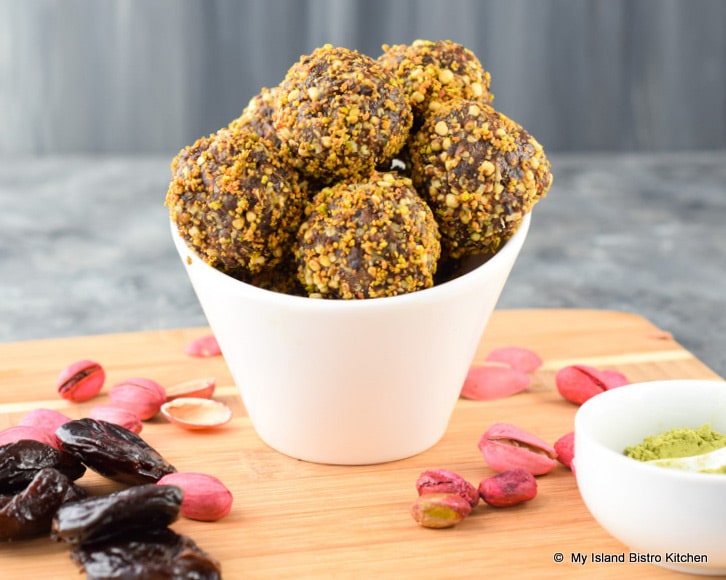
Prune and Pistachio Power Balls
Ingredients:
6 oz dried prunes, coarsely chopped (apx 1 cup chopped) ½ cup quick rolled oats (gluten-free, if required) 1/3 cup sunflower butter ½ cup pistachios, shelled and finely ground (apx. 4 oz unshelled) 1 tbsp ground chia seeds 1 tbsp cocoa 2 tsp chocolate whey protein powder 1½ tsp green tea matcha powder pinch fine sea salt 2 tbsp maple syrup 1 tbsp coconut oil 1 tsp vanilla 2/3 cup puffed quinoa cereal ½ cup sweetened shredded coconut
Additional finely chopped pistachios for rolling balls (optional)
Method:
Pulse prunes in food processor until they become paste-like or clump into a ball. Add the rolled oats, sunflower butter, pistachios, ground chia seeds, cocoa, chocolate whey protein powder, green tea matcha powder, salt, maple syrup coconut oil, and vanilla. Pulse mixture until ingredients are completely blended.
Add the puffed quinoa cereal and coconut and pulse just until combined. If mixture seems too dry, two to three teaspoons of water may be blended into ingredients. Place mixture in the refrigerator for about 20 minutes to chill.
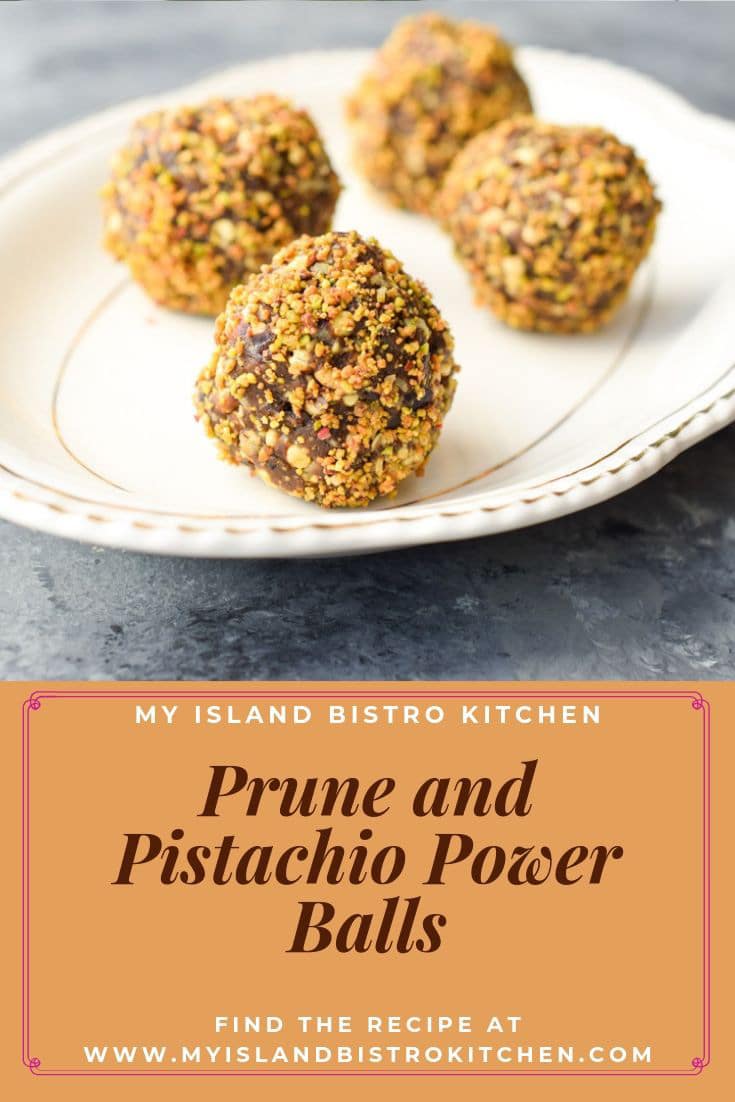
Roll mixture by hand into bite-sized balls. For frame of reference, each ball should weigh approximately 27 grams. Roll balls in finely chopped pistachio nuts, if desired. Place balls on parchment-lined baking sheet and freeze for 20-25 minutes to firmly set. Store balls, in single layers separated by waxed paper, in airtight container for up to five days in the refrigerator or freeze up to three months for longer storage.
(and you can pin any of the Pinterest-ready photos below to your favorite Pinterest boards)
Of course, by subscribing to receive an email notification of new posts and recipes, you can be among the first to know when I publish a new post or recipe. Simply enter your name and email address in the Subscription block over on the right-hand side of my home page.
PIN ME TO PINTEREST!
For other energy ball recipes from My Island Bistro Kitchen, click on the links below:
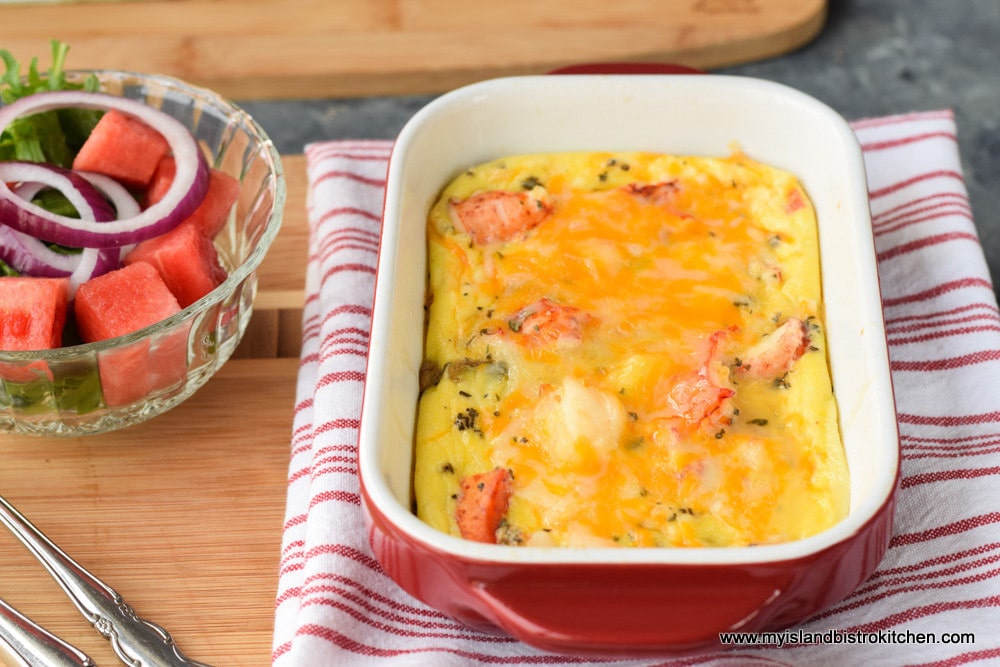
Prune and Pistachio Power Balls make a convenient on-the-go portable snack. These little balls of power are also the perfect pre- or post-workout snack.
Course Snack
Keyword energy balls, energy bites, power balls
Servings18
My Island Bistro KitchenMy Island Bistro Kitchen
Ingredients
6ozdried prunes, coarsely chopped (apx 1 cup chopped)
½cupquick rolled oats (gluten-free, if required)
1/3cupsunflower butter
½cuppistachios, shelled and finely ground (apx. 4 oz unshelled)
1tbspground chia seeds
1tbspcocoa
2tspchocolate whey protein powder
1½tspgreen tea matcha powder
pinchfine sea salt
2tbspmaple syrup
1tbspcoconut oil
1tspvanilla
2/3cuppuffed quinoa cereal
½cupsweetened shredded coconut
Additional finely chopped pistachios for rolling balls (optional)
Instructions
Pulse prunes in food processor until they become paste-like or clump into a ball. Add the rolled oats, sunflower butter, pistachios, ground chia seeds, cocoa, chocolate whey protein powder, green tea matcha powder, salt, maple syrup coconut oil, and vanilla. Pulse mixture until ingredients are completely blended.
Add the puffed quinoa cereal and coconut and pulse just until combined. If mixture seems too dry, two to three teaspoons of water may be blended into ingredients. Place mixture in the refrigerator for about 20 minutes to chill.
Roll mixture by hand into bite-sized balls. For frame of reference, each ball should weigh approximately 27 grams. Roll balls in finely chopped pistachio nuts, if desired. Place balls on parchment-lined baking sheet and freeze for 20-25 minutes to firmly set. Store balls, in single layers separated by waxed paper, in airtight container for up to five days in the refrigerator or freeze up to three months for longer storage.
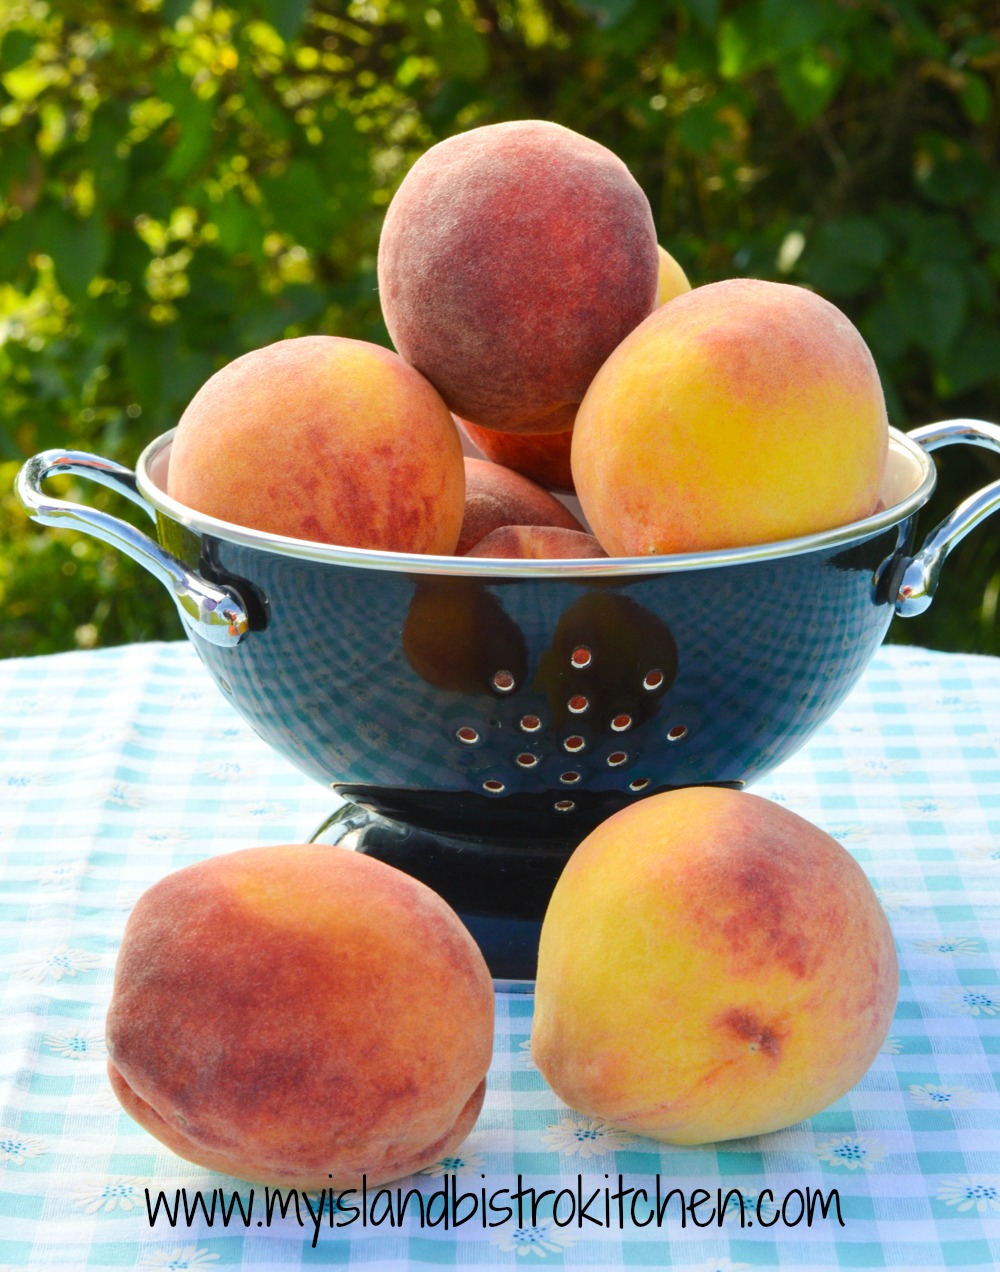
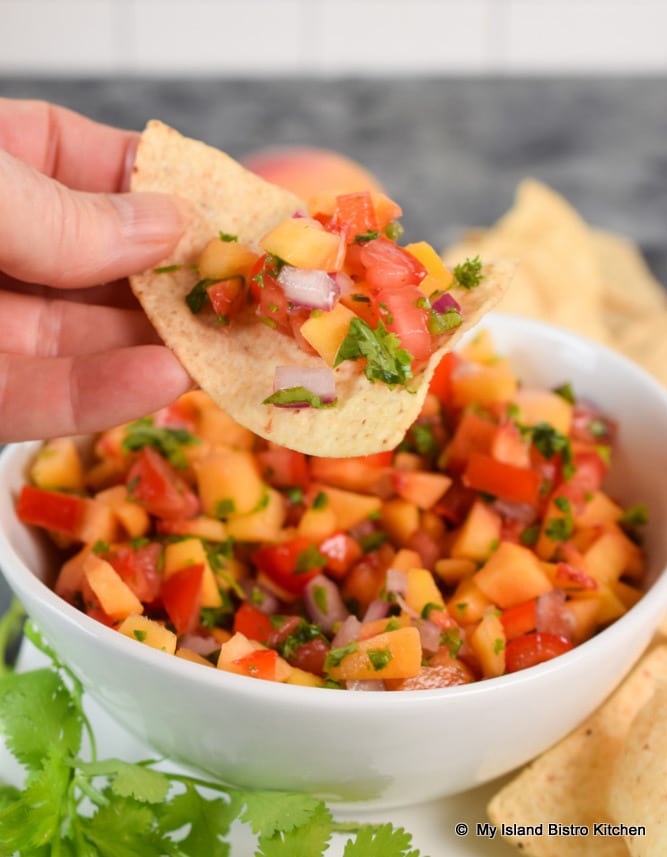
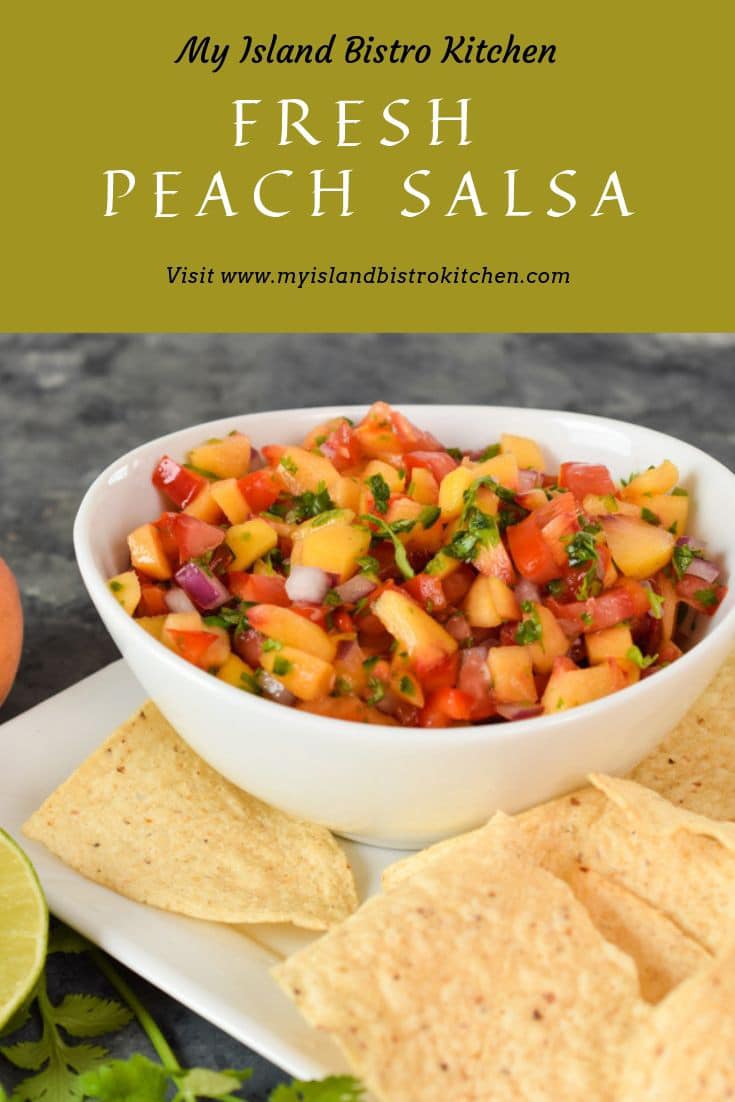
I like to use fresh produce when it is in season. It has so much more flavor than buying the same product when it is out of season. There are certain dishes that super fresh produce is essential and Fresh Peach Salsa is one of them. Versatile, this salsa can, of course, be used as a dip for tortilla chips and it can also be used as a topping for cooked fish, pork chops, or chicken breasts and for a number of other uses as well.
Peach Salsa
There are two types of salsa – Fresh and processed (bottled). Fresh salsa is meant to be used shortly after it has been mixed up. Ingredients in a fresh salsa are raw and the juices that emanate from the fruit and vegetables will be water thin. The ingredients will have vibrant flavor and the vegetables and fruits will hold their shape and be crisp, never soggy or dull. This is in contrast to a processed salsa where the ingredients will be cooked and the salsa will have a thicker consistency, almost sauce-like in texture. A cooked salsa will have a longer shelf life than the fresh salsa.
This colorful fresh Peach Salsa is super showy and very tasty.
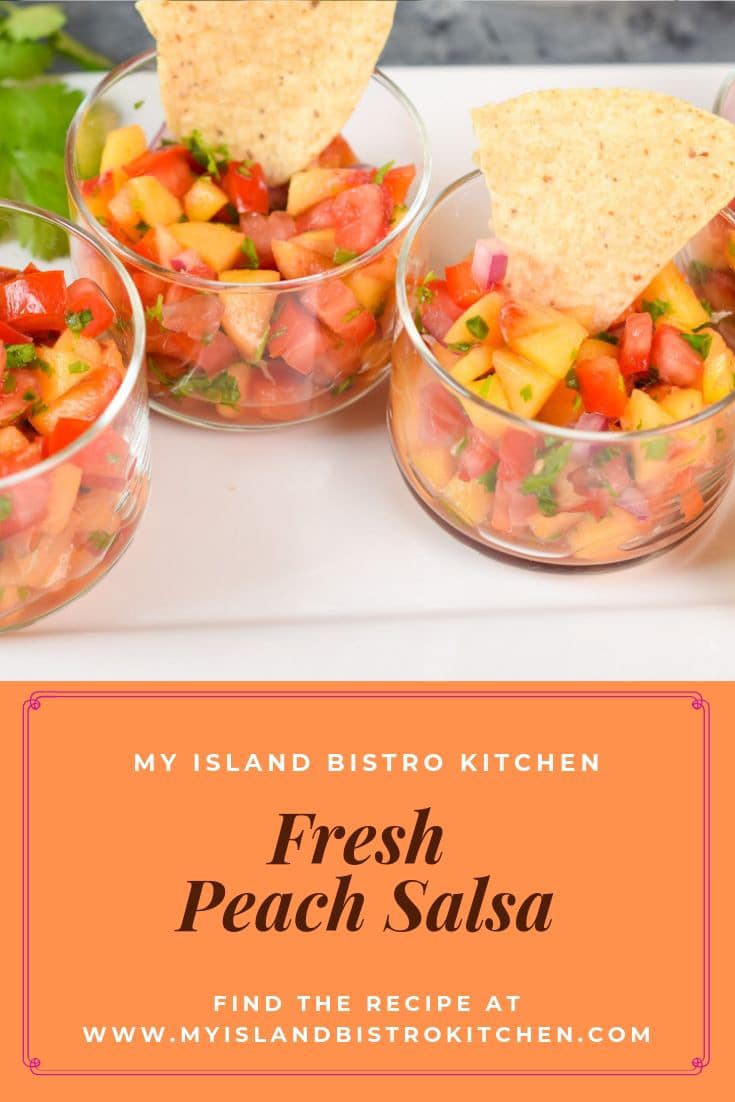
Fresh Peach Salsa
The great thing about the salsa is that the seasonings can be adjusted according to one’s personal taste. For my recipe, I have purposely gone gentle on the amount of Jalapeño pepper used as well as the garlic and ginger. My recommendation is, as always, to initially make the recipe the way the recipe developer has intended. Then, taste the salsa and, if it does not have sufficient “heat” for your taste, add a bit more seasoning – but just add a bit at a time, tasting as you go. As the old saying goes, you can always add more seasoning but, once it’s in the dish, you can’t remove it.
Peach Salsa
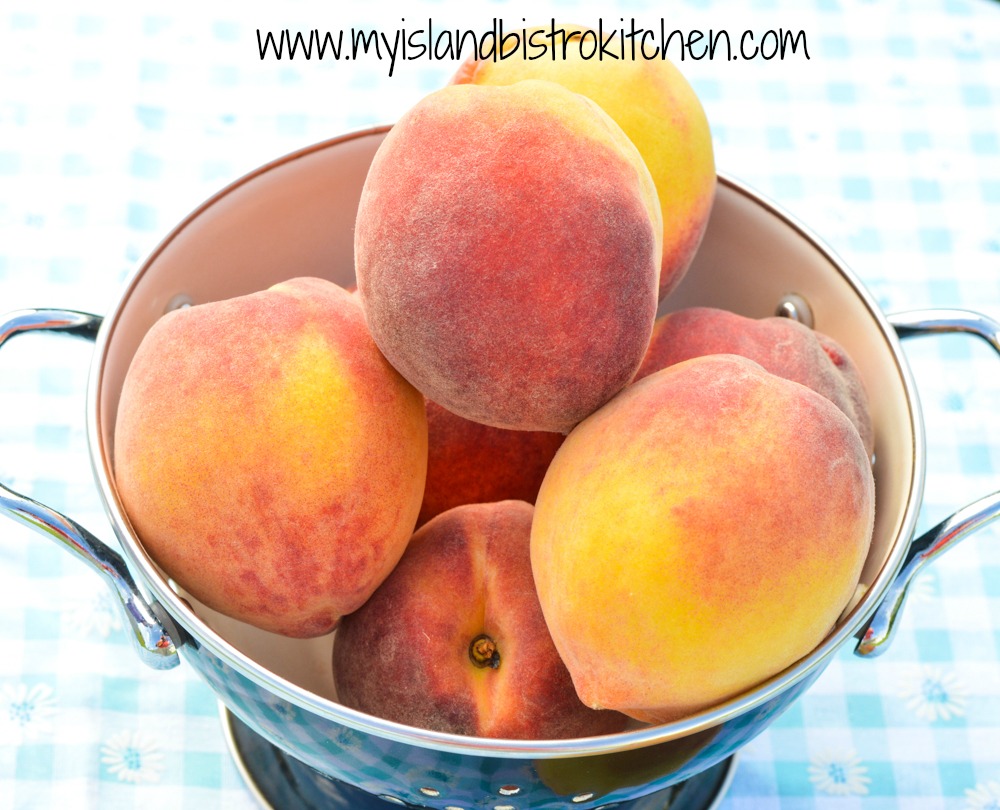
Peaches
Use ripe but still firm fresh peaches, peeled, pitted, and chopped into ¼” pieces. If the peaches are too ripe, they’ll break down too much in the salsa and add too much liquid. You want the peaches to hold their shape.
Peaches
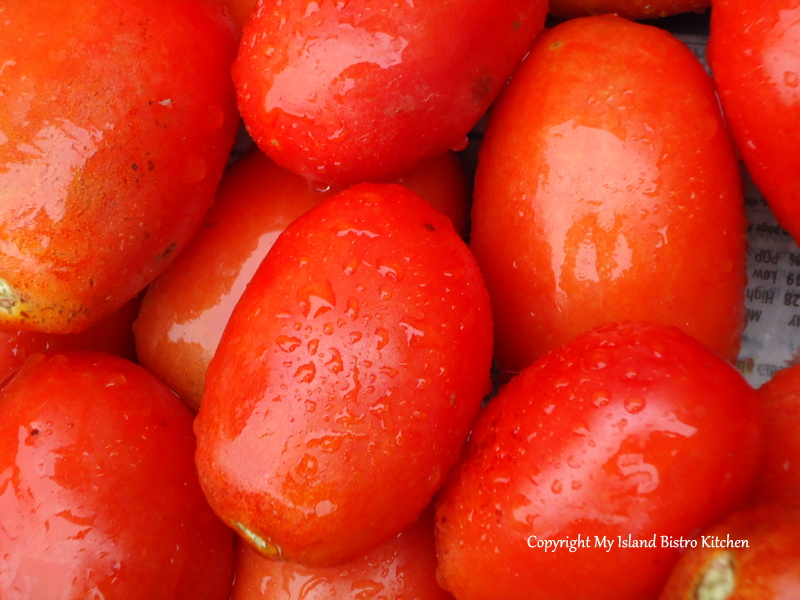
Tomato
Use plum tomatoes (aka the Roma variety) for this salsa. Plum tomatoes are a firm variety with fewer seeds and less juice than most other varieties. Plum tomatoes will hold their shape when diced and won’t add unnecessary juice to the salsa. There will still be some seeds in plum tomatoes so be sure to remove them and the juicy sac that surrounds the seeds then cut the tomato into ¼” pieces. Fresh Peach Salsa is meant to be a clean salsa, free of seeds.
Fresh Plum Tomatoes
Peppers
Adding a bit of sweet red pepper to Peach Salsa adds color and flavor. Of course, there has to be some Jalapeño pepper added, too. This is a hot chile pepper so, unless you like really hot and spicy food, I recommend the “less is more” practice. I add between 1½ – 2 teaspoons of very finely chopped Jalapeño pepper to this salsa. This, of course, can be varied with more or less according to personal taste preference.
Onion
Red or green onion may be used in the Peach Salsa. The red onion will add a more pungent flavor than will the more subtle green onion. I also think its burgundy/eggplant color adds an interesting hue to the salsa. With fresh salsa, color, vibrancy, and texture are key.
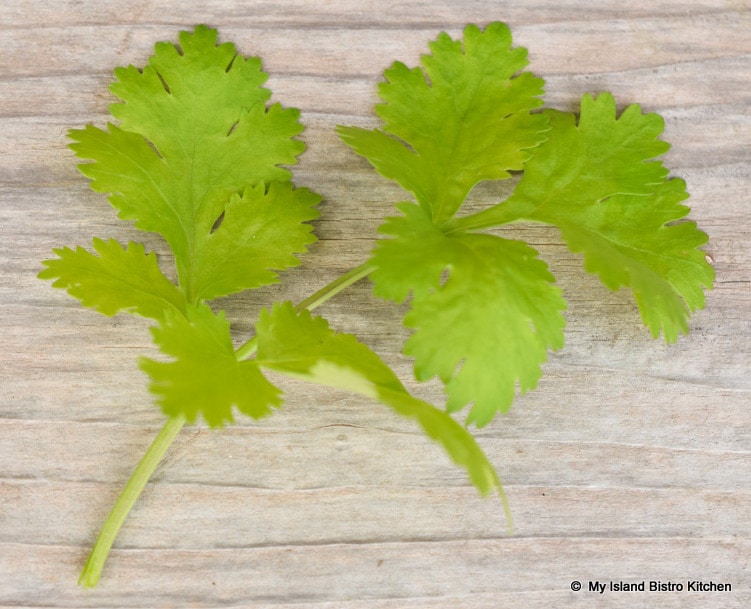
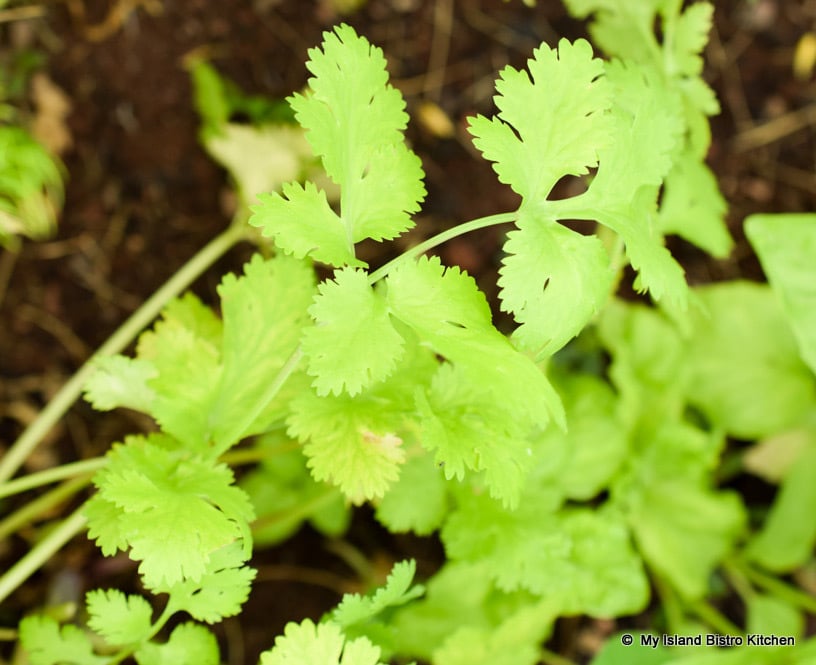
Cilantro
Fresh cilantro is a must for this salsa. I generally use between ¼ and 1/3 cup of the chopped herb. More, or less, may be used according to taste.
Fresh Cilantro
I grow Cilantro in my backyard chef’s garden every year. It’s a great addition to salads and fresh salsa. Cilantro will resemble flat-leaf parsley in appearance but it has a distinctively different flavor. Cilantro’s unique taste is often described as having a citrus undertone. It will add a burst of flavor and is a common ingredient in salsa.
Cilantro
Lime Juice
Always use freshly squeezed lime juice in a fresh salsa – it’s just so much fresher and better tasting than the commercially bottled version.
The lime juice performs double duty in the Peach Salsa. First, the acid in the juice helps to keep the peaches from turning brown quickly. Second, it gives wonderful citrus flavor to this fresh salsa.
Seasonings
Some garlic salt and ground ginger are sufficient to season this salsa since the primary ingredients take care of generating the flavor. Adding ½ teaspoon of sugar adds just a touch of sweetness to balance the Jalapeño pepper and lime juice.
Add some fresh chopped parsley for additional color and subtle flavoring.
Making the Salsa
Easy-peasy describes the method for making fresh Peach Salsa. Once all the ingredients are chopped they, and the seasonings, are simply mixed together in a bowl. Letting the salsa sit for about 15 minutes or so at room temperature allows the flavors to “mix and mingle” and deepen their relationship 🙂 Refrigerate the salsa, covered, for about 15 minutes to chill slightly before serving.
Ways to Enjoy Fresh Peach Salsa
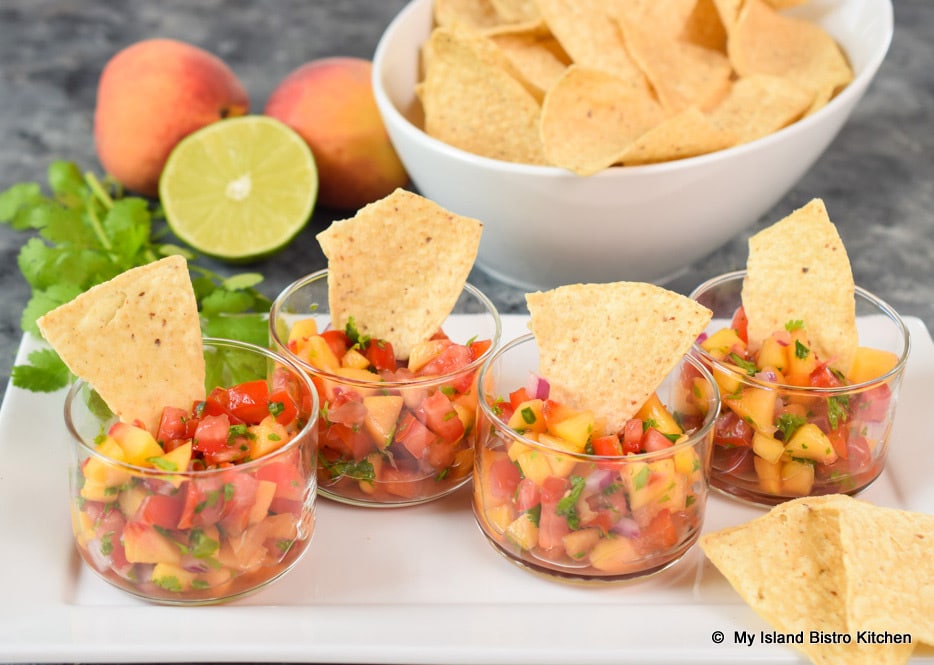
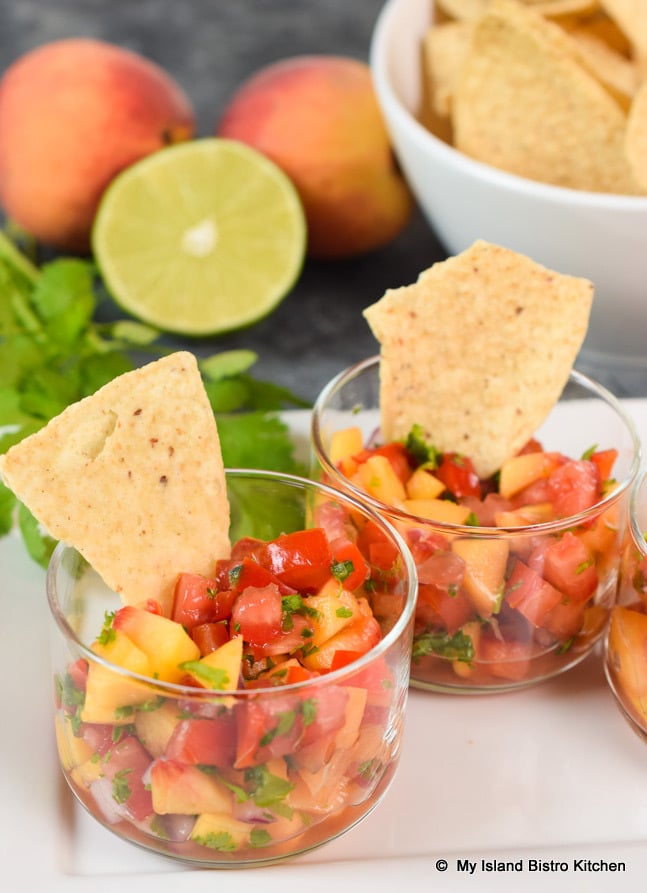
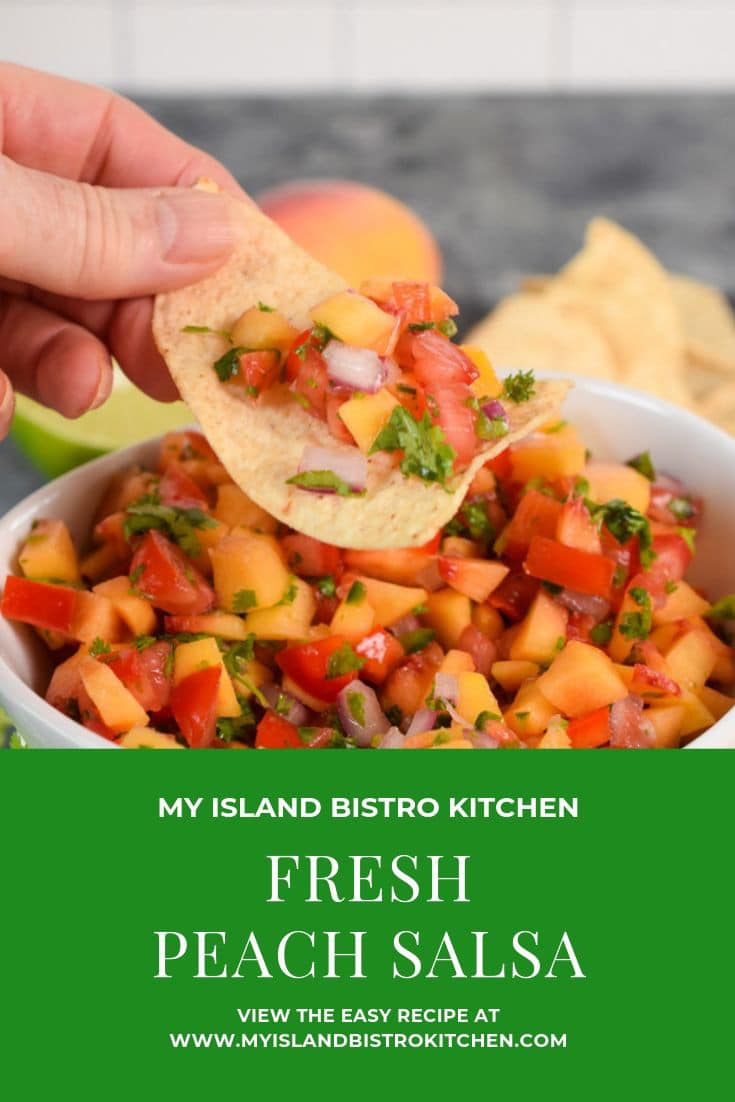
The traditional way to serve this salsa is to simply surround the bowl of salsa with tortilla chips for dipping.
A work-around for those concerned about the sanitation of guests “double dipping” (and there is always at least one who dips the tortilla chip more than once into the salsa) at a gathering is to serve the salsa in individual serving dishes like the small glass ones in the photo below. Guests simply pick up a personal-sized dish of salsa and double-dip the tortilla chips into the salsa to their heart’s content.
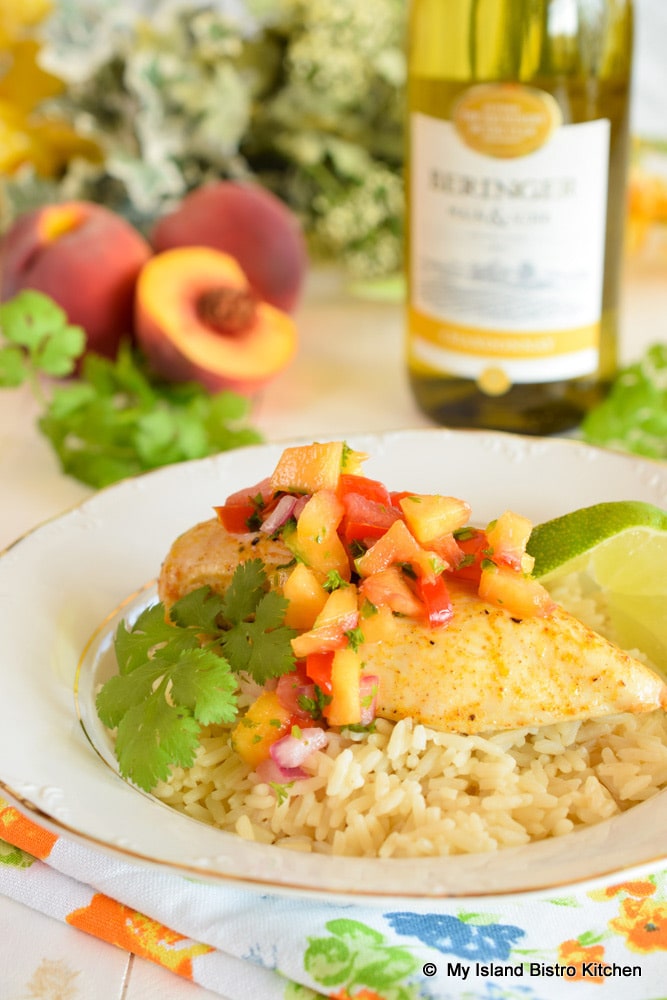
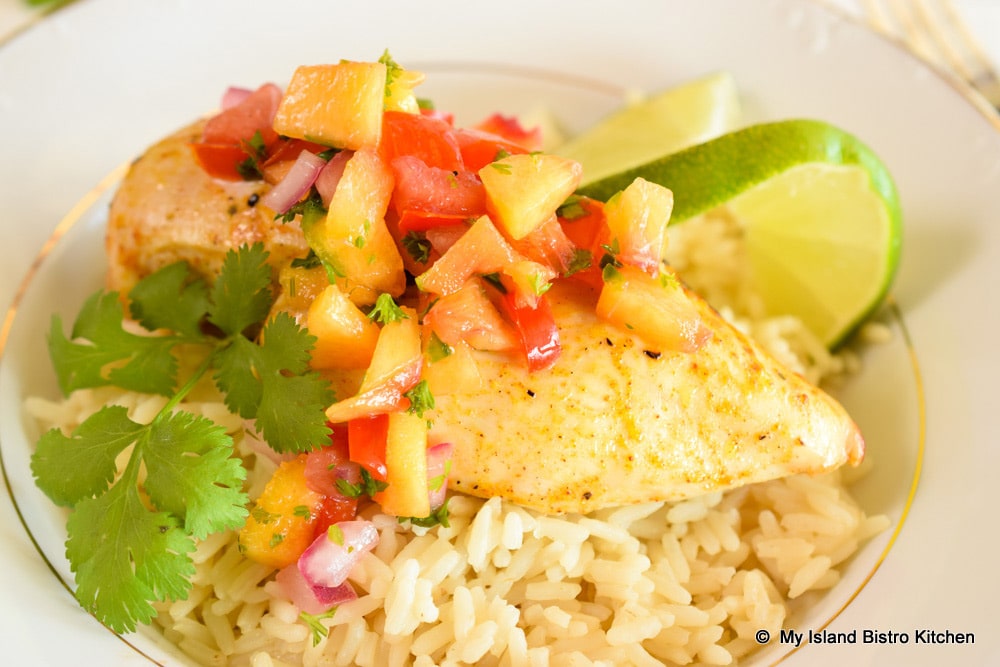
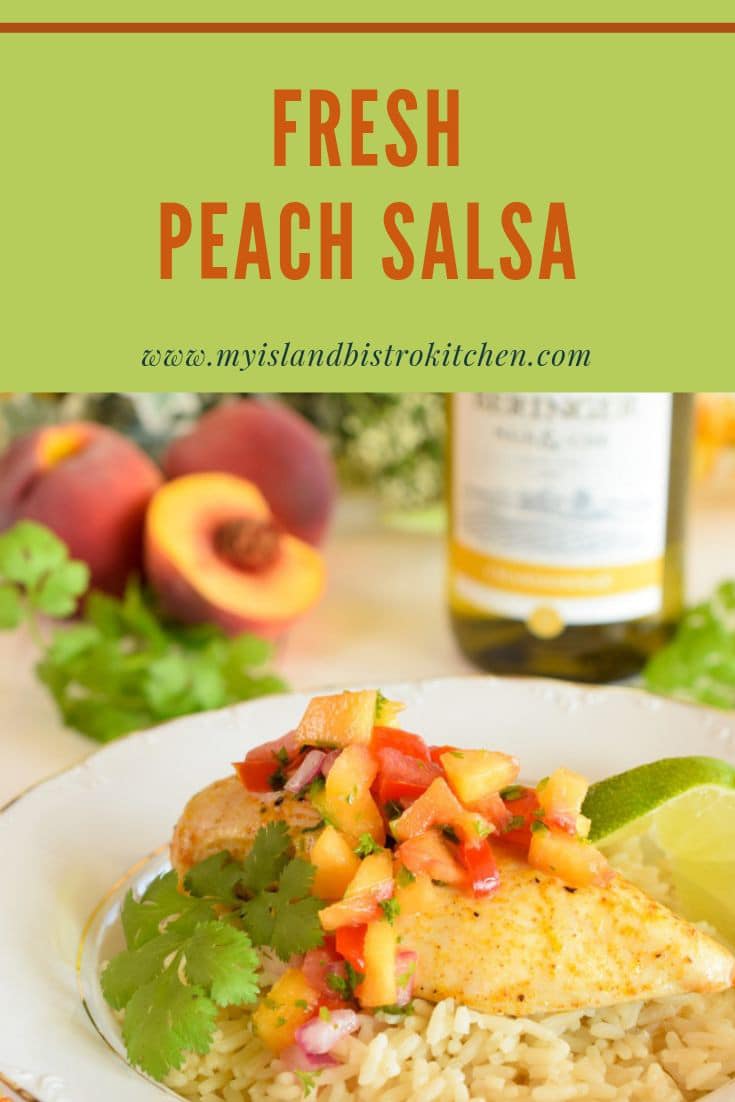
This fresh Peach Salsa is also a lovely addition spooned over cooked fish, pork chops or, as I have done here, oven-roasted chicken breasts served on a bed of rice.
Peach Salsa on Chicken Breast
The colorful salsa dresses up, or completes, a plain piece of meat, fish, or poultry and adds a burst of flavor and texture along with eye appeal.
Peach Salsa tops Roasted Chicken Breast
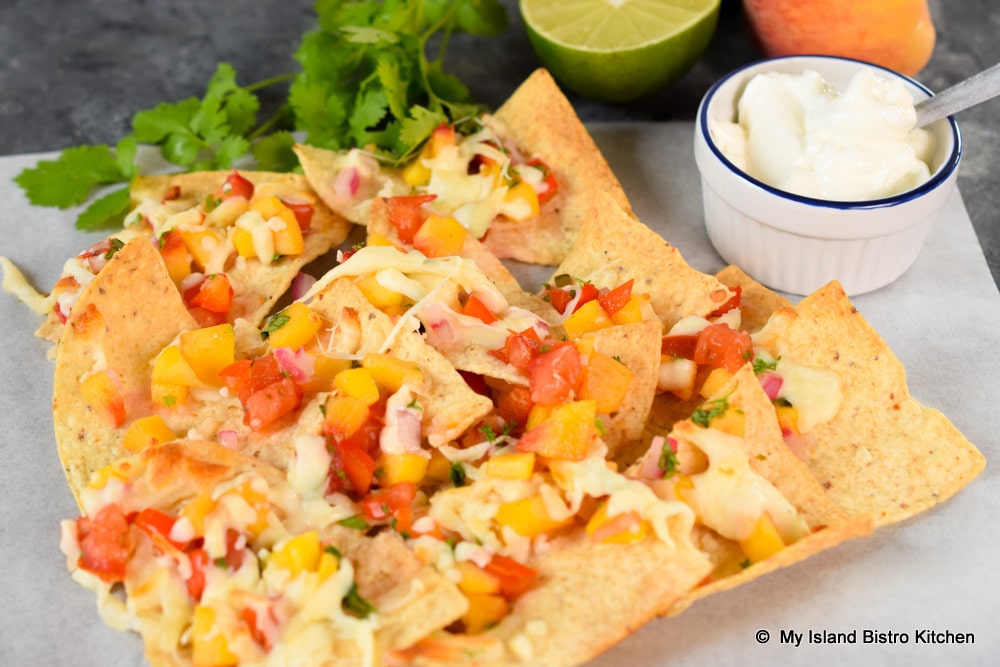
This mild salsa can also be spread over tortilla chips, topped with shredded mozzarella cheese, and placed in the oven at 400°F just until the cheese is melted. A perfectly delightful treat served hot with a dob of sour cream.
Fresh Peach Salsa on Tortilla Chips
Some other ways you might use this salsa: • Topping for tacos • Spooned over scrambled eggs or an omelette • Added as a condiment on burgers • Added to a grilled cheese sandwich • Mixed with sour cream as a topping for baked potatoes • Stirred into tuna or chicken salad • Served over rice as a side dish • Mixed with sour cream and use as a chip dip • Mixed with cold cooked quinoa for a side dish to meat, fish, or poultry
Fresh Peach Salsa
You will find a multitude of uses for this versatile, colorful, and flavorful Peach Salsa.
[Printable recipe follows at end of posting]
Fresh Peach Salsa
Ingredients:
2 medium-sized peaches, peeled, pitted, and diced small 1 medium-sized plum tomato, cored and seeds removed, diced 1/3 cup sweet red pepper, diced 2½ tbsp red onion, diced small (or green onion sliced thin) ¼ cup fresh cilantro, chopped 1½ tbsp freshly squeezed lime juice 1 – 2 tsp Jalapeño pepper, stem and ribs removed, seeded, and minced) ½ tsp granulated sugar ¼ tsp garlic salt 1/8 tsp ground ginger ½ tbsp chopped fresh parsley Fine sea salt, to taste
Tortilla chips for serving (optional)
Method:
Combine all ingredients in bowl. Let stand at room temperature for 15 minutes then cover tightly with plastic wrap and refrigerate for apx. 15 minutes before serving.
Serve as a dip with tortilla chips or spoon over fish, chicken, or pork.
Yield: Apx. 2½ – 3 cups Salsa (depending on size of peaches and tomato)
This easy-to-make Fresh Peach Salsa is the perfect summer condiment to serve with tortilla chips or as a topping to cooked chicken, pork, or fish.
Course Condiment
Keyword peach salsa, peaches, salsa
My Island Bistro KitchenMy Island Bistro Kitchen
Ingredients
2medium-sized peaches, peeled, pitted, and diced small
1medium-sized plum tomato, cored and seeds removed, diced
1/3cupsweet red pepper, diced
2½tbspred onion, diced small (or green onion sliced thin)
¼cupfresh cilantro, chopped
1½tbspfreshly squeezed lime juice
1-2 tsp Jalapeño pepper, stem and ribs removed, seeded, and minced
½tspgranulated sugar
¼tspgarlic salt
1/8tspground ginger
½tbspchopped fresh parsley
Fine sea salt, to taste
Tortilla chips for serving (optional)
Instructions
Combine all ingredients in bowl. Let stand at room temperature for 15 minutes then cover tightly with plastic wrap and refrigerate for apx. 15 minutes before serving.
Serve as a dip with tortilla chips or spoon over fish, chicken, or pork.
Recipe Notes
Yield: Apx. 2½ - 3 cups Salsa (depending on size of peaches and tomato)
And, of course, by subscribing to receive an email notification of new posts and recipes, you can be among the first to know when I publish a new post or recipe. Simply enter your name and email address in the Subscription block over on the right-hand side of my home page.
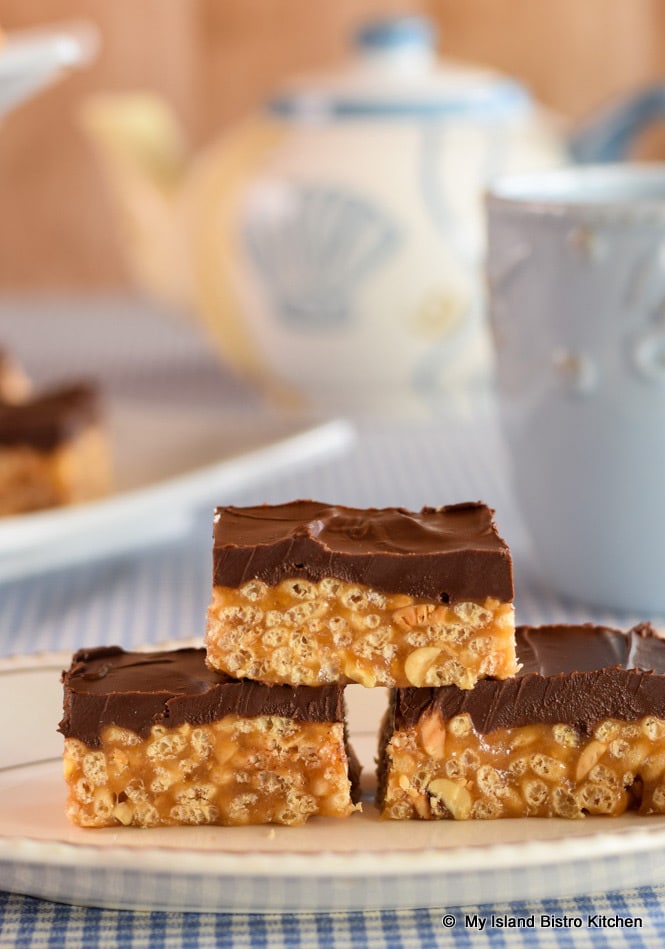
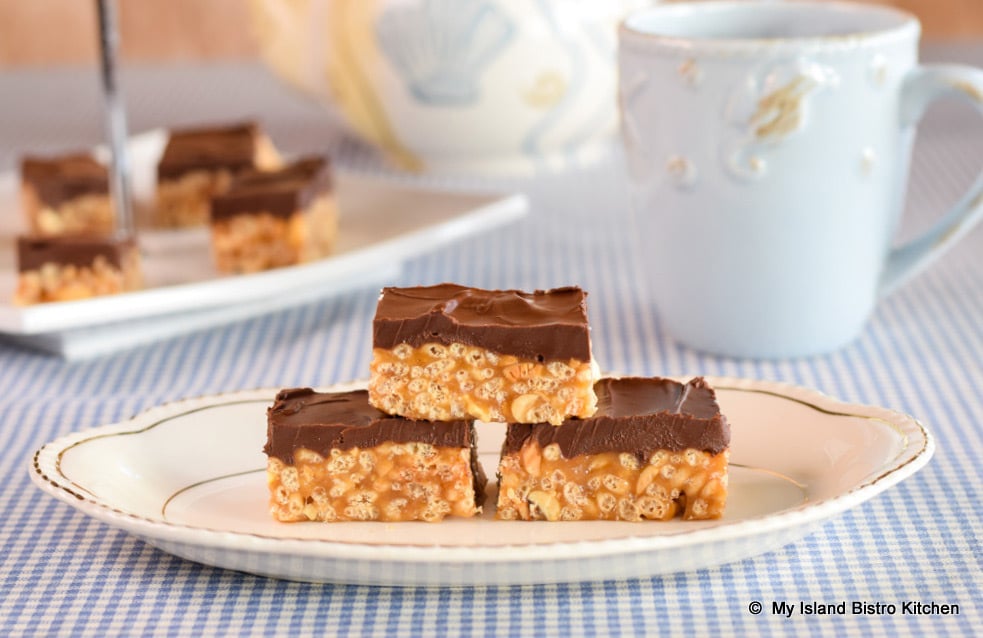
Everybody loves an easy square or bar to make that does not require careful watching as it bakes in the oven and that does not have to be frosted. Sweet Marie Bars fit nicely in that category. Taking only a few very basic ingredients, the result is one delectable treat that often finds its way on to sweet trays, particularly at Christmas.
Sweet Marie Bars have made their way into my picnic basket on more than one occasion since they are more like candy, in my opinion, than what we traditionally think of as squares or cookie bars.
This bar recipe has been around for a long time and is known by names other than Sweet Marie Bars. The core ingredients do not tend to change though the quantities may and, sometimes, the bars are iced with traditional frosting. I have seen them called Peanut Krispie Bars and a variation called Scotheroos that call for some butterscotch chips. There are probably other names for these bars and their variation(s). Regardless what they are called, they are one delectable treat any time of the year!
½ cup peanut butter ½ cup golden corn syrup ½ cup brown sugar, packed 1 tbsp butter
8 oz semi-sweet chocolate pieces or squares ¼ cup peanut butter 2 tsp butter
Method:
Line a 9”x9” square baking pan with tin foil and spray lightly with cooking spray (or grease with butter).
Stir the crispy rice cereal and salted peanuts together in a large heat-proof bowl (e.g., glass or stainless steel). Set aside.
In medium-sized, heavy-bottomed saucepan placed over low heat, combine the peanut butter, corn syrup, brown sugar, and butter. Stir until mixture is blended and heated. Do not boil.
Remove saucepan from heat and pour mixture over the cereal and peanut mixture. Stir to mix. Press mixture into prepared baking pan.
For topping, melt the chocolate in a microwave-safe bowl, a few seconds at a time. When chocolate is about half melted, stir in the peanut butter and butter. Continue to microwave in short bursts of seconds until chocolate is melted. Pour the topping over the square in pan and smooth with a knife or small flat metal spatula. Let cool completely to room temperature before lifting square from pan and cutting it into squares or bars of desired size. Square may cut out better if cooled square has been placed in the refrigerator for 15-20 minutes.
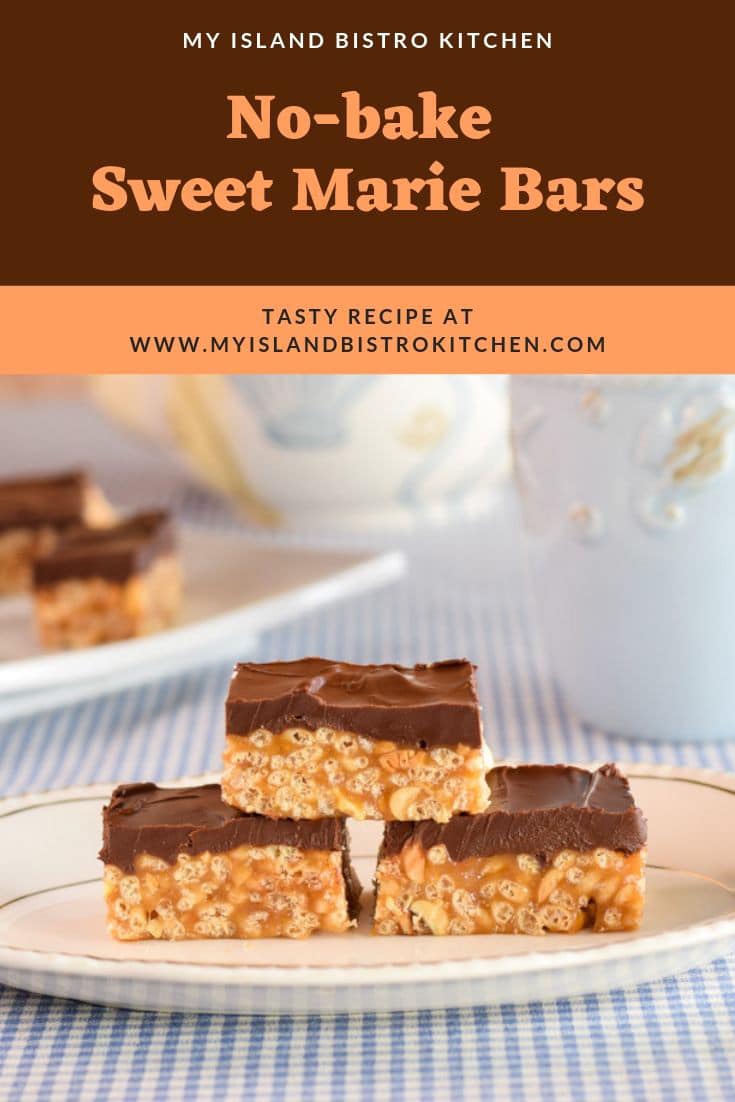
Easy-to-make no-bake bars that combine peanut butter and crispy rice cereal into a base topped with melted chocolate and peanut butter.
Course Snack
Keyword bars, nobake bars, nobake squares, Sweet Marie Bars
My Island Bistro KitchenMy Island Bistro Kitchen
Ingredients
2cupscrispy rice cereal (e.g., Rice Krispies)
¾cupsalted peanuts
½cuppeanut butter
½cupgolden corn syrup
½cupbrown sugar, packed
1tbspbutter
8ozsemi-sweet chocolate pieces or squares
¼cuppeanut butter
2tspbutter
Instructions
Line a 9”x9” square baking pan with tin foil and spray lightly with cooking spray (or grease with butter).
Stir the crispy rice cereal and salted peanuts together in a large heat-proof bowl (e.g., glass or stainless steel). Set aside.
In medium-sized, heavy-bottomed saucepan placed over low heat, combine the peanut butter, corn syrup, brown sugar, and butter. Stir until mixture is blended and heated. Do not boil.
Remove saucepan from heat and pour mixture over the cereal and peanut mixture. Stir to mix. Press mixture into prepared baking pan.
For topping, melt the chocolate in a microwave-safe bowl, a few seconds at a time. When chocolate is about half melted, stir in the peanut butter and butter. Continue to microwave in short bursts of seconds until chocolate is melted. Pour the topping over the square in pan and smooth with a knife or small flat metal spatula. Let cool completely to room temperature before lifting square from pan and cutting it into squares or bars of desired size. Square may cut out better if cooled square has been placed in the refrigerator for 15-20 minutes.
Recipe Notes
Yield:One (1) 9” pan of squares/bars
[Copyright My Island Bistro Kitchen]
If you have made this recipe and enjoyed it and/or wish to share it with your friends and family, please do so on social media but be sure to share the direct link to this posting from my website.
Connect with My Island Bistro Kitchen on Social Media
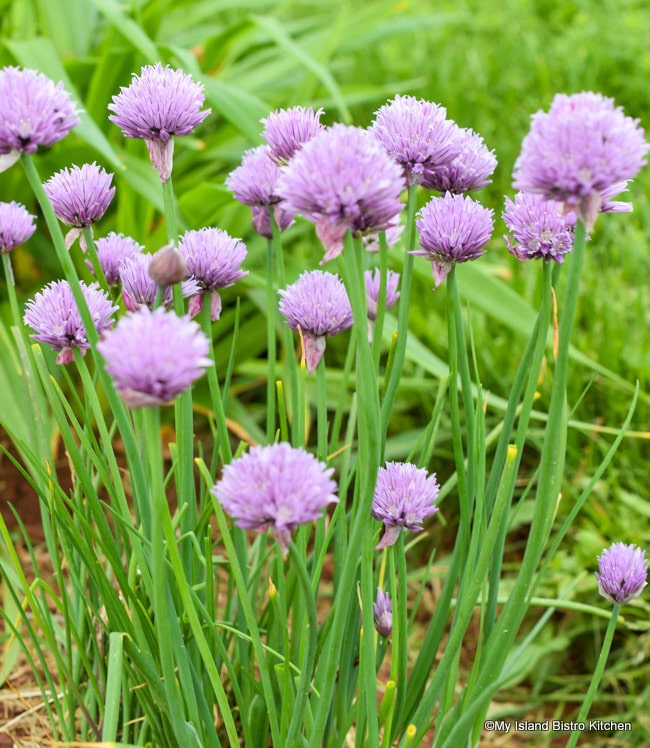
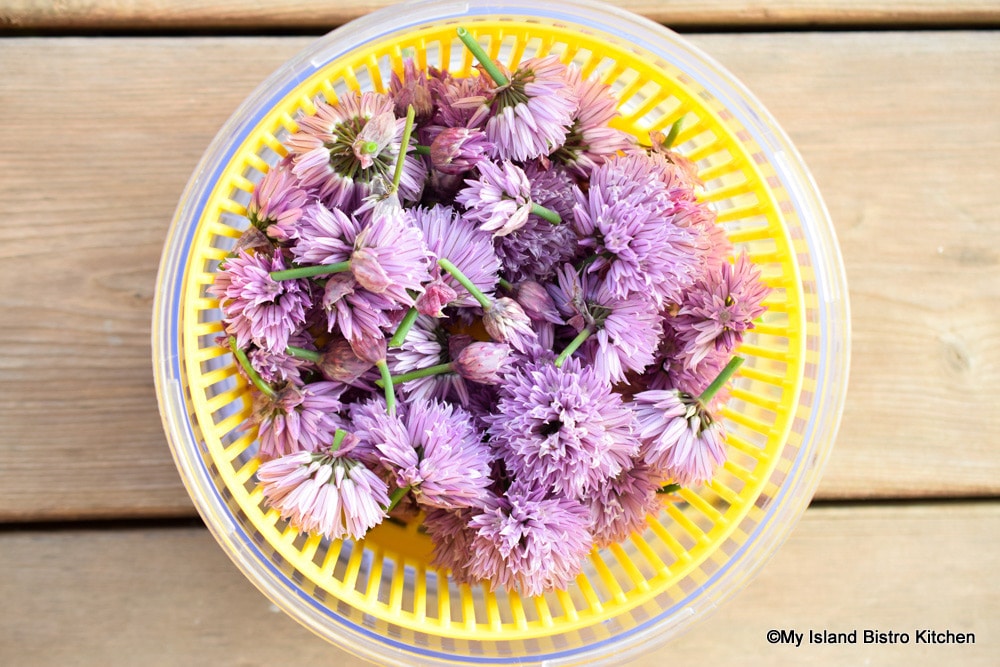
Chives, a perennial plant related to onions, are one of the season’s earliest gems. I generally cut back part of the patch to keep the chives producing all season long. But, letting some of the chives reach the flower blossom stage has its perks, too.
Chives
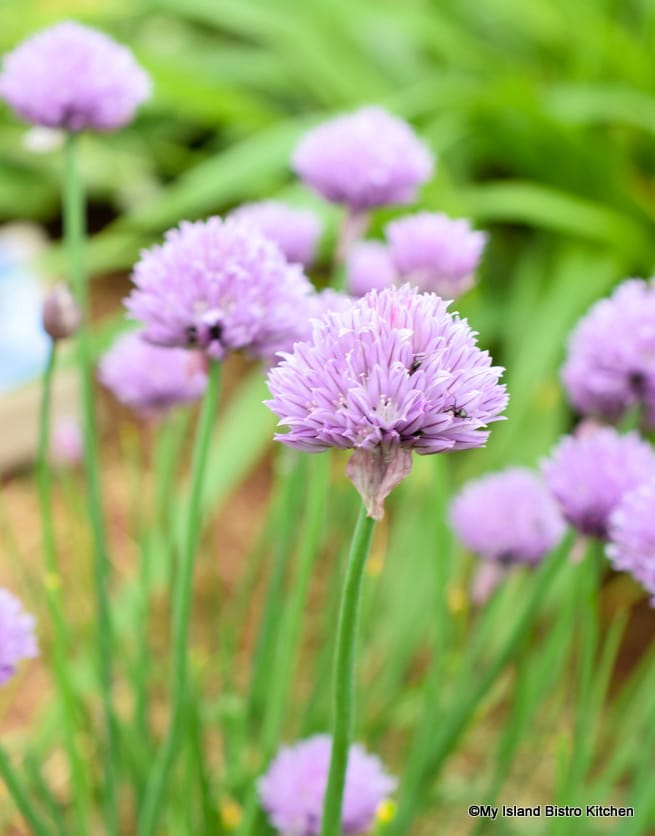
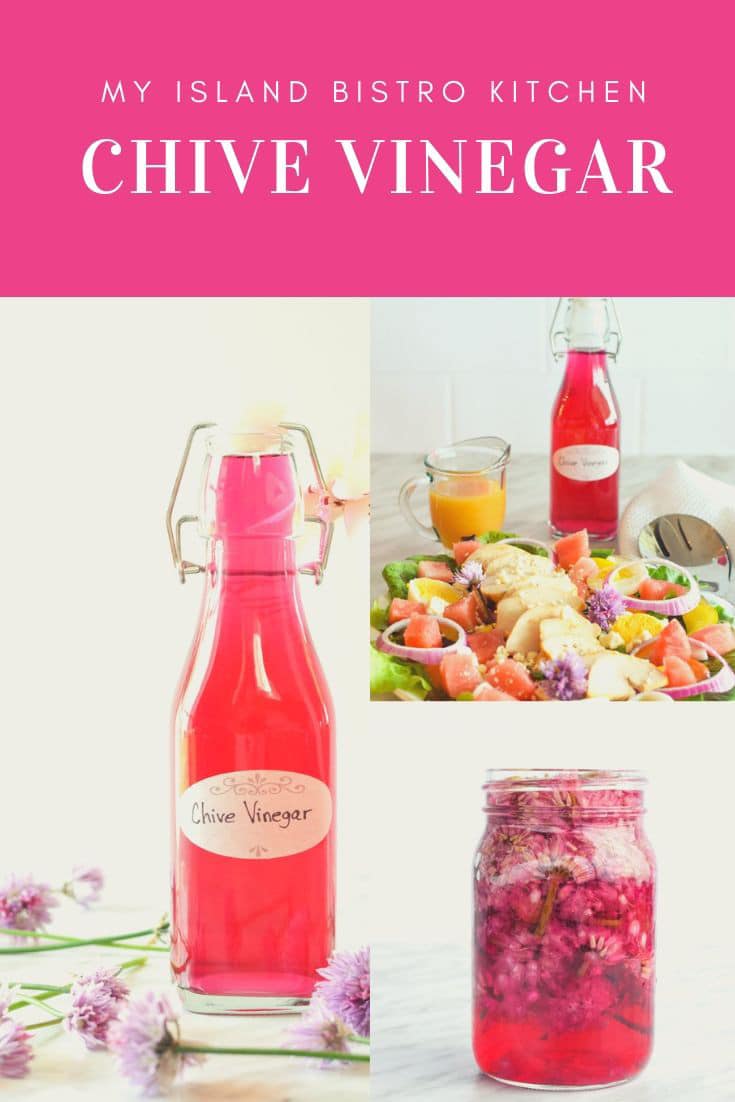
As they mature, chives will produce long stems that become somewhat hard and tough. Those stems produce fabulous lavender-hued edible blossoms. Those are the blossoms that I harvest to make chive vinegar. It just seems so wasteful not to make good use of them. And, when you see the color of the vinegar, you’ll understand why this is a prized commodity in my pantry.
Chive Blossoms
Chive vinegar is super easy to make and it will have a subtle onion essence. All that is required is about 80-100 chive blossoms that are pesticide free and 1½ cups of a good quality colorless, neutral, unflavored vinegar such as white wine vinegar or champagne vinegar. No special equipment and no special skillsets are required.
Snip the chive blossoms just below their heads. I generally leave about a 1” stem on just a few of the blossoms for a little extra flavor. Swish and wash the blossoms in a bowl of cool water then dry them in a salad spinner.
Chive Blossoms
Lay the blossoms, single layer, on a tea towel and let them air dry for about an hour or so. Use a meat pounder mallet to slightly crush the blossoms to hasten the release of their flavor.
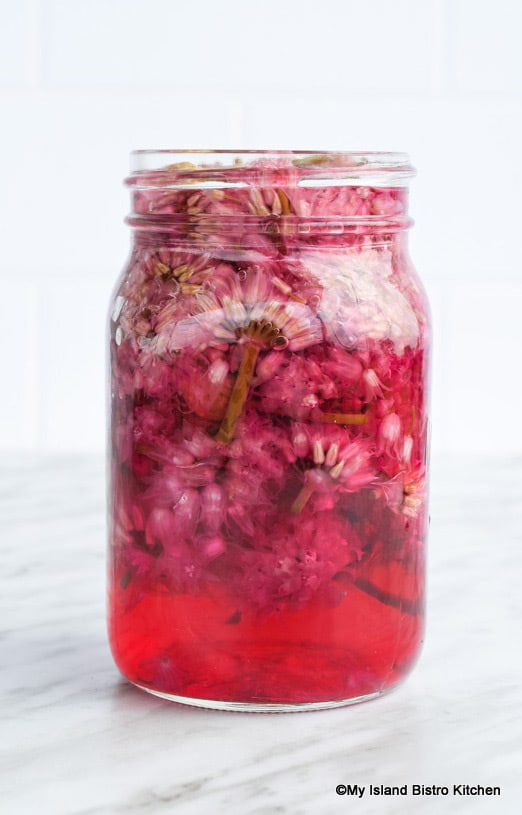
Stuff the blossoms into a 2-cup glass jar and add the vinegar. Use the end of a wooden spoon to reposition the blossoms, if necessary, to make room for all of the vinegar.
Steeping Chive Blossoms in Vinegar
Do not use a metal lid to cover the jar as it can react with the vinegar. Instead, use a double layer of plastic wrap to cover the jar and secure the wrap with an elastic band. Store the jar in a cool dark place for a couple of weeks to let the chives infuse the vinegar with flavor and for the vinegar to turn the most stunning shade imaginable.
Every couple of days, give the jar a gentle shake or two to move the vinegar in and around the chive blossoms. The color of the vinegar will develop very quickly but, like its flavor, will deepen the longer you let the chive blossoms steep in the vinegar.
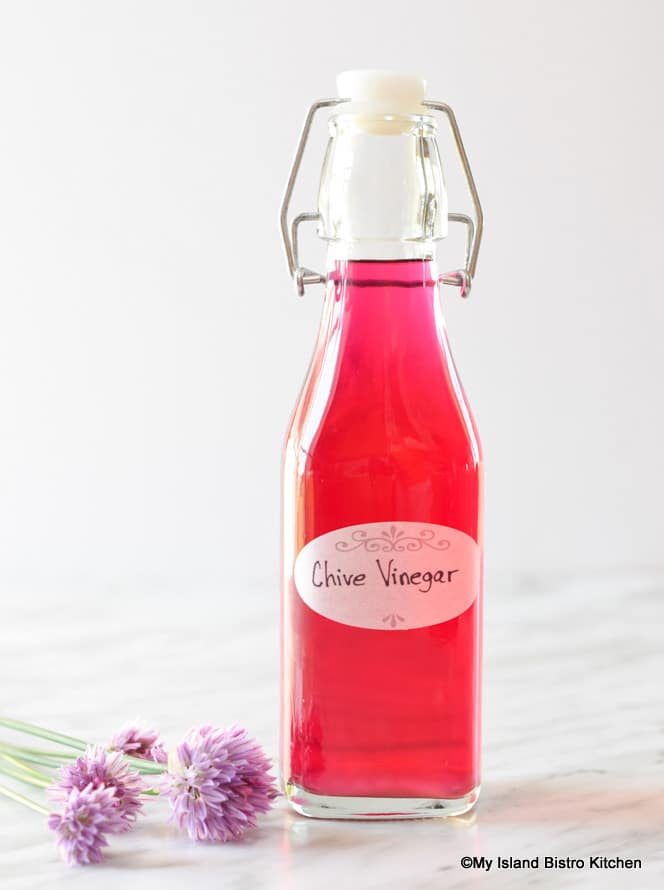
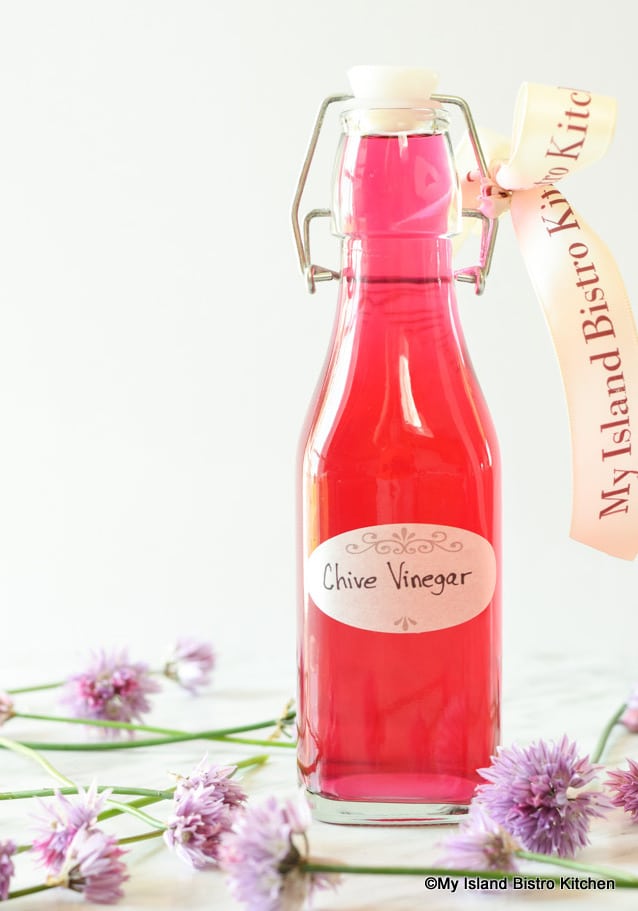
Once the infusion period is up, strain the vinegar from the blossoms. You can use either a wet cheesecloth lined fine wire mesh sieve or you can line the sieve with a paper coffee filter. Decant the vinegar into a sterilized bottle that has a non-metallic lid such as a rubber stopper (as shown in the photo below) or a cork. Store away from light.
Homemade Chive Vinegar
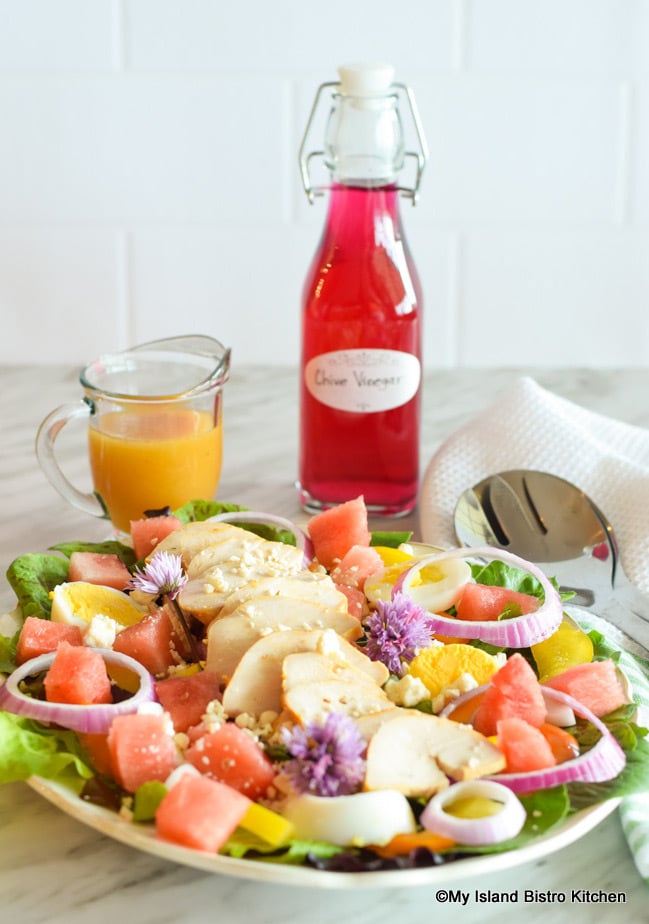
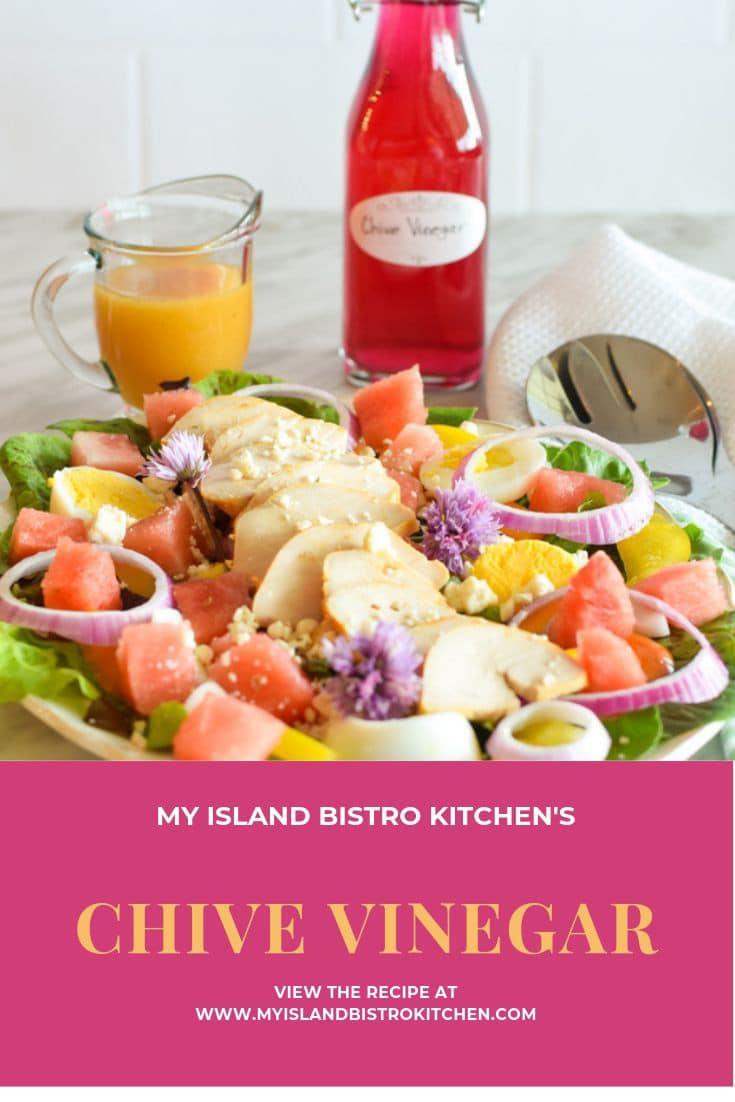
Use chive vinegar in any way or recipe you would use any vinegar.
For example, it makes a fantastic vinaigrette, especially for those main meal summer salads.
Vinaigrette Made with Homemade Chive Vinegar
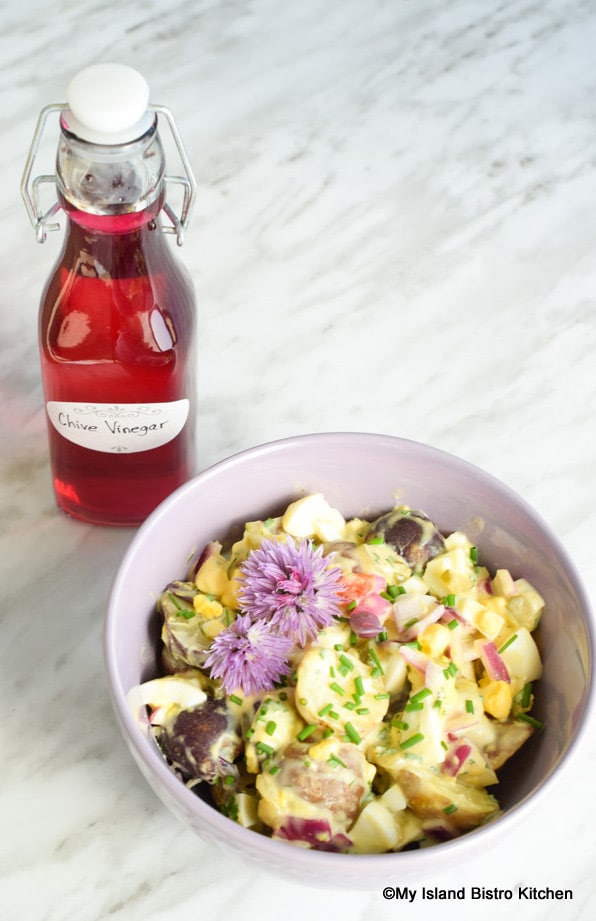
A light drizzle of the chive vinegar over a potato salad adds an extra punch of flavor.
Homemade Potato Salad Drizzled with Chive Vinegar
The vinegar can also be used in marinades, tossed with roasted veggies or over French fries, or for quick pickling of cucumber or red onion. This vinegar also makes a lovely host/hostess gift from your kitchen. Just look at the fabulous color of the vinegar and it’s all natural from the chive blossoms. No artificial coloring has been used.
Chive Vinegar as a Host or Hostess Gift
[Printable recipe follows at end of post]
Chive Vinegar
Ingredients:
Apx. 80-100 chive blossoms, including a few buds 1½ cups white wine vinegar or champagne vinegar
Method:
Snip blossoms from chive plants, just beneath the blossom heads. If desired, leave about 1” stem on a few of the blossoms for extra flavor. Wash blossoms in large bowl of cold water and spin dry in salad spinner. Transfer blossoms to tea towel to air dry for about an hour or so.
Use a meat pounder mallet to lightly crush the blossoms and buds to release their flavor.
Transfer blossoms and buds to a 2-cup glass jar. Fill with vinegar. Using the end of a wooden spoon, push down and redistribute the blossoms to make room for the vinegar.
Cover the jar with plastic wrap secured with a rubber band. Do not use a metal lid which can react with the vinegar. Place the jar in a dark, cool location and let it steep for 2 weeks to allow the flavor and color of the chive vinegar to develop. Over the two weeks, periodically give the bottle a gentle shake or two to redistribute contents.
Strain the steeped vinegar through a wet cheesecloth-lined fine wire mesh sieve (or line the sieve with a paper coffee filter). Discard the old blossoms and buds. Decant the vinegar into a sterilized bottle that has a non-metallic lid such as a rubber stopper or cork.
And, of course, by subscribing to receive an email notification of new posts and recipes, you can be among the first to know when I publish a new post or recipe. Simply enter your name and email address in the Subscription block over on the right-hand side of my home page.
Chive-infused vinegar is easy to make and is a wonderful addition to the cook's pantry. Use it just as you would any vinegar. Especially good in vinaigrettes and marinades and tossed with French fries and roasted vegetables.
Course Condiment
Keyword chives, homemade chive vinegar
My Island Bistro KitchenMy Island Bistro Kitchen
Ingredients
Apx. 80-100 chive blossoms, including a few buds
1½cupswhite wine vinegar or champagne vinegar
Instructions
Snip blossoms from chive plants, just beneath the blossom heads. If desired, leave about 1” stem on a few of the blossoms for extra flavor. Wash blossoms in large bowl of cold water and spin dry in salad spinner. Transfer blossoms to tea towel to air dry for about an hour or so.
Use a meat pounder mallet to lightly crush the blossoms and buds to release their flavor.
Transfer blossoms and buds to a 2-cup glass jar. Fill with vinegar. Using the end of a wooden spoon, push down and redistribute the blossoms to make room for the vinegar.
Cover the jar with plastic wrap secured with a rubber band. Do not use a metal lid which can react with the vinegar. Place the jar in a dark, cool location and let it steep for 2 weeks to allow the flavor and color of the chive vinegar to develop. Over the two weeks, periodically give the bottle a gentle shake or two to redistribute contents.
Strain the steeped vinegar through a wet cheesecloth-lined fine wire mesh sieve (or line the sieve with a paper coffee filter). Discard the old blossoms and buds. Decant the vinegar into a sterilized bottle that has a non-metallic lid such as a rubber stopper or cork.
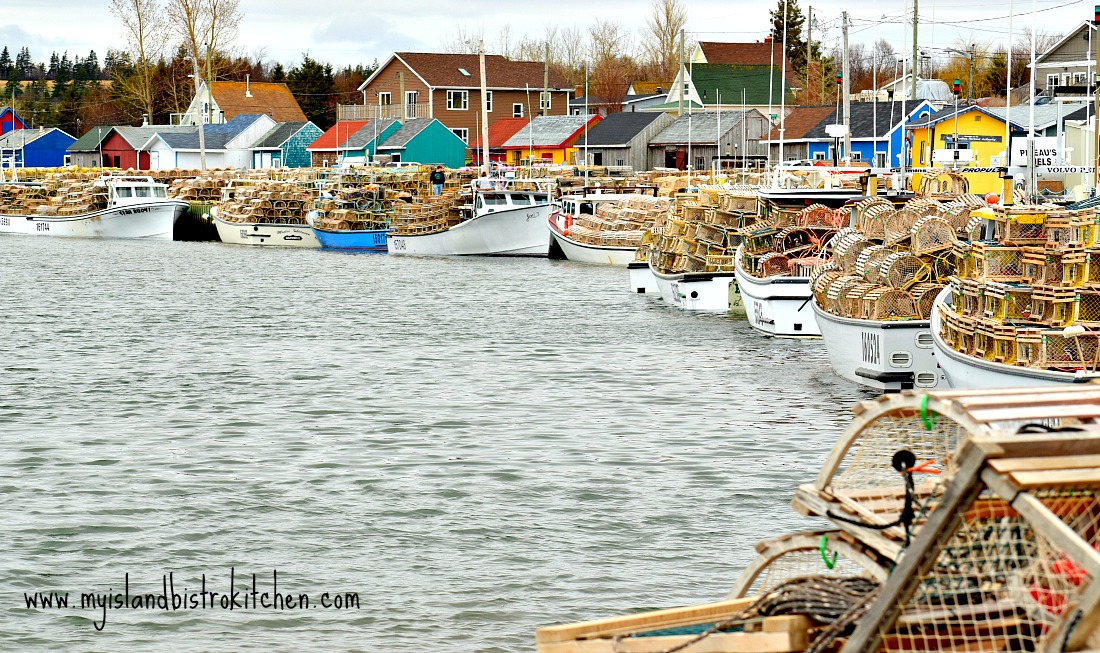
Eve of Setting Day in the Fishing Village of North Rustico, PEI, Canada
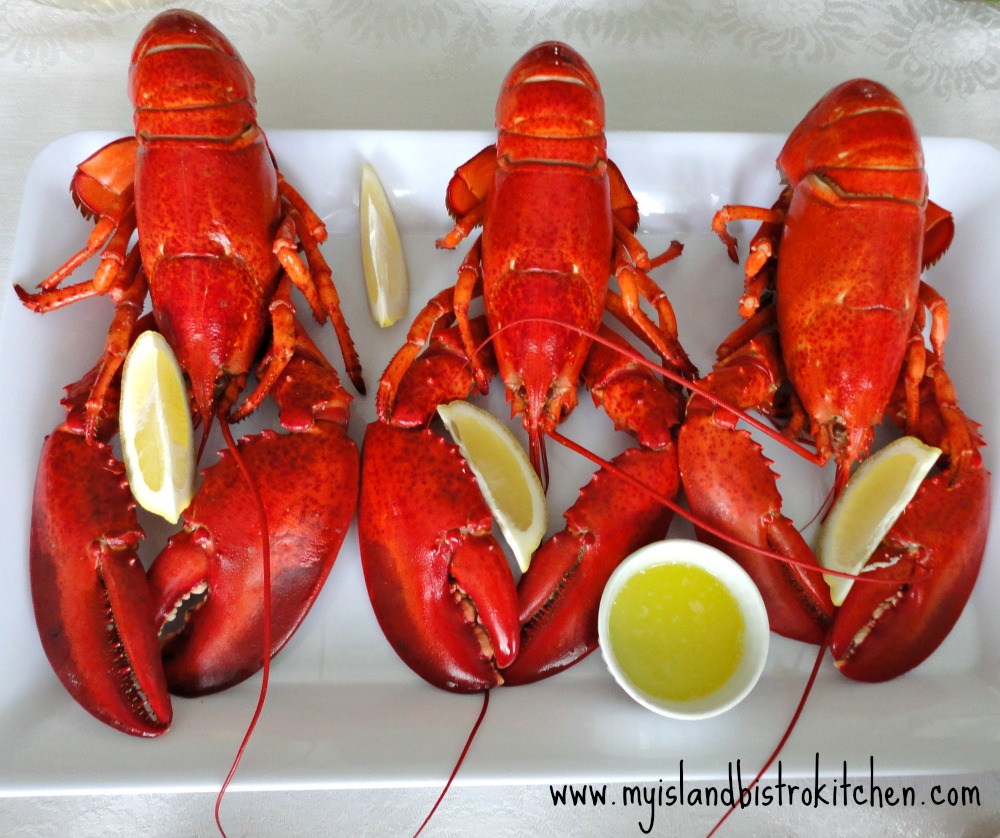
Living where we do, here in PEI, we have access to fresh local lobster and we make the most of it! The lobster fishery plays a major part in PEI’s economy and many people work in one of the many facets of this industry.
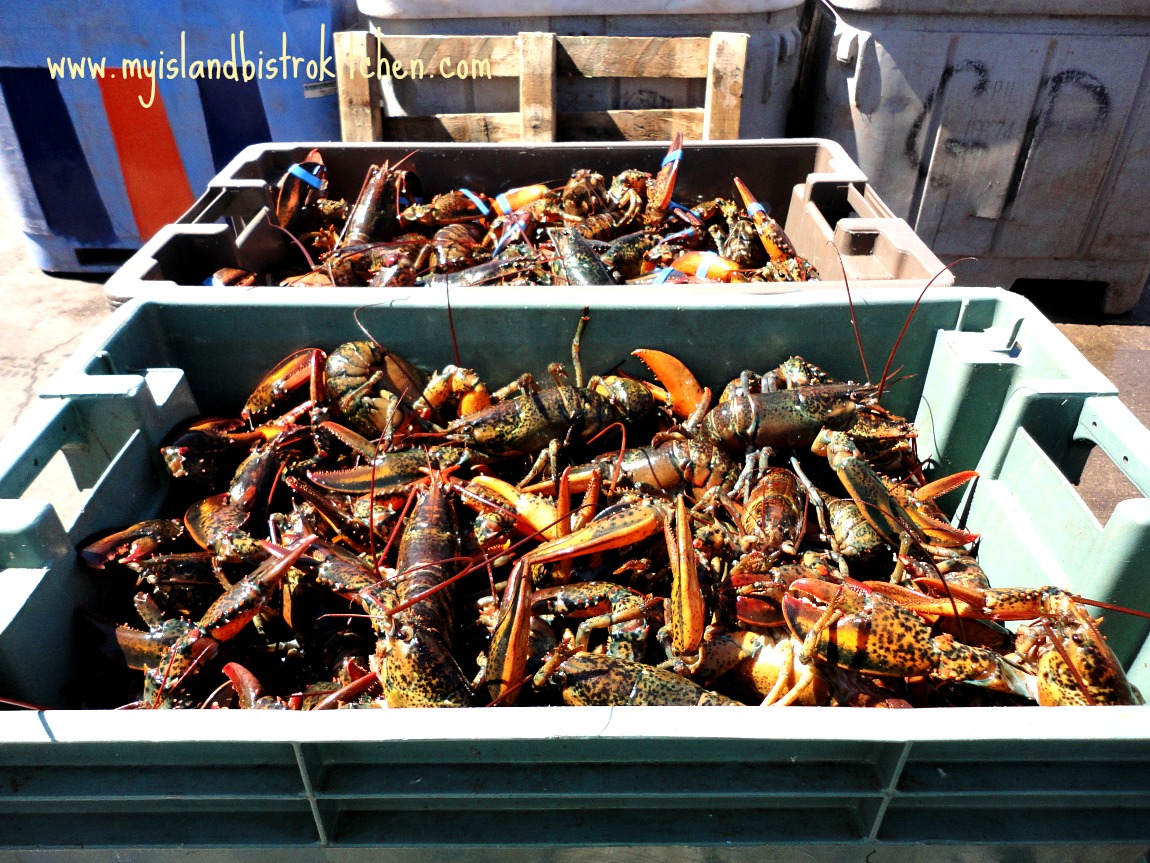
Fresh Catch of the Day – PEI Lobsters
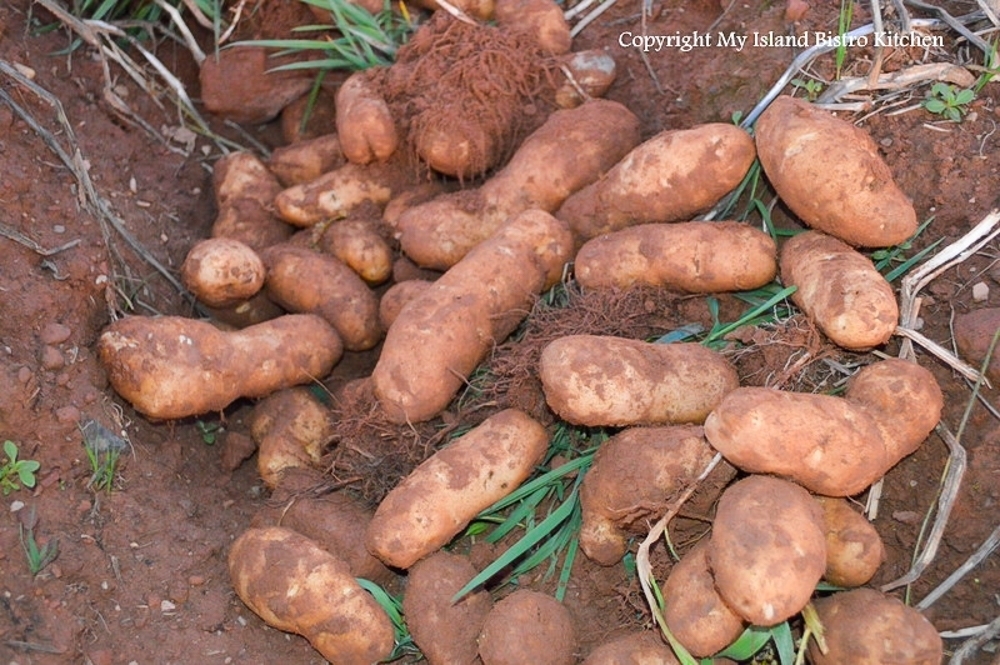
We are blessed on the Island with great food from the waters that surround our Island and from the rich red soil of our fertile land.
PEI Potatoes
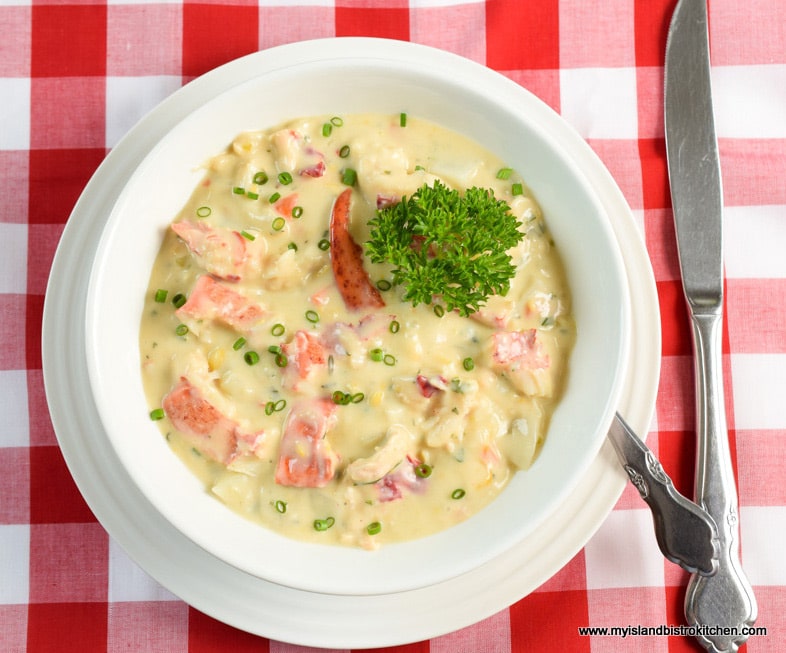
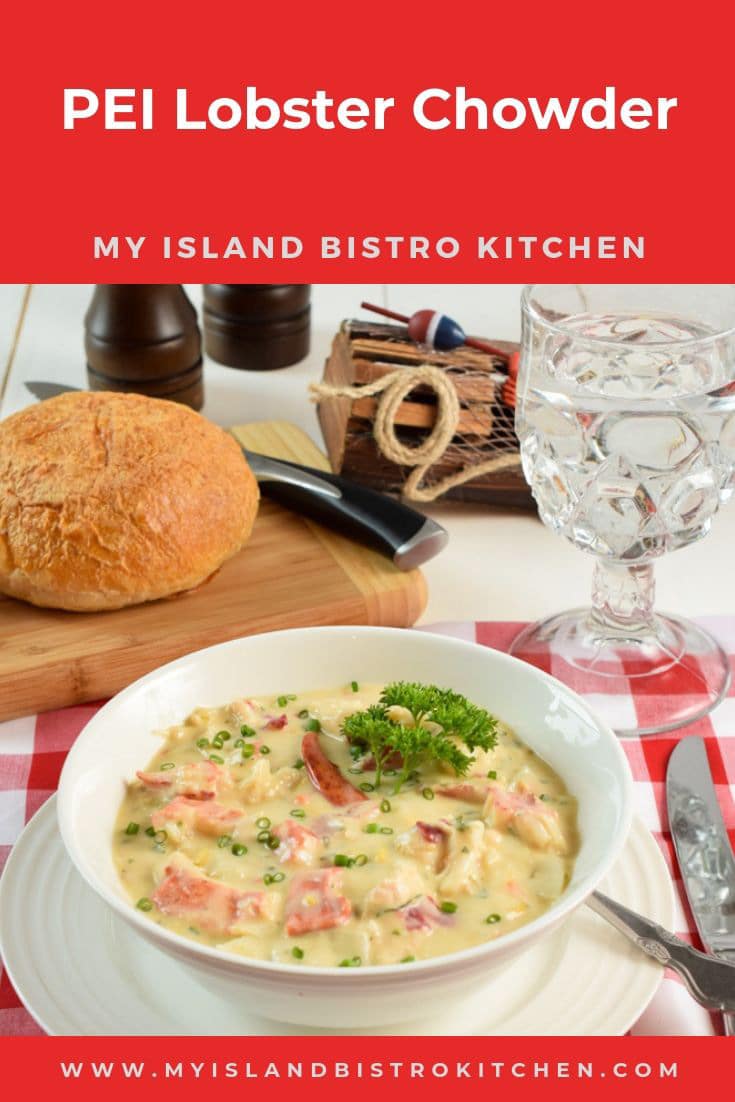
Combining foods from the sea and land, my recipe for Lobster Chowder features fresh lobster and potatoes, both foods for which PEI is known. Some creamed corn, milk, cream, and a flavorful lobster stock make this a rich, decadent, and delectable chowder. Follow the step-by-step preparation and cooking directions to create a lobster chowder feast.
PEI Lobster Chowder
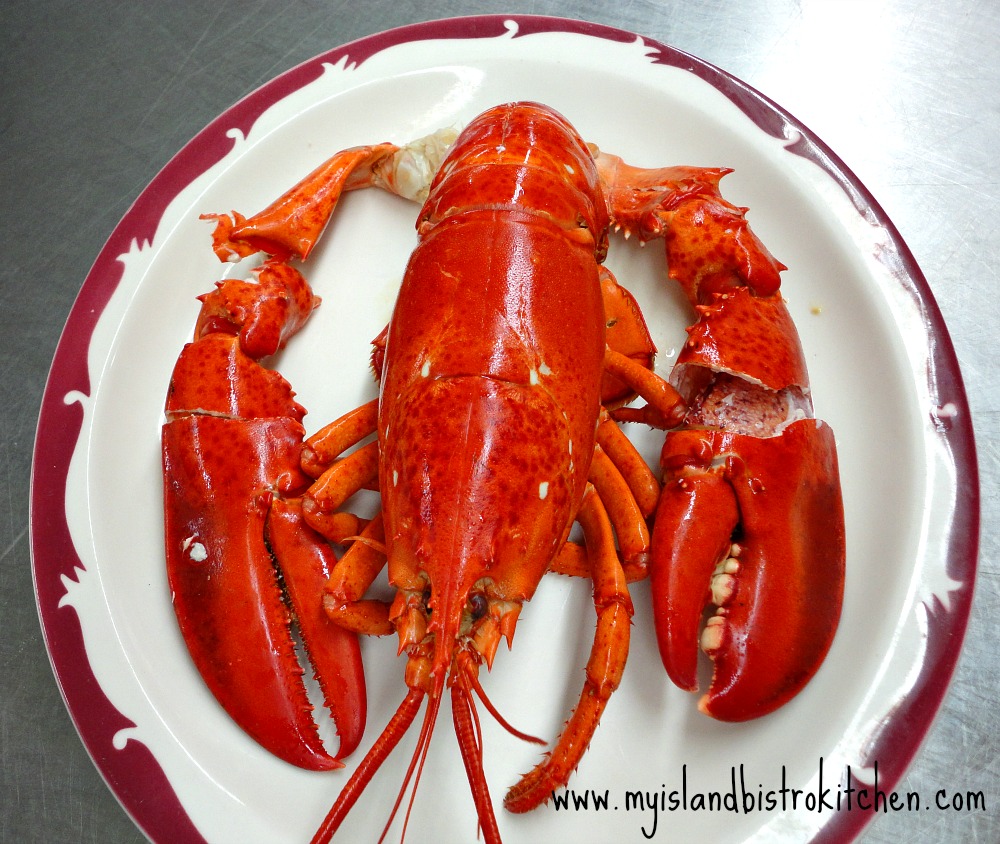
Lobster
A cooked lobster, about 1½ pounds, is required for this recipe. This should yield about 7 – 8 oz of lobster meat needed for the chowder. However, that said, it is always hard to gauge exactly how well filled lobsters will be with meat. To be certain of having enough lobster meat, you may wish to buy a 2-pound lobster (or two one-pounders, about the size of the one shown in the photo below).
Lobster in the Shell
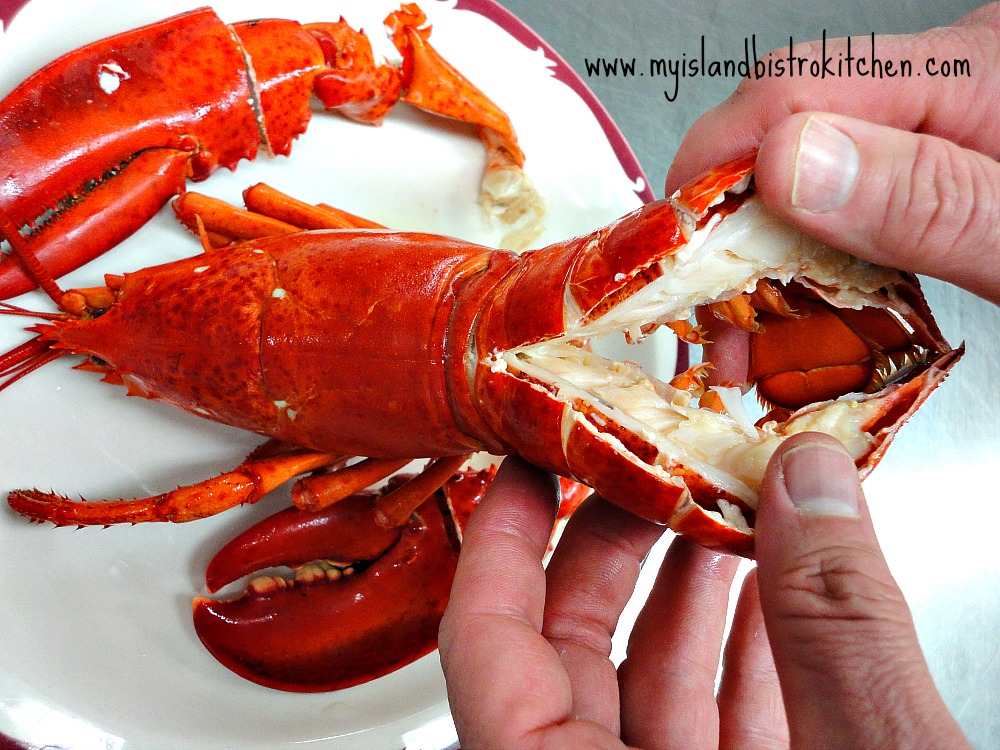
Use lobster fresh from the shell for this chowder because the shells will be needed to make the lobster stock which is the flavorful base for the chowder. The cleaned out shells still have great flavor to them and that flavor is infused into the stock.
When cracking open the lobster, capture any juice that flows as this will enhance the flavor of the lobster stock.
Cracking Open the Lobster
Refrigerate the lobster meat immediately in a tightly covered container as it will not be used until the latter stage of the chowder making.
Making the Lobster Stock
Remove and discard the head sac (aka grain sac or stomach) (behind the eyes) from the lobster body along with any red roe and green tomally. Enclose the shells inside a clean folded over towel. Using a hammer or rolling pin, give the shells a few good whacks to break them up somewhat. Cut the lobster legs into 2-3 pieces.
Heat olive oil in a stock pot, then add the lobster shells along with the legs. Cook for a couple of minutes then add the remainder of the ingredients. Cover and bring mixture to a boil then reduce heat to simmer for about an hour or so to let the flavor of the stock develop. Cooking the lobster shells in poultry stock (either chicken or turkey stock) will add a layer of flavor to the stock, more so than just simmering the shells in water. Strain mixture through a very fine wire-mesh sieve and discard the solids.
Using lobster stock (as opposed to clam juice, for example) maintains the authenticity of the lobster chowder and does not introduce another seafood flavour. Besides, why buy a seafood broth or stock when it is quite easy to use the lobster shells you already have to make homemade stock.
PEI Lobster Chowder
Bouquet Garni
A good chowder benefits from some gentle seasoning. For whole spices like star anise, peppercorns, and allspice, it’s best to contain them in a small sachet. It beats having to fish around in the chowder to find small peppercorns and allspice or broken bits of star anise or bay leaf.
To make the bouquet garni, use a double layer piece of cheesecloth, about 6” square. Place spices in center of cheesecloth, gather up the edges to form a little sack or sachet, and secure it with heavy thread.
This sachet will stay in the chowder during its entire cooking time and then will get removed and discarded before serving.
Making the Chowder
Sweating the aromatics (onion, celery, carrots, garlic, and red pepper) in butter draws out their moisture content and releases their flavor, developing a background flavour base for the chowder. While the whipping cream and creamed corn called for in this recipe will help to thicken the chowder, sprinkling a bit of flour over the vegetables and then stirring in the lobster stock will also help to thicken the chowder.
Use waxy potatoes for chowder. These would be potatoes like the red-skinned Norland variety, for example. Waxy potatoes are low in starch and will hold their shape better when cooked than will potatoes that have a high starch content. The goal here is to see small chunks of identifiable potato in the chowder.
A blend of whipping cream (35%MF) and whole milk makes this a rich and luxurious chowder. The whipping cream helps to thicken the chowder meaning less flour is needed. The less flour that is used, the less likely the chowder will have a pasty, starchy taste. A small amount of dry white wine is added to the liquid base of the chowder to complement the lobster’s natural saltiness. It’s all about subtly layering in flavor.
The addition of 10oz of canned creamed corn imparts an element of subtle sweetness to the chowder and also helps to thicken it. If the chowder, however, is still not sufficiently thick for your liking, an additional small amount of flour may be added at this stage. Be sure to mix it with some water or extra lobster stock and add some of the hot chowder to it to temper it before stirring it into the pot. This will prevent the chowder from curdling or going lumpy.
One of my go-to seasonings in many dishes is dried summer savory. Most commonly associated with poultry dishes, this herb is surprisingly versatile and can enhance seafood dishes, like this chowder, as well.
My fresh herbs of choice for this chowder are chives, thyme, dillweed, and parsley. Not a lot of any of the herbs is needed but small amounts of each do impart an extra layer of flavor depth to the chowder. The key is not to add too much to overpower the dish.
As always, taste the chowder and add any salt and freshly cracked pepper to suit your taste. Lastly, add the lobster meat and heat the chowder gently over low heat. The lobster is already cooked so it just needs to be heated. If it was added earlier or cooked too long, it will break apart and lose its lobster flavor.
Lobster Chowder
Serving and Garnishing the Chowder
Ladle the chowder into warm soup bowls. Garnish with fresh herbs or, to be really luxurious, add a lobster claw to the center of each bowl of chowder. Serve fresh rolls, biscuits, or artisan bread with this chowder and delight your favorite lobster lovers.
Lobster Chowder
This chowder can be made ahead and refrigerated up to 2 days. In fact, I think it is always better a day or two after it is made as the flavors have had a chance to mix and mingle to create a really flavorful chowder. To reheat, heat the chowder in the microwave or, alternatively, return chowder to a stockpot and reheat gently over medium-low heat.
[Printable recipe follows at end of post]
PEI Lobster Chowder Recipe
Ingredients:
1½ – 2 lb cooked lobster to yield apx. 7 – 8 oz meat (reserve shells and any juice from the lobster)
Lobster Stock: Cleaned-out shells, juice, and the legs from cooked lobster 2 tbsp olive oil 1 tsp minced garlic 3” chunk of celery, chopped 2” chunk of carrot, chopped ½ cup yellow onion, chopped 1 bay leaf 3 – 4 sprigs each of fresh thyme and parsley 3 cups poultry stock (chicken or turkey) 1/3 cup dry white wine
Bouquet Garni: 1 star anise pod 1 bay leaf 2 pepper corns 1 whole allspice
Chowder: 3 tbsp butter 1/3 cup onion, finely chopped 1/3 cup celery, finely chopped 1/3 cup carrots, finely diced 2 tbsp red pepper 2 cloves garlic, minced 1½ tbsp flour
2½ cups strained lobster stock (retain any excess stock to thin chowder if it becomes too thick) 1/3 cup dry white wine
1¼ cups waxy potatoes, such as the red-skinned Norland variety, peeled and diced into ½” cubes ½ – ¾ tsp dried summer savory ¾ cup whipping cream (35%MF) ¾ cup whole milk 1 – 10oz can creamed corn ¼ cup Parmesan cheese, finely grated
Lobster Stock: Remove and discard the head sac (aka grain sac or stomach) (located behind the eyes) from the lobster body, along with any red roe and green tomally. Enclose the shells inside a folded over clean towel. Using a hammer or rolling pin, break up the shells somewhat. Cut the lobster legs into 2-3 pieces.
To make the lobster stock, heat the olive oil in stock pot over medium heat. Add the lobster shells along with the legs. Cook for about 2 minutes then add any juice from the lobster along with the minced garlic, celery, carrot, onion, bay leaf, and sprigs of fresh thyme and parsley. Add the poultry stock and white wine. Cover and bring to a boil then reduce heat to simmer for about an hour. Strain through a fine wire-mesh sieve and discard the solids.
Bouquet Garni: To make the bouquet garni, use a small piece (apx. 6” square) of double-layer cheesecloth. Place spices in centre of sachet. Gather up corners and tie with heavy thread.
Chowder: Heat the butter in large heavy-bottomed pot over medium heat. When butter is melted, add the onion, celery, carrots, red pepper, and garlic. Sweat the vegetables, stirring frequently, for 2-3 minutes.
Reduce heat to medium-low. Sprinkle the flour over the vegetables and stir to blend. Cook for a few seconds, stirring constantly to prevent sticking and scorching. Gradually add 2½ cups of the lobster stock along with the white wine, stirring constantly to work out any lumps. Add the potatoes, the bouquet garni, and dried summer savory. Increase heat to medium and bring mixture just to a boil then reduce heat to medium low. Cook for 6-8 minutes or until potatoes are almost, but not quite, fork tender.
Combine the whipping cream and milk. Remove about 1/3 – ½ cup of the hot liquid from the pot and stir into the milk to temper it. Pour tempered milk into hot mixture and stir to combine well. Cook over medium-low heat for about 5 minutes. Add the creamed corn, and Parmesan cheese. Cook for 4-5 minutes, just until mixture is heated. If mixture is not as thick as desired, mix an additional tablespoon of flour in 2½ tablespoons of water or some leftover lobster stock (if any). Add a tablespoon of the hot chowder to temper it and then stir into the chowder in the pot.
Add the lobster meat to the chowder along with the fresh herbs, and butter. Heat for about 2-3 minutes on medium-low temperature. Season with salt and pepper to taste.
Remove and discard the bouquet garni. Ladle chowder into warmed bowls and garnish with sprig of parsley and/or chopped chives. Sprinkle lightly with paprika, if desired. Serve with crusty rolls, biscuits, or artisan bread.
Yield: Apx. 4-6 servings
If you have made this recipe and enjoyed it and/or wish to share it with your friends and family, please do so on social media but be sure to share the direct link to this posting from my website.
Connect with My Island Bistro Kitchen on Social Media
Follow “the Bistro” on Pinterest at https://www.pinterest.ca/peibistro/ and pin the Pinterest-ready photo found at the end of this post to your favorite Pinterest boards.
1½ - 2lbcooked lobster to yield apx. 7 – 8 oz meat(reserve shells and any juice from the lobster)
Lobster Stock:
Cleaned-out shells, juice, and the legs from cooked lobster
2tbspolive oil
1tspminced garlic
3” chunk of celery, chopped
2” chunk of carrot, chopped
½cupyellow onion, chopped
1bay leaf
3– 4 sprigs each of fresh thyme and parsley
3cupspoultry stock(chicken or turkey)
1/3cupdry white wine
Bouquet Garni:
1star anise pod
1bay leaf
2pepper corns
1whole allspice
Chowder:
3tbspbutter
1/3cuponion, finely chopped
1/3cupcelery, finely chopped
1/3cupcarrots, finely diced
2tbspred pepper
2clovesgarlic, minced
1½tbspflour
2½cupsstrained lobster stock(retain any excess stock to thin chowder if it becomes too thick)
1/3cupdry white wine
1¼cupswaxy potatoes, such as the red-skinned Norland variety, peeled and diced into ½” cubes
½ - ¾tspdried summer savory
¾cupwhipping cream (35%MF)
¾cupwhole milk
1– 10oz can creamed corn
¼cupParmesan cheese, finely grated
2½tspfresh chives, finely chopped
1– 1½ tsp fresh thyme, finely chopped
¾tspfresh dillweed, finely chopped
1tbspfresh parsley, finely chopped
1 - 2tbspbutter
Salt and cracked pepper, to taste
Instructions
Lobster Stock:
Remove and discard the head sac (aka grain sac or stomach (located behind the eyes) from the lobster body, along with any red roe and green tomally. Enclose the shells inside a clean folded over towel. Using a hammer or rolling pin, break up the shells somewhat. Cut the lobster legs into 2-3 pieces.
To make the lobster stock, heat the olive oil in stock pot over medium heat. Add the lobster shells along with the legs. Cook for about 2 minutes then add any juice from the lobster along with the minced garlic, celery, carrot, onion, bay leaf, and sprigs of fresh thyme and parsley. Add the poultry stock and white wine. Cover and bring to a boil then reduce heat to simmer for about an hour. Strain through a fine wire-mesh sieve and discard the solids.
Bouquet Garni:
To make the bouquet garni, use a small piece (apx. 6” square of double-layer cheesecloth. Place spices in centre of sachet. Gather up corners and tie with heavy thread.
Chowder:
Heat the butter in large heavy-bottomed pot over medium heat. When butter is melted, add the onion, celery, carrots, red pepper, and garlic. Sweat the vegetables, stirring frequently, for 2-3 minutes.
Reduce heat to medium-low. Sprinkle the flour over the vegetables and stir to blend. Cook for a few seconds, stirring constantly to prevent sticking and scorching. Gradually add 2½ cups of the lobster stock along with the white wine, stirring constantly to work out any lumps. Add the potatoes, the bouquet garni, and dried summer savory. Increase heat to medium and bring mixture just to a boil then reduce heat to medium low. Cook for 6-8 minutes or until potatoes are almost, but not quite, fork tender.
Combine the whipping cream and milk. Remove about 1/3 – ½ cup of the hot liquid from the pot and stir into the milk to temper it. Pour tempered milk into hot mixture and stir to combine well. Cook over medium-low heat for about 5 minutes. Add the creamed corn, and Parmesan cheese. Cook for 4-5 minutes, just until mixture is heated. If mixture is not as thick as desired, mix an additional tablespoon of flour in 2½ tablespoons of water or some leftover lobster stock (if any). Add a tablespoon of the hot chowder to temper it and then stir into the chowder in the pot.
Add the lobster meat to the chowder along with the fresh herbs, and butter. Heat for about 2-3 minutes on medium-low temperature. Season with salt and pepper to taste.
Remove and discard the bouquet garni. Ladle chowder into warmed bowls and garnish with sprig of parsley and/or chopped chives. Sprinkle lightly with paprika, if desired. Serve with crusty rolls, biscuits, or artisan bread.
Recipe Notes
Yield: Apx. 4-6 servings
Note 1: Chowder may be refrigerated up to two days.
Note 2: Be sure to ready the accompanying blog post to this recipe as it contains additional details, explanation, and tips for making this chowder.
Note 3: Any leftover lobster stock can be labelled and frozen for a future use.
[Copyright My Island Bistro Kitchen]
If you like lobster, you may also enjoy these other lobster recipes from My Island Bistro Kitchen:
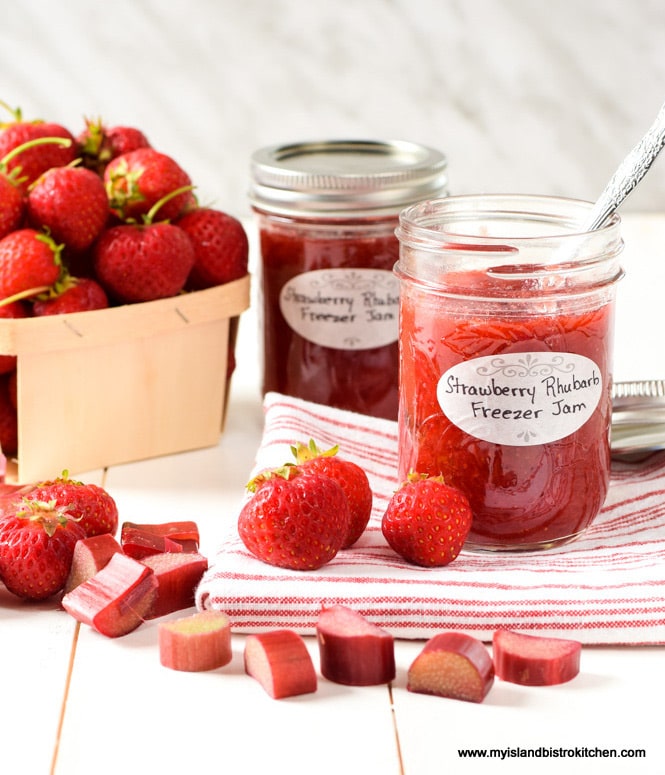
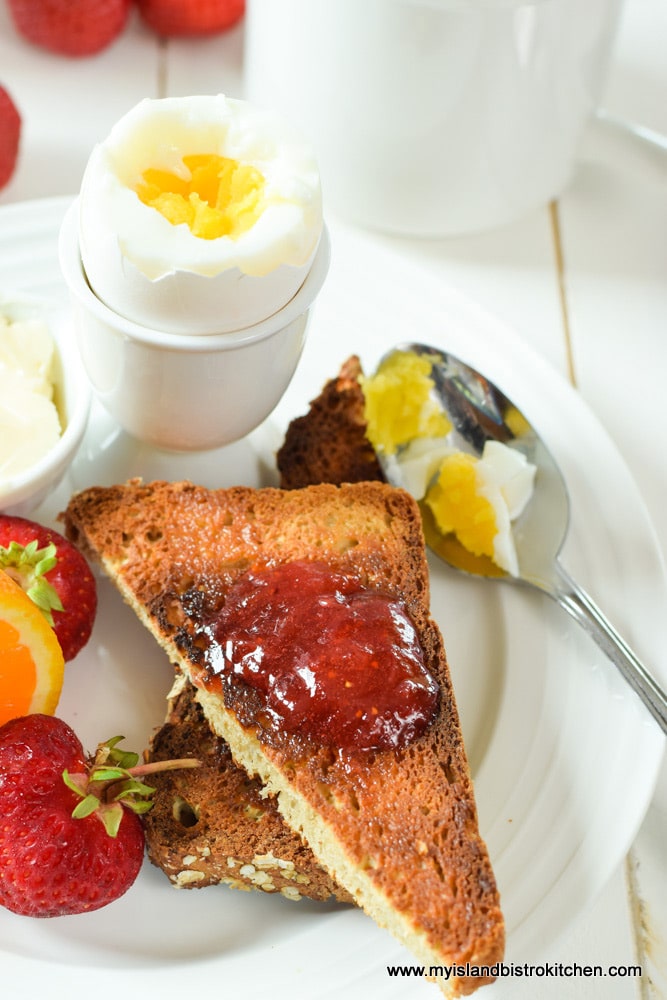
This Strawberry Rhubarb Freezer Jam boasts wonderful flavour and is very quick and easy to make. Because it is to stored in the freezer, it does not require a long cooking time or the hot water canning process.
Like any freezer jam, this Strawberry Rhubarb Freezer Jam is a softer jam than most that are cooked for many minutes on the stove in the traditional jam-making way. I know some recipes for freezer jams don’t require any cooking at all but I personally feel that, if the fruit has not had some cooking, it’s really just a sauce, not a jam. I think the heating of the product brings out deep flavour notes in the jam.
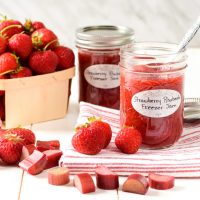
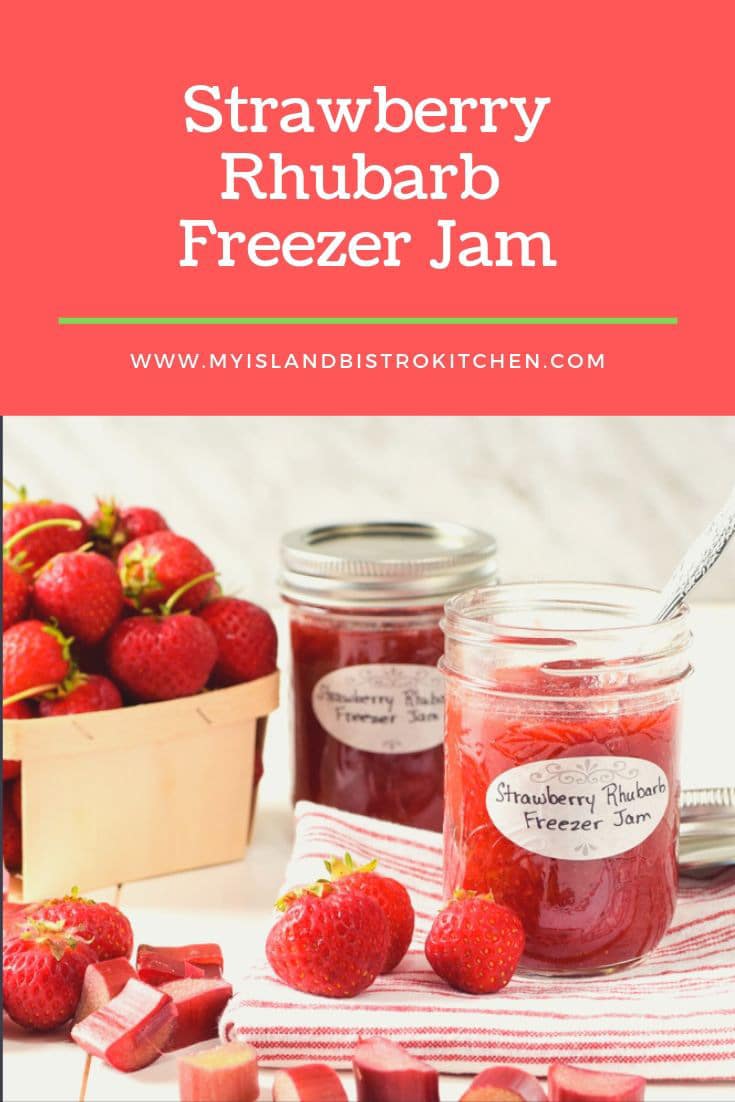
Strawberry Rhubarb Freezer Jam
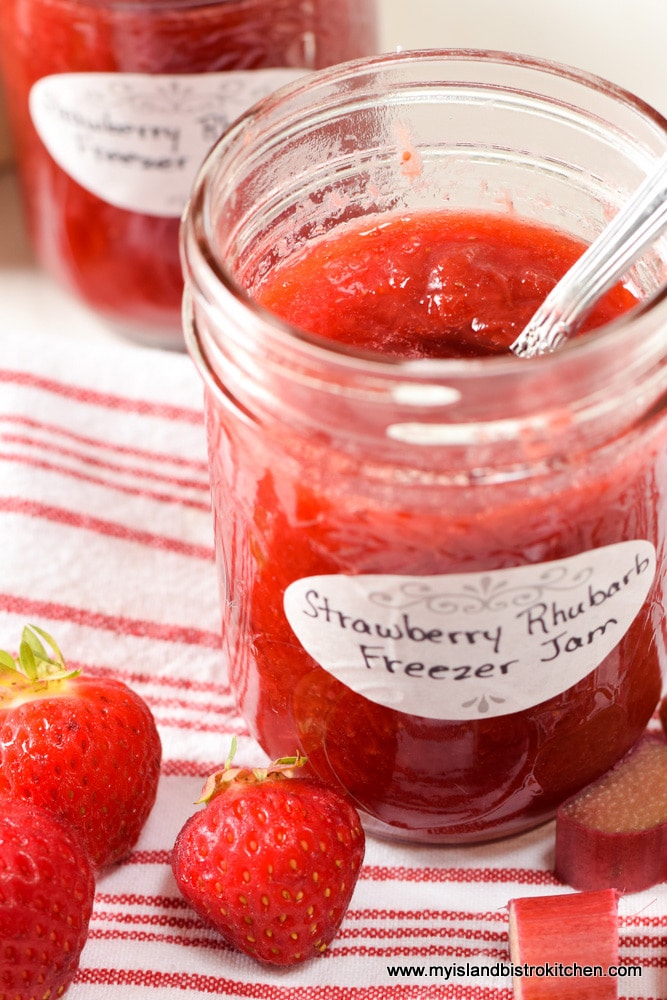
This jam will appear to be somewhat watery and runny when it first comes off the stove. However, it will thicken some as it sets up. For this reason, be sure to let the jars sit, undisturbed, on the counter for a full 24 hours to set before freezing. Resist the urge to pick up the jars and tilt and twirl them to see if the jam is thickening – just let them be.
And, just know that this jam is unlikely to become as thick as traditional jams that are cooked for many minutes on the stove. In my view, the easy procedure and speed with which this jam can be made, along with its wonderful combination of rhubarb and strawberry flavours, more than make up for the lack of a thick consistency.
My preference is to freeze the jam in sterilized glass jars. Even though the jam is going to be frozen, I still simply like to know the jars are sterilized before placing my jam in them. Plastic freezer containers can be used but the jam will need to cool before placing in the containers.
Strawberry Rhubarb Freezer Jam
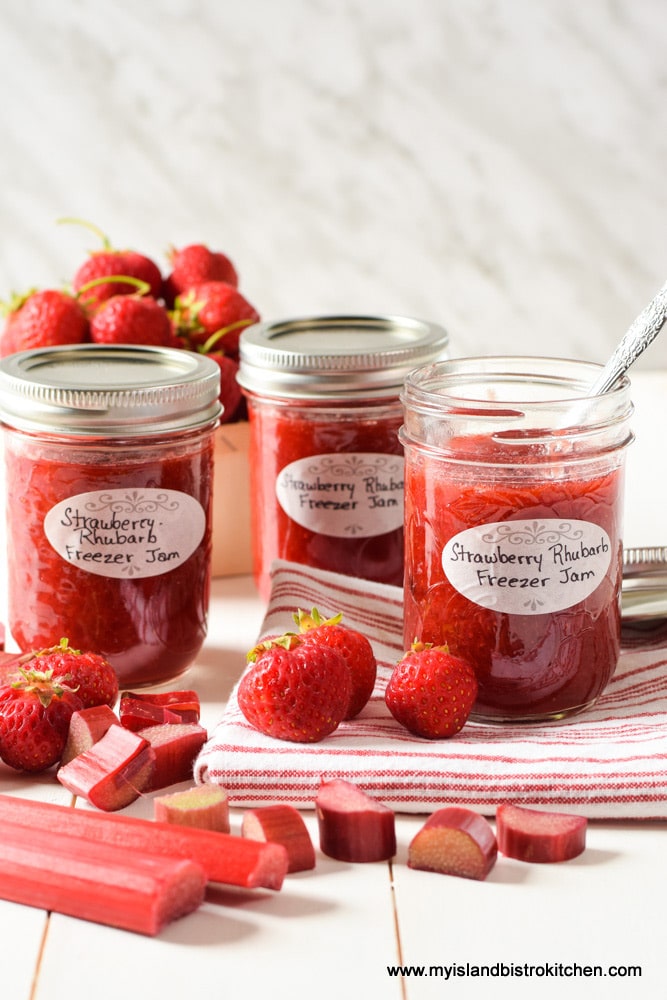
Because this jam has not been processed via the hot water canning method, it is not considered shelf-stable at room temperature so be sure to freeze the jam, after the 24-hour setting period, to preserve it. Once opened, store the jam in the refrigerator for up to about a month (if it lasts that long).
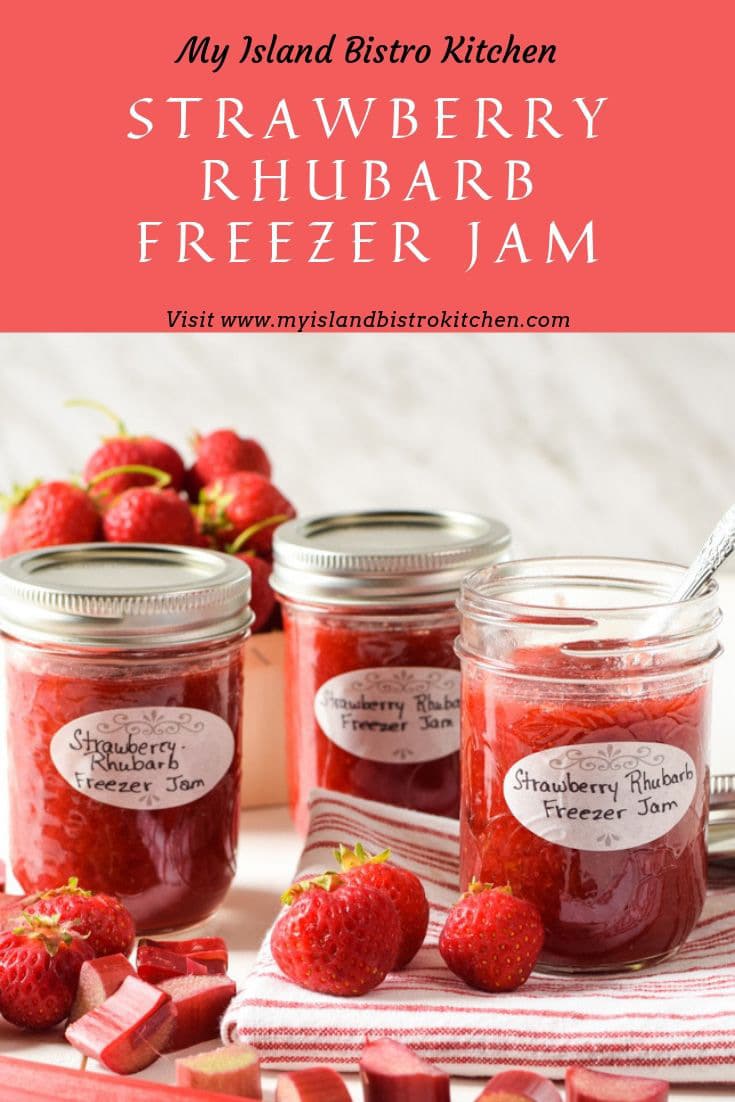
Strawberry Rhubarb Freezer Jam
Whether you are an experienced jam maker or a novice making your first batch, this is a great jam to make because it is quick and easy and requires no hot water canning.
Strawberry Rhubarb Freezer Jam
[Printable recipe follows at end of post]
Strawberry Rhubarb Freezer Jam
Ingredients:
1¼ lb strawberries, hulled, washed, and sliced (or quartered, if small berries) ¾ lb rhubarb, sliced ½“ thick 1½ cups granulated sugar
1½ cups granulated sugar 2 oz freshly squeezed lemon juice 2 tbsp orange juice
Method:
Place strawberries and rhubarb in medium-sized stockpot. Add the first 1½ cups sugar, stir into fruit, and let stand for 5 minutes. Place pot over medium high heat to bring mixture to a boil, stirring frequently. Boil hard for 4 minutes, starting the timing when the mixture reaches a rolling boil. Stir frequently.
Add the remaining 1½ cups of sugar, stirring to blend it in. Return mixture to a rolling boil, continuing to stir frequently to prevent it from scorching. Boil mixture briskly over medium-high heat for 4 minutes (starting the timing when the mixture reaches a rolling boil again), continuing to stir mixture often.
Remove jam from heat and stir in the lemon and orange juices. Skim off, and discard, any foam that remains. Jam will appear runny but will thicken somewhat when set. Fill sterilized jars, leaving about 1” headroom to allow for product expansion when freezing. Apply heated lids and jar bands to jars. Let jars stand on counter for 24 hours, without disturbing, to allow the jam to set before freezing.
This Strawberry Rhubarb Freezer Jam boasts wonderful flavor and is very quick and easy to make.
Course Breakfast
Cuisine Canadian
Keyword freezer jam, Strawberry and Rhubarb Jam
Servings4cups
My Island Bistro KitchenMy Island Bistro Kitchen
Ingredients
1¼lbstrawberries,hulled, washed, and sliced (or quartered, if small berries)
¾lbrhubarb,sliced ½“ thick
3cupsgranulated sugar (divided in half)
2ozfreshly squeezed lemon juice
2tbsporange juice
Instructions
Place strawberries and rhubarb in medium-sized stockpot. Add 1½ cups of the sugar, stir into fruit, and let stand for 5 minutes. Place pot over medium high heat to bring mixture to a boil, stirring frequently. Boil hard for 4 minutes, starting the timing when the mixture reaches a rolling boil. Stir frequently.
Add the remaining 1½ cups of sugar, stirring to blend it in. Return mixture to a rolling boil, continuing to stir frequently to prevent it from scorching. Boil mixture briskly over medium-high heat for 4 minutes (starting the timing when the mixture reaches a rolling boil again), continuing to stir mixture often.
Remove jam from heat and stir in the lemon and orange juices. Skim off, and discard, any foam that remains. Jam will appear somewhat runny and watery but will thicken somewhat when set. Fill sterilized jars, leaving about 1” headroom to allow for product expansion when freezing. Apply heated lids and jar bands to jars. Let jars stand on counter for 24 hours, without disturbing, to allow the jam to set before freezing.
Recipe Notes
Yield: Apx. 4 half-pint jars
Pin Me To Pinterest!
Strawberry Rhubarb Freezer Jam
For other great jam, jelly, and marmalade recipes from My Island Bistro Kitchen, click on the links below:
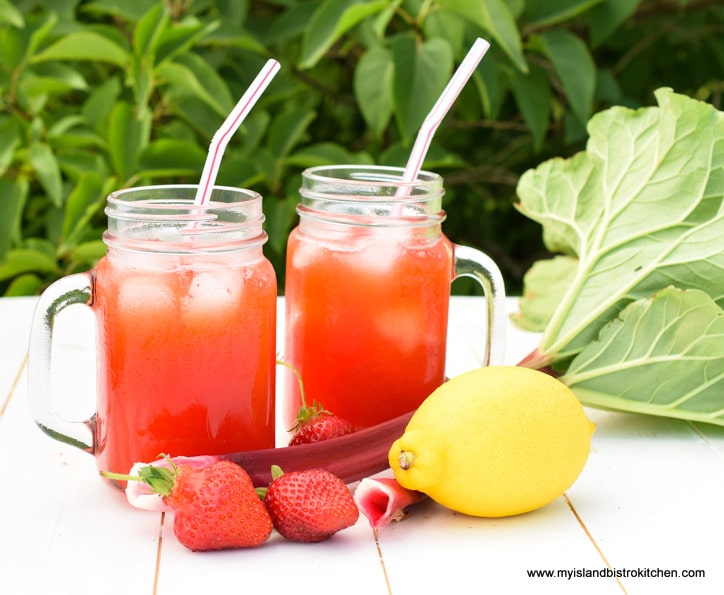
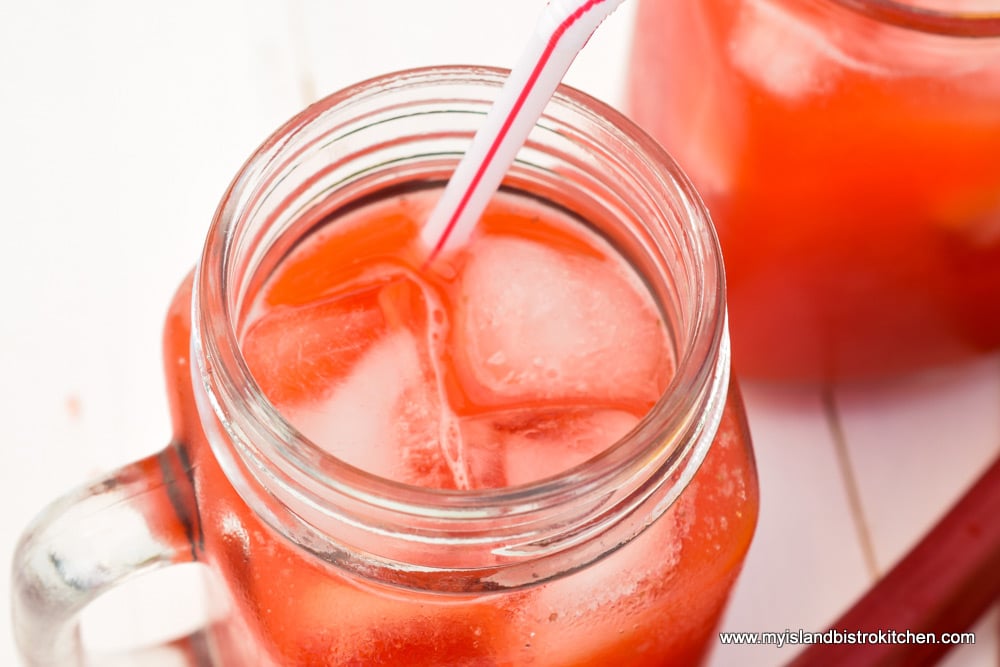
When the summer days are hot and thirst takes over, a tall glass of refreshing lemonade is just what is called for. Strawberry and rhubarb are always a winning flavour combination and they team up to make a wonderful Strawberry and Rhubarb Lemonade. There is no need for any addition of coloring in this drink as the deep red strawberries and bright red rhubarb impart their own shades into this colorful drink.
Strawberry Rhubarb Lemonade
This is one of those drinks I make when the strawberries and rhubarb are in season because this lemonade freezes very well in an airtight container. This makes it a great drink to have on hand for those hot summer days.
Strawberry Rhubarb Lemonade
Serve the lemonade plain over ice or half fill a glass with the lemonade and top it up with your favorite clear soda. If so inclined, an ounce of your favorite libation may be added to the lemonade.
[Printable recipe follows at end of post]
Strawberry Rhubarb Lemonade
Ingredients:
1½ cups water 1 cup super-fine sugar (aka caster sugar or instant dissolving sugar)
1 cup freshly squeezed lemon juice 2 tbsp coarsely grated lemon rind
¾ lb rhubarb, chopped into 1” chunks 1 cup water 1/3 cup super-fine sugar
2 cups fresh strawberries, sliced 1¼ cups water Pinch salt
Method:
For the simple syrup: In small saucepan, combine the 1½ cups water and 1 cup sugar together. Bring to a boil over medium heat, stirring constantly, until sugar is completely dissolved. Reduce heat to medium-low and boil gently for 3-4 minutes, stirring occasionally. Remove from heat and cool to room temperature (apx. 30-40 minutes). Add the lemon juice and lemon rind. Let mixture stand for at least an hour (or up to three hours) to allow the flavor to develop. Strain mixture twice through a fine mesh sieve to remove the lemon pulp and rind. Discard the pulp and rind.
For the rhubarb and strawberry juice: Combine the rhubarb, 1 cup of water and sugar in a large pot. Cover and bring to a boil then reduce heat to medium-low and cook for approximately 5 minutes. Add the strawberries and 1¼ cups water along with a pinch of salt. Cover and cook for about 5 minutes longer, or until rhubarb and strawberries are softened. Remove from heat and let stand for about 20 minutes. Use a food masher to loosely mash and break down the pulp. Place a large fine wire mesh sieve over a heatproof bowl. Line the sieve with a double layer of dampened cheesecloth. Pour the rhubarb and strawberry mixture into the sieve, letting the juice drip through. Use the back of a large spoon to very gently press the pulp in order to extract as much of the juice from the fruit as possible. Discard solids.
To assemble: In large jug or bottle, combine the simple syrup with the strained rhubarb and strawberry juice. Stir well. Chill.
To serve: Stir the chilled lemonade. Fill a glass approximately one-half full of ice cubes and add the lemonade. Garnish with a lemon wheel or fresh strawberry, if desired.
Additional Serving Suggestions:
Fill glass one-half full of lemonade. Top with sparkling water or clear soda such as lemon-lime, sprite, or grapefruit. Finish with ice cubes and a sprig of fresh mint.
Add 1 oz of your favorite libation to a glass half-filled with ice cubes. Top with lemonade. Garnish with lemon wedge and strawberry.
Lemonade will keep, covered, in the refrigerator for 3-4 days. Freezes well in airtight container.
Yield: Approximately 5-6 cups, depending on water content in fruit
With a perfect blend of sweet strawberries and tart rhubarb, this Strawberry Rhubarb Lemonade is a refreshing and thirst-quenching summertime sipper.
Servings6
My Island Bistro KitchenMy Island Bistro Kitchen
Ingredients
1½cupswater
1cupsuper-fine sugar(aka caster sugar or instant dissolving sugar)
1cupfreshly squeezed lemon juice
2tbspcoarsely grated lemon rind
¾lbrhubarb,chopped into 1” chunks
1cupwater
1/3cupsuper-fine sugar
2cupsfresh strawberries,sliced
1¼cupswater
Pinchsalt
Instructions
For the simple syrup: In small saucepan, combine the 1½ cups water and 1 cup sugar together. Bring to a boil over medium heat, stirring constantly, until sugar is completely dissolved. Reduce heat to medium-low and boil gently for 3-4 minutes, stirring occasionally. Remove from heat and cool to room temperature (apx. 30-40 minutes). Add the lemon juice and lemon rind. Let mixture stand for at least an hour (or up to three hours to allow the flavor to develop. Strain mixture twice through a fine mesh sieve to remove the lemon pulp and rind. Discard the pulp and rind.
For the rhubarb and strawberry juice: Combine the rhubarb, 1 cup of water and sugar in a large pot. Cover and bring to a boil then reduce heat to medium-low and cook for approximately 5 minutes. Add the strawberries and 1¼ cups water along with a pinch of salt. Cover and cook for about 5 minutes longer, or until rhubarb and strawberries are softened. Remove from heat and let stand for about 20 minutes. Use a food masher to loosely mash and break down the pulp. Place a large fine wire mesh sieve over a heatproof bowl. Line the sieve with double layer of dampened cheesecloth. Pour the rhubarb and strawberry mixture into the sieve, letting the juice drip through. Use the back of a large spoon to very gently press the pulp in order to extract as much of the juice from the fruit as possible. Discard solids.
To assemble: In large jug or bottle, combine the simple syrup with the strained rhubarb and strawberry juice. Stir well. Chill.
To serve: Stir the chilled lemonade. Fill a glass approximately one-half full of ice cubes and add the lemonade. Garnish with a lemon wheel or fresh strawberry, if desired.
Additional Serving Suggestions:
Fill glass one-half full of lemonade. Top with sparkling water or clear soda such as lemon-lime, sprite, or grapefruit. Finish with ice cubes and a sprig of fresh mint.
Add 1 oz of your favorite libation to a glass half-filled with ice cubes. Top with lemonade. Garnish with lemon wedge and strawberry.
Lemonade will keep, covered, in the refrigerator for 3-4 days. Freezes well in airtight container.
Recipe Notes
Yield: Approximately 5-6 cups, depending on water content in fruit
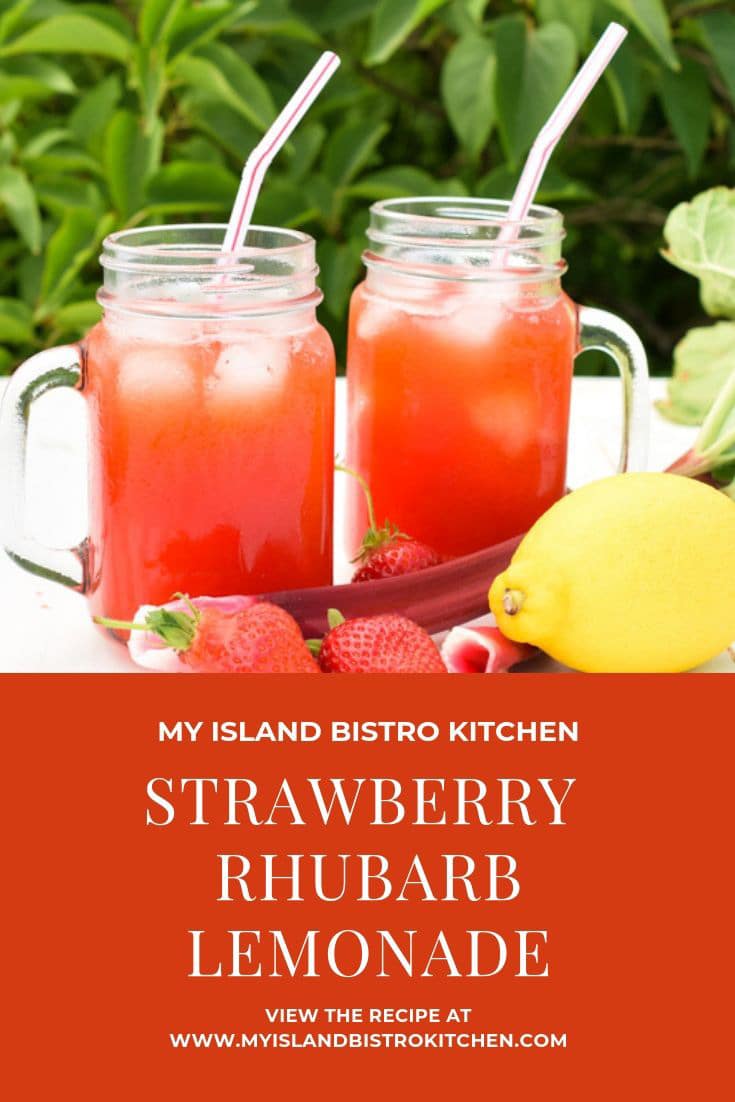
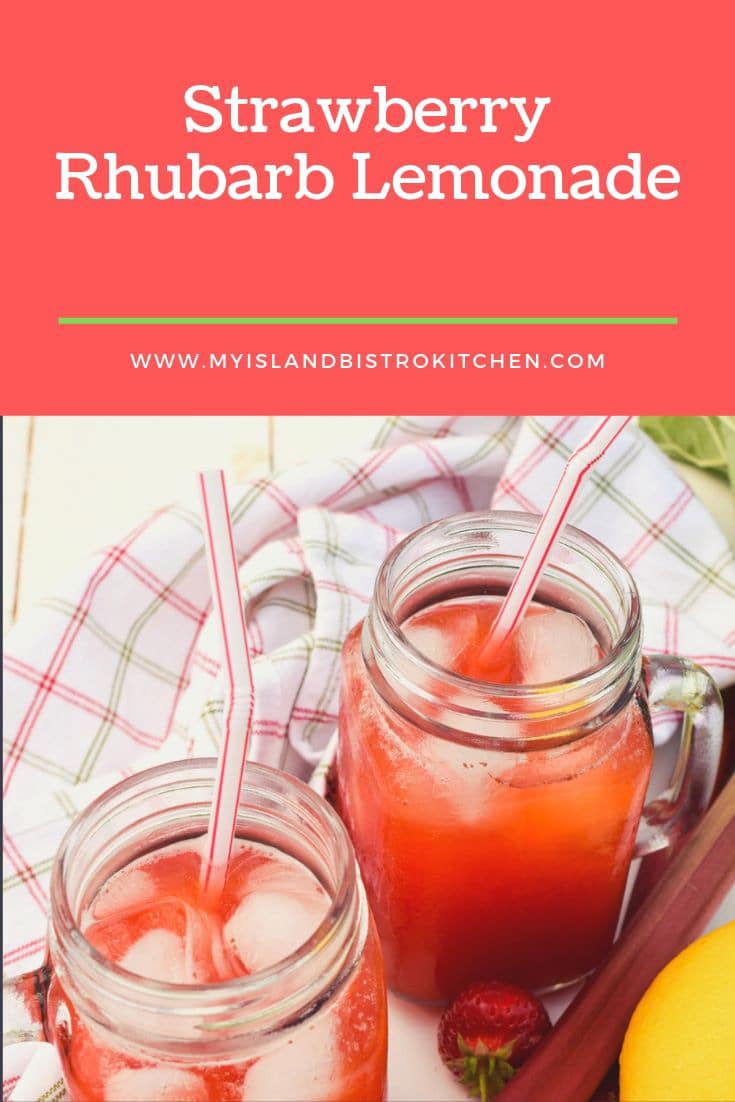
Pin Me To Pinterest!
Strawberry Rhubarb Lemonade
For other great lemonade recipes from My Island Bistro Kitchen, click on the links below:
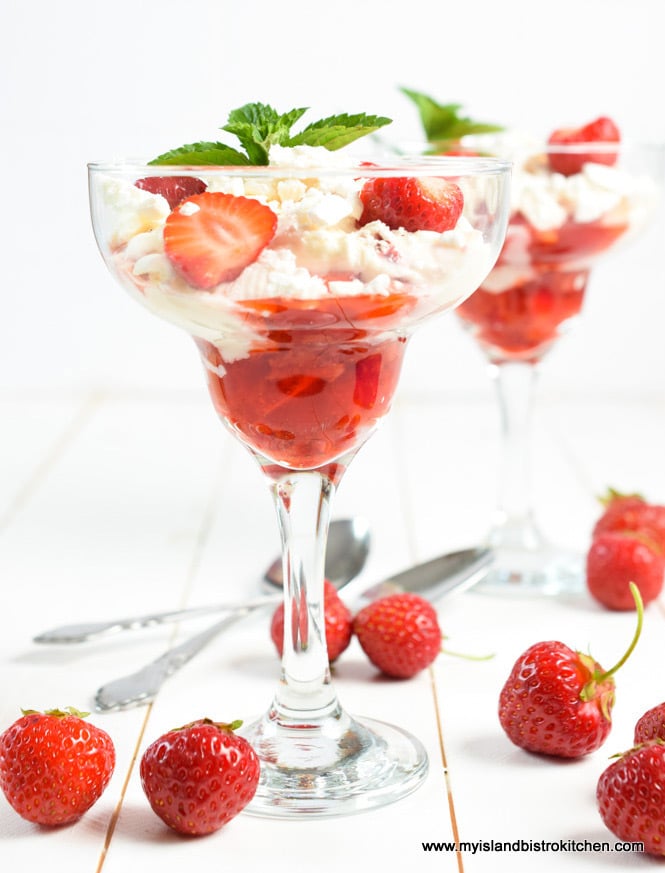
There is much folklore over the origins of Eton Mess, a parfait-like dessert that is named for the prestigious English college in Berkshire, England, across the River Thames from Windsor. Continue reading Strawberry Eton Mess Dessert→
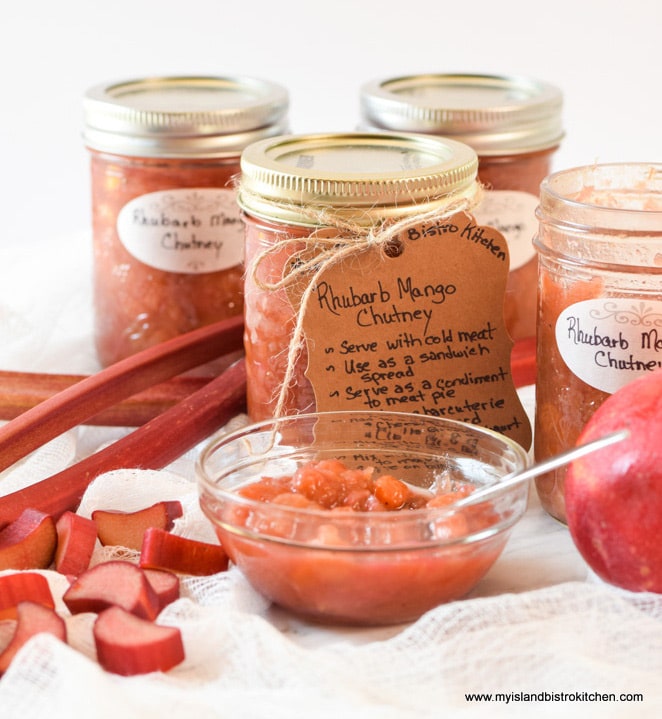
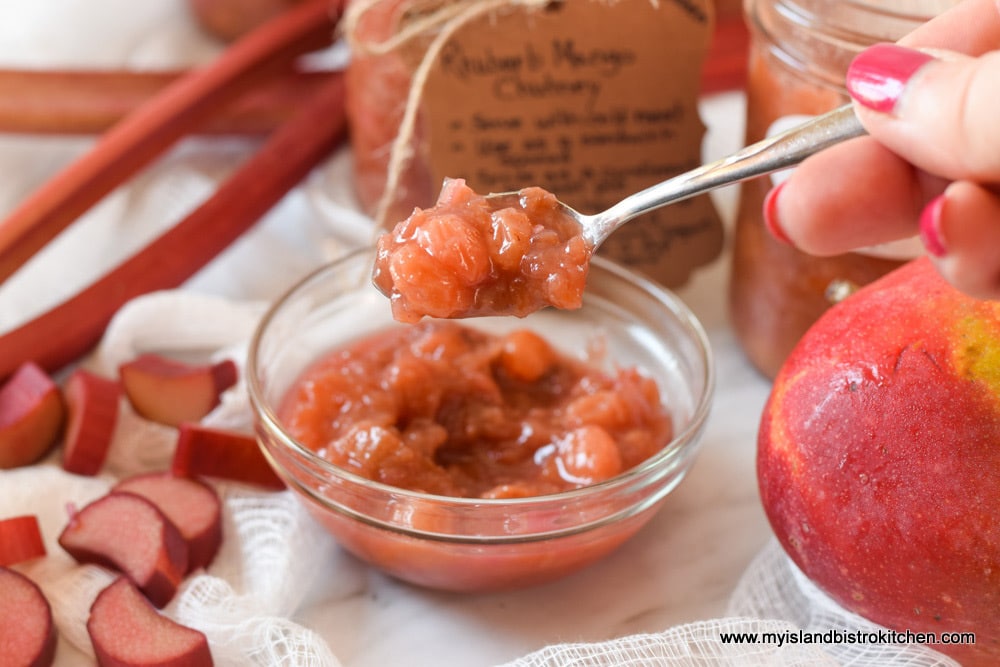
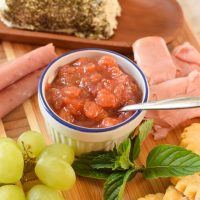
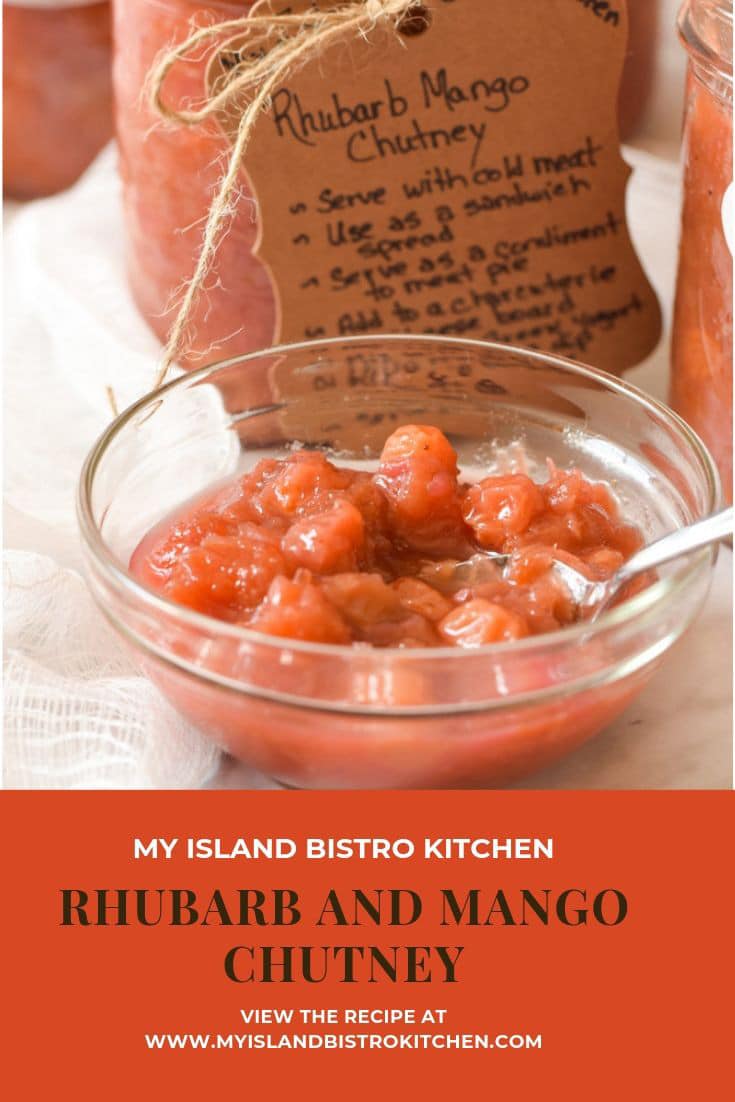
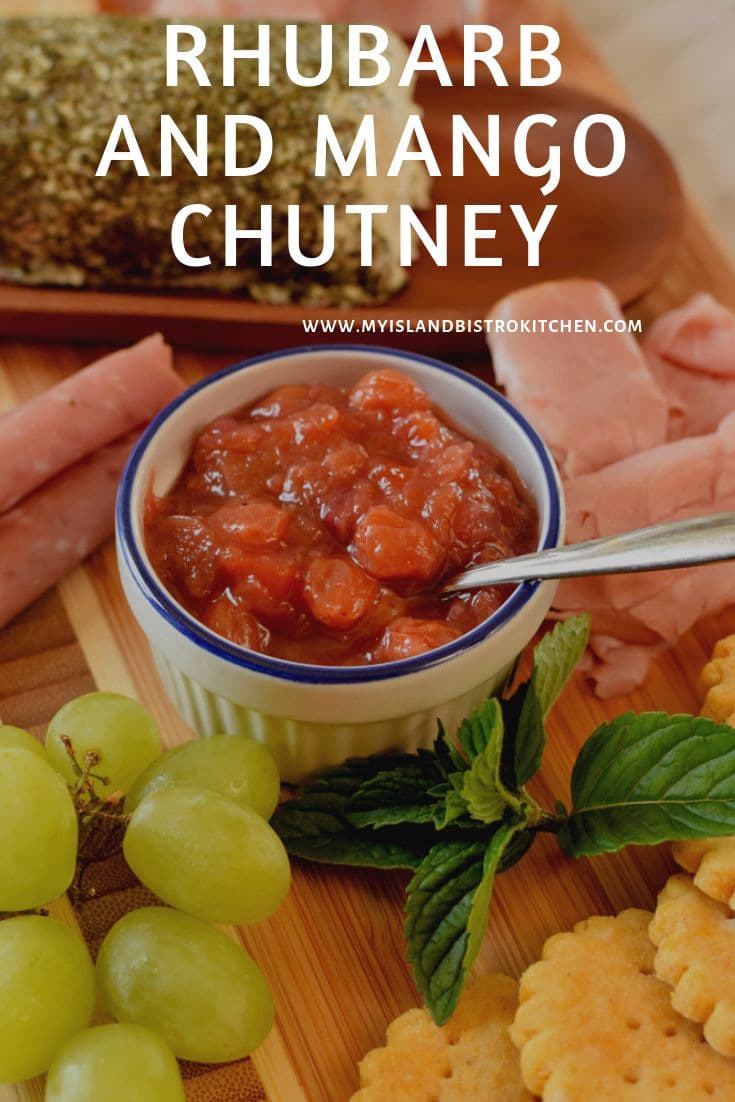
This Rhubarb and Mango Chutney is a mildly spicy condiment. Combining the tart rhubarb with the sweet fresh mango and a variety of spices produces a fabulous flavour combination that teeters between the sweet and savory.
Rhubarb and Mango Chutney
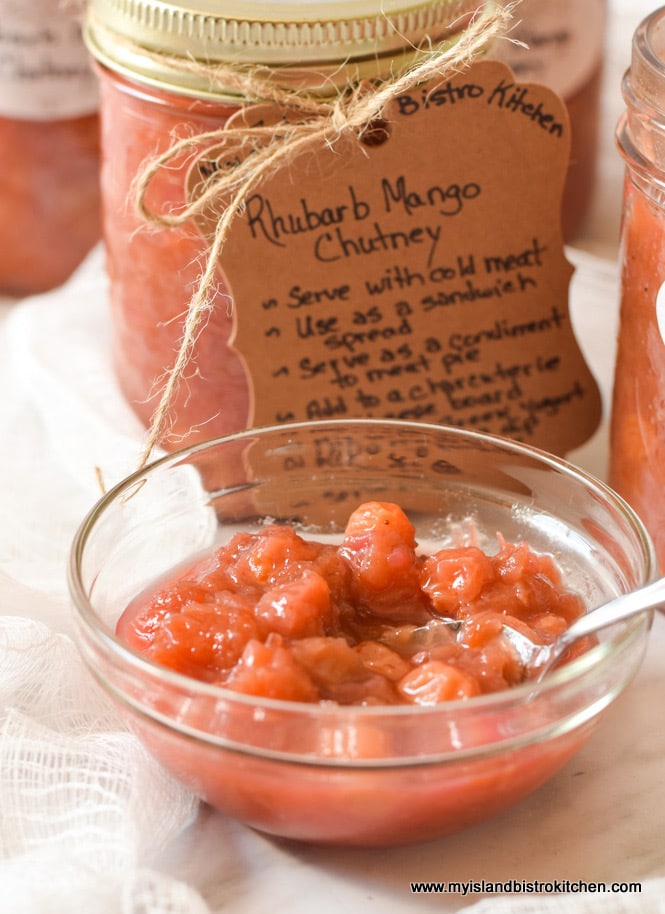
Chutney, with origins in India, differs from a relish that tends to be sweeter. A chutney will also have a more chunky texture with pieces of fruit. Chutney tends to lean more toward the savory side of the culinary scale.
Rhubarb and Mango Chutney
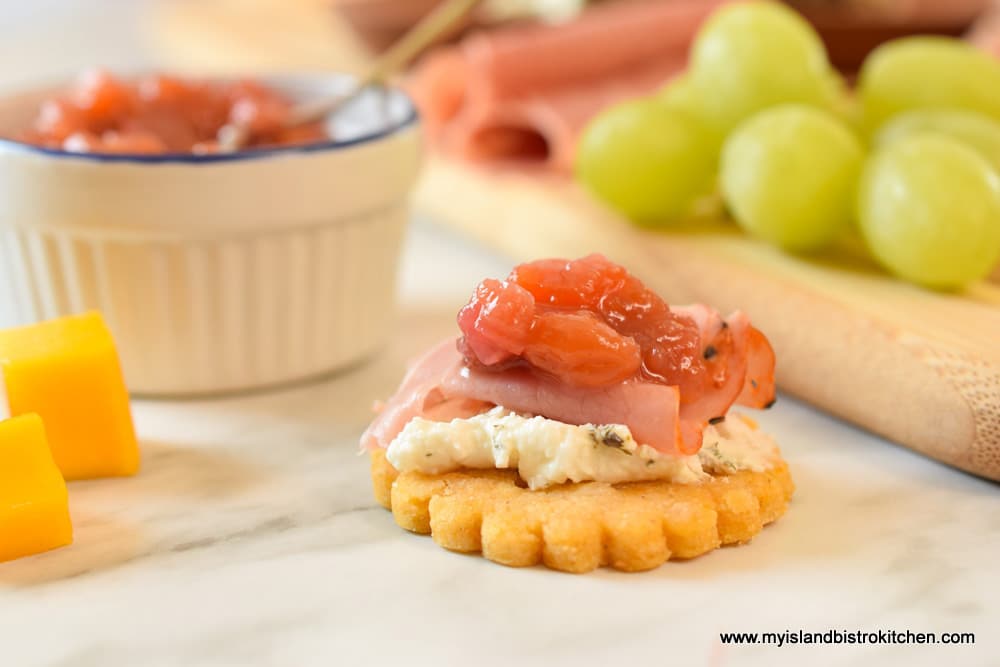
A versatile condiment, chutney can be used in sandwiches either as a spread on its own or mixed with mayonnaise. It’s a great snack or easy hors d’oeuvre when presented on a cracker with some cheese (e.g., goat cheese, Brie, or cream cheese) and some deli meat.
Rhubarb and Mango Chutney tops Deli Meat and Goat Cheese on Cracker
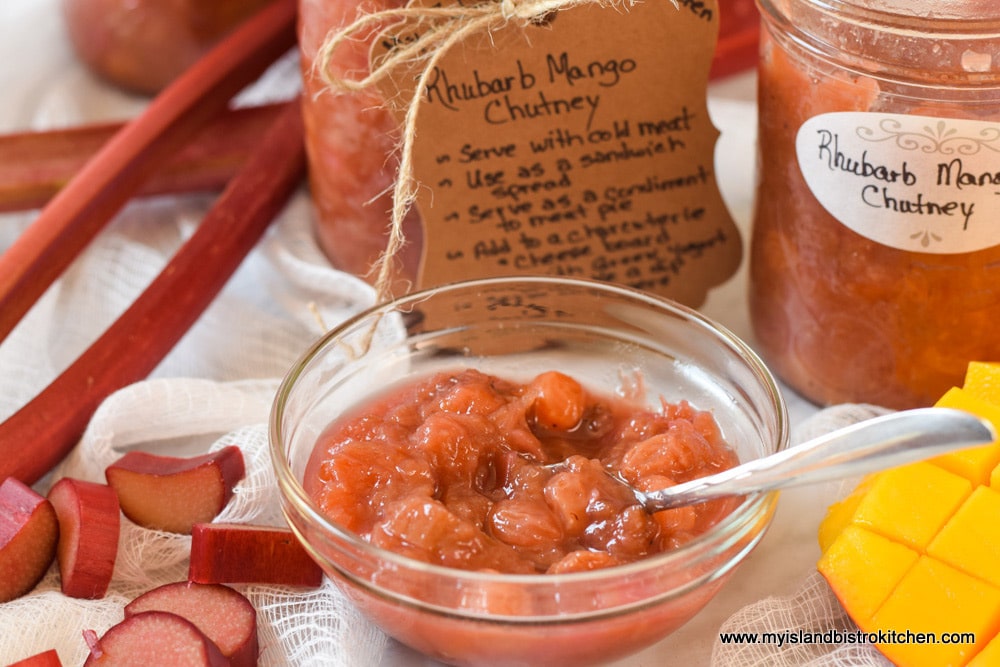
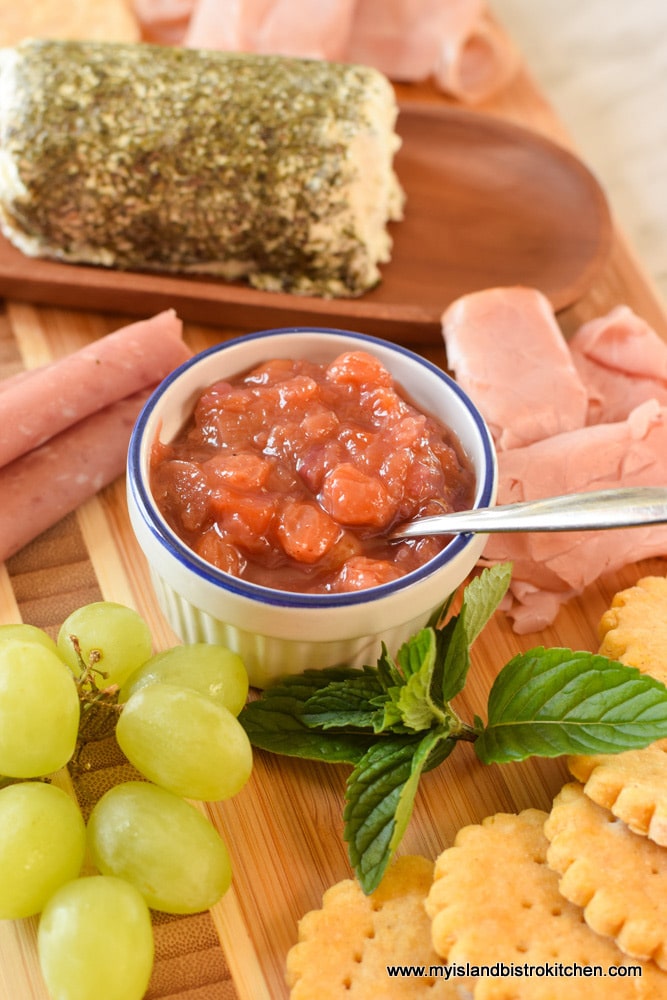
It complements cold meats like beef, pork, and poultry and is wonderful on a charcuterie board.
Rhubarb and Mango Chutney as a Condiment on a Charcuterie and Cheese Board
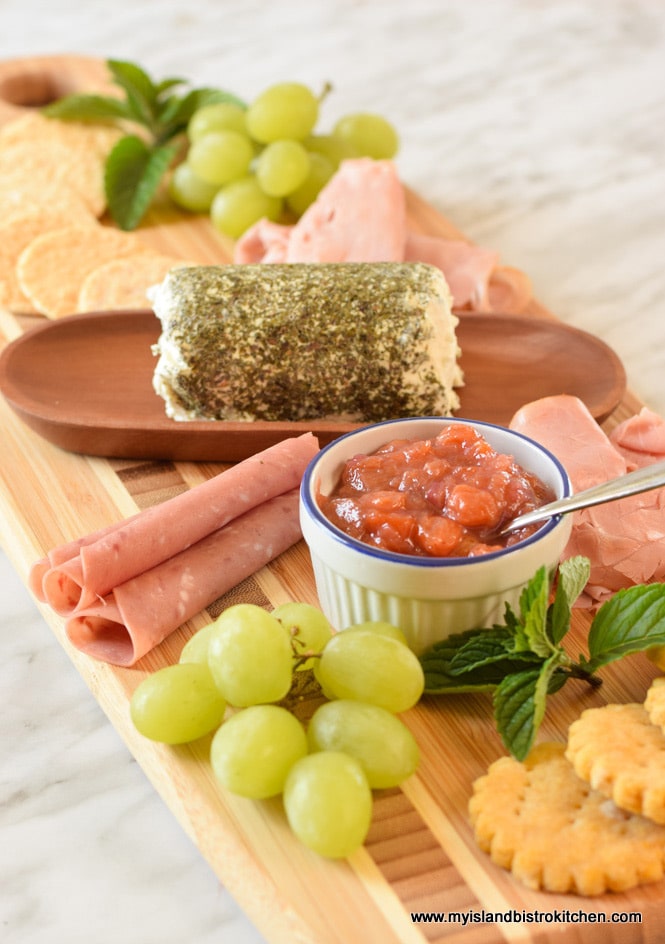
This Rhubarb and Mango Chutney is also tasty when mixed with some Greek yogurt and used as a dip for fresh veggies. I like to use it as a side to my chicken pot pie and beef pot pie and serve it as a burger condiment. The possibilities for the use of the chutney is limited only by your imagination.
Rhubarb and Mango Chutney on Charcuterie, Cheese, and Fruit Board
This recipe for sweet, tart, and slightly spicy Rhubarb and Mango Chutney is not difficult to make but it does take some time. A couple of stock pots as well as a hot water canner to process the jars of chutney will also be required.
Rhubarb and Mango Chutney
[Printable recipe follows at end of posting]
Rhubarb Mango Chutney
Ingredients: 4½ cups rhubarb (apx. 1 lb 3 oz), chopped into ¼“ pieces ½ cup red onion, finely chopped ¾ cup light brown sugar ½ cup white sugar ½ cup minus 1 tbsp apple cider vinegar ½ tsp fine sea salt 1/16 tsp coriander 1-2 garlic cloves, minced 1/8 tsp ground ginger 1/8 tsp cayenne 1/8 tsp nutmeg 1 tbsp olive oil
1 mango, peeled and chopped into ¼“ pieces (apx. 1 1/3 cups) 2/3 cup golden raisins
Method: Place rhubarb, onion, sugars, vinegar, salt, dry spices, and olive oil in medium-sized stock pot. Stir over medium heat until sugar dissolves. Make the spice sachet by combining the star anise, mustard seed, whole allspice and cloves, and cinnamon stick into center of small square of double or triple layer of cheesecloth (depending on how open the weave of the cheesecloth is). Draw edges of cheesecloth together to make a sachet and tie with heavy thread. Add the spice sachet to the pot. Bring mixture to a boil over medium-high heat, stirring frequently, then reduce heat to low and simmer for 15 minutes. Add the mango and raisins and continue to simmer about 25 minutes longer, or until mixture thickens, stirring occasionally.
While the chutney is cooking, fill a large pot of water, about ¾ full. Place 4 half-pint jars (see Note 1 below) and 1 quarter-pint jar (see Note 2 below), upright, into the water. Ensure the jars are fully submerged, each jar filled with water, and that the water is at least an inch over the tops of the jars. Cover, bring to a boil, and boil for 10 minutes. Turn off heat and leave the jars in the hot water while the chutney finishes cooking.
Meanwhile, fill the canner about one-third to one-half full of water. Cover and bring to a boil to have it ready for the filled jars.
When the chutney is cooked, use a jar lifter to remove the hot jars from the water. Discard the spice sachet in the chutney. Using a glass measuring cup and a canning funnel, transfer chutney into sterilized jars, leaving about ¼” headroom in each jar. Wipe the jar rims with a clean cloth. Seal jars with heated lids and fingertip-tightened ring bands.
Place filled jars in hot water bath wire basket, ensuring jars do not touch each other or fall over. Carefully lower basket into canner of hot water. Some empty jars may need to be added to the basket to fill up space so the filled jars do not fall over. Let the empty jars fill with water from the canner as they are submerged. Ensure the water level is at least 1” above the tops of jars, adding more boiling water as necessary. Cover with canner lid. Increase the heat to return the water to a rolling boil then decrease the heat to just keep the water at a rolling boil but not boiling over. Process jars in the hot water bath for 10 minutes, adjusting time for altitude. Start timing the processing from the point where a full rolling boil is reached after basket of jars has been added to the canner. At the end of the processing time, turn off heat and remove canner lid. Wait until the water stops boiling (approximately 3-5 minutes) then, using a jar lifter, carefully remove the jars, one at a time, and transfer them to a wire rack to cool completely. Listen for the “pop” or “ping” sound as the bottles seal over the next few minutes or hours. The lids of properly sealed jars will curve downward. Let jars rest, undisturbed, on wire rack for 12 hours. Store in cool, dark place. Refrigerate chutney once opened.
Note 1: You may want to sterilize an additional half-pint jar to have it ready to fill in case the recipe yields more than exactly 4½ cups of chutney. Many factors can vary the amount of chutney produced – e.g., amount of water in the rhubarb, ripeness of the mango, temperature at which the chutney was cooked, how long it was simmered, how much it was stirred during the cooking process, and how much liquid in the chutney may have evaporated, or not.
Note 2: I generally do not process the tiny quarter-pint jar in the hot water bath because it does not need the full 10 minutes that the half-pint jars require and I prefer not to take the cover off the canner to extract the small half-cup jar mid-way through the timing of the hot water bath. Instead, I let the small jar cool at room temperature then refrigerate it and eat its contents within a day or so because it’s hard not to taste freshly-made chutney! I call this my “tasting jar”.
The combination of tart rhubarb and sweet mango mixed with a variety of spices results in a Rhubarb Mango Chutney that can be enjoyed as a condiment in many different ways with meat, cheese, and charcuterie boards.
Course Side Dish
Cuisine Canadian
Keyword chutney, rhubarb and mango chutney
My Island Bistro KitchenMy Island Bistro Kitchen
Ingredients
4½cupsrhubarb(apx. 1 lb 3 oz), chopped into ¼“ pieces
½cupred onion,finely chopped
¾cuplight brown sugar
½cupwhite sugar
½cupminus 1 tbsp apple cider vinegar
½tspfine sea salt
1/16tspcoriander
1-2garlic cloves,minced
1/8tspground ginger
1/8tspcayenne
1/8tspnutmeg
1tbspolive oil
1mango,peeled and chopped into ¼“ pieces (apx. 1 1/3 cups)
2/3cupgolden raisins
Spice Sachet:
1star anise
1/8tspmustard seed
2whole allspice
3whole cloves
3” piece cinnamon stick
Instructions
Place rhubarb, onion, sugars, vinegar, salt, dry spices, and olive oil in medium-sized stock pot. Stir over medium heat until sugar dissolves. Make the spice sachet by combining the star anise, mustard seed, whole allspice and cloves, and cinnamon stick into center of small square of double or triple layer of cheesecloth (depending on how open the weave of the cheesecloth is). Draw edges of cheesecloth together to make a sachet and tie with heavy thread. Add the spice sachet to the pot. Bring mixture to a boil over medium-high heat, stirring frequently, then reduce heat to low and simmer for 15 minutes. Add the mango and raisins and continue to simmer about 25 minutes longer, or until mixture thickens, stirring occasionally.
While the chutney is cooking, fill a large pot of water, about ¾ full. Place 4 half-pint jars (see Note 1 below) and 1 quarter-pint jar (see Note 2 below), upright, into the water. Ensure the jars are fully submerged, each jar filled with water, and that the water is at least an inch over the tops of the jars. Cover, bring to a boil, and boil for 10 minutes. Turn off heat and leave the jars in the hot water while the chutney finishes cooking.
Meanwhile, fill the canner about one-third to one-half full of water. Cover and bring to a boil to have it ready for the filled jars.
When the chutney is cooked, use a jar lifter to remove the hot jars from the water. Discard the spice sachet in the chutney. Using a glass measuring cup and a canning funnel, transfer chutney into sterilized jars, leaving about ¼” headroom in each jar. Wipe the jar rims with a clean cloth. Seal jars with heated lids and fingertip-tightened ring bands.
Place filled jars in hot water bath wire basket, ensuring jars do not touch each other or fall over. Carefully lower basket into canner of hot water. Some empty jars may need to be added to the basket to fill up space so the filled jars do not fall over. Let the empty jars fill with water from the canner as they are submerged. Ensure the water level is at least 1” above the tops of jars, adding more boiling water as necessary. Cover with canner lid. Increase the heat to return the water to a rolling boil then decrease the heat to just keep the water at a rolling boil but not boiling over. Process jars in the hot water bath for 10 minutes, adjusting time for altitude. Start timing the processing from the point where a full rolling boil is reached after basket of jars has been added to the canner. At the end of the processing time, turn off heat and remove canner lid. Wait until the water stops boiling (approximately 3-5 minutethen, using a jar lifter, carefully remove the jars, one at a time, and transfer them to a wire rack to cool completely. Listen for the “pop” or “ping” sound as the bottles seal over the next few minutes or hours. The lids of properly sealed jars will curve downward. Let jars rest, undisturbed, on wire rack for 12 hours. Store in cool, dark place. Refrigerate chutney once opened.
Recipe Notes
Yield:Apx. 4½ cups (4 half-pint jars and 1 quarter-pint jar)
Note 1: You may want to sterilize an additional half-pint jar to have it ready to fill in case the recipe yields more than exactly 4½ cups of chutney. Many factors can vary the amount of chutney produced – e.g., amount of water in the rhubarb, ripeness of the mango, temperature at which the chutney was cooked, how long it was simmered, how much it was stirred during the cooking process, and how much liquid in the chutney may have evaporated, or not.
Note 2: I generally do not process the tiny quarter-pint jar in the hot water bath because it does not need the full 10 minutes that the half-pint jars require and I prefer not to take the cover off the canner to extract the small half-cup jar mid-way through the timing of the hot water bath. Instead, I let the small jar cool at room temperature then refrigerate it and eat its contents within a day or so because it’s hard not to taste freshly-made chutney! I call this my “tasting jar”.
Jamming and preserving season here in PEI starts with rhubarb, one of the first treats from the garden. The two crowns of rhubarb in our garden produce lots of rhubarb for use when it is in season and to freeze for later enjoyment.
Rhubarb Patch of Two Crowns
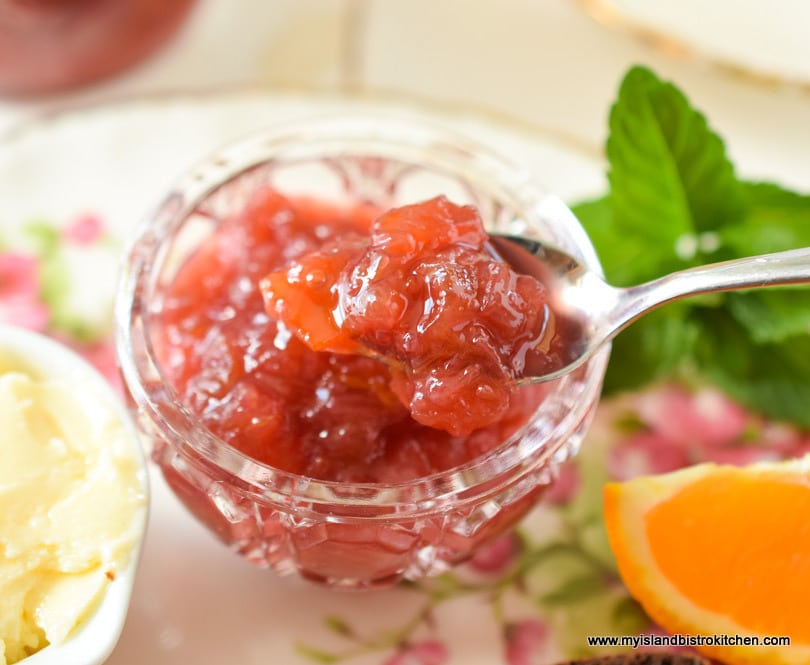
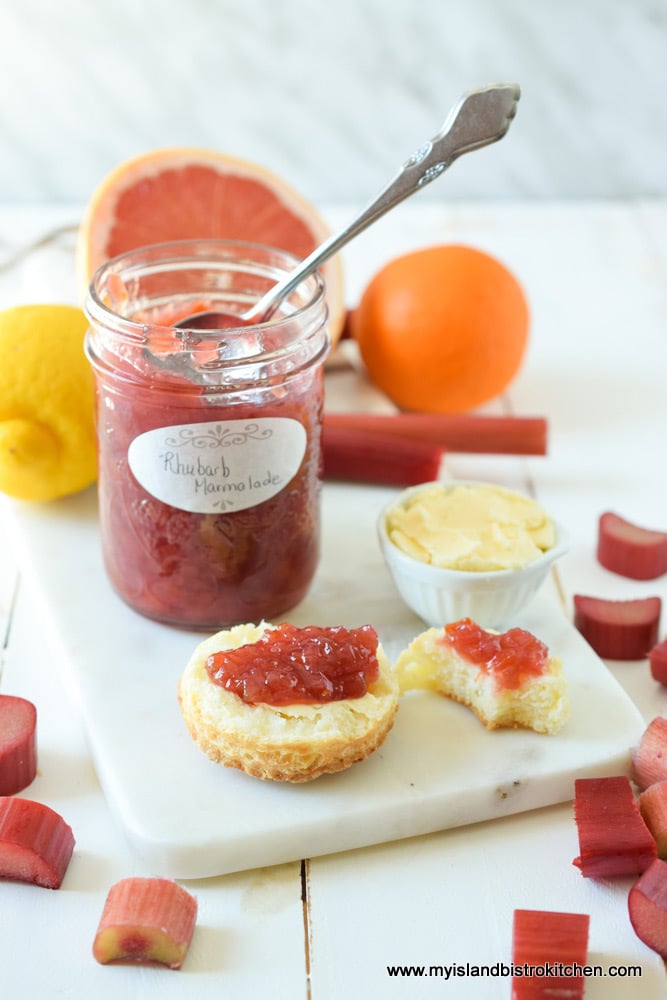
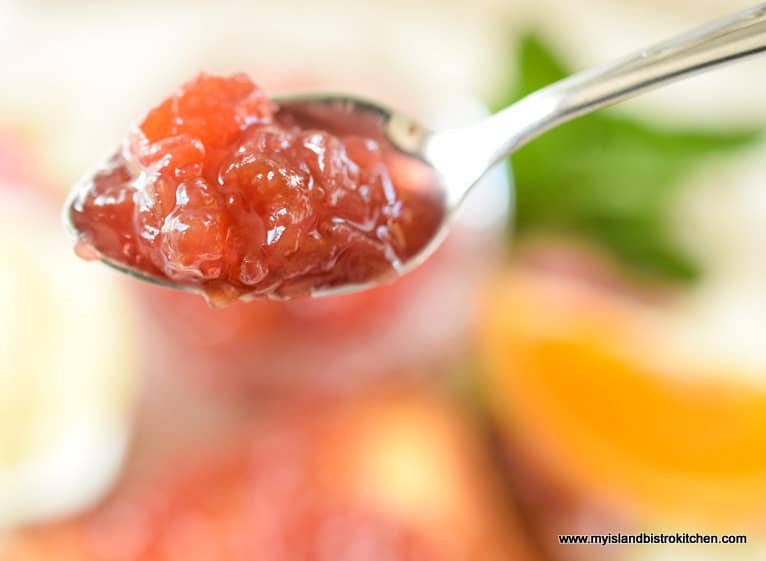
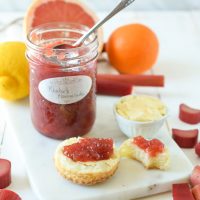
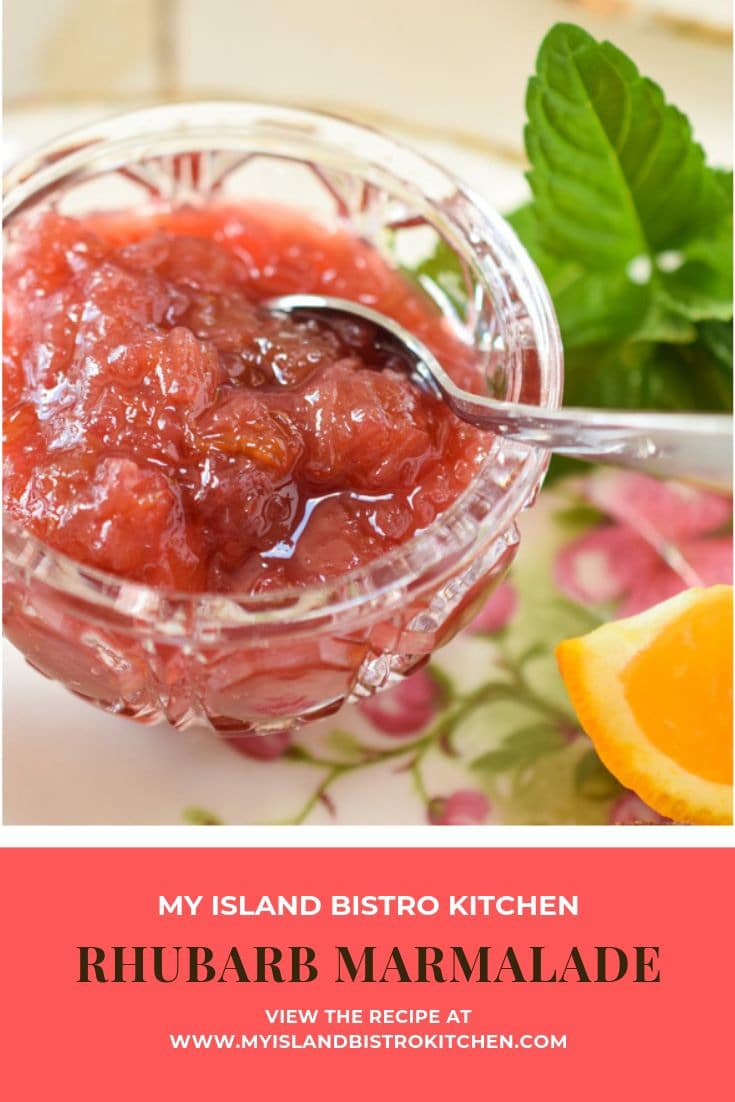
One of the first things I make with rhubarb as soon as it is ready is this wonderful rhubarb marmalade I have been making for years. The marmalade only takes five ingredients – rhubarb, granulated sugar, an orange, half a pink grapefruit, and half of a lemon. The color of the rhubarb marmalade is a lovely deep shade and its flavour is fresh and slightly tart.
Rhubarb Marmalade
Tips for making rhubarb marmalade:
Choose rhubarb stalks that are slender as marmalade is best made with smaller pieces of rhubarb. Stalks that are a bright red color will yield a marmalade with a richer, deeper color.
Prepare all the fruit before beginning to make the marmalade – chop the rhubarb, prepare the citrus fruit, and measure the sugar.
Set out all the pots and hot water canner needed.
Organize the process. Begin cooking the marmalade. While it is cooking, get the bottles sterilizing in hot water, and the water heating in the canner so that it will be ready to process the marmalade as soon as it is bottled.
Cook the marmalade to a sustained temperature of at least 217°F (to a maximum of 220°F) on a candy thermometer. If a candy thermometer is not available to test marmalade doneness, place a couple of freezer-safe saucers in the freezer. This method of testing is explained in the recipe.
Don’t overcook the marmalade as it will become very thick and dark in color. Cooking the marmalade to 217°F on a candy thermometer will yield a more pliable spread while cooking it to a temperature of 220°F will produce a thicker marmalade.
Rhubarb Marmalade
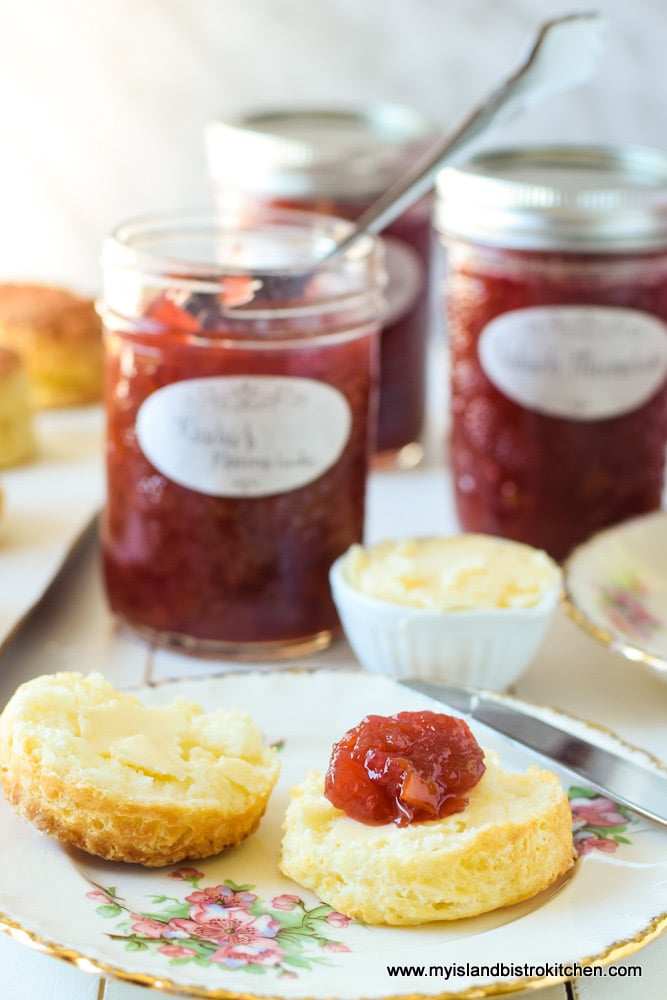
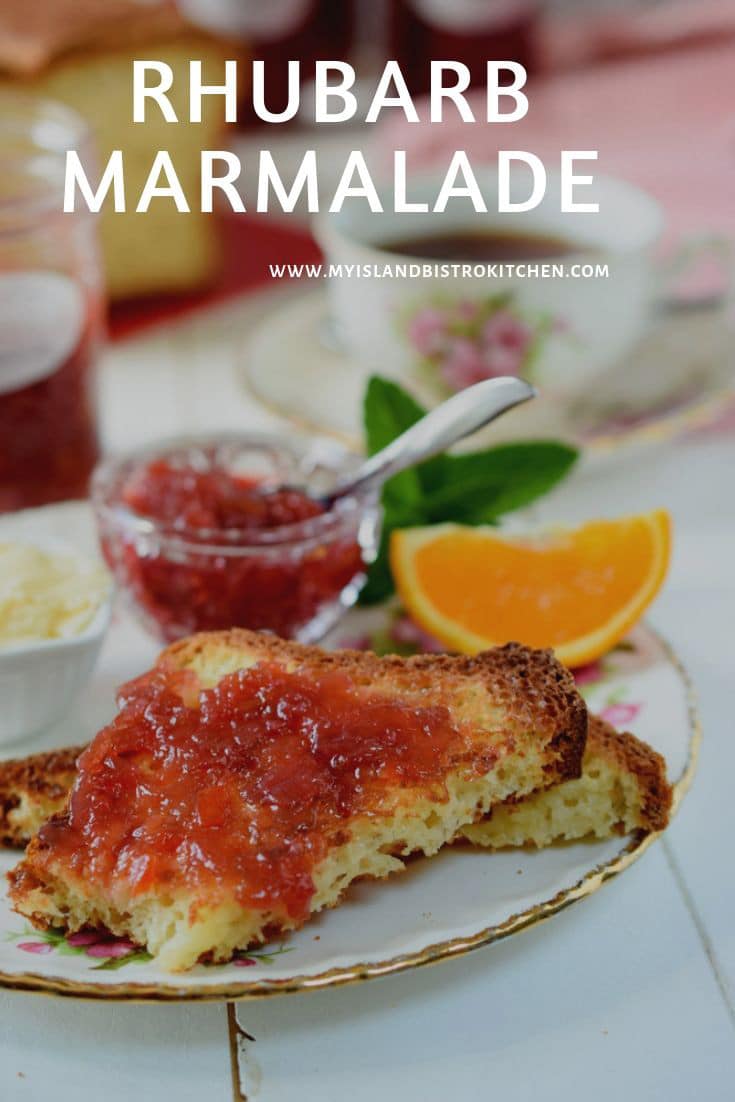
Serve this tasty rhubarb marmalade with biscuits, scones, toast, or crackers. Add a dollop to Greek yogurt or custard for a tasty dessert.
Rhubarb Marmalade
You’ll find many tasty, creative ways to enjoy this special treat!
Rhubarb Marmalade
[Printable recipe follows at end of post]
Rhubarb Marmalade
Ingredients:
8 cups rhubarb, thinly sliced into pieces between 1/8’ and ¼“ thick (apx. 2 pounds, 6 ounces, weighed after rhubarb leaves and root ends removed) 4¼ cups sugar 1 large orange (or 1½ small oranges) ½ pink grapefruit ½ small lemon
Method:
Wash the orange, grapefruit, and lemon well.
Peel orange, grapefruit, and lemon. Chop the pulp, remove and discard any seeds, and place pulp in bowl. Scrape the pith from the fruit peelings and discard. Chop the peel into small pieces. Set aside.
In a large pot, place the rhubarb and sugar. Add the citrus pulp and peel. Bring to a boil over medium high temperature, stirring to prevent scorching. Immediately lower the temperature and cook, uncovered, at a slow gentle boil until mixture thickens and reaches a sustained temperature of 217°F on a candy thermometer (see Note below for alternative testing method). Stir mixture regularly to prevent scorching. Be patient, this can take an hour or so. The marmalade may be cooked to a temperature of 220°F but it will be a thicker marmalade and less pliable to spread than if it is cooked to 217°F.
While the marmalade is cooking, fill a large pot of water, about ¾ full. Place 7 half-pint jars, upright, into the water. Ensure the jars are fully submerged, each jar filled with water, and that the water is at least an inch over the tops of the jars. Cover, bring to a boil, and boil for 10 minutes. Turn off heat and leave the jars in the hot water while the marmalade finishes cooking.
Meanwhile, fill the hot water canner about one-third to one-half full of water. Cover and bring to a boil to have it ready for the filled jars.
When the marmalade is cooked, use a jar lifter to remove the hot jars from the water. Using a canning funnel, pour marmalade into sterilized jars, leaving about ¼” headroom in each jar. Wipe the jar rims with a clean cloth. Seal jars with heated lids and fingertip-tightened ring bands.
Place jars in hot water bath wire basket, ensuring jars do not touch each other or fall over. Carefully lower basket into canner of hot water. Ensure the water level is at least 1” above the tops of jars, adding more boiling water as necessary. Cover with canner lid. Increase the heat to return the water to a rolling boil then decrease the heat to just keep the water at a rolling boil but not boiling over. Process half-pint jars in the hot water bath for 10 minutes, adjusting time for altitude. Start timing the processing from the point where a full rolling boil is reached after basket of jars has been added to the canner. At the end of the processing time, turn off heat and remove canner lid. Wait 4-5 minutes, until the water stops boiling then, using a jar lifter, carefully remove the jars, one at a time, and transfer them to a wire rack to cool completely. Listen for the “pop” or “ping” sound as the bottles seal over the next few minutes or hours. The lids of properly sealed jars will curve downward. Let jars rest, undisturbed, on wire rack for 12 hours. Store in cool, dark place. Refrigerate marmalade once opened.
Yield: Apx. 7 half-pint bottles
NOTE 1: If you don’t have a candy thermometer, place 2-3 freezer-safe saucers in freezer. To test for doneness of the marmalade, place a small amount of marmalade on chilled saucer and swirl saucer around. Let marmalade sit, untouched, for about a minute, then gently push your finger through the marmalade. If the marmalade holds its shape (i.e., does not immediately run back together after the finger has been removed from the marmalade), it is set and ready to bottle. If not, continue to cook mixture, repeating the “chill” test about every 3 minutes or so (always removing the pot from the heat while conducting the chill test) until the marmalade passes the “chill” test. Do not overcook as it will result in a very thick marmalade, dark in color.
Note 2:After jars have completely cooled, if there are any on which the lids have not curved downward, refrigerate them and use within one month.
A delicious marmalade made with rhubarb and citrus undertones. Perfect on biscuits, scones, and toast.
Course Breakfast
Cuisine Canadian
Keyword rhubarb, rhubarb marmalade
My Island Bistro KitchenMy Island Bistro Kitchen
Ingredients
8cupsrhubarb,thinly sliced into pieces between 1/8’ and ¼“ thick (apx. 2 pounds, 6 ounces, weighed after rhubarb leaves and root ends removed)
4¼cupssugar
1large orange(or 1½ small oranges)
½pink grapefruit
½small lemon
Instructions
Wash the orange, grapefruit, and lemon well.
Peel orange, grapefruit, and lemon. Chop the pulp, remove and discard any seeds, and place pulp in bowl. Scrape the pith from the fruit peelings and discard. Chop the peel into small pieces. Set aside.
In a large pot, place the rhubarb and sugar. Add the citrus pulp and peel. Bring to a boil over medium high temperature, stirring to prevent scorching. Immediately lower the temperature and cook, uncovered, at a slow gentle boil until mixture thickens and reaches a sustained temperature of 217°F on a candy thermometer (see Note below for alternative testing method). Stir mixture regularly to prevent scorching. Be patient, this can take an hour or so. The marmalade may be cooked to a temperature of 220°F but it will be a thicker marmalade and less pliable to spread than if it is cooked to 217°F.
While the marmalade is cooking, fill a large pot of water, about ¾ full. Place 7 half-pint jars, upright, into the water. Ensure the jars are fully submerged, each jar filled with water, and that the water is at least an inch over the tops of the jars. Cover, bring to a boil, and boil for 10 minutes. Turn off heat and leave the jars in the hot water while the marmalade finishes cooking.
Meanwhile, fill the hot water canner about one-third to one-half full of water. Cover and bring to a boil to have it ready for the filled jars.
When the marmalade is cooked, use a jar lifter to remove the hot jars from the water. Using a canning funnel, pour marmalade into sterilized jars, leaving about ¼” headroom in each jar. Wipe the jar rims with a clean cloth. Seal jars with heated lids and fingertip-tightened ring bands.
Place jars in hot water bath wire basket, ensuring jars do not touch each other or fall over. Carefully lower basket into canner of hot water. Ensure the water level is at least 1” above the tops of jars, adding more boiling water as necessary. Cover with canner lid. Increase the heat to return the water to a rolling boil then decrease the heat to just keep the water at a rolling boil but not boiling over. Process half-pint jars in the hot water bath for 10 minutes, adjusting time for altitude. Start timing the processing from the point where a full rolling boil is reached after basket of jars has been added to the canner. At the end of the processing time, turn off heat and remove canner lid. Wait 4-5 minutes, until the water stops boiling then, using a jar lifter, carefully remove the jars, one at a time, and transfer them to a wire rack to cool completely. Listen for the “pop” or “ping” sound as the bottles seal over the next few minutes or hours. The lids of properly sealed jars will curve downward. Let jars rest, undisturbed, on wire rack for 12 hours. Store in cool, dark place. Refrigerate marmalade once opened.
Recipe Notes
Yield: Apx. 7 half-pint bottles
NOTE 1:If you don’t have a candy thermometer, place 2-3 freezer-safe saucers in freezer. To test for doneness of the marmalade, place a small amount of marmalade on chilled saucer and swirl saucer around. Let marmalade sit, untouched, for about a minute, then gently push your finger through the marmalade. If the marmalade holds its shape (i.e., does not immediately run back together after the finger has been removed from the marmalade), it is set and ready to bottle. If not, continue to cook mixture, repeating the “chill” test about every 3 minutes or so (always removing the pot from the heat while conducting the chill test) until the marmalade passes the “chill” test. Do not overcook as it will result in a very thick marmalade, dark in color.
Note 2: After jars have completely cooled, if there are any on which the lids have not curved downward, refrigerate them and use within one month.
For other tasty marmalade recipes from My Island Bistro Kitchen, click on the links below:
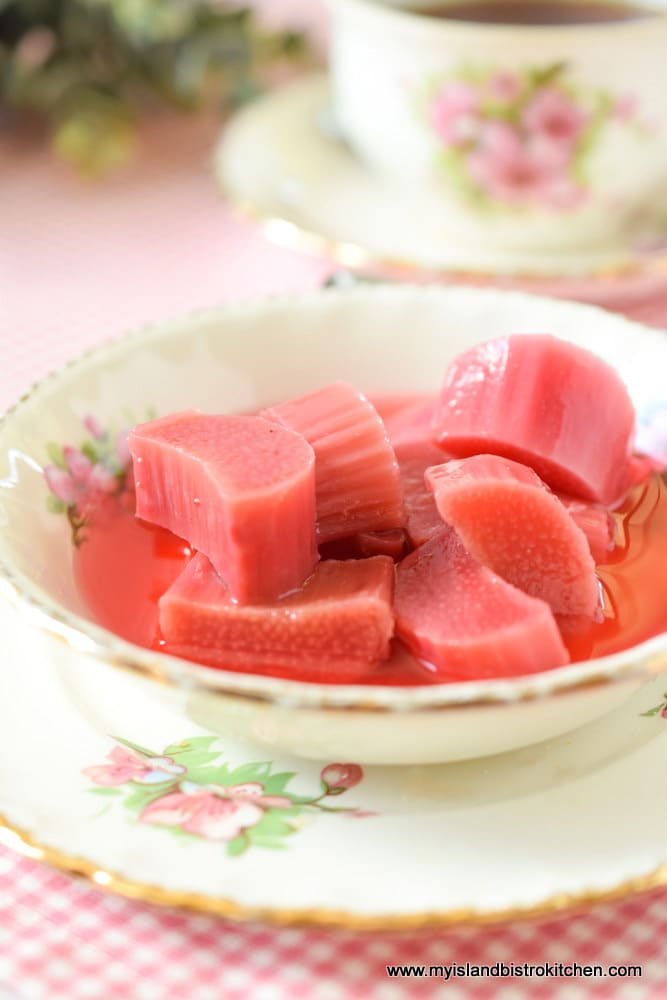
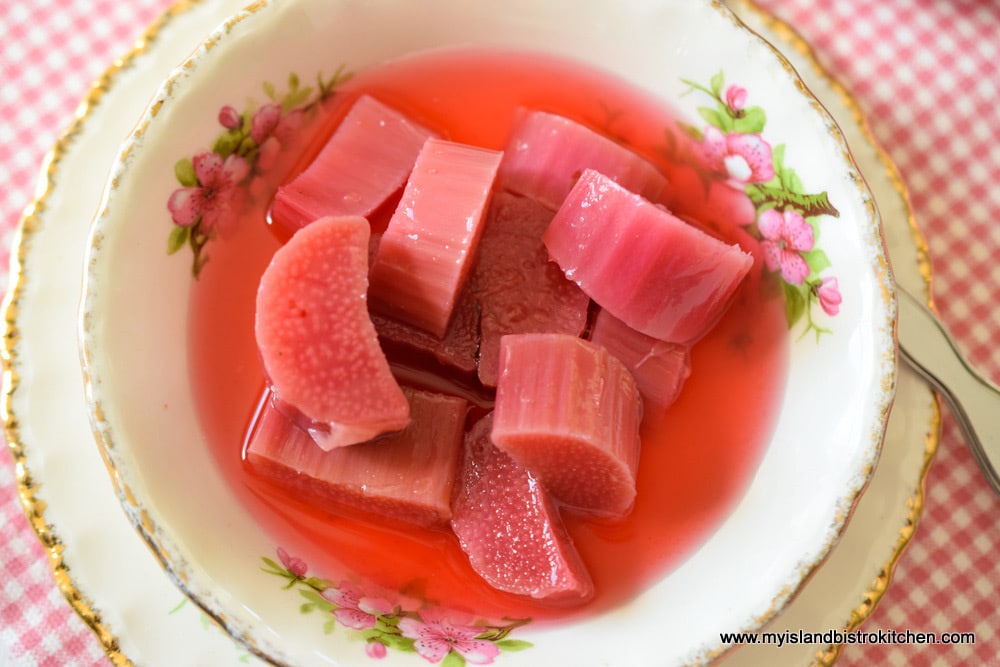
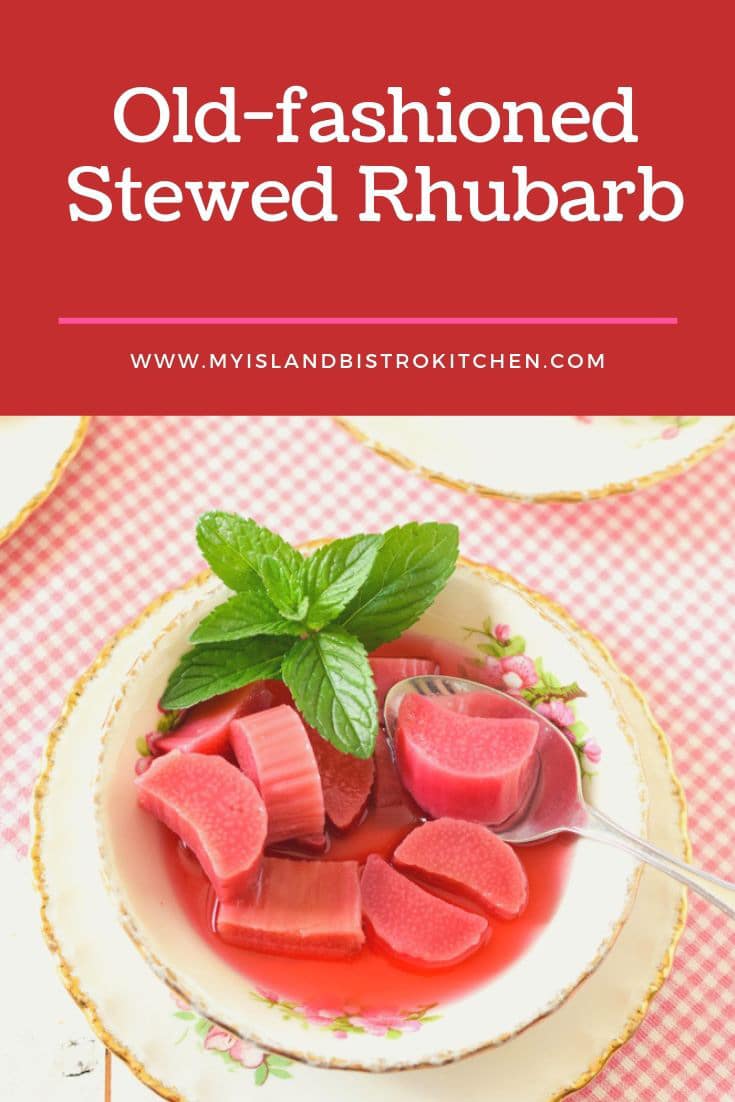
Old-fashioned stewed rhubarb is so simple to make and so tasty. During my growing up years, stewed rhubarb was a staple in the refrigerator during rhubarb season. My mother and grandmother both cooked the rhubarb slowly in a water and sugar mixture in the oven. This helped to retain the shape of the rhubarb and also its lovely rosy color. Cooking it on the stove, or in the oven at a higher temperature, would turn the rhubarb into sauce which is entirely different from this stewed rhubarb recipe.
While neither my mother or grandmother added anything to their stewed rhubarb, I add a small amount of pulp-free orange juice and a sprinkle of nutmeg which I think enhances the syrup in which the rhubarb is stewed and with which it is served.
Stewed Rhubarb
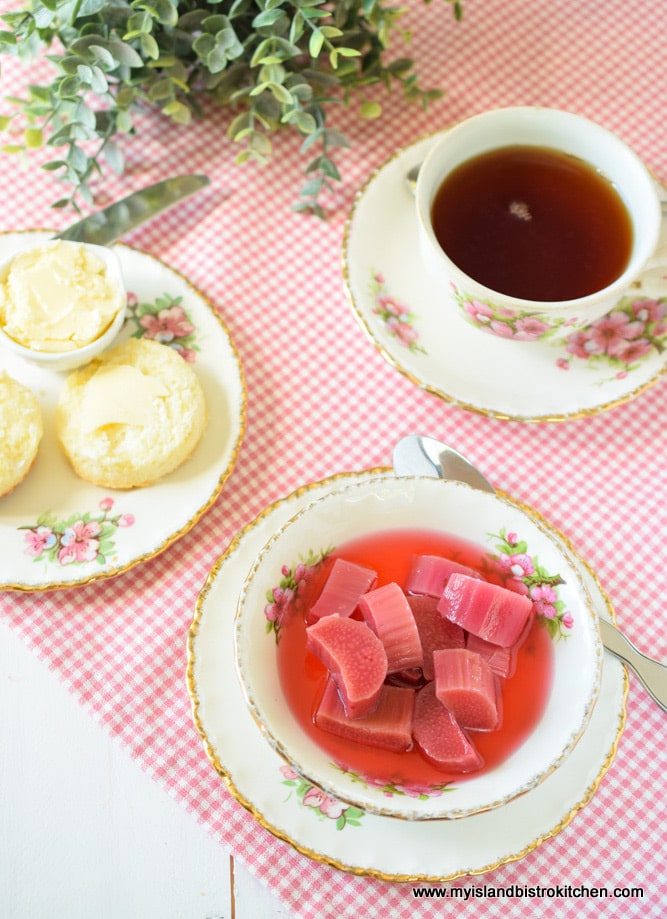
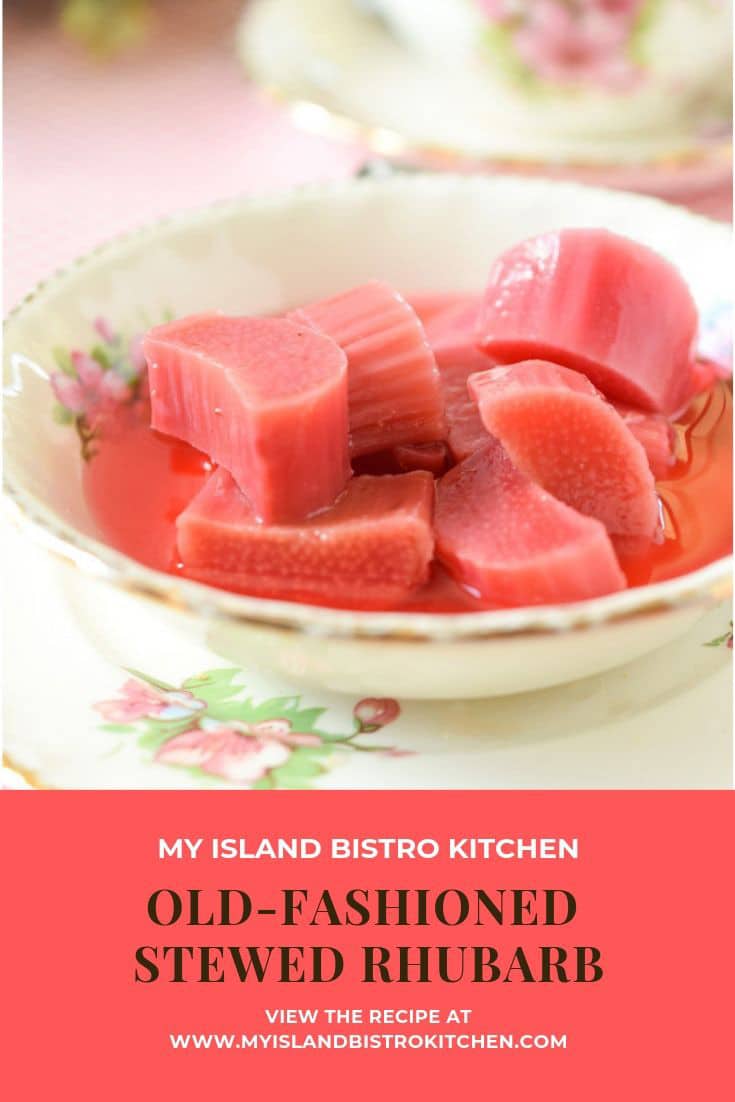
My grandmother would often serve this stewed rhubarb with biscuits made with homemade cream and slathered with homemade butter. She lived on a farm so had fresh cream daily and it was used liberally. (You can find my tea biscuit recipe here.) Stewed rhubarb would often be dessert after supper.
Stewed Rhubarb
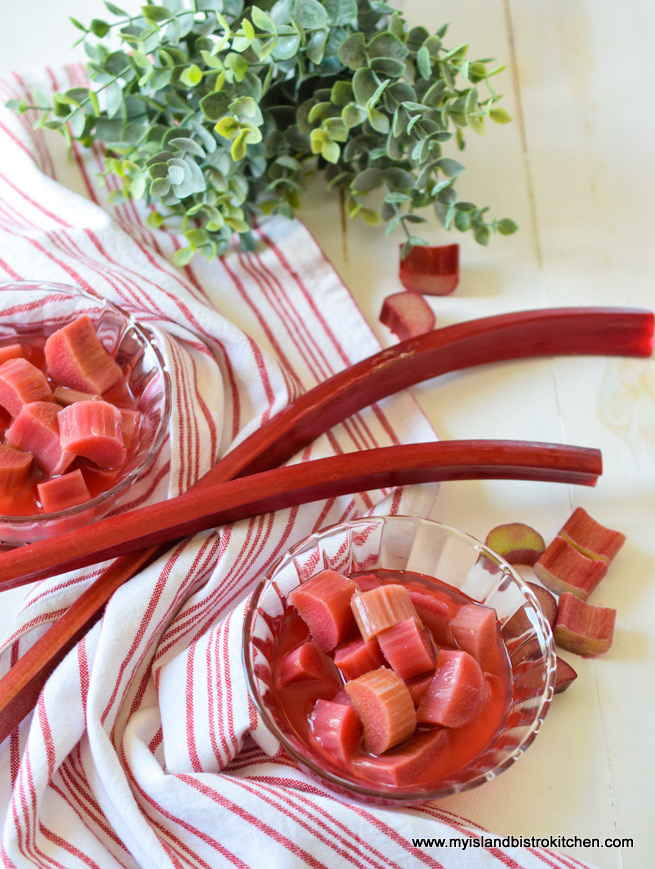
I freeze a lot of rhubarb for winter usage and will often have a dish of stewed rhubarb in the fridge any time over the year because it can easily be made with frozen rhubarb.
Stewed Rhubarb
Made with only five basic ingredients, it doesn’t get much simpler (or more tasty) than Old-fashioned Stewed Rhubarb.
[Printable recipe follows at end of post]
Stewed Rhubarb
Ingredients:
1 lb rhubarb, chopped into ¾“ pieces (approximately 3¾ cups chopped) ¾ cup hot water 1 cup + 1 tbsp granulated sugar 1½ tbsp pulp-free orange juice 1/8 tsp nutmeg
Method:
Preheat oven to 235°F oven.
In small saucepan over medium high heat, bring the hot water and sugar to a boil then reduce heat to simmer for 4 minutes.
Place rhubarb in casserole (apx. 2-quart size). Add the orange juice and nutmeg to the hot water and sugar mixture and pour over the rhubarb. Cover and place in oven for approximately 55-65 minutes, or until rhubarb is fork tender. Do not overcook or rhubarb will lose its shape and turn into sauce.
Yield: Apx. 5-6 servings
If you have made this recipe and enjoyed it and/or wish to share it with your friends and family, please do so on social media but be sure to share the direct link to this posting from my website.
Connect with My Island Bistro Kitchen on Social Media
Follow “the Bistro” on Pinterest at https://www.pinterest.ca/peibistro/ and pin the Pinterest-ready photo found at the end of this post to your favorite Pinterest boards.
Ruby red rhubarb stewed slowly in the oven to retain its shape and color makes a wonderful light dessert, especially when served with homemade biscuits. May be made with either fresh or frozen rhubarb.
Course Dessert
Cuisine Canadian
Keyword rhubarb
Servings6
My Island Bistro KitchenMy Island Bistro Kitchen
Ingredients
1lbrhubarb,chopped into ¾“ pieces (approximately 3¾ cups chopped)
¾cuphot water
1cup+ 1 tbsp granulated sugar
1½tbsppulp-free orange juice
1/8tspnutmeg
Instructions
Preheat oven to 235°F oven.
In small saucepan over medium high heat, bring the hot water and sugar to a boil then reduce heat to simmer for 4 minutes.
Place rhubarb in casserole (apx. 2-quart size). Add the orange juice and nutmeg to the hot water and sugar mixture and pour over the rhubarb. Cover and place in oven for approximately 55-65 minutes, or until rhubarb is fork tender. Do not overcook or rhubarb will lose its shape and turn into sauce.
Recipe Notes
Yield: Apx. 5-6 servings
[Copyright My Island Bistro Kitchen]
For other great rhubarb dessert recipes from My Island Bistro Kitchen, click on the links below:
It’s hard for me to imagine a roast turkey or chicken dinner without homemade cranberry sauce. Sometimes, I will make the sauce with just cranberries while other times, I will blend flavours as in the case of this Cranberry Rhubarb Sauce which combines the tart cranberries with the equally tart rhubarb. Lovely tang and extraordinarily rich color to this tasty sauce.
This Cranberry Rhubarb Sauce may be made with either fresh or frozen cranberries and rhubarb so it’s possible to make it year-round. This is a good thing because cranberries and rhubarb are not in-season locally together at the same time.
This condiment complements a roast poultry dinner very well. Try mixing it with some mayonnaise for a lovely spread on a cold chicken or turkey sandwich.
Rolled Stuffed Turkey Breast Served with Cranberry Rhubarb Sauce
I like my cranberry sauces to be very thick and not runny. The secret to making a thick cranberry sauce is to, first, make a simple syrup of water and sugar before adding the cranberries and rhubarb. The trick to getting a thickened sauce is to stir it both while it is cooking and cooling. Stir it plenty during the cooling process – it will appear somewhat watery when it comes off the stove but, by stirring it frequently as it cools, it will thicken well.
Cranberry Rhubarb Sauce
This sauce, like my other cranberry sauces, freezes well. I often make up a batch or two at a time and freeze it in airtight serving-size dishes of desired size. To thaw, simply remove the sauce from the freezer and thaw at room temperature for an hour or so (depending on the size of container, of course).
[Printable recipe follows at end of posting]
Cranberry Rhubarb Sauce
Ingredients:
2/3 cup granulated sugar 1/3 cup light brown sugar 1 cup water minus 1 tablespoon
1½ cups cranberries, fresh or frozen (approximately 6 oz) ¾ cup rhubarb, fresh or frozen, chopped into ¼“ chunks (approximately 3 oz) 2 tbsp peeled apple, finely chopped 1/4 cup orange juice 1 tsp lime juice (optional)
¼ tsp cinnamon 1/8 tsp nutmeg 1/16 tsp ginger 1 star anise pod (optional)
2 tsp finely grated orange rind
Method:
In medium-sized saucepan, over medium heat, bring sugars and water to boil. Boil, uncovered, for 5 minutes over medium-high heat, stirring occasionally.
Add cranberries, rhubarb, apple, and orange and lime juices. Bring to a boil. Cook, uncovered, over medium-low heat, stirring periodically throughout the cooking process, for about 8 minutes. Add the spices and star anise pod. Increase heat to return mixture to the boiling point then reduce heat to medium-low and continue to stir the sauce periodically while cooking it for another 10 minutes or until mixture thickens.
Remove saucepan from heat and discard the star anise pod. Add orange rind. Stir frequently as the sauce cools to help it to thicken.
Store, covered, in refrigerator for up to 5 days or freeze for longer storage.
Yield: Apx. 1 2/3 cups
For other Cranberry Sauce recipes, click on the links below:
1½cupscranberries,fresh or frozen (approximately 6 oz)
¾cuprhubarb,fresh or frozen, chopped into ¼“ chunks (approximately 3 oz)
2tbsppeeled apple,finely chopped
1/4cuporange juice
1tsplime juice(optional)
¼tspcinnamon
1/8tspnutmeg
1/16tspginger
1star anise pod(optional)
2tspfinely grated orange rind
Instructions
In medium-sized saucepan, over medium heat, bring sugars and water to boil. Boil, uncovered, for 5 minutes over medium-high heat, stirring occasionally.
Add cranberries, rhubarb, apple, and orange and lime juices. Bring to a boil. Cook, uncovered, over medium-low heat, stirring periodically throughout the cooking process, for about 8 minutes. Add the spices and star anise pod. Increase heat to return mixture to the boiling point then reduce heat to medium-low and continue to stir the sauce periodically while cooking it for another 10 minutes or until mixture thickens.
Remove saucepan from heat and discard the star anise pod. Add orange rind. Stir frequently as the sauce cools to help it to thicken.
Store, covered, in refrigerator for up to 5 days or freeze for longer storage.
Recipe Notes
Yield: Apx. 1 2/3 cups
[Copyright My Island Bistro Kitchen]
If you have made this recipe and enjoyed it and/or wish to share it with your friends and family, please do so on social media but be sure to share the direct link to this posting from my website.
Connect with My Island Bistro Kitchen on Social Media
Follow “the Bistro” on Pinterest at https://www.pinterest.ca/peibistro/ and pin the Pinterest-ready photo found at the end of this post to your favorite Pinterest boards.
Living in PEI, we are accustomed to high quality local seafood. When lobster is in season, I try to make the most of it, enjoying it steamed and fresh from the shell with the tender meat dipped in melted butter.
Steamed Lobster in the Shell
Once I have had a couple of good “feeds” of lobster with homemade potato salad and rolls, I start using the meat as an ingredient in other recipes like this easy-to-make oven-baked Lobster Frittata.
Oven-baked Lobster Frittata
Frittata is an Italian dish that is a cross between a crustless quiche and an open-faced omelette, probably leaning more toward similarity with the quiche. The main difference between a frittata and an omelette is that, for a frittata, the filling ingredients are cooked with the egg mixture versus being added just before an omelette is folded in half to finish cooking.
Traditionally, frittatas are made on the stovetop, either completely or, sometimes, they are partially cooked on the stove and then finished in the oven. However, it is quite acceptable to completely bake the frittata in the oven which is the method I am using for the Lobster Frittata.
Baked Lobster Frittata
There are two main tips for making this frittata. First, use cream, blend, or whole milk but never fat-reduced milk as it makes the frittata’s custard too runny and watery. The second tip is to pre-cook the vegetables to get rid of some of their liquid and also to ensure that they are sufficiently cooked. If they were added raw with the egg custard, they would not be sufficiently cooked in the same amount of time it takes to properly bake the frittata and they would release too much liquid into the egg custard. Even with the pre-cooking, the vegetables will still have a lot of moisture in them. For this reason, I recommend transferring them from the sauté pan to a paper-towel lined bowl to sop up the excess moisture before they are added to the egg custard mixture.
Frittata is a great brunch, lunch, dinner, or picnic fare, making it very versatile. It can be eaten hot from the oven or at room temperature. Serve with a side of toast, salad, homefries, or fresh fruit.
Baked Lobster Frittata
I use individual small 6″x4″ baking, or gratin, dishes for this recipe. Oblong baking dishes that have 1½ – 1¾ cups capacity work well for this recipe as the egg mixture will puff up somewhat and room needs to be allotted for that. If you don’t have individual baking dishes that are approximately 6”x4” inches, you could use one baking dish that would be large enough to hold the entire amount of ingredients.
Bake the frittatas on the middle rack in a preheated oven. It is important not to overbake frittata as it will become somewhat tough and leathery. This Lobster Frittata takes between 18-22 minutes when baked in the dishes called for in the recipe. When the frittata is perfectly baked, the eggs should be set and no longer runny.
[Printable recipe follows at end of posting]
Oven-baked Lobster Frittata
Ingredients:
4 large eggs 2½ tbsp cream Salt and Pepper ¼ – ½ tsp Herbes de Provence
1 tbsp olive oil 3 tbsp onion, chopped 1 – 2 cloves garlic, minced 5-6 slices zucchini, halved or quartered 5-6 button mushrooms, sliced 3 tbsp red bell pepper, chopped
4 oz cooked lobster, coarsely chopped 2 tbsp finely grated Parmesan cheese 1/3 cup shredded sharp cheddar cheese
¼ cup shredded sharp cheddar cheese
Method:
Place oven rack in center of oven. Preheat oven to 350°F.
Heat oil in small skillet. Sauté, over medium heat, the onions, garlic, zucchini, mushrooms, and red bell pepper for 4-6 minutes, until vegetables start to soften. Transfer to small bowl double lined with paper towel to absorb the moisture from the sautéed vegetables.
Whisk the eggs just enough to break them up and mix the whites with the yolks. Whisk in the cream. Season with salt and pepper and the Herbes de Provence.
Spray two 6”x4” baking dishes with cooking spray, each dish having 1½ – 1¾ cup capacity. Divide the vegetables and lobster equally between the two dishes. Sprinkle with the Parmesan cheese and first amount of cheddar cheese. Pour egg mixture over the vegetables, lobster, and cheese, dividing equally between the two dishes. Place on baking sheet and transfer to oven. Bake for 18-22 minutes, or until frittatas are puffed up and just set in the center. Add the remaining cheese for the last 2-3 minutes of baking.
Serve with a side salad, toast, fresh fruit, or homefries.
Place oven rack in center of oven. Preheat oven to 350°F.
Heat oil in small skillet. Sauté, over medium heat, the onions, garlic, zucchini, mushrooms, and red bell pepper for 4-6 minutes, until vegetables start to soften. Transfer to small bowl double lined with paper towel to absorb the moisture from the sautéed vegetables.
Whisk the eggs just enough to break them up and mix the whites with the yolks. Whisk in the cream. Season with salt and pepper and the Herbes de Provence.
Spray two 6”x4” baking dishes with cooking spray, each dish having 1½ - 1¾ cup capacity. Divide the vegetables and lobster equally between the two dishes. Sprinkle with the Parmesan cheese and first amount of cheddar cheese. Pour egg mixture over the vegetables, lobster, and cheese, dividing equally between the two dishes. Place on baking sheet and transfer to oven. Bake for 18-22 minutes, or until frittatas are puffed up and just set in the center. Add the remaining cheese for the last 2-3 minutes of baking.
Serve with a side salad, toast, fresh fruit, or homefries.
Energy bites (sometimes called energy balls, power balls, protein balls, or bliss balls) are a super tasty and convenient on-the-go snack.
My recipe for Peanut Butter Coconut Energy Bites is easy to make. They require no cooking or baking (provided, of course, that you buy the coconut already toasted and you don’t have to turn on the oven to toast coconut) — bonus ! Made with a blend of carefully selected ingredients that pair well together, these tasty treats provide a great energy boost, particularly mid-afternoon when energy typically starts to wane for many.
These energy bites freeze well and I regularly keep them on hand in my freezer so I have them ready for a snack anytime or as a portable treat to pop into a small container for the work lunch bag.
Peanut Butter Coconut Energy Bite Ready for the Lunch Bag
Energy bites are typically comprised of four sets of ingredients:
Main bulk/filler – this is most often rolled oats which also adds fibre to the energy bites. The oats give the energy bites body and structure.
Binder – dates are often used for this purpose since their texture and consistency lend them well to binding the other ingredients together, plus they have great flavor. Other dried fruits such as prunes, figs, or apricots, may also be used. Nut butters (e.g., peanut butter, almond butter, cashew butter, or hazelnut butter) are also great binding ingredients in addition to contributing flavour.
Liquid sweetener – The two most common sticky sweeteners used are typically maple syrup and honey though others, such as agave syrup, may also be used. Because they are liquid and not granular, they provide a smooth textured natural sweetener.
Add-ins – These are limited only by your creativity and taste preferences. Common add-ins are flax and/or chia seeds (either whole or in ground form), mini chocolate chips, cocoa, coconut, crispy rice cereal, hemp hearts, protein powder, finely ground nuts, dried fruits, spices, etc.
So, now that we have discussed the basic composition of most energy bites, let’s move on to this post’s featured recipe. Dates are the main “binder” in these Peanut Butter Coconut Energy Bites and are best blitzed in the food processor before other ingredients are added. Depending on the size of the food processor bowl, the dates will either form a paste-like consistency (more likely if a small food processor is used) or clump together into a ball (if a large food processor is used). Either consistency is fine as basically the goal is to break up the dates and smooth out their texture before pulsing with the other ingredients that don’t take as long to incorporate. A small food processor, if you have one, is great for this first step but use the larger food processor for incorporating the ingredients together. Use the pulse feature on the machine as you mix the ingredients. The goal is to incorporate them, not crush or mash all the ingredients into a smooth paste.
Peanut Butter Coconut Energy Bites
If the rolled oats are particularly large, it’s a good idea to blitz them separately 2-4 times in short bursts in a food processor before beginning to make the energy bites. Be careful, though, about processing them too much as the oats will quickly turn into oat flour which is not the consistency required for these energy bites. If the oats are over-processed, it will change the consistency of the energy bites.
This recipe calls for very finely ground nuts. This means their consistency should be like nut meal, almost to the point of being powder-like. While ground nuts can be purchased pre-packaged, I buy the nuts whole and use an electric coffee grinder I have reserved for the purpose of grinding nuts. The coffee grinder will quickly and easily turn the nuts into the desired nut “meal” more efficiently than a regular nut grinder which will not grind the nuts nearly so fine textured.
Some ingredients need to be added by hand at the end of the mixing process. These include the crispy rice cereal, chocolate chips, toasted coconut, and hemp hearts. These are the more fragile of the ingredients and are intended to be left intact in the balls. Incorporating them with the food processor would be likely to break them up and lose the texture and visual appearance they provide.
Peanut Butter Coconut Energy Bites
The energy bites can easily be made gluten free by using gluten-free rolled oats and, of course, ensuring all other ingredients called for in the recipe are gluten free.
If the mixture seems a bit too dry to form into balls, add small amounts of water, a teaspoon or two at a time, and quickly pulse the mixture in short bursts. Be careful, though, about adding too much water as it can make the mixture too soft and moist. Possible causes for the mixture to be a bit dry might be dates that are dry and/or the size/quality of rolled oats used.
I recommend chilling the mixture for about 20 minutes or so in the refrigerator to make it easier to form the balls. I am a huge promoter of using digital scales when cooking or baking. For size consistency, and as a frame of reference for these energy bites, use about 28 grams of mixture per ball.
Peanut Butter Coconut Energy Bite
These energy bites can be stored for up to five days in an airtight container in the refrigerator or frozen for up to three months for longer storage. Place the balls in single layers between sheets of wax paper in the storage container.
[Printable recipe follows at end of post]
Peanut Butter Coconut Energy Bites
Ingredients:
5 oz honey dates (pitted), coarsely chopped
¾ cup quick rolled oats (gluten-free, if required) ½ cup smooth peanut butter 2½ tbsp honey 1 tbsp coconut oil, melted and cooled 1 tsp vanilla ¼ cup very finely ground peanuts 1 tbsp ground chia seeds 1½ tsp vanilla whey protein powder 1/8 tsp fine sea salt
½ cup crispy rice cereal (gluten-free, if required) ½ cup semi-sweet mini chocolate chips ¼ cup pre-toasted coconut 3 tbsp hemp hearts
Method:
Pulse dates in food processor until they form a paste or clump into a ball. Add the rolled oats, peanut butter, honey, coconut oil, vanilla, ground peanuts, ground chia seeds, vanilla whey protein powder, and sea salt. Pulse mixture until ingredients are completely blended.
Mix in the crispy rice cereal, semi-sweet chocolate chips, toasted coconut, and hemp hearts by hand. If mixture seems too dry, two to three teaspoons of water may be blended into ingredients. Place mixture in the refrigerator for about 20 minutes to chill.
Roll mixture by hand into bite-sized balls. For frame of reference, each ball should weigh approximately 28 grams. Place balls on parchment lined baking sheet and freeze for 20-25 minutes to firmly set. Store, in single layers separated by waxed paper, in airtight container for up to five days in the refrigerator or freeze up to three months for longer storage.
These tasty Peanut Butter Coconut Energy Bites are filled with dates, rolled oats, peanut butter, ground nuts, toasted coconut, and chocolate chips. Makes a convenient on-the-go snack.
Course Snack
Cuisine Canadian
Keyword energy bites
Servings22
My Island Bistro KitchenMy Island Bistro Kitchen
Ingredients
5ozhoney datespitted, coarsely chopped
¾cupquick rolled oatsgluten-free, if required
½cupsmooth peanut butter
2½tbsphoney
1tbspcoconut oilmelted and cooled
1tspvanilla
¼cupvery finely ground peanuts
1tbspground chia seeds
1½tspvanilla whey protein powder
1/8tspfine sea salt
½cupcrispy rice cerealgluten-free, if required
½cupsemi-sweet mini chocolate chips
¼cuppre-toasted coconut
3tbsphemp hearts
Instructions
Pulse dates in food processor until they form a paste or clump into a ball. Add the rolled oats, peanut butter, honey, coconut oil, vanilla, ground peanuts, ground chia seeds, vanilla whey protein powder, and sea salt. Pulse mixture until ingredients are completely blended.
Mix in the crispy rice cereal, semi-sweet chocolate chips, toasted coconut, and hemp hearts by hand. If mixture seems too dry, two to three teaspoons of water may be blended into ingredients. Place mixture in the refrigerator for about 20 minutes to chill.
Roll mixture by hand into bite-sized balls. For frame of reference, each ball should weigh approximately 28 grams. Place balls on parchment lined baking sheet and freeze for 20-25 minutes to firmly set. Store, in single layers separated by waxed paper, in airtight container for up to five days in the refrigerator or freeze up to three months for longer storage.
Sometimes called energy balls, power balls, protein balls, or bliss balls, these trendy snacks are tasty little morsels. The recipe I am sharing today is for No-bake Chocolate Almond Bliss Balls, so named because they are, well, blissfully divine! Continue reading No-bake Chocolate Almond Bliss Balls→
Comfort food has an emotional, nostalgic, and/or sentimental aspect to it. It evokes reactions to the senses of sight, taste, and smell. Think of walking into a kitchen where, for example, a roast chicken or turkey dinner is cooking. Can you visualize the golden roasted chicken or turkey? Recall the aroma? The satisfying taste? The mere sound of someone talking about homemade apple pie can summon both the smell and taste sensation of such a fabulously simple dessert. Maybe you remember the smell of bread baking in the oven at your mother’s or grandmother’s house. Can you recall the heavenly taste of the homemade bread?
These are a few classic examples of traditional comfort foods. They are typically hearty foods (not necessarily devoid of calories) that conjure up great taste sensations and perhaps wonderful memories of special people in your life with whom you associate specific foods or special events.
One of my special memories of comfort food is arriving at my grandmother’s house just as a batch of big, fat, soft molasses cookies was coming out of the oven. This particular grandmother was the epitome of the typical picture of a grandmother – gray hair in a bun, floral pinafore….and you get the picture. Even as I write this, decades later, I can still conjure up the spicy scent of the molasses cookies and the memory picture of my grandmother removing the pan of cookies from the oven of her wood stove and her sheer pleasure, sitting in her Boston rocker beside the stove, watching little hands reaching for a warm cookie and savoring every bite. Sweet memories of simple pleasures.
Individual Double-crusted Chicken Pot Pies
Today, I am sharing my recipe for individual-size Chicken Pot Pies that, in my view, fall nicely into the comfort food category. Getting the right seasoning and consistency for the sauce and a flaky pastry in which to encase the filling are the two big aspects of making a tasty and satisfying chicken pot pie. Once you have a good recipe for those, you have a good chicken pot pie.
I am often asked if this recipe could be made into a large single pie and then sliced into portions. I do not recommend it as the filling is very creamy but quite fluid (it is intended that way – it is not meant to be thick, pasty, and dry) and would not slice into tidy pie slices much like, for example, a tourtière or quiche would. I think, trying to slice a larger pie made from this recipe would result in the filling flowing out into the pie plate after the first slice would be cut and it certainly would not plate well, either. If you think about it, you frequently find frozen store-bought chicken pot pies available in individual, personal-sized portions and that is the style for my recipe as well.
These pies are filled with a mixture of vegetables and chunks of chicken (or turkey – either works) surrounded by a gently seasoned creamy sauce. All encased within tender and flaky pastry, these Chicken Pot Pies are the full meal deal. I typically serve them with nothing but the condiments of homemade mustard pickles and/or cranberry sauce.
Chicken Pot Pie
Making homemade Chicken Pot Pies can be a bit time-consuming but, if you break the task down into logical steps, the work is accomplished quite efficiently and the end result is all worth it. There are four key steps in making this classic comfort food:
Get organized
Prepare the filling
Prepare the pastry
Assemble and bake the pies
Step 1 – Get Organized
Breaking down the tasks and preparing and measuring all the ingredients before beginning to cook will make the work of preparing Chicken Pot Pies efficient. Of course, the first step is to read through the recipe thoroughly to ensure you understand the steps and procedure. Make the grocery list of any items you don’t already have on hand. Plan the shopping excursion to the supermarket.
The recipe is written in logical format, calling for ingredients in the order in which the method is laid out. Break down the tasks. Some parts can actually be prepared the day before. If you need to cook chicken for this recipe, complete that task the day before. The vegetables can be peeled, chopped, and stored in the refrigerator overnight. The pastry can be made the day before and refrigerated. In fact, the entire filling can be made a day ahead and refrigerated and the pies assembled the following day.
Set out all the pots, pans, and cooking utensils needed. Remember those Home Economics class days when we thought these tasks were mundane and tedious and all we really wanted to do was get to the actual cooking? Turns out the teacher really was giving great advice on how to efficiently organize cooking activities. There is nothing more frustrating than looking for a grater or big spoon just as you’re ready for it!
Before starting to make the recipe, group the ingredients according to different aspects of the pie-making – i.e., pastry ingredients, vegetables, and sauce. By doing this upfront organization, it will ensure you don’t leave out an ingredient, the actual making of the dish will go faster, and the work area will be less chaotic and cluttered than it would be if several containers and ingredients are all over the counter.
Look for items in the recipe that need the longest cooking or chilling times and prepare those first. Start with the filling and know that the filling has to be completely cold before assembling the pies so be sure to allot time for the chilling process. Otherwise, hot or warm filling will break down the fat in the pastry, causing a soggy bottom crust. The pastry needs chilling time, though less than the filling, so make it while the filling is cooling.
Step 2 – Make the Filling
Cooked poultry (either chicken or turkey) is required for this recipe. This is a great recipe to use if you have leftover roast chicken or turkey. Chicken or turkey breasts can, of course, be cooked (using your preferred cooking method) specifically for this recipe. A supermarket BBQ chicken can also be used to save time.
Sauté the vegetables. Having the vegetables already chopped means they can be quickly added to the pan when needed since some vegetables require shorter cooking times than others. It also means that some vegetables in the pan are not getting over-cooked and limp while you stop to chop up the ones needed next.
Prepare the sauce. Either wheat-based or gluten-free flour can be used as the primary thickener in this recipe. The recipe calls for either chicken or turkey stock and either homemade or commercial stock can be used.
The sauce needs to be cooked until thickened to the consistency of a very thick chowder. Add the cooked chicken and frozen peas. Cool the filling completely before assembling pies.
Step 3 – Make the Pastry
The pastry for this pie can be made with either wheat-based flour or gluten-free 1-to-1 flour. The 1-to-1 flour can be used in the same quantity as the recipe calls for for the wheat-based flour. Other gluten-free flours cannot automatically be substituted, cup-for-cup, so you’d need to know their individual properties, substitution weights, and how they would interact with the fat and liquid content called for in the recipe in order to use them in this recipe.
Here are some basic hints on successfully making pastry, regardless if you are making wheat-based or gluten-free pastry. All ingredients, even the flour, should be super cold. Use only enough of the water-egg-vinegar mixture that the dough will cling together. Too much water will yield a tough crust and, as we all know, the hallmark of the best pastry is a tender and flaky texture. Adding some vinegar to the liquid ingredients helps to tenderize the dough. I use one part butter and one part lard in my pie pastry. Using all butter in pastry will give a wonderful flavor and a lovely tanned crust. However, it can be a bit finnicky to work with because it softens very easy and can quickly be over-blended with the flour. If overworked, a tough crust is likely. While lard is easy to work with and will give layers of flakiness in the pastry, it lacks the flavour that butter gives. I find the best combination of fats to provide flakiness, tenderness, flavour, and structure to pastry is to use one part lard and one part butter. I coarsely chop/cube the butter and lard into the flour then take my pastry cutter and blend the fats to the consistency of large peas. There is no need to mash it or blend it finely. Use flour sparingly on the work surface on which the pastry is rolled out as too much flour toughens pastry. Roll the pastry to desired thickness, generally between 1/16” – 1/8” thick.
Rolling Pie Pastry
The pastry can be made several days ahead and refrigerated up to three to four days or frozen for up to 2-3 months. Because pastry dough freezes well, I will often mix up a large batch of pastry to have on hand in the freezer. Simply divide the dough into desired size portions, form into disks, and freeze individually wrapped in plastic wrap inside airtight freezer bags.
This recipe is designed to be made into individual personal-sized pies, about 4” – 5” in diameter. These small individual pies have been designed to be double-crusted pies. I prefer presenting them as individual personal pies versus baking them in large pie plates because the smaller pies stay intact and plate well. By making them double-crusted, they are easily slid out of the pie plates on to dinner plates and the filling stays inside the two crusts. The filling is the consistency of thick chowder so, if it was made in a large pie plate and wedges were cut, it is likely that it would not cut out well with the filling staying intact inside each pie wedge and, for lack of a better description, it would go “splat” when cut and transferred to a plate.
Homemade Chicken Pot Pie
I have a supply of small tin pie plates I typically use for these pies but small tinfoil meat pie plates work equally well and, if I run out of the tin plates, I do use the tinfoil ones. These will often be labeled as meat pie plates and can be obtained at reasonable prices at supermarkets and even dollar stores. You can see a sample of those in the photo below.
5″ Individual Pie Plates
Step 4 – Assemble the Pies
Place the cold filling in the prepared and chilled pie shells. Cover with the top crust pastry. Ensure there are slits in the top of the pastry to allow the steam to escape while the pies bake. Glaze the tops of the pies with an egg wash, if desired. Use a light touch when applying the egg wash – don’t saturate the tops of the pies. The egg wash will add more color and a lovely gloss to the tops of the pies. Place the unbaked pies in the refrigerator for about 30 minutes to allow the filling to settle and to chill the pastry. This will help to reduce pastry shrinkage during baking.
Making Double-crusted Chicken Pot Pies
Place the pies on one or two large baking sheets and transfer them to the lowest rack in the oven that has been preheated to 425°F. After 10 minutes, reduce the heat to 375°F and bake the pies for about 35-40 minutes or until the filling starts bubbling out through the steam vent holes in the tops of the pies. Using the bottom rack heats the bottoms of the pies, yielding a more crispy and stable crust.
These pies are best if they rest after baking for 15-20 minutes at room temperature before eating. This allows the filling to set and the pie to be at comfortable eating temperature so its flavor is best enjoyed.
Chicken Pot Pies
If making the pies to have for later use, freeze them unbaked then bake them from frozen state. You may need to allow an additional 10-15 minutes for the frozen pies to bake.
Chicken Pot Pie
These Chicken Pot Pies are part of my “batch cooking for the freezer” repertoire. They are super handy to have on hand and make a weeknight dinner easy to pull together with minimal work and kitchen clean-up at the time. The added bonus is the divine aroma in the house as the pies bake, whetting the appetite for a tasty dinner to enjoy.
[Printable recipe follows at end of post]
Double-crusted Chicken Pot Pies
Ingredients:
1 batch pastry (recipe follows)
1½ tbsp olive oil 2 tbsp butter ½ cup onion, finely chopped ¾ cup carrots, diced into ¼“cubes 2/3 cup celery, finely chopped ¼ cup parsnip, diced into 1/8“ cubes ¼ cup turnip, diced into ¼“ cubes
2 oz cremini mushrooms, sliced or chopped 3 cloves garlic, minced ½ tsp dried summer savory ½ tsp dried oregano ¼ tsp dried rosemary, crushed 1 cup warm poultry stock (either chicken or turkey) 8 oz Russet potatoes, diced into ½” cubes (apx. 1 cup diced)
1 tbsp olive oil 1½ tbsp butter ¼ cup all-purpose flour (or 1-to-1 gluten-free flour) 1½ tbsp cornstarch 2 cups warm poultry stock (either chicken or turkey) 1/2 cup whipping cream (35% M.F.) 2½ tbsp Parmesan cheese, finely grated 2½ tbsp medium cheddar cheese, finely grated 1 tsp Dijon mustard ½ tsp Worcestershire sauce 1½ tbsp dry white wine (optional) Pinch cayenne pepper 1 tsp dried parsley Salt and Pepper, to taste
2½ cups cooked diced chicken ½ cup frozen peas
Method:
In large saucepan or Dutch oven, heat olive oil over medium heat then add the butter. When butter is melted, add the onion, carrots, celery, parsnip, and turnip. Cook, stirring occasionally, for approximately 10 minutes. Add the mushrooms, garlic, summer savory, oregano, and rosemary. Cook 2-3 minutes longer, stirring continuously. Add 1 cup chicken or turkey stock and the potatoes. Bring to a boil over high heat then reduce to low and simmer for approximately 8-10 minutes, or until vegetables start to soften. Remove from heat.
While vegetables are cooking start preparing the sauce by heating second amount of oil in separate saucepan over medium heat. Add the butter. Stir in the flour and cornstarch (mixed together). Whisk in the remaining 2 cups of warm chicken or turkey stock along with the whipping cream, cheeses, Dijon mustard, Worcestershire sauce, white wine, cayenne, parsley, and salt and pepper. Reduce heat slightly and cook, stirring frequently, until mixture thickens to the consistency of a very thick chowder.
Add the cooked chicken and frozen peas to the saucepan or Dutch oven containing the vegetables. Stir. Pour the sauce into the mixture. Stir. Remove from heat and cool for about ¾ hour at room temperature, stirring occasionally, then refrigerate until mixture is cold.
Pastry
Ingredients:
5 cups all-purpose flour (or, for gluten-free pastry, 5 cups gluten free 1-to-1 flour) 1¼ tsp salt 3 tsp granulated sugar 2/3 cup butter 2/3 cup lard 1 large egg, lightly beaten 3¾ tsp vinegar Enough ice-cold water to make 1 cup liquid (combined with egg and vinegar)
For egg wash: 1 large egg yolk mixed with 1 tbsp water (optional)
Method:
In medium-sized bowl, whisk the flour, salt, and sugar together. Cut the butter and lard into chunks and add to the flour. With a pastry cutter, cut the butter and lard into the flour until the fats resemble the size of large peas.
In a measuring cup, whisk the egg and vinegar together. Add enough cold water to measure 1 cup. Add the egg-vinegar-water mixture to the flour, small amounts at a time, and mix with a fork. Add only enough water that the dough clings together and can be formed into a ball.
Divide the dough into 20 equal pieces. Form disk shapes with each piece. Wrap disks individually in plastic wrap or place, single layer, in large airtight container. Place in the refrigerator for about 15 minutes to chill. Remove one disk at a time from the refrigerator and roll pastry to desired thickness, generally between 1/16”and 1/8” thickness. Transfer pastry to a 4” or 5” pie plate that has been lightly sprayed with cooking spray or greased. Cut off excess dough so pastry is flush with the pie plate edge. Place pie shell in refrigerator to keep chilled. Repeat with remaining disks.
Prepare pastry for the top crusts in the same manner as for the bottom crust. Remove pie shells from refrigerator and equally divide cold chicken filling between the prepared cold shells. Brush outside rim edges of bottom crust pastry along pie plate edge with a bit of water to moisten. Transfer rolled-out pastry to the top of pie filling in each pie plate. Trim excess pastry flush with the pie plate edge. Press the edge of the pastry all around the pie plate rim with tines of fork to adhere top crust to bottom crust. Cut slits in top of pie pastry to allow steam to escape as pie bakes. For additional venting, prick each pie in several places with tines of a fork.
For pastry egg wash, lightly beat the egg yolk with 1 tbsp water in a small bowl. With a pastry brush, lightly brush the pie with the egg wash.
Place pies in refrigerator for 30 minutes to allow filling to settle and to chill pastry to reduce shrinkage while pies bake.
While pies are chilling, place oven rack in lowest position in oven. Preheat oven to 425°F. Place pies on large baking sheet(s) and bake for 10 minutes then lower oven temperature to 375°F and bake for approximately 35-40 minutes or until filling is bubbling through slits in tops of pies. For unbaked frozen pies, bake at same temperatures for approximately 50-55 minutes, or until filling is bubbling through slits in tops of pies.
Yield: Ten – 4 or 5-inch individual pies
Note: If making this recipe gluten free, ensure that all ingredients, not only the flour, called for in the recipe are gluten free.
If you have made this recipe and enjoyed it and/or wish to share it with your friends and family, please do so on social media but be sure to share the direct link to this posting from my website.
Connect with My Island Bistro Kitchen on Social Media
Individual made-from-scratch double-crusted Chicken Pot Pies are chock full of poultry and vegetables in a delectable creamy filling, all encased between tender flaky pie crusts. The supreme comfort food!
Course Main Course
Cuisine Canadian
Keyword Chicken, chicken pot pies
Servings10
My Island Bistro KitchenMy Island Bistro Kitchen
Ingredients
1batch pastryrecipe follows
1½tbspolive oil
2tbspbutter
½cuponion,finely chopped
¾cupcarrots,diced into ¼“cubes
2/3cupcelery,finely chopped
¼cupparsnip,diced into 1/8“ cubes
¼cupturnip,diced into ¼“ cubes
2ozcremini mushrooms,sliced or chopped
3clovesgarlic,minced
½tspdried summer savory
½tspdried oregano
¼tspdried rosemary,crushed
1cupwarm poultry stock,either chicken or turkey
8ozRusset potatoes,diced into ½” cubes (apx. 1 cup diced)
Enough ice-cold water to make 1 cup liquid(combined with egg and vinegar)
For egg wash: 1 large egg yolk mixed with 1 tbsp water(optional)
Instructions
In large saucepan or Dutch oven, heat olive oil over medium heat then add the butter. When butter is melted, add the onion, carrots, celery, parsnip, and turnip. Cook, stirring occasionally, for approximately 10 minutes. Add the mushrooms, garlic, summer savory, oregano, and rosemary. Cook 2-3 minutes longer, stirring continuously. Add 1 cup chicken or turkey stock and the potatoes. Bring to a boil over high heat then reduce to low and simmer for approximately 8-10 minutes, or until vegetables start to soften. Remove from heat.
While vegetables are cooking start preparing the sauce by heating second amount of oil in separate saucepan over medium heat. Add the butter. Stir in the flour and cornstarch (mixed together). Whisk in the remaining 2 cups of warm chicken or turkey stock along with the whipping cream, cheeses, Dijon mustard, Worcestershire sauce, white wine, cayenne, parsley, and salt and pepper. Reduce heat slightly and cook, stirring frequently, until mixture thickens to the consistency of a very thick chowder.
Add the cooked chicken and frozen peas to the saucepan or Dutch oven containing the vegetables. Stir. Pour the sauce into the mixture. Stir. Remove from heat and cool for about ¾ hour at room temperature, stirring occasionally, then refrigerate until mixture is cold.
Pastry:
In medium-sized bowl, whisk the flour, salt, and sugar together. Cut the butter and lard into chunks and add to the flour. With a pastry cutter, cut the butter and lard into the flour until the fats resemble the size of large peas.
In a measuring cup, whisk the egg and vinegar together. Add enough cold water to measure 1 cup. Add the egg-vinegar-water mixture to the flour, small amounts at a time, and mix with a fork. Add only enough water that the dough clings together and can be formed into a ball.
Divide the dough into 20 equal pieces. Form disk shapes with each piece. Wrap disks individually in plastic wrap or place, single layer, in large airtight container. Place in the refrigerator for about 15 minutes to chill. Remove one disk at a time from the refrigerator and roll pastry to desired thickness, generally between 1/16”and 1/8” thickness. Transfer pastry to a 4” or 5” pie plate that has been lightly sprayed with cooking spray or greased. Cut off excess dough so pastry is flush with the pie plate edge. Place pie shell in refrigerator to keep chilled. Repeat with remaining disks.
Prepare pastry for the top crusts in the same manner as for the bottom crust. Remove pie shells from refrigerator and equally divide cold chicken filling between the prepared cold shells. Brush outside rim edges of bottom crust pastry along pie plate edge with a bit of water to moisten. Transfer rolled-out pastry to the top of pie filling in each pie plate. Trim excess pastry flush with the pie plate edge. Press the edge of the pastry all around the pie plate rim with tines of fork to adhere top crust to bottom crust. Cut slits in top of pie pastry to allow steam to escape as pie bakes. For additional venting, prick each pie in several places with tines of a fork.
For pastry egg wash, lightly beat the egg yolk with 1 tbsp water in a small bowl. With a pastry brush, lightly brush the pie with the egg wash.
Place pies in refrigerator for 30 minutes to allow filling to settle and to chill pastry to reduce shrinkage while pies bake.
While pies are chilling, place oven rack in lowest position in oven. Preheat oven to 425°F. Place pies on large baking sheet(s) and bake for 10 minutes then lower oven temperature to 375°F and bake for approximately 35-40 minutes or until filling is bubbling through slits in tops of pies. For unbaked frozen pies, bake at same temperatures for approximately 50-55 minutes, or until filling is bubbling through slits in tops of pies.
Recipe Notes
Yield:Ten – 4 or 5-inch individual pies
Note:If making this recipe gluten free, ensure that all ingredients, not only the flour, called for in the recipe are gluten free.
Making gluten-free muffins can have its challenges! Getting the right blend of flours, enough rising power to achieve the perfect contoured muffin tops, and the right balance of liquid to dry ingredients, and that’s all before getting a great flavour and texture. Good news, though, I have perfected a great flour blend for these Banana Date Muffins and have worked out the necessary ratios of wet to dry ingredients to accommodate the properties of gluten-free flours! Continue reading Gluten-free Banana Date Muffins→
It’s hard to beat the tantalizing scent of homemade bread or dinner rolls baking in the oven. It’s even harder to pass up the wonderful flavor of freshly made warm bread or rolls slathered with a generous spread of pure butter. Do I have your attention yet? Continue reading Mouthwatering Homemade Dinner Rolls→
My cooking is sometimes inspired by my travels. Often, before traveling, I will do some research to find out what foods and dishes are local to the area so I know what dishes to try when visiting those places or what foods to look for to bring back as mementos of the visit. Continue reading Creamy Scallop Carbonara Recipe→
These gluten-free Gumdrop Cookies are very easy to make and are super tasty. They are soft and chewy, studded with colorful fruit-flavored gumdrops. Continue reading Gluten-free Gumdrop Cookies→
(Mostly) PEI and Maritime Food – Good Food for a Good Life!