Those of us who have been fortunate enough never to have known or experienced war have opportunities to demonstrate our respect and gratitude for, and remembrance of, these acts of bravery and sacrifice. For example, we wear a poppy on the left breast, close to the heart to signify remembrance of the lives lost.

Thousands of people across the country will attend Remembrance Day ceremonies in their local communities where they will respectfully observe a moment’s silence at 11am on the 11th day of the 11th month to mark the time the Armistice was signed to end WWI. Wreaths will be laid in commemoration.

One of the most well-known poems about war was written in May, 1915, by Lt. Col. John McCrae, a Canadian Medical Officer in WWI. While stationed near Ypres, Belgium, where some of the most horrific and bloodiest fighting of WWI occurred, he was motivated to write about the death he saw around him and of the prolific red poppies growing amidst the devastation of war in the Flanders area of western Belgium. His poem, “In Flanders Fields” has become synonymous with Remembrance Day in Canada and Lt. Col. McCrae is often credited with being the catalyst that led to the poppy being identified as the symbol of remembrance of the blood shed by soldiers who were casualties of battle.

On this Remembrance Day, I am going to focus my food blog feature story on war cake, a wartime dessert that is still made and served in several Island households today.

As a small child I well remember my grandmother making war cake and this was long after WWII had ended. I loved her war cake! It is such a simple raisin-spice cake that is characterized by the absence of eggs and milk — ingredients that would have been scarce during wartime. This cake is sometimes referred to as “boiled raisin cake” because raisins form the main content and the majority of the ingredients are boiled, then cooled, before they are mixed with flour and baking soda and then baked in the oven. Because of food shortages during war time, many foods were rationed.

Born of necessity, homemakers during wartime became resourceful, frugal, adaptable, and creative in order to feed their families. Cooking tended to be very basic. Women were known to have saved their ration stickers so they could buy the raisins and sugar that the war cake recipe called for – thus war cake would have been a very prized commodity.
War cake was made for consumption on the home front but many also made the cakes in tin cans and packed them in socks, mittens, and underwear they were shipping overseas for their loved ones serving in the war. Imagine the excitement when a soldier would have received this package from home and discovered a mother’s or sister’s war cake inside! Amazingly, with the slow mail and ship service during WWI and WWII, there is evidence these cakes were received as the soldiers would refer to them in their letters home, letters that would have looked much like the July 7, 1914, letter in the photograph below.


In my research for this story, I examined many recipes for war cake and found similarities amongst them all. Some were very sketchy in terms of amount of ingredients to be put in the batter and many were almost totally devoid of any directions. While the amounts of the ingredients may vary slightly, all of the recipes I reviewed were essentially the same in ingredient content. All called for big, sticky raisins (you may know these as “Lexia” raisins), a variety of spices of the cook’s choice, either brown or white sugar or a combination of both, shortening or lard, boiling water, flour, and soda. One thing I noted was the significant amount of sugar that the recipes called for – i.e., two cups per cake. Sugar was one item that was commonly rationed during wartime and a cake taking two cups of sugar would certainly have been considered a luxurious dessert, I am sure. Flavour may vary from cake to cake based on spices used in the batter. The choice of spices varies but typically consisted of cinnamon, nutmeg, and cloves, as a minimum, with ginger frequently appearing in recipes. I added mace and cardamom to my cake to give it a bit more flavour (recipe follows at end).

I am told these cakes were often made with lard (as opposed to butter) for a couple of reasons. First, lard has a longer shelf life than butter would have had and, for cakes being sent overseas to the soldiers, it would have been a long journey for the cakes to reach Europe so shelf life of the cakes was an important factor. Second, butter was often scarce during wartime because there were no big herds of cattle on local farms so butter would have been used sparingly, even for those living on farms and churning their own. Lard, on the other hand, would have been much more readily available, particularly on farms. I found a couple of recipes that indicated either butter or shortening could be used in the recipe; however, butter was called for in a much lesser quantity than the shortening, if the latter was used instead. For example, I found one recipe that called for 2 tablespoons of butter or 1 cup of shortening which demonstrates how judiciously butter would have been used, if at all.
While its ingredients are simple, war cake takes some time to make. All of the ingredients, except the flour and soda, are boiled on the stove for 5 minutes. Then it is important to let the boiled raisin mixture cool to room temperature as the mixture will thicken naturally on its own as it cools. This will normally take 4-5 hours. If the flour and soda are added into a mixture that is too hot, the result is likely to be a gummy cake. When the raisin mixture is cooled, the flour and soda are stirred in and the mixture turned into the baking pan. My grandmother made her war cake in a loaf pan; however, traditionally, war cake seems to have been made in some kind of a round pan – usually a tube pan or, in the case of overseas shipping during war time, in tin cans. War cake is a very dense cake which makes it sometimes difficult to get the center of the cake baked without drying out the outside edges. It is also a heavier type cake which makes it somewhat prone to falling in the center. A tube (or Bundt pan, if you have one) removes the baking uncertainty and helps the cake to bake more evenly.

War cakes take, on average, about an hour to bake. The old recipes I reviewed didn’t even mention baking the cake let alone at what temperature (in fact, one recipe simply said “to thicken” but didn’t elaborate on what thickening agent was to be used!). These recipes predate our modern electronic ovens! While some suggest baking the cake at 350F, I thought that might be a bit high so I baked my war cake at 335F for one hour. Because there are no eggs or milk in the cake for moistness, it is very easy to overbake the cake and end up with a dry product. Hence, it is important to time the baking carefully and to use a cake tester starting at about the 45-minute point. If the cake starts to darken on the top or edges too quickly, simply place a piece of tin foil loosely over the top. Adding a small pan of water to the lower shelf in the oven while baking the cake will also help to keep the cake moist.

Because of the texture of the cake, it may seem soft on the top and not baked; however, if a cake tester comes out of the cake clean, it’s time to remove it from the oven before it dries out.
War cake is a “stick to the ribs” substantial, hearty kind of cake. It goes particularly well with a nice cup of tea.

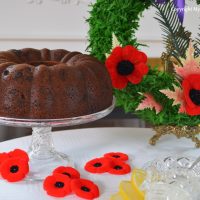
In keeping with the traditional way war cake was served, I have photographed the cake plain, just as it would have been eaten during wartime.

War cake was not traditionally iced. However, it would be lovely served with a dollop of whipped cream or vanilla or maple ice cream. It could also be dressed with a brown sugar sauce or, to make a plain cake really decadent, why not serve all three – ice cream, brown sugar sauce, and whipped cream!


Regardless where you are in the world, if you have any wartime memories (either your own or those passed down to you from your ancestors) of war cake made for consumption on the home front or to send to the soldiers fighting the war, I would love to hear about them. War cake is a part of wartime culinary history.
Here are some photographs of the Remembrance Day Ceremony at the cenotaph in downtown Charlottetown, PEI, this morning.


War Cake
Ingredients
- 3/4 cup shortening
- 2 cups brown sugar, lightly packed
- 1 pound large, sticky raisins
- 1 tsp salt
- 1 tsp cinnamon
- 1 tsp nutmeg
- 1/2 tsp cloves
- 1/4 tsp ginger
- 1/8 tsp mace
- 1/8 tsp cardamon
- 2 cups boiling water
- 3 cups all-purpose flour
- 2 tsp soda
Instructions
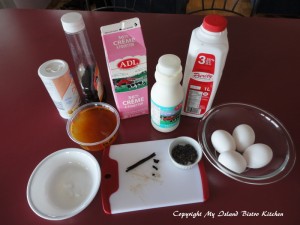
- Assemble ingredients.
- Place the shortening, brown sugar, raisins, salt, spices, and boiling water into a large saucepan. Over medium-high heat, bring mixture to a boil. Reduce heat to medium or slightly lower and boil mixture for five minutes. Remove from heat and set saucepan on cooling rack. Let mixture cool to room temperature (4-5 hours), stirring occasionally.
- In bowl, whisk the flour and baking soda together. Set aside.
- Grease large tube or Bundt pan.
- When raisin mixture has cooled completely, add the flour and baking soda. Stir until dry ingredients have been completely mixed into the raisin mixture.
- Spoon mixture into greased pan. Add a small pan of hot water to lower shelf in oven for moisture while cake is baking. Bake cake on middle rack in 335°F preheated oven. If cake starts to brown on the top too quickly, loosely place a piece of tin foil on top of cake. Bake apx. 1 hour but begin to test cake for doneness, using a cake tester, at the 45-minute point as cake can dry out very quickly.
- Remove cake from oven and place pan on cooling rack for 10 minutes then remove from pan. Allow cake to cool completely before cutting.
Recipe Notes
[Copyright My Island Bistro Kitchen]


 In double boiler, over medium heat, heat the whipping cream, half-and-half, milk, honey, sugar, lavender, and vanilla beans and pod. Stir occasionally and heat mixture until small bubbles start to appear around edge of mixture, about 10-12 minutes.
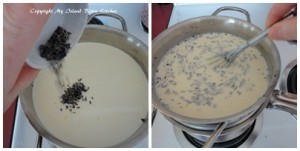 Remove from heat, cover, and let steep for 30 minutes to allow the lavender flavour to infuse the warm milk mixture.
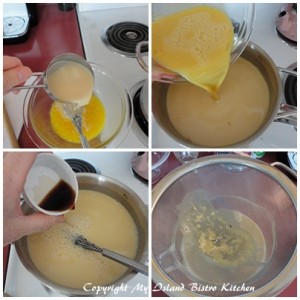 Strain mixture through a fine mesh sieve into a clean bowl. Discard remains in sieve and return strained mixture to a clean double boiler and heat to the scalding point, stirring to prevent the mixture from curdling or sticking to the bottom of the pot.
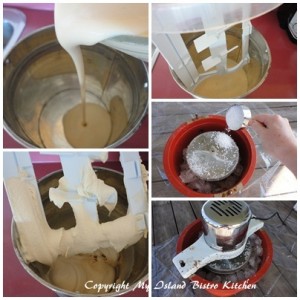 In a medium-sized bowl, whisk egg yolks and salt together. Whisk in vanilla. Add ¾ cup of the hot milk mixture to the eggs and whisk to blend. Pour this mixture into the custard in the double boiler. Cook over medium heat, stirring constantly until mixture thickens to consistency that it will coat the back of a wooden spoon. Do not boil. Be patient as this takes time.
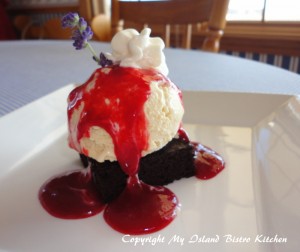 Strain mixture through sieve into a clean bowl. Cool completely then chill, covered, in refrigerator for at least 3 hours or more (can be chilled up to 24 hours). Freeze custard in ice cream maker according to manufacturer’s directions. Transfer ice cream to an airtight container and place plastic wrap directly on the surface of the ice cream. Cover and place in freezer for at least 4-6 hours to harden completely.

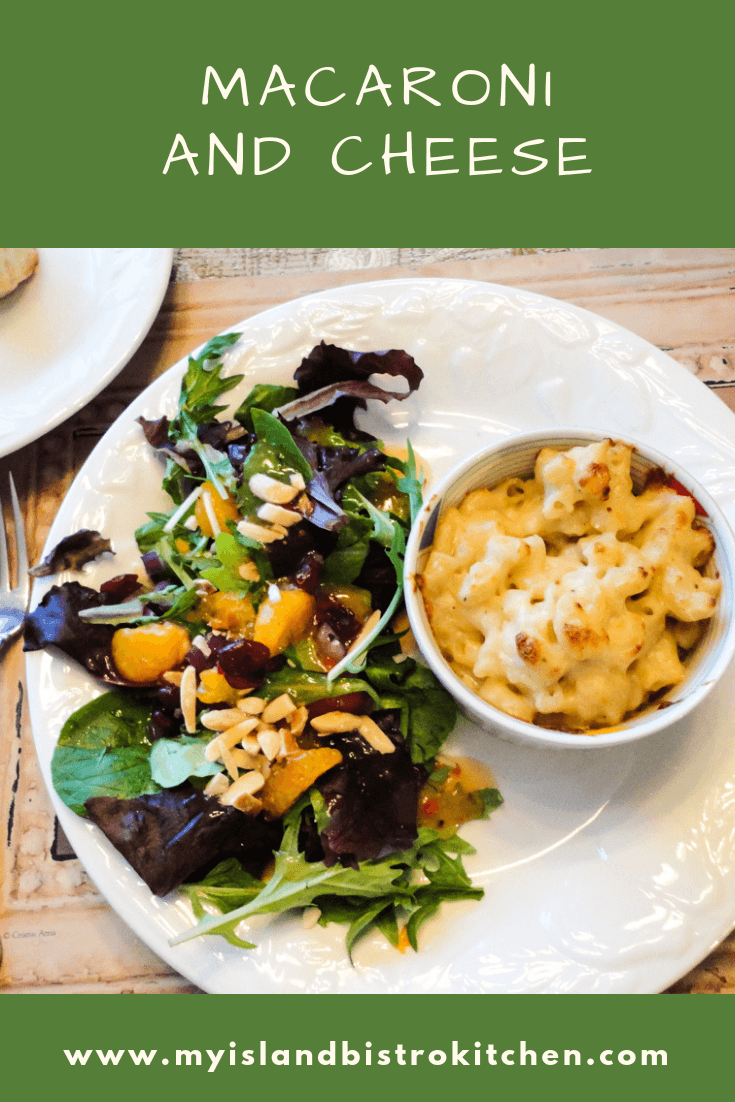
 Melt butter in saucepan. Add milk. Combine flour, salt, pepper, nutmeg, cayenne, and dry mustard. Whisk into milk and butter mixture. Cook over medium heat, stirring until mixture is smooth and starts to thicken.
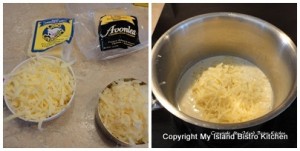 Add cheeses and stir until melted and blended
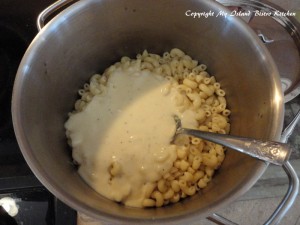 Pour cheese sauce over macaroni and stir until well combined. Turn into a greased 2-quart casserole or divide into greased ramekin dishes for individual servings.