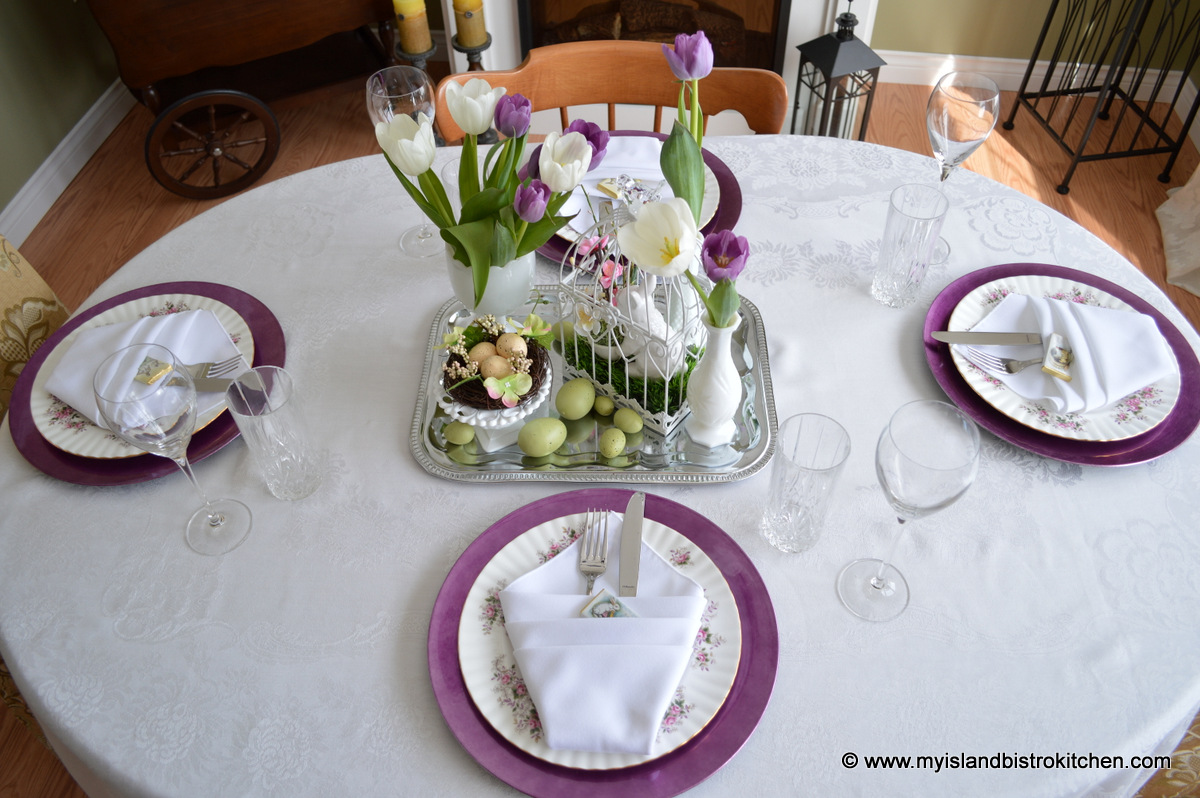
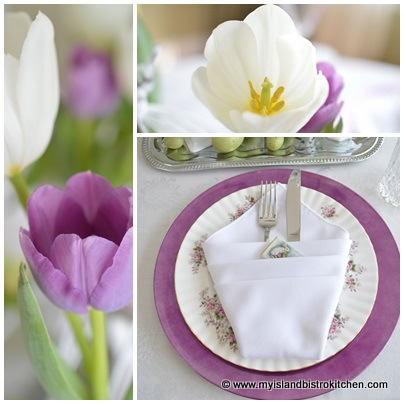
My color scheme for my Easter dinner table is purple and white. Of course, I am featuring the lovely spring tulips from the greenhouses of Vanco Farms in Mount Albion, PEI.
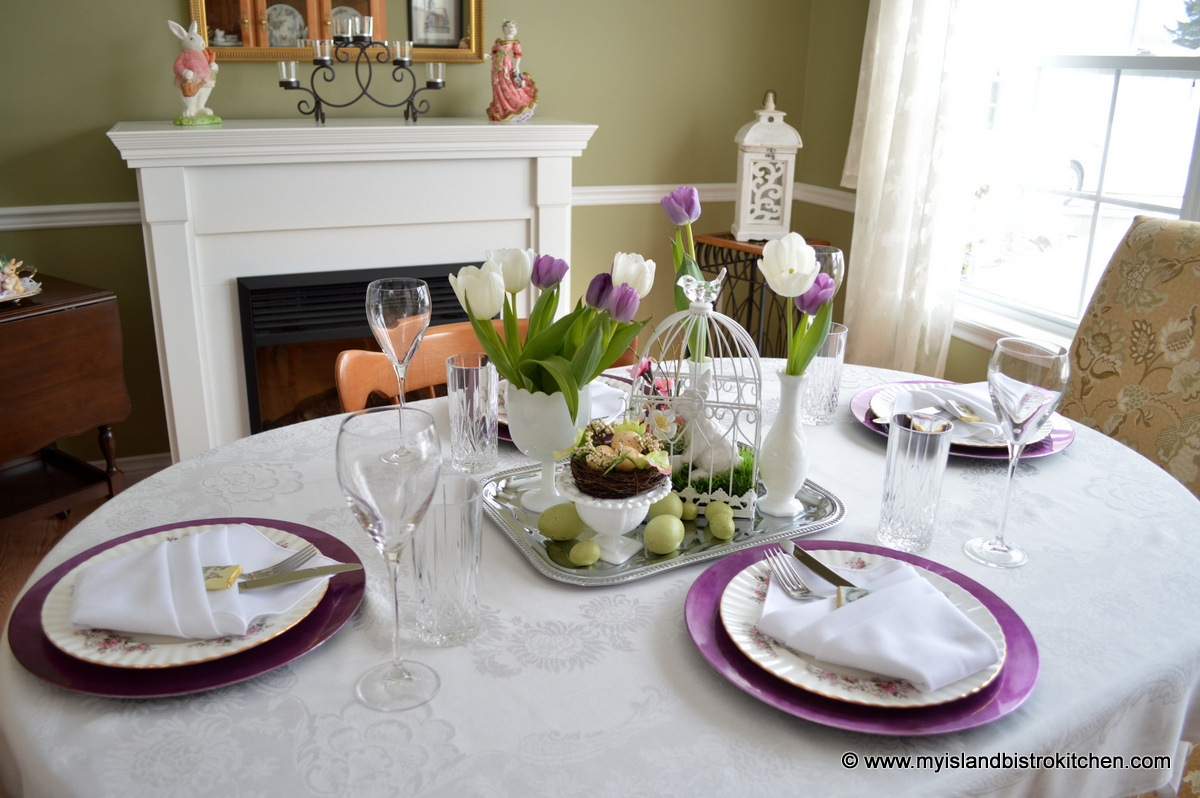
Lately, I have been using trays and baskets to “corral” the elements of my table centerpieces. I find this is an easy way to display a number of items in a centerpiece and it keeps them clustered as, otherwise, they sometimes spread aimlessly across the table without focus.
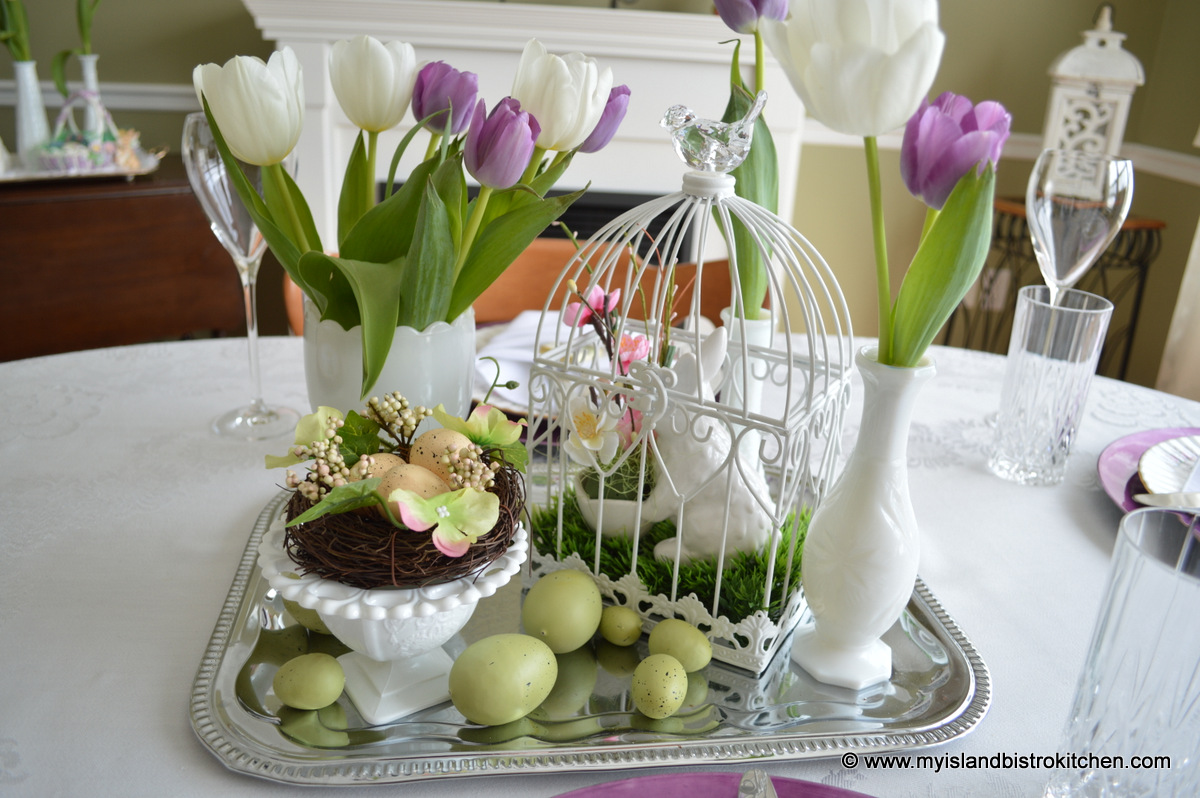
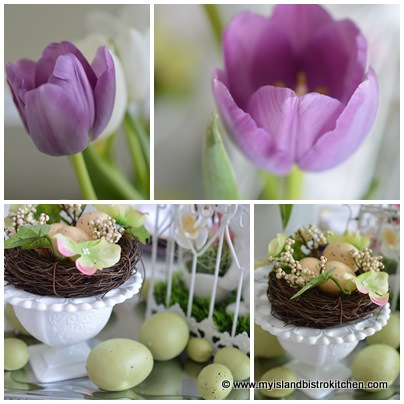
Today, I have used several pieces from my milk glass collection and added a small wire cage into which I have placed a bunny. Faux Easter eggs are a great filler to add interest to the tray. We often think that a bouquet of flowers in its entirety needs to be all in one container. However, a much more interesting collection, or vignette as I have done here, can be created if the flowers are distributed between several vessels and at different heights.
One of my favorite pieces of milk glass is the little bowl shown in the photograph below. It’s the perfect size to hold a small bird’s nest.
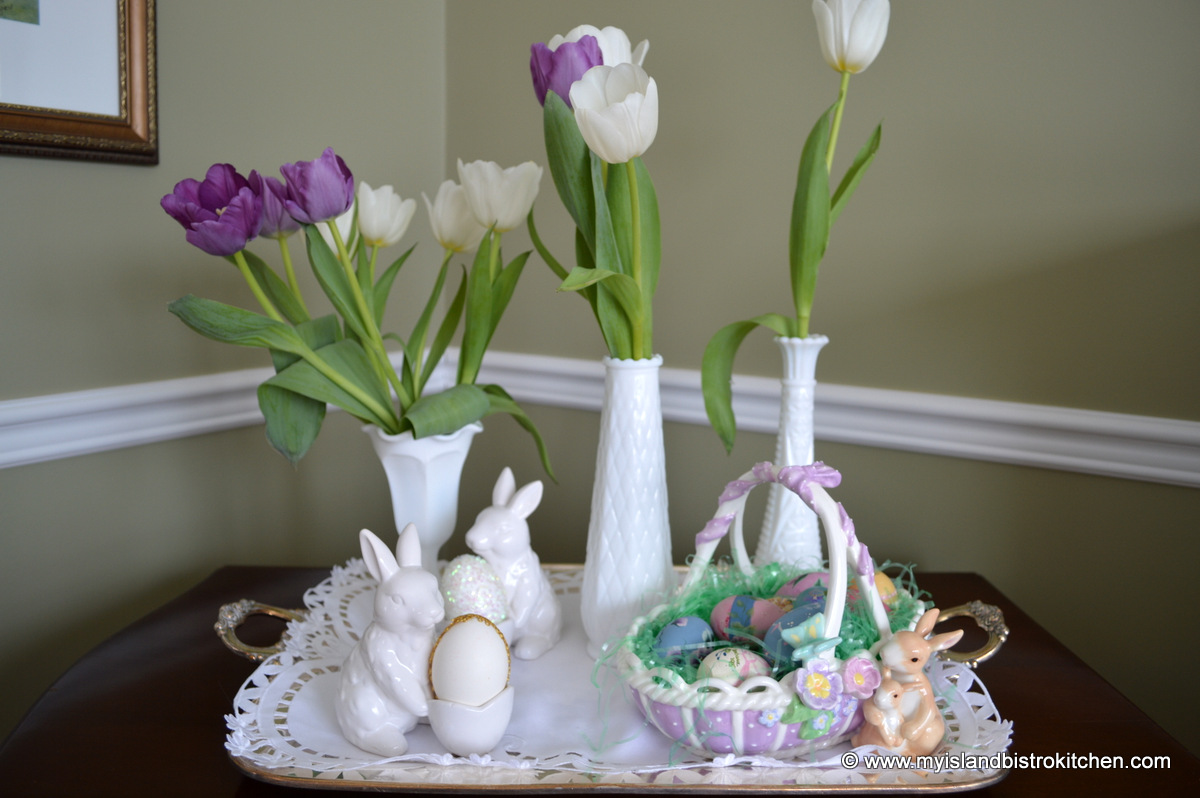
I have also chosen to carry the milk glass and tulip theme over to the tea cart where I have created another spring vignette in the corner of the dining room.
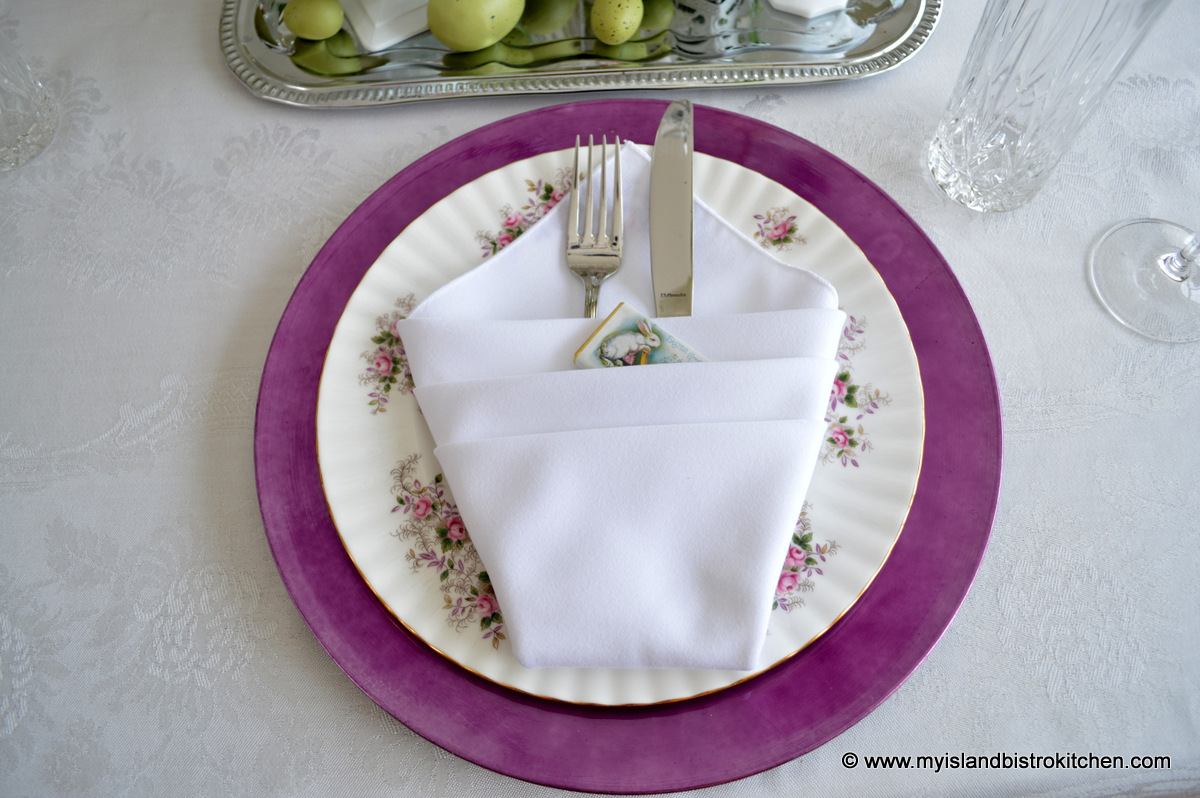
The napkin fold I have chosen is the Easter basket fold. This is a simple fold to do and I have used it to hold the cutlery and, what would an Easter basket be without a little chocolate tucked inside! Because the centerpiece vignette has several elements to it, I wanted to keep each placesetting as simple and uncluttered as possible. This allows the focus to be maintained on the vignette centerpiece.
I have used purple charger plates to frame each dinner plate and these coordinate perfectly with the purple tulips. I can easily change up the look of my Royal Albert “Lavender Rose” china by the use of different colored charger plates.
Purple is my favorite color so it’s an easy choice for me to work with this color scheme!
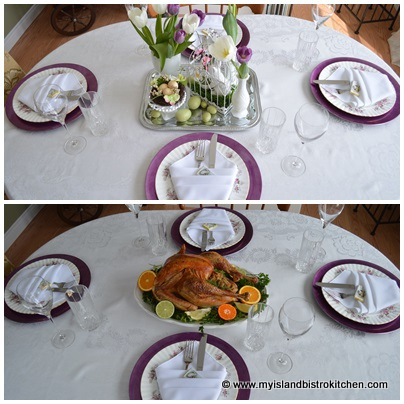
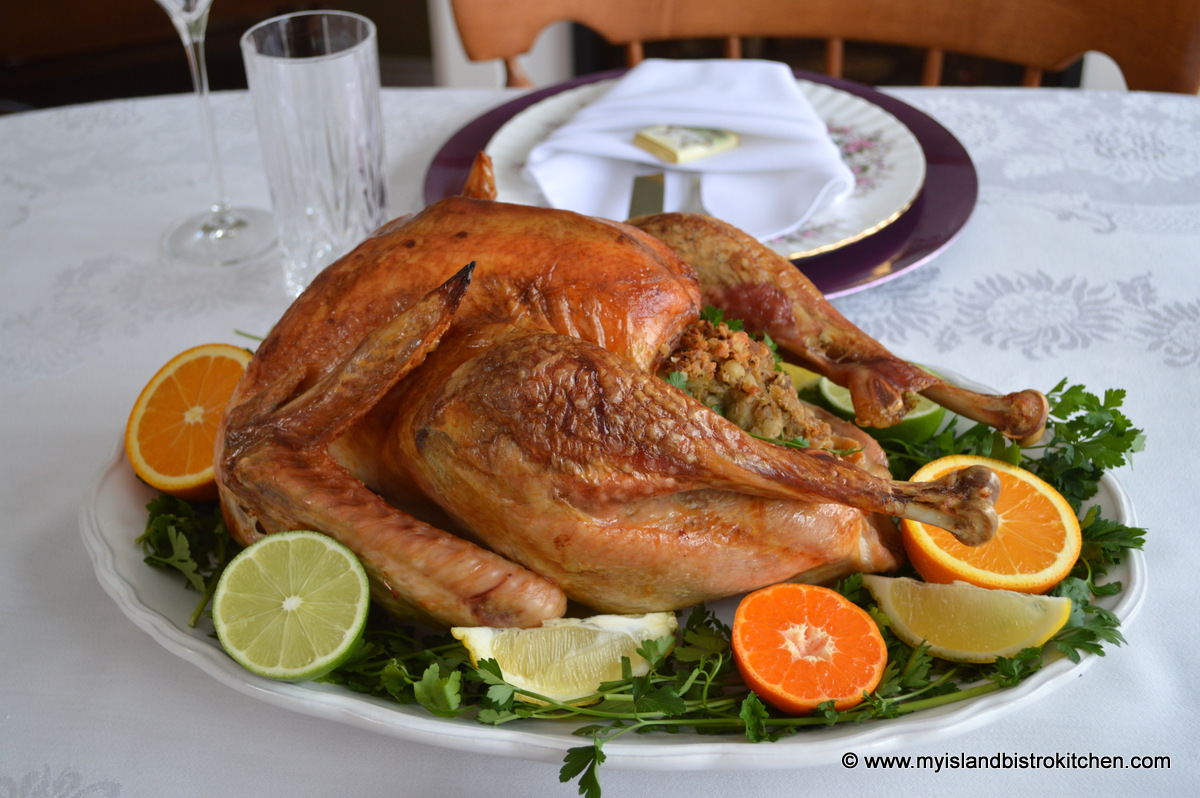
An added advantage of a “corralled” centerpiece is that it can easily be lifted off the table and replaced with a meat platter, for example, if you choose to carve the turkey or ham at the table. This way, your guests always see a centerpiece of some sort on the table throughout the entire meal, whether it be whatever was on the tray or the meat platter. The photograph below shows the table centerpiece when the guests arrive which is then removed and replaced with the turkey platter for the main course. The vignette tray is then easily returned to the table for the dessert course.
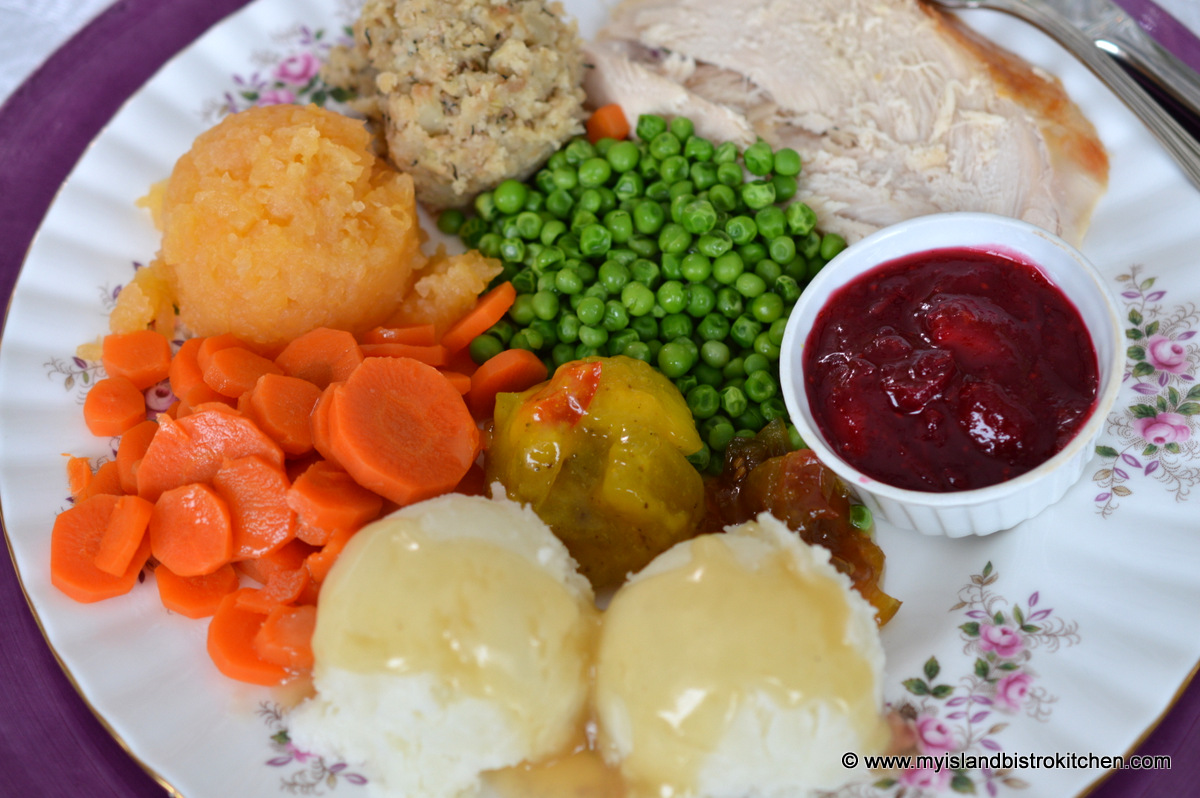
So, on the menu at my house for Easter Dinner is the traditional turkey dinner with all the trimmings, one of my all-time favorite meals.
———————-
Thank you for visiting “the Bistro” today. Connect with “the Bistro” through the following social media:
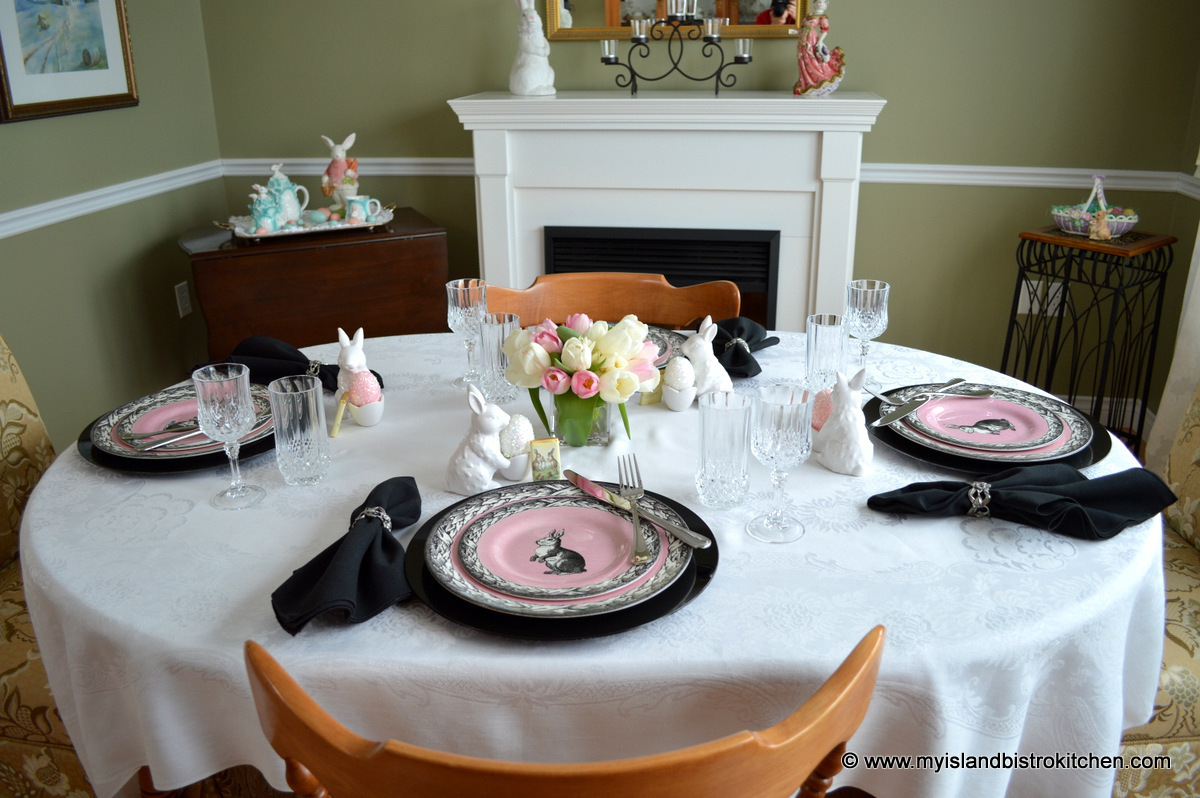
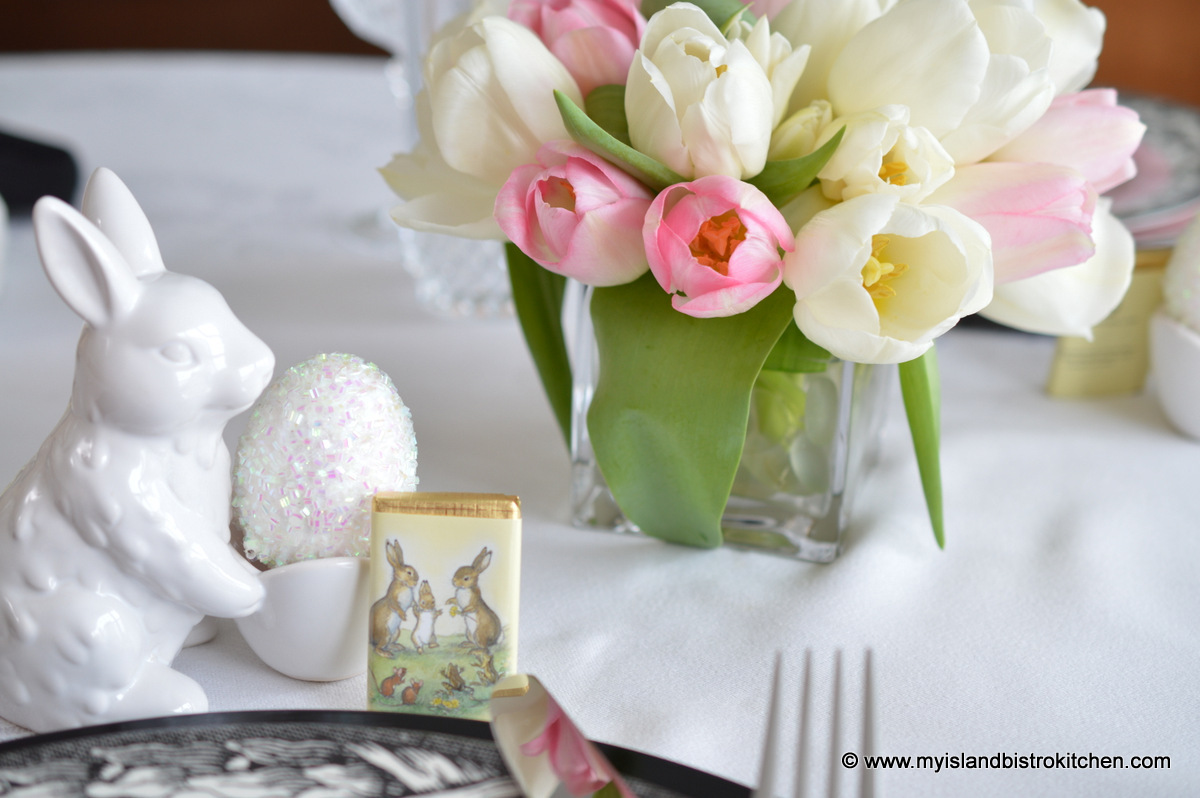
Today, I am sharing a slightly different tablesetting for the Easter season. The theme is pink and black and Peter Cottontail tip toes through the tulips!
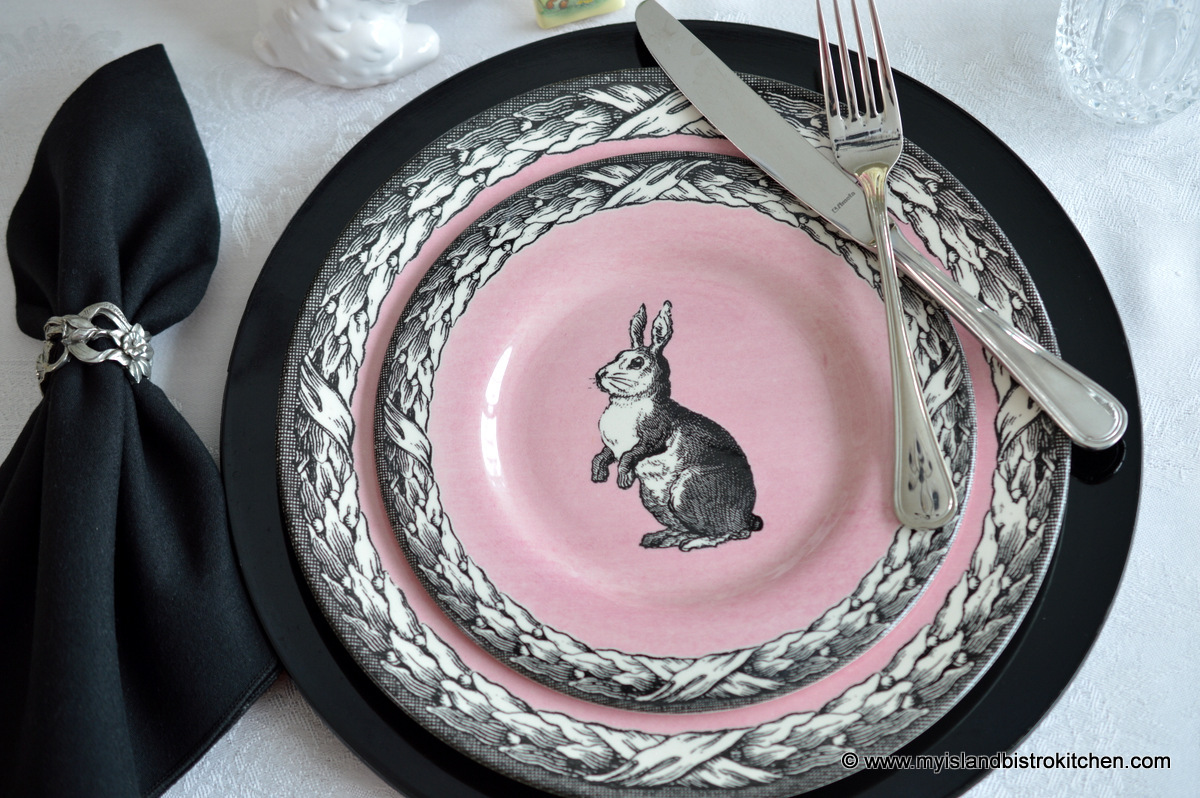
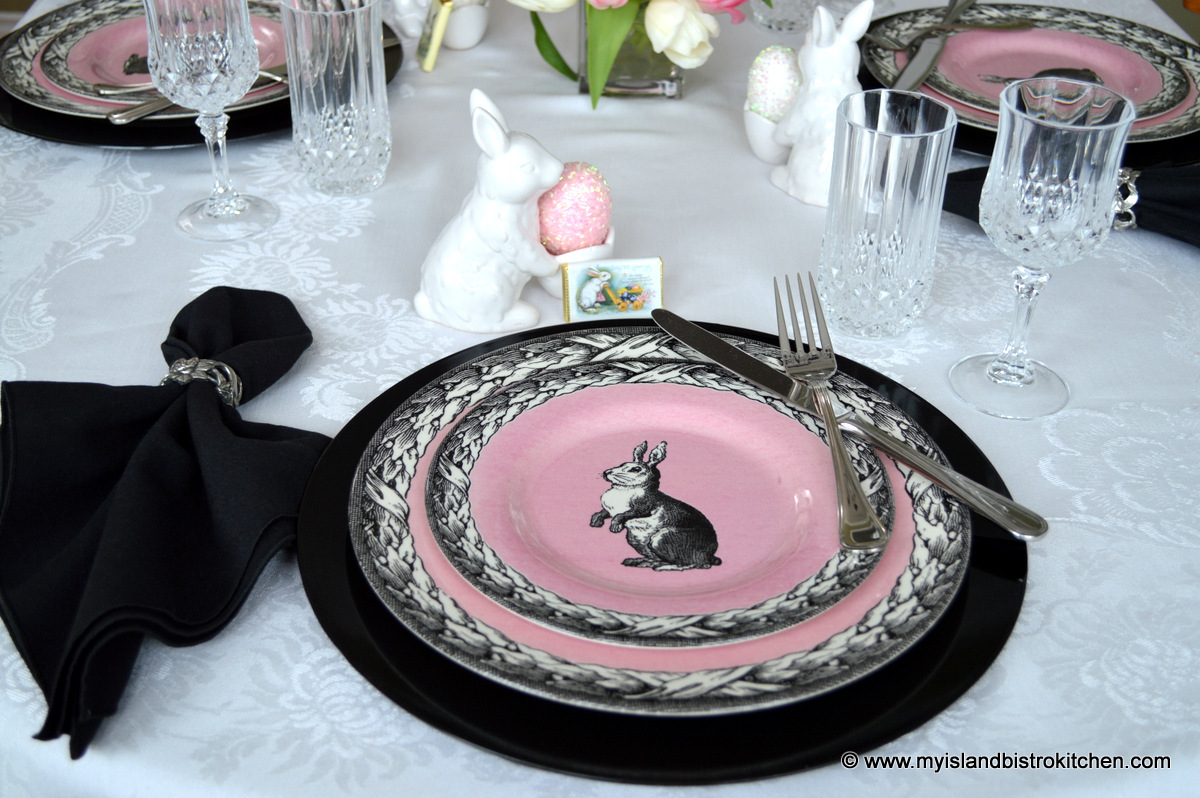
Let’s start with the dinnerware. The pink background of each plate with a black and white bunny and border make this a dramatic set of Easter holiday dinnerware.
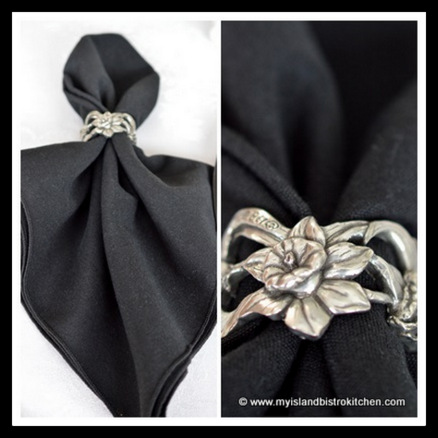
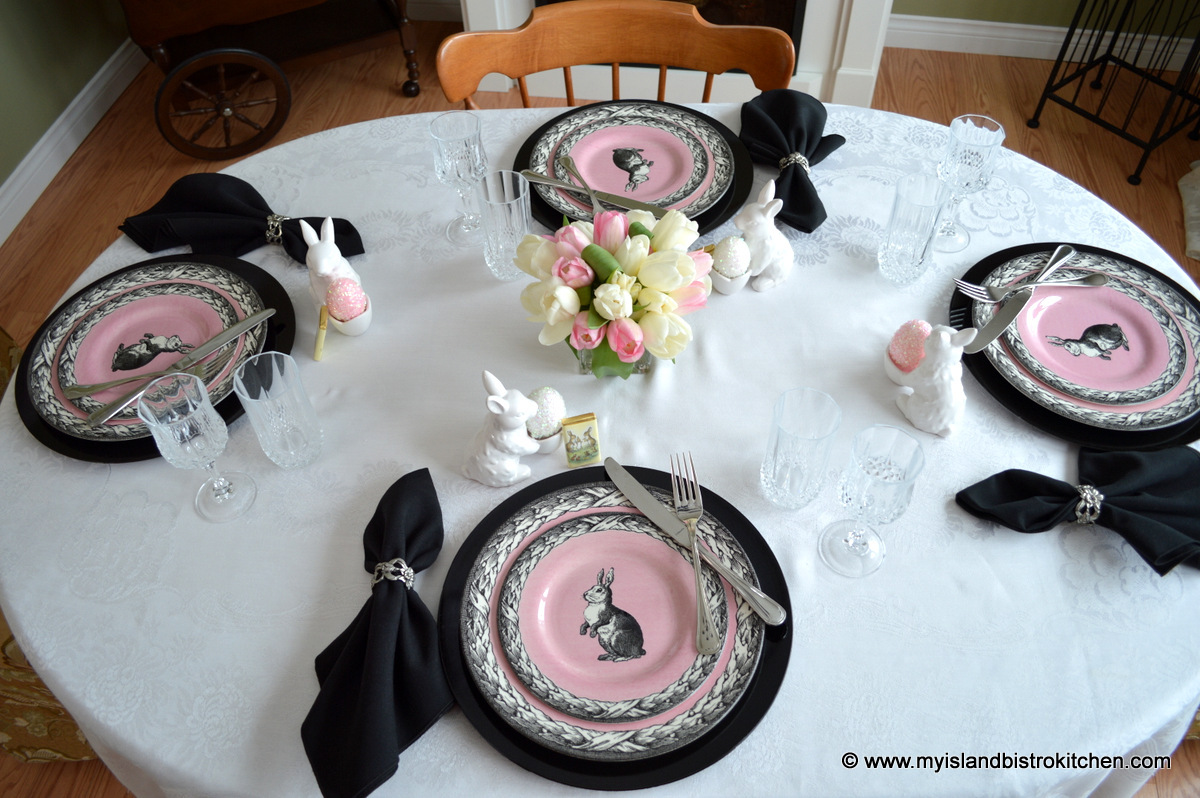
I started with my traditional white linen tablecloth as a blank canvas. I have opted to frame each place setting with a black charger plate which really makes the plate design pop, particularly against the white background. Matching black napkins complement each place setting. The pewter napkin rings feature a springtime daffodil design.
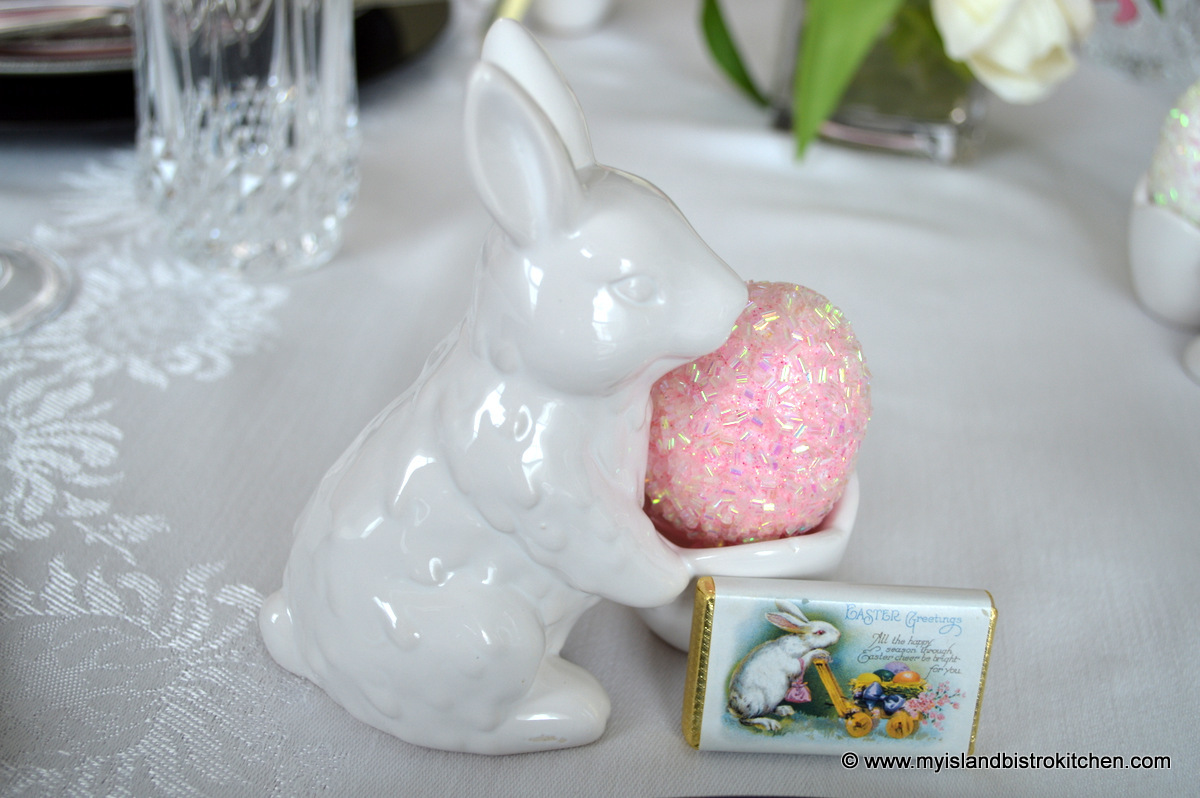
A little Easter bunny egg cup is set at each place setting along with an Easter-themed chocolate.
And, when all the elements come together, this is what each place setting looks like.
Here is an overhead view of the placesetting which I would class as contemporary-casual.
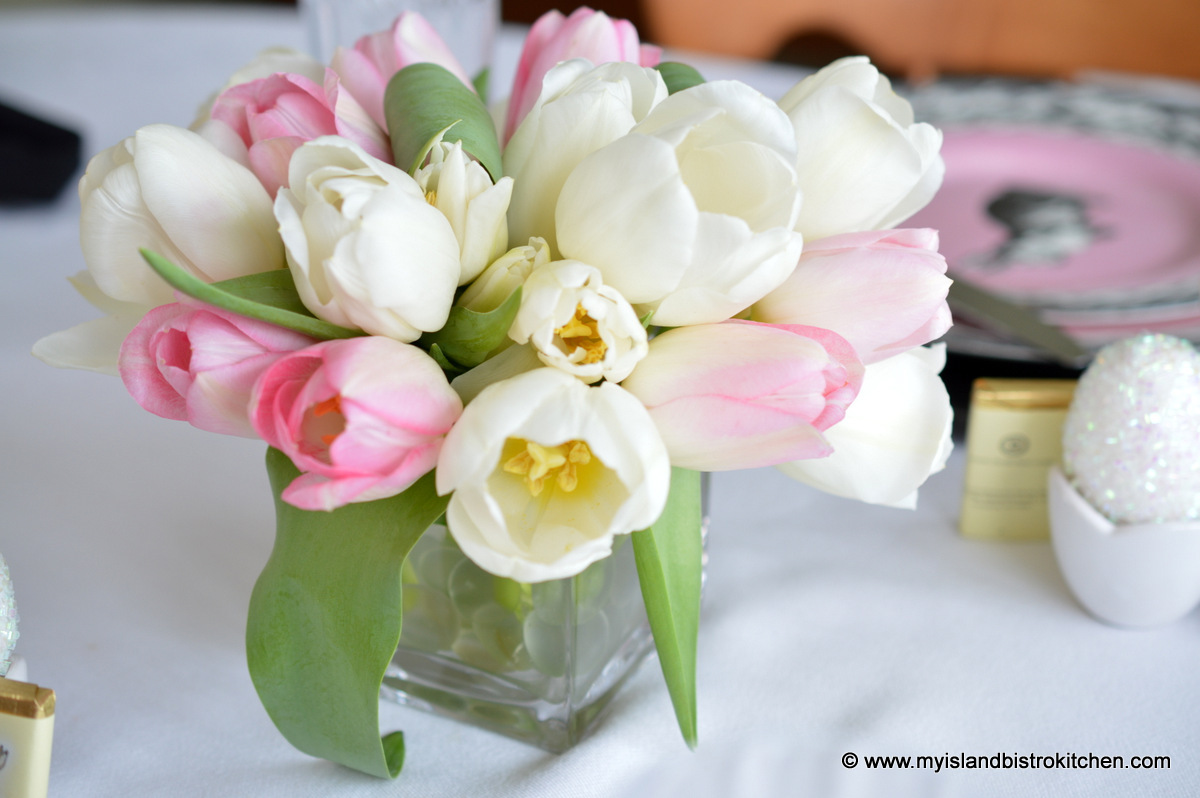
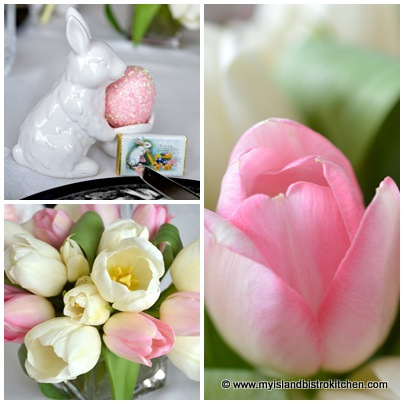
The beautiful pink and white tulips on today’s table came from Vanco Farms in Mount Albion, PEI. Click here to read my story on this Island farm that grows, sells, and ships tulips from their large greenhouses.
I am rarely without these beautiful flowers in my house throughout the winter and spring.
The tulips from Vanco Farms come in a vast array of colors and I can match up any color scheme of tablesetting with them. The pink ones I have chosen for today’s tablesetting are very delicate and procelain-like and they pop against their neighbouring white tulips.
A dressy yet simplistic and uncluttered tablesetting.
I hope you have a wonderful Easter!
———————-
Thank you for visiting “the Bistro” today. Connect with “the Bistro” through the following social media:
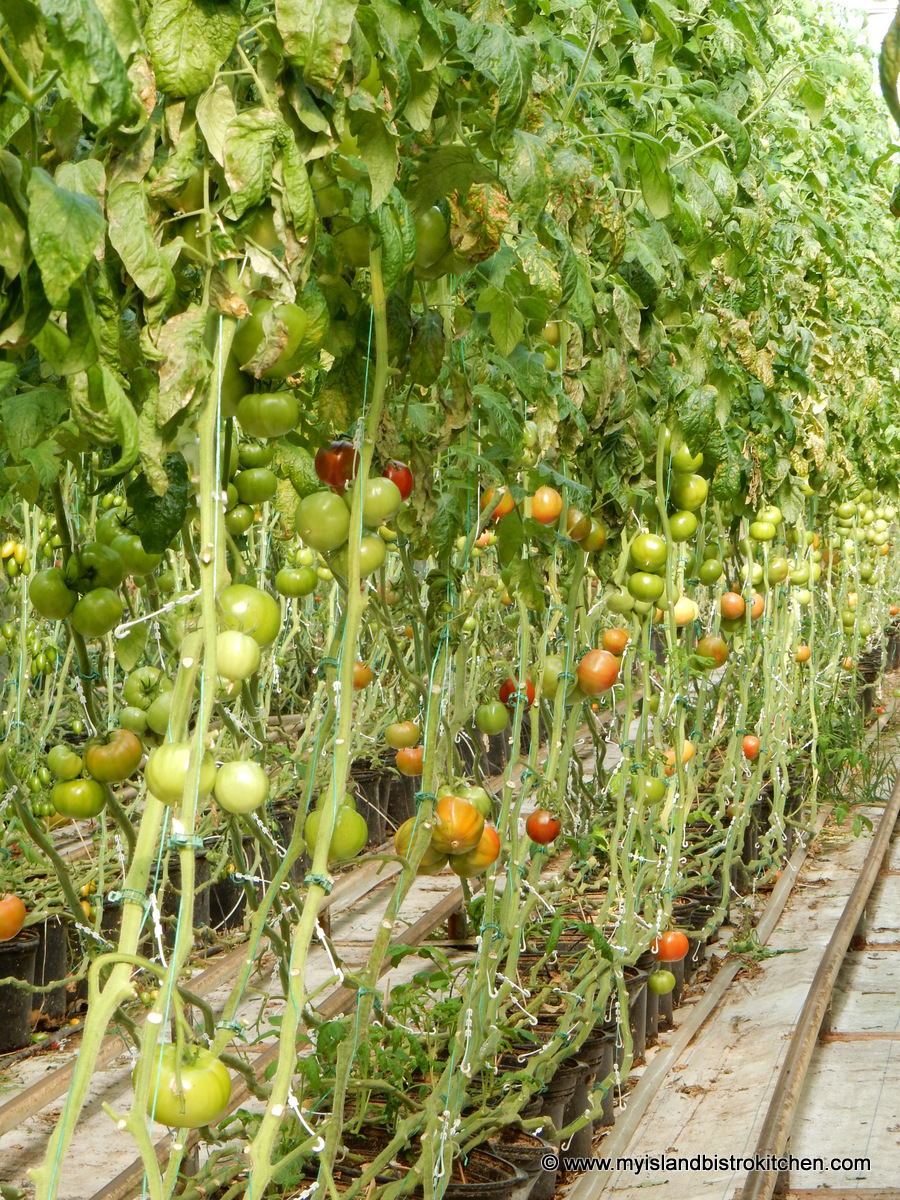
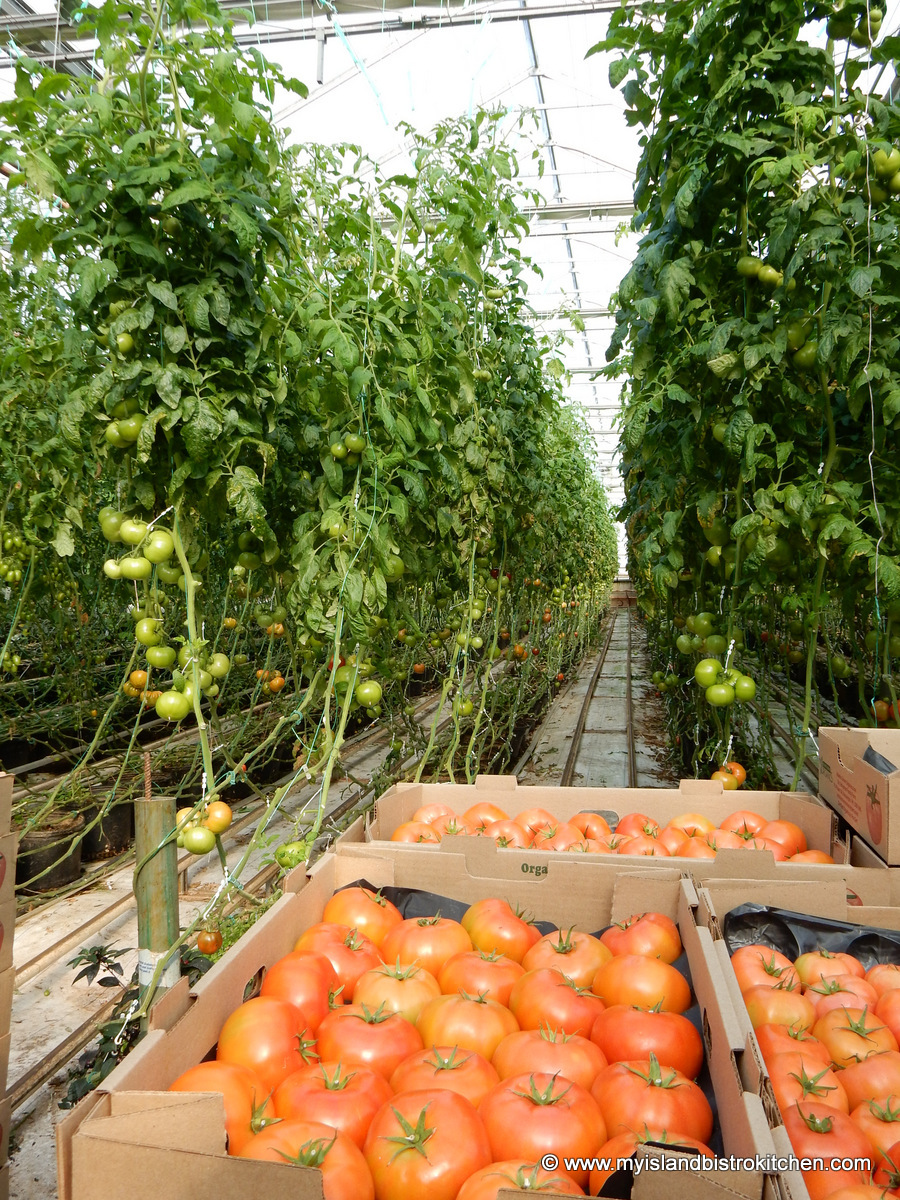
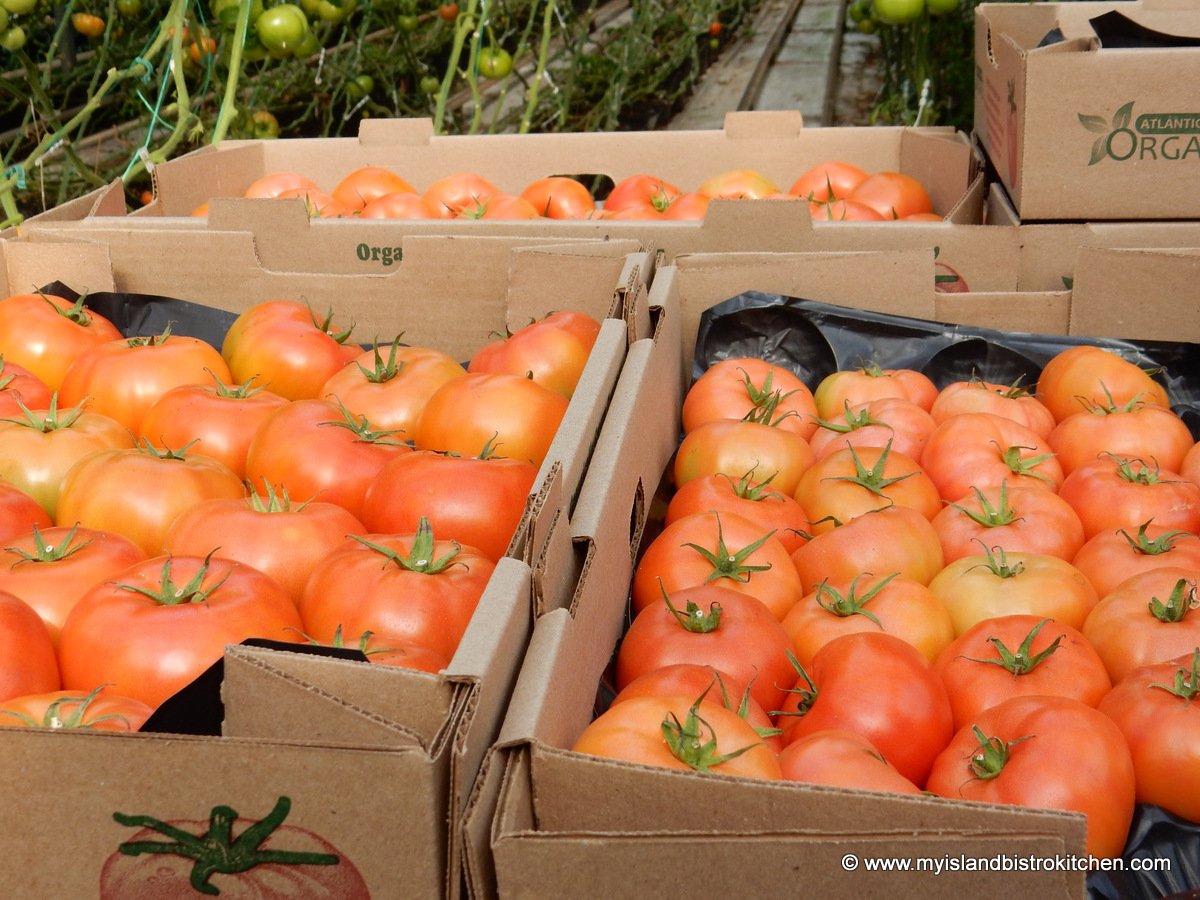
Rows of Beefsteak Tomatoes at the Schurman Family Farm, Spring Valley, PEI
Winter 2015 has been a true old-fashioned winter for PEI. Blizzard after blizzard has left the Island buried under mountains of snow. In fact, more than 500cm has fallen – that’s over 16 feet of snow this winter!
Along a rural country road in PEI, April 2015
As I write this posting in early April, most of the snow, unfortunately, is still around (and more keeps accumulating) so it’s going to be a long time before PEI sees any plants growing outside in the rich red soil for which our Island is known. However, that doesn’t mean there aren’t vegetables growing on PEI – even in the dead of winter.
Between tunnels of snow banks (some of which were more than twice the height of my car) and sometimes through side roads barely one lane wide in places, I made my way to Spring Valley to visit the Schurmans who operate a large greenhouse where they grow organic vegetables for sale year-round. In fact, if you live in Atlantic Canada and shop at Sobeys and/or the Atlantic Superstore, you have access to their Atlantic Grown Organics brand organically-grown tomatoes and cucumbers because both stores carry produce from the Schurman greenhouse.
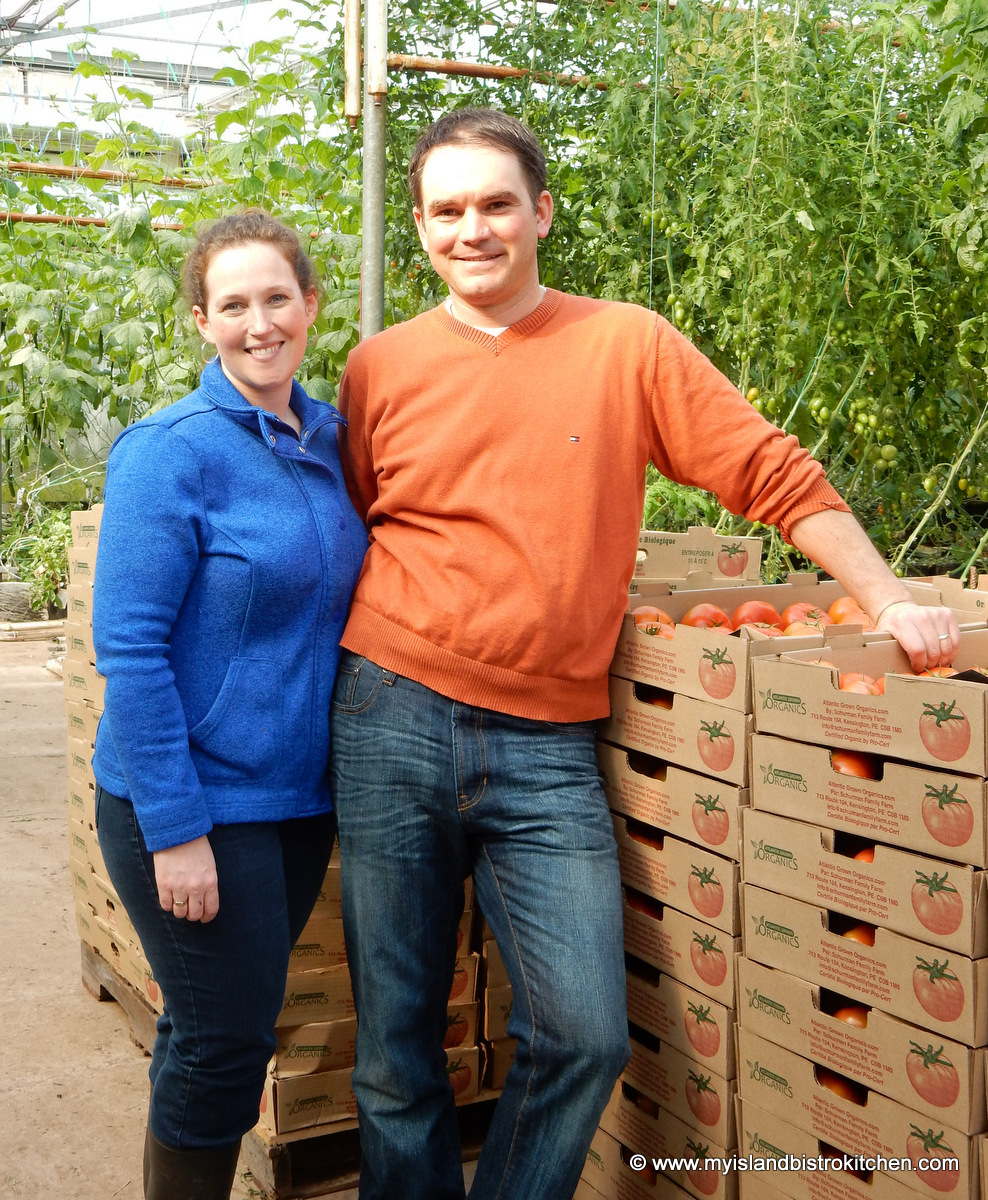
So, this year, while I’m not going south, I did spend an afternoon with Krista and Marc Schurman in their greenhouse which almost seemed tropical!
Krista and Marc Schurman of Schurman Family Farm, Spring Valley, PEI
Spring Valley is a rural community that is located just outside the town of Kensington on the Island’s north side. The Schurmans, former livestock producers, built the greenhouse in 2001 when they made the decision to diversify their farming operation from livestock to vegetable growing. The Schurman greenhouse is home to close to one (1) acre of produce grown year round. Marc, a third generation farmer, has a degree in plant science from the Nova Scotia Agricultural College (NSAC) in Truro, Nova Scotia. From the time he was a wee lad, he has had a keen interest in growing vegetables so his career choice was a logical one. His wife, Krista, has a degree in animal science, also from NSAC. Farming is clearly in the blood of the Schurman couple and it is evident from chatting with them that farming is their passion and they are committed to producing quality food for market.
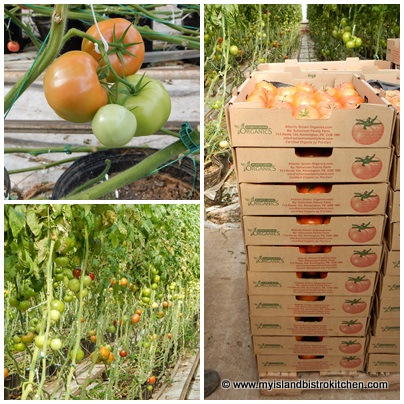
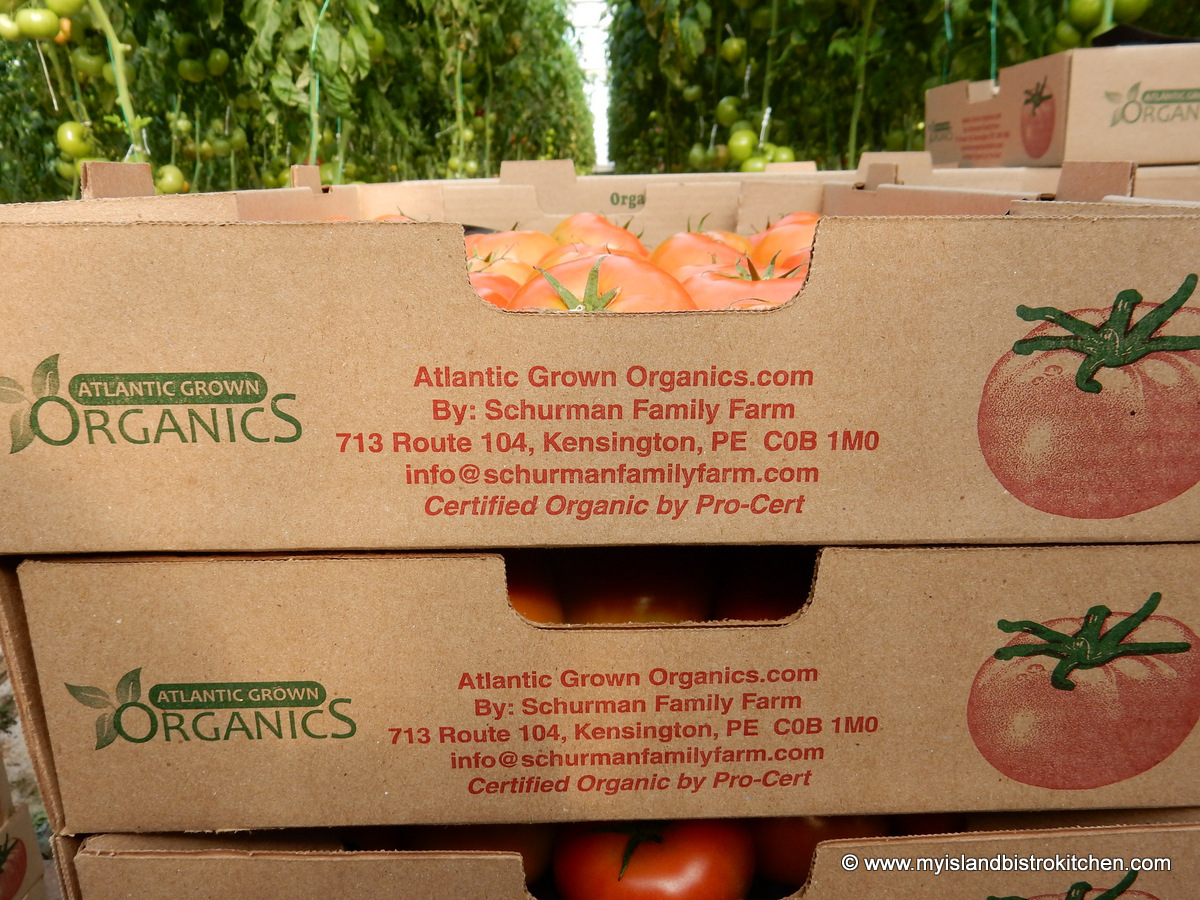
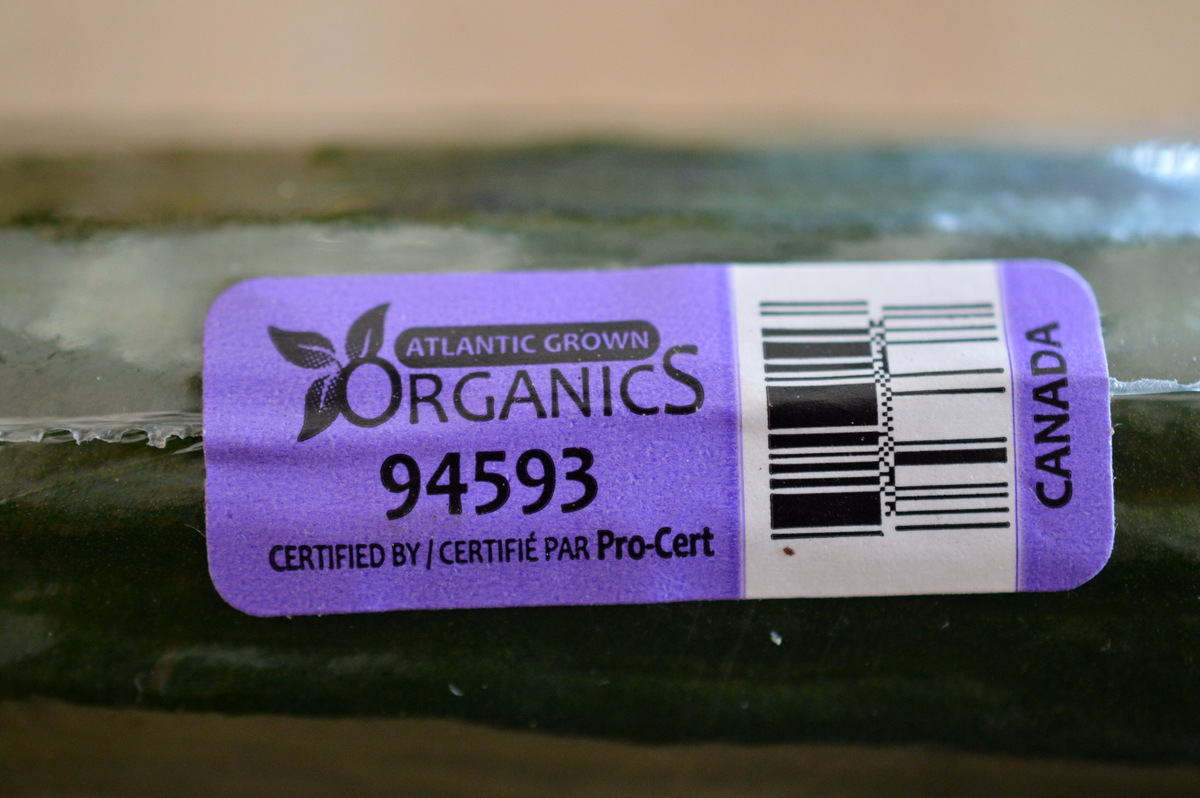
In 2006, the Schurmans, who market their produce under the label “Atlantic Grown Organics”, became a 100% organic greenhouse operation.
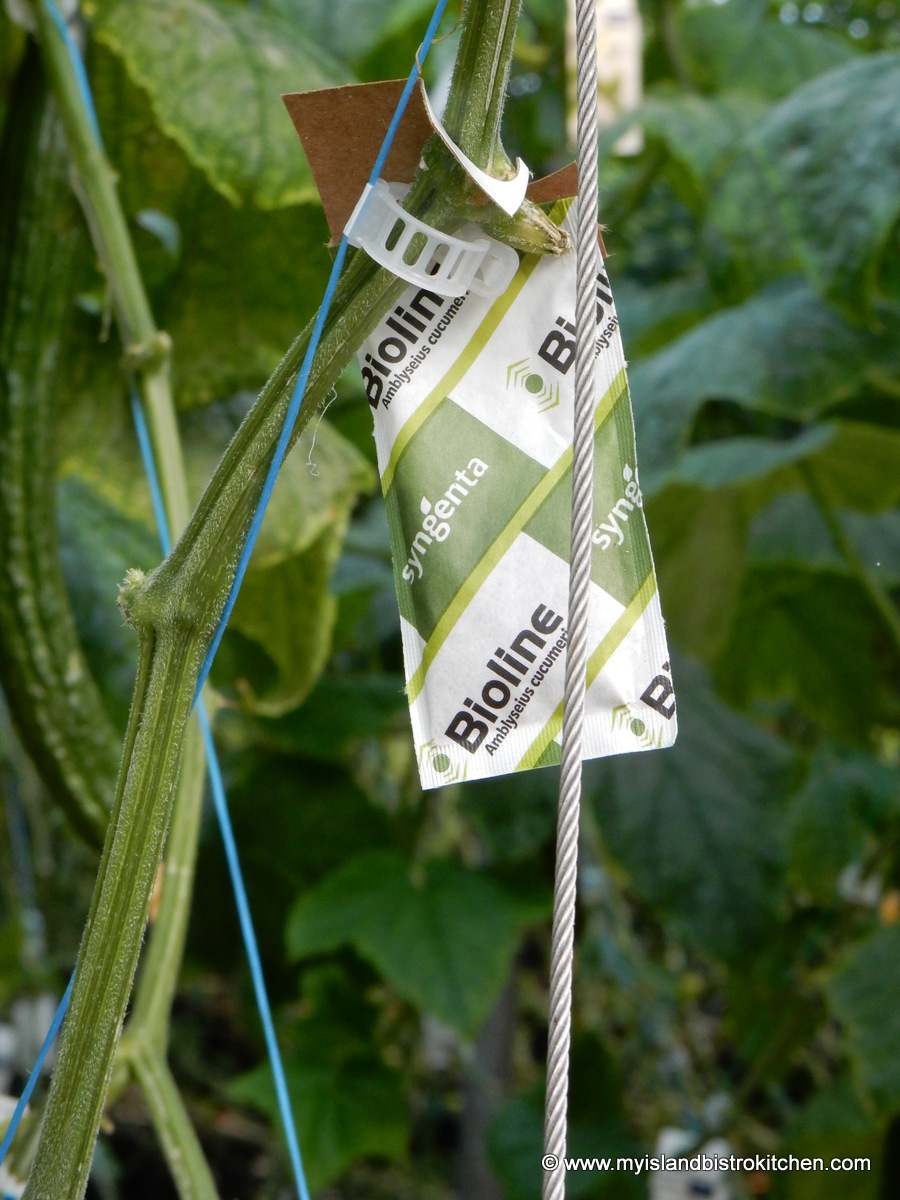
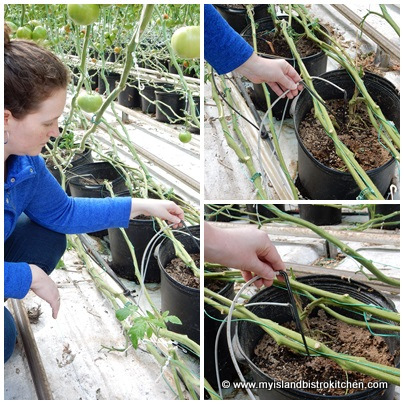
Farming organically is not without its challenges since it operates differently than conventional farming. One of the biggest challenges is to create a mini-ecosystem versus using chemicals to control for insect pests and plant disease. Insect packets (like those in the photograph below) are hung on the vines of the plants throughout the greenhouse. These packets release beneficial insects that, essentially, eat the bad insects that can destroy plant leaves and vegetables.
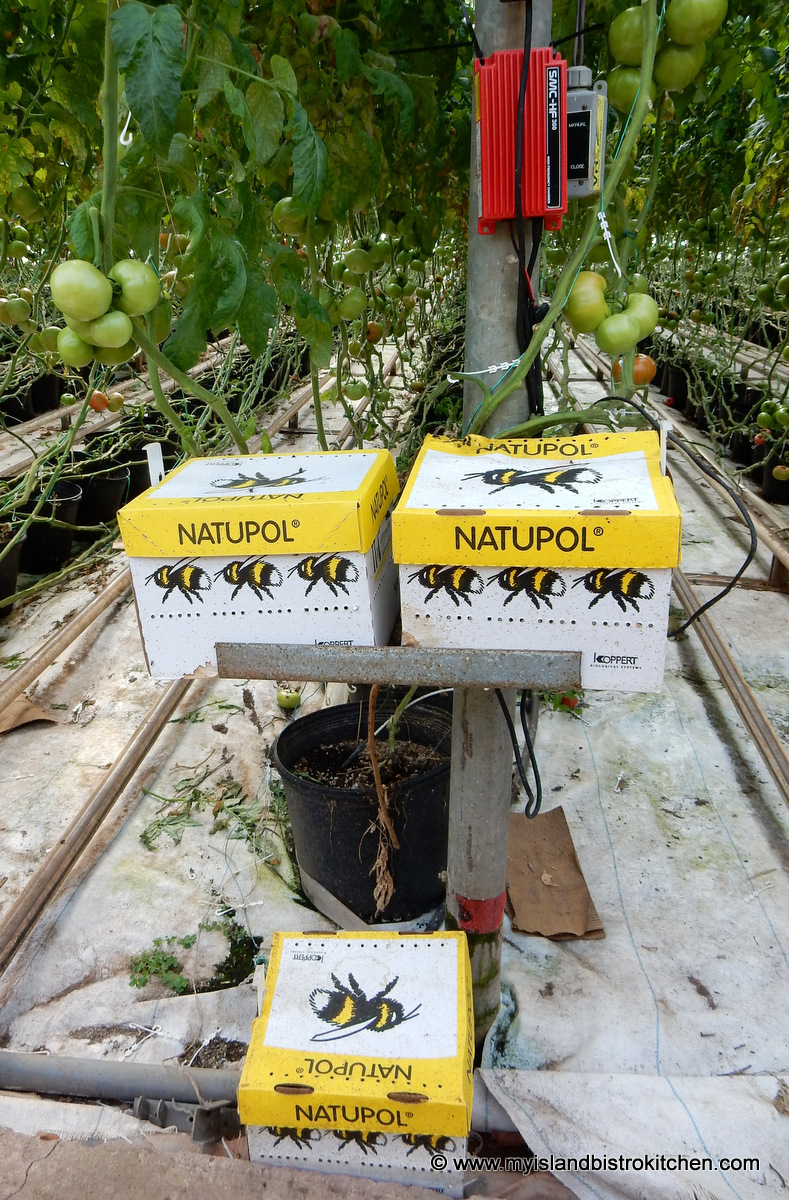
To simulate a natural environment, every six weeks, new hives of bumblebees are introduced into the greenhouse.
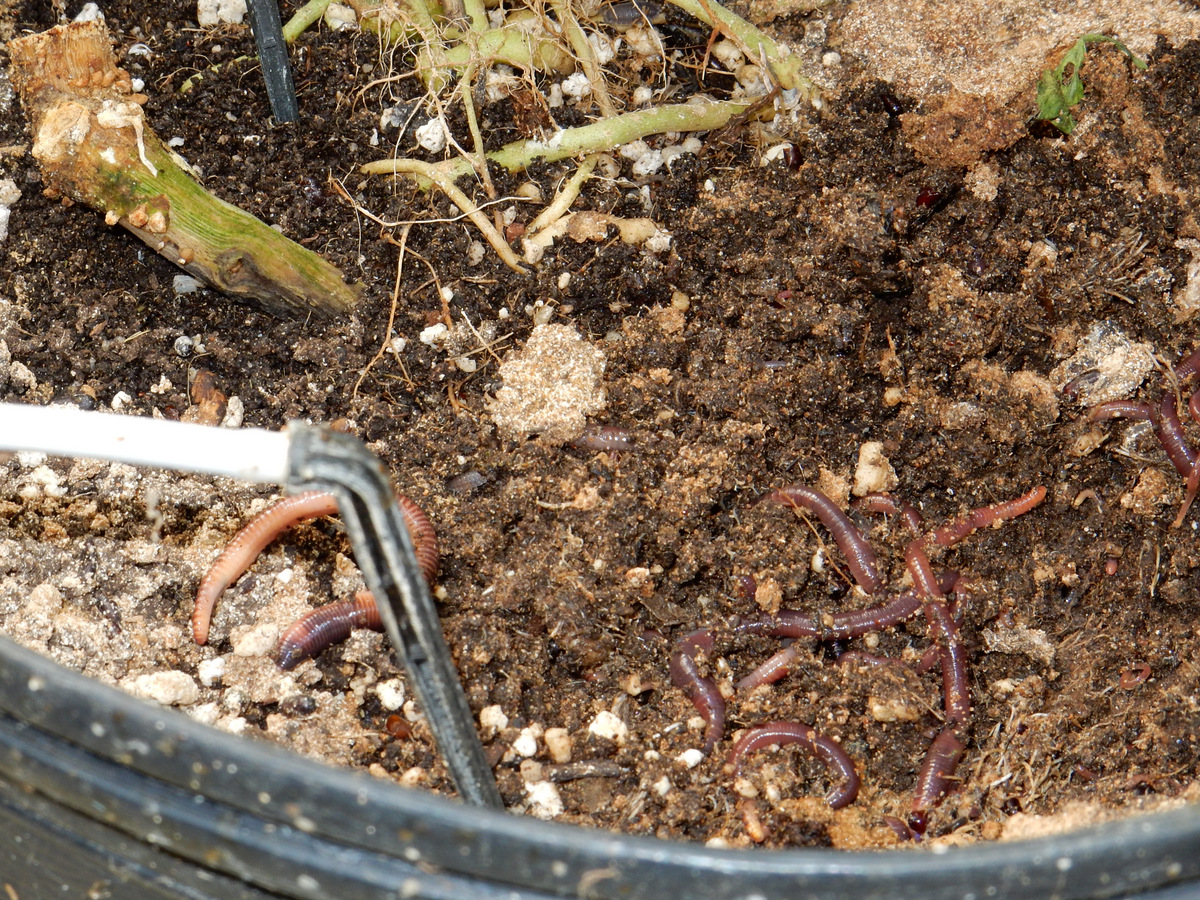
The bees buzz around, doing their job to pollinate the tomatoes. New hives are brought into the greenhouse every six weeks so that, as the hives age, there will always be young productive bees available to carry the load of pollinating thousands of flowers every week. Earthworms are used in the plant pots to keep the soil loose – essentially, they work and till the soil.
The Natural Kind of Garden Tillers
While greenhouse farming means more control can, in some respects, be exerted over growing conditions, there is a challenge to constantly balance the humidity and ventilation in the greenhouse as too much humidity can breed plant disease. The greenhouse relies on a computer system to indicate when there is too much humidity, at which time it tells the greenhouse roof to open slightly to let in some ventilation. When the humidity is once again balanced, the computer tells the roof to close.
Large pipes filled with hot water circulate throughout the entire greenhouse keeping the plants toasty warm and providing optimal temperature for plant growth.
A wood waste burner heats the water and a back-up generator provides assurance of a heat source should there be a loss of electricity. It wouldn’t take many hours without electricity in a PEI winter storm, for example, for the farm’s entire crop of producing plants and tiny seed plantings to be destroyed.
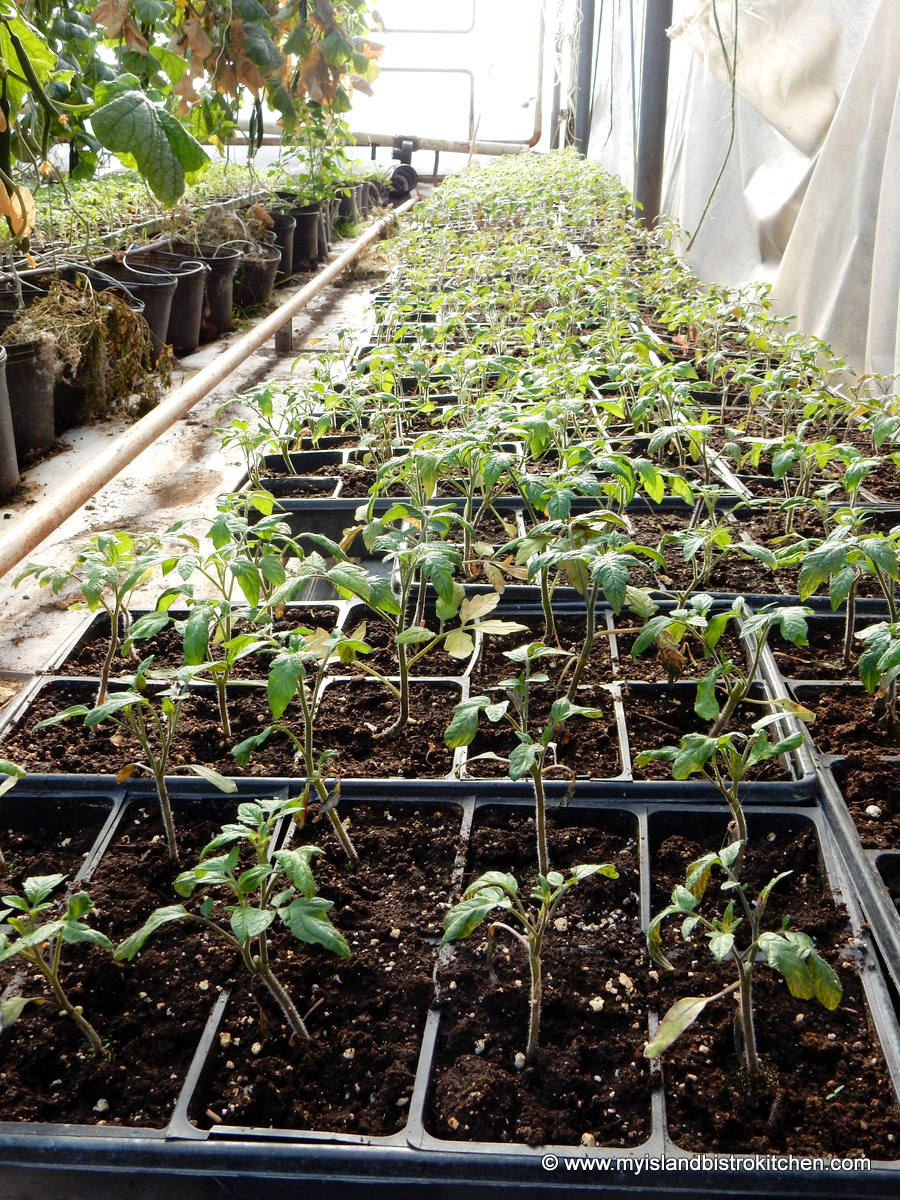
Plant seedlings started to ensure a continuous supply of fresh greenhouse produce
The series of hot water pipes also function as a sort of railway track for a cart and workers to move between the rows of plant pots so the plants can be pruned and harvested. The farm functions with a staff of three full-time employees and the couple’s three children help with picking the tomatoes from the vines.
Each plant pot is individually hooked up to the water sprinkling system that is triggered by readings from a weather station on the greenhouse roof as watering is measured by the amount of natural sunlight.
Watering probes inserted into each plant pot ensure the accurate amount of moisture is regularly provided to the plants
These water tanks are not your ordinary watering cans!
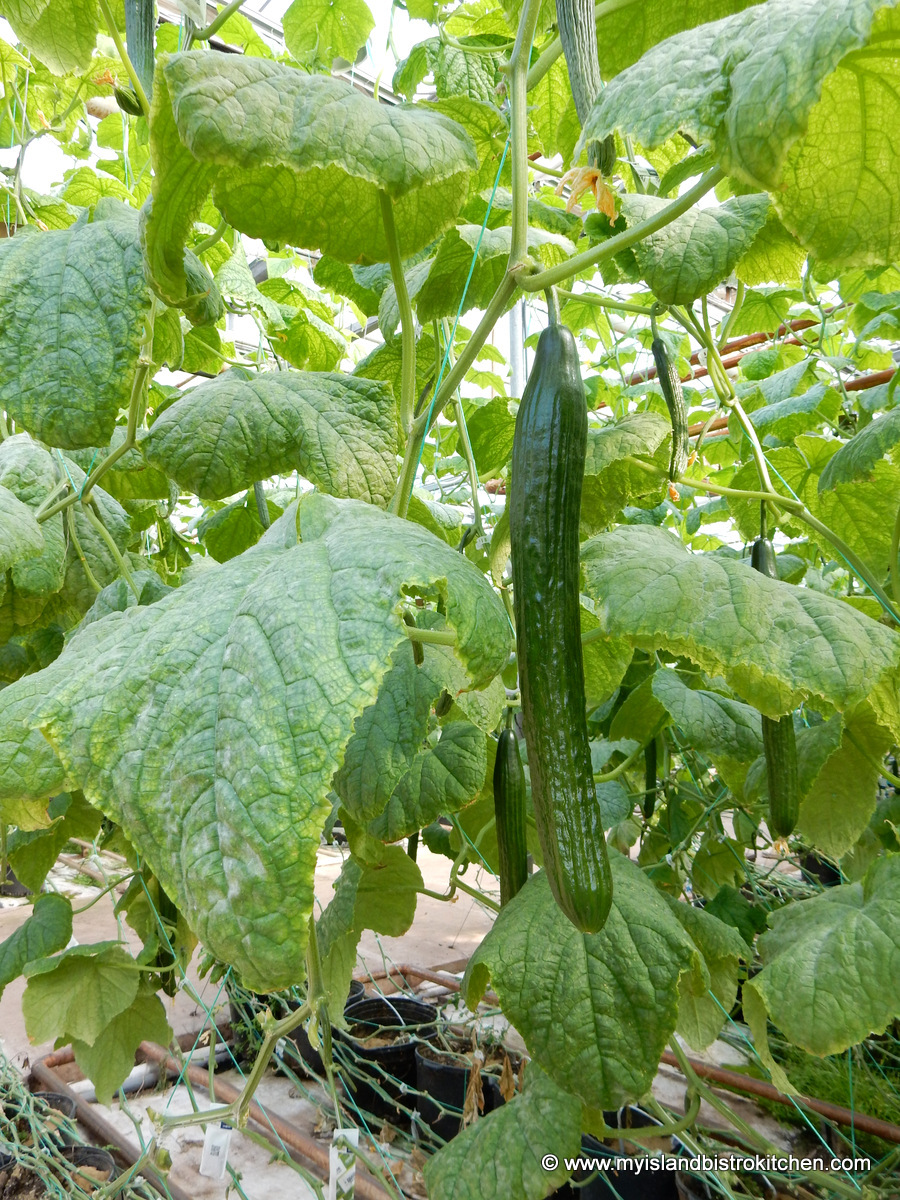
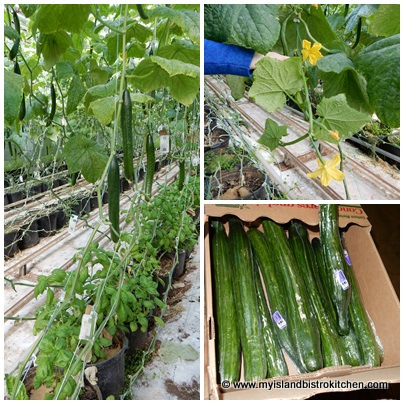
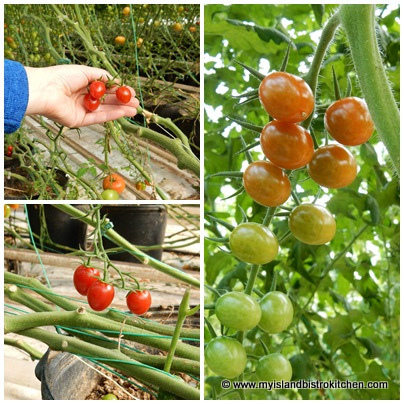
The main business of the greenhouse operation is to produce organic tomatoes and cucumbers for wholesale to Sobeys and the Atlantic Superstore in Atlantic Canada.
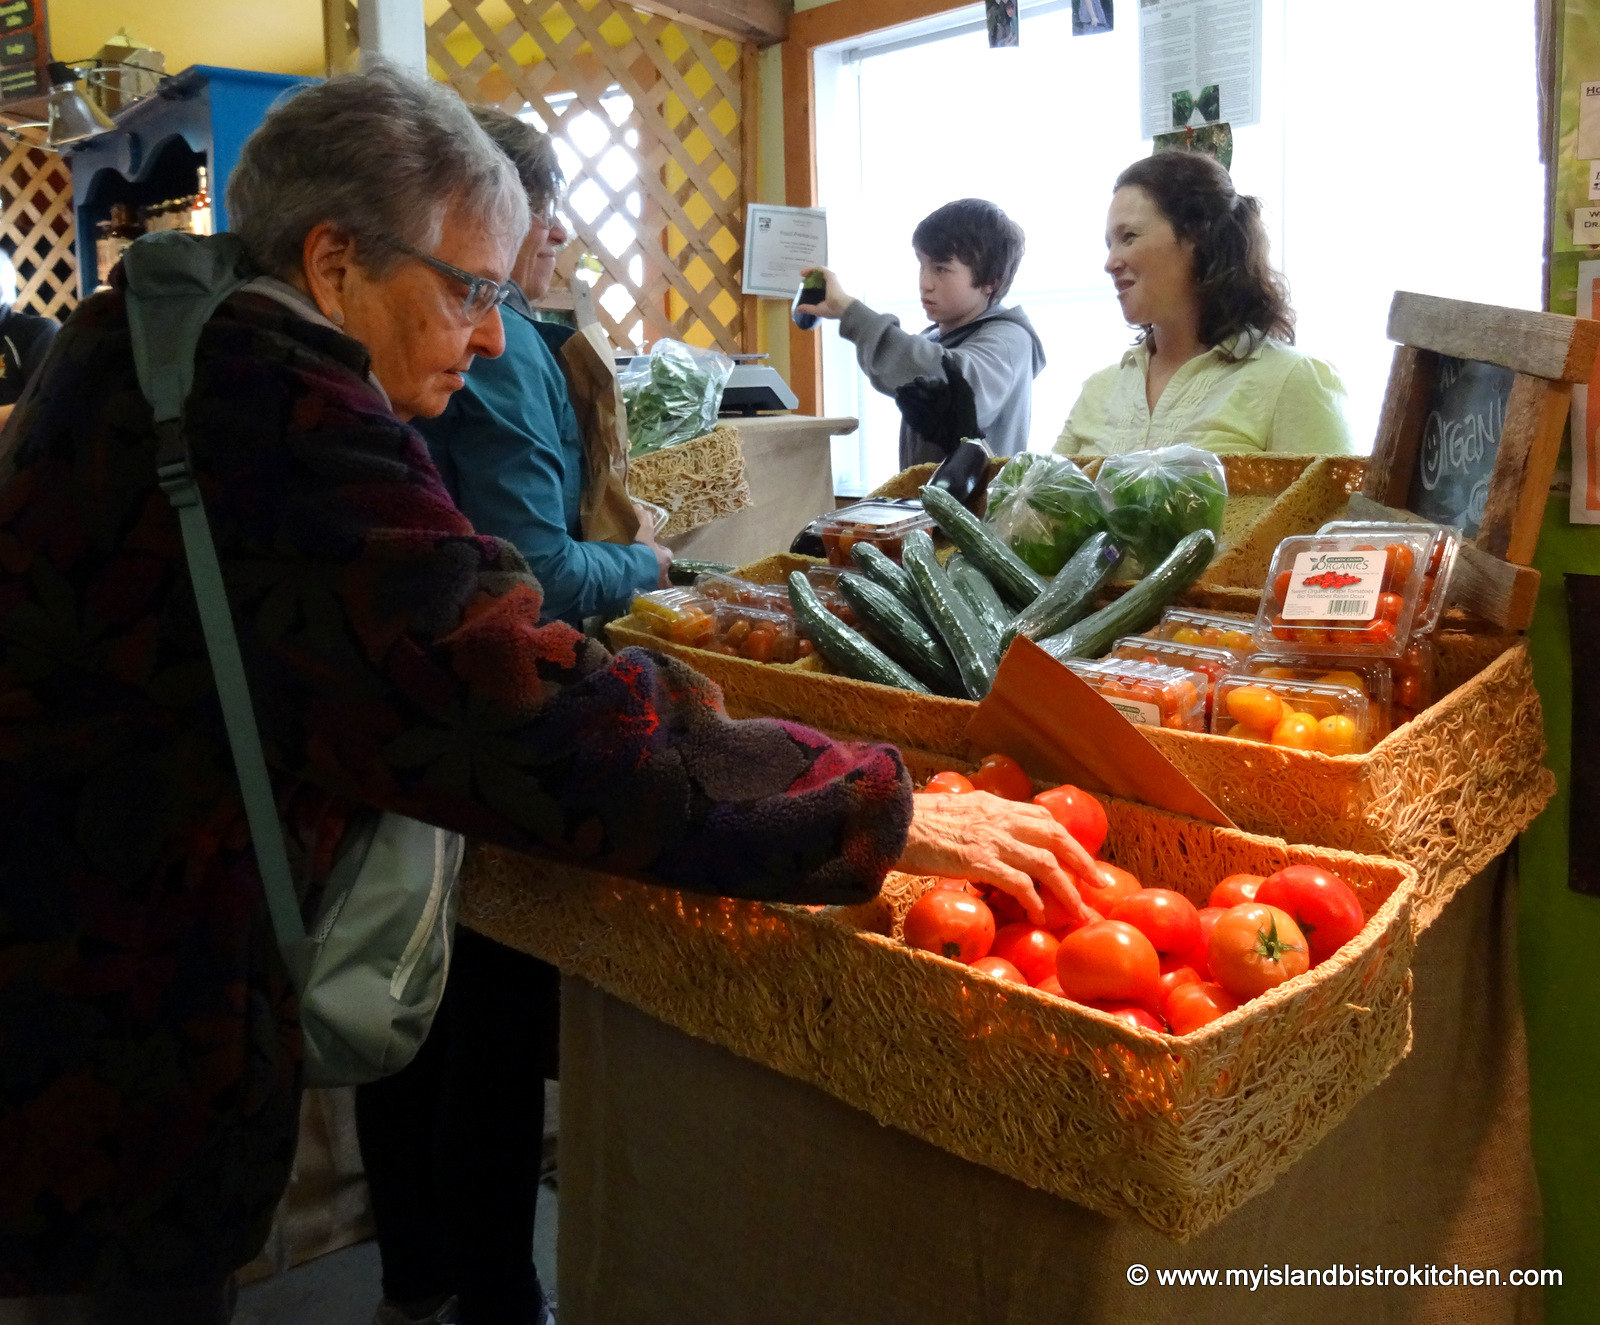
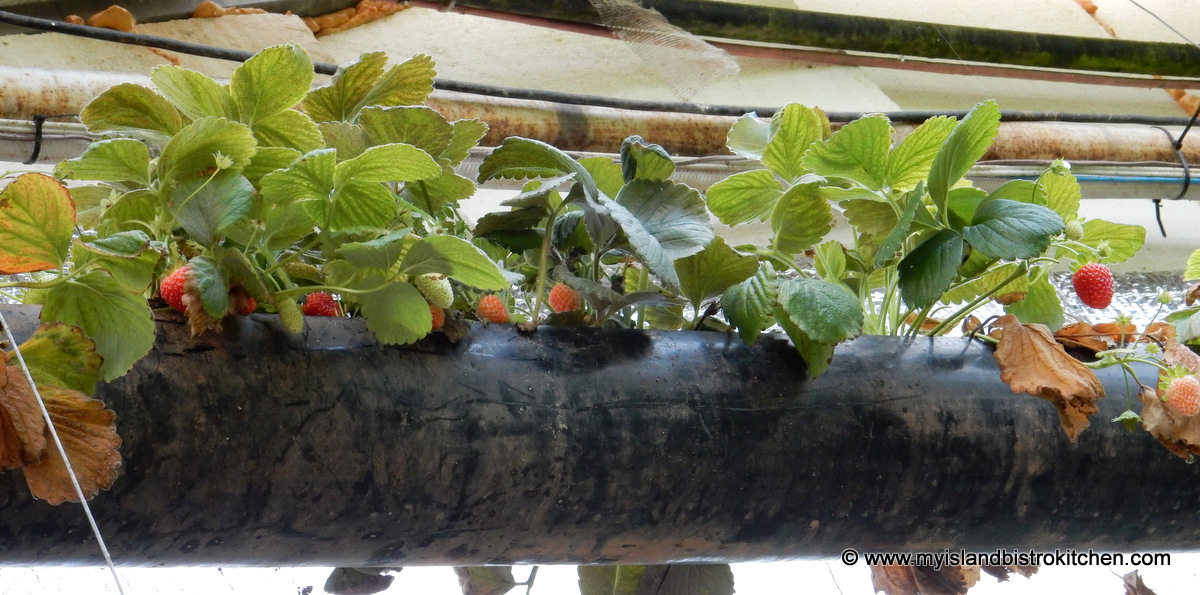
However, the Schurmans also direct market their produce at both the Charlottetown and Summerside Farmers Markets. Here (in addition to the tomatoes and cucumbers), you may also find special treats like fresh greenhouse-grown strawberries in winter along with lettuce, kale, herbs, peppers, beets, green onions, and even eggplant, grown especially for their Farmers Market clientele.
The Schurman Family Farm Booth at the Charlottetown Farmers Market
From early spring to late fall, the Schurmans also have a vegetable stand at the farm gate on Route 104 in Spring Valley.
Strawberries growing in the Schurman Family Greenhouse
The Schurmans find great satisfaction from their greenhouse operation. They say that producing big boxes of fresh, organically-grown, red tomatoes in the dead of winter on PEI, when there is little if any vegetation growing elsewhere, is deeply satisfying.
They also find it gratifying to connect with regular customers each Saturday at the local Farmers Markets as this opportunity provides them with feedback on their produce and appreciation from customers seeking good quality organic produce that is locally produced year round.
I believe it is always good when consumers can meet and connect with those who work hard to locally produce our food. So, if you are lucky enough to live in PEI, you can meet the Schurmans, face-to-face, on Saturdays at the Farmers Markets. Otherwise, be sure to look for the purple label “Atlantic Grown Organics” on the organic tomatoes and cucumbers when shopping at Sobeys and/or the Atlantic Superstores in Atlantic Canada. Buying these Island products not only supports local farmers and helps them to be sustainable operations but you’ll know you are buying quality, safe, fresh organic produce.
I think, if I had been working inside this greenhouse this year, I would hardly have noticed it was even winter (well, maybe not until I stepped outdoors)!
For more information on the Schurman Family Farm, visit their website.
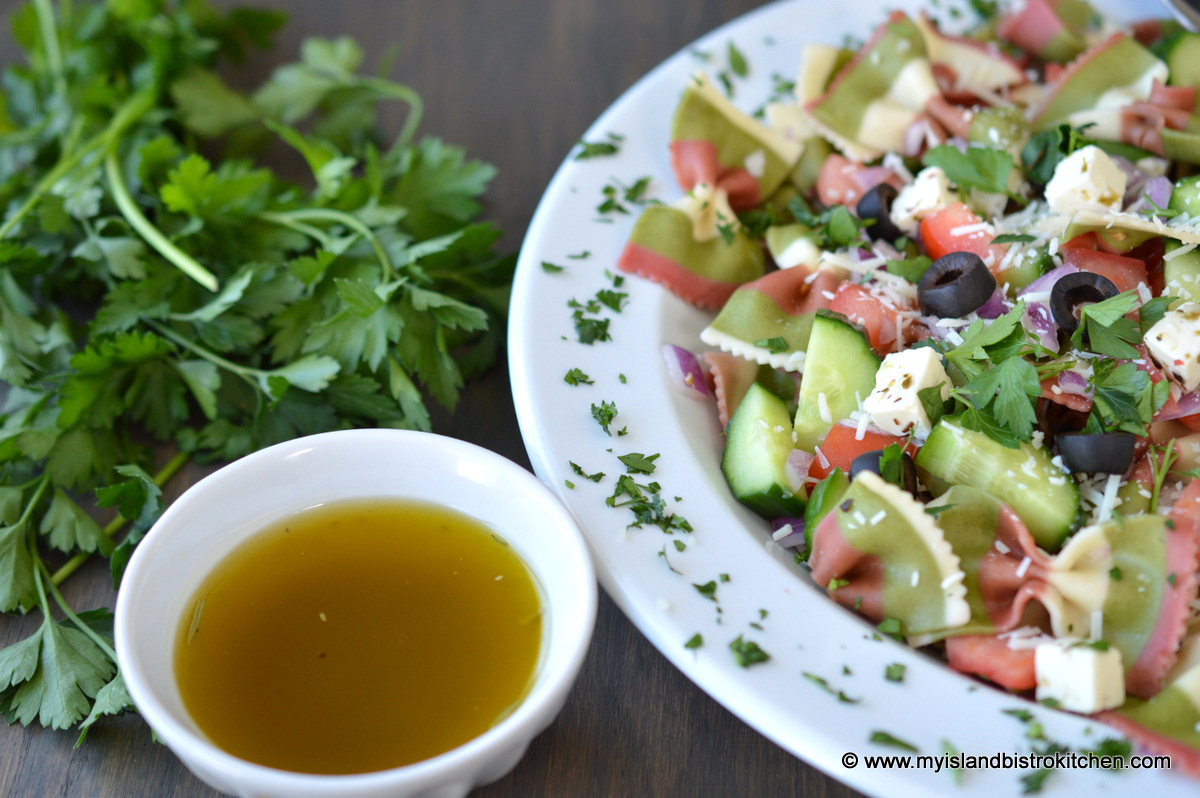
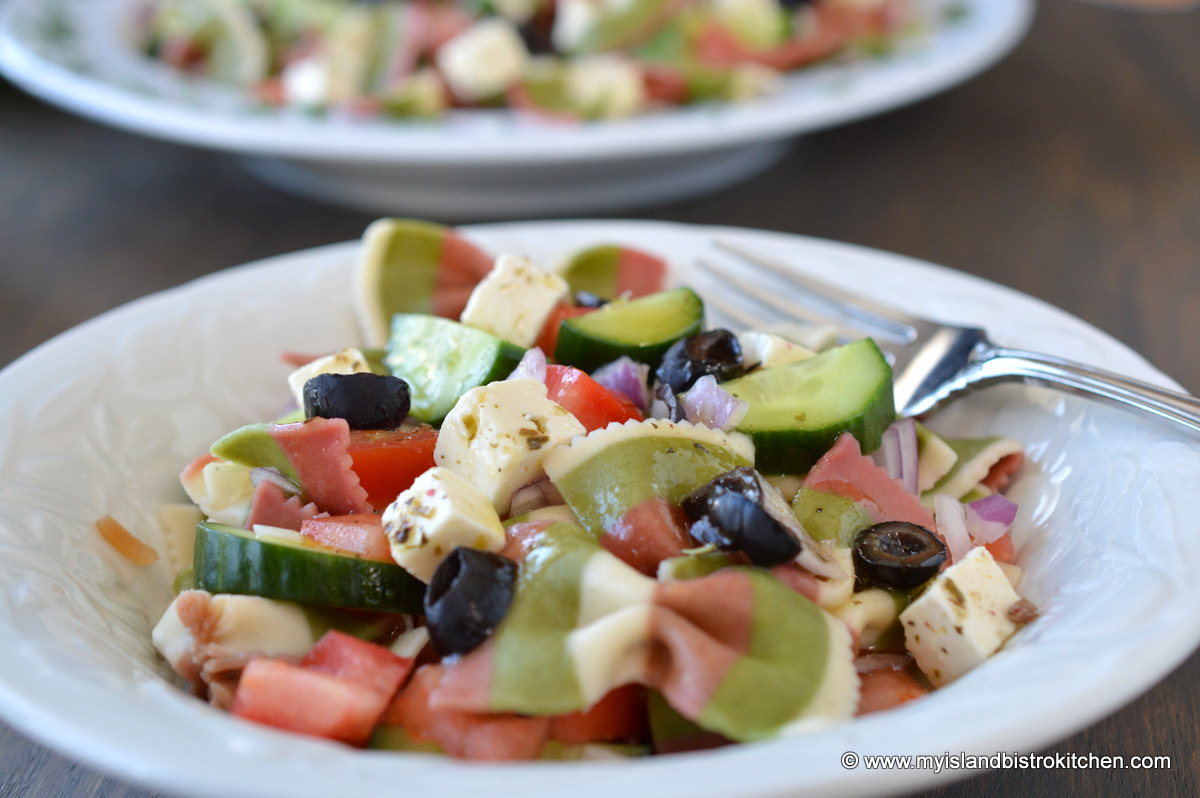
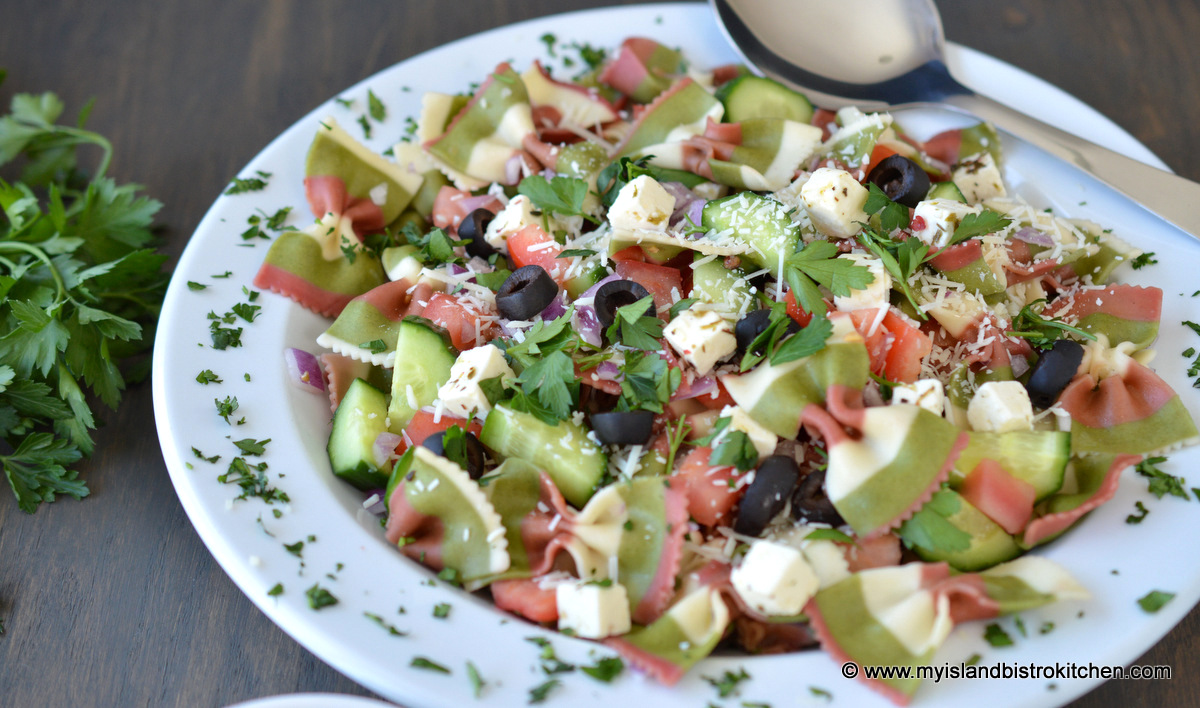
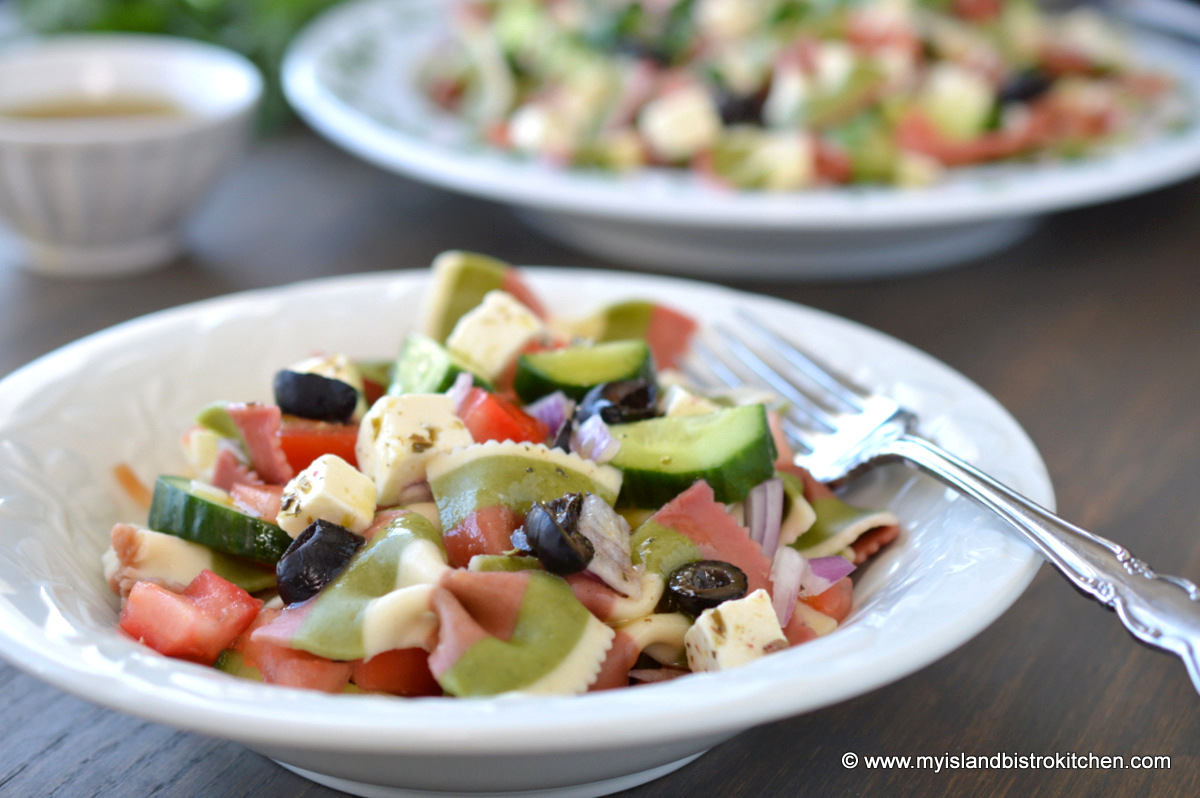
My Island Bistro Kitchen’s Pasta Salad
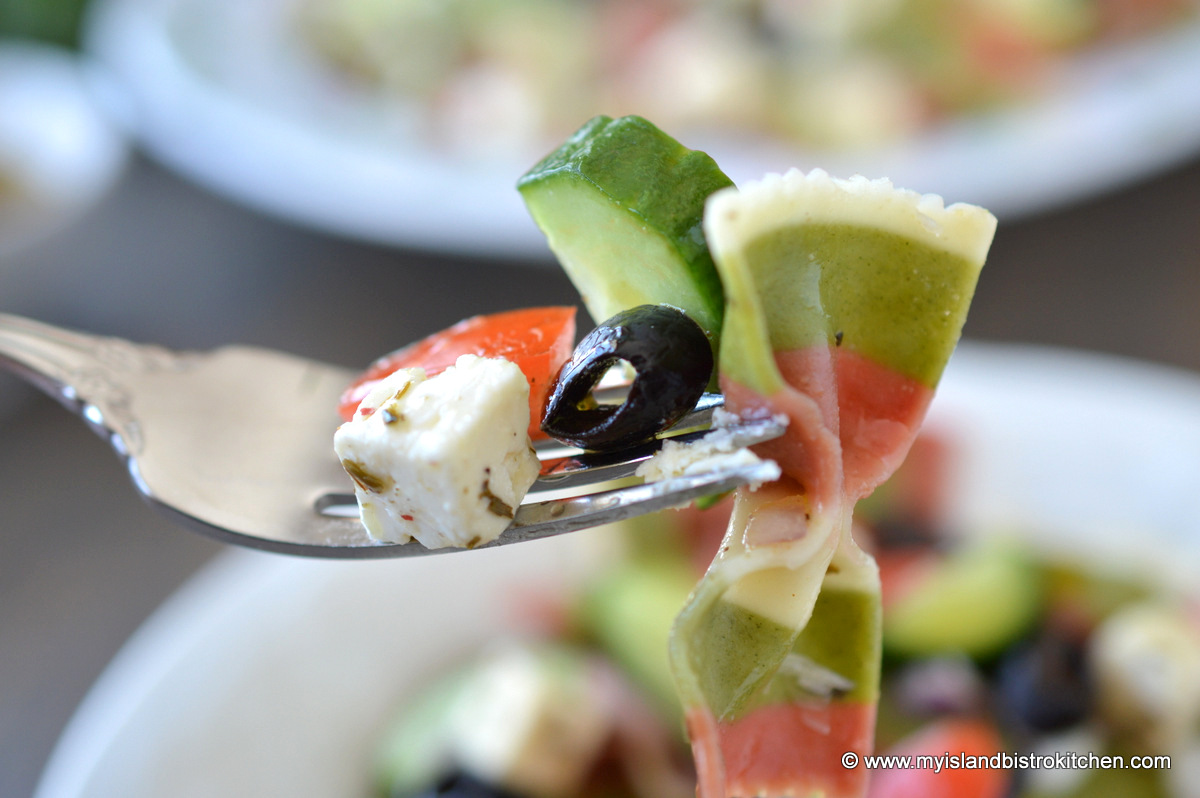
The recipe in which I have chosen to feature tomatoes and cucumbers from the Schurman Family Farm is a colorful pasta salad with herb dressing. While it is always important to use quality fresh ingredients in any recipe, it is doubly important when making salads because this is where the raw veggies star and you really taste their flavour.
I couldn’t have gotten vegetables any more fresh than these that were just picked off the vines in the greenhouse.
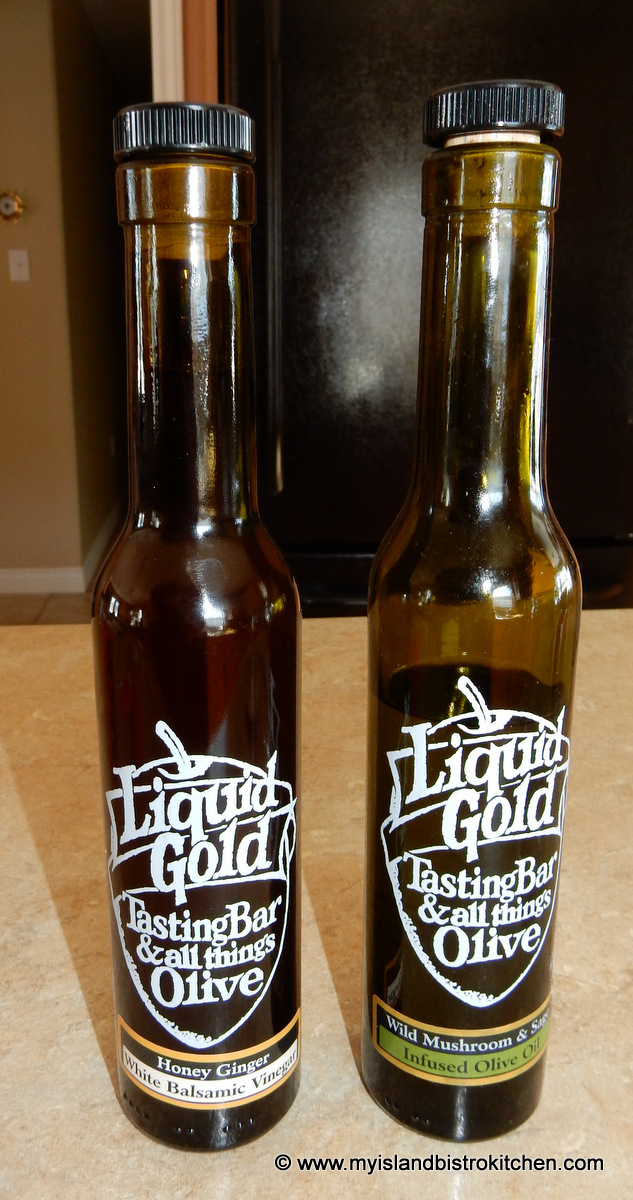
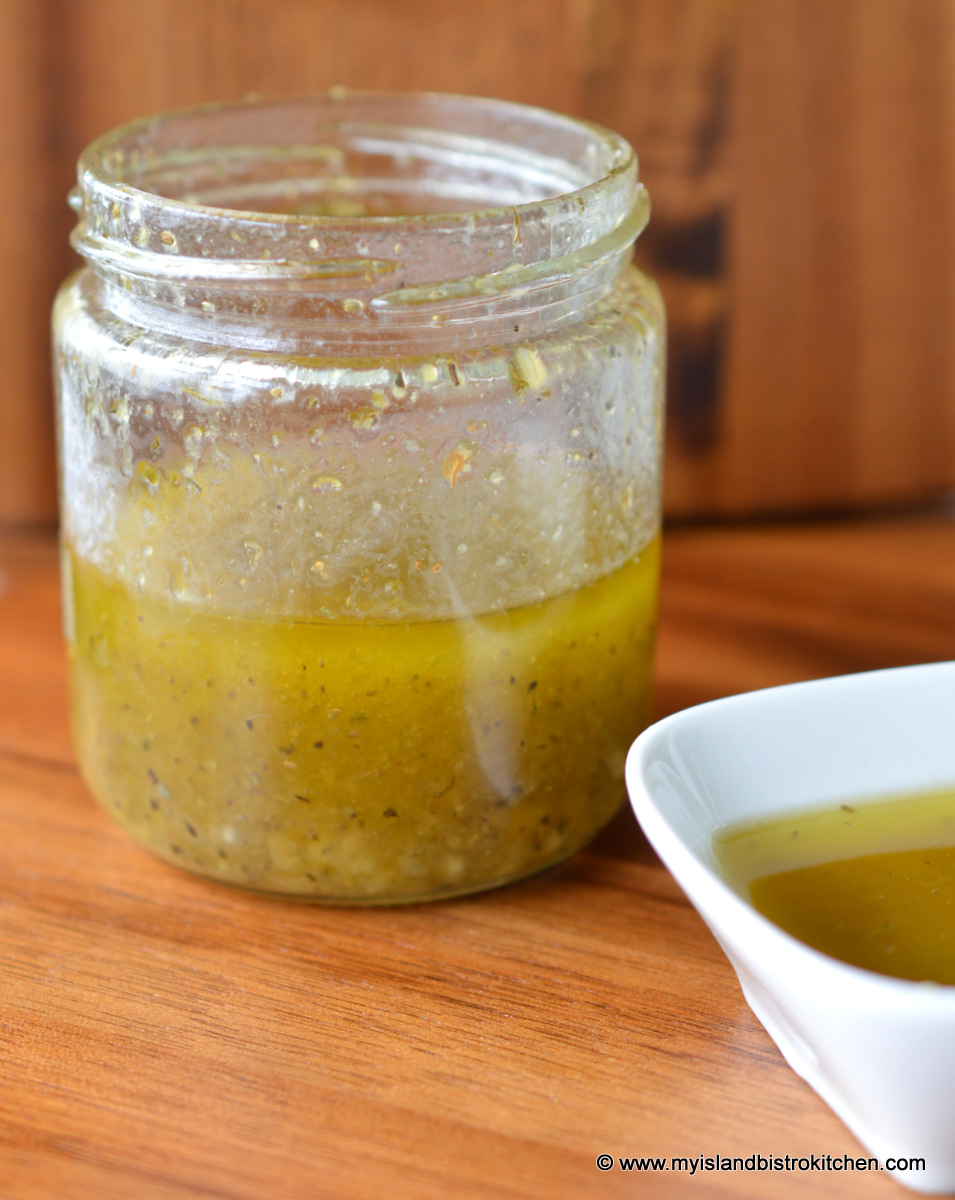
The quality and flavour of olive oil and balsamic vinegar is also important in the salad dressing. For this reason, I have used products from the Liquid Gold and All Things Olive store here in Charlottetown, PEI. You can use any olive oil and balsamic vinegar – either flavored or plain – that you wish; however, it will obviously change the flavour of the dressing. For this recipe, I chose to use the Wild Mushroom and Sage Olive Oil which I paired with a Honey Ginger Balsamic Vinegar.
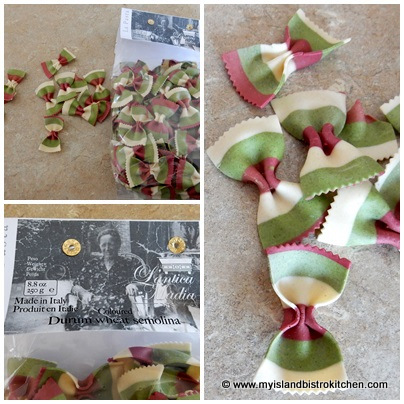
You can use any kind of bow tie pasta for this recipe.
I’ve chosen to use colored Durum wheat semolina from Italy because I love the tri-colored pasta which makes a colorful salad!
Pasta Salad
Ingredients:
8.8 oz (250g) bowtie pasta salt 1½ tsp cooking oil 2 tbsp onion soup mix boiling water
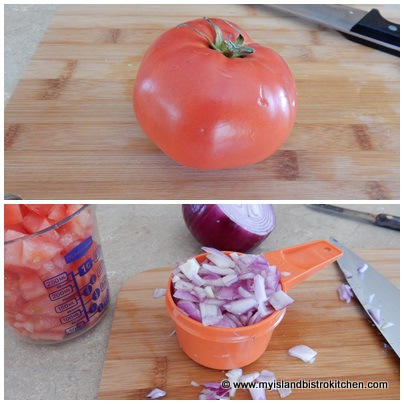
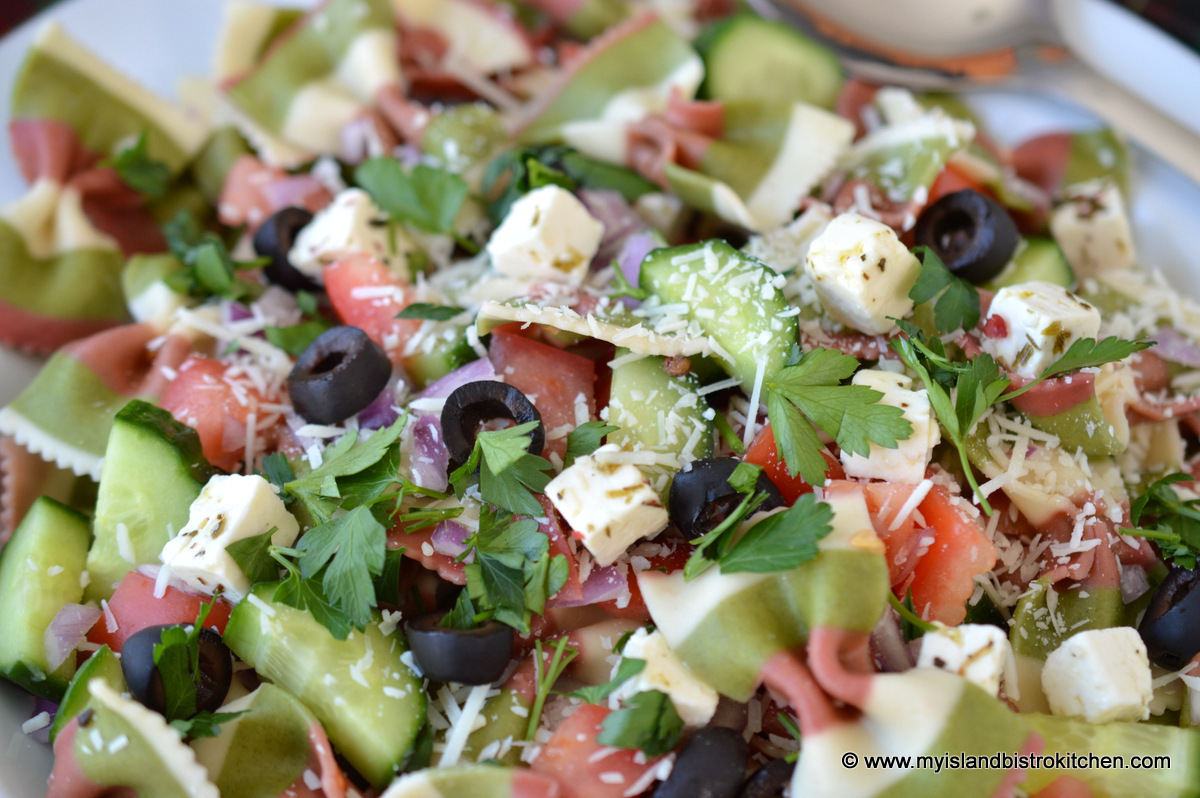
2 cups coarsely chopped English cucumber 1 cup diced tomatoes or halved cherry/grape tomatoes ½ cup chopped red onion 2 tbsp sliced black olives (optional) 3½ oz cubed feta cheese 1½ – 2 tbsp shredded Parmesan, Romano, and Asiago cheese mix Fresh parsley (optional)
Method:
Cook pasta, for length of time and in amount of boiling water and salt indicated on package, adding the oil and onion soup mix to the cooking process. Drain pasta, rinse in cold water, and allow to cool completely.
Cut ends off small cucumber and slice in half, horizontally. Cut cucumber into ¼ inch pieces.
Coarsely chop the tomatoes and red onion.
Place pasta into large bowl and add the cucumber, tomatoes, and onion. Toss to mix, being careful not to tear pasta. Drizzle with just enough dressing to coat all ingredients. Cover and refrigerate for 1-2 hours to allow flavours to mix.
At time of serving, mix in olives and add more dressing if needed/desired. Transfer to serving bowl. Sprinkle with cheeses and fresh parsley.
Dressing
Ingredients:
6 tbsp olive oil 2 tbsp balsamic vinegar 1½ tsp Dijon mustard 1½ tbsp sugar ½ tsp Italian seasoning ½ tsp celery seed Pinch dried dillweed 2 garlic cloves, minced Salt and pepper, to taste
Method:
Mix all ingredients in glass jar. Cover jar tightly with lid and shake jar vigorously to fully mix and incorporate all ingredients. Refrigerate until use. Remove from refrigerator to allow dressing to come to room temperature (5-7 minutes). Shake jar to mix dressing, then drizzle over salad.
Thank you for visiting “the Bistro” today. Connect with “the Bistro” through the following social media:
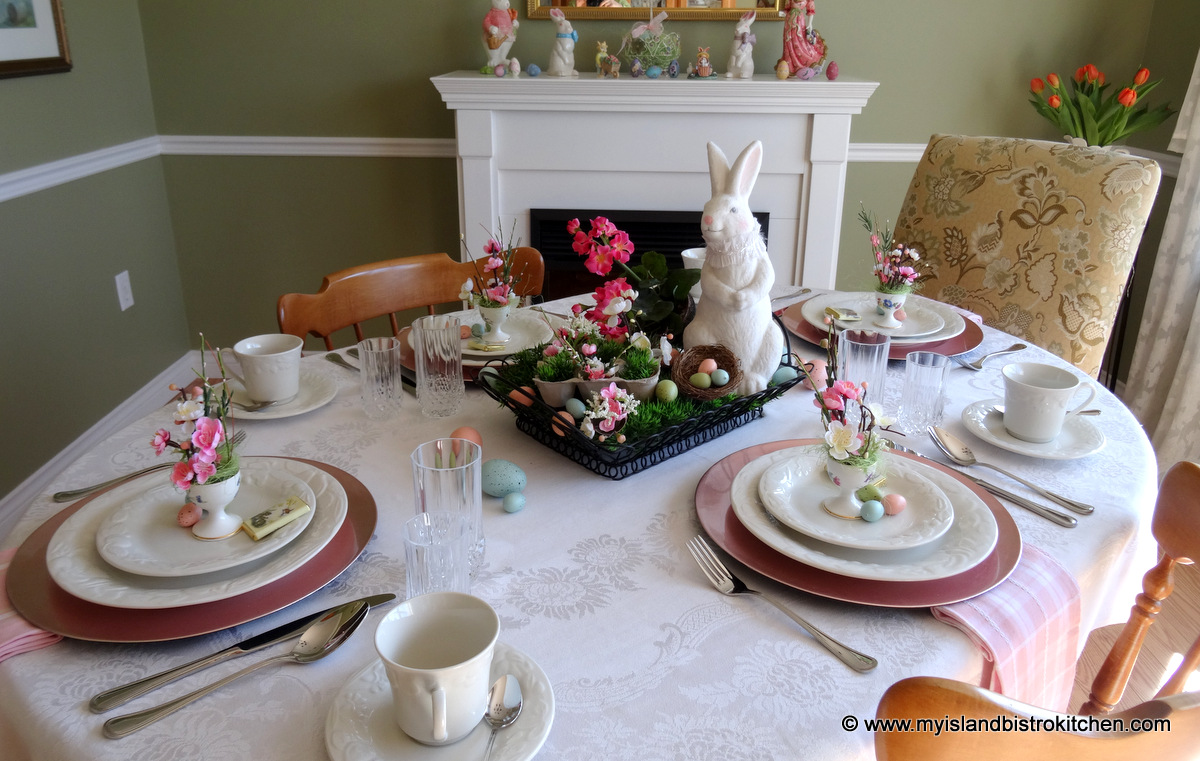
Easter offers so many options for tablescapes and tablesettings. Today, I am sharing a more casual, yet fun, tablescape.
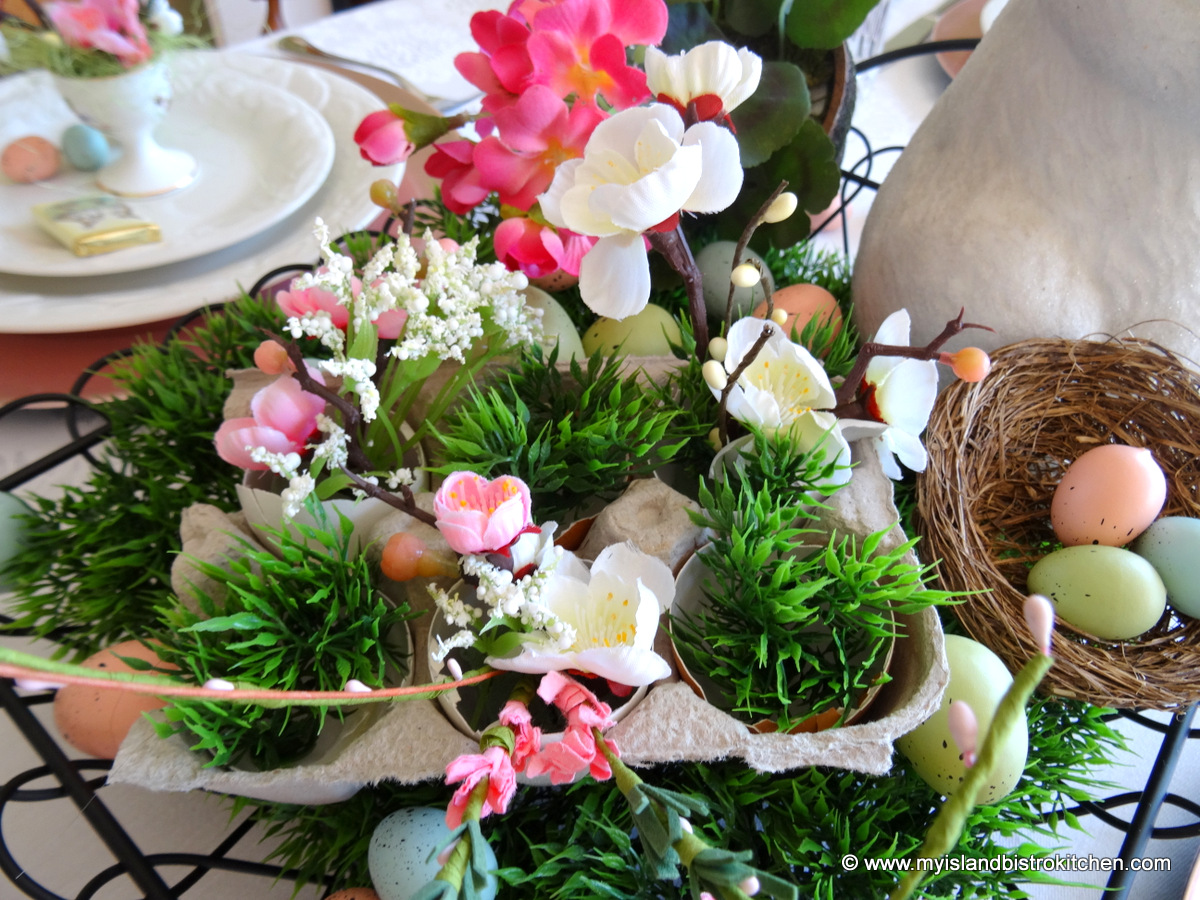
My focus with this tablesetting is the “corralled” tablescape. I have used a wire tray as the base into which I have clustered the elements of the table centerpiece. Corralling keeps the elements tidy and together instead of having them spread out over the table.
This is an ideal option if you plan to bring, during the meal, a platter of roast turkey or ham, for example, to be carved at the table. It is easy to lift off the basket or tray with the centerpiece on it and replace it with the meat platter. The centerpiece can then easily be returned to the table for the dessert course so the table is never without a focal centerpiece during the meal.
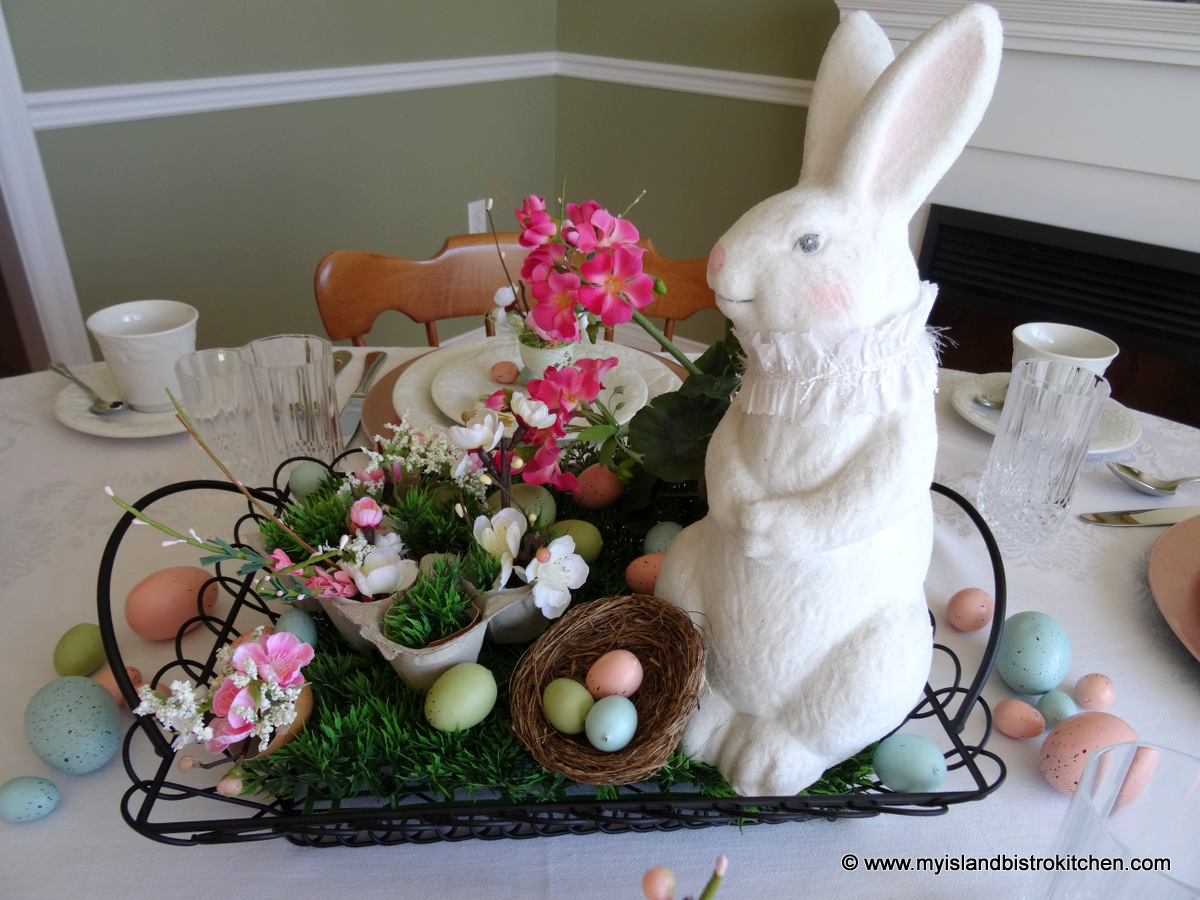
I have simply used some faux grass in the bottom of the tray and added a substantial-sized bunny to give the centerpiece prominence and height. Then, I filled in the rest of the basket with a small bright pink geranium, a tiny bird’s nest, some Easter eggs, and some egg shells filled with tiny flowers and faux grass. A piece of egg carton provides a nesting spot for the egg shells.
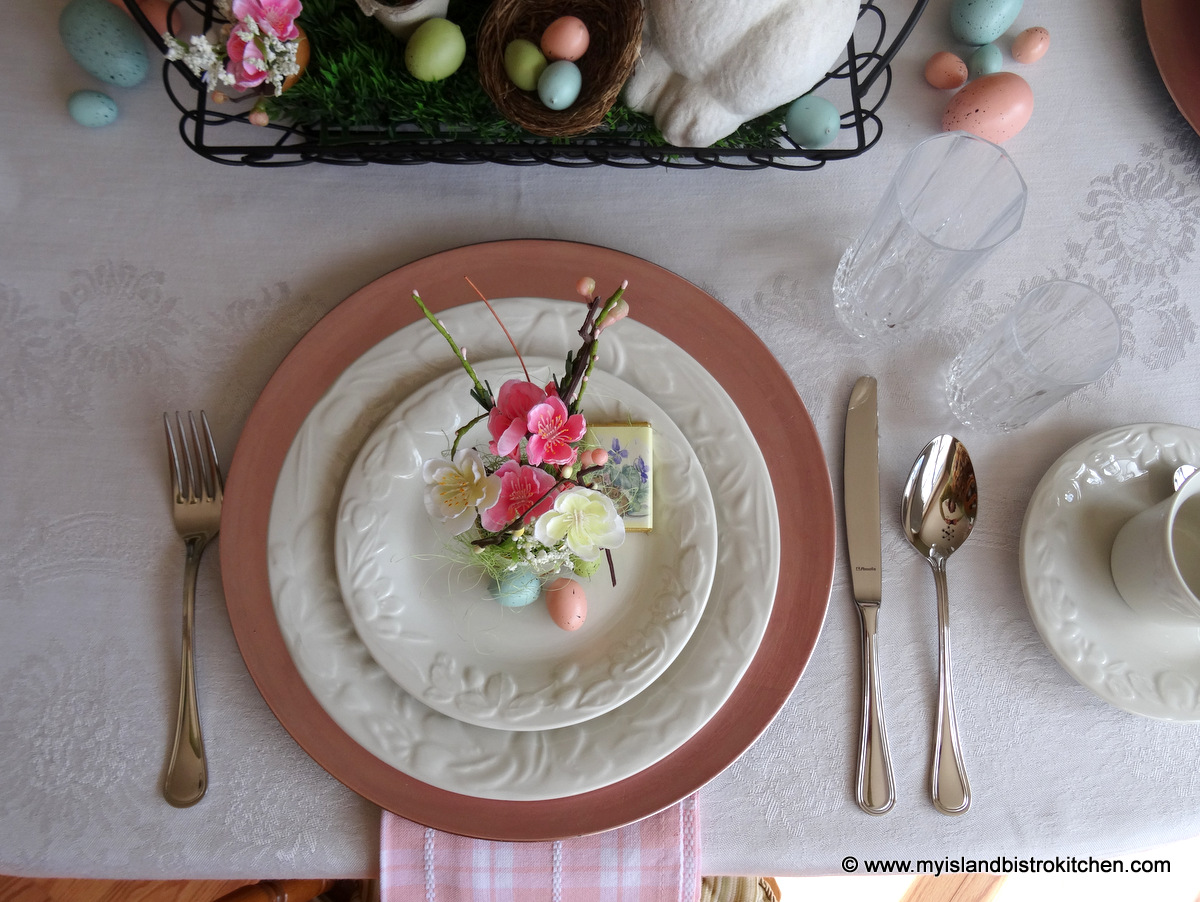
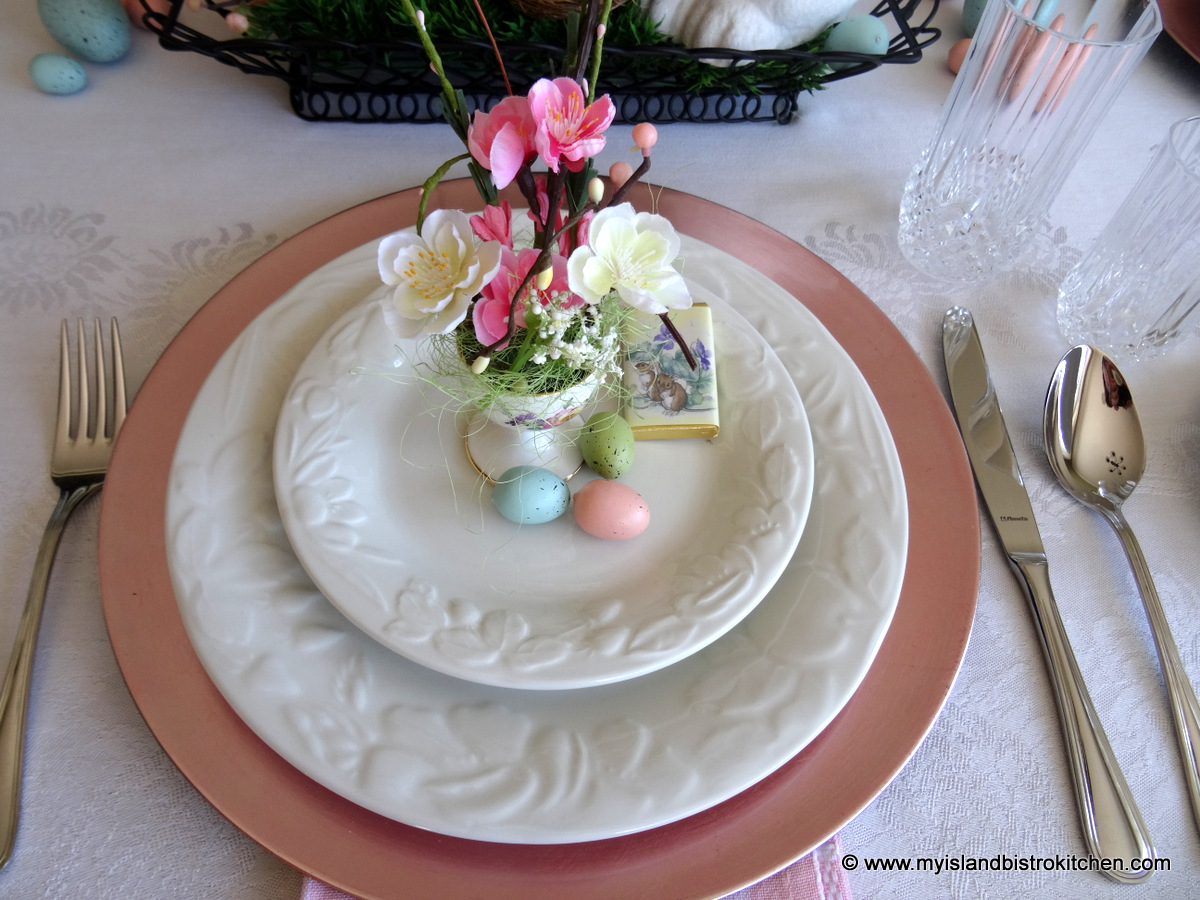
It is not necessary to have fine china to set an attractive table. This table is set for Easter brunch so I have used everyday stoneware and, instead of formal napkins, have opted to use pastel-colored tea towels that match the color scheme of the centerpiece. Tucked underneath the charger plates, the tea towels take up no room on the table and do not compete with the tablescape or place settings.
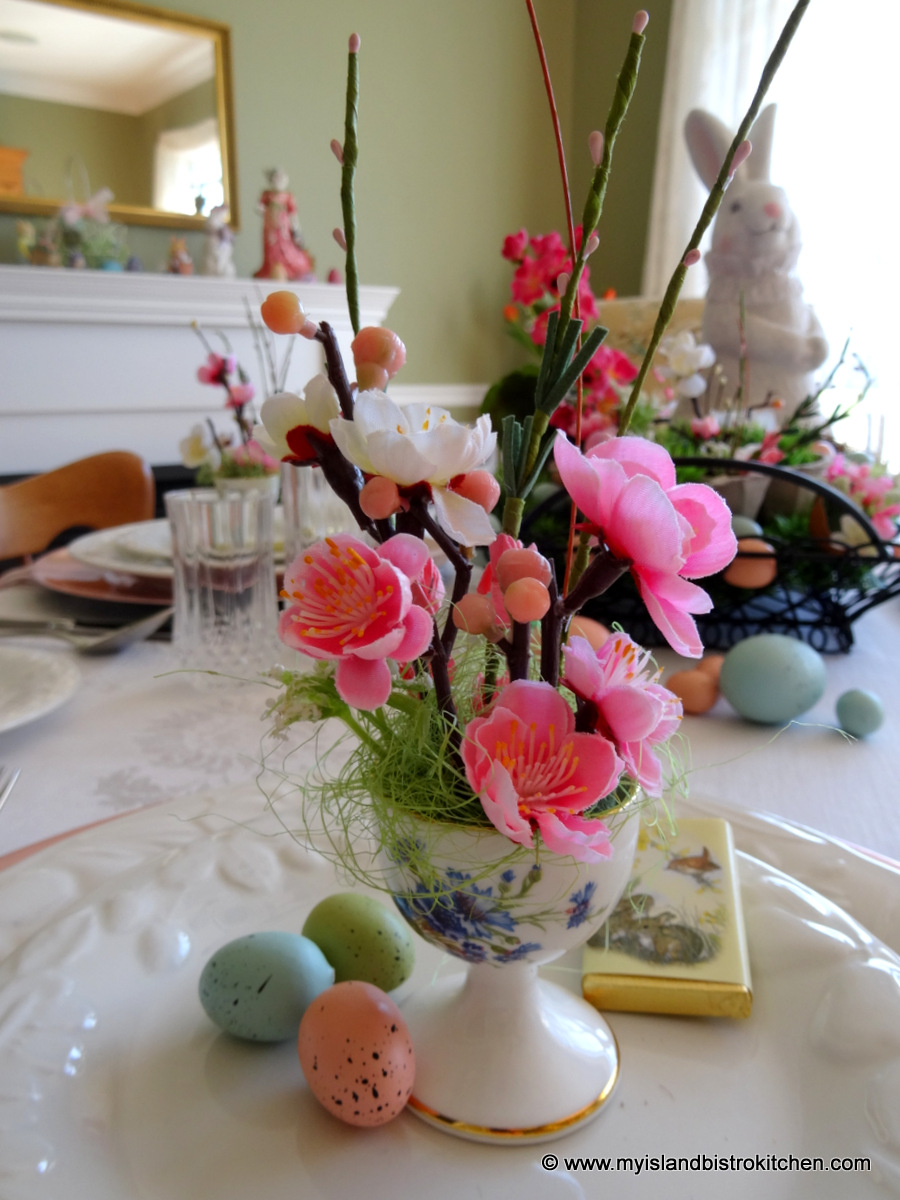
I have dressed up each place setting with an egg cup filled with tiny flowers that connect each place setting to the centerpiece.
A few tiny Easter eggs and a small chocolate bar complete the place setting.
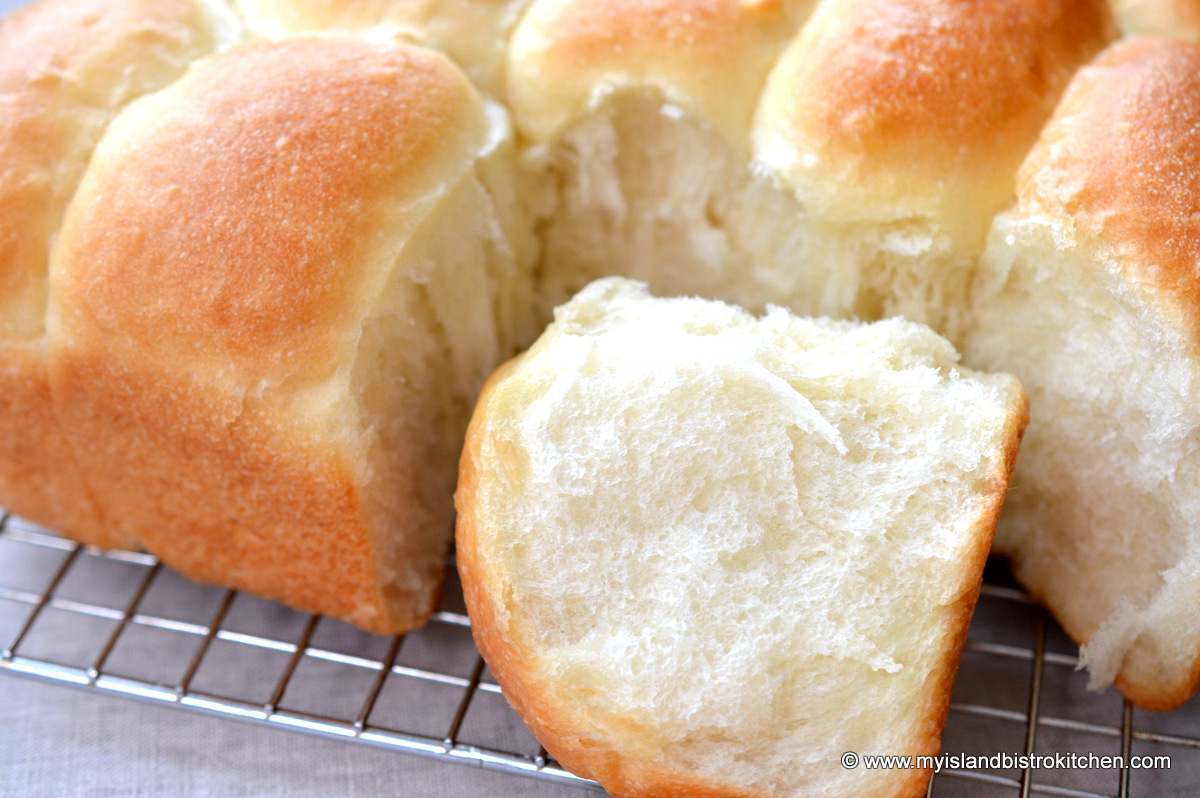
There is something so homey and cozy about homemade bread and rolls! And, of course, the scent throughout the house of them baking makes the taste buds jump in anticipation of a hot roll, or slice of bread, fresh from the oven and slathered in melting butter. Continue reading Pan Rolls→
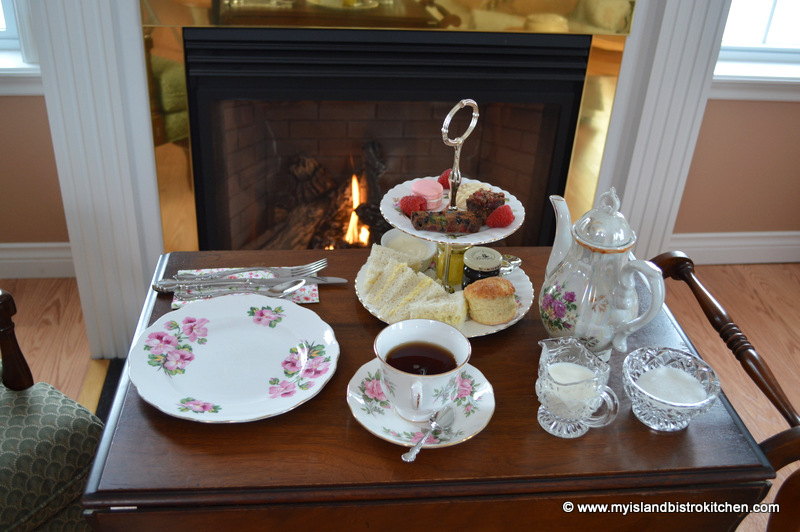
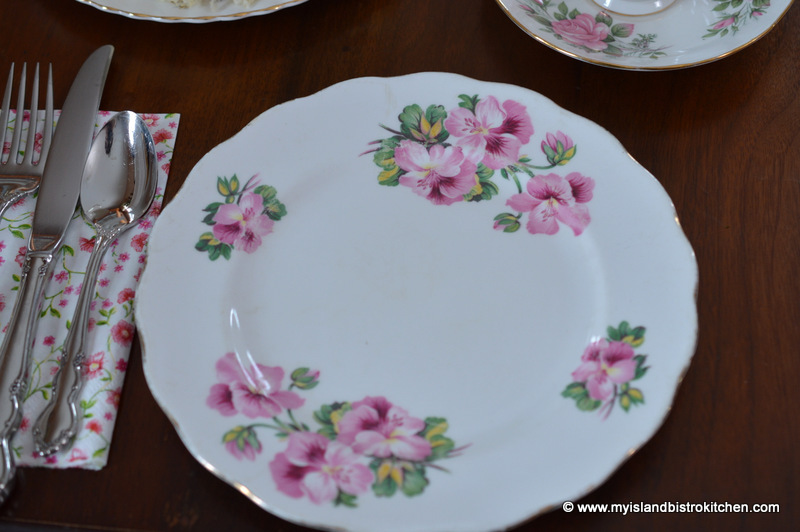
Sometimes, amidst the hustle and bustle of everyday life, it’s nice to simply curl up by the fire with a good book and a fine cup of tea. But why stop at a cup of tea when you can while away the afternoon with tasty fare served up in style. So, when you have no one else to please but yourself, you can still pamper yourself and enjoy a fine afternoon tea.
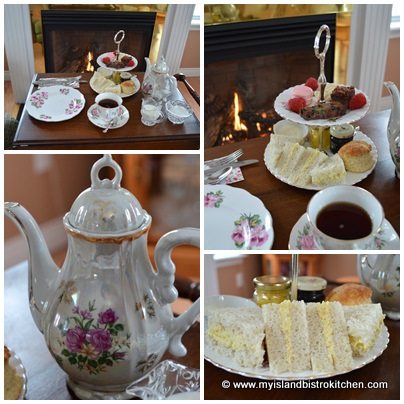
Curious about what’s on the tea table today? Let’s have a look-see what’s on the two-tier server. Anyone who knows me really well knows I love my tiered servers!
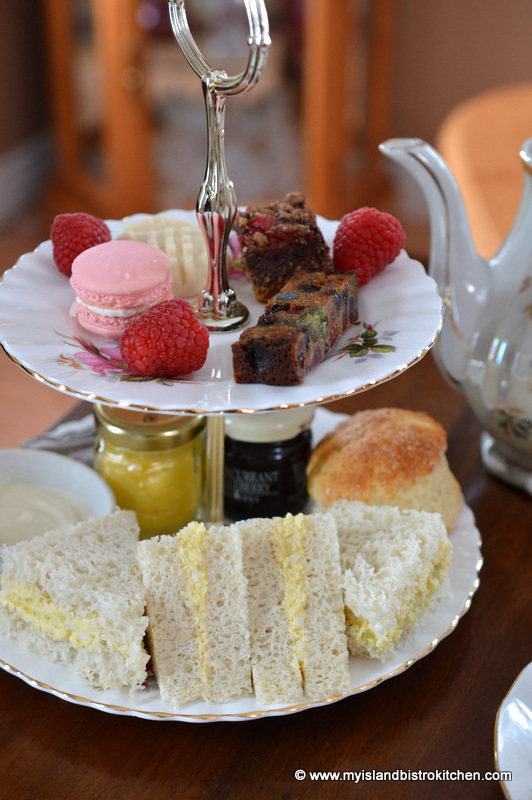
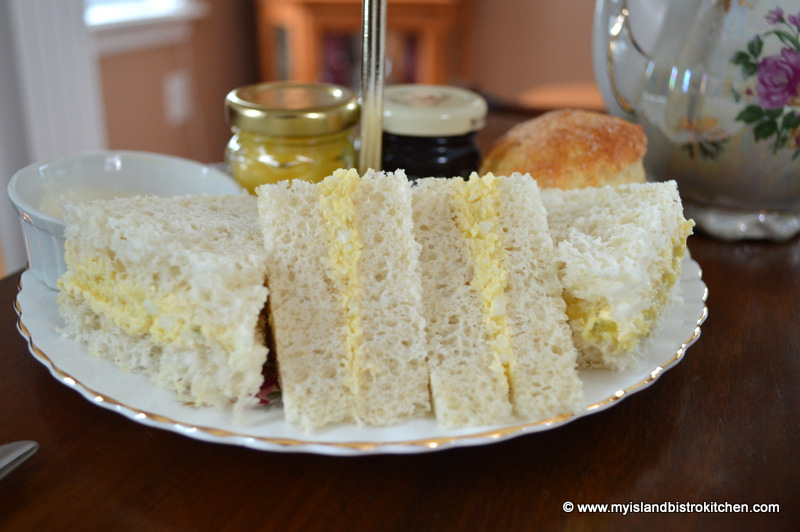
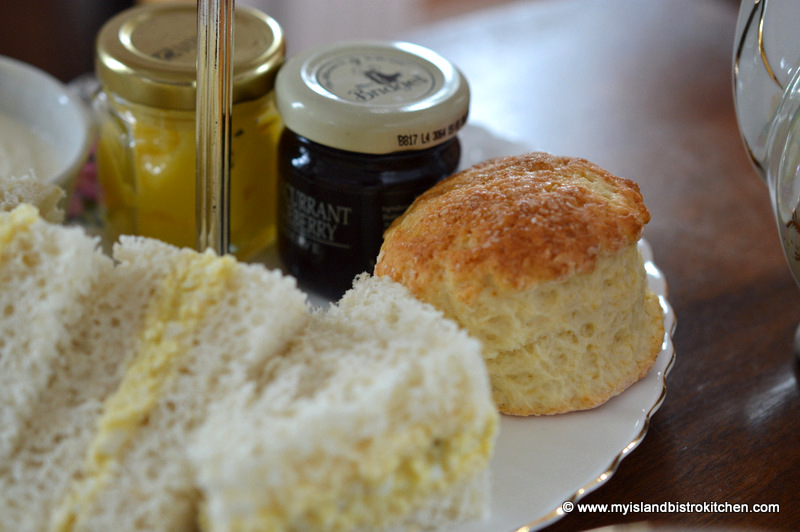
Let’s start with the sandwiches. Today’s offering is a simple egg salad sandwich, nice and easy to prepare, but ever so tasty!
Today I am serving a traditional scone with clotted cream, blackcurrant and blueberry jam, and my own lemon curd.
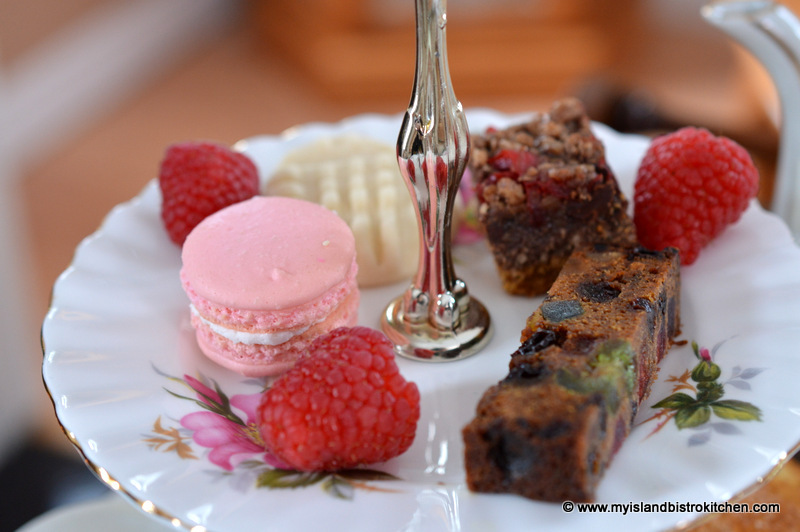
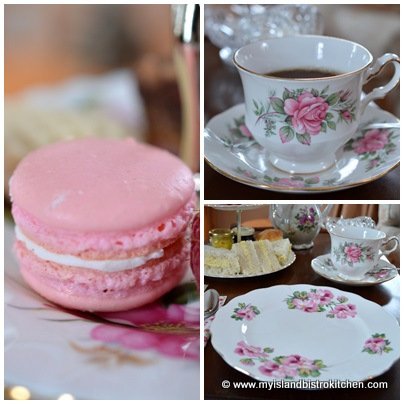
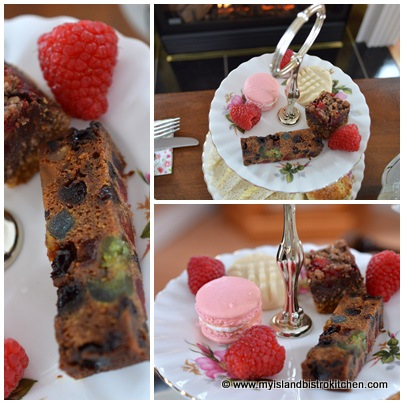
On the sweet plate, a selection of treats that include a macaron, melting moment cookie, Hello Dolly square, fruitcake, and some fresh raspberries. Are you drooling yet?
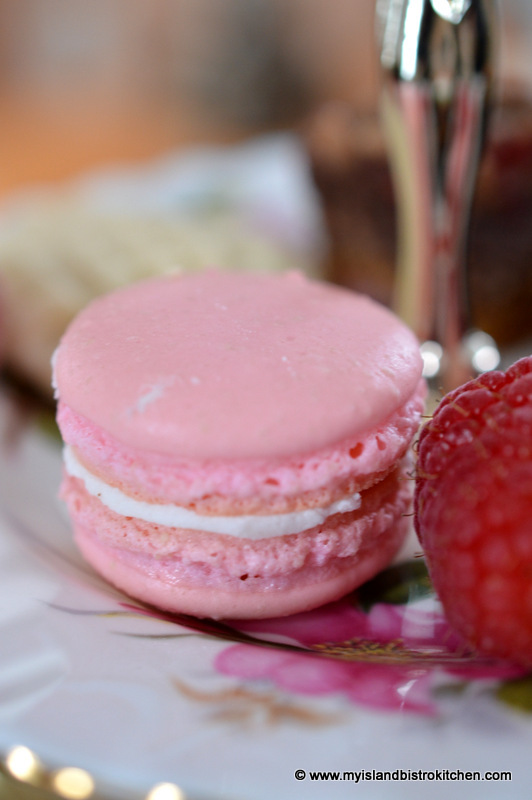
The macaron is filled with just a wee bit of buttercream icing.
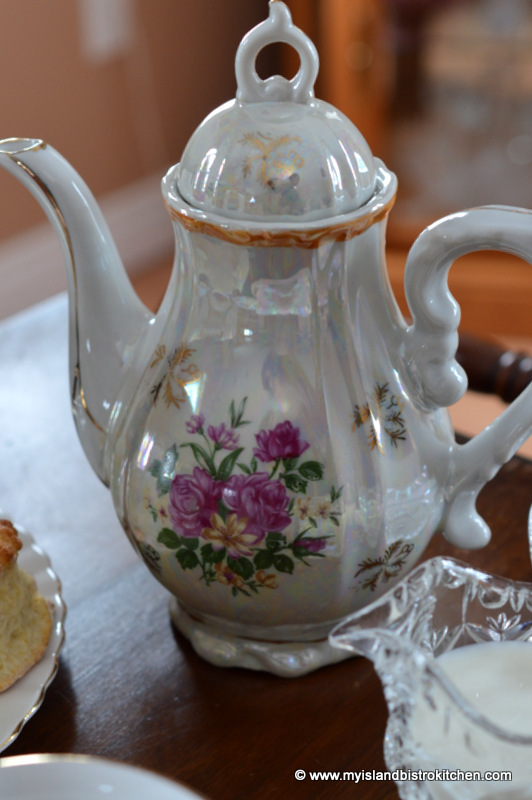
This personal-sized teapot was a thrift shop find several years ago. It holds just two cups of tea, perfect for one person.
Today’s tea is Stash’s Decaf English Breakfast, one of my all-time favorites.
While they are not a matched set, these tea plates work with the cup and saucer. Sometimes, mismatched china actually adds charm and character to a tea setting.
I love the blending of the pink shades! It’s very girly!
Thanks for dropping in for a spot of tea. Enjoy your week!
————————–
Thank you for visiting “the Bistro” today. There are lots of ways to connect with “the Bistro” through social media:
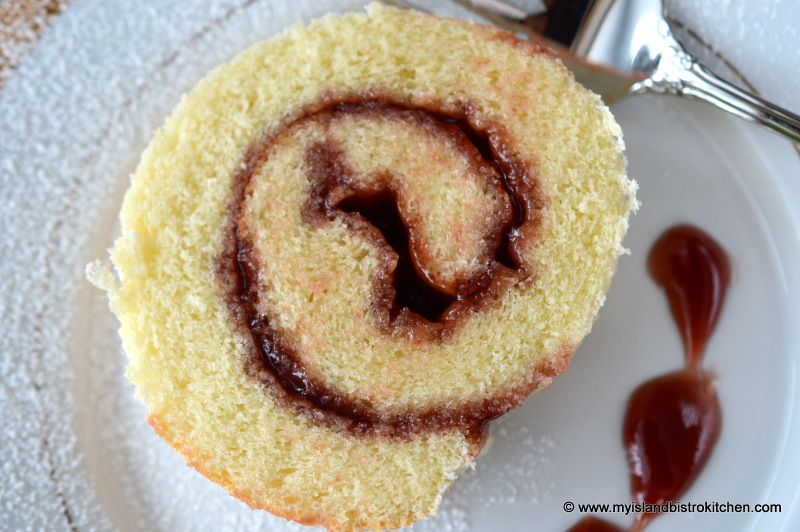
I grew up with jelly rolls being regularly made in my home. They’re a quick dessert, best eaten on the day they are made. This is because a jelly roll is really a sponge-type cake and, when the jam or jelly is spread on it, it tends to seep into the cake and after several hours can become somewhat soggy. Jelly rolls don’t take a lot of ingredients. So long as you have basic baking supplies and some jam or jelly, you can make a jelly roll.
Here are my tips for making jelly rolls:
1. Use cake and pastry flour as it gives a finer texture than all-purpose flour.
2. Don’t let the cake cool for too long before spreading it with jam or jelly as it may crack as you try to roll the jelly roll up. About 15-20 minutes cooling time is about right. If you put the jam or jelly on the cake when it is still too warm, though, it will cause it to seep into the cake too quickly, creating a soggy jelly roll.
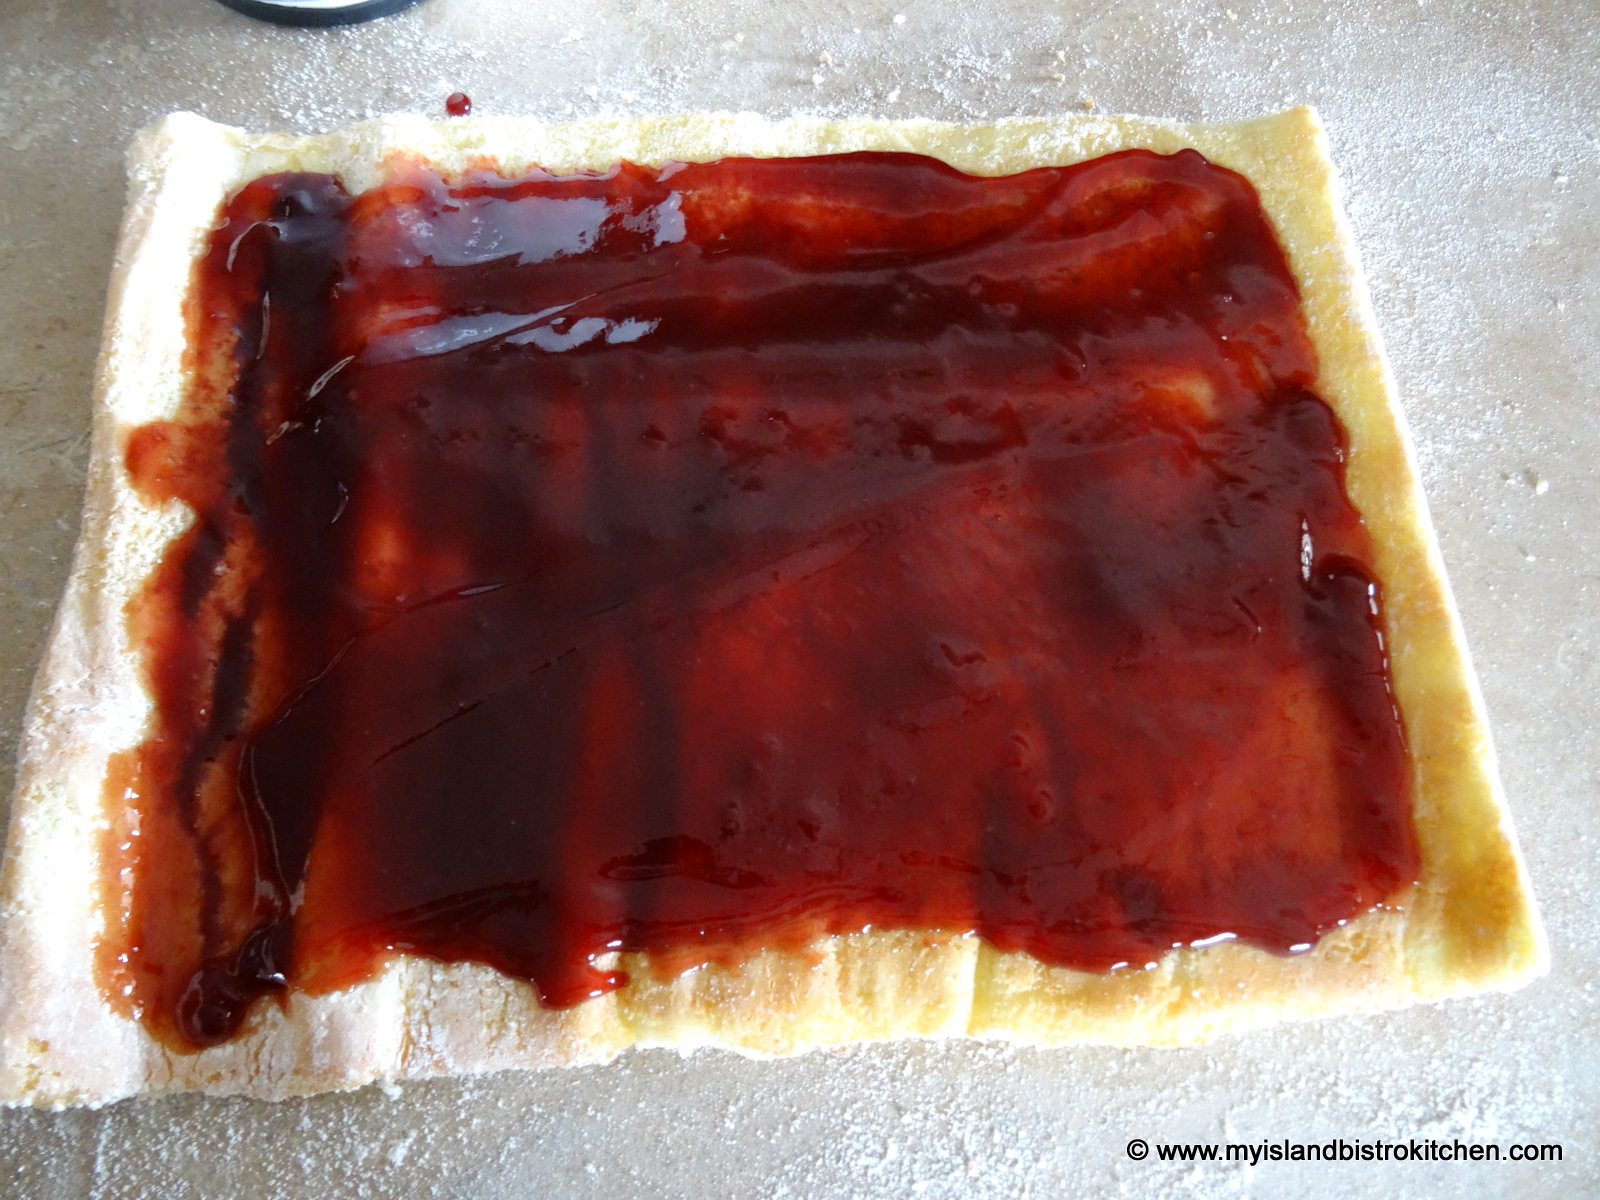
3. Use a good quality jam or jelly. If using jam, choose one that does not have big chunks of fruit in it; otherwise, it will make it more difficult to slice and plate presentation will not be optimal. I prefer colorful red jams and ones that are seedless – for example, seedless raspberry jam.
4. The jelly roll may be dusted with either granulated sugar or icing sugar. However, icing sugar stands up better than granulated sugar which tends to dissolve into the cake more quickly.
Jelly Roll
Ingredients:
1 cup + 3 tbsp cake and pastry flour 1¼ tsp baking powder ¼ tsp salt
4 large eggs 1 cup sugar 1 tsp vanilla ¼ tsp almond flavouring 2 tbsp cold water
¾ – 1 cup jam or jelly Icing sugar for dusting
Method:
Preheat oven to 400°F.
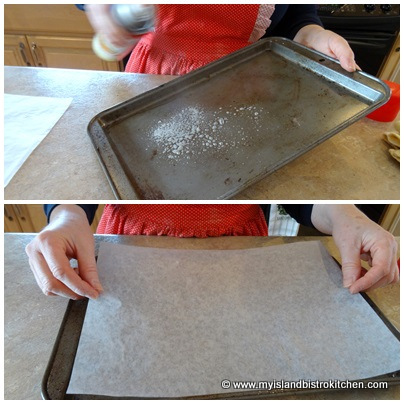
Grease, or spray cooking oil on 10”x15” rimmed baking sheet, ensuring sides are well-greased. Line bottom of pan with parchment paper. Lightly spray parchment paper with cooking oil.
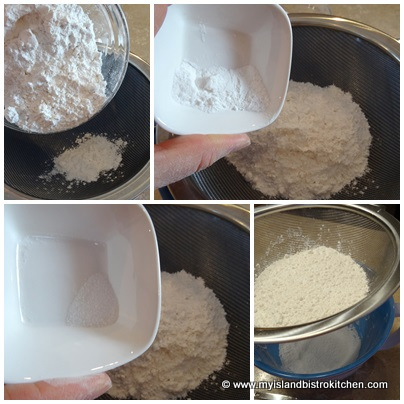
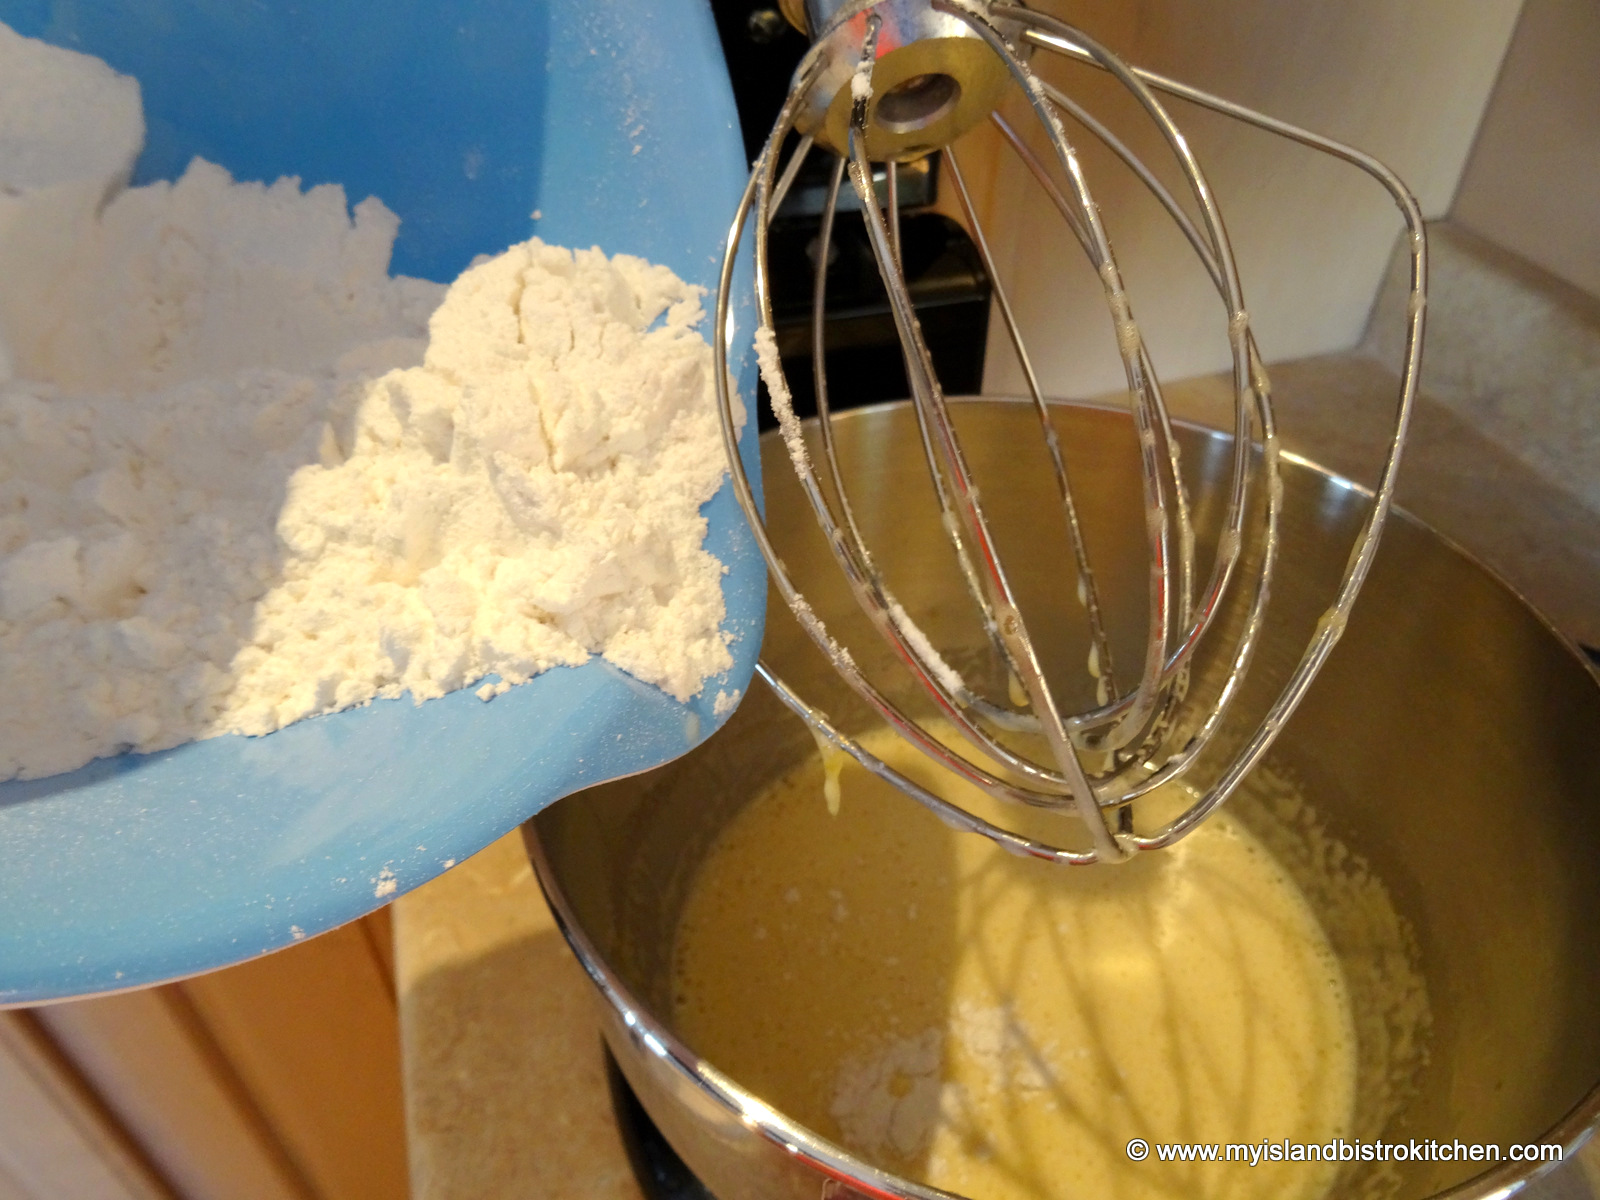
Sift flour, baking powder, and salt together. Set aside.
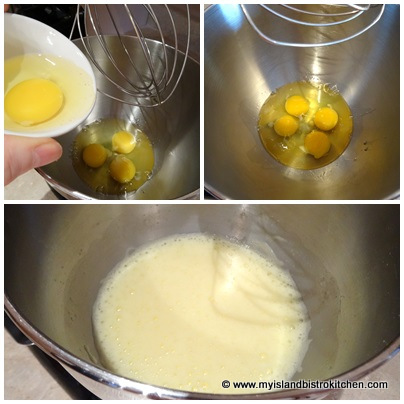
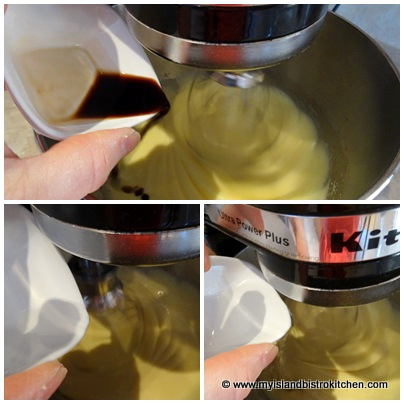
Beat eggs until frothy.
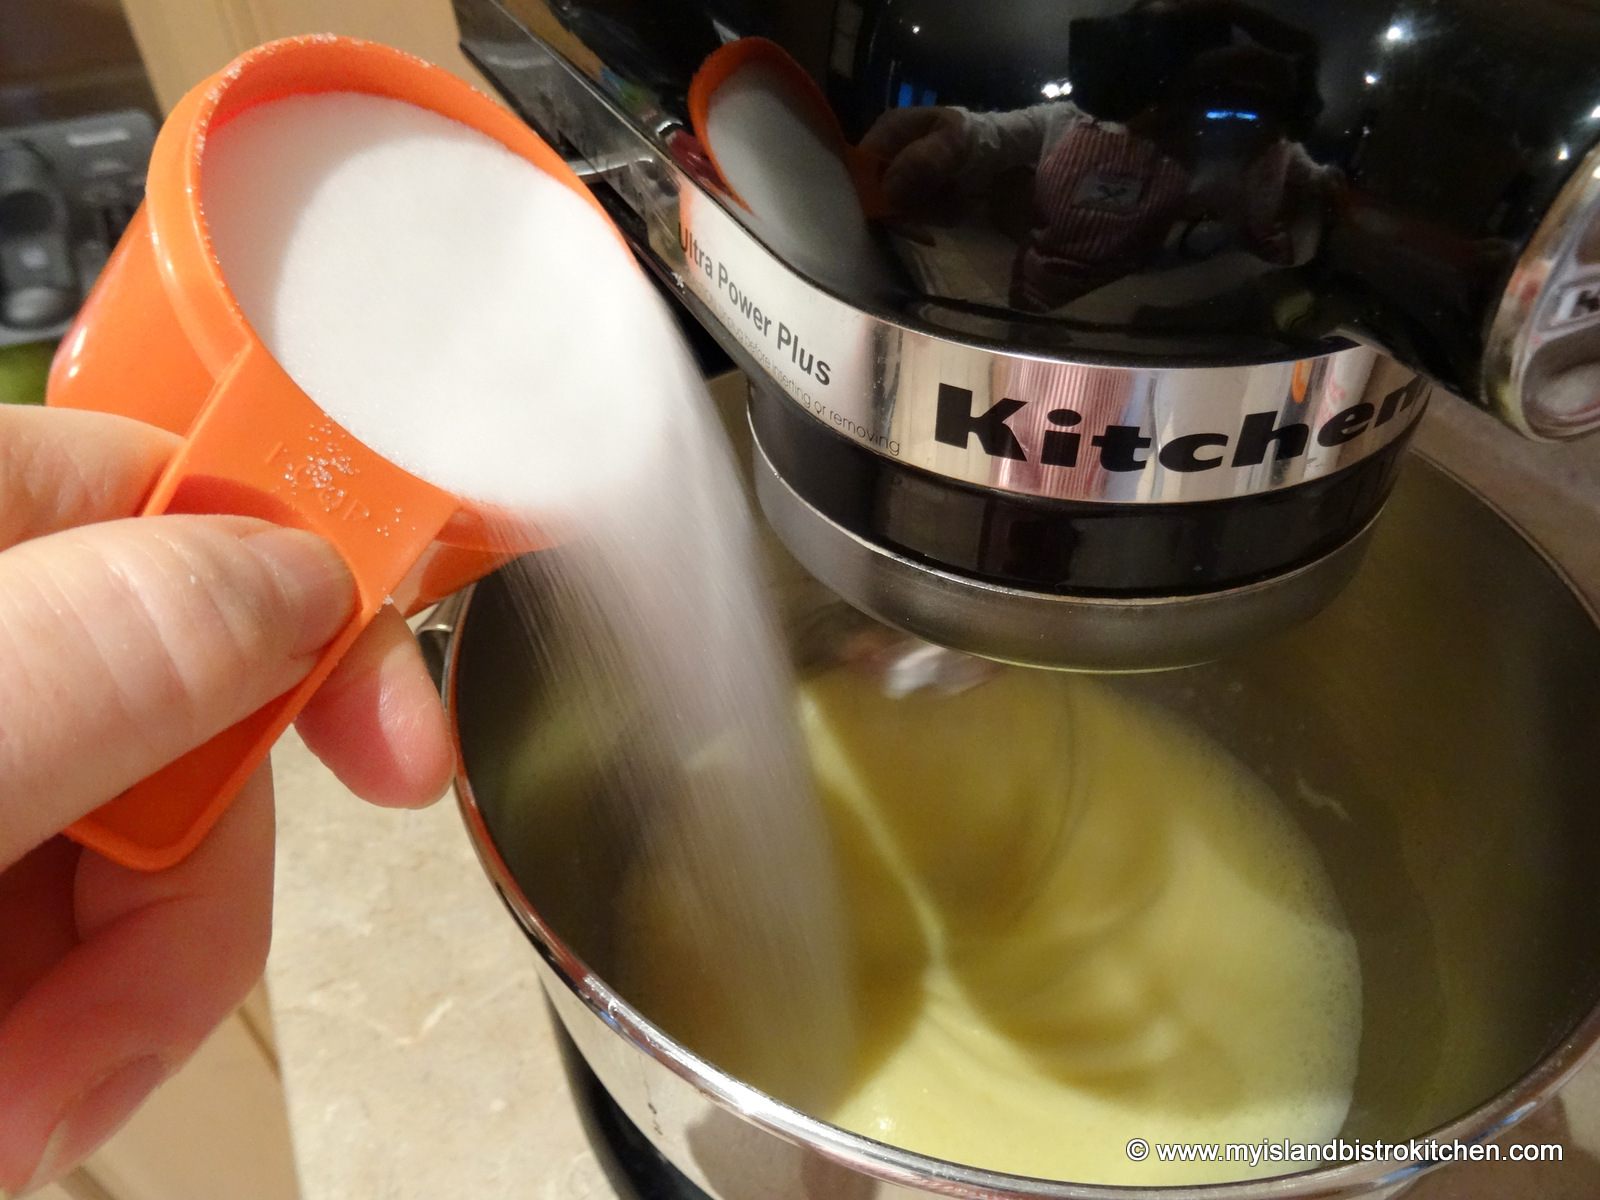
Slowly and steadily add the sugar and beat until light-colored and slightly thickened.
Beat in vanilla, almond flavouring, and water.
Add the sifted dry ingredients to the egg-sugar mixture. Stir just until incorporated.
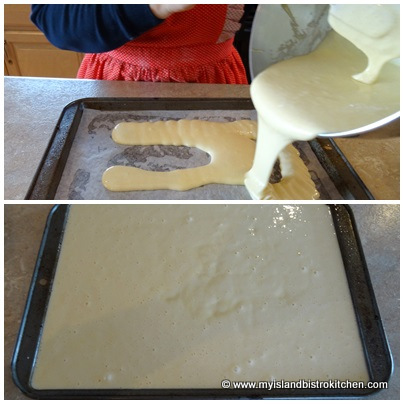
Pour batter into prepared pan.
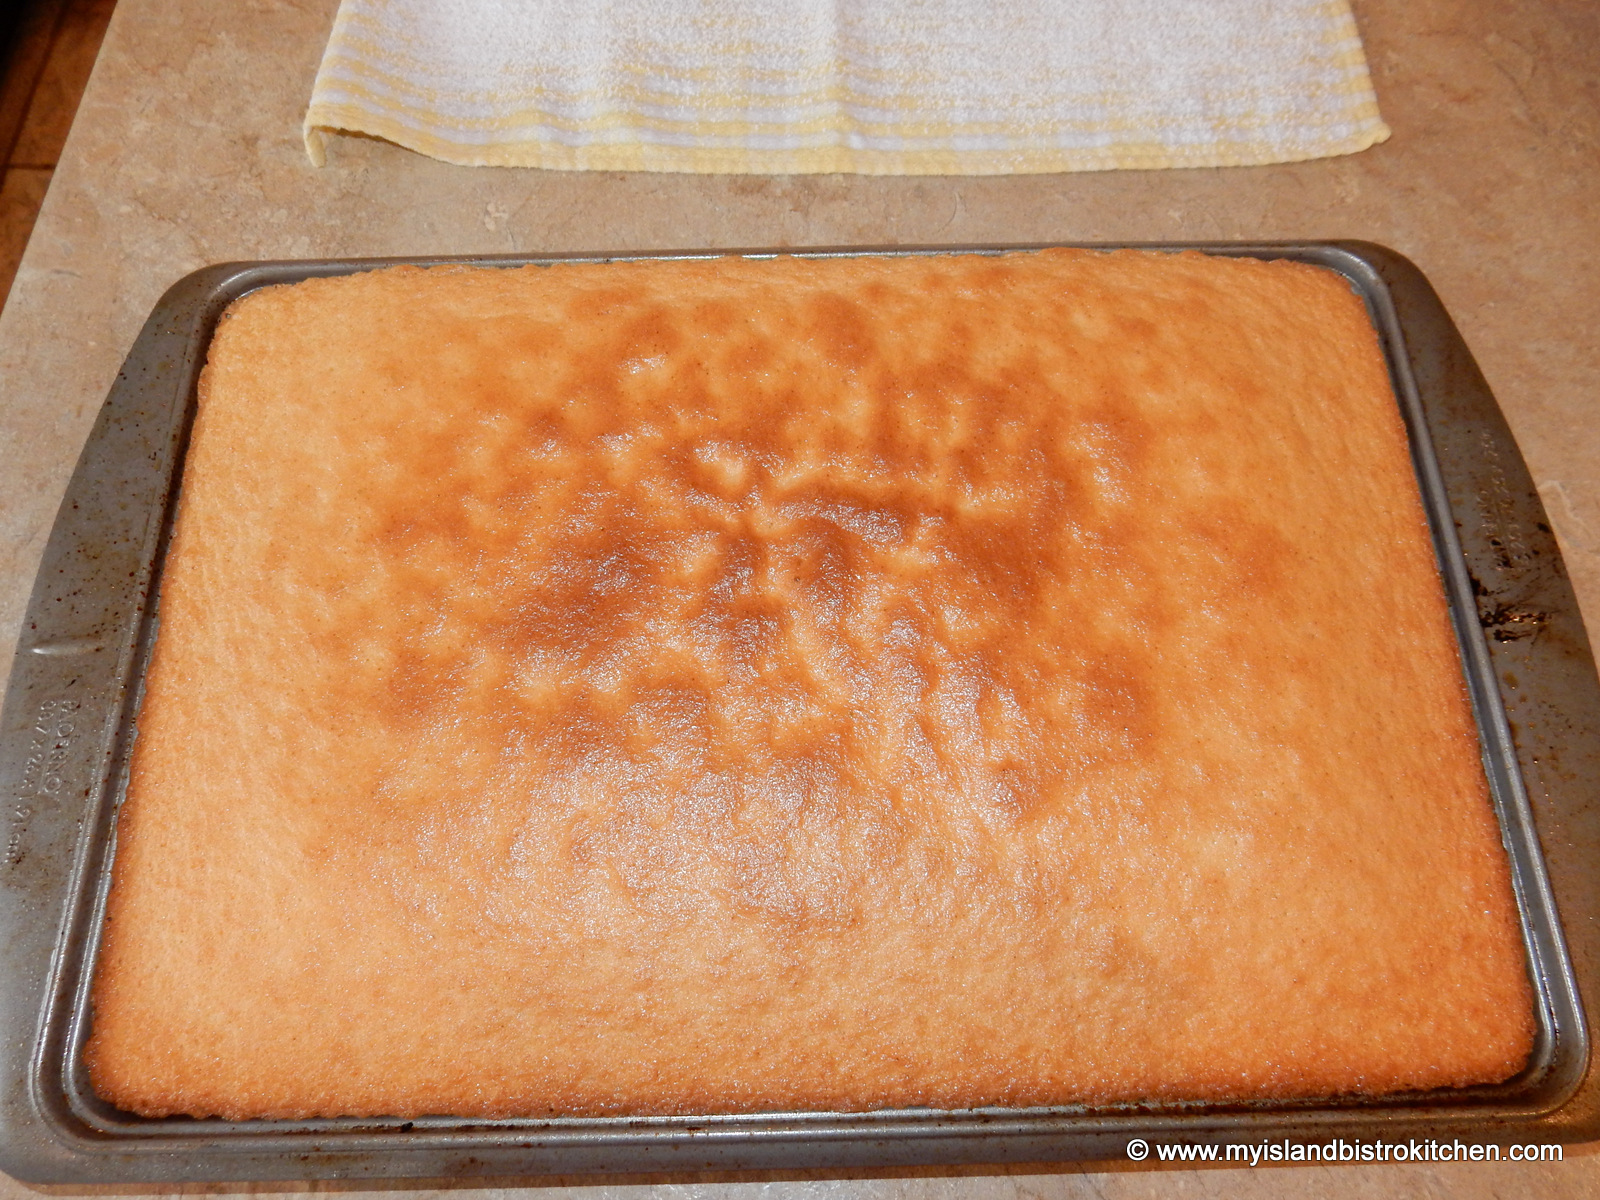
Bake 9-12 minutes or until cake tester inserted into cake comes out clean and cake springs back to a light touch. Do not overbake.
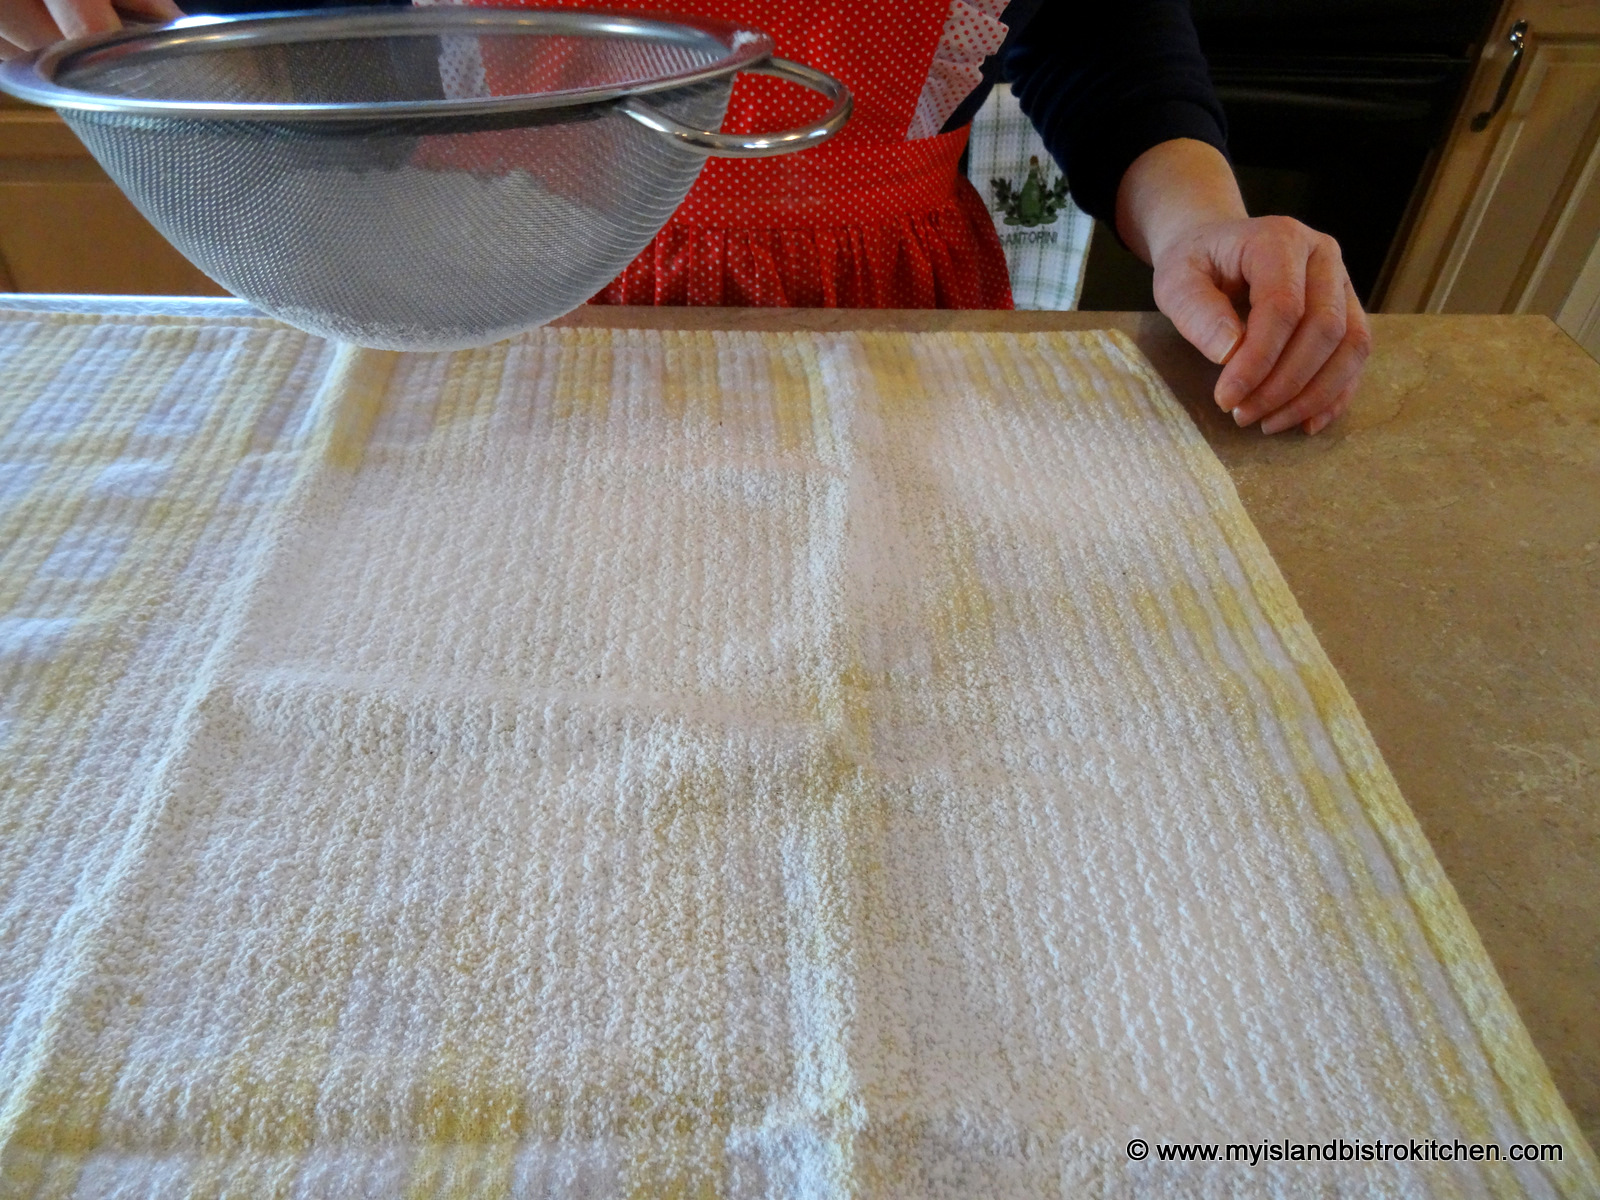
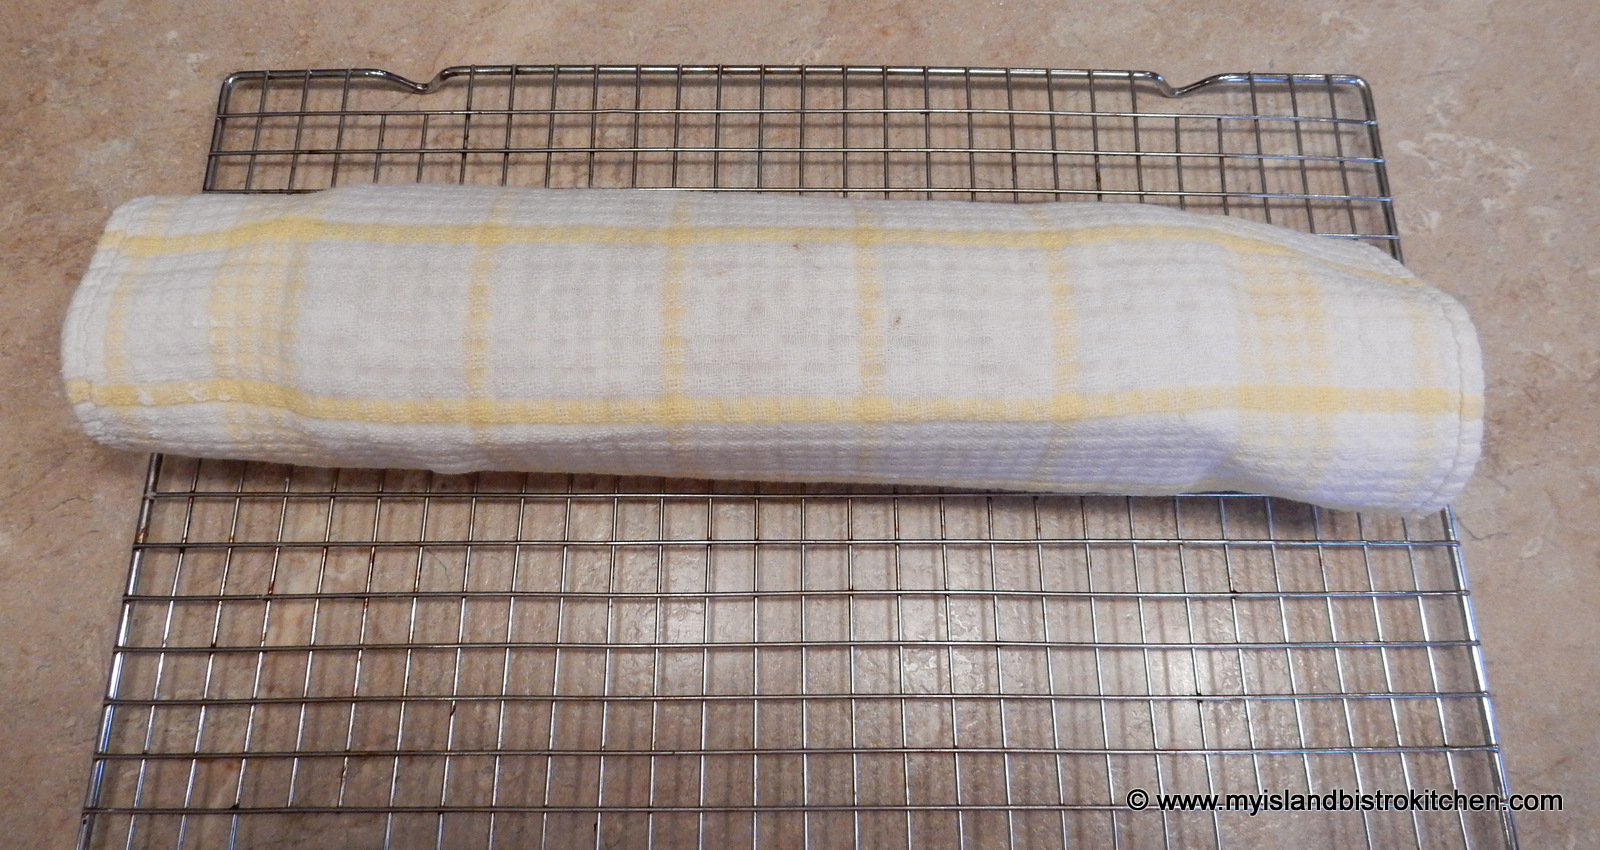
While cake is baking, lay a clean tea towel on counter and generously sprinkle with sifted icing sugar.
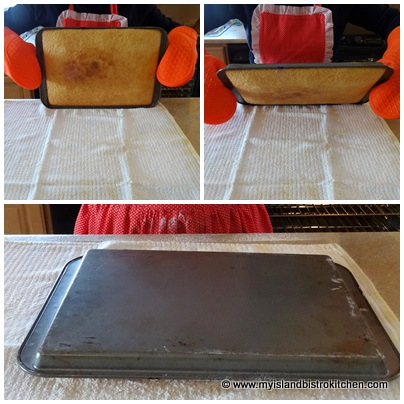
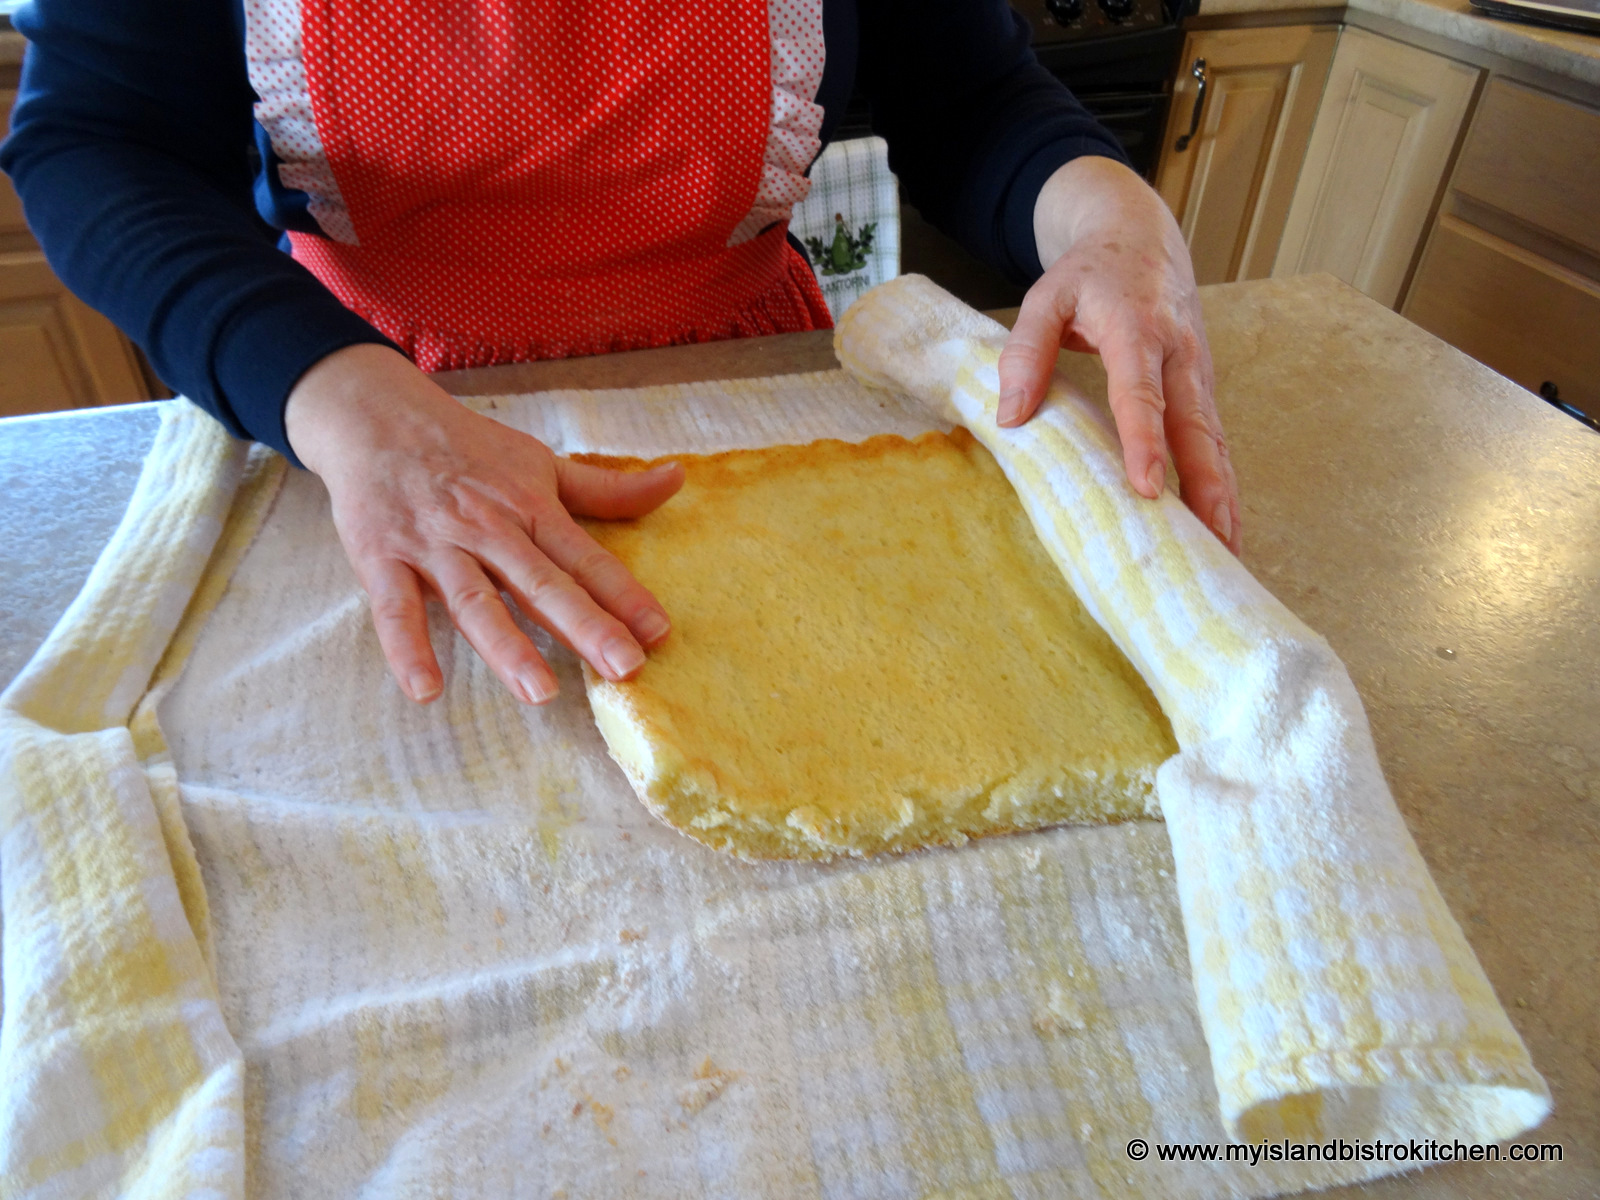
Remove cake from oven and run knife around all four edges to loosen cake from pan sides. Invert baked cake on sugar-dusted tea towel.
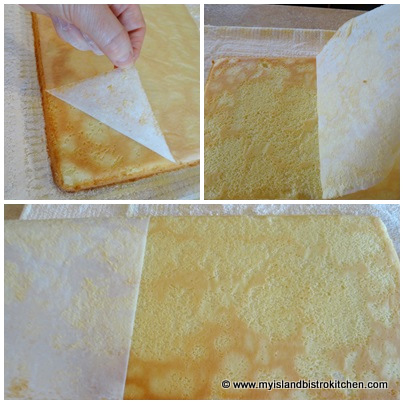
Peel off parchment paper, being careful not to tear cake.
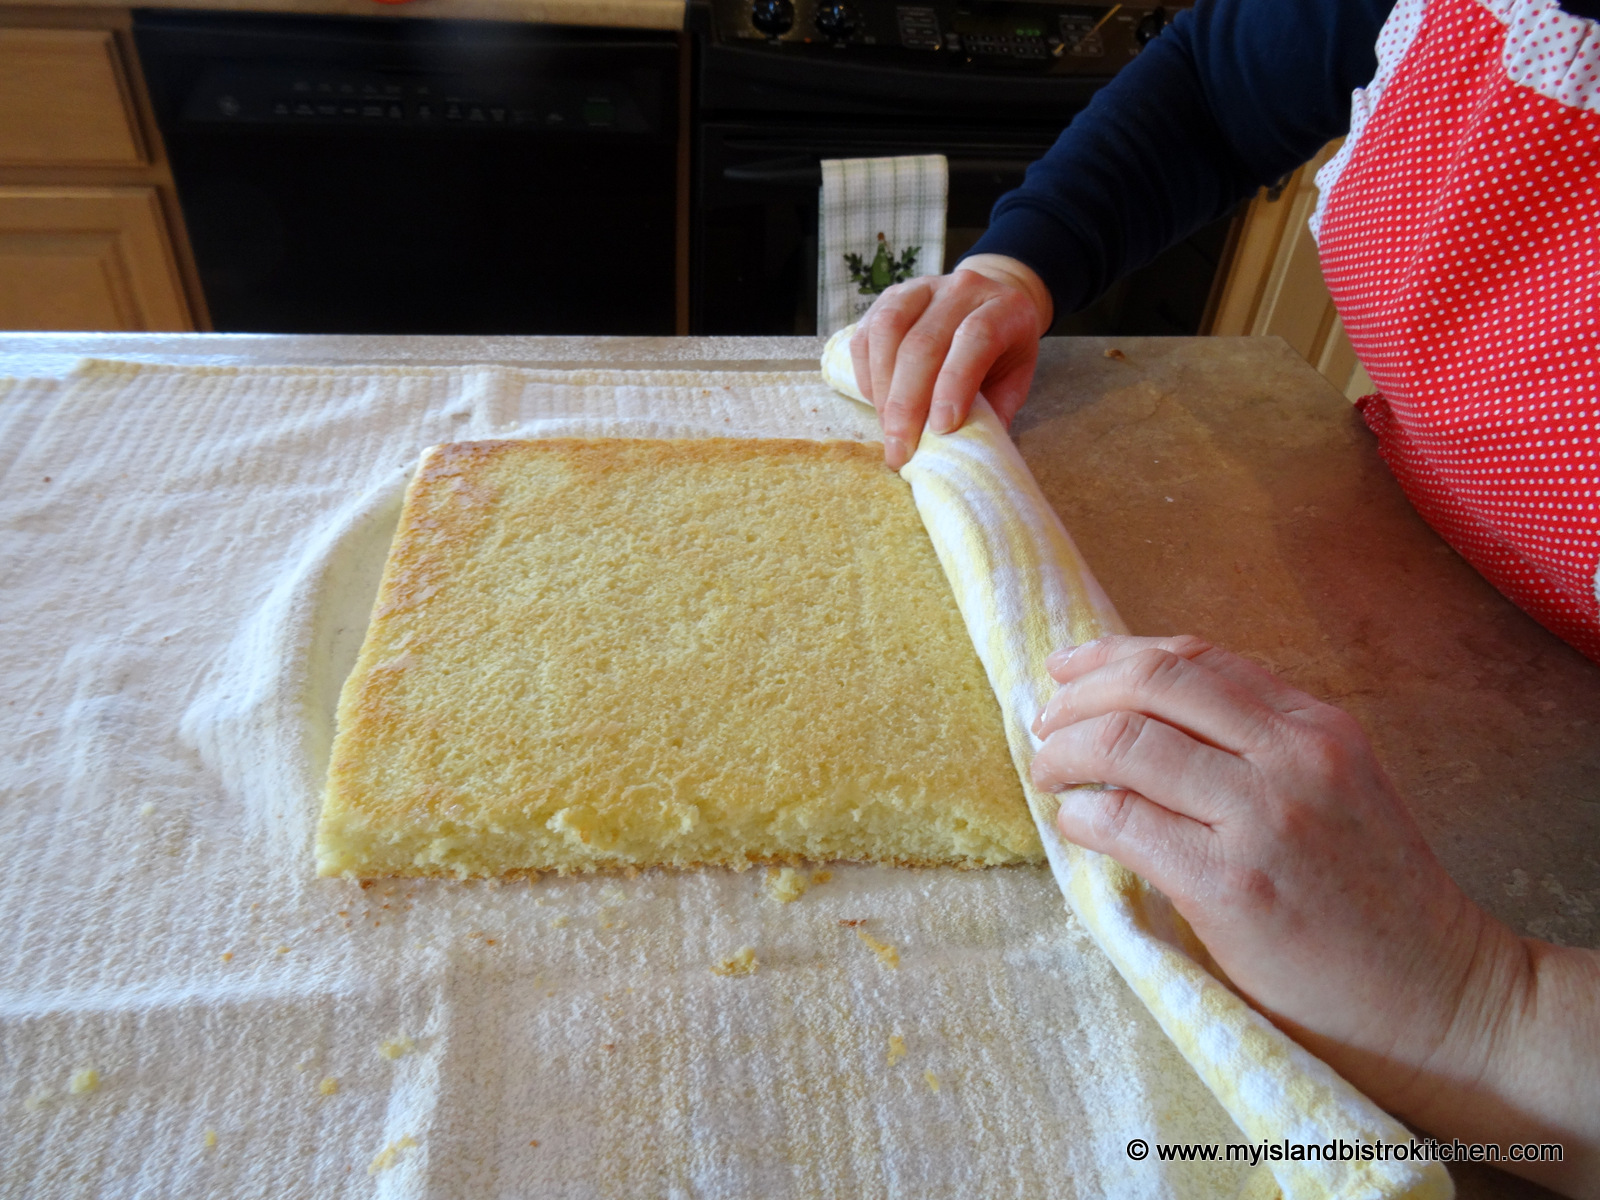
Trim off outside edges of cake.
Rolling from the narrow end of the cake, roll up cake and tea towel together.
Transfer to wire rack and cool for about 15-20 minutes.
Carefully unroll the cake.
Spread cake with jam or jelly, leaving about ½” on sides of cake free of jam or jelly.
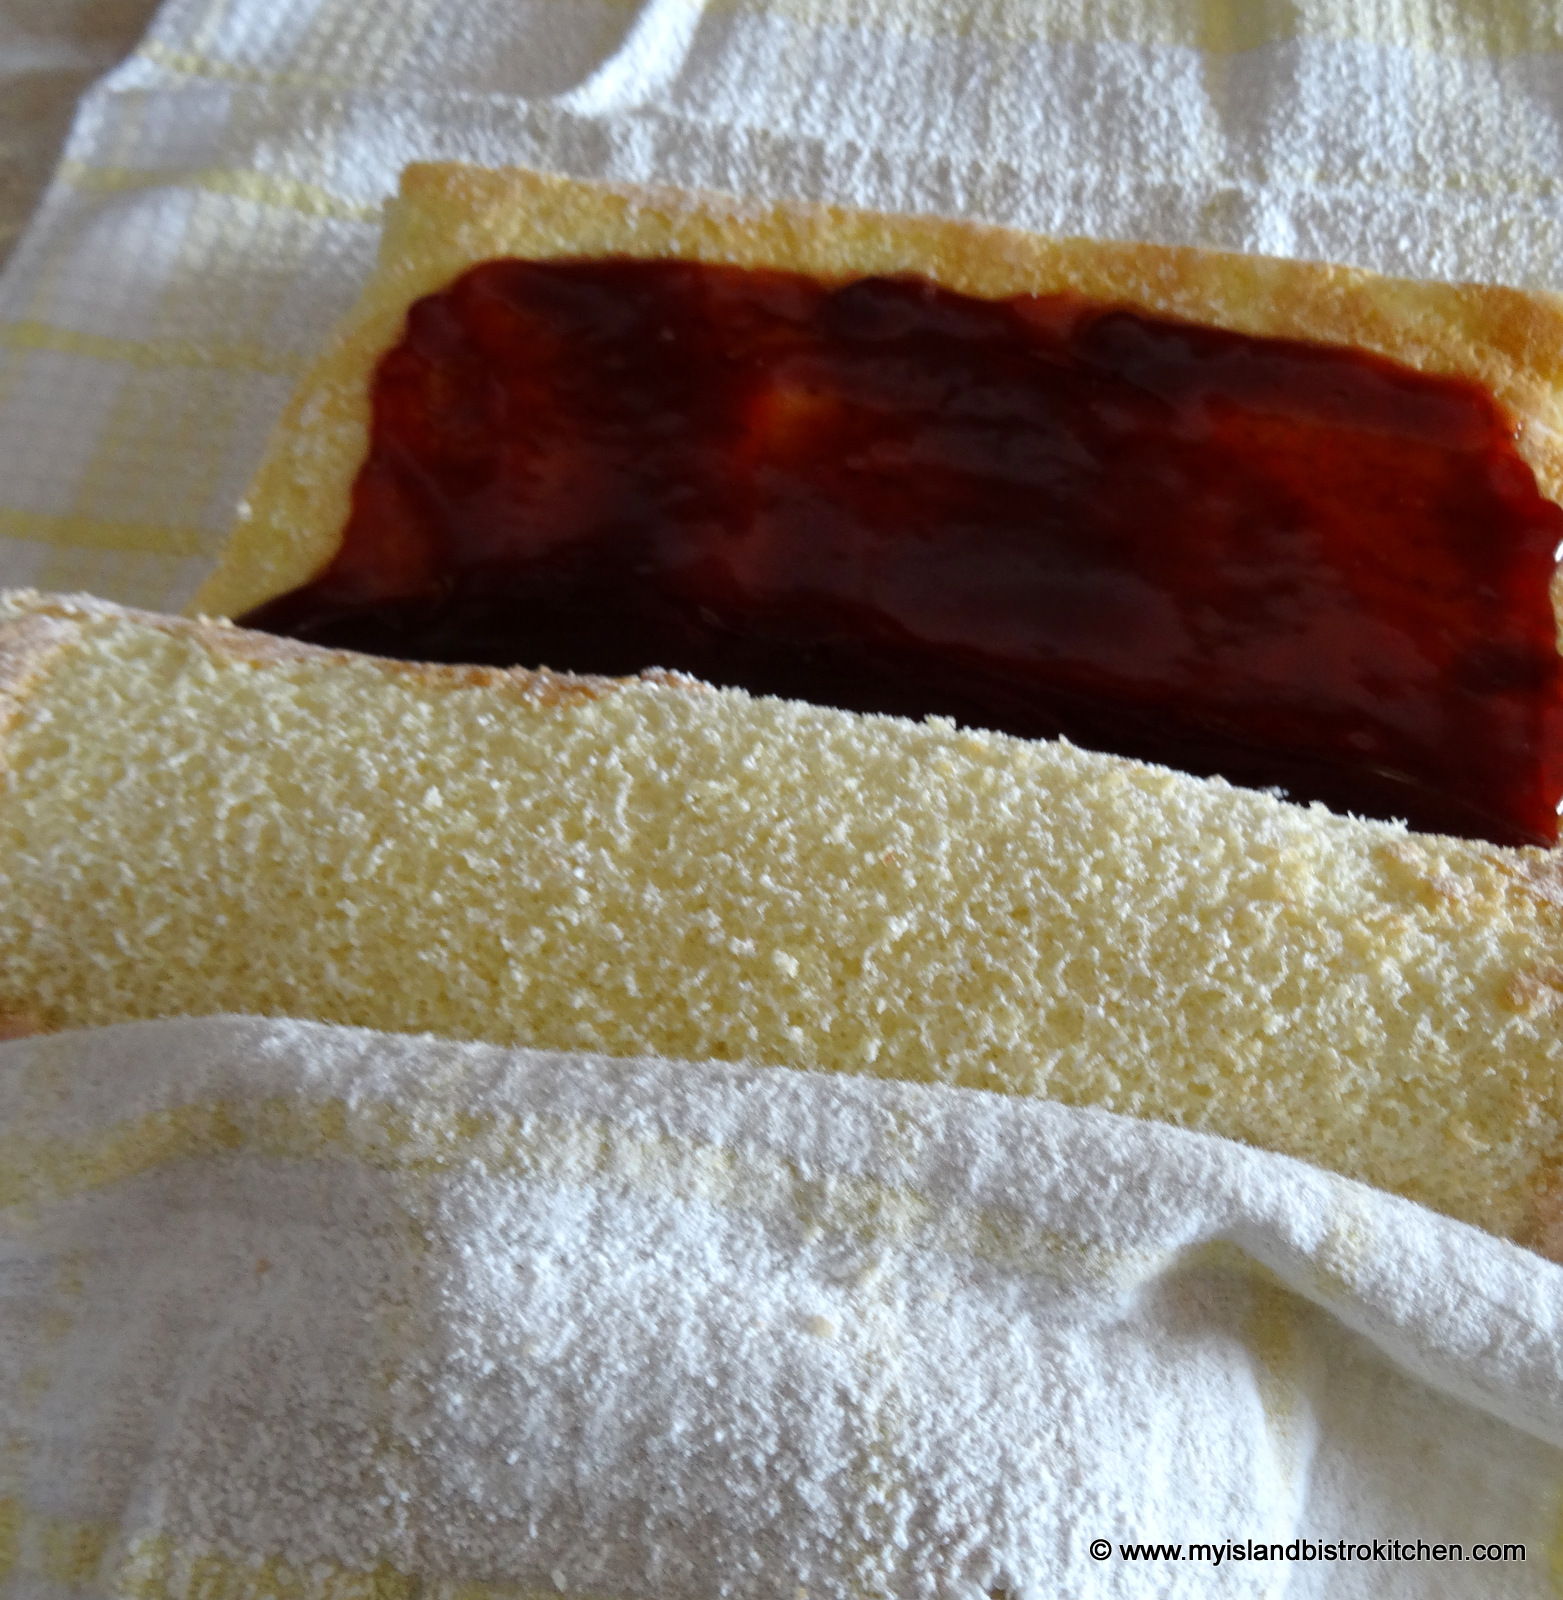
Using the tea towel as a guide, re-roll the filled cake.
Refrigerate for at least 30 minutes. Dust with icing sugar, cut, and serve.
Yield:Apx. 10-12 servings
If you have made this recipe and enjoyed it and/or wish to share it with your friends and family, please do so on social media but be sure to share the direct link to this posting from my website.
Connect with My Island Bistro Kitchen on Social Media
Follow “the Bistro” on Pinterest at https://www.pinterest.ca/peibistro/ and pin the Pinterest-ready photo found at the end of this post to your favorite Pinterest boards.
A Jelly Roll is an impressive dessert made with a thin sponge cake spread with a favorite jam or jelly and then rolled up, dusted with icing sugar, and sliced.
Course Dessert
Keyword jelly roll
Servings10
My Island Bistro KitchenMy Island Bistro Kitchen
Ingredients
1cup+ 3 tbsp cake flour
1¼tspbaking powder
¼tspsalt
4large eggs
1cupsugar
1tspvanilla
¼tspalmond flavouring
2tbspcold water
¾ - 1cupjam or jelly
Icing sugar for dusting
Instructions
Preheat oven to 400°F.
Grease, or spray cooking oil on 10”x15” rimmed baking sheet, ensuring sides are well-greased. Line bottom of pan with parchment paper. Lightly spray parchment paper with cooking oil.
Sift flour, baking powder, and salt together. Set aside.
Beat eggs until frothy. Slowly and steadily add the sugar and beat until light-colored and slightly thickened. Beat in vanilla, almond flavouring, and water.
Add the sifted dry ingredients to the egg-sugar mixture. Stir just until incorporated.
Pour batter into prepared pan. Bake 9-12 minutes or until cake tester inserted into cake comes out clean and cake springs back from a light touch. Do not overbake.
While cake is baking, lay a clean tea towel on counter and generously sprinkle with sifted icing sugar. Remove cake from oven and run knife around all four edges to loosen cake from pan sides. Invert baked cake on sugar-dusted tea towel. Peel off parchment paper being careful not to tear cake.
Trim off outside edges of cake. Rolling from the narrow end of the cake, roll up cake and tea towel together. Transfer to wire rack and cool for about 15 minutes. Carefully unroll the cake and spread with jam or jelly, leaving about ½” on sides of cake free of jam or jelly. Re-roll. Refrigerate for at least 30 minutes. Dust with icing sugar, cut, and serve.
Recipe Notes
Yield: Apx. 10-11 servings
NOTE: Be sure to read the accompanying blog post to this recipe as it contains tips for making the jelly roll successfully as well as step-by-step photos of the method used to make the jelly roll.
[Copyright My Island Bistro Kitchen]
Try one of these Jellies or Fruit Curds in your next Jelly Roll:
In October, I traveled to Farmington, near Souris, PEI, to watch the wet harvesting of cranberries at Mikita Farms. One of the recipes I developed with the Mikita Farm cranberries is for Cranberry-Banana Eggnog Muffins. Continue reading Cranberry-Banana Eggnog Muffins→
One of my all-time favorite desserts is Baked Alaska. I first had Baked Alaska on a cruise many, many years ago and I have loved it ever since. Many people think Baked Alaska is difficult to make but I don’t find it is. It does, however, take a little planning and time since it is prepared in stages. Baked Alaska can be made as a large dessert to serve several or it can be tailored down to serve one or two. My recipe is for two individual servings, perfect for a special intimate dinner such as Valentine’s Day, or anytime as a nice treat.
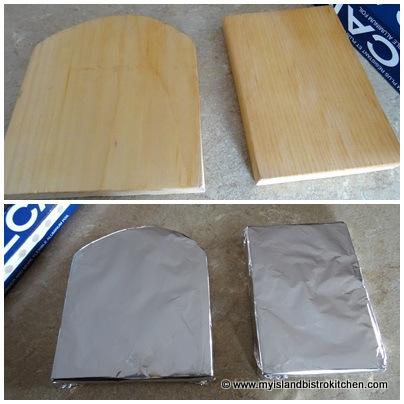
There are options for the cake base of a Baked Alaska. Brownies or pound cake are my preferences and they can be either bought or homemade. I like brownies because the dark contrast is eye-appealing with a light-colored ice cream. Whatever base is used, it needs to be cut out with a 2” cookie cutter and it should have a depth of about ½” to ¾ “. Now, at first glance, this might appear to be a rather miniscule dessert but, as you’ll soon discover, the meringue adds a lot of volume to the Baked Alaska.
Choice of ice cream is important for the Baked Alaska. Choose a high quality ice cream with a high percentage cream content for this dessert because it will freeze hard. Some of the lower fat or cheaper ice creams tend to be softer and, because this ice cream is going into a 475° oven, it needs to be able to stand up for itself! Any flavour of ice cream of your choosing will work. My favorites are vanilla, coffee, or strawberry. Let the ice cream soften slightly at room temperature for 5-7 minutes before scooping it out. You want to try and get as perfectly a round scoop as you can because this is what will give the Alaska its dome shape.
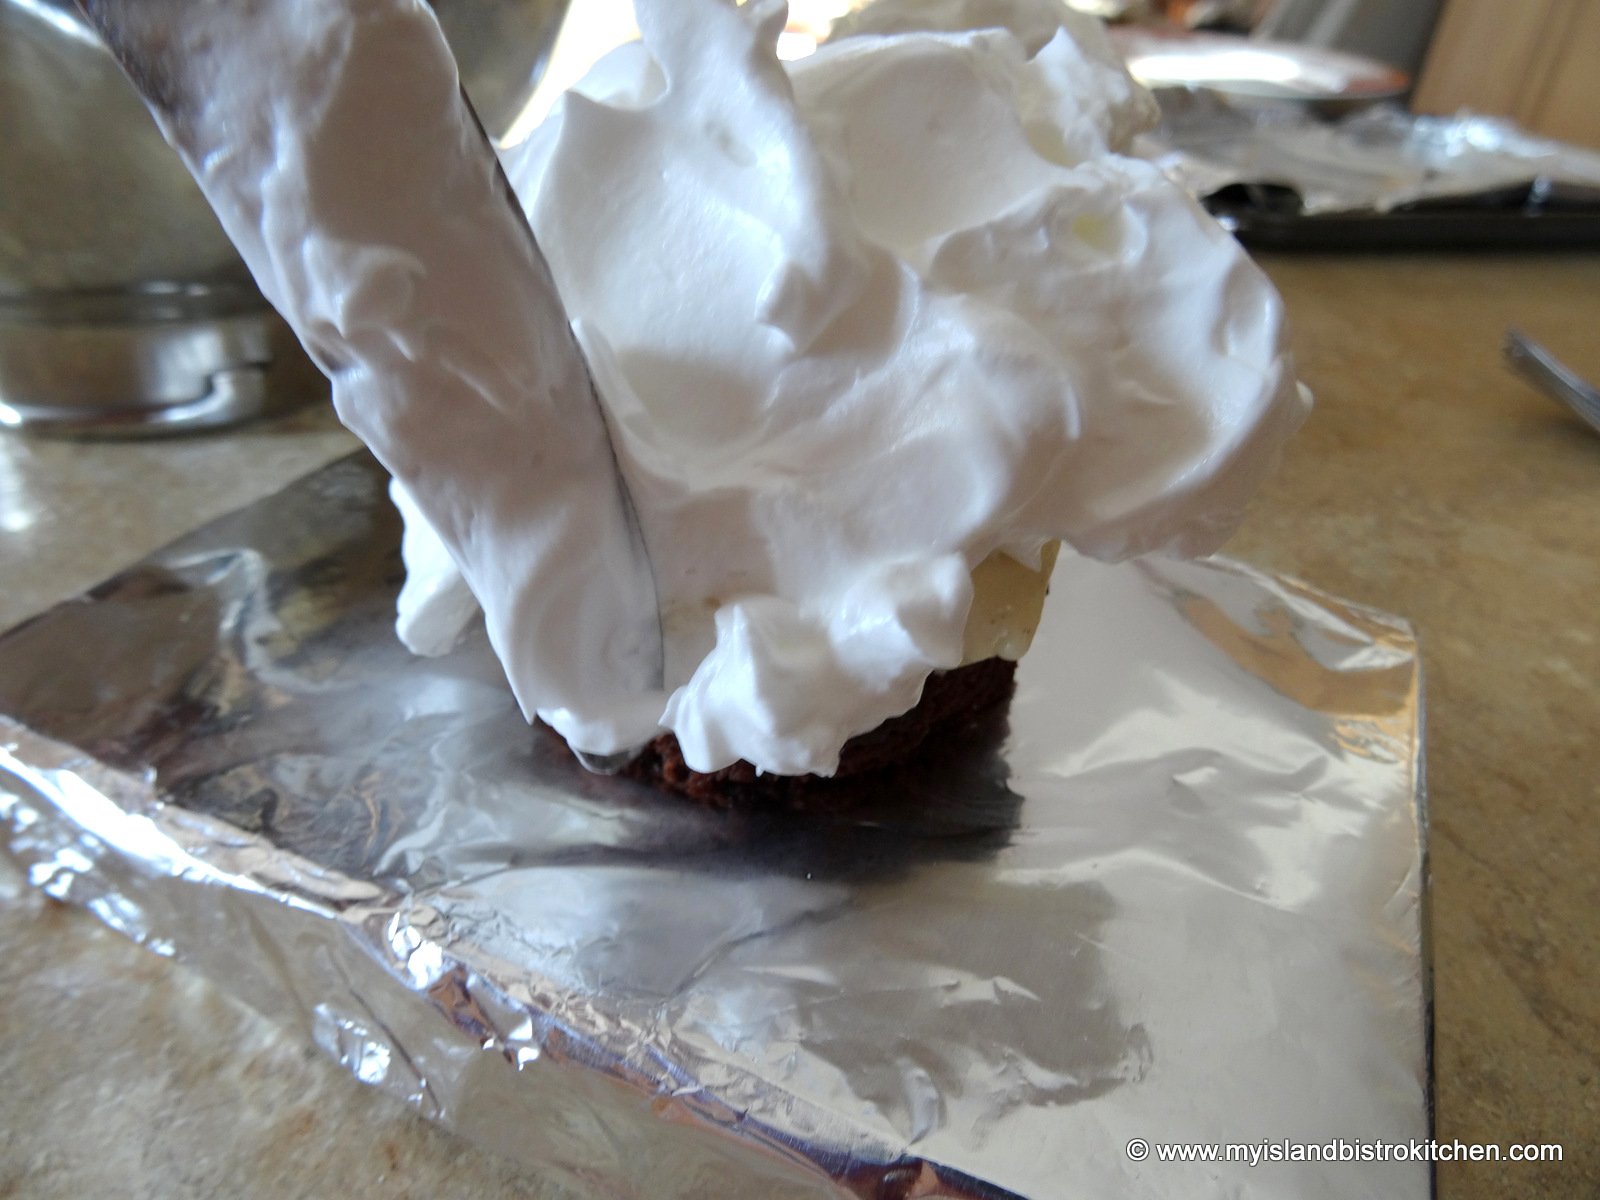
It’s important that both the cake base and the scoop of ice cream be frozen super hard so plan ahead to have them frozen for at least two hours or longer before serving time. I use a couple of small pieces of wooden boards covered with tin foil on which to bake the Alaskas because the boards don’t heat as fast as a metal cookie sheet would which could cause the Alaskas to start to melt down too quickly in the oven. The idea is to keep the Baked Alaskas as cold as possible. The Alaskas are only put in the oven for 2-3 minutes solely to tan the meringue.
The Raspberry Coulis can be made a day or two ahead and kept refrigerated.
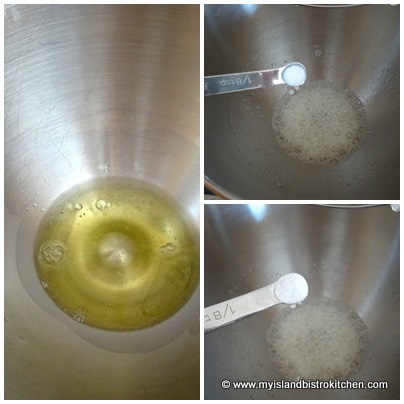
I find I have greater success with whipping egg whites for the meringue when they are at room temperature. Allow the separated egg whites to come to room temperature for about 30-40 minutes before whipping.
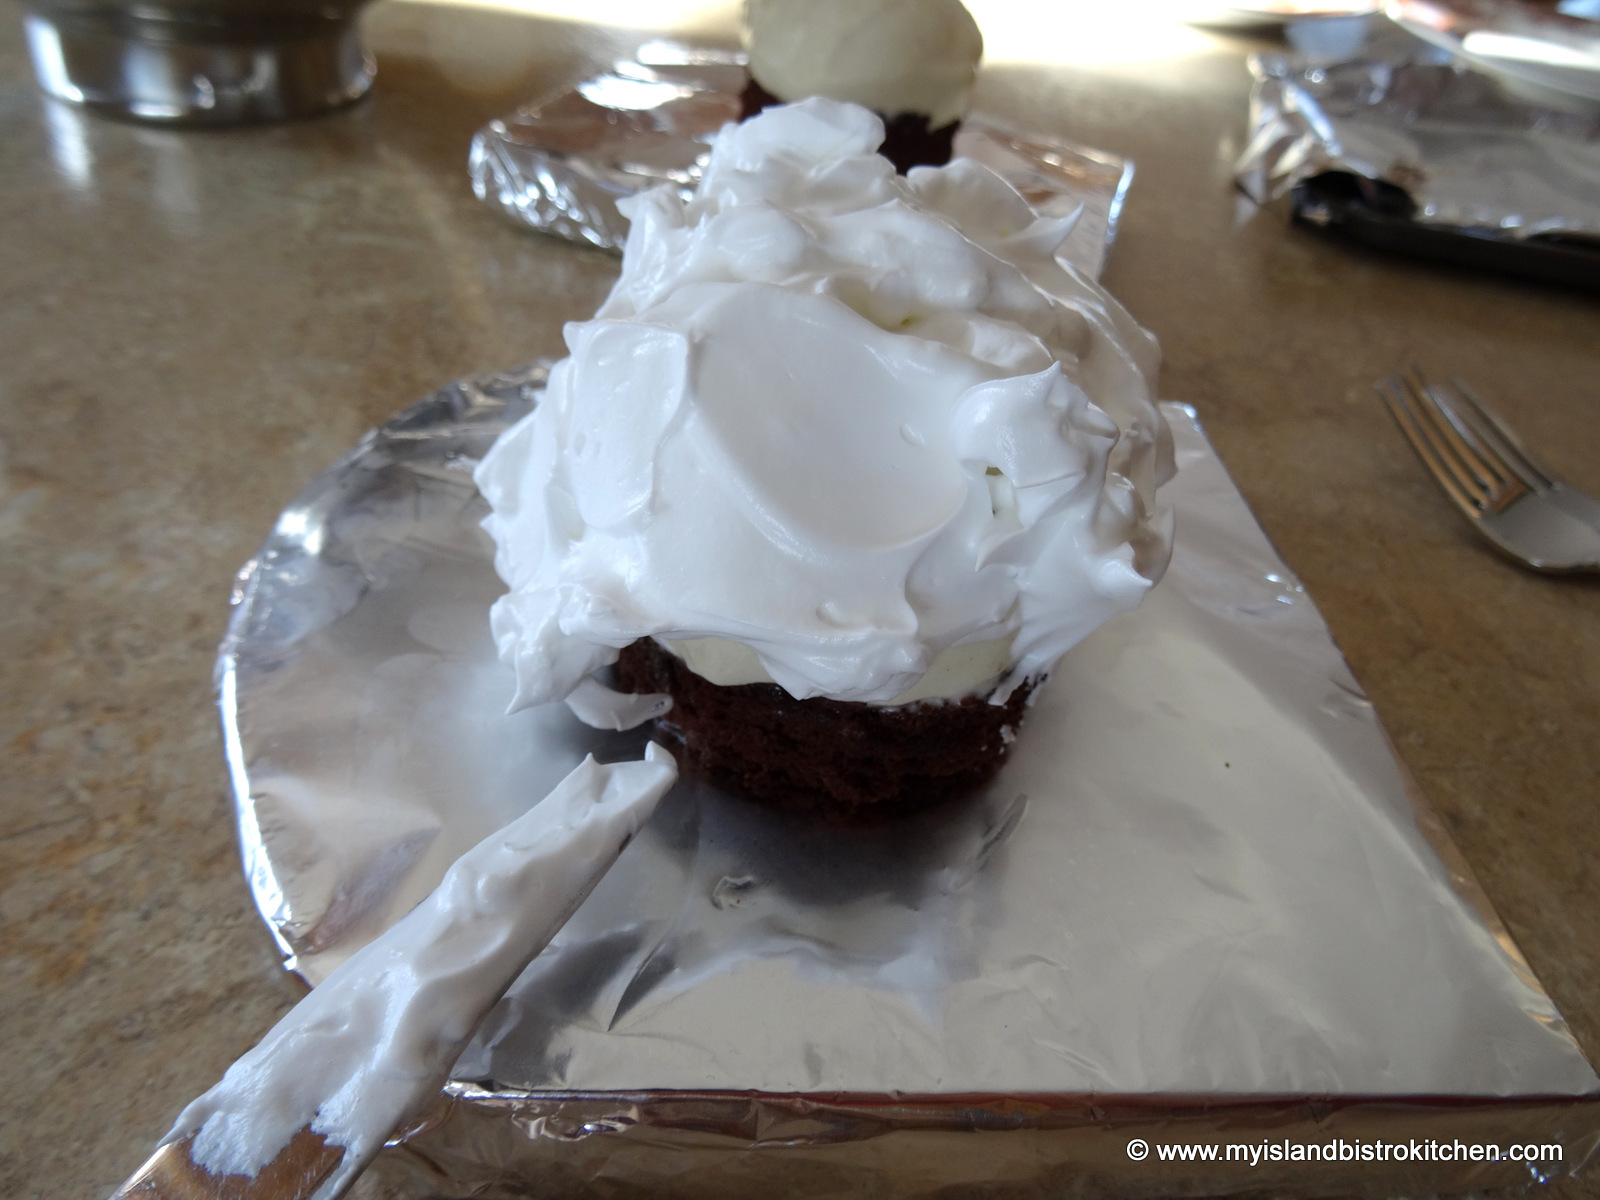
It’s super important to completely cover the ice cream and base with the meringue as, otherwise, heat will reach the ice cream which will simply melt and ooze out of the Alaska when placed in the oven. The meringue acts as an insulator of sorts which prevents the ice cream from melting for the 2-3 minutes it is in the oven. I have found that even the smallest gap in the meringue will cause the ice cream to melt in even the short time it is in the oven. Work as quickly as you can to apply the meringue so that the ice cream does not soften and melt.
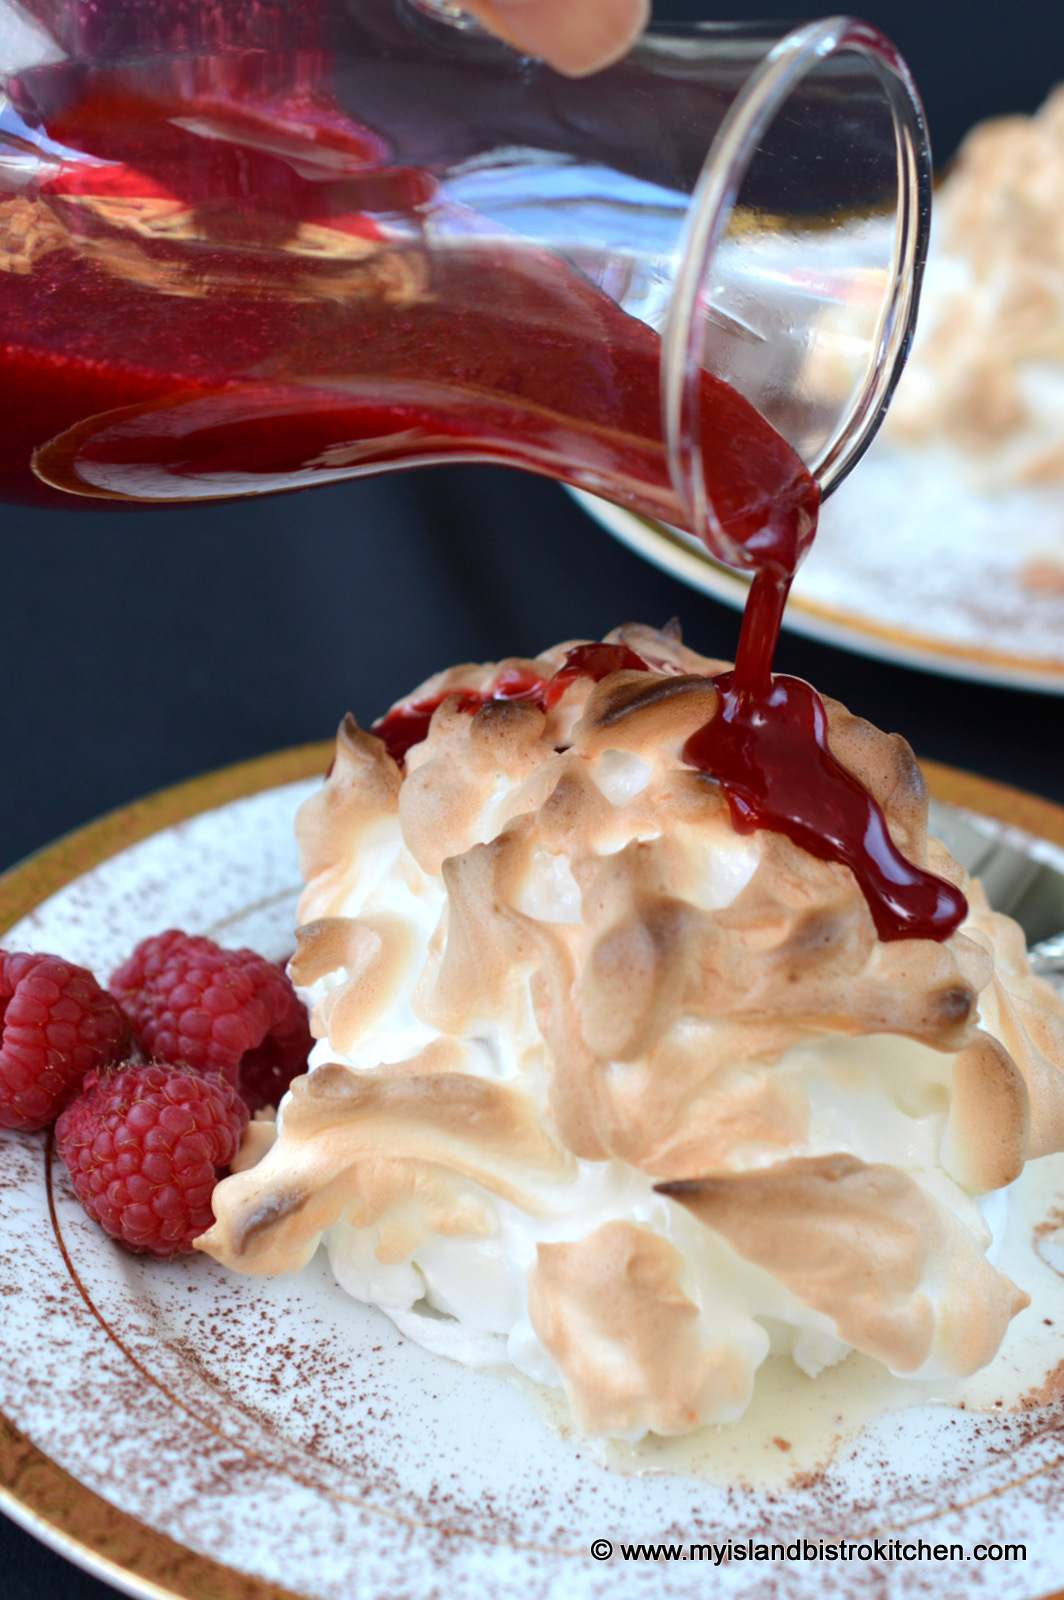
Individual Baked Alaskas with Raspberry Coulis
Raspberry Coulis:
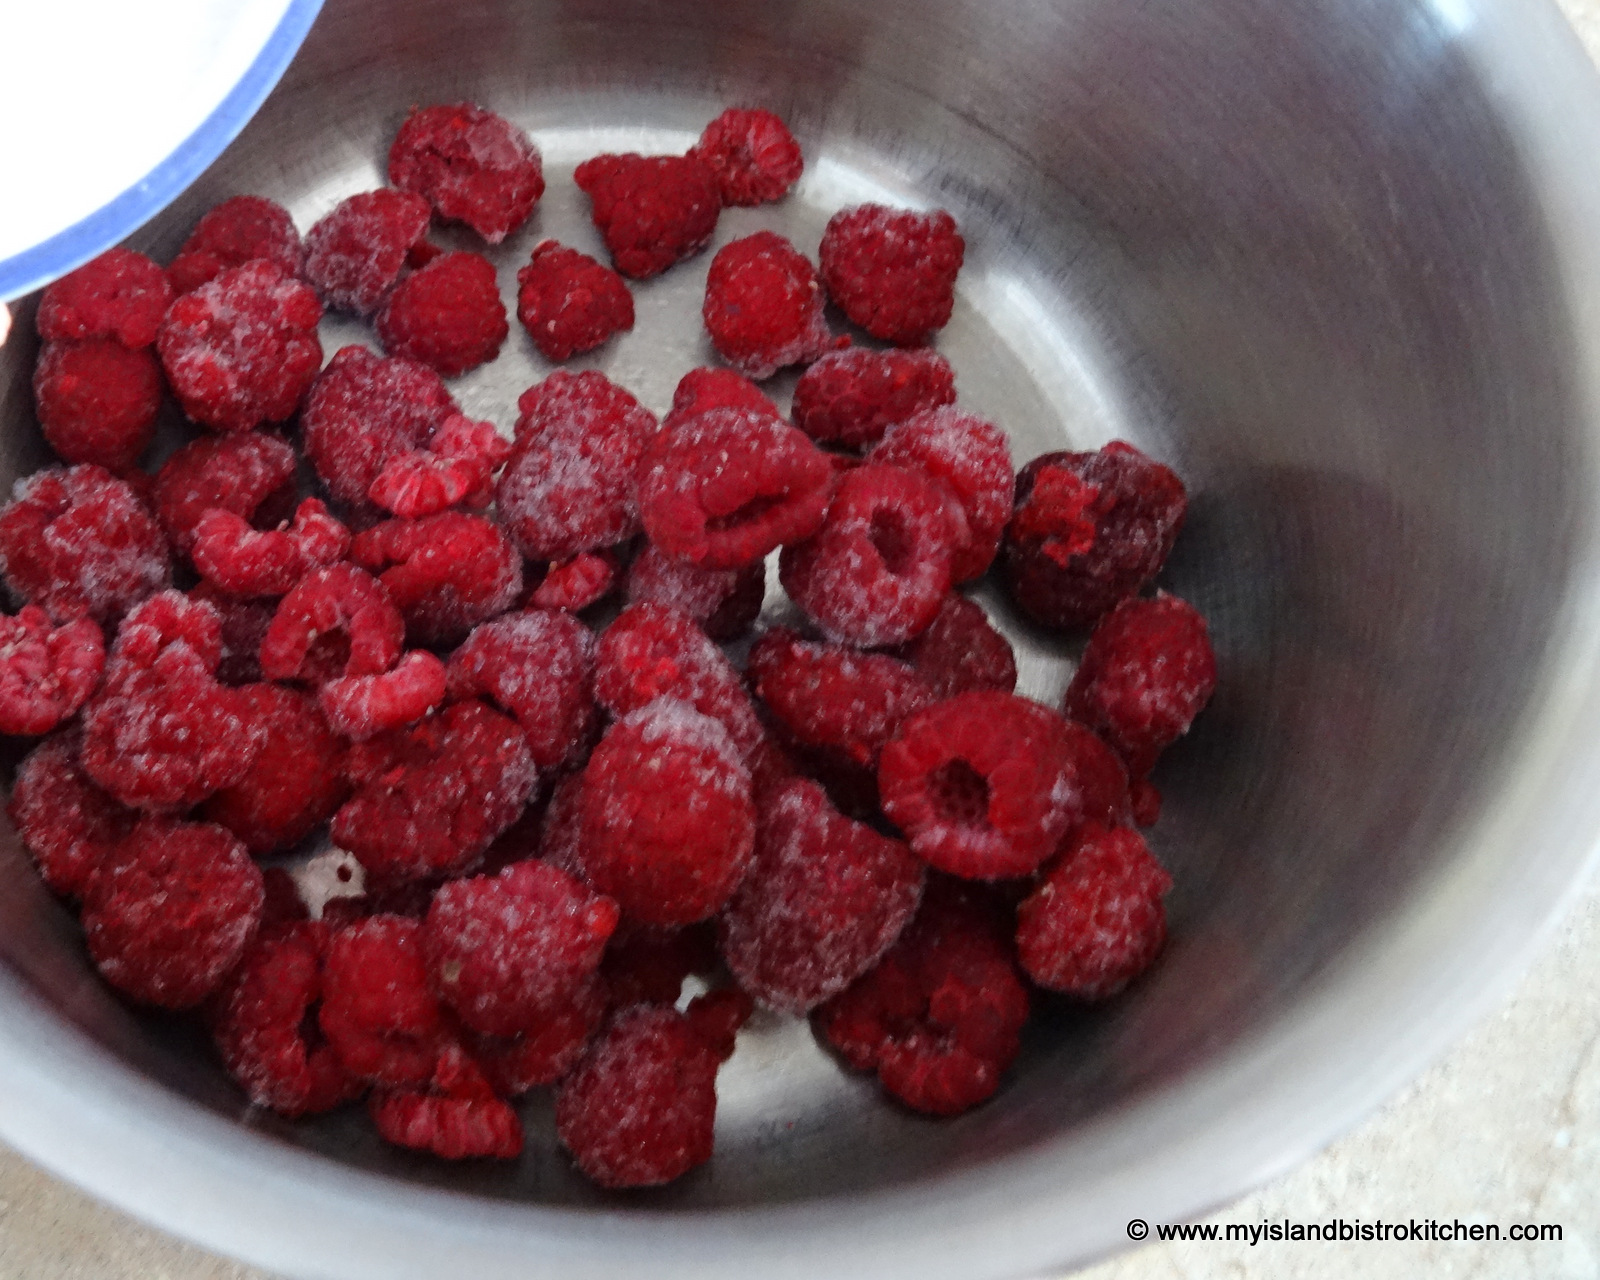
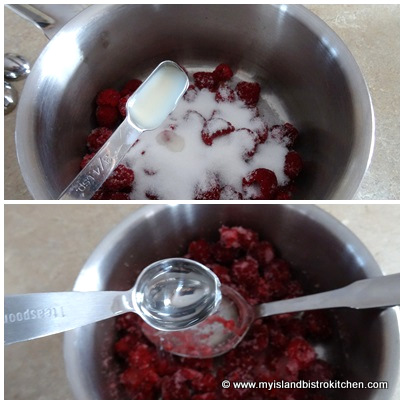
1¼ cups raspberries, fresh or frozen ⅓ cup sugar ¾ tsp lemon juice 1 tsp water
In medium-sized saucepan, combine all ingredients.
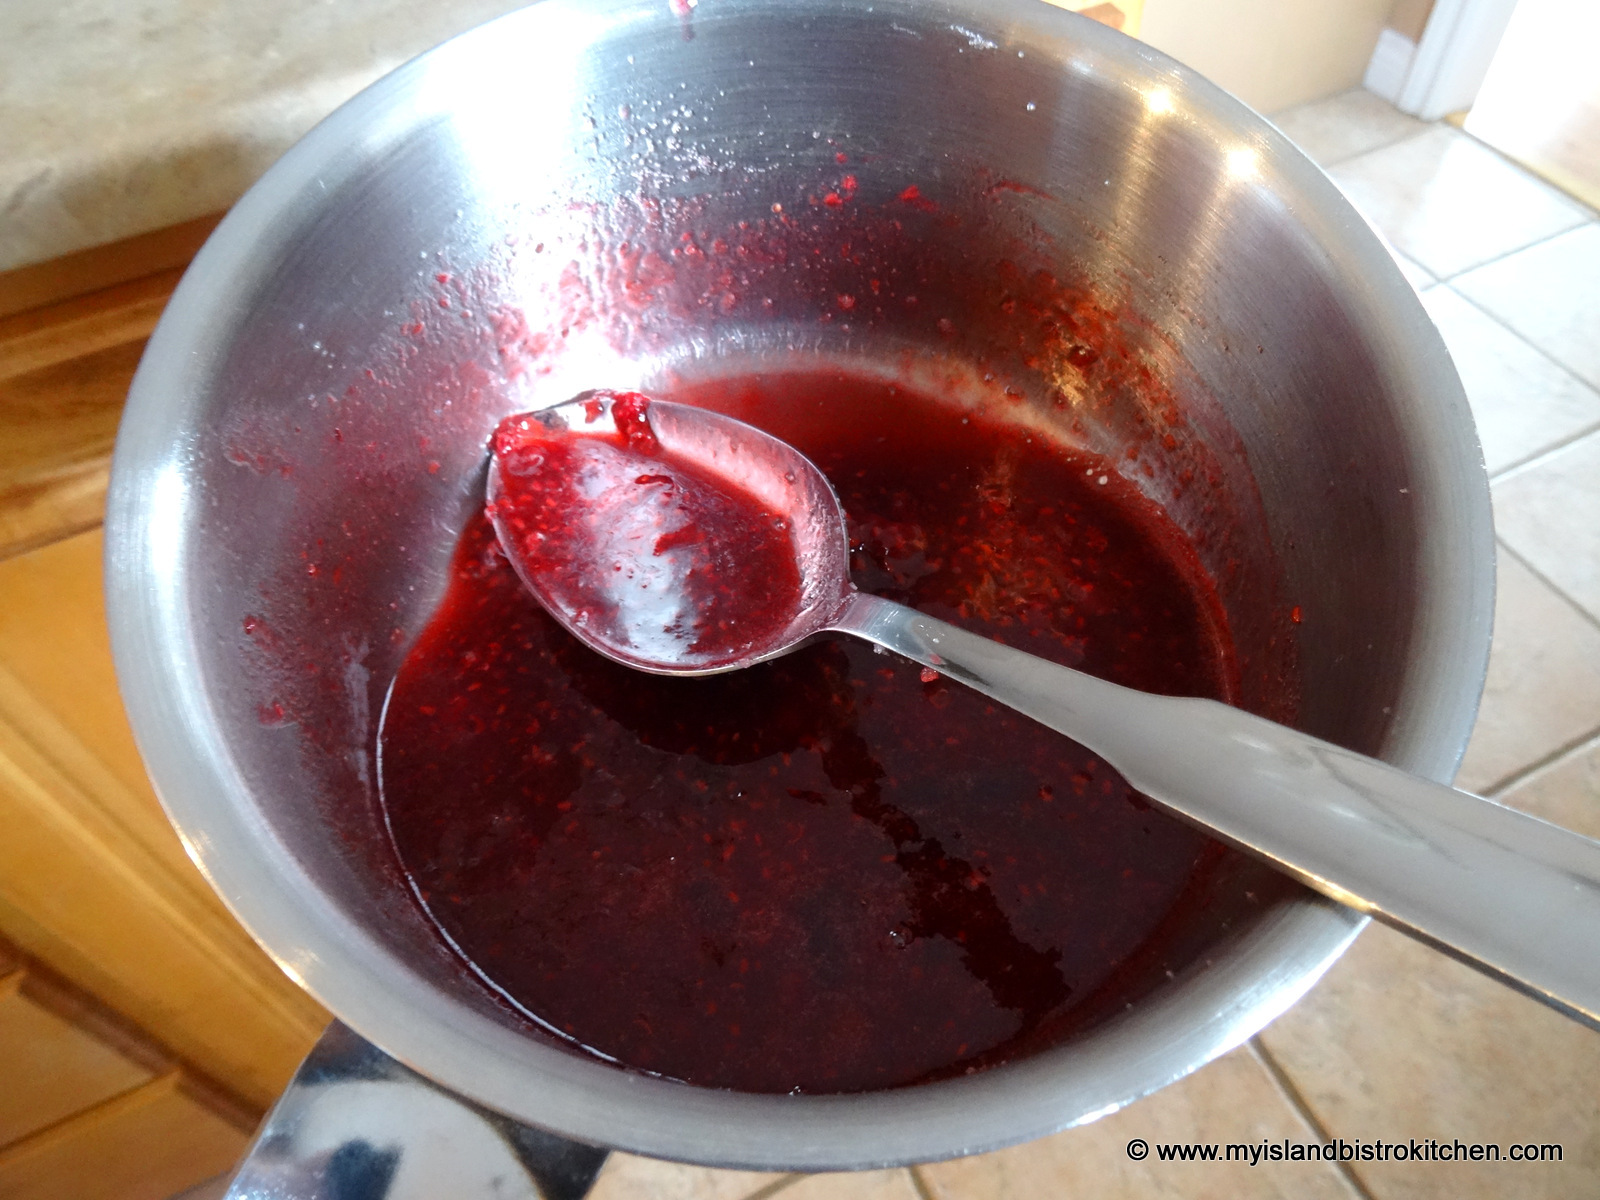
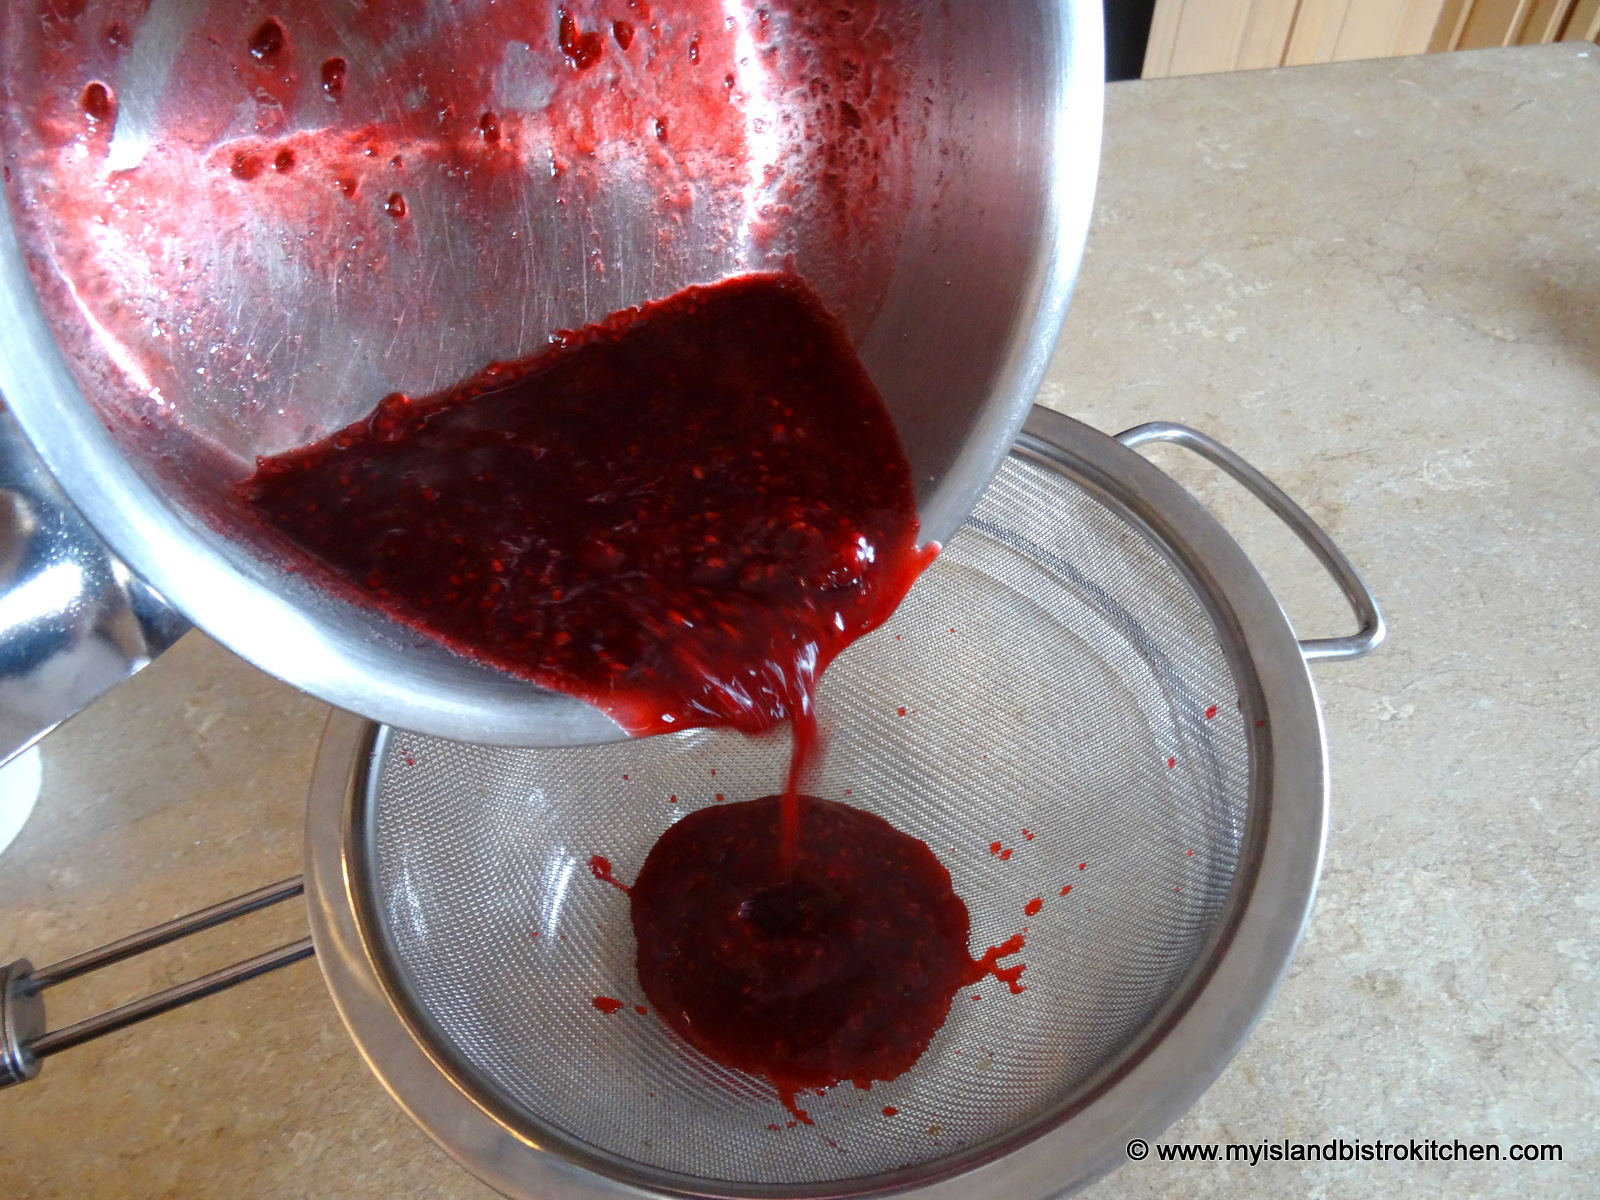
Cook over medium heat, stirring constantly until raspberries have broken down and released their juices.
Remove from heat and pour mixture into a fine sieve over a bowl.
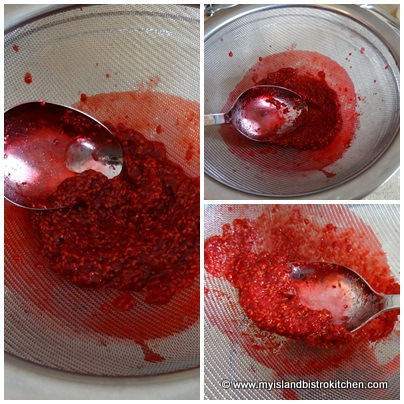
Press mixture with the back of a spoon to extract as much juice as possible. Discard raspberry seeds left in the sieve.
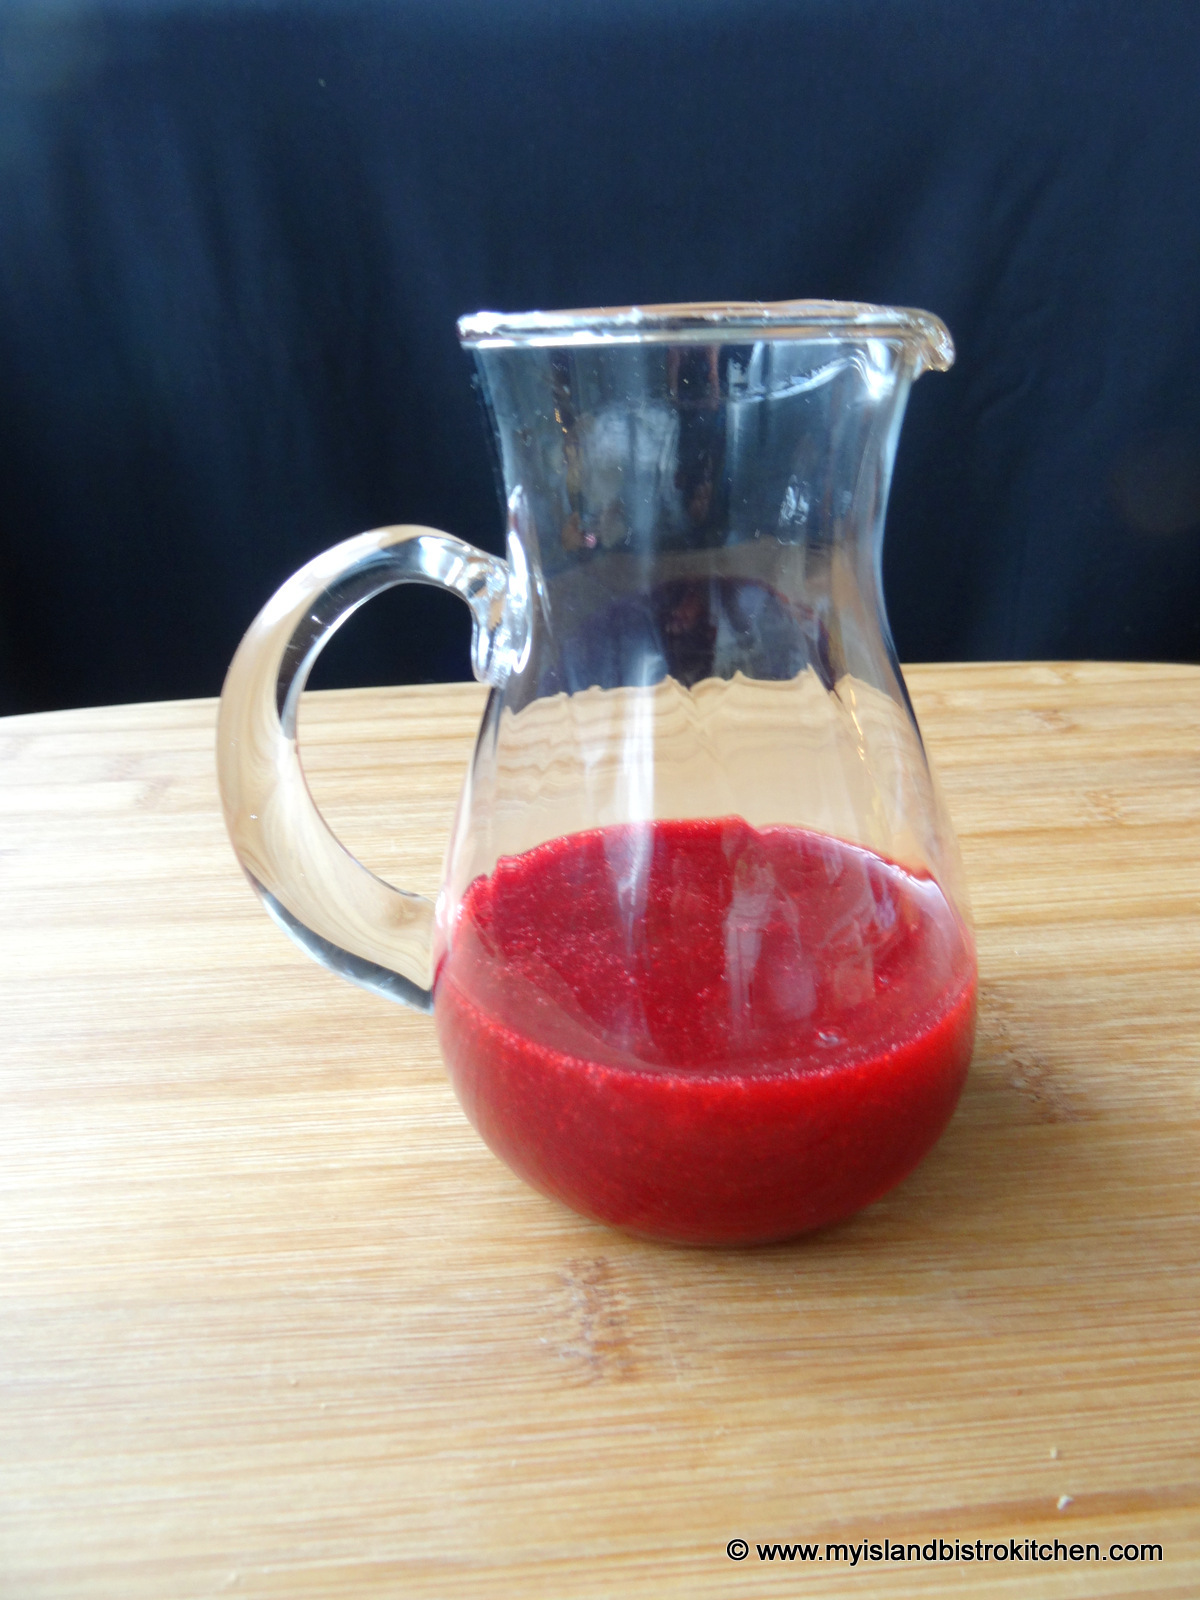
Cover coulis tightly with plastic wrap and refrigerate until well chilled.
Yield: ½ cup
Baked Alaskas:
2 pieces of brownie cut into 2” circles and sliced ½“ – ¾” thick. 2 round scoops of ice cream, your favourite flavour
Meringue:
2 large egg whites, room temperature ⅛ tsp salt ⅛ tsp cream of tartar ¼ cup sugar ½ tsp almond flavouring
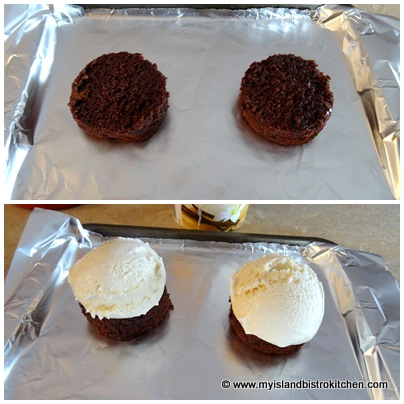
Line a small rimmed baking sheet with tin foil. Using the rimmed baked sheet allows for easy transport to and from the freezer and keeps the Alaska bases from accidentally sliding off. Place the brownie circles on the baking sheet and top each with a scoop of ice cream. Place in freezer for at least 2 hours, until very firm.
At the same time, cover two small boards with tin foil and place in freezer.
When ready to prepare the dessert, place oven rack about 8” from broiler and preheat oven to 475°F.
In bowl of stand mixer, beat egg whites just until frothy then add the salt and cream of tartar.
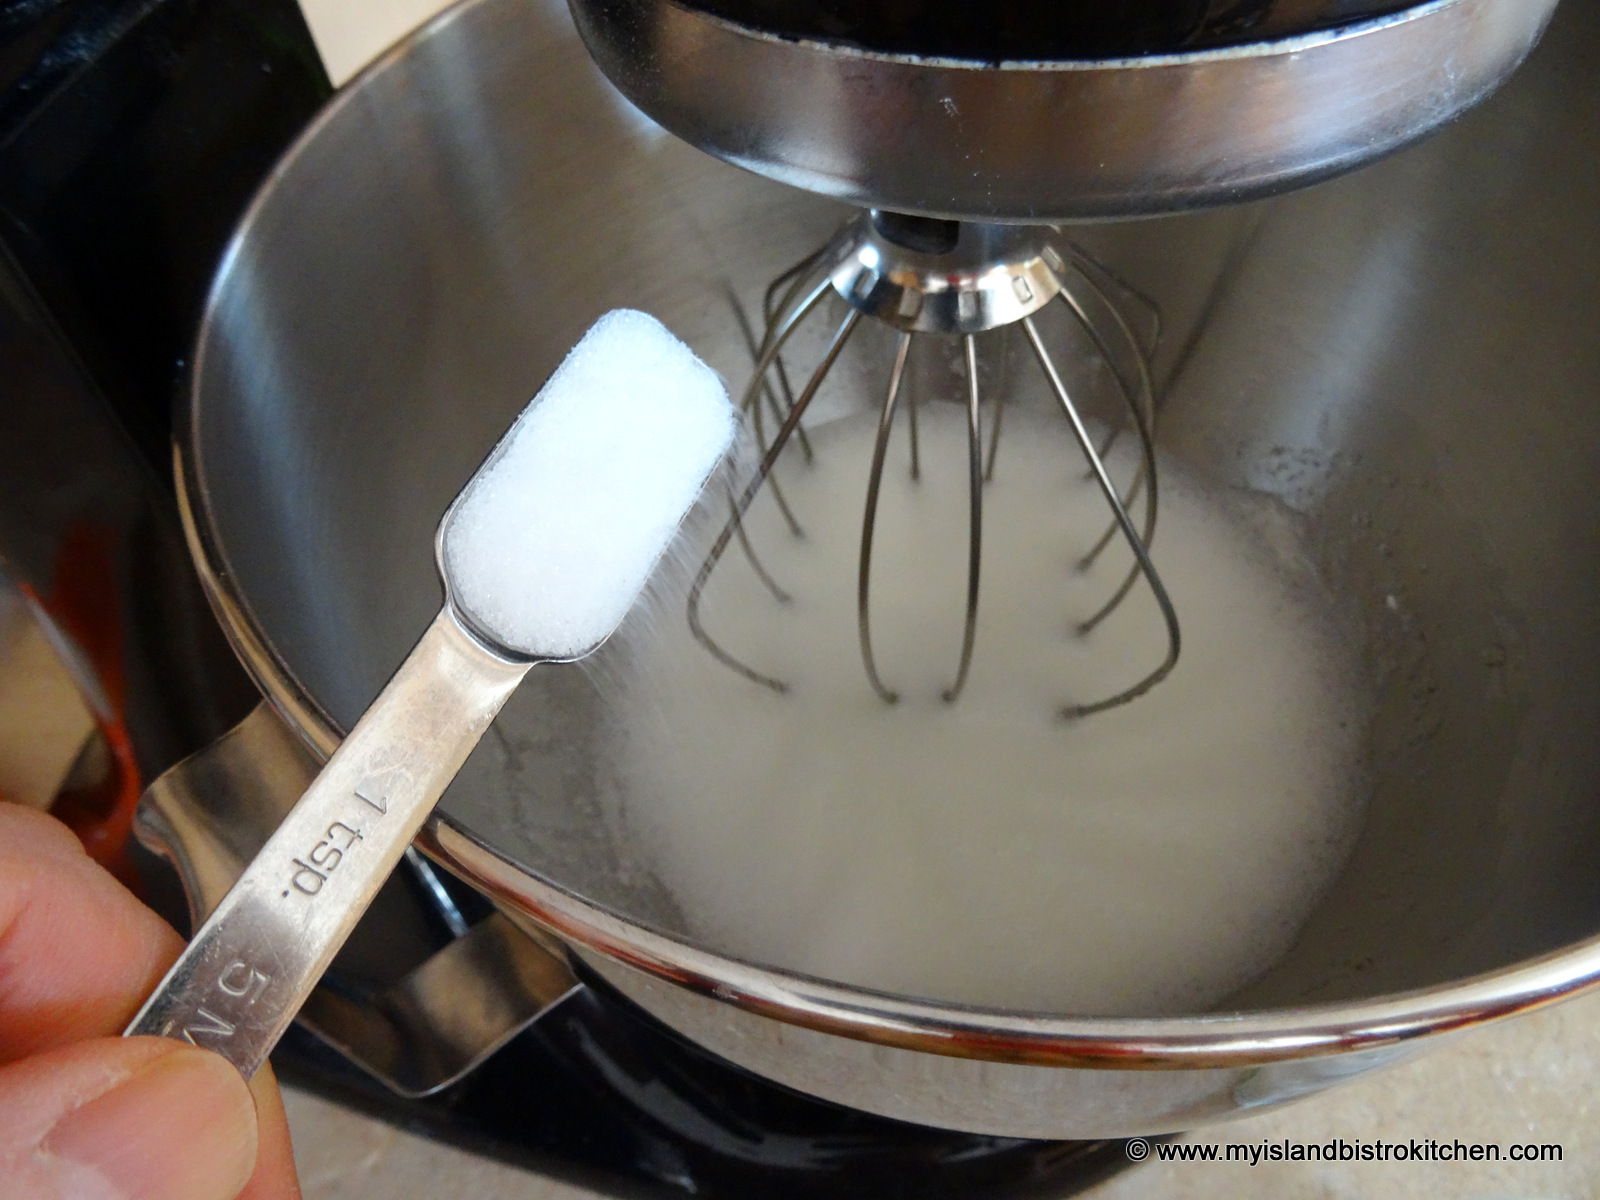
While beating the egg whites, add the sugar slowly, about a teaspoon at a time.
Continue to beat the egg whites until stiff peaks form when wire whisk is lifted from the egg whites.
Add the almond flavoring and beat for 10-15 seconds longer.
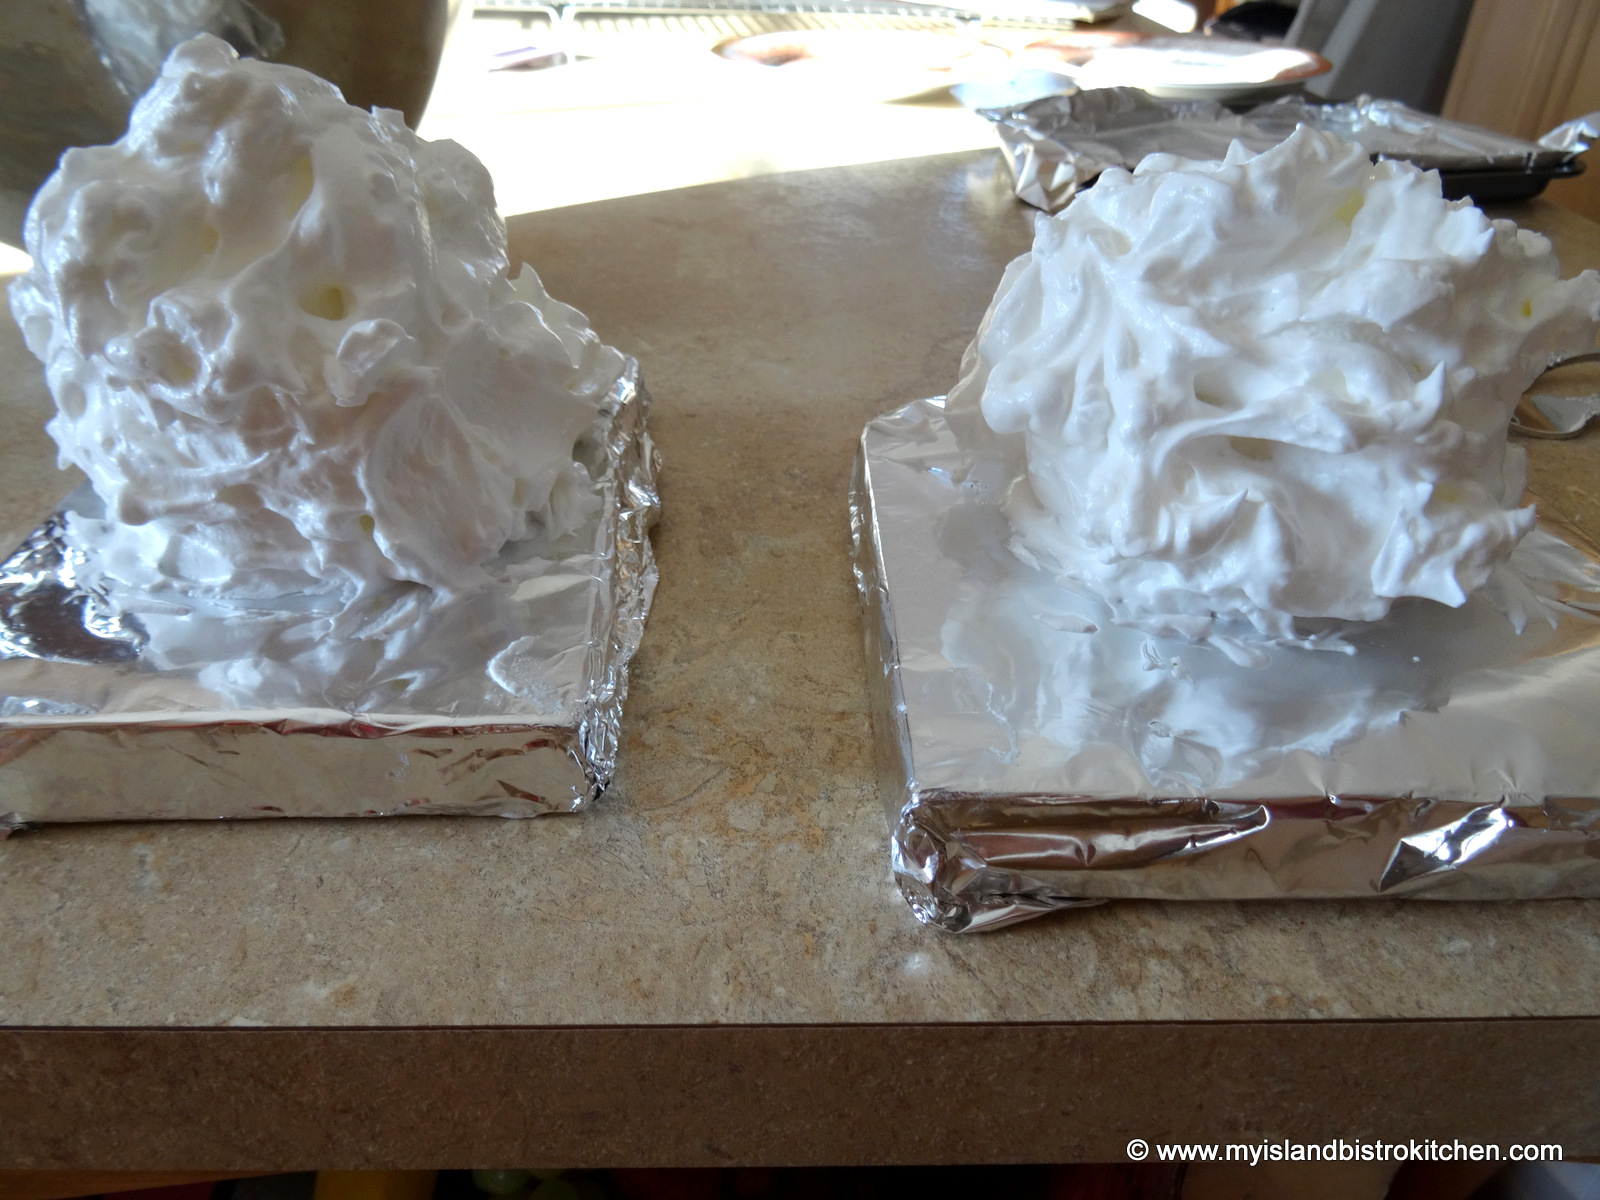
Remove brownie and ice cream rounds along with the foil-covered boards from the freezer. Transfer the brownie and ice cream rounds to the foil-covered boards. Quickly cover the ice cream and brownie completely with the meringue.
With the tip of a knife, twirl the meringue into decorate tips.
Place the Alaskas on a rimmed baking sheet for ease of transfer to and from oven. Bake in the pre-heated oven until the meringue browns, about 2-3 minutes.
Remove from oven and plate. Drizzle with Raspberry Coulis and garnish with fresh raspberries. Serve immediately.
Serves: 2
——————
Thank you for visiting “the Bistro” today. There are lots of ways to connect with “the Bistro” through social media:
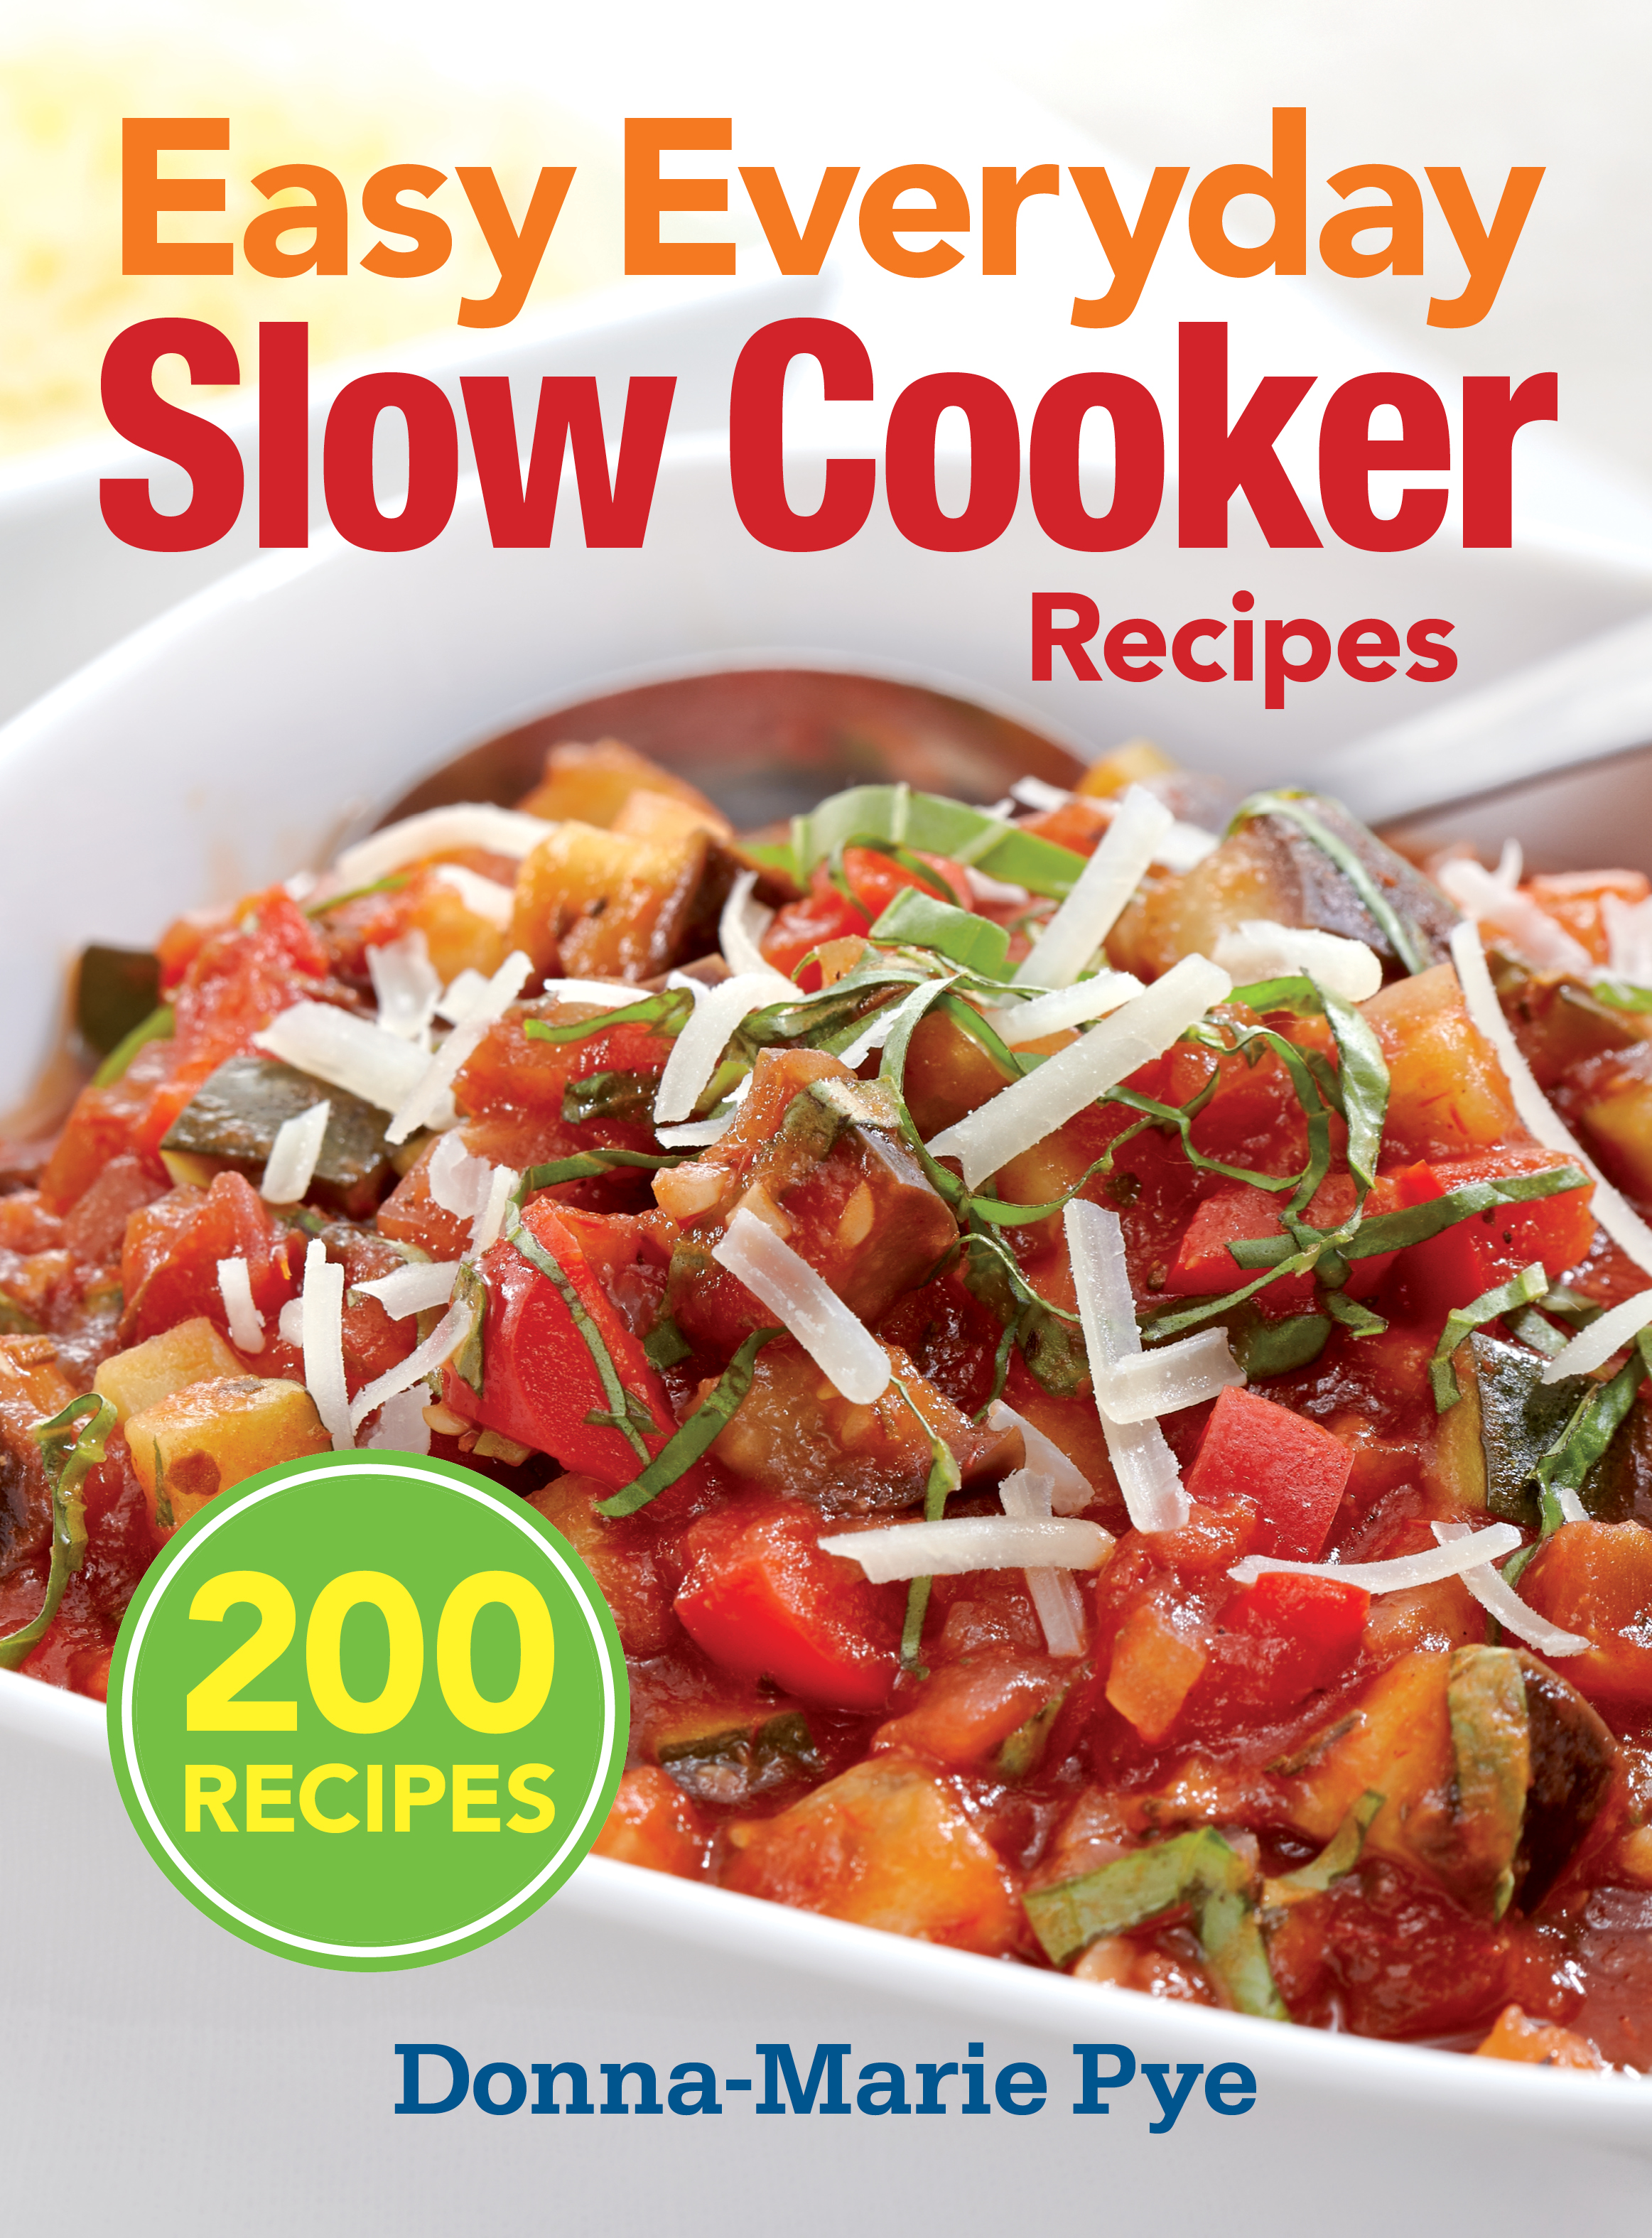
Title:Easy Everyday Slow Cooker Recipes Author: Donna-Marie Pye Publication Date: 2014 Publisher: Robert Rose Inc. Cover: Softcover Price: $24.95 (US$)/$27.95 (CDN$) Pages: 352
I recently received a complimentary review copy of Donna-Marie Pye’s “Easy Everyday Slow Cooker Recipes” from publisher, Robert Rose. This compendium of 200 recipes is, in my view, really the only slow cooker recipe book the home cook needs as it contains a vast variety of taste-tempting recipes.
Divided into 10 chapters, the recipes are conveniently and logically grouped: Soups; Stews: Chilis and Beans; Poultry; Beef and Veal; Pork and Lamb, Big-Batch Dinners for a Crowd; Meals for Two, Double-Duty Dinners; and Desserts. There is also a complete index of recipes in the back of the book. While there aren’t photos to accompany every recipe, there are over 75 full-page, color photographs and they are well-executed and of high quality.
The first 21 pages of the book are dedicated to explaining the construction of the slow cooker along with handy and useful tips on cooking with the counter top appliance, adapting conventional recipes for use in slow cookers, and information on food safety. Undoubtedly of use to even seasoned home cooks, this segment of the book would be particularly useful for those unfamiliar with slow cookers. I recommend reading these pages before starting to make any recipe from the book as they contain some great “meat”.
Each recipe is well laid out with print font that is easy to read. Ingredients are listed in the order in which the directions call for them which facilitates preparation. Ingredient amounts are given in both imperial and metric measurements. Directions are described in easy-to-follow, step-by-step method. Each recipe is accompanied by a friendly lead-in paragraph. As well, each recipe also has a “Tip” box on the page so the book becomes a self-teaching tool for the home cook. Look for tips on serving suggestions, liquids to tenderize meats, ingredient substitutions, and other useful hints for cooking with a slow cooker. In addition, with many of the recipes, there is also an explanation of any special ingredients the recipe may use. For example, this might include a description of fennel and how to prepare it for use or what certain foods, like tamari, are used for. Each recipe also gives its yield in terms of number of servings the recipe is expected to generate.
In terms of ingredients, I found most recipes call for easy-to-find ingredients that are likely to be available in most large supermarkets. However, there are a few recipes that call for ingredients that are unfamiliar to me – for example, sambal oelek or edamame – but these recipes are the minority in the book. For the most part, ingredients are inexpensive with the exception of the meat called for in any recipe. As with any recipe, I recommend pre-reading each recipe carefully before beginning preparation to ensure you have all the necessary ingredients and/or that they are ones you can source in your area. Some recipes do incorporate more contemporary/trendy ingredients such as balsamic vinegars, roasted red peppers, fennel, and salsa. In my view, the quantity of ingredients (particularly spices and flavourings) called for in the recipes is reasonable and the instructions are clear in terms of explaining if an item is to be finely or coarsely chopped or minced, whether to include liquid with contents of a canned ingredient, and the size of pieces into which the meat or vegetables are to be cut.
One of the things I like most about this book is the section on meals for two as not many recipe books include scaled-down recipes for the smaller household.
Test-driving Recipes
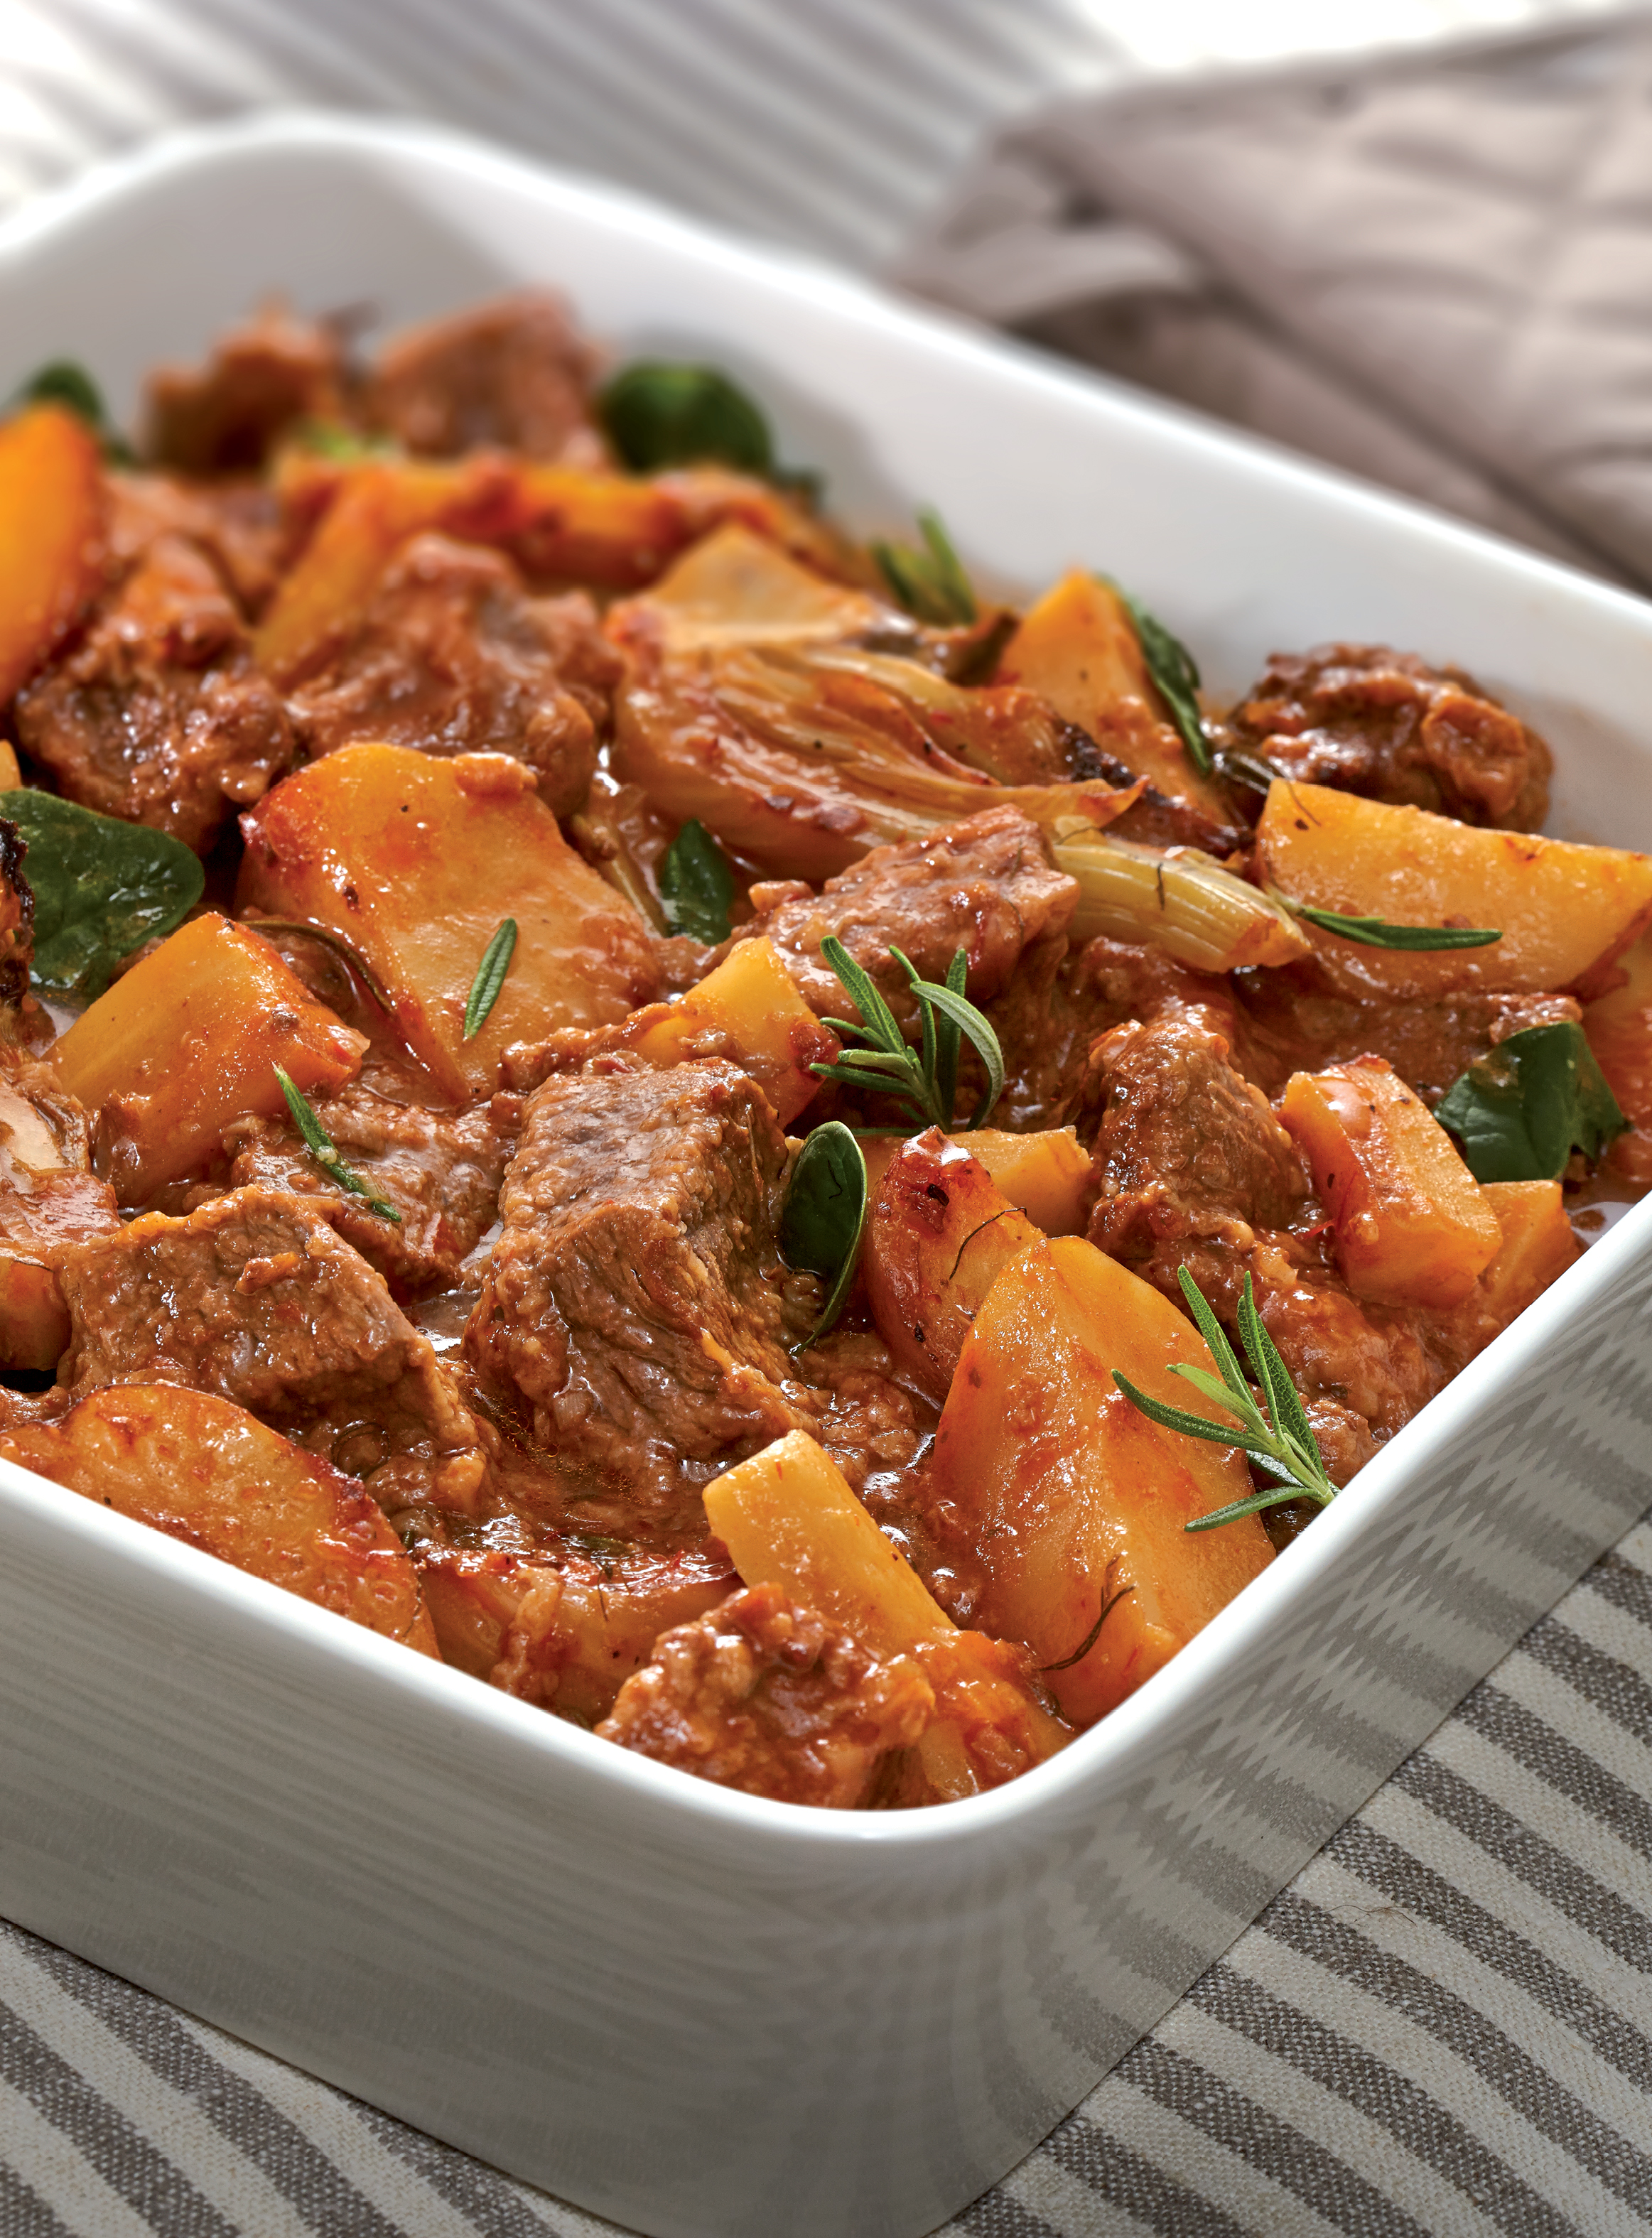
I recently made the Country Italian Beef Stew for which the publisher is allowing me to share the recipe and photo along with my review (recipe follow below review). This is a yummy stew with a delicious brown sauce/gravy and is one I will definitely make again. This was also the first time that I cooked with a fennel bulb. Not being familiar with whether all fennel bulbs are the same size or not (the recipe called for one fennel bulb), I erred on the side of caution and used only a good half of the bulb in case I didn’t like it. However, I loved it – it has a subtle but not overpowering fennel flavour. This stew has good flavour and texture and reheats well, too.
Concluding Thoughts
I like this book. Very much, in fact, and it will make its way on to my crowded, and now premium-spaced, recipe bookcase and I will use the book as it contains many taste-tempting recipes. Retailing for $24.95 (US$)/$27.95 (CDN$), I feel this book is reasonably priced for its content and quality. If you are a committed slow cooker user, I think you’ll find this a wonderful inspiration for many meals and, if you are new to slow cookers, I believe you will find a number of new recipes to add to your meal preparation.
Country Italian Beef Stew (page 66, beef, international) Makes 6 to 8 servings
This stew features the wonderful flavors of the Mediterranean — fennel, basil and rosemary. Fennel has a distinctive mild licorice flavor, but even if you are not a licorice fan, you will enjoy the bold flavors of this beef stew. • Minimum 4-quart slow cooker 3 tbsp all-purpose flour (45 mL) 1 tsp salt (5 mL) 1 tsp freshly ground black pepper, divided (5 mL) 2 lbs stewing beef, cut into 1-inch (2.5 cm) (1 kg) cubes 2 tbsp vegetable oil (approx.) (30 mL) 6 tiny new potatoes, halved or quartered (6) 2 parsnips, cut into 1- to 2-inch (2.5 to 5 cm) (2) pieces 1 fennel bulb, trimmed and cut into 1 1⁄2-inch (1 cm) wedges 1 cup chopped onion (250 mL) 1 cup beef broth (250 mL) 1⁄2 cup dry red wine (125 mL) 1 can (71⁄2 oz/213 mL) pizza sauce (1) 4 cloves garlic, minced (4) 1 tsp dried rosemary, crumbled (5 mL) 1 cup fresh baby spinach leaves (250 mL)
1. In a heavy plastic bag, combine flour, salt and 1⁄2 tsp (2 mL) of the pepper. In batches, add beef to bag and toss to coat with flour mixture. Discard excess flour mixture. 2. In a large nonstick skillet, heat half the oil over medium-high heat. Cook beef in batches, adding more oil as needed, for 5 minutes or until browned all over. Using a slotted spoon, transfer to slow cooker stoneware. Stir in potatoes, parsnips, fennel and onion. 3. In a 2-cup (500 mL) measuring cup, combine broth, wine, pizza sauce, garlic, rosemary and the remaining pepper. Pour over beef mixture. 4. Cover and cook on Low for 8 to 10 hours or on High for 4 to 5 hours, until bubbling. Just before serving, stir in spinach until wilted.
Tip: Crush dried rosemary between your thumb and fingers before adding it to a dish. This helps release the full aromatic flavor of the herb.
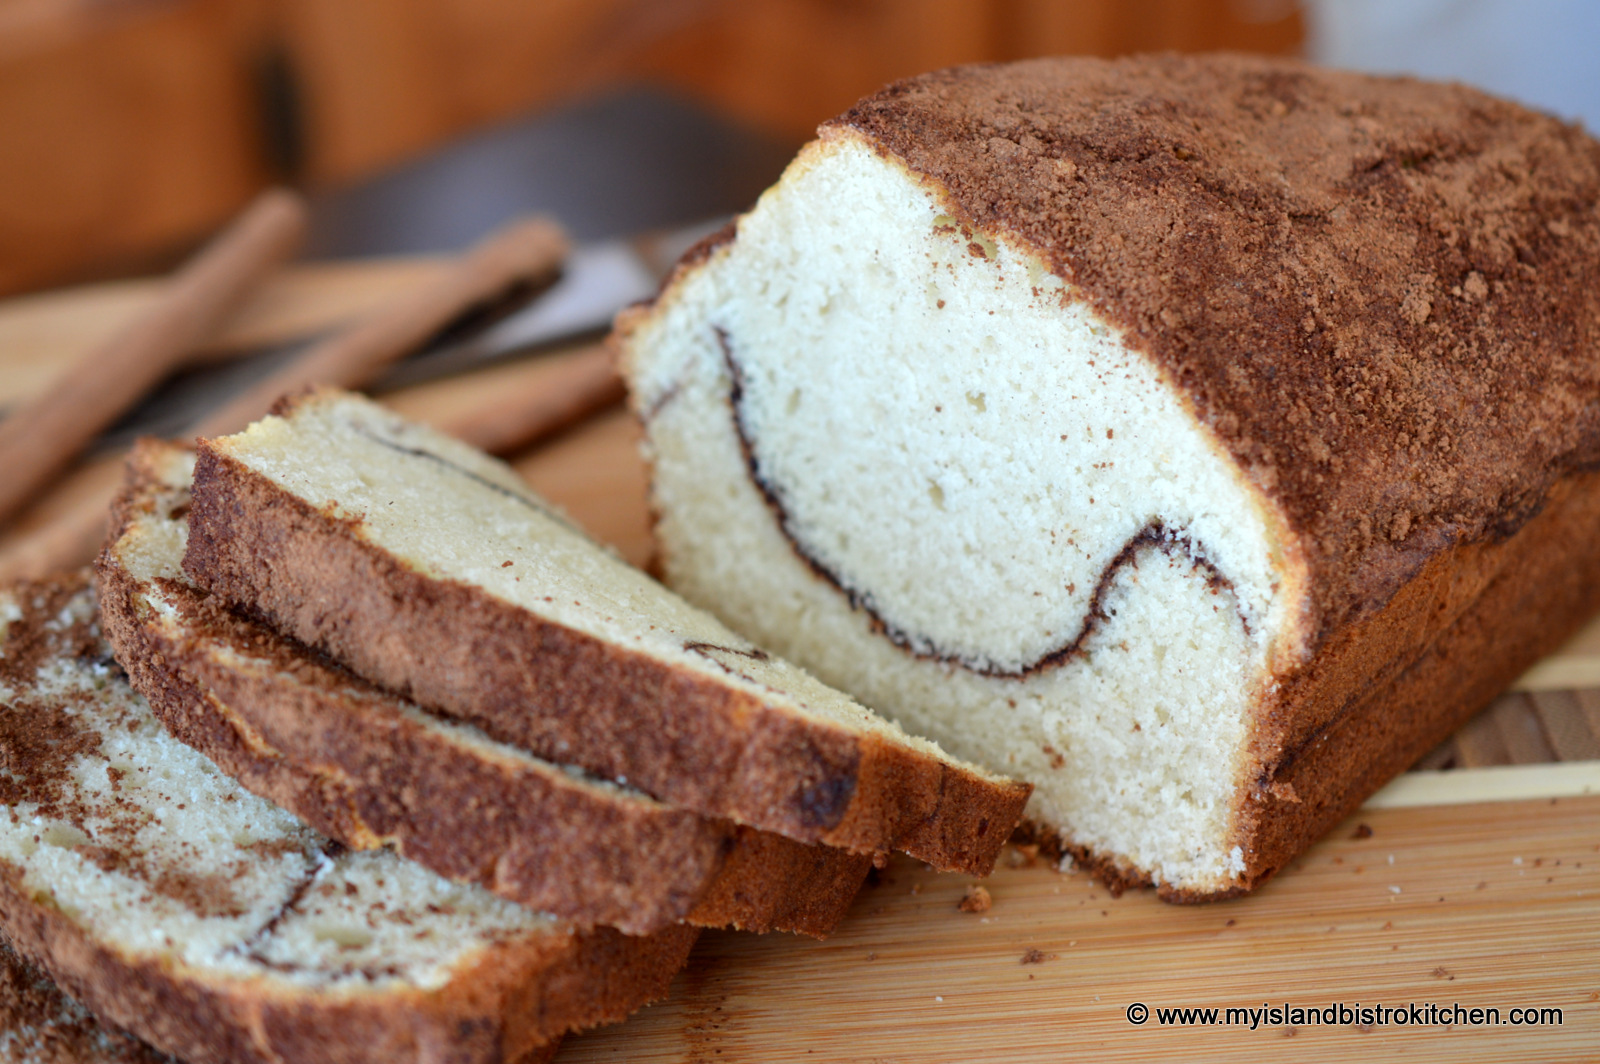
Did you ever get the urge to bake (often on a storm day, for example) and realize that every recipe you look at requires a shopping trip to the supermarket? Well, here’s my answer to that dilemma. Today’s recipe is Cinnamon Quick Bread that takes no more than pantry staples. So long as you have basic baking supplies, you can whip this tasty sweet bread up in no time. Continue reading Cinnamon Quick Bread→
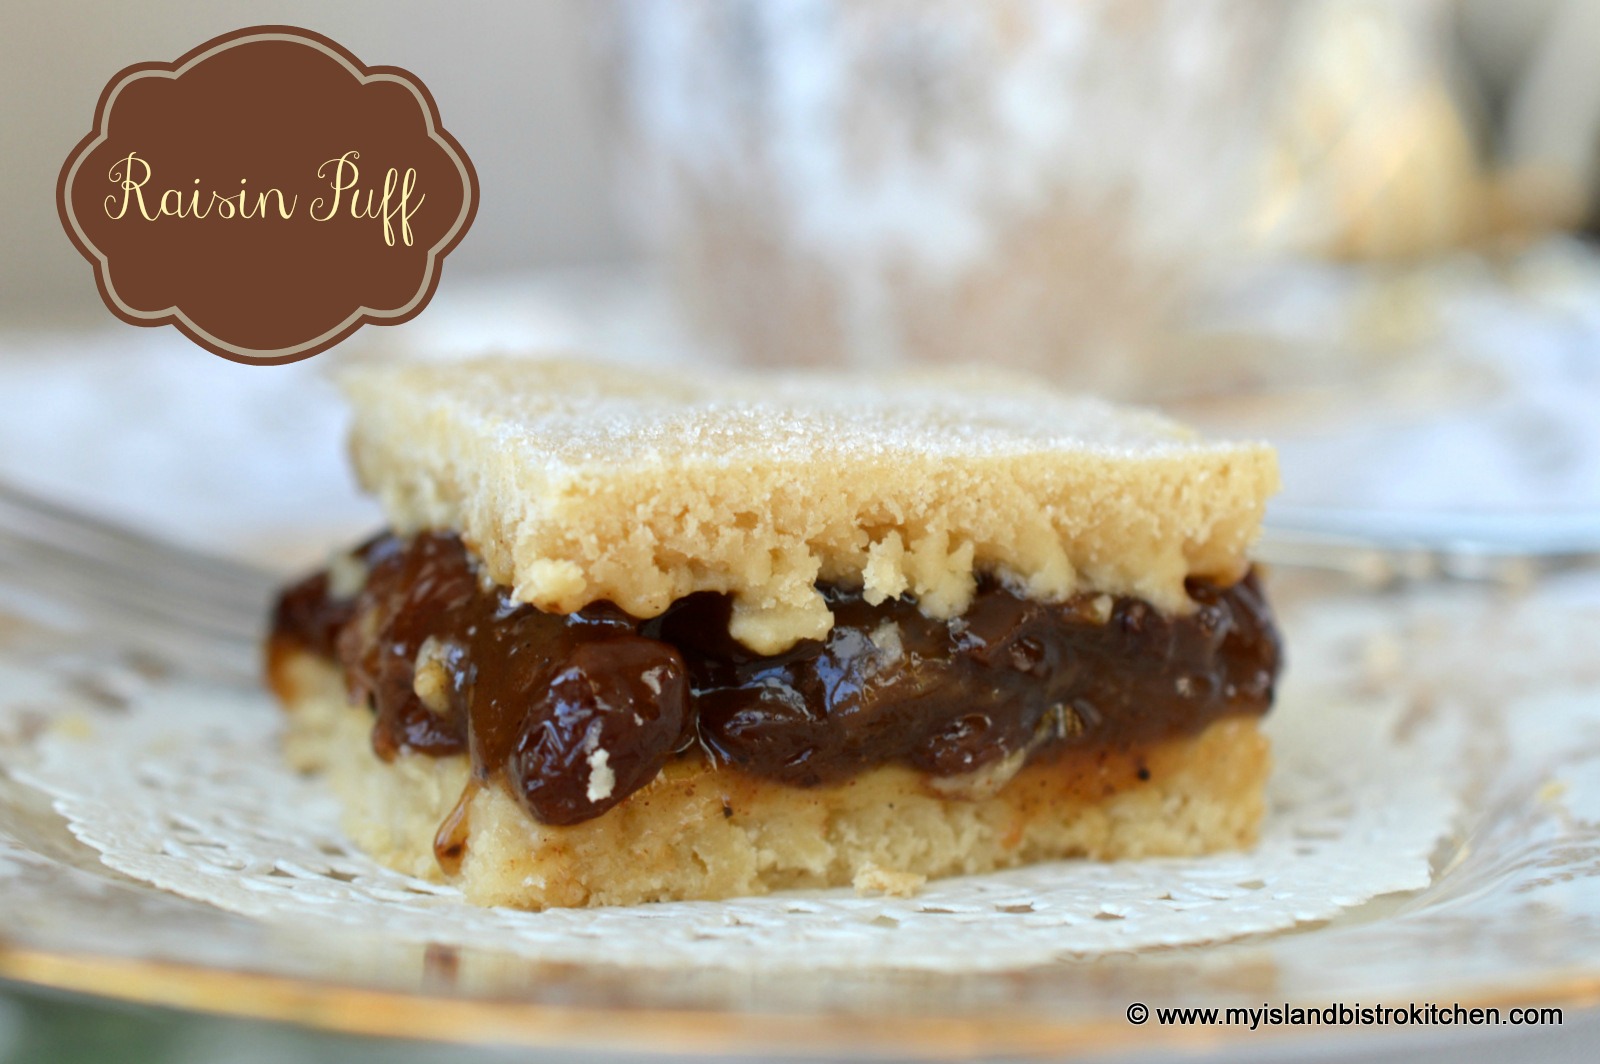
Today, I’m sharing the recipe for a real old-fashioned vintage dessert. Some of you may remember your mother or grandmother making Raisin Puff (aka Plum Puff) dessert or, perhaps, you have made it yourself. Continue reading Raisin Puff (aka Plum Puff)→
Today, I celebrate my third blogiversary, three years blogging about food. For those of you who are regular followers of my blog, you’ll notice I often focus on food that is produced in my home province of Prince Edward Island on the East Coast of Canada and I frequently features stories about Island food producers. As I have said countless times, we may be Canada’s smallest province but we sure do produce some mighty fine food! Along with top quality food products to work with, Island-produced food gives me great inspiration to cook, bake, and blog.
So, some “eye candy” to celebrate the blogiversary.
I live in a winter climate so I chose ice blue for the cupcake frosting, almost a Tiffany blue.
I like the turquoise-colored frosting against the chocolate cupcakes encased in the silver foil liners. There are many pretty paper cupcake liners on the market but I have yet to discover the trick to keeping the oil/butter from seeping through and spoiling the look of them. That’s one reason why I like the foil liners – they stay clean.
The cupcakes are themed around snowflakes and ice crystals. Here’s a close-up of the detail.
I spent some time playing with the lighting today so these cupcakes starred in many photos! (They were very patient subjects!)
One of the things I like most about cupcakes is that they are each a little mini canvas to work with. They are also more casual than a cake and each guest gets his/her own mini cake. As well, they are size and portion-controlled and don’t need to be served on a plate!
They may be a more casual option to a celebratory cake but that doesn’t mean cupcakes can’t be dressed up for the party!
Thanks for stopping by “the Bistro” today and celebrating my third blogiversary with me! Cheers!
———————–
Thank you for visiting “the Bistro” today. There are lots of ways to connect with “the Bistro” through social media:
I was recently contacted by Laure Solange Tchamdja, President and CEO of Aldanel Authentic Foods, of Charlottetown, PEI, to let me know about her new line of tomato sauces being produced right here on PEI. I sat down for a chat with Tchamdja to find out more about the sauces.
In October, 2013, Tchamdja began producing tomato sauce. The company manufactures five varieties of their tomato-based sauces, all sold in 240ml bottles: Tomato Celebration, Spinach Carnival, Chili Tango, Carrot Symphony, and Rouge Poivron. Over the period of some nine months in the lab, the BioFood Technology plant on the UPEI campus in Charlottetown helped Tchamdja convert her family recipe into a commercial product suitable for the retail market. As the company does not presently have its own manufacturing plant, the sauces are produced at the BioFood Technology plant on the UPEI campus in Charlottetown.
Tchamdja wanted to create a tomato sauce product that is safe and healthy, not too spicy, and that would help working women, young professionals, and students prepare healthy meals at home. She says her products are versatile and multipurpose and one does not have to be a chef to use them. They can be used directly from the bottle as pasta sauces, added to soups and vegetables, used as a condiment for meat and fish, as a sauce for pizza, on nachos, and even as marinades for meat and fish. So, the product can be used as is without having to cook it again or it can be used as an ingredient in a recipe. Tchamdja says her products are all natural with no preservatives and are low in sugar.
Initially, Tchamdja sold her tomato sauces at local PEI shops such as Riverview Country Market. She has since expanded her markets to include Sobey’s and Co-op Supermarkets, Pete’s Frootique in Halifax, and Winners and Home Sense stores in Eastern Canada.
The products are sold under the Aldanel™ label, the letters for which are formed from those found in the names of her children. Depending on the retailer, prices per 240 ml bottle range from $4.49 to $5.99 (as of the time of writing).
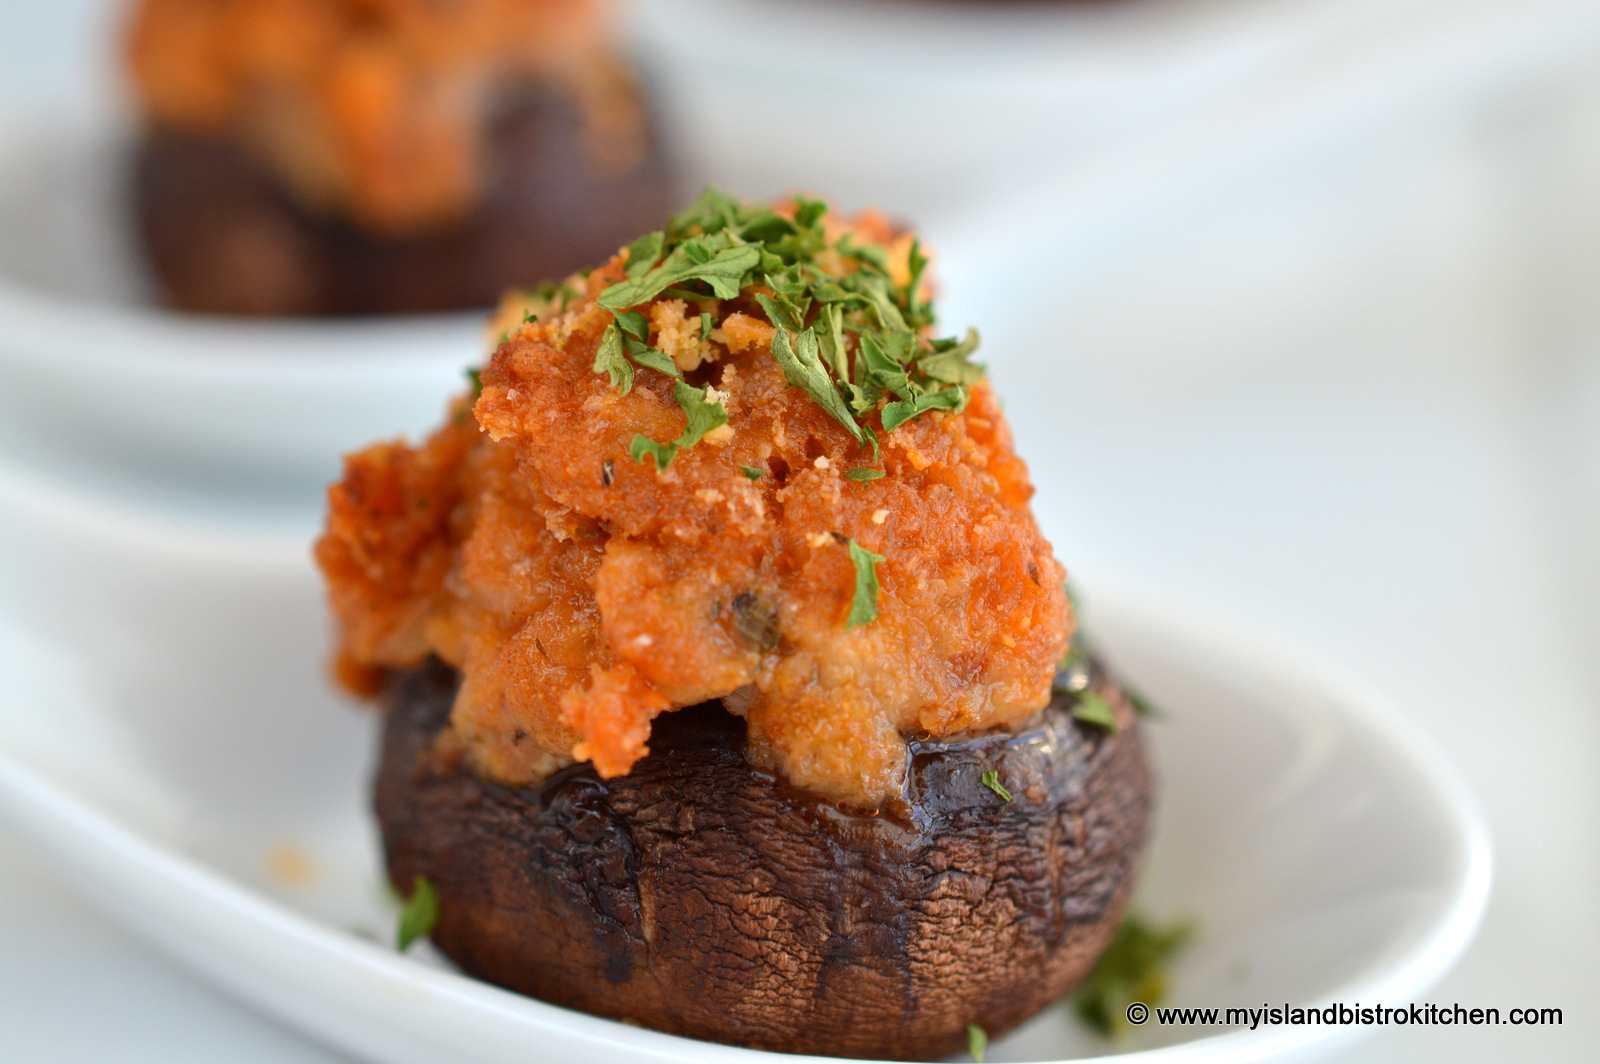
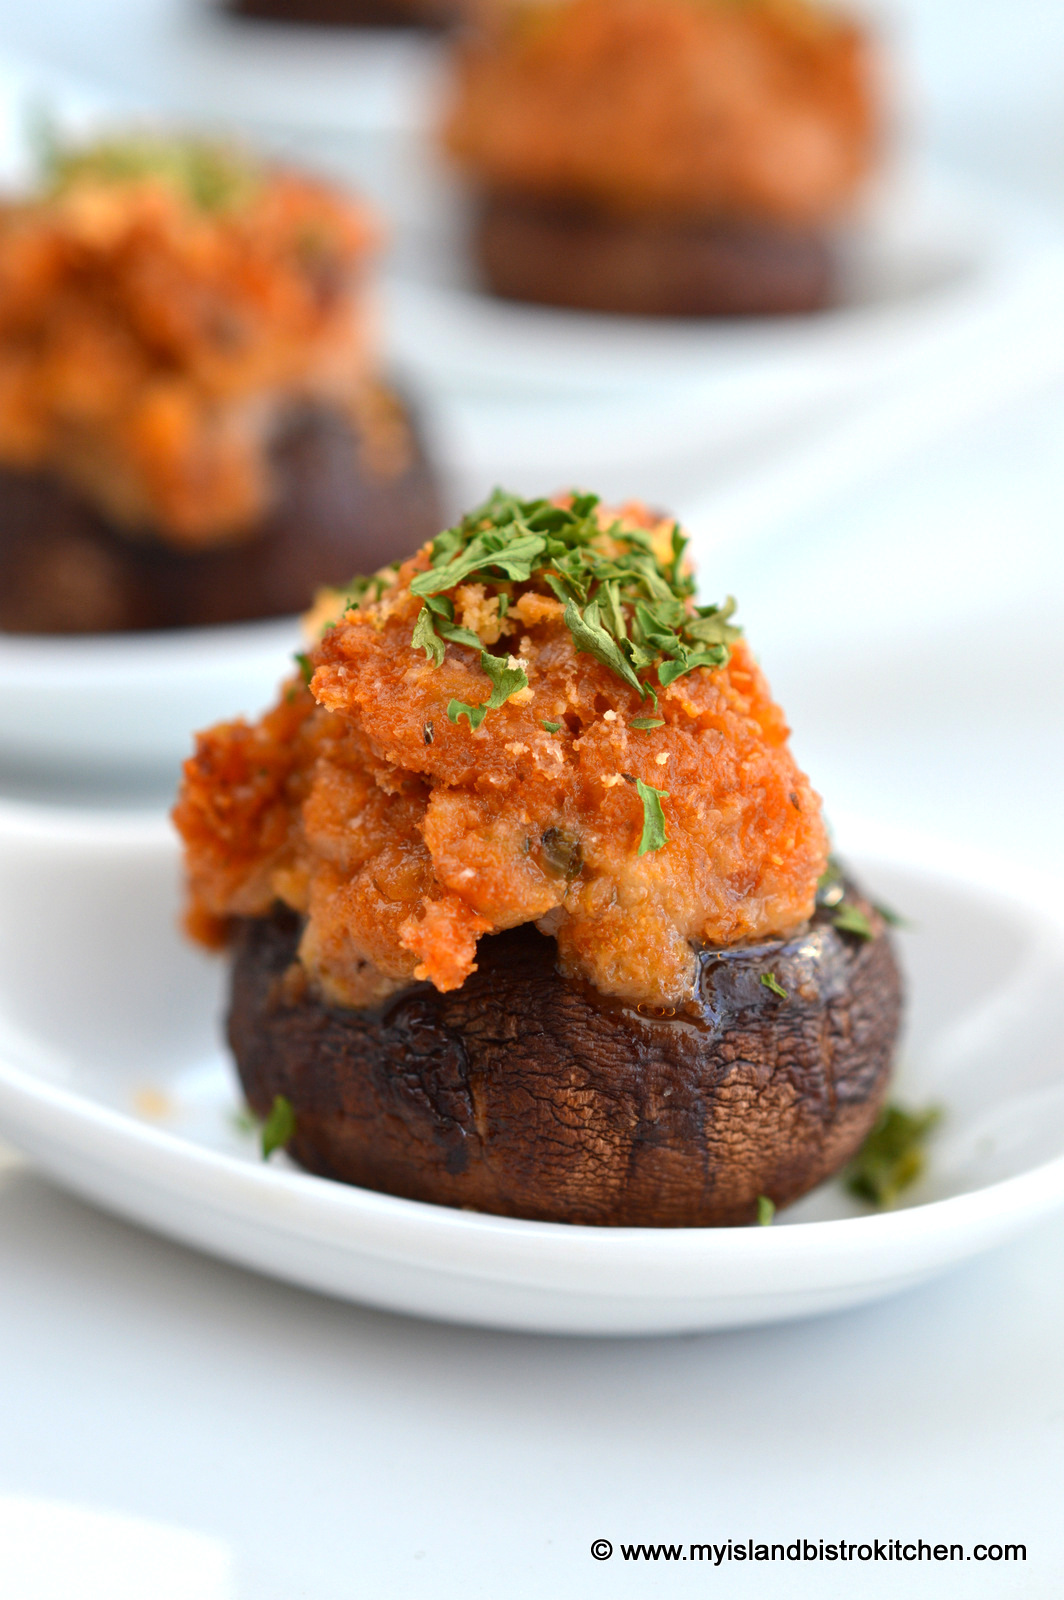
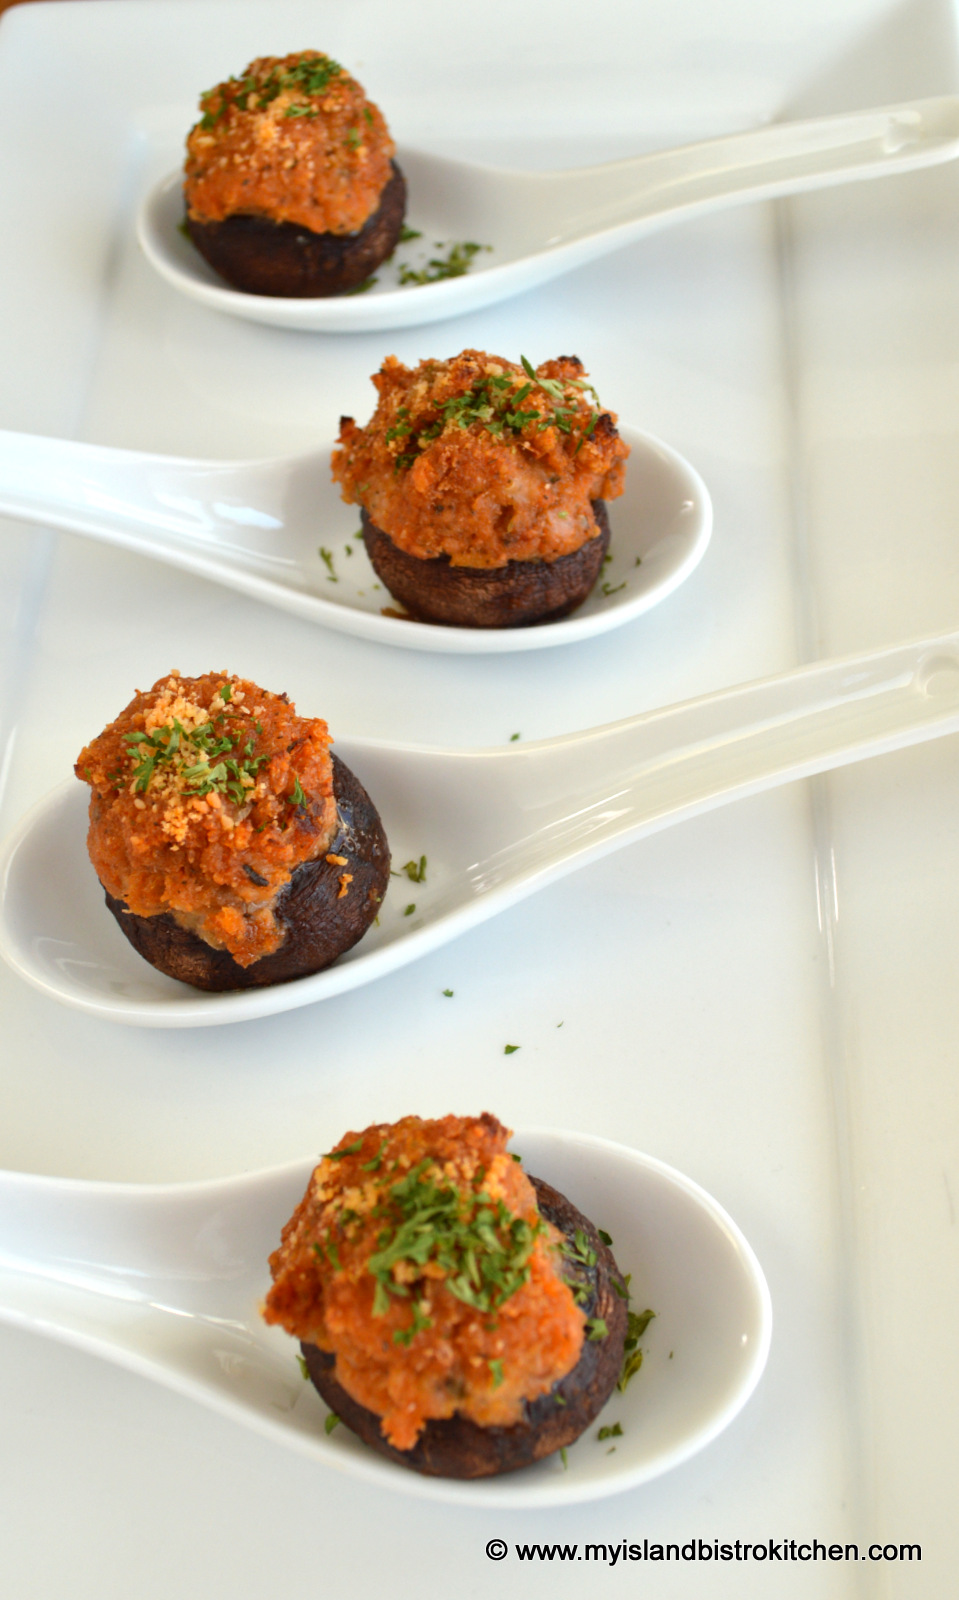
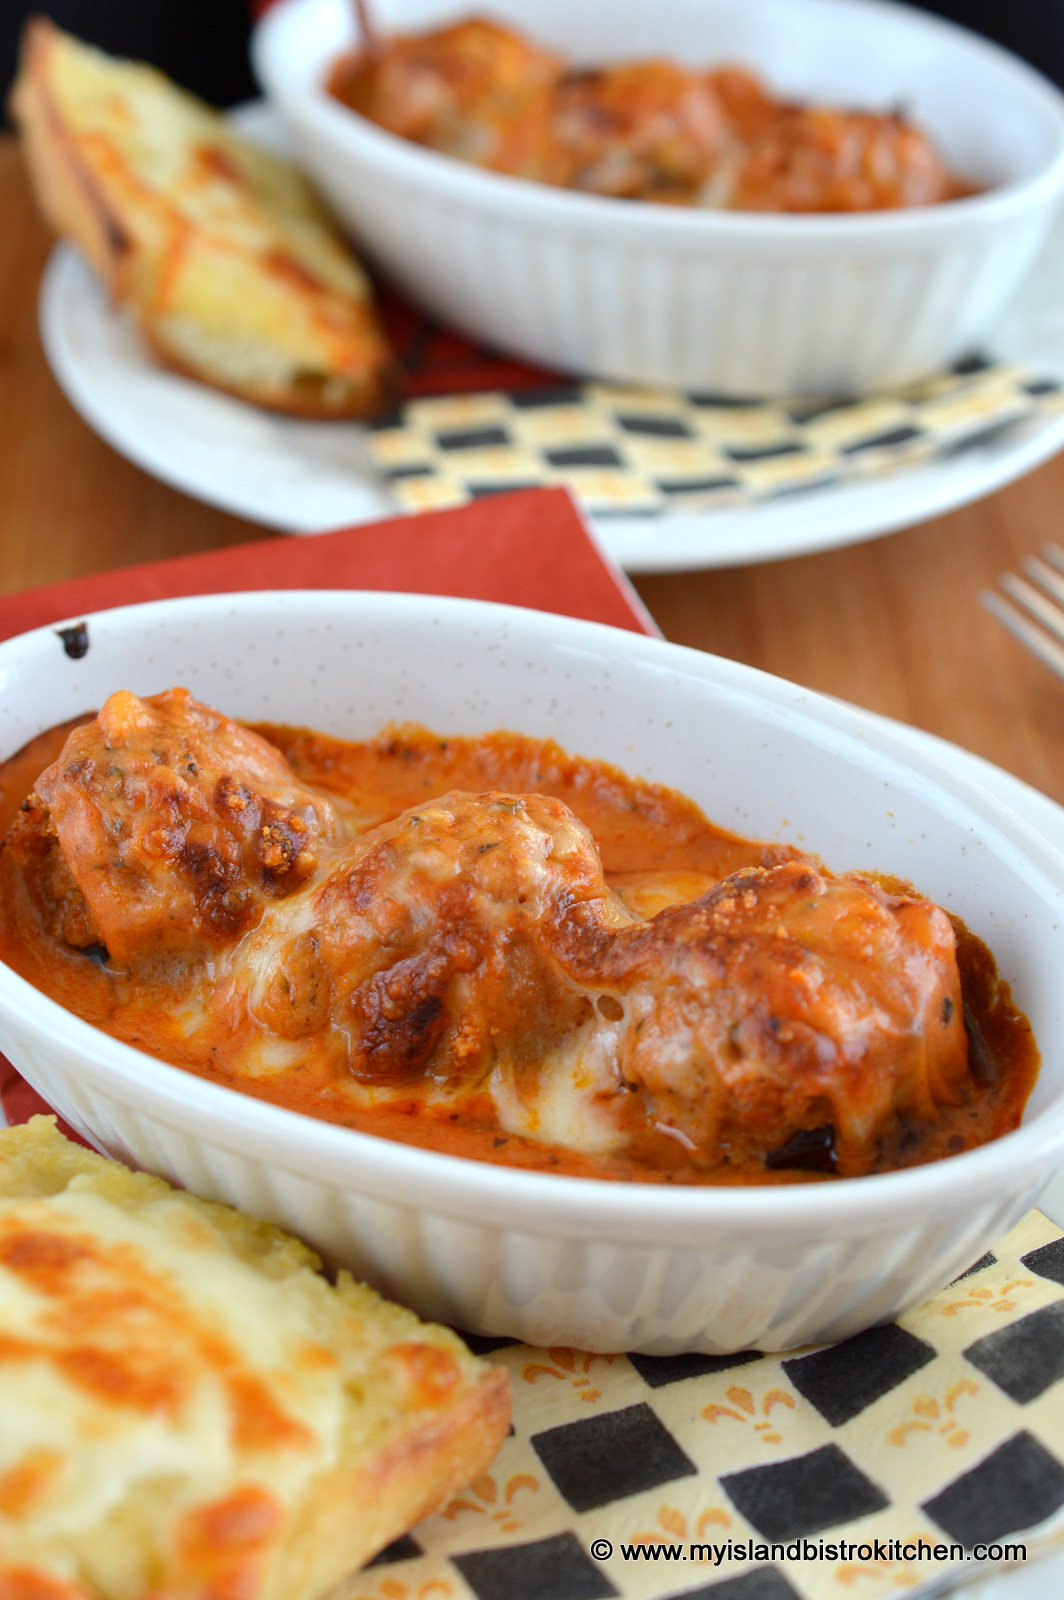
Tchamdja offered me some complimentary samples of her Tomato Celebration sauce to try. Tchamdja is correct – I found the sauce to be a versatile ingredient in several dishes. I have used it as a pizza sauce and found it very tasty. I have also used it in a recipe I created for baked stuffed fingerling hors d’oeuvres. And, I have used it as an ingredient in the following recipes for sausage-stuffed cremini mushroom caps.
My recipe for stuffed mushrooms is suitable for hors d’oeuvres or, add a tomato sauce, and they turn into an appetizer.
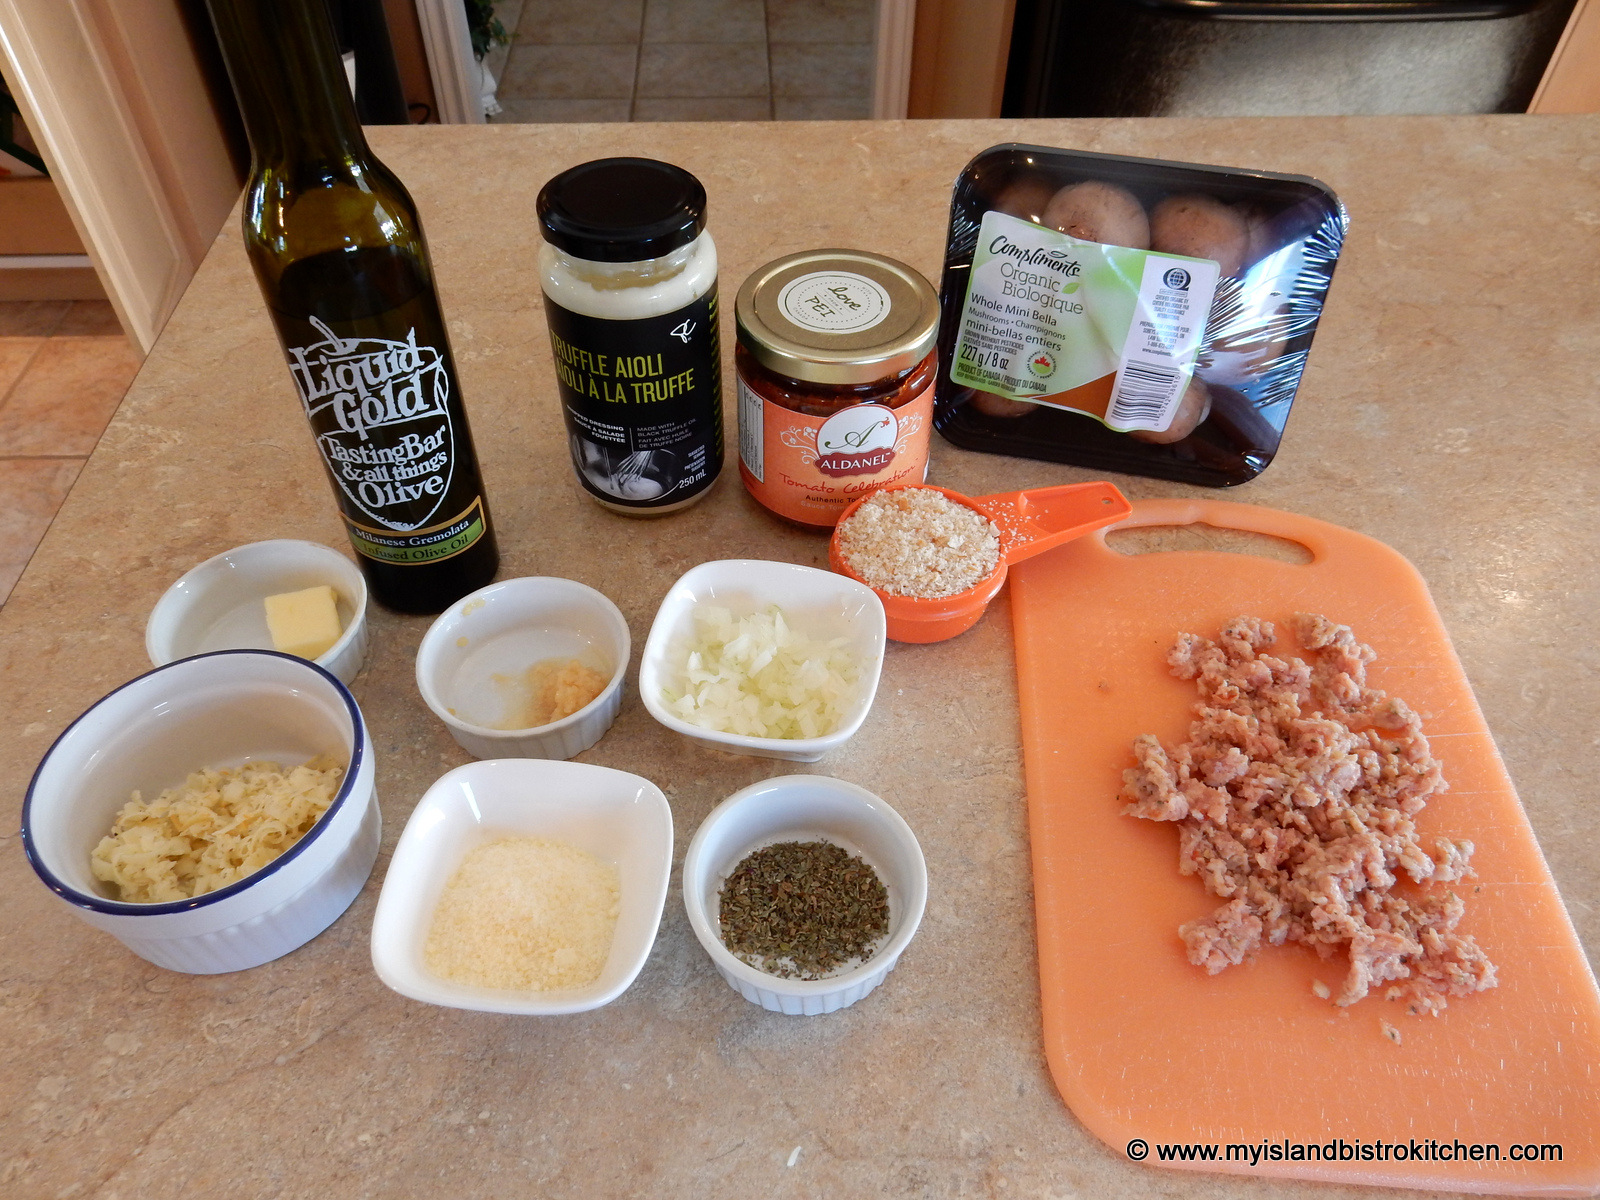
I have chosen to use cremini mushrooms but white button mushrooms would also work. As well, any kind of sausage can be used – I have chosen to use sun-dried tomato sausage from KJL Meats here in Charlottetown. The herb and garlic Gouda cheese I used is from Glasgow Glen Farm in New Glasgow, PEI. The tomato sauce that I am featuring in both recipes is Aldanel’s “Tomato Celebration” variety but any of their other sauces would work well, too.
Sausage-stuffed Cremini Mushroom Caps
Stuffed Cremini Mushroom Caps (Hors d’oeuvres)
1 tsp olive oil ½ tsp butter
12 medium-sized cremini mushrooms, washed, dried, and de-stemmed (reserve the stems) 2 cloves of garlic, minced 1½ tbsp onion, finely chopped 2 oz. sun-dried tomato sausage, removed from casing and loosely broken up 2 tbsp Ardanel™ tomato sauce 2 tsp truffle aioli ½ tsp basil ½ cup fine breadcrumbs 2 tbsp shredded Gouda cheese 1 tbsp finely grated Parmesan cheese Salt and pepper, to taste
Method:
Assemble ingredients.
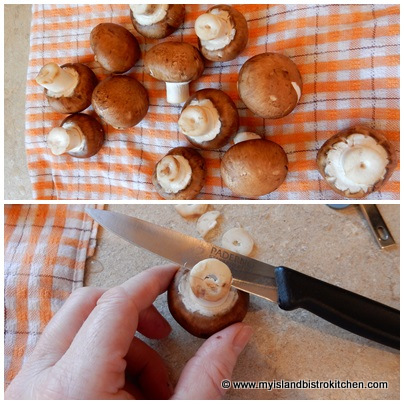
Trim and discard ends from mushroom stems.
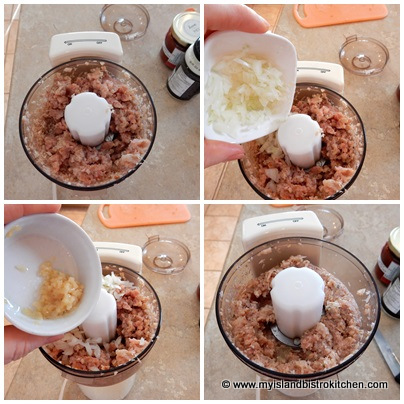
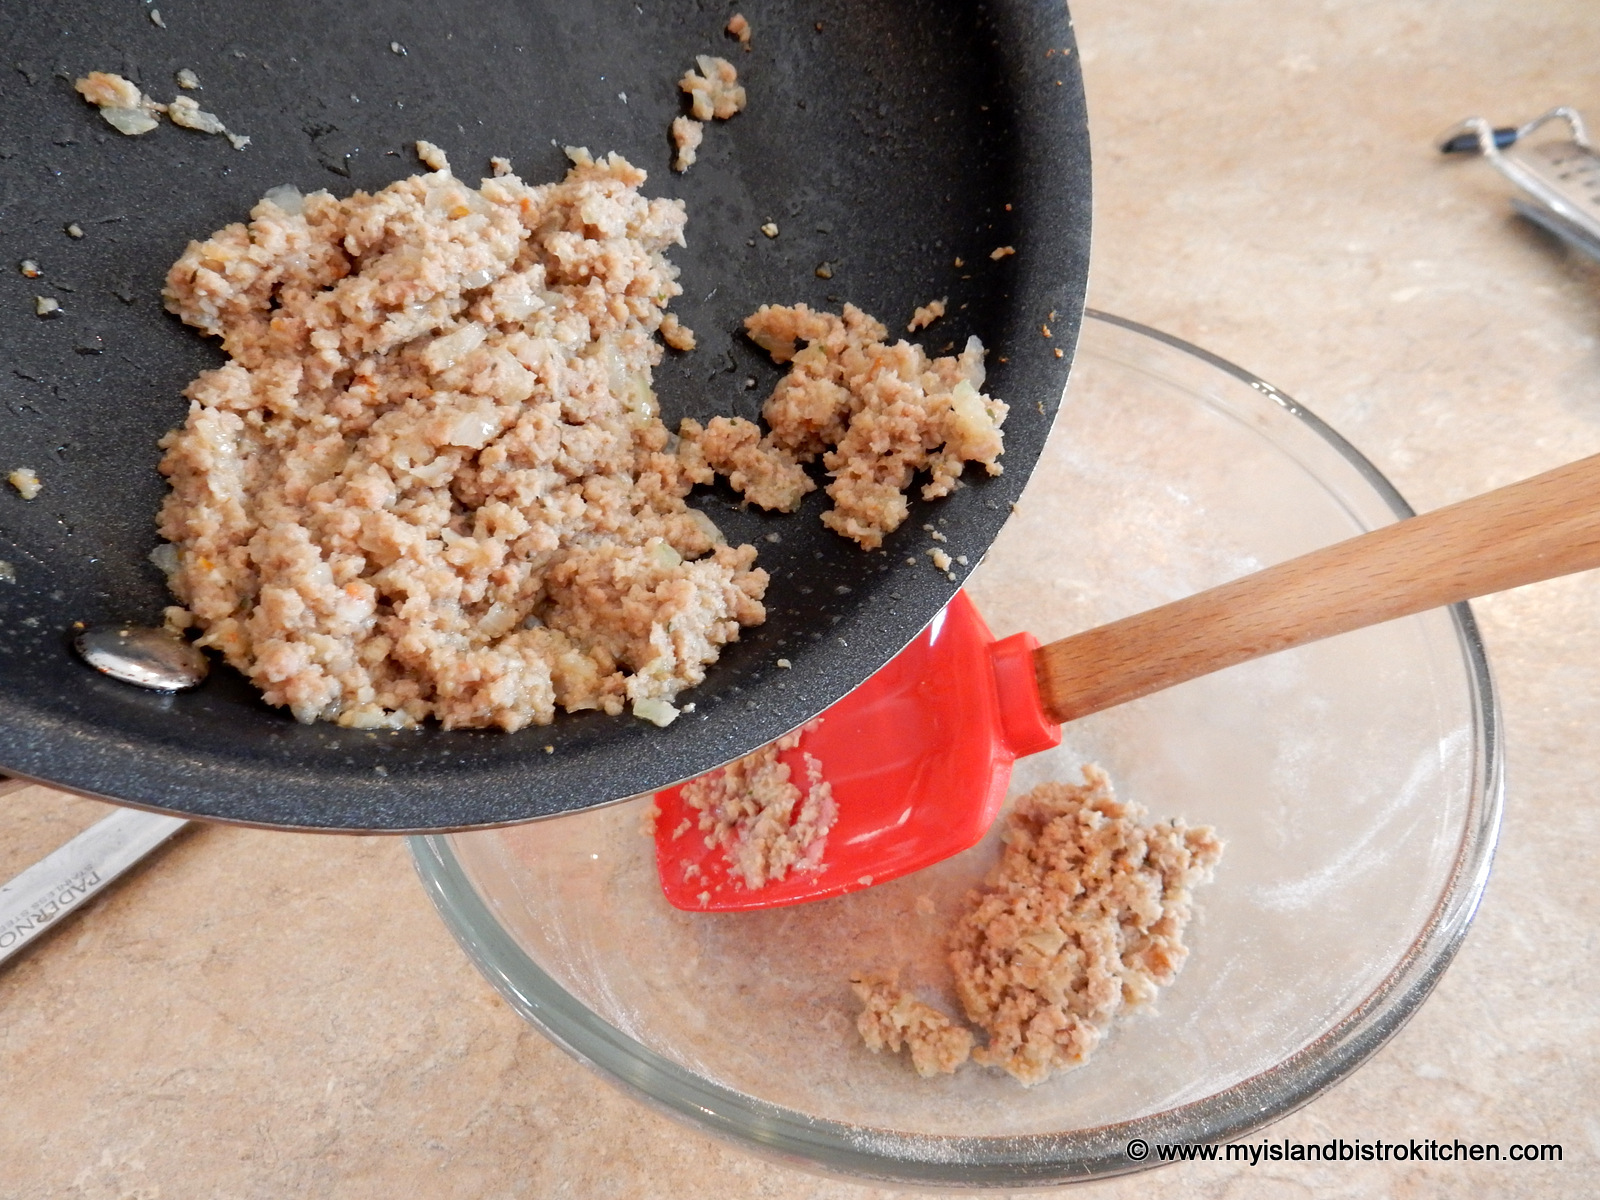
Remove the stems from the mushroom caps and place mushroom stems into bowl of small food processor. Pulse until mixture is finely chopped.
Add garlic, onion, and sausage and pulse just until mixture is combined.
Preheat oven to 375ºF.
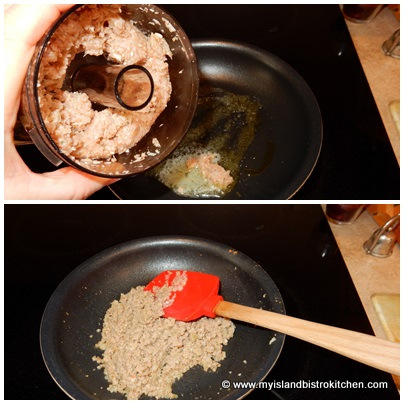
Heat oil in small frypan. Add butter.
Add mushroom-sausage mixture and cook over medium heat for 4-5 minutes, or until sausage meat is no longer pink.
Transfer mixture to small bowl.
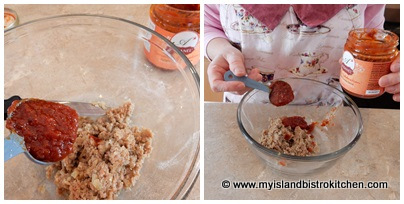
Add the tomato sauce.
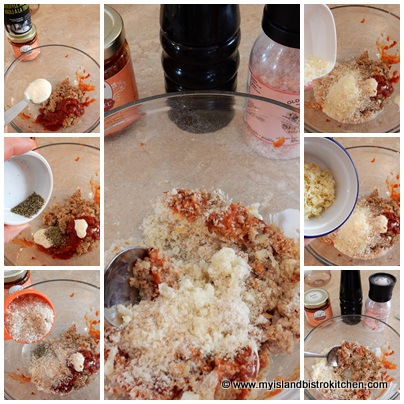
Add truffle aioli, basil, breadcrumbs, and cheeses along with salt and pepper to taste.
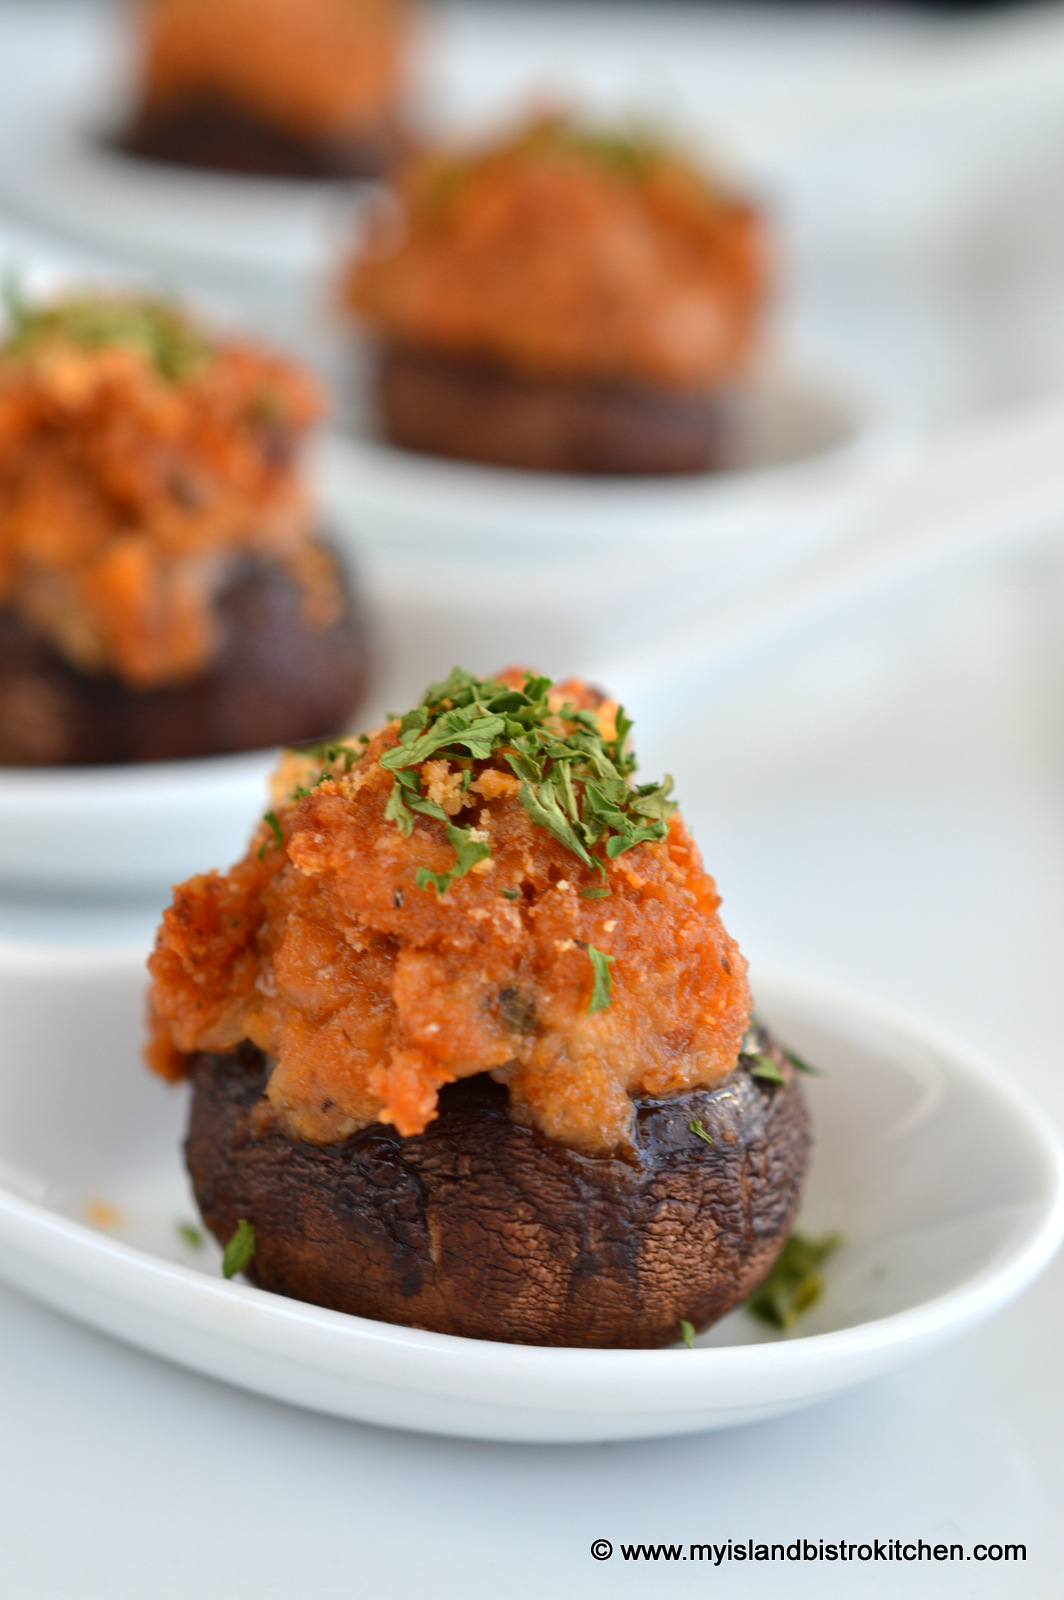
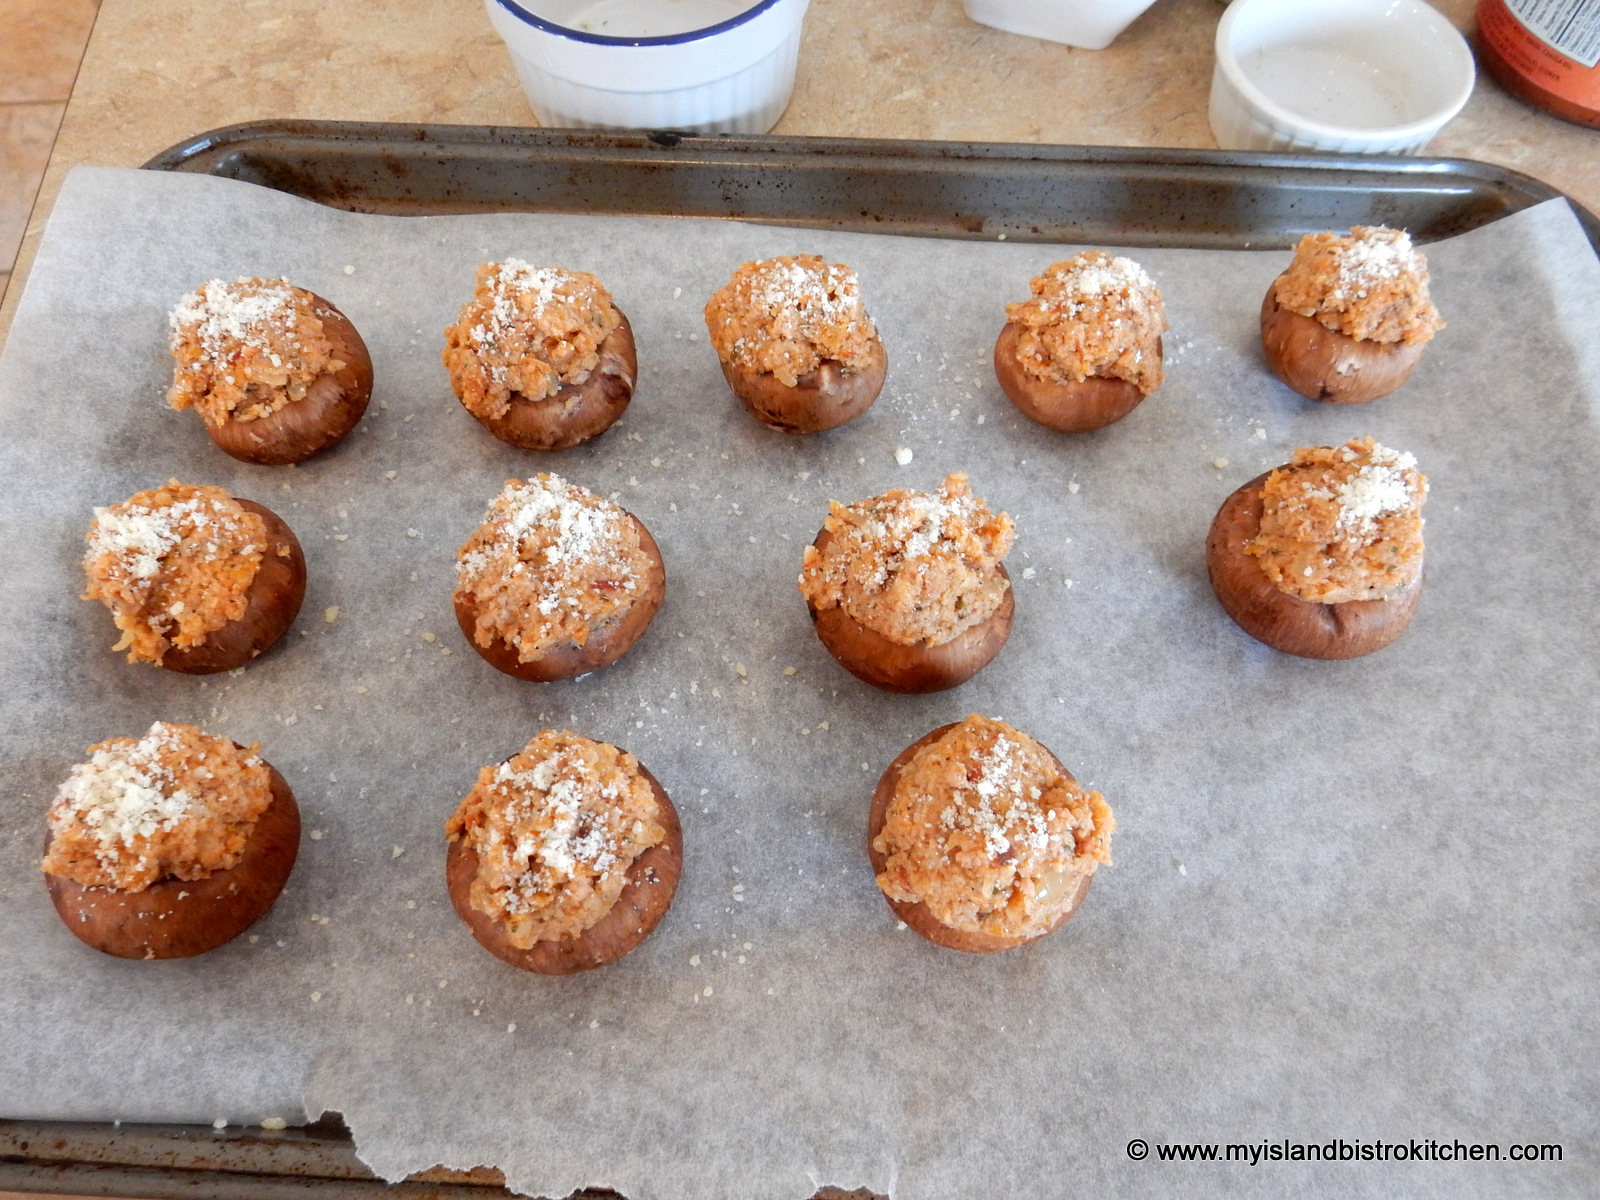
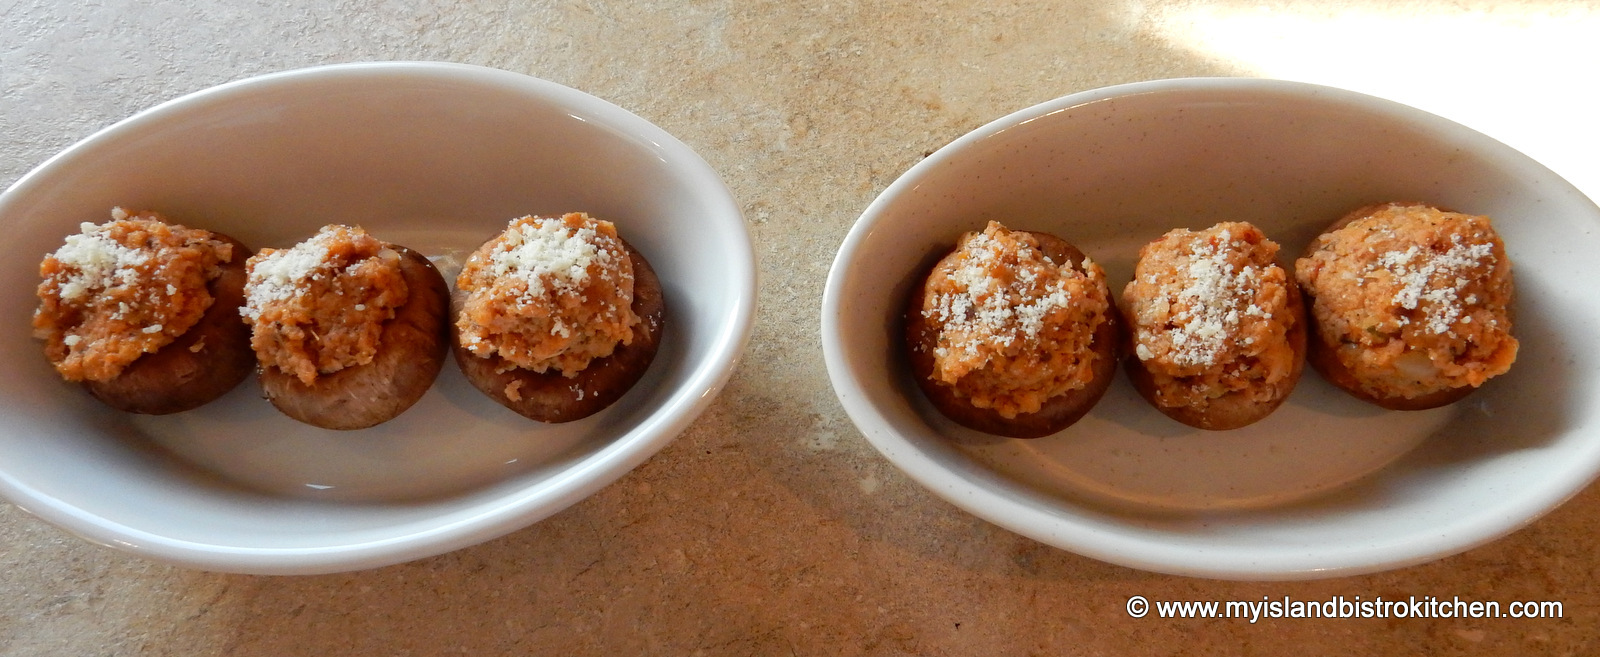
Place mushroom caps on parchment-lined baking sheet. Stuff each mushroom cap with mixture, slightly mounding the top. Sprinkle with finely grated Parmesan cheese.
Bake for about 12 minutes. Garnish with fresh chives, sliced green onion, or parsley, if desired. Serve immediately.
Yield:12 hors d’oeuvres
Sausage-stuffed Cremini Mushroom Caps
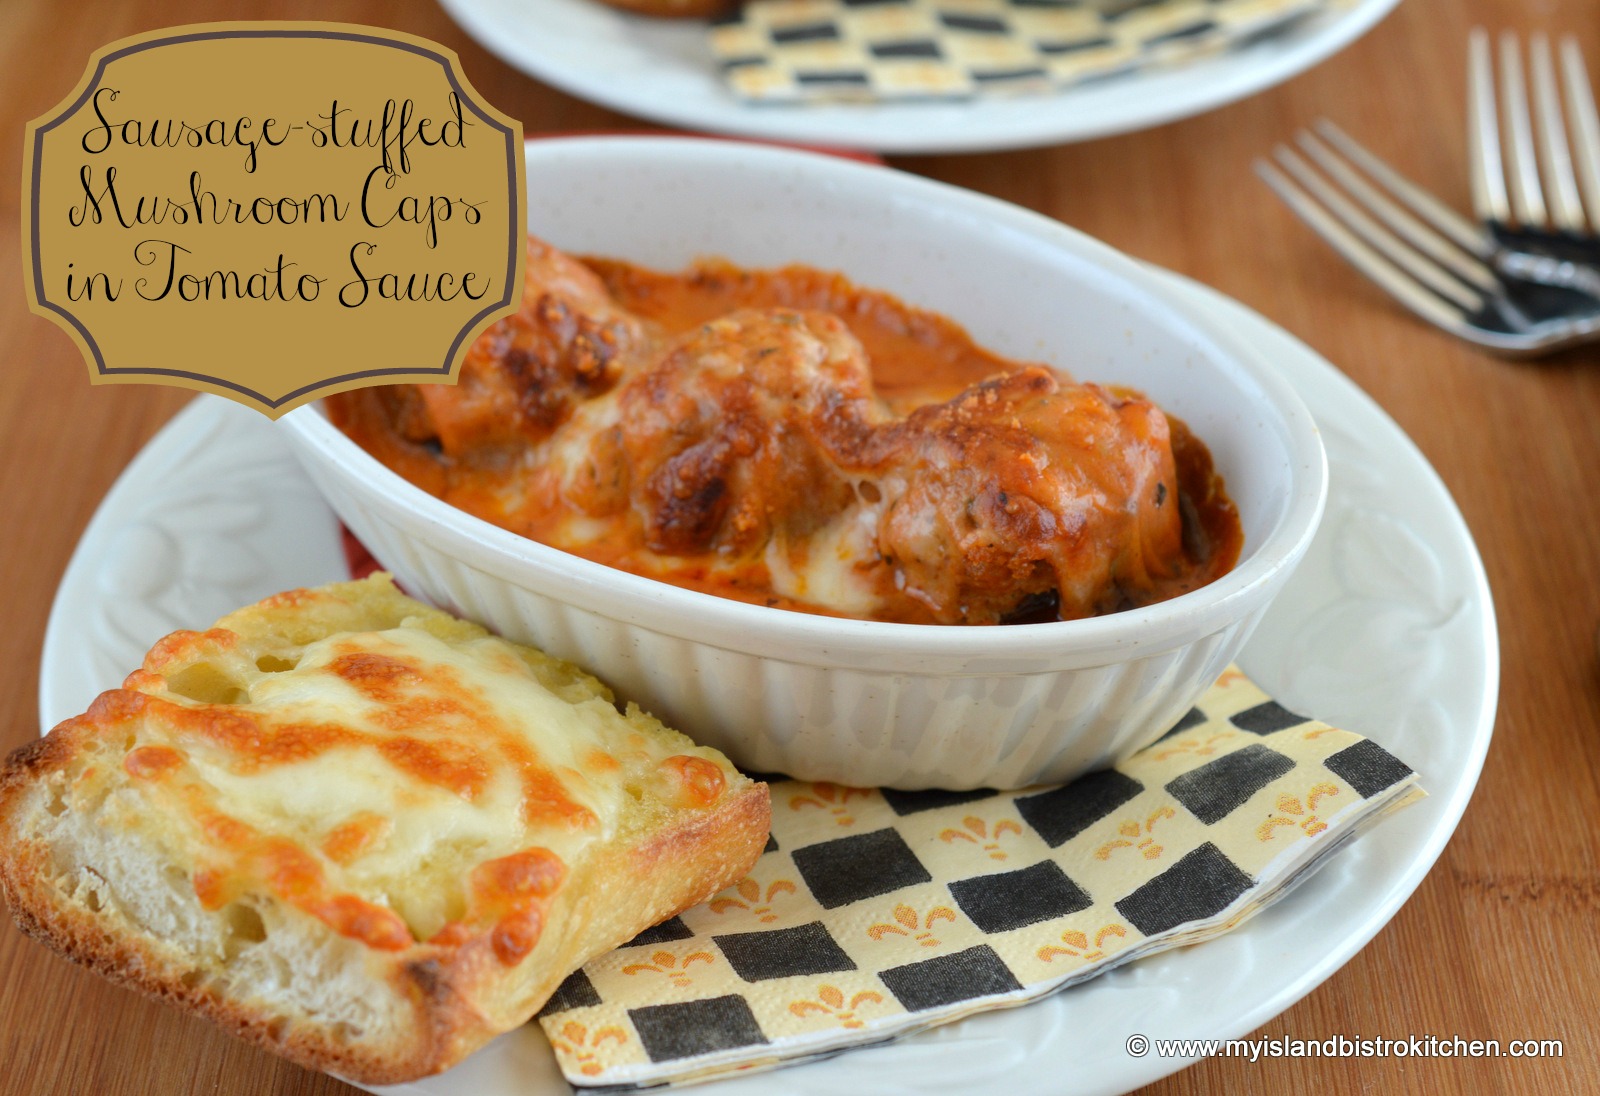
Stuffed Cremini Mushroom Caps with Tomato Sauce (Appetizer)
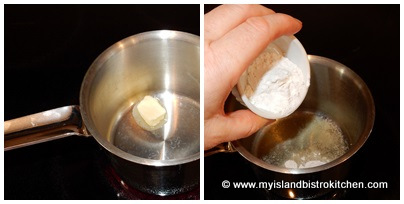
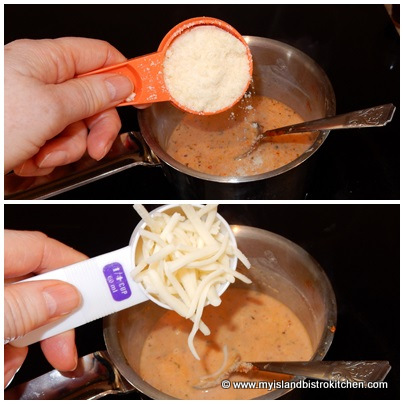
½ tbsp butter 1½ tbsp flour ½ cup chicken or vegetable broth ½ cup light cream or milk ¼ cup Ardanel™ tomato sauce ½ tsp Italian seasoning ¼ cup finely grated Parmesan cheese ½ cup shredded Mozarella cheese
Method:
Over medium heat, melt butter. Stir in flour.
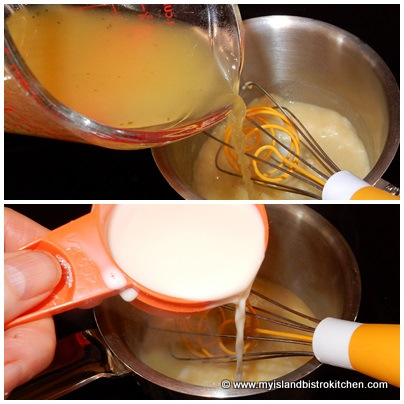
Whisk in the broth and milk until mixture is smooth.
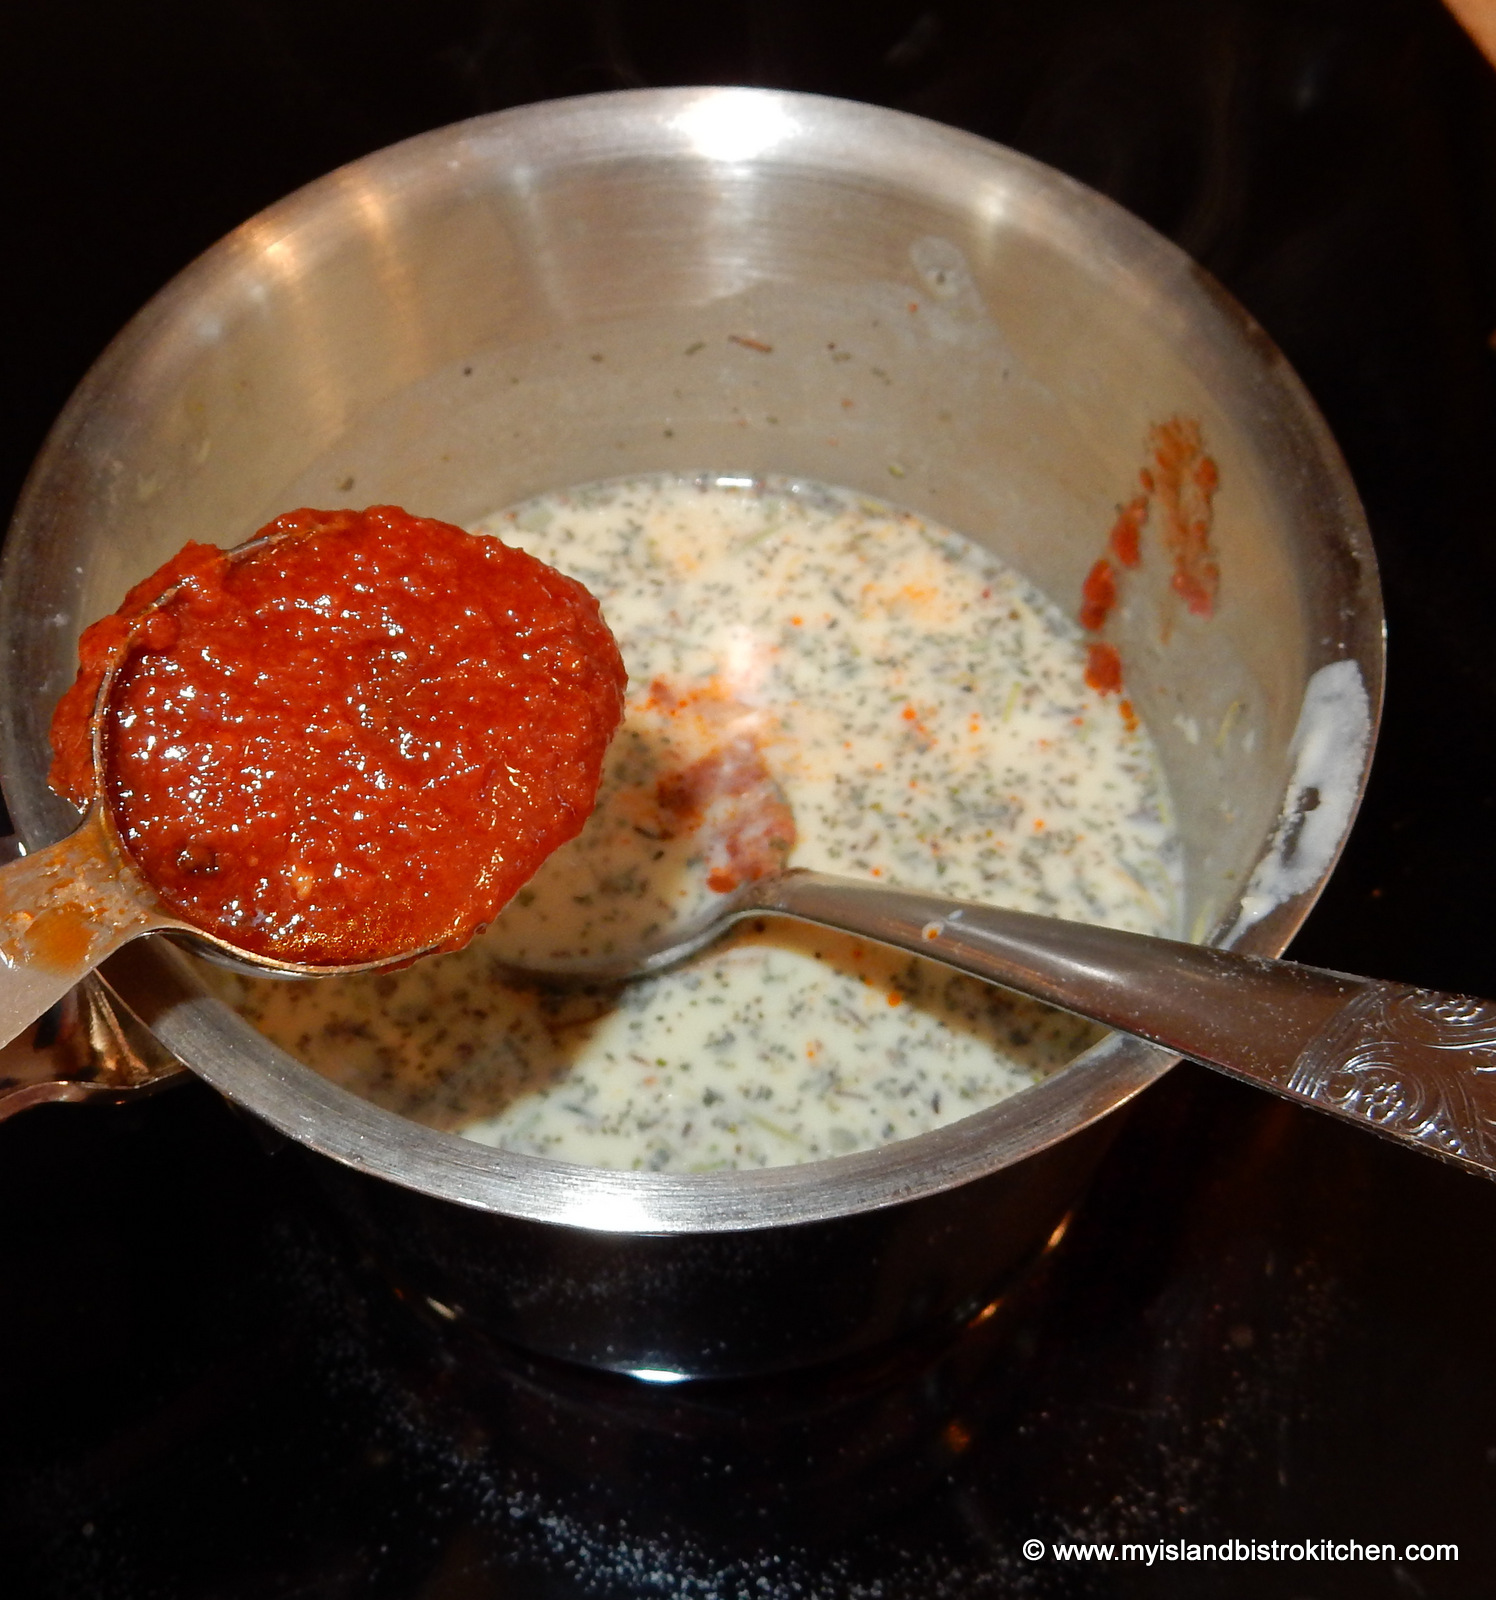
Stir briskly until mixture starts to thicken then add the tomato sauce, Italian seasoning, and cheeses.
Stir until cheese is melted and sauce is thickened to desired consistency.
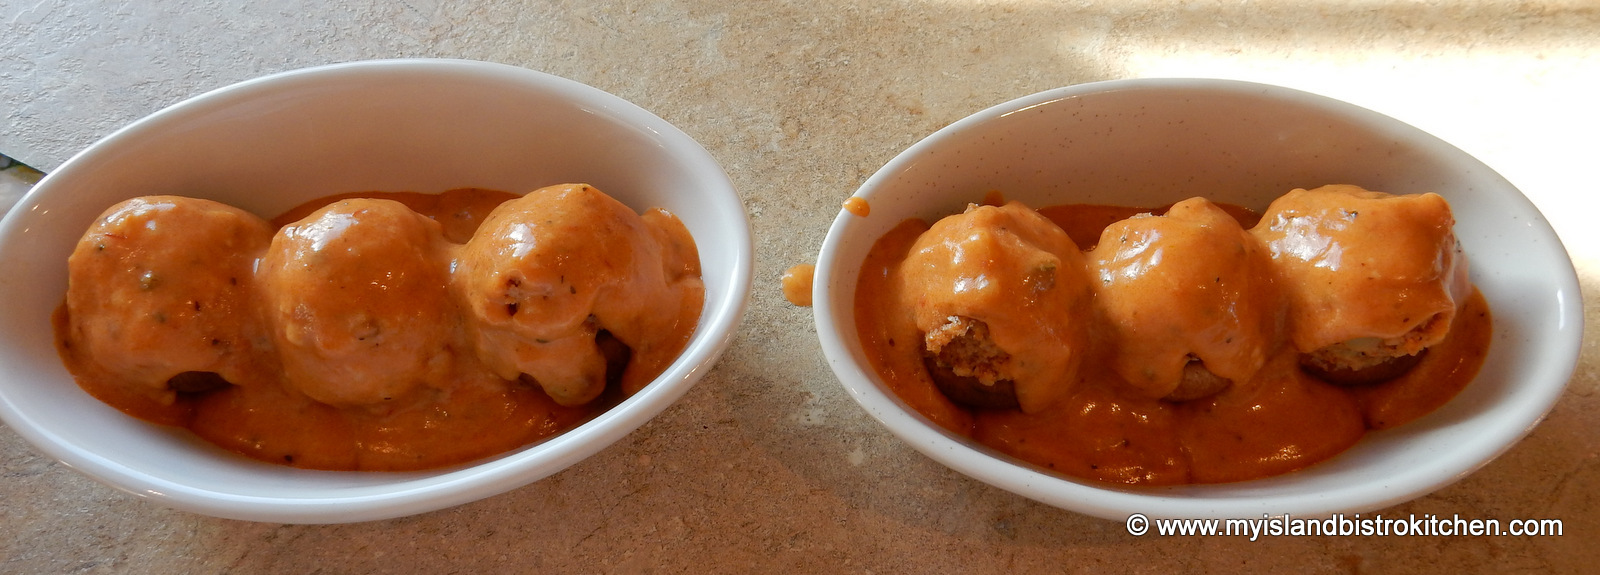
Grease four oven-safe appetizer-sized baking dishes. Place three stuffed mushrooms into each dish.
Pour the sauce over the mushrooms, dividing it equally between the four dishes.
Sprinkle with shredded mozzarella cheese.
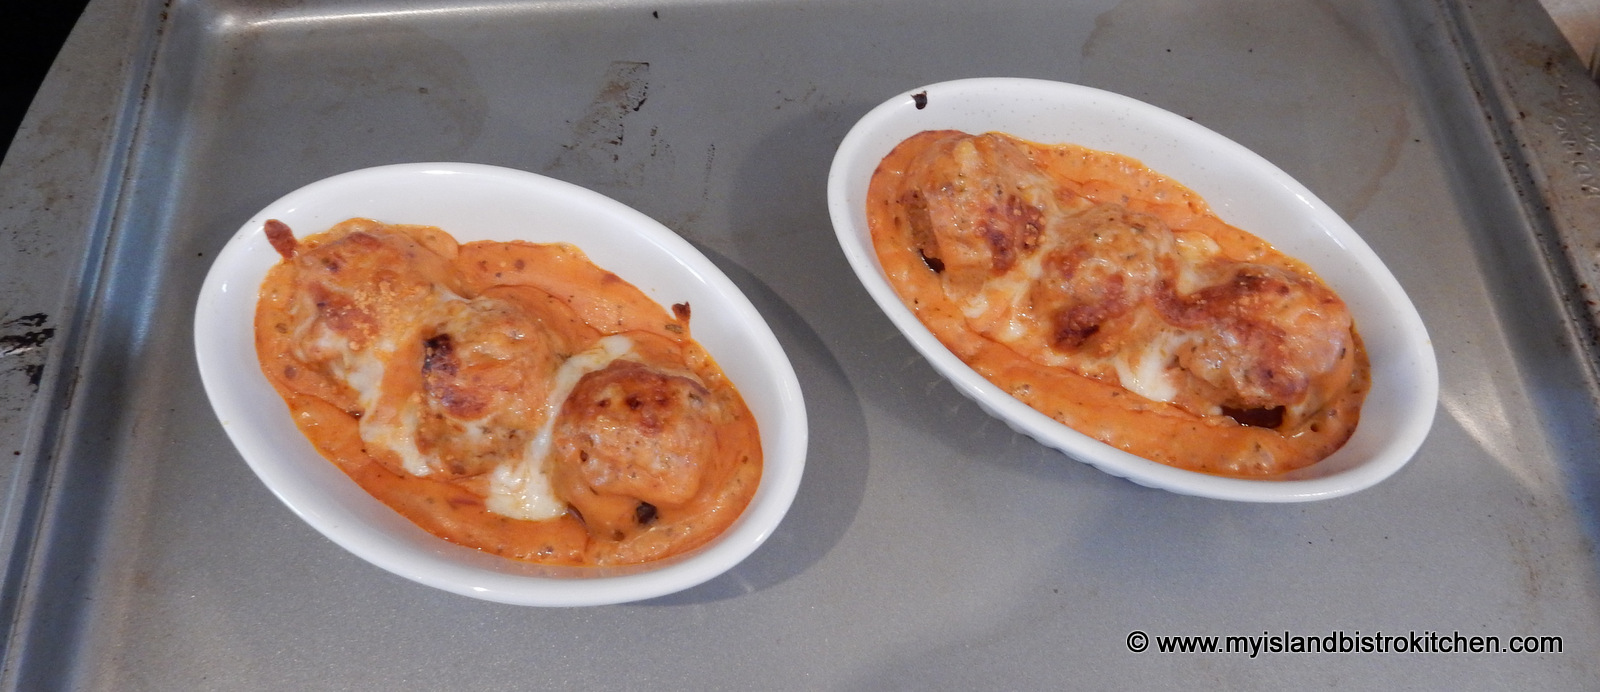
Broil on high for about 5-6 minutes, until cheese is melted and sauce is bubbling. Serve immediately.
Yield:4 appetizer servings
Sausage-stuffed Cremini Mushroom Caps in Tomato Sauce
To learn more about the Aldanel tomato sauce products, visit their website.
This recipe is also being submitted for the Foodie Pages CHEF’S BOX Challenge.
———————–
Thank you for visiting “the Bistro” today. There are lots of ways to connect with “the Bistro” through social media:
Brrrrr, it’s been a cold day on Prince Edward Island. Our first cold snap of the season. Temperatures were around -13C but, with the wind chill, it certainly felt a lot colder than that. A good day to curl up by the fireside with some tasty food and a good cup of tea.
Was overseas to New Brunswick yesterday and, of course, that meant a stop at Tony’s Bistro and Pâtisserie in Moncton. I introduced you to this great French Pâtisserie back in November (click here for the link to the story).
We had lunch at Tony’s yesterday and, naturally, I had to bring home some goodies that we could have for afternoon tea today. Ready to have a peek?
Let’s start with these tasty little quiches. Nice flaky pastry, these were delicious!
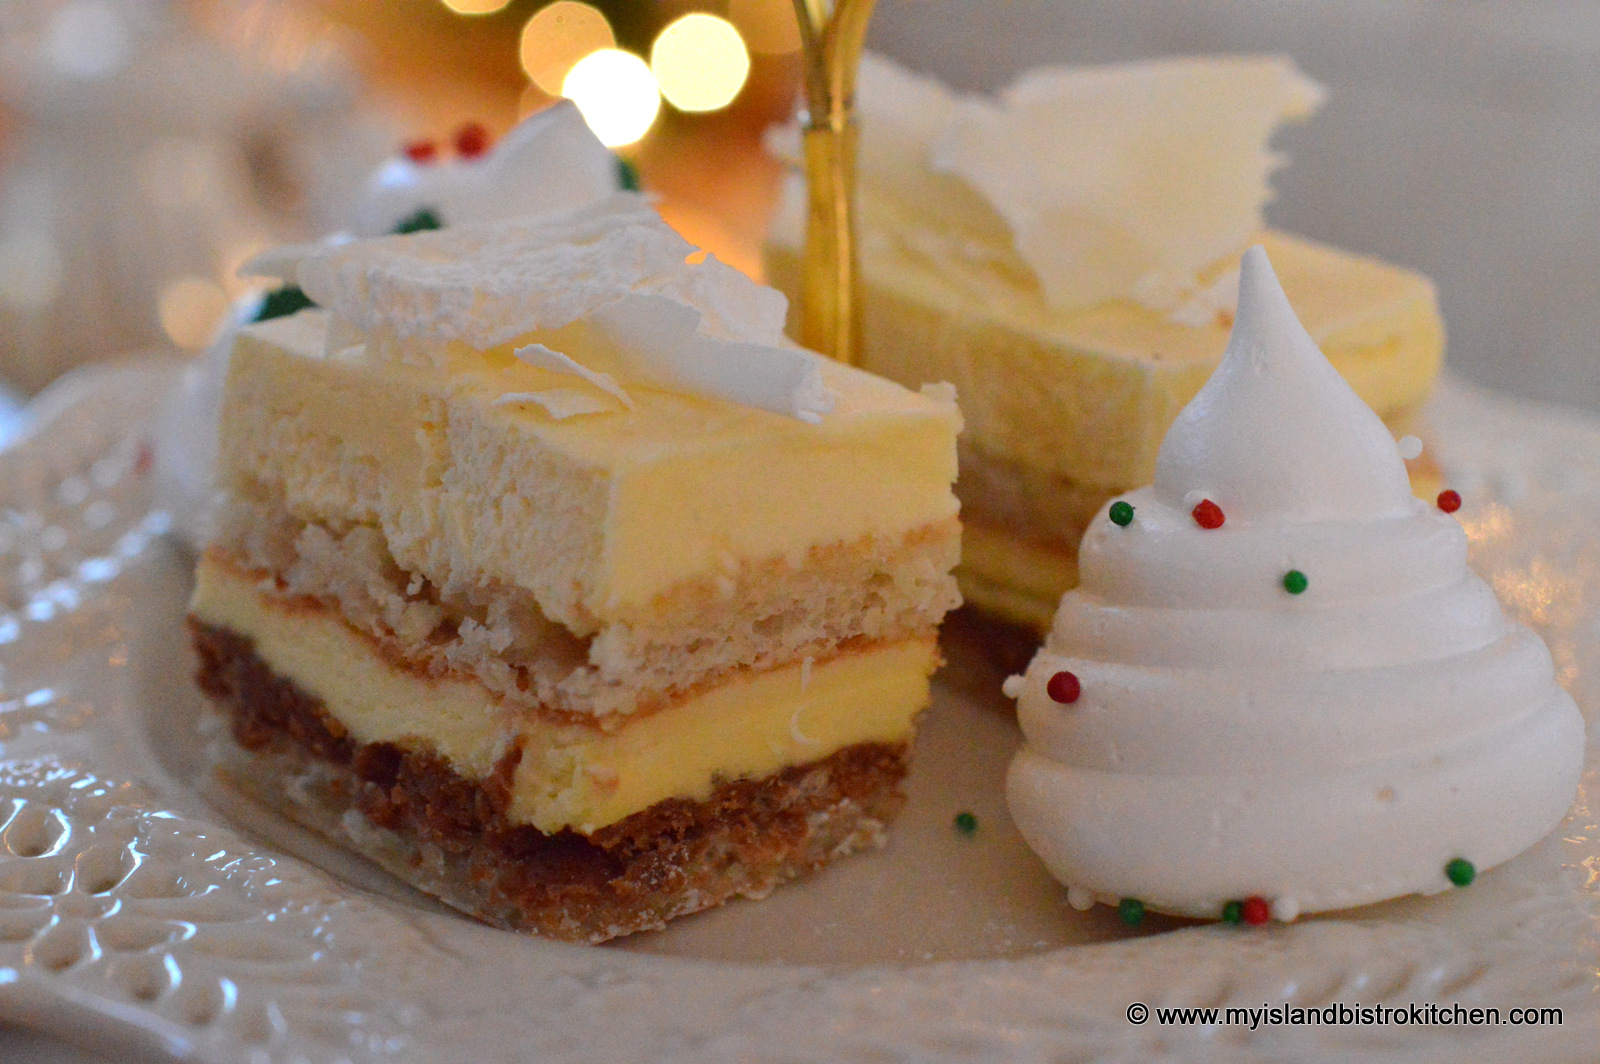
Then, there was the White Chocolate Rocher cake. This was seriously rich and decadent! Layers of decadence!
Did you check out the little white meringue trees? Light as air.
My choice of tea today was the Lady Slipper Blend from Lady Baker’s Tea Trolley. You can read the story I previously published on this tea company by clicking here.
The China cups and saucers are Royal Vale but I could find no pattern name on them.
This will be my last afternoon tea of 2014 so thank you to those who have visited my tea table over the past year. I will also be joining Sandi’s last Tea Time party of the year over at Rose Chintz Cottage.
And, if you find yourself in Moncton, New Brunswick, I recommend a visit to Tony’s Bistro and Pâtisserie at 137 McLaughlin Drive.
Happy New Year, everyone!
——————–
Thank you for visiting “the Bistro” today. There are lots of ways to connect with “the Bistro” through social media:
Throughout the holiday season, I am known to change tablesettings several times depending on number of guests and type of dining (e.g., brunch, lunch, dinner, etc.). That, however, doesn’t mean that I don’t rejig and re-use some of the same elements in more than one tablesetting.
I recently shared my tablesetting for an intimate dinner for four where I clustered three poinsettias in the center of the small round table and set a miniature poinsettia at each place setting. To view this tablesetting, click here.
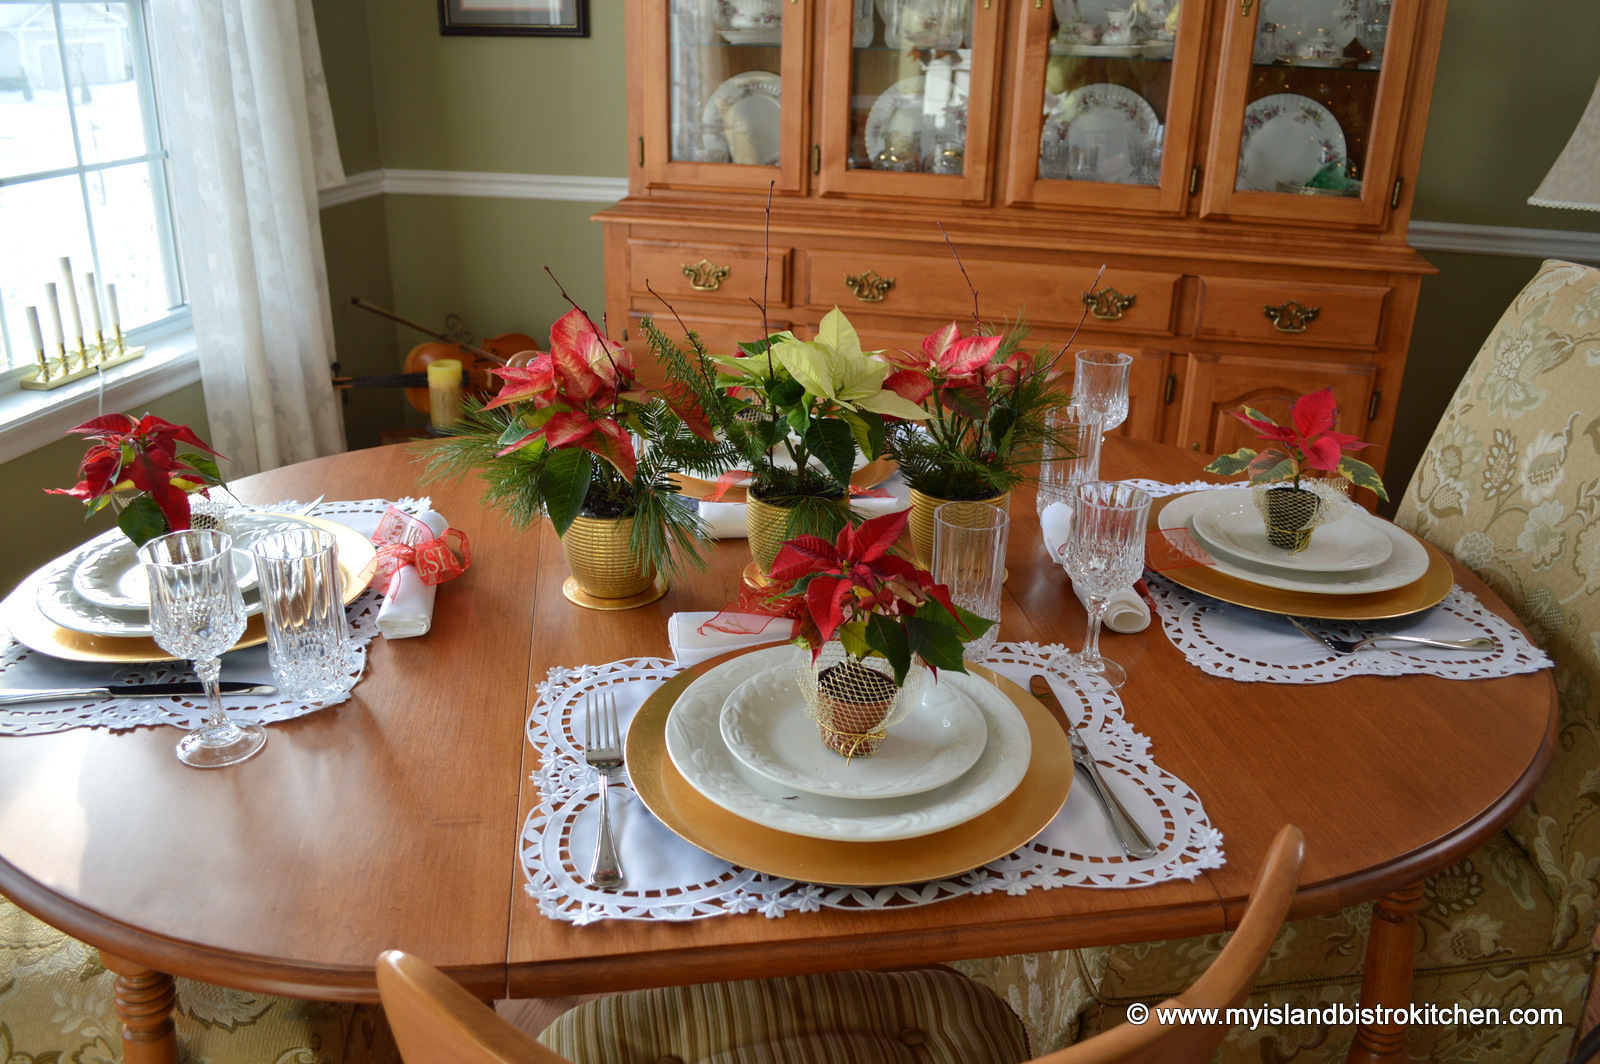
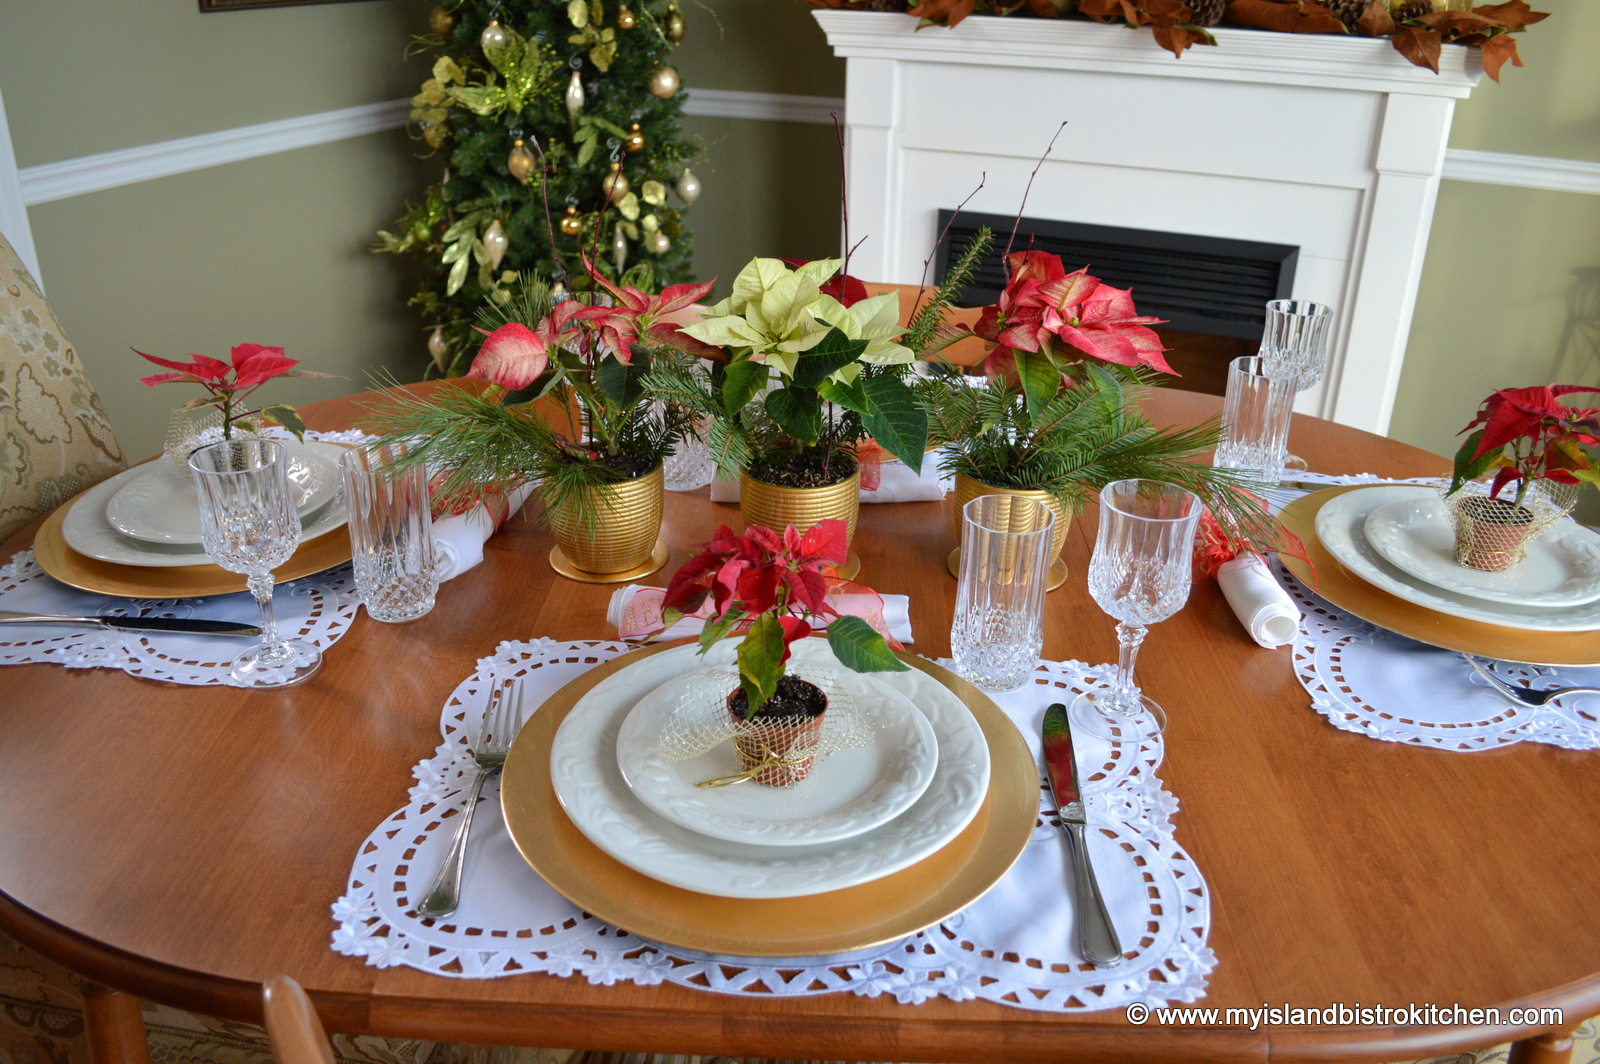
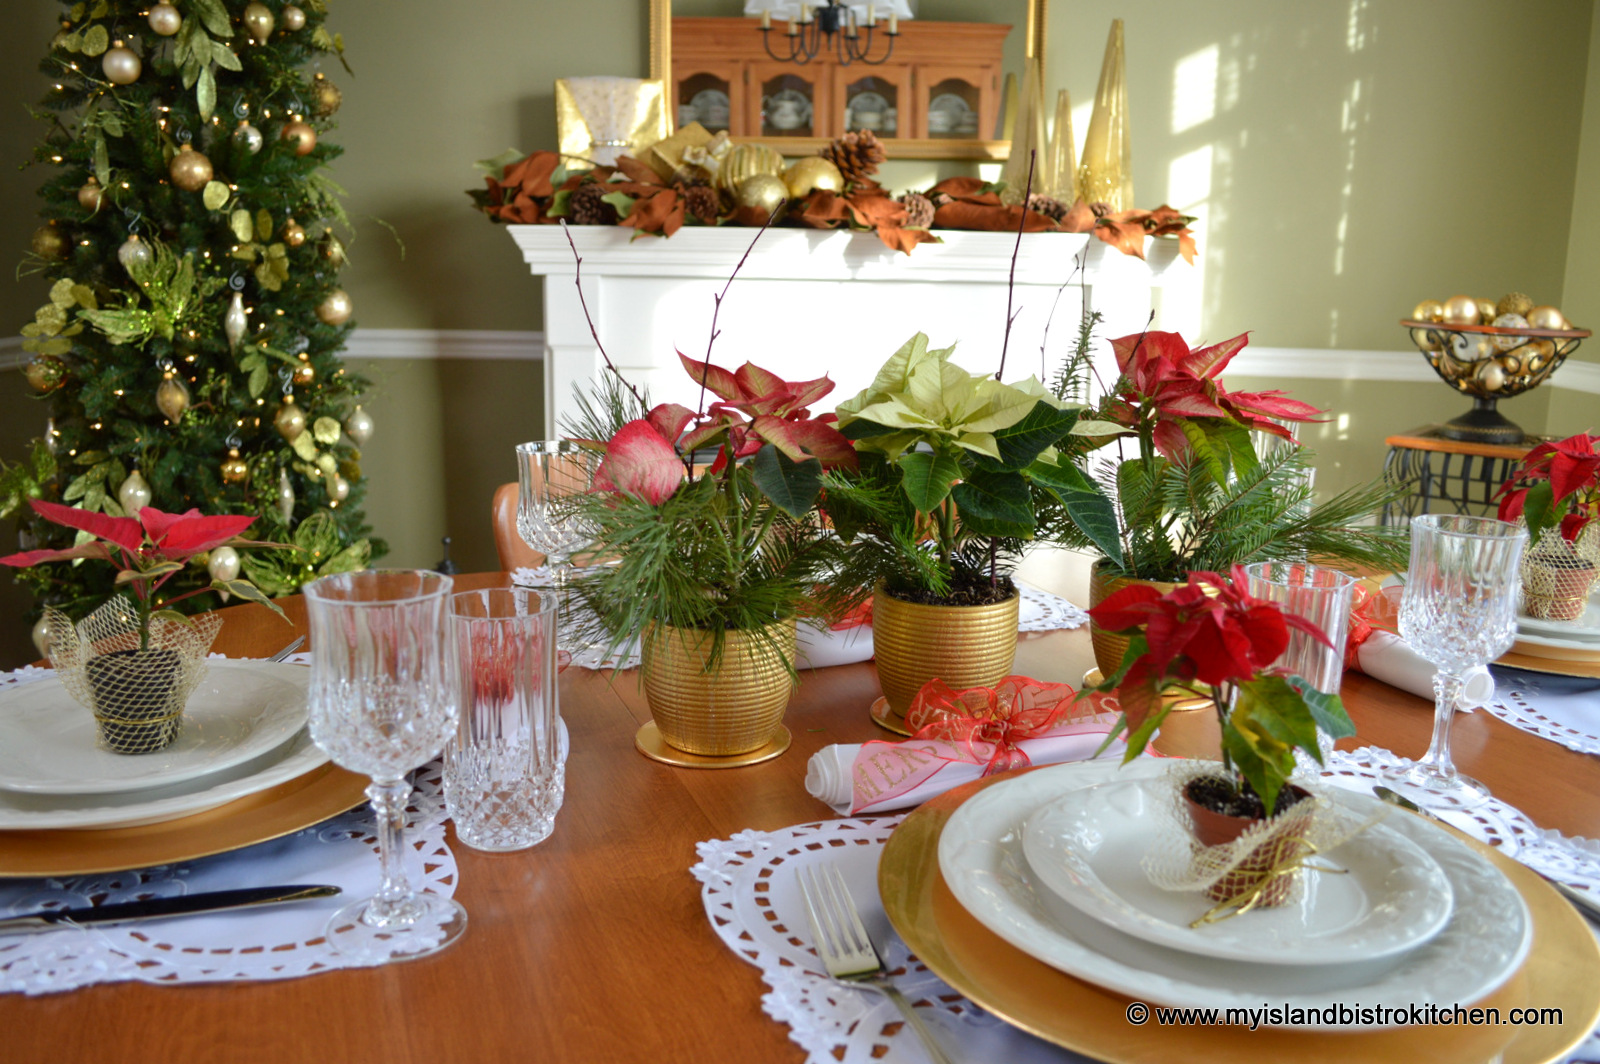
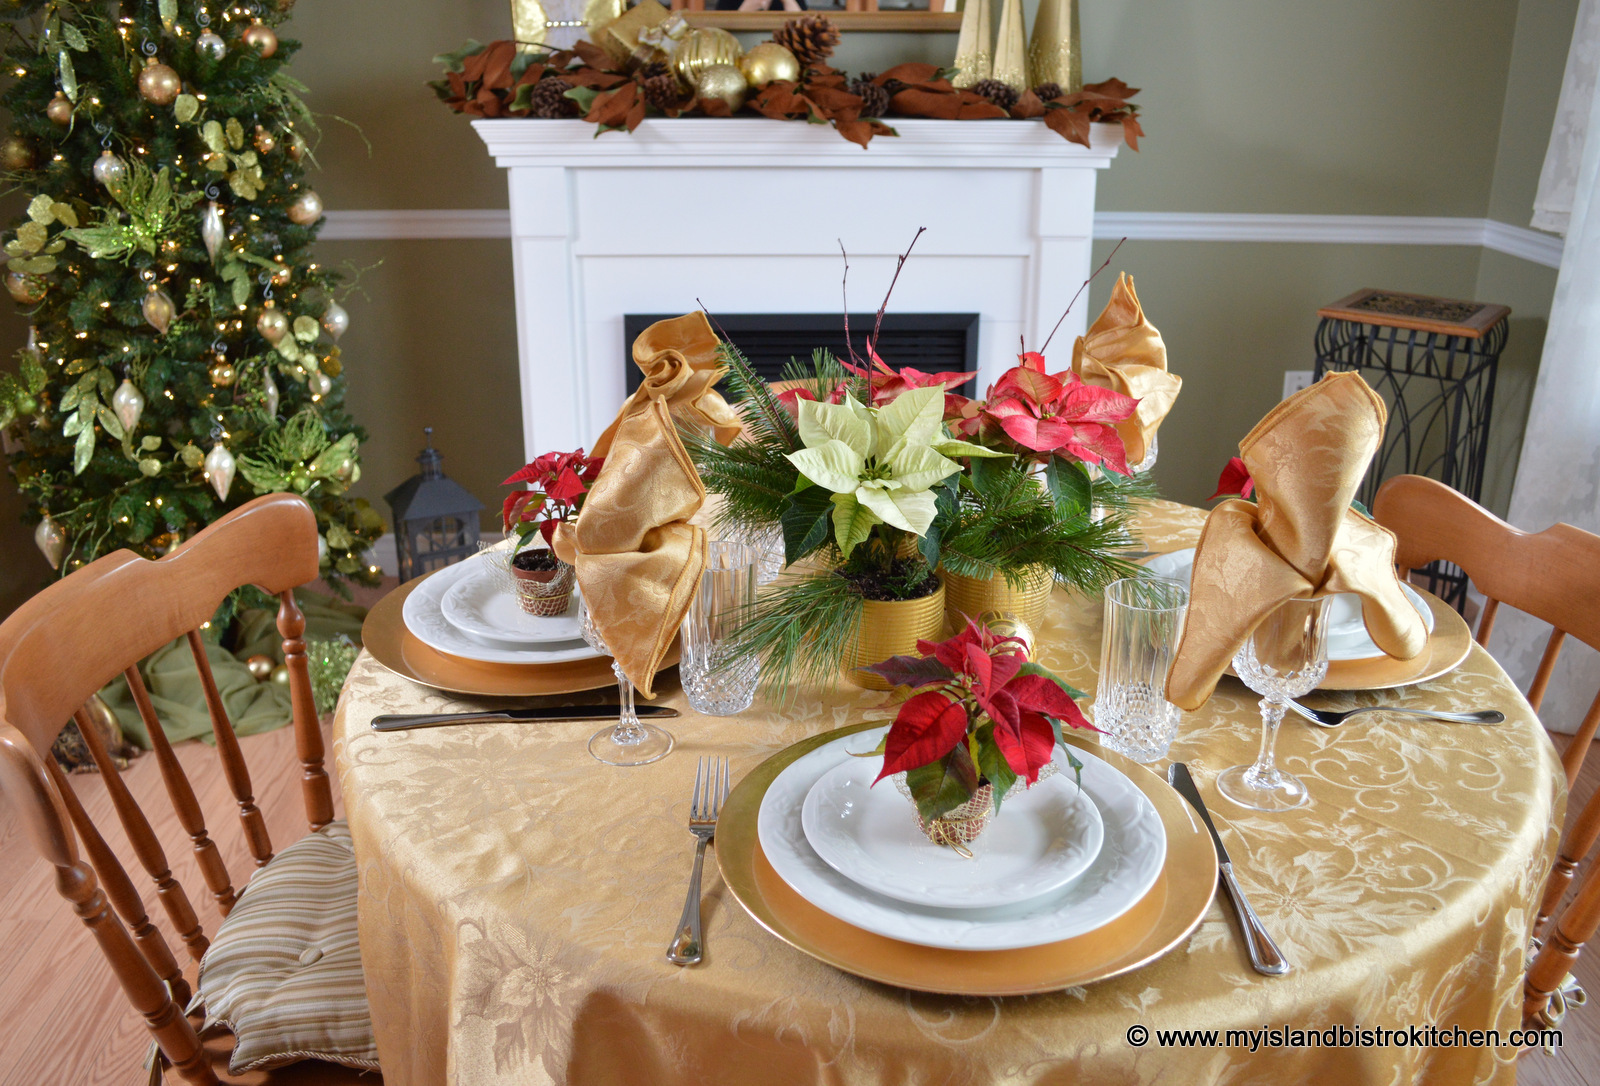
Today, I have turned my table back into its oval shape, bought more miniature poinsettias for guest favours but have used the same three small poinsettias for the table centerpiece. This is a very economical way to achieve a centerpiece for more than one dinner party (and less work!). Instead of clustering the 3 poinsettias into a centerpiece, I have placed them at equal distance apart down the center line of the table.
I have decided that, this year, I want my tablesettings to show the maple wood in my table as opposed to covering it up with a full tablecloth. I bought the placemats and matching napkins on a trip to San Juan and it’s a wonderful memory of a great vacation each time I dress my table with them.
Letting the wood of the table show lends a slightly more casual look to the table than does a tablecloth.
I purchased several of the miniature poinsettias at the beginning of the season and have used them on bed trays, tea tables and, of course, at placesettings on the dinner table.
The miniature poinsettias came in little plastic terracotta pots so I simply wrapped them in gold sparkly netting and tied them with gold cord for a festive look. They make great take-away guest favours.
For those who regularly follow my tablescape segment on my food blog, you will recall that I have previously said that, if you aren’t knacky with, or don’t have time to do, fancy napkin folds, then a simple and effective way is to simply use a napkin ring and roll or fluff the napkin through the ring.
However, if you don’t have napkin rings, all you really need is a spool of pretty ribbon to tie around the napkin as I have done here with a sheer organza wire-edged ribbon that bears the words “Merry Christmas” in gold glittery print, again tying in the gold color and the red of the poinsettias.
The photo below shows the individual placesetting. You don’t need expensive formal China to set a pretty table. This one is set with basic everyday ironstone dinnerware. Again, I am using my basic gold chargers to tie in with the poinsettia gold pots.
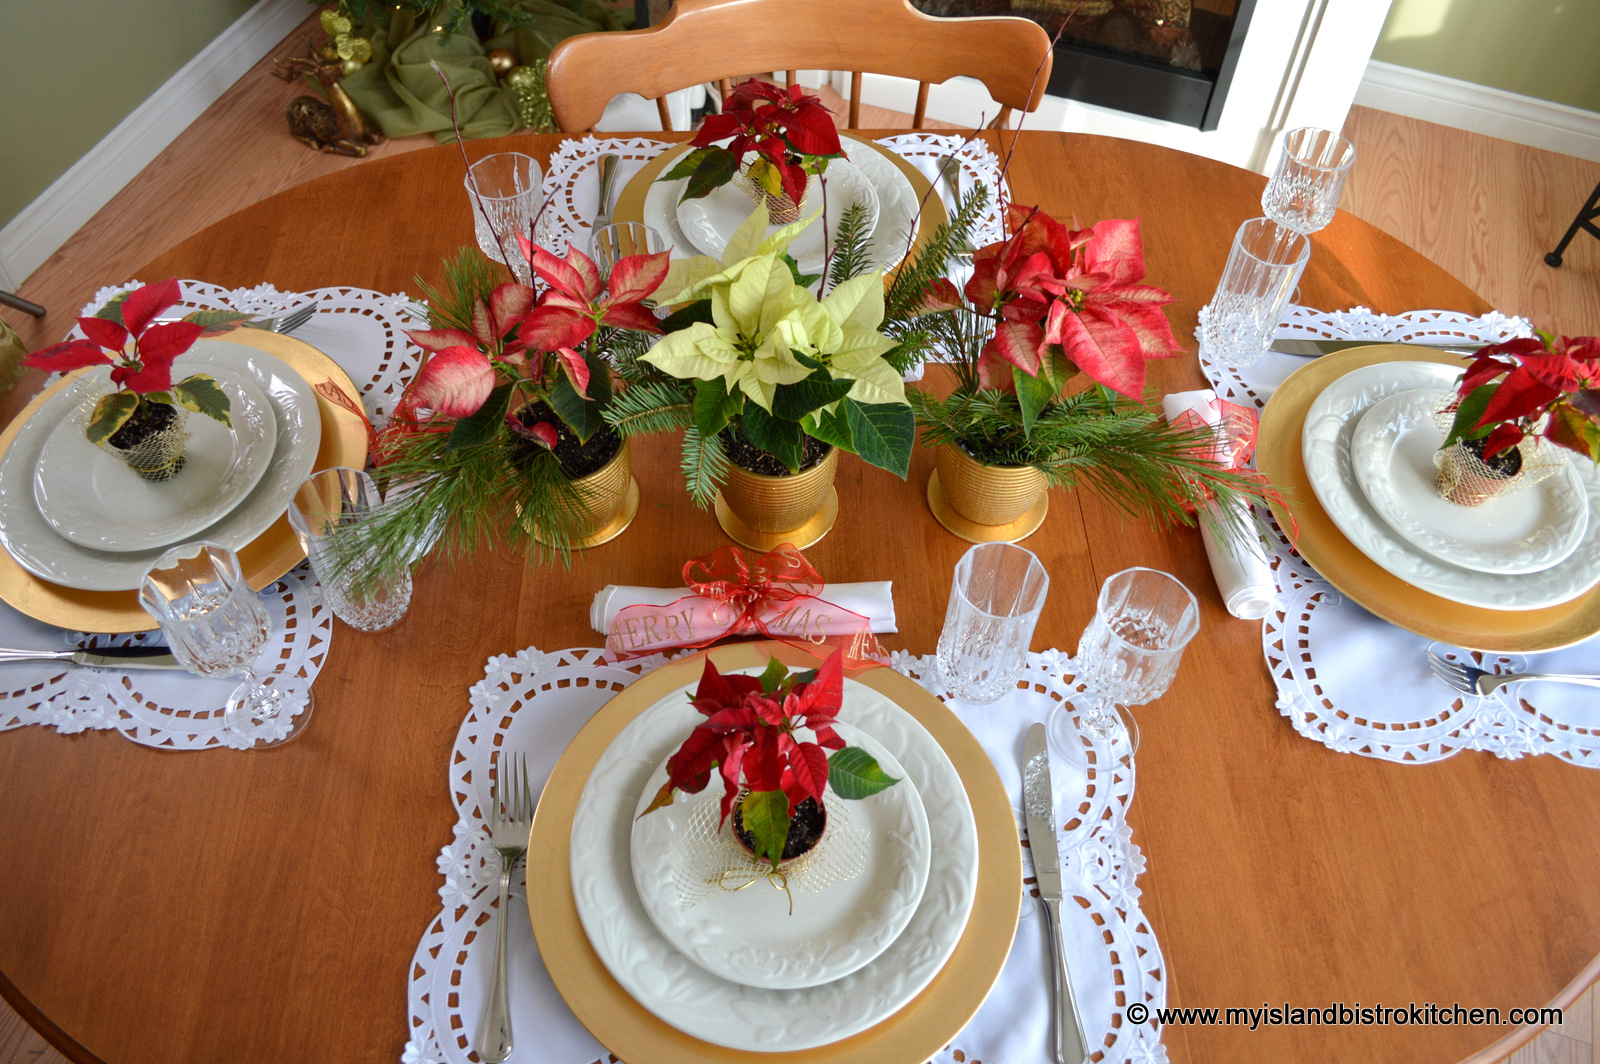
The photo below shows an overhead view of my colorful Christmas table.
To view other Christmas and New Year’s Tablesettings, click on the links below:
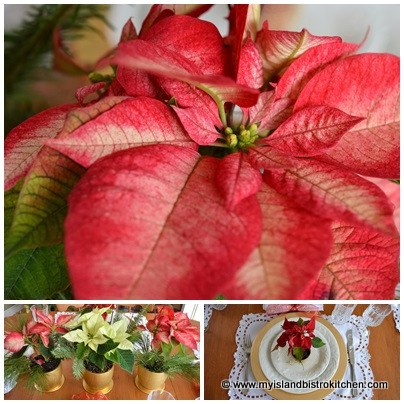
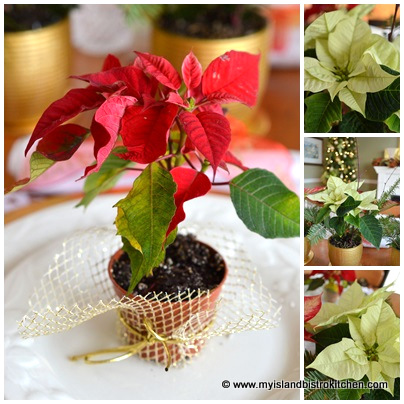
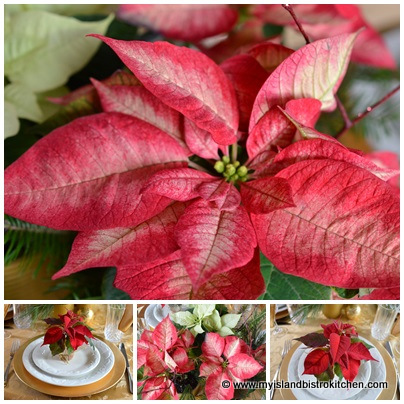
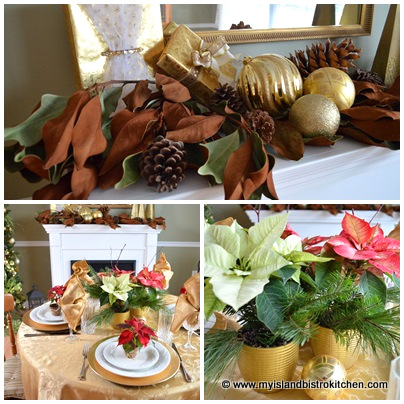
Poinsettias are one of the most commonly seen plants over the Christmas season. They come in a variety of colors and shades and in various sizes. Each season I have several placed around my home — in front of fireplaces, in the entryway, and anywhere else that I think needs a pop of color and a festive touch.
Today, I am using both small and miniature poinsettias in a seasonal tablescape.
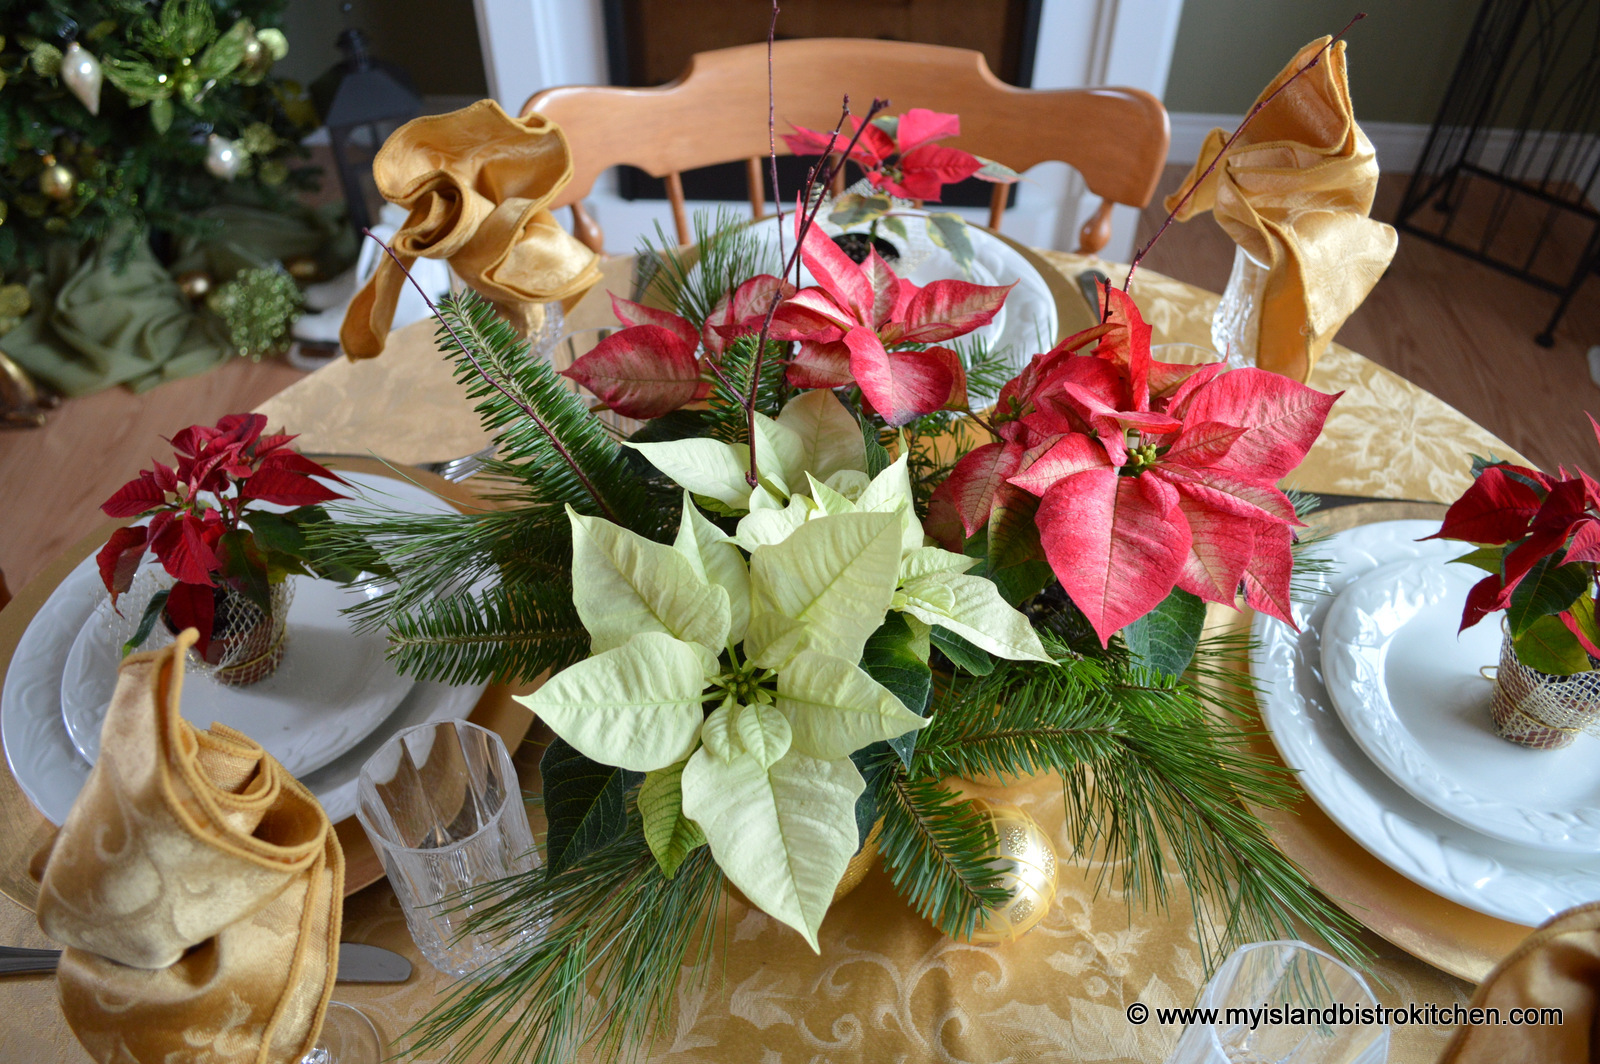
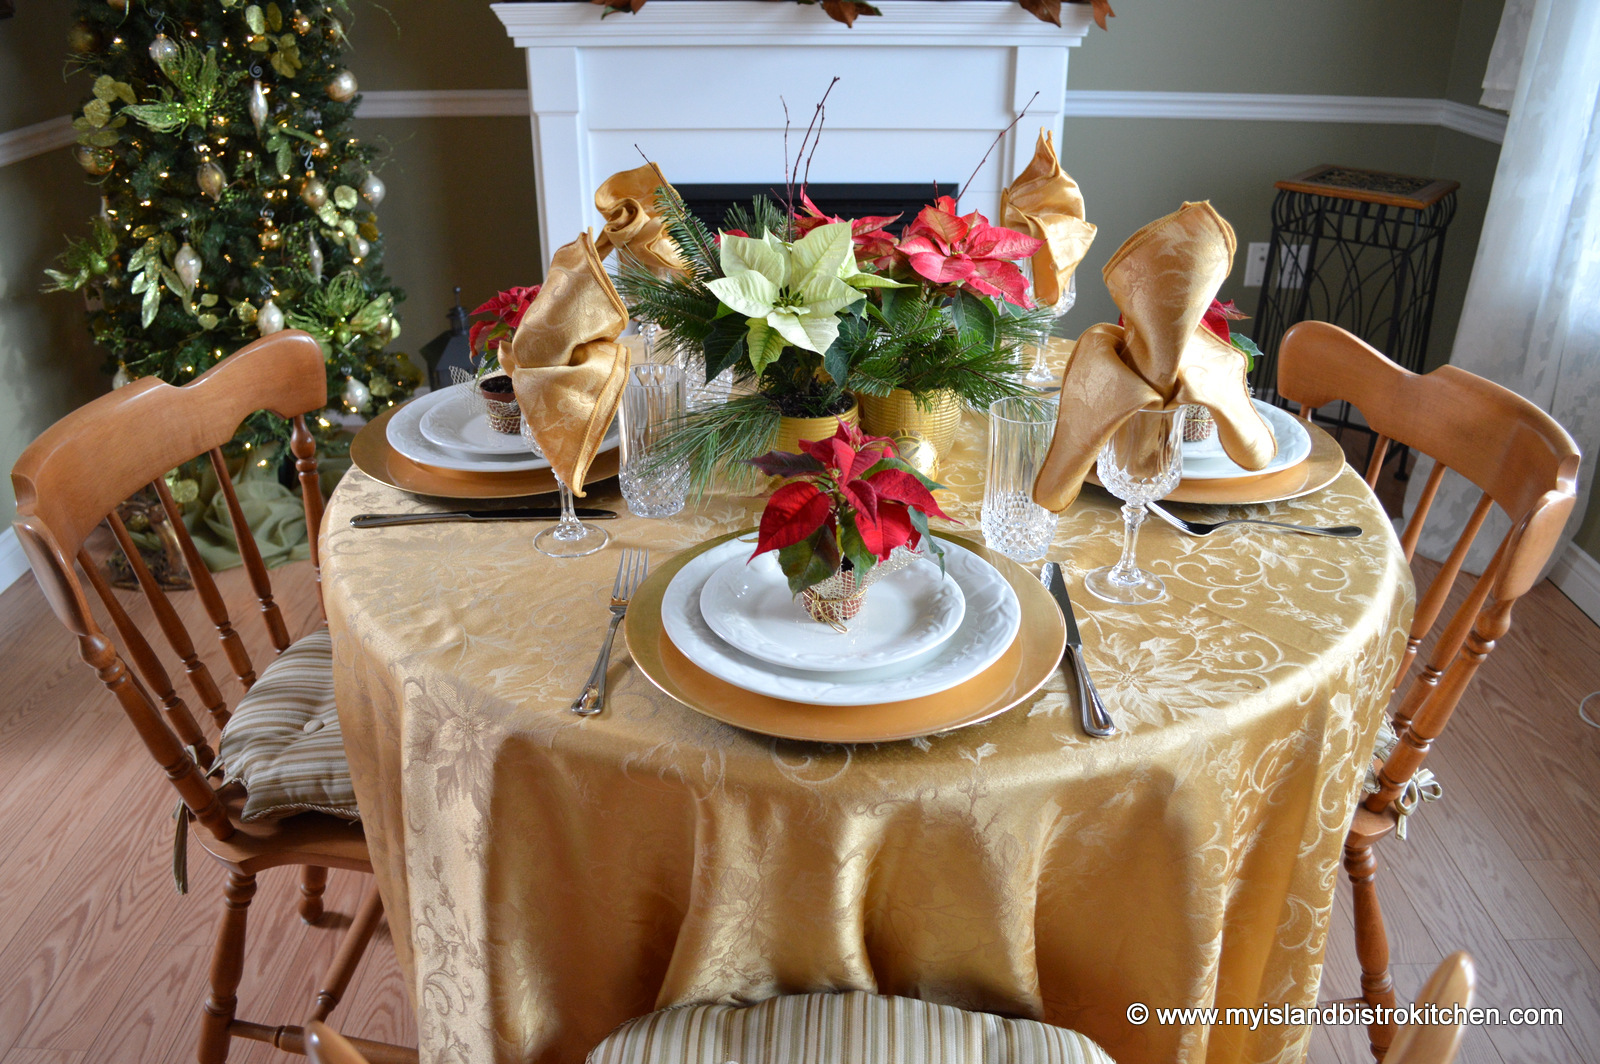
Poinsettia Tablescape
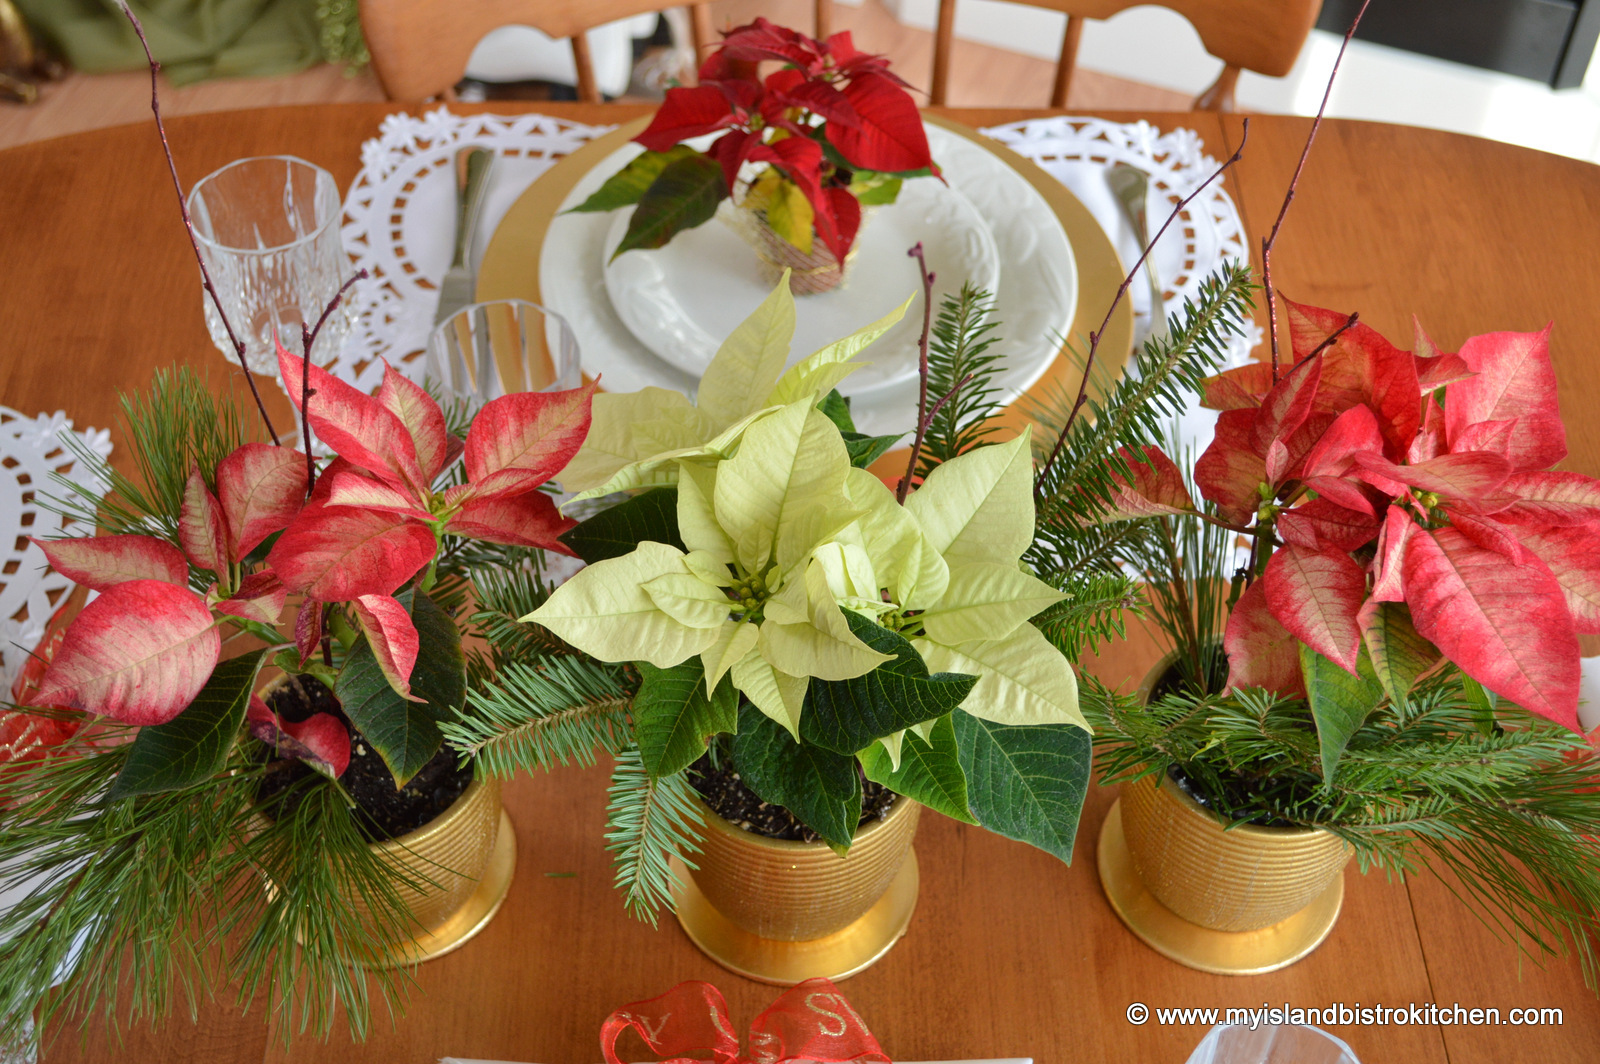
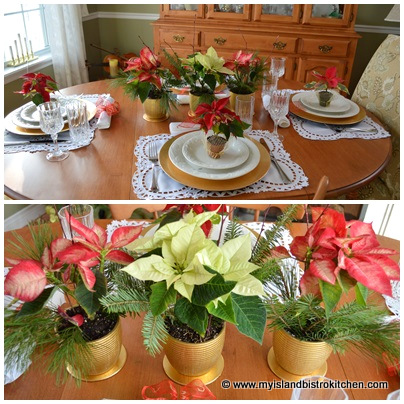
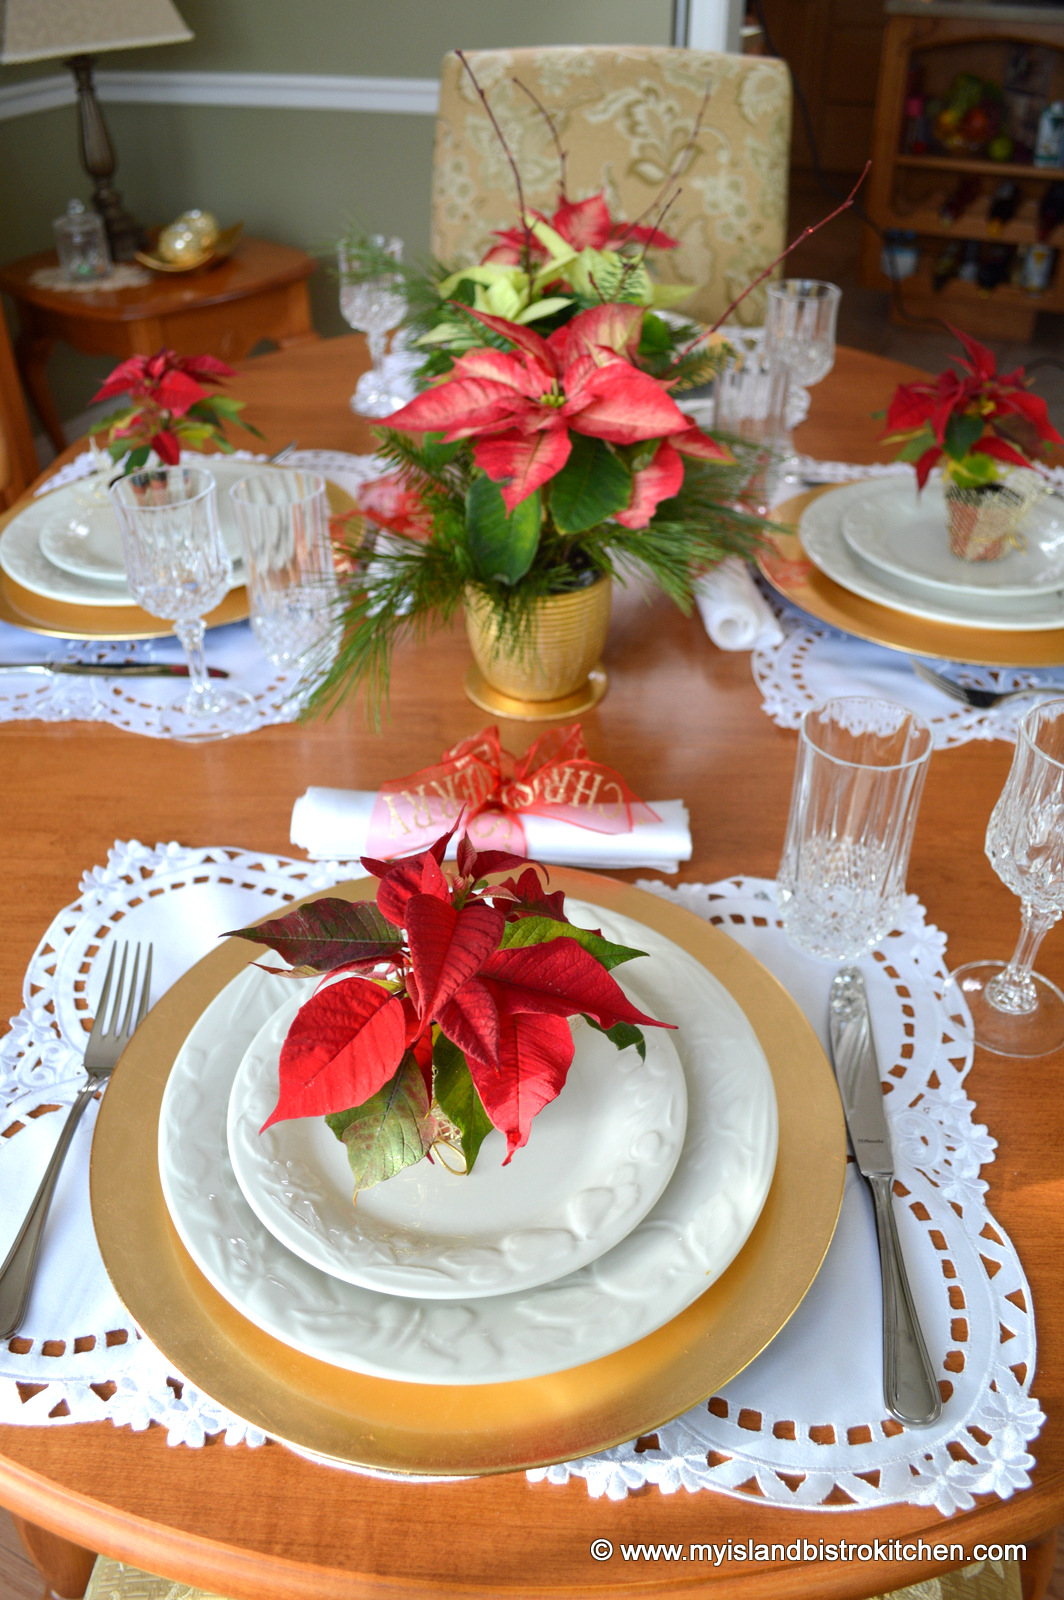
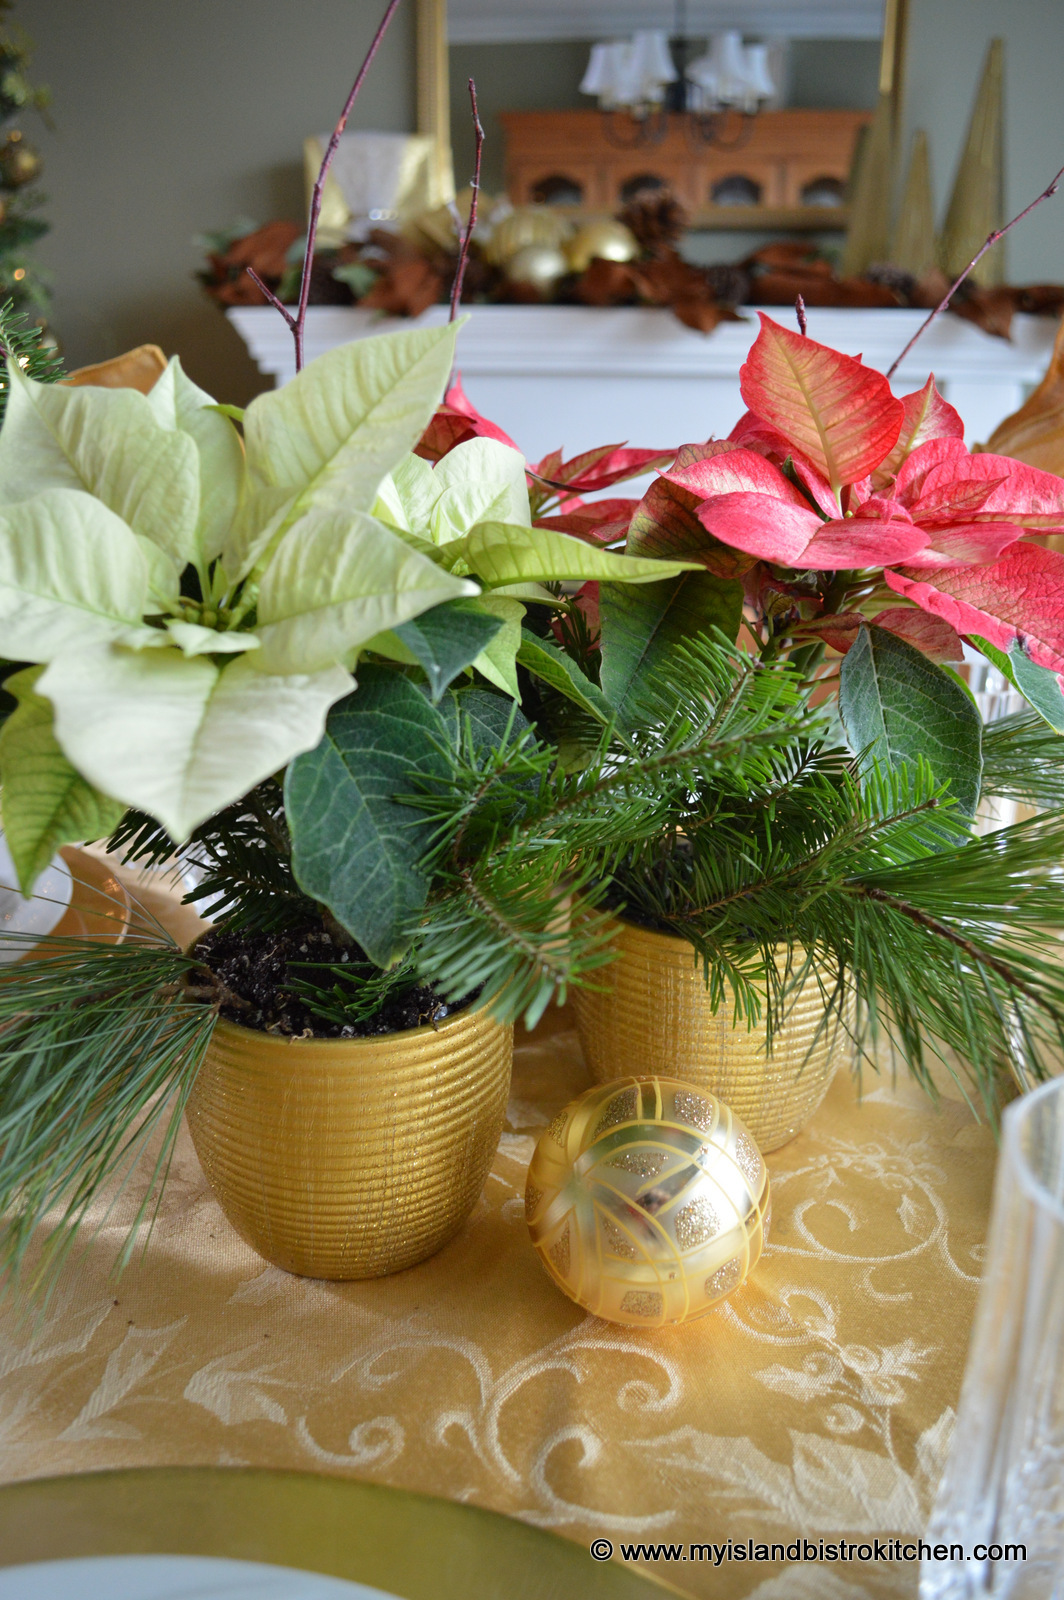
I have clustered three small poinsettias in the center of the small round dining table.
Three Poinsettias Cluster to Form a Table Centerpiece
These plants are just supermarket stock so I removed the commercial plastic wrappers from them and transplanted them into small glittery gold pots that I found at my local dollar store. I added some fresh pine and green fir along with a few twigs, scattered some Christmas balls around the trio and, voilà, I have the look of a custom-made centerpiece at a fraction of the price. By keeping each plant in its own pot, it allows me to use them as a grouping or elsewhere individually. I chose two variegated plants in red shades and one in the soft green for contrast.
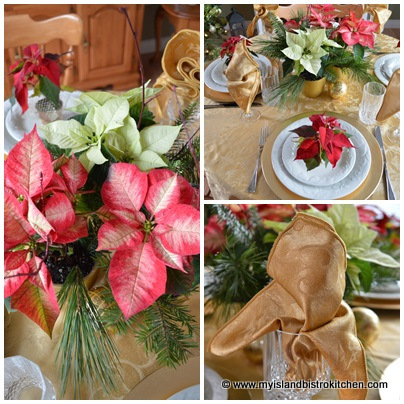
Poinsettia Tablescape
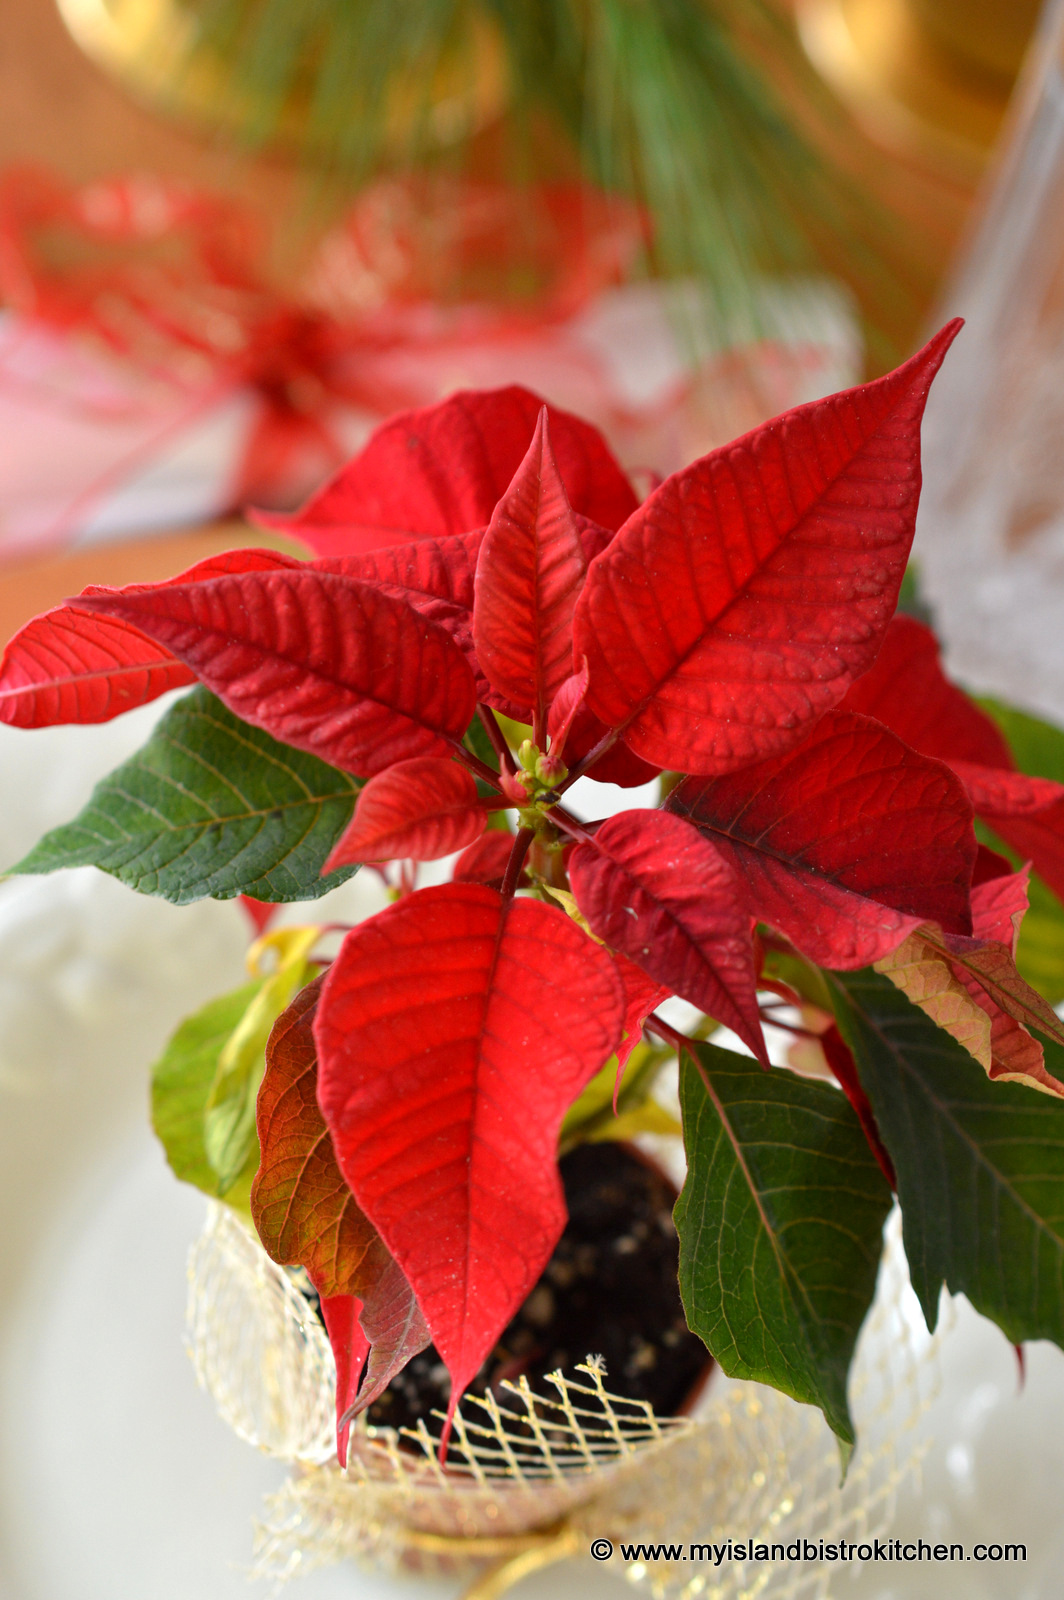
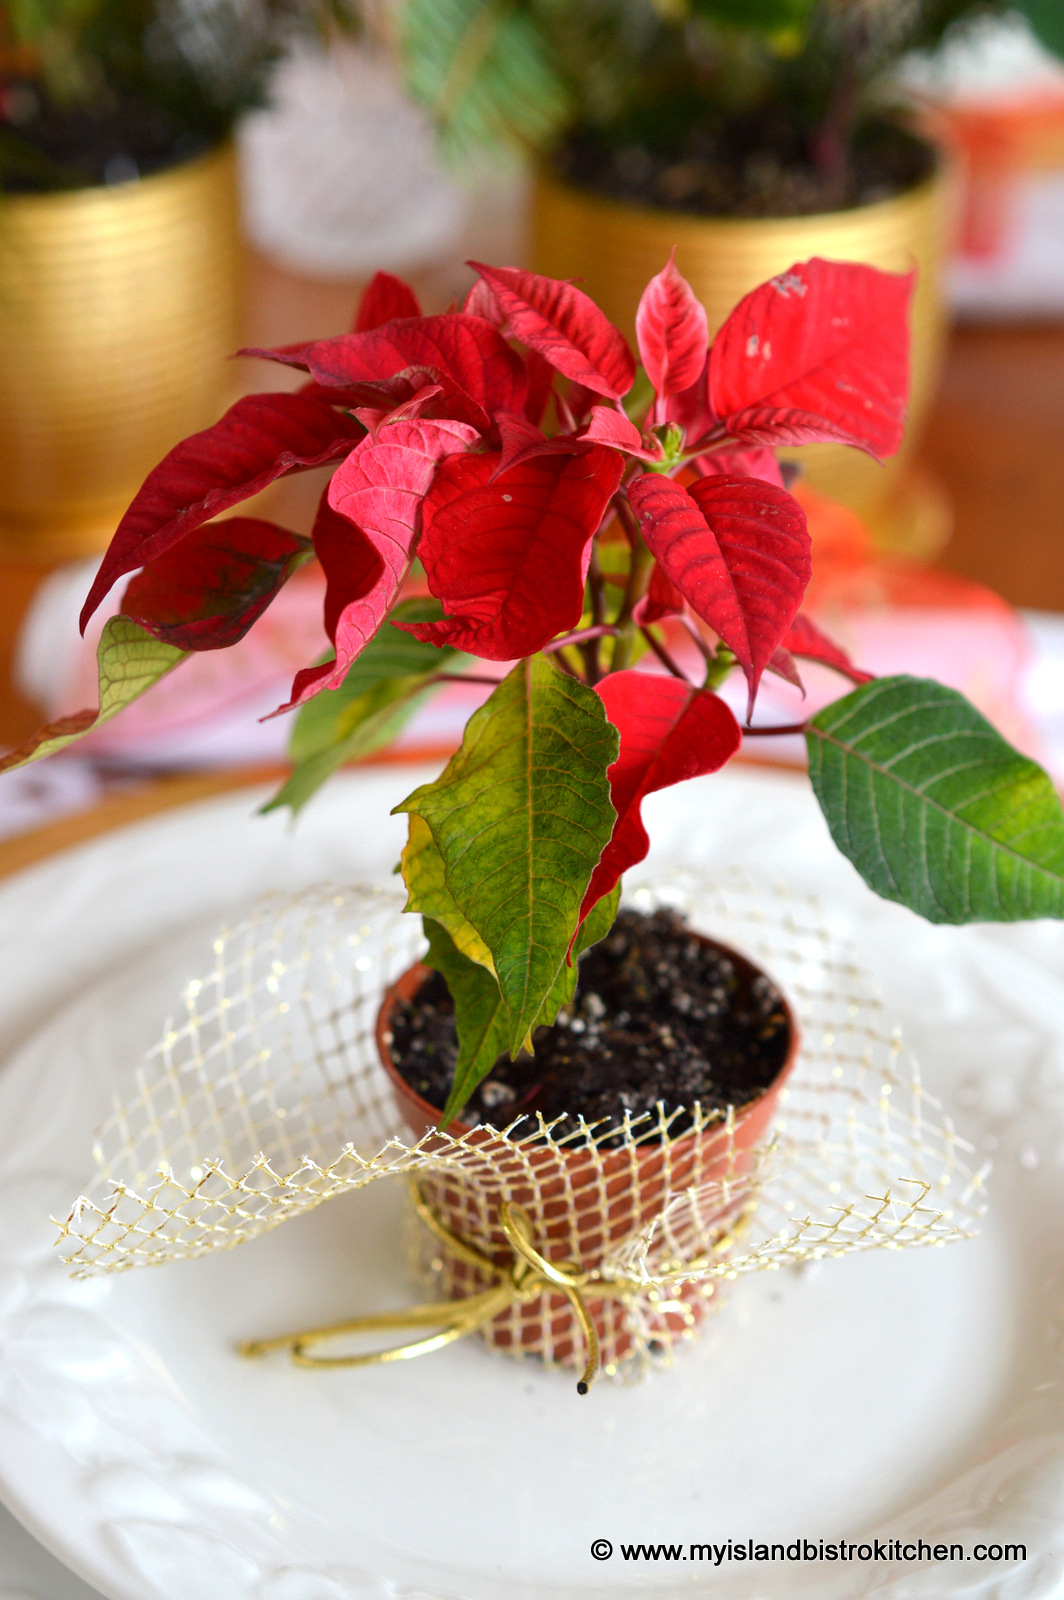
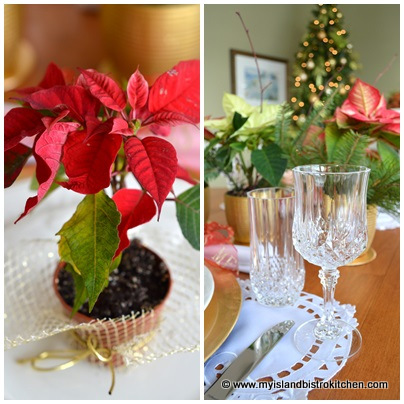
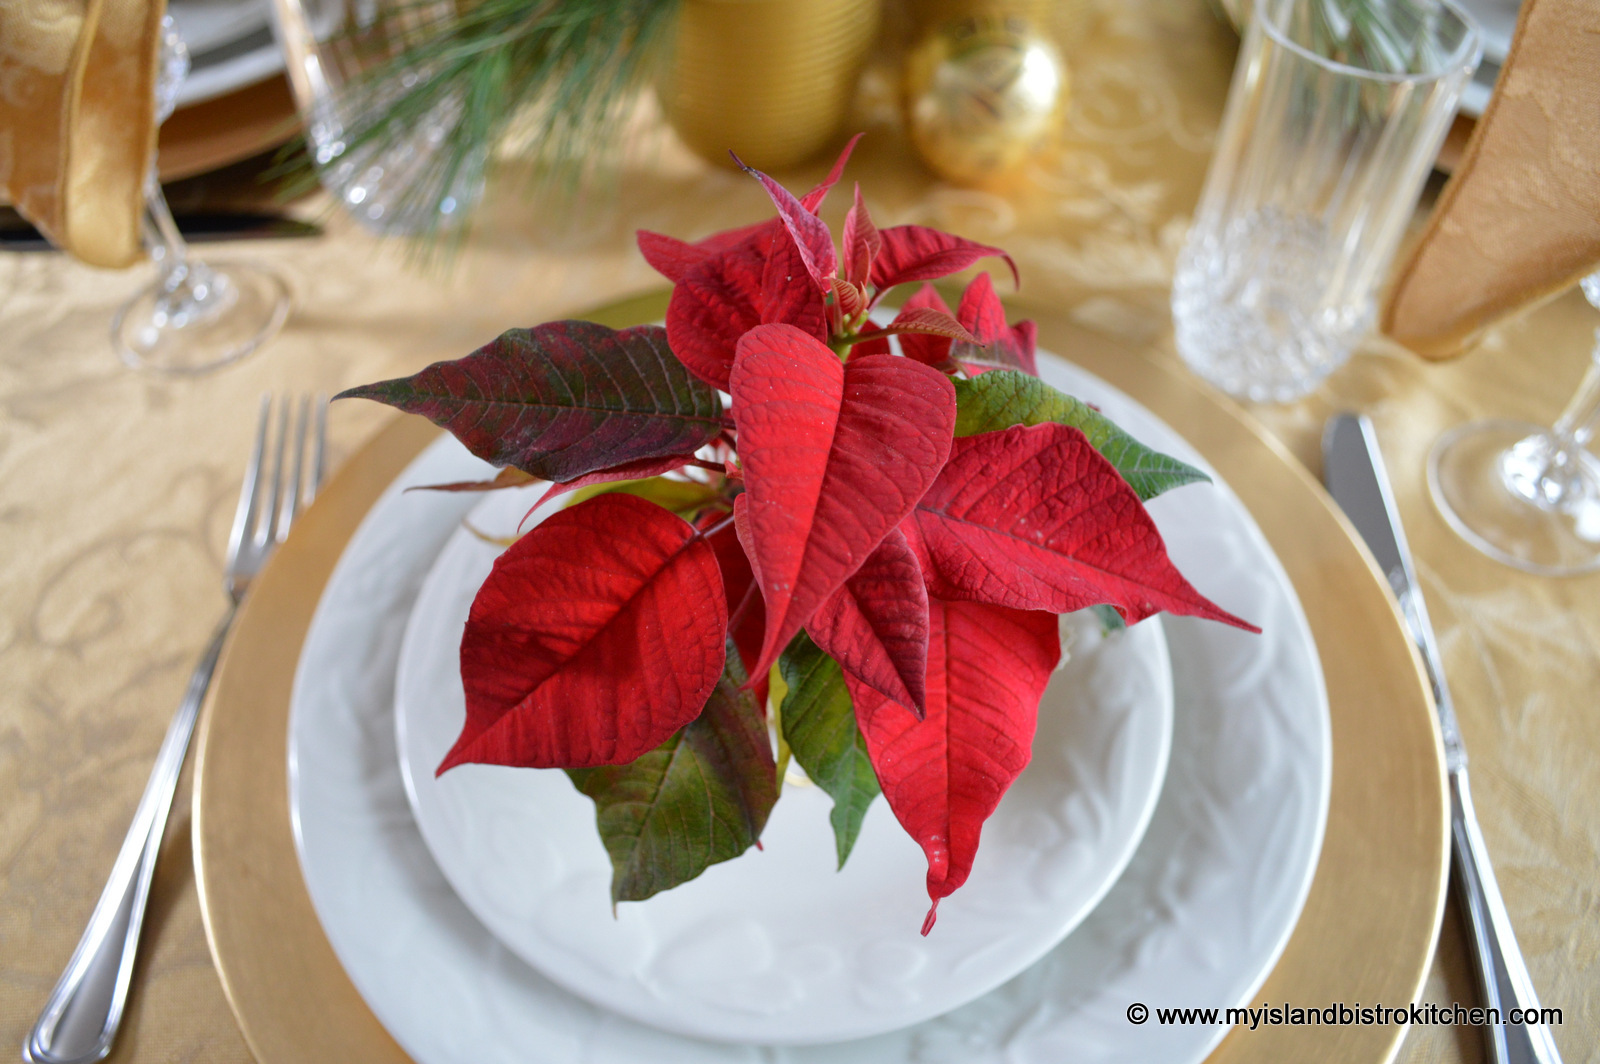
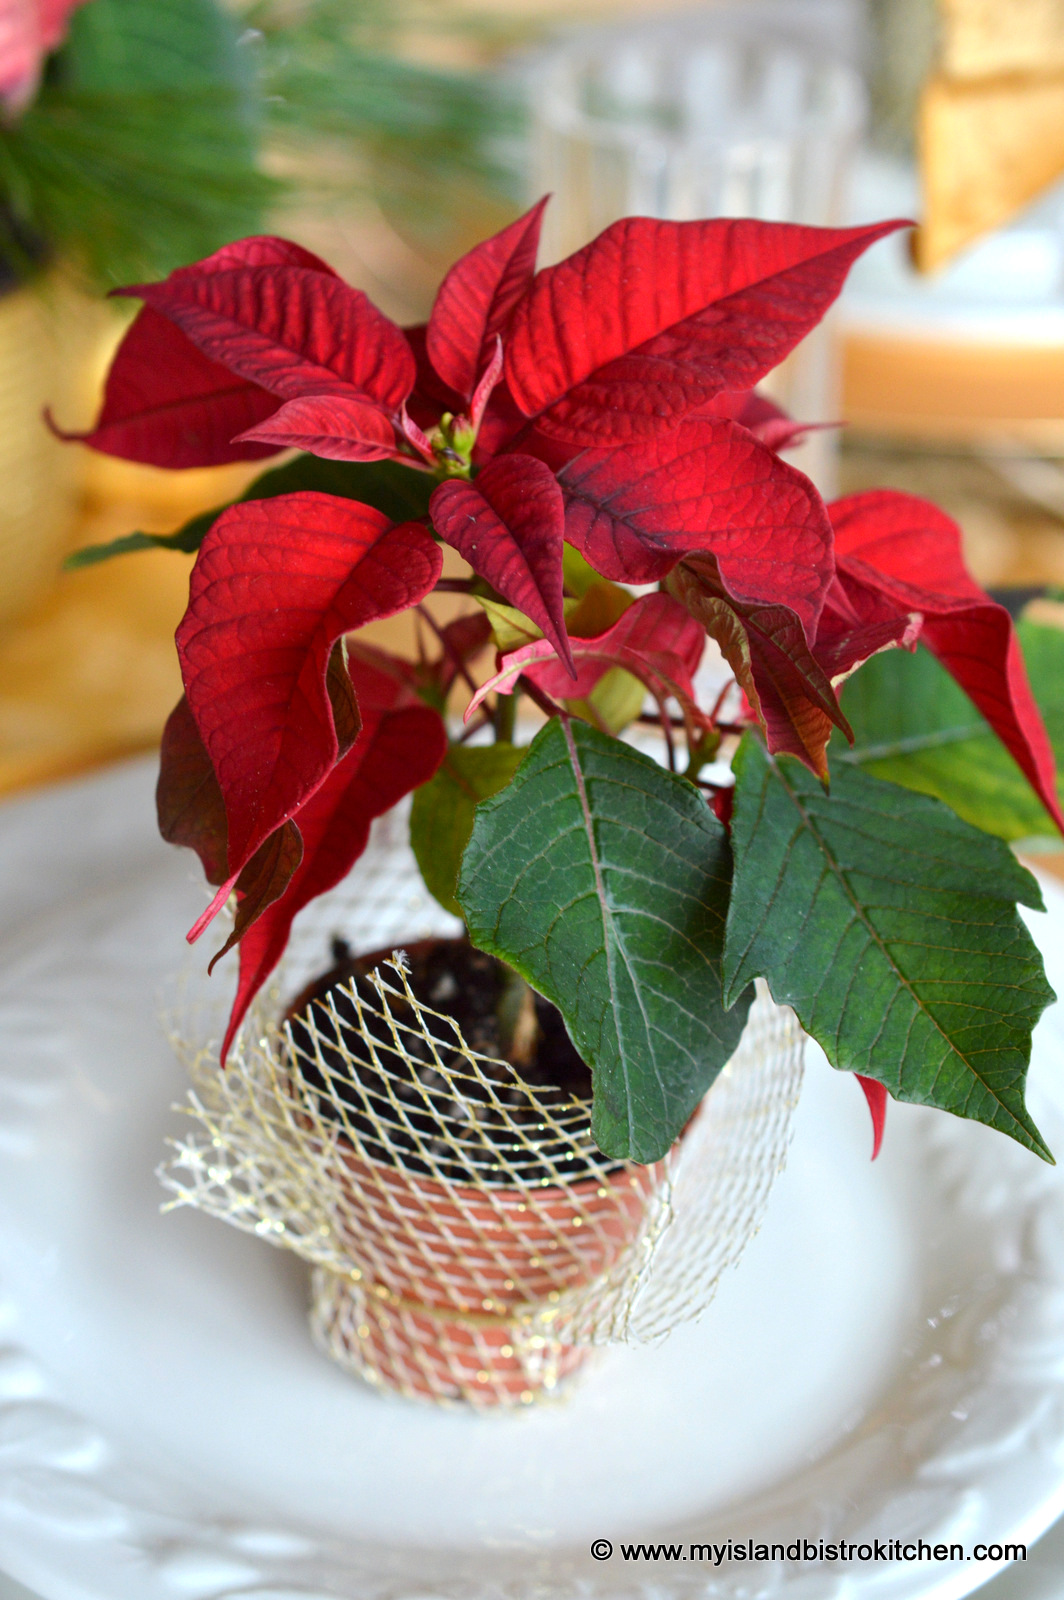
I also found these little tiny miniature poinsettias at the supermarket and thought they would be ideal decorations for each place setting and would be nice take-away favours for guests to take home with them as a remembrance of the dinner.
Miniature Poinsettia
I simply covered the little terracotta pots with some gold netting and tied it with gold elastic cord.
Miniature Poinsettia
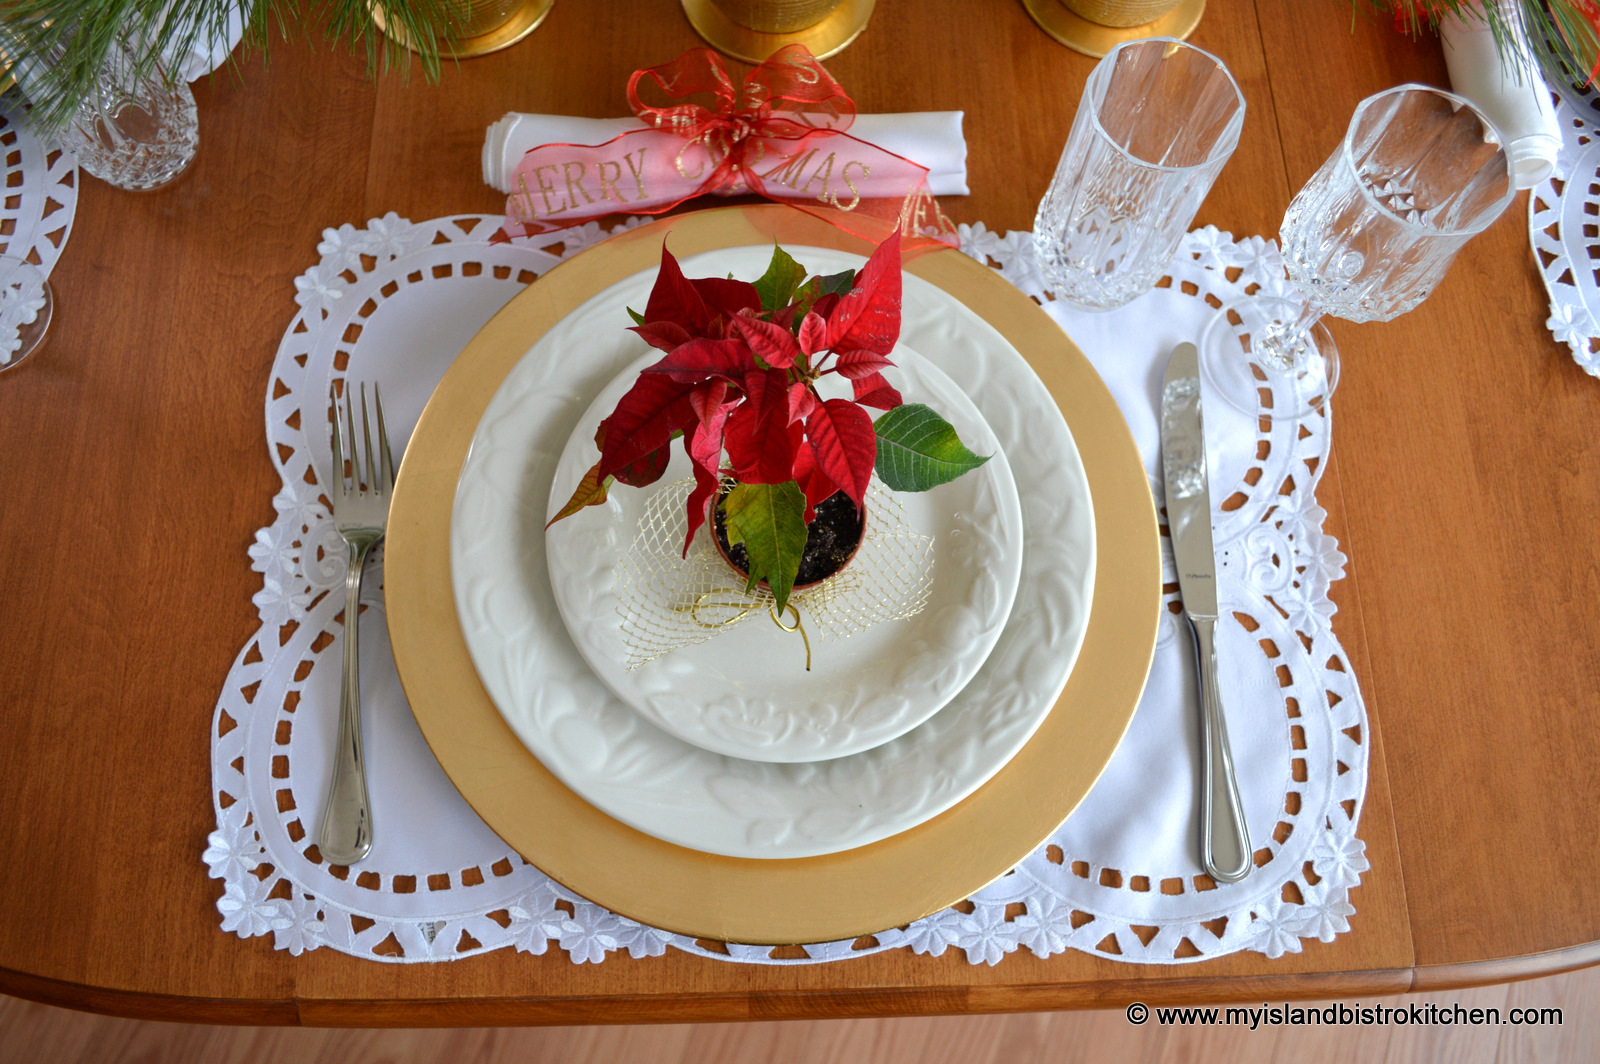
I used a floor-length round gold tablecloth for the table and opted to use my gold charger plates as the backdrop for white dinnerware which, of course, makes the red poinsettias pop in color. By keeping the gold theme going in the charger plates, it keeps the tablesetting in the same color scheme without introducing another color. This is particularly important when the table is small as is the case with this tablesetting. Keeping the same color of charger plates as the tablecloth gives the illusion that this table is bigger than it actually is. Had I used other colored charger plates (e.g., red or green), the difference would have been very noticeable.
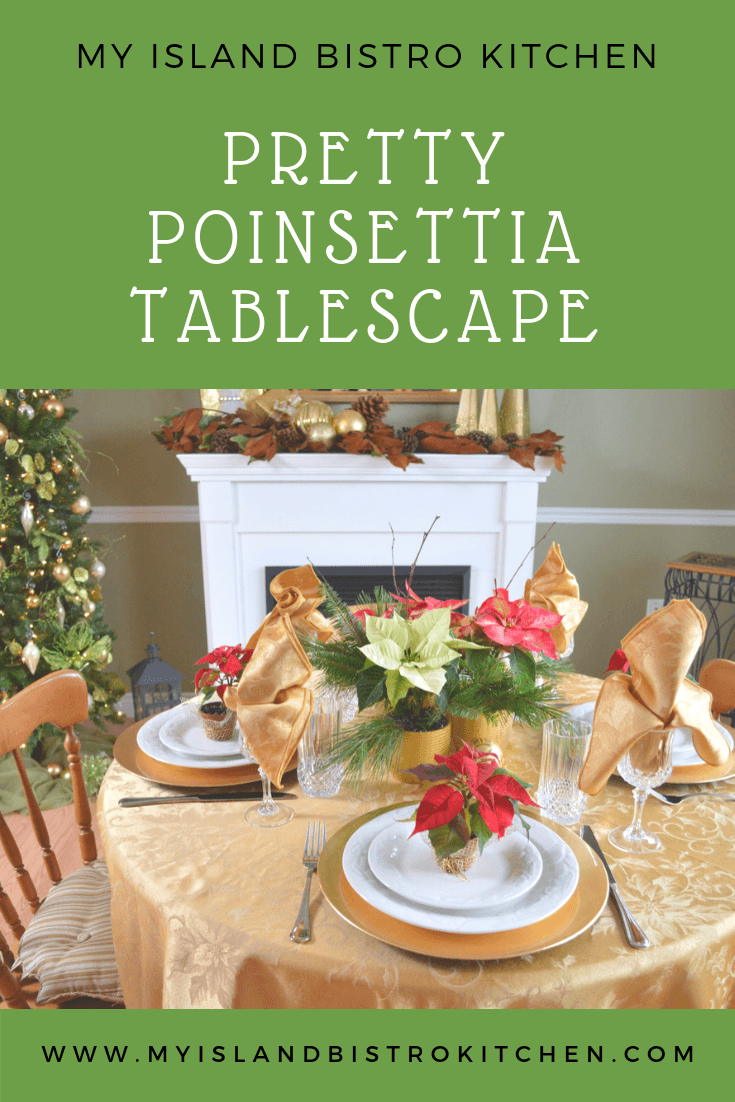
Pretty Poinsettia Tablescape
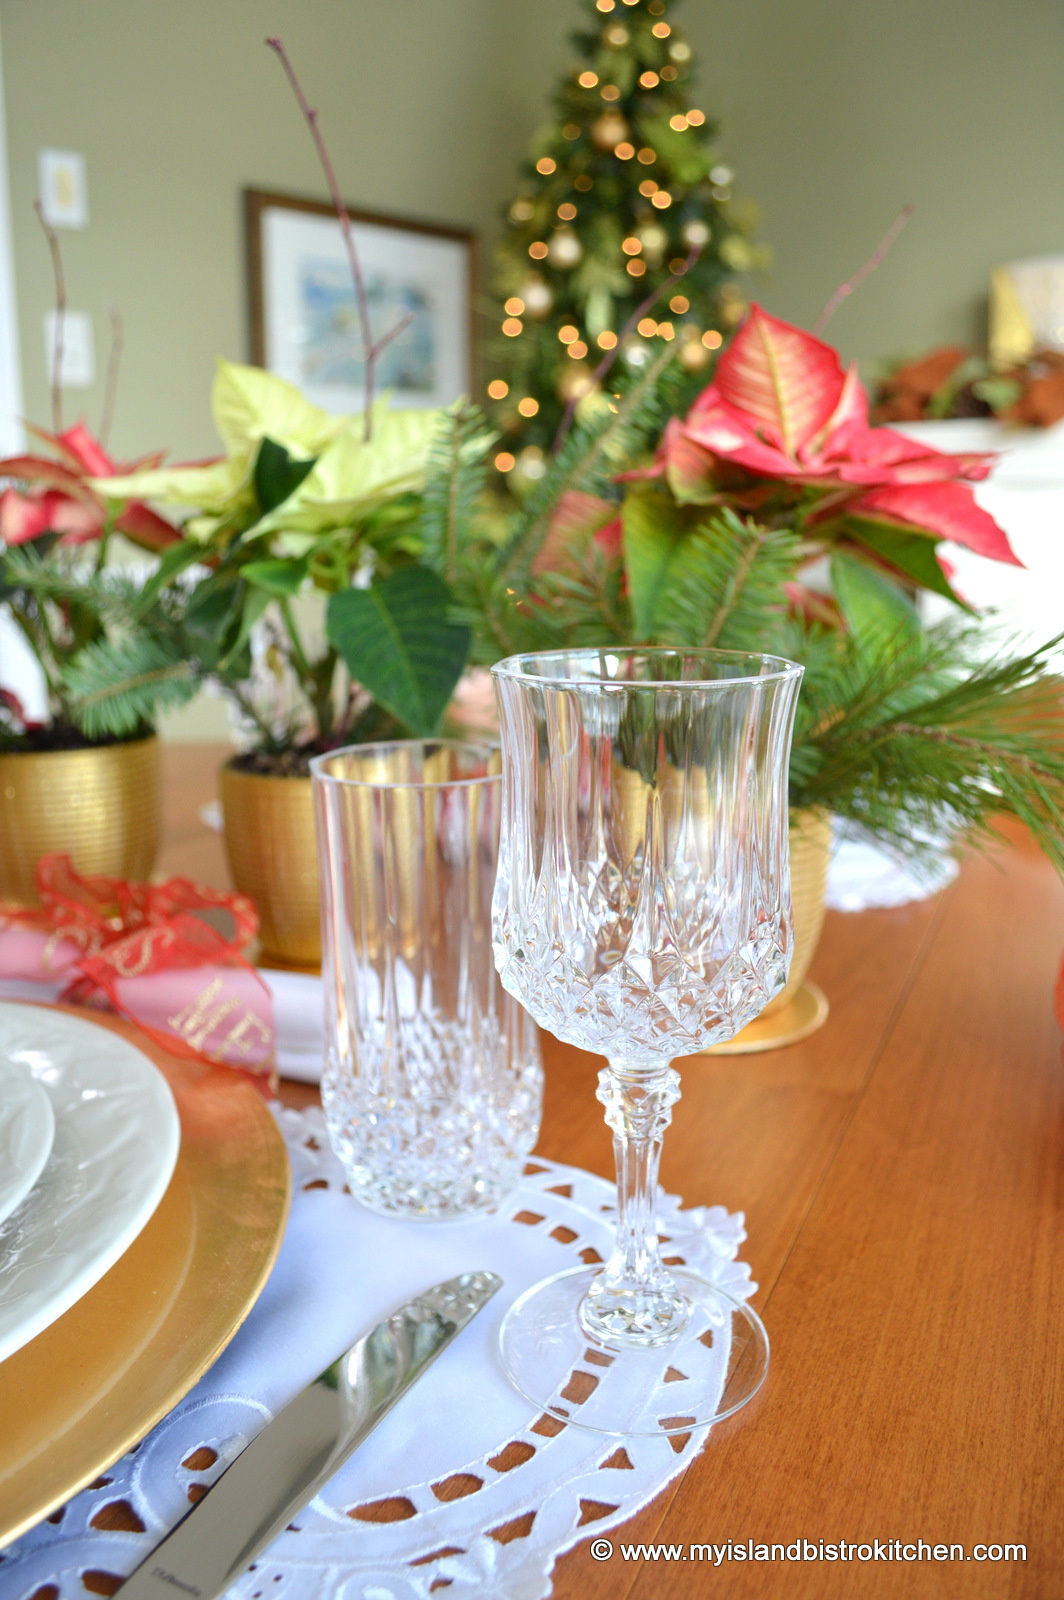
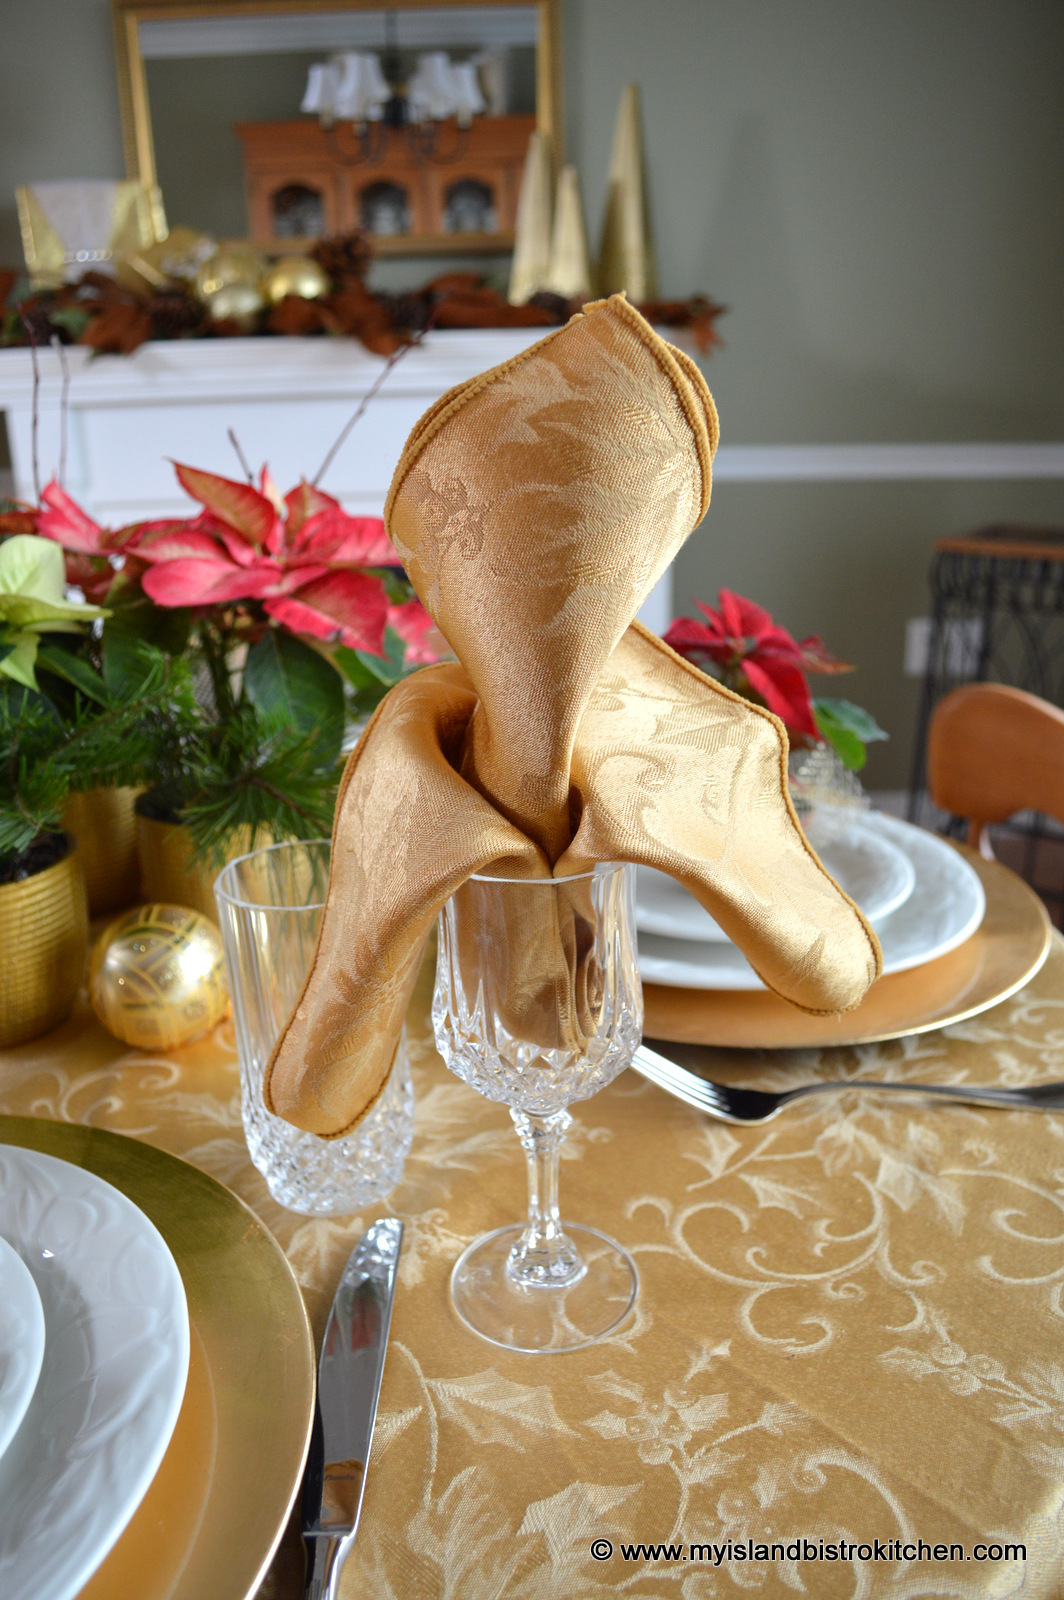
The small table creates a setting for very intimate dining. However, it does not leave a lot of room for extras on the table, such as napkins. For this reason, I opted to place the matching gold napkins in the wineglasses in a simple cascade napkin fold for economy of space.
Easy Napkin Fold
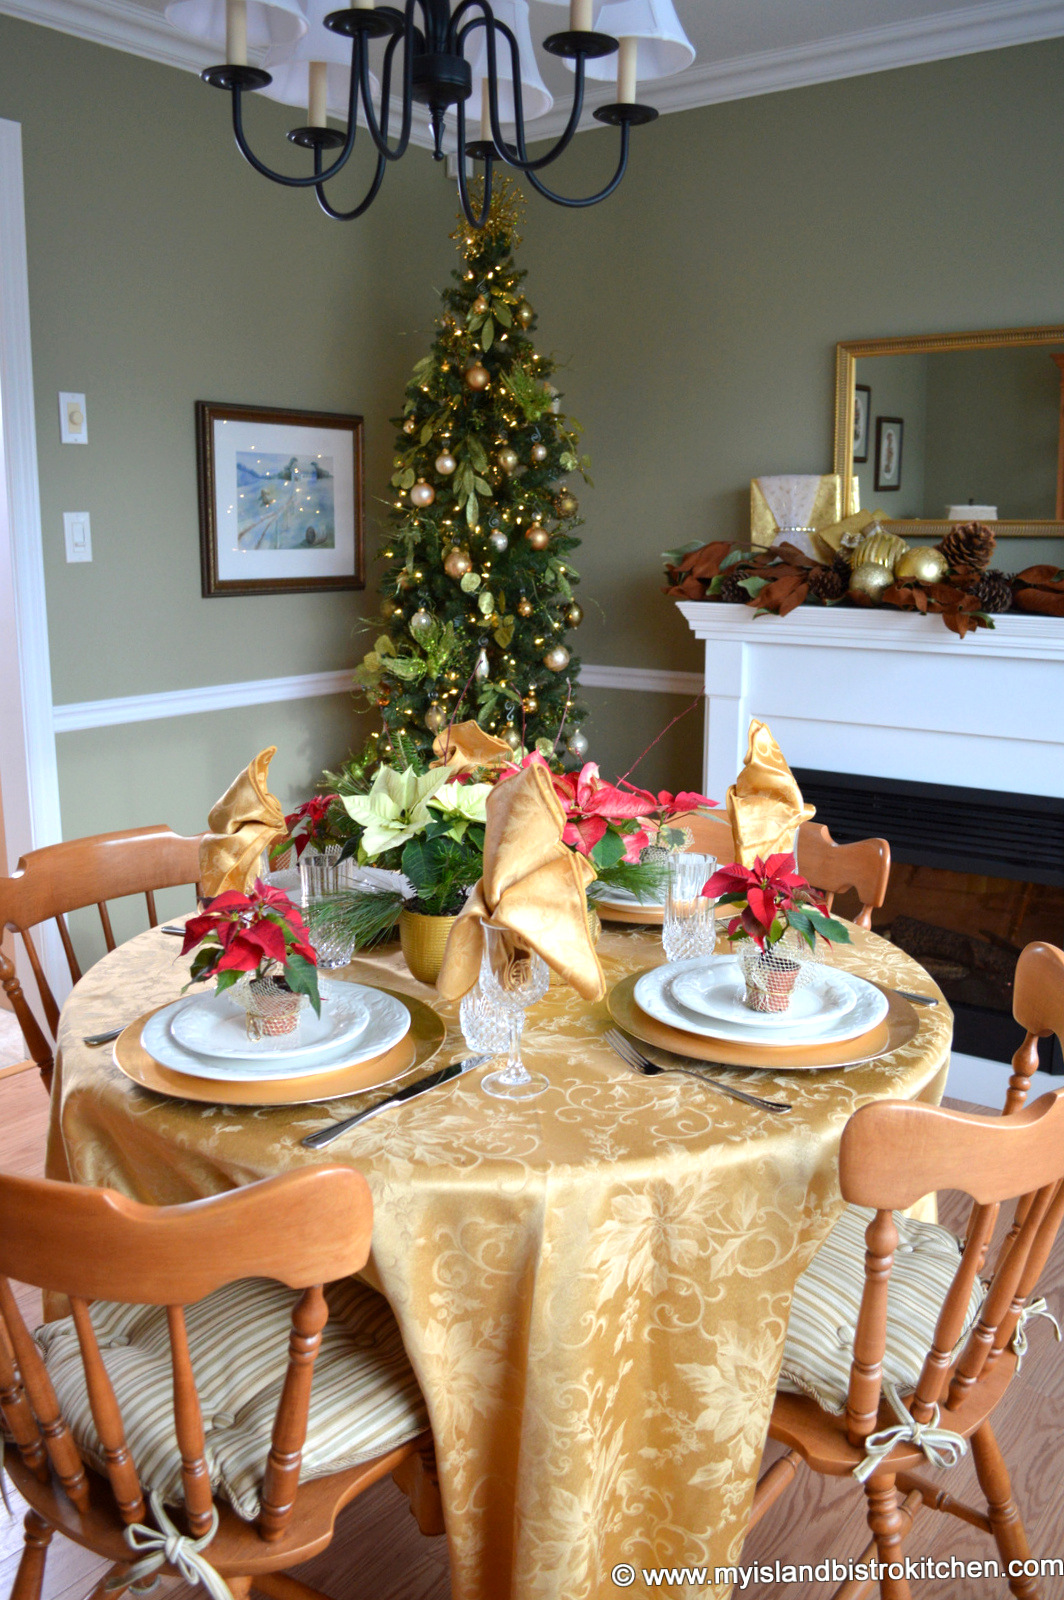
The photo below shows the top down view of the tablesetting.
Pretty Poinsettia Tablescape
I usually put a tree in my dining room and decorate it in shades of green, gold, and ivory. I then carry these shades into my mantle decorations this season. The gold tablecloth blends in with the color scheme and, of course, the red poinsettias give a pop of color.
Poinsettia Tablesetting
I hope you have enjoyed a glimpse into my seasonal poinsettia tablesetting.
To see another tablesetting where I have used the same elements as in this one for a totally different look, click here.
To view other Christmas and New Year’s Tablesettings, click on the links below:
Title: Best of Bridge Holiday Classics Author: Various Publication Date: 2014 Publisher: Robert Rose Inc. Cover: Hardcover Price: $29.95 Pages: 303
Robert Rose Inc. has offered me the opportunity to conduct a review of Best of Bridge Holiday Classics. This is the latest in the “Best of Bridge” series of cookbooks.
While this cookbook is aimed at holiday entertaining, I would suggest there are recipes that would be suitable year-round for both everyday and special event use. The book has an attractive, sturdy hardcover and the pages are spiral bound making it easy for the book and pages to stay open for the recipe being made.
The book features a collection of 225 recipes spread throughout eight chapters: Holiday Brunches, Cocktail Parties Plus, Buffets and Potlucks, Sit-down Dinners, Leftovers, Holiday Cookies and Squares, Desserts and Other Sweet Treats, and Food Gifts. At the beginning of each chapter, there is a separate table of contents outlining the recipes (and their page numbers) found in that section of the book. There is also a handy alphabetical index at the back of the book.
In addition, there are a couple of pages at the front of the book giving sample menus for holiday brunch, a buffet party, a traditional holiday meal, a snowy Christmas Eve, New Year’s Eve Banquet, and a Vegetarian Celebration. Recipes suitable for each event are listed along with their page numbers for ease of retrieval. This is useful, particularly for those who have no idea which recipe pairs well with another or what to serve with what.
When I am conducting a cookbook review, I try to approach it from the stance of how user-friendly it would be for someone with little culinary experience unless, of course, the book is highly specialized and advanced and is targeted for experienced cooks. So, I review recipes from the point of whether someone with little cooking and/or baking experience could take the recipes and easily follow and understand the instructions sufficiently to achieve success.
To begin, I found the font in the book a bit large and folksy. Everything (ingredients and method of preparation) is printed in capital letters which I find makes the pages cluttery and difficult to read. Generally, the instructions for making the recipes are all lumped together in one long paragraph. This makes it difficult to follow the method. I find cookbooks that lay out the instructions in separate, step-by-step, paragraphs are easier to follow, particularly for less experienced cooks. Breaking down the steps of a recipe into separate short paragraphs makes them less formidable and daunting and it is easier and quicker to find your place and progress in the instructions as you go about making the recipe.
I found the ingredients are used in the instructions in the order in which they are listed. The recipes in the book call for, what I would consider to be, ordinary ingredients which makes it easy to prepare the dishes. Most, if not all, ingredients would be found in standard grocery stores. The exact quantity of ingredients called for, though, is sometimes vague or lacking in the recipe. For example, on page 71, the recipe for Guacamole Cherry Tomato Halves calls for “1 small basket cherry tomatoes”. Cherry tomatoes come in various sizes of baskets and home gardeners would obviously harvest their own so it would have been clearer to have specified a certain quantity of tomatoes, in pound or kilogram measure, for example.
I also found that the instructions for several recipes were somewhat vague as well. For example, on p. 169, the recipe for Rhubarb Relish was very vague with the method starting out by “Simmer, uncovered, approximately 4 hours” but it didn’t say what to simmer or what kind or size of pot to use– i.e., in my view, it should have started out by saying “Combine all ingredients in the order listed in a certain size of pot (i.e., small, medium, or large pot). Simmer, uncovered, approximately 4 hours.” I also found several recipes would neglect to state early on in the instructions to preheat the oven and the oven temperature would only be given as the last instruction, at the stage when the dish was going into the oven. Now, experienced cooks would automatically know to preheat the oven whether it was stated as the first step in the recipe or not. However, a novice cook would be unlikely to know of this requirement, hence the importance of stating this step at the beginning of the method/instructions. It’s very important to pre-read each recipe carefully all the way through before starting to make it to ensure that the amount of ingredients required and the method of preparation are clearly understood.
In addition, I also found that, while most recipes did give a yield indication, some do not indicate a clear yield to be expected. For example, on page 231, the recipe for Nanny’s Real Scottish Shortbread gives the yield as “makes a tinful” which is not helpful as there is no indication what size of tin or how many shortbread the recipe makes and, as we all know, tins come in all sizes and some would hold four cookies and others 44, depending on the size of tin and cookies. This recipe does not indicate what size each shortbread cookie should be cut into. Regardless if that is how someone shared their recipe, the recipe should have, in my opinion, been tested to determine its exact yield before publishing it in the book. If someone is making a recipe and has a need for a specific number of shortbread, or servings, they need to know how many the recipe is expected to generate.
There are a few color photos in the book and they are of good quality but there is certainly not a photo for every recipe. Including photos is so important in a cookbook as, not only do photos of mouth-watering food inspire people to try the recipes but the color photos also give a frame of reference of what the finished dish should look like.
Test-driving Recipes
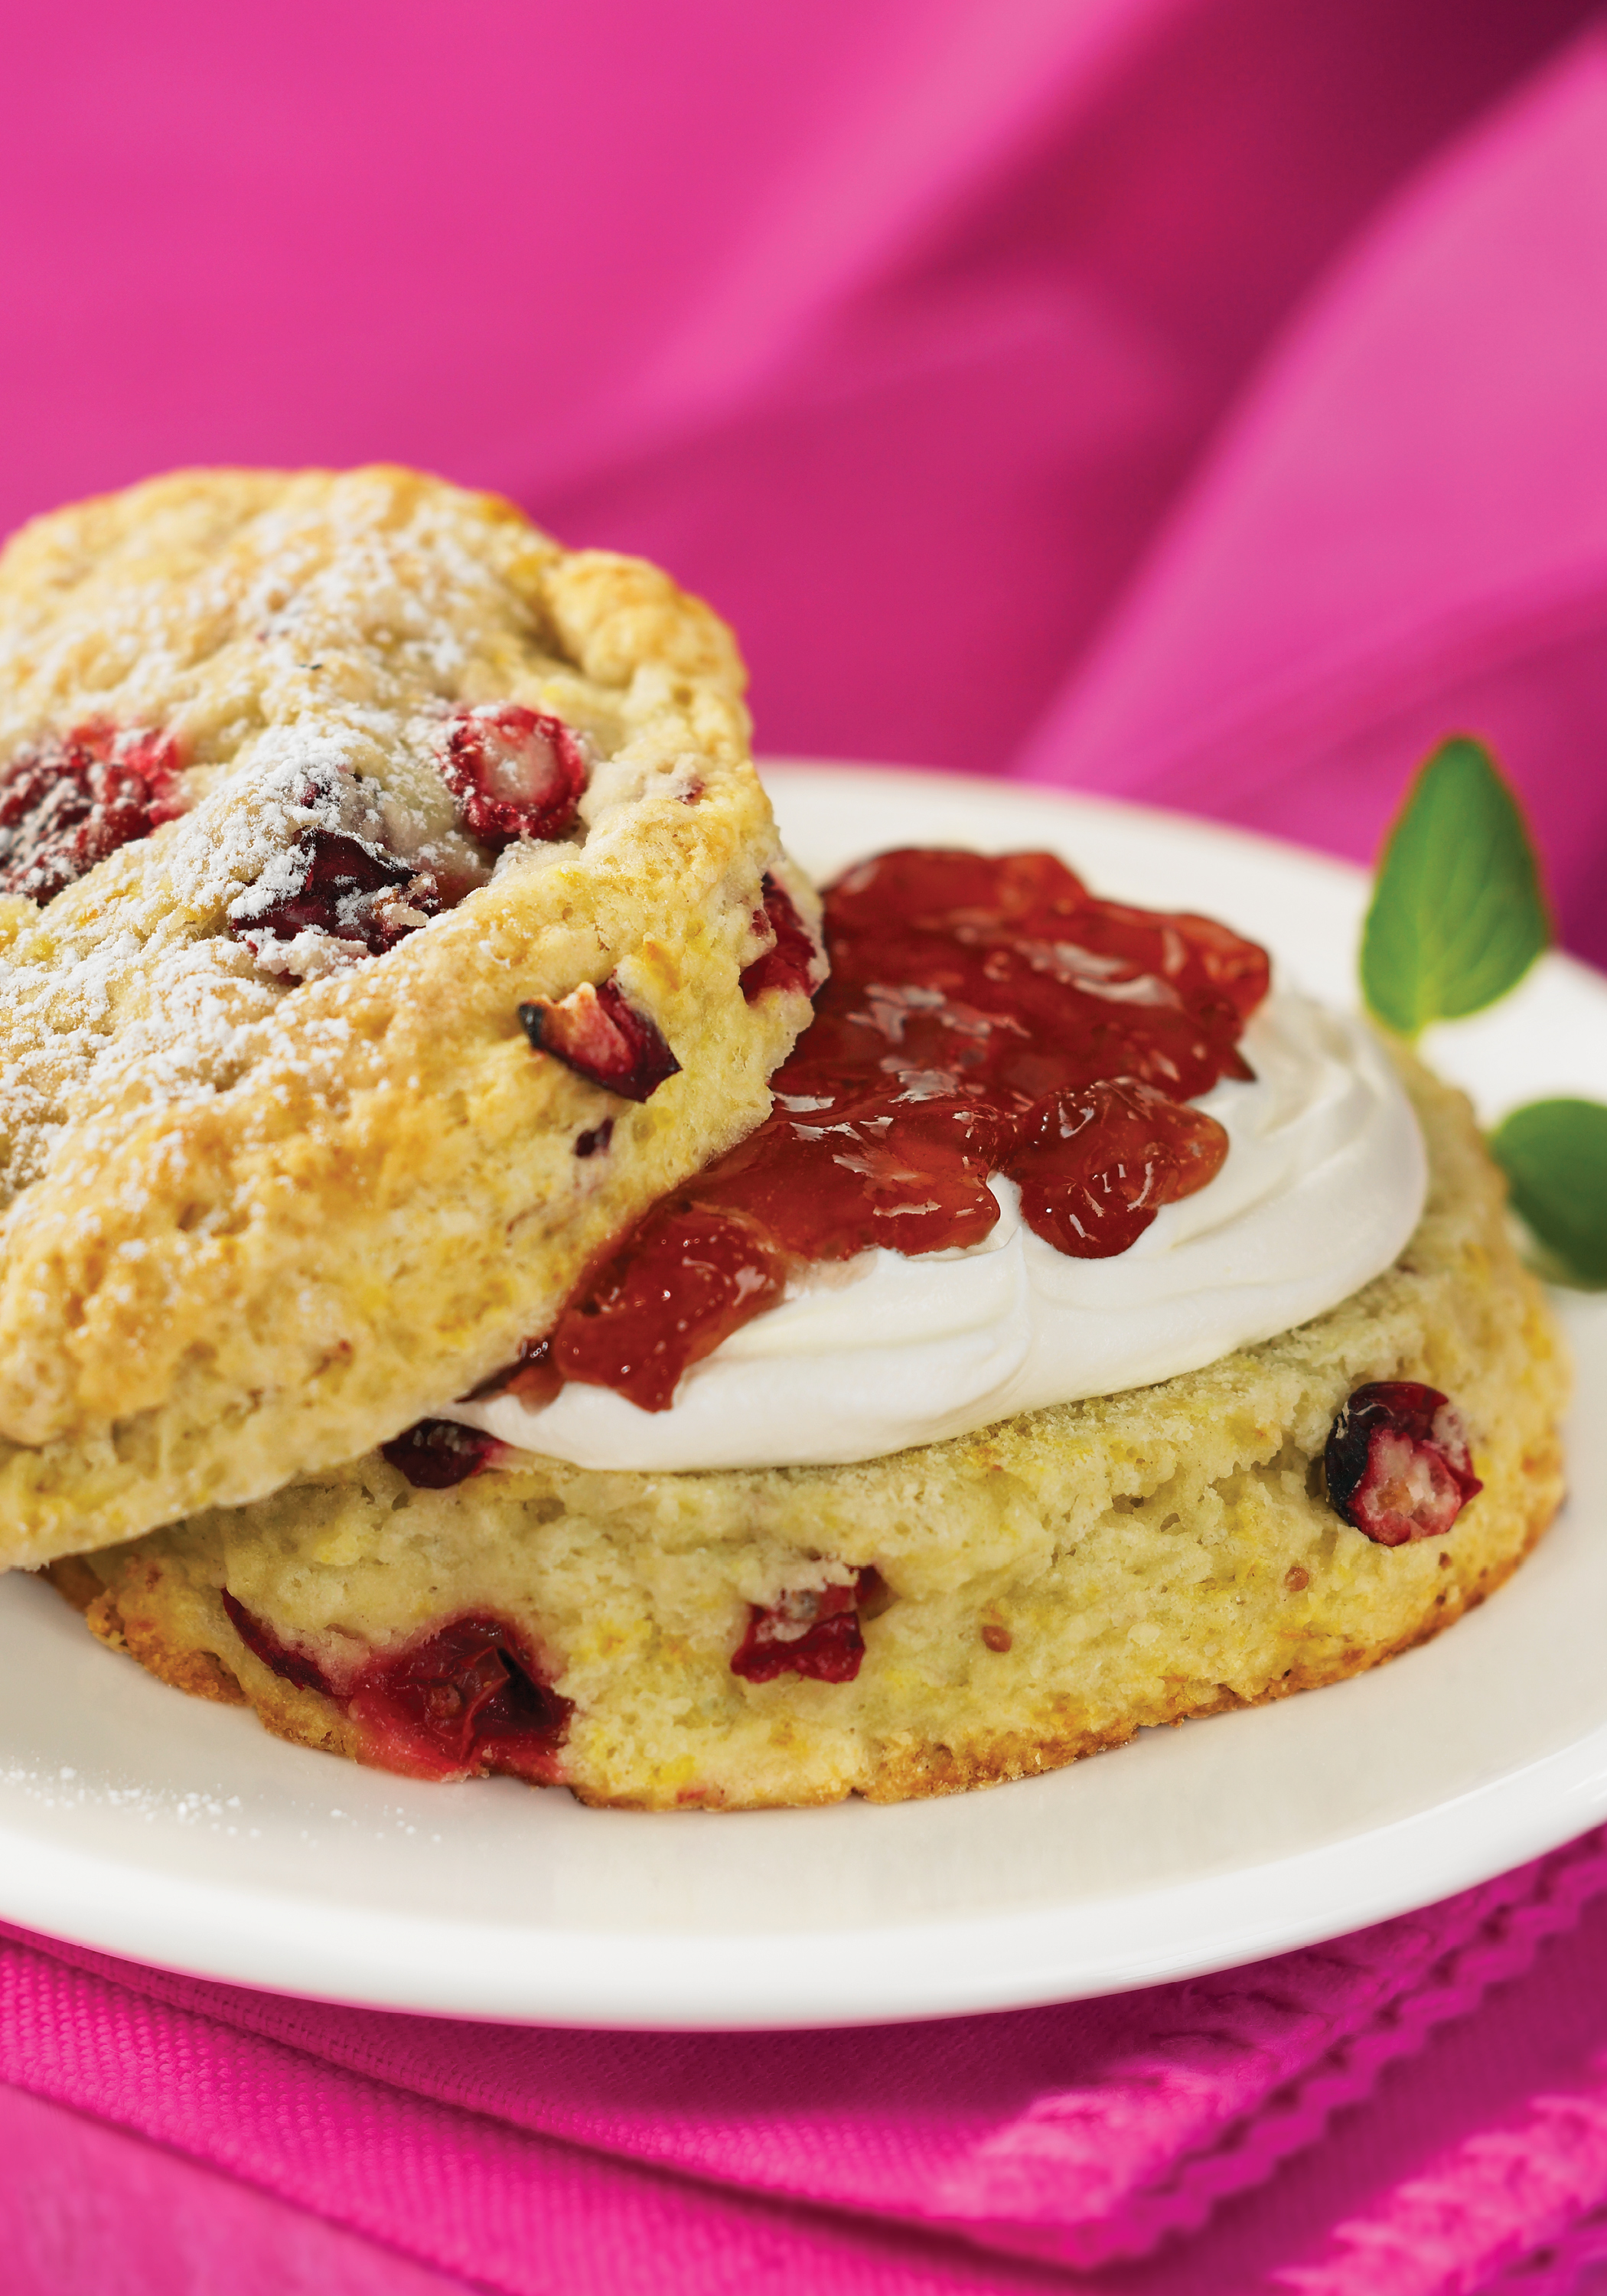
I tested two recipes out of the cookbook, choosing two in categories that I have significant personal experience. Robert Rose Inc has given me permission to share the recipes and their photos for Cranberry Scones and Crazy Crunch to accompany my review of this cookbook. The recipes follow at the end of this review. Cranberry Scones
These combine a tasty combination of cranberries and orange; however, I found they did not have the light and airy texture I associate with scones and find I get from other recipes. I also did not find that they rose as scones usually do for me and they had a prevalent flour taste.
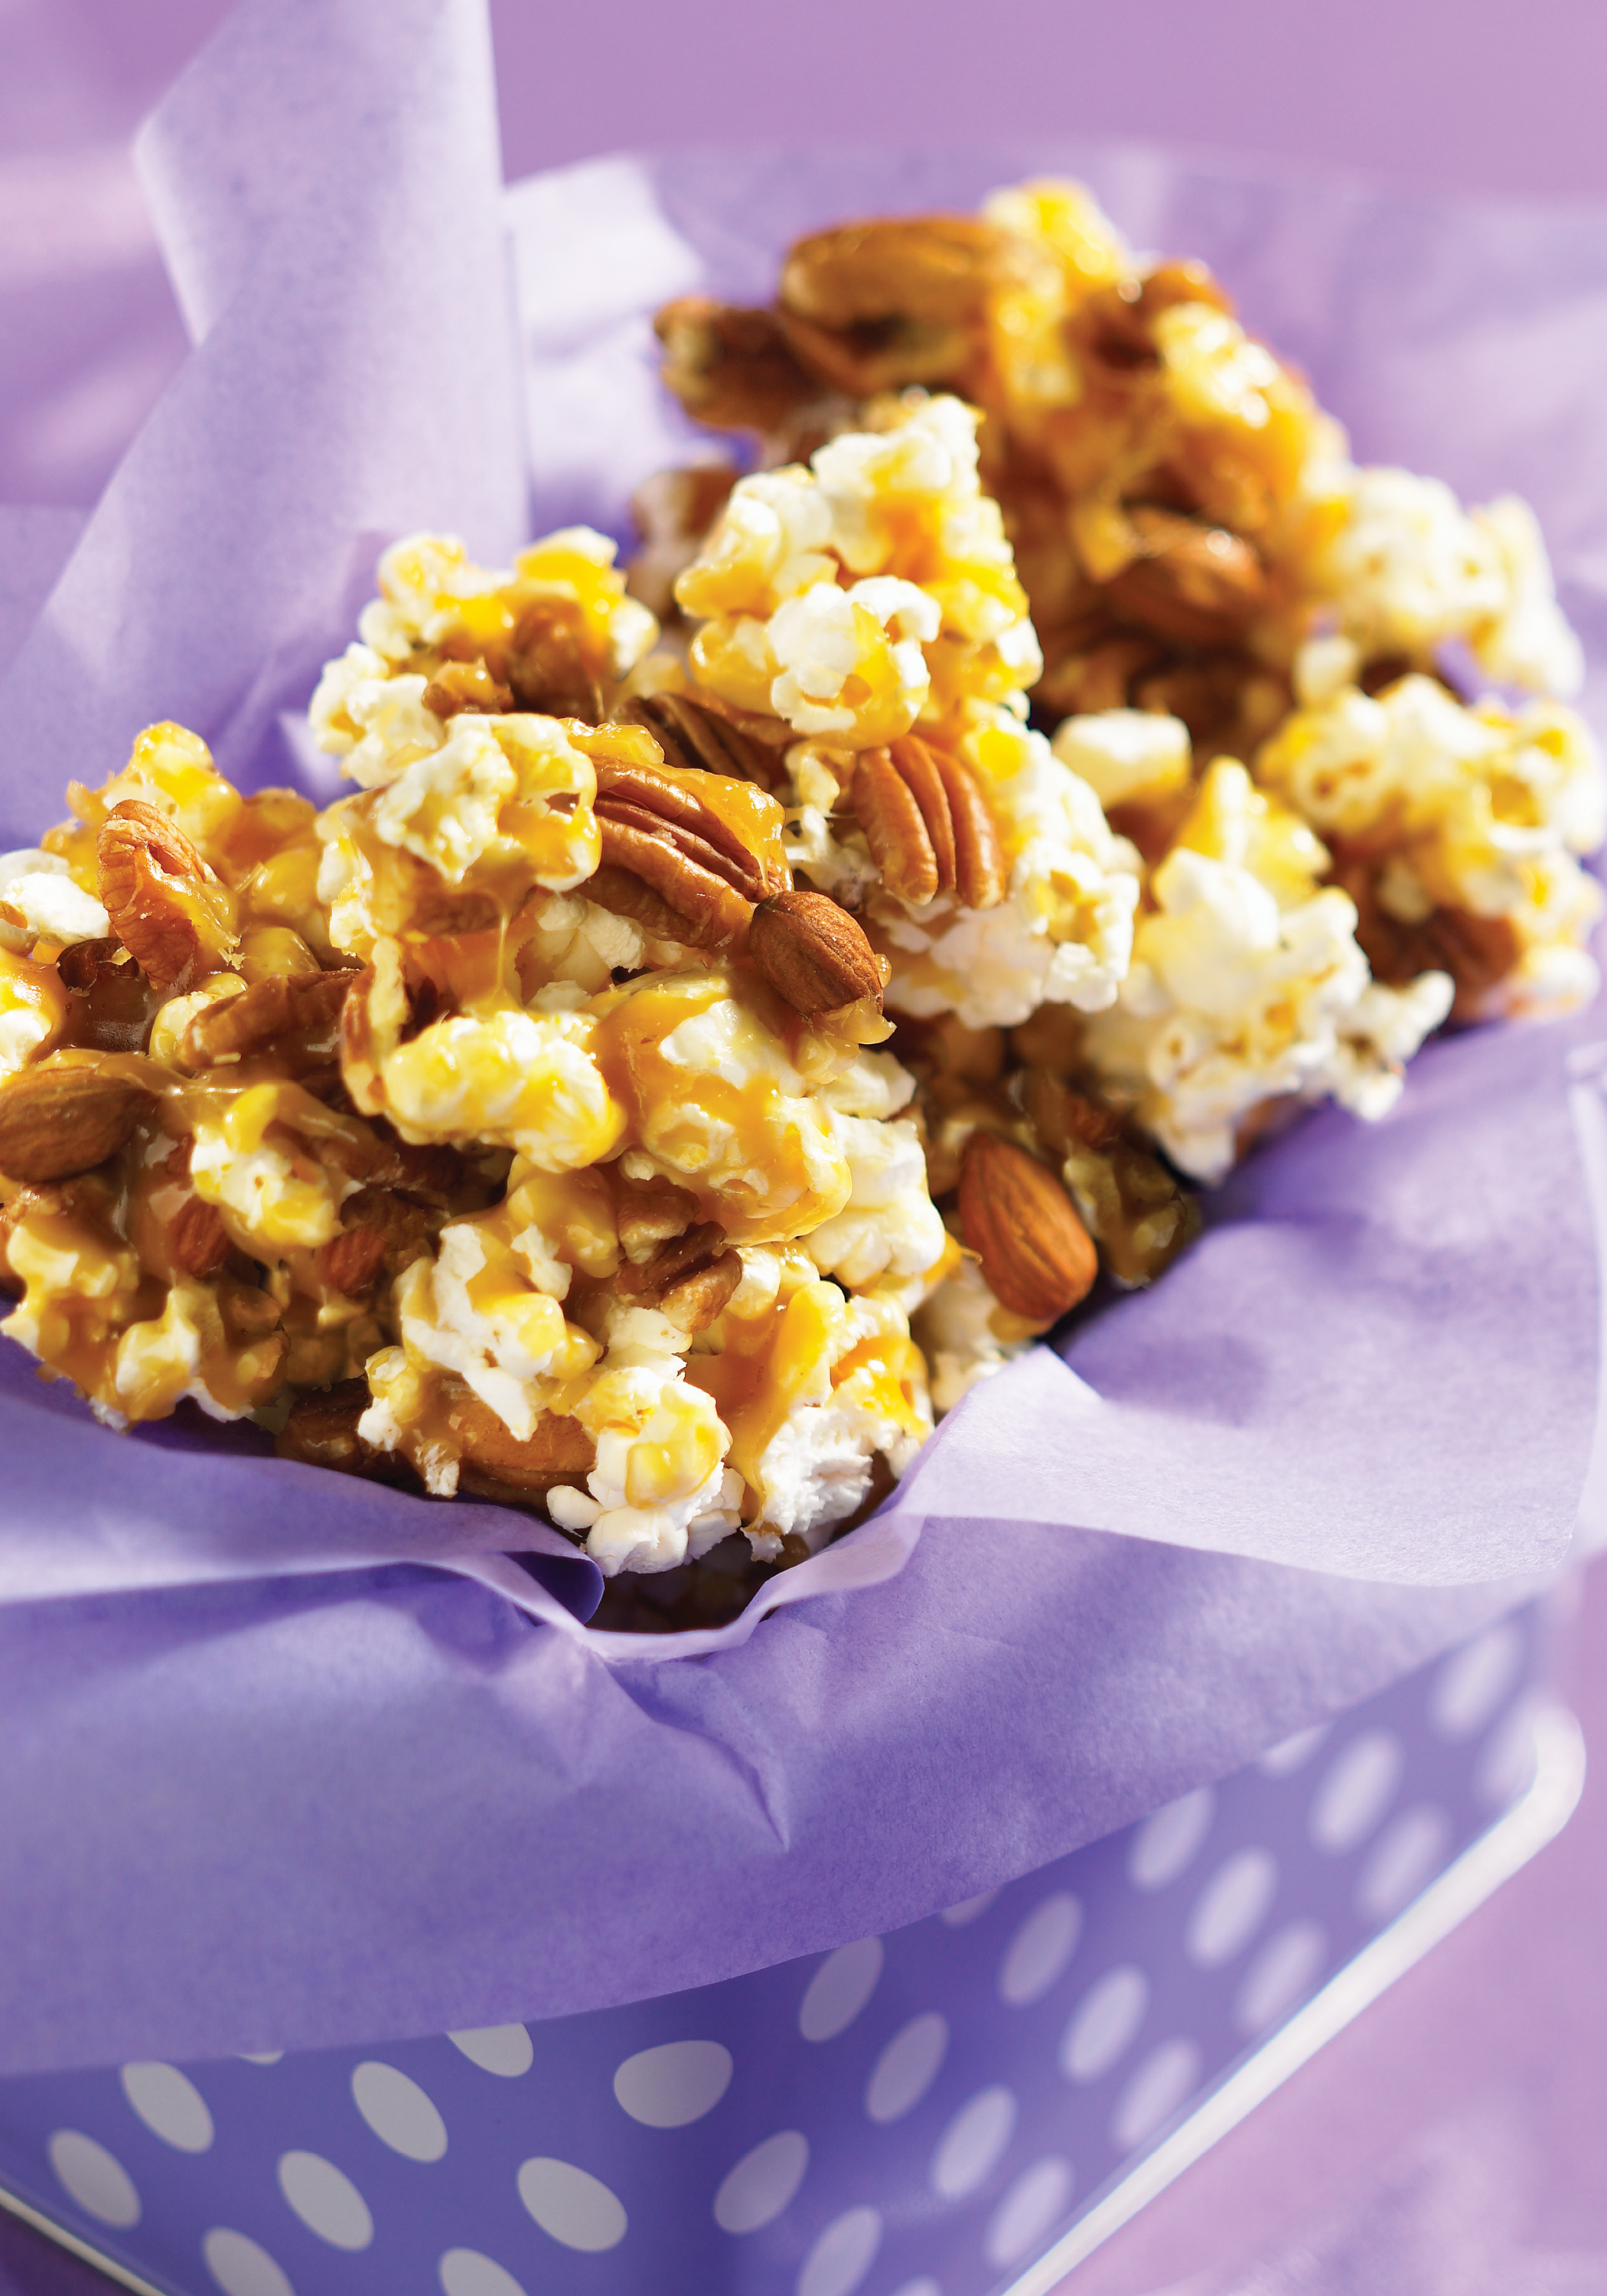
Crazy Crunch
I have a lot of experience making similar recipes and know that the caramel syrup has to reach the hard crack stage (300°F) before it is done. This recipe, however, gave a wide time span of “10-15 minutes” and a vague description of the mixture having a “light caramel color” for instructions to determine when the syrup is done. As any experienced candy maker knows, a five-minute span differential is a lifetime in candy-making and is the difference between success and failure. Also, there is no definition of “light caramel color” – what is a light color to some may be dark to another and, with no photo as a frame of reference, I did not find this particularly helpful.
The recipe also does not indicate at what temperature the mixture should be boiled – i.e., over high, medium, or low heat, a rolling or gentle boil, and whether or not the syrup should be stirred as it cooks. In my view, it would have been more useful had the recipe given directions for the use of a candy thermometer and a certain temperature which is a more accurate determination of doneness.
I used a thermometer and cooked the mixture over medium heat and found it took more than 15 minutes to reach the hard crack state of doneness. The recipe turned out for me and is tasty but I am not sure I would have had success had I removed it from the heat at any point between 10 and 15 minutes as the recipe suggested. Someone, inexperienced in candy-making, would not likely know how to adjust the recipe for success.
Concluding Thoughts
Overall, I found the book contains a good selection and number of appealing recipes that call for tasty ingredients and I will certainly make more recipes from it. However, in my opinion and given the foregoing, some quality control and assurance over ingredient listing, instruction writing (and ensuring the instructions for each recipe are consistently written across the book) and, in some cases, precise recipe yields are missing. For a cookbook priced at $29.95, I want to know the recipes have been tested for success and have exact amounts of ingredients listed and clear, fulsome, accurate instructions along with the expected yield from each recipe. For this reason, I would suggest the book would be best suited for individuals who have experience cooking and baking as some recipes in the book could prove challenging for novice cooks.
Disclosure: I received a complimentary copy of Best of Bridge Holiday Classics from Robert Rose Inc., for the purposes of conducting a review of the cookbook. I received no compensation for this review and was under no obligation to provide a positive review. All opinions expressed are purely my own.
Cranberry Scones from “The Best of Bridge Holiday Classics”. Photo courtesy Robert Rose Inc., publisher.
Cranberry Scones, page 46
3⁄4 cup buttermilk or plain yogurt (175 mL) 1 large egg (1) 2 3⁄4 cups all-purpose flour (675 mL) 4 tsp baking powder (20 mL) 1⁄2 tsp baking soda (2 mL) 1⁄2 tsp salt (2 mL) 1⁄2 cup margarine (125 mL) 1 cup coarsely chopped cranberries (250 mL) (fresh or frozen) 1⁄2 cup granulated sugar (125 mL) Grated zest of 1 orange 1 tbsp butter, melted (15 mL) 1⁄4 cup confectioners’ (icing) sugar (60 mL) Preheat oven to 375°F (190°C). Beat buttermilk and egg in small bowl and set aside. In large bowl, Combine flour, baking powder, baking soda and salt. Cut in margarine until mixture resembles small peas. Mix in cranberries, sugar and orange zest. Add buttermilk mixture and stir until soft dough forms. Using your hands, form dough into a large ball and place on floured surface. Pat out to 1-inch (2.5 cm) thickness. Cut in 4-inch (20 cm) rounds. Place on ungreased cookie sheet and bake scones for 15 to 20 minutes. While still warm, brush with butter and sprinkle with confectioners’ sugar. Makes 8 large scones.
Crazy Crunch, page 280
Crazy Crunch from “Best of Bridge Holiday Classics”. Photo courtesy Robert Rose Inc., publisher.
Put this in fancy jars and give it as a little extra at Christmas time. 2 quarts popped popcorn (2 L) 1 1⁄3 cups pecans (325 mL) 2⁄3 cup almonds 150 mL 1 1⁄3 cups granulated sugar (325 mL) 1 tsp vanilla (5 mL) 1 cup margarine (250 mL) 1⁄2 cup corn syrup (125 mL) Mix popcorn, pecans and almonds on a cookie sheet. Combine sugar, vanilla, margarine and syrup in a pan. Boil 10 to 15 minutes or to a light caramel color. Pour over corn, pecans and almonds. Mix well. Spread to dry. Makes about 10 cups (2.5 L).
I suspect some of you may be giving bottles of wine, balsamic vinegars, or olive oils as gifts, or host/hostess gifts, over the holidays. So, I thought I would share some of my favorite ways to decorate long-necked bottles for gift giving.
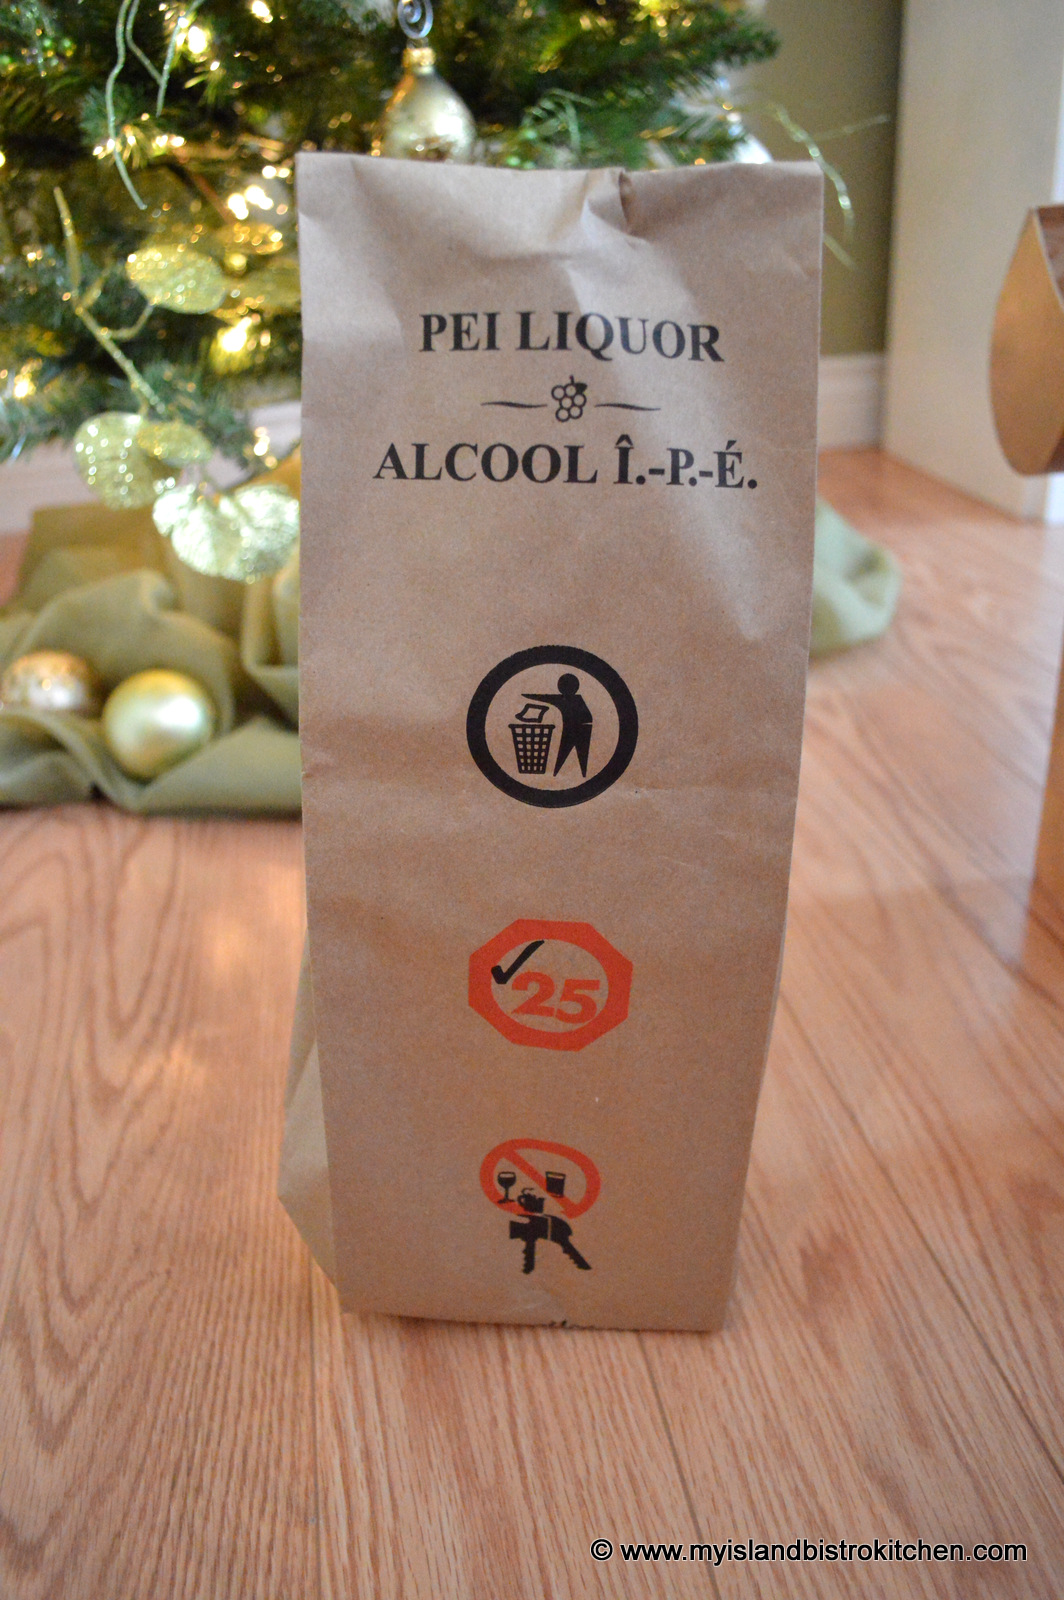
To start, here’s how NOT to present a gift:
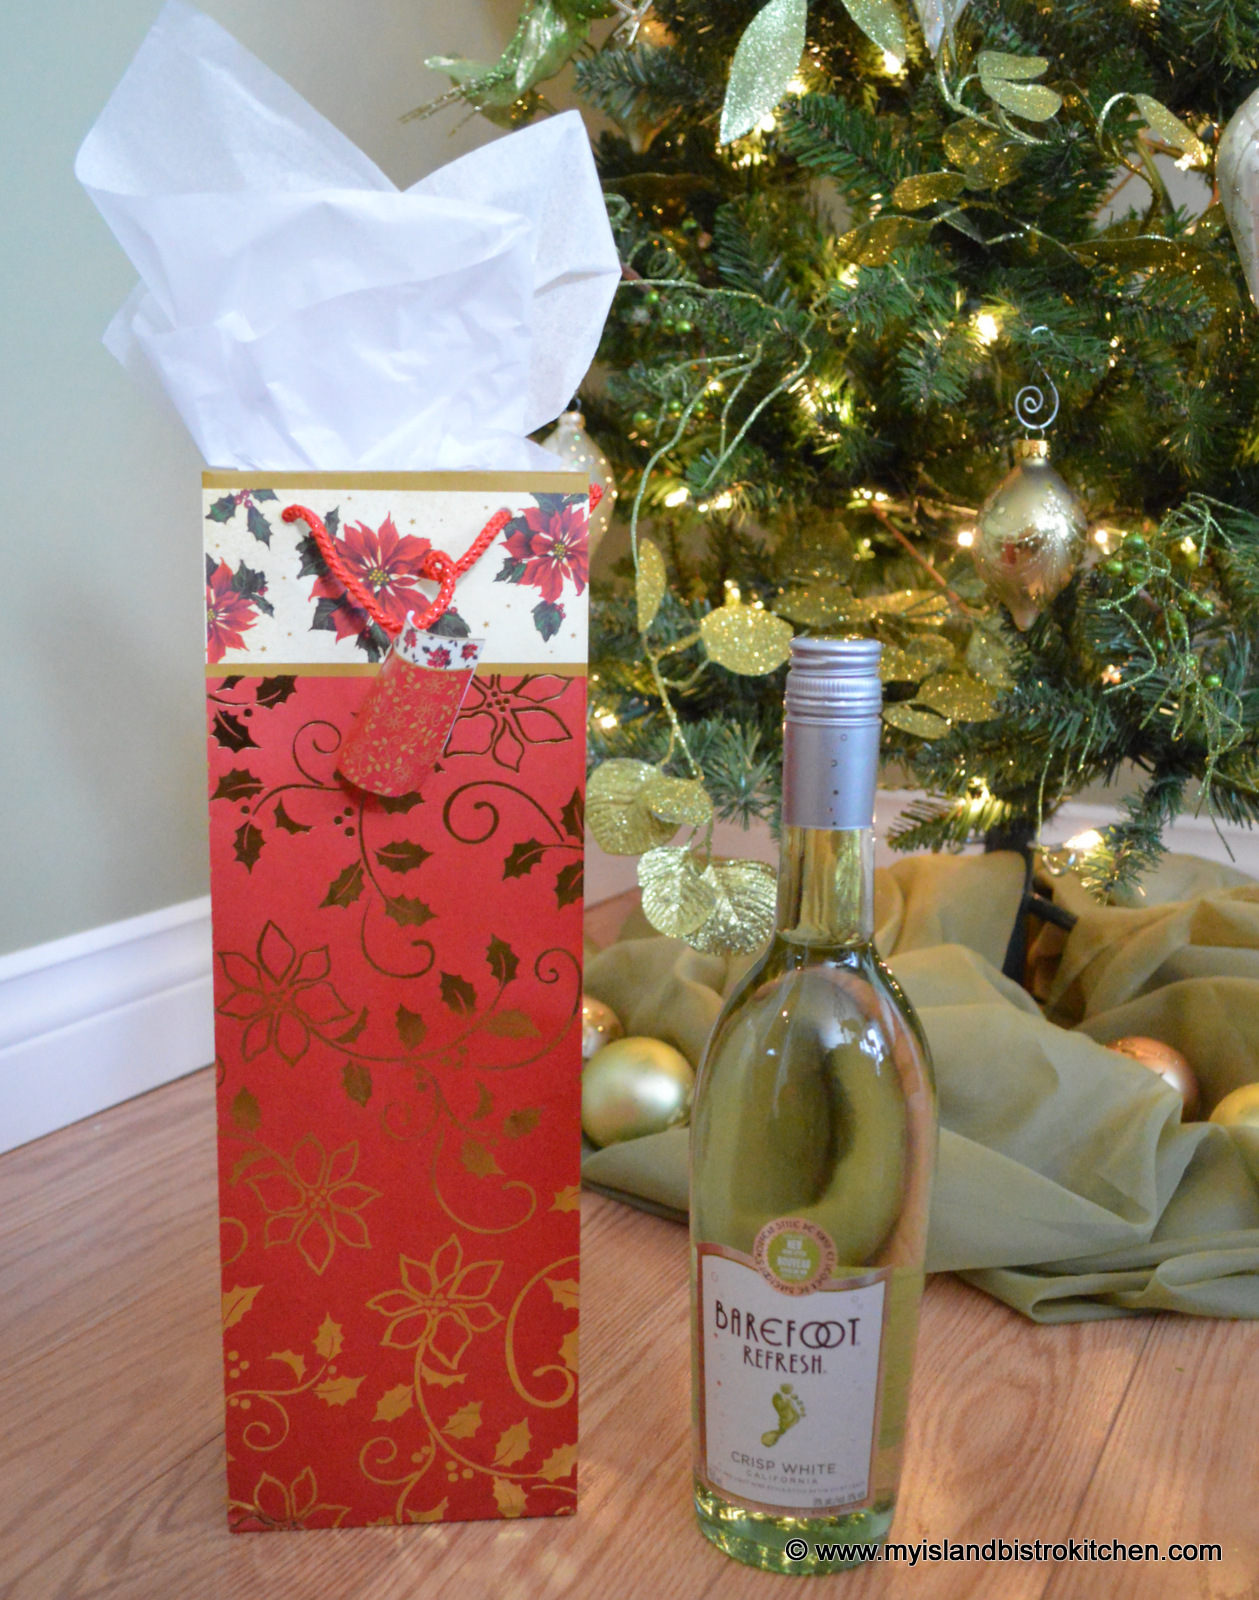
The easiest and most traditional way is to use a decorated gift bag. These are quite economical and can be found just about anywhere, including dollar stores. Be sure to fluff some tissue paper on top for a polished look.
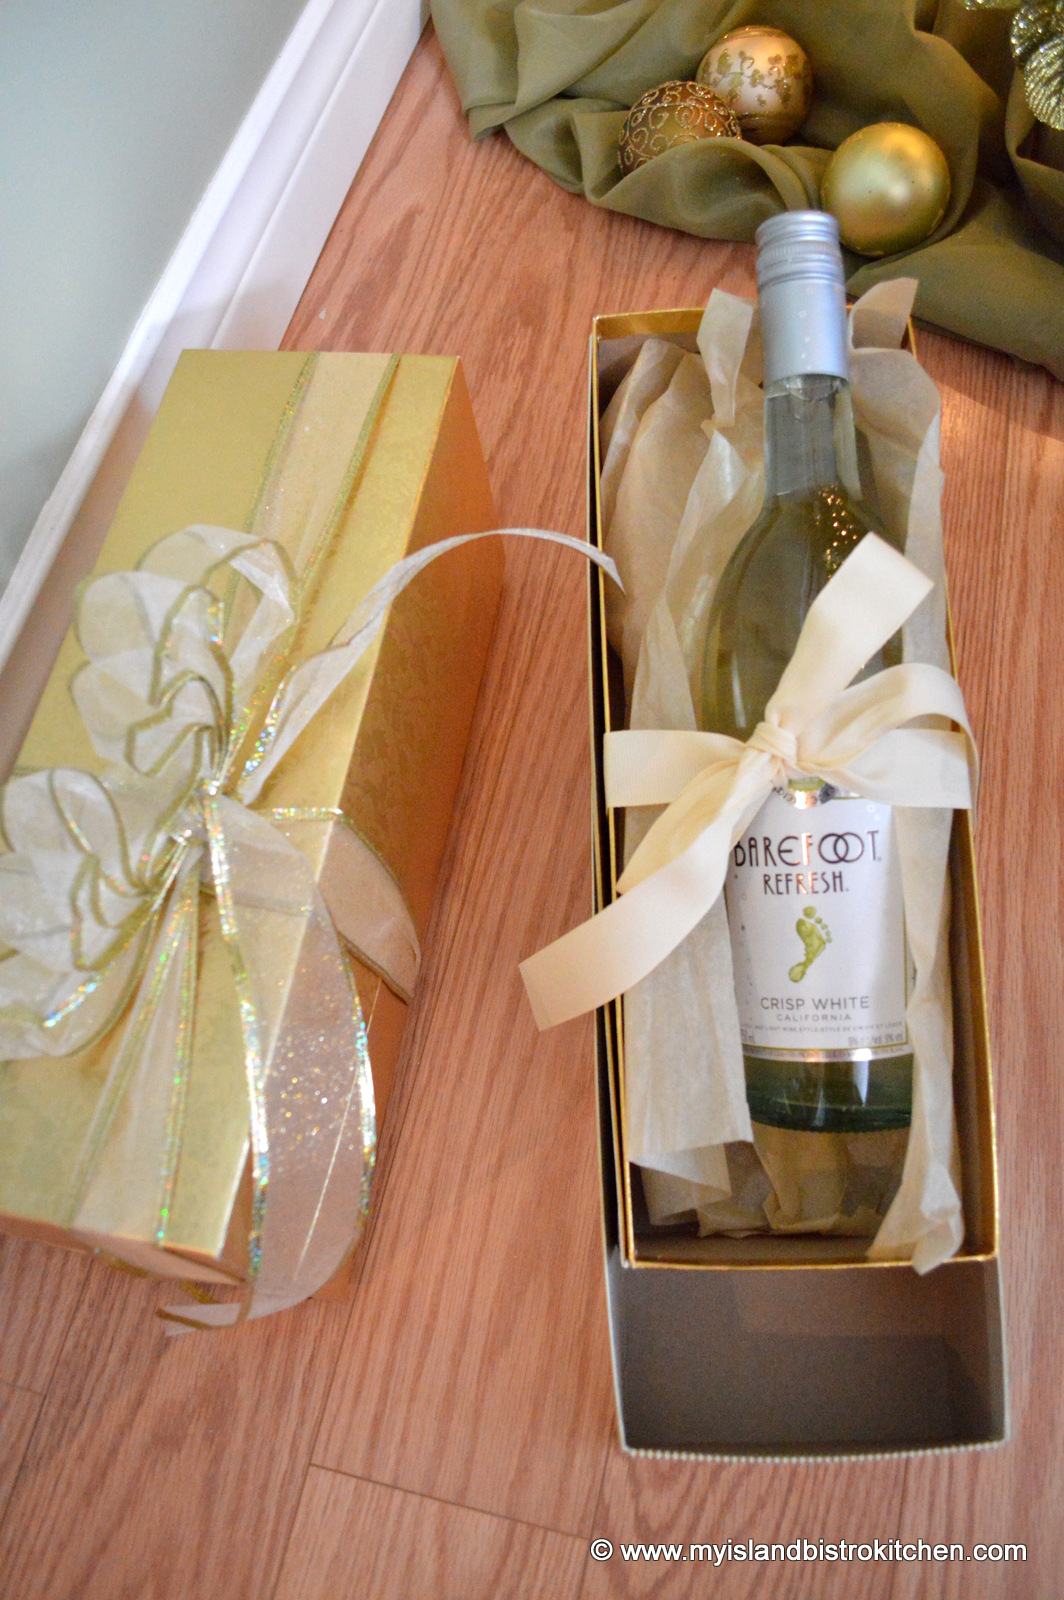
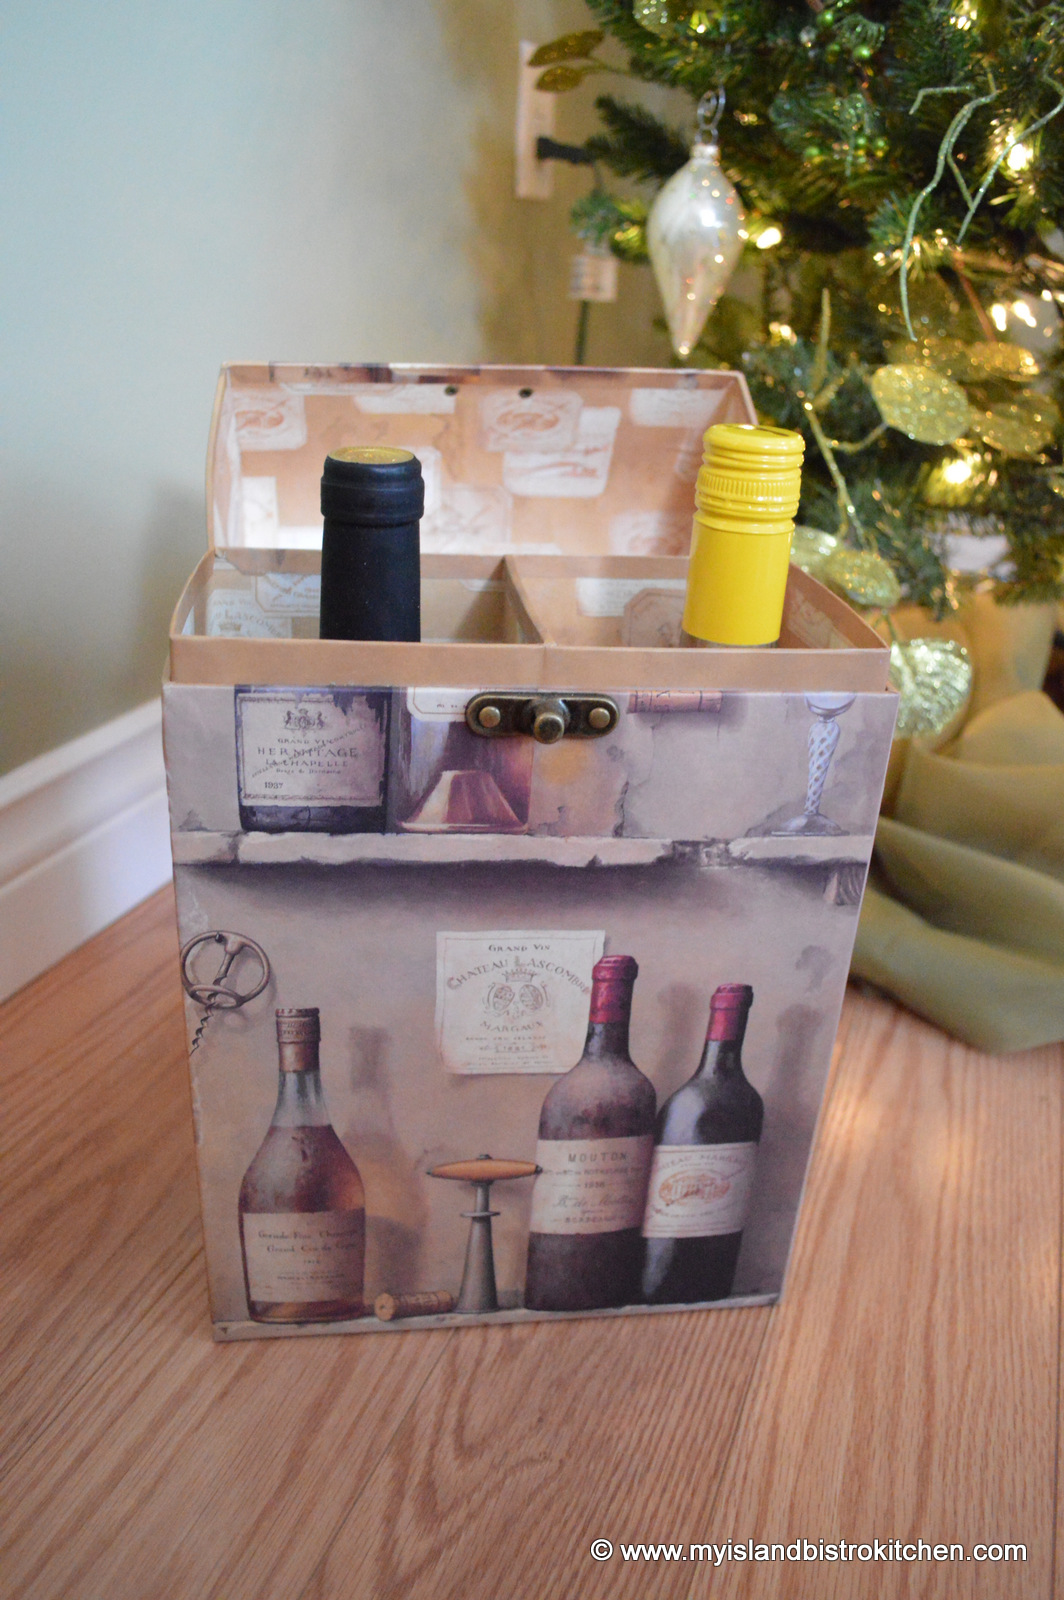
I like the boxes below which are made especially for wine. Most come with lovely ribbon attached that can simply be tied around the box. Some even have a sheet of tissue paper in them so they are a quick and elegant option. These are readily available in different stores; these came from Winners.
The wonderful hard-sided box below is almost a gift in itself and no further decoration is required. Simply slip the bottle inside and off you go. The box in the photo was a purchase from my local Winners store.
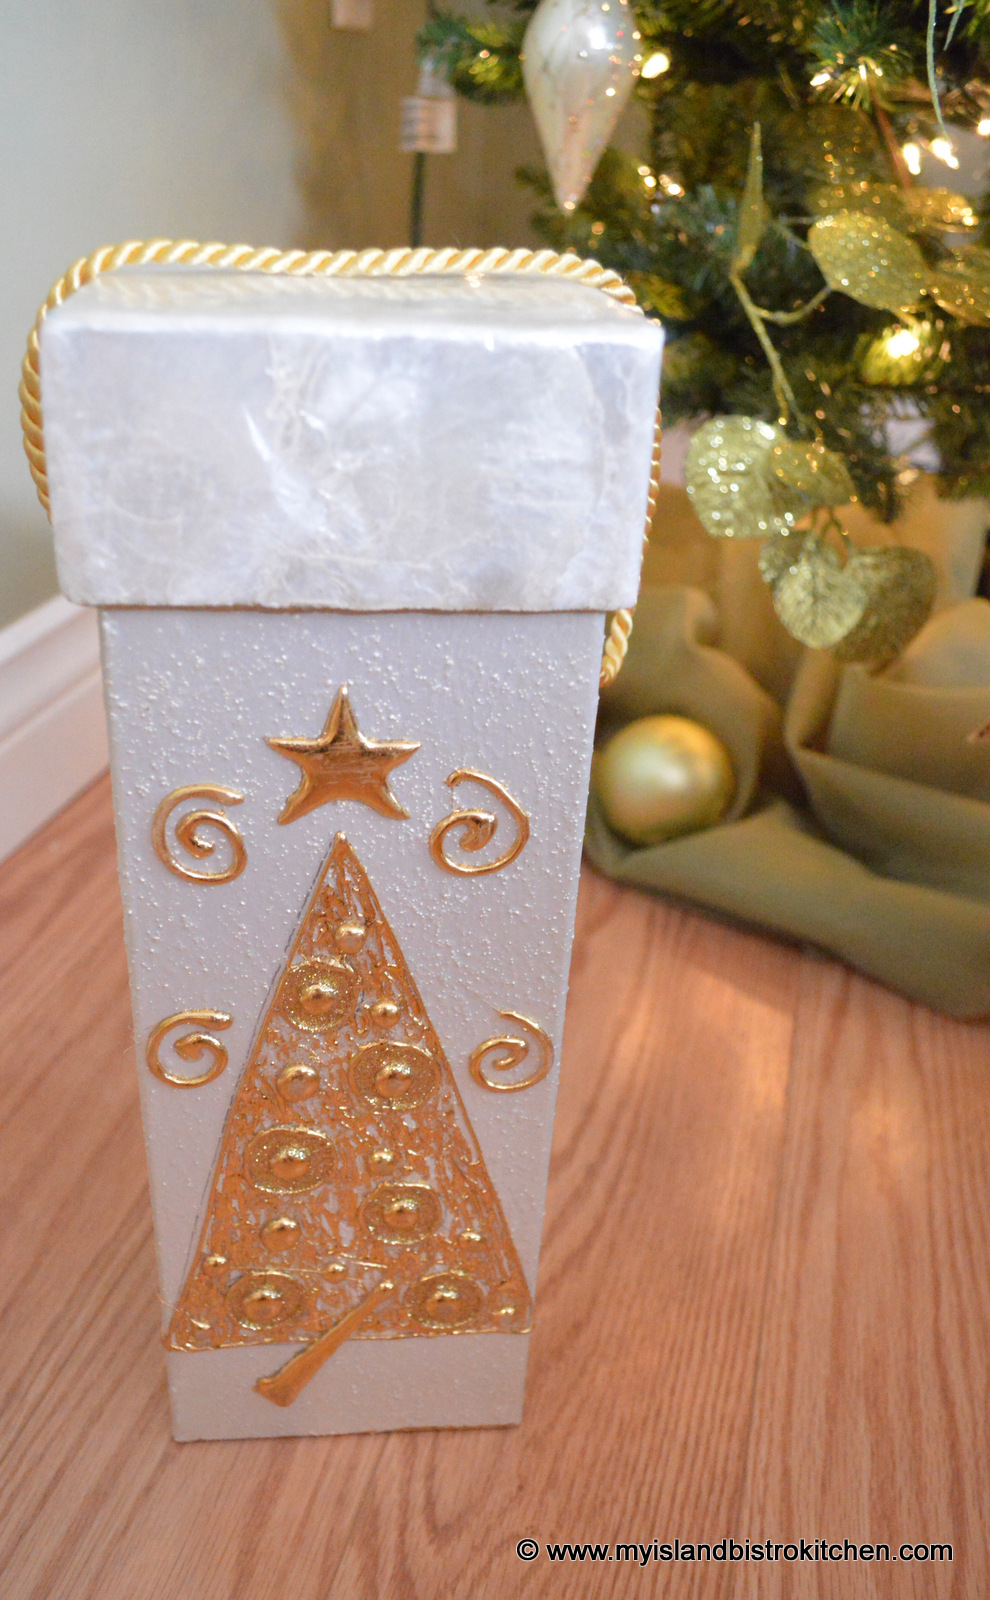
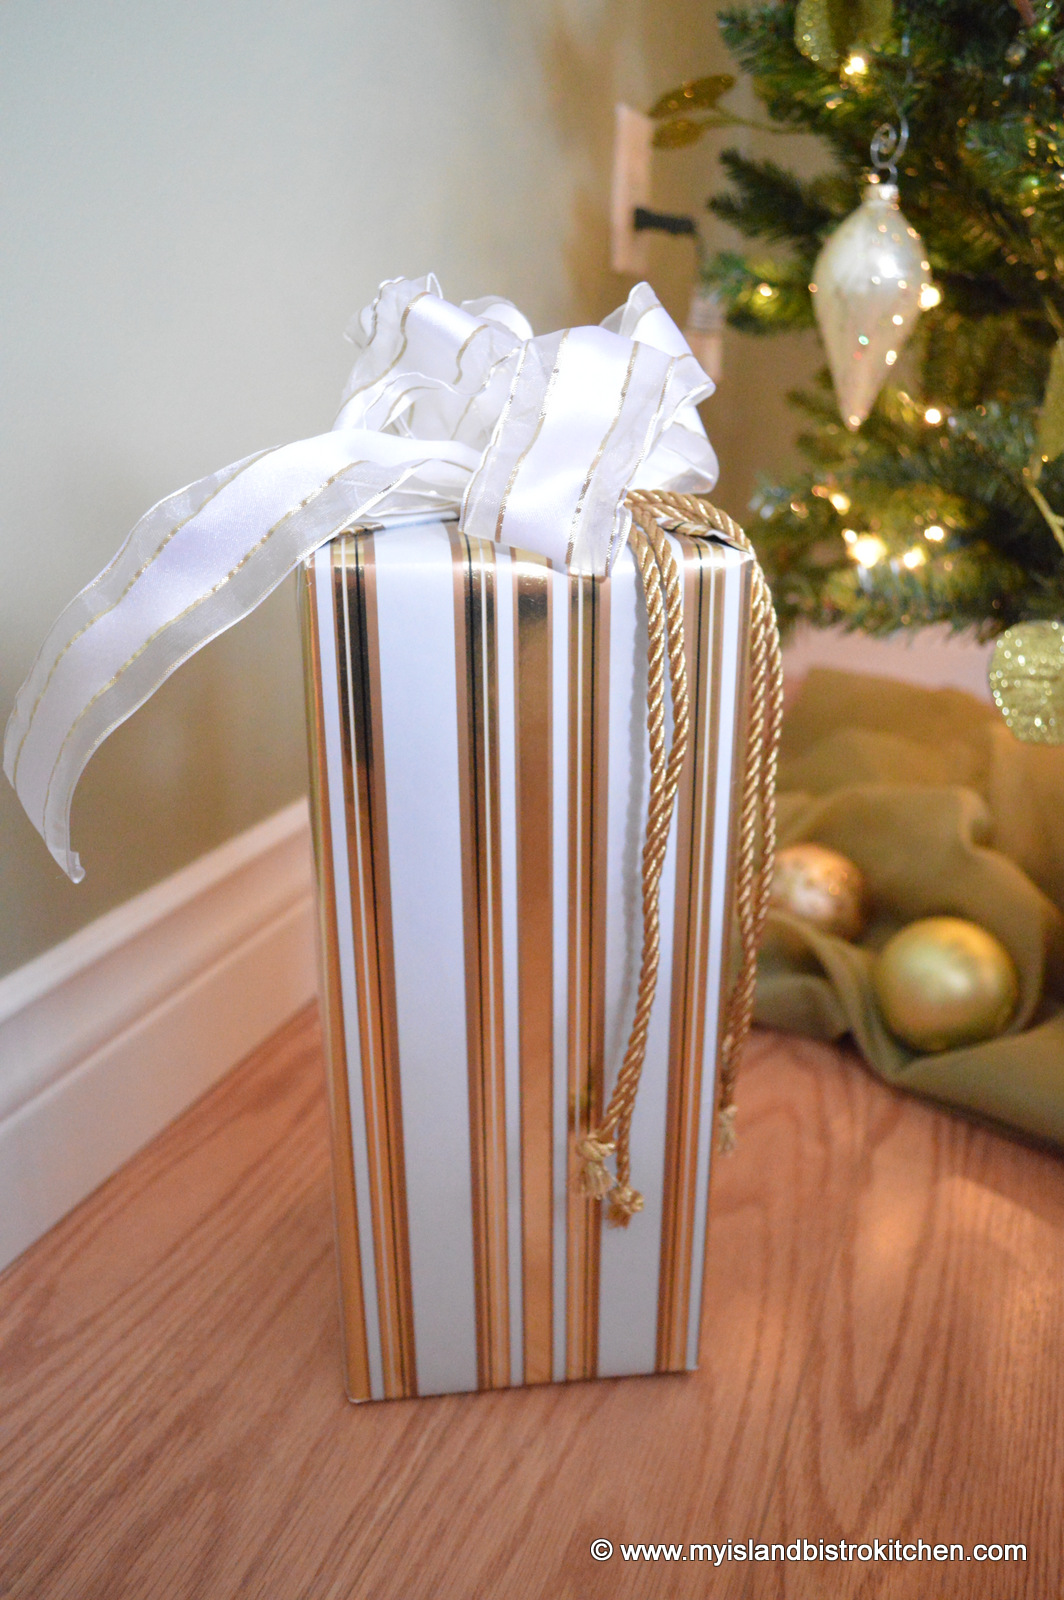
If you are into wrapping gifts, any box that the bottle will fit into will do. Choose elegant wrapping paper and pretty ribbon and/or cord to decorate the box.
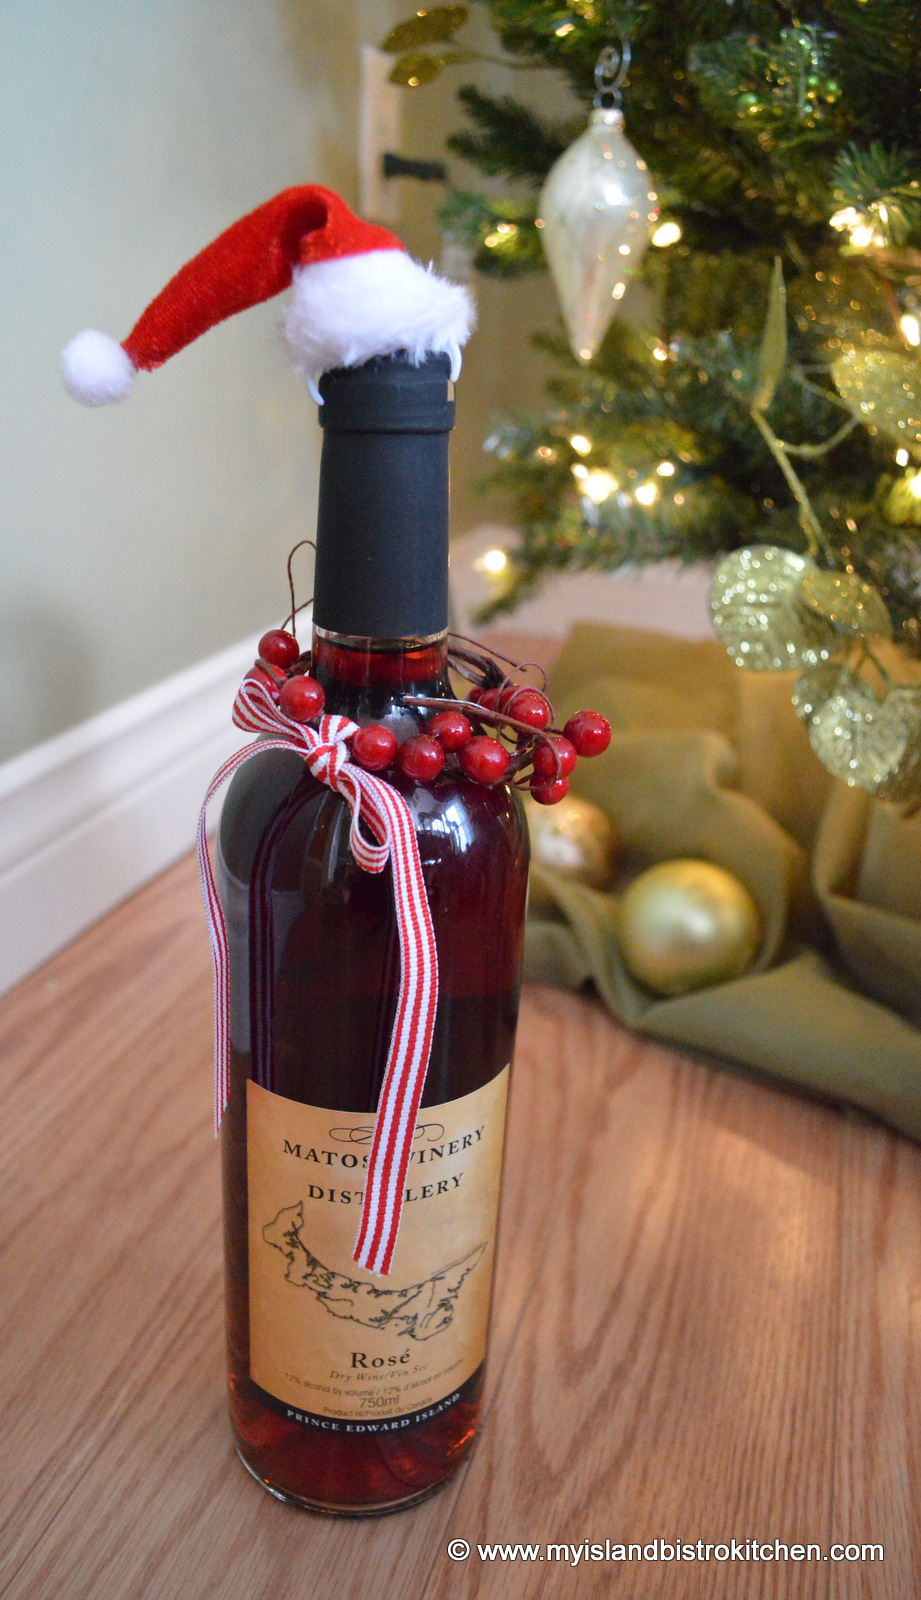
Wine bottles don’t always have to be fully wrapped and concealed. In the photo below, I used a Santa hat hairclip from the local dollar store to adorn the top of the bottle and added a tiny wreath of red berries and a pretty stripped ribbon to make this bottle a conversation piece.
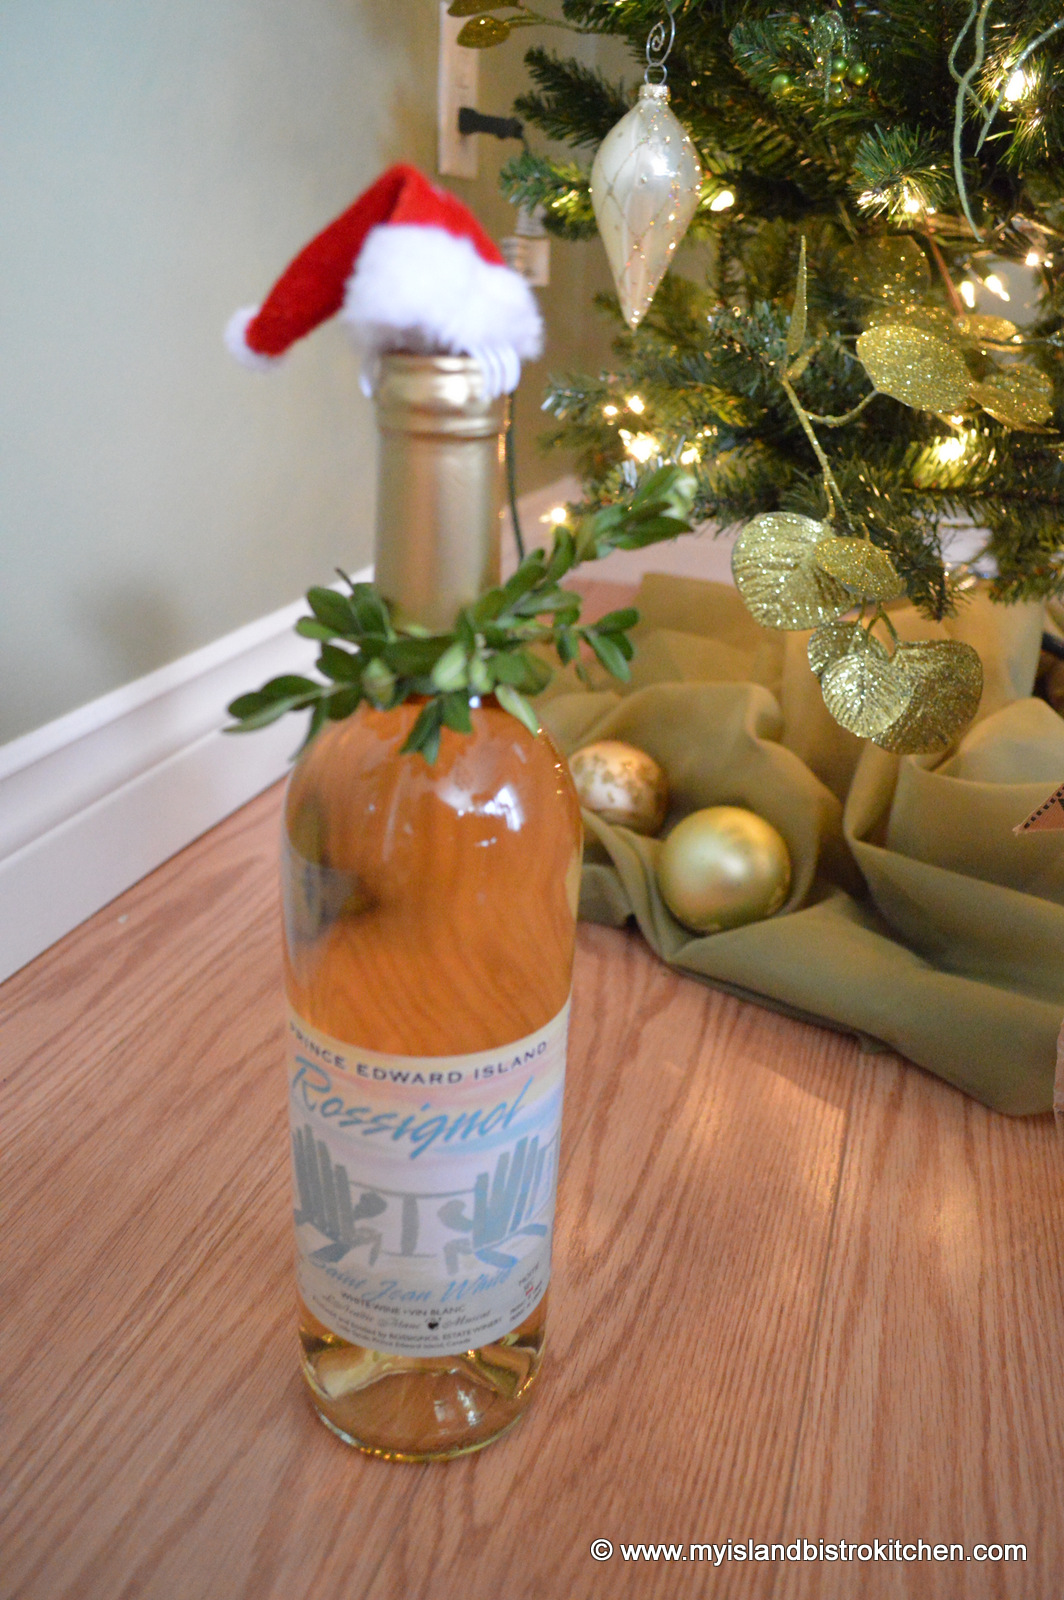
For the bottle below, I used the Santa hat hair clip and cut a piece of boxwood from the tree beside my walkway and used it to make a tiny fresh wreath for the neck of the bottle.
I found the Santa hat and matching scarf below at my local Dollarama store. It’s a fun and funky way to present a gift of wine.
If you are feeling particularly generous and are giving two bottles of wine, the option below is a hard-sided box that accommodates two bottles. It’s another Winners find.
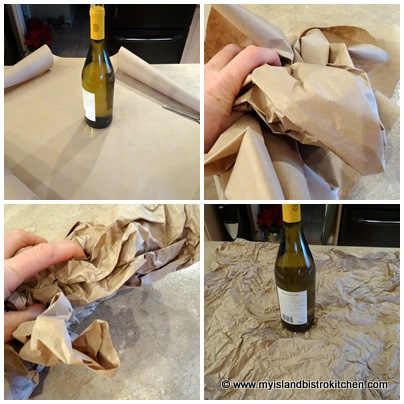
For the bottle below, I used distressed brown paper.
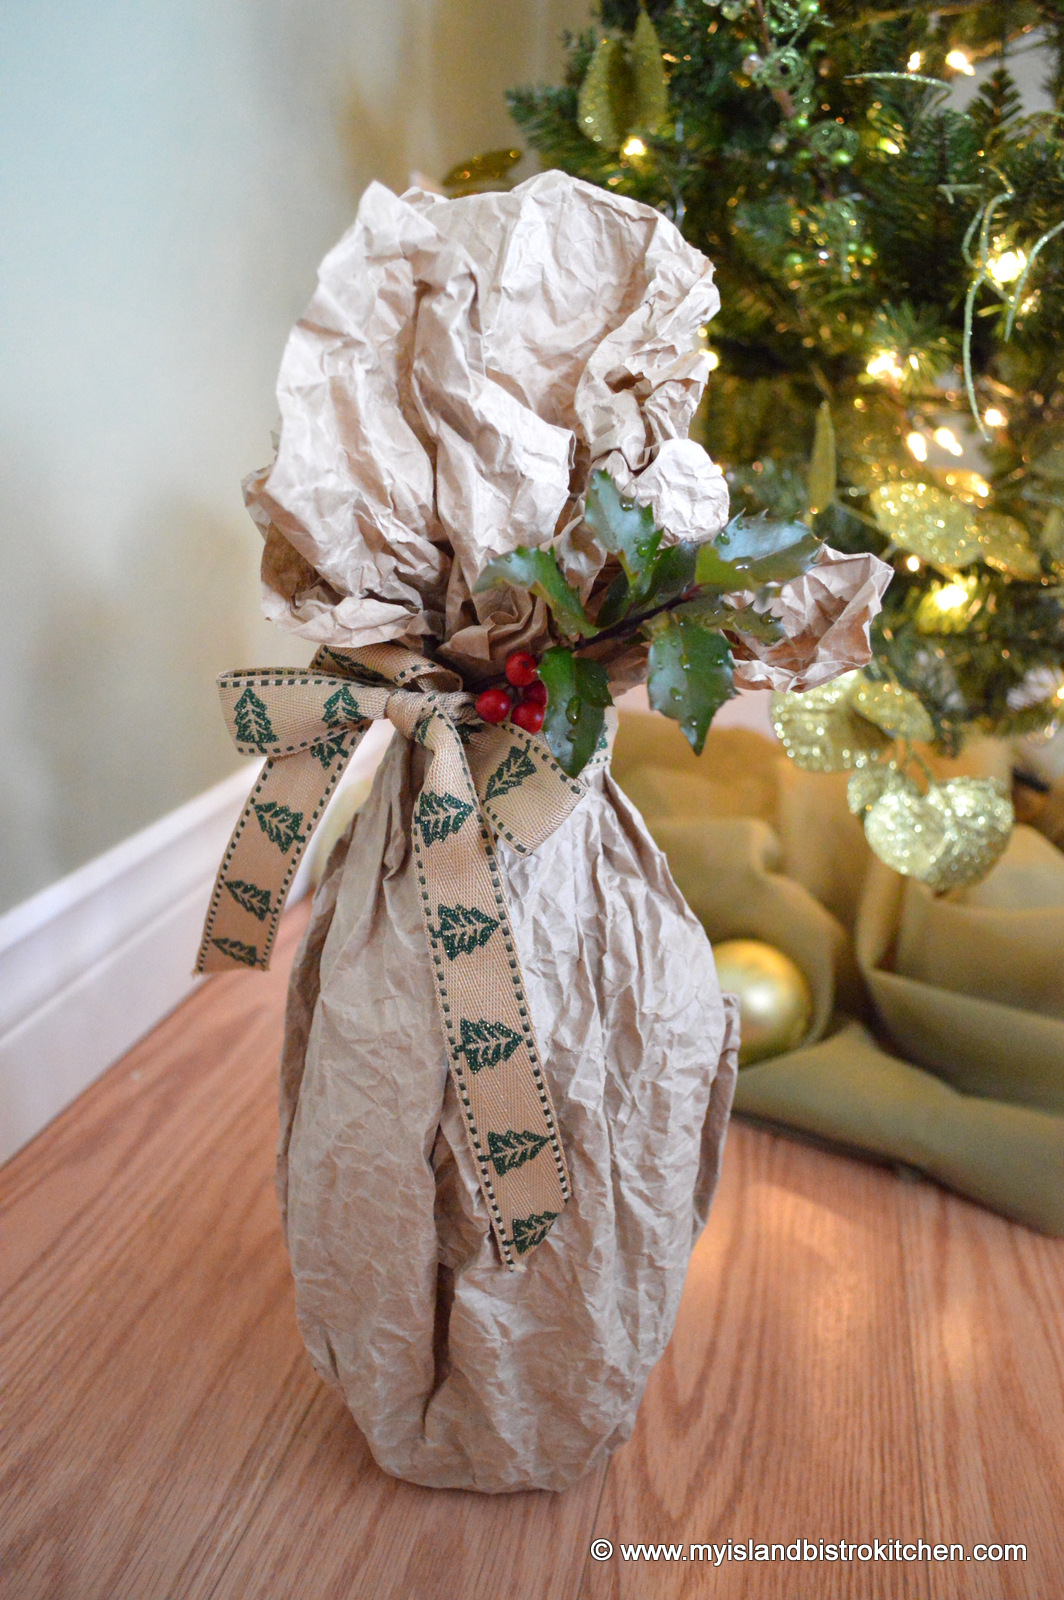
Simply take a 30″ square of brown wrapping paper and crumple it up and massage it until it is soft and supple. This is a good thing to do to relieve stress (or to keep the kids busy)! Place the bottle in the centre of the distressed paper and draw all sides up and secure around the bottle top with an elastic band, then decorate with pretty rustic ribbon and a sprig of holly.
I hope these suggestions will inspire you to decorate your bottles of wine, olive oils, and vinegars for gift-giving presentation.
Have a wonderful holiday!
——————————–
Thank you for visiting “the Bistro” today. There are lots of ways to connect with “the Bistro” through social media:
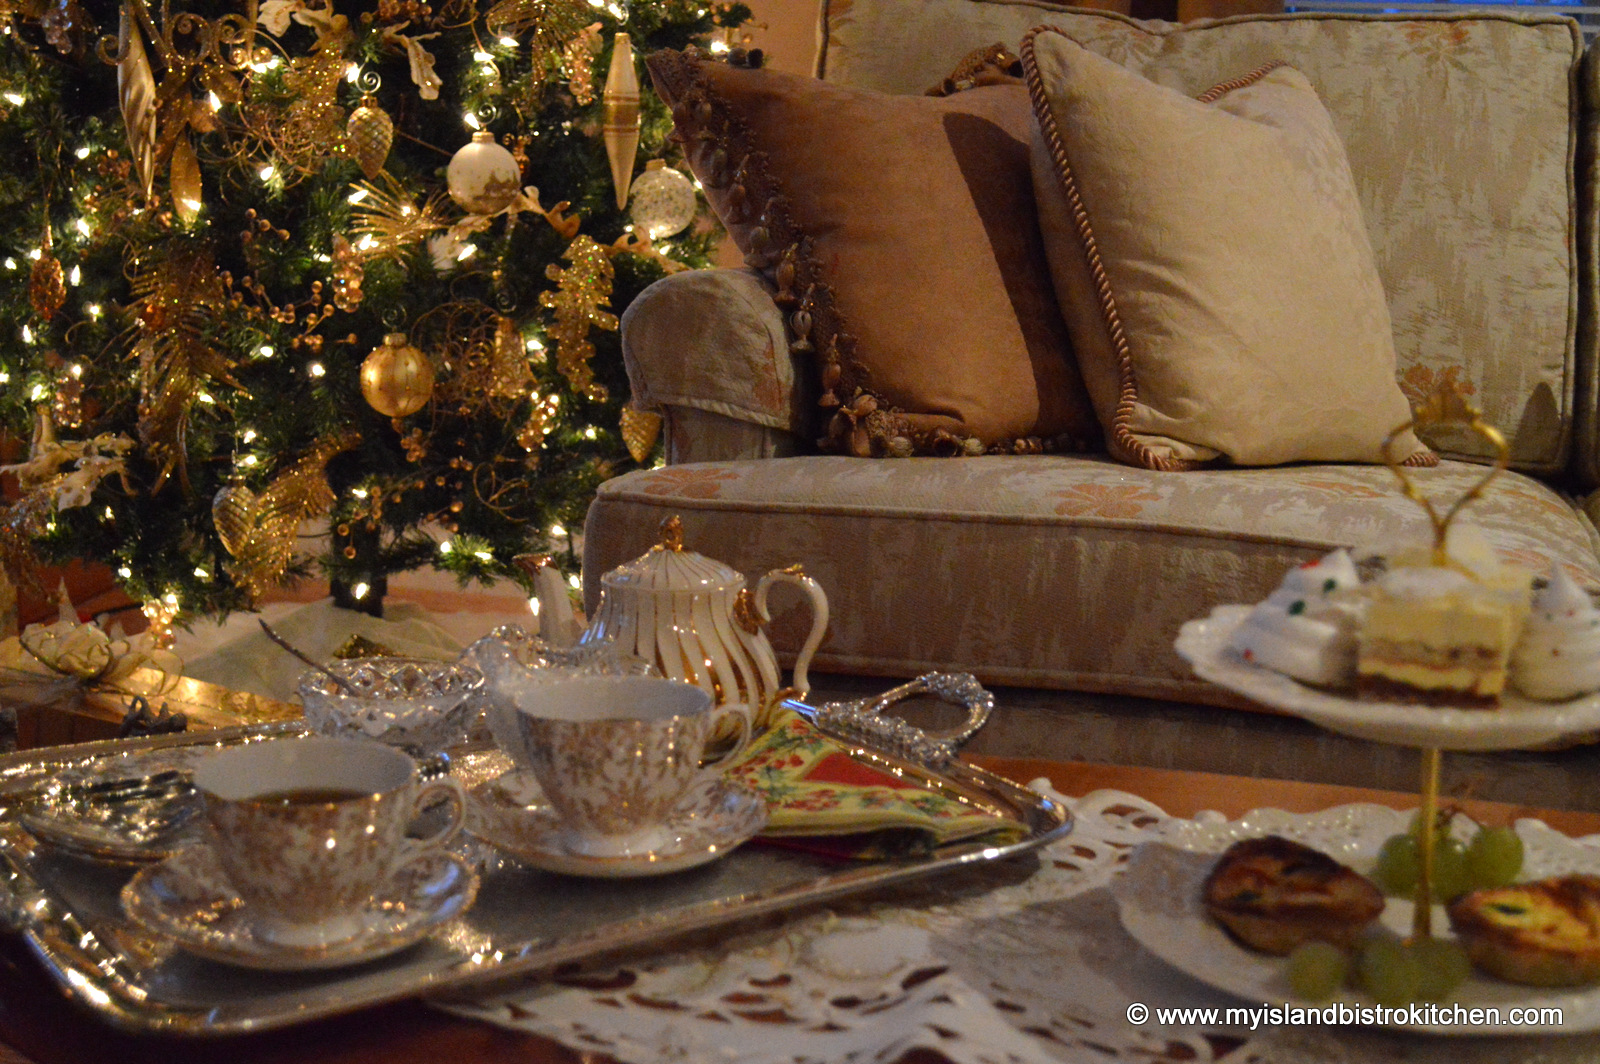
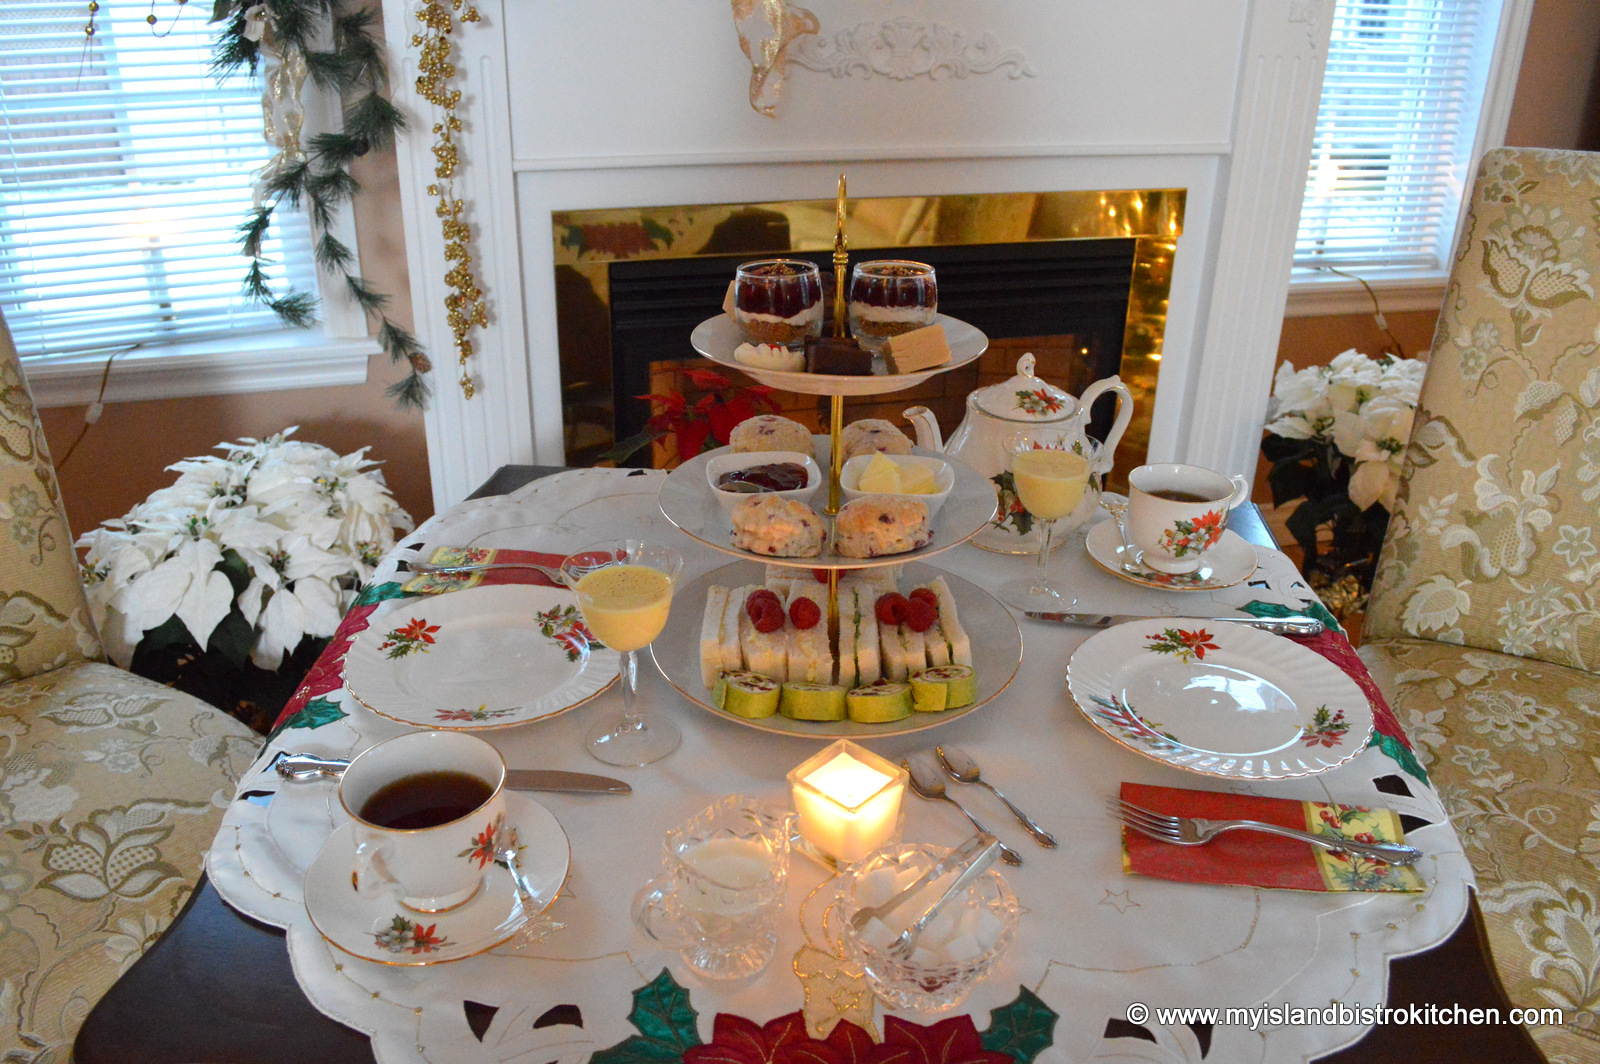
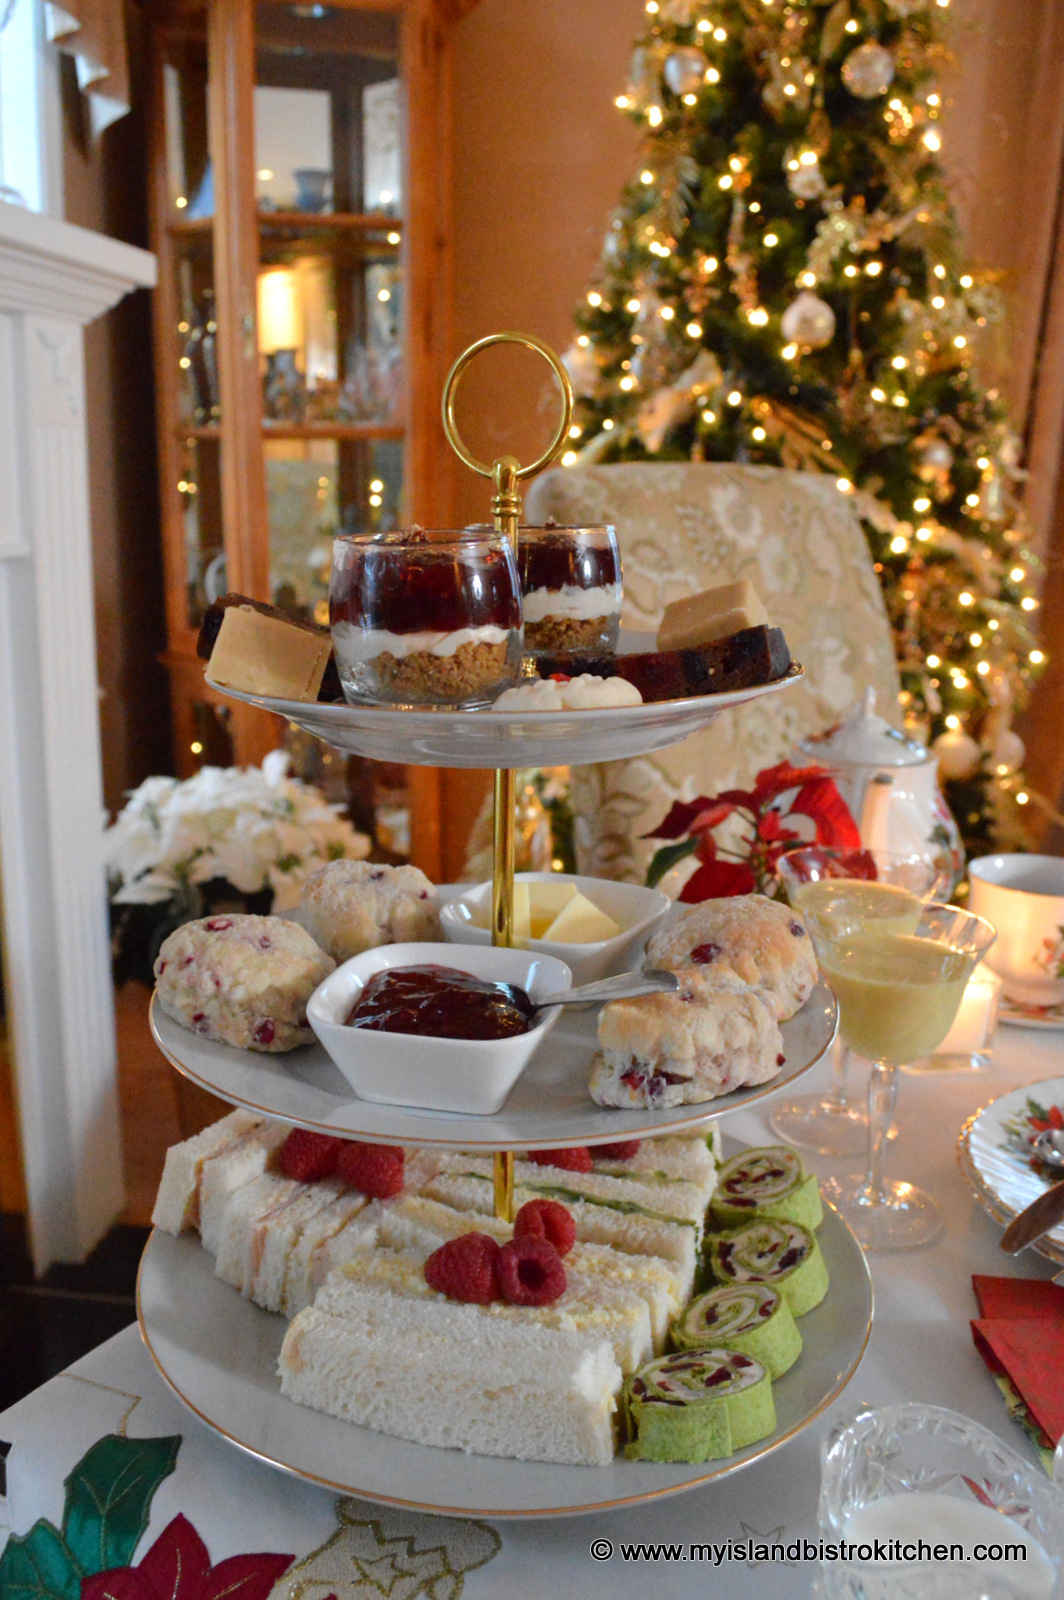
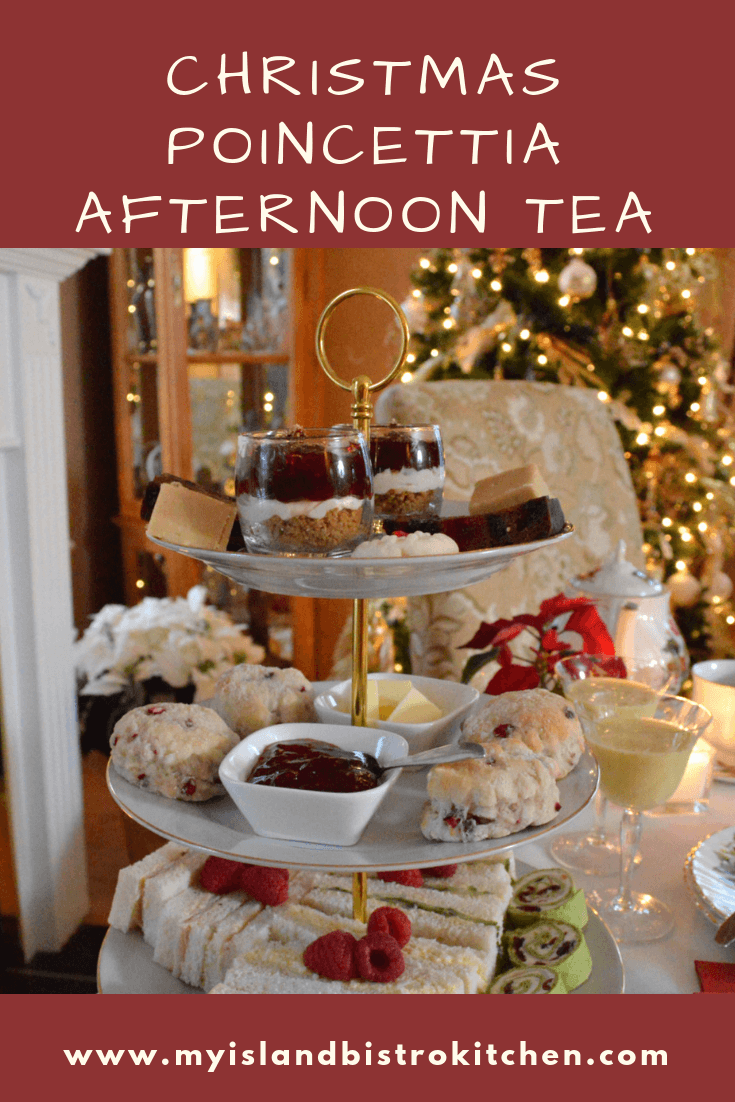
One of my absolute favorite ways to celebrate the holidays is with a festive afternoon tea. It’s a relaxed way to entertain whether it’s one guest or several. The best part of entertaining with afternoon tea is that much of the preparation can be done in advance before guests arrive.
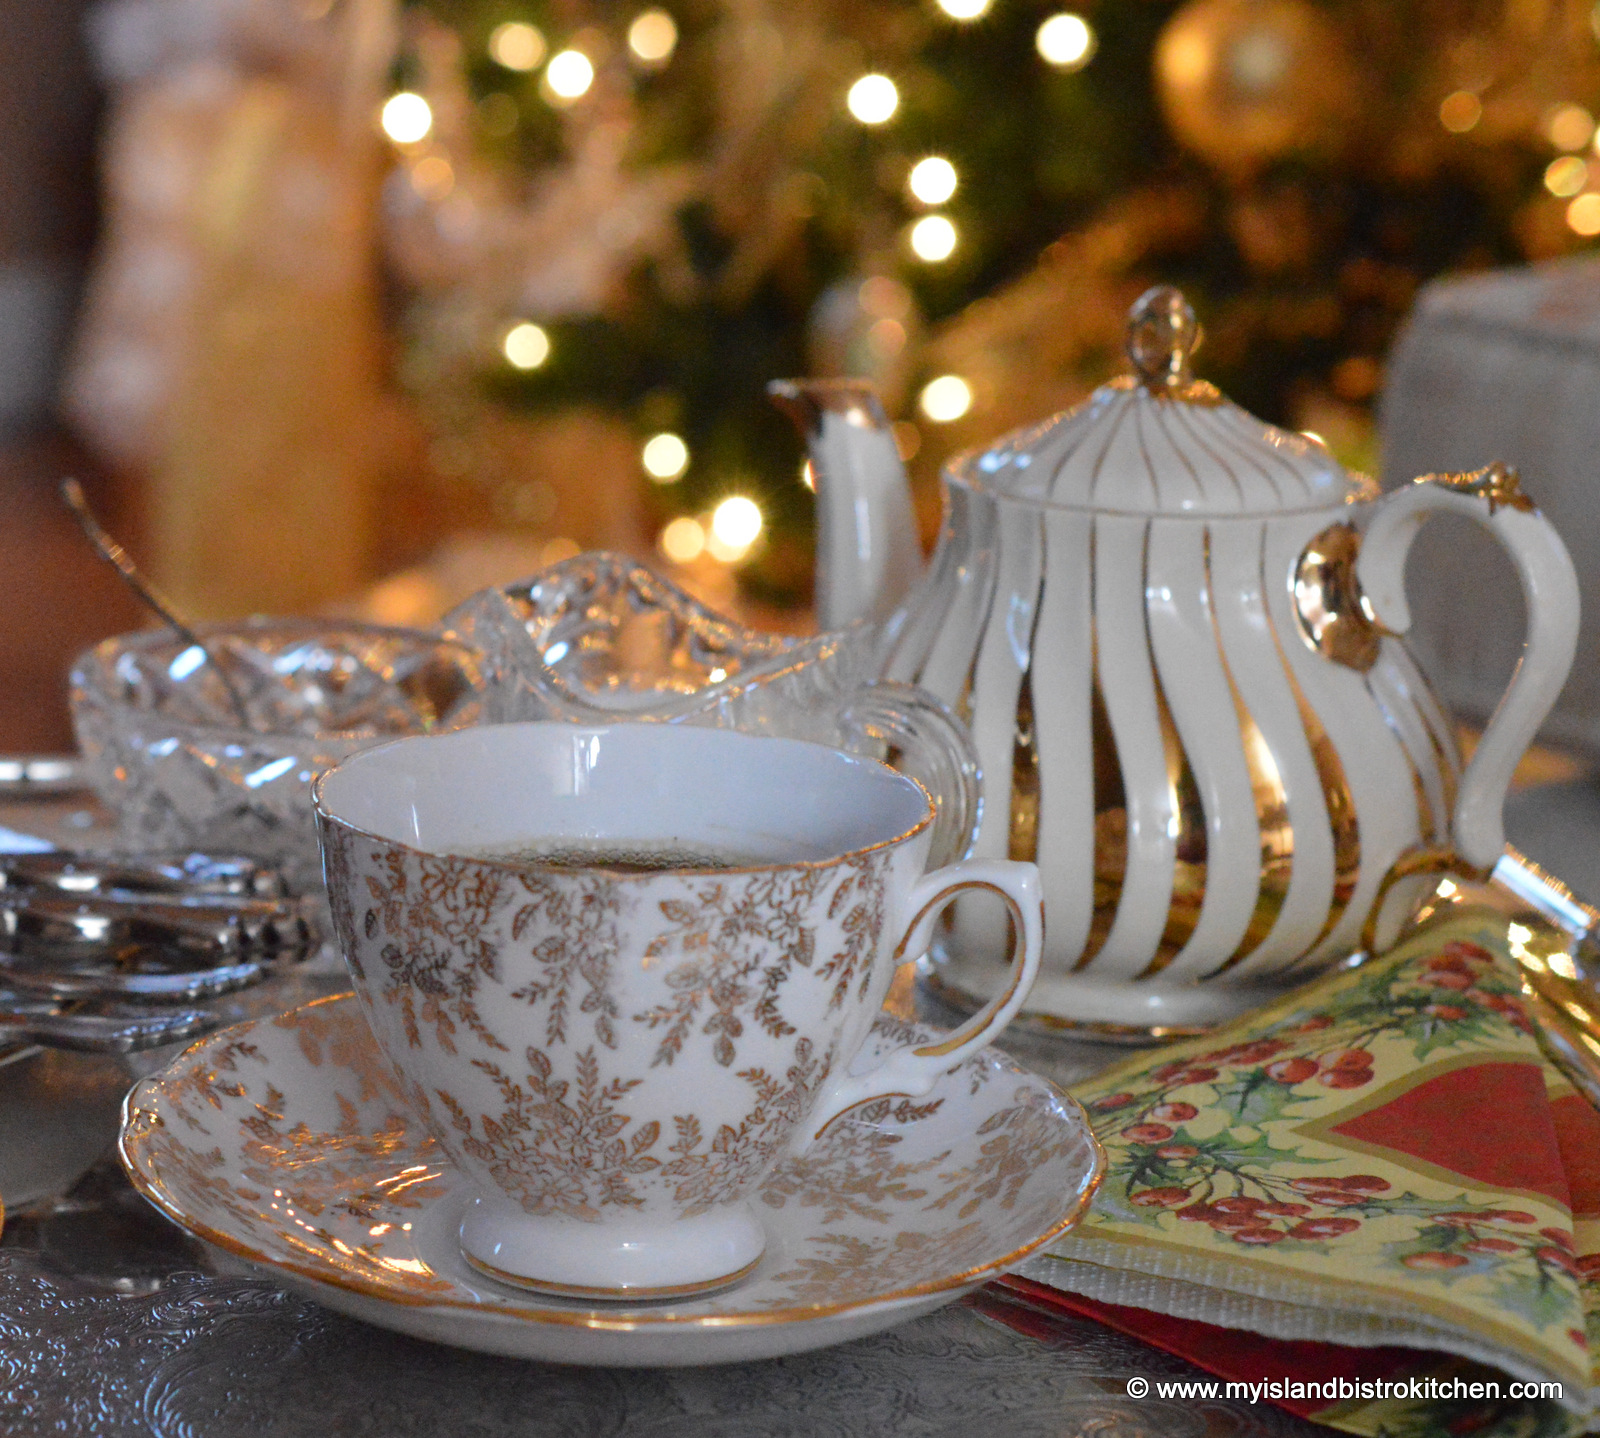
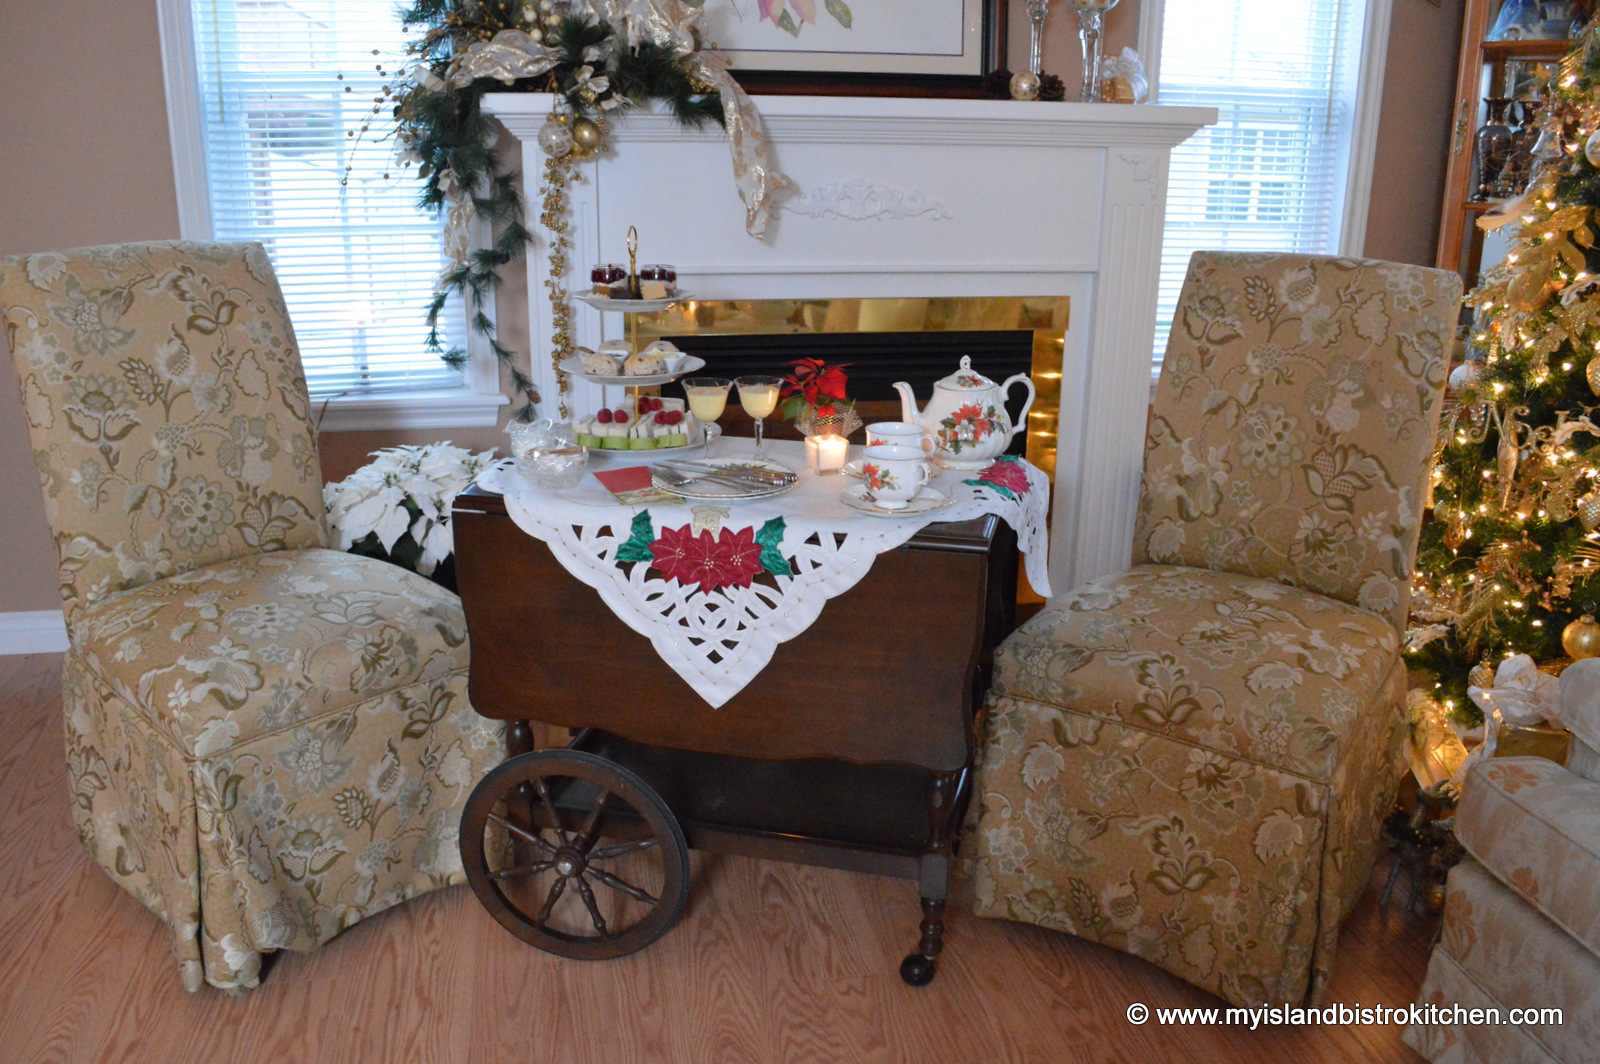
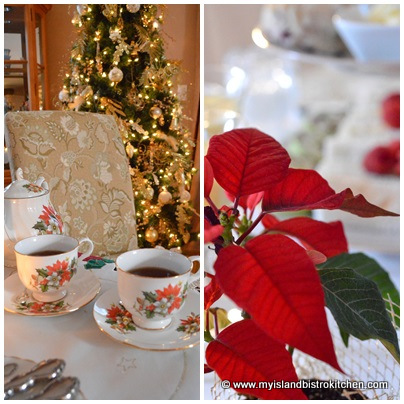
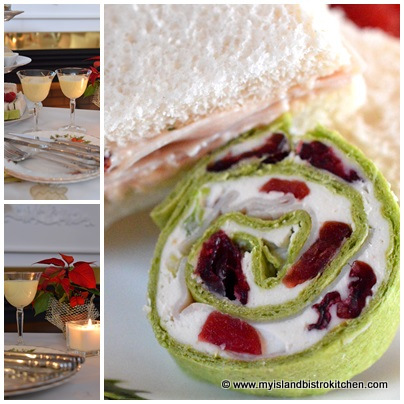
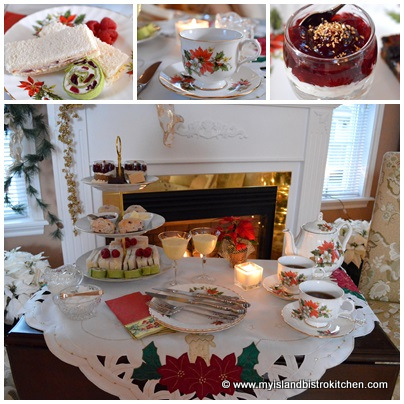
Today, my afternoon tea setting is for two in front of the warm and cozy fireplace and beside the Christmas tree. It’s a reason to stop, pause, and relax during the busy Christmas preparations.
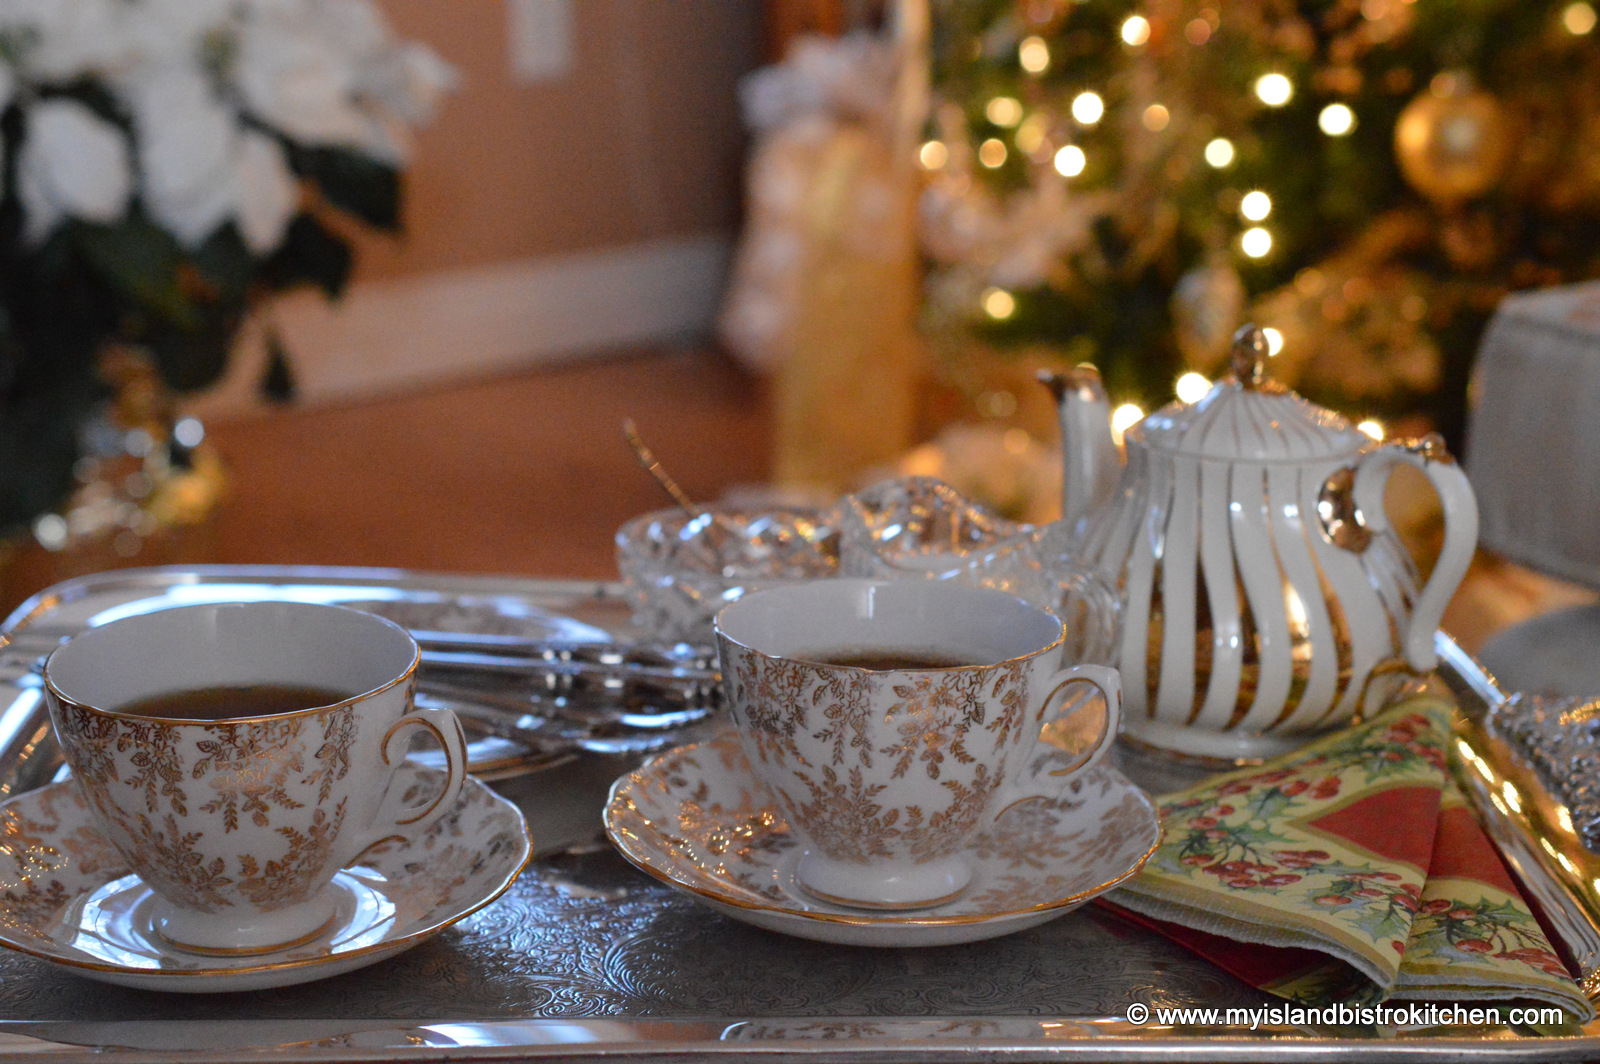
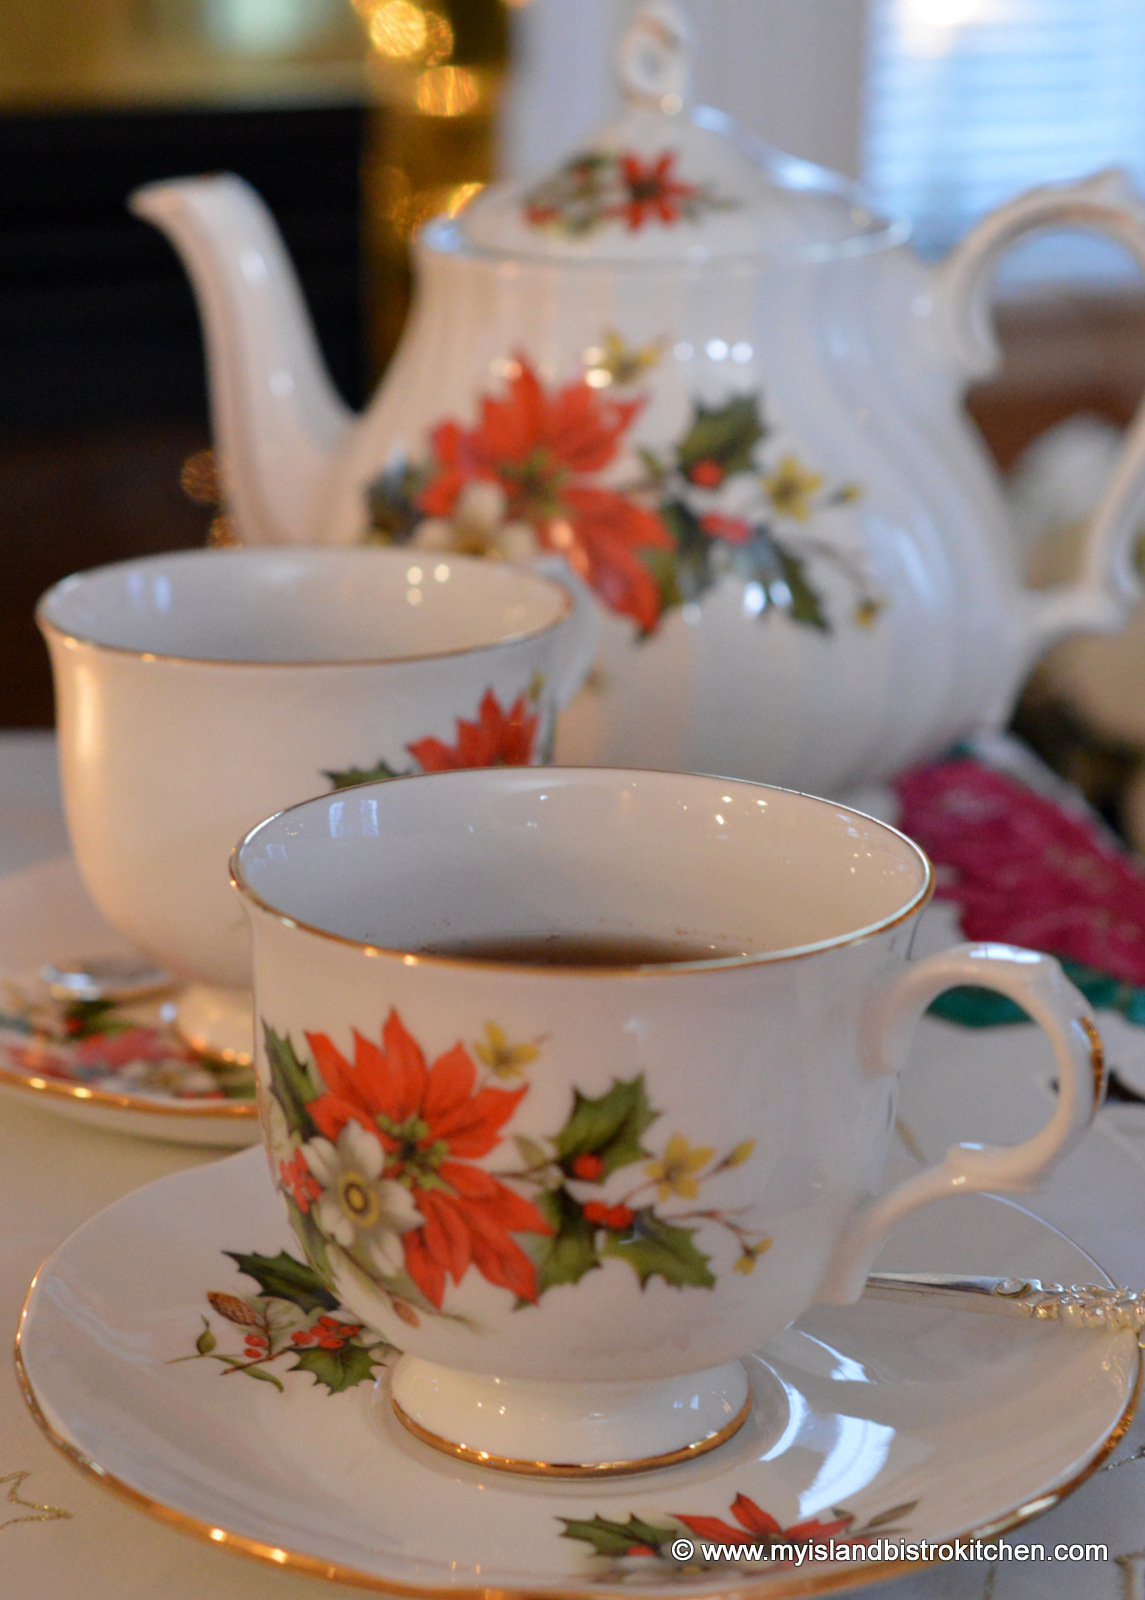
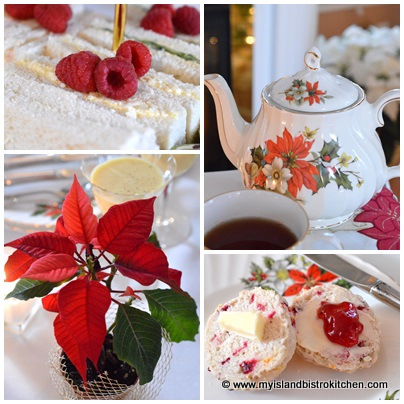
I have been fortunate in finding some pieces of Christmas China over the years that just beg for an afternoon tea experience. The teapot and teacups are made by Sadler.
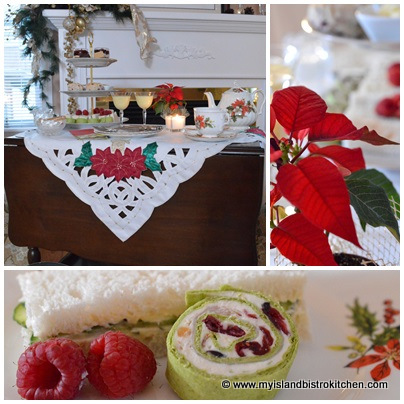
The tea is being served on a tea trolley. I like the versatility of trolleys as they can be used solely as a serving unit beside a larger table or even, depending on their size, as a miniature self-serve buffet. Or, either one or both of the trolley extensions can be lifted, turning the unit into a tea table as I have done today. This tea trolley is the larger of the two I own.
A few years ago, I found the delightful Christmas table square in the photo above. With its poinsettias and candles, it became the canvas and theme for today’s tea.
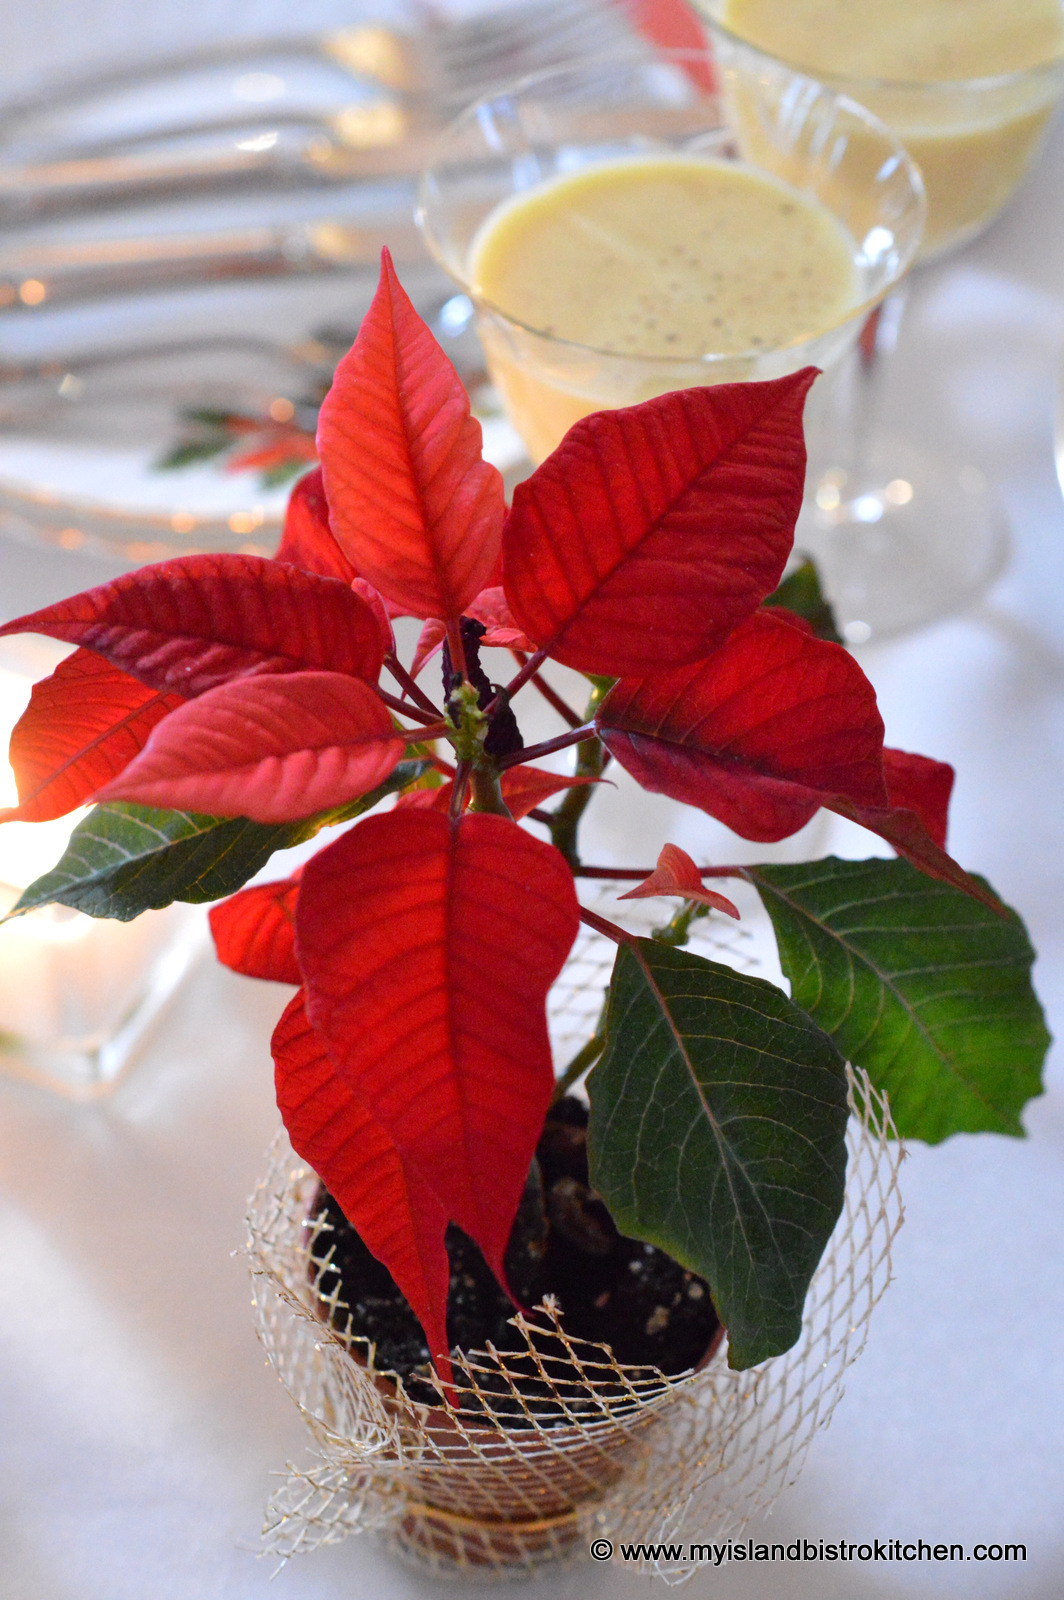
I like the miniature poinsettias like the one in the photo above. I use them on tea tables, in placesettings, and on bed trays because they are just the perfect size and add a touch of Christmas wherever they are used.
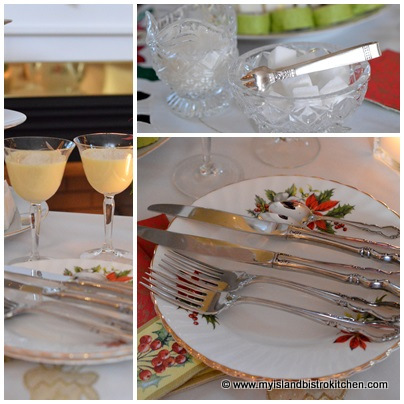
I have been searching for some time now for a small set of sugar tongs. I found the antique tongs in a local second-hand shop recently. The tea plates in the photo below are Royal Adderly “Poinsettia” pattern.
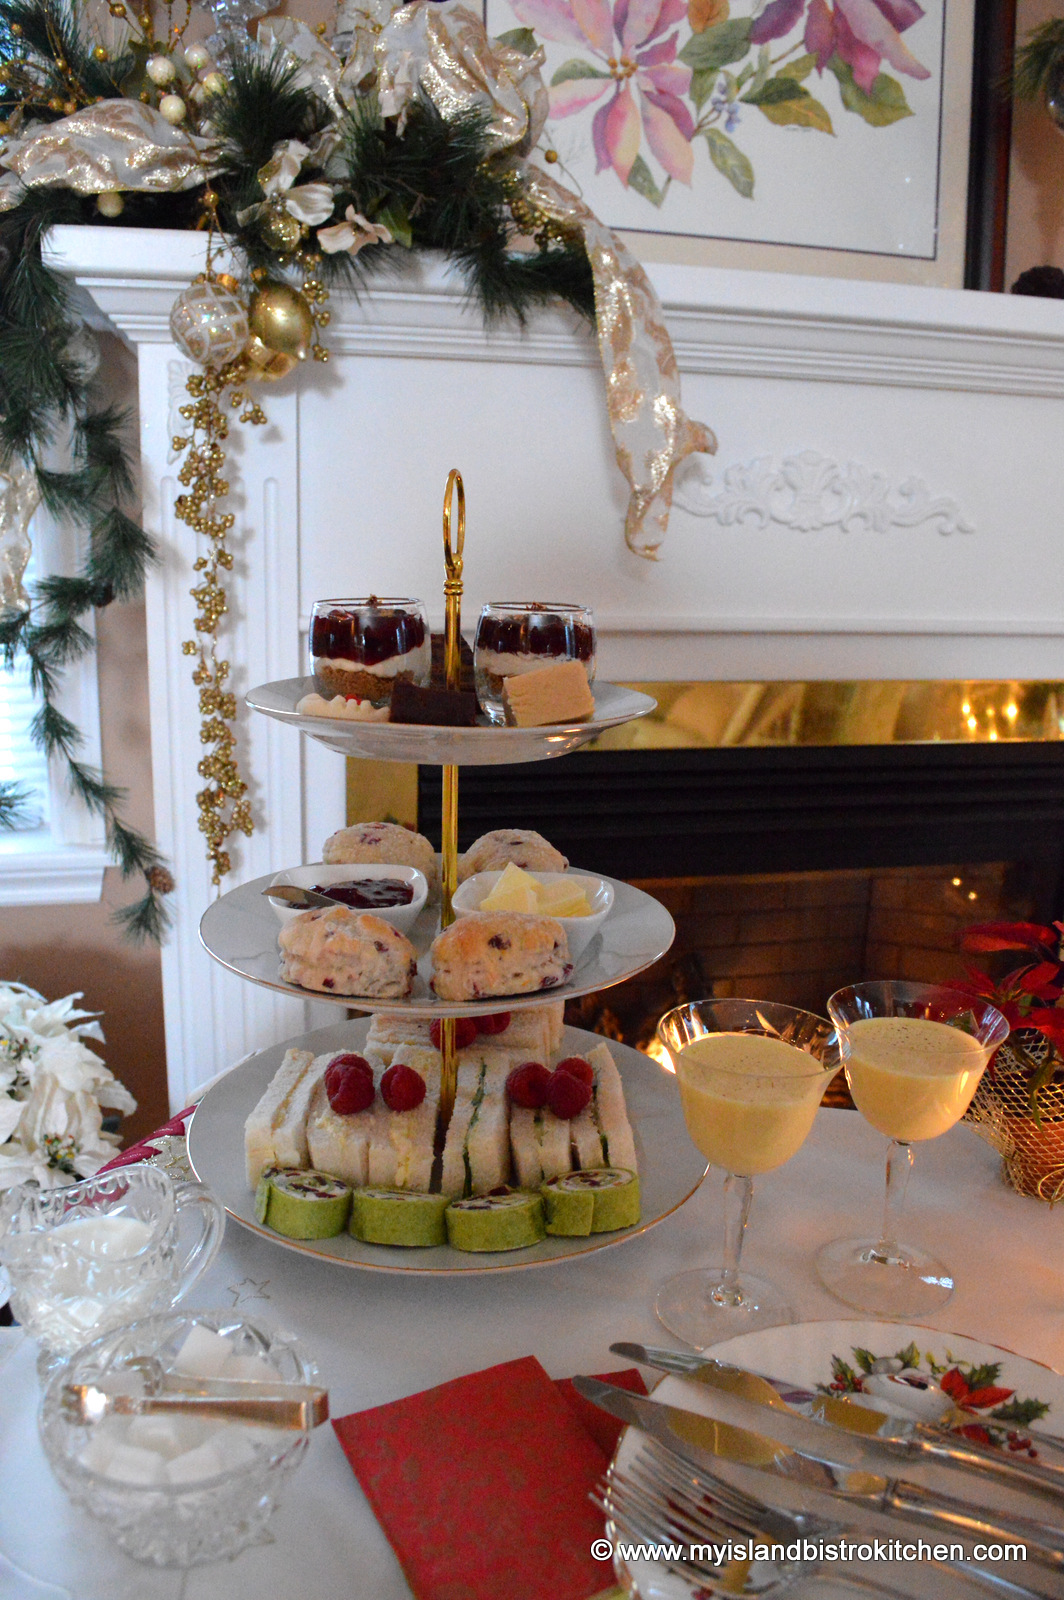
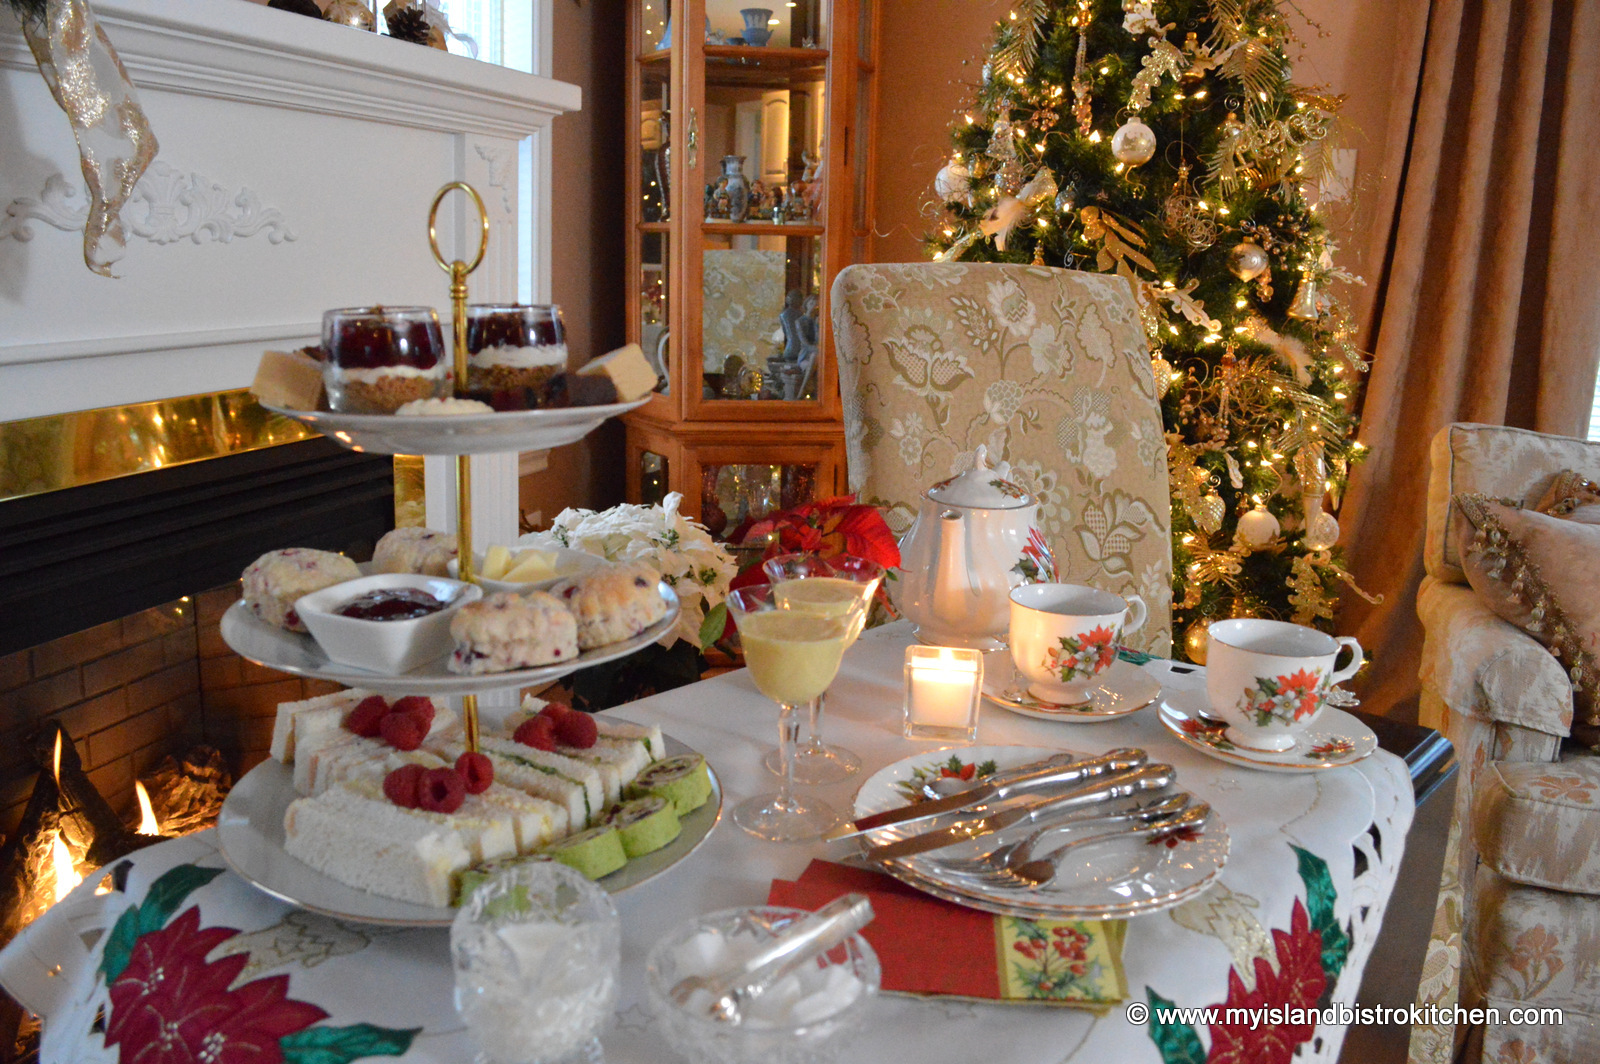
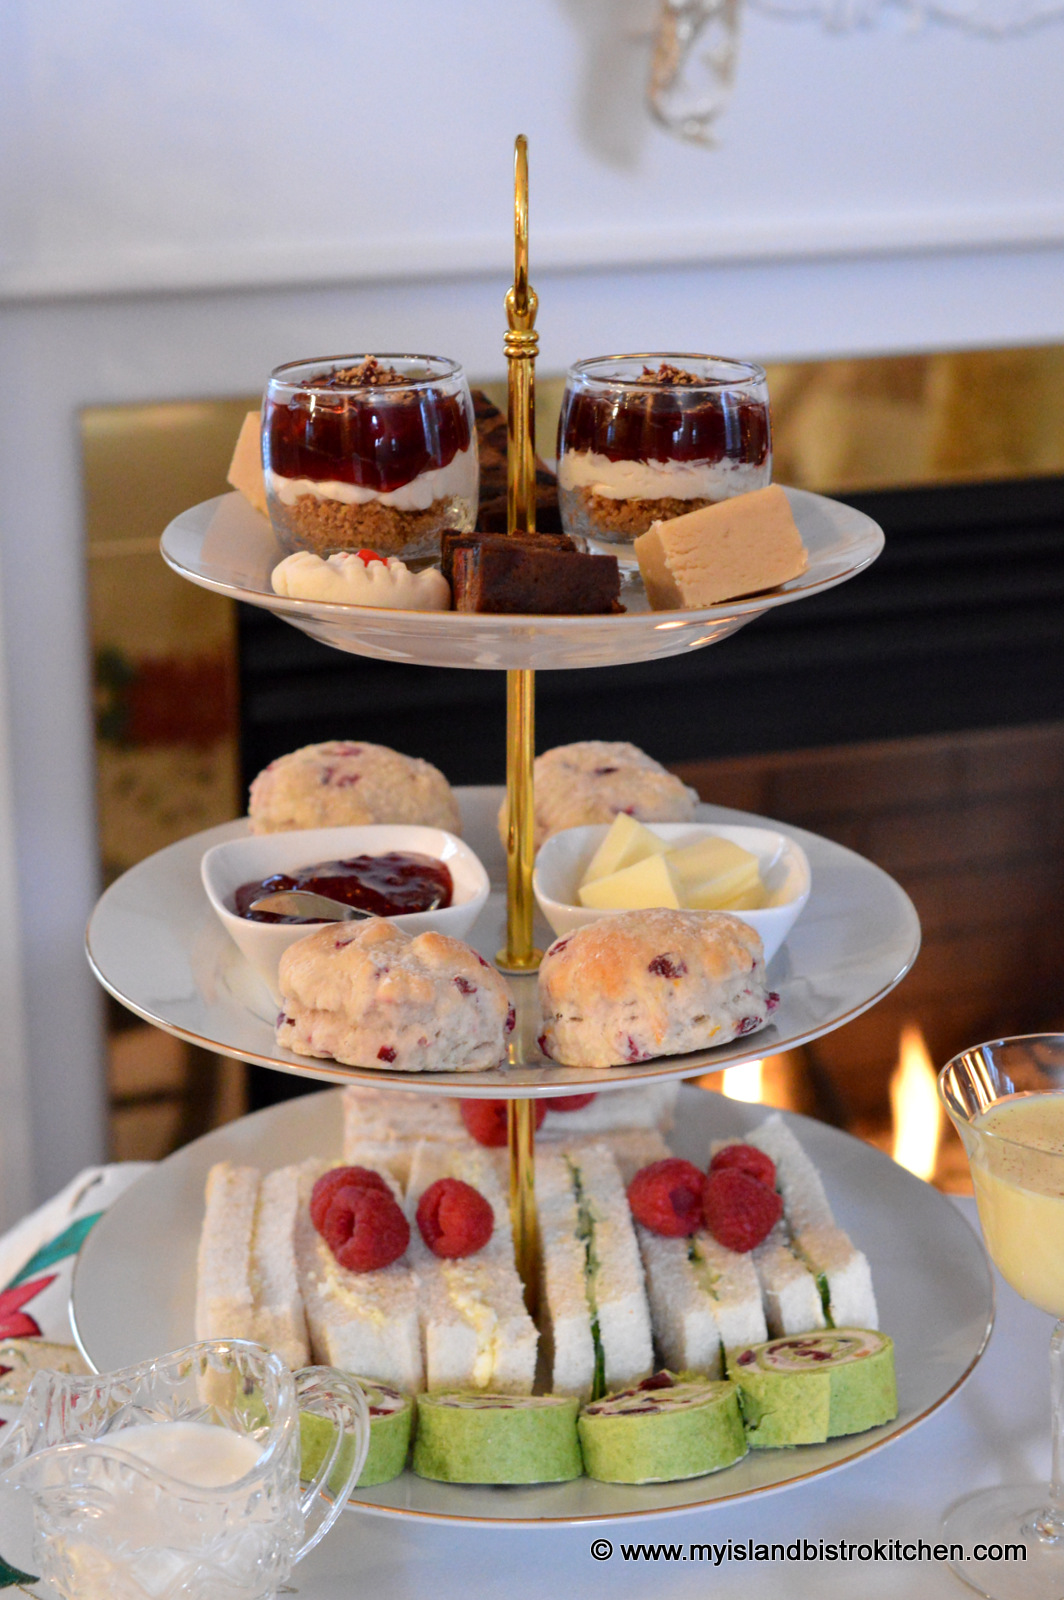
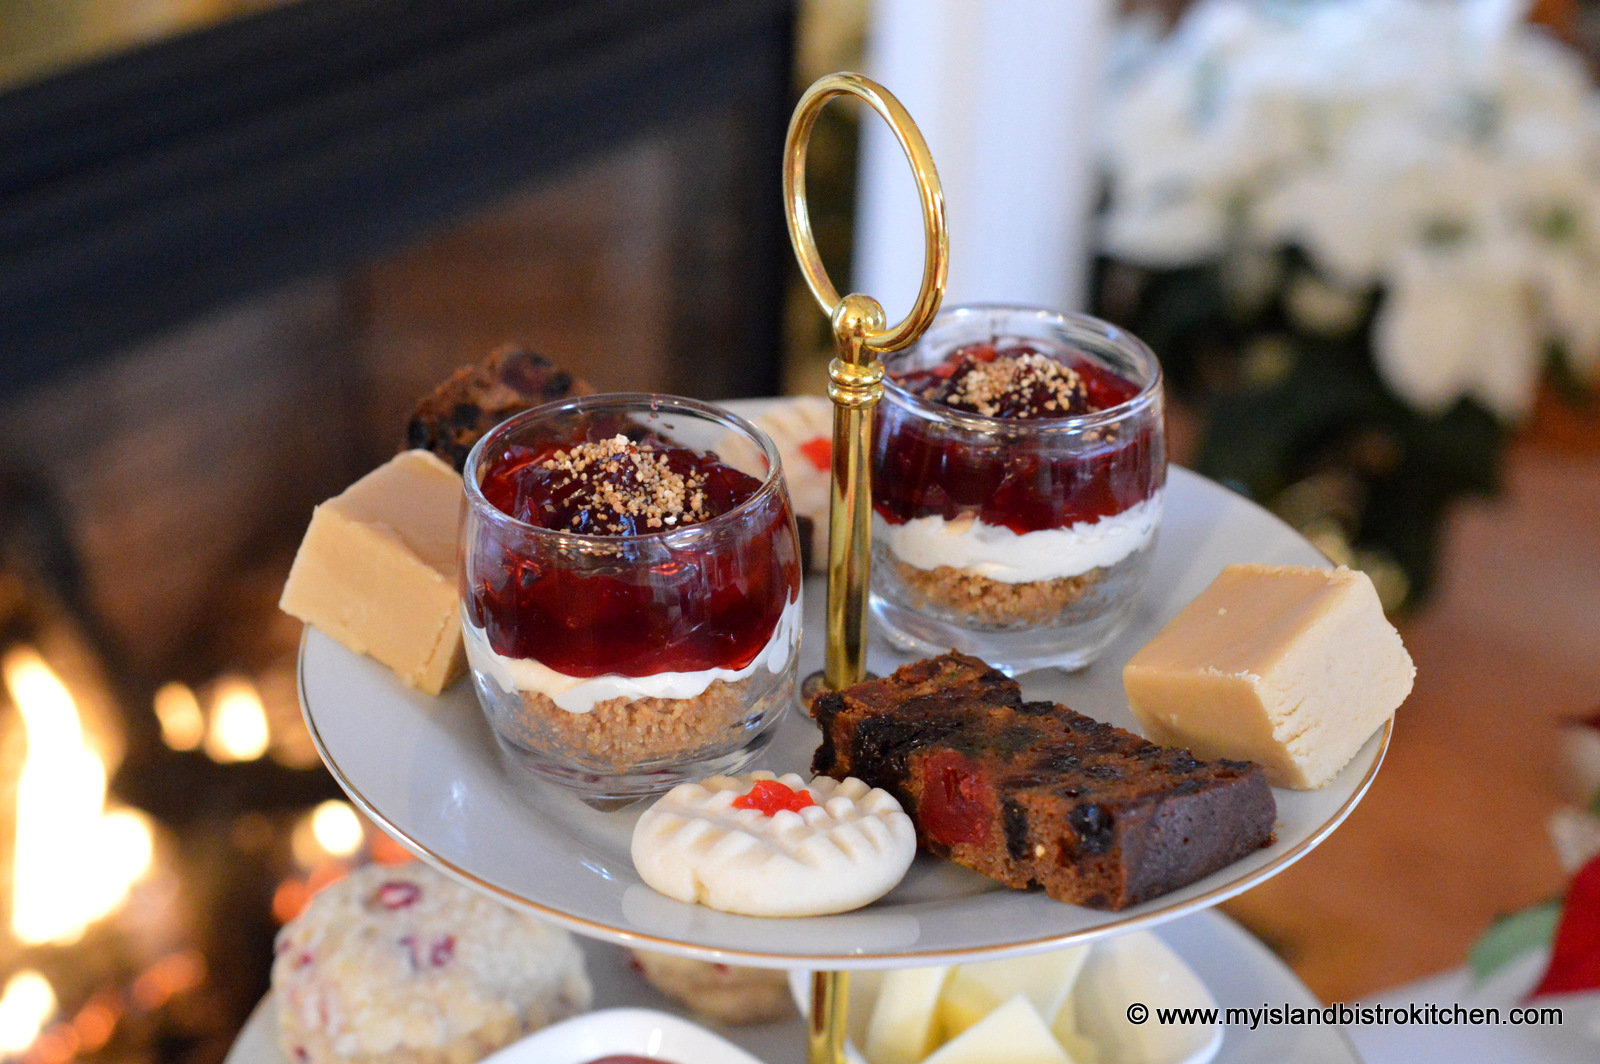
I love tiered servers and, while there are many pretty floral ones available, my preference is for the plain white because the food really stands out against the white background. I can mix and match my teapots and cups and saucers much easier with a white server than with a floral.
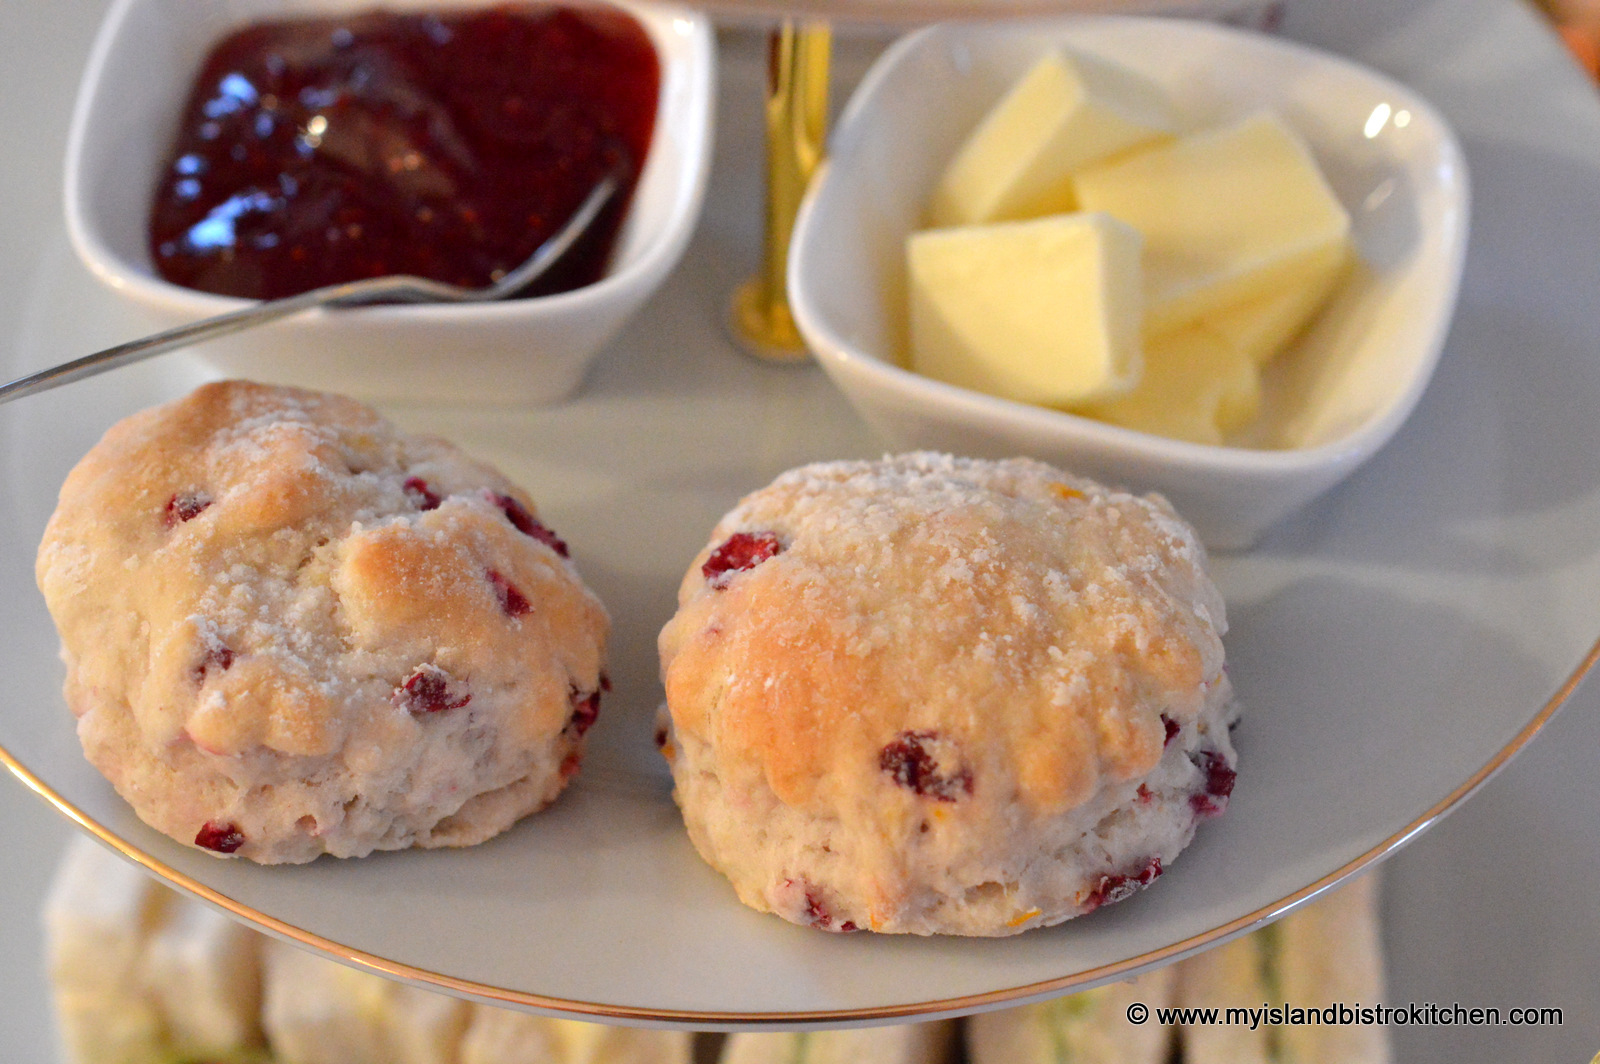
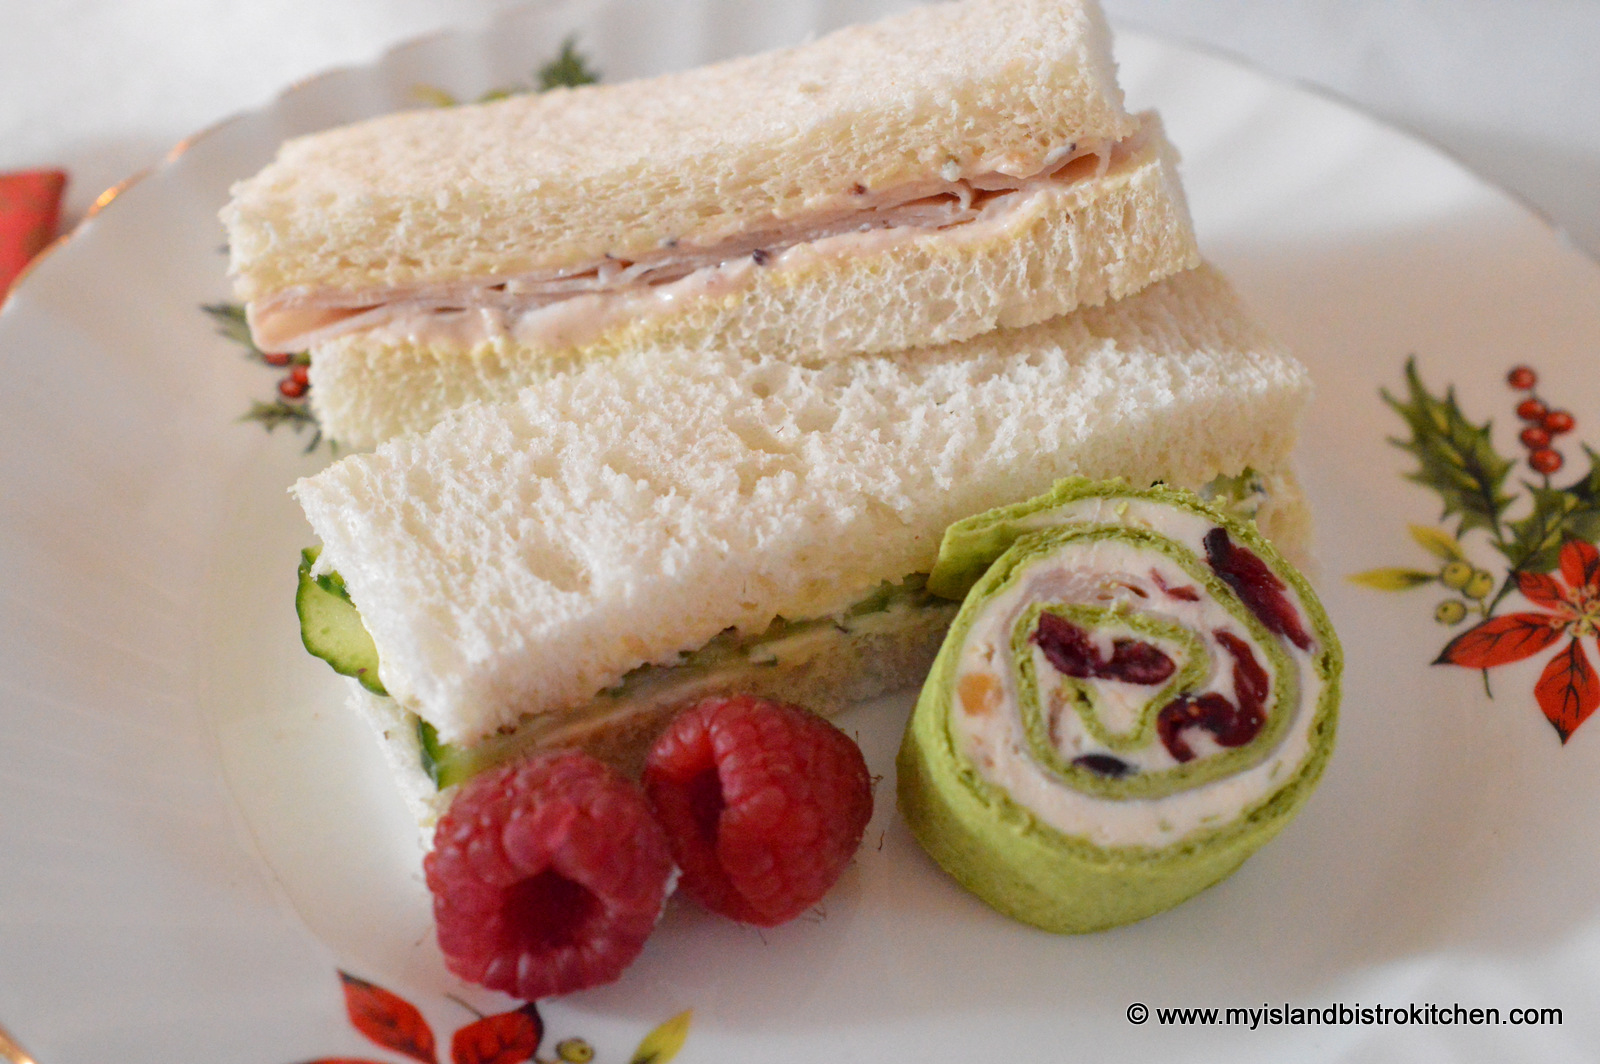
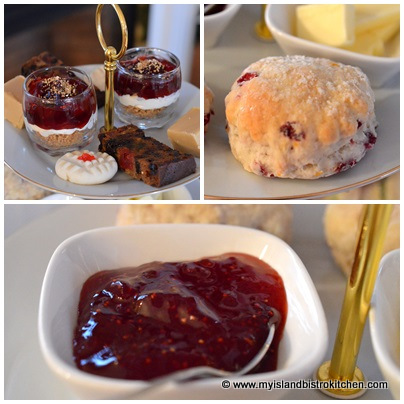
I have followed the traditional order of placement on a three-tier server: sandwiches on the bottom plate, scones on the middle, and sweets on the top tier.
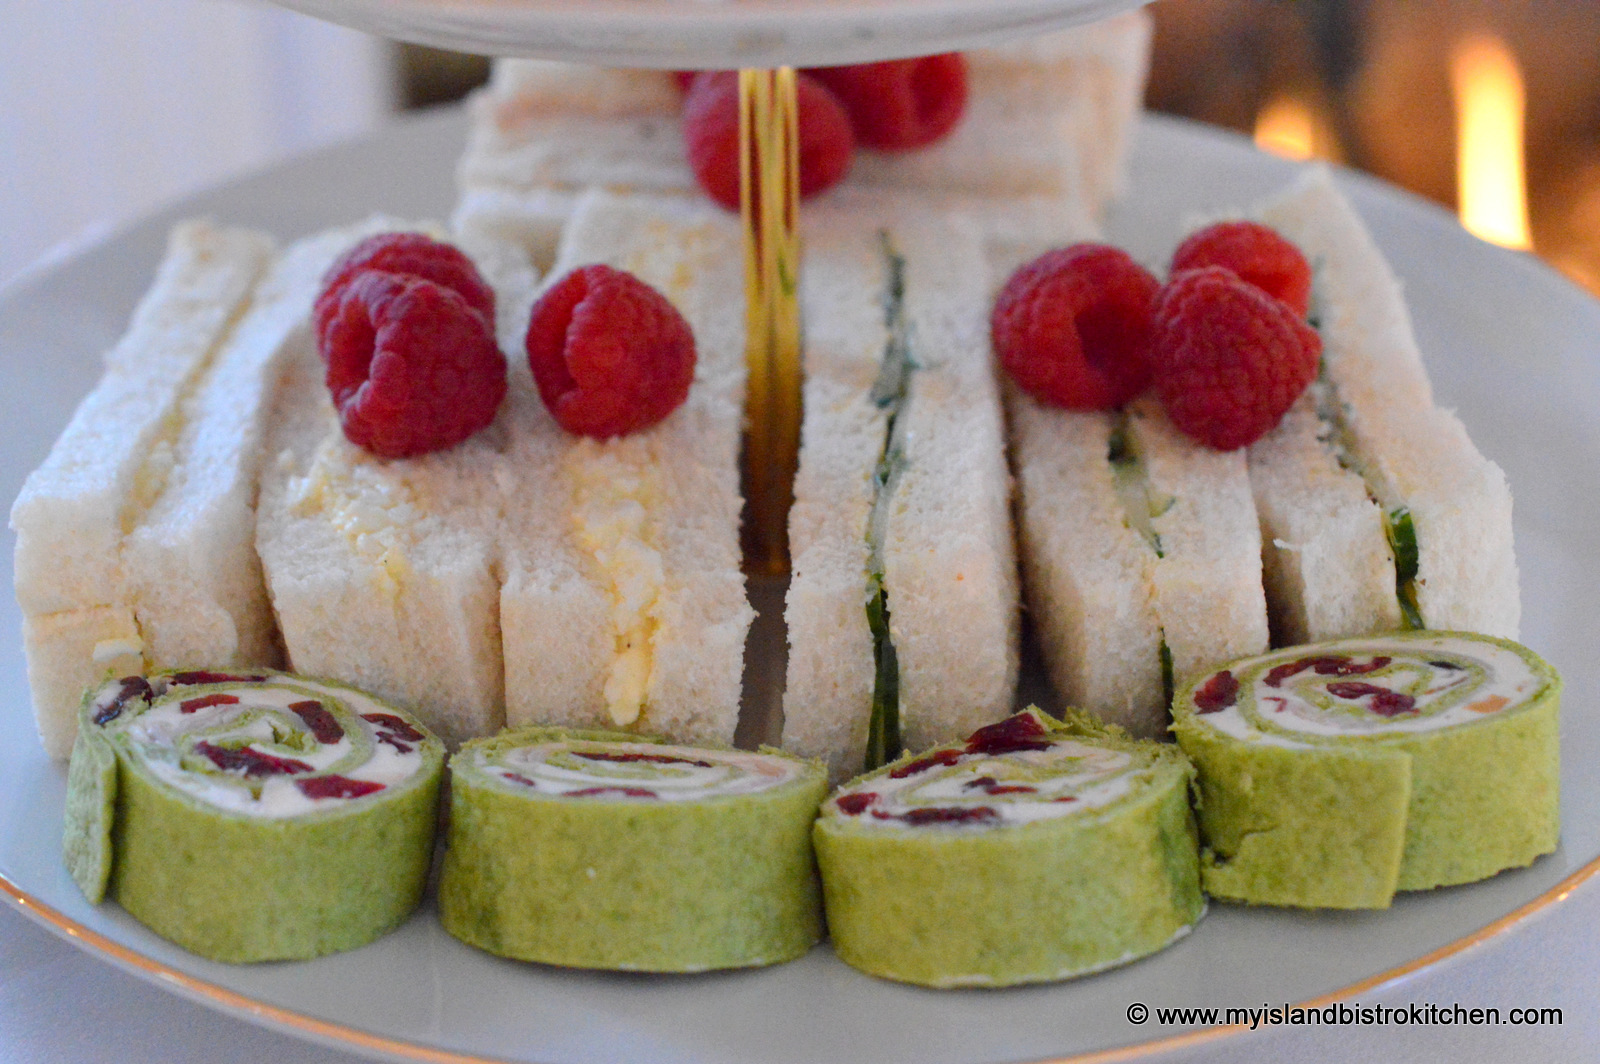
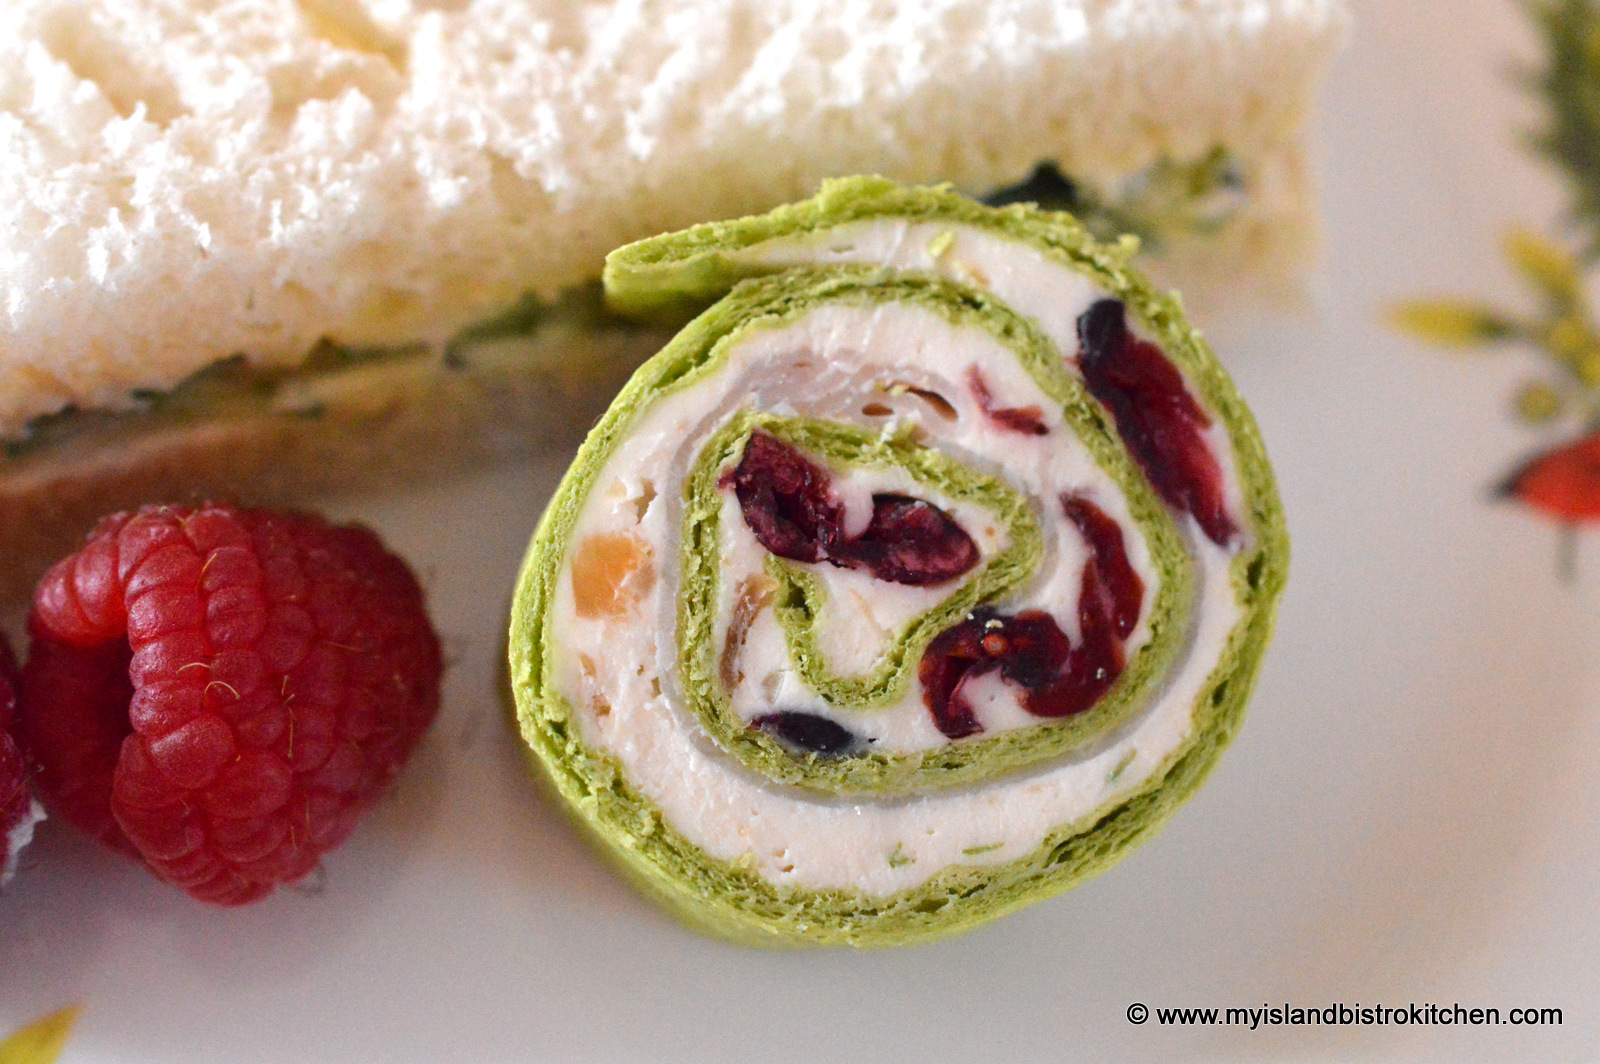
The green spinach tortillas with the dots of dried cranberries add color to the sandwich plate and the fresh raspberries add a splash of red against the white bread.
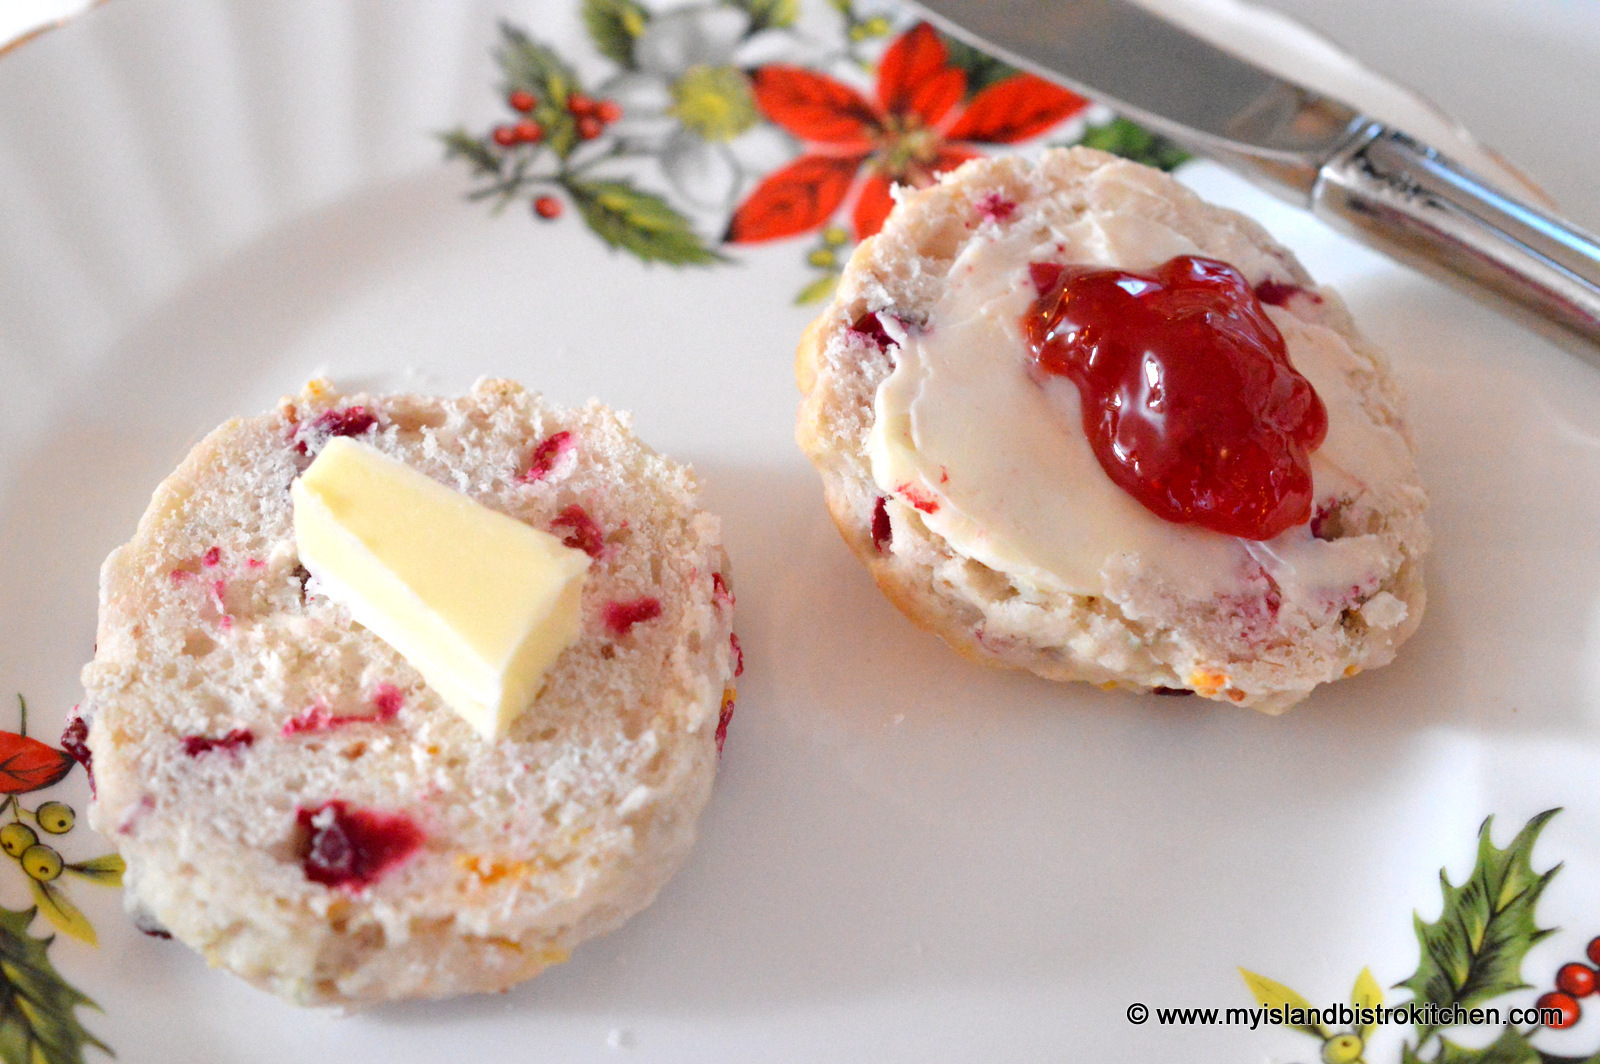
Toothsome cranberry scones in the photo above were enjoyed for the scones course.
An easy way to get a taste of cherry cheesecake when you only want a couple of servings is to make them individually in tiny glasses.
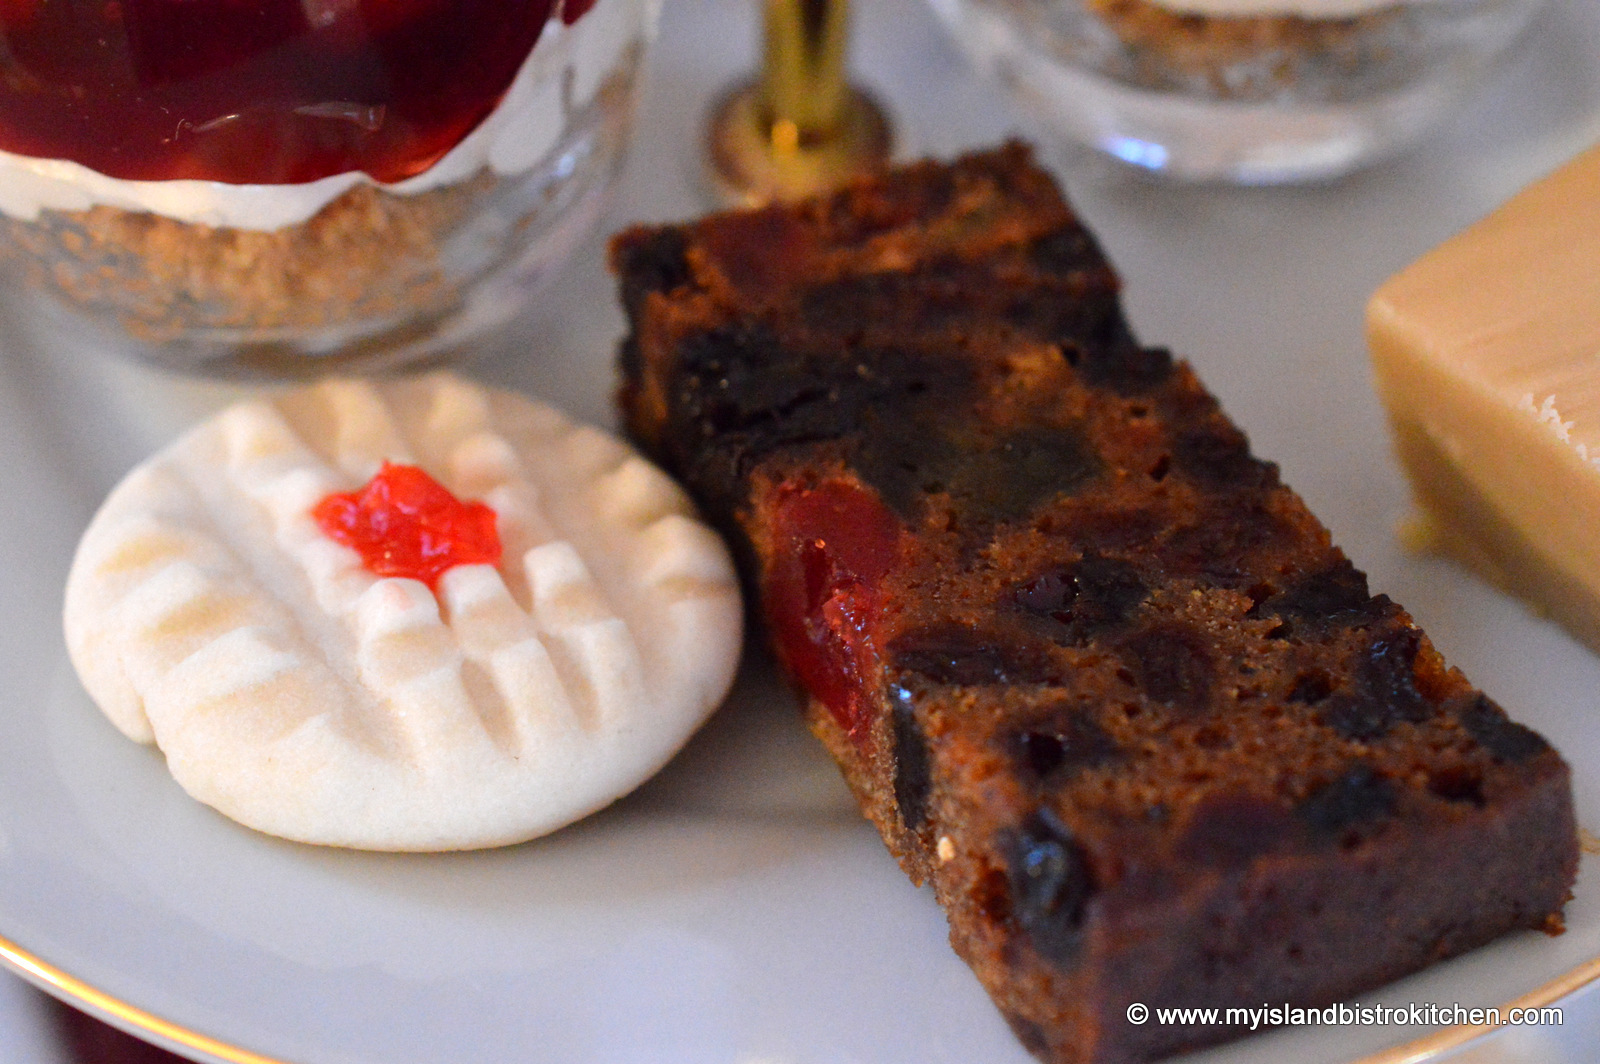
Of course, a traditional tea tray would include fruitcake. This is my own recipe which I developed and shared earlier and you can find it by clicking here.
Here is the menu for the tea.
~ Eggnog with a sprinkle of Nutmeg ~
~ Selection of Tea Sandwiches ~
Egg Salad
Sliced Turkey with Cranberry Mayonnaise
Cucumber with Herbed Cream Cheese
Pinwheel Spinach Wraps with Cream Cheese, Fig Goat Cheese, Sliced Turkey, Green Onions and Dried Cranberries
~ Scones ~
– Cranberry Scones served with Butter and Homemade Strawberry Jam ~
~ Sweets ~
My Island Bistro Kitchen’s Dark Fruitcake
Melting Moments
Miniature Cherry Cheesecake
Brown Sugar Fudge
~ Tea Selection ~
Kenyan Tinderet (David’s Tea)
I hope you have enjoyed a glimpse into my Christmas afternoon tea.
My best wishes to you and yours for a wonderful Christmas season.
——————————–
Thank you for visiting “the Bistro” today. There are lots of ways to connect with “the Bistro” through social media: