

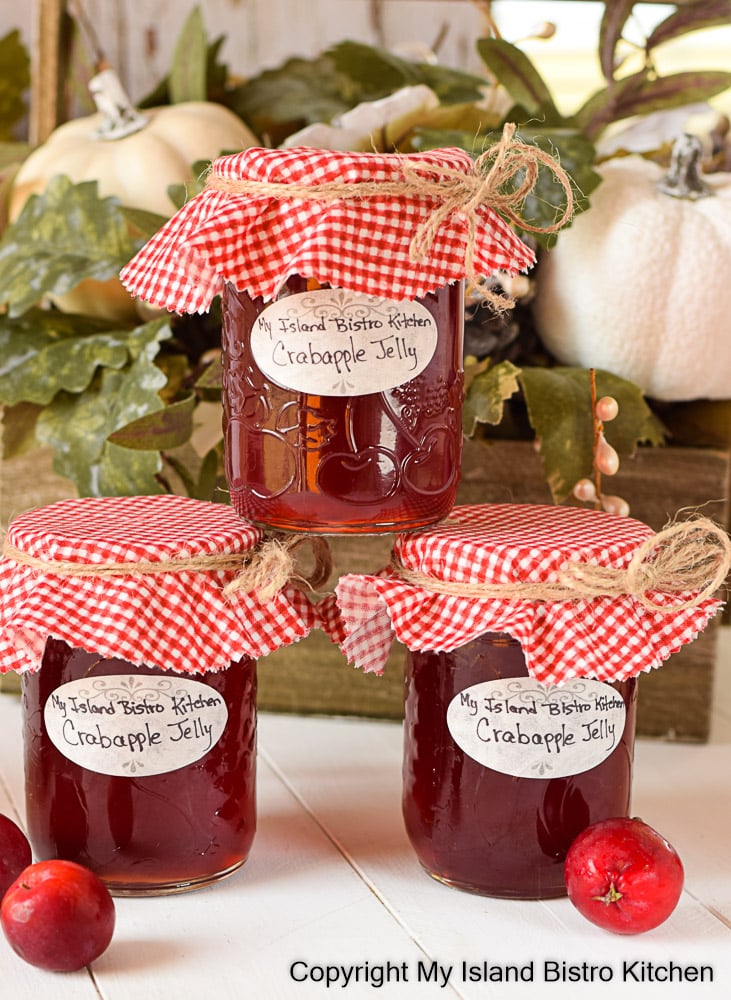
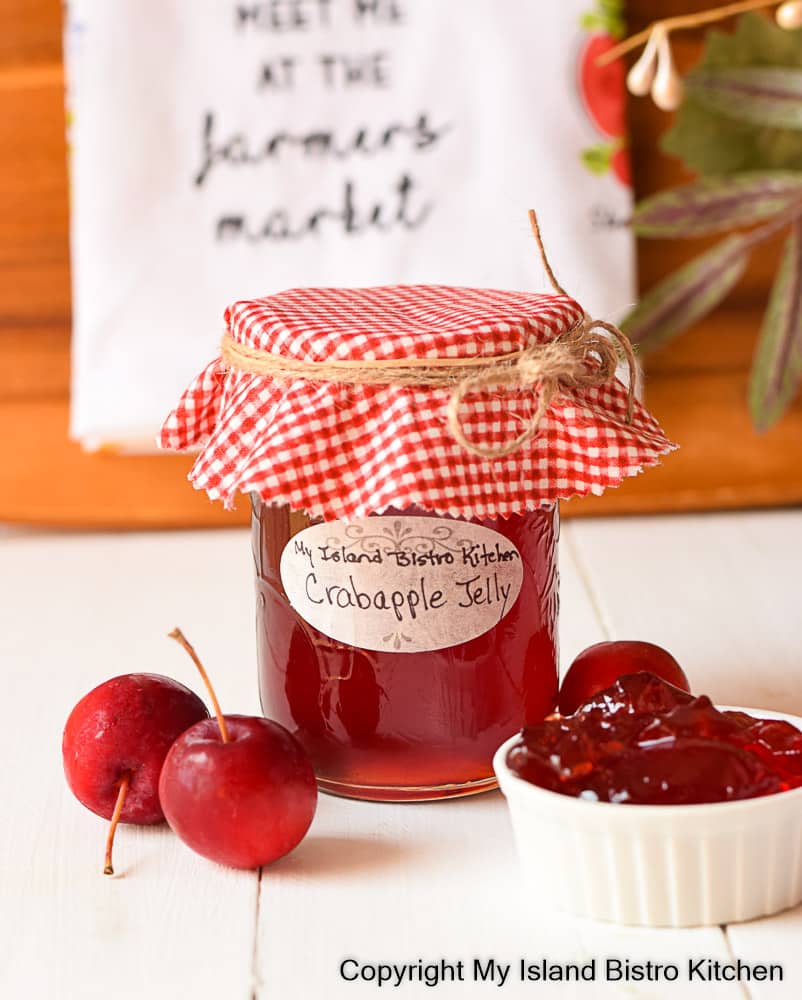
As I write this post, it’s apple season in Prince Edward Island and orchards are filled with trees bearing wonderful apples of so many varieties. There’s nothing like heading to a u-pick orchard to pick your own apples. I typically pick several pecks each fall — in fact, sometimes it’s easy to get carried away and pick too many! However, they do get processed into pies, crisps, sauces, and jellies like this Crabapple Jelly.
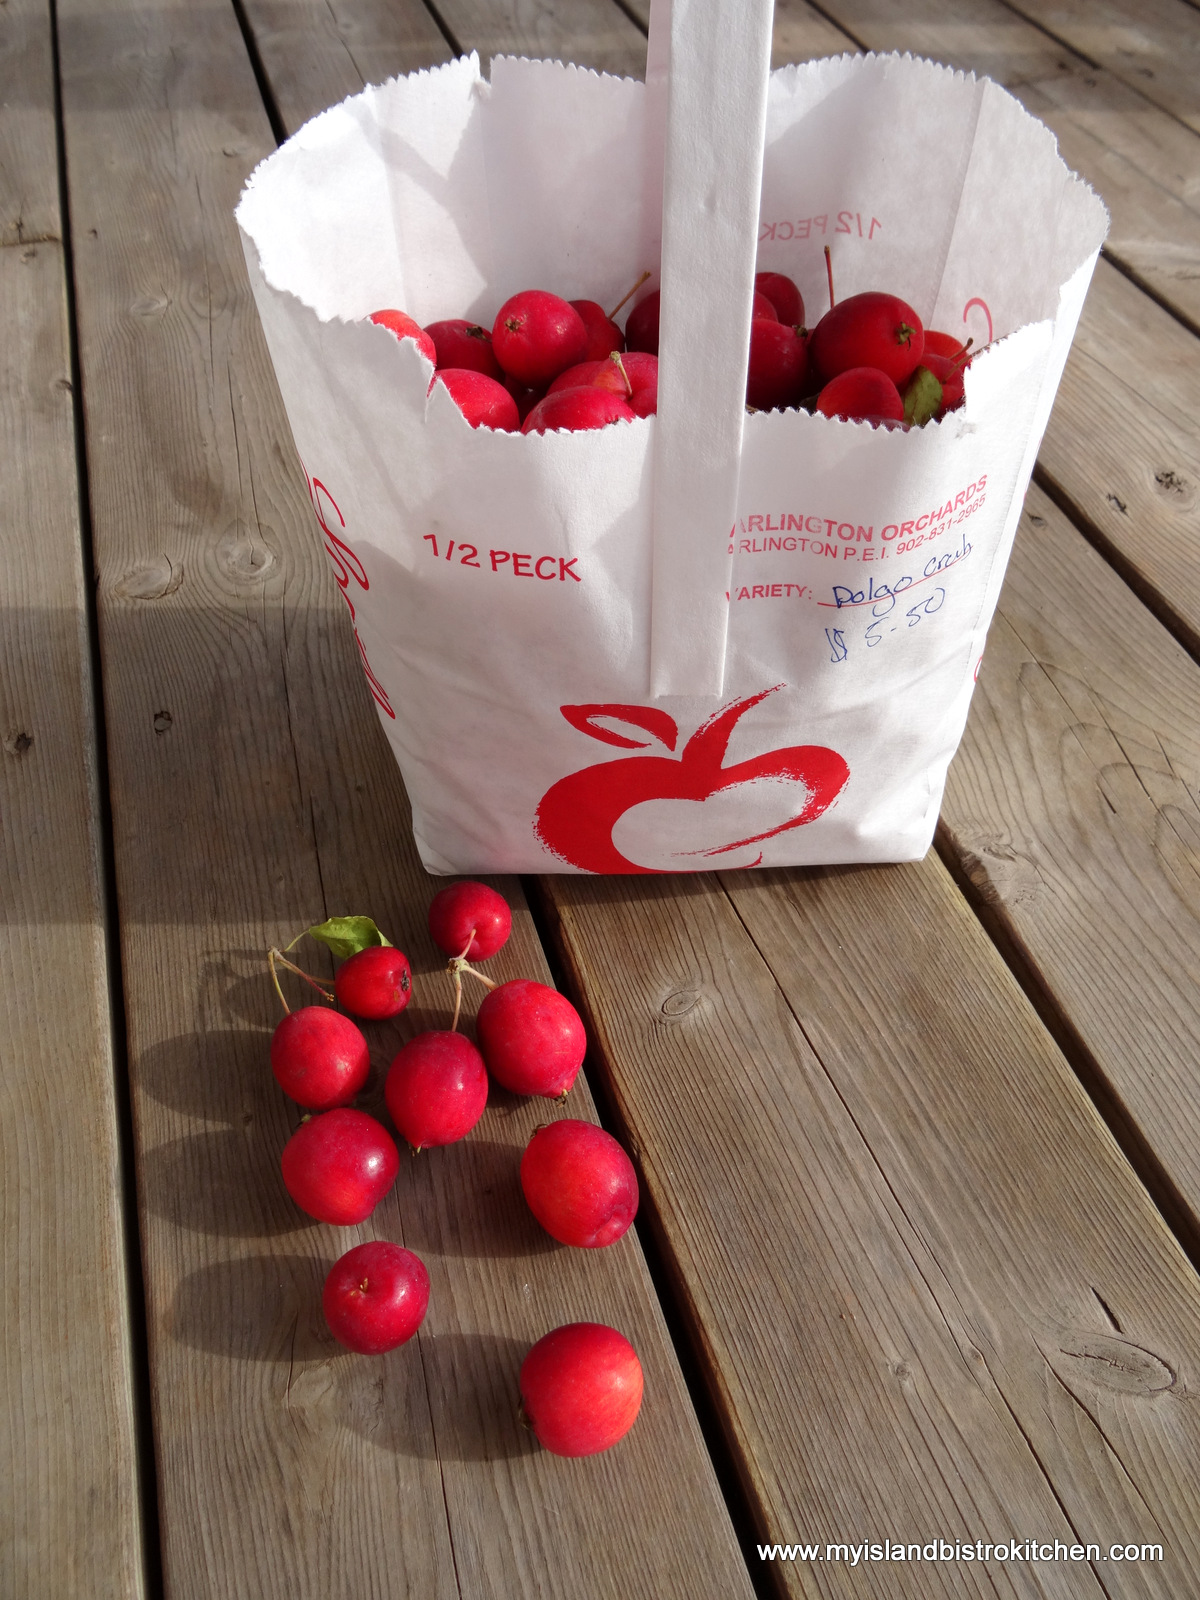
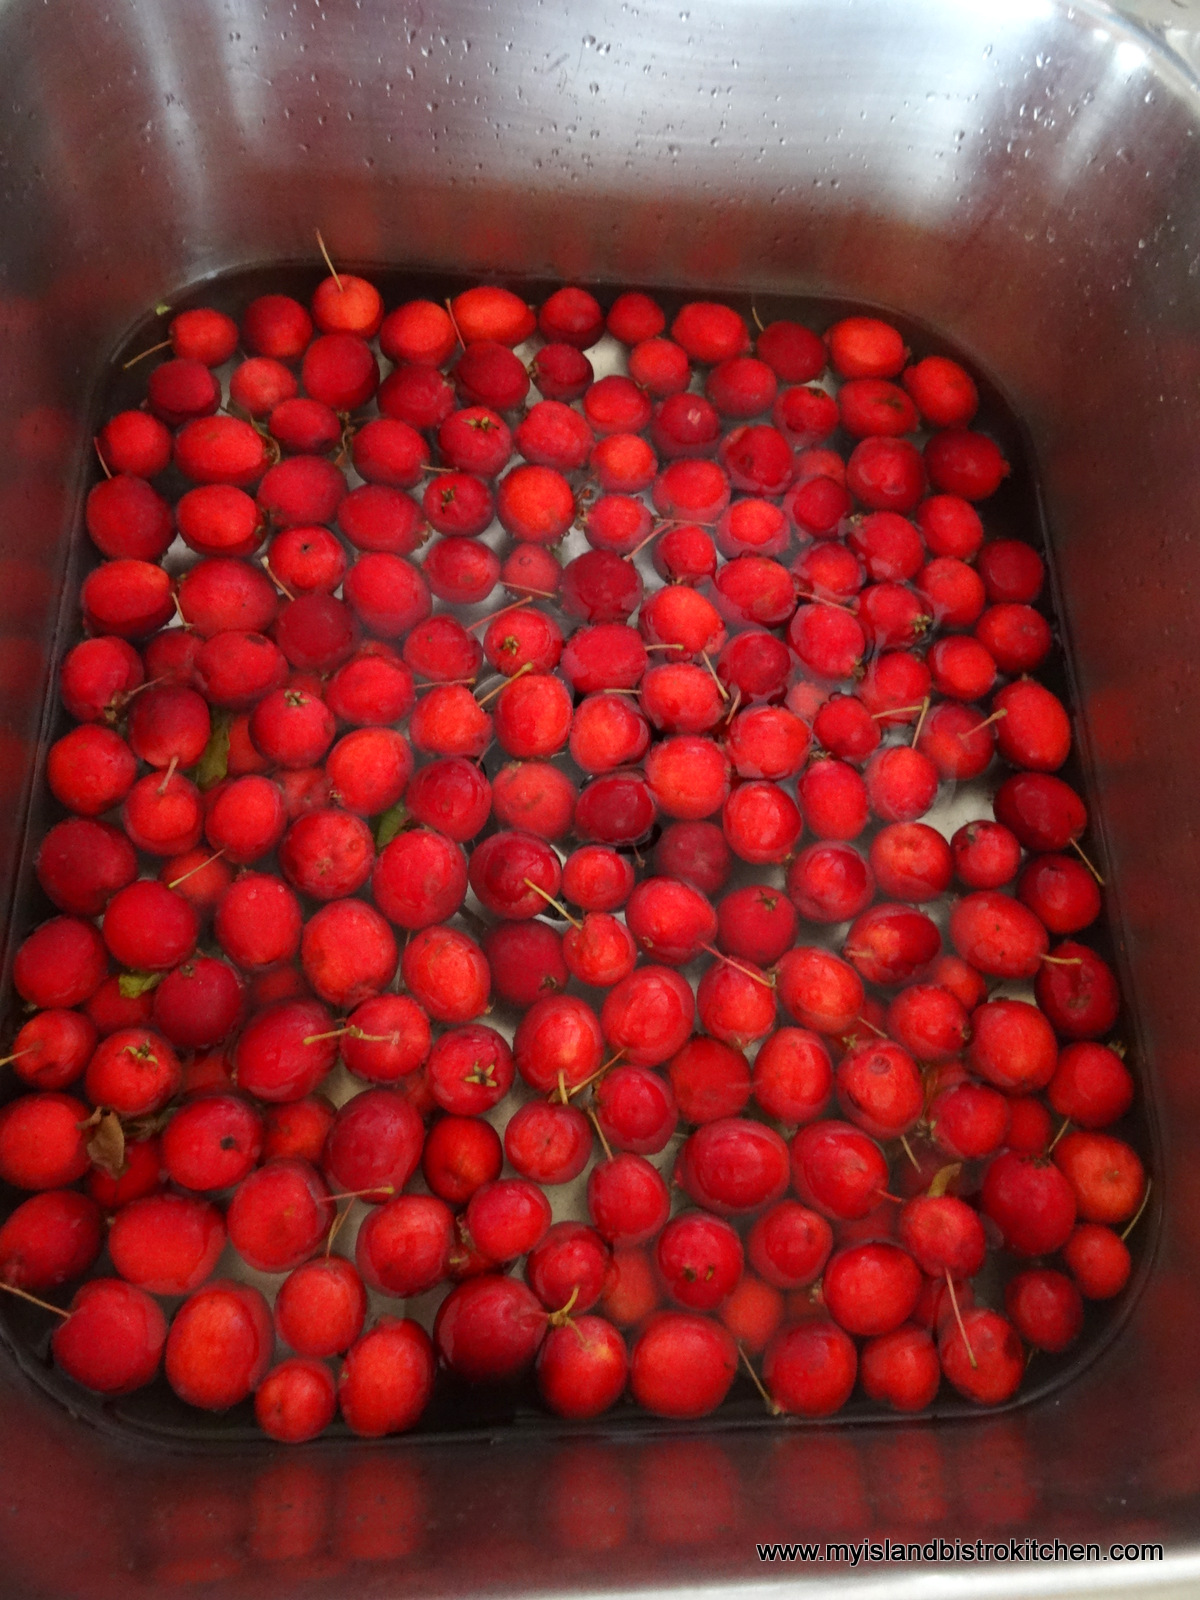
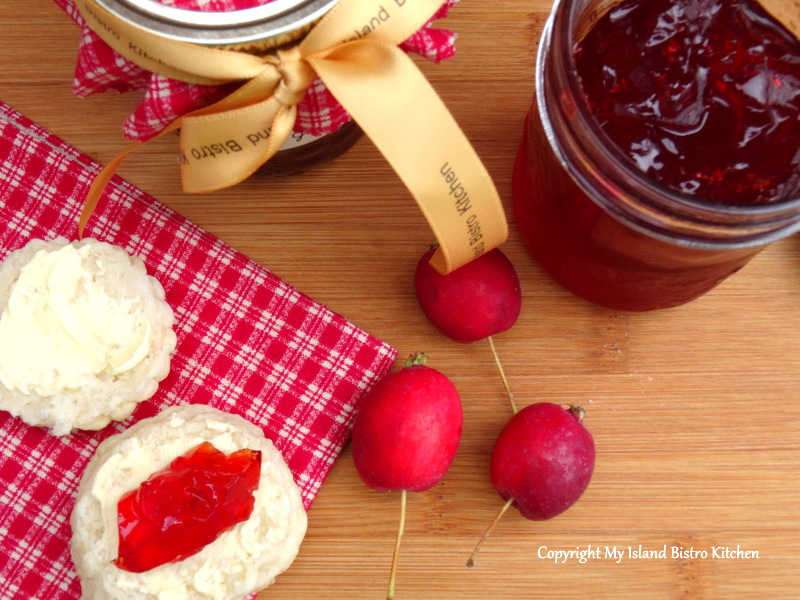
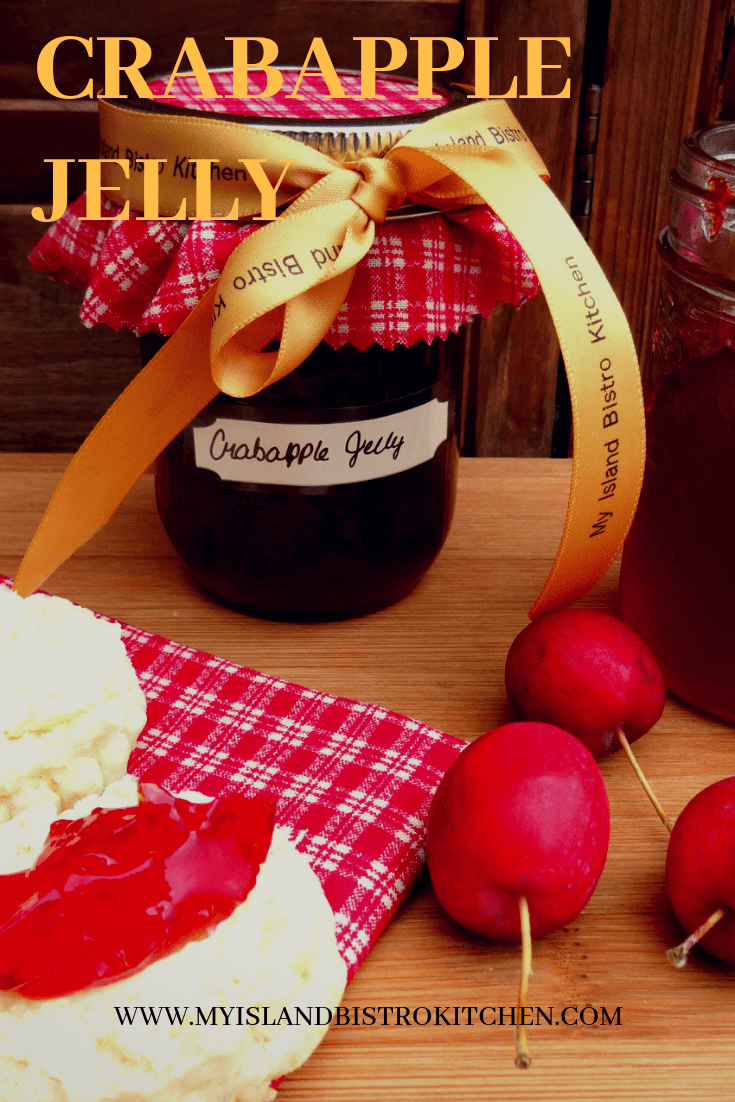
For apple jelly lovers, now is the time to make that rich red crabapple jelly that is so flavorful. The apples I used in the recipe I am sharing today came from Arlington Orchards in Arlington, west of Summerside, PEI. I knew by the color of the tiny apples that they would make a good crabapple jelly and I was not disappointed. They are the Dolgo Crabapple variety and are usually available around early September.
Now, crabapple jelly is not particularly difficult to make but it is a lengthy process and does take a bit of skill and know-how to get it cooked to the correct jelly state.
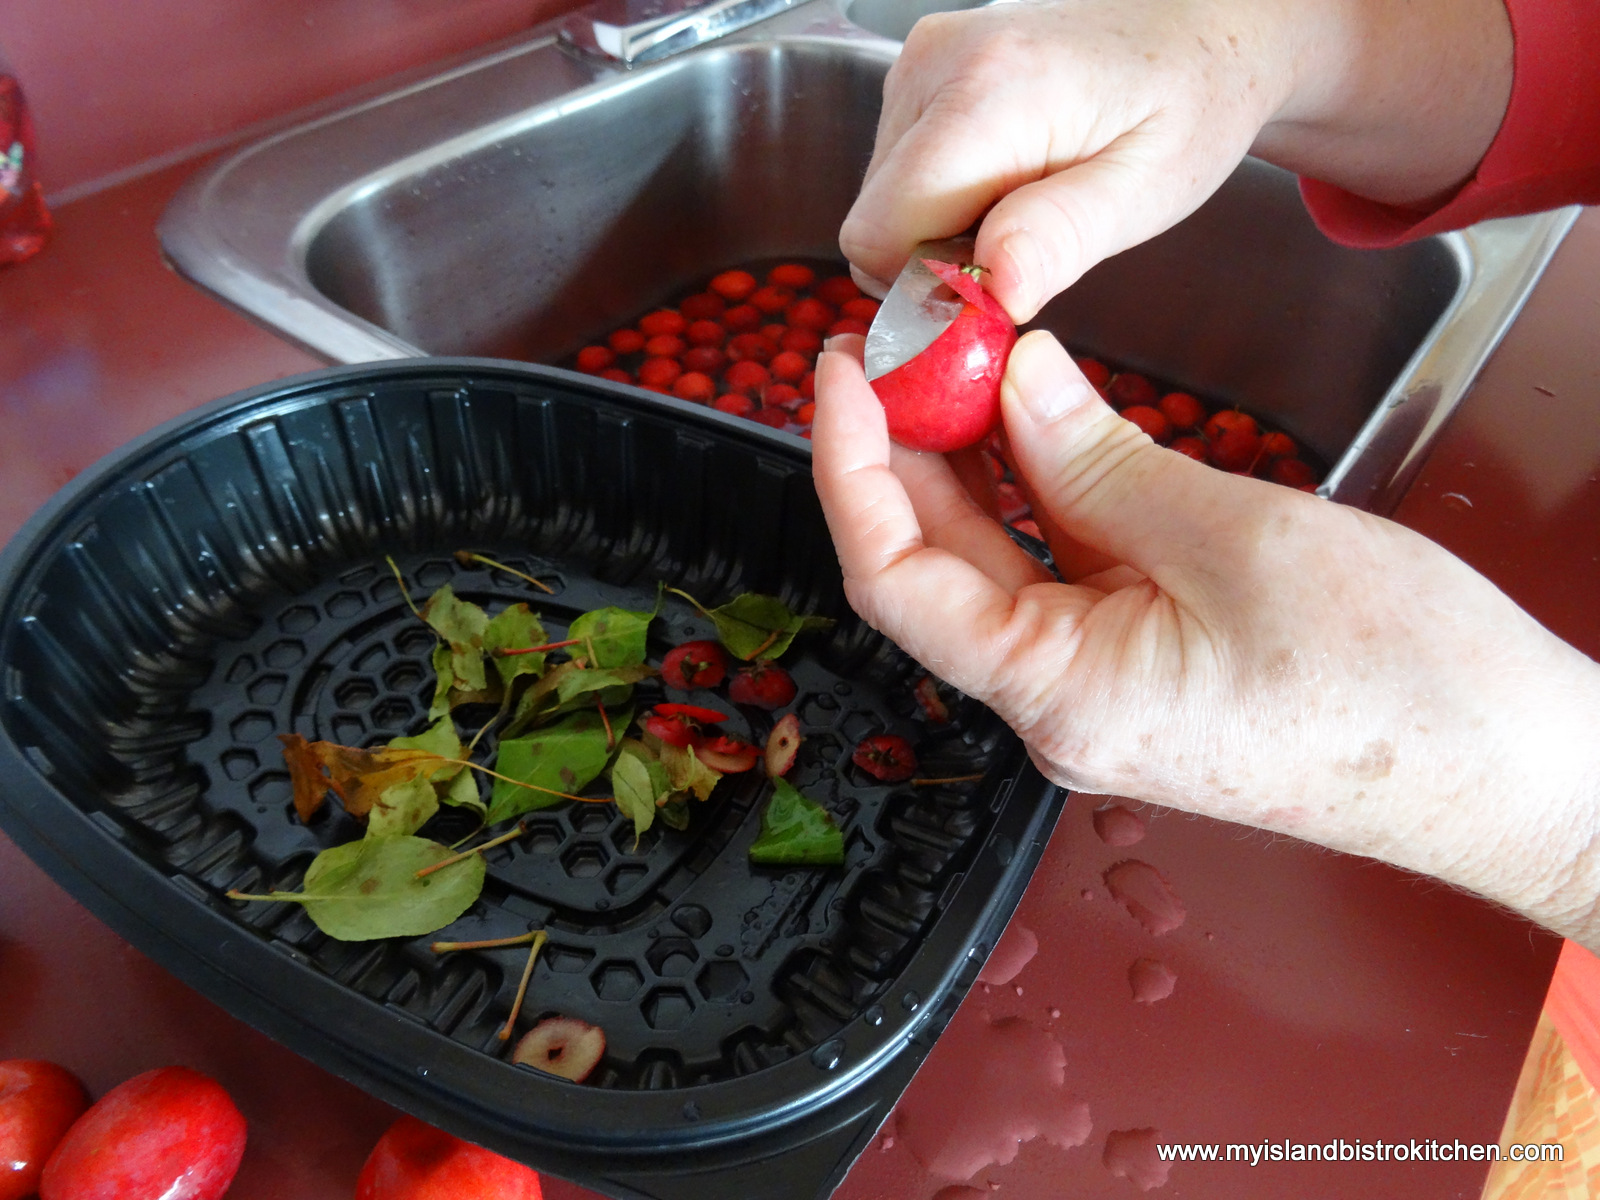
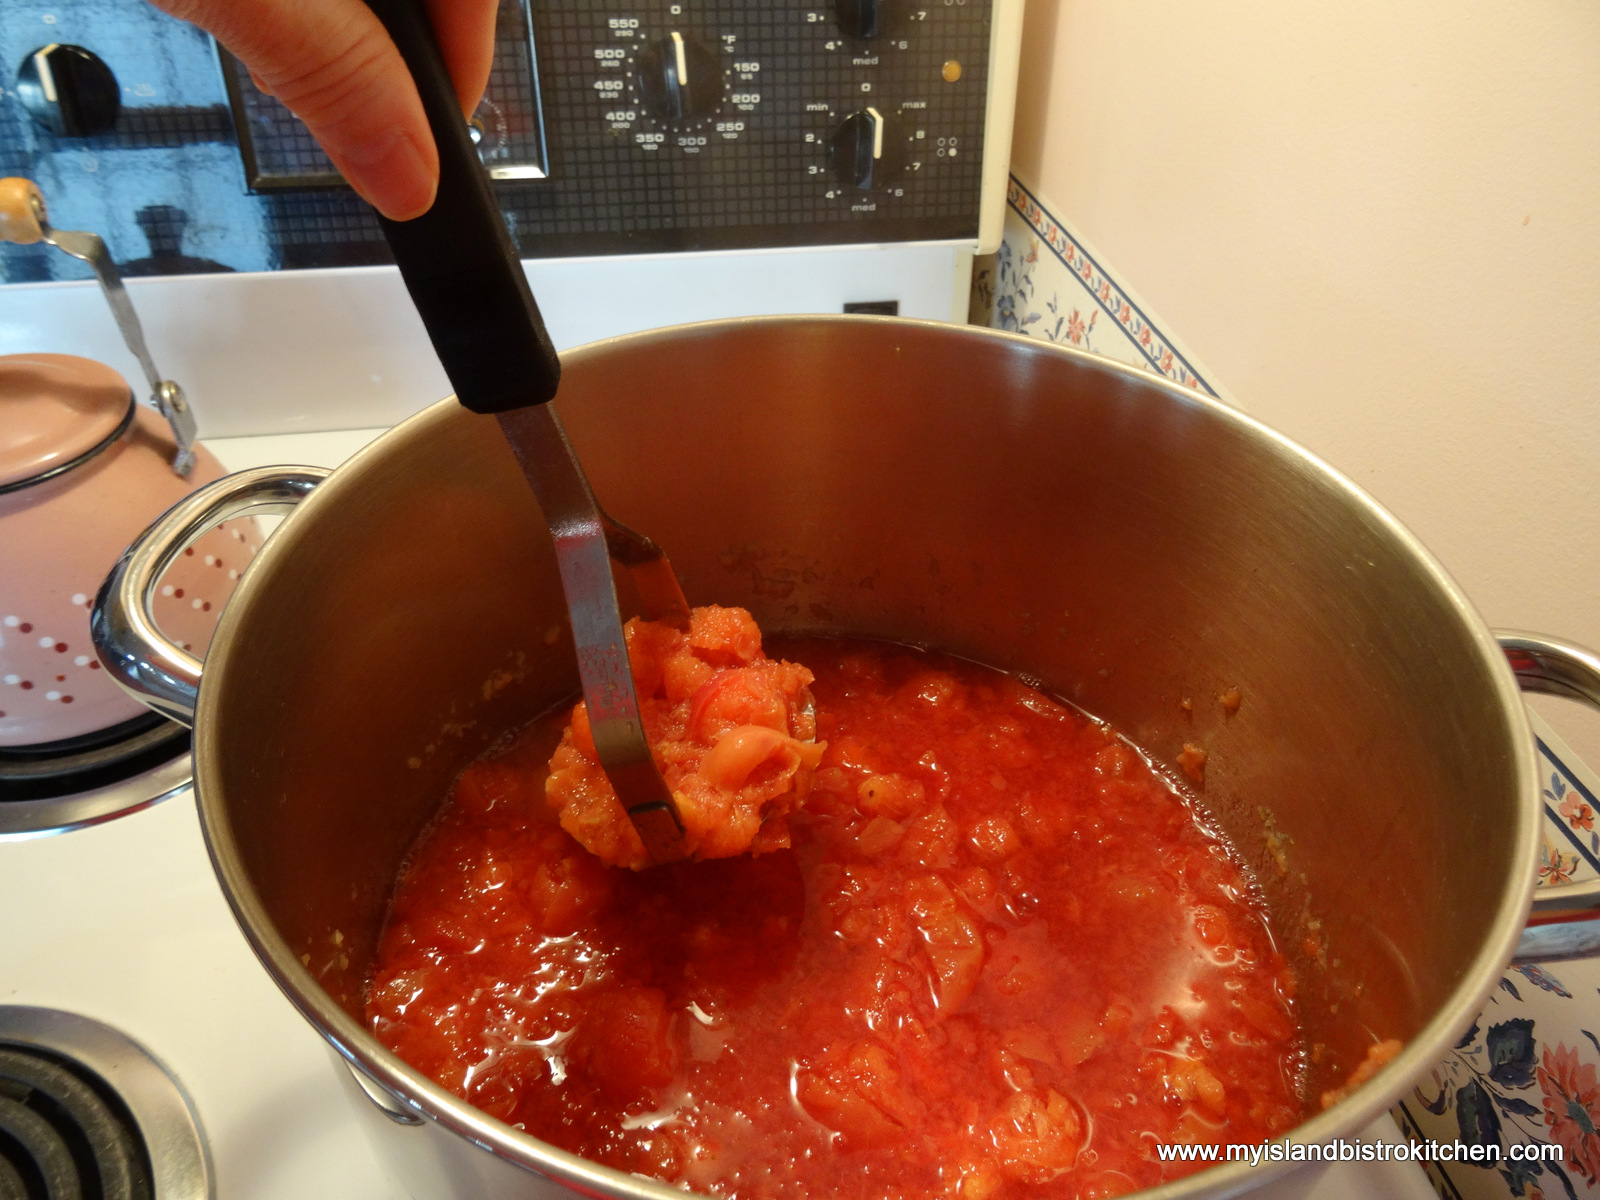
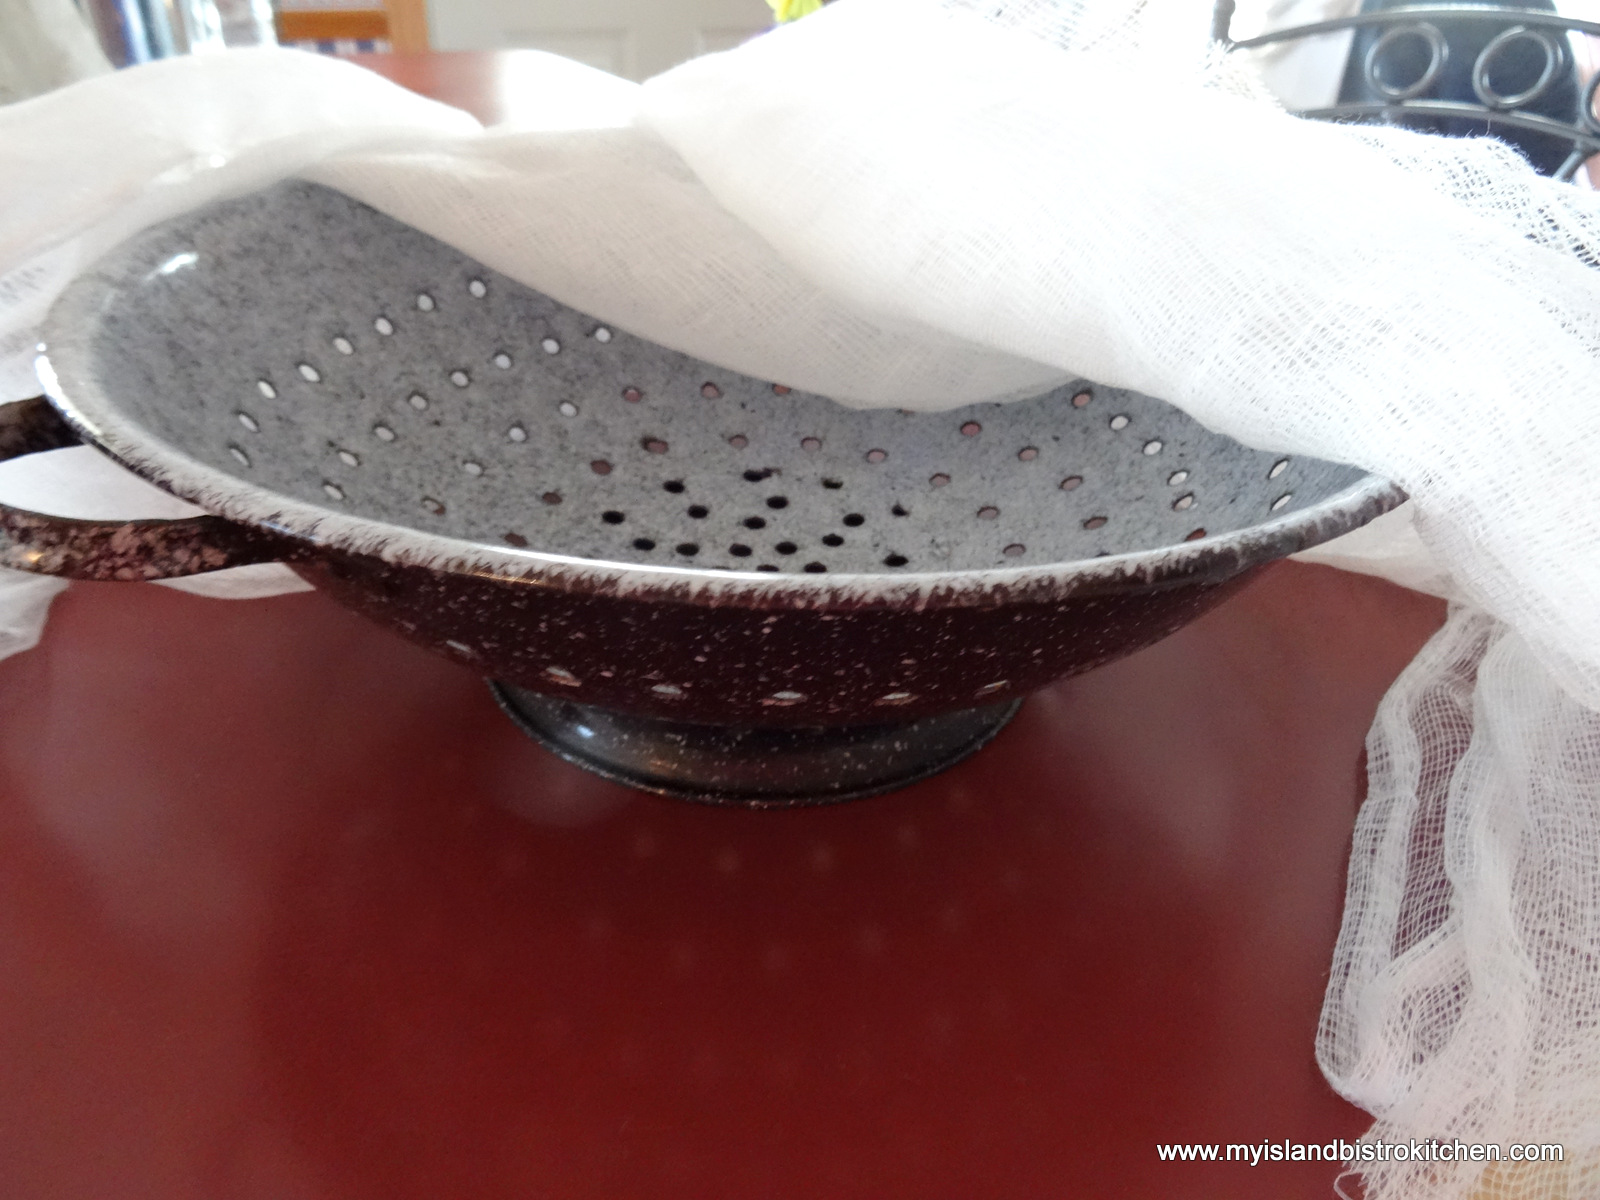
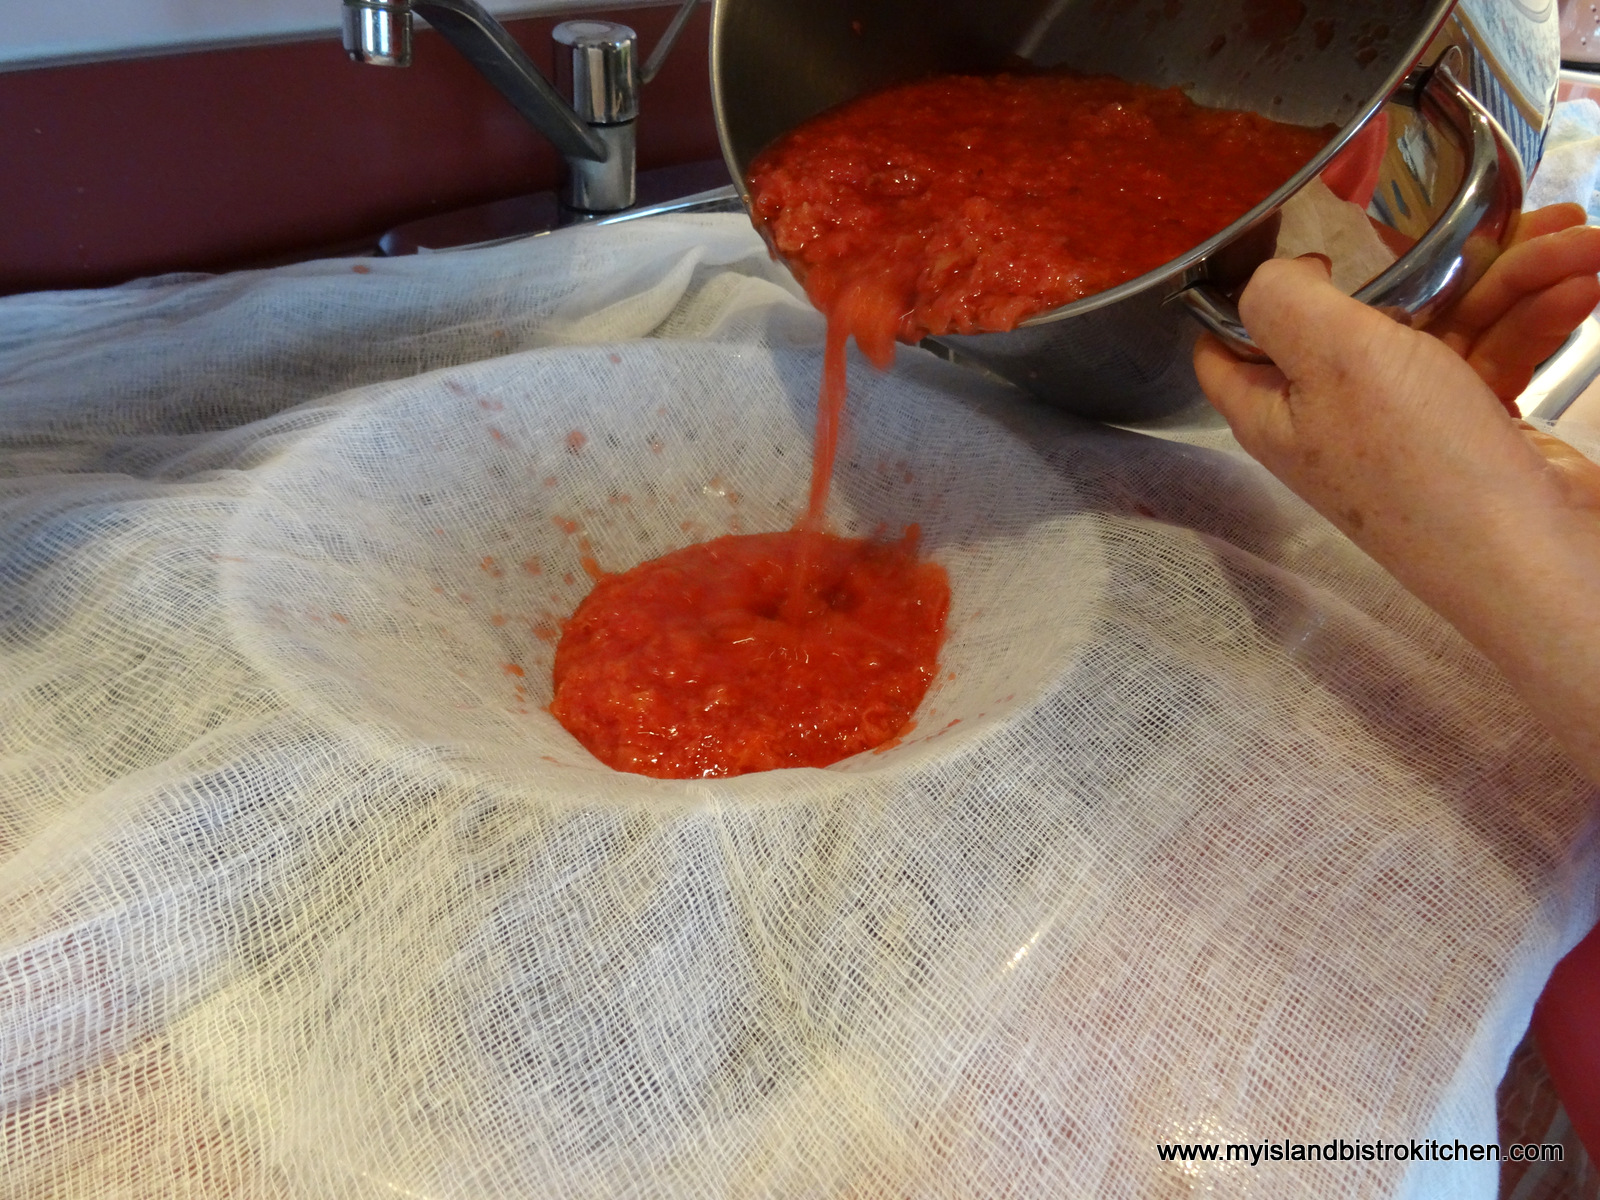
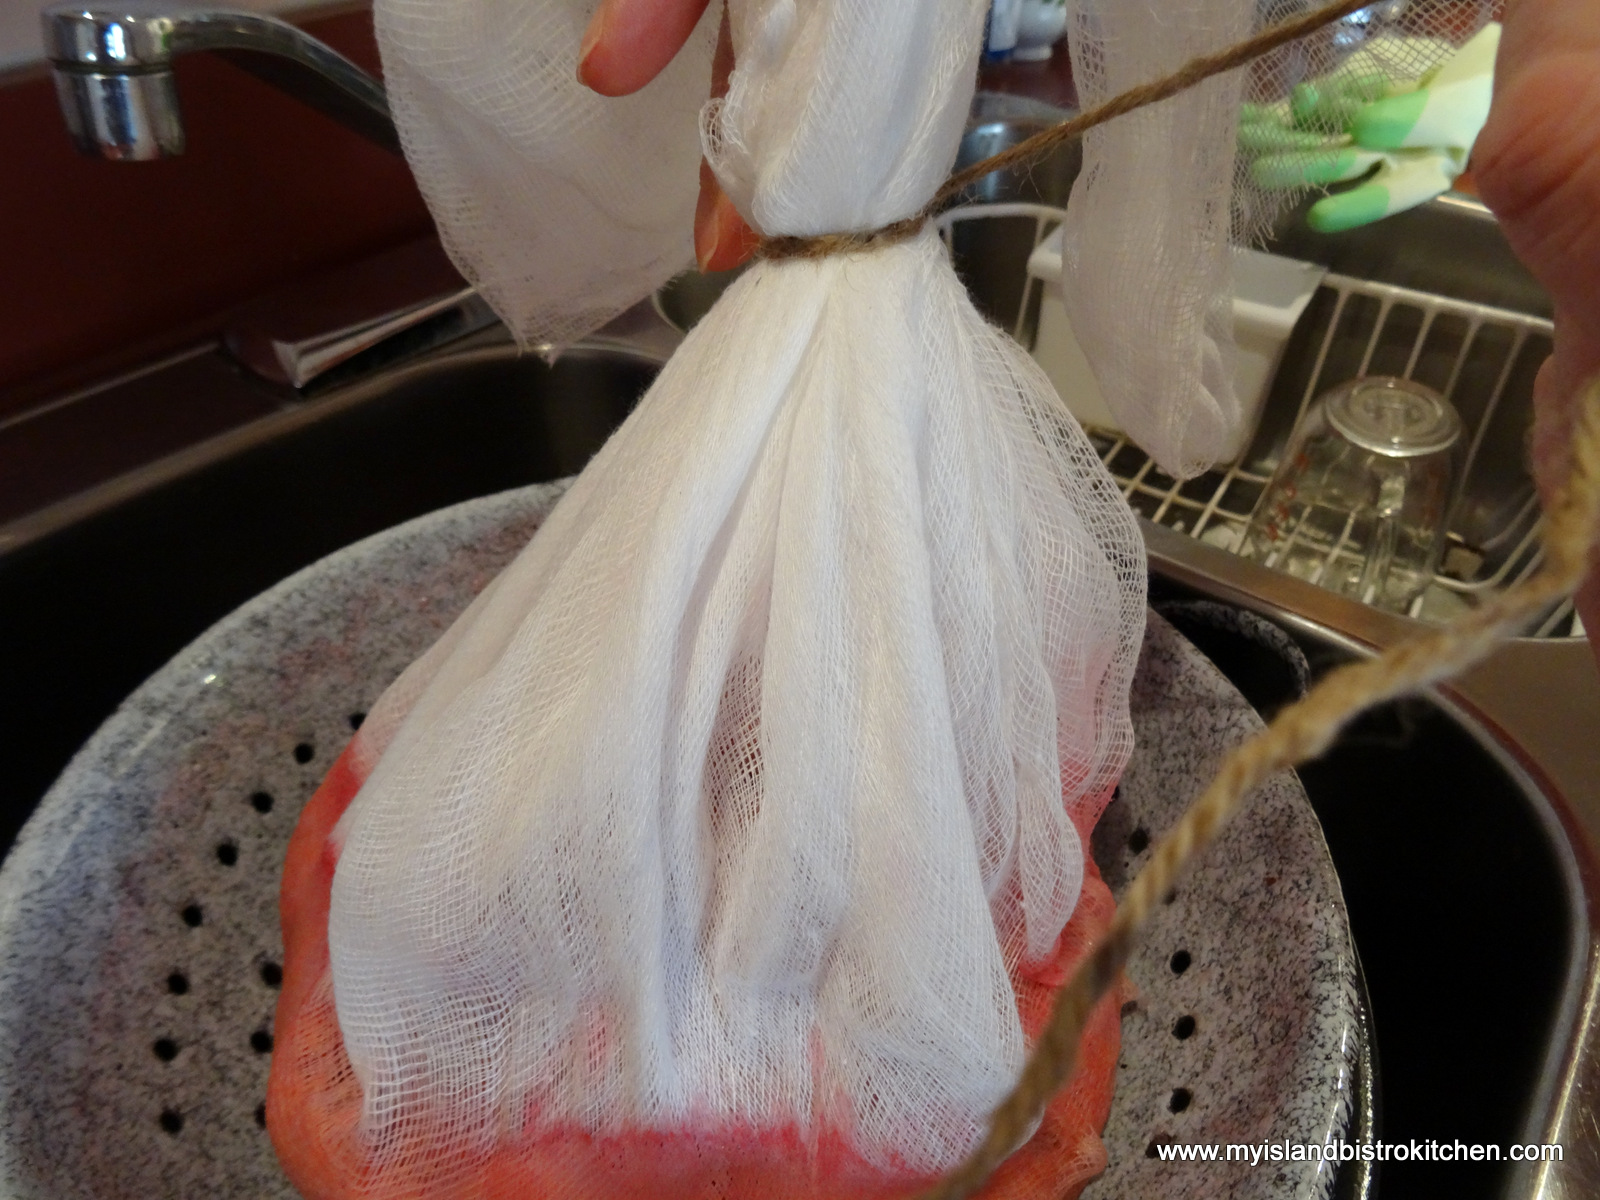
First, you have to wash and cut off the stem and blossom ends of the tiny crabapples. Then, they have to be cooked to the “mushy” stage. I take a potato masher and mash down any remaining chunks of apple after cooking as I find this helps the mixture to drip better once it is in the jelly bag. The “mush”/”mash” (pulp) gets bundled into a cheesecloth bag, tied, and hung over a bowl or pot to catch the juice dripping, at its own speed and on its own accord, from the cooked apples. I use either a fine mesh ready-made jelly bag or a double weight of cheesecloth because I don’t want any apple seeds or pieces of apple peel or pulp coming through. If the cheesecloth weave is very loose, I suggest using a triple layer. The objective is to have the juice as clear as possible so it does not make a cloudy jelly. The aim is to have a transparent crabapple jelly with no seeds or bits of the pulp in it.
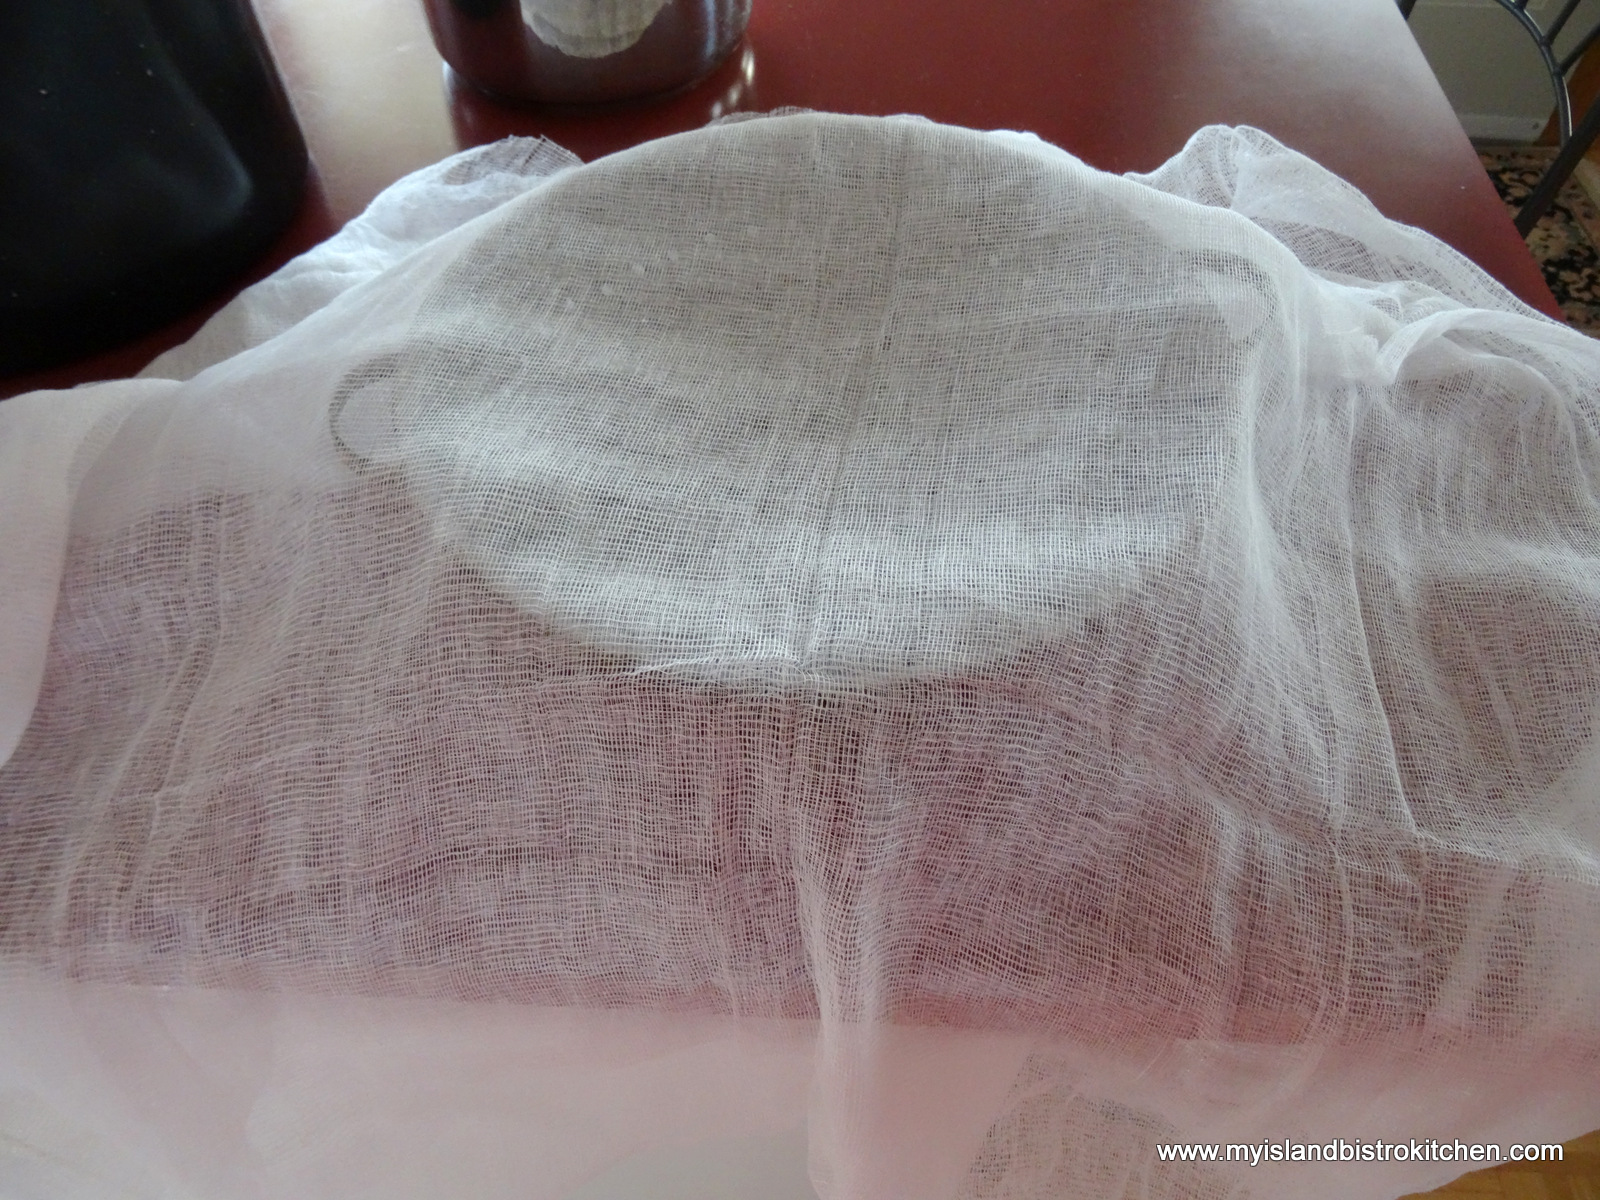
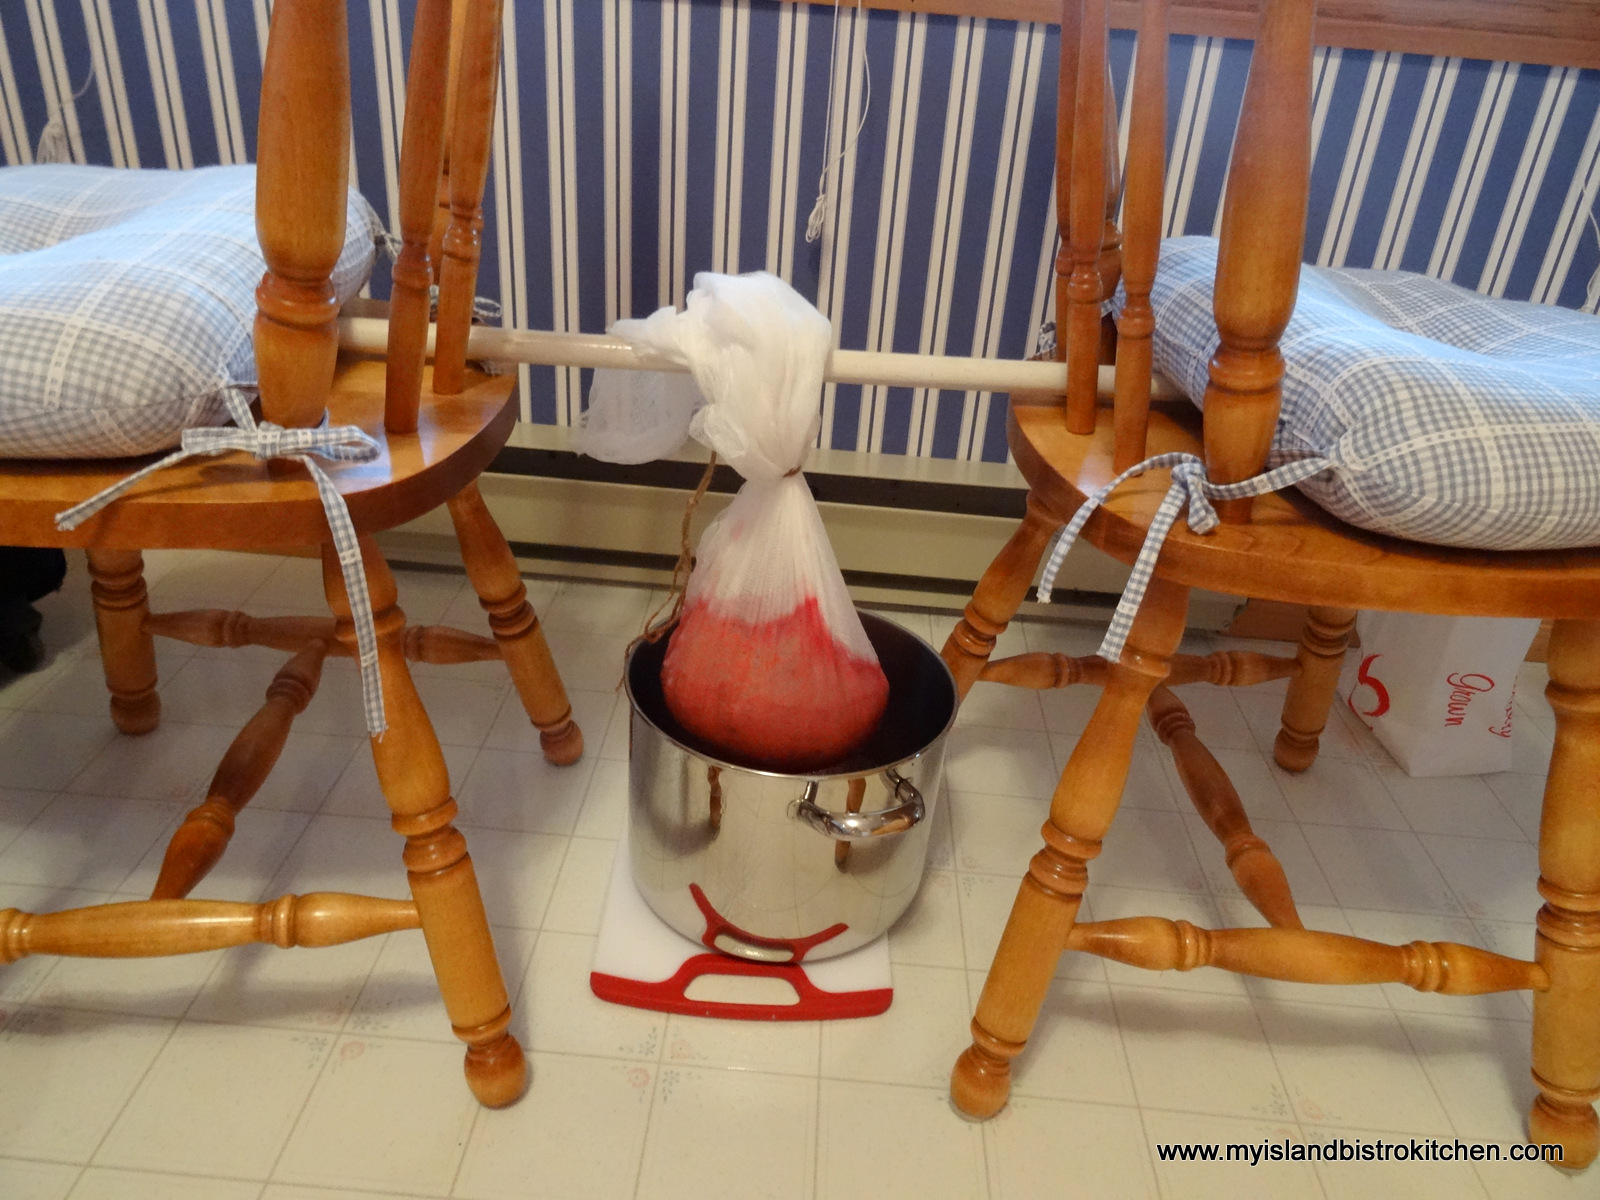
The time-consuming process is waiting for the juice to slowly drip from the pulp in the jelly bag– it takes several hours and I usually leave it overnight. The bag has to get suspended to allow the juice to slowly drip out. Specific jelly bag and stand units are available for this purpose. However, I concoct a really “sophisticated” outfit for this — I simply hang the jelly bag on to a sturdy broom handle and suspend the broom between two chairs with a bowl or pot placed under the bag to catch the juice. Really high tech, don’t you think!
Nevertheless, it is inexpensive, works, and gets the job done. The big tip I have here is to resist the temptation to squeeze the jelly bag to hasten the juice flow or to extract more juice from the pulp. This can cause some of the bits of the pulp to make their way through the cheesecloth and into the juice and this can very likely cause a cloudy jelly. Simply suspend the bag and hands off to let it do its own thing in its own good time.
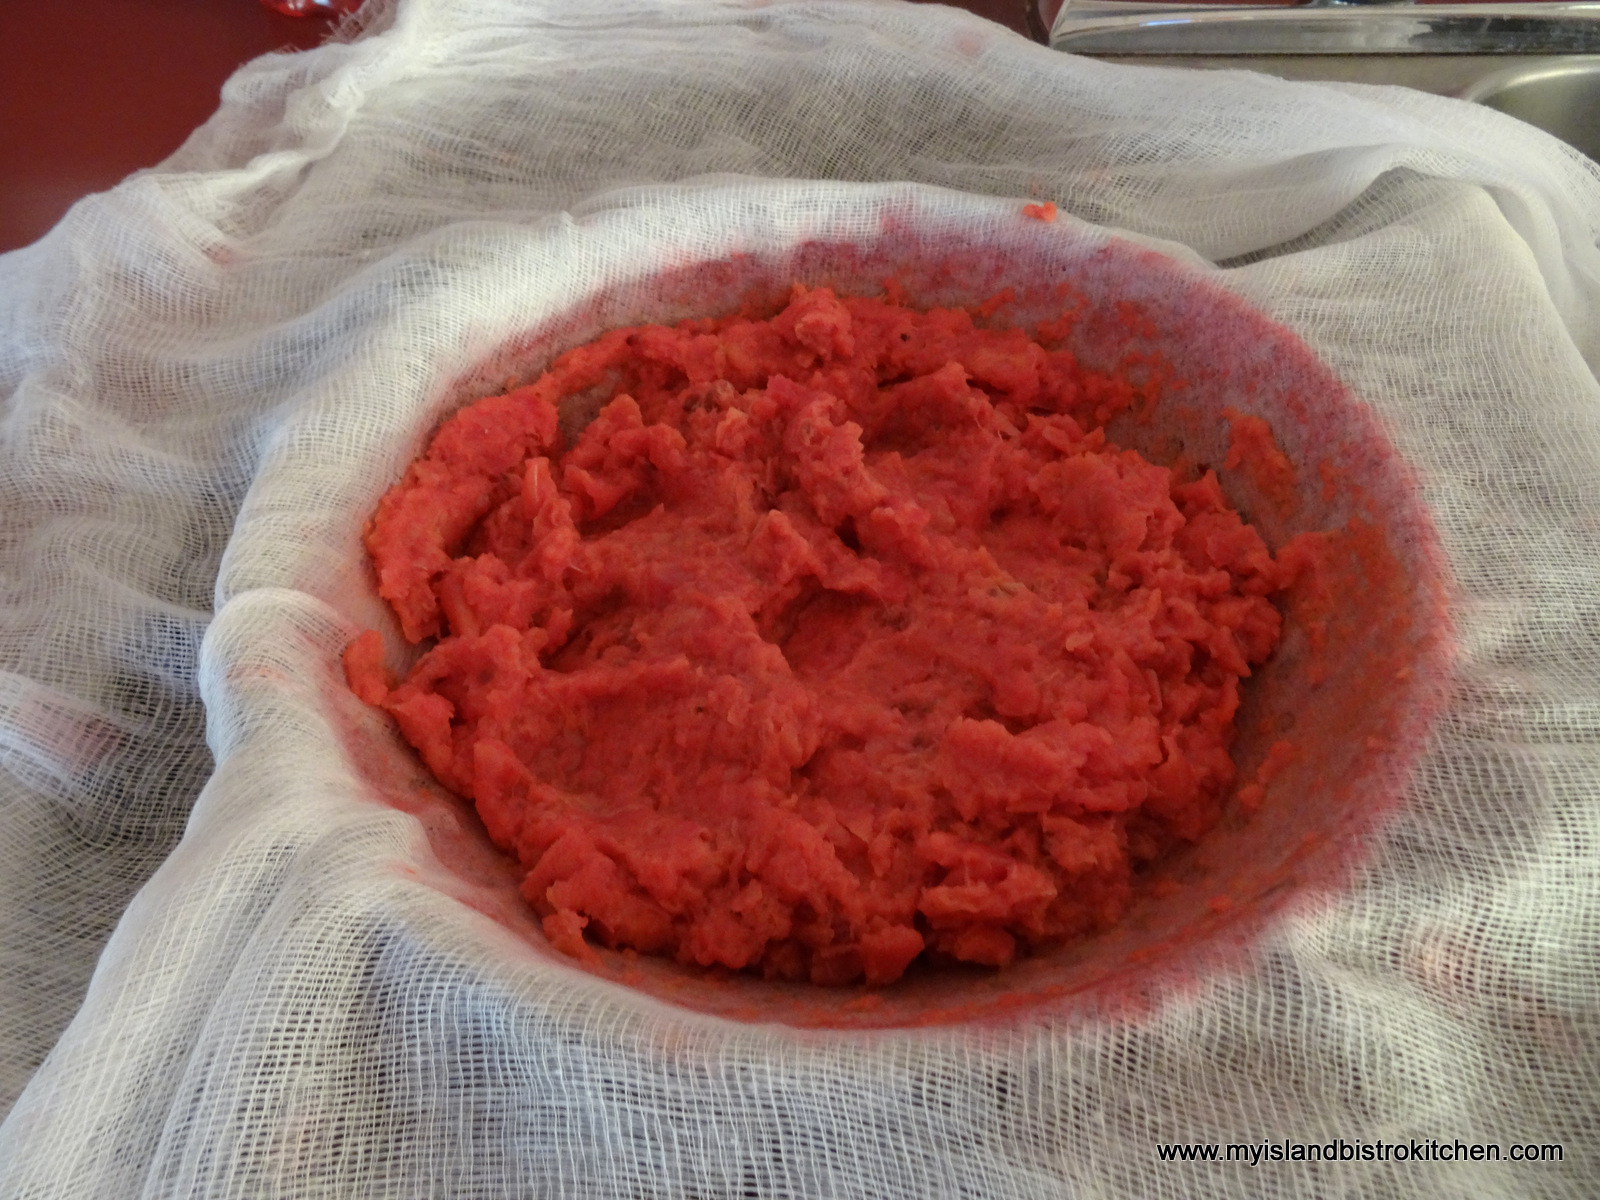
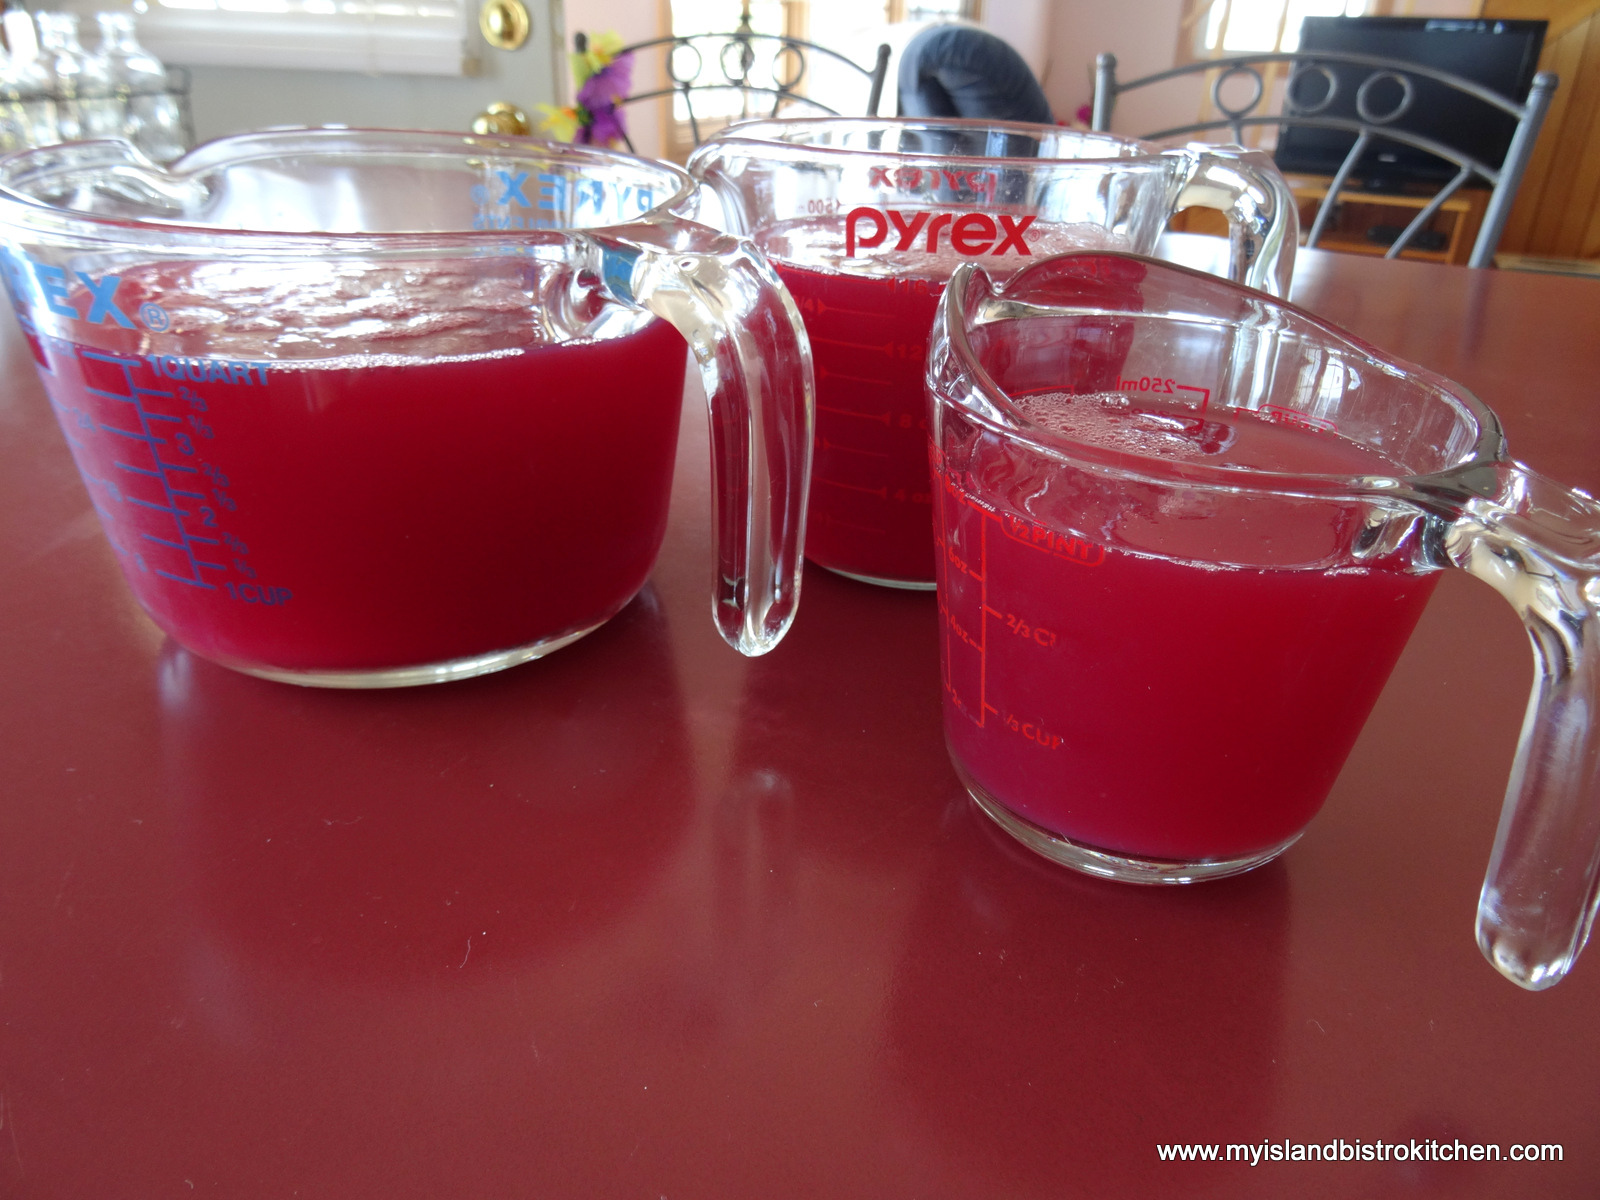
Once it is apparent that there is no more juice dripping, discard the solid contents of the jelly bag. Measure and pour the extracted juice into a stock pot. Add the sugar and lemon juice and start the cooking process. I add sugar at the ratio of 3/4 cup sugar to 1 cup extracted apple juice.
When the mixture reaches 220°F, on a candy thermometer, it is at the gelling stage. For extra assurance, or if you don’t have a candy thermometer, I recommend also using the “wrinkle test”. Place 2-3 freezer-proof saucers in the freezer as you start to make the jelly. Once you think the jelly is at, or nearing, the gelling stage, take a small sample of the jelly and place it on a cold saucer. Return the saucer to the freezer for a minute, then remove it. If the jelly starts to “wrinkle” when pushed gently with a finger, it has reached the jelly stage and is ready for bottling and processing in a hot water bath. If not, continue cooking and conducting the wrinkle test every 4-5 minutes until it reaches the jelly stage. Just remember to remove the jelly pot from the heat while conducting the test.
You will need some equipment to make this jelly and here’s my checklist:
6 half-pint jars and 1 quarter-pint glass canning jar for the jelly (plus 1 more half-pint jar to take up extra space in the canner basket, if needed, during the hot water process)
6 to 7 two-piece lid and screw band sets (lids must be brand new and not previously used; screw bands may be re-used provided they have no dents or rust on them)
Large, heavy-bottomed stock pot for jelly making
Large-sized pot for sterilizing jars
Small saucepan for heating jar lids
Water bath canner with basket
Cheesecloth and heavy-duty kitchen twine, or a ready-made jelly bag
Large metal colander
Candy thermometer
Potato masher
Large, heat-proof spoon for stirring jelly
Jar lifter tongs
Wide-mouthed canning funnel
Ladle or heat-proof glass measuring cup
Chopstick or small non-metallic heat-proof spatula
Magnetic lid lifter
A timer
Clean cloth for wiping jar rims of jam-filled jars
Heat-proof cutting board for setting jars of jelly on when they come out of the hot water canner
[Printable recipe follows at end of posting]
Crabapple Jelly
Ingredients:
4 lbs crabapples
7 cups water
Granulated sugar (3/4 cup of sugar for each cup of extracted apple juice)
3-4 tbsp bottled lemon juice
1 tsp butter
Method:
Wash apples.
Remove stem and blossom ends from apples.
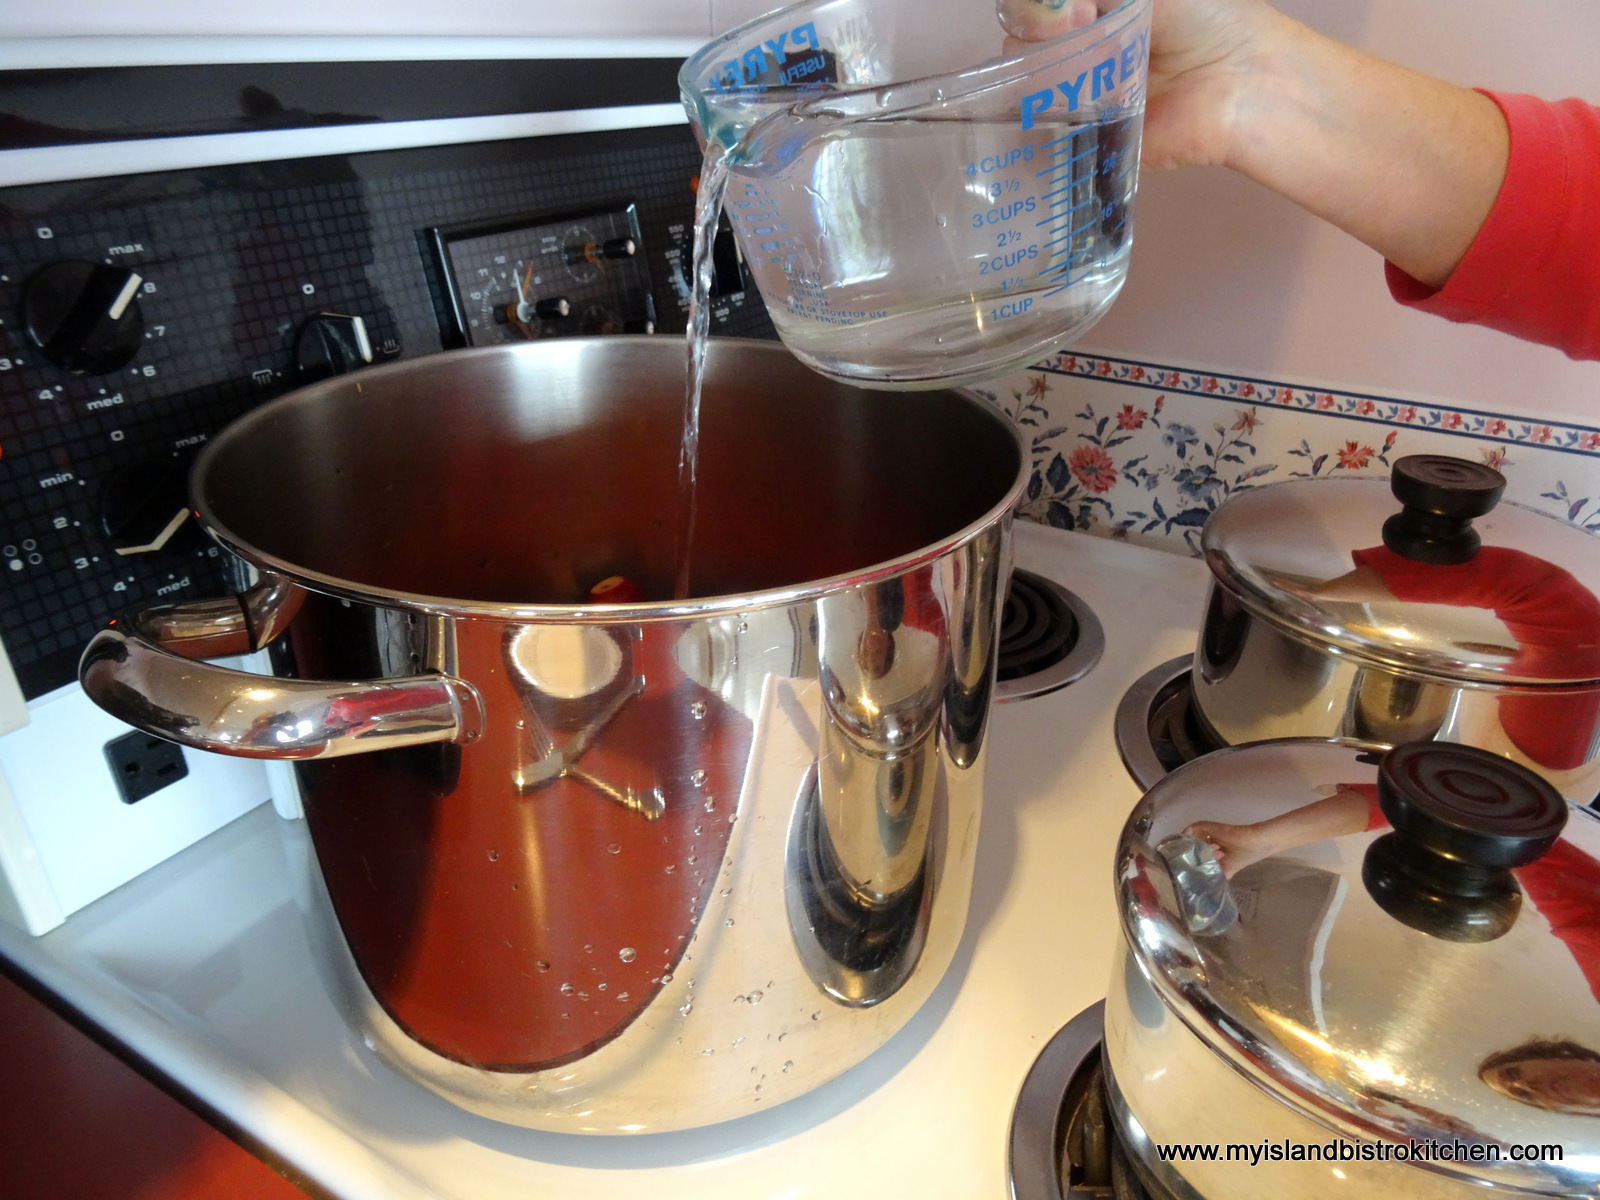
Leave apples whole. Place apples in large stock pot.
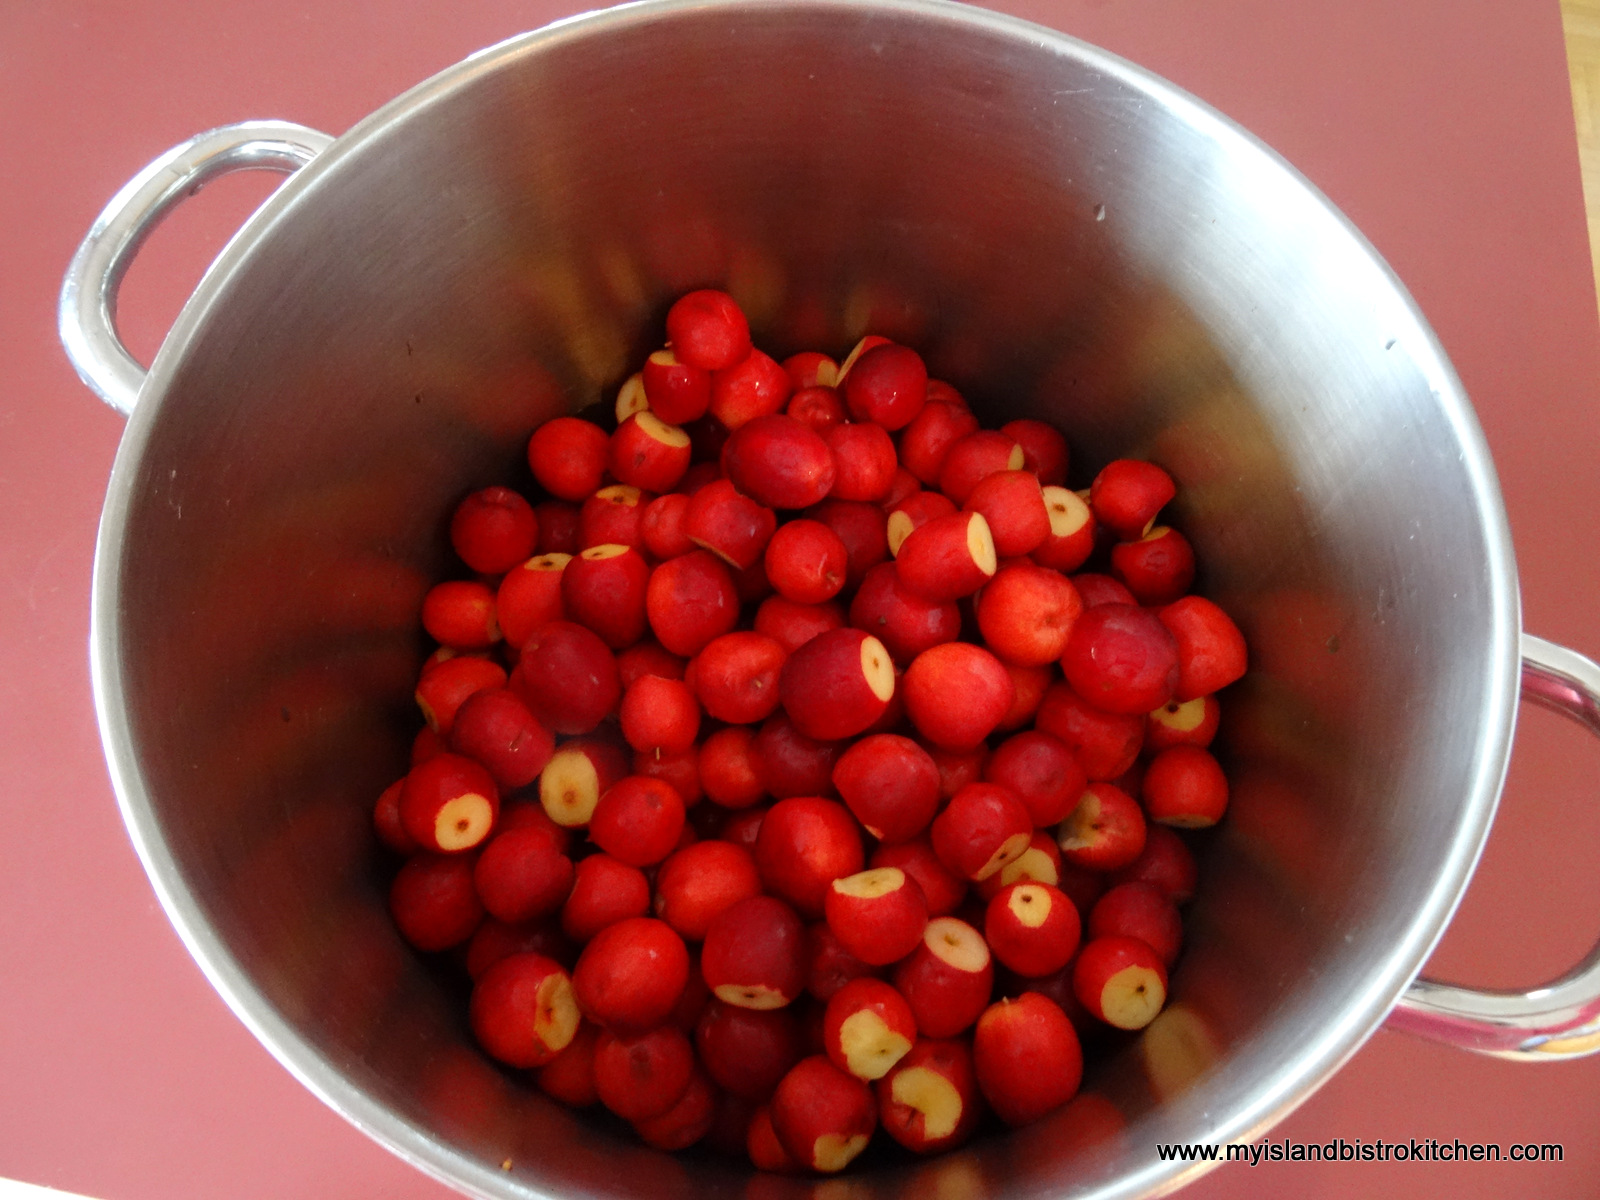
Add the water, cover, and bring to a boil then reduce heat to low and simmer for approximately 40-45 minutes or until apples have softened and begun to break down into mush.
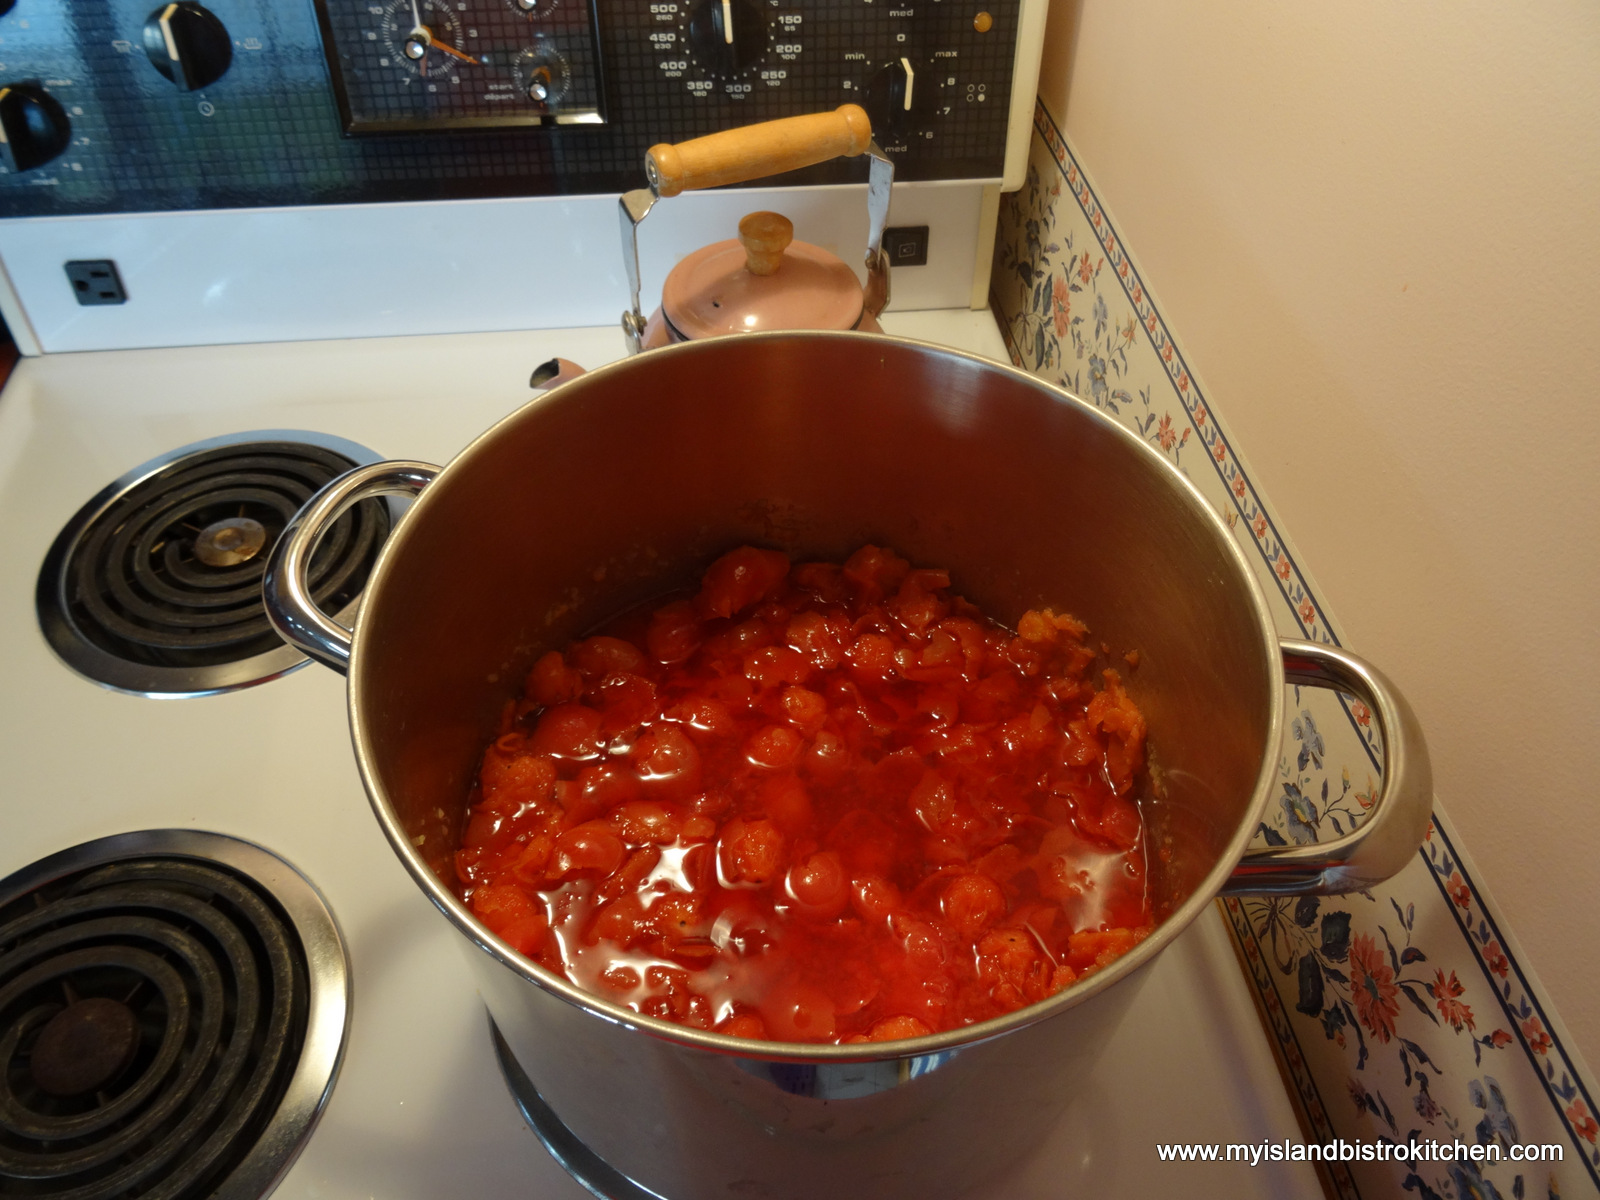
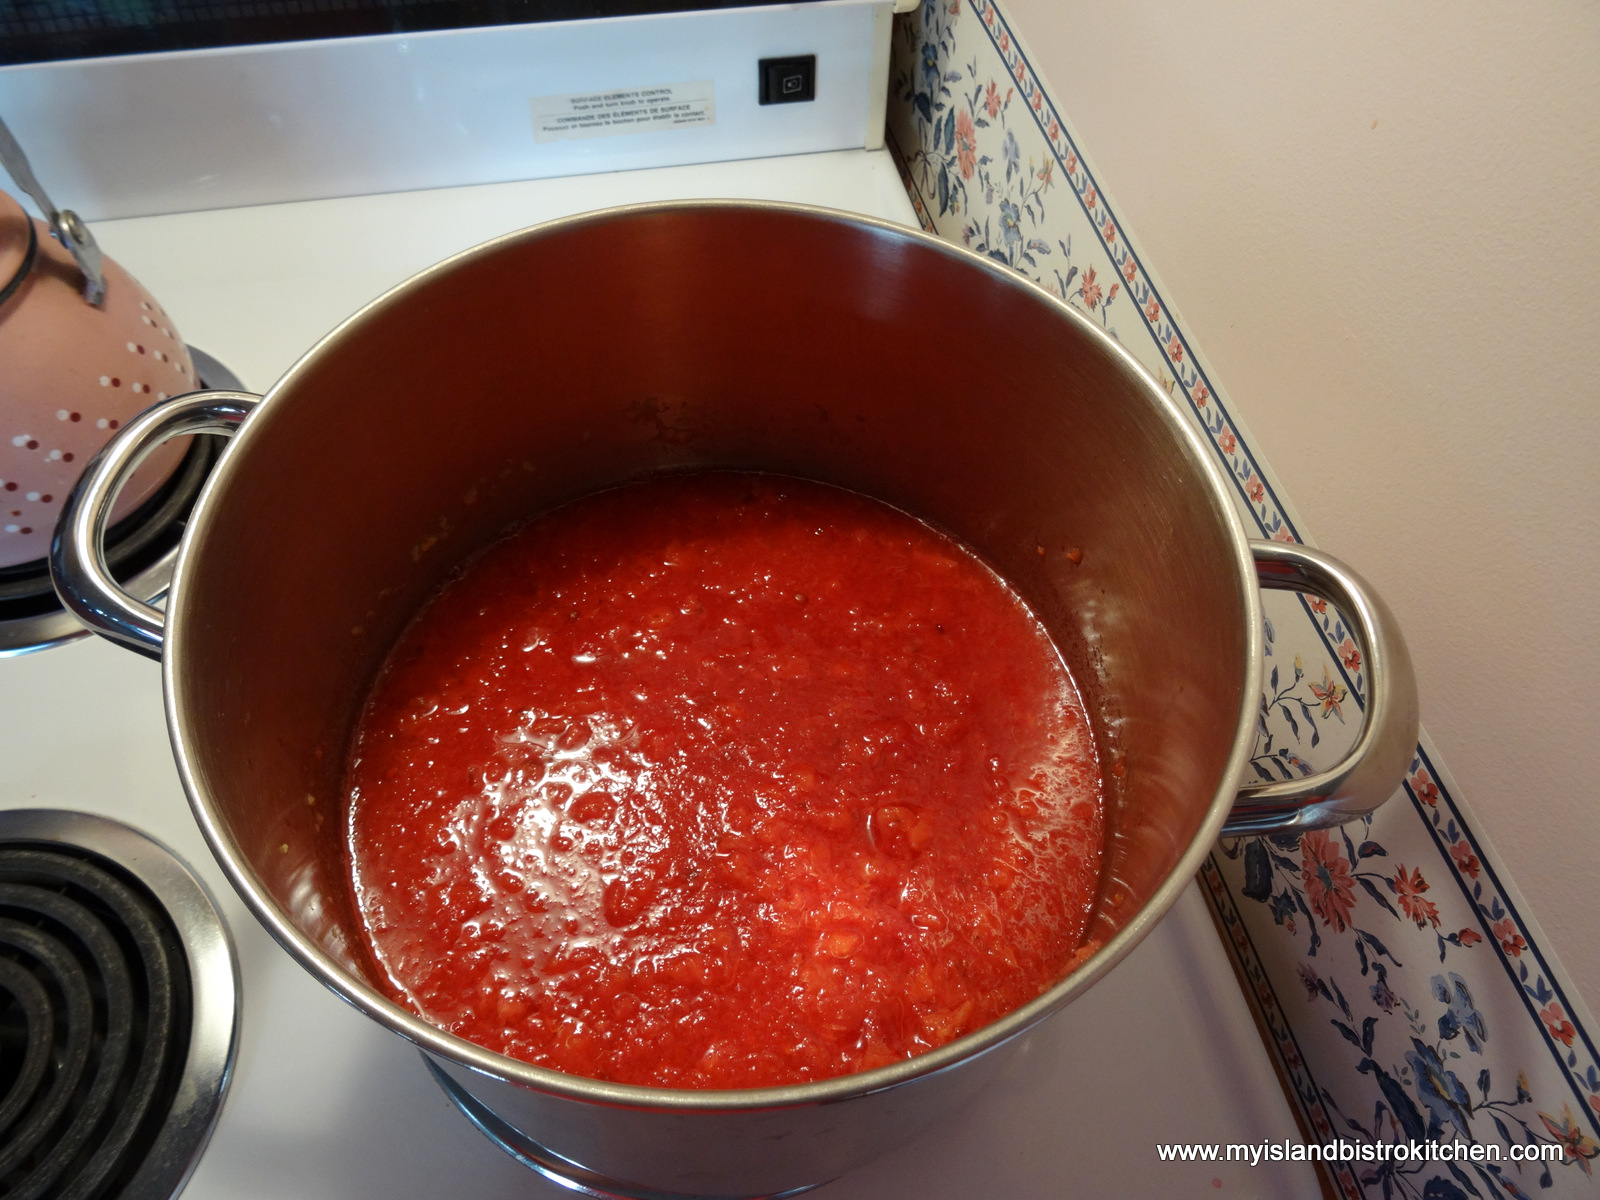
Gently mash any large chunks of apple with a potato masher.
Use a fine mesh jelly bag or, alternatively, place a double, or triple, weight of cheesecloth in a large colander. (It’s a good idea to pre-dampen the jelly bag or cheesecloth with water before adding the pulp – I was busy taking photos and started pouring in the pulp to get ready for a photo before realizing the cheesecloth had not been dampened.)
Place the colander over a large clean pot or bowl. Pour the apple pulp into the jelly bag or cheesecloth-lined colander.
Let mixture drip for about 20 minutes or so to get some of the initial juice out of the pulp.
Gather up the top of the jelly bag or ends of cheesecloth and tie tightly with an all-purpose kitchen twine or heavy string, making a loop by which to hang the jelly bag to allow the juice to drip out.
If you have a jelly bag and stand unit, use it. However, if you don’t, there is no need to go out and buy one. Simply hang the jelly bag on a sturdy broom handle and support the broom between two chairs. Place a large pot or bowl under the jelly bag to catch the juice as it drips.
Allow the juice to drip on its own for several hours (i.e., at least 3-4) or overnight, until no more juice is seen dripping through. Resist the urge to squeeze the jelly bag to hasten the juice flow, or to extract more juice from the pulp, as this can cause some of the apple pulp to escape the bag resulting in a cloudy juice and jelly.
Place 2-3 freezer-safe saucers in the freezer. These are used to conduct the “wrinkle test” to test the jelly for “gelling” status.
Fill a large pot with hot tap water, about three-quarters full. Place seven half-pint jars and one quarter-pint jar upright, into the water. Ensure the jars are fully submerged, each jar filled with water, and that the water is at least an inch over the tops of the jars. Cover, bring to a boil, and boil gently for 10 minutes. Turn off heat and leave the jars in the hot water while the jelly is cooking.
Fill the hot water canner about one-third to one-half full of hot tap water. Cover and bring to a boil to have it ready for the filled jars. Once it comes to the boil, reduce the heat to a gentle boil.
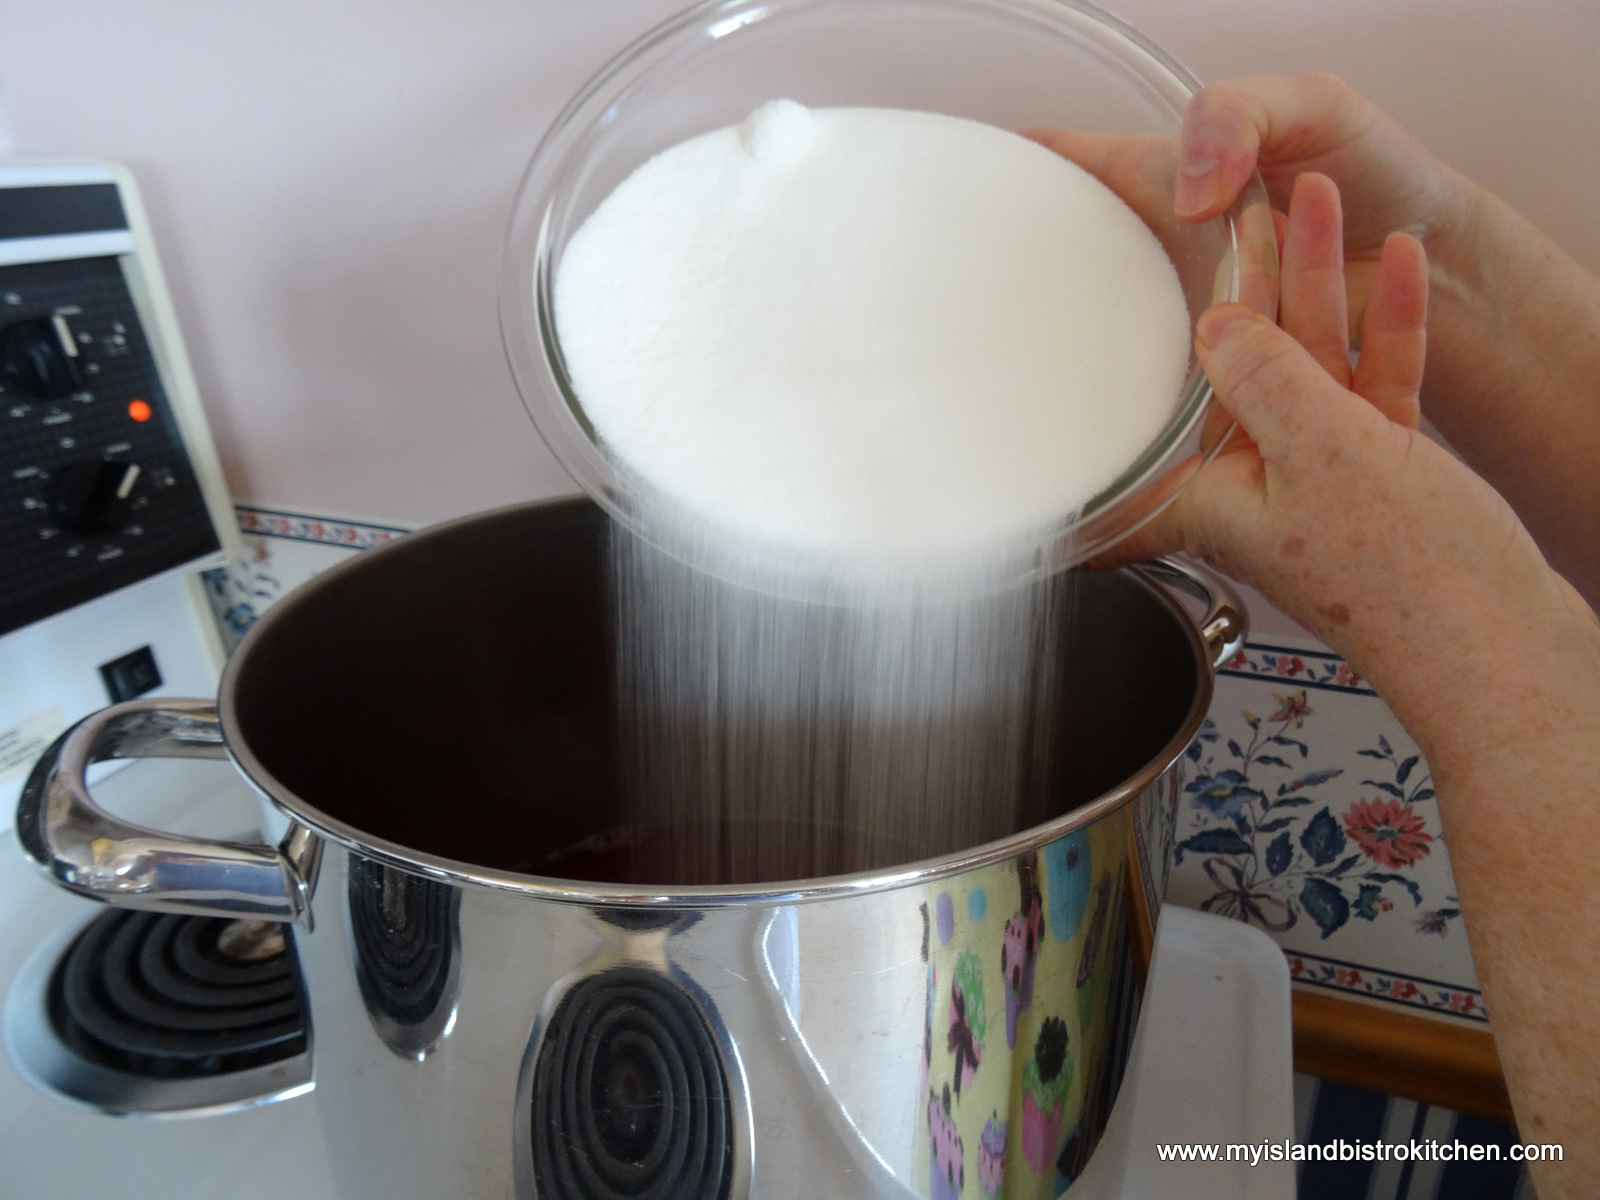
When jelly bag is done dripping, discard the apple pulp. To determine the amount of sugar needed, measure out the extracted juice and add ¾ cup of sugar for each cup of juice.
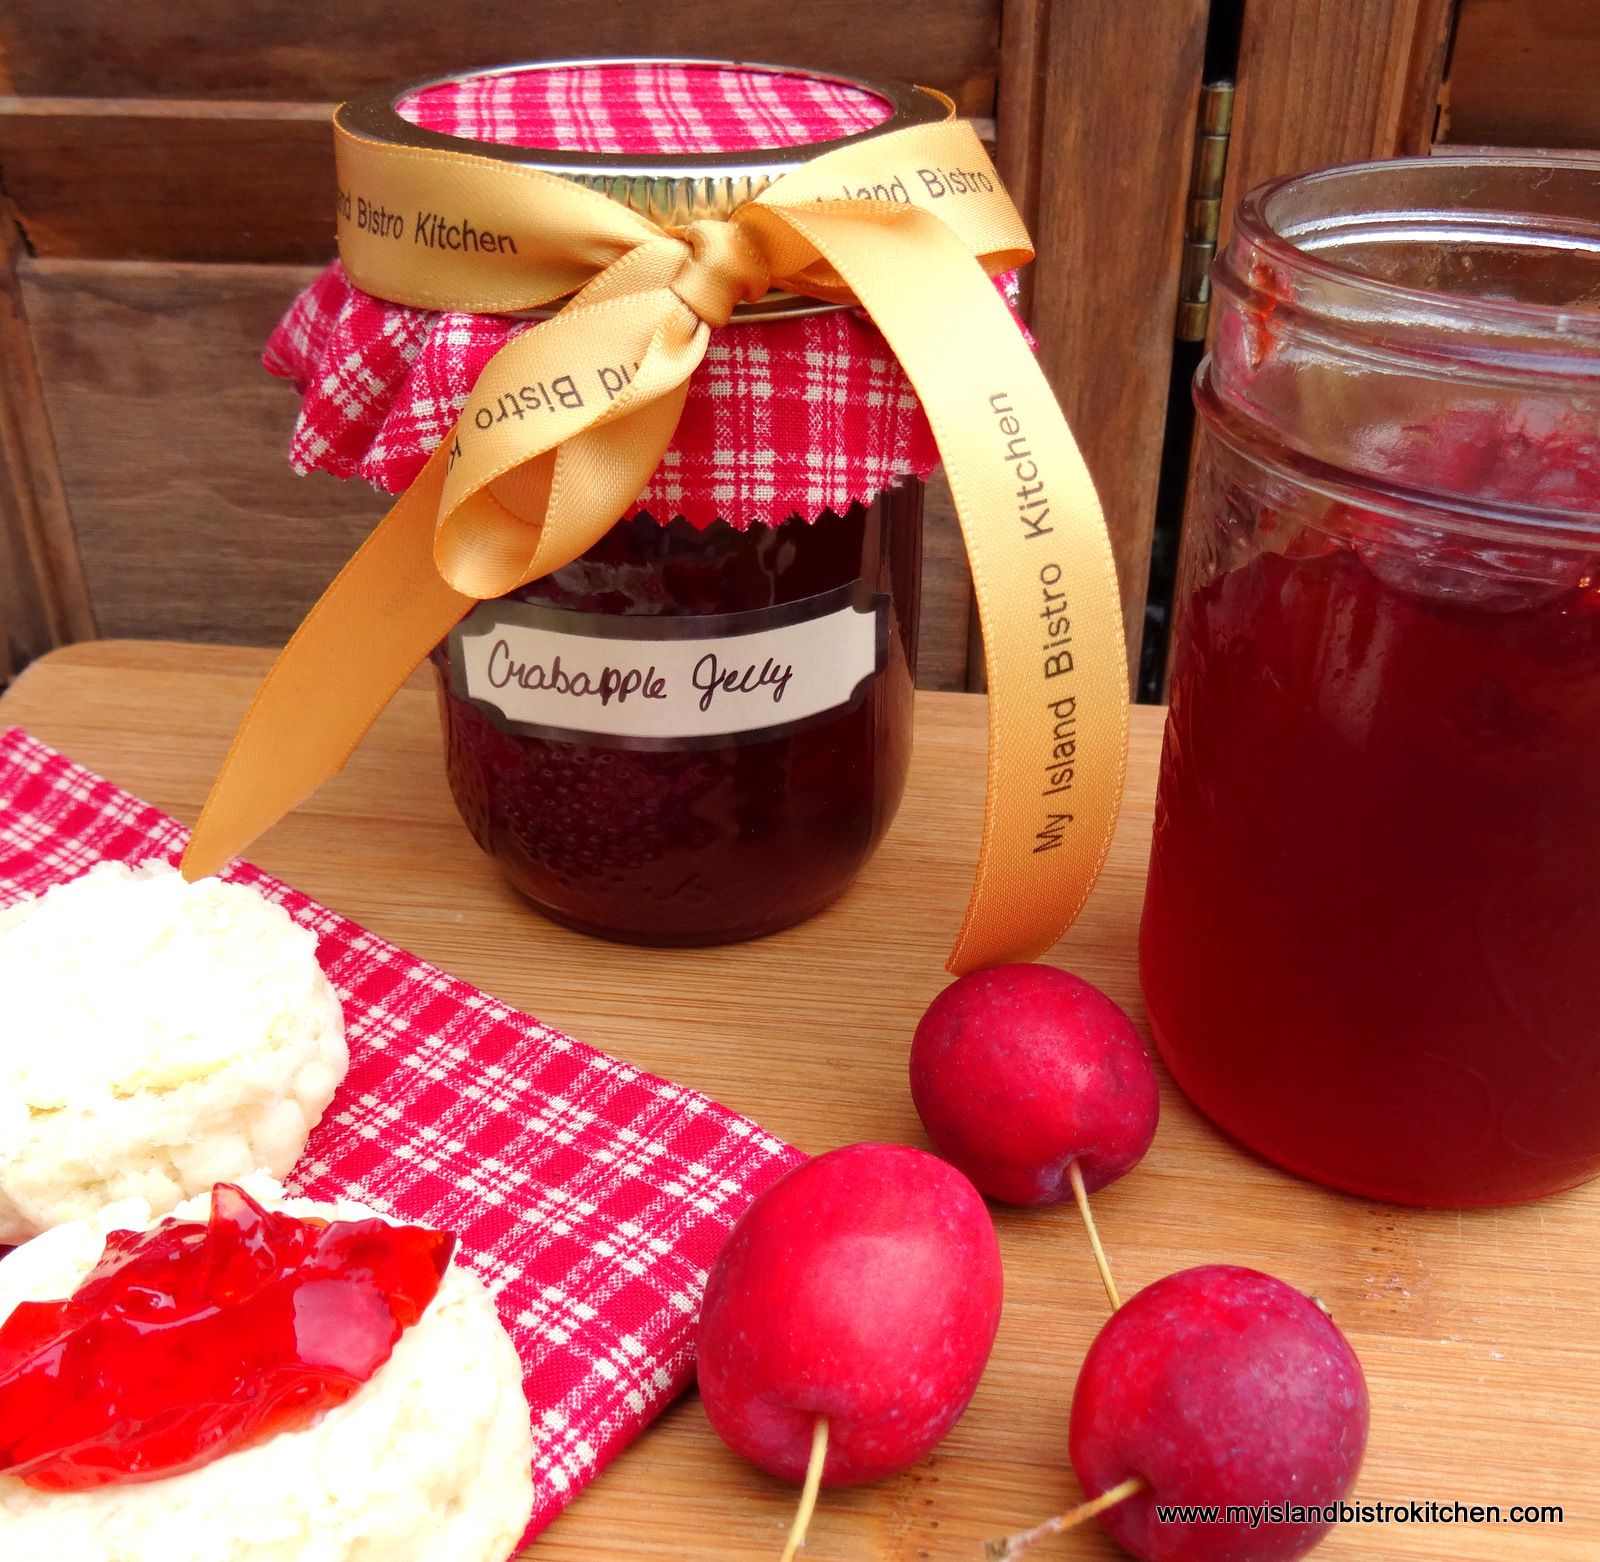
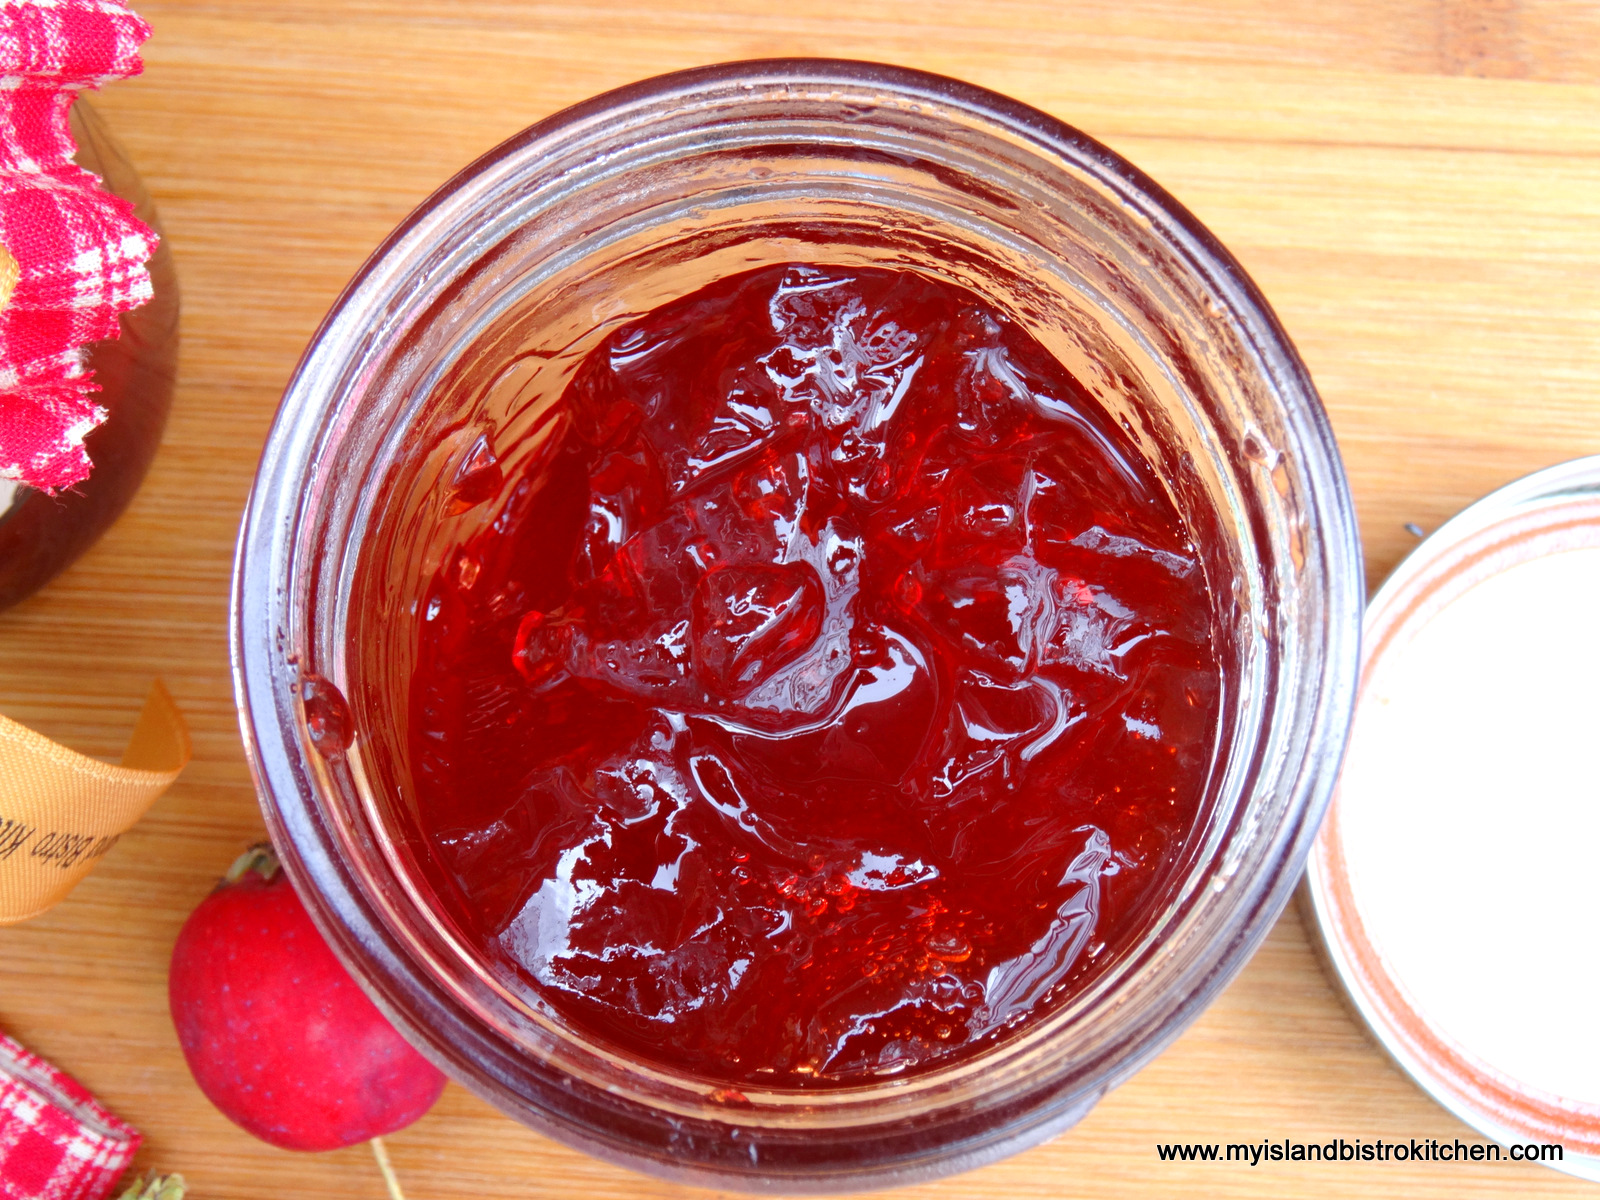
Pour juice into pot. Just look at that gorgeous color of juice! That’s what will give the jelly its fabulous color.
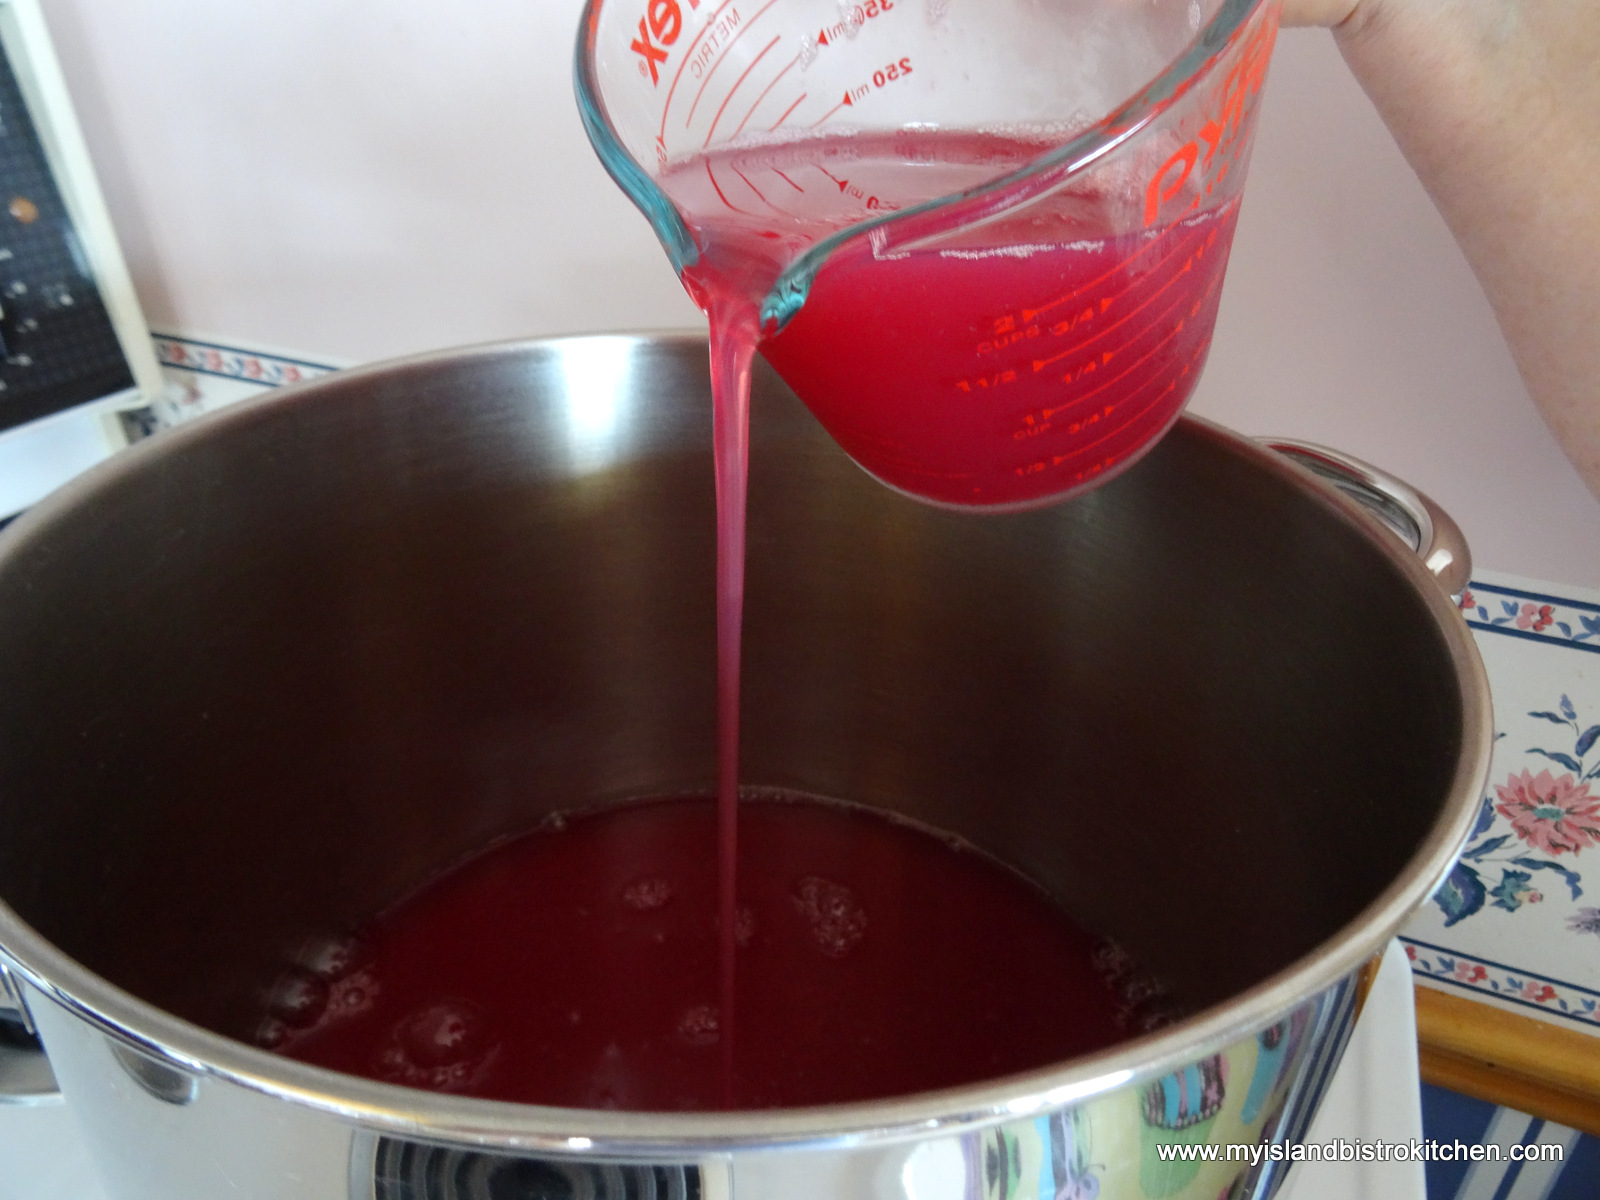
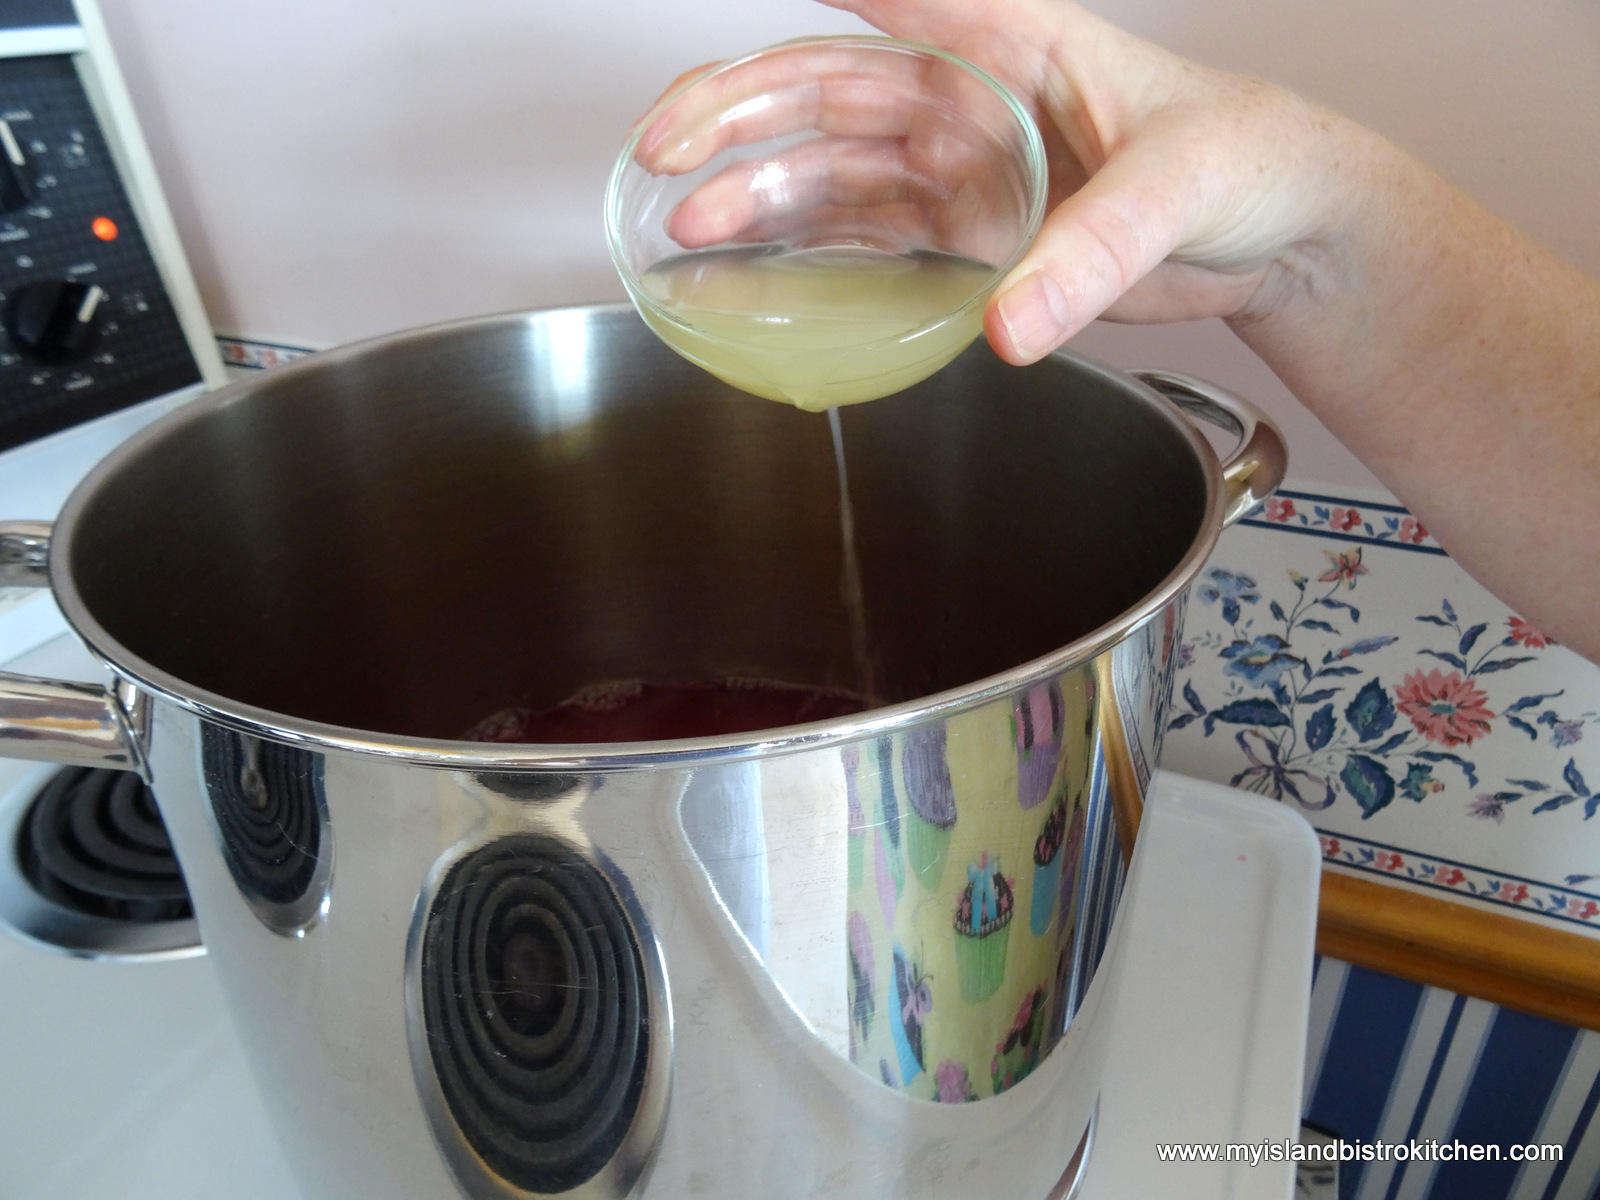
Add the lemon juice and sugar to the extracted apple juice.
Stir to dissolve sugar.

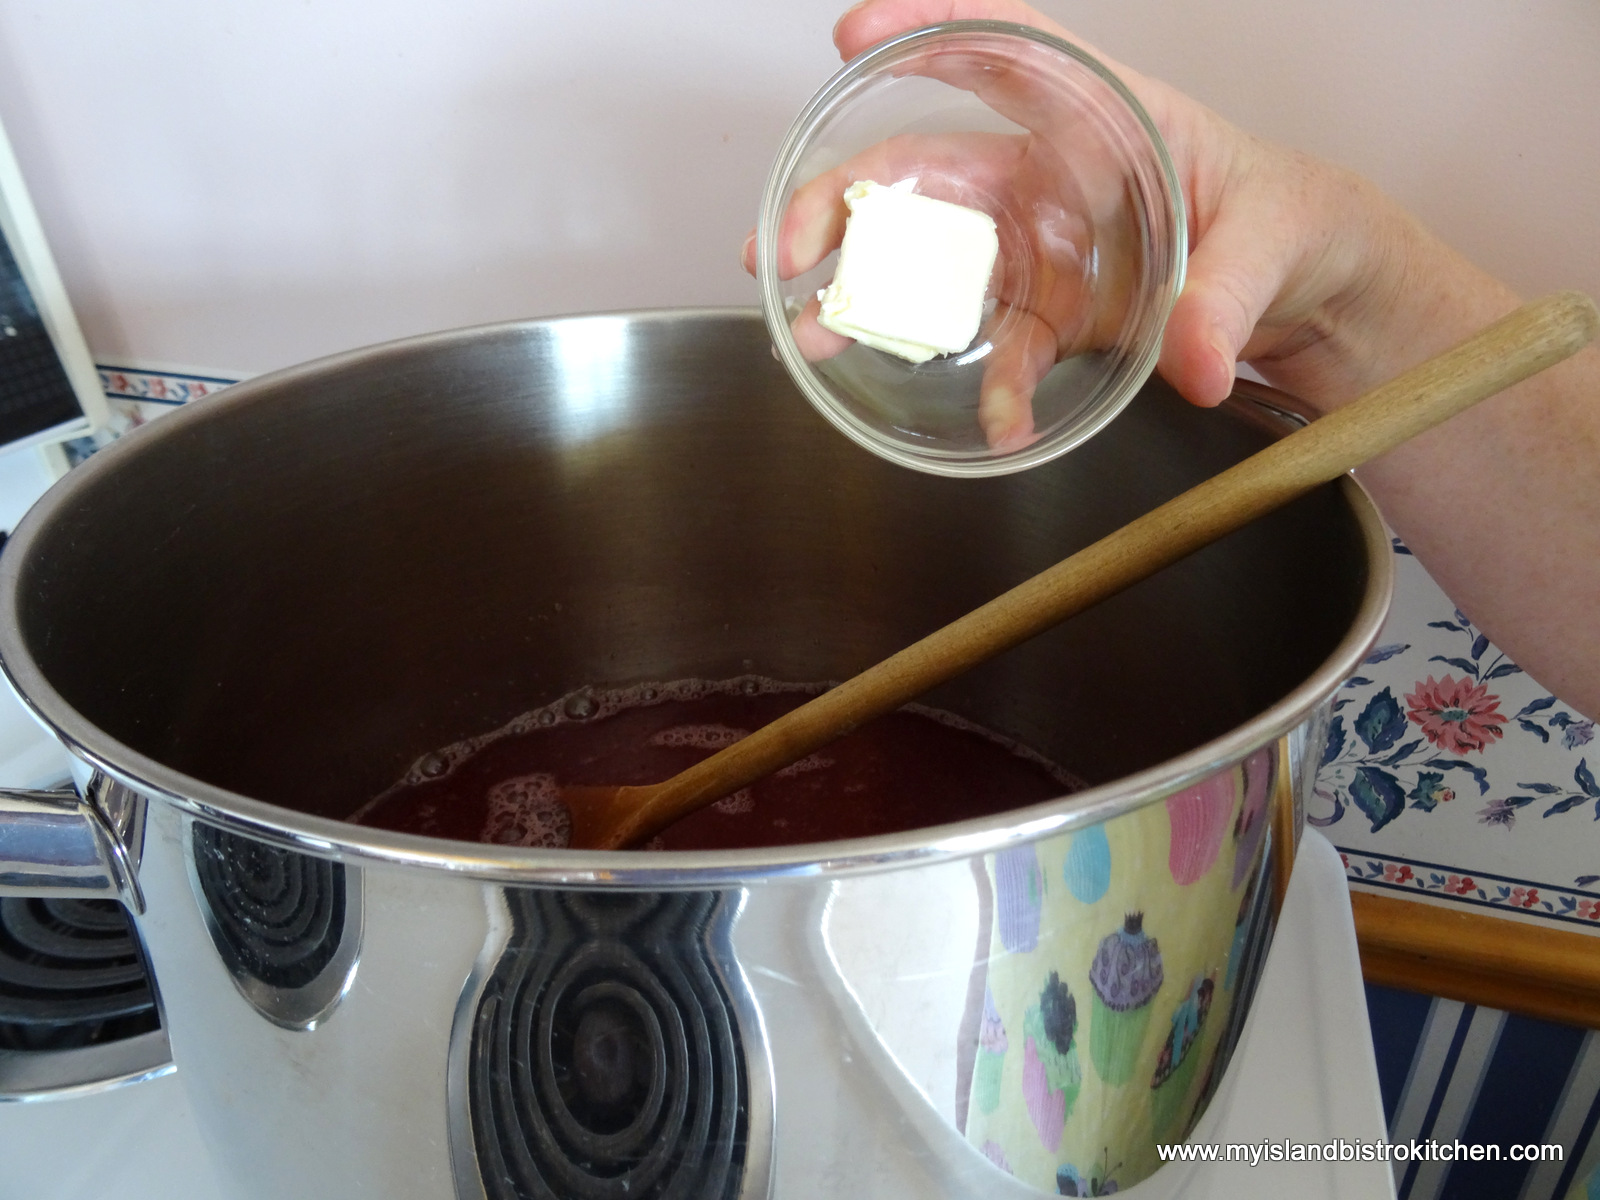
Add 1 teaspoon of butter to reduce foaming (some is likely still to occur and will need to be skimmed off before bottling).
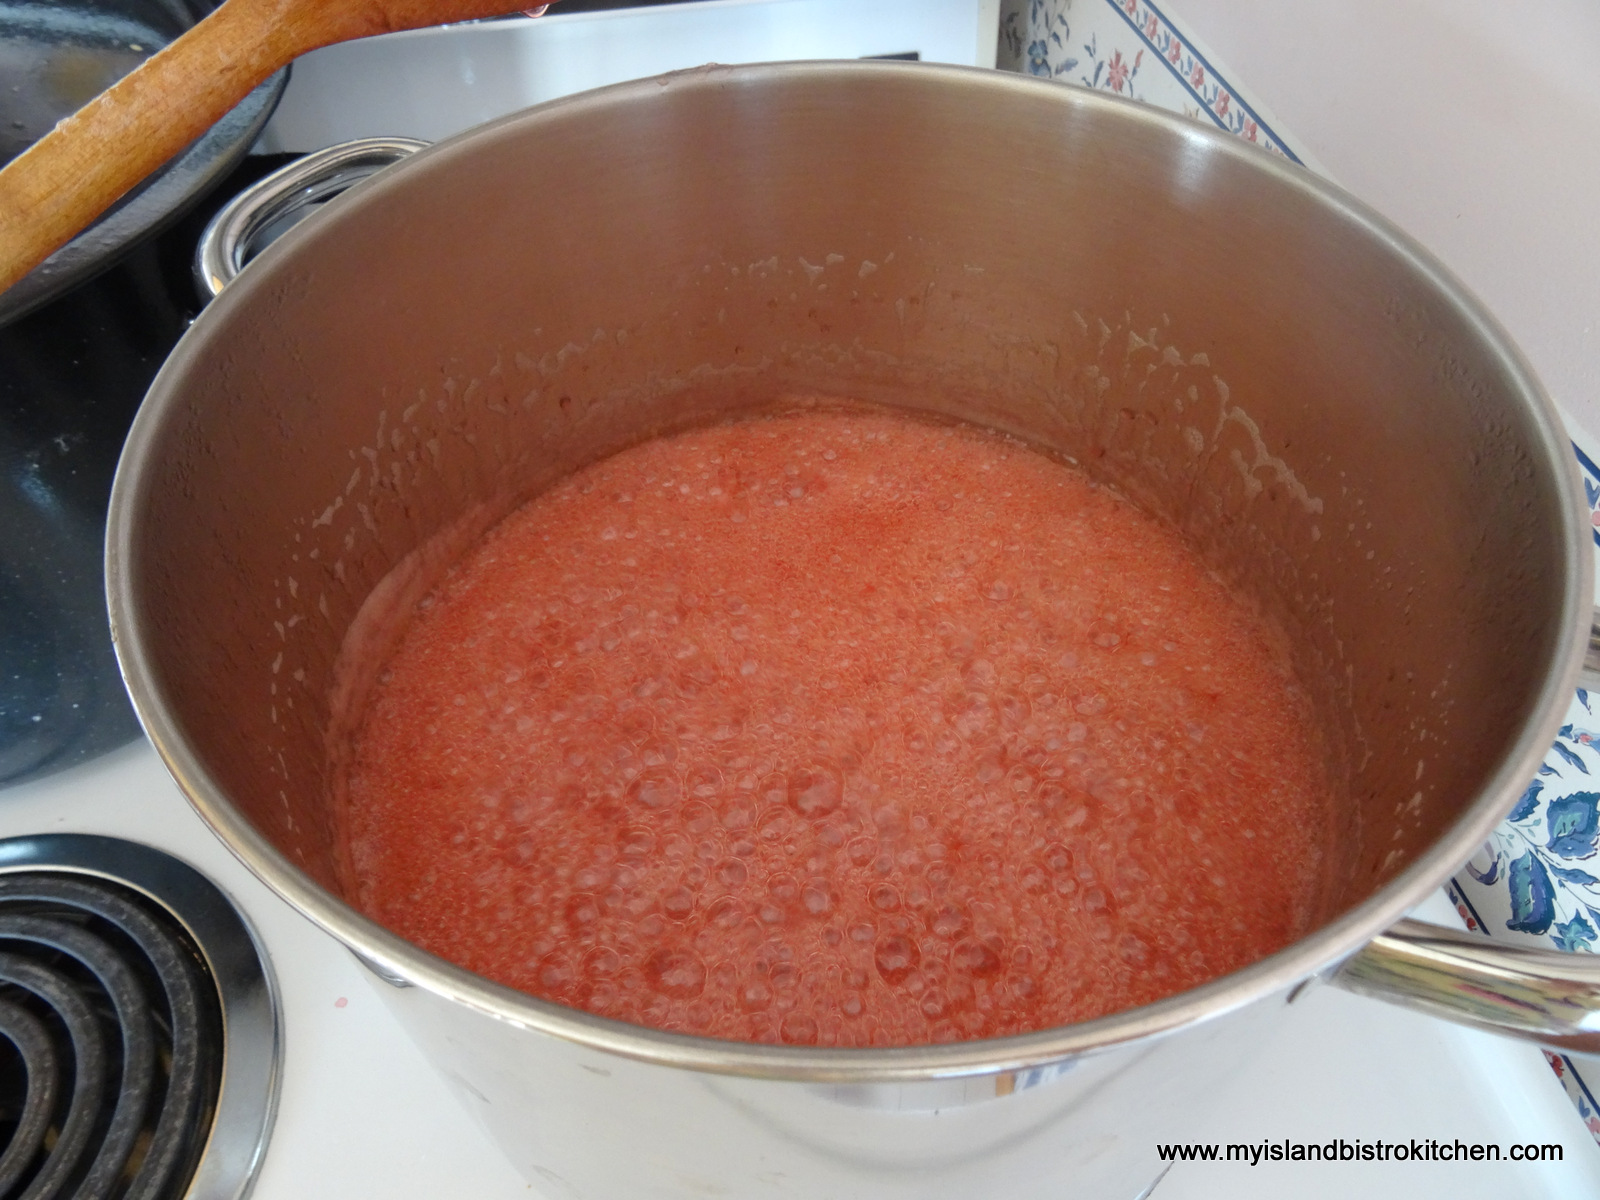
Bring mixture to a rolling boil over medium-high heat.
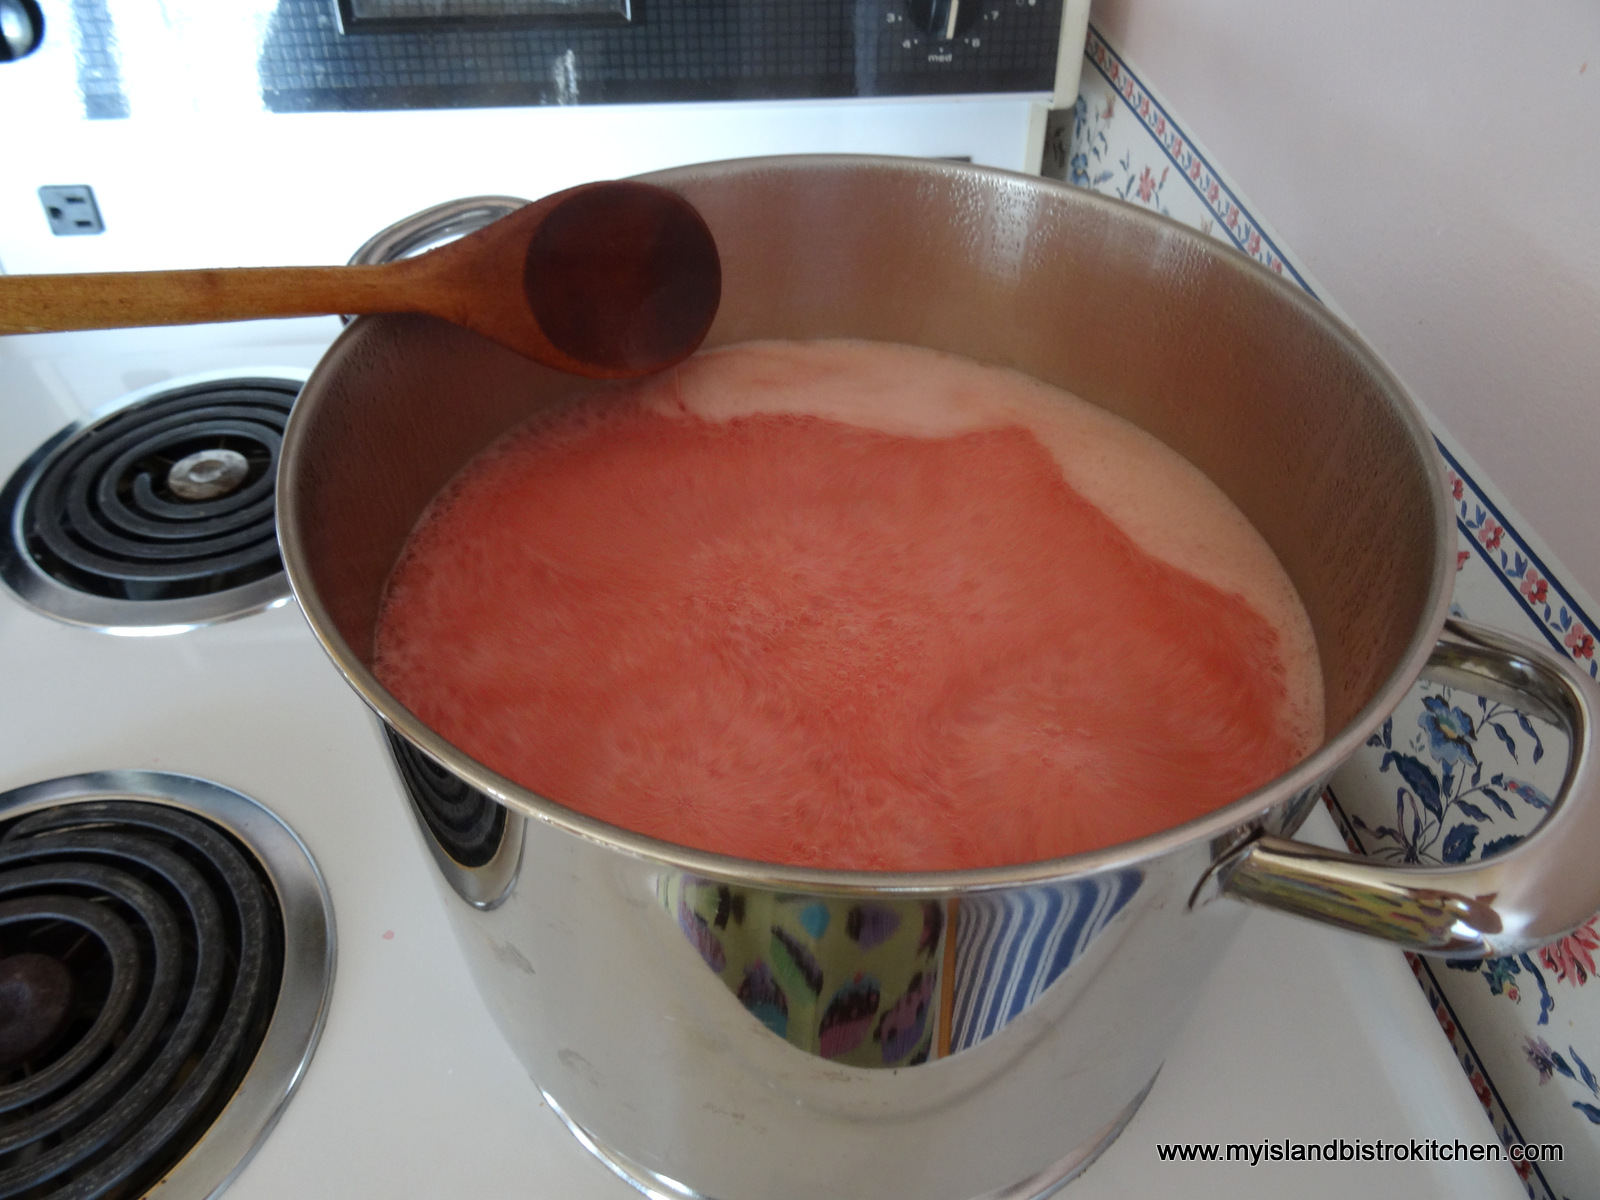
Continue to boil over medium high heat until mixture registers 220°F on a candy thermometer. Stir mixture occasionally as it boils.
If you don’t have a candy thermometer, or for further assurance that the jelly has reached the gel stage, remove one of the saucers from the freezer and place a couple of teaspoons of the jelly on it. Place the jelly in the freezer for one minute. Remove it from the freezer and push the jelly gently with a finger. If jelly wrinkles, it is done.
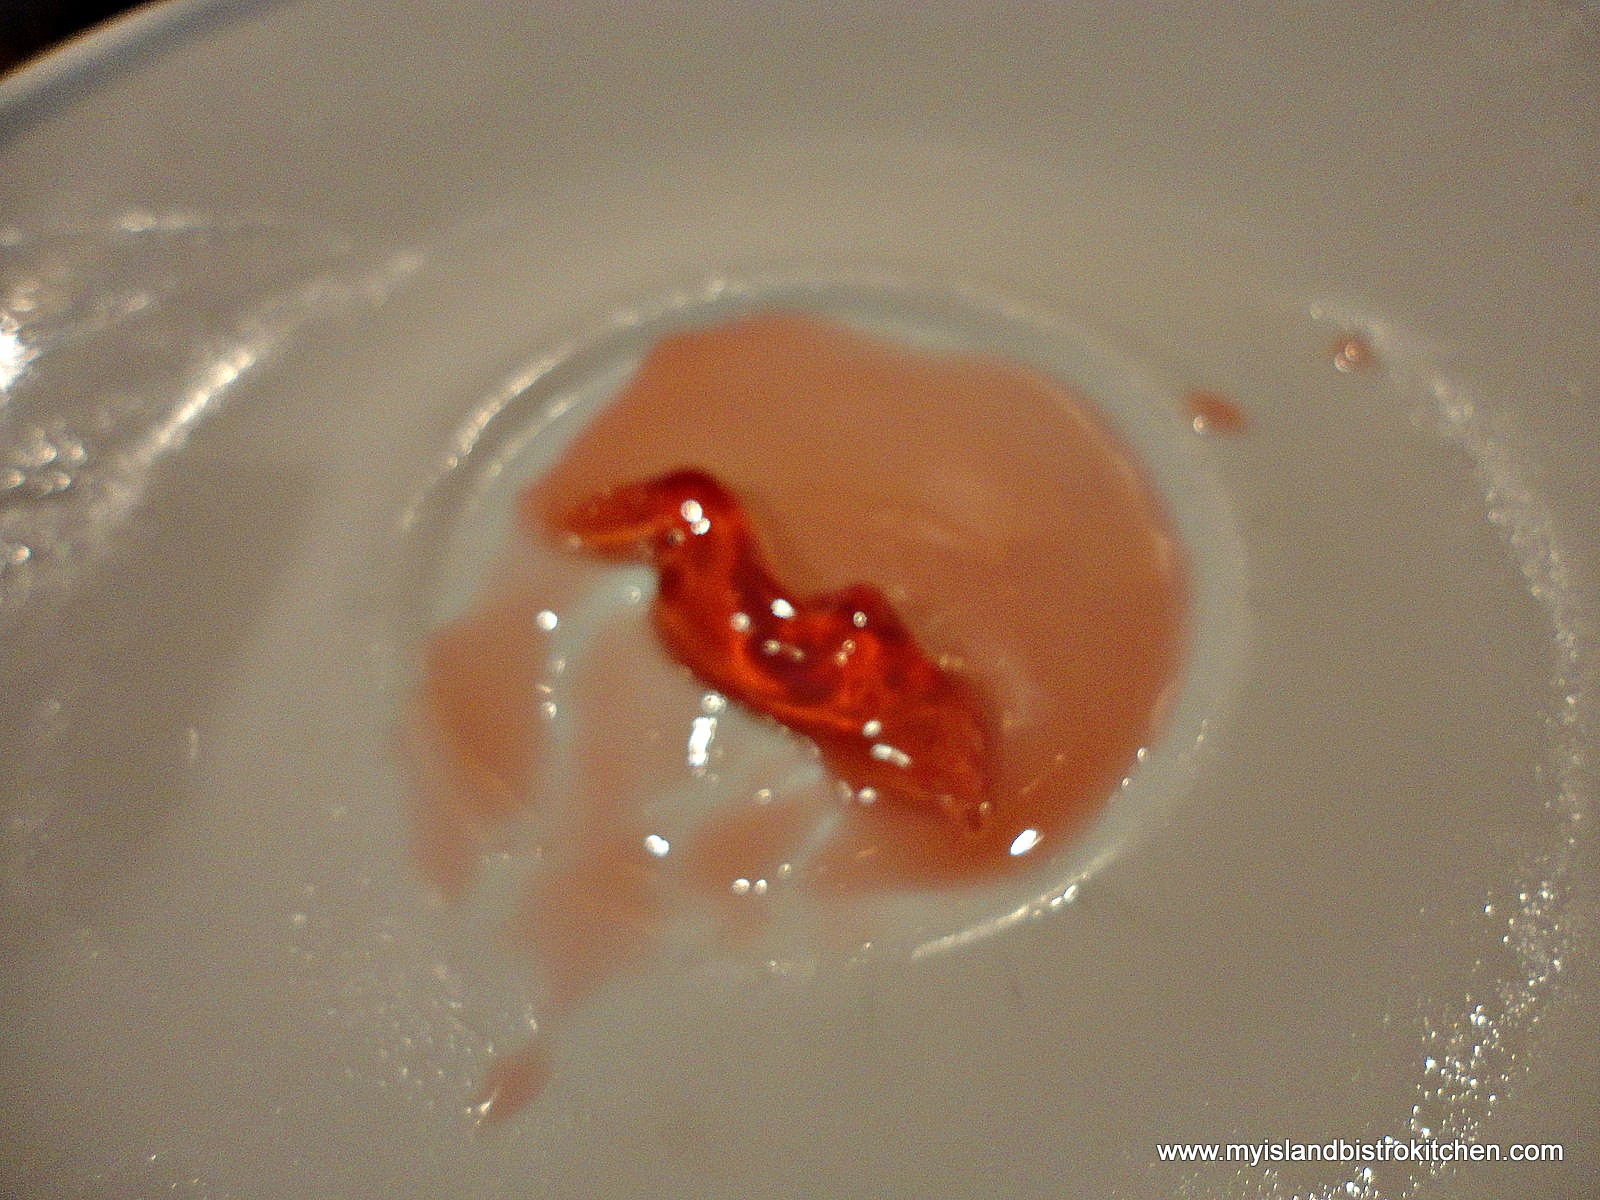
If it doesn’t wrinkle, keep cooking the jelly, conducting the wrinkle test every 4-5 minutes until it is done. Do not overcook. Remove jelly pot from heat while conducting gelling tests.
Skim off any foam that may still remain on top of the jelly.
Using jar lifter tongs, carefully remove the hot sterilized jars from the water, one at a time, emptying the water from the jars back into the pot. Drain jars well.
Remove a small amount of the hot water from the stockpot in which the jars were sterilized and place in a small saucepan over simmering heat. Place the lids in the hot water to soften the rubber sealing compound. Do not boil the lids.
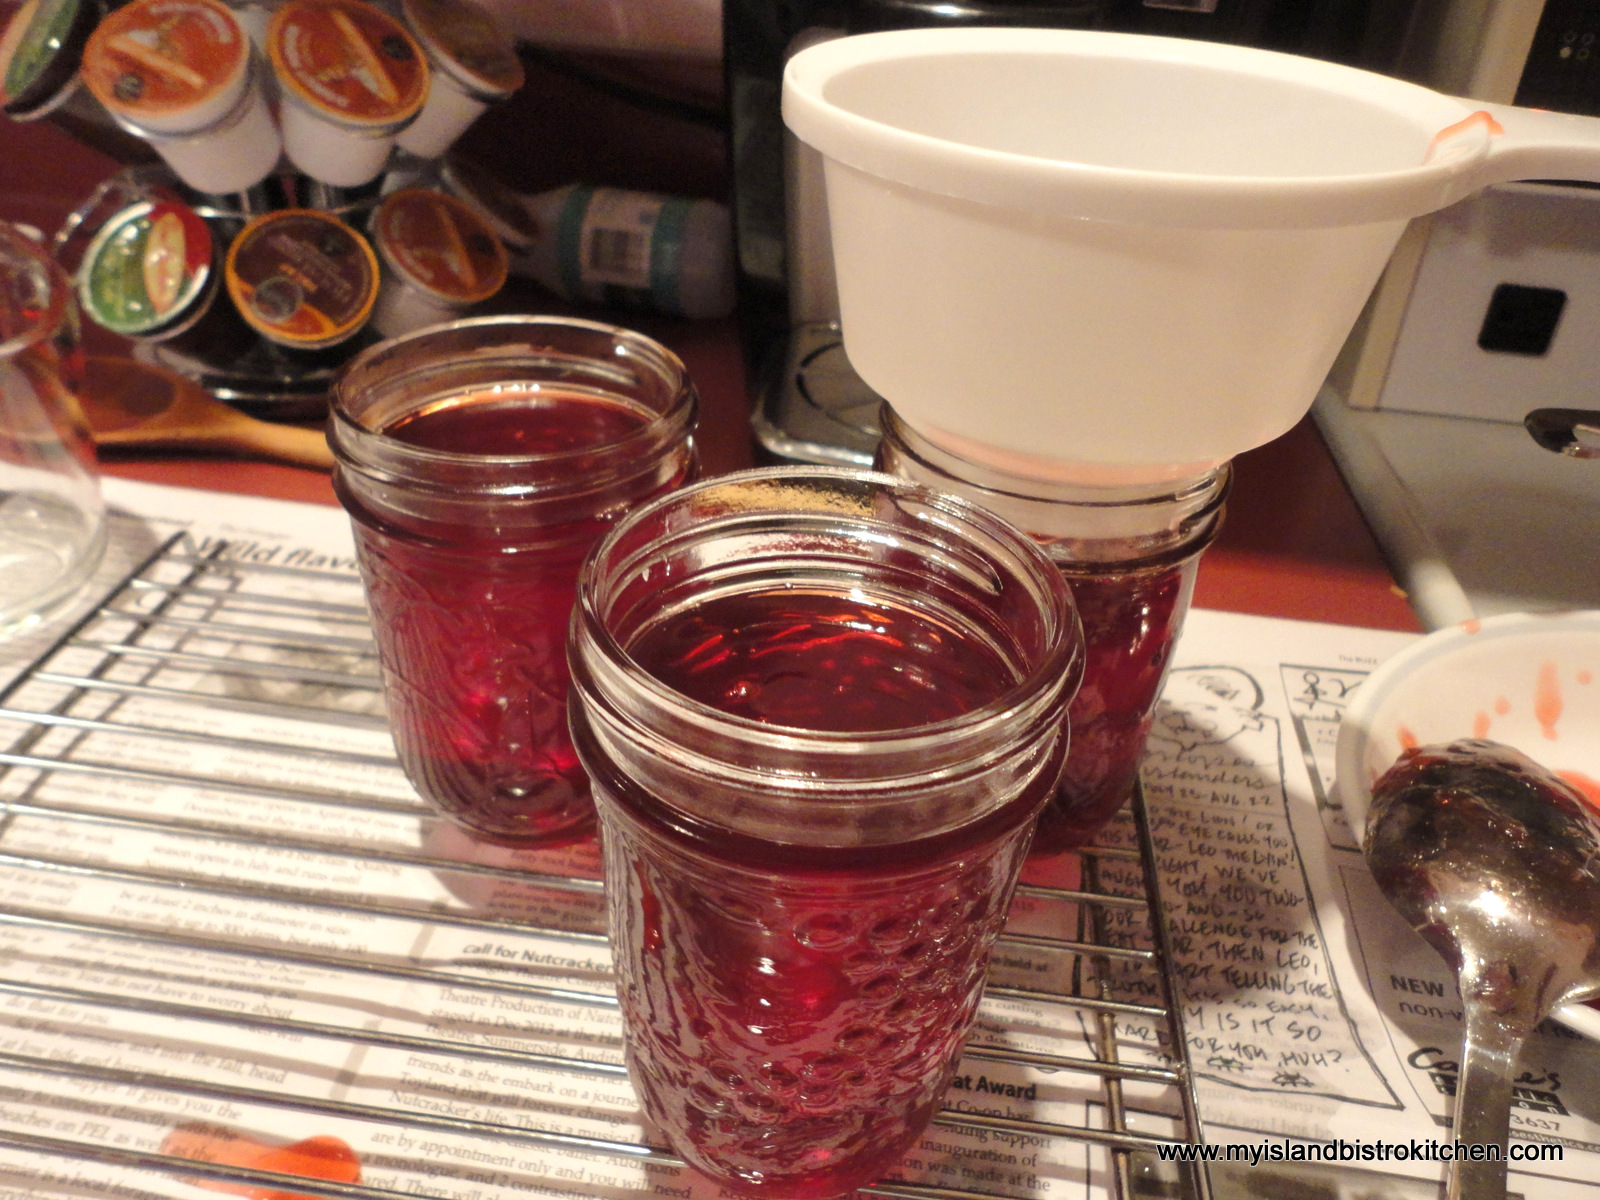
Using a ladle, or a heat-proof glass measuring cup, and a wide-mouthed canning funnel, pour jelly into the hot sterilized jars, leaving about ¼” headroom in each jar to allow for expansion during the hot water processing. Remove any trapped air bubbles in the jars with a chopstick or small heatproof, non-metallic spatula. Wipe the jar rims with a clean damp cloth to remove any sticky residue that could prevent the lids from sealing properly to the jars.
 Using a magnetic lid lifter, remove lids from the hot water and center the heated lids on jars so the sealing compound on the lid edges aligns with the jar rims. Fingertip tighten the ring/screw bands until resistance is encountered. Do not over-tighten.
Using jar lifter tongs, carefully place hot filled jars upright in wire basket positioned in the canner, ensuring jars do not touch each other or fall over. If needed, add the extra hot empty jar, upright, to the basket to fill up space so the filled jars do not topple over. Let the empty jar fill with water from the canner as it is submerged. Ensure the water level is at least 1″ above the tops of jars, adding more boiling water as necessary. Cover with canner lid. Return the water to a full rolling boil over high heat then decrease the heat to just keep the water at a moderately rolling boil but not boiling over. Process half-pint jars (See Note below) in the hot water bath for 10 minutes, adjusting time as and if necessary for altitude. Start timing the processing from the point at which a full rolling boil is reached after jars have been added to the canner. At the end of the processing time, turn off heat and remove canner lid.
Let jars sit in the hot water for 5 minutes then, using jar lifter tongs, carefully remove the jars filled with jelly, upright and one at a time, and transfer them to a heat-proof cutting board, that has been covered with a towel to protect the board, to cool completely. Listen for the “pop” or “ping” sound as the bottles seal over the next few minutes or hours. The lids of properly sealed jars will curve downward. Cover jars with a towel to protect jelly from the light.
Let jars rest, undisturbed, on counter for 24 hours. Then, test each jar for proper sealing by lightly pressing down on the center of each jar lid. If the lid is already curved downward, and does not pop back up to a light touch, it is properly sealed. Any jars that do not pass this test should be refrigerated and the jelly used within a week or so. Store properly sealed jelly bottles in cool, dark, dry place. Refrigerate jelly once jar has been opened.
Yield: Apx. 5½ – 6 cups
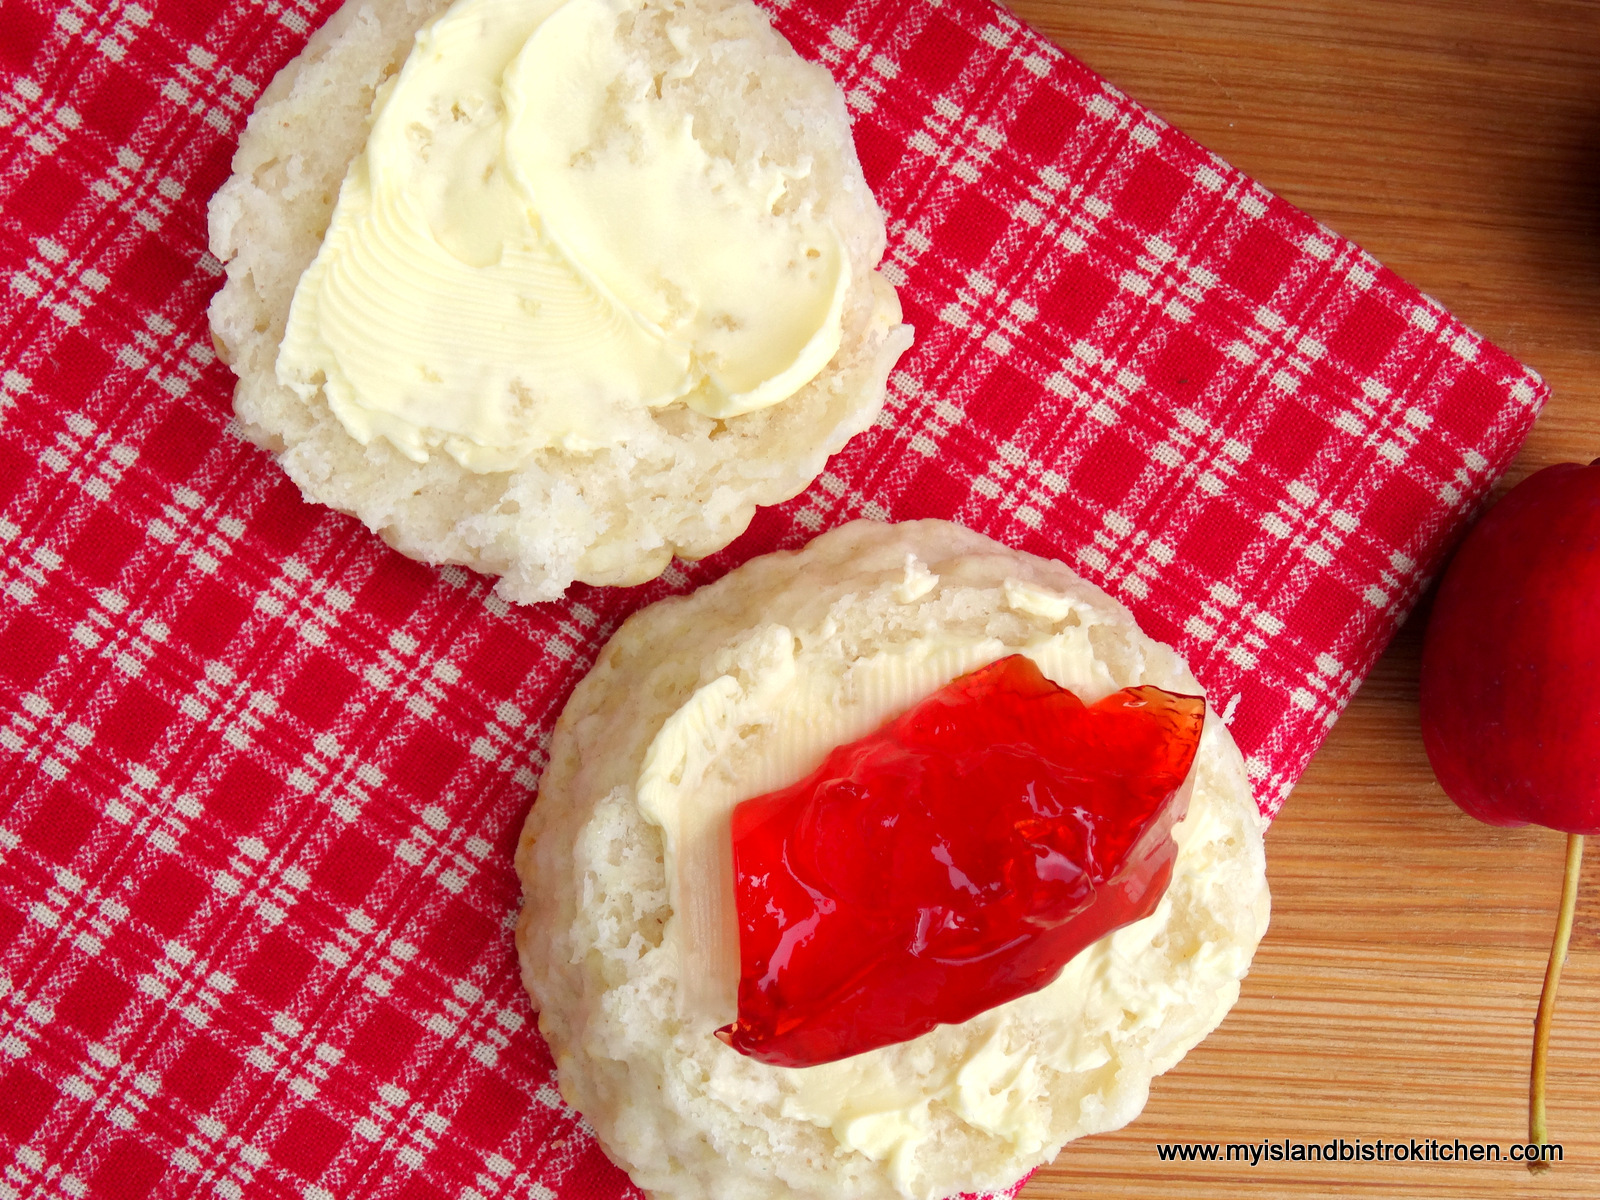
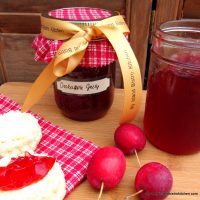
NOTE 1: It is difficult to give an exact amount of jelly this recipe will yield because so much depends on the quality and size of the crabapples as well as how much juice is actually extracted. I typically get between 5 1/2 – 6 cups of jelly from this recipe so recommend that six half-pint jars and one quarter-pint jar be sterilized and ready for bottling. The small ½-cup (quarter-pint) jar, if it is used, does not actually need the full 10 minutes of hot water canning. However, to remove it partway through, at the 5-minute point in the boiling process, would disturb the rolling boil and timing and thus interfere with the proper canning of the larger half-pint jars so, there are a couple of options. The first is to let the small jar remain in the hot water bath with the half-pint jars for the full 10-minute period. The second option is not to process the tiny jar in the hot water and to, instead, use it as the “tasting jar”, refrigerating and consuming the jelly within a couple of days. However, if the desire is to can the entire batch of jelly into the small ½-cup (quarter-pint) jars, then process the basket of them for 5 minutes, instead of 10. These tiny bottles make great gifts, especially if they are accompanied by fresh biscuits or scones!
Be sure to read through the printable version of the recipe several times before making the jelly to ensure understanding of the process and that all the necessary equipment is at hand.
Crabapple Jelly
Ingredients
- 4 lbs crabapples
- 7 cups water
- Granulated sugar (use 3/4 cup granulated sugar for each cup of extracted juice)
- 3-4 tbsp bottled lemon juice
- 1 tsp butter
Instructions
Wash and remove stem and blossom ends from apples. Leave apples whole. Place apples in large stock pot. Add the water, cover, and bring to a boil then reduce heat to low and simmer for approximately 40-45 minutes or until apples have softened and begun to break down into mush. Gently mash any large chunks of apple with a potato masher.
Use a ready-made jelly bag or, alternatively, place a double weight of dampened cheesecloth in a large colander (use triple weight if cheesecloth is very loose weave). Place the colander over a large clean pot or bowl. Pour the apple pulp into the jelly bag or cheesecloth-lined colander. Let mixture drip for about 20 minutes or so to get some of the initial juice out of the pulp. Gather up end of jelly bag or, alternatively, the ends of the cheesecloth and tie tightly with an all-purpose kitchen twine, making a loop by which to hang the jelly bag to allow the juice to drip out.
The jelly bag with the apple pulp will be heavy so, if you don't have a jelly bag and stand unit, something strong from which to suspend the jelly bag to drip will be needed. A suggestion would be to hang the jelly bag on a broom handle and support the broom between two chairs. Place a large pot or bowl under the jelly bag to catch the juice as it drips. Allow the apple pulp to drip on its own for several hours (i.e., at least 3-4 hours) or overnight, until no more juice is seen dripping through. Resist the urge to squeeze the jelly bag to hasten the juice flow, or extract more juice, as this can cause some of the apple pulp to escape the bag resulting in a cloudy juice and jelly.
When it is determined the juice has fully been extracted, prepare the jars by washing them in hot soapy water. Rinse. Fill a large pot with hot tap water, about ¾ full. Place 7 half-pint jars and 1 quarter pint jar, upright, into the water. Ensure the jars are fully submerged, each jar filled with water, and that the water is at least an inch over the tops of the tallest jars. Cover, bring to a boil, and gently boil jars for 10 minutes. Turn off heat and leave the jars in the hot water to have ready to fill once the jelly finishes cooking.
If you don't have a candy thermometer, or for extra certainty of determining gel status of jelly, place 2-3 freezer-safe saucers in the freezer. These will be used to conduct the "wrinkle test" for jelly “gel” status.
When jelly bag is done dripping, discard apple pulp in jelly bag. To determine the amount of sugar needed, measure out the extracted juice and, for each cup of juice, measure out ¾ cup of granulated sugar. Pour juice into pot. Add the lemon juice and sugar to the extracted apple juice. Stir to dissolve sugar. Add 1 tsp butter to reduce foam accumulation. Over medium-high heat, bring mixture to a rolling boil and continue to boil, uncovered, at this temperature until mixture reaches 220°F on a candy thermometer. Stir mixture occasionally as it boils.
As soon as the jelly is on the stove, fill the canner about one-third to one-half full of hot tap water. Cover and bring water to a boil to have it ready for processing of the filled jars. As the jelly is just about done, it’s a good idea to boil a kettle of extra water to have ready, if needed, to top up the canner water after filled jars are added.
For extra assurance of gelling, remove jelly pot from the heat and remove one of the saucers from the freezer and place a couple of teaspoons of the jelly on it. Place the saucer with the jelly on it in the freezer for one minute. Remove saucer with jelly from the freezer and push the jelly gently with a finger. If the jelly wrinkles, it is done. If it doesn’t wrinkle, keep cooking the jelly, and conducting the wrinkle test every 4-5 minutes until it is done. Do not overcook. Remove jelly stockpot from the heat while conducting the tests.
When jelly has reached the gelling stage, skim off any foam that may still remain on top of the jelly.
Use jar lifter tongs to carefully remove the hot sterilized jars from the water, one at a time, emptying the water from the jars back into the pot. Drain jars well.
Remove a small amount of the hot water from the stockpot in which the jars were sterilized and place in small saucepan over simmering heat. Place the lids in the hot water to soften the rubber sealing compound. Do not boil the lids.
Using a ladle, or a heat-proof glass measuring cup, and a wide-mouthed canning funnel, pour jelly into the hot sterilized jars, leaving about ¼” headroom in each jar to allow for expansion during the hot water processing. Remove any trapped air bubbles in the jars with a chopstick or small heatproof, non-metallic spatula. Wipe the jar rims with a clean damp cloth to remove any sticky residue that could prevent the lids from sealing properly to the jars.
Using a magnetic lid lifter, remove lids from the hot water and center the heated lids on jars so the sealing compound on the lid edges aligns with the jar rims. Fingertip tighten the ring/screw bands until resistance is encountered. Do not over-tighten.
Using jar lifter tongs, carefully place hot filled jars upright in wire basket positioned in the canner, ensuring jars do not touch each other or fall over. If needed, add the extra hot empty jar, upright, to the basket to fill up space so the filled jars do not topple over. Let the empty jar fill with water from the canner as it is submerged. Ensure the water level is at least 1” above the tops of jars, adding more boiling water as necessary. Cover with canner lid. Return the water to a full rolling boil over high heat then decrease the heat to just keep the water at a moderately rolling boil but not boiling over. Process half-pint jars (*See Note below) in the hot water bath for 10 minutes, adjusting time as and if necessary for altitude. Start timing the processing from the point at which a full rolling boil is reached after jars have been added to the canner. At the end of the processing time, turn off heat and remove canner lid.
Let jars sit in the hot water for 5 minutes then, using jar lifter tongs, carefully remove the jars filled with jelly, upright and one at a time, and transfer them to a heat-proof cutting board, that has been covered with a towel, to cool completely. Cover with towel to keep light off jelly. Listen for the “pop” or “ping” sound as the bottles seal over the next few minutes or hours. The lids of properly sealed jars will curve downward. Cover jars with a towel to keep light away from the jelly. Let jars rest, undisturbed, on counter for 24 hours. Then, test each jar for proper sealing by lightly pressing down on the center of each jar lid. If the lid is already pressed downward, and does not pop back up, it is properly sealed. Any jars that do not pass this test should be refrigerated and the jelly used within a week or so. Store properly sealed jelly bottles in cool, dark, dry place. Refrigerate jelly once jar has been opened.
Recipe Notes
Yield: Apx. 5½ - 6 cups
NOTE 1: It is difficult to give an exact amount of jelly this recipe will yield because so much depends on the quality and size of the crabapples as well as how much juice is actually extracted. I typically get between 5 1/2 to 6 cups of jelly from this recipe so recommend that six half-pint jars and one quarter-pint jar be sterilized and ready for bottling. The small ½-cup (quarter-pint) jar, if is needed, does not actually need the full 10 minutes of hot water canning. However, to remove it partway through, at the 5-minute point in the boiling process, would disturb the rolling boil and timing and thus interfere with the proper canning of the larger half-pint jars so, there are a couple of options. The first is to let the small jar remain in the hot water bath with the half-pint jars for the full 10-minute period. The second option is not to process the tiny jar in the hot water and to, instead, use it as the “tasting jar”, refrigerating and consuming the jelly within a couple of days. However, if the desire is to can the entire batch of jelly into the small ½-cup (quarter-pint) jars, then process the basket of them for 5 minutes, instead of 10. These tiny bottles make great gifts, especially if they are accompanied by fresh scones!
Copyright My Island Bistro Kitchen
For more great jam, jelly, and marmalade recipes from My Island Bistro Kitchen, click on the links below:
Peach Marmalade
Rhubarb Marmalade
Green Tomato Marmalade
Blueberry and Grand Marnier Jam
Gooseberry Jam
Zucchini Jam
Pumpkin Jam
Strawberry Rhubarb Freezer Jam
Cherry Jam
Raspberry Jam
Rosy Rhubarb Jelly
Strawberry-Rhubarb Jelly
Thank you for visiting “the Bistro” today. There are lots of ways to connect with “the Bistro” through social media:
Join My Island Bistro Kitchen on Facebook
Follow the Bistro’s tweets on twitter @PEIBistro
Find the Bistro on Pinterest at “Island Bistro Kitchen”
Follow along on Instagram at “peibistro”
Pin Me To Pinterest!
This post and recipe were last updated September 5, 2023.
