Green Tomato Chow

By now, most gardeners probably have tomatoes spilling out of their gardens.

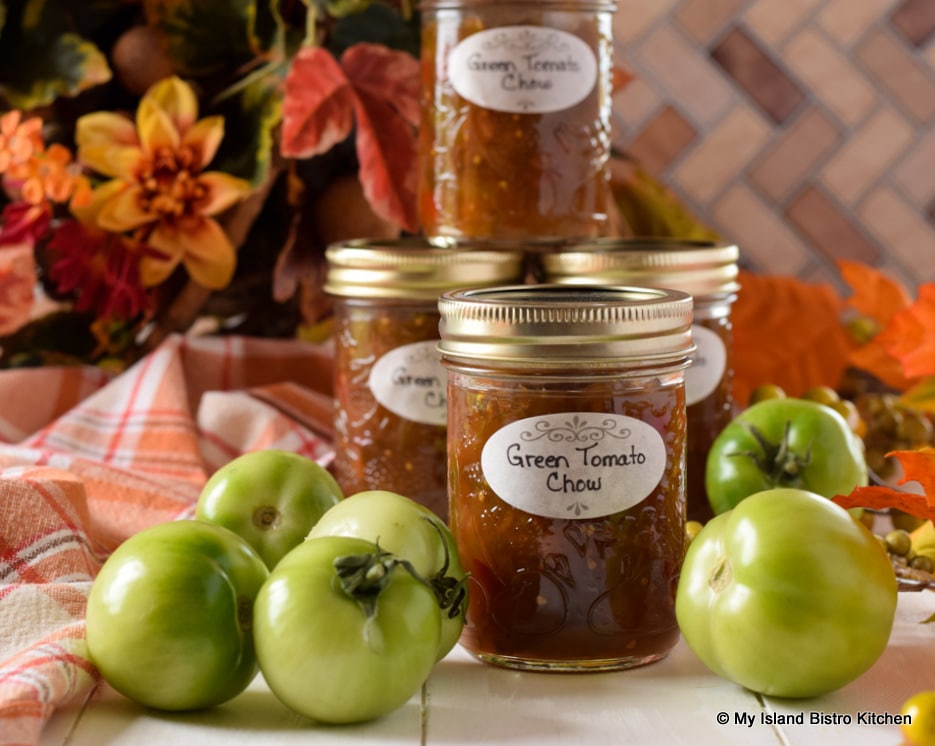
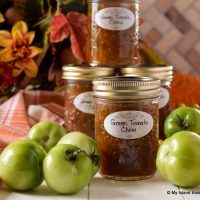
Do you have an abundance of green tomatoes you’re wondering what to do with?  Today, I am sharing my recipe for Green Tomato Chow (recipe follows at end of posting), a tasty condiment that makes good use of green tomatoes.

Bottles of Green Tomato Chow Surrounded by Green Tomatoes
Green Tomato Chow
Green Tomato Chow


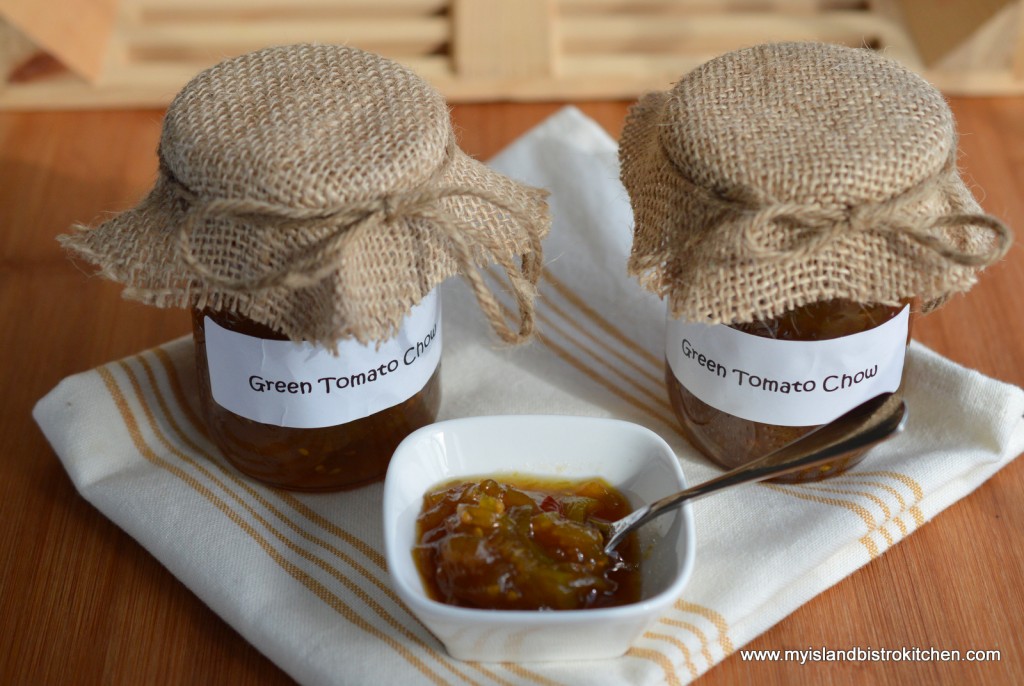
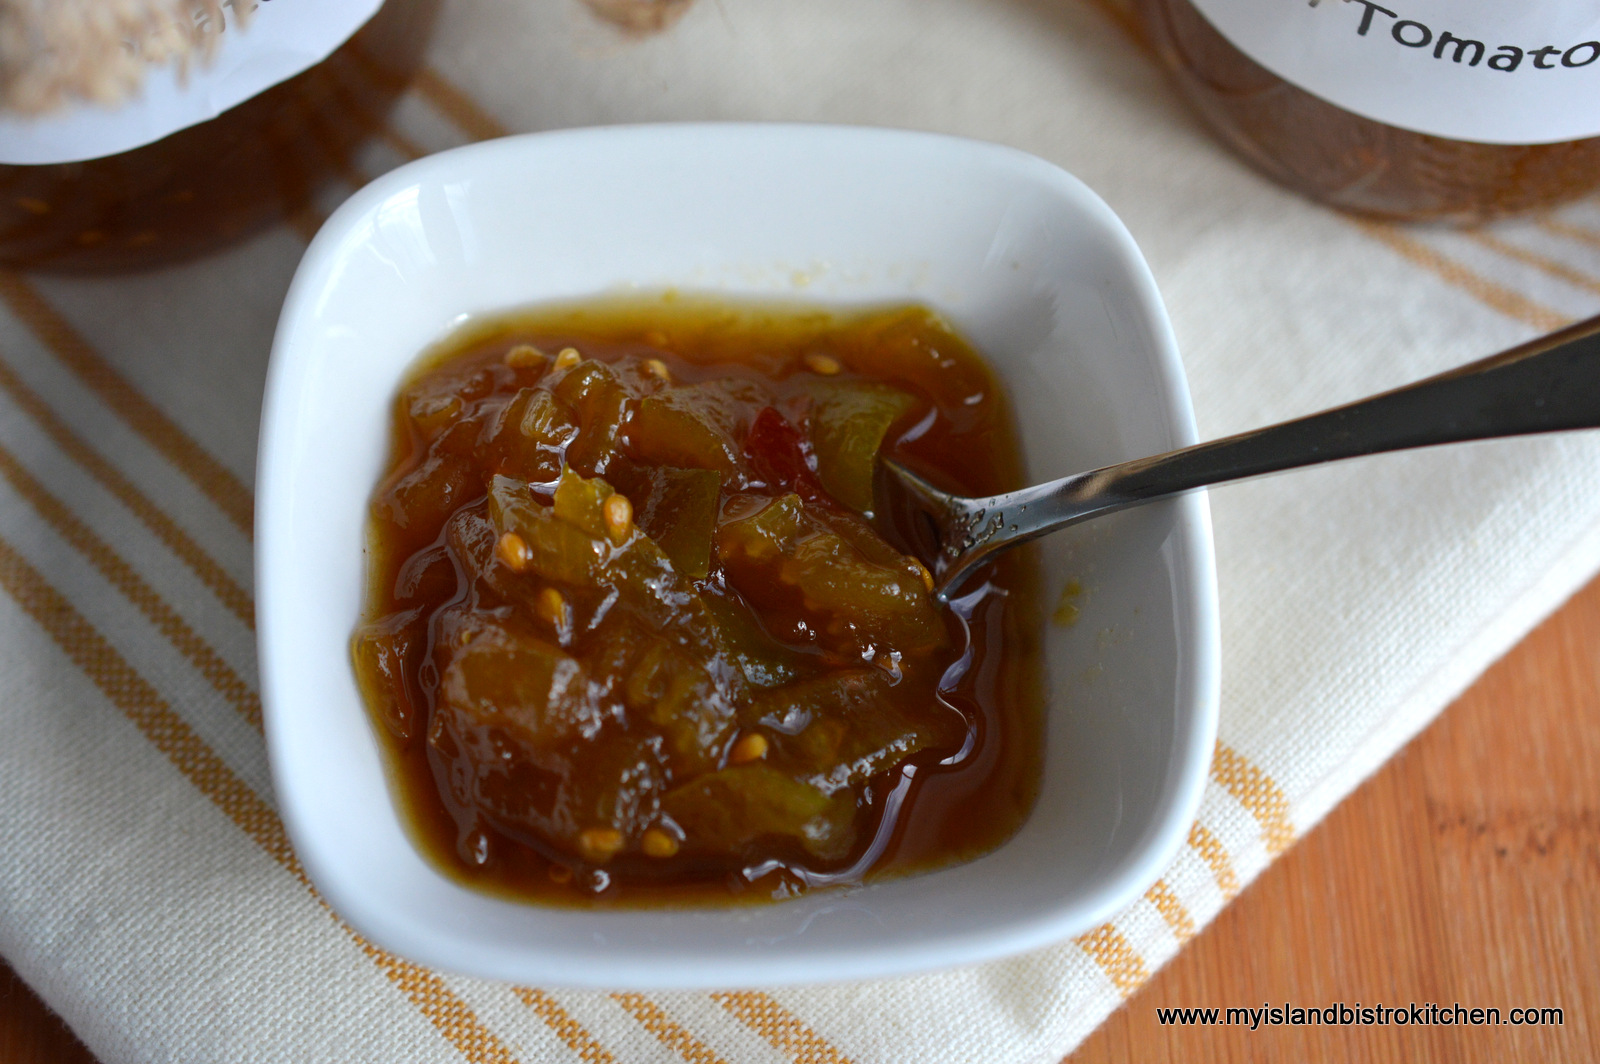
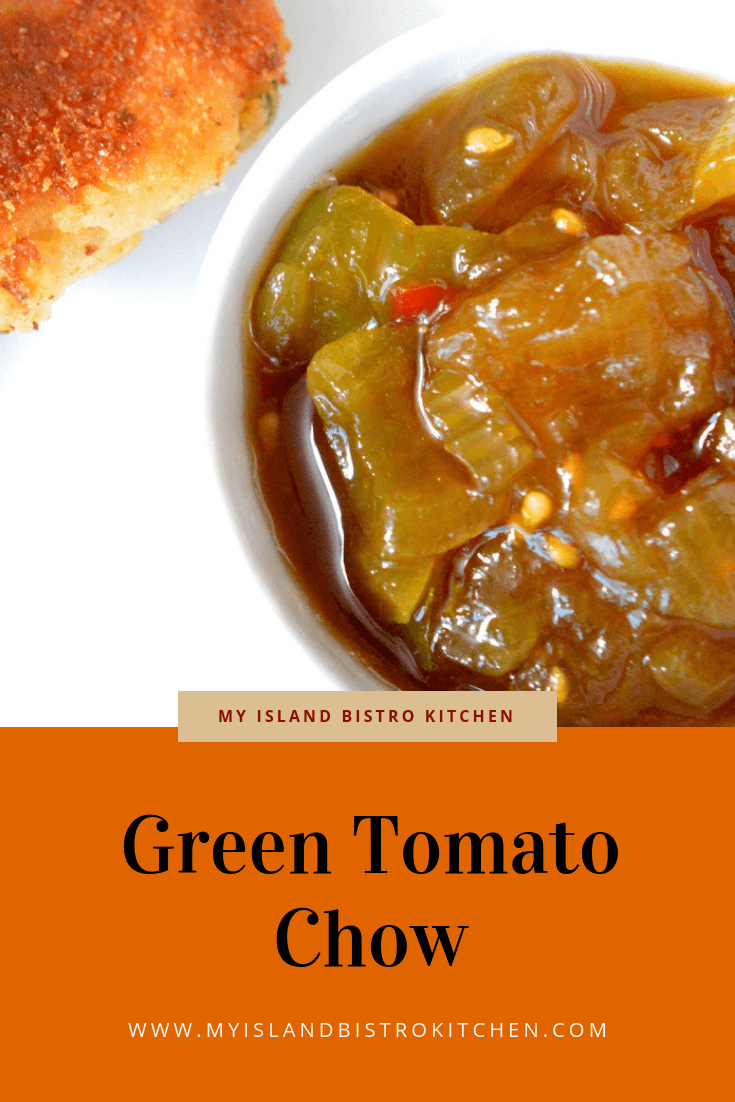
I grew up with chow being made every fall. It’s a great condiment to serve with cold meats, baked beans, stews, casseroles, chicken and meat pies, hot chicken/beef/turkey dinners, and, of course, if you are a Maritimer, with fish cakes.

Green Tomato Chow with Fish Cakes, Baked Beans, and a Homemade Biscuit

Chow is not difficult to make but, like any pickling and preserving, it can be a bit time-consuming since the vegetables have to be cut up and soaked for several hours (either all day or all night), then slowly simmered until cooked.  Making chow is not something that can be rushed.

Green Tomato Chow
Green Tomato Chow

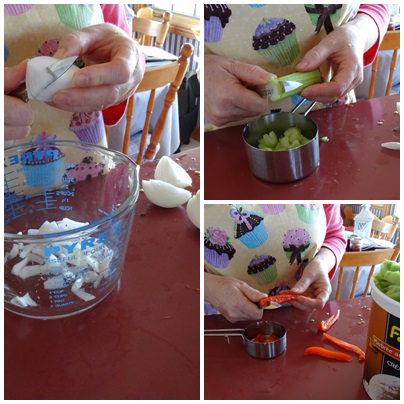
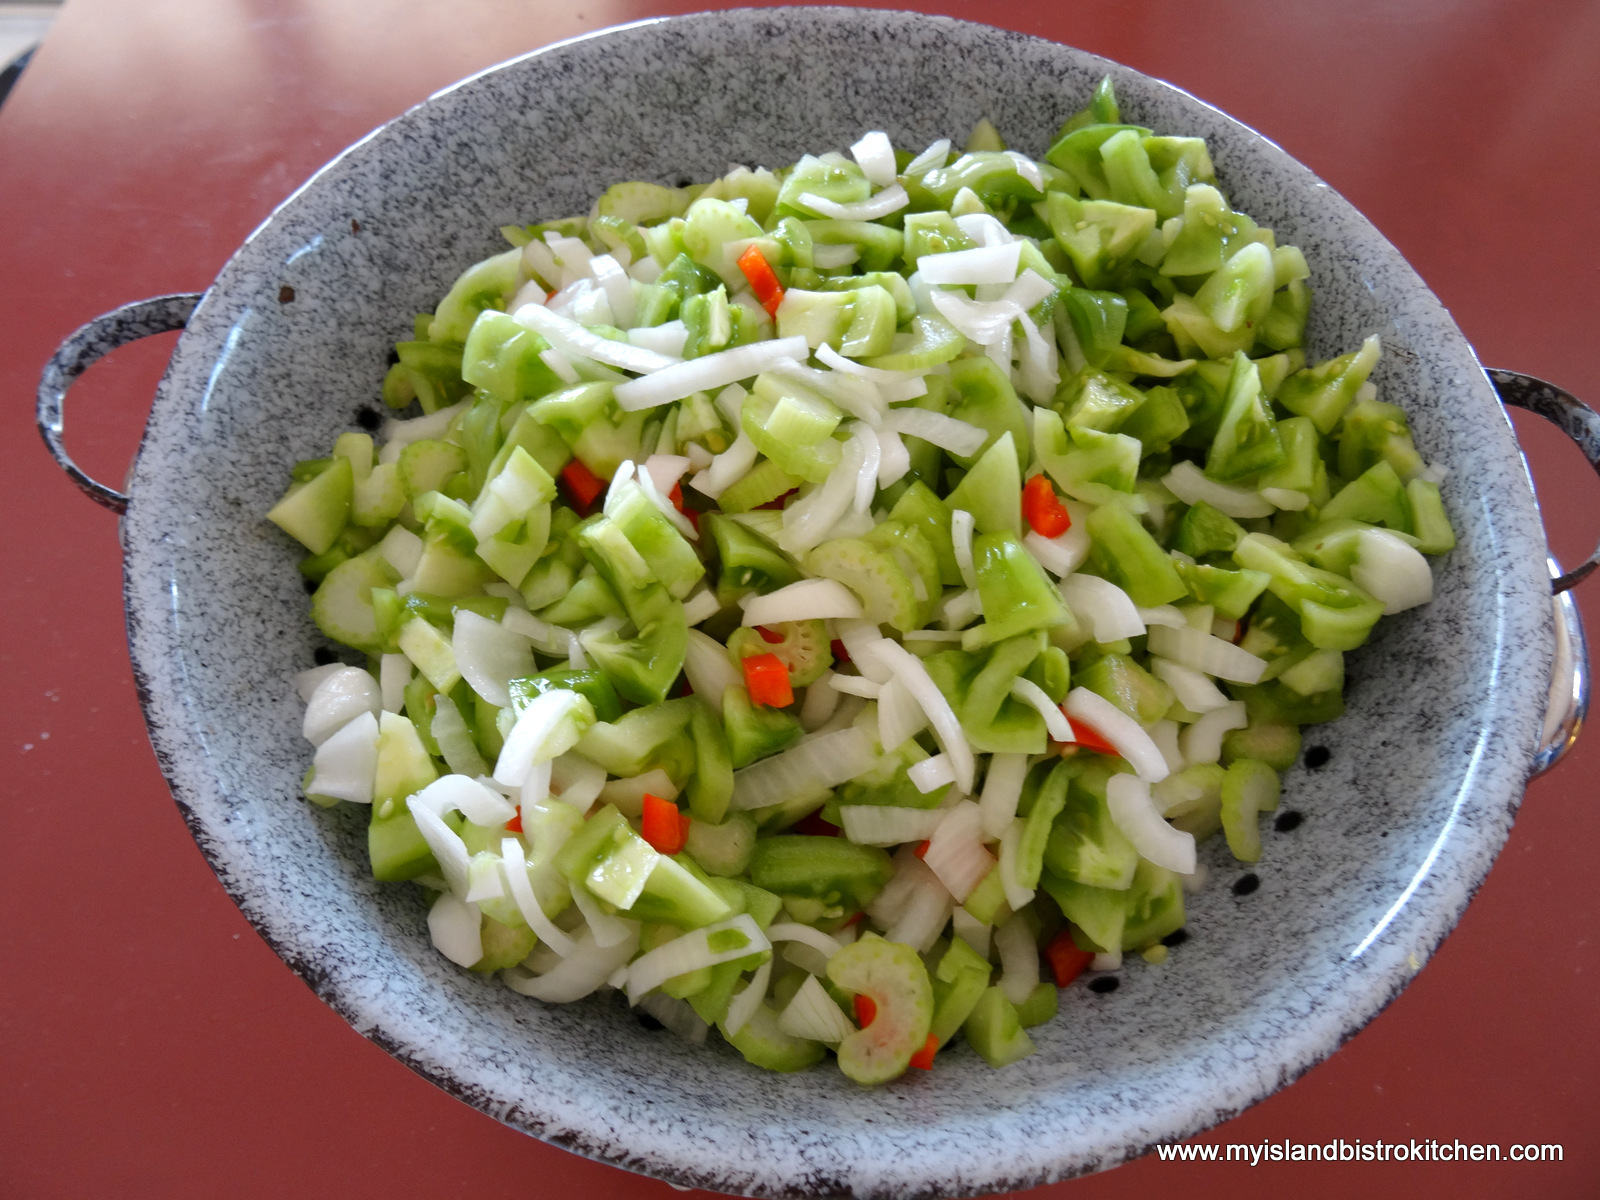
The first thing you need to do is gather up all the ingredients and equipment you will need. Chow is basically nothing more than green tomatoes, onions, celery, red pepper, vinegar, sugar, and spices along with some pickling salt.  No out of the ordinary ingredients. A list of equipment and utensils needed to make the chow can be found further down in this post.

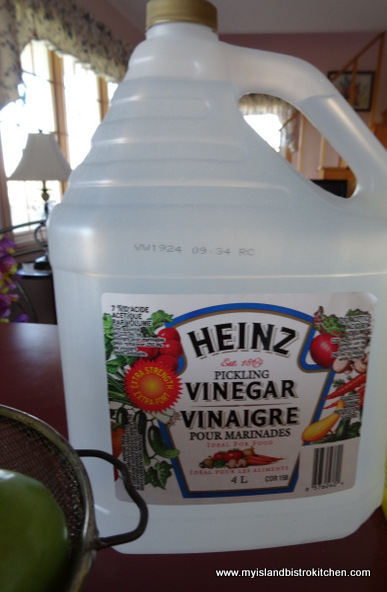
You can use regular white vinegar for this recipe but I recommend using the pickling vinegar which is stronger.

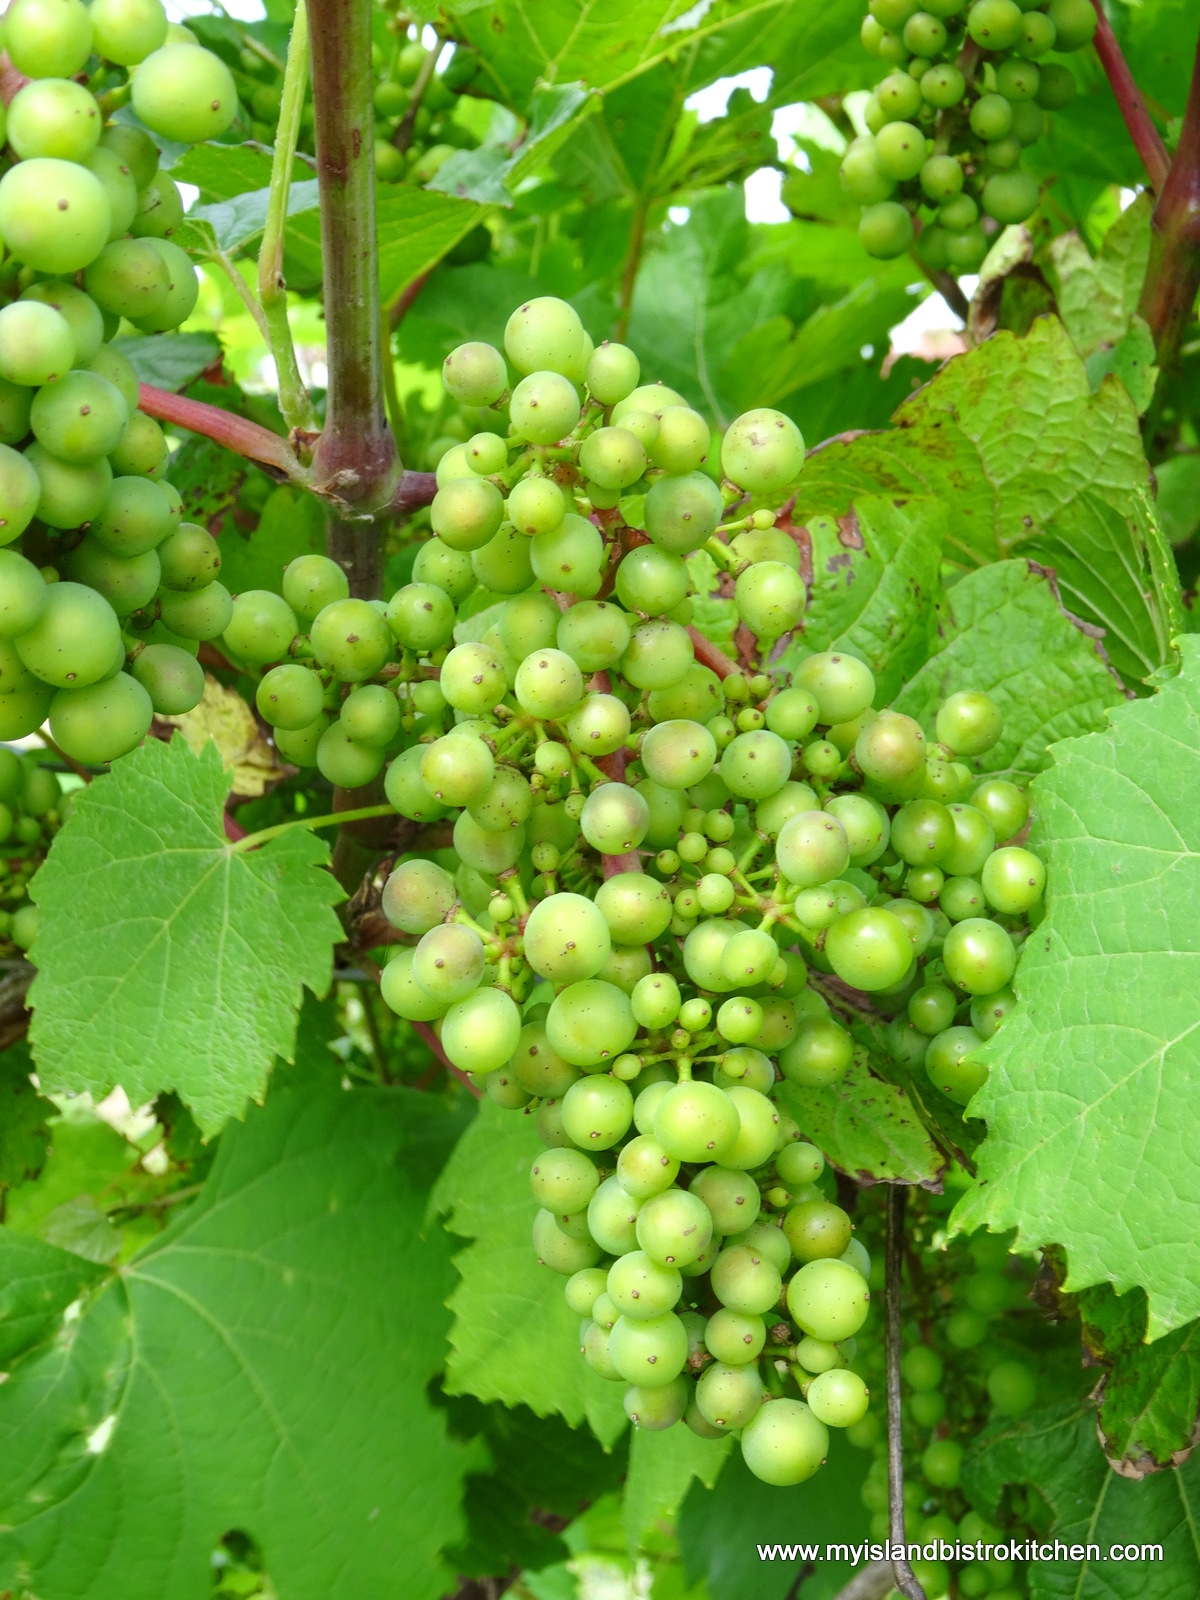
Any kind of green tomatoes will make good chow. The ones I’ve used are just the basic garden variety of tomatoes.  It’s usually a case of whatever green tomatoes are available in the garden!

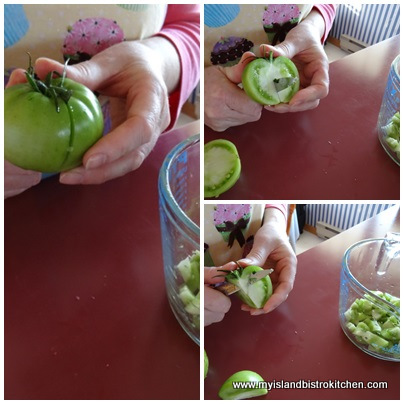
Some cooks cut the tomatoes crosswise into slices.  I cut mine into chunks. Either works.  You don’t, however, want to chop the vegetables up too finely as it will start to resemble more of a relish than a chow.

Cut up the onions, celery, and red pepper.

Place all the vegetables into a large bowl.

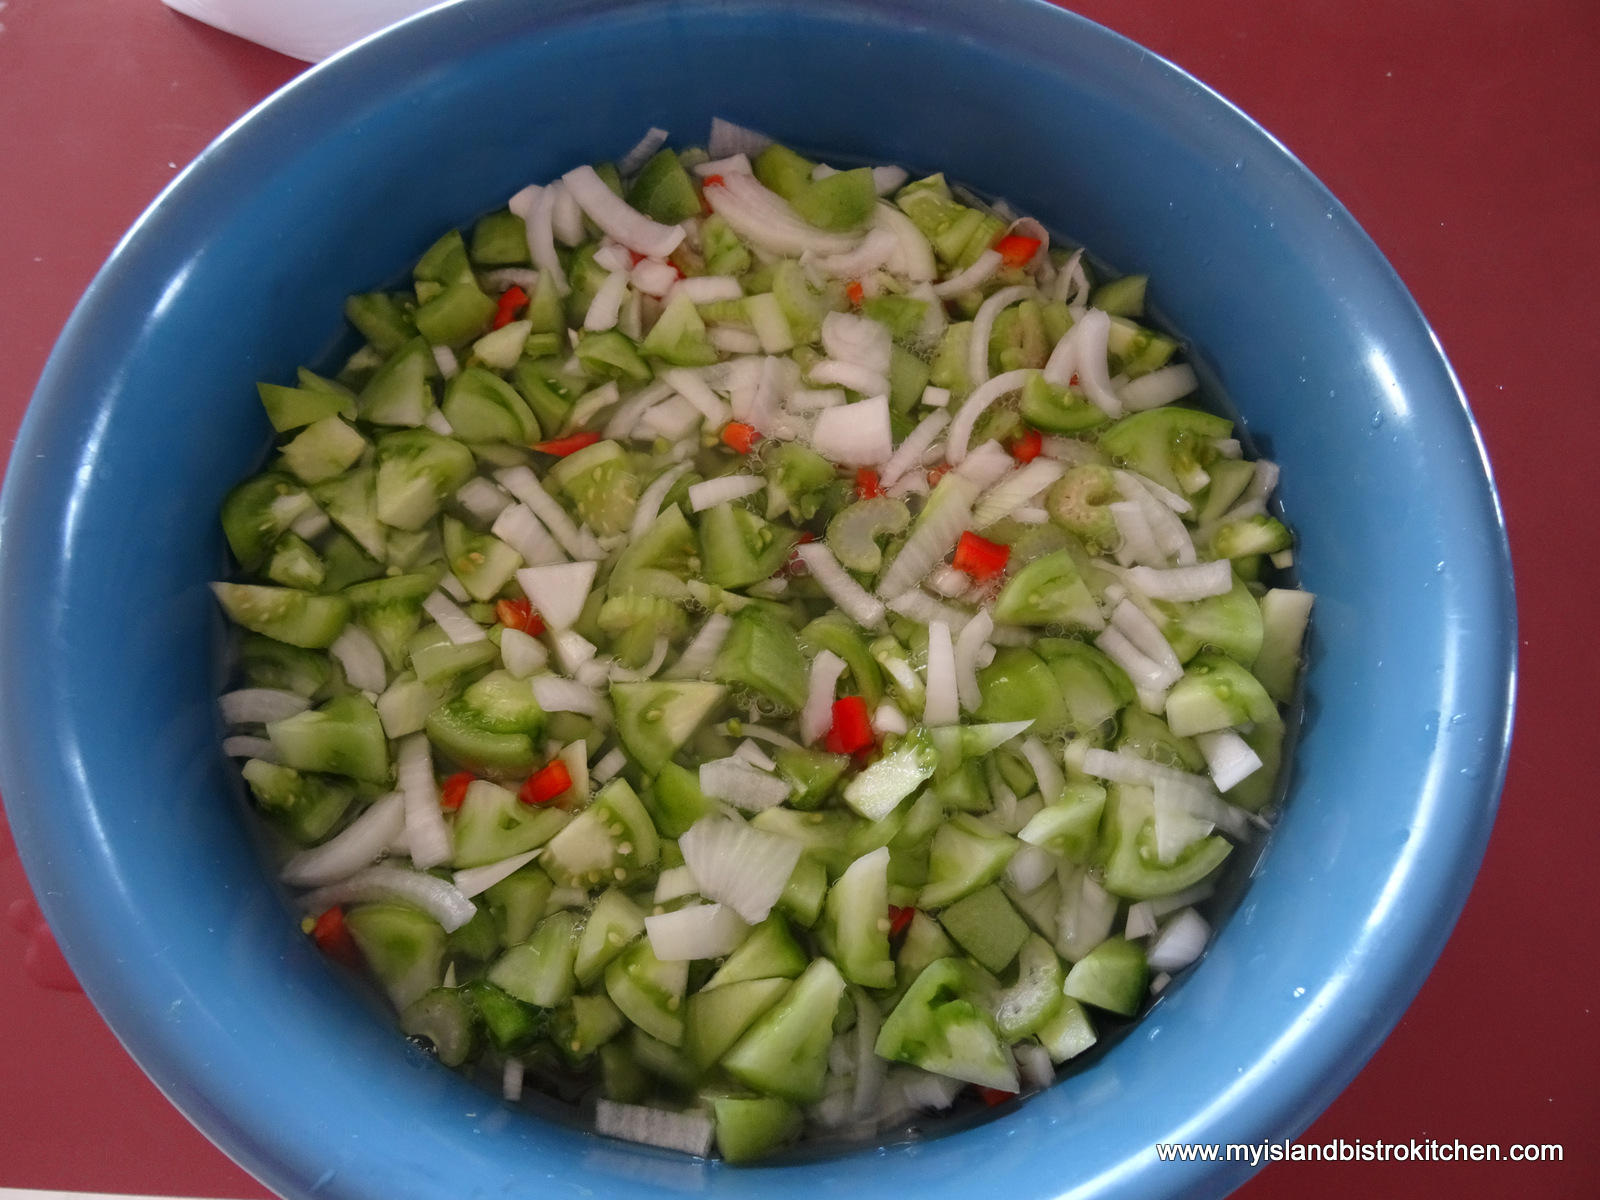
The vegetables need to be soaked for 7-8 hours in a salt brine.  Be sure to use pickling salt, not regular table salt (see my posting on mustard pickles for explanation).  It’s important to ensure that the salt is completely dissolved in water before pouring it over the vegetables.  You will need enough salted cold water to completely cover the vegetables to soak.  I use a ratio of 1/2 cup pickling salt to 4 cups of water.

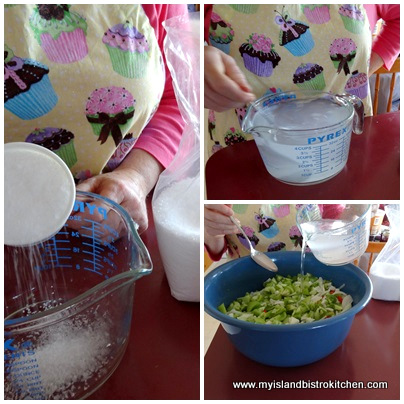
Pour the salt brine over the vegetables and set the mixture aside to soak for 7 – 8 hours.

Drain the vegetables into a large colander.

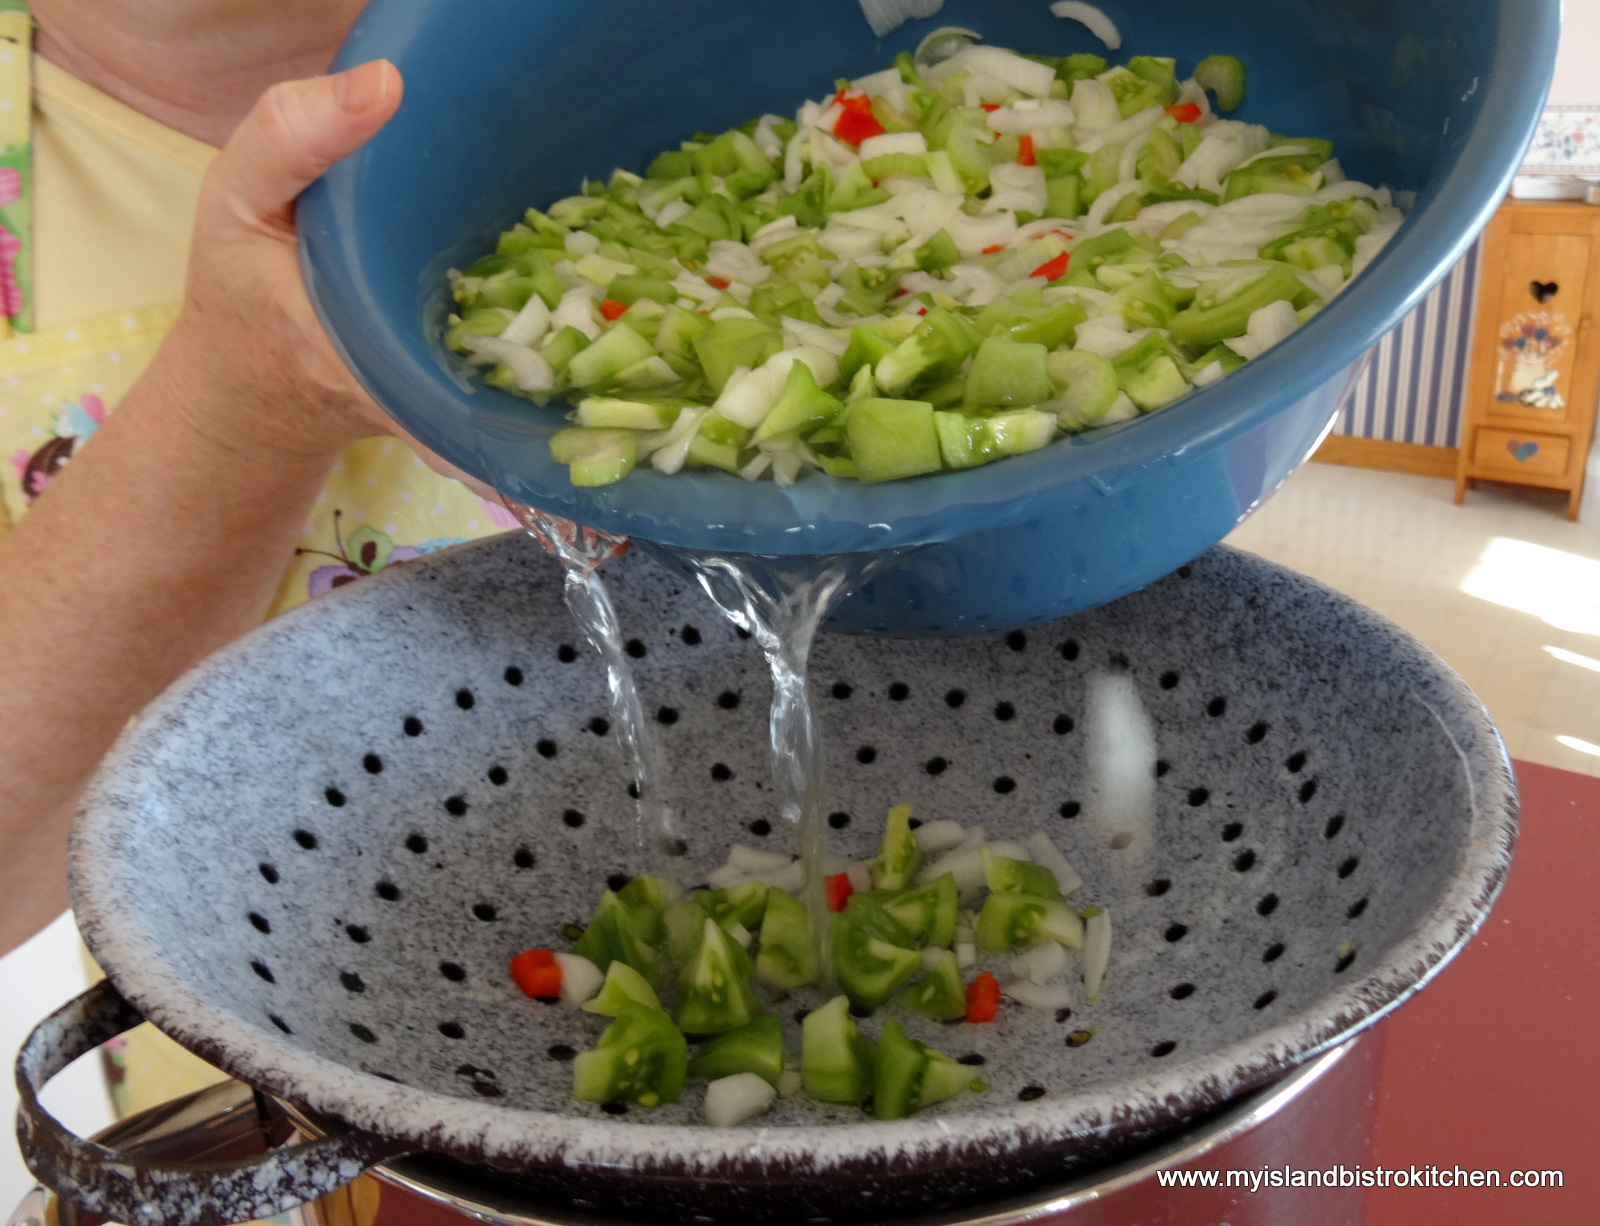
Under cold running water, quickly rinse the vegetables to remove any salt residue.  Swish the vegetables around to ensure that all are rinsed off.

You’ll want to get as much water drained out of the vegetables as possible so let them sit in the colander for 1 to 1 1/2 hours. You may want to carefully stir the vegetables around in the colander periodically during this period to ensure better drainage.

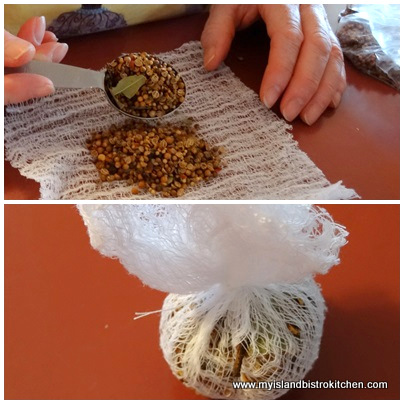
Meanwhile, prepare the spice sachet.  I make a small cheesecloth sachet by doubling, or even folding the open weave cheesecloth over 3-4 times, and then placing the pickling spice mixture in the centre.  The sides of the cheesecloth are then gathered up and tied with kitchen string or very strong thread. The whole spices need to be corralled in a sachet as, well, it’s not a very pleasant experience to unexpectedly bite into a whole clove in the chow, for example!  I buy a pickling spice mix at my local bulk foods store.  If you can’t find a product labelled “pickling spice” in your area, you can always make your own.  In my mustard pickle posting I give an explanation of spices typically included in a pickling spice mix. This sachet will get dropped into the stockpot and infuse flavor into the chow base as the chow cooks.

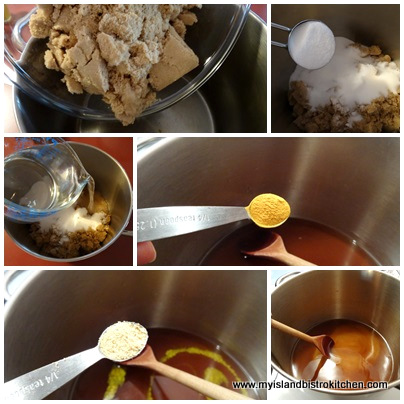
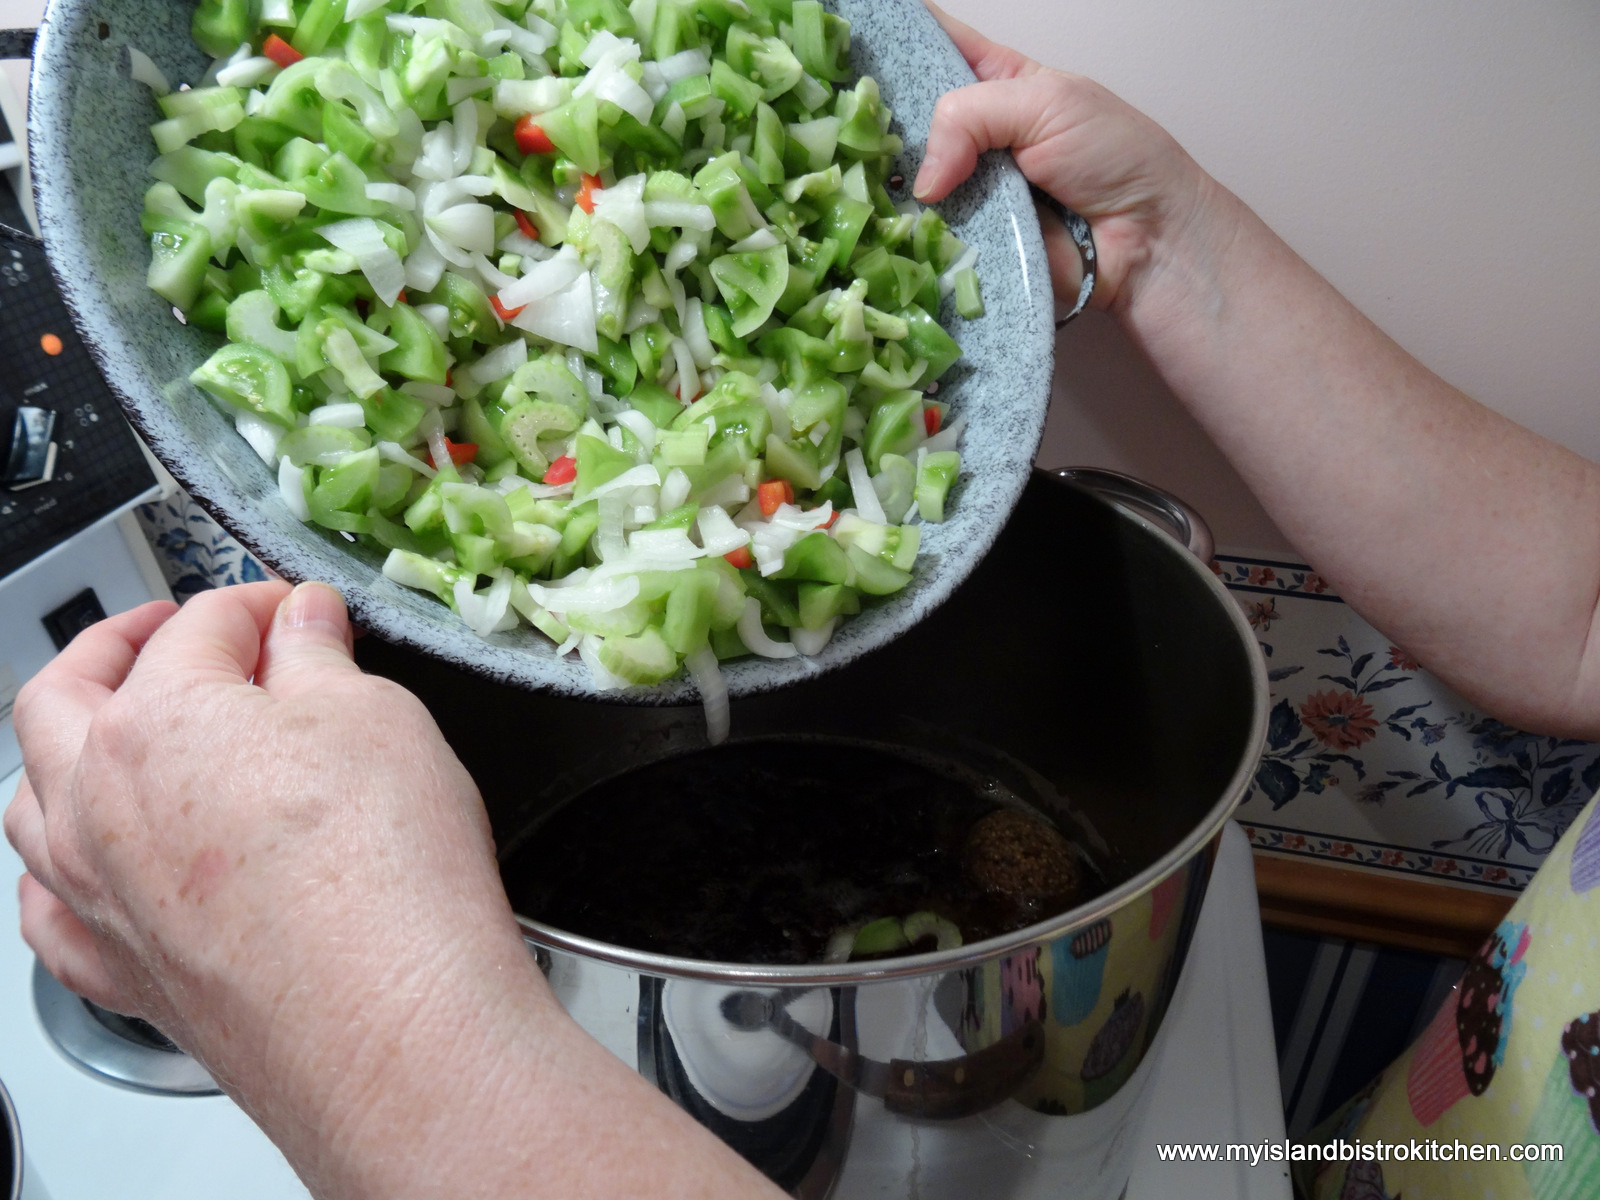
Into a large stockpot, place the sugars, spices, and vinegar.  Stir well.

Drop in the spice sachet and bring mixture to a boil.

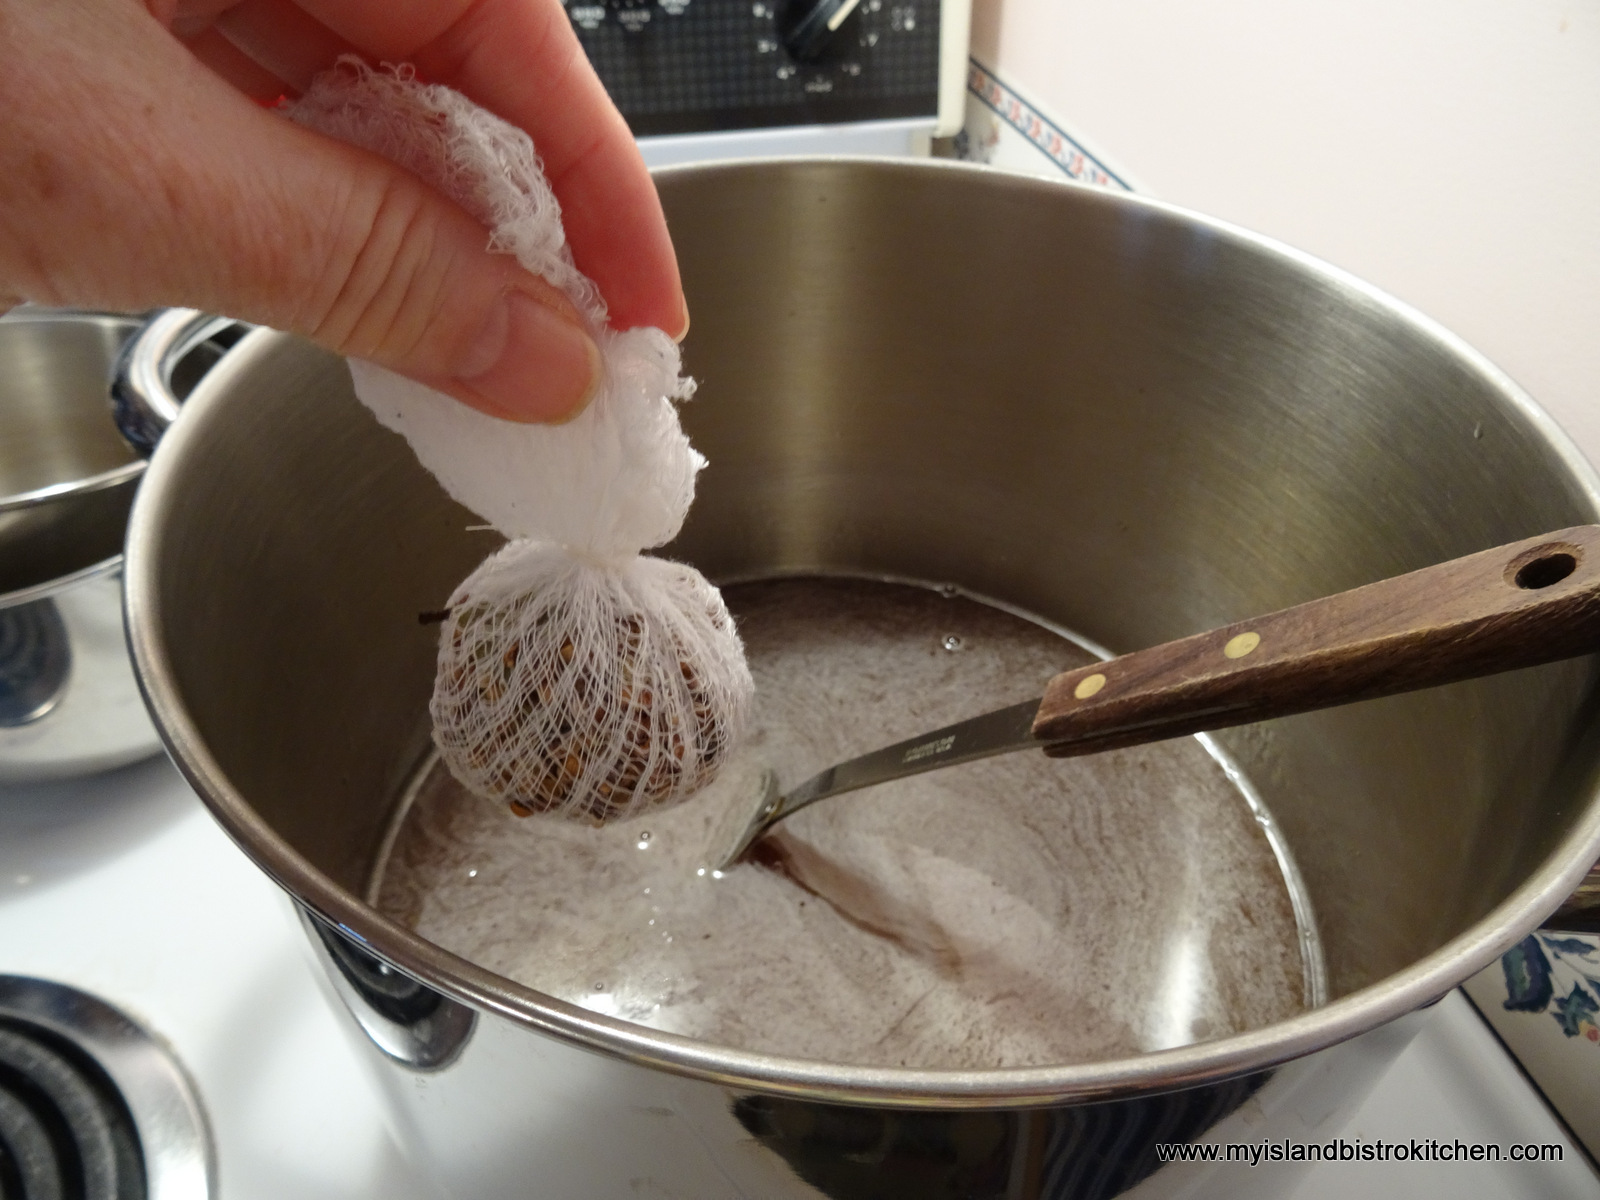
Add the drained vegetables and return mixture to a boil, then immediately reduce heat to medium-low.

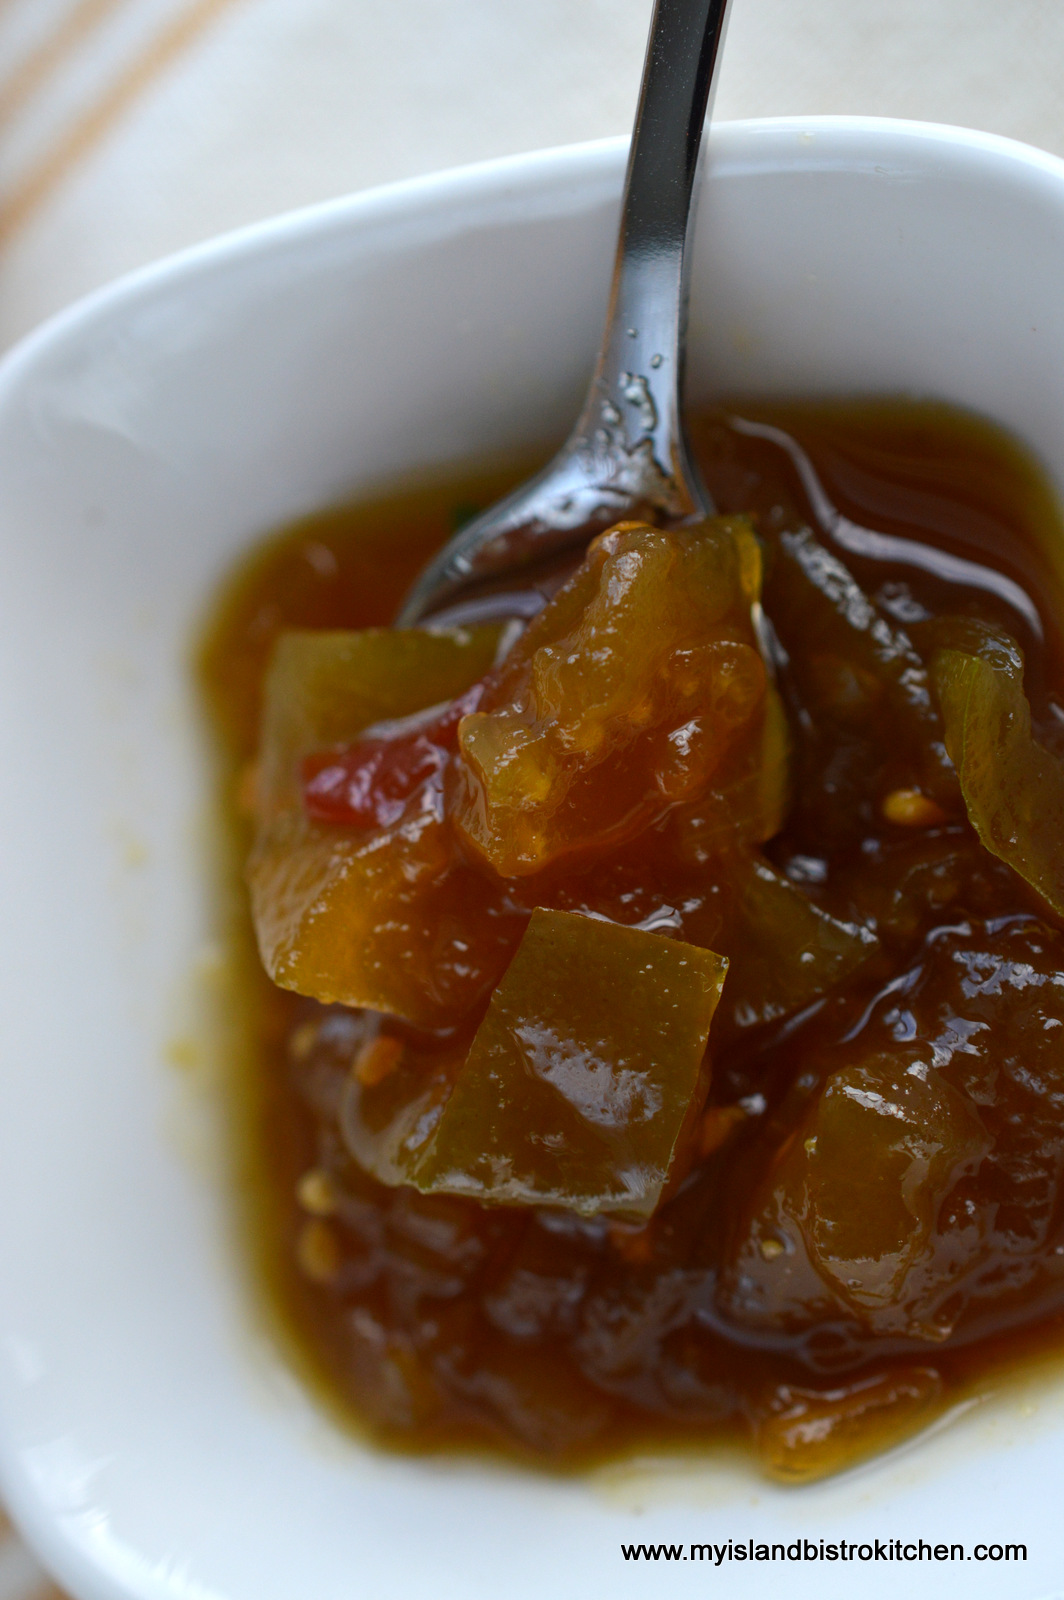
Cook until vegetables are cooked, somewhat translucent, and the mixture is slightly thickened. Stir mixture occasionally to make sure it is not sticking to the bottom of the pot.

While the chow is cooking, start the bottle sterilization process.  Again, refer to my mustard pickle posting for details on this and the proper canning jars to use.

Once the chow is cooked and thickened, remove it from the heat and remove and discard the pickling spice sachet.  Bottle the chow while it is hot into the hot, sterilized bottles.  With clean, damp cloth, wipe  each jar rim to remove any sticky chow residue. Seal immediately with heated lids. Screw on jar bands just until resistance is met.

Process filled jars immediately in a hot water bath. I process my half-pint jars for 10 minutes (at a rolling boil) but you should refer to the canner manufacturer’s directions for the proper time for your local altitude. Cool the jars, undisturbed, on the counter for 24 hours and then store them in cool, dark place. Let chow age for at least 2 weeks before serving.

Green Tomato Chow
Green Tomato Chow


Chow making, like pickling, is a process and takes time. Make sure you read through the recipe several times before making the recipe to ensure understanding of the process and sequencing involved.

You will need the following equipment to make this chow:

Digital Scales for weighing tomatoes
7 pint-sized glass canning jars
7 – two-piece lid and screw band sets (lids must be brand new and not previously used)
Cheesecloth for making spice sachet and kitchen string for tying sachet

Large measuring cup or bowl for mixing salt water brine
Large bowl for soaking vegetables in salt water brine
Large colander for draining vegetables
Large heavy-bottomed stock pot for cooking chow
Large pot for sterilizing jars
Small saucepan for heating jar lids
Water bath canner with basket
Jar lifter tongs
Wide-mouthed canning funnel
Ladle or heat-proof glass measuring cup
Chopstick or small heat-proof spatula
Magnetic lid lifter
A timer

Green Tomato Chow

Ingredients:

3 lbs green tomatoes, chopped into chunks
3¼ cups onions, chopped
1 cup celery, sliced
½ cup sweet red pepper, diced
Apx. 1 cup pickling salt

Combine all ingredients into a large bowl. Using the ratio of ½ cup pickling salt to 4 cups cold water, cover ingredients completely with salted water. Add as much salted water as necessary to cover the vegetables. For this amount of vegetables, you will likely need at least 1 cup pickling salt dissolved in 8 cups water. Make sure the pickling salt is thoroughly dissolved in the water before pouring over vegetables. Let vegetables soak at room temperature for 7-8 hours. Drain vegetables in large colander. Quickly rinse vegetables with cold water to remove any traces of salted water residue on vegetables. Let vegetables drain in colander for 1 to 1½ hours, gently stirring the vegetables periodically for better drainage.

4 cups pickling vinegar
3 cups brown sugar, lightly packed
1 cup granulated sugar
1½ – 2 tbsp pickling spice tied into a small pickling spice sachet made with cheesecloth
¼ tsp tumeric
¼ tsp dry mustard

Method:

Combine vinegar, sugars, and spices into a large stockpot. Bring to a boil, stirring occasionally. Add the drained vegetables and bring to a boil over medium heat. Reduce heat to medium-low and cook mixture slowly for1 to 1½ hours until vegetables are cooked, somewhat translucent, and mixture is slightly thickened. Stir periodically.

While chow mixture is cooking, start the bottle sterilization process. Wash jars and lids in hot soapy water. Quickly wash the lids and do not let them stay in the hot dish water as, once heated enough to soften the rubber sealing compound and then cooled, they are no longer effective. Rinse jars and lid. (The lids will be heated to soften the rubber sealing compound at the time of bottling.)

Fill a large-sized pot about two-thirds full of hot tap water. Place the jars, upright, into the water. Ensure the jars are fully submerged, each jar filled with water, and that the water is at least an inch over the tops of the jars, adding more if necessary. Cover, bring to a boil, and boil gently for 10 minutes. Reduce heat to simmer and leave the jars in the hot water to have ready to fill once the chow is ready for bottling.

Fill the canner a good half full of hot tap water. Cover and bring to a boil to have it ready for processing of the filled jars. Once it comes to a full boil, reduce heat to keep the water gently boiling.

When the chow is ready to be bottled, use jar lifter tongs to carefully remove the hot sterilized jars from the water, one at a time, emptying the water from the jars back into the pot. Drain jars well.

Remove a small amount of the hot water from the stockpot in which the jars were sterilized and place in small saucepan over simmering heat. Place the lids in the hot water for just a few minutes to soften the rubber sealing compound. Do not boil the lids.

Boil a kettle of water to have ready to top up water in the canner, if needed, once the filled jars are added.

Remove and discard spice sachet from chow. Using a ladle, or a heat-proof glass measuring cup, and a wide-mouthed canning funnel, fill the hot sterilized jars with the chow, leaving about 1/2” headroom in each jar to allow for expansion during the hot water processing. Remove any trapped air bubbles in the jars with a chopstick or small heatproof spatula. Wipe the jar rims with a clean damp cloth to remove any stickiness that could prevent the lids from sealing properly to the jars.

Using a magnetic lid lifter, remove lids from the hot water and center the heated lids on jars so the sealing compound on the lid edges aligns with the jar rims. Fingertip tighten the ring/screw bands until resistance is encountered. Do not over-tighten.

Using jar lifter tongs, carefully place filled jars upright in the canner’s wire basket positioned in the canner, ensuring jars do not touch each other or fall over. Ensure the water level is at least 1” above the tops of jars, adding more boiling water as necessary. Cover with canner lid. Increase the heat to return the water to a full rolling boil then decrease the heat to just keep the water at a moderately rolling boil but not boiling over. Process jars in the hot water bath for 10 minutes, adjusting time as and if necessary, for higher altitudes. Start timing the processing from the point at which a full rolling boil is reached after filled jars have been added to the canner. At the end of the processing time, turn off heat and remove canner lid.

Let jars sit in the hot water for 5 minutes then, using jar lifter tongs, carefully remove the jars filled with chow, upright and one at a time, and transfer them to a heat-proof cutting board, that has been covered with a towel, to cool completely. Listen for the “pop” or “ping” sound as the bottles seal over the next few minutes or hours. The lids of properly sealed jars will curve downward.

Let jars rest, undisturbed, on counter for 24 hours. Cover jars with towel to keep light out. Then, after 24 hours, test each jar for proper sealing by pressing down on the center of each jar lid. If the lid is already pressed downward, and does not pop back up, it is properly sealed. Any jars that do not pass this test should be refrigerated and the chow used within a week or so. Store properly sealed chow bottles in cool, dark place. Refrigerate chow once jar has been opened.

For best flavor, let chow age for at least 2 weeks before serving.

Yield:  Apx. 6 – 7 half-pint jars.

If you have made this recipe and enjoyed it and/or wish to share it with your friends and family, please do so on social media but be sure to share the direct link to this posting from my website.
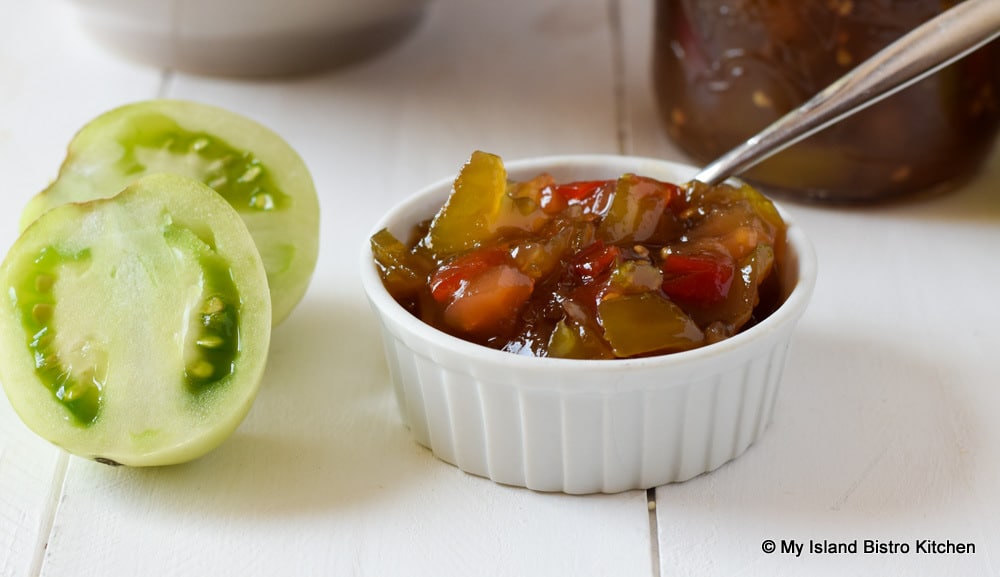
Green Tomato Chow

This Green Tomato Chow is a sweet yet slightly tangy condiment. Lovely served with many meals, it is superb served with fish cakes.

Course Condiment
Cuisine Canadian
Keyword chow, Green Tomato Chow
My Island Bistro Kitchen Barbara99

Ingredients

  • 3 lbs green tomatoes, chopped into chunks
  • cups onions, chopped
  • 1 cup celery, sliced
  • ½ cup sweet red pepper, diced
  • Apx. 1 cup pickling salt
  • Combine all ingredients into a large bowl. Using the ratio of ½ cup pickling salt to 4 cups cold water, cover ingredients completely with salted water. Add as much salted water as necessary to cover the vegetables. For this amount of vegetables, you will likely need at least 1 cup pickling salt dissolved in 8 cups water. Make sure the pickling salt is thoroughly dissolved in the water before pouring over vegetables. Let vegetables soak at room temperature for 7-8 hours. Drain vegetables in large colander. Quickly rinse vegetables with cold water to remove any traces of salted water residue on vegetables. Let vegetables drain in colander for 1 to 1½ hours. Gently stir the vegetables periodically for better drainage.
  • 4 cups pickling vinegar
  • 3 cups brown sugar, lightly packed
  • 1 cup granulated sugar
  • 1½ - 2 tbsp pickling spice tied into a small pickling spice sachet made with cheesecloth
  • ¼ tsp tumeric
  • ¼ tsp dry mustard

Instructions

  1. Combine vinegar, sugars, and spices into a large stockpot. Bring to a boil over medium heat, stirring occasionally. Add the drained vegetables and bring just to the boiling point. Reduce heat to medium-low and cook mixture, uncovered, slowly for 1 to 1½ hours, until vegetables are cooked, somewhat translucent, and mixture is slightly thickened. Stir periodically.

  2. While chow mixture is cooking, start the bottle sterilization process. Wash jars and lids in hot soapy water. Quickly wash the lids and do not let them stay in the hot dish water as, once heated enough to soften the rubber sealing compound and then cooled, they are no longer effective. Rinse jars and lids. (The lids will later be heated to soften the rubber sealing compound at the time of bottling.)

  3. Fill a large-sized pot about two-thirds full of hot tap water. Place the jars, upright, into the water. Ensure the jars are fully submerged, each jar filled with water, and that the water is at least an inch over the tops of the jars, adding more if necessary. Cover, bring to a boil, and boil gently for 10 minutes. Reduce heat to simmer and leave the jars in the hot water to have ready to fill once the chow is ready for bottling.

  4. Fill the canner a good half full of hot tap water. Cover and bring to a boil to have it ready for processing of the filled jars. Once it comes to a full boil, reduce heat to keep the water gently boiling.
  5. When the chow is ready to be bottled, use jar lifter tongs to carefully remove the hot sterilized jars from the water, one at a time, emptying the water from the jars back into the pot. Drain jars well.
  6. Remove a small amount of the hot water from the stockpot in which the jars were sterilized and place in small saucepan over simmering heat. Place the lids in the hot water for a few minutes to soften the rubber sealing compound. Do not boil the lids.

  7. Boil a kettle of water to have ready to top up water in the canner, if needed, once the filled jars are added.
  8. Remove and discard spice sachet from chow. Using a ladle, or a heat-proof glass measuring cup, and a wide-mouthed canning funnel, fill the hot sterilized jars with the chow, leaving about 1/2” headroom in each jar to allow for expansion during the hot water processing. Remove any trapped air bubbles in the jars with a chopstick or small heatproof spatula. Wipe the jar rims with a clean damp cloth to remove any stickiness that could prevent the lids from sealing properly to the jars.

  9. Using a magnetic lid lifter, remove lids from the hot water and center the heated lids on jars so the sealing compound on the lid edges aligns with the jar rims. Fingertip tighten the ring/screw bands until resistance is encountered. Do not over-tighten.
  10. Using jar lifter tongs, carefully place filled jars upright in the canner's wire basket positioned in the canner, ensuring jars do not touch each other or fall over. Ensure the water level is at least 1” above the tops of jars, adding more boiling water as necessary. Cover with canner lid. Increase the heat to return the water to a full rolling boil then decrease the heat to just keep the water at a moderately rolling boil but not boiling over. Process jars in the hot water bath for 10 minutes, adjusting time as and if necessary, for higher altitudes. Start timing the processing from the point at which a full rolling boil is reached after jars have been added to the canner. At the end of the processing time, turn off heat and remove canner lid.

  11. Let jars sit in the hot water for 5 minutes then, using jar lifter tongs, carefully remove the jars filled with chow, upright and one at a time, and transfer them to a heat-proof cutting board, that has been covered with a towel, to cool completely. Listen for the “pop” or “ping” sound as the bottles seal over the next few minutes or hours. The lids of properly sealed jars will curve downward. Let jars rest, undisturbed, on counter for 24 hours. Cover jars with towel to keep light out. Then, after 24 hours, test each jar for proper sealing by pressing down on the center of each jar lid. If the lid is already pressed downward, and does not pop back up, it is properly sealed. Any jars that do not pass this test should be refrigerated and the chow used within a week or so. Store properly sealed chow bottles in cool, dark place. Refrigerate chow once jar has been opened.
  12. For best flavor, let chow age for at least 2 weeks before serving.

Recipe Notes

Yield:  Apx. 6 – 7 half-pint jars. Exact yield will depend on how much the chow is cooked down.

Green Tomato Chow
Green Tomato Chow


Did you Know?

You can join the Facebook page for My Island Bistro Kitchen:  https://www.facebook.com/MyIslandBistroKitchen/

Follow “the Bistro” on Twitter:  https://twitter.com/PEIBistro/

See the drool-worthy gallery of mouth-watering food photos from My Island Bistro Kitchen on Instagram: https://www.instagram.com/peibistro/

Follow “the Bistro” on Pinterest at https://www.pinterest.ca/peibistro/

For other great pickle and relish recipes from My Island Bistro Kitchen, click on the links below:

Mustard Pickles
Dill Pickles
Bread and Butter Pickles
Rhubarb Relish
Mustard Beans 
Pickled Beets
Rhubarb and Mango Chutney

Pin Me To Pinterest!

Chow

Homemade Green Tomato Chow


Thank you for visiting “the Bistro” today.

This post was last updated on September 16, 2022


Rossignol Winery — PEI’s First Winery

Rossignol Winery, Little Sands, PEI

There are three wineries in Prince Edward Island and the oldest of them is Rossignol Winery. To find out more about Rossignol wines and products, I visited the winery and vineyards in Little Sands where I met owner and vintner, John Rossignol.

John Rossignol, owner, Rossignol Winery, Little Sands, PEI

In the early 1990s, John was looking for a new career and one which he could pursue while living in a rural environment. He had developed an interest in wine making and in a special place called Prince Edward Island (PEI) where there were no established wineries. Hence, he saw a potential niche market. However, his dream was not without some challenges, chief amongst them being that there were no existing laws in PEI governing and regulating commercial wine making. Working with the provincial government for over two years, John pursued his dream and, in 1995, the Liquor Control Act and Regulations were enacted which allowed for commercial wine production in PEI.

Grapevines at Rossingol Winery

In the meantime, while the process to develop and enact legislation was underway, John was optimistic so he planted grapevines to get a vineyard established so he’d have grapes available should the Province give permission for commercial wine making. The winery was built in 1994 and the first wine produced in 1995, upon enactment of the enabling legislation.

Rossignol Winery, Little Sands, PEI

Currently, there are about ten acres of grapevines grown onsite at the winery. The remainder of the grapes needed for production are sourced from other Island vineyards.

John grows four varieties of grapes. Two of the most common are Marechal Foch, a French hybrid grape that is successfully proven to grow well in the Maritime climates and l’acadie blanc that was developed in Nova Scotia.

John Rossignol checks the status of the grapes on the grapevines at his winery in Little Sands, PEI
John Rossignol checks the status of the grapes on the grapevines in his vineyard at the winery in Little Sands, PEI

The grapes below were photographed in mid-August.  They will be ready for harvesting in October.

The winery also has an onsite apple orchard to produce apples for its iced apple cider, “Liberty Blossom”.

Apple Orchard at Rossignol Winery, Little Sands, PEI

The wonderful sand sculptures at the winery are the artistic work of sand sculpter, Abe Waterman.

Sand Sculpture by Abe Waterman - at the Rossignol Winery, Little Sands, PEI
Sand Sculpture by Abe Waterman – at the Rossignol Winery, Little Sands, PEI

The detail in these works of art at the edge of the vineyard at the winery is incredible.

Since its beginnings, the winery has made a number of fruit wines (e.g., strawberry, wild blueberry, rhubarb). In the winery’s early years, John says this was a necessity as there weren’t enough grapes available to make the traditional wines as we think of them. Supportive of local products, John sources raw products such as Island strawberries, raspberries, and black currants from local farmers.

Fruit Wines Produced by Rossignol Winery, Little Sands, PEI

The fruit wines are especially popular in summer and are generally consumed as an aperitif. John likes the Strawberry Wine paired with cheese and says the blueberry wine can also be a table wine. This medium-sweet red wine is especially good paired with spicy, curried food. In total, the winery now produces 16 varieties of products under the Rossignol label.

When asked what the winery’s most popular wines are, John says the Little Sands White and the High Bank Red top the list. The winery also produces some specialty liqueurs, including their iced apple cider, maple liqueur, and cassis which they bottle in special Italian bottles. The cassis is a relatively new product for the winery which began the process four years ago to get this product ready for market. The cassis has been on the market for two years now and is particularly popular with chefs.

The winery also makes a wild rose liqueur from the hips of locally grown roses. These products are suitable as after-dinner drinks.

John indicates he experiences no great challenge to running a winery in rural PEI. He says PEI has good growing conditions for quality fruit which, in turn, means good quality wine.

“PEI has good growing conditions for quality fruit which, in turn, means good quality wine.” – John Rossignol

I asked John what his greatest satisfaction is from producing wine. He says, when he started in the business, it was always intended to be a lifestyle business which it remains today. He tells me he enjoys getting to work from his nearby home without going through city rush hour traffic. He also derives satisfaction from looking for new markets that keep the business interesting and different. But, perhaps most of all, John says he enjoys a business that actually allows him to be involved in all stages of the production of the finished product. That means he farms the grapes, makes the wine, and bottles, markets, and sells it so he gets to see the entire process of production from start to finish.

After our chat about the Rossignol products, John toured me through the winery.

The wine is sterilized by filtration and passes through three large tanks.

Tanks Containing Wine in Progress

Some products, such as the maple liqueur, are aged in traditional oak barrels.

Traditional Oak Barrels for Aging Wine

The barrels in the photo below contain red wine which has been aging for two years.

Oak Barrels of Red Wine Aging for Two Years

During my visit, the winery staff was busy bottling wine.

Bottling Wine
Bottling Wine
Corking and Labeling the Bottles


Freshly Bottled Wine
Boxes of Wine Ready for Shipment

Rossignol wines are presented in uniquely-labelled bottles. Labels feature the work of local painters, including John’s wife Dagny, as well as some of John’s own artwork.

Wine Bottle Label Designed by Dagny Rossignol


Wine Bottle Label Designed by John Rossignol

One of the earliest artists involved with producing artwork for Rossignol bottles is Nancy Perkins who happened to drop by the winery during my visit.

Nancy Perkins, Designer of Wine Bottle Labels at Rossignol Winery
Nancy Perkins, One of the Designers of Wine Bottle Labels at Rossignol Winery

Rossignol wines and liqueurs are available at the winery located at 11147 Shore Road, in Little Sands, PEI, as well as at Island liquor stores. The winery has at times shipped their products to Ontario, Nova Scotia, New Brunswick, Manitoba, and Alberta Liquor Commissions. Recently, the winery has sent four shipments of wines to China which has shown a special interest in PEI wines.

The winery regularly sends samples of their wines to wine competitions and, as you can see from the photo below, they have garnered many medals attesting to the fine quality of wine being produced at Rossignol Winery.

Rossignol was recently awarded the gold medal for the best fruit wine in Canada at the All Canadian Wine Championships in Ontario. That’s great recognition and validation for a winery that was the pioneer in wine making in PEI and is still going strong, producing on average about 40,000 bottles of wine annually.

For more information on Rossignol Winery, visit their website at http://www.rossignolwinery.com/Rossignol-Winery.html

————

Thank you for visiting “the Bistro” today. There are lots of ways to connect with “the Bistro” through social media:

Join My Island Bistro Kitchen on Facebook
Follow the Bistro’s tweets on twitter @PEIBistro
Find the Bistro on Pinterest at “Island Bistro Kitchen
Follow along on Instagram at “peibistro


Crabapple Jelly

It’s apple season in Prince Edward Island and orchards are filled with trees bearing wonderful apples of so many varieties.  There’s nothing like heading to a U-pick orchard to pick your own apples.  I typically pick several pecks each fall — in fact, sometimes it’s easy to get carried away and pick too many!  However, they do get processed into pies, crisps, sauces, and jellies like this Crabapple Jelly.

Crab Apple Jelly
Crabapple Jelly

For apple jelly lovers, now is the time to make that rich red crabapple jelly that is so flavorful.  The apples I used in the recipe I am sharing today came from Arlington Orchards in Arlington, west of Summerside, PEI.  I knew by the color of the tiny apples that they would make a good crabapple jelly and I was not disappointed.  They are the Dolgo Crabapple variety.

Crab Apples
Crabapples

Now, crabapple jelly is not particularly difficult to make but it is a lengthy process and does take a bit of skill and know-how to get it cooked to the correct jelly state.

First, you have to wash and cut off the stem and blossom ends of the tiny crabapples.  Then, they have to be cooked to the “mushy” stage.   I take a potato masher and mash down any remaining chunks of apple after cooking as I find this helps the mixture to drip better once it is in the jelly bag.  The “mush” (pulp) gets bundled into a cheesecloth bag, tied, and hung over a bowl or pot to catch the juice dripping from the cooked apples.    I use a double weight of cheesecloth because I don’t want any apple seeds or pieces of apple peel or pulp coming through.  If the cheesecloth weave is very loose, I suggest using a triple layer. The objective is to have the juice as clear as possible so it does not make a cloudy jelly.  The aim is to have a transparent crabapple jelly.

Clear, transparent jelly

The time-consuming process is waiting for the juice to slowly drip from the pulp in the jelly bag– it takes several hours and I usually leave it overnight.  The bag has to get suspended to allow the juice to slowly drip out.  Specific jelly bag and stand units are available for this purpose. However, I concoct a really “sophisticated” outfit for this — I simply hang the jelly bag on to a broom handle and suspend the broom between two chairs with a bowl or pot placed under the bag to catch the juice.  Really high tech, don’t you think!  Nevertheless, it works and gets the job done. The big tip I have here is to resist the temptation to squeeze the jelly bag to hasten the juice flow or to extract more juice from the pulp.  This can cause some of the bits of the pulp to make their way through the cheesecloth and into the juice and this can very likely cause a cloudy jelly.

Once it’s apparent that there is no more juice dripping, discard the contents of the jelly bag. Measure and pour the extracted juice into a stock pot.  Add the sugar and lemon juice and start the cooking process.  I add sugar at the ratio of 3/4 cup sugar to 1 cup extracted apple juice.

Place 2-3 freezer-proof saucers in the freezer — these will be used to test the jelly’s state of “jelling”.  Once a small sample of the jelly is put on a cold saucer, placed in the freezer for a minute, removed, and starts to “wrinkle” when pushed gently with a finger, it has reached the jelly stage and is ready for bottling and processing in a hot water bath.

You will need some equipment to make this jelly and here’s my checklist:

5 half-pint jars and 1 quarter-pint glass canning jar for the jelly (plus 1 more half-pint jar to take up extra space in the canner basket, if needed, during the hot water process)
6 – two-piece lid and screw band sets (lids must be brand new and not previously used; screw bands may be re-used provided they have no dents or rust on them)
Heavy-bottomed stock pot for jelly
Large-sized pot for sterilizing jars
Small saucepan for heating jar lids
Water bath canner with basket
Jar lifter tongs
Wide-mouthed canning funnel
Ladle or heat-proof glass measuring cup
Chopstick or small non-metallic heat-proof spatula
Magnetic lid lifter
A timer

[Printable recipe follows at end of posting]

Crabapple Jelly

Ingredients:

4 lbs crabapples
7 cups water

Granulated sugar (see Method below for amount)
3-4 tbsp strained fresh lemon juice
1 tsp butter

Method:

Wash apples.

Remove stem and blossom ends from apples.

Leave apples whole. Place in large stock pot.

Add the water.

Cook, covered, for approximately 40-45 minutes or until apples have softened and begun to break down into mush.

Gently mash any large chunks of apple with a potato masher.

Place a double, or triple, weight of cheesecloth in a large colander. (It’s a good idea to pre-dampen the cheesecloth with water before adding the pulp – I was busy taking photos and started pouring in the pulp to get ready for a photo before realizing the cheesecloth had not been dampened.)

Place the colander over a large pot.  Pour the apple pulp into the cheesecloth-lined colander.

Let mixture drip for about 20 minutes or so to get some of the initial juice out of the pulp.

Gather up the ends of cheesecloth and tie tightly with an all-purpose kitchen twine or heavy string, making a loop by which to hang the jelly bag to allow the juice to drip out.

Hang the jelly bag on a broom handle and support the broom between two chairs. Place a large pot or bowl under the jelly bag to catch the juice as it drips.

Allow this to drip on its own for several hours (i.e., at least 3-4) or overnight, until no more juice is seen dripping through. Resist the urge to squeeze the jelly bag to hasten the juice flow, or to extract more juice from the pulp, as this can cause some of the apple pulp to escape the bag resulting in a cloudy juice and jelly.

Place 2-3 freezer-safe saucers in the freezer. You will need these to test the jelly for “jelling” status.

Fill a large pot with hot tap water, about three-quarters full.  Place six half-pint jars and one quarter-pint jar upright, into the water.  Ensure the jars are fully submerged, each jar filled with water, and that the water is at least an inch over the tops of the jars.  Cover, bring to a boil, and boil for 10 minutes. Turn off heat and leave the jars in the hot water while the jelly is cooking.

Fill the hot water canner about one-third to one-half full of hot tap water. Cover and bring to a boil to have it ready for the filled jars. Once it comes to the boil, reduce the heat to a gentle boil.

When jelly bag is done dripping, discard bag and apple pulp. To determine the amount of sugar needed, measure out the extracted juice and add ¾ cup of sugar for each cup of juice.

Pour juice into pot. Look at that gorgeous color of juice!

Add the lemon juice and sugar to the extracted apple juice.

Stir to dissolve sugar.

Add 1 tsp butter to reduce foaming (some is likely still to occur and will need to be skimmed off before bottling).

Bring mixture to a rolling boil.

Continue to boil over medium high heat for about 20 minutes or so, stirring occasionally, then test for status of jelling.

To test for jelling, remove one of the saucers from the freezer and place a couple of teaspoons of the jelly on it. Place the jelly in the freezer for one minute. Remove it from the freezer and push the jelly gently with a finger. If jelly wrinkles, it is done.

If it doesn’t wrinkle, keep cooking the jelly, testing every 4-5 minutes until it is done. Do not overcook. Remove jelly pot from stove while conducting jelling tests.

Skim off any foam that may still remain on top of the jelly.  Bottle hot jelly into sterilized jars, using a wide-mouthed canning funnel and either a ladle or a heat-proof glass measuring cup. Leave  ¼” headroom in each jar. Wipe rims with clean damp cloth to remove any stickiness that could prevent lids from sealing properly.

Heat jar lids and immediately place over hot filled jars. Apply metal rim bands to jars, fingertip tightening each.  Process jars in hot water bath. Allow jelly jars to sit at room temperature for 24 hours to set then store in cold room out of light.

Yield: Apx. 5½ – 6 cups

Crab Apple Jelly on Fresh Biscuits
Crabapple Jelly on Fresh Biscuits

Be sure to read through the printable version of the recipe several times before making the jelly to ensure understanding of the process and that all the necessary equipment is at hand.

Crabapple Jelly

This stunningly beautiful transparent crabapple jelly is made without pectin. Perfect accompaniment to toast, biscuits, and scones.
Course Jelly
Cuisine Canadian
Keyword crabapple jelly, jelly
My Island Bistro Kitchen My Island Bistro Kitchen

Ingredients

  • 4 lbs crabapples
  • 7 cups water
  • Granulated sugar (see Method below for amount of sugar required)
  • 3-4 tbsp strained fresh lemon juice
  • 1 tsp butter

Instructions

  1. Wash and remove stem and blossom ends from apples. Leave apples whole. Place in large stock pot. Add the water, cover, and bring to a boil then reduce heat to low and simmer for approximately 40-45 minutes or until apples have softened and begun to break down into mush. Gently mash any large chunks of apple with a potato masher.
  2. Place a double weight of dampened cheesecloth in a large colander (use triple weight if cheesecloth is very loose weave). Place the colander over a large clean pot or bowl. Pour the apple pulp into the cheesecloth-lined colander. Let mixture drip for about 20 minutes or so to get some of the initial juice out of the pulp. Gather up ends of cheesecloth and tie tightly with an all-purpose kitchen twine, making a loop by which to hang the jelly bag to allow the juice to drip out. Alternatively, if you have one, use a jelly bag with its own stand for this process.

  3. The jelly bag with the apple pulp will be heavy so, if you don't have a jelly bag and stand unit, something strong from which to suspend the jelly bag to drip will be needed. A suggestion would be to hang the jelly bag on a broom handle and support the broom between two chairs. Place a large pot or bowl under the jelly bag to catch the juice as it drips. Allow this to drip on its own for several hours (i.e., at least 3-4 hours) or overnight, until no more juice is seen dripping through. Resist the urge to squeeze the jelly bag to hasten the juice flow, or extract more juice, as this can cause some of the apple pulp to escape the bag resulting in a cloudy juice and jelly.

  4. When it is determined the juice has fully been extracted, prepare the jars and lids by washing them in hot soapy water. Rinse. Fill a large pot with hot tap water, about ¾ full.  Place 6 half-pint jars and 1 quarter pint jar, upright, into the water.  Ensure the jars are fully submerged, each jar filled with water, and that the water is at least an inch over the tops of the tallest jars.  Cover, bring to a boil, and boil jars for 10 minutes. Turn off heat and leave the jars in the hot water to have ready to fill once the jelly finishes cooking. 

  5. Place 2-3 freezer-safe saucers in the freezer.  These will be needed to test the jelly for “jell” status.

  6. When jelly bag is done dripping, discard bag and apple pulp.  To determine the amount of sugar needed, measure out the extracted juice and, for each cup of juice, measure out ¾ cup of sugar. Pour juice into pot. Add the lemon juice and sugar to the extracted apple juice. Stir to dissolve sugar. Add 1 tsp butter to reduce foaming.  Over medium-high heat, bring mixture to a rolling boil and continue to boil, uncovered, at this temperature for about 20 minutes or so, stirring occasionally, then test for status of jelling.

  7. As soon as the jelly is on the stove, fill the canner about half full of hot tap water. Cover and bring water to a boil to have it ready for processing of the filled jars. As the jelly is just about done, it’s a good idea to boil a kettle of extra water to have ready, if needed, to top up the canner water after filled jars are added.

  8. To test for jelling, remove one of the saucers from the freezer and place a couple of teaspoons of the jelly on it. Place the jelly in the freezer for one minute. Remove saucer with jelly from the freezer and push the jelly gently with a finger. If the jelly wrinkles, it is done. If it doesn’t wrinkle, keep cooking the jelly, testing every 4-5 minutes until it is done. Do not overcook. Remove jelly stockpot from the stove while conducting the tests.

  9. Skim off any foam that may still remain on top of the jelly.

  10. Use jar lifter tongs to carefully remove the hot sterilized jars from the water, one at a time, emptying the water from the jars back into the pot. Drain jars well.

  11. Remove a small amount of the hot water from the stockpot in which the jars were sterilized and place in small saucepan over simmering heat. Place the lids in the hot water to soften the rubber sealing compound. Do not boil the lids.

  12. Using a ladle, or a heat-proof glass measuring cup, and a wide-mouthed canning funnel, pour jelly into the hot sterilized jars, leaving about ¼” headroom in each jar to allow for expansion during the hot water processing. Remove any trapped air bubbles in the jars with a chopstick or small heatproof, non-metallic spatula. Wipe the jar rims with a clean damp cloth to remove any stickiness that could prevent the lids from sealing properly to the jars.

  13. Using a magnetic lid lifter, remove lids from the hot water and center the heated lids on jars so the sealing compound on the lid edges aligns with the jar rims. Fingertip tighten the ring/screw bands until resistance is encountered. Do not over-tighten.

  14. Using jar lifter tongs, carefully place filled jars upright in wire basket positioned in the canner, ensuring jars do not touch each other or fall over. If needed, add the extra hot empty jar, upright, to the basket to fill up space so the filled jars do not topple over.  Let the empty jar fill with water from the canner as it is submerged. Ensure the water level is at least 1” above the tops of jars, adding more boiling water as necessary. Cover with canner lid. Return the water to a full rolling boil over high heat then decrease the heat to just keep the water at a moderately rolling boil but not boiling over. Process jars in the hot water bath for 10 minutes, adjusting time as and if necessary for altitude. Start timing the processing from the point at which a full rolling boil is reached after jars have been added to the canner. At the end of the processing time, turn off heat and remove canner lid.

  15. Let jars sit in the hot water for 5 minutes then, using jar lifter tongs, carefully remove the jars filled with jelly, upright and one at a time, and transfer them to a heat-proof cutting board, that has been covered with a towel, to cool completely. Listen for the “pop” or “ping” sound as the bottles seal over the next few minutes or hours. The lids of properly sealed jars will curve downward. Let jars rest, undisturbed, on counter for 24 hours.Then, test each jar for proper sealing by pressing down on the center of each jar lid. If the lid is already pressed downward, and does not pop back up, it is properly sealed. Any jars that do not pass this test should be refrigerated and the jelly used within a week or so. Store properly sealed jelly bottles in cool, dark place. Refrigerate jelly once jar has been opened.

Recipe Notes

Yield: Apx. 5½ - 6 cups


For more great jam, jelly, and maramalade recipes from My Island Bistro Kitchen, click on the links below:

Peach Marmalade
Rhubarb Marmalade
Green Tomato Marmalade
Blueberry and Grand Marnier Jam
Gooseberry Jam
Zucchini Jam
Pumpkin Jam 
Strawberry Rhubarb Freezer Jam
Cherry Jam

Thank you for visiting “the Bistro” today. There are lots of ways to connect with “the Bistro” through social media:

Join My Island Bistro Kitchen on Facebook
Follow the Bistro’s tweets on twitter @PEIBistro
Find the Bistro on Pinterest at “Island Bistro Kitchen
Follow along on Instagram at “peibistro

Pin Me To Pinterest!

Jelly