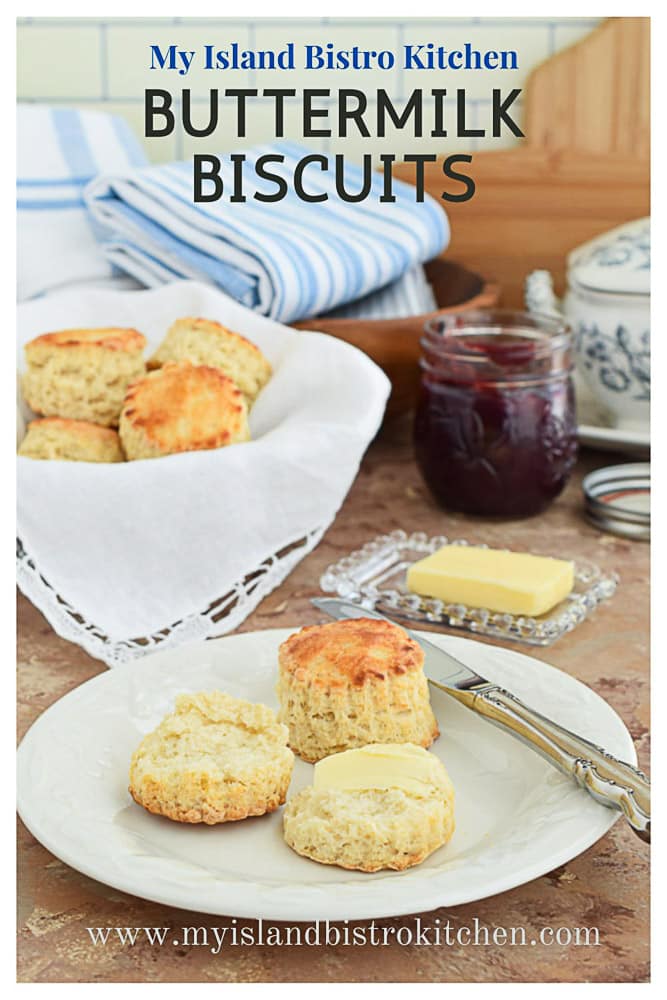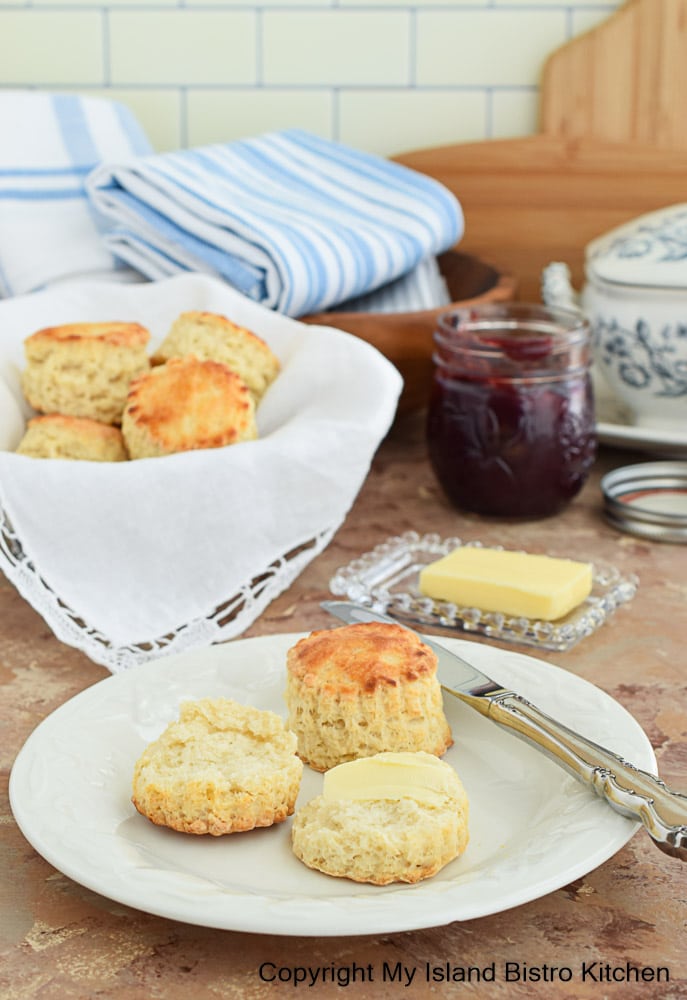
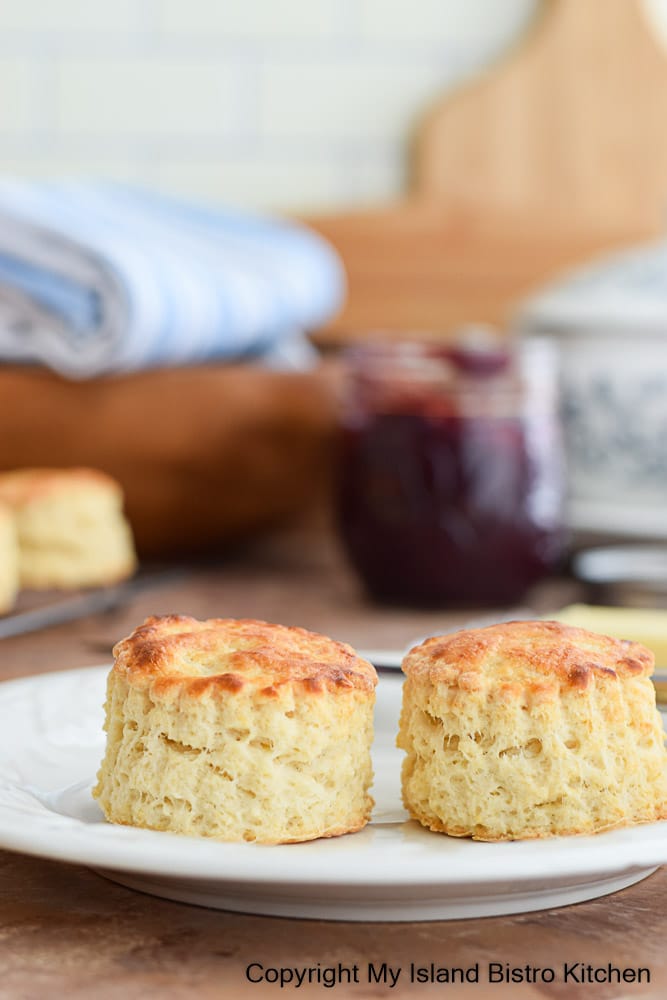
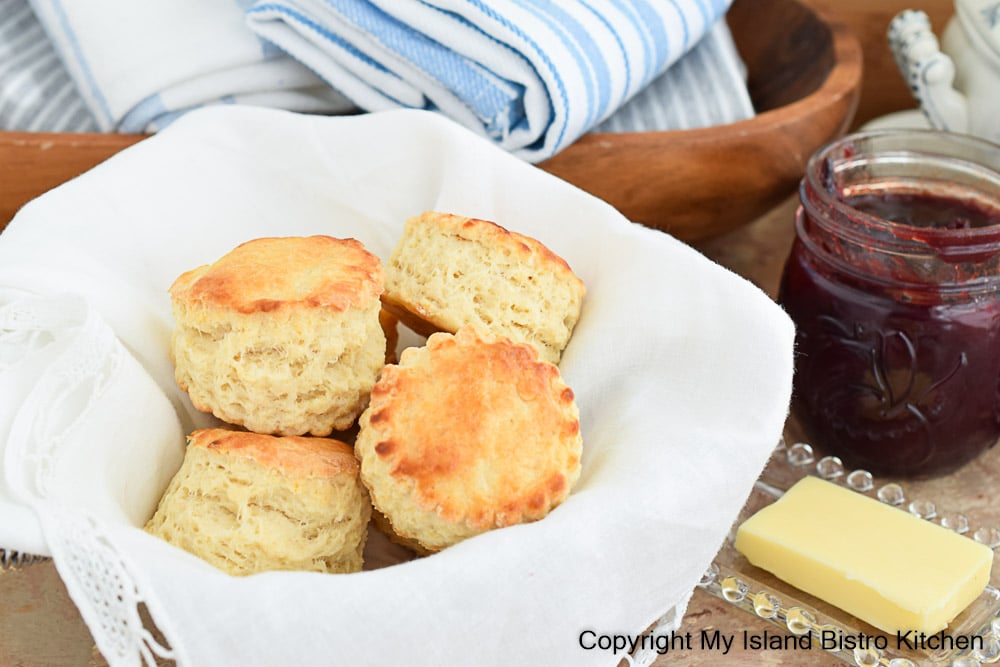
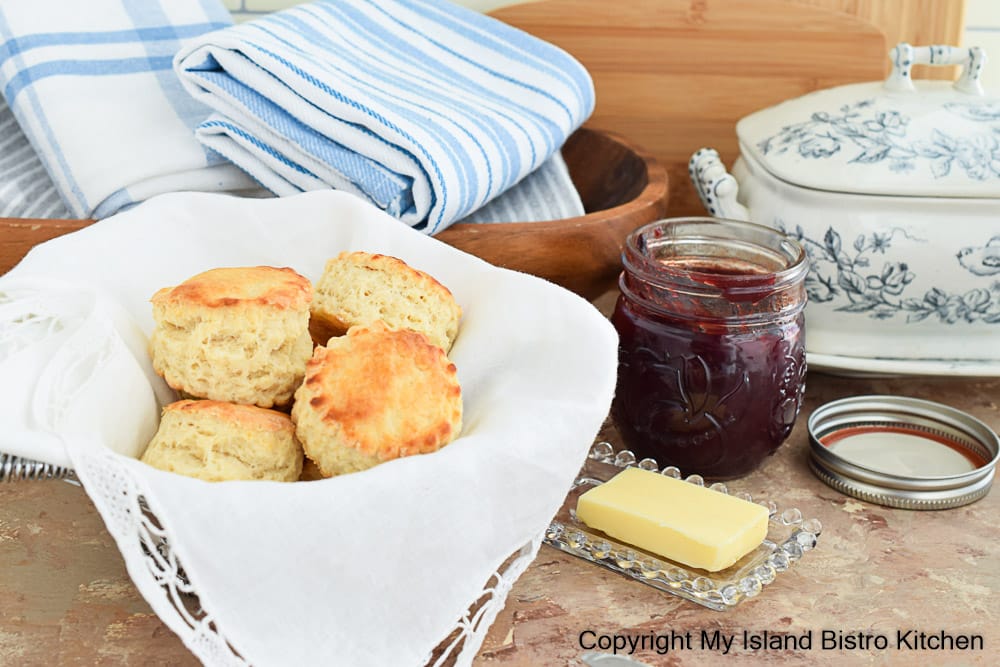
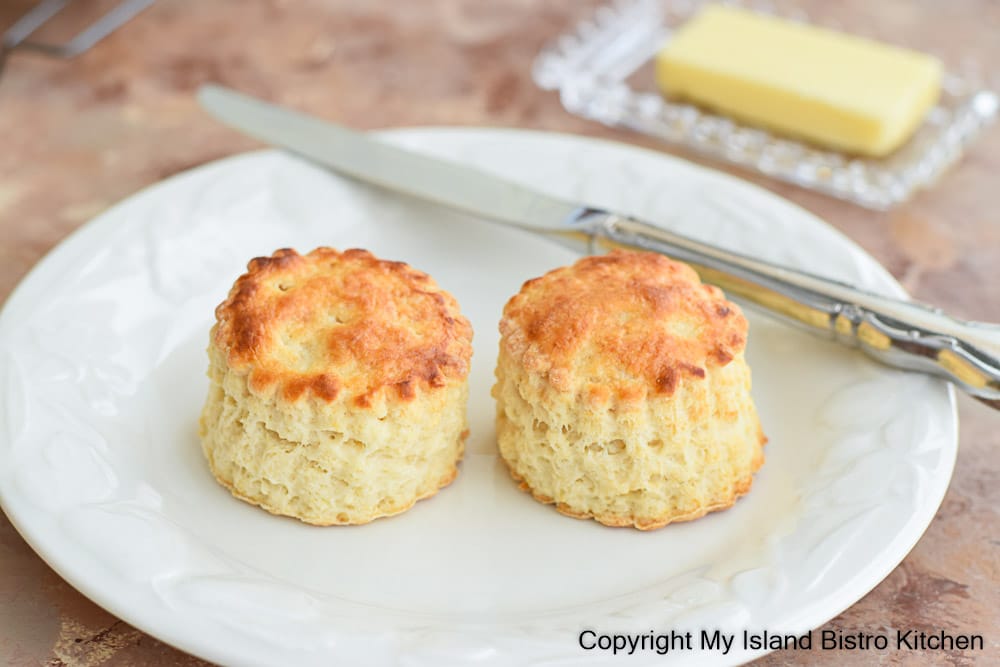
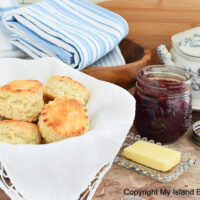
Homemade Buttermilk Biscuits, still slightly warm from the oven, are indeed a treat, especially when slathered with good butter. With their soft and tender texture and buttery flavor, these biscuits complement many meals.
Let’s begin by examining the basic ingredients in Buttermilk Biscuits and what they contribute to the final baked good.
Buttermilk – Buttermilk has high acidity levels and performs several functions in biscuits. Not only does it provide the liquid content and some of the fat content, lending tenderness and moisture to the biscuits, but it also adds just a hint of tangy flavor. A key and very important function of the buttermilk is its role in activating the baking soda, one of the biscuit leavening agents. When the baking soda and the lactic acid found in the buttermilk connect in the dough, a chemical reaction occurs, activating the leavening properties of baking soda, causing the biscuits to rise into lovely tall biscuits.
Butter – Butter, a big flavor enhancer in biscuits, must be very cold when used in biscuit recipes. As the cold butter melts during the baking process, it will create pockets of steam which will help the biscuits rise and achieve a tender, delicate crumb. I recommend unsalted butter in this recipe though salted butter may be substituted, in which case, reduce the amount of salt called for in the recipe to a scant ½ teaspoon.
Flour – Flour is the ingredient that will provide structure to the biscuits. All-purpose flour, with its mid-level 8%-10% protein content, works fine in this recipe. I do not recommend bread flour for biscuits as, with its high protein content (12%-14%), it will produce more gluten when liquid is added to it and biscuits will be less likely to have the desired soft and delicate texture.
Sugar – A small amount (1/2 tbsp) of sugar adds a wee bit of sweetness to counteract the tang of the buttermilk.
Salt – Salt obviously adds flavor.
Baking Powder and Baking Soda – Combined, baking powder and baking soda are the leavening agents that cause the biscuits to rise.
My general tips and hints for making biscuits are –
- Start by measuring the flour accurately. Do not scoop the flour from the bag or container with the measuring cup itself. Use a spoon to scoop up the flour and shake the flour off of the spoon and into the cup. Do not simply dump the spoonfuls of flour into the measuring cup. When the cup is full, use the flat side of a knife to level and scrape excess flour from the cup. Do not pat or tamp down the flour in the cup or shake or tap the cup to make room for more flour as this will result in more flour than is needed in the recipe and dry biscuits are likely to result. If you prefer weighted measurements (always the more accurate), I use 10 oz/282 grams of flour in this recipe.
- Always sift or sieve the dry ingredients together (the flour, baking powder, baking soda, and salt). This ensures the ingredients are thoroughly dispersed throughout the dough. All ingredients should be cold for biscuit making so it’s a good idea to put the dry ingredients in the refrigerator an hour or so before mixing up the biscuit dough. There is no point in having the butter cold if it is going to be mixed in with room temperature ingredients which will cause the butter to start to soften.
- Always use super cold butter for biscuits. Use a wire-edged pastry cutter for best results in cutting the cold butter into the dry ingredients. Cutting in the butter, to about the size of peas, ensures there are bits of butter well distributed throughout the dough. After cutting in the butter, quickly run fingers through the mixture several times, scooping up a few of the bigger bits of the butter and rubbing them into flat slivers between the thumb and forefinger. It is not necessary to do this with every single piece of butter – just quickly pick several at random and ensure the slivers are coated with the flour to keep them from clumping together in the dough. These slivers will provide strips of solid butter fat that will fall in between layers of the biscuit dough and, as the butter melts in the oven, will push or lift the dough up into layers of tender texture. Essentially, during baking, when the cold butter meets up with the hot oven temperature and begins to melt, moisture in the butter generates pockets of steam that help ensure a tender biscuit crumb and biscuits that rise to their full potential.
- Frozen butter may be used, if desired. I recommend using the large hole side of a box grater to grate the butter. Ensure the butter, whether it is cut into the dry ingredients with a pastry cutter or grated, is coated well with the flour mixture before adding the buttermilk. It is important to keep the butter pieces separated and dispersed throughout the dough versus clumping together in a mass.
- Of course, after the baker has been working with the butter, cutting it into the dry ingredients and producing the “slivers” of butter by hand, the butter has naturally started to soften. So, there are a couple of options to ensure the butter is in super-cold state when the biscuits go into the oven. After the butter has been incorporated into the dry ingredients, the mixture could be refrigerated for approximately 15 minutes to ensure the butter is, once again, very cold before proceeding to mix in the cold buttermilk and cutting out the biscuits. However, I find it just as effective if the dough is completely mixed and the biscuits cut out, placed on the baking sheet, and then placed in the freezer for 15-20 minutes, or the refrigerator for 25-30 minutes, before baking. Note, if chilling the biscuits, do not brush any milk or cream on the biscuit tops until the biscuits are about to go into the oven.
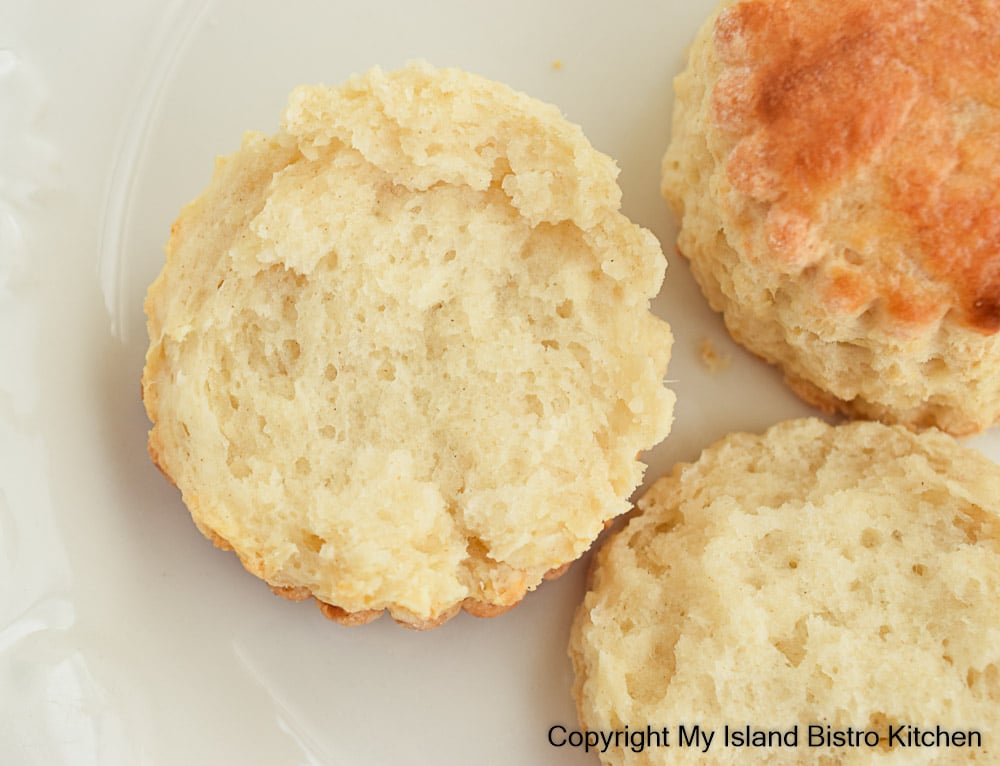
- Only mix the liquid and dry ingredients as minimally as possible and do so gently and with a Danish Dough Whisk, or a fork. You do not want to mush, mash, or “smoosh” the butter into the dry ingredients as this will inhibit the butter’s ability to produce pockets of steam that will help the biscuits rise to their potential. Over-mixing will result in over-developing the flour’s gluten and yield dense, tough biscuits. Just mix enough that the flour is incorporated, no liquid is visible floating around in the bowl, and the dough starts to pull away from the sides of the bowl.
- Do NOT over-knead dough, either, as over-working the dough will “stir up” the gluten in the flour and, once again, will yield dense, tough, dry biscuits. After kneading, bits of the butter should still be visible in the dough. With biscuits, you are not “blending” ingredients but, rather, are simply barely mixing them just enough so that the dough sticks together so the biscuits can be cut out.
- These biscuits can be formed from dough that has either been kneaded in the traditional manner or by using the fold-over method. If kneading the dough, do so no more than 8-10 times (less, if possible) and work the dough gently. If using the fold-over method, fold the dough in half over onto itself, much like folding a piece of paper. Lightly and gently press the dough down. Turn the dough a half turn and repeat the folding exercise. Do this 4-5 times in total, taking care not to overhandle or overwork the dough. For further explanation of this method, please click this link to my posting on “How To Make Perfect Scones” as the fold-over method is the one I use when making scones, a close cousin to biscuits. I find the fold-over method results in less handling of the dough than does the kneading method. Use whichever method you are most comfortable with as, done properly, either will yield tender biscuits.
- Using a gentle touch, use a rolling pin or simply pat the dough to desired thickness, or as indicated in a particular recipe. Don’t over compress the dough – again, that’s a recipe for tough biscuits. For buttermilk biscuits, I find dough that is ½“ – ¾“ thick yields a nice height buttermilk biscuit. Using buttermilk in biscuits tends to result in biscuits that often have higher rise than do biscuits made with milk or whipping cream, for example, so I tend to use a slightly less thick dough for cutting out buttermilk biscuits. Keep in mind that the thicker the dough from which biscuits are cut, the greater the possibility of the biscuits toppling over as they bake.
- A good, general size cutter for biscuits is a 2″ double open-ended cutter. I do not recommend using a glass or small can to cut out the biscuits as it does not allow the dough to “breathe” while the biscuits are being cut and, in the process tends to compress the dough and seal the sides of the biscuits.
- Flour the cutter lightly before cutting each biscuit and cut the biscuits as close together as possible to minimize the amount of dough that will have to be gathered up and patted down, or rolled out, again for the next cutting – remember, the goal is to minimize the amount of “working the dough” that happens. Larger cutters can, of course, be used if desired. However, that will reduce the yield from the recipe.
- Make sure the cutter is sharp-edged and do not twist the cutter when cutting out the biscuits. Cut straight down into the dough and lift the cutter straight up and out of the dough. Twisting the cutter causes compression of the biscuit and “seals” the sides of the biscuit. Think of it as suffocating the biscuits and cutting off their access to the supply of air they need to help them rise properly. This can be a cause of the biscuits not rising to their maximum potential and can also be a cause of them toppling over during baking. Resist also the urge to take each biscuit and shimmy it between your hands to make it look smoother, tidier, and taller. Again, this is “sealing” in the sides of the biscuits and potentially inhibiting their rise and may cause them to topple during baking. If desired, the biscuits can, of course, be cut into square shapes using either a sharp knife or bench scraper.
- Once the first cut of biscuits is made from the dough, gather up the remaining bits of dough and roll it out, or pat it down, to desired thickness and continue to cut out remaining biscuits. Again, resist the urge to work the dough any more than absolutely necessary to pull it together. Cutting the dough with a knife or bench scraper into squares will eliminate the need to gather up bits of dough from the first cutting and re-rolling, or patting down, for the second cutting. This, of course, reduces the amount of handling of the dough. Every time the dough is handled, more gluten strands are created and the possibility of tough biscuits increases.
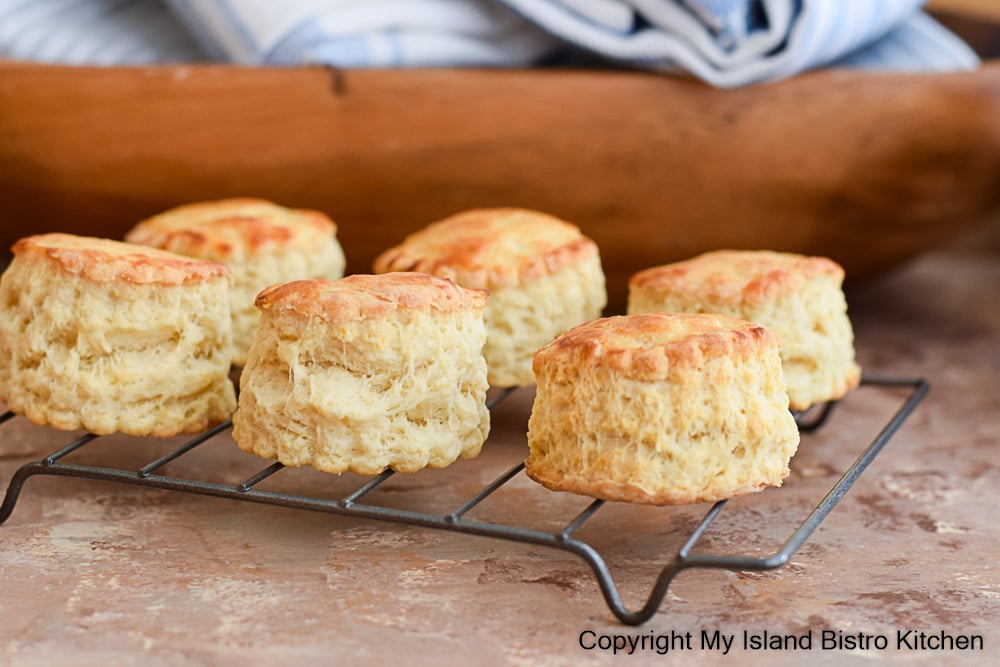
- For smoother-topped biscuits, flip the biscuits upside down when placing them on the baking sheet. I find this also helps the biscuits to bake with less “toppling over”.
- Place biscuits close together on the baking sheet – e.g., ¾” to 1” apart. The least space they have to travel, the more likely they will rise straight. There is never a guarantee that some of the biscuits won’t topple while baking but placing them close together on the baking sheet limits just how far they can travel. Toppling does not affect the flavor of the biscuits, of course, but it does matter, for appearance purposes, if lovely, tall, straight biscuits are desired.
- Brushing the tops of biscuits with milk or cream is optional but it does enhance browning and the generation of a lovely soft crust.
- Bake the biscuits in a hot oven (e.g., generally between 425°F and 450°F), or according to recipe directions. While these temperatures may seem like high baking temperatures, it does quickly set the biscuits and speeds the release of ingredient moisture to turn into steam that will aid in more lofty biscuits with a light texture.
[Printable Recipe Follows At End of Post]
Buttery Buttermilk Biscuits
Ingredients:
2 cups all-purpose flour (10 oz/282g – See Note 1 below)
1 tbsp baking powder
¾ tsp salt
Scant ½ tsp baking soda
½ tbsp granulated sugar
7 tbsp cold unsalted butter (See Note 2 below), cut into ½“ cubes
1 cup cold buttermilk
1-2 tbsp buttermilk for brushing tops of biscuits (optional)
Method:
Line baking sheet with parchment paper. Assemble and measure out ingredients.
In large bowl, sift or sieve together the flour, baking powder, salt, and baking soda. Whisk in the sugar.
Use a wire pastry cutter to cut the cubed butter into the dry ingredients until mixture resembles the size of peas. Quickly run fingers through the mixture several times, scooping up the bigger bits of the butter and rubbing them into flat slivers between the thumb and forefinger. It is not necessary to do this with every piece of butter – just quickly pick several at random. Ensure butter slivers are coated with the dry ingredients. Make a well in the center of the dry ingredients.
Pour buttermilk, all at once, into well in center of dry ingredients. Using a Danish dough whisk, or fork, mix ingredients just enough that the liquid is absorbed into the dry ingredients, no liquid remains visible in the bowl, and the dough starts to pull away from the sides of the bowl and can be roughly brought together. Dough will be soft and sticky and some floury spots may remain at this point. Transfer dough onto lightly floured work surface, gently working it just until a shaggy dough mass forms. Do not overmix.
Knead dough 8-10 times (See Note 3 below). Do not over-knead. Roll, or pat, dough to approximately ½“ – ¾“ thickness. Using a 2” floured round, sharp-edged cookie cutter, cut out biscuits, re-flouring cutter before cutting out each biscuit. Push the cutter straight down and up and out of the dough without twisting the cutter in the process. Gather dough scraps and roll or pat dough to ½” – ¾“ thickness, from which to cut remaining biscuits, being careful to work the dough no more than absolutely necessary to bring it together. Transfer biscuits to prepared baking sheet, spacing biscuits about ¾“– 1” apart. Place the baking sheet of biscuits in the refrigerator for 25-30 minutes, or the freezer for 15-20 minutes, to ensure the butter is cold before baking biscuits.
While the biscuits are chilling, position oven rack in the middle-to-upper third of oven and preheat oven to 450°F.
Remove biscuits from refrigerator or freezer and lightly brush tops of biscuits with buttermilk, if desired. Bake for apx. 14-17 minutes, or until biscuits are lightly browned on top, rotating the baking sheet partway through the baking. Remove biscuits from oven and let cool on baking sheet for 3-4 minutes then transfer to wire rack.
Yield: Apx. 14-16 biscuits (depending on thickness of dough from which biscuits are cut and the size of cutter used)
Note 1: While different sources may list 1 cup of all-purpose flour as weighing slightly more or less than the weight measures I list for this recipe, the weights I have given in this recipe are based on 1 cup of all-purpose flour (properly filled and leveled) weighing 5 ounces on my digital scales. Therefore, if 10 ounces (or 282 grams) of all-purpose flour is used, it will be the correct amount for this particular biscuit recipe.
Note 2: Biscuits may be made with salted butter in which case, reduce amount of salt called for in recipe to a scant ½ teaspoon.
Note 3: In lieu of kneading dough, the fold-over dough method may be used. Fold the dough in half over onto itself, much like folding a piece of paper. Lightly and gently press the dough down to about 1” thick. Turn the dough a half turn and repeat the folding exercise. Do this 4-5 times in total, taking care not to overhandle or overwork the dough. Pat, or roll dough, to ½“ – ¾“ thickness and cut out biscuits.
If you have made this recipe and enjoyed it and/or wish to share it with your friends and family, please do so on social media but be sure to share the direct link to this posting from my website.
Buttery Buttermilk Biscuits
Ingredients
- 2 cups all-purpose flour (10 oz/282g – See Note 1 below)
- 1 tbsp baking powder
- ¾ tsp salt
- Scant ½ tsp baking soda
- ½ tbsp granulated sugar
- 7 tbsp cold unsalted butter (See Note 2 below), cut into ½“ cubes
- 1 cup cold buttermilk
- 1-2 tbsp buttermilk for brushing tops of biscuits (optional)
Instructions
- Line baking sheet with parchment paper. Assemble and measure out ingredients.
- In large bowl, sift or sieve together the flour, baking powder, salt, and baking soda. Whisk in the sugar.
Use a wire pastry cutter to cut the cubed butter into the dry ingredients until mixture resembles the size of peas. Quickly run fingers through the mixture several times, scooping up the bigger bits of the butter and rubbing them into flat slivers between the thumb and forefinger. It is not necessary to do this with every piece of butter – just quickly pick several at random. Ensure butter slivers are coated with the dry ingredients. Make a well in the center of the dry ingredients.
- Pour buttermilk, all at once, into well in center of dry ingredients. Using a Danish dough whisk or fork, mix ingredients just enough that the liquid is absorbed into the dry ingredients, no liquid remains visible in the bowl, and the dough starts to pull away from the sides of the bowl and can be roughly brought together. Dough will be soft and sticky and some floury spots may remain at this point. Transfer dough onto lightly floured work surface, gently working it just until a shaggy dough mass forms. Do not overmix.
- Knead dough 8-10 times (See Note 3 below). Do not over-knead. Roll, or pat, dough to approximately ½“ – ¾“ thickness. Using a 2” floured round, sharp-edged cookie cutter, cut out biscuits, re-flouring cutter before cutting out each biscuit. Push the cutter straight down and up and out of the dough without twisting the cutter in the process. Gather dough scraps and roll or pat dough to ½” – ¾“ thickness, from which to cut remaining biscuits, being careful to work the dough no more than absolutely necessary to bring it together. Transfer biscuits to prepared baking sheet, spacing biscuits about ¾“– 1” apart. Place the baking sheet of biscuits in the refrigerator for 25-30 minutes, or the freezer for 15-20 minutes, to ensure the butter is cold before baking biscuits.
- While the biscuits are chilling, position oven rack in the middle-to-upper third of oven and preheat oven to 450°F.
- Remove biscuits from refrigerator or freezer and lightly brush tops of biscuits with buttermilk, if desired. Bake for apx. 14-17 minutes, or until biscuits are lightly browned on top, rotating the baking sheet partway through the baking. Remove biscuits from oven and let cool on baking sheet for 3-4 minutes then transfer to wire rack.
Recipe Notes
Yield: Apx. 14-16 biscuits (depending on thickness of dough from which biscuits are cut and the size of cutter used)
Note 1: While different sources may list 1 cup of all-purpose flour as weighing slightly more or less than the weight measures I list for this recipe, the weights I have given in this recipe are based on 1 cup of all-purpose flour (properly filled and leveled) weighing 5 ounces on my digital scales. Therefore, if 10 ounces (or 282 grams) of all-purpose flour is used, it will be the correct amount for this particular biscuit recipe.
Note 2: Biscuits may be made with salted butter in which case, reduce amount of salt called for in recipe to a scant ½ teaspoon.
Note 3: In lieu of kneading dough, the fold-over dough method may be used. Fold the dough in half over onto itself, much like folding a piece of paper. Lightly and gently press the dough down to about 1” thick. Turn the dough a half turn and repeat the folding exercise. Do this 4-5 times in total, taking care not to overhandle or overwork the dough. Pat, or roll dough, to ½“ – ¾“ thickness and cut out biscuits.
Copyright My Island Bistro Kitchen 2023
Connect with My Island Bistro Kitchen on Social Media
Join the Facebook page for My Island Bistro Kitchen: https://www.facebook.com/MyIslandBistroKitchen/
Follow “the Bistro” on “X” (formerly Twitter): https://twitter.com/PEIBistro/
See the drool-worthy gallery of mouth-watering food photos from My Island Bistro Kitchen on Instagram: https://www.instagram.com/peibistro/
Follow “the Bistro” on Pinterest at https://www.pinterest.ca/peibistro/ and pin the Pinterest-ready photo at the end of this posting to your favorite Pinterest boards!
You may also enjoy these other Biscuit recipes from My Island Bistro Kitchen:
Tea Biscuits
Whole Wheat Biscuits
Rustic Oat Bran Biscuits
PIN ME TO PINTEREST!