Pork Loin Roast with Pomegranate, Red Wine, and Black Garlic Sauce served with Potato Croquettes and Roasted Root Vegetables
If you have been following my postings, you will recall my January 12, 2013, entry using black garlic in a sauce over sea scallops. My latest culinary escapade finds it is a suitable flavouring for sauces for meat as well. Below you will find the recipe I created for a pomegranate, red wine, and black garlic sauce to accompany a marinated pork loin roast. It serves 2-3.
As I described in my earlier posting on black garlic, don’t expect any traditional garlic flavour from this fermented version which is very sweet and tastes more like a fig or a prune than it does garlic. I like pomegranate molasses but it can sometimes be hard to find as many of the traditional supermarkets in my area don’t tend to carry it. However, if you can locate a grocer who sells Middle Eastern food in your area, you are most likely able to find the molasses there. The marinade itself is very traditional but the sauce I have created for drizzling over the roast pork loin slices is a somewhat sweet sauce with a rich burgundy color which, of course, comes from the combination of the pomegranate molasses, red wine, and black garlic. It makes a fine pairing, both in taste and visually, with the roast pork.
Pork Loin Roast with Pomegranate, Red Wine, and Black Garlic Sauce
Ingredients:
3/4 lb pork loin roast
Marinade
2 tbsp soya sauce 1 clove garlic, minced 1 1/2 tbsp brown sugar 1 tbsp olive oil 1/8 tsp ginger 1/2 tbsp white wine vinegar 1 tsp shallot, finely minced salt and pepper to taste Mix all ingredients and place in dish. Place roast in marinade and turn once to coat. Cover and place in refrigerator for 3-4 hours, turning occasionally to baste.
Preheat oven to 425F. Place roast on rack in small roaster. Roast, uncovered, for 15 minutes. Reduce temperature to 325F and continue to roast, covered, until internal temperature of roast registers 150-160F on meat thermometer. Remove from oven and let stand, covered for 10-15 minutes before slicing and serving with Pomegranate, Red Wine, and Black Garlic Sauce (recipe below).
Mixing the soya sauce, oil, white wine vinegar, and garlic for the marinade
Adding brown sugar, ginger, salt, pepper, and shallots to the marinade
Marinating the Pork Roast and Preparing it for Roasting
Pomegranate, Red Wine, and Black Garlic Sauce
1 tsp butter 1 tbsp shallots, finely minced 2 cloves black garlic, sliced or fork-mashed 1 1/2 tbsp pomegranate molasses 1/4 cup chicken stock 1/2 tbsp balsamic vinegar 1/4 cup red wine 1 tbsp brown sugar 1/16 tsp cardamon 1 tbsp orange juice 1 tsp cornstarch
Melt butter in saucepan. Add shallots and sauté for 2-3 minutes. Add black garlic. Stir and sauté for apx. 30 seconds.
Add pomegranate molasses, chicken stock, balsamic vinegar, red wine, brown sugar, and cardamon. Stir over medium heat just until mixture reaches boiling point. Reduce heat to low.
Mix cornstarch into orange juice. Add some of the hot mixture to the orange juice and cornstarch mixture to temper it. Add the mixture to the pot. Stir over medium-low heat until thickened.
Slice roast into 1/4″ thick slices and plate. Drizzle warm sauce over pork.
Making the Pomegranate, Red Wine, and Black Garlic Sauce
Making the Sauce for the Pork Roast
Sliced Pork Loin Roast Served with Pomegranate, Red Wine, and Black Garlic Sauce
I served the pork loin roast with potato croquettes and roasted root vegetables which were lightly tossed with a maple syrup and balsamic vinegar dressing.
Pork Loin Roast with Pomegranate, Red Wine, and Black Garlic Sauce
A moist and tender pork roast is marinated, roasted, and served with a delectable sauce made with pomegranate, red wine, and black garlic.
Course Main Course
Keyword pork, pork roast
Servings3
My Island Bistro KitchenMy Island Bistro Kitchen
Ingredients
3/4lbpork loin roast
Marinade
2tbspsoya sauce
1clovegarlic, minced
1 1/2tbspbrown sugar
1tbspolive oil
1/8tspginger
1/2tbspwhite wine vinegar
1tspshallot, finely minced
salt and pepper to taste
Pomegranate, Red Wine, and Black Garlic Sauce
1tspbutter
1tbspshallots, finely minced
2clovesblack garlic, sliced or fork-mashed
1 1/2tbsppomegranate molasses
1/4cupchicken stock
1/2tbspbalsamic vinegar
1/4cupred wine
1tbspbrown sugar
1/16tspcardamon
1tbsporange juice
1tspcornstarch
Instructions
Marinade:
Mix all marinade ingredients and place in dish large enough to accommodate the meat. Place meat in marinade and turn once to coat. Cover and place in refrigerator for 3-4 hours, turning occasionally to baste.
Preheat oven to 425°F. Place roast on rack in small roaster. Roast, uncovered, for 15 minutes. Reduce temperature to 325°F and continue to roast, covered, until internal temperature of roast registers 150-160F on meat thermometer. Remove from oven and let stand, covered for 10-15 minutes before slicing and serving with Pomegranate, Red Wine, and Black Garlic Sauce.
Pomegranate, Red Wine, and Black Garlic Sauce:
Melt butter in saucepan. Add shallots and sauté for 2-3 minutes. Add black garlic. Stir and sauté for apx. 30 seconds.
Add pomegranate molasses, chicken stock, balsamic vinegar, red wine, brown sugar, and cardamon. Stir over medium heat just until mixture reaches boiling point. Reduce heat to low.
Mix cornstarch into orange juice. Add some of the hot mixture to the orange juice and cornstarch mixture to temper it. Add the mixture to the saucepan. Stir over medium-low heat until thickened.
Slice roast into 1/4" thick slices and plate. Drizzle warm sauce over pork.
Recipe Notes
Yield:2-3 servings
Marinated Pork Loin Roast with Pomegranate, Red Wine, and Black Garlic Sauce
One year ago today my blog went live! It’s been a great year of cooking, baking, and traveling across the Island to meet local producers and write feature stories about the great food products they grow, fish, or produce. I have thoroughly enjoyed taking their products and creating recipes that feature them. It’s amazing the variety of foods and beverages that are grown or produced on Prince Edward Island or fished in the waters that surround our Island! Thank you to all those who accommodated me with my requests for interviews over the past year and who granted me behind-the-scenes access so I could take photographs and bring you stories of the foods and food festivals and events on PEI. And, thank you to all who have visited my blog and read the stories over the past year. I hope you have enjoyed them.
I have a great line-up of upcoming feature stories and recipes for my blog. From time to time, I will mix in some tablescapes and table settings along with some afternoon teas for variety. So, from land and sea to table, there should be something of interest for everyone!
In a few days time I will be launching a new monthly feature on my blog and you won’t want to miss the yummy recipes that go with it. To ensure you get notified each time I post a new entry to my blog, be sure to sign up for email notifications. You can find the sign-up feature in the upper left-hand corner of my main page. And, don’t forget to follow me on twitter @PEIBistro and on Pinterest at “Island Bistro Kitchen”!
Ever heard of black garlic? What do you think of when you hear the term?
Fermented Black Garlic Bulbs
Black garlic is not a variety of garlic grown. Rather, it is regular garlic bulbs that have gone through a fermentation process. Fermenting garlic to turn it into black garlic is truly food transformation. I say that because black garlic in no way tastes, looks like, or has the same consistency as the traditional hard white garlic we use to give garlic flavour to dishes.
To find out more about black garlic, I travelled to Kensington, PEI, where I paid a visit to garlic grower, Al Picketts, of Eureka Garlic.
Eureka Garlic, Kensington, PEI
Al has been growing garlic for 12 years. In 2012, he grew 42,000 plants and this year, with the cloves already in the ground since October, Al has increased his crop to 46,380 plants which will be harvested in July-August, 2013. He grows eight types of garlic and 78 varieties in those types. Yes, Al knows a thing or two about garlic!
Garlic Bulbs Drying
Al’s main business is in selling seed garlic but, in November, 2011, he began the fermentation process to turn garlic into black garlic. Al has been working with the Bio Food Tech Center in Charlottetown as he perfects his fermentation process and product. While Al keeps his exact fermentation process a carefully-guarded secret, he did show me a recycled refrigerator that he insulates well, heats with a water heater, and uses as an incubator of sorts for the fermentation process.
Incubator for Fermenting Black Garlic
Inside this incubator are stacks of covered plastic storage boxes containing hundreds of garlic bulbs fermenting. He tells me it takes about three weeks in controlled temperature for the fermentation to occur. The top right photo below shows a garlic bulb in the early stages of fermentation and the one in the lower right photo is a completely fermented bulb. The photo on the left below shows different colored bulbs in the plastic containers; these are bulbs at different stages of the fermentation process as they change and deepen in color.
Black Garlic in Various Stages of Fermentation
When fermented, the cloves will be a dark chocolate brown color – almost black — and very soft. This is not the kind of garlic you could put through a garlic press and it does not mince well. But, oh, it does have its own unique flavour! The cloves can be carefully sliced or mashed with a fork and added to recipes.
Black Garlic Bulb and Clove
When Al offered me a taste of the black garlic, straight up, I must admit I was trying to prepare my tastebuds for a somewhat pungent, strong garlic flavour. But, one of the most surprising things about black garlic is the taste. I would describe it as somewhat sweet, no discernible garlic taste, and being a cross between a prune and a fig in taste, color, and texture. So, if you are looking to use it as you would regular garlic, don’t expect any garlic flavour in the dish as black garlic has a sweet, fruity taste. Black garlic, however, brings its own unique subtle flavour to dishes like soups, sauces, and seafood and is often used in Asian cooking. The black color does not change when cooked so you need to prepare for that color in your dish. There are not a lot of black foods and some might suggest they would not be appetizing. However, I find the contrast of the black garlic on white fish, for example, to be quite dynamic and appealing.
Black Garlic Color and Texture
Black garlic is a relatively new local food item and the jury is still out as to whether it is a food fad or if it may well become a food trend. Could it be garlic’s new cavier? Promoters claim it may be the next superfood, citing its health benefits — it reportedly boasts twice as many antioxidants as raw garlic. That said, I couldn’t find any scientific research studies completed on black garlic that would state conclusively what its specific health benefits are.
So, if it doesn’t taste like garlic why, then, use it? I would say because it offers another flavouring and complexity to many dishes. I have used it on pizza and in seafood dishes and I plan to try it next with pork.
Al tells me that black garlic can be stored at room temperature – no refrigeration required – for several months. He says it can also be stored in the freezer and, when you want to use it, just remove as many cloves as needed and mash them with a fork or slice them with a knife – there is no need to thaw them first.
Al sells his black garlic for $30/pound. On Prince Edward Island, it is available directly from Al at his farm “Eureka Garlic” on the corner of Routes 2 and 233 in Kensington (902)836-5180.
Black Garlic Packaged for Sale
As you know, when I visit a local producer, I bring home their product and make a recipe featuring the food item. The recipe below, for scallops, is how I used black garlic with seafood and I found the result really tasty (yes, I’ve made this dish more than once already!). The black garlic does not mask the scallop flavour and yet it accents the seafood well. This recipe serves two.
Black Garlic on Fresh Scallops
Scallops in Black Garlic
14 scallops
3 T butter
Fresh ground pepper
4 cloves black garlic, sliced
¼ cup white wine
½ T balsamic vinegar
1 tsp freshly squeezed lemon juice
1 tsp dried chives
Pinch dillweed
1 tsp parsley
Ingredients
Melt 2 T butter in small skillet. Over medium-high heat, sear the scallops 2-3 minutes per side until lightly golden in color. Transfer scallops to plate and keep warmed.
Searing ScallopsBlack Garlic
Add 1 additional tablespoon of butter to skillet. Add the black garlic and sauté for 30-45 seconds. Add pepper to taste. Add white wine, balsamic vinegar, and lemon juice. Stir over medium-low heat 1-2 minutes until sauce reduces. Add herbs and heat for about 30 seconds.
Adding Black Garlic
To serve, plate the warm scallops and spoon the black garlic sauce over the seafood. Serve with potato or rice and a side of vegetables.
Serves 2
Scallops with Black Garlic Served with Potato Cake and Vegetables
Thank you for visiting “the Bistro” today. There are lots of ways to connect with “the Bistro” through social media:
Join My Island Bistro Kitchen on Facebook Follow the Bistro’s tweets on twitter @PEIBistro Find the Bistro on Pinterest at “Island Bistro Kitchen” Follow along on Instagram at “peibistro”
For the past few weeks, I have been sharing some of my tablescapes as well as table and afternoon tea settings. I will share one more afternoon tea setting before I return to my usual food stories and recipes.
What better way to spend a snowy afternoon than having tea with friends. Living in northeastern Canada, snow is common so I drew my inspiration for this tea from the snowflakes that were gently fluttering and falling outside my window just before the sun came out on this late afternoon.
For this tea, I have opted to host it buffet style and all in a winter white theme accented with gold.
Buffet Afternoon Tea
Lots of shortbread accompanied by coconut macaroons and divinity fudge, some made into wee snowballs.
Winter White Sweets
A light dusting of confectioner’s sugar gives the illusion of snow on these sugar cookie snowflakes!
Snowflake Sugar Cookies
Dainty French macaroons sandwiched together with buttercream icing are light and airy. They make a fine addition to any tea table.
Eggnog, always a seasonal beverage, goes well with vanilla cupcakes which are decorated with edible snowflakes.
These cupcakes, frosted with almond buttercream icing and presented in their white and gold snowflake wrappers, were the stars of the afternoon tea!
I love these elegant and delicate gold and white teacups.
Mini white carnations blend well with the winter white setting.
Dining Room Fireplace Mantle Backdrop for Snowflake Buffet Afternoon Tea
I found these candles at our local Winners store and I knew immediately what they would be used for! They added glow and ambiance to a late afternoon tea.
Thank you for visiting “the Bistro” today. There are lots of ways to connect with “the Bistro” through social media:
Join My Island Bistro Kitchen on Facebook Follow the Bistro’s tweets on twitter @PEIBistro Find the Bistro on Pinterest at “Island Bistro Kitchen” Follow along on Instagram at “peibistro”
Happy New Year, everyone! Today, I followed a New Year’s Day tradition in Prince Edward Island — attending several levées in Charlottetown. There were many of these events across the Island today. The list below is just a partial list of those in the Charlottetown-Cornwall-Stratford, PEI areas. One man told me that he had attended as many as 23 levées on one New Year’s Day! We certainly didn’t partake in that many but we did attend six.
Sampling of Charlottetown Area 2013 Levées
Levées have their origins in France. The first recorded Levée held in Canada was in 1646. Originally, these were events reserved for men but, for decades now, women also attend. The purpose of levées is to give the opportunity for citizens to pay their respects and offer well wishes for the new year to representatives of the Monarch, provincial and municipal leaders, the military and, really, any other group or organization that chooses to host a Levée. In Charlottetown today, for example, the President of the University of Prince Edward Island was hosting a levée as was the Bishop, the Women’s Institute, and some business owners. Levées are very social events and are traditionally a way for those in public office to connect with the citizens they serve and for people to mix and mingle while renewing old acquaintances as they gather.
Typically a levée lasts 1-2 hours. Calling cards or business cards are appreciated as each levée-goer is presented to the dignitaries. However, if you don’t have your own cards, blank ones are available at each venue. It is not uncommon for groups of people to sport around in mini-vans with designated drivers or hire a bus or mini-bus to transport them between the levée venues. This is a particularly good idea for those intending to “imbibe”. It also helps with parking as levées on the Island are a popular way to spend New Year’s Day and, generally, draw crowds of several hundred.
Bus Carrying Levée-goers arrives at City Hall Levée
Some people actually strategize and plan out the best way for them to attend as many levées as possible. Some have it down to a science!
A big part of levées are the refreshments. In PEI, we can certainly boast of our hospitality and refreshments at events like levées! The fare and beverage offerings vary from venue to venue but, suffice it to say that you wouldn’t have to visit too many levées before your tummy would be full. I’ll talk more about the refreshment aspect as I describe the six levées I attended today. As you can imagine, as a foodie, I was particularly interested in the fare served!
Our day started out at 10:00am by visiting Fanningbank, home of the Island’s Lieutenant-Governor, Frank Lewis.
Levée-goers entering Fanningbank
Last year, it was drizzling rain and we had a long wait outside but, this year, we were there at the start of the levée and had no wait to speak of. Good thing as it was about -7C this morning. The architecture of this fine Georgian-style home is well worth a visit. The Christmas decorations were still in place and the wood fireplaces were crackling and sending good warmth throughout the home.
The Singing Strings, a youth string orchestra, entertained and provided wonderful background music as visitors wound their way around the grand foyer to greet the Lieutenant-Governor and his wife.
Singing Strings Entertain at Lieutenant-Governor’s 2013 New Year’s Day Levée
Lieutenant-Governor Frank Lewis greets well-wishers at 2013 Levée
After bestowing good wishes for the forthcoming year to Her Majesty’s representative on the Island, attendees were offered the choice of either hot apple cider or a cranberry and vodka cocktail.
Apple Cider or Cranberry and Vodka Cocktail
The dining room table displayed several plates of fruit cake (which was very moist and tasty, by the way) and, what I considered to be the star of the food table, wonderful coconut macaroons, nice, soft, and chewy – just the way macaroons are supposed to be!
Fanningbank Fare
Aren’t these coconut macaroons resplendent in their holiday colors!
Coconut Macaroons at Fanningbank Levée
From Fanningbank, we made our way up Kent Street to City Hall where Mayor Clifford Lee and the city councillors were receiving Levée-goers. Our City’s leaders looked fine, each sporting a red rose on his lapel.
Mayor Lee and City Councillors at City Hall’s 2013 Levée
Treats at City Hall included crackers and cheese along with cookies including gingerbread men. Beverages consisted of a choice of white wine, fruit punch, tea, or Starbuck’s coffee.
City Hall Levée Fare
PEI harpist, Jill Harris, provided wonderful background music for the event.
Harpist Jill Harris at Charlottetown City Hall Levée 2013
Leaving City Hall, we travelled down to Haviland Street to the Haviland Club. I had never been in this historic building before and found its interior design quite intriguing. Refreshments consisted of cheese, crackers, and cold cuts along with a vegetable and dip platter and the bar was open at the Club today as well.
Haviland Club Levée
Our next stop took us to the HMCS Queen Charlotte on Water Street Parkway. I had heard that they served great seafood chowder at their Levée and, as those of you who are regular followers of my blog and twitter will know, this foodie has a thing for seafood chowder! This version was really good served with a choice of white or whole wheat roll. Their signature beverage was Moose Milk. Yes, that’s right, Moose Milk – not quite sure on the exact ingredients but it is a concoction of rum or whiskey (not sure which), milk or eggnog, ice cream, and spices and ….. I didn’t get to try it because I was driving but I heard it was really good!
Moose Milk and Seafood Chowder at HMCS Queen Charlotte Levée
Next on the agenda was the Prince Edward Island Regiment on Haviland Street. These two lads stood at attention as levée-goers made their way inside and I’m sure these two fellas must have been frozen.
Members of the Prince Edward Island Regiment Stand Guard at Entrance to the Regiment’s 2013 Levée
The PEI Regiment band was entertaining inside. The Regiment served chowder as well and had the packages of crackers laid out in the shape of 2013. Having just had chowder up the street, I had to pass this one by but it sure looked good, too.
Prince Edward Island Regiment Levée
After a busy morning of five levées, we took a mini break and then attended Premier Robert Ghiz‘ levée held from 3:00pm – 5:00pm at the Confederation Centre of the Arts in the city center where the Premier and his wife, Kate, along with their two wee daughters greeted Islanders.
There was a huge line-up for this levée but we arrived about 20 minutes before it began and were easily able to get inside the lobby from the cold while we waited. Each attendee was photographed with the Premier and his wife (last year, the photographs arrived in the mail 2-3 weeks into January).
Premier’s 2013 Levée
The reception was held inside Memorial Hall where there were trays of fruit, cheeses, and crudités and waiters circulated with trays of bacon-wrapped scallops.
Levée Fare at the PEI Premier’s 2013 New Year’s Day Levée
My favorite was the same as last year, a whipped garlic potato piped into small dishes and then topped with bacon bits, sundried tomatoes and chives, and/or sour cream. Simply divine!
Whipped Garlic Potato with Toppings
Fruit punch, wine, tea, and coffee were also available.
Fruit Punch
A pianist provided background music.
Musical Entertainment at Premier’s Levée
I hope you have enjoyed this mini-tour of just a few of the New Year’s Day levées held on our beautiful Island on this cool winter day.
Best wishes to you and yours for good health, happiness, and prosperity in 2013.
One of the most relaxing ways to spend an afternoon over the Christmas holiday season is with an afternoon tea. As someone who loves to bake, I always seem to “over-do” it on the baking front at Christmas!
Holiday Afternoon Tea Setting
Living on an Island on Canada’s East Coast, we have ready access to lobster. I maintain there is no comparison to our fine quality lobster that comes out of the cold Atlantic waters. Lobster at Christmas is one of our traditions. This year, the prices have been particularly good for consumers (CD$4.99/lb, uncooked; $5.99/lb, cooked) but not so much for the lobster fishers. Naturally, I chose lobster sandwiches for my holiday tea!
Lobster Sandwiches
The filling for the lobster sandwiches was nothing more than the lobster, finely chopped celery, mayonnaise, a squirt or two of lemon juice, and a bit of Dijon mustard. I don’t like to add any ingredients that will detract from the fresh taste of the lobster itself.
I served locally-made Eggnog from Charlottetown’s Purity Dairy. With a sprinkle of nutmeg, this seasonal beverage was very tasty! And, of course, freshly brewed tea served in my newly-acquired Sadler Christmas teapot and matching cups and saucers, rounded out the beverage menu.
Sadler Christmas Teapot
I also included my new miniature teaspoons adorned with little teapots.
In addition to my fruit cake, I always try to ensure my Christmas baking includes a mix of squares, cookies, balls, and shortbread. I also try to ensure a mix of colors and textures on my sweet trays. Yes, I know that the traditional way to serve is to have the sandwiches on the bottom tier and the sweet treats on the top tier. However, as you can see, I had lots of different varieties of sweets so needed the bigger plate for them given my tea table was small and had limited room for additional trays! Therefore, I reversed what is served on the two trays of the server.
Christmas Sweets!
I shaped the macaroons into miniature tree shapes and presented them on their own separate tray.
Macaroon Trees
My tea table is not large so I chose a small floral centerpiece of red and white miniature carnations mixed with seasonal greenery and accented with frothy baby’s breath.
The Tea Table
I love winter afternoon teas by the fireplace!
These tea plates are new this year, too.
Place Setting
Fireside Tea
Must eat these up before they melt by the fire!
I hope you take some well-earned relaxation time over this holiday season and that a nice cuppa tea with some delectable sweet treats are part of your celebration.
Best wishes for a wonderful new year!
Barbara
I will be sharing this posting with Sandi at her Tea Time Tuesday event at Rose Chintz Cottage.
Sometimes, I like to glitz up my Christmas Eve tablesetting and I thought you might like to have a look.
Christmas Eve Table Setting
My dining table is not large but comfortably seats four and can accommodate six guests. To give an air of formality to the setting, I started out with an antique Irish linen tablecloth and chose simple gold charger plates to frame each place setting. And, of course, I used my fine china for the occasion.
For the central tablescape, I opted to go with one main floral arrangement flanked by two smaller matching satellites. Additional satellites can be added if the length of the table is greater. It’s a great way to extend the floral centerpiece down the entire length of a dining room table. The color scheme is deep rose that draws that particular color out of the darker flowers in the Royal Albert “Lavender Rose” china pattern.
Small glass cubes are very versatile standbys to have in a collection of vases. Here, I have covered them in a sparkling ribbon that shines like rhinestones. This, of course, covers up the mechanics of the arrangement (i.e., the oasis used to hold the flowers in place) and also lends an air of elegance to the table. I used lots of magnolia leaves and seasonal greens as the base for each arrangement, then the roses, and finally the frothy baby’s breath was added. Magnolia leaves are wonderful because they are deep green on one side and a velvety rusty-brown on the underside. So, you’re getting two colors and texture with one leaf!
Roses on a bed of magnolia leaves and seasonal greenery
One of the easiest ways to present napkins is in a napkin ring. Here, I have chosen a very simple napkin roll because the flowers form the focal point of the table and an extravagant napkin fold is not necessary. I found these “blingy” napkin rings a while back at our local Winners store.
Place Setting
I love these wonderful little clip-on birds. I use them on trees, in mantle sprays and garlands, and even work them into place settings. So it wouldn’t appear too “matchy-matchy”, I selected two green and two pink, again to bring out the colors in the china.
Birds Adorn Each Place Setting
The color of these roses is just extraordinary. It’s amazing how well the rusty-brown of the magnolia leaves works with the deep rose color of the flowers.
Deep Rose Roses
Here is an overhead view of the table. I usually line up the cutlery but, for this setting, opted to stagger the height of the flatwear.
Festive Holiday Table
For safety reasons, I am not a big fan of using tall taper candles in tablescapes, particularly those (like this one) that will actually be used. One jerk of a knee on a table leg and a tall burning candle is easily knocked over. Generally, if my tablescape involves candles, I will choose to use low votive candles. There are many beautiful and decorative votive holders on the market and they will still give the soft glow and ambiance of candlelight and I find them safer options.
One of the things to keep in mind with any table setting is the time of day it will be used. Colors change in different lights. Some colors look great in daylight but don’t show well at night. Some will work well no matter the lighting. Here is a photo of my same table setting at night. The colors of the roses change and get a little deeper shade and everything has a warmer golden glow. I particularly like how the ribbon surrounding the glass cubes really sparkles in the glow of the evening candle light. When you are selecting the color scheme for your table setting, it’s a good idea to make sure that the colors can transition well from daytime to evening, if you are planning to use it for both.
In the Evening Light
Roses and Birds
Our Christmas Eve dinner tradition is very seafood-oriented. We start with seafood chowder, then fresh Atlantic lobster with salads and, for dessert, finish with cherry cheesecake. This year, our wine pairing was Matos Chardonnay, produced from locally-grown grapes from vineyards in St. Catherine’s, PEI. You can check out my October 22, 2012, story on Matos Winery by clicking here.
Matos Chardonnay
The seafood chowder recipe I used is Jeff McCourt’s PEI Seafood Chowder. You can find this recipe included in the story I wrote on September 16, 2012, following my participation in one of the culinary boot camps at which Chef McCourt taught at the Culinary Institute of Canada in Charlottetown, PEI.
Seafood Chowder
How appetizing does that great Atlantic lobster look!
Traditional PEI Lobster Dinner
And, for anyone who still has room left, a piece of cherry cheesecake as a finale to Christmas Eve dinner.
Cherry Cheesecake
Setting a beautiful table adds to the festive mood of the holiday. Thank you for visiting my blog today and enjoy this holiday season.
To view my other Christmas and New Year’s tablesettings, click on the links below:
For this, my second tablescape of the Christmas season, I have opted to go with a more casual look, using everyday plain white dinnerware because it is not always necessary to have fine china in order to set a festive table. This setting would be quite suitable for weekday family dinners over the holidays or for casual dinner parties where you don’t want the look to be too fussy and overstated.
Cupcakes with Cherries on Top!
The centerpiece consists of three separate arrangements of carnations to look like iced cupcakes with a red cherry carnation on top. I have left the three arrangements together because my dining table is not large. They can, however, be separated and dispersed down the length of the table. To complete the look, I simply added some of my favorite Christmas balls and a couple of decorative votives and, voila, a simple yet attractive centerpiece.
I like these little votives for tealights. They are very versatile.
These are some of the Christmas decorations that hang on my living room tree and, of course, I always buy extras to place here and there throughout the house to tie the look together. I often use them in my holiday tablesettings.
Below is a top view of the cupcake tablescape.
For this setting, I decided to just use a runner down the center of the table instead of a full tablecloth. Keeping the wood of the table exposed lends itself to a casual setting. For each place setting, I used Christmas poinsettia placemats that work well with the poincettia-themed napkins. These hard placemats are great because they can easily be wiped off and they protect the table from hot plates. This is particularly important to consider when opting not to use a full tablecloth with a protective table pad underneath. If you are going to be serving a hot meal, I recommend these ‘board’ placemats.
Typically, I tend to use plain-colored napkins. However, because I was setting this table with plain white dinnerware, I chose napkins with a seasonal pattern of burgundy and green because there was nothing on the table that they would clash with and I thought they would add a splash of color to each white place setting. If I had used plain white napkins on a white plate that sat on a mostly off-white placemat, the placesetting would have gotten lost. The napkin fold I used is called the “wave”. It is a simple fold in keeping with the simplistic setting. It also works well with the entire tablescape which is low. I then placed the cutlery on top of the napkin, giving the setting a more informal and relaxed look.
The “Wave” Napkin Fold
This is a great setting to use when the event calls for understated, more casual dining.
It’s no secret that I love setting beautiful tables! I genuinely believe it enhances a wonderful meal by providing the ambiance and it shows your guests that you put some thought and care into the dinner party. Today, I am sharing photos and a description of my Evergreens and Reindeer Christmas Tablescape. Continue reading Evergreens and Reindeer Christmas Tablescape→
This year seemed to be a particularly good year for growing pumpkins on the Island. Everywhere I looked I saw fields, bins, and wagons full of the bright orange pumpkins which are members of the gourd family.
Trailer Loads of Pumpkins at Kool Breeze Farm in Wilmot Valley, near Summerside, PEI
Bins of Pumpkins at Kool Breeze Farm
Funny how we can’t wait to display them on our doorsteps and in fall displays but, once the end of November arrives, we don’t want to see pumpkins hanging around as thoughts turn to Christmas decorating.
Pumpkins at Compton’s Vegetable Stand, St. Eleanors, near Summerside, PEI
Field of Pumpkins, Marshfield, PEI
So, wondering what to do with those pumpkins instead of throwing them into the compost bin? Why not make a batch of old-fashioned pumpkin jam. This isn’t an altogether common jam you are likely to find on many supermarket shelves. Yet, it is a very tasty, economical, and versatile jam that only takes four ingredients — pumpkin, sugar, crushed pineapple, and jello. This is a jam that my grandmother used to make every fall for her brother yet I don’t recall it ever being on her own pantry shelves and I’m not sure why.
The jam has a wonderful bright orange-yellow color. In fact, I think it is more like a marmalade than a jam. Regardless, it is very tasty on toast, biscuits, as a filling for cookies, and as a dollop on warm vanilla custard.
Pumpkin Jam on Biscuits
Pumpkin Jam as a Filling for Thumbprint Cookies
To make the jam, select a pumpkin that is more oblong than round in shape. I visited my local vegetable stand and they told me these are “jamming” pumpkins.
Pumpkin for Jam
Cut the pumpkin open and remove and discard the seeds and pulp.
Split Pumpkin Ready to be Seeded
Cut the pumpkin flesh into finely diced pieces and place in pot.
Diced Pumpkin
Add the sugar to the diced pumpkin and let the mixture sit overnight. The sugar will draw the juice out of the pumpkin.
Adding Sugar to the Diced Pumpkin
In the morning, drain and reserve the juice from the pumpkin.
Draining the Juice from the Pumpkin
Boil the juice for 20 minutes over medium heat to form a syrup.
Syrup for Pumpkin Jam
Add the drained pumpkin to the hot syrup.
Adding Pumpkin to Hot Syrup
Over medium heat, cook the pumpkin until it starts to become transparent, approximately 20-30 minutes.
Cooking the Jam
Add the can of crushed pineapple and its juice to the jam.
Adding the Crushed Pineapple to the Pumpkin Jam
Add the jello to the jam.
Adding the Jello to the Pumpkin Jam
Bring jam to a boil over medium heat.
Cooked Pumpkin Jam
Meanwhile, sterilize the jars.
Fill the sterilized jars.
Bottling Pumpkin Jam
Place warmed lids on the hot jam bottles to seal and fingertip-tighten the rims to the bottles.
Placing Lids on Jam Jars
Store this jam in the refrigerator for approximately 1 month and enjoy it fresh as a treat when pumpkins are in season.
Pumpkin Jam
Thank you for visiting “the Bistro” today. There are lots of ways to connect with “the Bistro” through social media:
Join My Island Bistro Kitchen on Facebook Follow the Bistro’s tweets on twitter @PEIBistro Find the Bistro on Pinterest at “Island Bistro Kitchen” Follow along on Instagram at “peibistro”
Cut, peel, remove and discard seeds and pulp of pumpkin. Cut pumpkin into small diced pieces.
Place diced pumpkin in large pot. Add sugar. Soak overnight.
Drain pumpkin in colander, reserving juice.
Return reserved juice to pot and boil for 20 minutes over medium heat.
Add the drained pumpkin to the hot syrup. Cook over medium heat until pumpkin pieces start to become translucent, about 20-30 minutes.
Add the crushed pineapple and its juice to the mixture. Stir.
Sprinkle the jello over the mixture. Stir and bring mixture to a boil over medium heat.
Sterilize the jars either by using the sanitizer setting on the dishwasher or by placing the jars in boiling hot water.
Fill sterilized jars, leaving approximately 1/4" head room at jar top. Heat lids and place on jars. Fingertip tighten rims to jars. Store this jam in the refrigerator for apx. 1 month and enjoy it fresh as a treat when pumpkins are in season.
Be sure to follow me on twitter @PEIBistro as, in the days leading up to Christmas, I will be posting Christmas gift ideas for the foodies on your list.
As we draw near to the end of harvest season, and before we embark on the busy Christmas season, I thought I would share some photographs from my Harvest Afternoon Tea. Happy Thanksgiving to our neighbors to the South who are celebrating the American Thanksgiving today (November 22, 2012).
The Tea Table
I like the rich colors and tones of autumn – the deep shades of greens, oranges, golds, reds, and rusts.
I love these little matching individual-sized white teapots (photo below)! I don’t have a large collection of china teacups and saucers but do have some seasonal ones like these fall-themed ones.
My harvest tea table has a distinctive fall theme to it, mostly centered around pumpkin!
The cooler autumn days often sees us drawn closer to the warmth of the fireplace.
Harvest Afternoon Tea Setting
As much as I love the colors of fall, I love the flavours of the season equally well. One of the least common jams is pumpkin jam and I don’t think I have ever seen it on a store shelf yet it is so tasty and simple to make. I will soon be publishing a separate posting with the recipe for this jam on my blog so don’t throw out those pumpkins just yet as I will have a use to which you can put them!
For my tea table, I chose a fall-themed menu of homemade biscuits served with the pumpkin jam, petite pumpkin muffins perfectly sized for tea-time, shortbread (which you may know by the name “Scotch cookies”), pumpkin tarts, and thumbprint cookies filled with the pumpkin jam.
These are some of my foods of autumn.
I like the tiered stands and use them frequently on tea tables. They are convenient, take up less space on the table, and look impressive.
I was able to find these great peach and yellow-colored tea roses which I think really enhanced the tea table.
My living room mantle dressed for autumn makes a great backdrop for the tea table.
Thank you for visiting “the Bistro” today. There are lots of ways to connect with “the Bistro” through social media:
Join My Island Bistro Kitchen on Facebook Follow the Bistro’s tweets on twitter @PEIBistro Find the Bistro on Pinterest at “Island Bistro Kitchen” Follow along on Instagram at “peibistro”
Potato Vodka Made by Prince Edward Distillery, Hermanville, PEI
PEI has long been known for growing world-class potatoes – they are, after all, our primary cash crop, injecting more than one billion dollars annually into the Island economy, directly and through spin-offs[i]. We all know potatoes as a vegetable on dinner tables and are familiar with them boiled, mashed, baked, as French fries and potato chips, and as the key ingredient in scalloped potatoes. But, would you think of potatoes as a main ingredient in a beverage? Well, there are a couple of industrious and innovative women who have figured out a new use for PEI spuds. Julie Shore and Arla Johnson own and operate Prince Edward Distillery where potato vodka is their flagship product.
Road Map from Charlottetown to Hermanville, location of Prince Edward Distillery
Drive east from the Island’s capital city of Charlottetown along the northeastern shore of the Island and you will find Hermanville, a small rural district not far from the town of Souris in the eastern end of PEI. Late this past summer, I travelled to Hermanville to visit Prince Edward Distillery to find out about this potato vodka. In addition to learning how potato vodka is made, I learned the Distillery is diversifying its operation. They are now producing gin, rye whiskey, rum, and a bourbon-style corn whiskey that sells under the label of IC Shore and that’s in addition to the potato vodka and wild blueberry vodka. Also new this year (2012) are their decadent rum cakes made locally with the Distillery’s Merchantman 1897 rum.
Products Made at Prince Edward Distillery, Hermanville, PEI
The story of Julie and Arla’s arrival on PEI is similar to several others who have come to the Island and made it their home. They came to PEI on holiday in 1997, fell in love with the Island, and decided to move here. Leaving their jobs behind – Julie as a dental hygiene sales representative and Arla as a psychologist – they built an Inn (Johnson Shore Inn) in Hermanville in 1999, down a long, secluded, and narrow, unpaved lane that leads to a spectacular unobstructed view of the Gulf of St. Lawrence. However, they soon discovered the tourist, and by extension the innkeeper’s, season is short in rural PEI (usually late May to the end of September). That extra time on her hands got Julie thinking about the business her ancestors had been in, pre-prohibition, in North Carolina – distilling apple brandy and bourbon. Living in the land of potatoes, Julie had the idea to set up a distillery to produce potato vodka. Thus, in 2007, Prince Edward Distillery was born with the first batch of potato vodka running from the still’s spigot in 2008.
Rum, Whiskey, and Rye Produced at Prince Edward Distillery
Julie is the master distiller. In 2011, the Distillery produced 10,000 bottles of the six different liquors the Distillery produces. Apart from her ancestral history of distilling (she’ll tell you distilling is in her blood!), I asked Julie if she had to have special training to be a distiller. She tells me she has taken a distilling course at Cornell University and yeast-making courses in Montreal and France. She and Arla travel the world over visiting distilleries and learning more about the art of fine distilling. Visit their onsite retail outlet and look at the large map on the wall that points out the impressive world travels Julie and Arla have journeyed.
Julie says the best variety of potatoes for potato vodka is Russet Burbank. These spuds are the highest starch potato grown on the Island and the starch content is important for the yeast to work in the fermentation process. The Distillery buys approximately 50,000 pounds of locally-grown potatoes, on an annual basis, to use as the base for potato vodka. Julie explains that it takes about 18 pounds of potatoes to produce one 750 ml bottle of the potato vodka so, as you can imagine, it takes a lot of spuds to yield any amount of vodka. While potato vodka is not unheard of, it is more rare since 99% of vodkas on the market are grain-based. That’s probably because, as Julie says, potato vodka is difficult to distill due to the fact that potatoes are approximately 80% water, have to be cooked, and it takes such a volume of the raw ingredient (potatoes) to produce the final product.
Prince Edward Distillery’s Potato VodkaTour of Prince Edward Distillery
Making potato vodka is very labour intensive. The potatoes are ground and cooked to break down their starch into fermentable sugars so that fermentation will occur with the addition of yeast (wait till you hear what is done with the leftover mash from the potatoes and who the benefactors are!). The mixture is fermented for four days in 1000-gallon tanks to form alcohol.
German-made Holstein Copper Vertical Still at Prince Edward Distillery
Using a 680-litre German-made Holstein copper vertical still that Julie had imported from Germany and capably assembled herself (since it came in parts and didn’t come with an instruction book), this fermentation mixture is distilled three times to remove impurities, achieve a neutrality of the alcohol, and to get the perfect alcohol content for the vodka. Julie tells me it takes 10-14 days to produce a batch of vodka from start to finish, raw product (potatoes) to bottling.
The Distillery has enjoyed sweet success and very early in its operation. Their products rank among the best. Just a year after producing their first vodka for market, the potato vodka won gold in the 2009 San Francisco World Spirits Competition and, in the same year, the wild blueberry vodka won silver in the UK International Spirits Challenge in London, England. Yes, our locally-produced Island wines and spirits can match any on the market!
Prince Edward Distillery supports local producers, buying and using locally-produced potatoes, grains, and blueberries in their liquor production. The Distillery employs between 4-6 full time employees and 1 part-time employee on a seasonal basis. Currently, their products are sold in PEI and Nova Scotia markets. However, they are exploring markets farther afield.
Prince Edward Distillery’s Spirit Outlet at Peakes Quay in Charlottetown, PEI
This past summer, the Distillery decided to open a spirits outlet shop at Peakes Quay on the Charlottetown waterfront, a popular tourist attraction of small shops and not far from the seaport where dozens of cruise ships dock each year. In addition to the Peakes Quay location (open seasonally), the Distillery’s products are available at the onsite retail shop in Hermanville and in PEI and Nova Scotia liquor stores.
So, about that mash I mentioned earlier – the left-over potato product after the liquid has been extracted for the vodka. Well, behind the distillery may well be what many have dubbed as the most cheerful hogs on the Island! Yes, that’s right, hogs or, more specifically, Heritage Berkshire pigs which Julie raises on the mash. She says there are lots of nutrients left in the potato mash so why throw it out when she can raise pigs on it!
Heritage Berkshire Pigs Raised on Mash at Prince Edward Distillery
The Distillery is open daily, May – October, for tours and taste-testing; from October – May, it is open by appointment or by chance. A tour of the Distillery and taste-testing of two spirits costs $10. (or, if you simply want to taste any spirit, it is $3./taste). For more information on the Prince Edward Distillery, visit their website, call them at 902-687-2586, or, better still (pun intended!), take the scenic northeastern shoreline route to Hermanville and visit the Distillery at 9985, Route 16.
Prince Edward Distillery, Hermanville, PEI
Whimsical T-Shirts at Prince Edward Distillery
True to tradition, when I visit a local producer, I bring home their product and create a recipe with it. I decided to create a Vodka Tomato Sauce for pasta using Prince Edward Distillery’s potato vodka. I find the vodka actually goes well with tomatoes and draws out the tomato flavour and makes it pop without adding a competing flavour to the dish. The key, of course, is not to over-do it – less is often more and the idea is that the vodka enhance and contribute to the taste of the sauce, not overpower it. My recipe creation follows.
Farfalle Pasta in Tomato Vodka Sauce
Thank you for visiting “the Bistro” today. There are lots of ways to connect with “the Bistro” through social media:
Join My Island Bistro Kitchen on Facebook Follow the Bistro’s tweets on twitter @PEIBistro Find the Bistro on Pinterest at “Island Bistro Kitchen” Follow along on Instagram at “peibistro”
[i] Source of Statistics: Prince Edward Island Potato Board, 23 October 2012
Tomato Vodka Pasta Sauce
By Barbara99 Published: November 15, 2012
Yield:
Prep:10 mins
Cook:50 mins
Ready In:60 mins
A rich, flavourful tomato sauce suitable for various types of pasta
Remembrance Day Service at the cenotaph in front of Province House, Charlottetown, PEI, Canada [11 November 2012]Every year on November 11th we pause to remember the sacrifices and achievements of those who valiantly and selflessly served our country in times of war and conflict, and in peacekeeping missions around the world. We remember those who gave the ultimate sacrifice – their lives for their country so future generations could have a better, more secure life. We think about their achievements and the role they played in forming Canada’s nationhood. We thank them for the peace, freedom, and human rights we enjoy in Canada today.
Those of us who have been fortunate enough never to have known or experienced war have opportunities to demonstrate our respect and gratitude for, and remembrance of, these acts of bravery and sacrifice. For example, we wear a poppy on the left breast, close to the heart to signify remembrance of the lives lost.
Poppy
Thousands of people across the country will attend Remembrance Day ceremonies in their local communities where they will respectfully observe a moment’s silence at 11am on the 11th day of the 11th month to mark the time the Armistice was signed to end WWI. Wreaths will be laid in commemoration.
Remembrance Day Wreath
One of the most well-known poems about war was written in May, 1915, by Lt. Col. John McCrae, a Canadian Medical Officer in WWI. While stationed near Ypres, Belgium, where some of the most horrific and bloodiest fighting of WWI occurred, he was motivated to write about the death he saw around him and of the prolific red poppies growing amidst the devastation of war in the Flanders area of western Belgium. His poem, “In Flanders Fields” has become synonymous with Remembrance Day in Canada and Lt. Col. McCrae is often credited with being the catalyst that led to the poppy being identified as the symbol of remembrance of the blood shed by soldiers who were casualties of battle.
“In Flanders Fields”
On this Remembrance Day, I am going to focus my food blog feature story on war cake, a wartime dessert that is still made and served in several Island households today.
War Cake
As a small child I well remember my grandmother making war cake and this was long after WWII had ended. I loved her war cake! It is such a simple raisin-spice cake that is characterized by the absence of eggs and milk — ingredients that would have been scarce during wartime. This cake is sometimes referred to as “boiled raisin cake” because raisins form the main content and the majority of the ingredients are boiled, then cooled, before they are mixed with flour and baking soda and then baked in the oven. Because of food shortages during war time, many foods were rationed.
Ration Books, Cards, and Stickers
Born of necessity, homemakers during wartime became resourceful, frugal, adaptable, and creative in order to feed their families. Cooking tended to be very basic. Women were known to have saved their ration stickers so they could buy the raisins and sugar that the war cake recipe called for – thus war cake would have been a very prized commodity.
War cake was made for consumption on the home front but many also made the cakes in tin cans and packed them in socks, mittens, and underwear they were shipping overseas for their loved ones serving in the war. Imagine the excitement when a soldier would have received this package from home and discovered a mother’s or sister’s war cake inside! Amazingly, with the slow mail and ship service during WWI and WWII, there is evidence these cakes were received as the soldiers would refer to them in their letters home, letters that would have looked much like the July 7, 1914, letter in the photograph below.
Letter from a soldier written from “Somewhere in France” on July 7, 1914. In the letter, the soldier encloses two pansies as “souvenirs from France”, one flower each for the young lady he was writing to and her mother. All these years later, the pressed pansies have still retained their color and are intact.Old War Cake Recipes
In my research for this story, I examined many recipes for war cake and found similarities amongst them all. Some were very sketchy in terms of amount of ingredients to be put in the batter and many were almost totally devoid of any directions. While the amounts of the ingredients may vary slightly, all of the recipes I reviewed were essentially the same in ingredient content. All called for big, sticky raisins (you may know these as “Lexia” raisins), a variety of spices of the cook’s choice, either brown or white sugar or a combination of both, shortening or lard, boiling water, flour, and soda. One thing I noted was the significant amount of sugar that the recipes called for – i.e., two cups per cake. Sugar was one item that was commonly rationed during wartime and a cake taking two cups of sugar would certainly have been considered a luxurious dessert, I am sure. Flavour may vary from cake to cake based on spices used in the batter. The choice of spices varies but typically consisted of cinnamon, nutmeg, and cloves, as a minimum, with ginger frequently appearing in recipes. I added mace and cardamom to my cake to give it a bit more flavour (recipe follows at end).
Ingredients for War Cake
I am told these cakes were often made with lard (as opposed to butter) for a couple of reasons. First, lard has a longer shelf life than butter would have had and, for cakes being sent overseas to the soldiers, it would have been a long journey for the cakes to reach Europe so shelf life of the cakes was an important factor. Second, butter was often scarce during wartime because there were no big herds of cattle on local farms so butter would have been used sparingly, even for those living on farms and churning their own. Lard, on the other hand, would have been much more readily available, particularly on farms. I found a couple of recipes that indicated either butter or shortening could be used in the recipe; however, butter was called for in a much lesser quantity than the shortening, if the latter was used instead. For example, I found one recipe that called for 2 tablespoons of butter or 1 cup of shortening which demonstrates how judiciously butter would have been used, if at all.
While its ingredients are simple, war cake takes some time to make. All of the ingredients, except the flour and soda, are boiled on the stove for 5 minutes. Then it is important to let the boiled raisin mixture cool to room temperature as the mixture will thicken naturally on its own as it cools. This will normally take 4-5 hours. If the flour and soda are added into a mixture that is too hot, the result is likely to be a gummy cake. When the raisin mixture is cooled, the flour and soda are stirred in and the mixture turned into the baking pan. My grandmother made her war cake in a loaf pan; however, traditionally, war cake seems to have been made in some kind of a round pan – usually a tube pan or, in the case of overseas shipping during war time, in tin cans. War cake is a very dense cake which makes it sometimes difficult to get the center of the cake baked without drying out the outside edges. It is also a heavier type cake which makes it somewhat prone to falling in the center. A tube (or Bundt pan, if you have one) removes the baking uncertainty and helps the cake to bake more evenly.
War Cake Baked in a Bundt Pan
War cakes take, on average, about an hour to bake. The old recipes I reviewed didn’t even mention baking the cake let alone at what temperature (in fact, one recipe simply said “to thicken” but didn’t elaborate on what thickening agent was to be used!). These recipes predate our modern electronic ovens! While some suggest baking the cake at 350F, I thought that might be a bit high so I baked my war cake at 335F for one hour. Because there are no eggs or milk in the cake for moistness, it is very easy to overbake the cake and end up with a dry product. Hence, it is important to time the baking carefully and to use a cake tester starting at about the 45-minute point. If the cake starts to darken on the top or edges too quickly, simply place a piece of tin foil loosely over the top. Adding a small pan of water to the lower shelf in the oven while baking the cake will also help to keep the cake moist.
Including a Small Pan of Hot Water on the Bottom Shelf of the Oven Helps to Keep the Cake Moist During Baking
Because of the texture of the cake, it may seem soft on the top and not baked; however, if a cake tester comes out of the cake clean, it’s time to remove it from the oven before it dries out.
War cake is a “stick to the ribs” substantial, hearty kind of cake. It goes particularly well with a nice cup of tea.
War Cake and Tea
In keeping with the traditional way war cake was served, I have photographed the cake plain, just as it would have been eaten during wartime.
Sliced War Cake
War cake was not traditionally iced. However, it would be lovely served with a dollop of whipped cream or vanilla or maple ice cream. It could also be dressed with a brown sugar sauce or, to make a plain cake really decadent, why not serve all three – ice cream, brown sugar sauce, and whipped cream!
War Cake on a Tea Table
War Cake
Regardless where you are in the world, if you have any wartime memories (either your own or those passed down to you from your ancestors) of war cake made for consumption on the home front or to send to the soldiers fighting the war, I would love to hear about them. War cake is a part of wartime culinary history.
Here are some photographs of the Remembrance Day Ceremony at the cenotaph in downtown Charlottetown, PEI, this morning.
Remembrance Day in Charlottetown, PEI [11 November 2012]Lest We Forget
Hon. Robert W.J. Ghiz, Premier of the Province of Prince Edward Island lays a wreath on behalf of the people of the Island at the Remembrance Day Service in Charlottetown, PEI [11 November 2012]Small Child Watches as a Veteran lays a Wreath at the Remembrance Day Service in Charlottetown, PEI ]11 November 2012]
Remembrance Day 2012
Veterans Laying Wreaths at Remembrance Day Service in Charlottetown, PEI [11 November 2012]At the Charlottetown Cenotaph – Remembrance Day 2012
Flag Flies at Half-Mast on Remembrance Day, Charlottetown, PEI [11 November 2012]
An old-fashioned cake made with large sticky raisins and a mixture of spices. Common cake during war time.
Course Cake
Cuisine Canadian
Keyword war cake
Servings12
My Island Bistro KitchenMy Island Bistro Kitchen
Ingredients
3/4cupshortening
2cupsbrown sugar, lightly packed
1poundlarge, sticky raisins
1tspsalt
1tspcinnamon
1tspnutmeg
1/2tspcloves
1/4tspginger
1/8tspmace
1/8tspcardamon
2cupsboiling water
3cupsall-purpose flour
2tspsoda
Instructions
Assemble ingredients.
Place the shortening, brown sugar, raisins, salt, spices, and boiling water into a large saucepan. Over medium-high heat, bring mixture to a boil. Reduce heat to medium or slightly lower and boil mixture for five minutes. Remove from heat and set saucepan on cooling rack. Let mixture cool to room temperature (4-5 hours), stirring occasionally.
In bowl, whisk the flour and baking soda together. Set aside.
Grease large tube or Bundt pan.
When raisin mixture has cooled completely, add the flour and baking soda. Stir until dry ingredients have been completely mixed into the raisin mixture.
Spoon mixture into greased pan. Add a small pan of hot water to lower shelf in oven for moisture while cake is baking. Bake cake on middle rack in 335°F preheated oven. If cake starts to brown on the top too quickly, loosely place a piece of tin foil on top of cake. Bake apx. 1 hour but begin to test cake for doneness, using a cake tester, at the 45-minute point as cake can dry out very quickly.
Remove cake from oven and place pan on cooling rack for 10 minutes then remove from pan. Allow cake to cool completely before cutting.
One crop we grow really well on this Island is potatoes. Our PEI spuds are world-class quality and often win awards on the national stage. According to statistics obtained through the Prince Edward Island Potato Board, 86,500 acres of potatoes were grown on the Island in 2012. An economic impact study was completed in 2012 showing that the potato industry contributes over one billion dollars annually to the PEI economy, either directly or through spin-off effects. Now, that’s no small potatoes!!!
Last spring, I was looking for a potato operation and a potato field that I could follow from planting through to harvesting specifically for this blog post entry. It’s one thing to go into the supermarket and purchase a bag of potatoes but it is quite another to know where the potatoes come from and to watch them grow and I thought my readers would be interested to see some photographs of potato growing and harvesting on PEI. One evening in mid-May, I was heading from Summerside to Charlottetown “through the 225” as the locals refer to one of the shortcut routes between the two cities, when I came across this rather large and odd-looking black machine pulling into a huge field.
Filler Machine Loads Seed Potatoes Into Potato Planter in Warren Grove, PEI [19 May 2012]Of course, curiosity got the best of me and I did a u-turn fairly quickly and drove into the field where I discovered four tractors and machines were working at preparing the soil, fertilizing, and planting the field with potatoes. Lots of John Deere equipment moving in that field on a Saturday evening in May!
Preparing to Plant Russet Burbank Potatoes in Warren Grove, PEI [19 May 2012]Well, I thought this was just very fortuitous timing! I had found my field to follow!!! It turns out the field in Warren Grove, near North River on the outskirts of Charlottetown, PEI, was being planted by Smith Farms of Newton, near Kinkora, in the central part of the Island.
Robert, the man driving the big John Deere tractor that was hauling the rather ominous looking black machine, was very willing to explain what the machine was. I learned it is called the “filler machine” – it brings the cut potato seed from the warehouse to the field where it is then loaded into the planter. I asked if it would be okay if I took some photographs of the machine as it filled the planter. Robert explained that I’d have to be quick if I wanted to get a picture of it as it speedily fills the planter that backs in under it. Quick isn’t the word for it – it’s more like ‘in a blink of an eye’ and then the planter pulls away from the filler machine and off it goes down the field to plant the spuds.
Planting Potatoes in Warren Grove, PEI [19 May 2012]According to the Prince Edward Island Potato Board, there are over 100 varieties of potatoes grown in PEI but the majority of the acreage is made up of the top 30 varieties. The most common variety, Russet Burbank (which is what this field in Warren Grove was planted with), accounts for about 50% of the potato acreage grown on PEI. The Russet is a multipurpose variety used at local processing plants to make frozen French fries as well as for food service and retail bags of table potatoes (because of its slender shape, the Russet makes a great choice for baked potatoes, in particular). The Potato Board tells me that other common varieties grown on the Island include Superior (an early round white table variety), Goldrush (a long russet skin table variety), Yukon Gold (a yellow flesh table variety), Norland (a red skin, white flesh table variety), and Atlantic (a round white variety use to make potato chips.)
The Potato Board says, over the past three years, PEI seed and table potatoes have been shipped to over 30 countries besides Canada and the United States. No matter where you are, chances are you may have sampled PEI potatoes! The next time you are in your local supermarket, be sure to check the bags of potatoes to see if they may have come from the rich and fertile red soil of PEI, Canada.
Bags of PEI Potatoes in Retail Store
On June 25th, I found the field was lined with neat rows of bright green leafy plants. The potatoes were growing well!
Potatoes Starting to Grow – 25 June 2012
Over the next several weeks I would periodically drive by the field to see if the delicate white potato blossoms would appear. Sure enough, on August 8th, I found they were out in blossom.
Potatoes Blossoms [8 August 2012]
Russet Burbanks in Blossom [8 August 2012]In mid-October, it was time to harvest the potatoes. I followed the windrowers and potato harvester in the field and spoke with Andrew Smith who told me these potatoes are destined for Cavendish Farms, a processing plant in New Annan, PEI, which makes frozen French Fries. As you can see by the long slender length of these Russets, they are well-suited for French Fries!
Harvesting the Russet Burbank Potatoes in Warren Grove, PEI [17 October 2012]There were literally dozens and dozens of seagulls following the harvester, looking for “left-over” potatoes in the field!
How many workplaces have a gorgeous backdrop of fall foliage like this one does! And, I was lucky enough to spend part of an afternoon in this workplace, following the harvesting equipment. There is nothing like the smell of fresh PEI soil turning up spuds on a crisp, sunny October afternoon!
Potato Harvesting in Warren Grove [17 October 2012]Potato Harvesting in Full Swing in PEI [17 October 2012]
Potato Harvesting in PEI [17 October 2012]The windrowers dig several rows of potatoes at once and move the potatoes over into one row. This field had two windrowers working in it. The harvester then comes along, also digging several rows at the same time, and picks up all the potatoes left by the windrowers. This process speeds up the harvesting. Andrew told me that when he moves the harvester down the length of the field after the two windrowers have first gone through, he is picking up potatoes from 11 drills, transferring them to the truck that drives alongside the harvester! The truck then transports the potatoes to the warehouse.
Windrowing and Digging in the Evening [17 October 2012]PEI weather is often unpredictable in fall (sometimes quite rainy) so potato farmers have to work with the weather which often means they dig potatoes late into the evening to ensure the crop gets out of the ground.
Potato Harvesting at Night [17 October 2012] I debated what I would make to showcase the Russet Burbank potatoes that came out of the Warren Grove field. I settled on a potato puff. The Russets are a lovely white flesh potato with a somewhat dry texture that makes them a good choice for this dish. This is a suitable side dish that pairs particularly well with chicken, beef, or pork.
Duchess Potatoes Made with PEI Russet Burbank Potatoes
My thanks to Smith Farms of Newton, PEI, for allowing me to follow their potato planting and harvest cycle this year.
Thank you for visiting “the Bistro” today. There are lots of ways to connect with “the Bistro” through social media:
Join My Island Bistro Kitchen on Facebook Follow the Bistro’s tweets on twitter @PEIBistro Find the Bistro on Pinterest at “Island Bistro Kitchen” Follow along on Instagram at “peibistro”
Roasted Marinara Sauce with Sun-dried Tomato Pork Sausage on Halloween Pasta
I was looking for a meal to serve that would have a Halloween theme when I came across these wonderful orange and black Italian-made farfalle pasta. I bought the pasta not knowing how I would prepare and serve it. It just looked so fun and season-appropriate that I couldn’t pass the pasta by! Served with locally-made sun-dried tomato and pork sausage tossed in a rich and flavourful homemade marinara sauce, and topped with freshly grated Parmigiano Reggiano cheese, this pasta dish was a real hit. Add a freshly toasted garlic and cheese roll and a glass of red wine, and this meal is easily dressed up.
Italian-made Durum Wheat Semolina Farfalle Pasta
I am very lucky as we have a great little meat shop in Charlottetown, KJL Meats, co-located with the Riverview Country Market on Riverside Drive. Using locally-produced pork , they make several varieties of wonderful sausages onsite. The variety I chose for this dish was sun-dried tomato and I was not disappointed – it was really good! They tell me their sausages are all natural with no additives or preservatives. I also dropped by our local “Liquid Gold” store and picked up two new products (will soon need extra cupboards to store all these oils and balsamic vinegars in!) — a bottle of oregano white balsamic vinegar and one of organic Tuscan herb infused olive oil were added to my growing collection! Both were used in the marinara sauce and I also cooked the sausage in a small amount of the Tuscan olive oil. Freshness matters and I find their products are super-fresh.
My recipe for the marinara sauce is my own creation. Don’t be put off by the number of ingredients — it takes them all to make the flavour. I like to roast the vegetables for the sauce because it gives them a distinct and rich flavour that I would classify as “full-bodied” in any dish. After they are roasted, I break them up loosely with a potato masher. There is no need to worry about getting them crushed completely at this point since that will occur later during the purée stage. All that needs to happen at this point is that they are crushed enough to allow their juices and flavours to permeate the sauce while it cooks. I like to use the immersion blender to purée the sauce in the stock pot. I tend to like the sauce a bit on the chunky side so I don’t purée it completely smooth but that is a matter of personal taste. If you don’t have an immersion blender, a food processor or blender can, of course, be used – just make sure you let the mixture cool before placing it in the processor or blender. The sauce takes a bit of time to make but it is good (and the house smells divine in the process!). This recipe makes about 3 1/2 cups but it is easily doubled. The sauce also freezes really well which makes meal preparation quick and easy on a busy evening. I cooked the sun-dried tomato pork sausage, then sliced it into thin slices (about 1/8th inch thick) before tossing it in the sauce and serving it over the pasta. The sausage could also be removed from the casing and scrambled fried instead of being sliced.
This was a fun dish to create and even more fun to eat, particularly with the orange and black Halloween pasta!
Halloween Pasta Served with Roasted Marinara Sauce
Thank you for visiting “the Bistro” today. There are lots of ways to connect with “the Bistro” through social media:
Join My Island Bistro Kitchen on Facebook Follow the Bistro’s tweets on twitter @PEIBistro Find the Bistro on Pinterest at “Island Bistro Kitchen” Follow along on Instagram at “peibistro”
Roasted Marinara Sauce
By Barbara99 Published: October 30, 2012
Yield:3 1/2 cups
A rich, thick, flavourful tomato sauce that is a great accompaniment to pasta or pizza
Preheat oven to 450 degrees. Cut vegetables into 1/2" - 1" pieces. Slice the parsnip slightly thinner. Place in a bowl and drizzle with olive oil, tossing to coat vegetables. Place on tin foil lined baking sheet. Sprinkle with sea salt and freshly ground pepper. Roast for about 40 minutes until vegetables are slightly fork tender and edges of vegetables start to char slightly. Peel garlic. Transfer vegetables and garlic to stock pot and, with a potato masher, loosely break up the vegetable chunks.
Add remainder of ingredients. Over medium-high heat, bring mixture to boil. Reduce heat and simmer over low heat for 45-50 minutes, stirring occasionally.
Remove from heat and discard bay leaf. Using an immersion blender, purée sauce to desired consistency. (Alternatively, let mixture cool and transfer to food processor to purée.)
Toss with pasta (and meat, if using) or use as pizza sauce. Freezes well.
Matos Winery & Distillery, St. Catherines, Prince Edward Island
The farmers on PEI are busy with their various harvests these days and taking full advantage of the great weather we have been having. I stopped by Matos Winery in St. Catherines, PEI, last Wednesday as they were picking the grapes. I had visited the winery in early September and toured the vineyards but delayed posting the story until harvest time because I wanted to visit the winery when the grapes were being picked and processed.
When I first met Jim and Heather Matos on an early September Saturday afternoon, Jim had just finished the painstaking work of netting all the grapevines in an effort to keep the birds at bay. Despite Jim’s best efforts and the addition of noise maker squawkers, the birds did pose a problem this fall as they figured out a way to still get at the grapes despite the netting. This meant a loss of some of the grape crop.
Netting the Grapes To Protect Against the Birds
Matos is a new winery in its second year having opened for business on June 24, 2011. The Matos’ bought the St. Catherines property near Cornwall and prepared the soil in 2006. They then did their first vine planting in 2007 followed by three years of labour-intensive work that culminated in their first grape harvest in October, 2010.
I asked Heather what brought them to PEI to open their winery as the Island is not known as a wine-making region (we currently have only three wineries operating on the Island). She tells me they came to PEI on a holiday in 2004 and fell in love with the Island. When they decided to open a winery, they looked at locations as far away as Europe and the United States but were still drawn back to PEI. In fact, after hearing about the harsh, cold winters (often with a lot of snow) on the Island, Jim came to PEI for a visit in the dead of winter to see if the conditions would be conducive to grape-growing. Finding them suitable, the couple settled on a property in St. Catherines that had a certain slope, angle, and close proximity to a waterway – all conditions Jim was looking for in a location for a vineyard. Jim says grapes require good sandy soil and they do well in hot, dry summer conditions like we had in 2012.
Matos Vineyard, St. Catherines, PEI
The vineyard itself covers 11 acres and is home to 16,000 grapevines imported from France. The species of grapevines are vitis vinifera which means they are not as hardy as hybrid vines. Vinifera vines are more susceptible to disease and require more care but Jim maintains they produce a better quality of wine than hybrids.
Two varieties of grapes are grown in the vineyard – Chardonnay and Gamay.
Grapes in the Matos Winery Vineyard
From these grapes, Matos produces five kinds of wine – Chardonnay, Gamay-Noir, Rosé, Wildberry Gamay, and Strawberry Chardonnay. The Matos tell me they produced approximately 18,000 bottles of wine last year.
Jim is no stranger to winemaking. He comes from a long history of vintners. His family had a vineyard and made wine in the Acores, Portugal. After coming to Canada, the Matos ran a U-brew business importing wine-making supplies in Ontario for 20 years before deciding to start their own winery.
Walk with Jim through the precise, neat, and meticulously cared for rows of grapevines in the vineyard and it is easy to see and hear his passion for winemaking and dedication to high quality. A perfectionist, he is more concerned about producing quality products versus quantity. The Matos also have a keen eye for different products so much so that they are also distilling a couple of unique spirits, too. Using the skins of the grapes left over from winemaking, Matos is producing Bagaço which is a Portuguese version of Italian Grappa, sometimes referred to as moonshine. They are also producing Anisette, a licorice-flavoured liqueur that is a popular drink in France.
Bagaço and Anisette Distilled at Matos Winery and Distillery
On a beautiful warm October 17th, a small crew was assembled in the vineyard and busy hand-picking the clusters of grapes.
Harvesting the Grapes at Matos Winery, St. Catherines, PEI
Large blue bins of the grapes were seen throughout the vineyard before being gathered up by the tractor and trailer moving carefully amongst the rows of carefully-tended vines.
Grape Harvest at Matos Winery, St. Catherines, PEI
Harvesting the Grapes
Arriving at the Winery with a Load of Grapes for Processing
After transport to the winery, the grapes were put through the grape crusher destemmer, a machine that uses an auger to remove and discard the stems from the grapes then drops the fruit into the crusher where the grapes are crushed.
Destemming and Crushing the Grapes
Using a peristaltic pump, the crushed fruit is then pumped through a hose into a membrane bladder press which extracts the juice but doesn’t harm the seeds or break the skins of the grapes.
Membrane Bladder Press – Pressing out the Juice from the Grapes
The juice is then transported via hose into the large unoaked stainless steel fermentation tanks and the fermentation process starts with Jim controlling the temperature in the tanks and monitoring the sugar content and status and progress of the fermentation.
Stainless Steel Fermentation Tanks
Jim tells me the white wine will ferment for 14 days and the red for 7 days but the entire processing and filtering of his white wines take 4-5 months before they are ready for bottling and the red wines take about 6-8 months.
Processing the Grapes
Wine-making is a lengthy process that takes a lot of time, patience, labour, and attention to detail and that’s only after all the painstaking pampering and pruning that has gone into the growing and care of the grapevines and grapes.
Processing Grapes to Extract the Grape Juice
Bottles of Wine Ready for Shipping
Matos wines are fine quality products. After only one year in production, Matos’ Gamay-Noir won the prestigious silver medal at the 2011 Canadian Wine Awards, chosen second from among 1117 entries. Most recently, in October 2012, the Gamay-Noir won bronze at the 2012 Canadian Wine Awards, ranking third out of 1260 entries. Matos Winery was competing with wineries from all across Canada, including the well-known Canadian wine-producing regions of Niagara, ON, and several in BC. That’s not only impressive but a validation of the high quality product the winery is producing in its young days.
Matos’ Gamay-Noir Wine Wins Silver Medal at 2011 Canadian Wine Awards
The Matos wines were also recently featured at the “Savour Victoria” event which was part of the PEI Fall Flavours Culinary Festival (see my blog entry of October 4, 2012, on this event).
Matos’ Chardonnay is a very versatile wine that pairs well with chicken, seafood like PEI lobster, pastas with cream sauces, or vegetarian dishes. The Gamay-Noir goes well with steak and tomato-based dishes, including pizza. The Rosé is a lovely compliment to either turkey or chicken and the Wildberry pairs particularly well with dark chocolate.
Matos Chardonnay with Dinner
The Matos wines are competitively priced between $14.95 – $16.95 and are sold onsite in the winery’s gift shop, in Island liquor stores, and are served in many PEI restaurants.
Matos Winery Gift Shop and Taste-Testing Bar
Tours and wine-tasting are available at the winery which is located at 3156 West River Road, St. Catherines PE, C0A 1H0. Cost is $5.00 per person. In the summer months, the winery gift shop is open seven days a week. During the fall months, the gift shop is open on Saturdays from 10am-5pm and Sundays 1pm-5pm (Oct – Dec).
For more information on Matos Wines, visit their website at http://matoswinery.com/ or call the winery at 1-902-675-WINE (9463).
Thank you for visiting “the Bistro” today. If you enjoyed this post, why not subscribe to my feed by entering your email address in the subscribe box in the upper left-hand sidebar. That way, you will receive an email notification whenever I add a new posting to this blog.
Be sure to visit my new Facebook page at My Island Bistro Kitchen. You may also wish to follow me on twitter @PEIBistro and on Pinterest at “Island Bistro Kitchen”.
One of the most common fall flavors in many Prince Edward Island households surrounds pickle, chow, and relish-making. I love the smell of fresh mustard pickles in the house – not so much the mess, the tedious job of peeling and cutting up the cucumbers, and the “distressing” task of peeling strong pickling onions – an activity sure to bring a tear to the eye! In many Island households, a meal of any kind is not complete unless there are mustard pickles on the table. So, for most of us true cooks, we endure the process knowing the end result is worth the effort.Continue reading How To Make Mustard Pickles→
Happy Thanksgiving! I hope everyone enjoyed this Canadian holiday today.
PEI Colored Leaves
Thanksgiving in Canada is the second Monday in October and is a time set aside in the calendar year to celebrate and gives thanks for the season’s harvest bounty. Historical records indicate that the first Thanksgiving in Canada was in 1872 to celebrate the recovery of The Prince of Wales from a serious illness. Thanksgiving became an official Canadian holiday on January 31, 1957, when the Parliament of Canada proclaimed: “A Day of General Thanksgiving to Almighty God for the bountiful harvest with which Canada has been blessed – to be observed on the second Monday in October”.
While thanksgiving is officially on Monday, many Islanders have their Thanksgiving Dinner the day before, on Sunday. The traditional Island Thanksgiving Dinner in our home focuses on roast turkey, dressing, and gravy accompanied by mashed potatoes, carrots, turnip, peas and, of course, cranberry sauce. Pumpkin pie is also the most favoured of seasonal desserts. While some chefs may vary the menu and composition of a turkey dinner somewhat, there is nothing, in my view, any better than the plain traditional dinner with all the “fixings” as we call them. Pure comfort food!
There are so many things I am grateful for – family, health, employment, freedom and peace, and good food from the rich red soil on the beautiful Island on which I am fortunate enough to live.
I hope you enjoy the following photographs of my traditional Prince Edward Island Thanksgiving Dinner.
Seasonal butternut squash soup, served with hot biscuits from the oven, is a wonderful start to any autumn meal!
Butternut Squash Soup
We have still been able to get some “greens” from the garden though this is the end of them for this season. This simple salad was made with one-half pear, red onion rings, green grapes, dried cranberries, and pecans, then drizzled with a cranberry-pear balsamic vinaigrette.
Fall Harvest Salad with Cranberry-Pear Vinaigrette
Roast turkey dinner is one of my all-time favorite meals!
Thanksgiving Turkey Dinner
Traditional PEI Thanksgiving Dinner
A fine finale to a great meal – pumpkin pie! I make my own pie crusts because I love making pastry. The recipe I used for this pie filling was the one from E.D. Smith. Just be sure to use pure pumpkin purée, not pumpkin pie filling, for this recipe.
Pumpkin Pie – A Traditional Favorite Thanksgiving Dinner Dessert
Our Island farmers are busy on the land these days, harvesting potatoes, our primary agricultural crop. The photograph of potato digging was taken in Westmoreland, the one of the cows in Freetown, and the turkeys (found wandering along the roadside) in Shamrock, all on October 6th. (Yes, the soil really is that red in PEI!)
Farming on PEI
Pumpkins Abound at Thanksgiving Time on PEI
Sunflowers
Fall Pumpkins, Gourds, and Corn
Thank you for visiting “the Bistro” today. There are lots of ways to connect with “the Bistro” through social media:
Join My Island Bistro Kitchen on Facebook Follow the Bistro’s tweets on twitter @PEIBistro Find the Bistro on Pinterest at “Island Bistro Kitchen” Follow along on Instagram at “peibistro”
While the heavens opened and poured rain on Victoria-by-the-Sea, PEI, on Saturday, September 29th, it didn’t dampen the enthusiasm that was evident at “Savour Victoria” or the great local food that diners enjoyed throughout the evening. As Richard LaGrange of the Orient Hotel says, “Victoria hospitality really can make up for a little rain” (well, okay, it really was a LOT of rain!).
The Victoria Wharf on a Rainy and Windy September 29, 2012
This was the last signature event of “Fall Flavours”, PEI’s annual Culinary Festival. The small seaside village of Victoria on the Island’s south shore proved to be an ideal venue for the event. Pam Beck, Tourism Development Manager for Central Coastal Tourism Partnership, says Victoria was chosen because of its special qualities and quaintness. In the summer, Victoria swells with tourists who leisurely stroll around the tiny village of less than 200 year-round inhabitants, visiting local shops and restaurants and watching the lobster fishing boats unloading their day’s catch. Pam says organizers wanted to make the event “a celebration of Victoria, our Island, and all its beauty and bounty”. I’d say mission accomplished on that front!
The village is small and neatly laid out in a square shape. Everything is within easy walking distance and that is a good thing given the inclement weather and the fact that there were five venues for diners to visit during the evening – four for appetizers and drinks and one for dinner. Victoria does not have any really large restaurants and the ones it does have only operate seasonally. Some of the Fall Flavours events elsewhere on the Island have used big tents on location but organizers of “Savour Victoria” devised a plan that would use and promote establishments that already exist so that, when people come back to Victoria in the future, the venues will still be there for them to return to.
“Savour Victoria” was produced by Central Coastal Tourism Partnership, a new (2011) organization dedicated to promoting tourism development in the central part of the Island. Because “Savour Victoria” was classed as a signature event, it meant a celebrity chef was part of the activities. Bob Blumer, cookbook author (several times over) and creator and host of his own TV shows on the Food Network “Glutton for Punishment”, “Surreal Gourmet”, and “World’s Weirdest Restaurants”, spent the weekend in Victoria overseeing and participating in the Savour Victoria event. Bob was actively engaged in the preparations for the dinner which featured as much locally produced food as possible and was presented in unique and creative ways that Bob is known for.
Here is how the evening worked. Everyone first checked in at the Victoria Playhouse where they picked up a gift bag that contained an engraved “Savour Victoria” souvenir wine glass and a map of the Village. From there, people headed out, donned in raincoats and carrying umbrellas, to the different venues that were serving appetizers and pre-dinner drinks.
“Savour Victoria” in Victoria-by-the-Sea, PEI – 29 September 2012
Four venues opened for the “Wandering Appetizers with Wine & Beer Tastings” portion of the evening which began at 6:00pm. These included Coach House Antiques, By-The-Sea Kayaking, Red Sand Jewelry, and Island Chocolates.
Coach House Antiques, Victoria-by-the-Sea, PEI – Appetizers: Smoked Ham from Island Taylored Meats & COWS Creamery Cheese
By-The-Sea Kayaking, Victoria-by-the-Sea, PEI. Appetizers – Raspberry Point Oysters served with Matos Winery’s “Bagaço”, Portuguese Moonshine.
Red Sand Jewelry, Victoria-by-the-Sea, PEI. Appetizer – Cajun-seared Atlantic Scallops, Carmelized Onions and Cream Cheese on Baguette
Island Chocolates, Victoria-by-the-Sea, PEI. Appetizer – Roasted Sweet Peppers on Chocolate Crostini with Goat Cheese and a Dusting of Cocoa
Four local eating establishments then opened to serve a sit-down dinner at 7:30pm. These were the Victoria Village Inn, Landmark Café, Lobster Barn Pub & Eatery, and the Orient Hotel. When diners purchased their ticket, they selected which of the four venues they wished to go to for the sit-down dinner.
Victoria Village Inn, Victoria-by-the-Sea, PEI
Landmark Cafe, Victoria-by-the-Sea, PEI
Lobster Barn Pub and Eatery, Victoria-by-the-Sea, PEI
Orient Hotel, Victoria-by-the-Sea, PEI
Each of the restaurants served exactly the same meal. Local chefs from the restaurants prepared the meal and were assisted by chef support from the Culinary Institute of Canada, Charlottetown, PEI. The featured wines of the evening were all local and came from nearby Matos Winery in St. Catherine’s, PEI.Just take a look at this great menu that was collaboratively chosen by the local chefs and Bob Blumer:
Wandering Appetizers with Wine & Beer Tastings
Coach House Antiques: Smoked Ham from Island Taylored Meats & COWS Creamery Cheese. PEI Brewing Company Beer Tastings.
By-the-sea Kayaking: Raspberry Point Oysters. Matos Vineyards Wine Tastings.
Red Sand Jewelry: Cajun-seared Atlantic Scallops, Carmelized Onions & Cream Cheese on Baguette Matos Vineyards Wine Tastings.
Island Chocolates: Roasted sweet peppers on chocolate crostini with goat cheese and a dusting of cocoa . Matos Vineyards Wine Tastings.
Seated Dining Menu
Course 1: Kim Dormaar’s Medallion Smoked Salmon Course 2 – Bob Blumer’s Fire-roasted Corn Chowder with sweet corn and garlic from nearby fields, local cream, and Island Taylored Meats double-smoked bacon. Fresh-baked bread. Matos Vineyards wine pairing.
Course 3 – Bob Blumer’s Lobster-Filled Cupcake topped with creamy, buttery superior organic potatoes, seasoned with fresh local herbs and served with a medley of greens from Just a Little Farm on the Appin Rd, and dressed with balsamic and black truffle oil vinaigrette. Matos Vineyard wine pairing.
Course 4 – Panna cotta made with white and dark chocolate from Island Chocolates, served with an almond lace cookie. Matos Vineyard wine pairing.
After sampling the appetizers, it was off to the venue of choice for the sit-down dinner. I dined at the Orient Hotel. The Hotel does not operate a restaurant but does open a tea room in the summer months. In fact, the Orient Hotel had closed its tearoom doors for the season and re-opened especially for this event. Just look how elegantly this cozy dining room was dressed!
Orient Hotel Dining Room, Victoria-by-the-Sea, PEI
“Savour Victoria” Course 1: Kim Dormaar’s Medallion Smoked Salmon
“Savour Victoria” Course 2: Bob Blumer’s Fire-roasted Corn Chowder
“Savour Victoria” Course 3: Bob Blumer’s Savory Lobster-Filled Cupcake topped with creamy, buttery Superior Organic Potatoes
“Savour Victoria” Course 4: Panna cotta made with white and dark chocolate from Island Chocolates, served with an Almond Lace Cookie
Throughout the evening, Bob circulated amongst the venues, chatting with patrons, and signing copies of his cookbook. He says he hasn’t been on the Island since a memorable bike trip in his teens so he jumped at the opportunity to come back. Says Bob, “During my too-short stay, I fell in love with Victoria-by-the-Sea, and with all of the incredible/eccentric/gregarious people who live there. Dinner was a real community effort (with some imported talent from Charlottetown) – and the community really rocked it.” Asked what the most memorable thing is that he will take away from his Island experience, Bob tells me, “the camaraderie, the lobster and, of course, the incredible beauty of the land.” Great endorsement, Bob!
Celebrity Chef Bob Blumer at “Savour Victoria”, Victoria-by-the-Sea, PEI (Love the inscription he wrote on the cookbook!)
Pam Beck says organizers aimed for a reasonably-priced event ($85/pp) for sampling four appetizers, drinks, a four-course sit-down dinner, and wine. The event was sold out – all 150 tickets — and Pam says it was about 50/50 split between Islanders and tourists.
This was a very enjoyable evening and it really makes me appreciate the wonderful foods we produce right here on PEI. I asked Richard LaGrange what, from the perspective of a host restaurant, he thought made the event so successful – it was, after all, a huge undertaking to carry out this kind of event using eight small venues, none of which have large kitchens. Richard says, in his view, the event’s success was due to the team effort that went into it, the entire community coming together, and the attitude and professionalism shown by members of the Culinary Institute of Canada. Richard says the most memorable aspect of the “Savour Victoria” experience for him was watching the chefs and the other food staff working together so seamlessly and guiding the rest toward a common goal.
I think this event may be a catalyst for Victoria to consider hosting similar events in the future. They proved they can do it! Richard LaGrange sums it up best when he says: I would hope that the Islanders who attended and who hadn’t been to our village for a while will have been reminded of all the reasons people flock to Victoria, and that those who were visiting us for the first time had their appetites whetted and will be back for seconds.” Hmmmm, “seconds” are good – yes, I’ll have another one of those yummy, savory lobster cupcakes, please!
(Mostly) PEI and Maritime Food – Good Food for a Good Life!


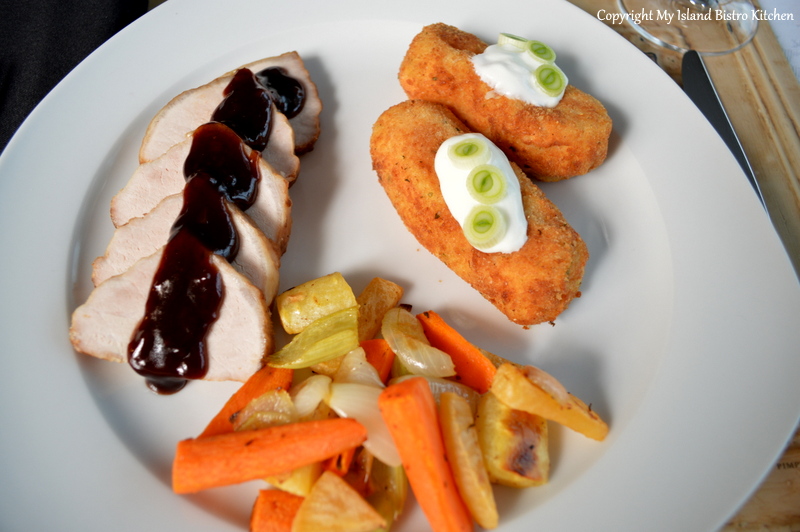
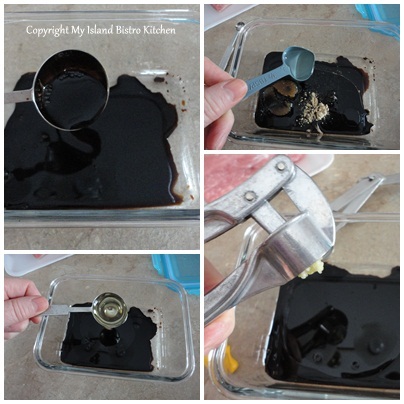
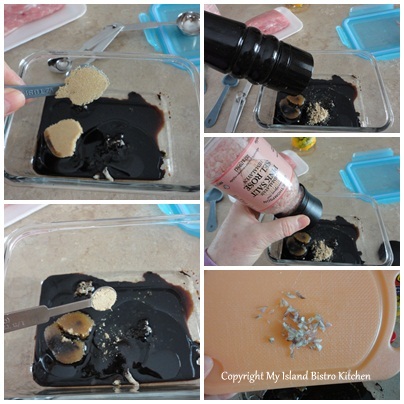
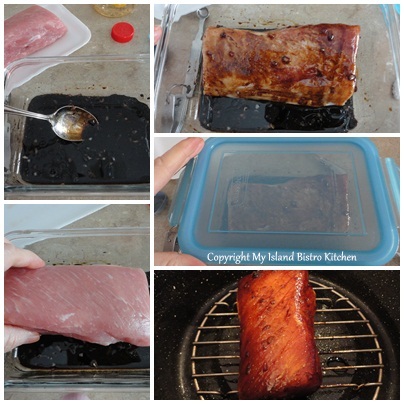
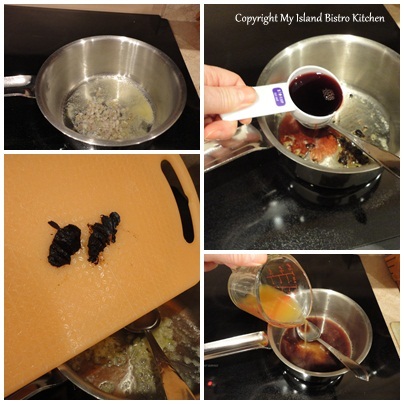
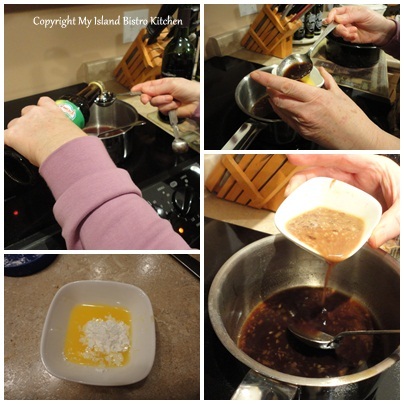
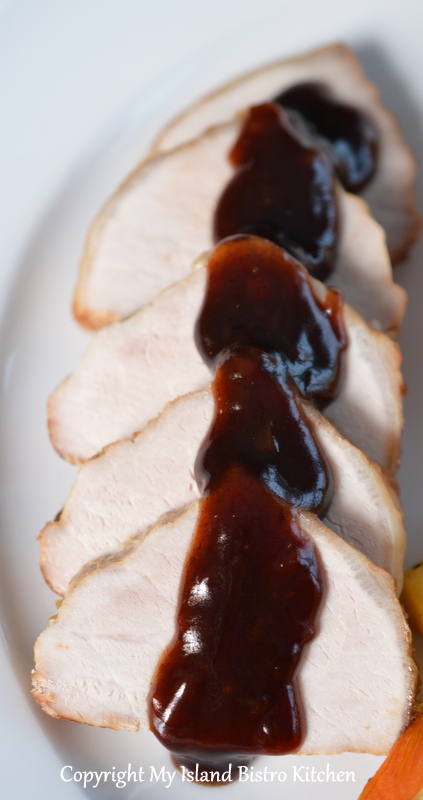

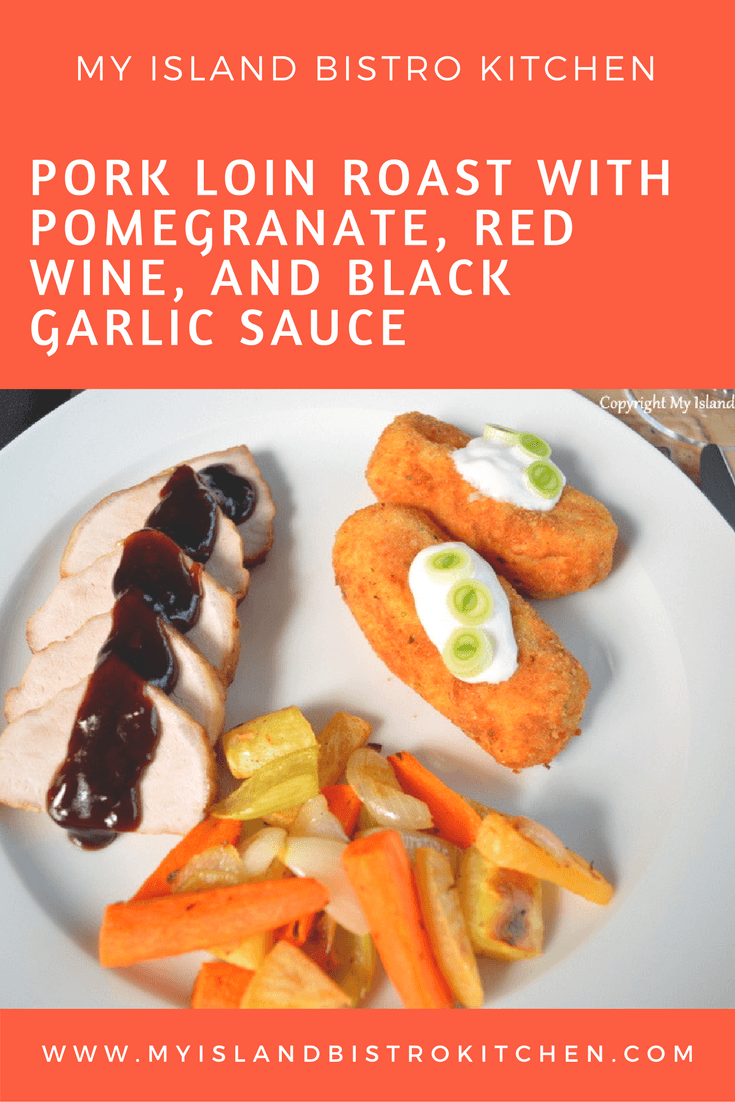

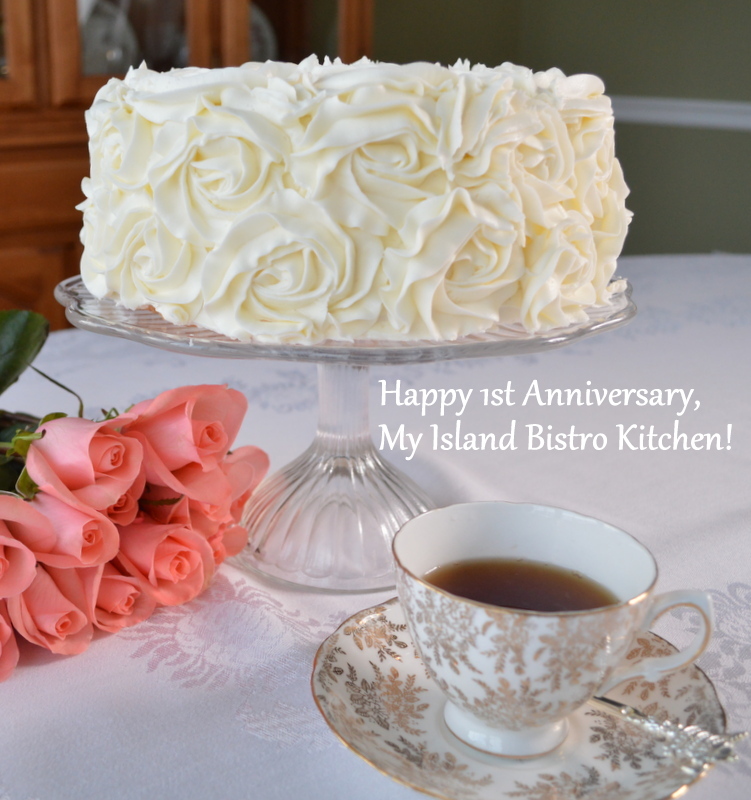
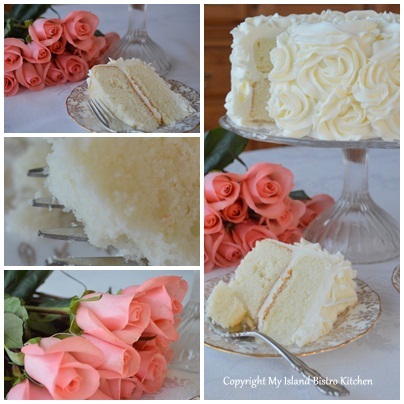
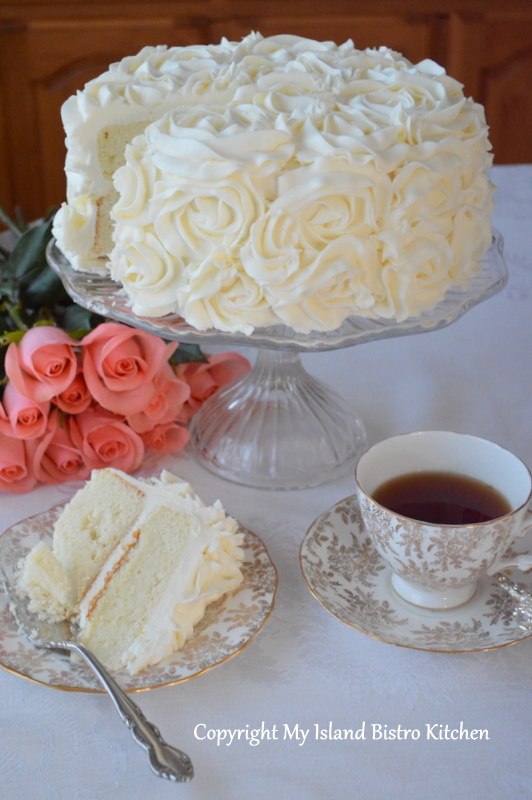

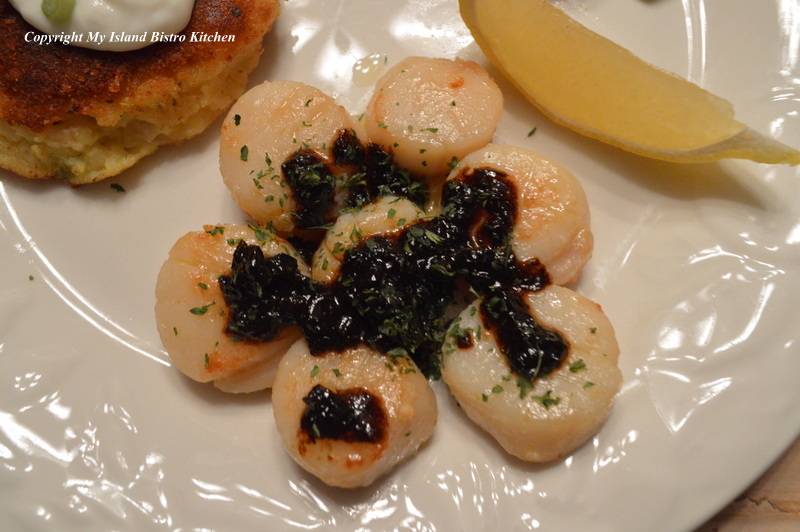
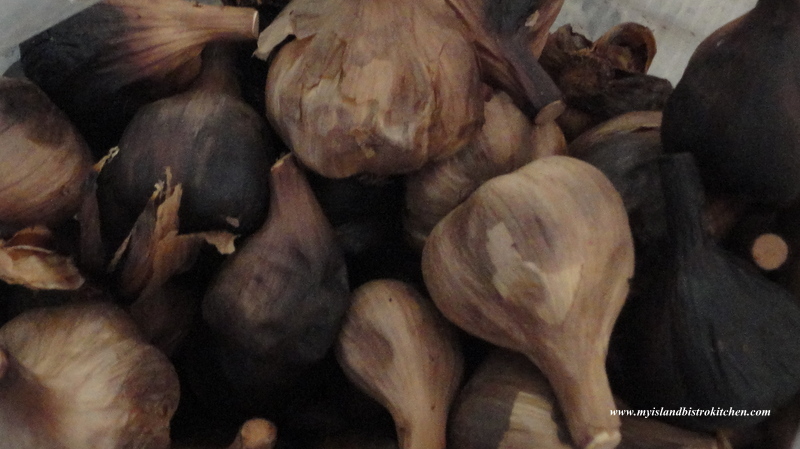

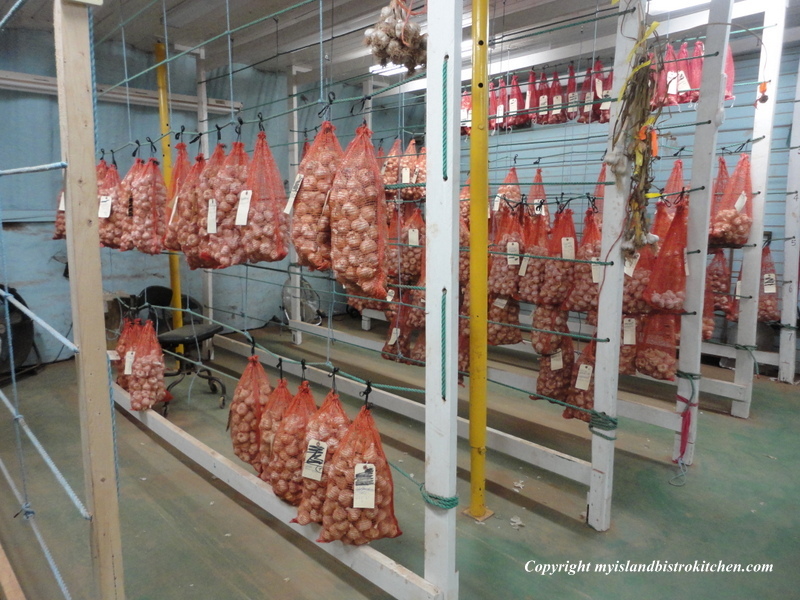
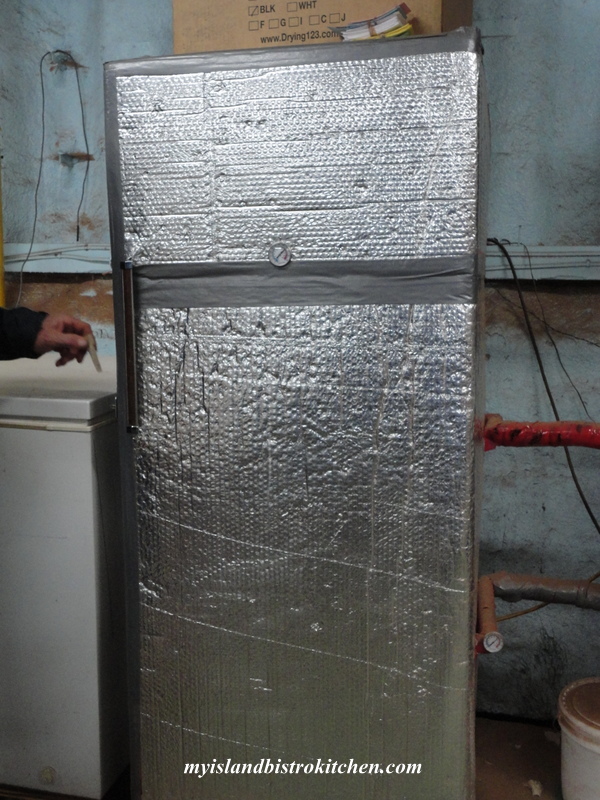
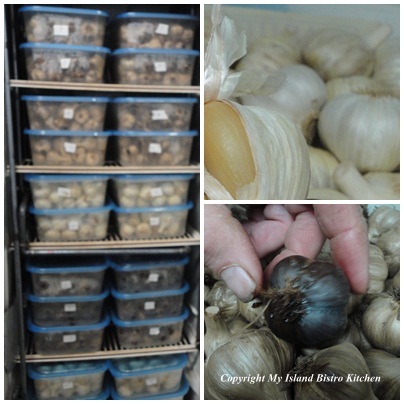
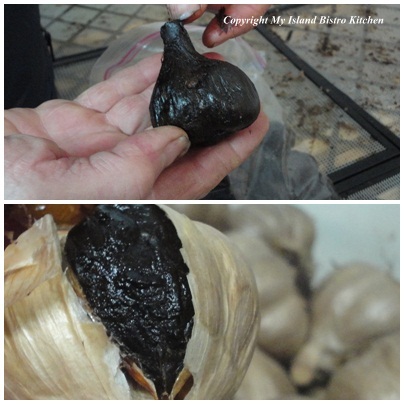
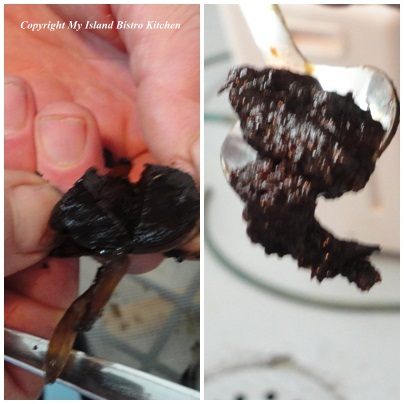
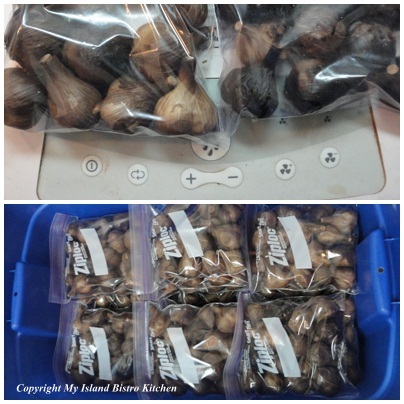
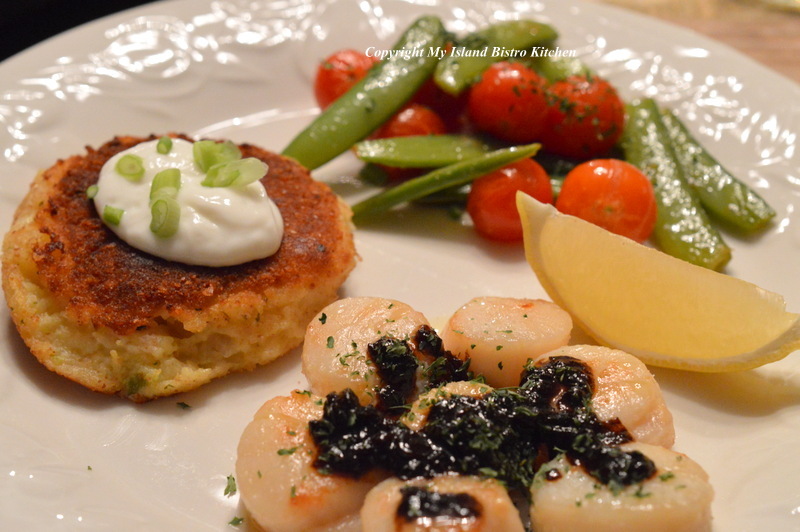
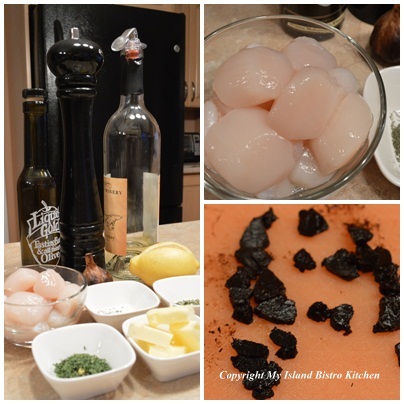
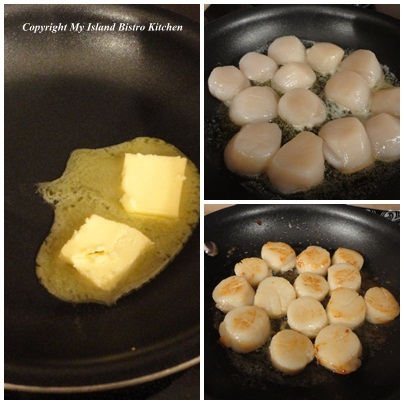
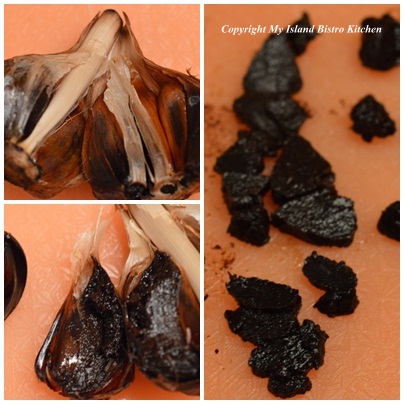
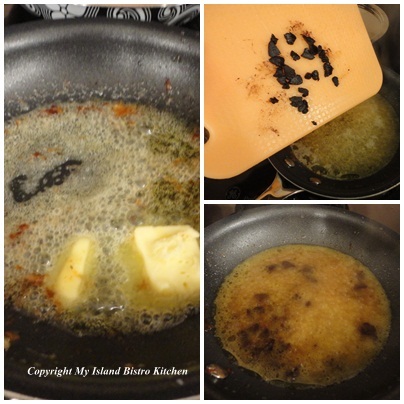
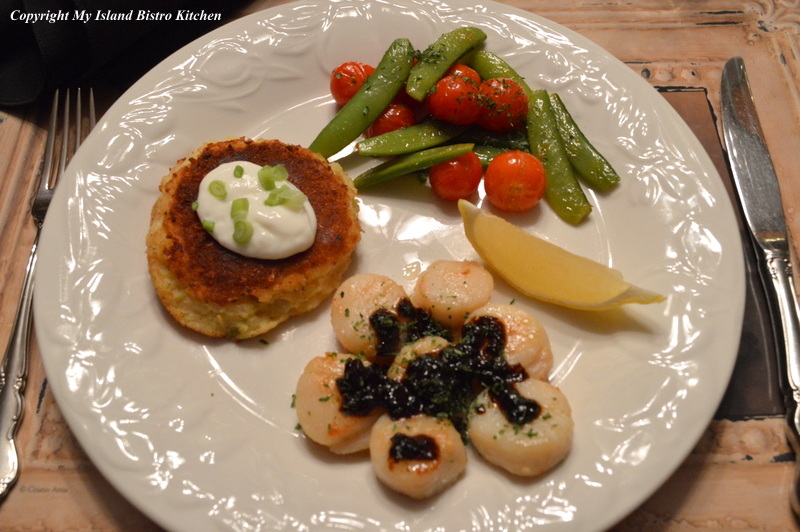


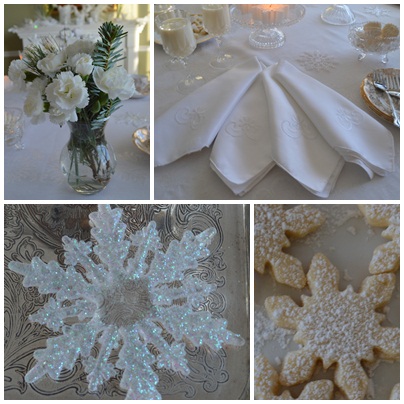


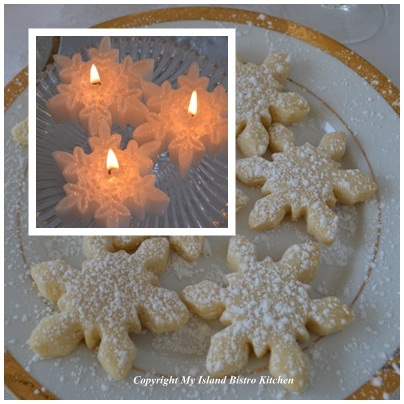
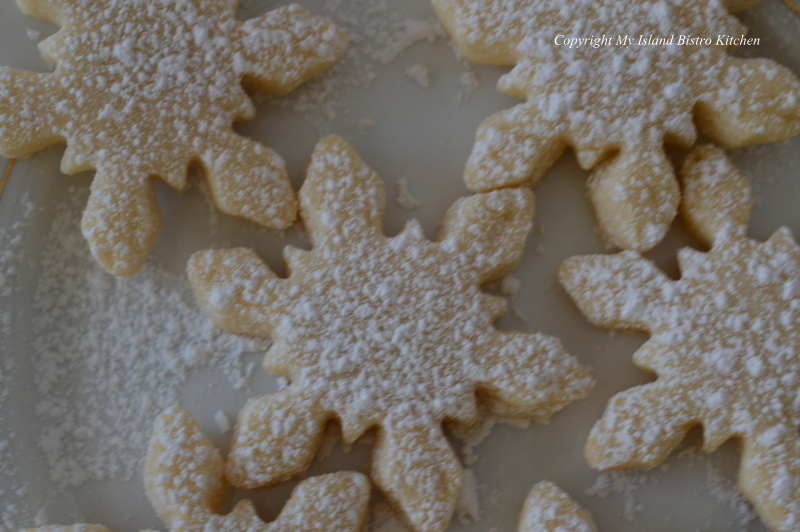

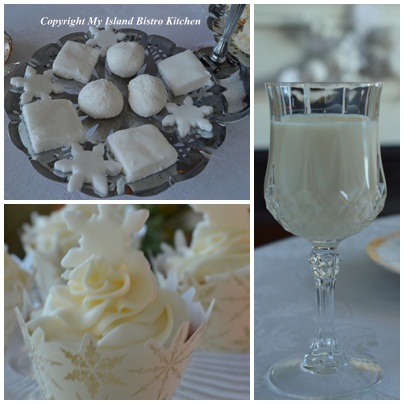
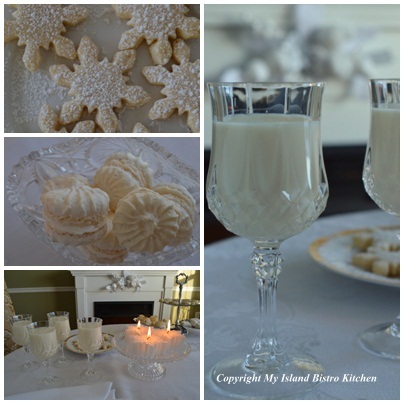

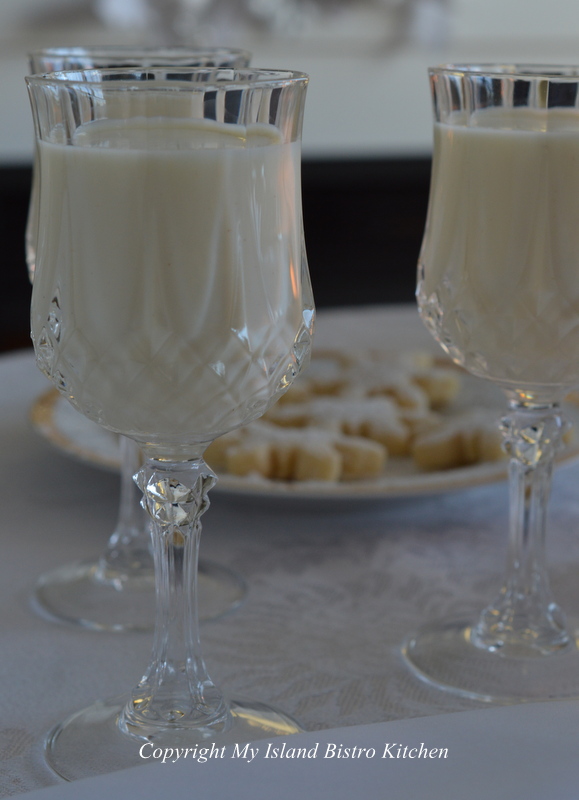

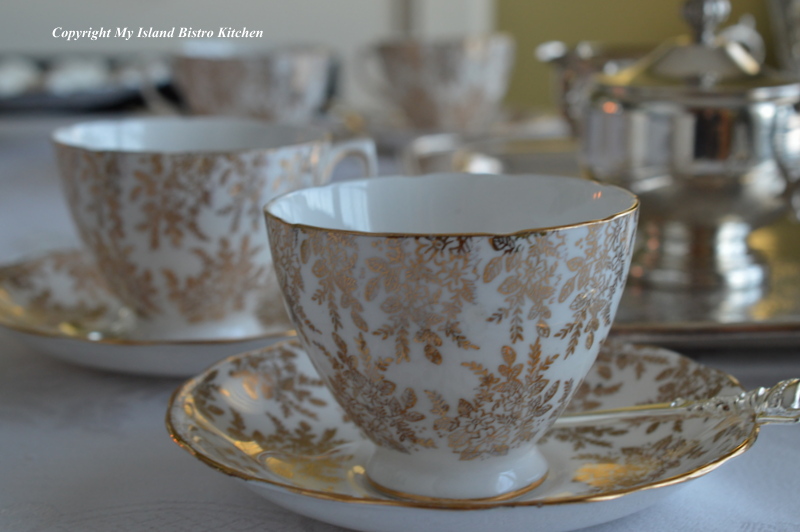
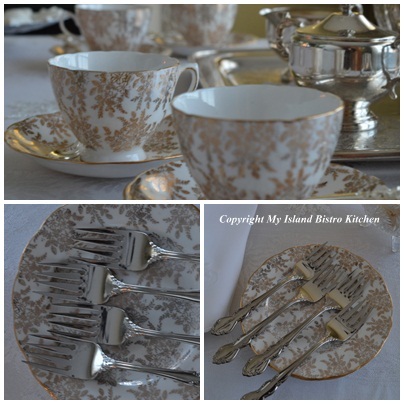
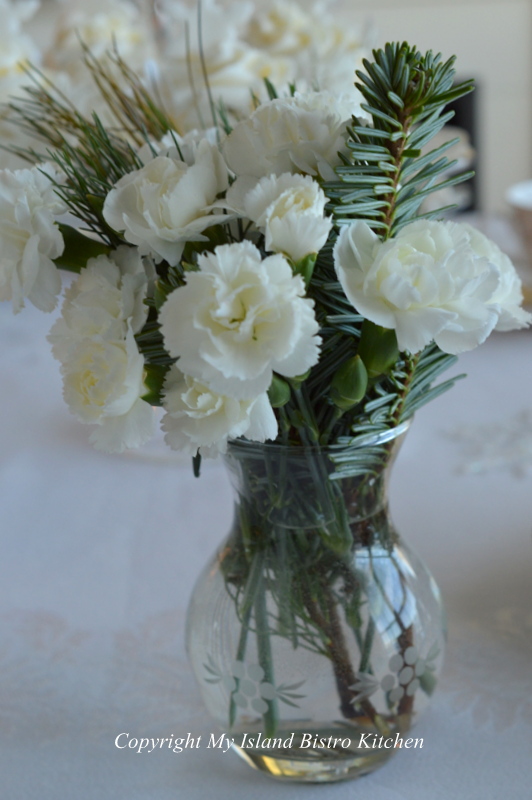

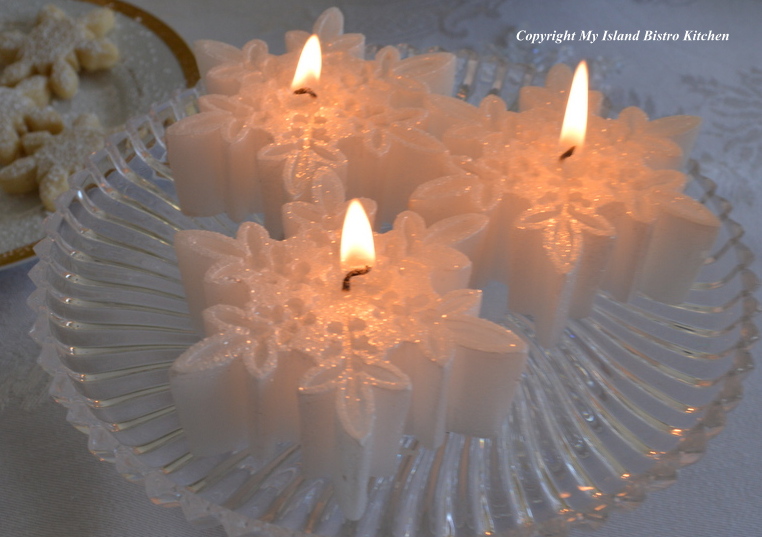


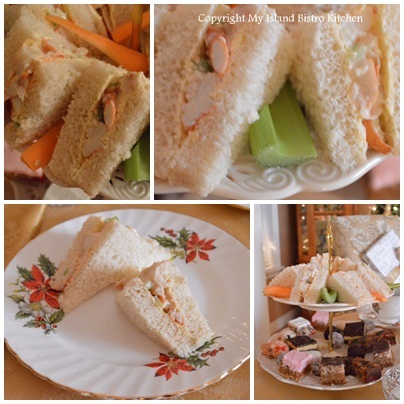
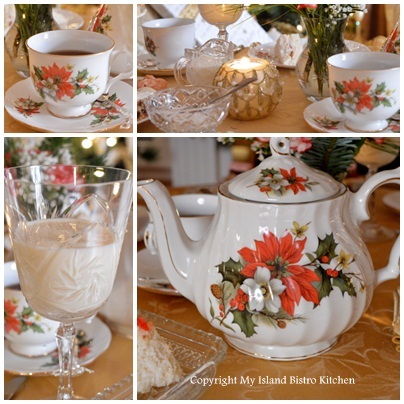

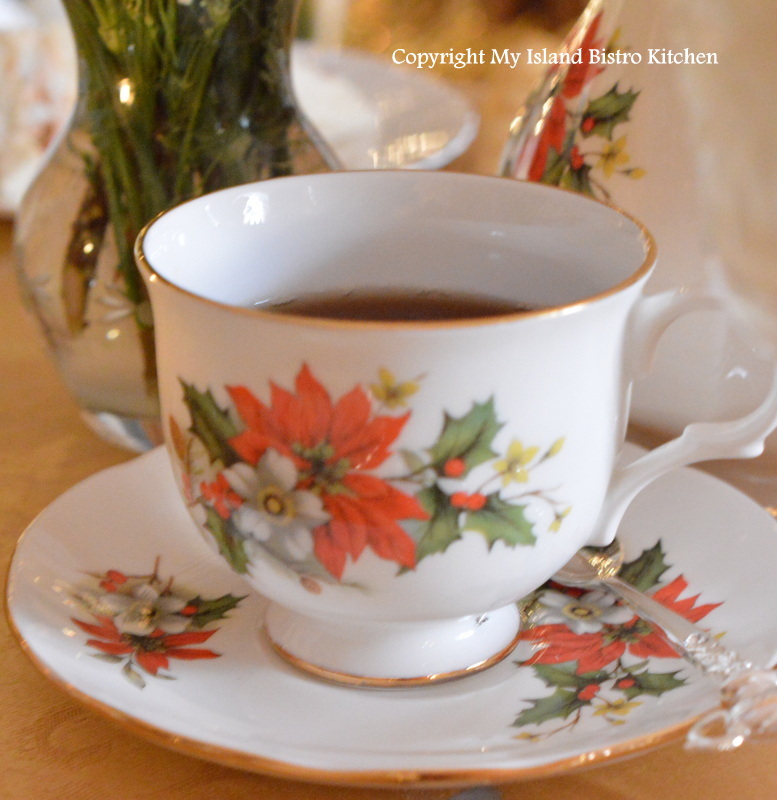

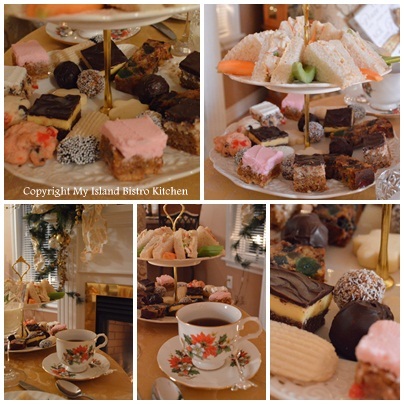
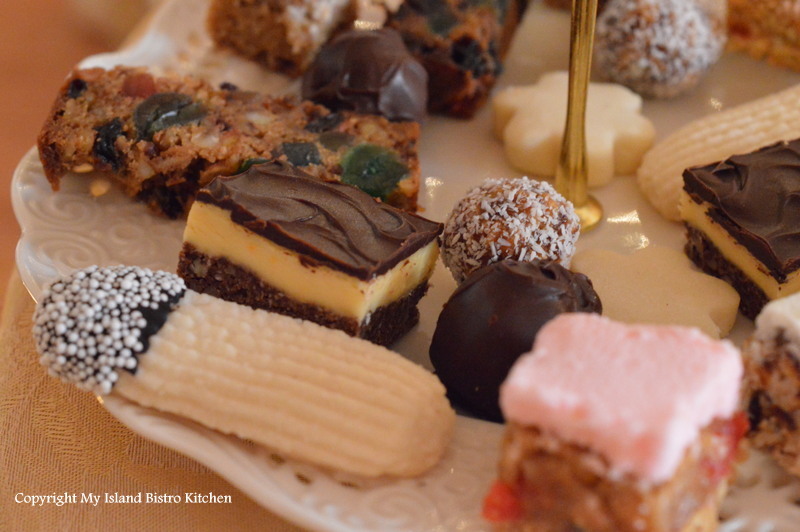


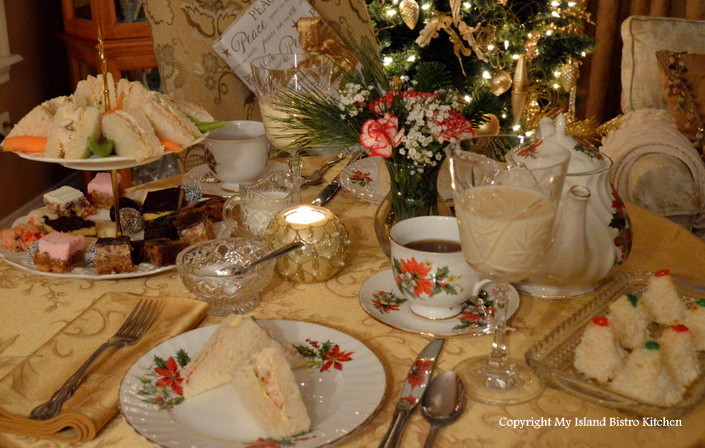
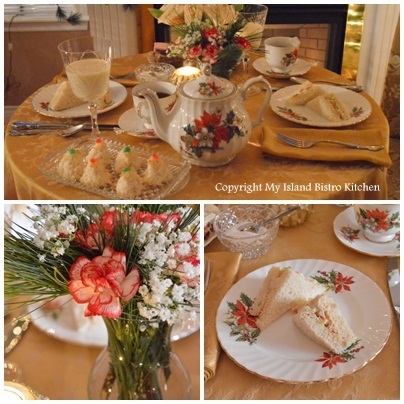
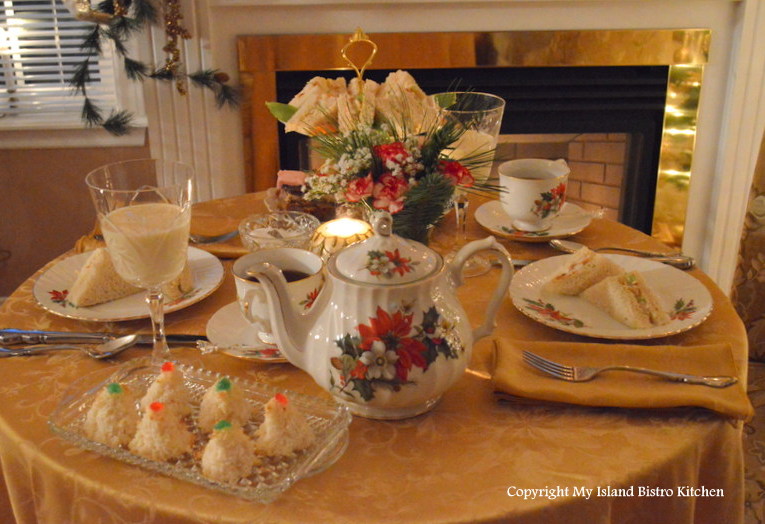


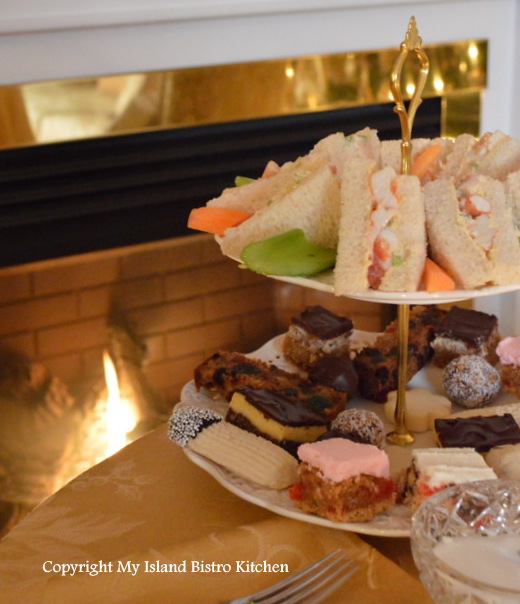
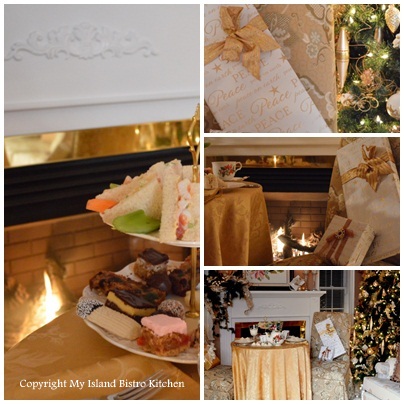
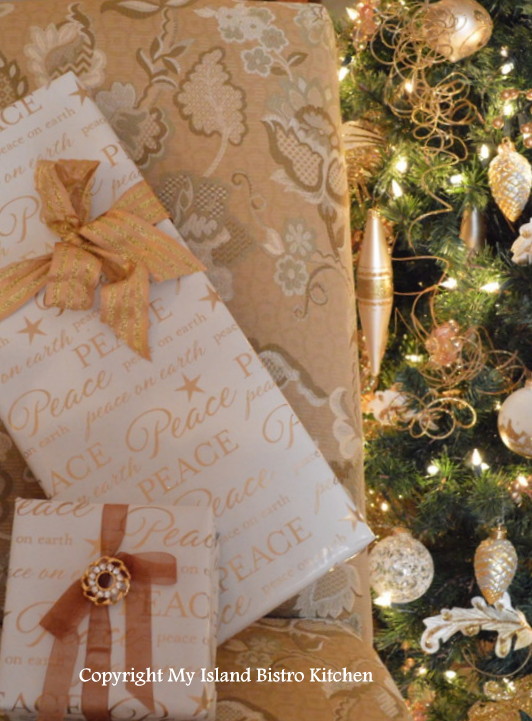
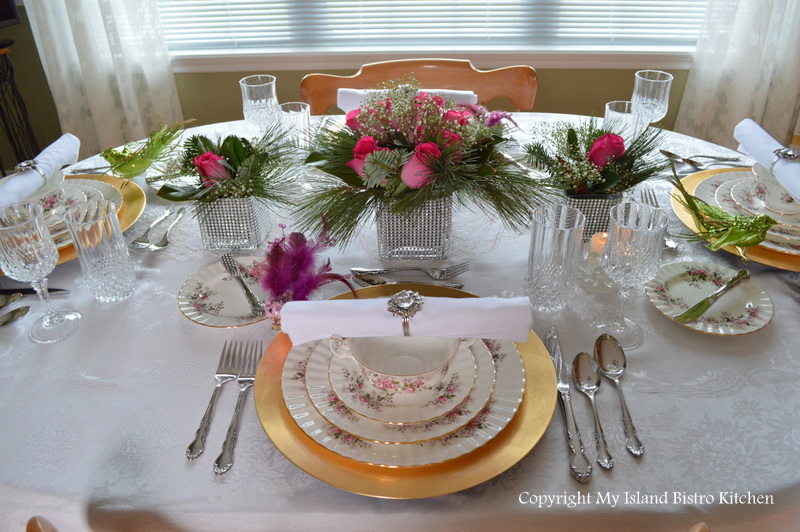


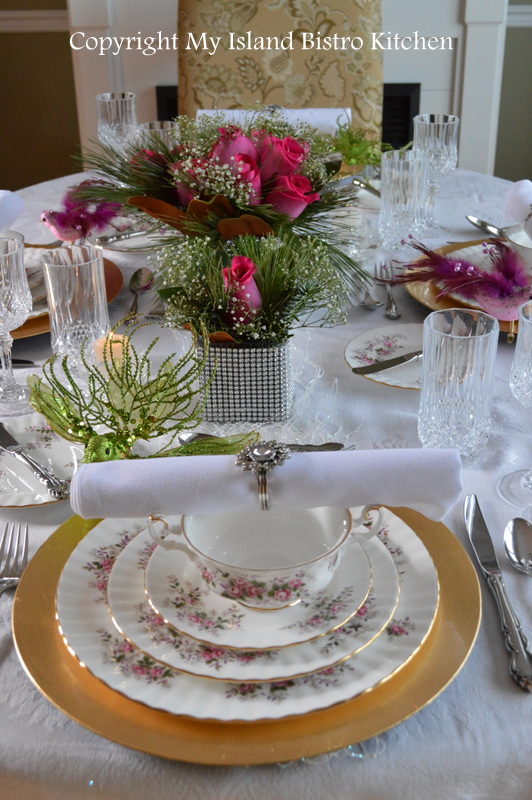

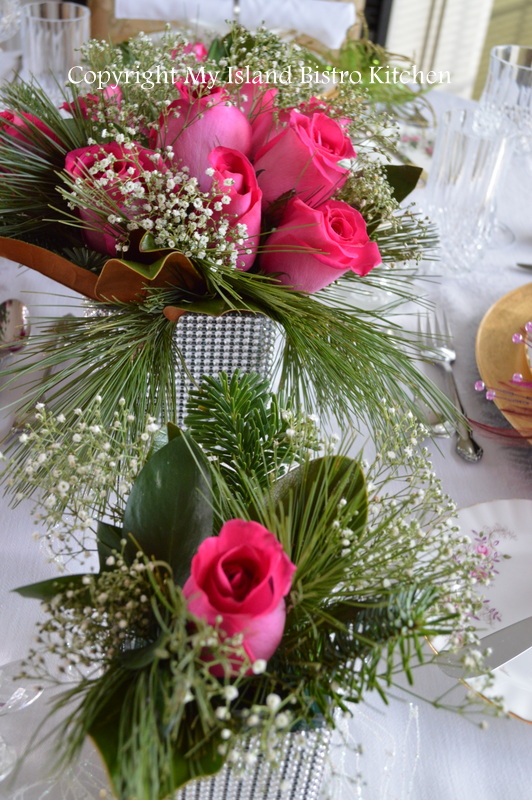
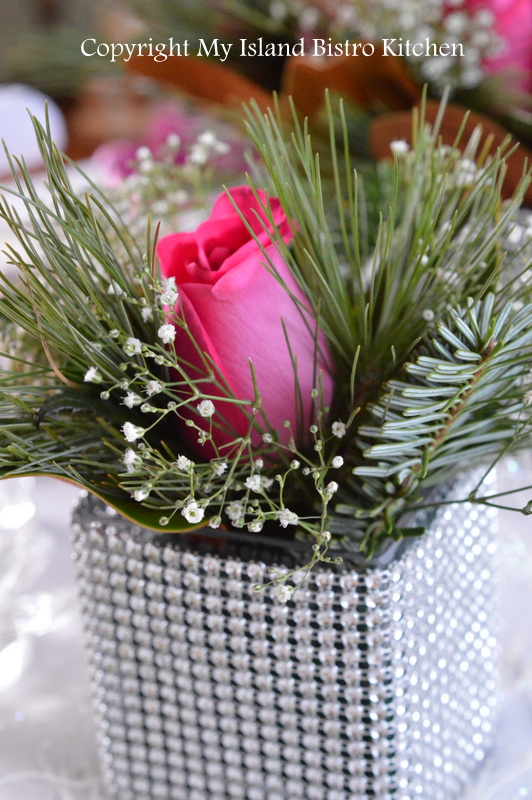

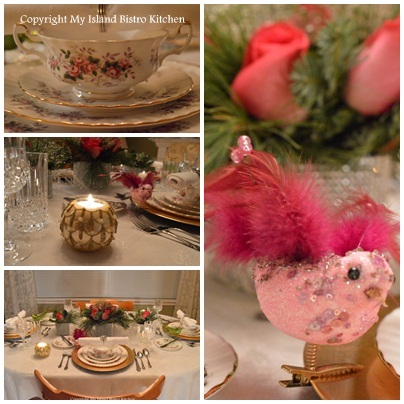
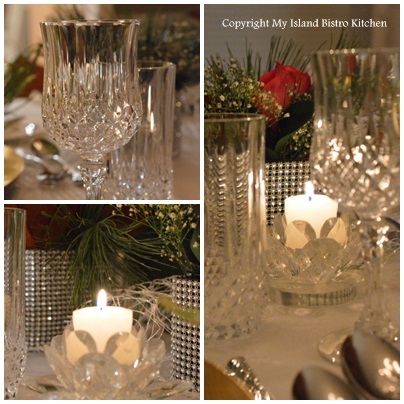
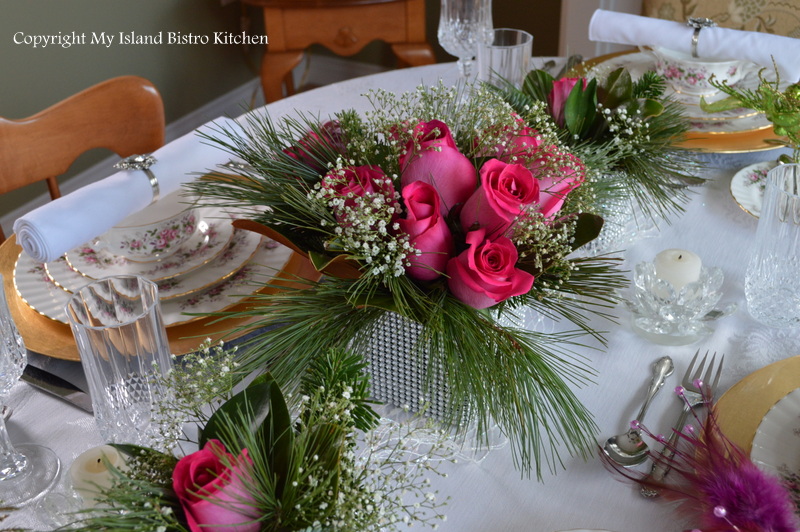
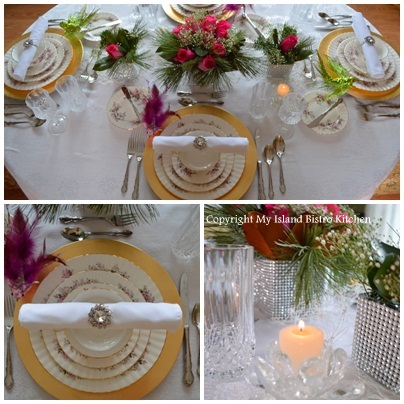


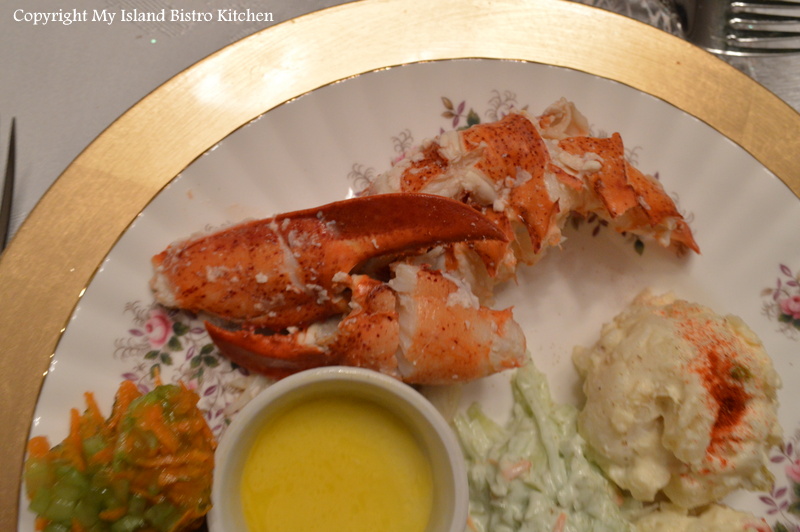


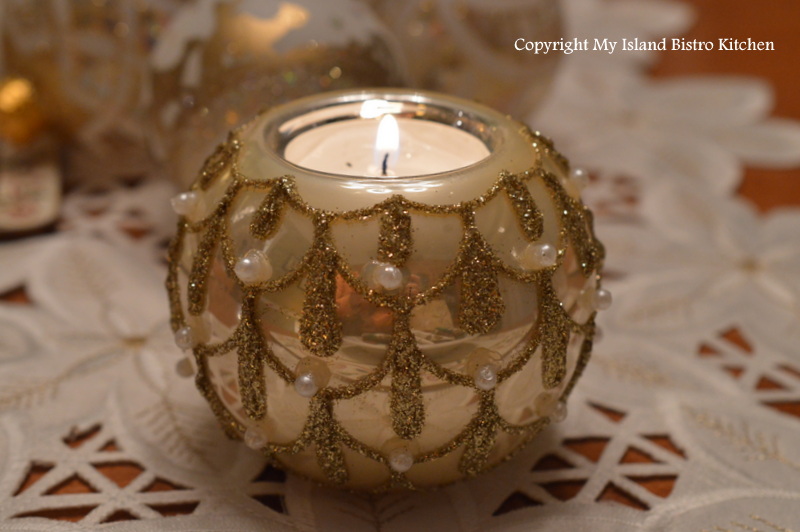
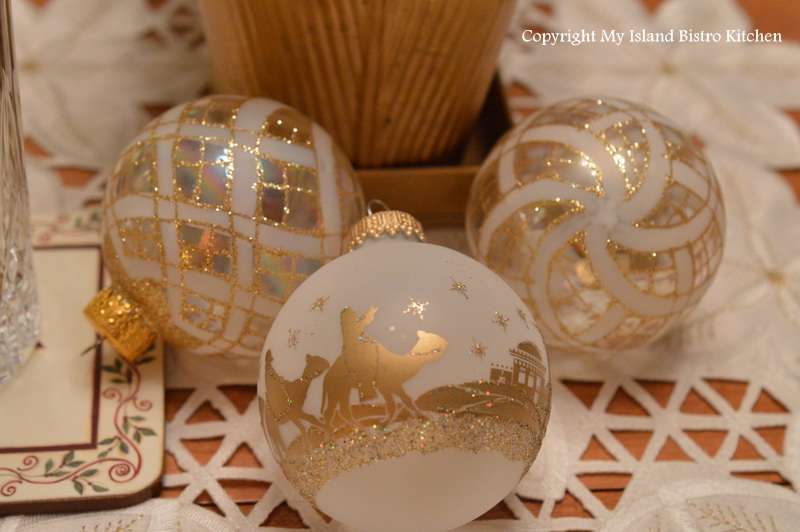
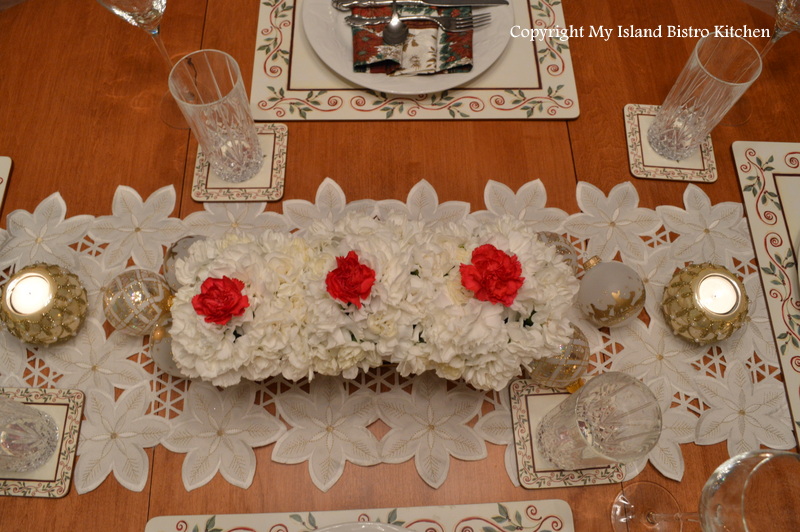

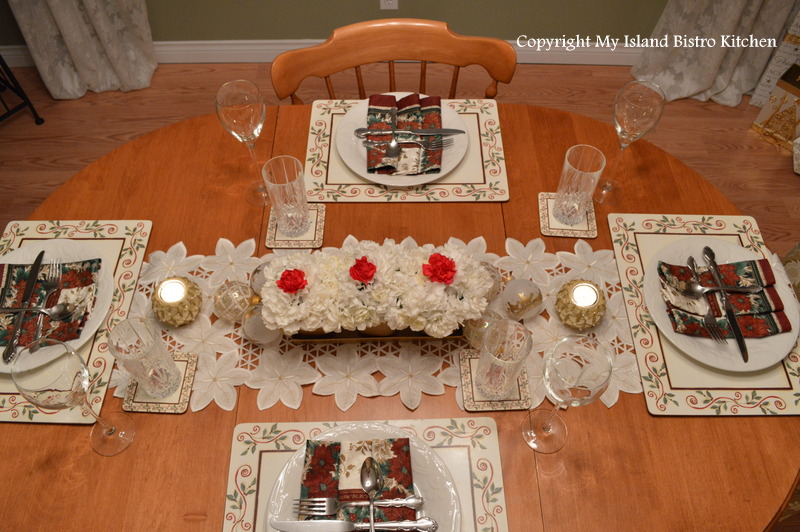

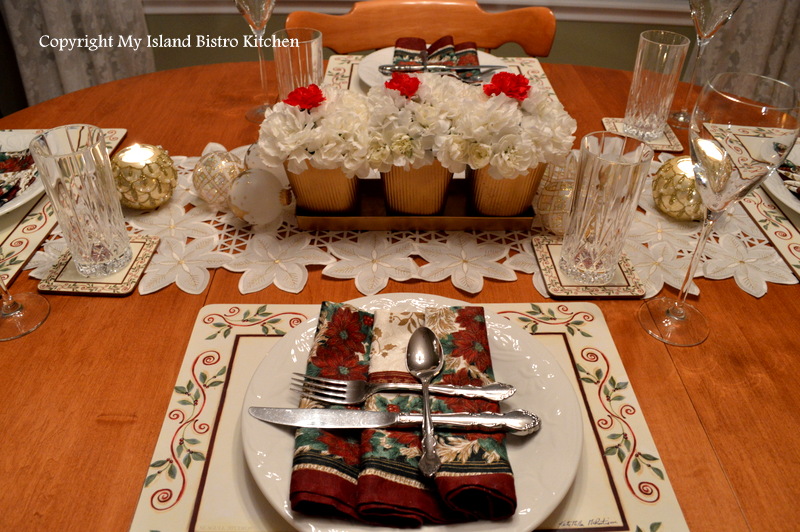


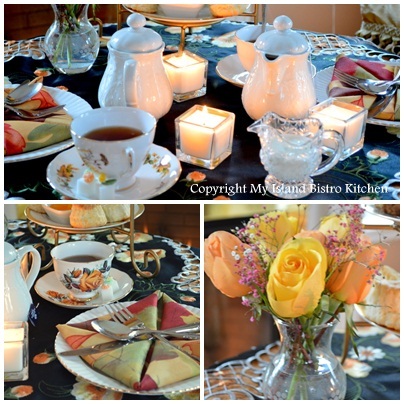
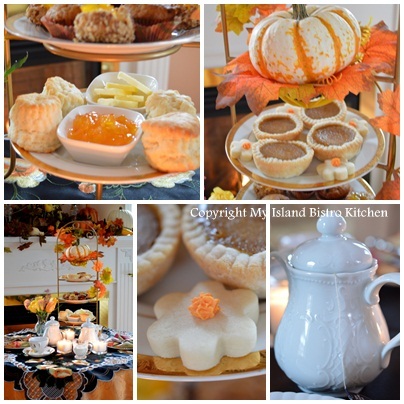

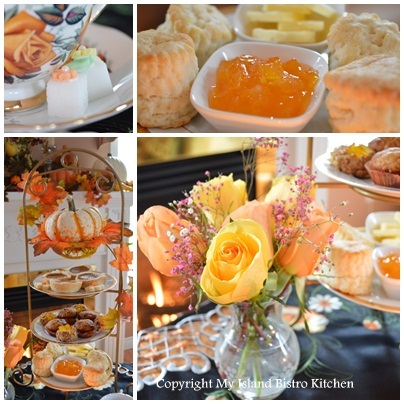

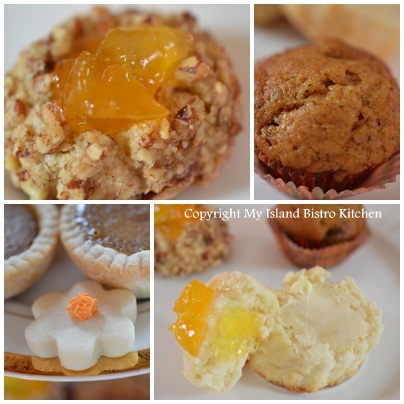
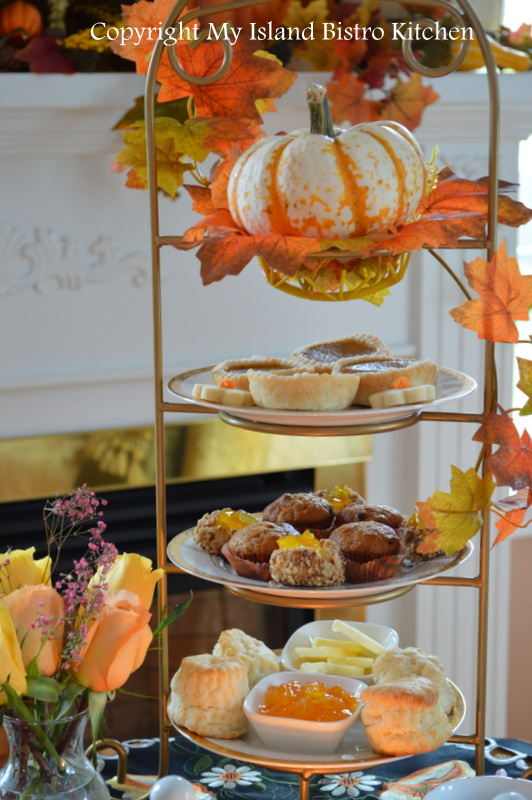
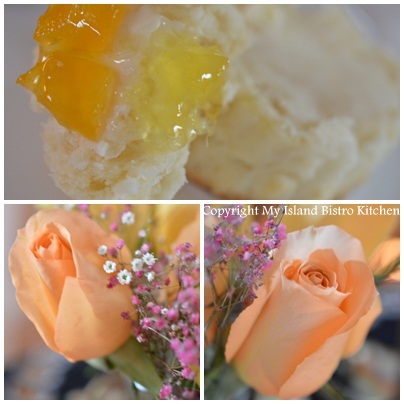
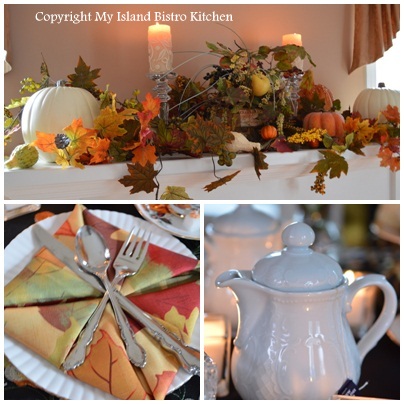


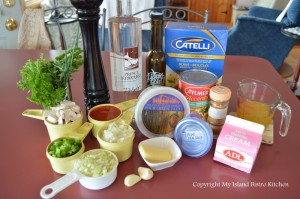 Heat oil and butter in large pot. Add onion, celery, green pepper, mushrooms, and garlic. Sauté 2-3 minutes over medium heat.
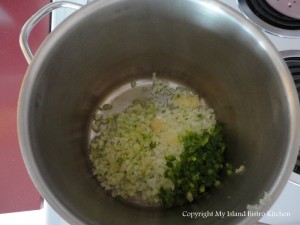 Add diced tomatoes, salt, and pepper. Simmer over low heat 5-7 minutes.
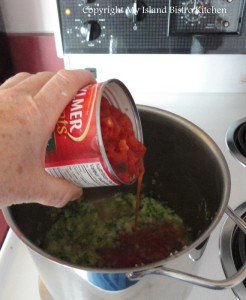 Whisk the corn starch with the cooled chicken stock until smooth.
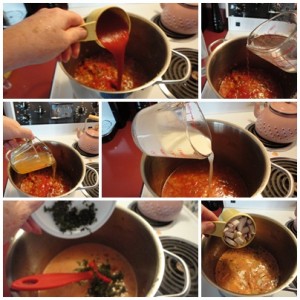 Stir tomato sauce, vodka, and chicken stock/cornstarch into mixture. Simmer 18-20 minutes, until slightly thickened.
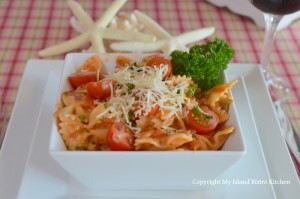 Stir in whipping cream, oregano, basil, chives, cayenne, red pepper flakes, and parsley. Simmer 7-10 minutes.


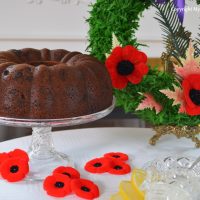


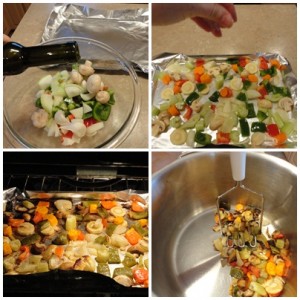 Preheat oven to 450 degrees. Cut vegetables into 1/2" - 1" pieces. Slice the parsnip slightly thinner. Place in a bowl and drizzle with olive oil, tossing to coat vegetables. Place on tin foil lined baking sheet. Sprinkle with sea salt and freshly ground pepper. Roast for about 40 minutes until vegetables are slightly fork tender and edges of vegetables start to char slightly. Peel garlic. Transfer vegetables and garlic to stock pot and, with a potato masher, loosely break up the vegetable chunks.
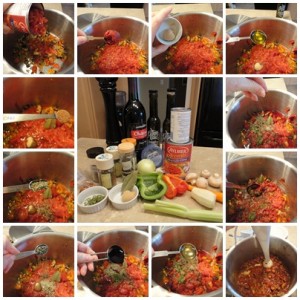 Add remainder of ingredients. Over medium-high heat, bring mixture to boil. Reduce heat and simmer over low heat for 45-50 minutes, stirring occasionally.
 Remove from heat and discard bay leaf. Using an immersion blender, purée sauce to desired consistency. (Alternatively, let mixture cool and transfer to food processor to purée.)
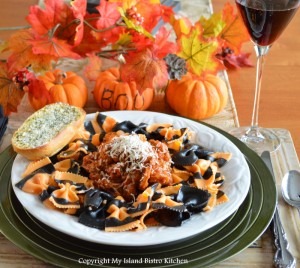 Toss with pasta (and meat, if using) or use as pizza sauce. Freezes well.


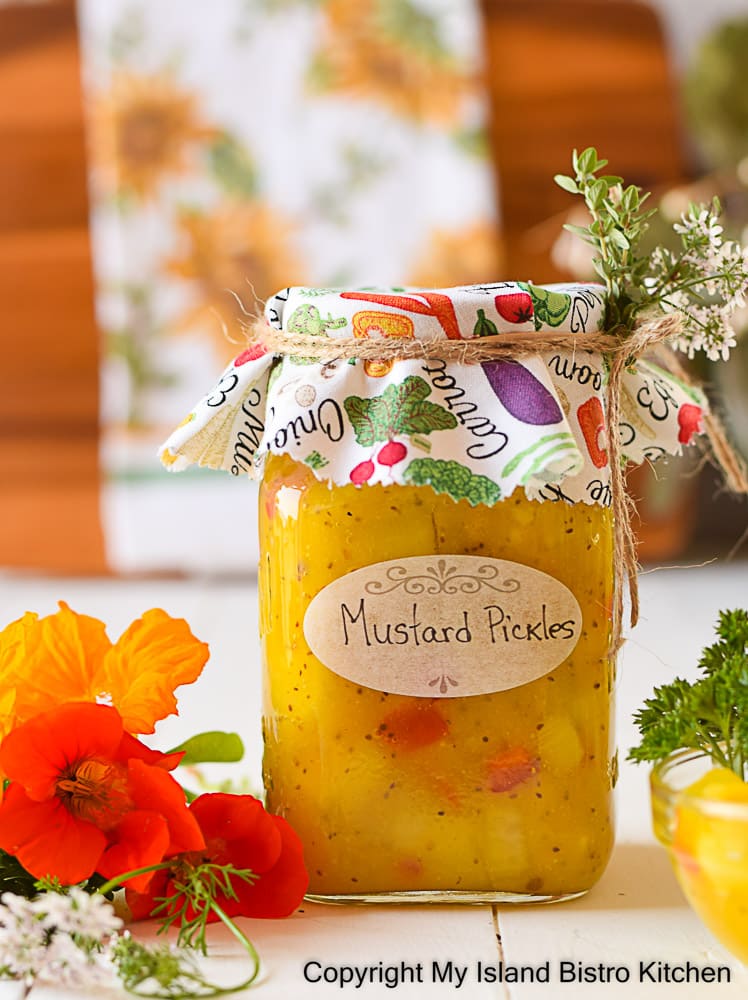

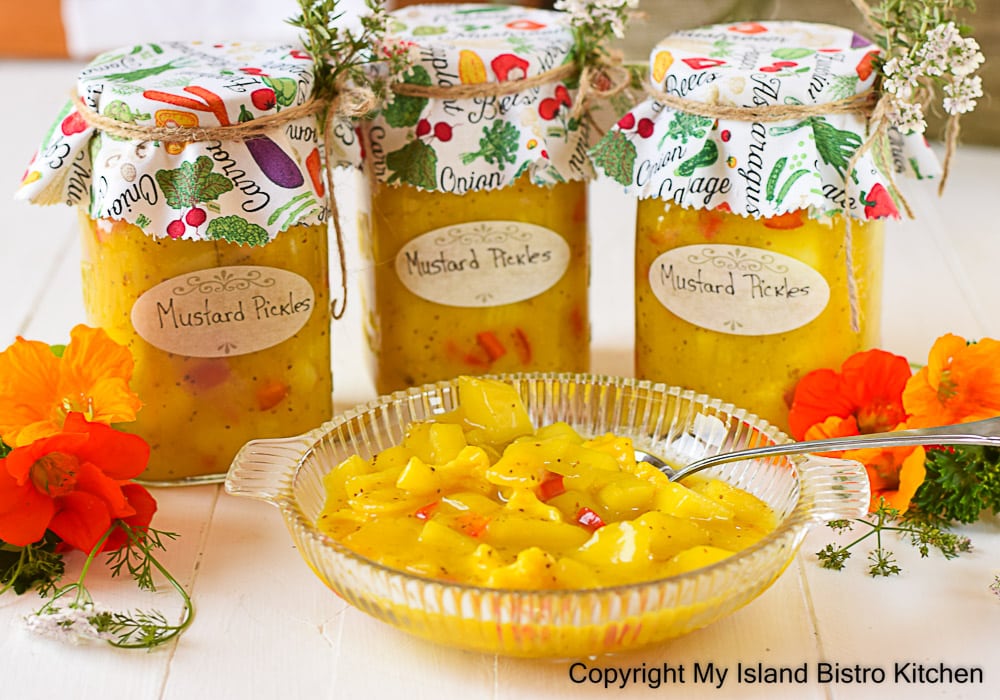


")