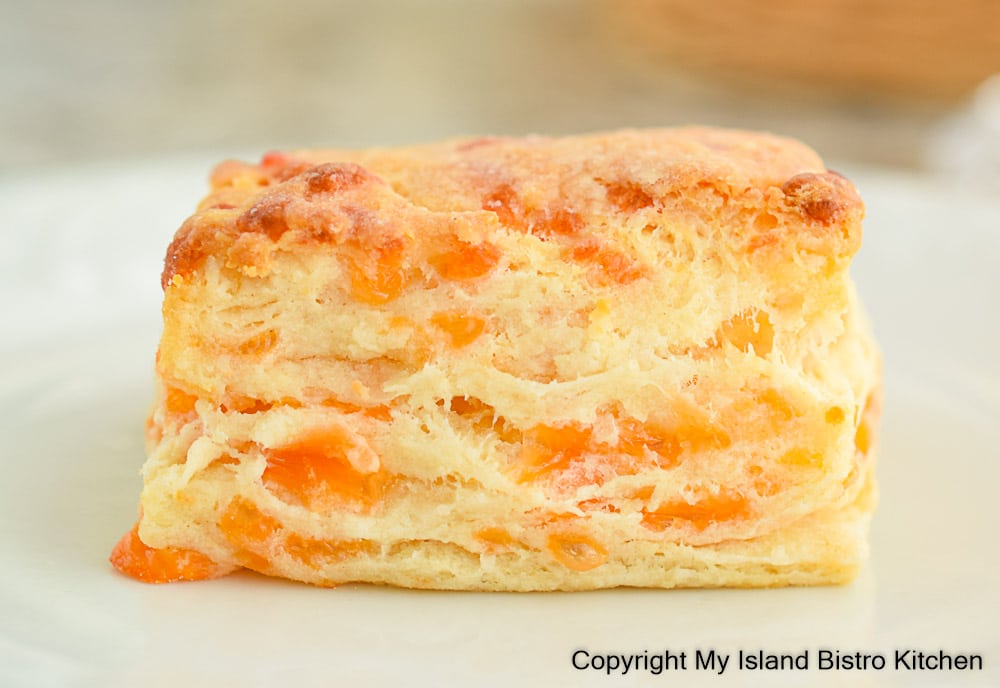
Today, I am sharing my recipe for Cheddar Cheese Biscuits. With layers of flakiness and a soft and tender crumb, these Cheddar Cheese Biscuits are full of delicious butter and cheese flavors. They are best served slightly warm with a good slather of fine butter. Continue reading Cheddar Cheese Biscuits Recipe→
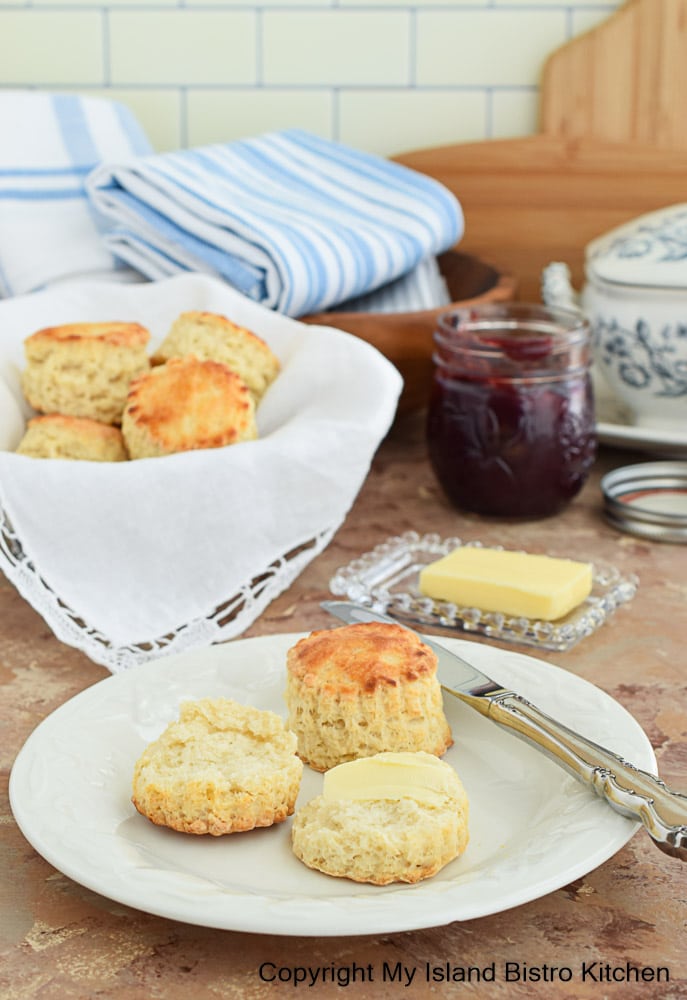
Homemade Buttermilk Biscuits, still slightly warm from the oven, are indeed a treat, especially when slathered with good butter. With their soft and tender texture and buttery flavor, these biscuits complement many meals. Continue reading Buttery Buttermilk Biscuits Recipe→
Having a repertoire of biscuit recipes at the ready is always handy. The wonderful thing about biscuits is that they are easy to make and can be pulled together quickly, just in time for a meal. This, of course, is due to the fact that they are leavened with baking powder, not yeast.
Biscuits are always best served when they are fresh from the oven and still slightly warm and that is true of these Rustic Oat Bran Biscuits, too. Continue reading Rustic Oat Bran Biscuits→
As I write this post, it’s autumn – the days are shorter and cooler and leaves are off the trees, all signs that winter on PEI is not far off. This time of the year always makes me think of warm and cozy teas leisurely enjoyed in front of the fireplace.
A Fireside Tea
My late day event today is what I’m calling a “savoury tea” – which, because of my menu choices, most closely resembles (but is not quite) a “high tea”. I’m drawing the menu from previous postings to my food blog so those interested in the food items can access my recipes by clicking on the hotlinks throughout this posting.
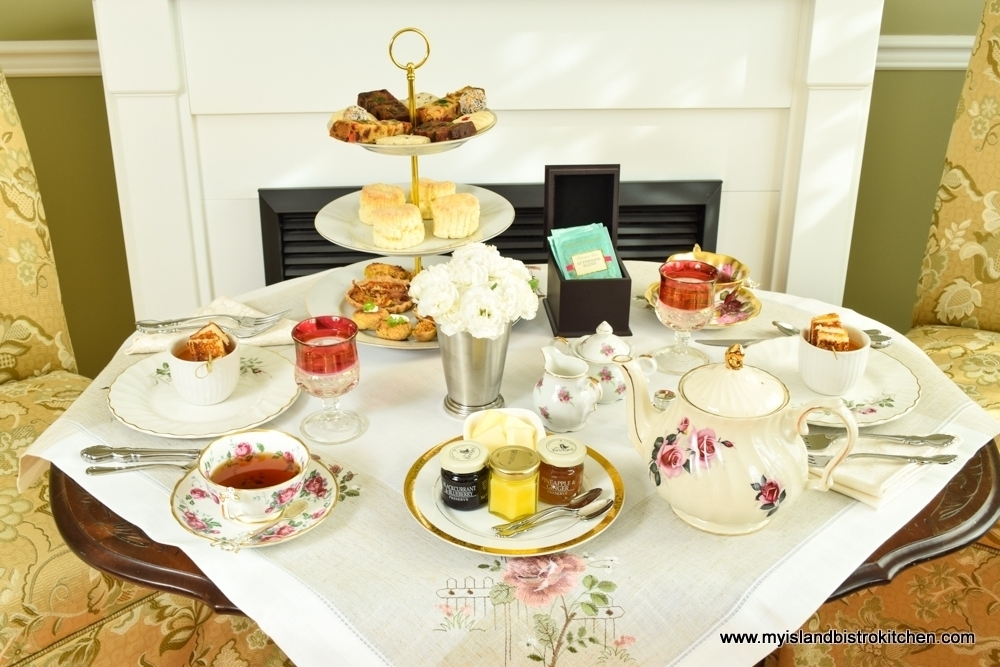
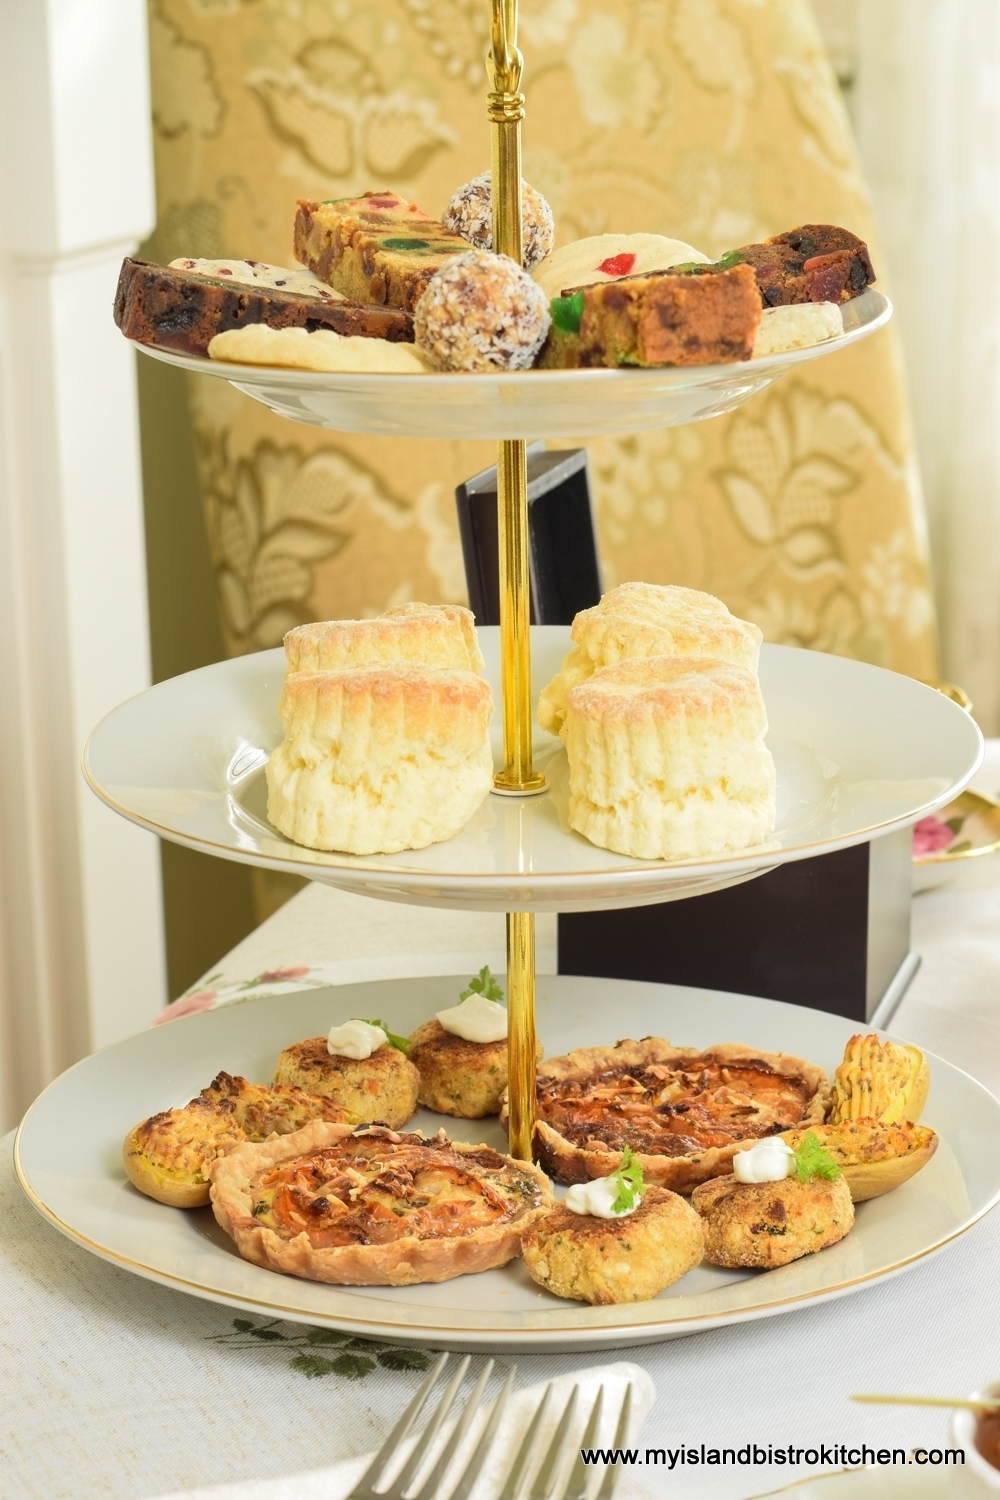
Some people refer to the traditional afternoon tea of dainty (and always crustless) sandwiches, scones, and an array of sweets as “high tea” (which it isn’t). I’m not sure why this happens – perhaps it is because the food is often served on a tall (hence “high”) three-tier server (pictured below), or curate stand, along with fancy cups and saucers on the table or it may be because the mere mention of afternoon tea evokes the notion that it is a “high” society event. In any event there is a distinction between a “high tea” and an “afternoon tea” (the latter sometimes referred to as a “low tea”).
Three-tier Server
Originally, afternoon teas consisted of light refreshments served on low tables like coffee tables, for example. The idea of an afternoon tea was to have some refreshments, mid-afternoon, to counter the sluggishness often experienced in the afternoon and to stave off the hunger until dinner was served later in the evening. Partakers would often be seated in comfy armchairs as opposed to formal dining chairs and would use the low tables upon which to set their cup and saucer and refreshments. In fact, some high-end hotels in London serve afternoon tea in the surroundings of their lobbies and, indeed, comfortable armchairs and sofas are still used along with low coffee tables. Today, however, the traditional afternoon tea is most often served at regular height tables. What characterizes a traditional afternoon tea are crustless finger sandwiches, scones, sweets and, of course, tea.
High tea, on the other hand, is more like a light supper featuring hot menu items which are most frequently served at a regular height table. Foods denoting a high tea might include egg dishes like quiches, and/or dishes that include meat and fish. Bread or biscuits would most commonly be served but less likely sandwiches if hot savoury dishes are part of the menu. And, of course, there would indeed be tea! High teas, then, tend to be comprised of more substantial fare and are typically served later in the afternoon or early evening as in the case of mine today. For those who watch the British soap opera, Coronation Street, you’ll often hear the characters invite others “round for tea” – it’s “high tea” or supper they are referring to in this context. (Yes, I’m a “Corrie” fan!)
Because of the choice of menu items I am serving, my savoury tea is, therefore, most similar (but not quite identical) to a “high tea” versus an “afternoon tea”.
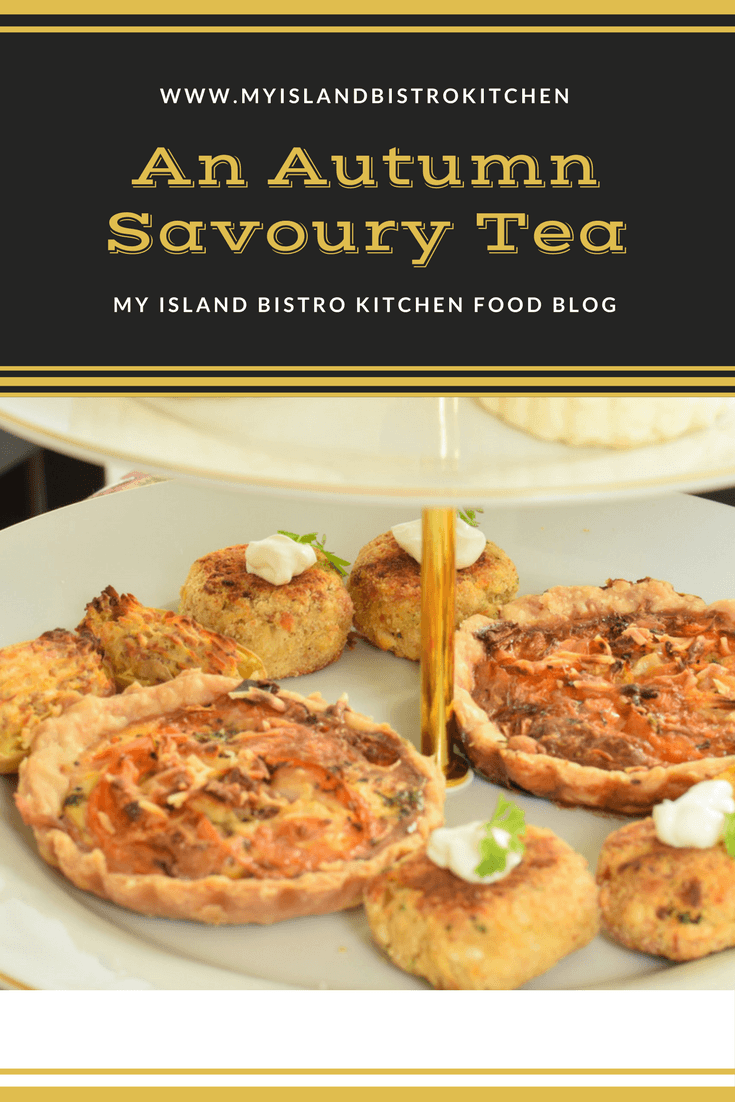
A Savoury Tea
The Table
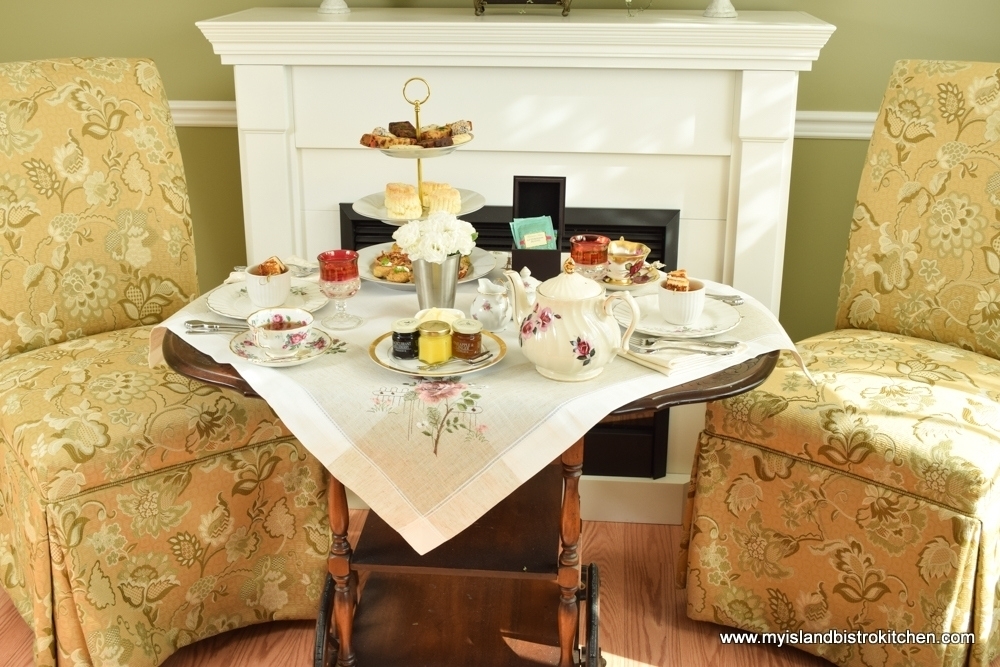
I was fortunate enough to find an antique Gibbard tea trolley, in relatively decent condition, a few years ago and it is, indeed, handy. I love to use it for displays in my dining room and, because it has a double drop leaf, it often serves as my tea table when it is just tea for two. It’s the perfect size to hold all the tea elements and is easily wheeled to whatever location in the house I choose for the tea. (I am still on the hunt for a Roxton maple tea trolley in excellent condition to match my dining room set so, if anyone on PEI has one they are interested in parting with, or knows someone who does, please get in touch!)
Tea Trolley
The Linens
The tablecloth square on my tea table is one I bought in Burano on my last trip to Italy. Yes, when I’m looking for mementos of trips, my interests usually veer toward tabletop items and foods local to the area!
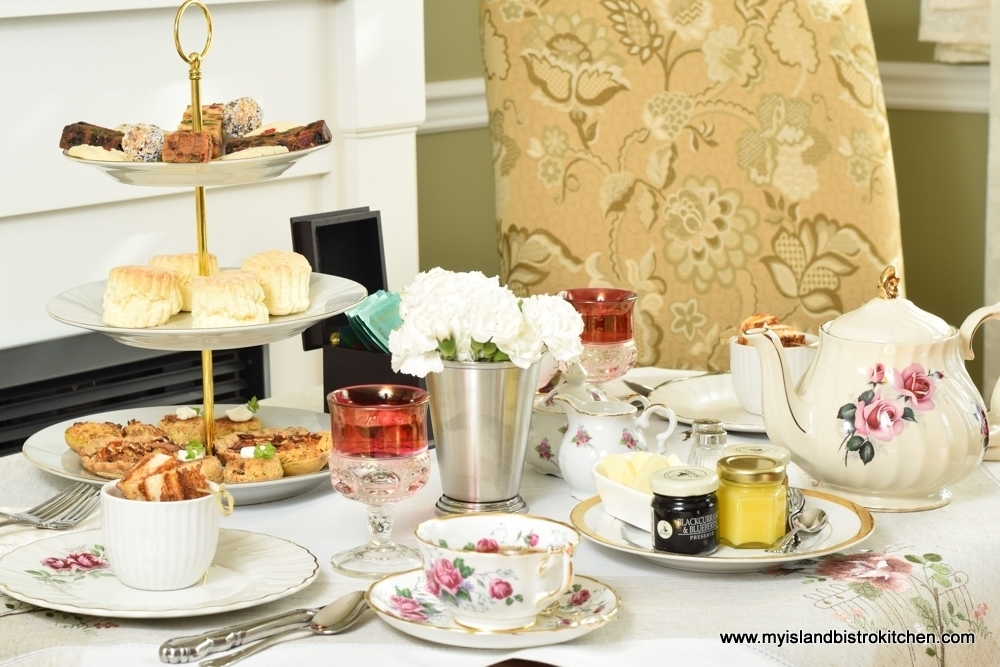
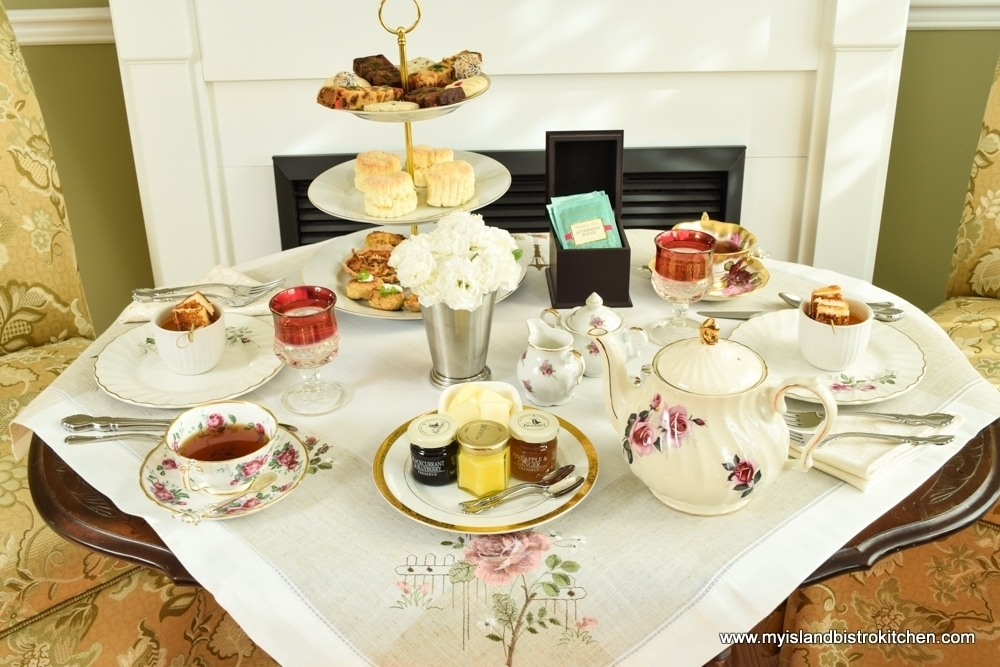
The Tea Table is Set
Napkin folds for tea tables tend to lean toward basic, classic designs, much like the simple triangular fold I’ve chosen here. Most often, the folds tend to be flat designs as opposed to stand-up folds and the napkins are usually plain in color.
Simple Teatime Napkin Fold
The Flowers
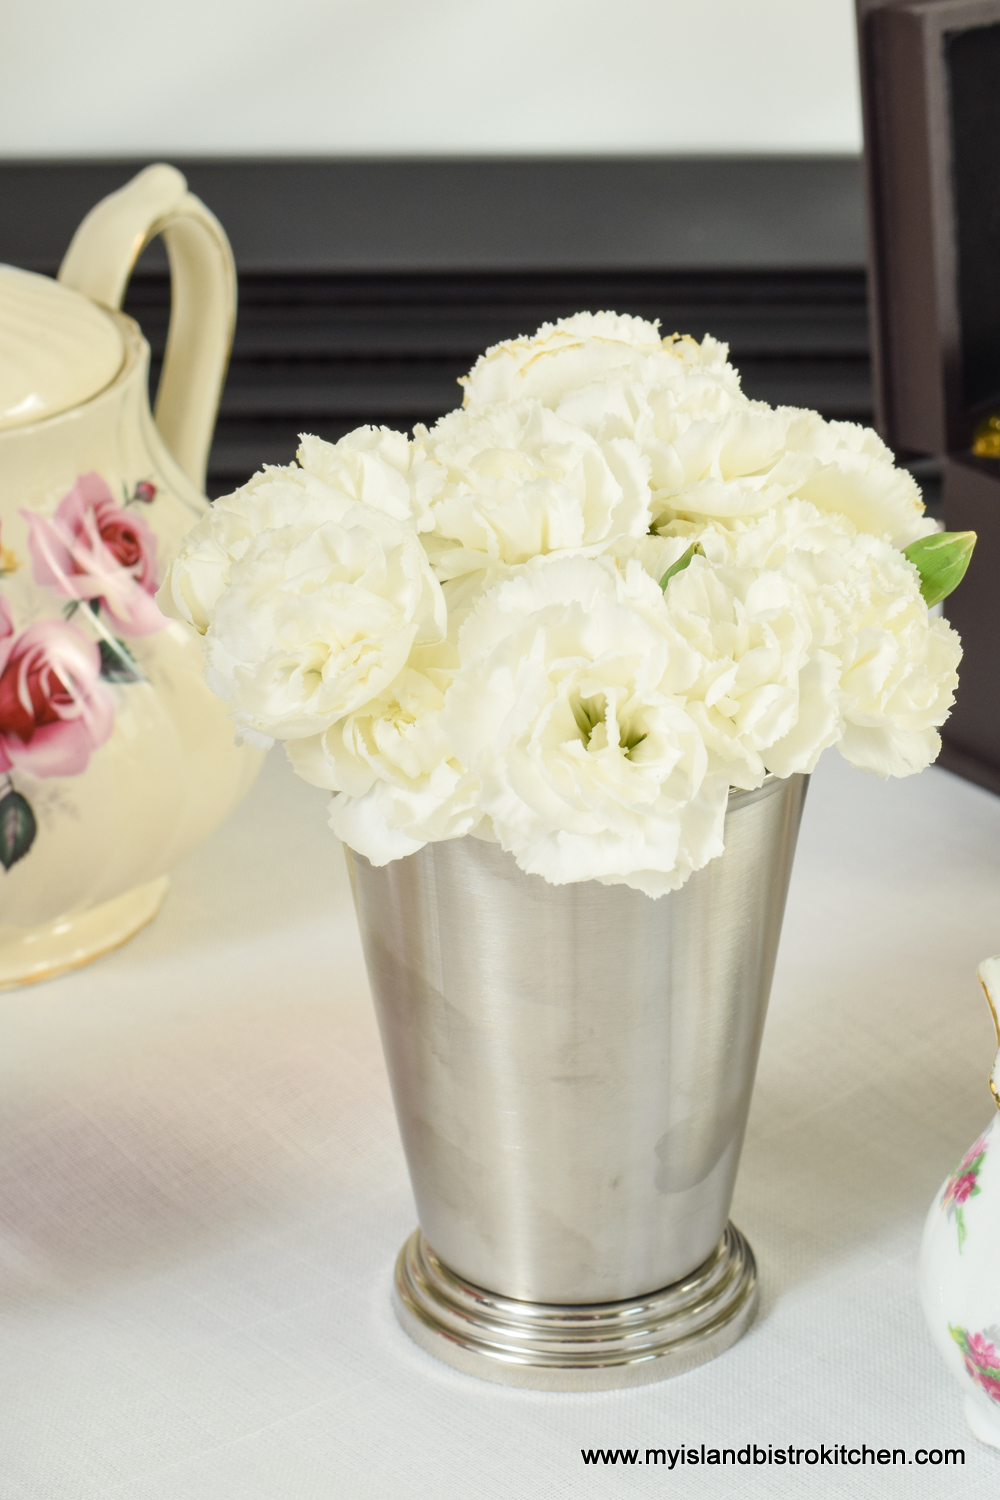
I like to include fresh flowers on my tea tables. They don’t have to be anything more elaborate than a simple bouquet of mini carnations. The arrangement, however, does need to be proportionately sized. Floral arrangements for tea tables are typically quite small, especially if it is a tea table set for two. Using a single color and variety of flower keeps the look simple and uncluttered.
Bouquet of Mini White Carnations for the Tea Table
Dishes and Glassware
Sometimes, it’s nice to use a formal tea set or pieces from formal china for tea settings. Matching pieces do lend an air of formality and cohesiveness to the setting. However, it’s totally acceptable to have a mix of dishes on the tea table so long as they coordinate in style and color.
Always use small tea-sized plates, or supper plates, for tea events. Small portions of food characteristic of tea fare just look better on small plates as the food does not appear so minuscule and “lost” as it would on a large dinner plate, for example. These pink design plates were a thrift shop find.
Tea Plate
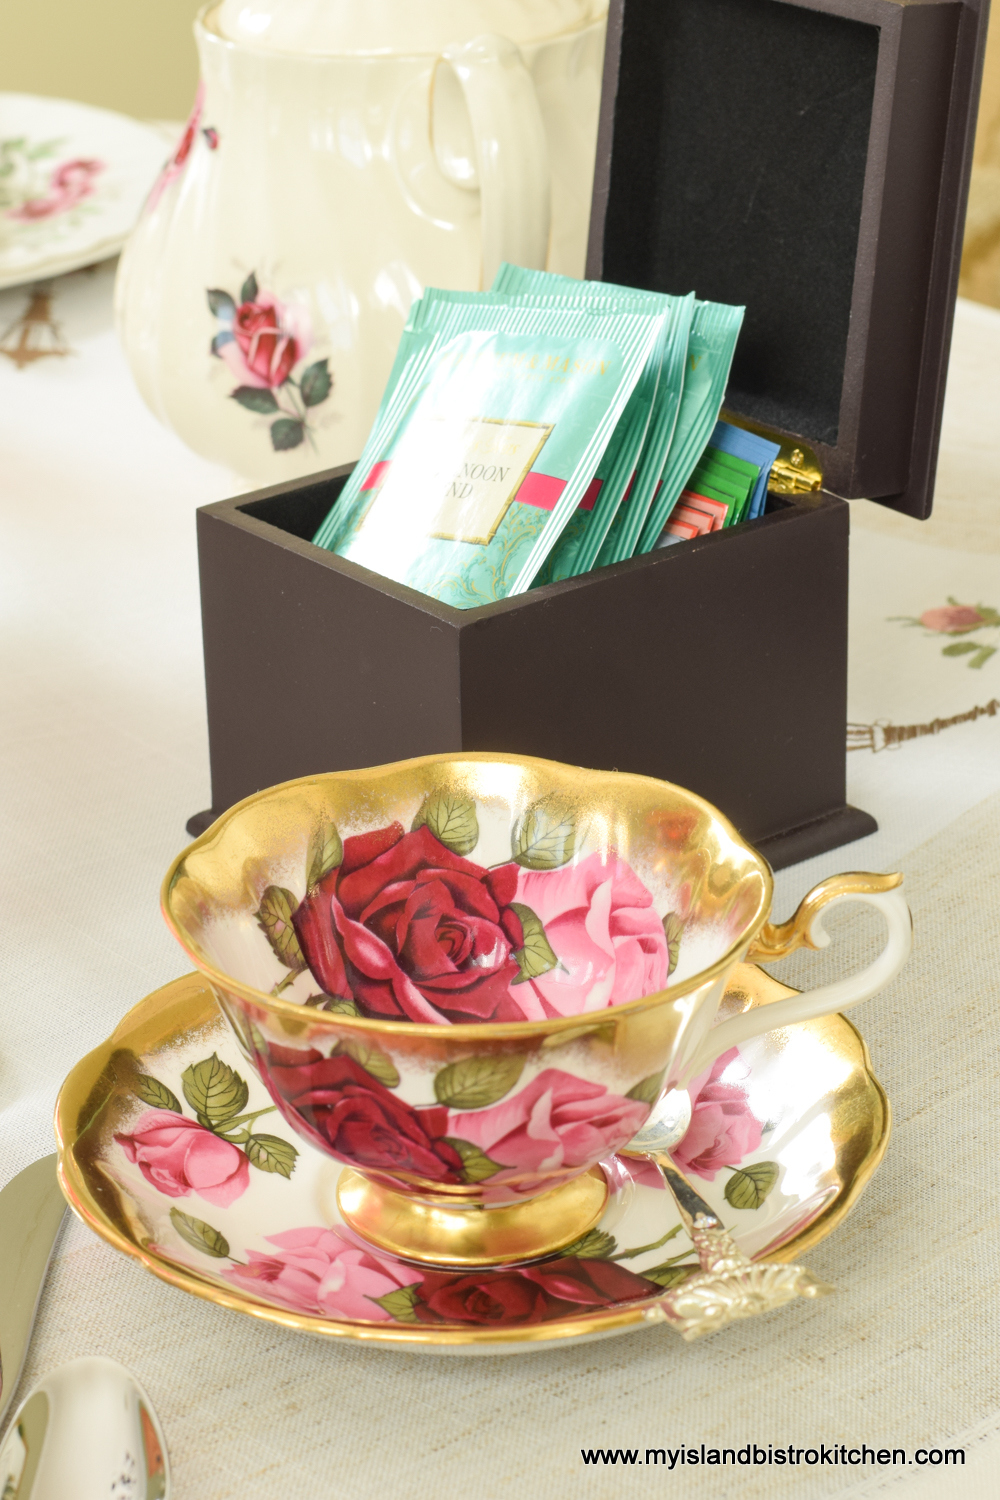
From my collection, I have simply chosen two different teacups and saucers that I particularly like. They both have pink designs to compliment the plates.
Teacup and Saucer
Both cups have wonderful designs inside and outside.
China Teacup and Saucer
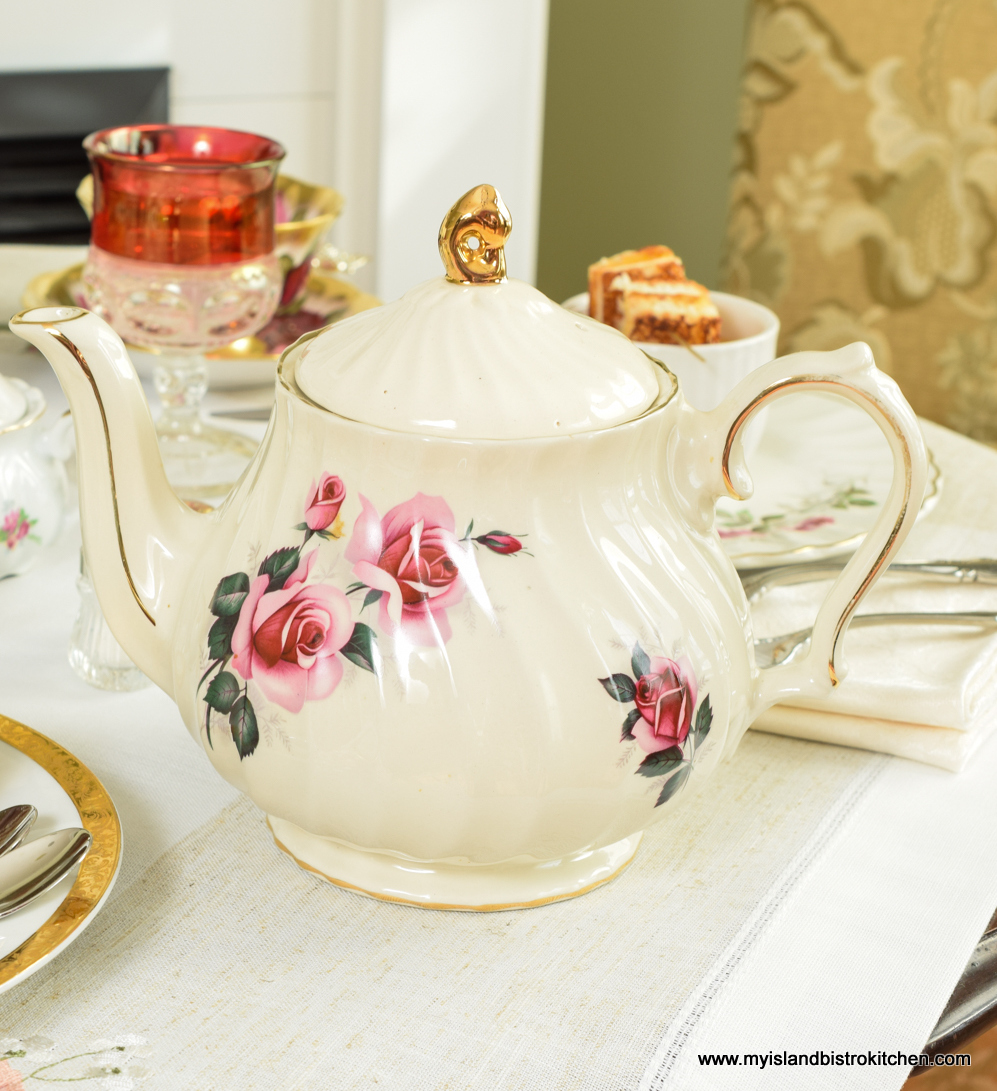
The teapot, a Sadler, also has a pink theme. The pink shades coordinate with the salmon pink shade highlighted in the tablecloth.
Sadler Teapot
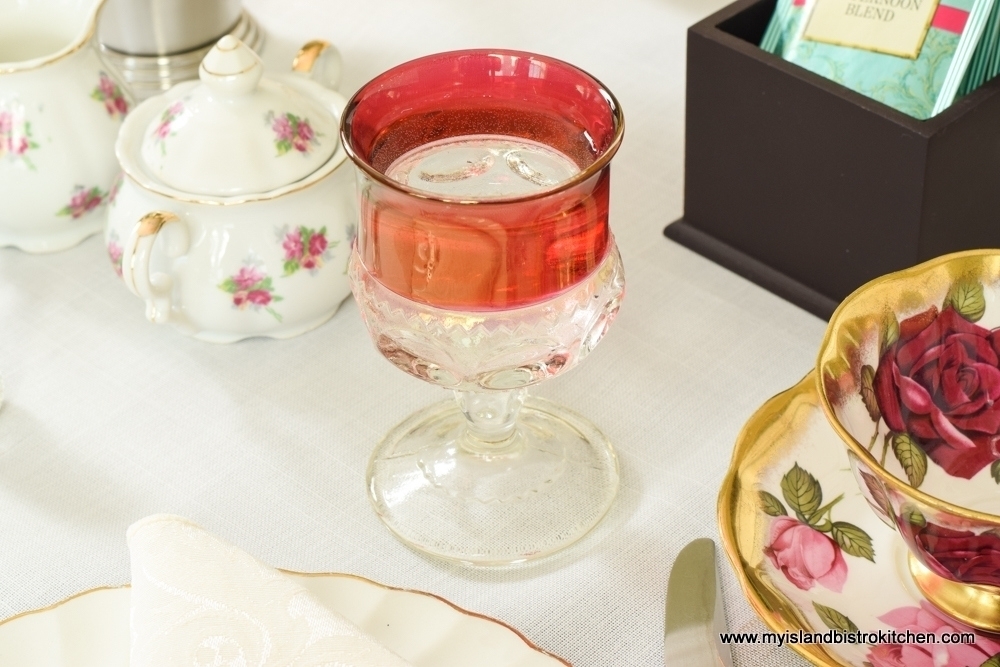
I found these little pedestal glasses with cranberry trim at a second-hand shop and knew they would be perfectly sized for tea tables. They lend an air of elegance and color to the table.
Cranberry Glass
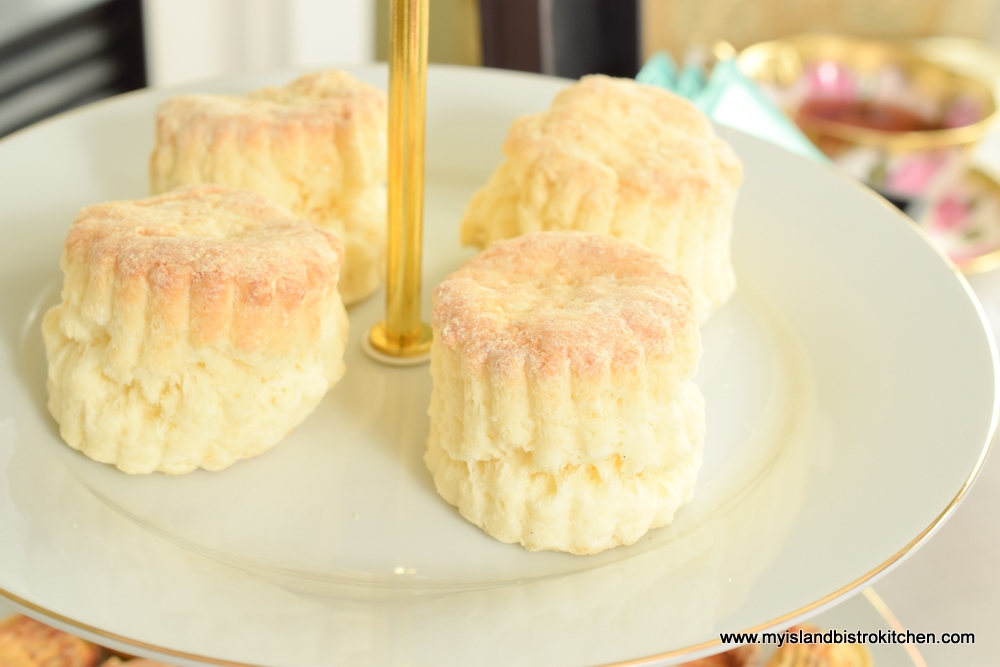
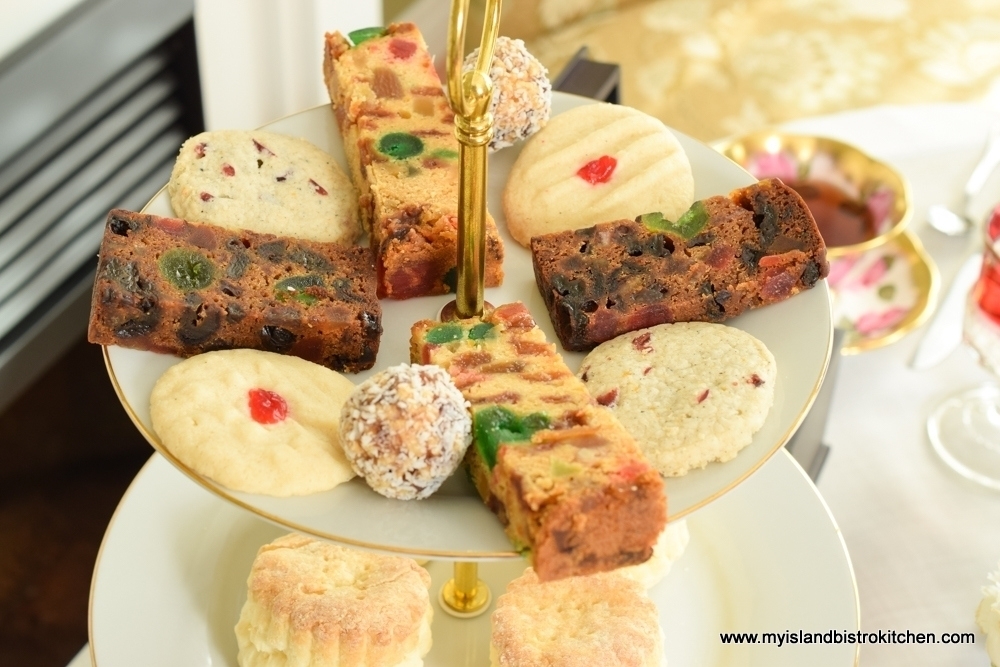
I adore my three-tier servers! They give an air of elegance and sophistication to any tea table. Plus, they are super useful and an efficient way to serve the food. All the food items can be brought to the table at once on one unit, taking up less space as tea tables tend to be small and compact. Sandwiches/savoury items go on the bottom tier, scones/biscuits on the middle tier, followed by the tempting sweet treats on the top tier.
The Menu
So, here is what is on my five-course savoury tea menu.
~ Starter ~
Cream of Roasted Tomato Soup with Grilled Cheese Squares
~ Savoury ~
Harvest Quiche
Baked Stuffed Fingerlings
Mini Lobster Cakes
~ Biscuits ~
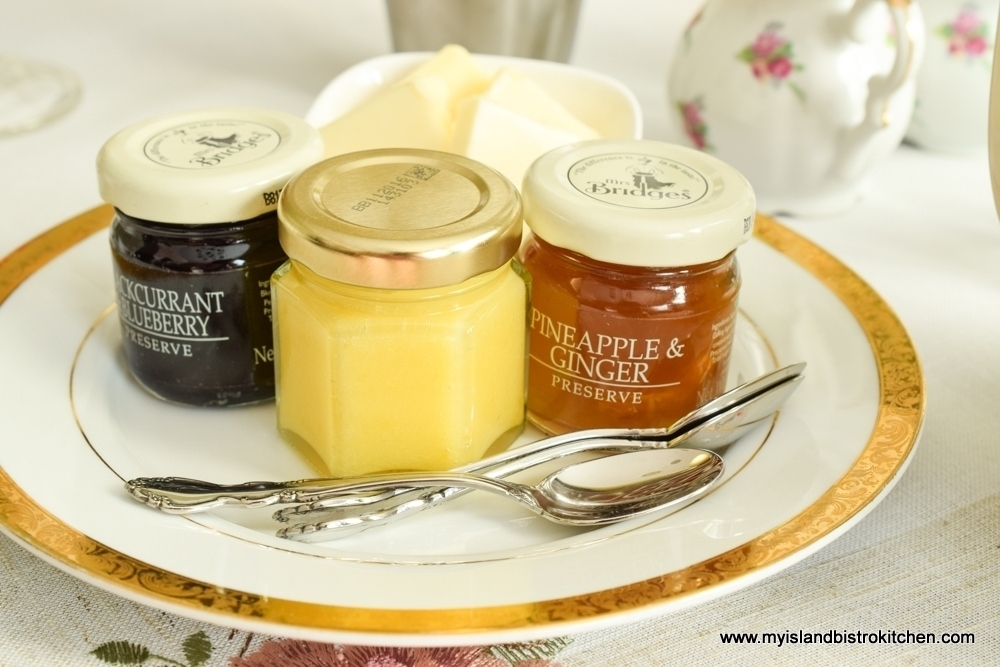
Biscuits served with lemon curd and preserves
~ Sweet Offerings ~
Dark and Light Fruitcake
Frypan Cookie Balls
Gluten Free Earl Grey Cranberry-Orange Shortbread
Gluten Free Melting Moments
~ Dessert ~
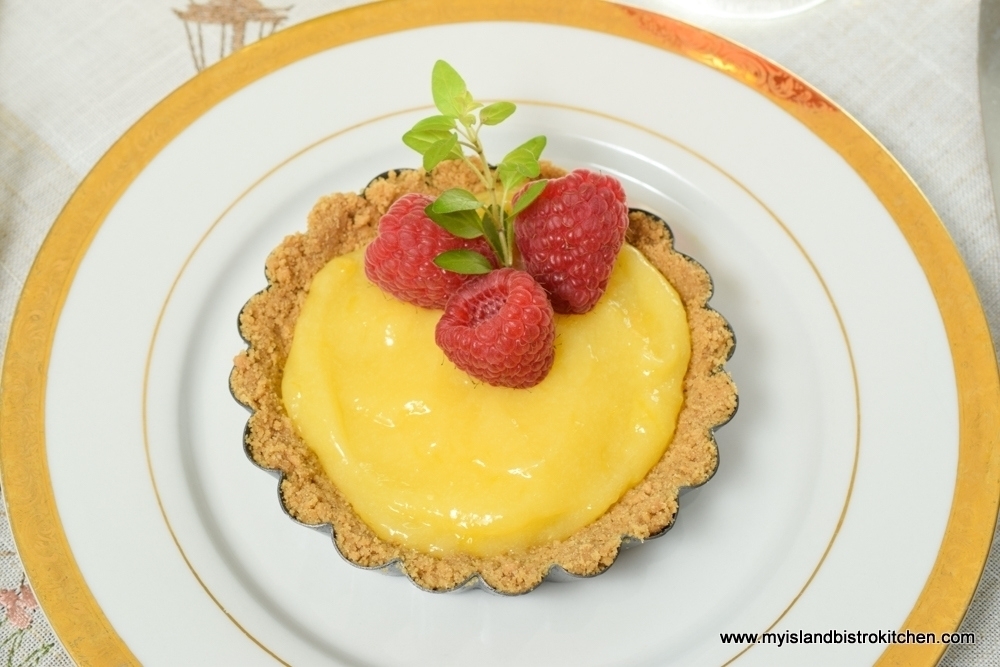
Luscious Lemon Curd Tartlets
~ Tea ~
Fortnum and Mason’s “Afternoon Tea” blend
The traditional order in which to consume tea foods are sandwiches/savouries first, followed by the scones/biscuits, and ending with the sweets. So, let’s take a closer look at the menu items.
Starter Course
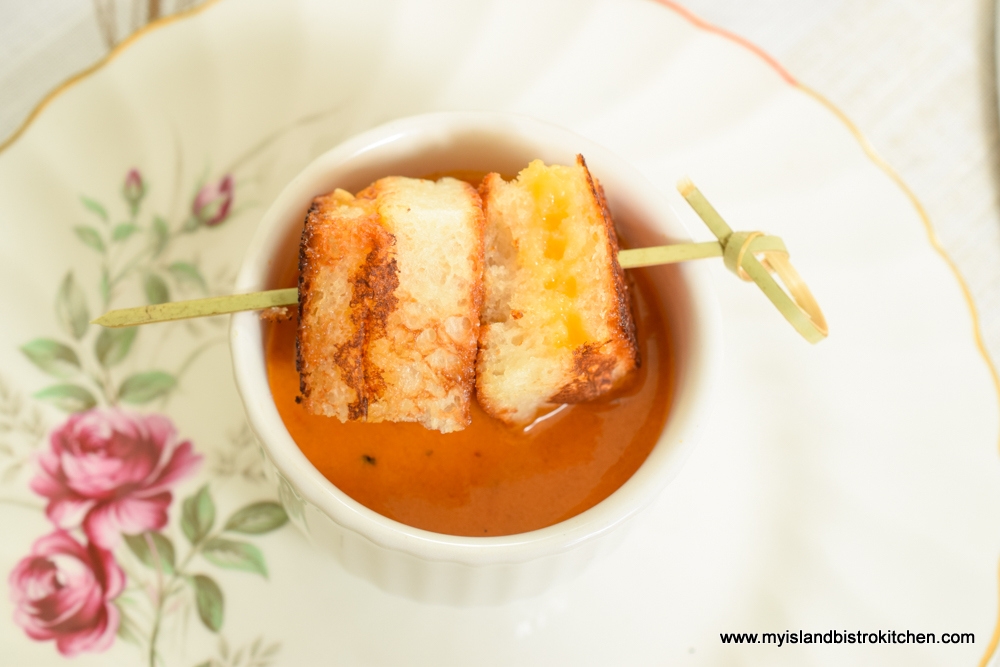
For the starter course, I’m serving my homemade cream of roasted tomato soup with tiny squares of grilled cheese.
Cream of Roasted Tomato Soup with Grilled Cheese Squares
In keeping with the small portion size conducive to tea serving size, I’m serving the soup in small soup cups and threading the grilled cheese squares on to a skewer.
Cup of Cream of Roasted Tomato Soup with Grilled Cheese Squares
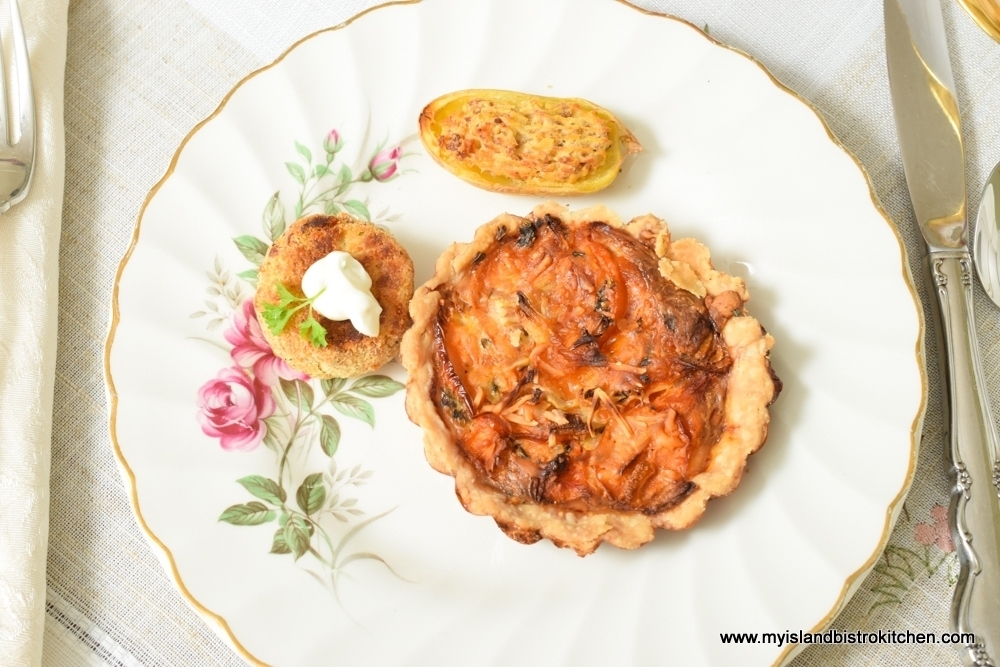
Savoury Course
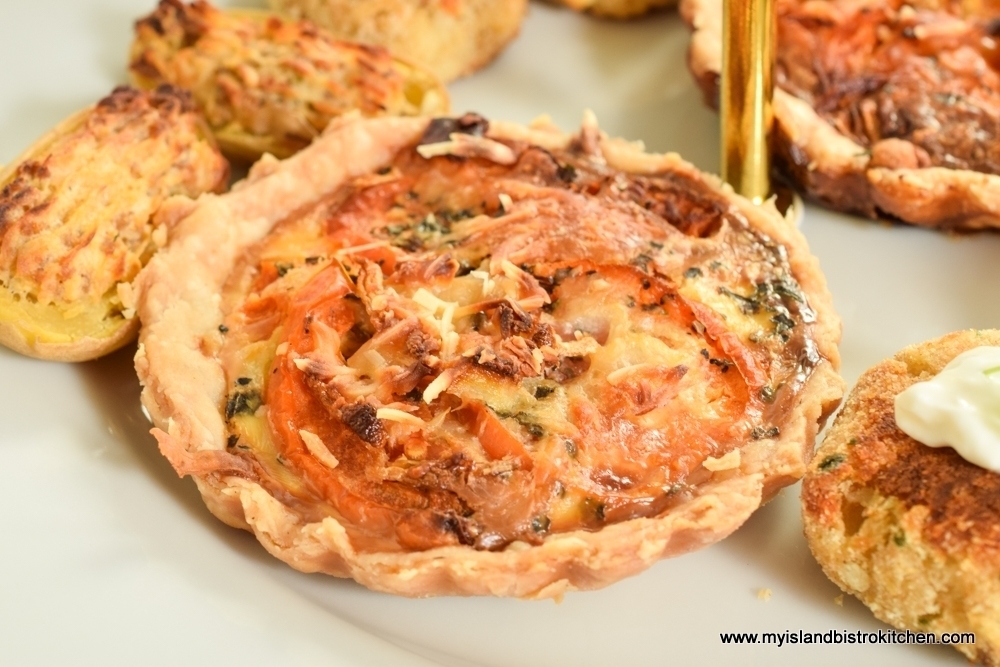
For the savoury course, I have selected three hot items – mini harvest quiches, baked stuffed fingerlings, and mini lobster cakes. By clicking on the foregoing hotlinks, you can access my recipes. I will often plan ahead for tea events when I am doing my batch cooking for the freezer. In this case, I made some mini quiches and lobster cakes earlier and had them frozen. This allows me to add some variety to my tea events that I probably might not otherwise have if I had to mix up special small batches especially for a tea event.
Mini Harvest Quiche
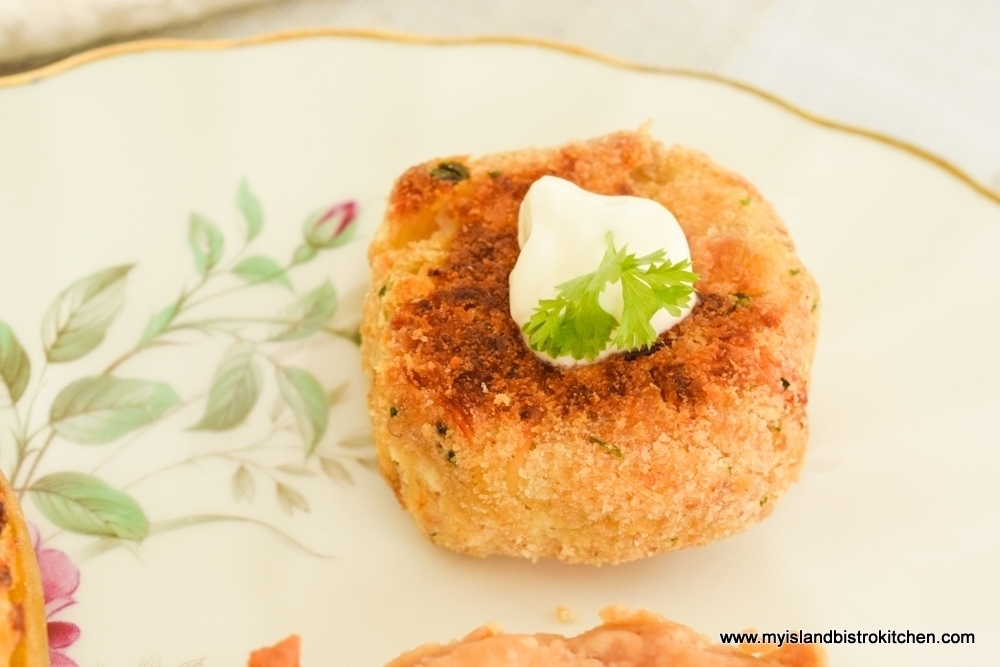
The fingerlings are stuffed with sausage, cheese, tomato sauce, and seasonings and are tasty little bites.
Baked Stuffed Fingerlings
Living on PEI, lobster fishing is one of our main fisheries so, naturally, I am going to include it in some fashion on my menu. The small lobster cakes are served with a small dob of sour cream.
Mini Lobster Cake
Keep the size portions small – they can be the same size as appetizers/hors d’oeuvres or very slightly larger. For example, I use the small individual tart shells for the mini quiches because I like the look of a complete, uncut quiche for each serving. If using pieces cut from a larger quiche, I recommend making the quiche in a small quiche/pie plate 6” – 8” in diameter, no larger.
Biscuits Course
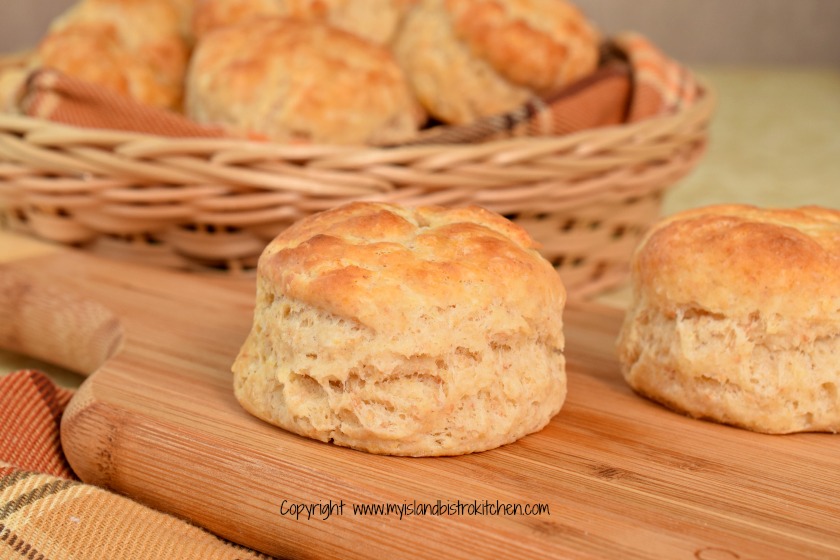
Because this is a savoury tea, I am swapping out the traditional scones associated with afternoon tea and am replacing them with biscuits. I currently have two biscuit recipes on my food blog – classic tea biscuits and whole wheat biscuits. Either works well with this type of tea.
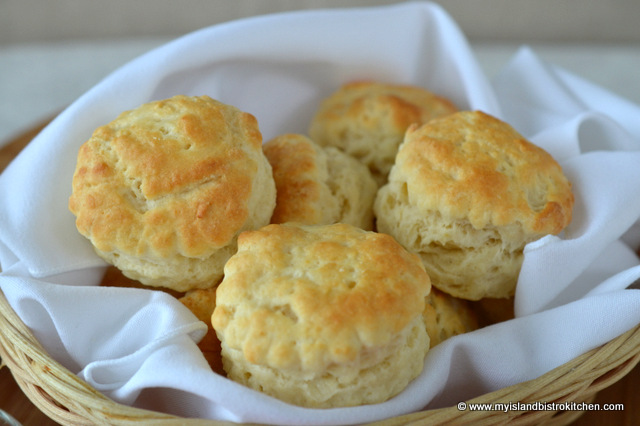
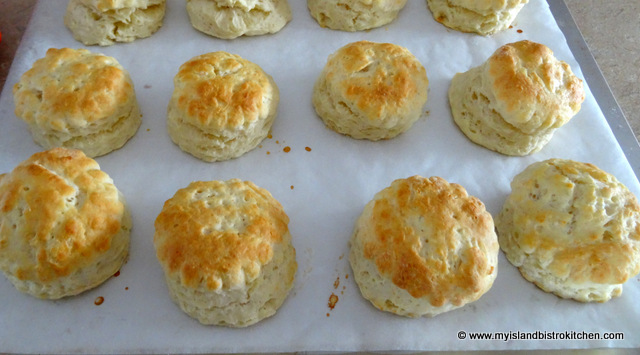
Homemade Biscuits
Biscuits are less sweet and rich than scones and I think they go better with my savoury tea. That doesn’t mean, however, that lemon curd and preserves can’t be enjoyed with biscuits! It’s a great way to transition the palate from the savoury course to the sweets!
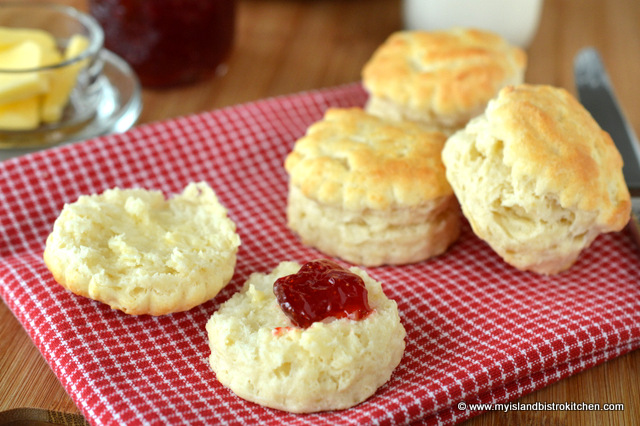
Lemon Curd, Jam, and Marmalade
I have made a batch of my lemon curd to enjoy with the biscuits. Sometimes, I will use small dishes for the preserves but, if I have the small jars, I will often use them because I like the look of the tiny jars clustered together on a server plate!
This is an optional course because, really, the sweets themselves are generally sufficient. However, a nice touch is to add one special signature dessert. With my fresh batch of lemon curd, a luscious lemon curd tartlet was an obvious choice. I added some bright red raspberries for contrast along with a sprig of greenery.
Luscious Lemon Curd Tartlet
Tea Selection
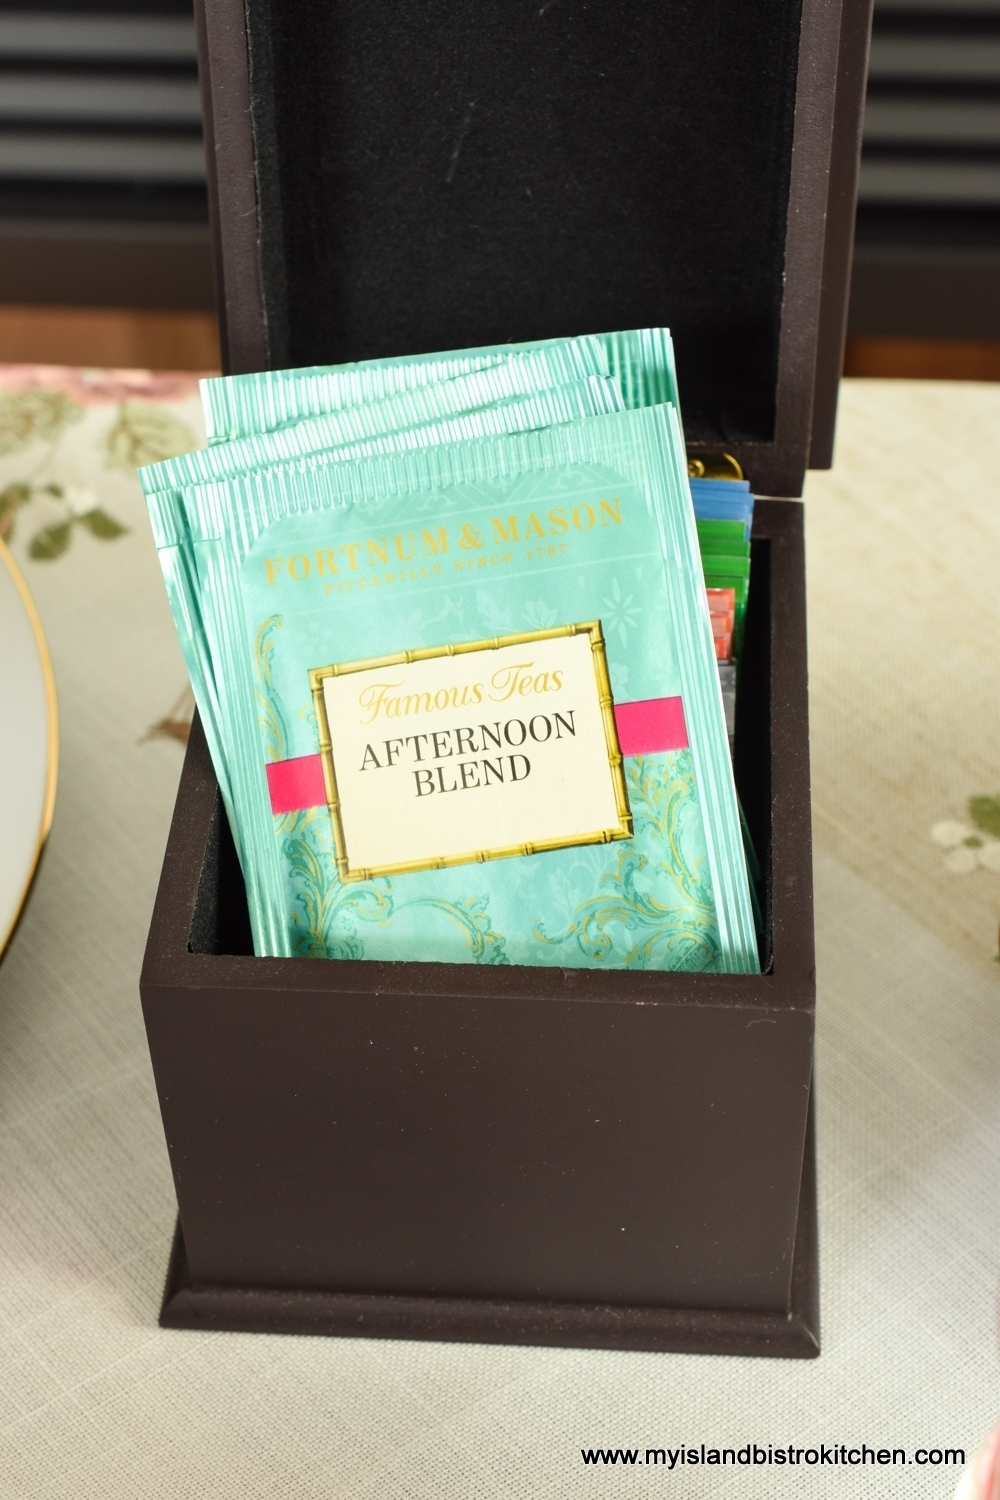
My tea selection is one of my personal all-time favorites – Fortnum & Mason’s “Afternoon Tea” blend which I brought home from my latest trip to London. When in London, I always try to make time for a stop at Fortnum & Mason’s flagship store on Piccadilly to browse through their food halls and to pick up some of their tea. This tea from Ceylon is crisp and refreshing yet full bodied so it goes equally well with a savoury tea as it does with a traditional afternoon tea.
Fortnum and Mason’s “Afternoon Tea” Blend
I thoroughly enjoy the opportunity to go out for afternoon tea but, unfortunately, where I live, there are no restaurants or hotels that offer this option. I think that’s why, when I’m in London, I allot time for 1-2 afternoon teas which are always a highlight of my visits. I often agonize over which ones to choose because there are so many wonderful options. I have written postings on three I particularly enjoyed and you can access those by clicking on the following links: Afternoon Tea in London and “Scents of Summer” Afternoon Tea in London.
Tea time can be elaborate or simplified and, with some planning, can be made in to an event for entertaining family and friends at home. You’ll find inspiration for tea events of all sorts here on my blog. Simply go to the “Afternoon Teas” menu or type “Afternoon Tea” in the search box on the home page.
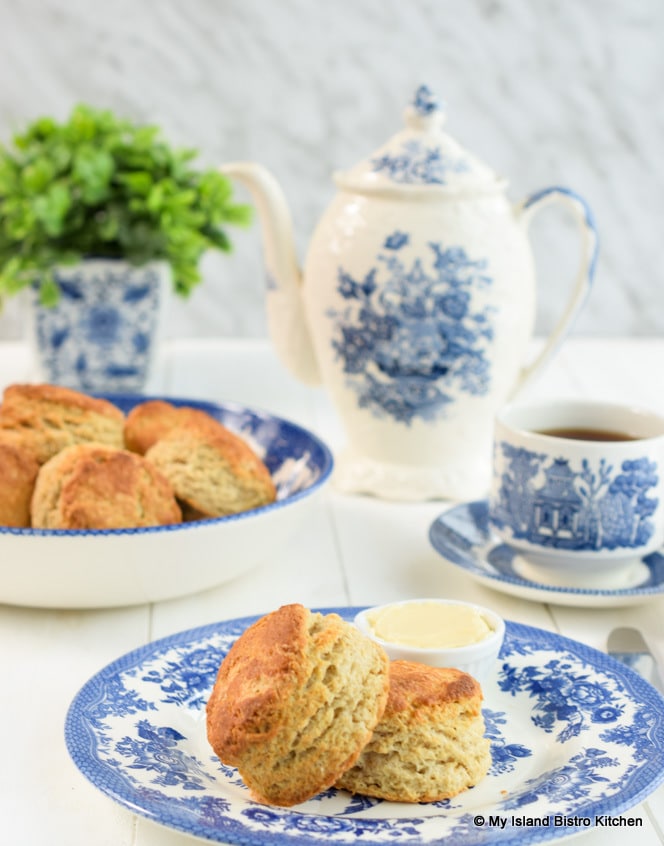
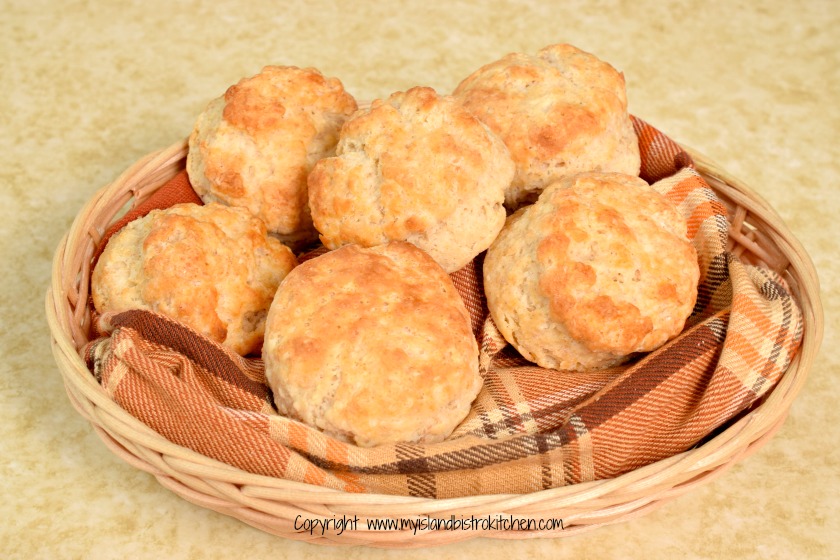
For me, one of the hallmarks of a wonderful homemade meal is a fresh batch of tender and flavorful whole wheat biscuits on the table! These are particularly good with baked beans (especially when the biscuits are slathered with molasses!) or, well, just about anything! Biscuits are a form of a quick bread so they don’t take long to whip up and, best of all, they only call for pantry staples like flour, baking powder, salt, butter, milk and sometimes a small amount of sugar.
Whole Wheat Biscuits
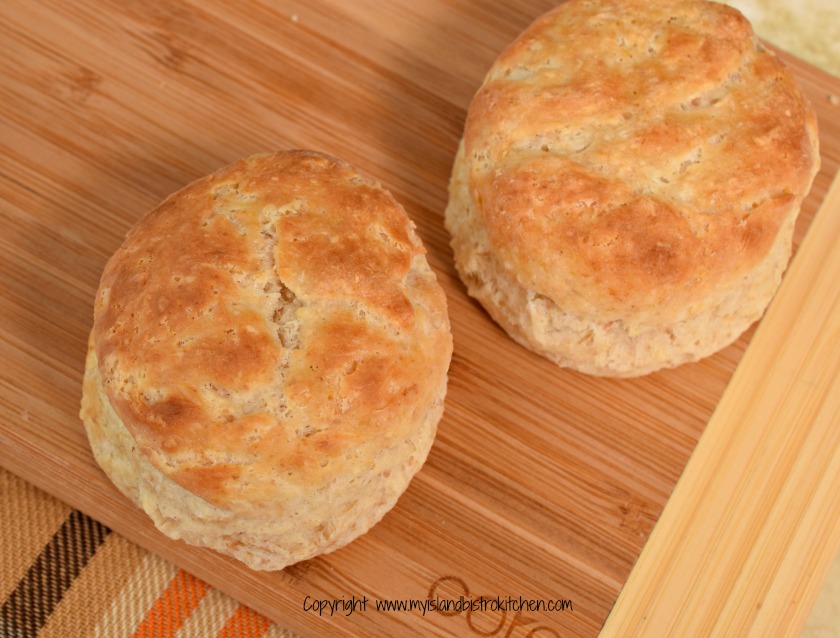
My recipe calls for a combination of flours – 1 1/4 cups of all-purpose flour and 3/4 cup whole wheat flour. I find that using all whole wheat flour does not yield the tender texture that can be achieved by blending all-purpose flour with the whole wheat. Shortening or butter can be used as the fat for biscuits; however, nothing beats butter for flavor!
Whole Wheat Biscuits
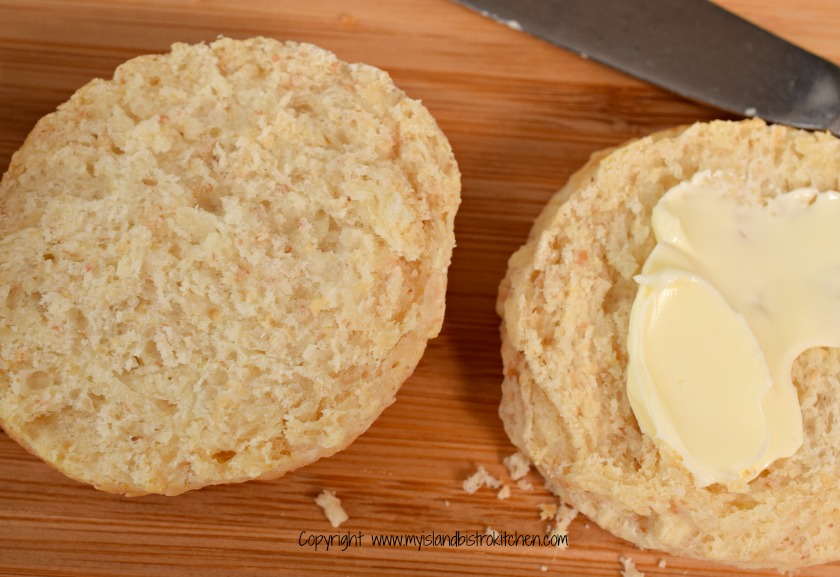
These biscuits have a different flavor and texture than my standard white biscuits and these are made with buttermilk (or sour milk) instead of with whipping cream and whole milk (click here for the recipe for my white tea biscuits). They are two distinctly different types of biscuits. The whole wheat ones are slightly more “rustic” while the white biscuits are very refined. I tend to make the whole wheat biscuits to serve alongside a more rustic meal like beans, chili, and stews, for example. My regular “go-to” standard biscuits are the white tea biscuits and, for sure, they are the ones I use for afternoon teas because of their light, tender crumb.
Whole Wheat Biscuit
My hints for making biscuits are –
Use cold ingredients. In fact, it’s a good idea to put the flour mixture in the refrigerator for about an hour or so so that it is cold to start with.
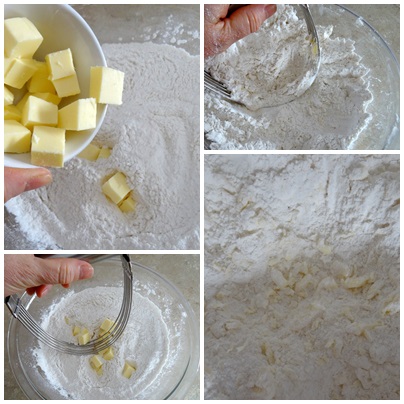
Use cold butter or even frozen butter which is what I use. That cold butter will give flaky tenderness to the biscuits. The butter can be cut into the flour mixture with a pastry cutter but my preference is to hold a grater (with large holes) over the flour and grate the butter right into the flour. Stop and give the mixture a stir after grating some butter to integrate and distribute it and then keep on grating the rest of the butter. This helps to ensure that the butter gets incorporated right into the cold flour. If you grate the butter into a separate bowl, it will tend to clump together, especially as you transfer it to the flour mixture.
Only mix the liquid and dry ingredients as minimally as possible and do so gently and with a fork. Over-mixing will result in over-developing the flour’s gluten and yield tough biscuits. Just mix enough that the flour is incorporated and the batter starts to pull away from the sides of the bowl.
Let the batter rest in the bowl for 1-2 minutes. This allows the ingredients to settle (they need to get to know each other!).
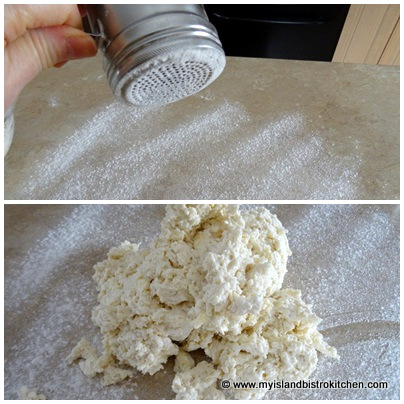
Turn the batter out on to a lightly floured surface. Knead the mixture 8-10 times only. Do NOT over-knead as over-working the dough will “stir up” the gluten in the flours and will yield dense, tough biscuits. After kneading, little bits of the butter should still be visible in the dough. With biscuits, you are not “blending” ingredients but, rather, are simply barely mixing them just enough so that the dough sticks together.
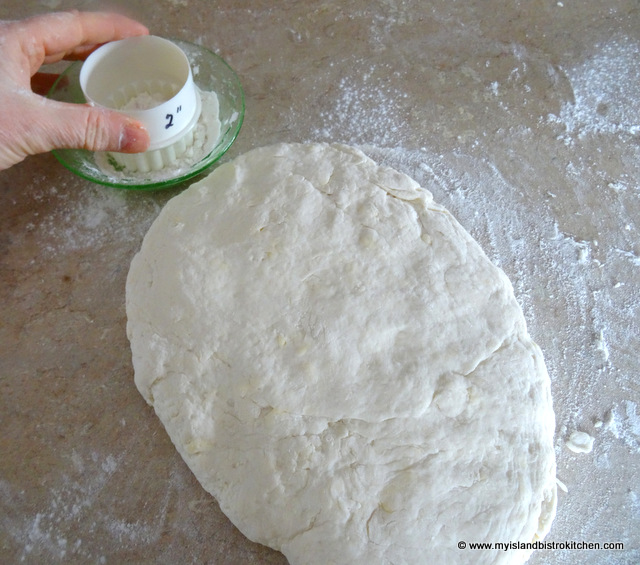
Use a rolling pin, or simply pat the dough to about 1″ thickness. Use desired size of biscuit cutter. A good, general size cutter for biscuits is a 2″ cutter. Flour the cutter before cutting each biscuit and cut the biscuits as close together as possible to minimize the amount of dough that will have to be gathered up and patted down again for the next cutting – remember, the goal is to minimize the amount of “working the dough” that happens . Make sure the cutter is sharp-edged and do not twist the cutter when cutting out the biscuits. Cut straight down into the dough. Twisting the cutter while cutting the biscuits can be a cause of biscuits unevenly rising and hence spreading during the baking process – that’s when they lose their shape and go downhill to the point that they may look like a ski slope!
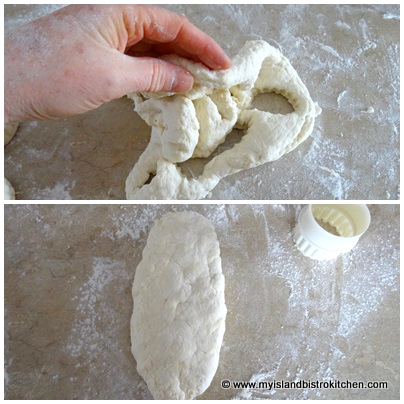
Once the first cut of biscuits is made from the dough, gather up the remaining bits and pat it down to 1″ thickness and continue to cut out remaining biscuits. Again, resist the urge to knead the dough any more than absolutely necessary to pull it together.
Bake the biscuits in a hot oven (450F) until they start to turn golden brown on top, about 14-16 minutes, generally.
Biscuits are best served slightly warm so make them just before the meal.
Whole Wheat Biscuits
[Printable recipe follows at end of posting]
Whole Wheat Biscuits
Ingredients: 1¼ cups all-purpose flour ¾ cup whole wheat flour 4 tsp baking powder 1 tsp salt 1 tbsp granulated sugar 6 tbsp cold, unsalted butter, cut into small chunks 1 cup buttermilk or sour milk*
1-2 tbsp milk for brushing tops of biscuits
Method: Preheat oven to 450°F. Line baking sheet with parchment paper.
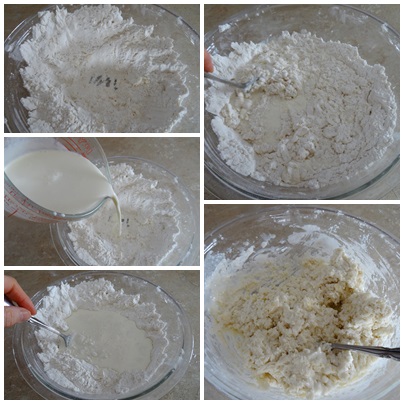
In large bowl, whisk together the flours, baking powder, salt, and sugar.
Grate cold (or frozen) butter over flour in bowl, or use a pastry cutter to cut in the butter until mixture resembles coarse crumbs.
Make a well in the center of the ingredients. Pour milk into well in dry ingredients. Using a fork, mix ingredients together just until flour mixture is incorporated. Do not overmix. Mixture will be a soft, moist batter.
Let batter rest in bowl for 1-2 minutes then turn out onto a floured surface. Knead dough 8-10 times. Do not over-knead.
Roll or pat dough to desired thickness, about 1” thick. Using a 2” floured round cookie cutter, cut out biscuits, re-flouring cutter before cutting out each biscuit. Gather up remaining dough, pat down to about 1” thick and cut out biscuits.
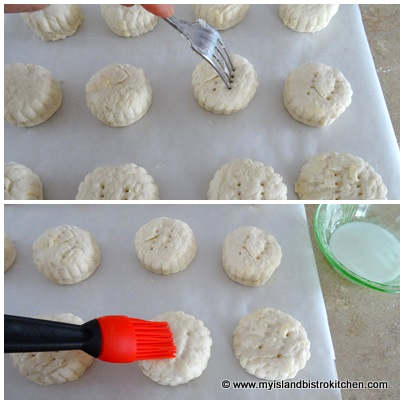
Using a small spatula, transfer the biscuits to prepared baking sheet, placing them about 1” to 1½ “ apart. Prick tops of biscuits with fork tines and lightly brush with milk, if desired. Bake for 14-16 minutes or until lightly browned on top. Remove from oven and let cool on baking sheet for 3-4 minutes then transfer to wire rack.
Biscuits may also be placed close together in a greased baking pan with sides. Baking the biscuits in this manner will yield soft-sided biscuits.
*To sour milk, place 1 tbsp white vinegar in a measuring cup. Add enough milk to make 1 cup. Stir. Let stand for 5 minutes to sour.
Delicious easy-to-make classic whole wheat biscuits that are tender and flavorful.
Ingredients
1¼ cups all-purpose flour
¾ cup whole wheat flour
4 tsp baking powder
1 tsp salt
1 tbsp granulated sugar
6 tbsp cold, unsalted butter, cut into small chunks
1 cup buttermilk or sour milk*
1-2 tbsp milk for brushing tops of biscuits
Instructions
Preheat oven to 450°F. Line baking sheet with parchment paper.
In large bowl, whisk together the flours, baking powder, salt, and sugar. Grate cold (or frozen) butter over flour in bowl, or use a pastry cutter to cut in the butter until mixture resembles coarse crumbs. Make a well in the center of the ingredients.
Pour milk into well in dry ingredients. Using a fork, mix ingredients together just until flour mixture is incorporated. Do not overmix. Mixture will be a soft, moist batter. Let batter rest in bowl for 1-2 minutes then turn out onto a floured surface. Knead dough 8-10 times. Do not over-knead.
Roll or pat dough to desired thickness, about 1” thick. Using a 2” floured round cookie cutter, cut out biscuits, re-flouring cutter before cutting out each biscuit. Gather up remaining dough, pat down to about 1” thick and cut out biscuits.
Using a small spatula, transfer the biscuits to prepared baking sheet, placing them about 1” to 1½ “ apart. Prick tops of biscuits with fork tines and lightly brush with milk, if desired. Bake for 14-16 minutes or until lightly browned on top. Remove from oven and let cool on baking sheet for 3-4 minutes then transfer to wire rack. Biscuits may also be placed close together in a greased baking pan with sides. Baking the biscuits in this manner will yield soft-sided biscuits.
*To sour milk, place 1 tbsp white vinegar in a measuring cup. Add enough milk to make 1 cup. Stir. Let stand for 5 minutes to sour.
If you have made this recipe and enjoyed it and/or wish to share it with your friends and family, please do so on social media but be sure to share the direct link to this posting from my website.
Connect with My Island Bistro Kitchen on Social Media
Join the Facebook page for My Island Bistro Kitchen: https://www.facebook.com/MyIslandBistroKitchen/
Follow “the Bistro” on “X” (formerly Twitter): https://twitter.com/PEIBistro/
See the drool-worthy gallery of mouth-watering food photos from My Island Bistro Kitchen on Instagram: https://www.instagram.com/peibistro/
Follow “the Bistro” on Pinterest at https://www.pinterest.ca/peibistro/ and pin the Pinterest-ready photo found at the end of this post to your favorite Pinterest boards.
You may also enjoy these other Biscuit recipes from My Island Bistro Kitchen:
Turkey Chowder is the perfect way to use up leftover turkey. It’s a welcome tummy-warming and tasty chowder for cold winter days and is a real treat after skiing, a long winter walk, snowshoeing, or coasting on the snow-covered hills. Serve with warm rolls or biscuits straight from the oven for an extra special treat. Continue reading Turkey Chowder Recipe→
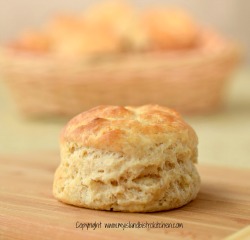
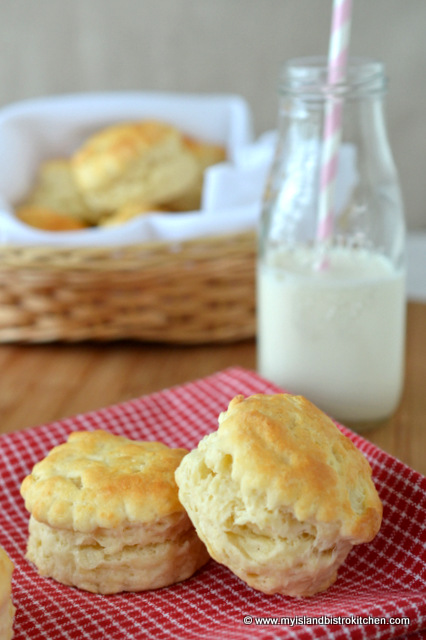
Do you love the smell of tea biscuits baking in the oven? It’s one of my favorite kitchen scents.
My first recollection of biscuits dates back to visiting a grandmother. She made the best biscuits, added a good slather of peanut butter to the warm, fresh-out-of-the-oven biscuits, and served them with a tall glass of cold milk to a wee gal patiently sitting on a high stool at her elbow by the cupboard. I suspect her biscuit recipe was just made from memory and wasn’t written or recorded anywhere. Isn’t it funny how some foods remind us of certain people and bring back great recollections!
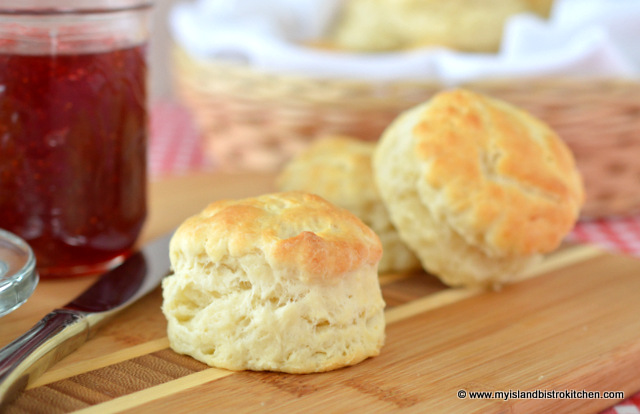
Biscuits are not hard to make and they require only pantry staple ingredients — essentially, flour, leavening, salt, shortening/butter, and liquid – usually dairy (i.e., milk, whipping cream, or buttermilk). What makes biscuit recipes differ is usually the quantity of ingredients used, the type of dairy used as liquid and, sometimes, there will be some additions to the basic ingredients – for example, some recipes call for cream of tartar, a small amount of sugar, or even an egg.
I often hear people say they can’t make biscuits because they always turn out hard as bricks. I suspect this is quite likely due to over-kneading the dough. Biscuit dough should be kneaded as little as possible, just enough to gather up the dough and have it hold together to cut out the biscuits. Usually, only 8-10 kneads is all that is required. I have published lots of tips and hints for making biscuits in a post containing my Buttermilk Biscuit recipe which you can access by clicking here. If you are new to biscuit making or have experienced issues with making satisfactory biscuits in the past, you may find some of the hints and tips in that post useful.
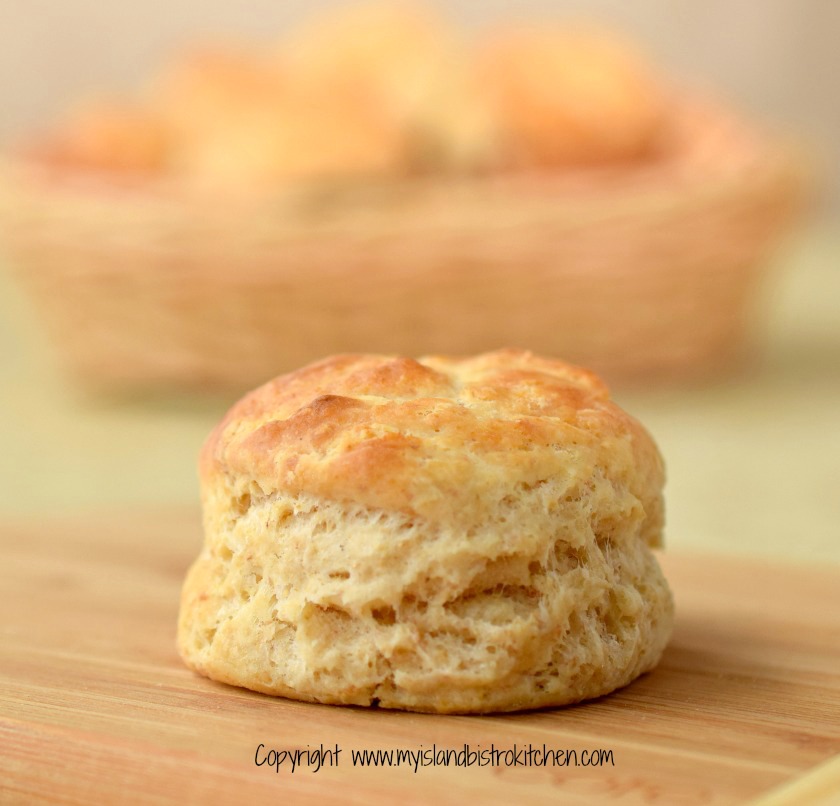
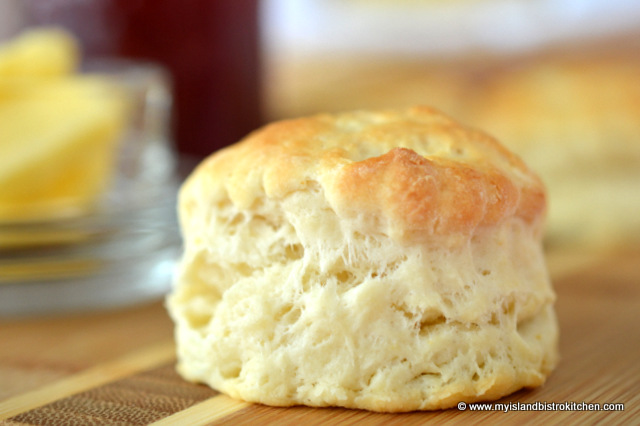
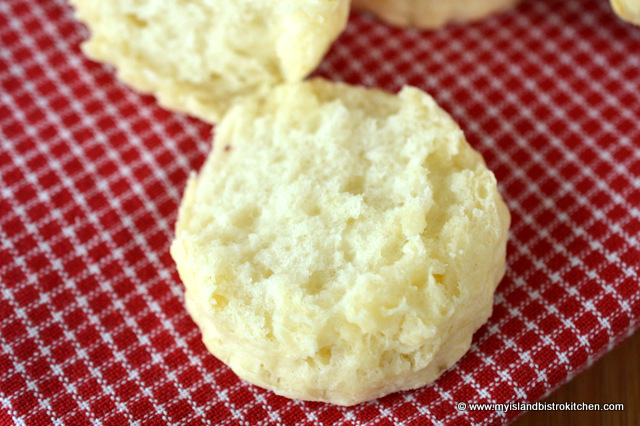
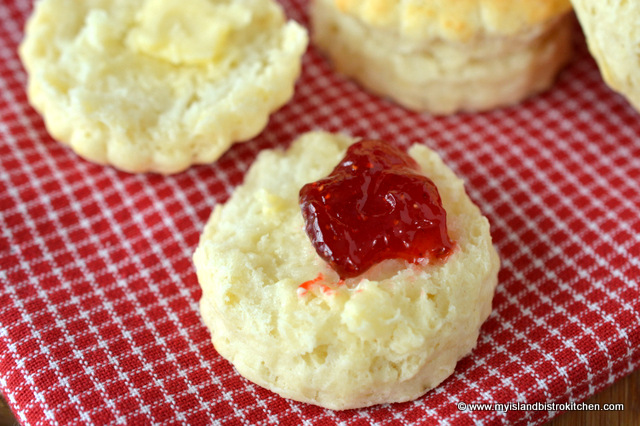
Texture of biscuit
The dough can be rolled out with a rolling pin or simply patted to the desired thickness, which is what I do. I find about 1″ thick dough yields a good depth of biscuit. I use a 2″ crinkled-edge cookie cutter for mine but a straight edge cutter works just as well.
Over the years, I have tried many biscuit recipes, some yielding good results, others not so much. As the old saying goes, if you can’t find something already suitable, develop your own so that’s what I have done to create my own biscuit recipe that has come from many kitchen testing trials to arrive at the right selection and amount of ingredients to yield the flavour and texture I was looking for.
[Printable recipe follows at end of post]
My Island Bistro Kitchen’s Tea Biscuits
Ingredients:
2¼ cups all-purpose flour 1 tbsp sugar 4 tsp baking powder ¾ tsp salt ½ tsp cream of tartar ¼ cup cold unsalted butter ⅔ cup whipping cream ¾ cup whole milk
1-2 tbsp milk for brushing on top of biscuits
Method:
Assemble ingredients.
Preheat oven to 425°F. Line large baking sheet with parchment paper.
In large bowl, whisk together the flour, sugar, baking powder, salt, and cream of tartar.
Using a pastry cutter, cut in the butter until mixture resembles coarse crumbs. Make a well in the center of the ingredients.
In large measuring cup, mix together the whipping cream and milk. Pour into well in dry ingredients. Mix together just until flour mixture is incorporated. Do not overmix. Mixture will be a soft, moist batter.
Let batter stand in bowl for just a minute or so then turn out onto a floured surface. Knead dough 8-10 times, just until it holds together enough to cut out the biscuits. Do not over-knead.
Roll or pat to desired thickness – I suggest about 1” thick will yield a good depth of finished biscuit.
Using a 2” round floured cookie cutter, cut out biscuits. Dip the cookie cutter in flour before cutting out each biscuit.
Gather up remaining dough, pat down to about 1” thick, and cut out the rest of the biscuits.
Using a small spatula, transfer the biscuits to prepared baking sheet, placing them about 2” apart. If desired, prick tops of biscuits with fork tines and lightly brush with milk.
Bake for 14-16 minutes or until lightly browned on top.
Preheat oven to 425°F. Line baking sheet with parchment paper.
In large bowl, whisk together the flour, sugar, baking powder, salt, and cream of tartar.
Using a pastry cutter, cut in the butter until mixture resembles coarse crumbs.
Make a well in the center of the ingredients.
In large measuring cup, mix together the whipping cream and milk. Pour into well in dry ingredients. Mix together just until flour mixture is incorporated. Do not overmix. Mixture will be a soft, moist batter.
Let batter stand in bowl for just a minute or so, then turn out onto a floured surface.
Knead dough 8-10 times. Do not over-knead.
Roll or pat to desired thickness, about 1” thick.
Using a floured 2” round cookie cutter, cut out biscuits. Dip cutter in flour before cutting out each biscuit.
Gather up remaining dough, pat down to about 1” thick, and cut out biscuits.
Using a small spatula, transfer the biscuits to prepared baking sheet, placing them about 2” apart. If desired, prick tops of biscuits with fork tines and lightly brush with milk.
Bake for 14-16 minutes or until lightly browned on top.
If you have made this recipe and enjoyed it and/or wish to share it with your friends and family, please do so on social media but be sure to share the direct link to this posting from my website.
Connect with My Island Bistro Kitchen on Social Media
Follow “the Bistro” on Pinterest at https://www.pinterest.ca/peibistro/ and pin the Pinterest-ready photo at the end of this posting to your favorite Pinterest boards!
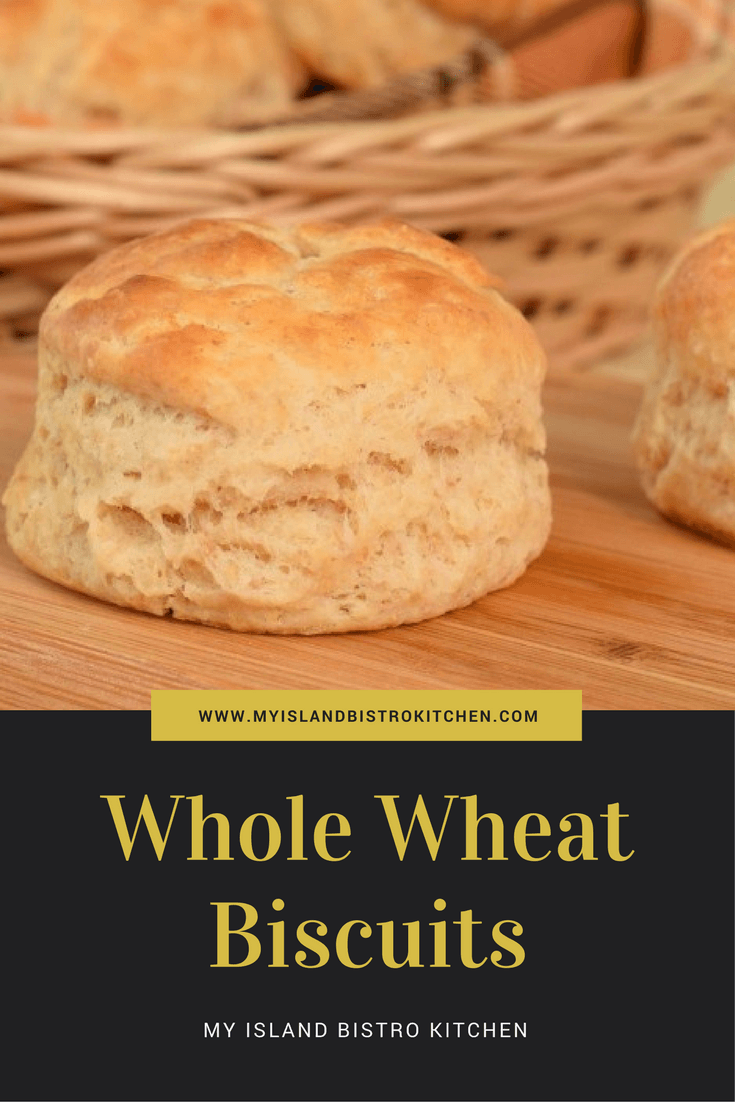
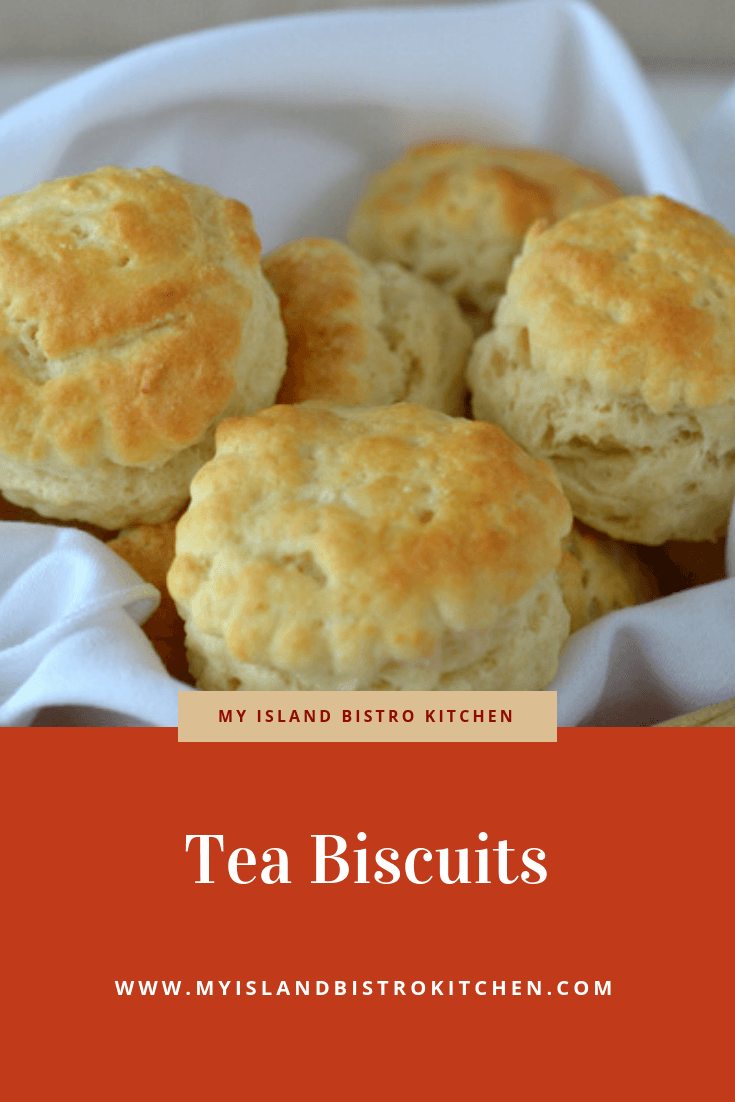
Pin Me To Pinterest!
Tea Biscuits
Posting was last updated October 13, 2023
(Mostly) PEI and Maritime Food – Good Food for a Good Life!