Tag Archives: roasted vegetables

An Autumnal Themed Thanksgiving Dinner

Thanksgiving Dinner
Autumnal-themed Thanksgiving Dinner

Undisputedly, a big roasted turkey is the traditional star of the Thanksgiving dinner in many North American homes.  Playing the supporting roles, of course, are all the fixins’, including the variety of vegetables and gravy. This year, however, I am deviating from the norm and putting a new twist on Thanksgiving dinner, lightening it up and sizing it down for smaller households, while still staying true to some of the elements of what one would expect to be on the Thanksgiving dinner table.  Here’s why I’ve shaken up the norm a bit.

Sizing Down and Lightening up the Thanksgiving Dinner

I sometimes hear people say they don’t want to cook a big turkey, or even a whole chicken, because perhaps they have a small household of only one, two, or three people and it’s just too much meat for them.  And, then there is the large carcass to deal with – though I am a big proponent of using it to make great homemade stock (click here for my stock recipe).  Others have indicated they don’t have a big roaster in which to roast a turkey and still some others say they don’t know how to roast a turkey to get it cooked properly.  I have heard some say that, while they like a roast turkey dinner, it can be a heavy meal with rich gravy, heavily spiced stuffing, and so forth. Others may be on a restricted diet making it a challenge to, alternatively, dine out for Thanksgiving dinner.  Whatever the reason, I have decided to create a Thanksgiving dinner menu suitable for the smaller household and those looking for lighter fare.

Now, it can be challenging to size everything down precisely to one or two servings and, to be frank, it’s not the most cost-effective or efficient approach to meal preparation for the smaller household.  I learned that many years ago and that’s when I moved to batch cooking for the freezer which allows me to have much greater meal variety than would be the case if I was to spend time in the kitchen preparing unique daily meals for one or two.  This menu, by the way, is also suitable for any autumnal dinner party and the recipes referenced are scalable to the number of servings required.
Bread
Baguette

Menu Inspiration

The inspiration for the menu was drawn primarily from seasonal foods, those that would be considered to be fall flavors. While varied from the traditional Thanksgiving dinner style, I aimed to still maintain elements of a typical Thanksgiving dinner. From the gourd family comes the butternut squash for the soup.  From the garden come the fresh greens, vine-ripened tomatoes, beets, and carrots.  From the fields of a local farmer, come the potatoes.  From the cranberry bogs and high bush blueberry field come the cranberries and blueberries.  And, from a local orchard and distillery come the apples and liqueur for the dessert. In lieu of turkey, I have opted to go with chicken breasts though turkey breasts could certainly be used.  The chicken breasts are smaller to roast and plate quite attractively. The steamed mussels for an appetizer have been included because, well, it’s PEI and we love our mussels any time of the year!

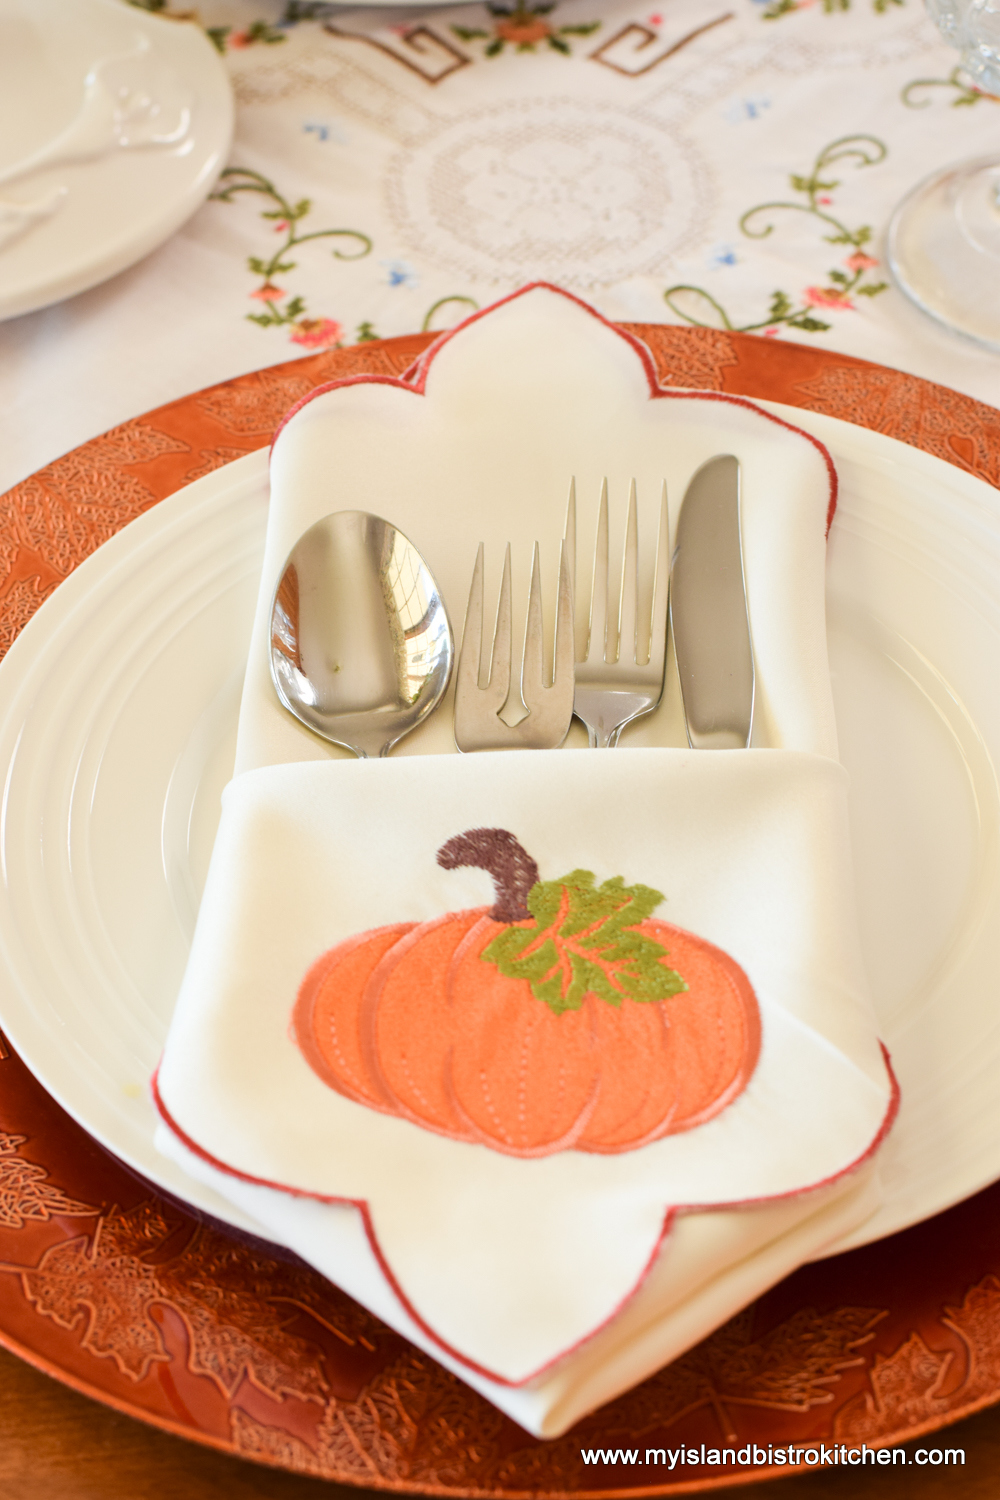
The table is set – it’s time to enjoy Thanksgiving dinner!
Placesetting
Thanksgiving Dinner Placesetting

The Menu

Food is meant to be enjoyed and savored, not hurriedly consumed.  This menu and its serving style aim for that objective.

Appetizers

Island Blue Mussels steamed in Upstreet’s “Rhuby Social” beer

Savory Mushroom and Quinoa Crostini

Soup

Roasted Butternut Squash Soup

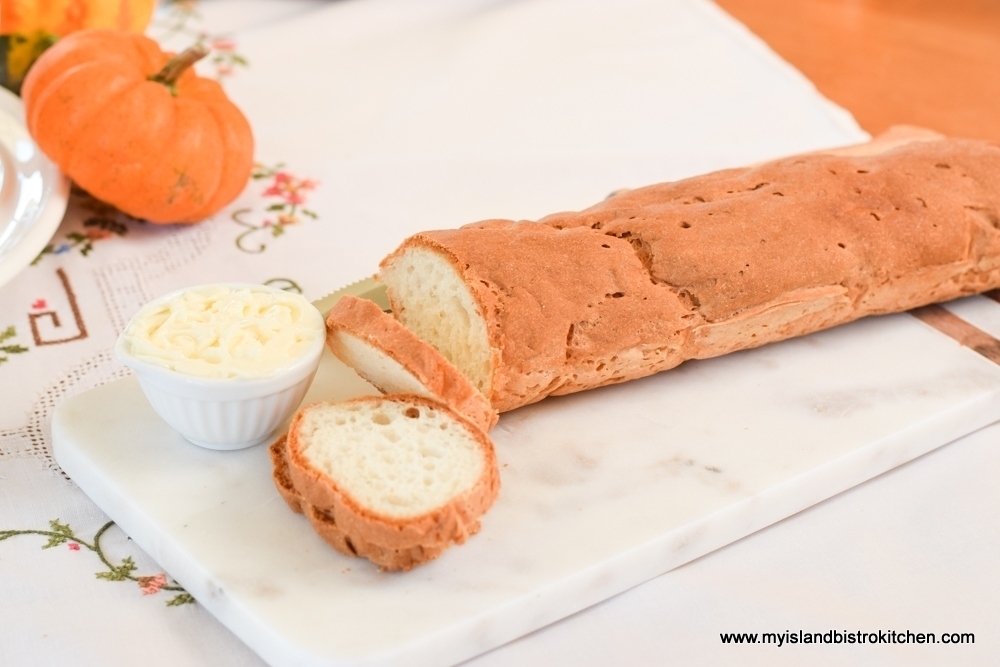
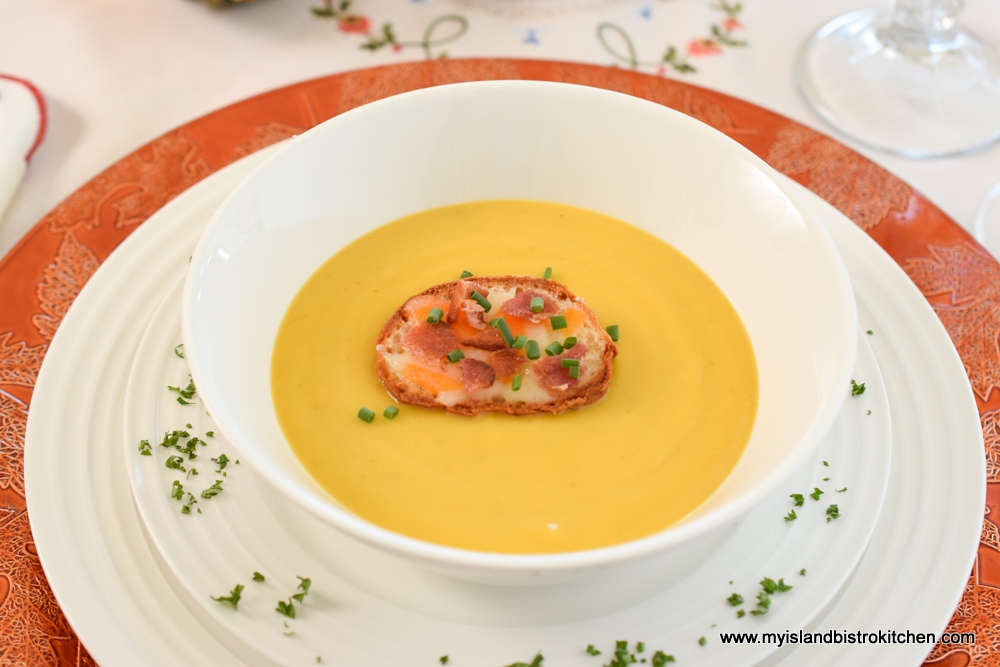
Served with a toasted baguette slice topped with cheese, bacon, and chives

Salad

Mix of Garden Greens with Vine-ripened Mini Tomatoes and Button Mushrooms

Dressed with Raspberry Vinaigrette and served from the salad urn, tableside

 Main

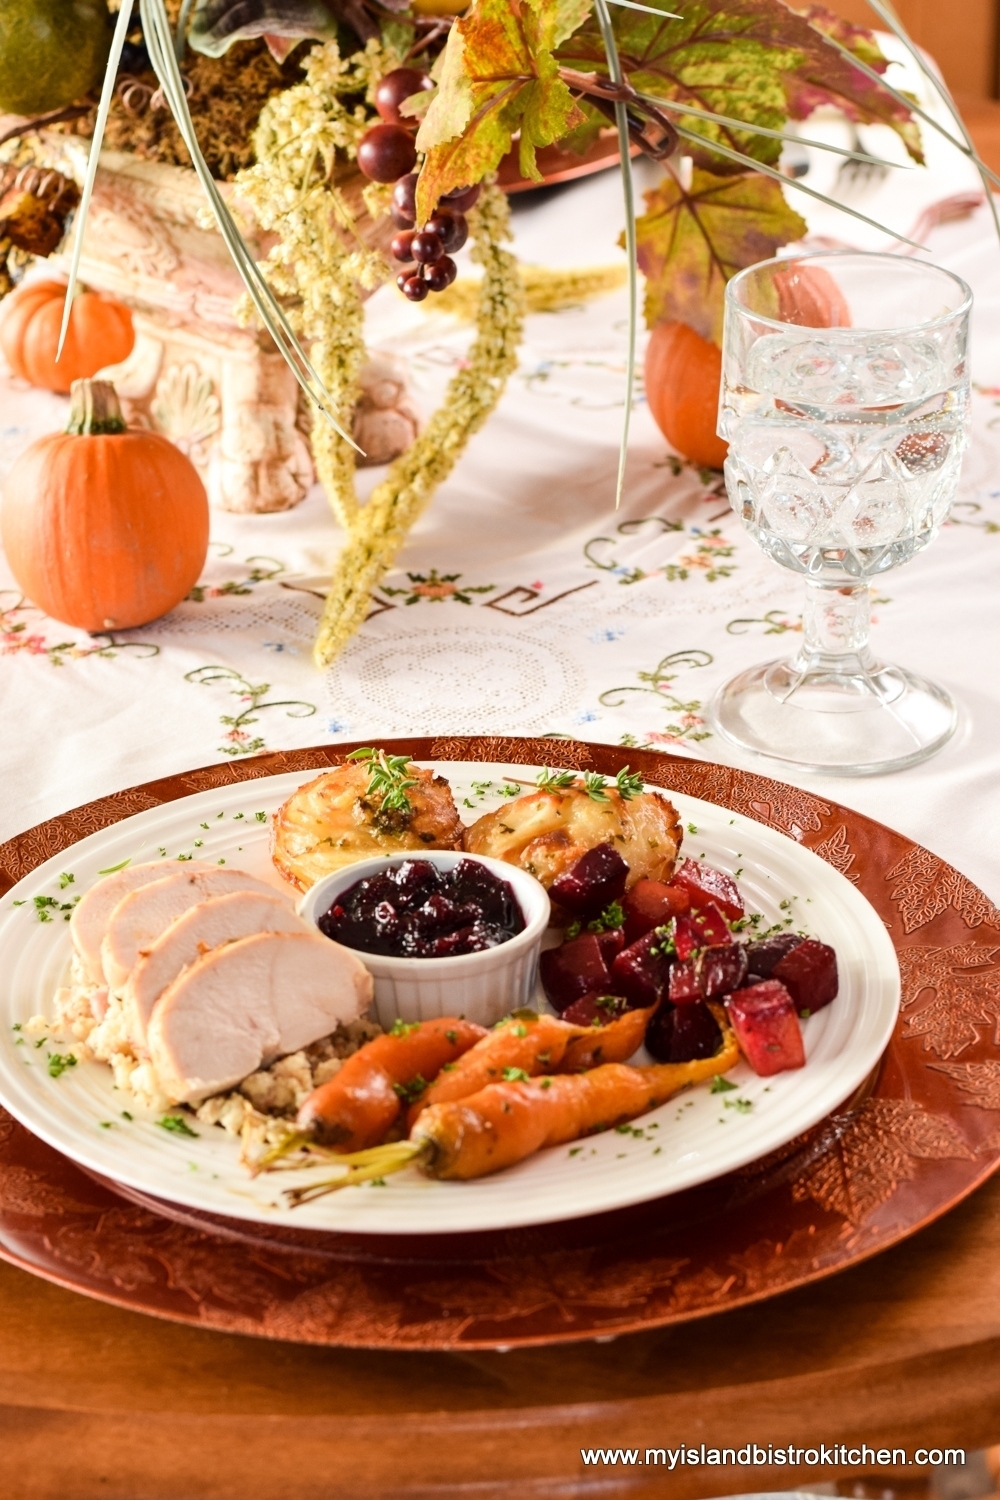
Roasted Chicken Breast with a dry rub of spices

Served over Sausage Bread Dressing

Accompaniments

Petite Roasted Potato Stacks

Thinly sliced potato tossed with melted butter, herbs, and cheese then roasted

Roasted Beets and Carrots

Cranberry Blueberry Sauce

Dessert

Apple-Maple Bread Pudding with Maple Sauce

Wine Pairing

   Clean Slate 2016 Riesling (Germany)


The Appetizers

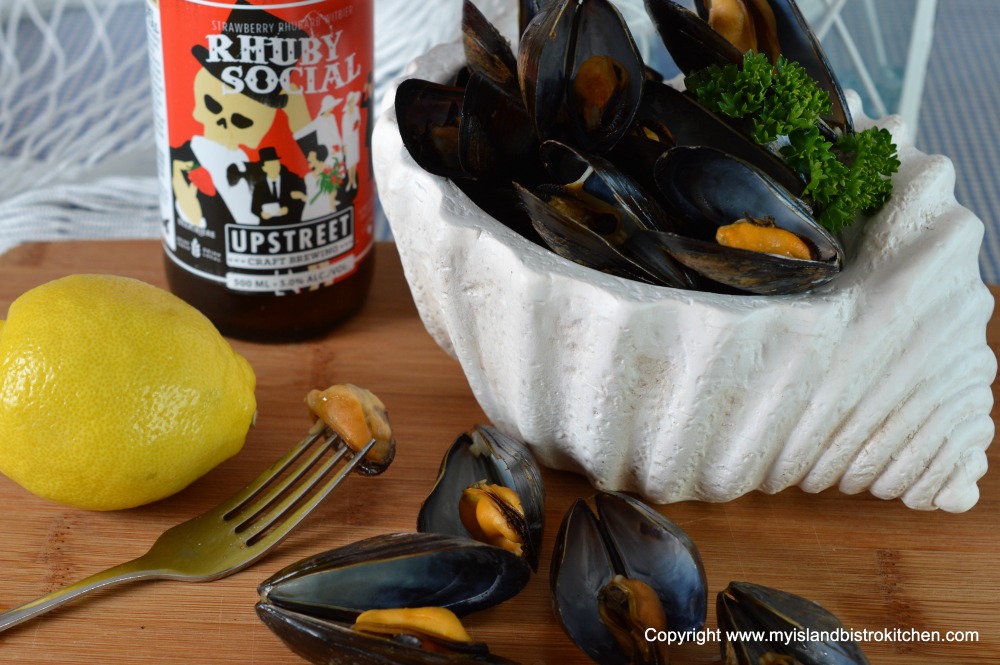
It’s almost bordering on the sacrilegious if either (or both) steamed mussels and oysters are not on the menu for a gathering here in PEI!  Yes, we love our seafood!  I’ve chosen Island Blue Mussels steamed in Upstreet’s “Rhuby Social” beer (recipe here).  Steaming mussels in beer lends a wonderful flavor to the mussels.  Easy and quick to prepare, these mussels are a great start to a wonderful meal.
PEI Mussels
PEI Mussels Steamed in Rhuby Social Beer from Upstreet Craft Brewing

The second appetizer I’ve chosen is the Savory Mushroom and Quinoa Crostini (recipe here).  These little morsels are ever-so-tasty.  This recipe is easy to reduce or increase in size, depending on the number of guests and either wheat-based or gluten-free baguettes can be used.
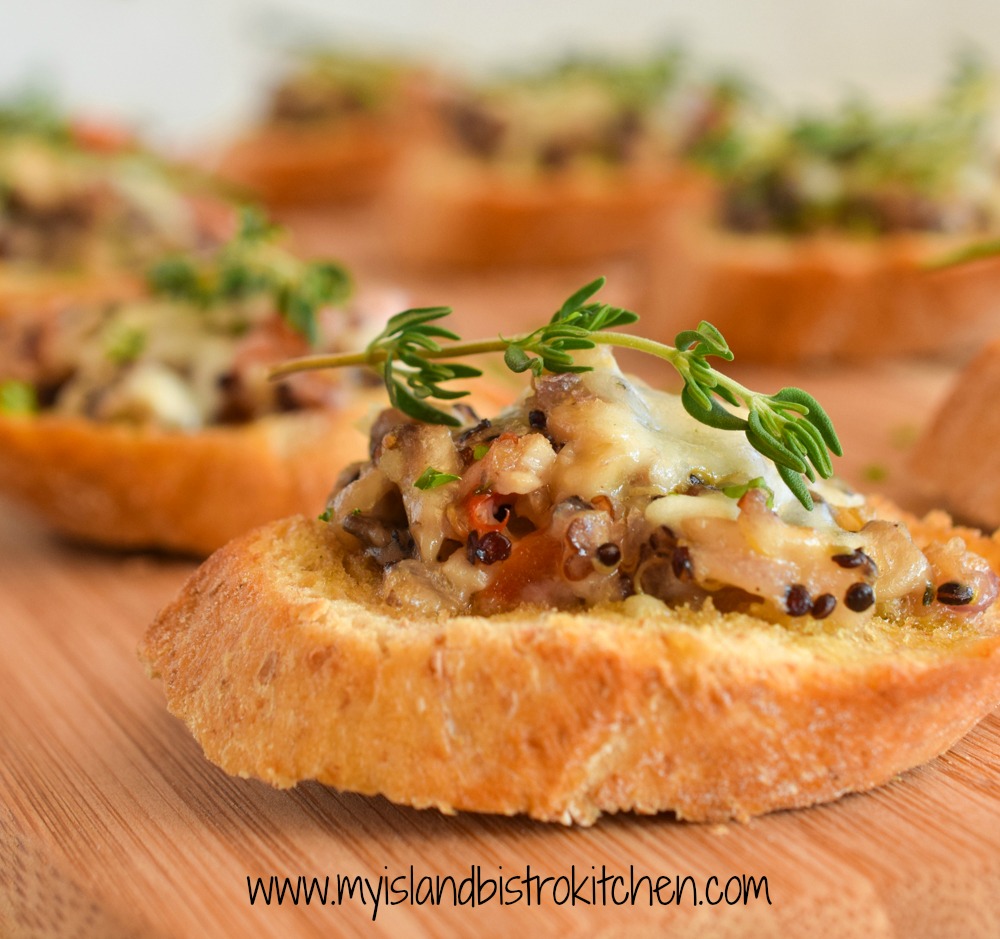
Savory Mushroom and Quinoa Crostini

The Soup

Our Thanksgiving dinner this year starts with Roasted Butternut Squash Soup, a stunning golden yellow soup that is smooth and luxurious and filled with the warm flavors of fall (click here for recipe). This soup is a great way to kick off an autumnal dinner. My recipe for this soup makes 8-10 servings so, if making the soup specifically for Thanksgiving dinner in a small household, the remainder can be frozen for later enjoyment.  Alternatively, the soup can be made in advance of Thanksgiving, frozen, and then the number of servings needed thawed and reheated for the dinner.  I love when I can do prep work for dinners days ahead as it relieves some of the work and stress on the day of the dinner.
Squash Soup
Classic Roasted Butternut Squash Soup

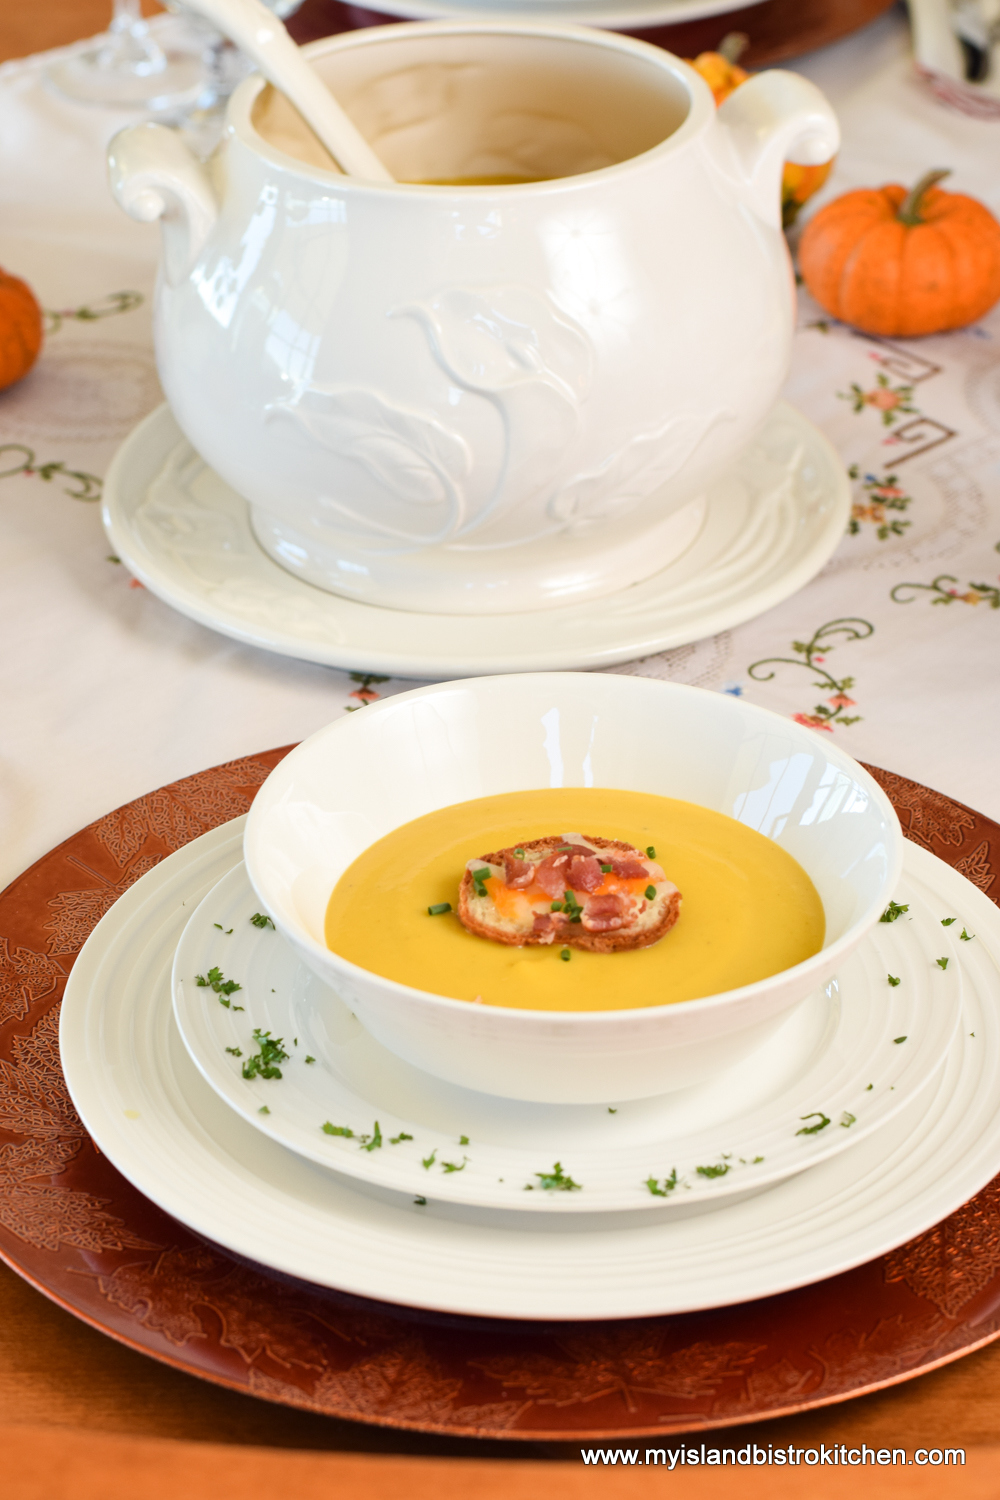
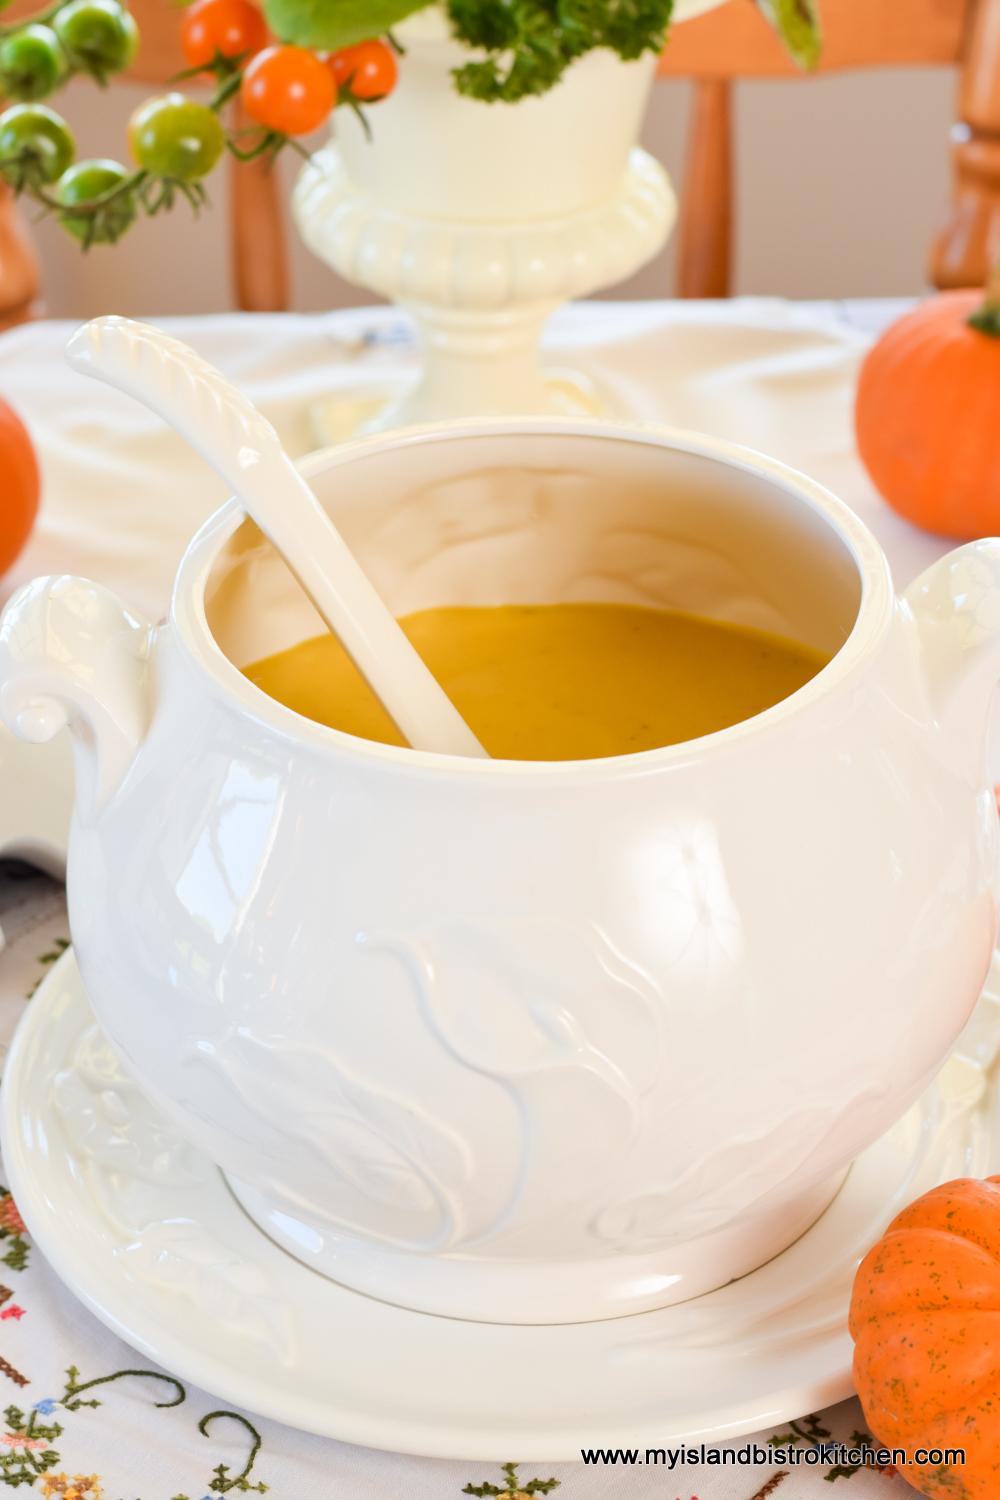
Serving the soup at the table from a soup tureen adds a lovely touch to a special meal or dinner party.
Squash Soup
Classic Butternut Squash Soup

The soup tureen can also serve as a table centerpiece for the soup course.
Soup
Roasted Butternut Squash Soup

The Salad

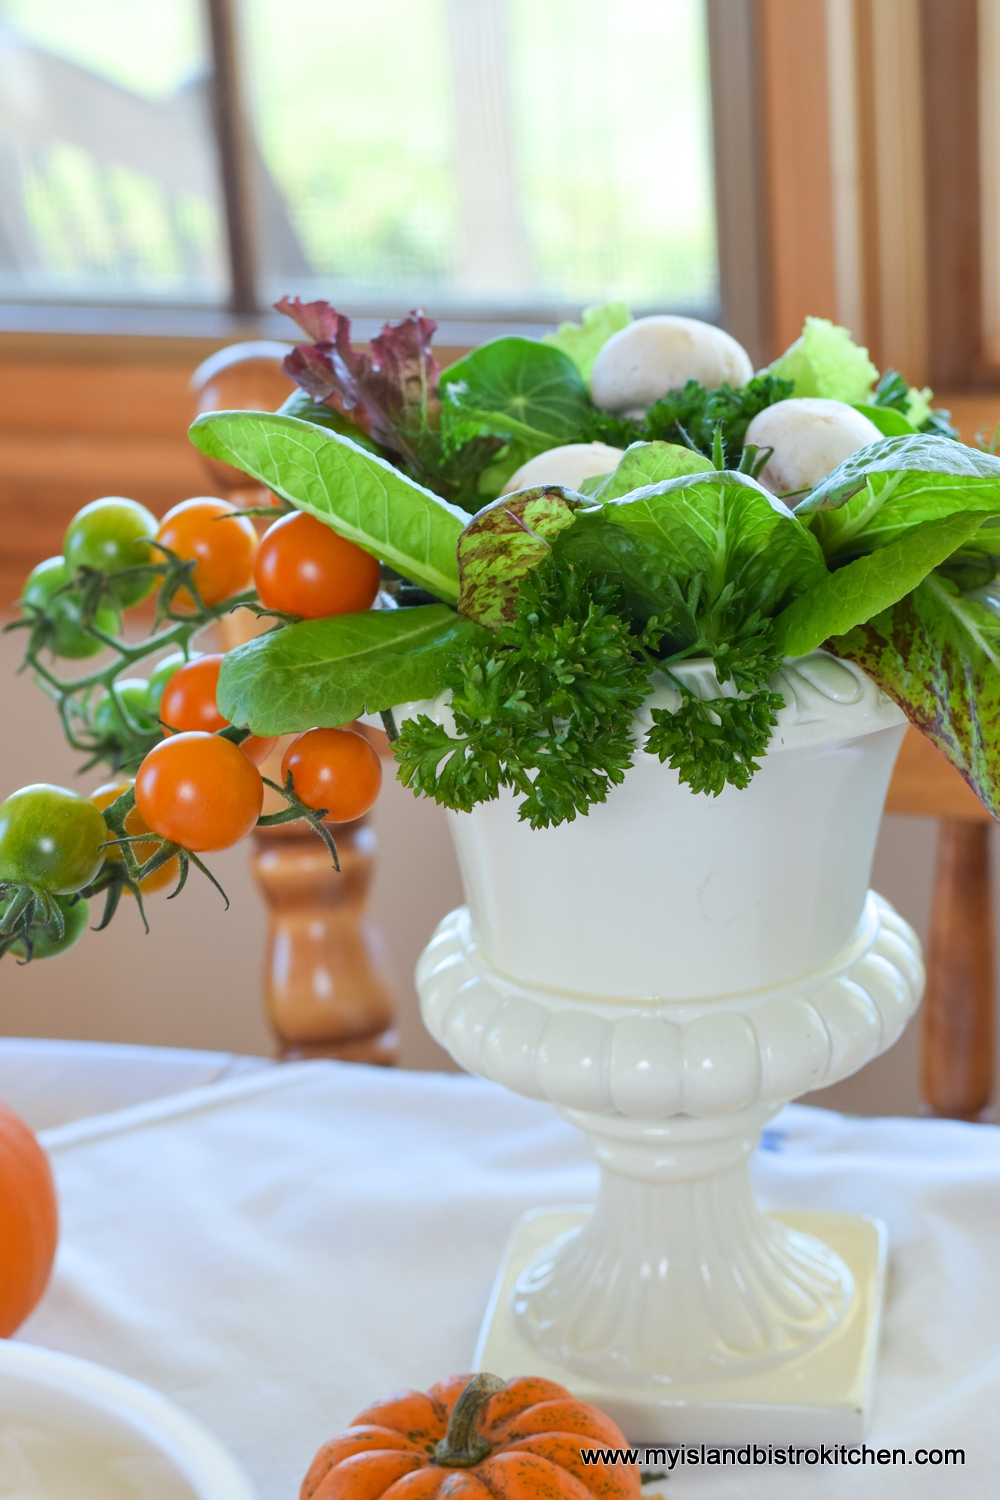
Our garden did fabulously this year.  We grow a grand selection of lettuce that usually takes us well into the fall, sometimes until late October.  Our one tomato plant with mini tomatoes has literally produced hundreds of tiny orange tomatoes this year.  It was a very prolific producer and we have been blessed to have its produce right through to Thanksgiving, even if it meant blanketing it down on frost nights in order to keep it producing.
Salad
Salad Urn

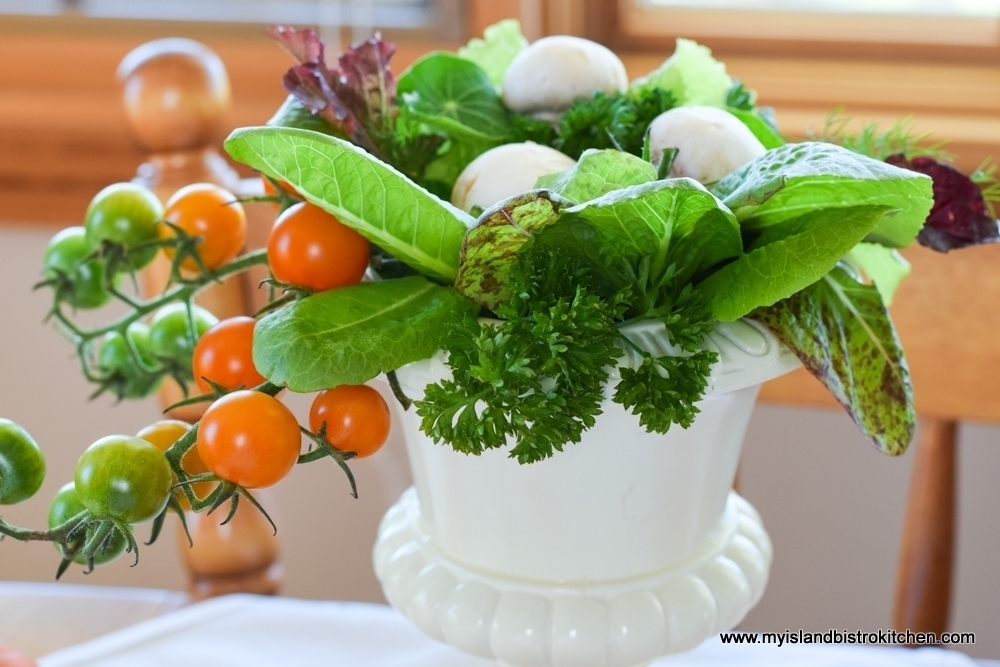
My salad bowl is a small ceramic urn-shaped planter which also serves as the table centerpiece for the salad course.  It’s a great conversation piece and it elevates the status of the salad! When using a unique vessel, like this urn, for the salad ingredients to be assembled at the table, opt for few ingredients that can easily be divided between plates. It’s not always necessary to have a multitude of ingredients in a salad, particularly if it is a starter to a meal.  In this salad, all I’ve used is a selection of lettuce, tiny tomatoes, and button mushrooms served with a simple raspberry vinaigrette. I like vinaigrettes because they allow the flavour of the vegetables to shine through as they are not masked by a heavy cream dressing.
Salad
Edible Salad Centrepiece

Chicken Breasts

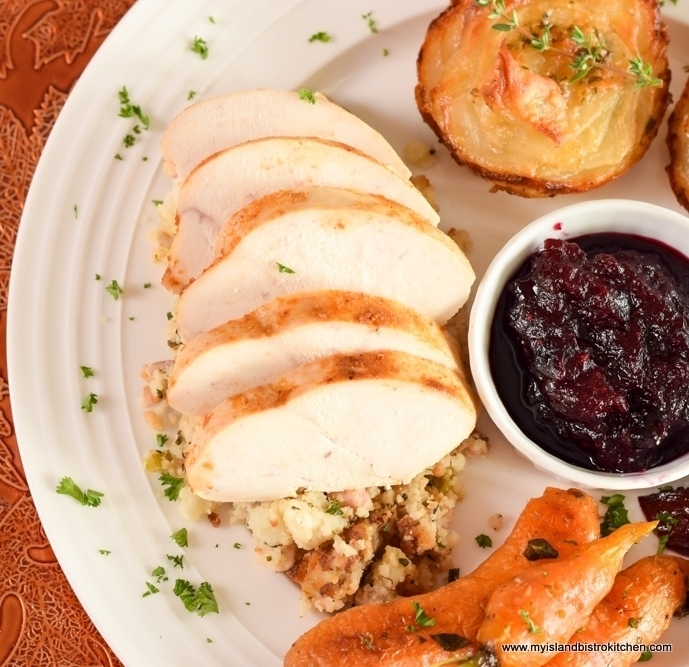
Chicken breasts sometimes get a bad rap for being dry.  I think this is because they have not been properly prepared and cooked.  I always brine my chicken breasts – it makes such a huge difference in both flavor and texture and no more dried out, stringy chicken.  All I do is place the chicken breasts in a salt brine for 1½ – 2 hours, rinse them off, then pat them dry with paper towel followed by a light brushing of some olive oil and a sprinkle of selected dry spices.  Then, into my convection oven set at 400°F they go just until they test done on my trusty meat thermometer.  The high heat locks in the juices and cooks the chicken fast so it does not get a chance to dry out.  The result is perfectly cooked and juicy chicken …. every time.  The great thing about boneless skinless chicken breasts is it’s all meat and no waste and they slice beautifully for plating, sandwiches, etc.
Chicken
Sliced Roasted Chicken Breast

The Dressing

For my Thanksgiving dinner, I have plated the sliced chicken over sausage bread dressing – recipe here.  This is not a heavily spiced dressing so it is in keeping with my “lighter” Thanksgiving dinner theme yet it still bows to the tradition of having stuffing/dressing as a side dish at dinner.  In fact, I will often make this recipe and freeze it for later use when I am having some kind of chicken dish for a meal.  So, this is also something that can be made ahead for this dinner and the dressing can be heated for just a few seconds in the microwave.
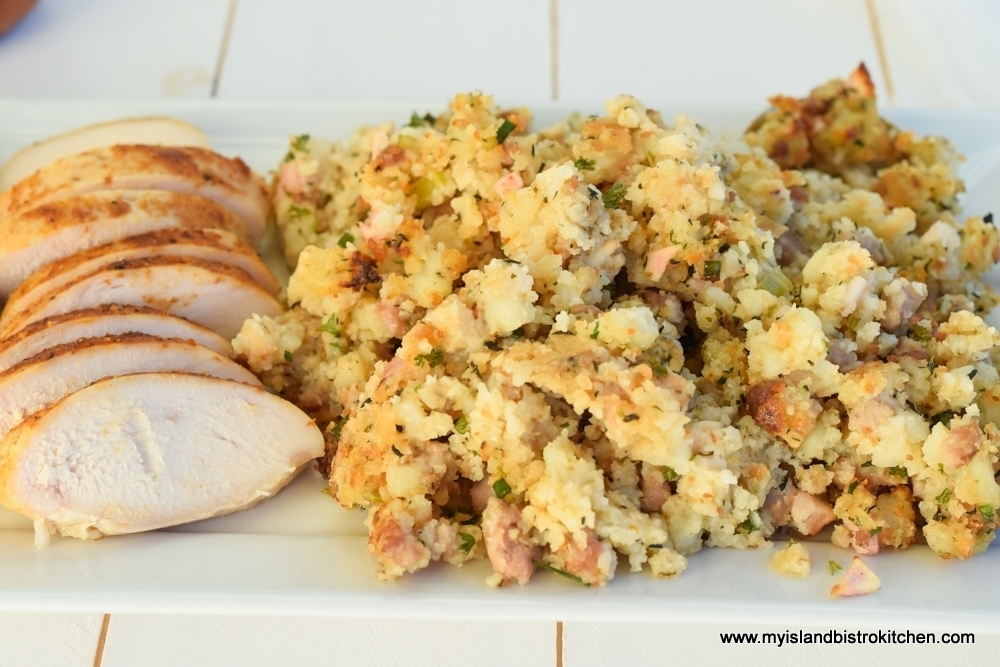
Stuffing Recipe
Sweet and Savory Sausage Bread Stuffing

The Potatoes

Because this meal is meant to be light, the traditional gravy is absent.  This meant I needed to come up with a potato side dish that did not need gravy.  These Roasted Potato Stacks (recipe here), are the perfect potato side dish.  These are not difficult to make and, with the butter, garlic, herbs, and cheeses, these tasty morsels are simply divine.  They bake perfectly in muffin cups and plate beautifully.  They are best served fresh from the oven.  However, they can be pre-made, roasted, and refrigerated for up to 24 hours then reheated for a few minutes in the oven.  So, again, this is a menu item that can be made in advance of the dinner.  While my published recipe makes eight potato stacks (serves four), the recipe is easily halved (or, alternatively, make the whole recipe and enjoy leftovers the following day).
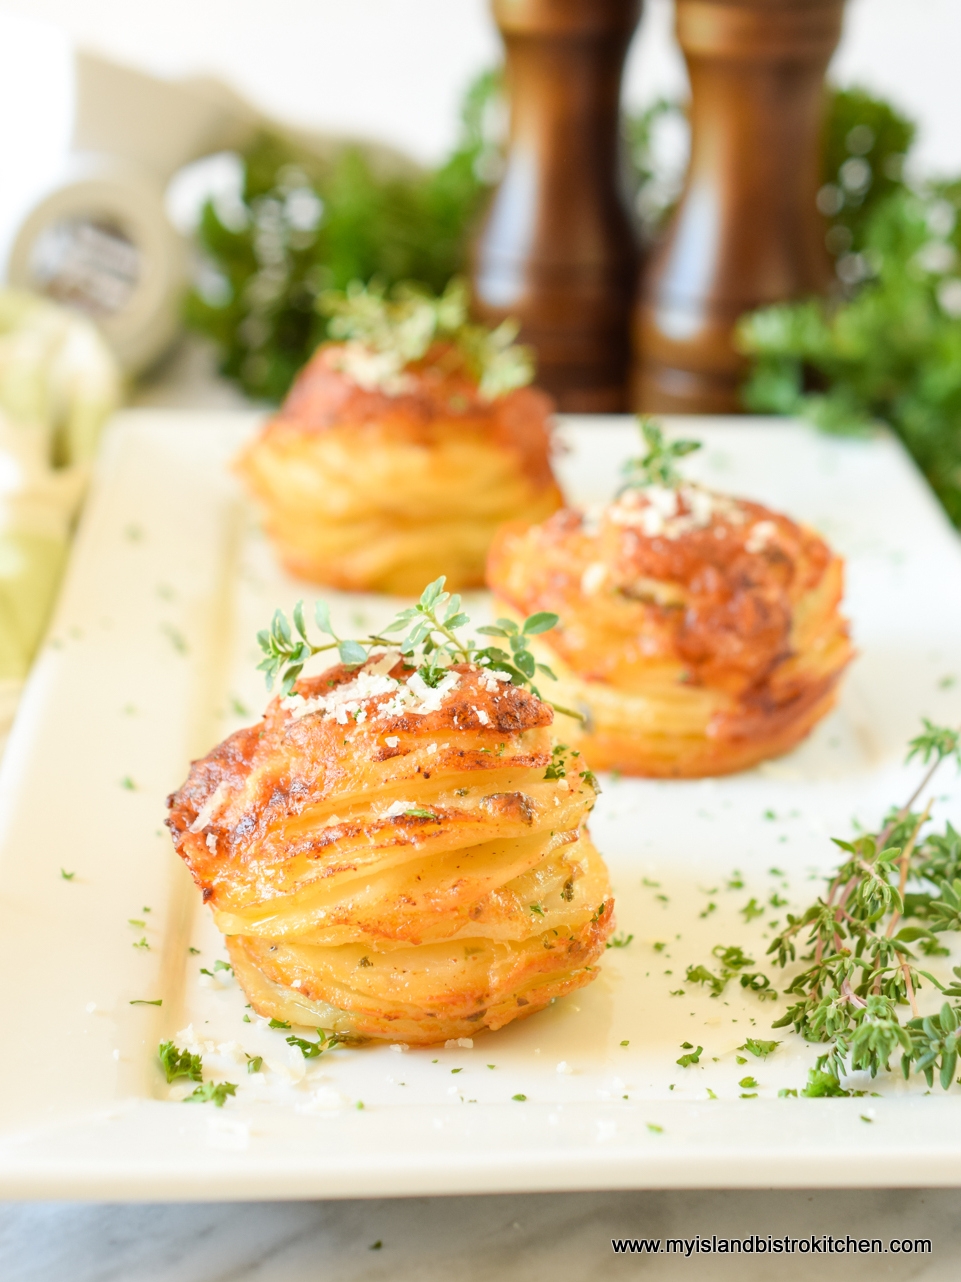
Potato Stacks
Roasted Potato Stacks

The Roasted Vegetables

For my vegetable side dishes, I decided to go really local — all the way to our backyard garden!  Beets and freshly dug carrots were roasted with herbs in the oven.  I love roasted vegetables because their true flavors are evident and no nutrients or flavor are washed down the drain as can be the case with boiled vegetables.  The beets were tossed with a spritz or two of raspberry balsamic vinegar and the same of orange juice.  The key is not to add too much liquid to the roasted vegetables that would make them soupy or lose their roasted flavor.  Both the vinegar and orange juice are just meant to be flavor enhancers so very little is needed.
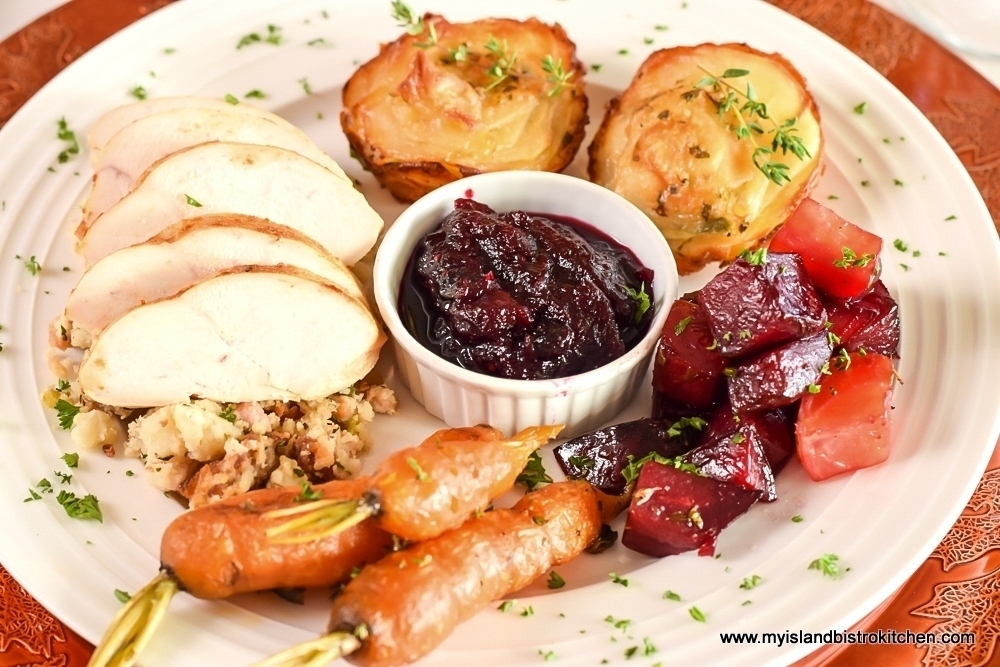
Thanksgiving
Thanksgiving DInner

The Condiment

For the condiment, I’m serving my Cranberry Blueberry Sauce.  This sauce is a beautiful deep burgundy-plum color and combines two complementary flavors.  The tartness of the cranberries is enhanced by the sweetness of the high bush blueberries.  Click here for my recipe.
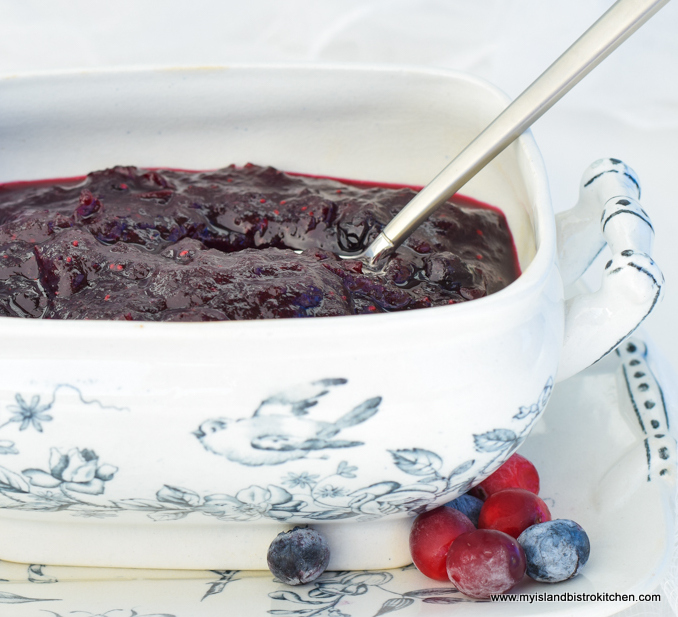
Sauce
Cranberry Blueberry Sauce

The Dessert

To bring one of the quintessential fall flavors into the menu, I am serving Apple-Maple Bread Pudding with Maple Sauce (recipe here).  Both the pudding and the sauce freeze well for later use and both can be made ahead of the dinner, thawed, and reheated for dessert.
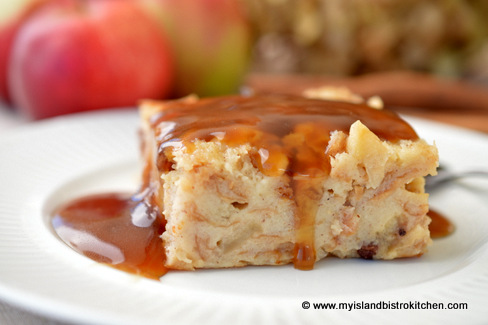
Bread Pudding
Apple-Maple Bread Pudding

The Wine Pairing

The wine I’ve paired with this meal is Clean Slate, a 2016 Riesling from Mosel, Germany, an affordable wine that appeals to a variety of tastes.  When selecting the wine for this meal, I considered the menu items, both individually and collectively.  Thanksgiving dinner plates tend to have a variety of foods with flavors that span the spectrum from sweet (Cranberry-Blueberry Sauce) to the moist and gently spiced (Sausage Bread Dressing) to the herbed and roasted (the vegetables) to the slight saltiness (brined chicken breast).  With that variety, it can be a challenge to select one wine that will temper and balance all the flavors and cleanse and refresh the palate between bites so that the true flavors of each of the foods can be enjoyed.

A Riesling wine is a great choice because it has low alcohol content with lots of palate-refreshing acidity along with a slight touch of sweetness to balance and complement the variety of flavors.
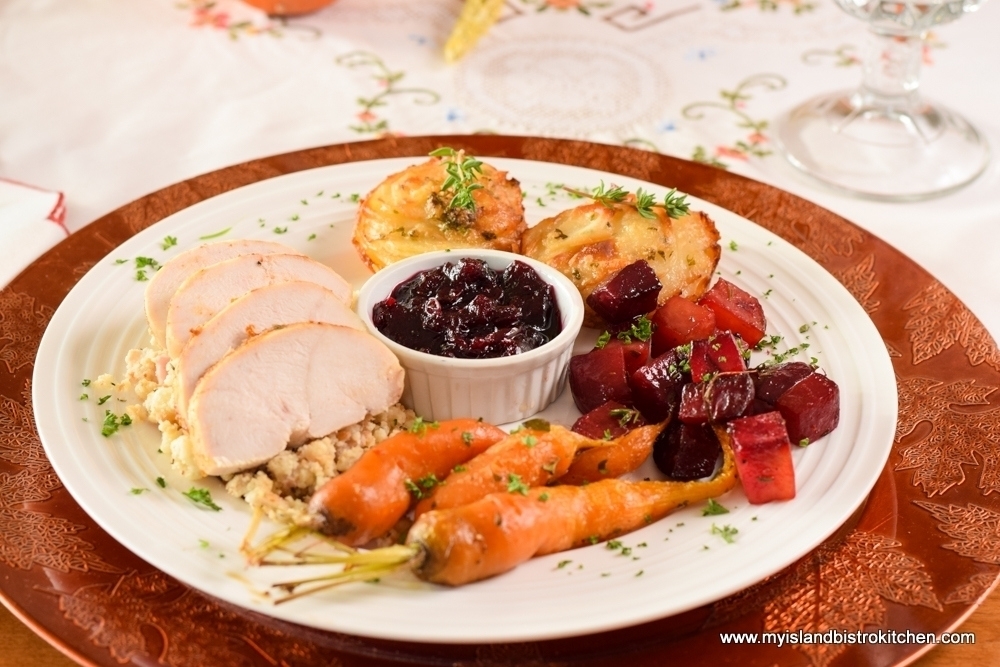
Thanksgiving
Thanksgiving Dinner

So, whether you’re looking for inspiration for a Thanksgiving dinner with a lighter fare, one that is suitable for smaller households, or for an autumnal-themed dinner party, this menu is scalable to virtually any number, big or small. All recipes referenced can be found on My Island Bistro Kitchen’s website, a one-stop destination for recipes for a tasty fall dinner.

Pin Me To Pinterest!
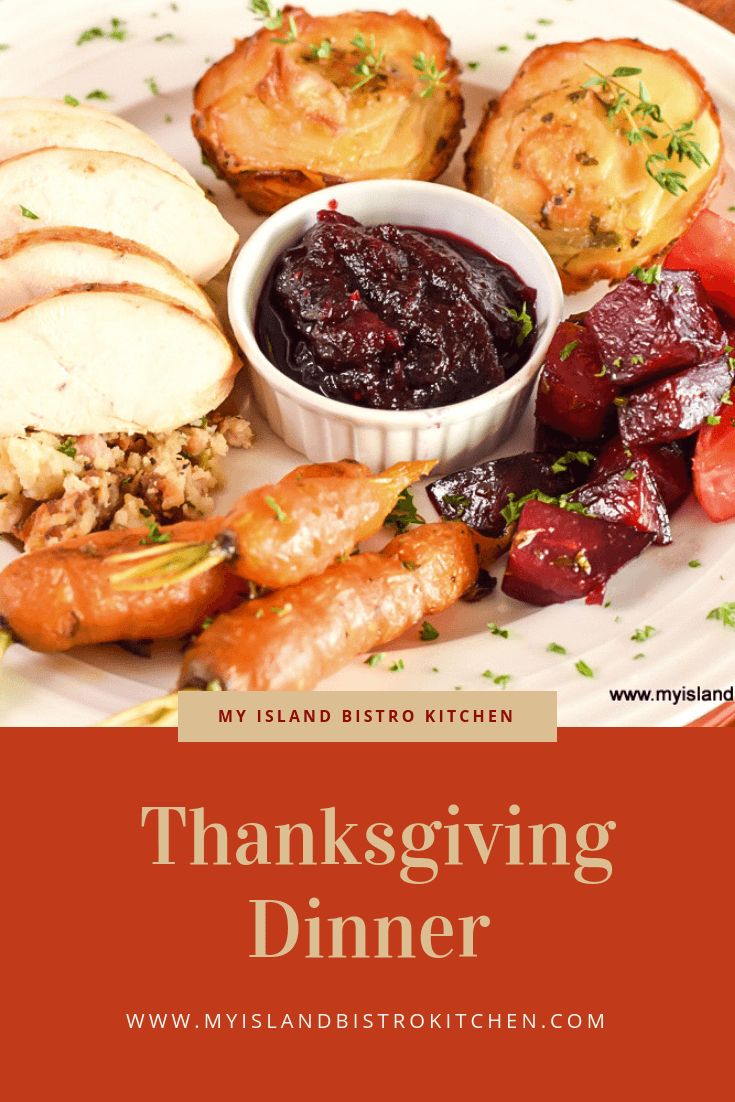
Thanksgiving
Thanksgiving Dinner 2018

Classic Roasted Butternut Squash Soup

Classic Roasted Butternut Squash Soup

When days are cooler, or downright cold, there is nothing better to warm the tummy than a bowl of comfort soup.  One of the soups I place in that category is homemade Roasted Butternut Squash Soup.  Full of flavour with a lovely velvety texture, Roasted Butternut Squash Soup has a rich natural golden-yellow color that can’t be beat!  This is a showstopper soup on both the taste and appetizing color fronts, the latter of which is drawn from the orange, fleshy pulp of the squash.

Squash Soup
Classic Roasted Butternut Squash Soup

This soup offers a delicate balance of sweet and savory notes and, while it can certainly be made year-round, this soup is most often served in the fall because its ingredients speak to autumn flavours like the squash, apple, and root vegetables that are fresh and local in most places in autumn.

Butternut squash is inexpensive, readily available year-round and, because of its bulk and substance, goes a long way as an ingredient in various dishes, including soup. That’s in addition to it being both healthy and delicious with its slightly sweet nutty flavour.

Squash
Butternut Squash

Roasted Butternut Squash Soup freezes well, so long as it is made with whole milk (not fat-reduced) or, alternatively, with a blend of whole milk and cream. In fact, this soup has now joined the ranks of being one of my staples that I freeze in single-serving portions ready for weekday lunch bags. It’s lovely on its own or paired with a favorite sandwich. A real treat in the middle of a work day!

Butternut Squash Soup
Classic Roasted Butternut Squash Soup

Roasting vegetables brings out deep, rich flavours that, in my opinion, are sometimes lost in other cooking methods like boiling, for example, where some of the flavour and nutrients get washed down the sink when the cooked vegetables are drained.  With roasting, all nutrients and flavours are retained.  Butternut squash is very easy to roast.  Simply slice the squash in half, vertically, and clean out the seeds and fibrous membrane.

Squash
Butternut Squash

Lightly brush the cut sides and cleaned out hollow of the squash halves with a light coating of olive oil. Sprinkle with salt and pepper.  Place squash halves, cut side down, on greased tinfoil-lined rimmed baking sheet.  Bake at 425°F for about 35 minutes then flip the squash halves over, brush again very lightly with olive oil and roast for another 15-20 minutes, or until the flesh is soft when pierced with a fork. Make sure the squash does not start to burn or char.  If you see this happening, loosely place a piece of tin foil over the squash. Remove the squash from the oven and let it cool for about 10 minutes then, with a large spoon, scoop the pulp away from the skin and transfer to a bowl.  This can be done the day before the soup is made. Make sure to cover the squash and refrigerate it until needed.  Don’t let the squash cool completely before removing it from its skin as, otherwise, it will be difficult to remove it away from the skin (experience speaking here).  I like to roast the squash, cut-side down, because it keeps the moisture in and caramelizes the flesh of the squash.  I do, however, flip the squash halves over part way through the roasting process because I find it gives the squash a nice roasted flavour.

Butternut Squash
Roasted Butternut Squash

I also find that roasting the squash whole versus cutting it into chunks is preferable.  First, it’s hard to cut uncooked squash but it is very easy to scoop out soft roasted pulp from the squash skin.  And, second, the roasting needs to occur at a reasonably high temperature and small chunks will burn easily and won’t have the caramelized flavour that can be achieved through the roasting process, particularly in the early stage where the squash is roasted, cut side down.  A lovely deep roasted flavour is the objective, not a burnt/charred taste.  This, to say, I think I have more control over the flavour if the squash is roasted whole.

Squash Soup
Classic Butternut Squash Soup

The base for Roasted Butternut Squash Soup starts out like many other cream soups with the aromatics being sautéed till fragrant and starting to soften.  The chicken broth and seasonings are then added to the pot and the vegetables, along with the apple, continue to cook in the broth until tender.  I don’t add the squash into the soup at this point because I think that cooking it too long in the broth causes it to lose some of its rich caramelized/roasted flavour and, since it is already cooked, it is not necessary to cook it further.  The vegetable/broth mixture is removed from the heat and cooled for about 30 minutes – I don’t like to put hot mixtures into my blender jar. To speed up the cooling process of the broth, I often place the stockpot containing the vegetables and broth into a sink filled with ice cold water. The mixture does not have to be completely cooled, just not boiling hot.  Once cooled enough to work with and ready for puréeing, remove the bay leaves, stir in the roasted squash, then purée the whole mixture until velvety smooth.

The puréed mixture goes back on to the stove with some maple syrup for a touch of sweetness and the whole milk (or a combination of whole milk and cream) along with a blend of Parmesan and cheddar cheeses. Continue to taste the soup throughout the cooking processes and add additional salt and pepper, to taste, if and as necessary. Heat only until the mixture is heated and the cheeses melted.  Never boil a cream soup.

Squash Soup
Classic Roasted Butternut Squash Soup

Serve this soup plain or garnish it with seasoned croutons, a dollop of sour cream with a sprinkle of fresh herbs or toasted butternut seeds, or a toasted baguette slice topped with cheese, herbs, and bacon.

Classic Roasted Butternut Squash Soup

Roasted Butternut Squash Soup is a rich, velvety-smooth and comforting soup that is filled with the wonderful flavours of autumn.  This luxurious, yet economical, cream soup is sure to be one you will make again and again, anytime of the year.

Squash Soup
Classic Roasted Butternut Squash Soup

[Printable recipe follows at end of posting]

Classic Roasted Butternut Squash Soup

Ingredients:

1 large butternut squash (apx. 3 lbs)
Olive oil
Salt and Pepper

3 – 4 tbsp butter
2 tbsp olive oil
2/3 cup onion, finely chopped
¼ cup celery, thinly sliced
¼ cup carrot, thinly sliced
¼ cup parsnip, thinly sliced
5 cloves garlic, minced

4 cups chicken or turkey stock, homemade or store-bought
1 small apple (any variety), peeled and diced
3 bay leaves
¾ tsp dried summer savory
¼ tsp dried sage
1/8 tsp nutmeg
Pinch ginger
Pinch cayenne (optional)
Salt and freshly Ground Pepper, to taste

2 tbsp pure maple syrup
1¼ cups whole milk (or combination of whole milk and cream)

2 tbsp freshly grated Parmesan cheese
½ cup coarsely grated cheddar cheese

Method:

Preheat oven to 425°F.

Wash butternut squash.  With large chef’s knife, slice the squash in half, vertically.  With large spoon, scoop out the seeds and fibrous matter from the interior of each squash half (save the seeds for roasting!)

Prepare large rimmed baking sheet by lining with tin foil sprayed lightly with cooking oil.  Lightly brush the cut sides and scooped out hollow of the squash halves with olive oil.  Sprinkle with salt and pepper.  Place the squash halves, cut side down, on the baking sheet.  Roast the squash in preheated oven for about 35 minutes. Remove the squash from the oven and, with a large flat lifter, carefully flip the squash pieces over, applying another light brushing of olive oil to the flesh side. Return the squash to the oven for about another 15-20 minutes, or until the flesh of the squash is very soft when pierced with a fork.  Remove from oven and let squash cool for 10 minutes or so.  Scoop out the flesh and place in medium-sized bowl.  (Do not let squash cool completely as it will be difficult to remove from its skin.)

In large stockpot, heat the butter over medium heat till melted.  Add the olive oil.  Add the onion, celery, carrot, and parsnip.  Stir briskly for 4-5 minutes.  Add the garlic and cook for another minute, continuing to stir the mixture.

Add the chicken stock, apple, and spices.  Bring to a boil over medium high heat then reduce heat to medium-low and cook until vegetables are soft, about 10-15 minutes. Remove from heat and cool for about 30 minutes. Remove and discard bay leaves.  Stir in cooked squash.

Purée soup mixture in blender until very smooth.  Work in batches, starting with one cup of the mixture, puréeing it until smooth, then adding another 1 to 1½ cups, never filling the blender jug more than a scant half full at a time.  Transfer puréed mixture to clean stockpot. Add the maple syrup and milk.  Stir well.  Heat slowly over medium-low heat but do not boil.  Add the Parmesan and cheddar cheese.  Stir until cheeses are melted.  Serve plain or garnish with croutons and some toasted squash seeds, a dollop of sour cream with a sprinkle of fresh herbs, or a toasted baguette slice topped with cheese, herbs, and bacon.

Yield:  Apx. 8-10 servings (apx. 1 cup per serving)

Note:
To make this soup lactose-free, use lactose-free butter, milk, and cheese.

Classic Roasted Butternut Squash Soup

This classic roasted butternut squash soup is luxuriously thick, velvety smooth, and is packed full of flavourful aromatics, light seasonings, and a blend of cheeses. Pure comfort food at its finest!
Course Soup
Cuisine American
Servings 8
My Island Bistro Kitchen My Island Bistro Kitchen

Ingredients

  • 1 large butternut squash apx. 3 lbs
  • Olive oil
  • Salt and Pepper
  • 3 - 4 tbsp butter
  • 2 tbsp olive oil
  • 2/3 cup onion finely chopped
  • ¼ cup celery thinly sliced
  • ¼ cup carrot thinly sliced
  • ¼ cup parsnip thinly sliced
  • 5 cloves garlic minced
  • 4 cups chicken or turkey stock homemade or store-bought
  • 1 small apple any variety, peeled and diced
  • 3 bay leaves
  • ¾ tsp dried summer savory
  • ¼ tsp dried sage
  • 1/8 tsp nutmeg
  • Pinch ginger
  • Pinch cayenne optional
  • Salt and freshly Ground Pepper to taste
  • 2 tbsp pure maple syrup
  • cups whole milk or combination of whole milk and cream
  • 2 tbsp freshly grated Parmesan cheese
  • ½ cup coarsely grated cheddar cheese

Instructions

  1. Preheat oven to 425°F.
  2. Wash butternut squash. With large chef’s knife, slice the squash in half, vertically. With large spoon, scoop out the seeds and fibrous matter from the interior of each squash half (save the seeds for roasting!)
  3. Prepare large rimmed baking sheet by lining with tin foil sprayed lightly with cooking oil. Lightly brush the cut sides and scooped out hollow of the squash halves with olive oil. Sprinkle with salt and pepper. Place the squash halves, cut side down, on the baking sheet. Roast the squash in preheated oven for about 35 minutes. Remove the squash from the oven and, with a large flat lifter, carefully flip the squash pieces over, applying another light brushing of olive oil to the flesh side. Return the squash to the oven for about another 15-20 minutes, or until the flesh of the squash is very soft when pierced with a fork. Remove from oven and let squash cool for 10 minutes or so. Scoop out the flesh and place in medium-sized bowl. (Do not let squash cool completely as it will be difficult to remove from its skin.)
  4. In large stockpot, heat the butter over medium heat till melted. Add the olive oil. Add the onion, celery, carrot, and parsnip. Stir briskly for 4-5 minutes. Add the garlic and cook for another minute, continuing to stir the mixture.
  5. Add the chicken stock, apple, and spices. Bring to a boil over medium high heat then reduce heat to medium-low and cook until vegetables are soft, about 10-15 minutes. Remove from heat and cool for about 30 minutes. Remove and discard bay leaves. Stir in cooked squash.
  6. Purée soup mixture in blender until very smooth. Work in batches, starting with one cup of the mixture, puréeing it until smooth, then adding another 1 to 1½ cups, never filling the blender jug more than a scant half full at a time. Transfer puréed mixture to clean stockpot. Add the maple syrup and milk. Stir well. Heat slowly over medium-low heat but do not boil. Add the Parmesan and cheddar cheese. Stir until cheeses are melted. Serve plain or garnish with croutons and some toasted squash seeds, a dollop of sour cream with a sprinkle of fresh herbs, or a toasted baguette slice topped with cheese, herbs, and bacon.

Recipe Notes

To make this soup lactose-free, use lactose-free butter, milk, and cheese.

For other great soup, chowder, chili, and stock/broth recipes from My Island Bistro Kitchen, click on the links below:

SOUPS

Cream of Roasted Tomato Soup
Cream of Celery Soup
Ham Lentil Soup
Roasted Cream of Cauliflower Soup
Rich and Hearty Goulash Soup
PEI Potato Leek Soup
Cream of Winter Root Vegetable Soup
Cock-A-Leekie Soup
Roasted Cream of Asparagus Soup
Hamburger Soup
The Bistro’s Beefy Minestrone
Boiled Ham Dinner
Classic Cream of Broccoli and Cheese Soup
Classic Homemade Turkey Vegetable Soup
Irish Stew
Roasted Parsnip and Pear Soup

CHOWDERS

PEI Mussel Chowder
PEI Lobster Chowder
Turkey Chowder

STOCKS/BROTH

Homemade Turkey Stock
Homemade Beef Stock

CHILI

My Island Bistro Kitchen’s Chili
Chicken and Pumpkin Chili

PIN THESE CUSTOM PINTEREST-READY PHOTOS TO YOUR FAVORITE PINTEREST BOARDS!


Roasted Cream of Cauliflower Soup

Cauliflower Soup
Roasted Cream of Cauliflower Soup

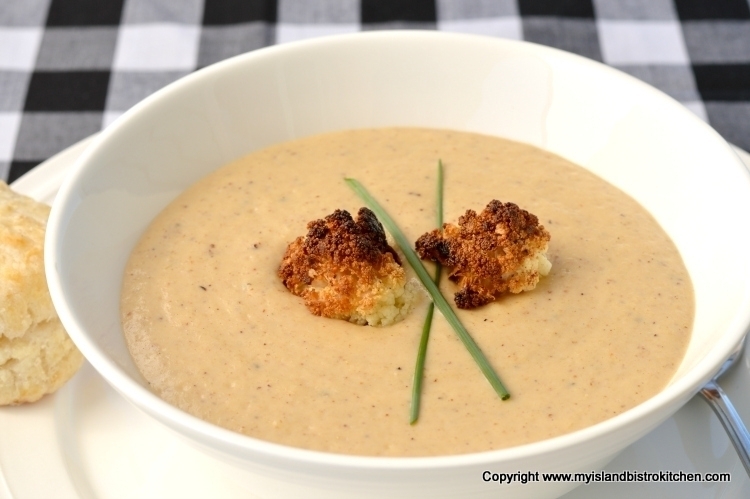
One of my all-time favorite soups is made with the most unlikely vegetable – cauliflower. I first had this soup on a cold, rainy night in a small café in Mahone Bay, Nova Scotia, many years ago. We were looking for light fare and cauliflower was the soup of the day. I must admit, the thoughts of cauliflower in soup was not at all appealing to me but the menu was limited so this is what was ordered. What came to the table was, without a doubt, one of the most palate-pleasing soups I’ve ever had! Rich and creamy with a sprinkle of nutmeg on top and served with a multi-grain bread, this became a soup that I just had to figure out how to make on my own.  So I set about figuring out just what ingredients would have been used to enhance the somewhat blah cauliflower. My recipe is a good replica of that first cauliflower soup I so enjoyed.

Cauliflower Soup
Roasted Cream of Cauliflower Soup

Over the years, I’ve worked on my recipe for the soup. The first thing I do is roast the cauliflower that I sprinkle with nutmeg.  Of all the spices, I find nutmeg complements the cauliflower best. Roasting vegetables deepens their flavor and this, of course, contributes to the overall flavor of the soup. To make life simpler, rather than say the recipe calls for one head of cauliflower (which comes in different sizes), or x cups of florets, I’ve measured the exact weight of cauliflower my recipe takes for optimal results.  This measurement is taken after the main core stalk of the cauliflower has been removed and discarded. For roasting, I break off chunks of the florets instead of breaking off each individual floret.  The small florets would burn in the roasting process and there is a difference between roasting and burnt offerings! It’s important to stir and turn the cauliflower every 10-12 minutes as it roasts to prevent burning and to ensure even roasting of all sides of the florets.  I also find that loosely mashing the roasted cauliflower with a potato masher makes the vegetable easier to purée evenly.

I use a combination of leeks, onion, and garlic to flavor the soup. The addition of a small amount of fresh fennel does add a layer of flavor complexity to this soup but its addition is optional. When I am making this soup at a time when I have fresh fennel in the garden, I use it but I would not buy an expensive fennel bulb out of season for the small amount the recipe calls for.

The base for this soup is chicken stock. I use the liquid chicken bouillon concentrate to make the stock but homemade or canned/boxed stock can certainly be used.

Cool both the cauliflower and the soup mixture to room temperature before puréeing it. I recommend puréeing the mixture in small batches to ensure the mixture is very smooth and free of any lumps or chunks of cauliflower, leeks, or onions.

I also recommend the milk be at room temperature for about 20-30 minutes or so before blending it into the puréed cauliflower mixture to avoid the milk curdling. Use whole milk, not fat-reduced or skim, for this soup – it’s meant to be luxurious, velvety, and soothing to the palate. In fact, a small amount of cream can be substituted for part of the milk in the recipe. This soup freezes well (yes, it really does) but whole milk or a blend of milk/cream needs to be used when freezing cream-based soups successfully. Soups made with fat-reduced or skim milk do not freeze and reheat well as the ingredients tend to separate.

Once the milk is added (slowly) to the puréed mixture, it’s important not to boil it – all it needs is a slow, gentle heating to the point that the cheese will melt.  My recipe calls for a blend of three flavorful cheeses – cheddar, mozzarella, and parmesan.  I buy the bag of pre-shredded cheese with this mixture in it and these three cheeses do complement, not only each other well, but the cauliflower, too.  Stir the soup over low heat just until the cheeses have all melted and blended into the soup. Never boil this soup.

The soup may be served in small appetizer-sized portions for the soup course of a dinner or, in larger portions as a main meal for lunch or a light supper.  Serve this gorgeous-colored soup with homemade biscuits, crusty rolls, rustic or French bread.

Cream of Cauliflower Soup
Roasted Cream of Cauliflower Soup

Roasted Cream of Cauliflower Soup

Ingredients:

1¼ lb cauliflower florets, chopped into chunks of about 7-9 florets   (weighed after large core stalk removed)
2-3 tbsp olive oil
½ tsp ground nutmeg
Salt and pepper

3 tbsp butter
2/3 cup sliced leeks (white and light green parts only)
1/3 cup onion, finely chopped
¾ oz fresh fennel, finely minced (optional)
2 cloves garlic, minced
3 tbsp flour

2¼ cups chicken stock
2 cups whole milk (at room temperature for 20-30 minutes)
Salt and pepper, to taste

1 cup shredded three-cheese blend (cheddar, mozzarella, and Parmesan cheeses)

Method:

Preheat oven to 400°F.

Line a large rimmed baking sheet with tin foil and spray with cooking oil.

In large bowl, toss the cauliflower florets, oil, nutmeg, salt, and pepper.  Spread cauliflower in single layer on prepared baking sheet.  Roast for approximately 40-45 minutes or until cauliflower is very soft, stirring and turning the cauliflower every 10-12 minutes for even roasting.  Cool slightly.  Break florets into small pieces and mash loosely with a potato masher to break down the florets for easier puréeing.

In medium-sized stock pot, melt the butter.  Sauté the leeks, onion, fennel, and garlic over medium heat until leeks and fennel are softened (but not browned), about 7-8 minutes. Sprinkle the flour over the mixture and stir to blend. Slowly whisk in the chicken stock. Bring to a boil, stirring constantly. Reduce heat and simmer 2-3 minutes or until mixture is thickened, stirring constantly. Remove from heat and cool to room temperature.  Purée cooled mixture along with the cauliflower in small batches in food processor or blender until smooth.

Return puréed mixture to stockpot and, over medium-low heat, slowly stir or whisk in the milk.  Add salt and pepper to taste. When mixture is heated (do not boil), stir in 1 cup of three-cheese blend.  Heat, stirring constantly, just until cheese is melted (do not boil).

Ladle into soup bowls and garnish with roasted cauliflower florets.

Yield: 6-7 servings

Roasted Cream of Cauliflower Soup

Yield: 6-7 servings

A rich and velvety-textured cream-based soup made with roasted cauliflower and a blend of three cheeses.

Ingredients

  • 1¼ lb cauliflower florets, chopped into chunks of about 7-9 florets (weighed after large core stalk removed)
  • 2-3 tbsp olive oil
  • ½ tsp ground nutmeg
  • Salt and pepper
  • 3 tbsp butter
  • 2/3 cup sliced leeks (white and light green parts only)
  • 1/3 cup onion, finely chopped
  • ¾ oz fresh fennel, finely minced (optional)
  • 2 cloves garlic, minced
  • 3 tbsp flour
  • 2¼ cups chicken stock
  • 2 cups whole milk (at room temperature for 20-30 minutes)
  • Salt and pepper, to taste
  • 1 cup shredded three-cheese blend (cheddar, mozzarella, and parmesan cheeses)

Instructions

  1. Preheat oven to 400°F.
  2. Line a large rimmed baking sheet with tin foil and spray with cooking oil.
  3. In large bowl, toss the cauliflower florets, oil, nutmeg, salt, and pepper. Spread cauliflower in single layer on prepared baking sheet. Roast for approximately 40-45 minutes or until cauliflower is very soft, stirring and turning the cauliflower every 10-12 minutes for even roasting. Cool slightly. Break florets into small pieces and mash loosely with a potato masher to break down the florets for easier puréeing.
  4. In medium-sized stock pot, melt the butter. Sauté the leeks, onion, fennel, and garlic over medium heat until leeks and fennel are softened (but not browned), about 7-8 minutes. Sprinkle the flour over the mixture and stir to blend. Slowly whisk in the chicken stock. Bring to a boil, stirring constantly. Reduce heat and simmer 2-3 minutes or until mixture is thickened, stirring constantly. Remove from heat and cool to room temperature. Purée cooled mixture along with the cauliflower in small batches in food processor or blender until smooth.
  5. Return puréed mixture to stockpot and, over medium-low heat, slowly stir or whisk in the milk. Add salt and pepper to taste. When mixture is heated (do not boil), stir in 1 cup of three-cheese blend. Heat, stirring constantly, just until cheese is melted (do not boil).
  6. Ladle into soup bowls and garnish with roasted cauliflower florets.
Schema/Recipe SEO Data Markup by Yummly Rich Recipes
https://myislandbistrokitchen.com/2016/11/09/roasted-cream-of-cauliflower-soup/

Did you Know?

You can join the Facebook page for My Island Bistro Kitchen:  https://www.facebook.com/MyIslandBistroKitchen/

Follow “the Bistro” on Twitterhttps://twitter.com/PEIBistro/

See the drool-worthy gallery of mouth-watering food photos from My Island Bistro Kitchen on Instagramhttps://www.instagram.com/peibistro/

Follow “the Bistro” on Pinterest at https://www.pinterest.ca/peibistro/

(and you can pin any of the Pinterest-ready photos below to your favorite Pinterest boards)

Of course, by subscribing to receive an email notification of new posts and recipes, you can be among the first to know when I publish a new post or recipe. Simply enter your name and email address in the Subscription block over on the right-hand side of my home page.

Pin this Cauliflower Soup to Pinterest!

Cauliflower Soup

Cauliflower Soup

For the recipe for the biscuits in the photos, click here.

Through the Drills at Jen and Derek Campbell’s Organic Farm in Wilmot Valley, PEI

CSA Box of Vegetables from Jen and Derek's Organic Farm
CSA Box of Vegetables from Jen and Derek’s Organic Farm

In August, I visited the farm of Jen and Derek Campbell in Wilmot Valley, just outside Summerside, Prince Edward Island.  I delayed posting this story until now because I wanted to publish it during National Organic Week in Canada which runs from September 21-28, 2013.

The Campbells are organic farmers and grow the most amazing variety of vegetables I have ever seen….some I have never heard tell of, like this alien-looking vegetable called kohlirabi, for example.

Kohlrabi
Kohlrabi

If you want to meet someone totally passionate about her work, then Jen is the gal to talk with.  Jen manages the day-to-day operations of the farm while husband, Derek, works in nearby Summerside, returning home to work on the farm evenings and weekends.  With twin four-year old boys, this is a busy household.

Jen grew up on a potato farm so is no stranger to farming.  She attended a natural resource school, Sir Sandford Fleming College, in Ontario graduating with a diploma as an Eco-system Management Technician.  After graduation, Jen lived and apprenticed on an organic farm for nine months.  A woman ran the farm so Jen was inspired that she, too, could be a farmer.  But, she didn’t start farming right away after graduation.  Jen returned home to PEI and began working at the Agricultural Research Station in Charlottetown, then at ADL Dairy for four years.  But the yearn for the land was great and the couple settled in Brookvale, PEI, where they began their organic farming.  They stayed in Brookvale for five years where they were certified organic farmers then, in 2011, moved to Wilmot Valley to be closer to family.  This marks the second year they have been farming in this location and they have one more year before they qualify as certified organic farmers in their Wilmot Valley location.  This is because certification requires the land to be three years free from the last prohibited substance in order to be considered fully organic.  They are, however, certified to grow organic transplants while the rest of the farm is in transition for one more year.  Being in transition means that, while they manage their farm organically and keep all the proper records, they have to wait until early summer 2014 to say their produce is “certified organic”.

New Transplants Mid-Summer at Campbell's Organic Farm
New Transplants Mid-Summer at Campbell’s Organic Farm

Today, the Campbells have approximately 3 – 3½ acres of land in cultivation and have between 2½ – 3 acres which are actually farmed with over 40 different vegetables.  They are under the control of Atlantic Certified Organic (ACO), Atlantic Canada’s accredited certification body, and must maintain comprehensive records of their farming operation, buffer zones between their farm and others which are not organic, and ingredient content of compost and fertilizer used. In addition, they must test their water regularly and submit to monitoring by ACO as well as a third party inspection to ensure they are following the organic standards.

Vine-ripened Organic Tomatoes

The Campbells grow the usual types of vegetables like tomatoes, beans, lettuce, onions, broccoli, and so forth but they also grow some vegetables that people might not associate with being grown on PEI.  For example, they grow tasty kohlrabi, collard greens, round lemon cucumbers that look like yellow transparent apples, Pattypan squash, and a multitude of herbs.

Pattypan Squash
Pattypan Squash

This is the first time I have seen these apple-shaped cucumbers.  In appearance, they resemble a yellow transparent apple but, in flavour, there is no mistaking they are cukes!

Round Cucumbers
Round Cucumbers

I wish my basil plants looked as healthy as these!

Organic Basil
Organic Basil

The day before I arrived for my early August visit, the Campbells had just harvested their garlic crop.

Freshly-harvested Garlic Drying

Jen says her produce is available at the Village Store in Lower Bedeque.  But, her biggest market comes from the Community Shared Agriculture Boxes (CSA Boxes). This process involves individuals (known as CSA members and sometimes referred to as shareholders) buying shares in her farm – i.e., at the beginning of the season, they sign a contract with the Campbells.  In return, the Campbells contract with their CSA members to do the best job they can to provide them with high-quality vegetables.  The CSA members either buy their shares upfront for the anticipated harvest or they contract to pay in installments over the season.  As a benefit and return on their investment, once harvest season begins, CSA members get a regular share of the vegetables from the farm as they are available. The risk, of course, that the CSA members accept is that weather and/or pests can play havoc with crops so, sometimes, yields might be lower or some crops might not be available at all that season if a crop failure happens.

Large-sized CSA box
Large-sized Weekly CSA box

Jen has two sizes of boxes available for her shareholders – those who buy large shares get a box of 12 different vegetables worth between $28-$30.  The smaller boxes have fewer vegetables and their shares are valued at $18.  The most popular size is the large share box because it is the better deal for people who eat lots of vegetables and CSA members with large share boxes also have unlimited swaps and grabs from the grab boxes.

Extra Veggies in the Grab/Swap Boxes

While the boxes will come with vegetables pre-selected by Jen and will obviously vary according to what is in season, CSA members can swap out some vegetables, that they either don’t like or need, for something else from, what Jen refers to as, the grab boxes of other vegetables and herbs available.

Green Beans in the Grab/Swap Boxes

Currently, there are 88 families and restaurants on the Island who have bought in to Jen’s CSA boxes which are available from June until October.  Of those, 84 are weekly recipients while 4 have opted to receive boxes every two weeks.  When she first began CSA boxes in 2008, Jen had 15 CSA members.  Today, with her 88 CSA members, she has a waiting list of others wanting to join.  Jen tells me she has very loyal CSA members with a 98% return of the same folks year-over-year.

Knowing that weeds, pests, and plant diseases are common to farmers, I asked Jen how, as an organic farmer, she combats them.  They obviously don’t use herbicides and Jen tells me control is through cultivation and weeding.  Last year, the couple purchased a vintage 1951 Alice Chalmers tractor which they converted to be electric.  They use this cultivating tractor to weed many of their vegetables such as carrots, beans, spinach, lettuce, etc., and they also use an ECO weeder for cultivating their broccoli and cabbage crops.  However, much weed control is still done the traditional, old-fashioned, painstaking way of hand weeding and by some flame weeding.

I asked Jen what the greatest source of her satisfaction is as an organic farmer and what keeps her farming organically.  She tells me she loves to work outside on the land but her greatest satisfaction comes from the feedback she receives from her CSA members who are very supportive and appreciative of her products.  She enjoys educating her CSA members on different vegetables, and how to prepare them, and encouraging people to step outside their comfort zones and try new veggies.   I can attest to this as I stopped by one of her Charlottetown drop-off locations and it was like a cross between Christmas and Old Home Week when her CSA members would come to pick up their CSA boxes of produce.

Jen's Truck Arriving at Distribution Location with Weekly CSA Boxes
Jen’s Truck Arriving at Distribution Location with Weekly CSA Boxes

Greeted enthusiastically by Jen, there was lots of “oohing and ahhing” as the CSA boxes were opened by Jen for each person. 

This is definitely personalized service and attention to CSA shareholders!

Jen tells me she sees her CSA members more as friends than customers or shareholders.  She sees most of them every week and, from the chit-chat, they were like long-time friends who were having great discussions over how they were going to prepare and serve this week’s offerings from their CSA boxes!

This summer, the Campbells have been busy building their new washing and packing barn which Jen, jokingly refers to as her “Veggie Palace”.   In addition to improvements in her washing and packing processes, when complete, the new facility will have a large walk-in cooler in which to store the veggies.

Jen employs two part-time seasonal employees, one from May till mid-November and the other from the end of June to the first of September.  Harvesting is done four days a week, Monday to Thursday, and Jen has two output distribution days –  i.e., she has two drop-off areas in Charlottetown each Tuesday and one in Summerside on Thursdays.  CSA members show up at one of these drop-off/pick-up locations with their recyclable grocery bags, baskets, or coolers to claim their share of fresh, organic vegetables from the Campbell farm.  PEI produce at its best!

Line-up to Pick up Weekly CSA Boxes

Jen regularly blogs about what produce is available by the week on the farm and you can read her blog here:   http://farmfreshveggies.blogspot.ca/

There is nothing better than farm-fresh produce just picked from the field.  I arrived home from my visit to the Campbell farm with a supply of two kinds of beets, tri-colored carrots, kohlrabi, Pattypan squash, and collard greens.

One of my favorite ways to serve vegetables is to roast them.  I used kohlrabi, pattypan squash, beets, carrots, and red onion in a roasted veggie medley for which the recipe follows.

Preheat oven to 425C.

Peel and chop the vegetables into chunks of similar size.

Place veggies in large bowl and drizzle with a good quality olive oil, just enough to coat the vegetables. Add salt, pepper, and garlic powder to taste.

Transfer the vegetables, single-layer, to a parchment or tin-foil lined rimmed baking sheet.

Roast for about 40 minutes or so, just until the veggies are fork-tender.  Serve hot.

Roasted Vegetables
Roasted Vegetables

My thanks to Jen Campbell for taking time out of her busy farming season to show me around her organic farm and explain its operation to me.

How are you celebrating National Organic Week this year?

To raise awareness and show appreciation and support for local organic farmers who grow great food for us, please share this story on your social media sites.

Thank you for visiting “the Bistro” today.

Be sure to visit my new Facebook page at My Island Bistro Kitchen.  You may also wish to follow me on twitter @PEIBistro and on Pinterest at “Island Bistro Kitchen”.