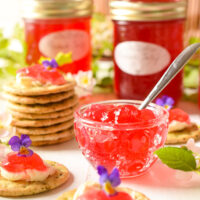
Rosy Rhubarb Jelly
Ingredients
- 1¾ lb deep red rhubarb stalks, chopped into ½“ chunks (1¾ lbs weighed after leaves and root ends removed)
- 2/3 cup water
- ¼ cup orange juice
- 3¼ cups granulated sugar
- 1 tsp butter
- 1 – 85ml pkg liquid pectin
Instructions
-
Place rhubarb, water, and orange juice in medium-sized stockpot. Cover and bring to a boil over medium-high heat. Reduce heat to low and simmer for 8-10 minutes, or until rhubarb is very soft and mushy, stirring occasionally. Remove from heat and, using a potato masher, further break down the cooked rhubarb.
-
Transfer the cooked rhubarb to a dampened fine mesh jelly bag. If you have a jelly bag stand, affix the jelly bag to it suspended over a bowl or pot. However, if you don’t have the formal stand, simply hang jelly bag over a broom handle suspended between two chairs with jelly bag positioned over a bowl or large measuring cup to catch the juice as it extracts.
-
Let jelly bag containing the rhubarb suspend, undisturbed, to allow the juice to extract and strain on its own. This may take anywhere from an hour or so to a couple of hours or longer, depending on the quality and age of the rhubarb as well as the local climate growing conditions in which the rhubarb was grown. Do not squeeze the jelly bag or try to force the juice through quicker as this will result in a cloudy/murky jelly. The rhubarb pulp should yield 1½ cups of strained juice. However, if it is short the 1½ cups, up to 1/3 cup water may be added to yield 1½ cups liquid. If it yields more than 1½ cups of juice, only use the 1½ cups called for in the recipe as adding more juice will affect the gelling process.
-
When the rhubarb is nearing the end of its straining, prepare the bottles and canner. Wash jars and lids in hot soapy water, first checking to ensure that the jars have no cracks or chips in them. Rinse. Fill a large pot with hot tap water, about ¾ full. Place the half-pint and quarter pint jars, upright, into the water (the extra bottles will be go into the canner to fill it up so the filled jars do not topple over during the hot water process). While the extra jars do not need to be sterilized, they do need to be hot going into the canner of boiling water as, otherwise, they may crack with the temperature change. Ensure the jars are fully submerged, each jar filled with water, and that the water is at least an inch over the tops of the jars. Cover, bring to a boil, and boil for 10 minutes. Turn off heat and leave the jars in the hot water to have ready to fill once the jelly finishes cooking.
-
Fill the canner about half full of hot tap water. Cover and bring to a boil to have it ready for processing of the filled jars as the filled jelly jars must immediately go into the canner to be processed while the jelly is still hot. Ensure the canner water is boiling before beginning to cook the jelly as there will not be enough time to get it to the boiling point once the jelly is in the bottles and ready for immediate processing. Boil a kettle of extra water to have ready, if needed, to top up the canner water after filled jars are added.
-
Place 1½ cups rhubarb juice and the sugar in a small stockpot over medium-high heat. Add the butter. Bring to a full rolling boil, stirring frequently. Add the liquid pectin and boil hard for 1 minute, stirring continuously. Immediately remove stockpot from heat and skim off any residual foam.
-
Use jar lifter tongs to carefully remove three half pints and the quarter pint hot sterilized jars from the water, one at a time, emptying the water from the jars back into the pot. Drain jars well.
-
Remove a small amount of the hot water from the stockpot in which the jars were sterilized and place in small saucepan over simmering heat. Place the lids in the hot water to soften the rubber sealing compound. Do not boil the lids.
-
Using a ladle, or a heat-proof glass measuring cup, and a wide-mouthed canning funnel, pour jelly into the hot sterilized jars, leaving about ¼” headroom in each jar to allow for expansion during the hot water processing. Remove any trapped air bubbles in the jars with a chopstick or small heatproof, non-metallic spatula. Wipe the jar rims with a clean damp cloth to remove any stickiness or jelly particles that could prevent the lids from sealing properly to the jars.
-
Using a magnetic lid lifter, remove lids from the hot water and center the heated lids on jars so the sealing compound on the lid edges aligns with the jar rims. Fingertip tighten the ring/screw bands until resistance is encountered. Do not over-tighten.
-
Using jar lifter tongs, carefully place filled jars upright in wire basket positioned in the canner, ensuring jars do not touch each other or fall over. Add some of the hot empty jars, upright, to the basket to fill up space so the filled jars do not topple over. Let the empty jars fill with water from the canner as they are submerged. Ensure the water level is at least 1” above the tops of jars, adding more boiling water as necessary. Cover with canner lid. Return the water to a full rolling boil over high heat then decrease the heat to just keep the water at a moderately rolling boil but not boiling over. Process jars in the hot water bath for 10 minutes, adjusting time as and if necessary for altitude. Start timing the processing from the point at which a full rolling boil is reached after jars have been added to the canner. At the end of the processing time, turn off heat and remove canner lid.
-
Let jars sit in the hot water for 5 minutes then, using jar lifter tongs, carefully remove the jars filled with jelly, upright and one at a time, and transfer them to a heat-proof cutting board that has been covered with a towel, to cool completely. Listen for the “pop” or “ping” sound as the bottles seal over the next few minutes or hours. The lids of properly sealed jars will curve downward. Let jars rest, undisturbed, on counter for 24 hours. Then, test each jar for proper sealing by pressing down gently on the center of each jar lid. If the lid is already pressed downward, and does not pop back up, it is properly sealed. Any jars that do not pass this test should be refrigerated and the jelly used within a week or so. Store properly sealed jelly bottles in cool, dark place. Refrigerate jelly once jar has been opened.
Recipe Notes
Yield: Apx. 3 half-pint bottles and 1 quarter-pint bottle
NOTE 1: The small ½-cup (quarter-pint) jar does not actually need the full 10 minutes of hot water canning. However, to remove it partway through, at the 5-minute point in the boiling process, would disturb the rolling boil and timing and thus interfere with the proper canning of the larger half-pint jars so, there are a couple of options. The first is to let the small jar remain in the hot water bath with the half-pint jars for the full 10-minute period. The second option is not to process the tiny jar in the hot water and to, instead, use it as the “tasting jar”, refrigerating and consuming the jelly within a couple of days. However, if the desire is to can the entire batch of jelly into the small ½-cup (quarter-pint) jars, then process the basket of them for 5 minutes, instead of 10. These tiny bottles make great gifts, especially if they are accompanied by fresh scones!