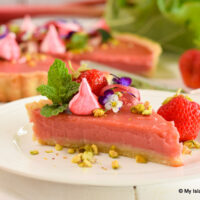
Strawberry Rhubarb Tart
Ingredients
- Pâte Sucrée:
- 1 1/8 cups all-purpose flour (or gluten-free 1-to-1 or cup-for-cup baking flour, if required)
- 1/8 cup almond flour
- 1/3 cup sifted icing sugar (aka powdered sugar or confectioner’s sugar)
- ¼ tsp salt
- ½ cup cold unsalted butter, diced into ½“ pieces
- 1 cold egg yolk
- 2 tbsp cold cream
- Filling:
- 10 oz rhubarb, chopped into ½“ pieces
- 10 oz strawberries, coarsely chopped and mashed
- 3 tbsp freshly squeezed and strained lemon juice
- 2 tsp finely grated lemon zest
- 4 large eggs, room temperature
- 4 large egg yolks, room temperature
- ¾ cup caster sugar (aka instant dissolving sugar or berry sugar)
- 1/8 tsp salt
- ½ cup butter (room temperature), cubed
- Pink Food Coloring (optional)
Instructions
-
Pâte Sucrée:
-
Measure all-purpose flour, almond flour, icing sugar, and salt into medium-sized bowl. Combine with a whisk.
-
Toss the cold butter pieces into the dry ingredients to coat them. Using a pastry cutter, cut the butter into the dry ingredients until mixture resembles the size and texture of coarse rolled oats.
-
In measuring cup, combine the egg yolk with the cream. Stir with fork to break up yolk and combine with the cream. Slowly add the liquid ingredients to the pastry ingredients, stirring with a fork. Mixture will be a shaggy texture at this point. Transfer mixture to a lightly floured work surface and, with hands, bring mixture together to form a disk shape about 5”- 6” in diameter. Do not overwork dough. Wrap dough tightly in plastic wrap and refrigerate for about 1 hour.
-
Grease a 9”x1” fluted tart pan, ensuring each crevice is well greased.
-
On a lightly floured work surface, roll chilled dough of desired thickness into a circle, large enough to fit the tart pan (note that not all of the pastry may be required, depending on desired thickness of crust – see Note 1 below). Transfer pastry to tart pan, gently pushing the pastry down to fit into each of the pan’s fluted edges without stretching the pastry. Roll the rolling pin across the top of the tart pan to remove excess pastry and create a tidy edge flush with pan rim. Dock pastry bottom in several places with fork tines to prevent air pockets from forming while the crust bakes. Refrigerate shell for about 1 hour.
-
While pastry shell is chilling, position oven rack in lower third of oven and preheat oven to 350°F.
-
Crumple and distress a piece of parchment paper large enough to mold around the inside of the tart pan, allowing enough overhang by which to grasp it to remove the beans or pie weights that will be placed in it for blind baking and that will be removed part way through the crust baking process. This crumpling/distressing procedure will weaken the parchment paper, allowing it to be more pliable for fitting into the tart pan. Depending on the quality of parchment paper, repeat with a second piece of distressed parchment paper, if necessary. The paper lining needs to be strong enough to hold the beans when they are being lifted from the tart shell part way through the baking.
-
Remove the tart shell from the refrigerator and place on a rimmed cookie sheet or pizza pan. Carefully fit the distressed parchment paper inside the tart shell. Repeat with the second layer of parchment paper, if necessary. Add ceramic pie weights or dry uncooked beans, filling the tart pan about 2/3 to ¾ full, ensuring the weights are evenly distributed and placed as far as possible up the sides of the tart pan.
-
Transfer tart shell to the oven and bake for 15 minutes. Remove shell from oven and carefully remove the pie weights and parchment paper and transfer them to a heatproof bowl. Be very careful as the pie weights will be hot! As some of the earlier pierced holes in the shell bottom may have filled in during the blind baking process with the pie weights, further pierce the tart shell in several places, if necessary, to prevent it from forming air bubbles as it continues to bake. Return tart shell to oven and bake for another 18-20 minutes or until pastry has a dry appearance and is lightly golden brown. Cool shell completely in pan on wire rack before adding filling.
-
Filling:
-
Combine rhubarb, mashed strawberries, lemon juice, and lemon zest into a saucepan. Cover and bring mixture just to the boiling point over medium heat then immediately reduce to a simmer. Cook slowly, stirring occasionally, for approximately 12-15 minutes, or until rhubarb and strawberry mixture is soft and mushy. Using a potato masher, mash the mixture to further break down the rhubarb and strawberries as much as possible.
-
Strain rhubarb/strawberry mixture through a fine wire mesh sieve into a heatproof bowl to extract the juice. If this does not yield 1 cup of juice on its own, the back of a large spoon may be used to very gently press the pulp to extract more juice. Discard the rhubarb/strawberry pulp. Straining the juice a second time through a clean fine wire mesh sieve to refine it further and remove any traces of the fruit pulp impurities is recommended. Discard any remaining pulp and solids. This should equal 1 cup of strained strawberry-rhubarb juice needed for the recipe. If it strains out more than 1 cup of juice, only use the 1 cup called for in the recipe. If it strains out slightly less than 1 cup of juice, up to 1 tablespoon of strained freshly squeezed lemon juice may be added to equal 1 cup of juice. (See Note 2 below)
-
Whisk the egg yolks and whole eggs together. Set aside.
-
Combine the strained strawberry-rhubarb juice with the caster sugar and salt in a heavy-bottomed saucepan over medium heat (See Note 3 below). Cook, stirring frequently, until the sugar dissolves then reduce heat to low. Slowly drizzle and whisk approximately ¼ cup of the hot juice into the eggs to temper them so they do not curdle then whisk the entire egg mixture into the juice in saucepan. If a deeper pink color is desired, add a small amount of pink food coloring until depth of color choice is obtained. Stir mixture frequently with a whisk until mixture is smooth and thickened and temperature registers 185°F on a candy thermometer.
-
When the filling is nearly ready, position oven rack in center of oven and preheat oven to 350°F.
-
Remove filling from heat and strain mixture through a fine wire mesh sieve into large measuring cup or bowl. Stir in the butter until melted and combined with filling. Transfer filling to cooled pastry shell and level out and smooth filling with an offset spatula. Bake tart at 350°F for about 6 minutes to set. Cool tart completely on wire rack then refrigerate until set, approximately 4 hours.
-
Remove outer ring of tart pan. If desired, slide large bench scraper under tart to remove it from pan bottom and transfer to serving plate or tray.
-
Top of tart may be decorated as desired or left plain. Dust tart top with icing (confectioner’s) sugar, if desired, just at time of serving. Slice into wedges and garnish with fresh fruit of choice and/or a dollop of whipped cream. Keep tart refrigerated until serving time.
Recipe Notes
Yield: Apx. 8 slices
NOTE 1: Not all of the pastry may be required for the tart as amount used will depend on personal preference for thickness of crust. Any leftover pastry may be tightly wrapped in plastic wrap, placed in an airtight freezer bag, labelled, and frozen for another purpose.
NOTE 2: The exact amount of rhubarb/strawberry juice extracted from the rhubarb and strawberries is hard to predict with 100% accuracy because so much depends on the quality and age of the rhubarb and strawberries and their water content as well as their growing conditions. If the strained amount is slightly less than the 1 cup required for the filling in this recipe, up to 1 tbsp of fresh, strained lemon juice can be added to equal 1 cup of juice. If the amount of strained juice results in more than 1 cup, only use the 1 cup called for in the recipe as this amount has been tested to achieve the optimal texture of the topping. Adding more juice than called for in the recipe is likely to yield a filling that is too runny to cut and plate well and may result in too much filling for the tart pan capacity.
NOTE 3: If you don’t have a heavy bottomed saucepan in which to make the filling, the filling can be made in a heatproof bowl set over simmering water to ensure it does not scorch during cooking.
Copyright My Island Bistro Kitchen 2022