Best Pickled Beets
Ingredients
- 5 lbs cylindra beets*, (weighed after leaves removed but with 1” stem and root ends intact) [*See Note 1]
- Boiling water
- 2 tsp cooking oil
- 2¾ cups brown sugar
- 2¾ cups pickling vinegar (7% acidity)
- 1 cup + 3 tbsp water
- 2¾ tsp pickling spice, tied into a small cheesecloth sachet
- 2 – 6” cinnamon sticks
- ¼ tsp salt
Instructions
Pre-Prep
-
Assemble and set out all equipment and ingredients.
-
Make the spice sachet by placing the pickling spice onto a small square (apx. 6”-7” square) of cheesecloth and tying up ends with kitchen string or heavy thread. If cheesecloth has a very open weave, use two to three layers to enclose and contain the spices.
-
Inspect jars to ensure there are no chips or cracks in them. Inspect screw bands/rings to ensure there are not dents in them or any rust. Set out new lids.
Preparing and Cooking the Beets
-
Try to select uniformly-sized beets so they all cook at the same rate. Remove the leaves from the beets, leaving about 1” stem in place as well as the root end then weigh out 5 lbs of beets. Rinse beets under cold water to remove any dirt. Do not peel beets. If some beets are larger than others, place them in the bottom of the large stockpot with the smaller ones on top. Cover the beets with boiling water and add 2 tsp cooking oil. Cover and cook over medium-high heat until beets are fork tender. Be patient; beets take a long time to cook.
Jar Sterilization
-
As soon as the beets start cooking, begin the jar sterilization process. It takes longer than you might think to get a big pot of hot tap water filled with jars to the boiling stage.
-
Wash the jars in hot soapy water. Rinse well and drain jars. Fill a large-sized pot (fitted with a wire rack to keep the jars up off the bottom of the pot), capable of holding at least 7-8 pint-sized jars upright. Use two pots for this process, if necessary. Do not stack jars, one on top of another. Place the jars, upright and in single layer, into the water. Ensure the jars are fully submerged, each jar is filled with water from the canner as it is submerged, and that the water is at least an inch over the tops of the jars, adding more water if necessary. Cover, bring to a boil, and boil gently for 10 minutes. Turn off heat and leave the jars in the hot water to have ready to fill once the beets are ready to be bottled.
-
Because so many factors can impact and determine exactly how many jars will be needed to accommodate the beets, it is recommended to have at least one to two extra jars sanitized in case they are needed. Even if they aren’t needed to be filled with beets, the hot empty jars may be needed to fill up space in the hot water canner if it is not completely filled to capacity with jars containing the beets. This is to ensure that the filled jars do not topple over during the hot water processing.
-
To protect your countertop from the hot wet bottles and syrup drippings, use a heatproof cutting board covered with newspaper to protect the board. Set a wire rack on top of the board as a base for the hot jars to sit.
Preparing the Hot Water Canner
-
While the beets are cooking and as soon as you have gotten the bottle sterilization process underway, fill the canner about one-half full of hot tap water and, over medium-high heat, bring the canner water to the boiling stage to have ready when the beets are bottled and ready for their hot water bath. Reduce heat to keep the canner water hot until the beets are in the bottles.
Making the Syrup
-
When the beets are starting to get along with their cooking (about 20 minutes or so away from being fork tender), start making the syrup in a separate smaller stockpot. Combine the sugar, vinegar, water, pickling spice sachet, cinnamon sticks, and salt into the stockpot. Bring to a boil over medium-high heat. Reduce heat to medium low and boil, uncovered, slowly for about 18-20 minutes. Do not boil the syrup too rapidly or for too long as it will evaporate and there won’t be enough syrup to fill the jars. This means more syrup has to be made and the hot syrup needs to go over the hot beets as soon as they are bottled so timing is everything.
Bottling the Beets
-
Remove cooked beets from water, rinse quickly under cold water to make them easier to handle for peeling and slicing. Do not cool down beets too much or let them get cold as they must be hot going into the bottles. Peel beets and remove and discard stem and root ends.
-
Using jar lifter tongs, carefully remove the hot sterilized jars from the water, one at a time, emptying the water from the jars back into the pot. Drain jars well and place on heat-proof board with wire rack on top. Do be very careful as this is scalding hot water.
-
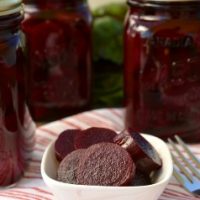
Slice hot beets into ¼” thick slices and pack into sterilized jars, leaving 1” headroom.
-
While beets are being sliced and bottled, boil a kettle of water to have ready in case extra is needed to top up the canner after the filled jars are added.
-
Remove and discard the pickling spice sachet and cinnamon sticks from the syrup. Ladle hot syrup over beets leaving ½“ headroom in each jar to allow for expansion during the hot water processing. Remove any air bubbles that may appear in the jars by inserting a chopstick or small heat-proof spatula into each bottle and gently moving the beet slices to remove any pockets of air that may have formed. Add more sliced beets to jars, if necessary, to bring beets up to 1“ from jar rims and more syrup to bring it to ½” from jar rim. Wipe the jar rims with a clean damp cloth to remove any stickiness that could prevent the lids from sealing properly to the jars.
-
Center the washed lids (See Note 2 below) on jars so the sealing compound on the lid edges aligns with the jar rims. Fingertip tighten screw bands/rings until resistance is encountered. Do not over-tighten.
Hot Water Processing
-
Immediately upon jars being filled and capped, use jar lifter tongs to carefully place filled jars upright in wire basket positioned in the canner, ensuring jars do not touch each other or fall over. If a canner is not completely full of filled jars, add enough hot empty jars to fill it to capacity to prevent filled jars from toppling over during processing. Make sure the empty jars are already hot as cold jars immersed in boiling hot water are likely to crack. Let the empty jars fill with water from the canner as they are submerged.
-
Ensure the water level is at least 1” above the tops of jars, adding more boiling water as necessary. Cover with canner lid. Increase the heat to return the water to a full rolling boil then decrease the heat to just keep the water at a moderately rolling boil but not boiling over. Process pint-sized jars in the hot water bath for 30 minutes (see Note 3 below), adjusting time as and if necessary for altitude. Start timing the processing from the point at which a full rolling boil is reached after jars have been added to the canner. At the end of the processing time, turn off heat and remove canner lid.
-
Let jars sit in the hot water for 5 minutes then, using jar lifter tongs, carefully remove the jars filled with beets, one at a time, upright and without tilting them, and transfer them to a heat-proof cutting board, that has been covered with a towel, to cool completely. Listen for the “pop” or “ping” sound as the bottles seal over the next few minutes or hours. The lids of properly sealed jars will curve downward.
Testing Lids for Proper Sealing
-
Cover jars with a towel to keep light out and let jars rest, undisturbed, on counter for 24 hours. Then, test each jar for proper sealing by lightly pressing down on the center of each jar lid. If the lid is already pressed downward, and does not pop back up, it is properly sealed. Any jars that do not pass this test should be refrigerated and the beets used within a week or so.
Storage of Pickled Beets
-
Store properly sealed bottles in cool, dry, dark place and allow to rest for at least 1-2 weeks to allow flavor to fully develop before opening. Use beets within 1 year of bottling. Refrigerate beets once jar has been opened.
Recipe Notes
Yield: Apx. 6 pints
[Copyright My Island Bistro Kitchen]
NOTE 1: Long and slender cylinder beets are recommended for pickling as they slice into uniform slices, fit well into the jars, and have lovely presentation. Regular ball beets can, of course, be used for pickling; however, some of the round beets grow quite large and the slices may have to be cut into two or three pieces to get them to fit in the jars.
NOTE 2: While, historically, the lids (with the orange-rust colored gasket on their underside) were preheated in simmering hot water for 1-2 minutes to soften the lid gasket before applying the lids to the hot jars, Bernardin® (the company that manufactures canning lids available in Canada) is now (2024) saying that preheating their particular brand of lids is no longer necessary to provide a proper seal as the sealing compound they use in their lid manufacturing performs better at room temperature. They recommend washing the lids in hot soapy water, rinsing them, and setting the lids aside until needed in the canning process.
Note this pertains specifically to the Bernardin® brand of lids. Other manufacturers’ lids may differ so, if you are using another brand of lids, do check the manufacturer’s instructions for lid preparation of their particular brand lids. Typically, if a brand’s lids need to be preheated, the method is simply to place the lids in a small pan of simmering hot water over low heat just long enough to heat the rubber piece. This doesn't take longer than a minute or two at most. Do not boil the lids.
NOTE 3: Using jars other than the size indicated in the recipe (pints) may require adjustment to the hot water processing time of 30 minutes.