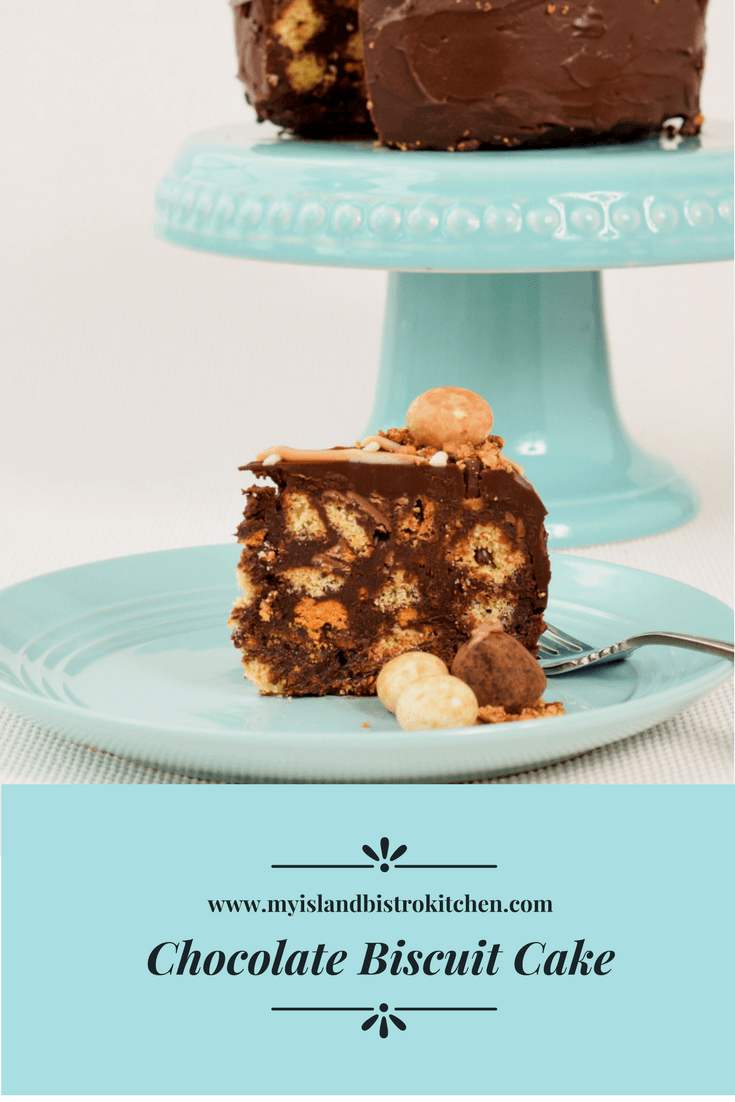
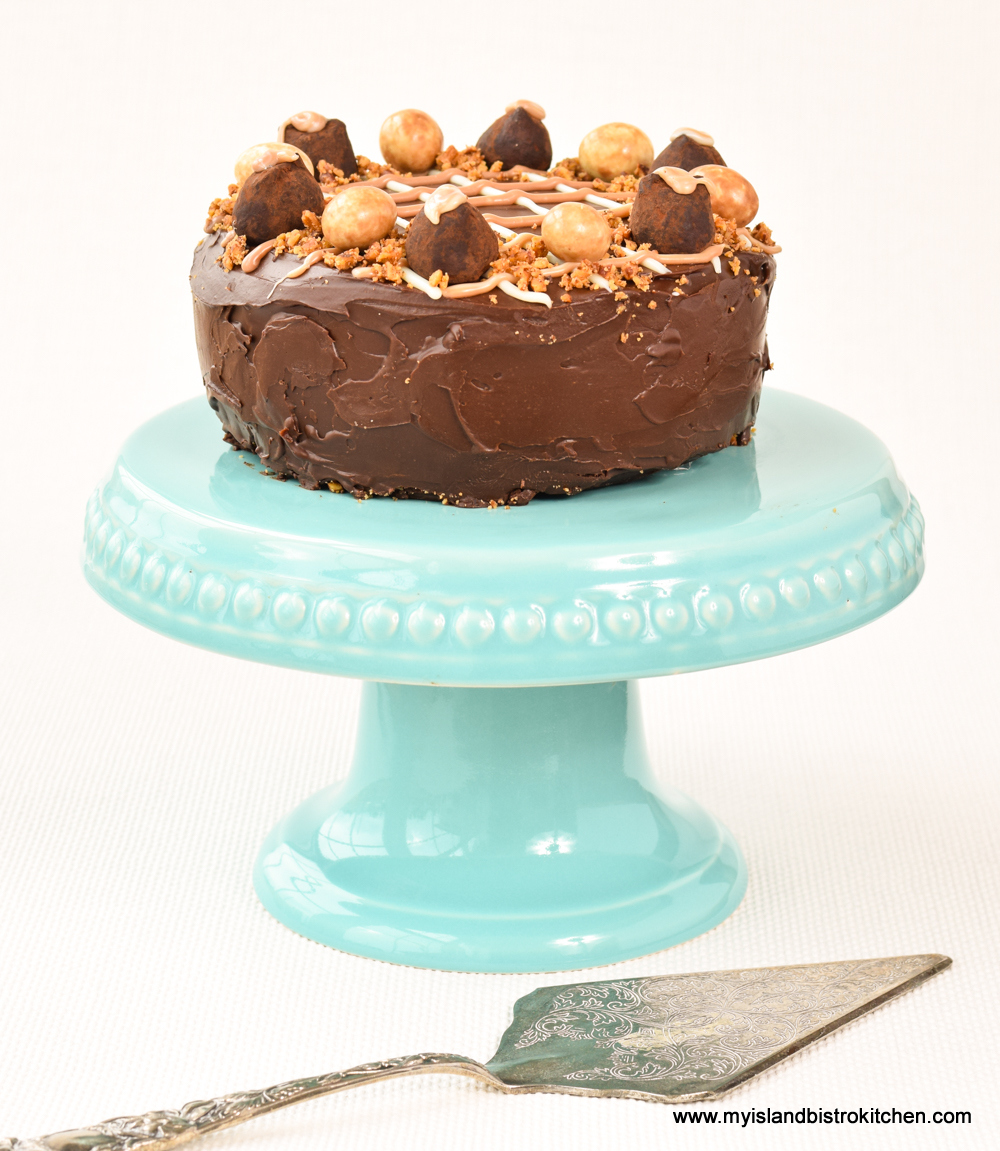
If you are a chocolate lover, this Chocolate Biscuit Cake is for you! What’s not to love about cookies and chocolate bar chunks encased in a rich ganache then smothered with a decadent chocolate ganache glaze!
I am giving alternate instructions for making a gluten-free version of the cake and want to point out, at the offset, if you are making the gluten-free version, ensure that all ingredients called for in the recipe (not just the cookies and chocolate bars) are, in fact, gluten free.
The Chocolate Biscuit Cake is said to be a favorite teatime treat of Her Majesty Queen Elizabeth II. It’s also said to be a favorite of Prince William who chose it as his groom’s cake at his April 2011 wedding to Katherine Middleton. There are many versions and recipes for this cake which is sometimes referred to as “refrigerator cake” because it is a no-bake cake that is set by refrigeration.
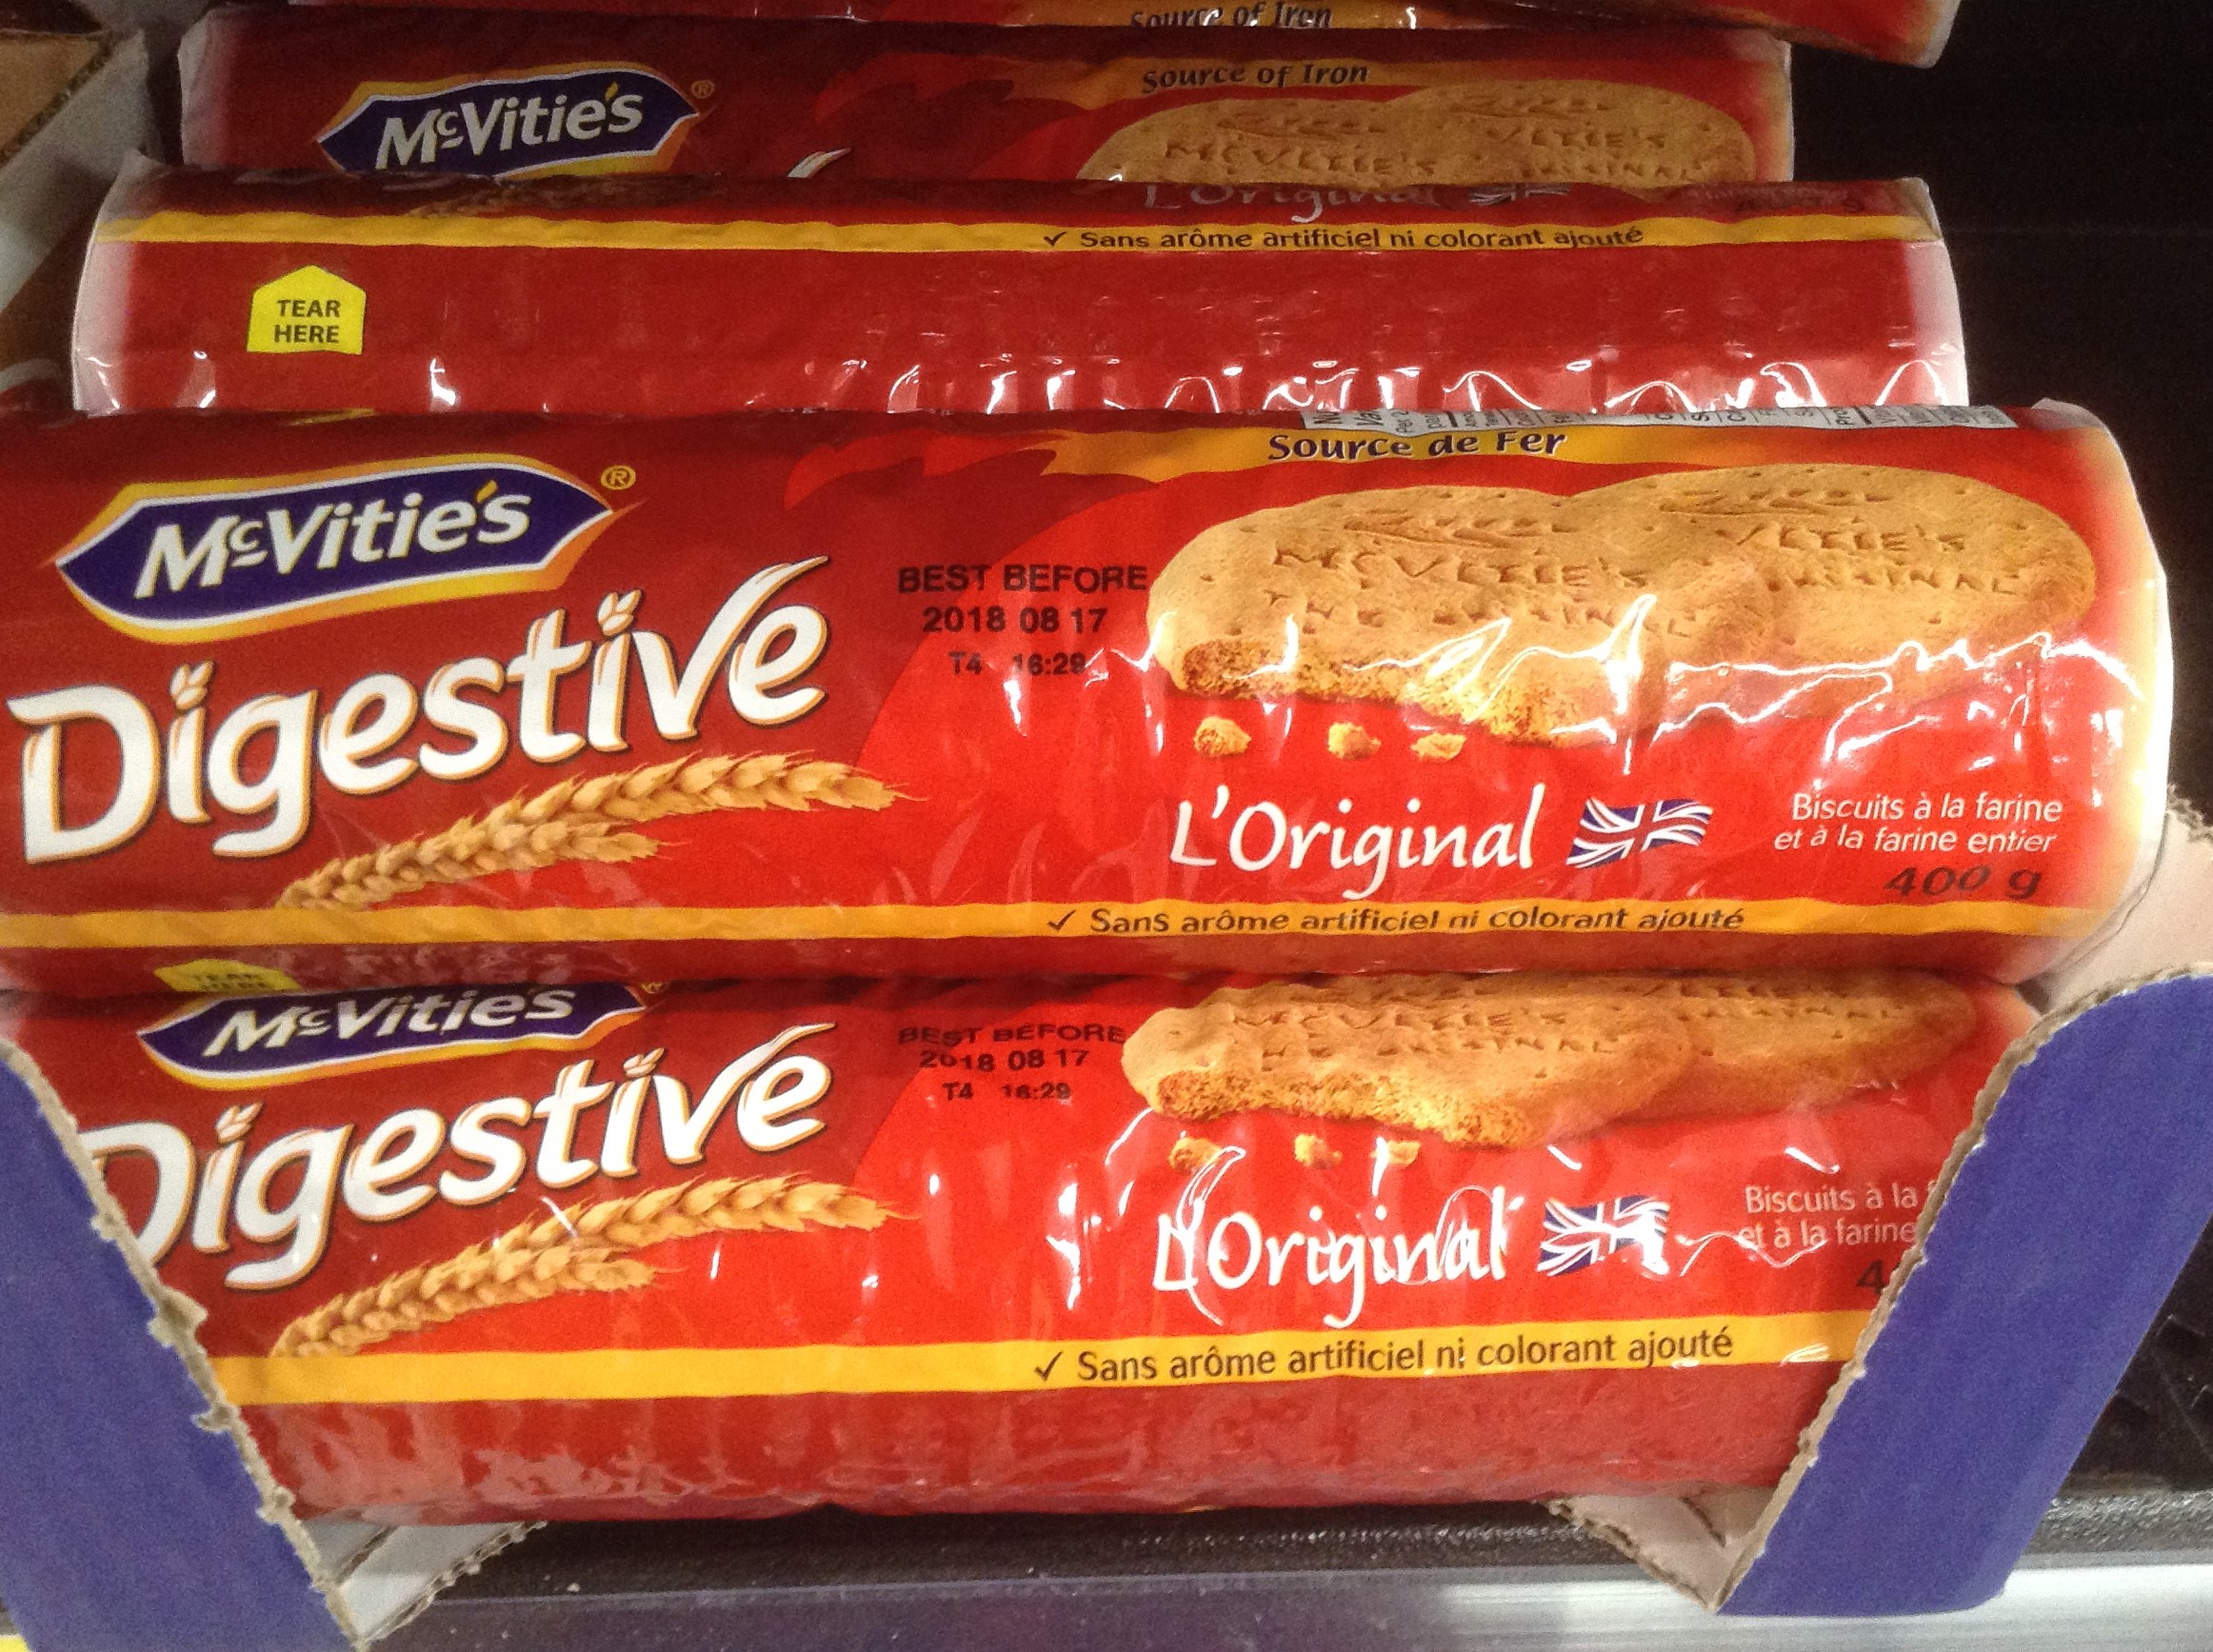
Traditionally, the cake is made with biscuits (the British term for what is known as “cookies” in North America). The sturdy, crisp Digestive cookies are the traditional ingredients. These would be found in the cookie aisles of the larger supermarkets, under brand names such as McVities, Christie, and others. The label on the package will say “Digestives”. The Digestives are very plain-flavored and thin.
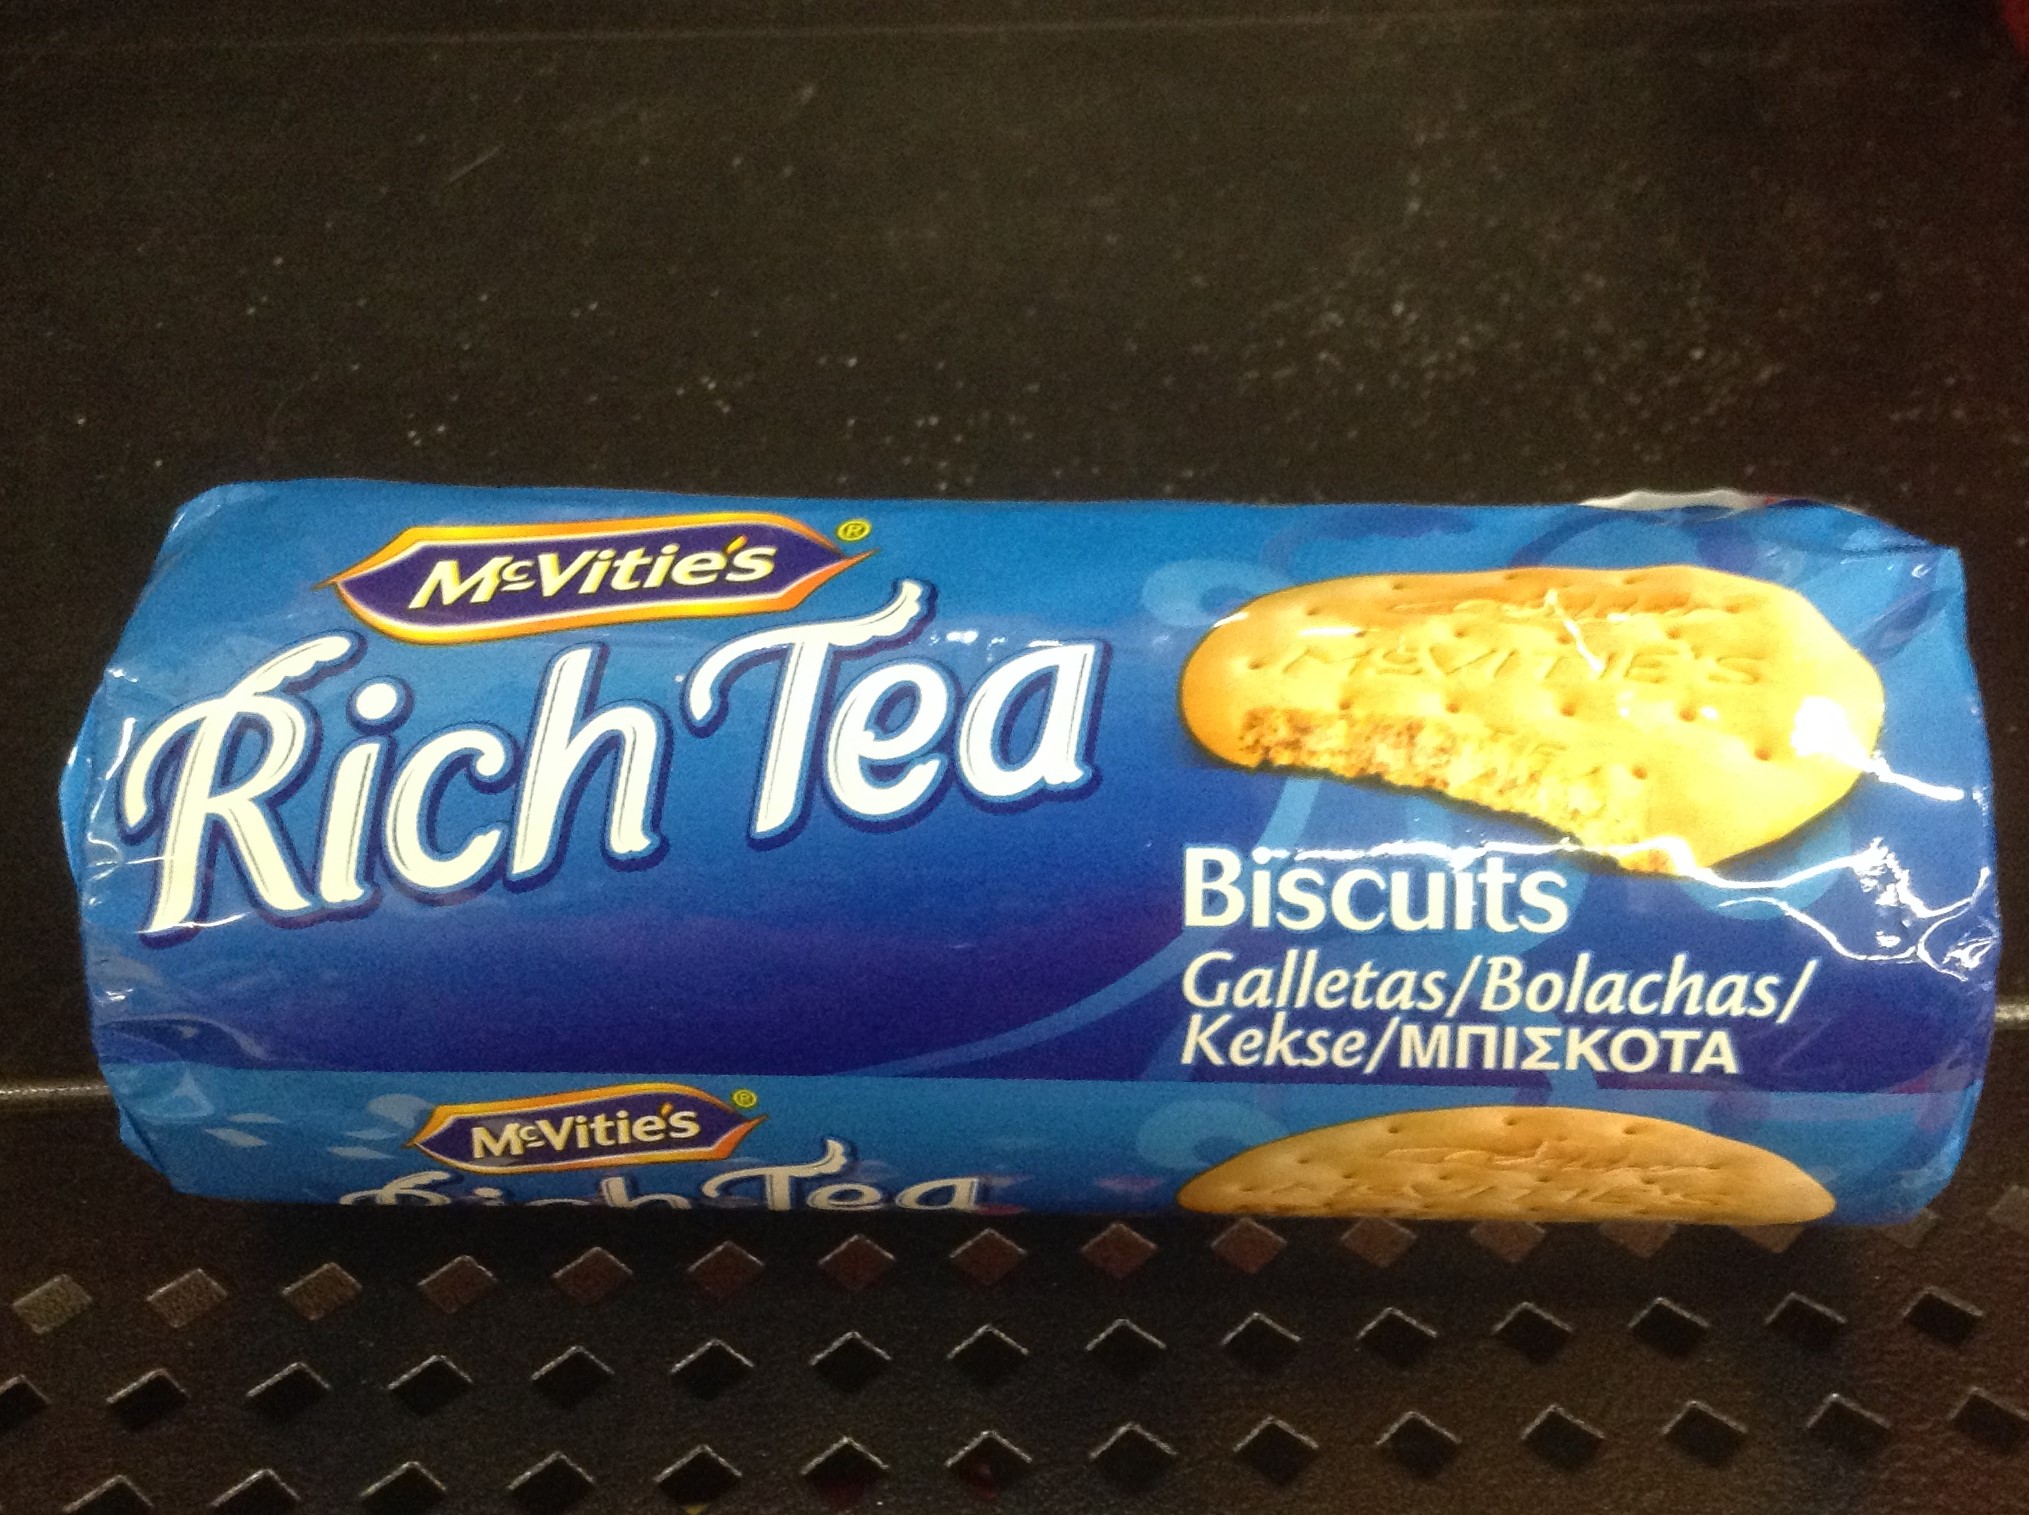
Sometimes, rich tea biscuits may also be added to the cake and they will be labeled as “Rich Tea Biscuits”. They are similar to the Digestives, just a little bit sweeter.
I wanted to make my version of the Chocolate Biscuit Cake gluten free and could not find any gluten-free commercially-made Digestive cookies locally. So, I improvised, knowing I’d need a “sturdy” cookie that would not become soggy or break apart in the cake as the warm ganache was added. I took my gluten-free Snickerdoodle recipe (click here for that recipe), halved it, using a medium egg instead of the extra-large egg the recipe calls for, omitted the nutmeg and cardamom, and did not roll the cookies in the spice-sugar mixture. I made the cookies the night before making the cake, baked them an extra 2 minutes to crisp them up, and left them on the counter overnight. This resulted in a hard, crisp, sturdy cookie that could hold its own in the cake. I weighed out the cookies to get 8 oz and it took 13 of the Snickerdoodles which were made the size indicated in my recipe.
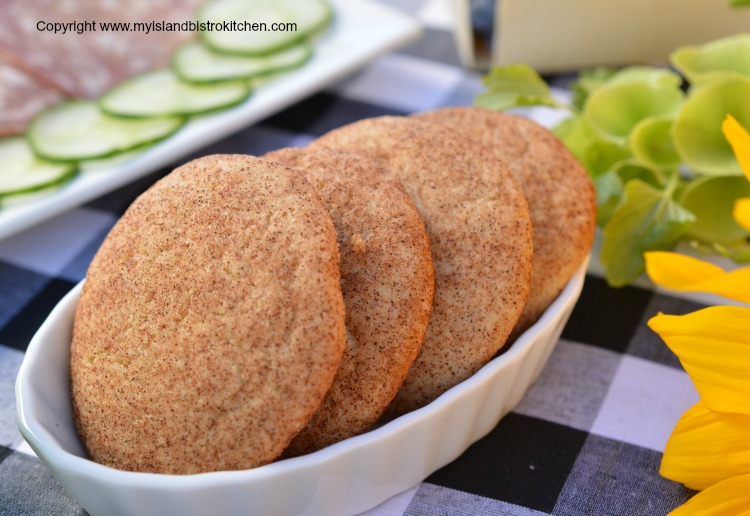
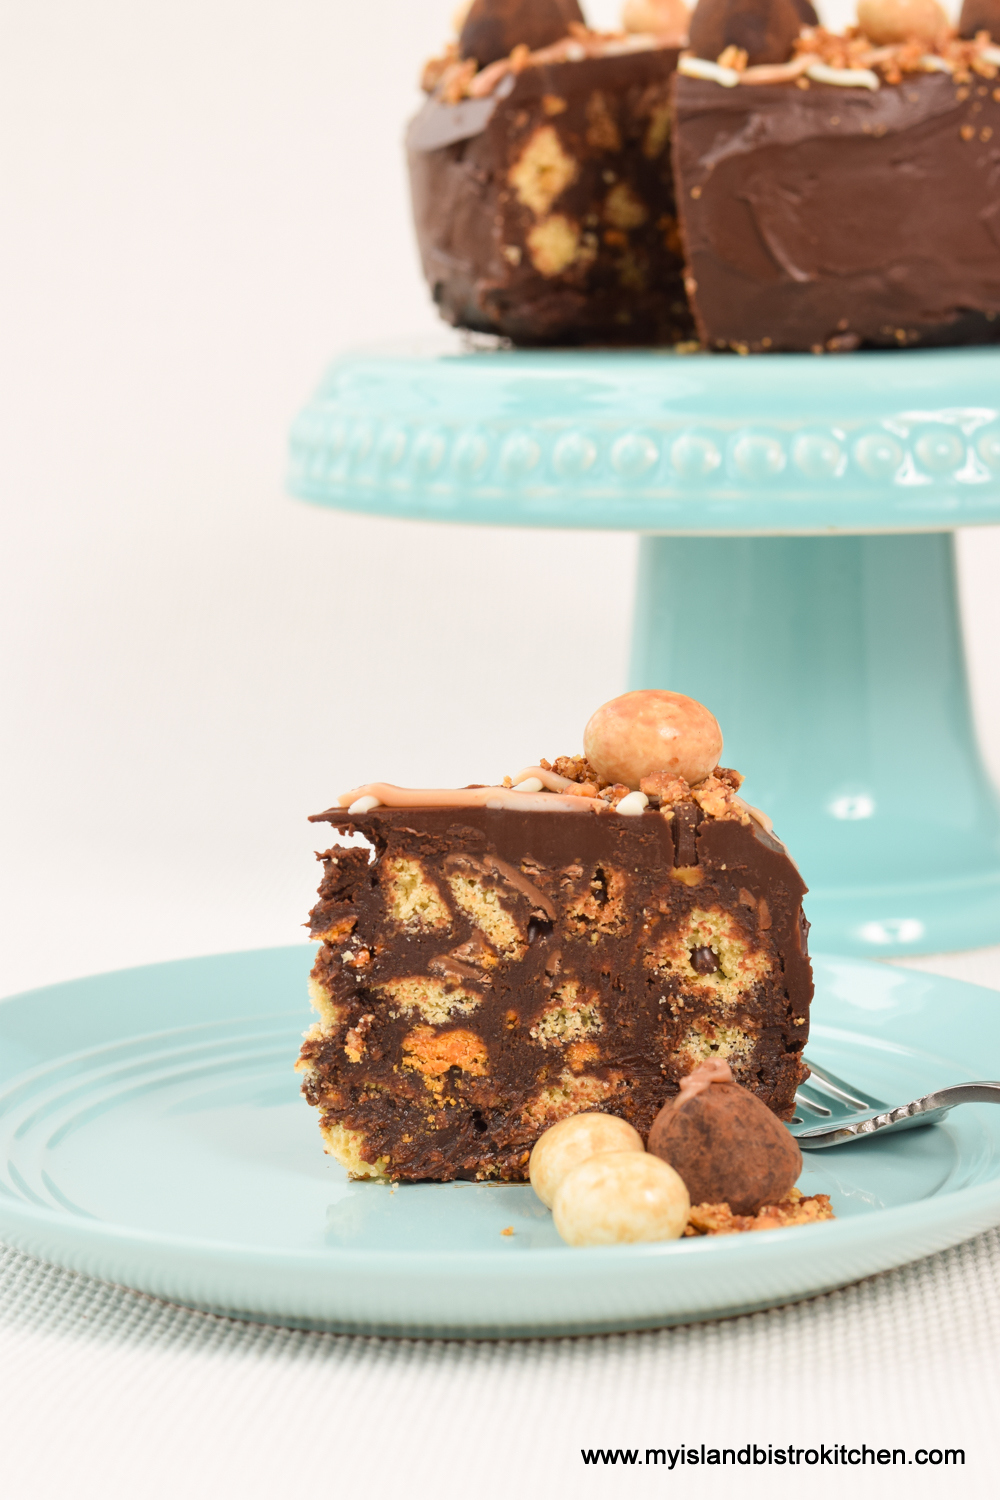
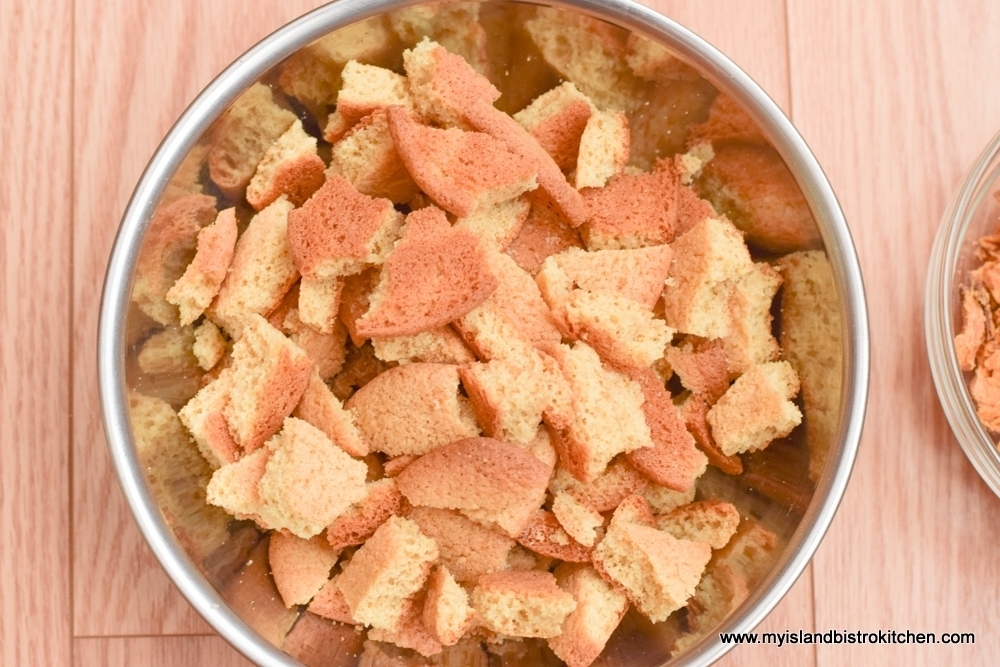
It’s really important to use crisp, not soft and chewy, cookies in this recipe as the cookies have to be able to stand up to being tossed with the chocolate ganache and packed into the pan without being broken into unrecognizable crumbs or becoming soggy. They are meant to give a crunchy texture to the cake. Break up the cookies by hand, not by food processor, into bite-sized chunks. Using a food processor will chop them up too fine and result in crumbs. You want to see actual chunks of cookies (er, biscuits!) in the cake. The photo below shows the size of the cookie chunks I used in the cake.
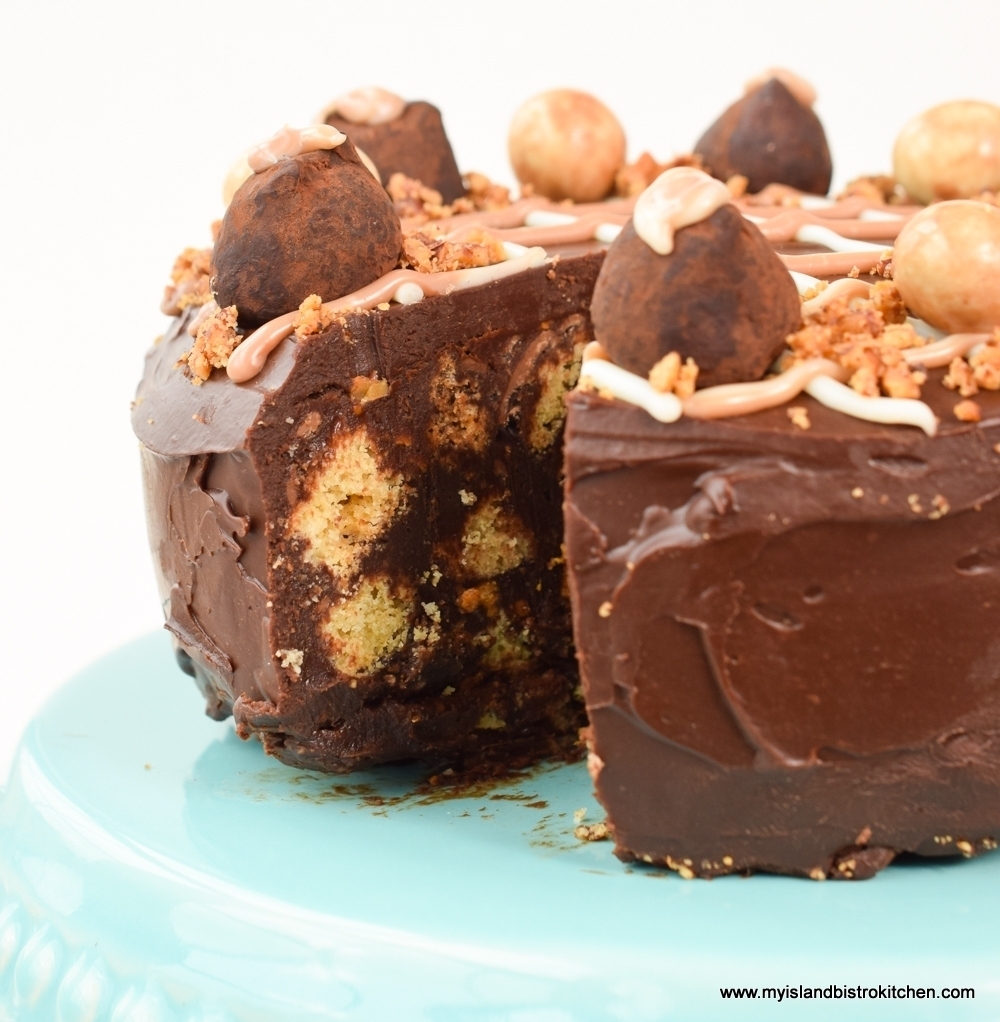
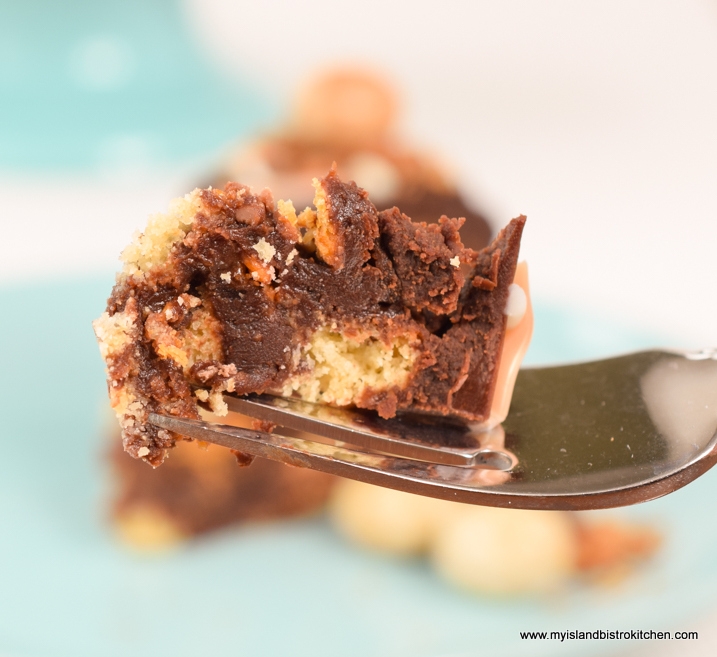
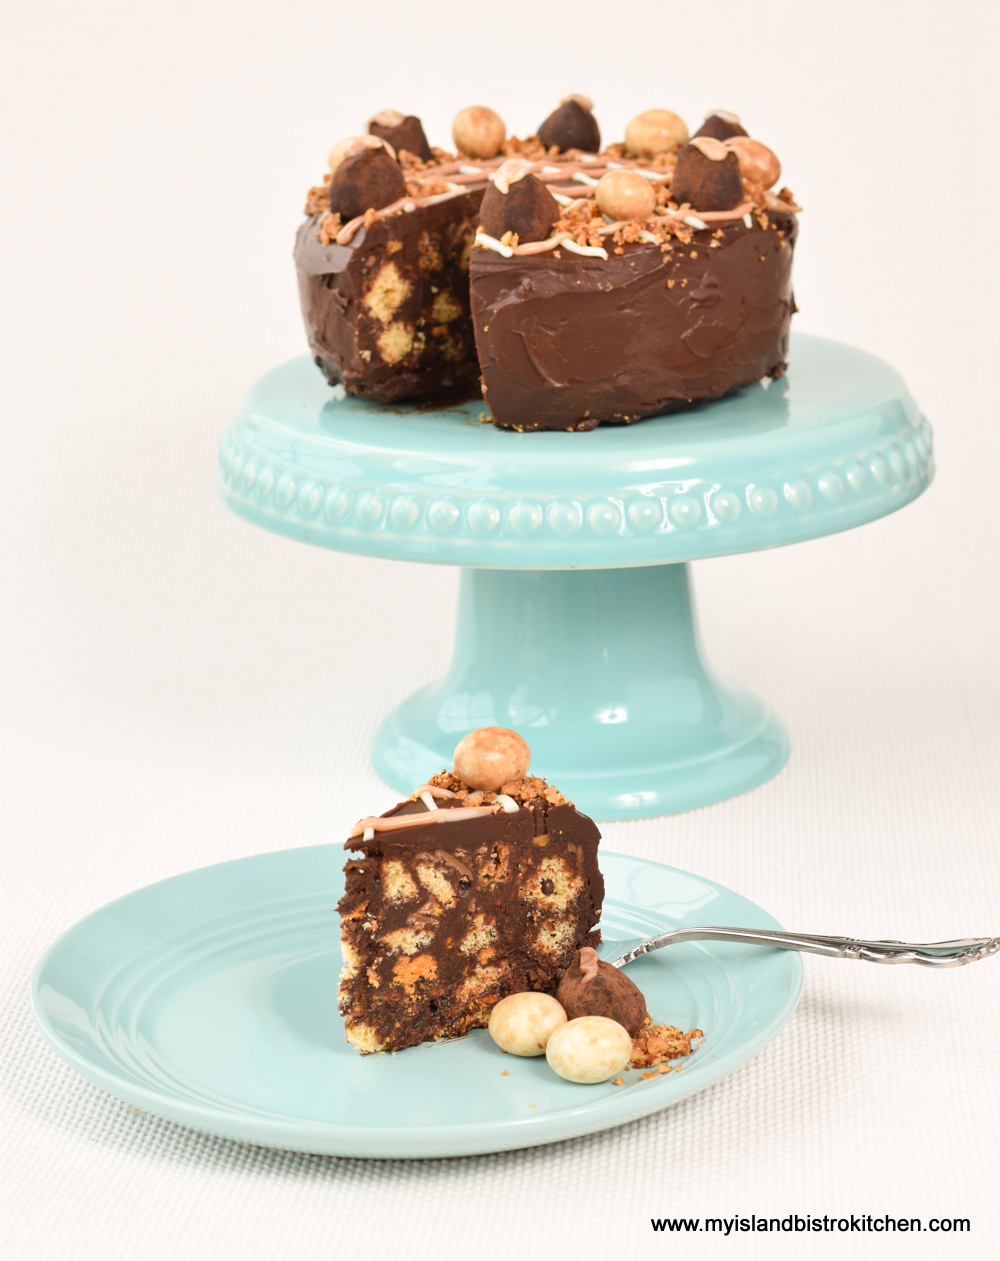
The photo below demonstrates how the cookies and chocolate bar chunks are visible in the finished cake.
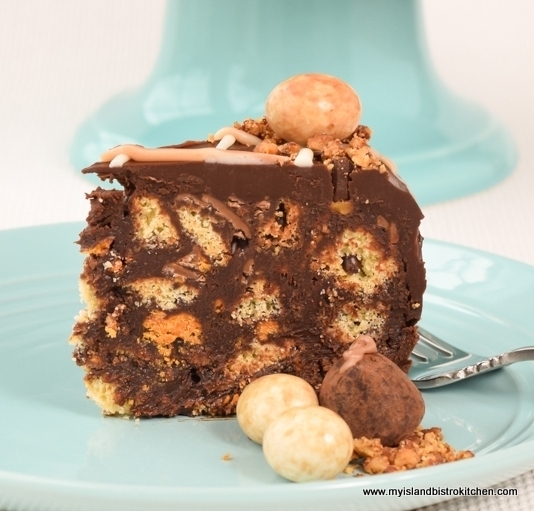
I used crisp and crunchy Butterfinger chocolate bars in the recipe instead of using all cookies for the ingredients. I chose the Butterfinger bars because their label said they were gluten-free and also because I really like this bar and it is crunchy enough to remain intact in the cake. This added extra flavour and crunch and made the cake just a bit more interesting. If, however, you wish not to add chocolate bars to the cake, simply replace the 6 oz called for with that weight of additional cookies, either more Digestives or some Rich Tea Biscuits (or, for the gluten-free version, more gluten-free Snickerdoodles).
A good quality dark chocolate is needed for this recipe because it is a huge ingredient in the cake and ganache glaze and you really taste the properties of the chocolate in the ganache – don’t compromise on this ingredient. If you are making a gluten-free version of the cake, be sure to check the package label on the chocolate to ensure that it contains no trace of wheat because, as I discovered, some packages do say the chocolate contains, may contain, or may have been in contact with wheat.
Biscuit Cake is traditionally made with golden syrup which I could not source locally so I substituted amber corn syrup with success. I also added one medium-sized egg as a binder for the ingredients. Not all Biscuit Cakes call for an egg as an ingredient but I think it adds to, and helps stabilize, the texture of the ganache in the cake.
Adding the chocolate liqueur is optional but it really does add a dimension of deeper flavour. If you’re going to have an extravagant “death by chocolate” cake experience, you might as well go all the way!
Some Biscuit Cake recipes call for additional ingredients like raisins, nuts, and dried fruit. I don’t add those to my cake because, to me, that’s taking away from a Biscuit Cake and moving it more to a non-baked fruit cake. And, I don’t think the cake needs these ingredients – this, of course, is a personal preference.
The easiest pan to use for this recipe is the 6” round springform pan (3” deep) because it makes it so easy to unmold the cake. Line the bottom and sides of the pan with parchment paper to facilitate the removal of the cake from the pan. I recommend using a separate circle of parchment for the pan bottom and one long continuous strip of parchment to go around the sides of the pan. This is recommended over simply cutting a large piece of parchment paper and squashing it into the pan which will result in uneven nooks, crannies, and wrinkles into which the batter can escape. This will cause the cake to have an uneven appearance when unmolded.
If you don’t have a small springform pan, other pans (e.g., a non-springform 6” round pan (3” deep) or a 6”x9”x3″ loaf pan) can be used. However, the pan will need to be lined such that the liner gives “handles” with which to lift the cake from the pan since the sides of the pan will not spring open for easy removal. For example, you might line the pan with plastic wrap, leaving enough excess that it could be used to lift the cake from the pan. The cake mixture is likely to have cooled enough by this point that it is safe to pack it into a plastic wrap lined pan. However, if in doubt, I’d suggest lining the plastic wrapped pan with parchment paper so the cake is not in direct contact with the plastic wrap.

My preference, when preparing the chocolate ganache for the cake itself, is to use a double boiler or, if you don’t have one, a heatproof bowl over a pot of simmering water. I find this gives greater control and less risk of scorching the ingredients which could occur if heated over direct heat. It’s important to let this ganache cool for about 10 minutes before mixing it into the cookie and chocolate bar mixture because a really hot mixture will melt the chocolate on the Butterfinger bars thus losing that texture and it may cause even the most sturdy of cookies to become soggy. Cover the pan with plastic wrap secured with an elastic band. Refrigerate the cake for at least 3 hours to let it set, then unmold it to a serving plate.
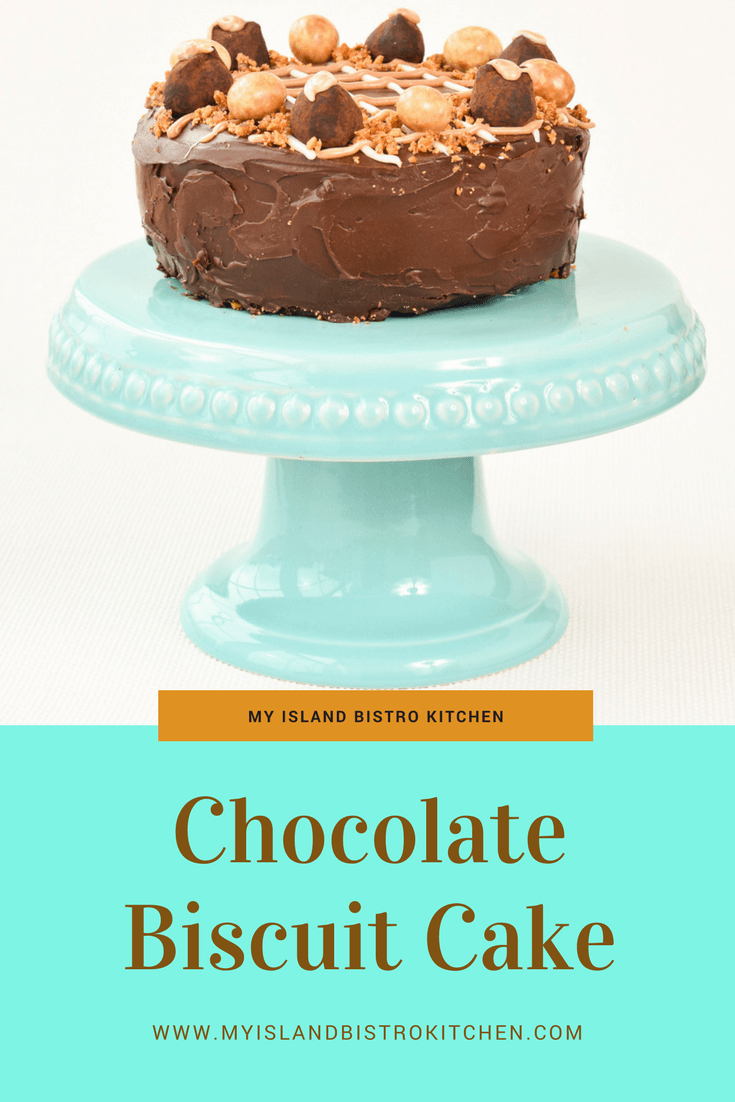
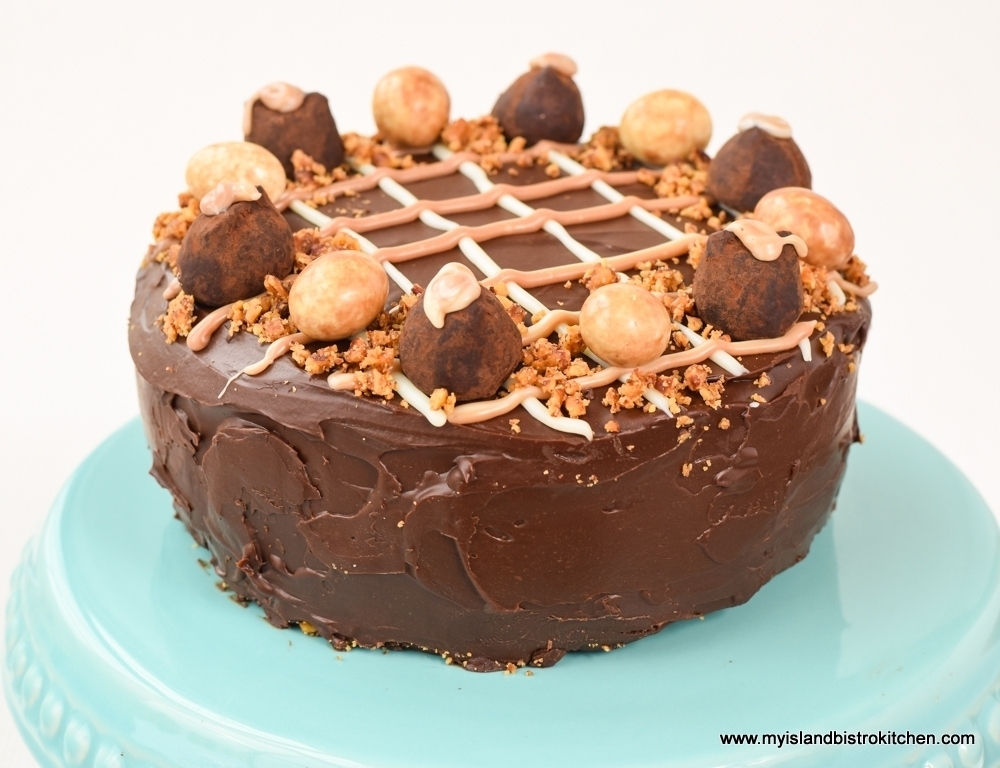
The chocolate for the ganache glaze is chopped a bit finer than that needed for the ganache in the cake. The reason it needs to be a bit smaller is because the hot whipping cream mixture is used to melt the chocolate, off heat, and smaller pieces will melt easier and faster. The chocolate does not, however, need to be chopped super fine for this. After the hot whipping cream has been poured over the chocolate and let stand for 3-5 minutes, give the mixture a good stir. To make the ganache silky smooth, I recommend using a hand-held immersion blender. After letting the ganache sit for 12-15 minutes to cool slightly so it does not melt the cake, simply pour it over the top of the cake, letting the glaze run down the sides. Don’t worry about getting the ganache glaze perfectly smooth on the sides – it’s not fondant and imperfections are perfectly fine on this cake! Using an offset spatula or a dinner knife, spread the ganache so it covers the top and sides of the cake. Refrigerate for at least an hour before cutting and serving the cake.
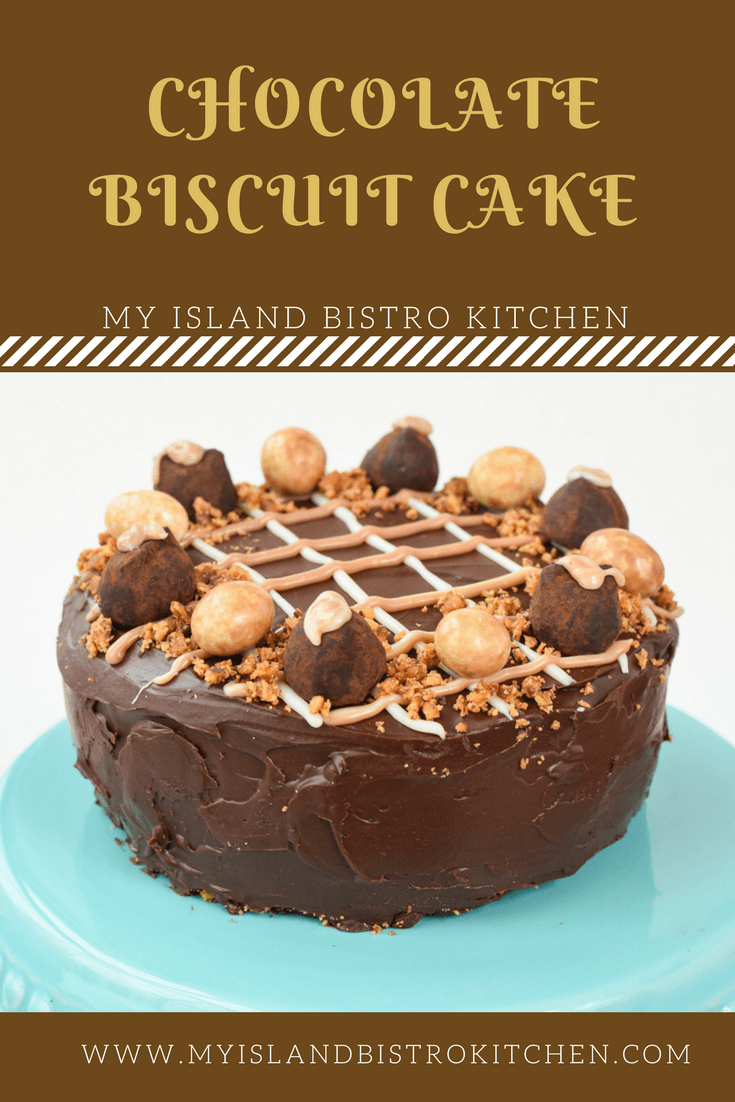
Serve this delectable cake with just the plain ganache glaze or decorate as desired.
While it may sound like a stretch to be able to get 12 servings from a 6” cake, this Chocolate Biscuit Cake is very rich so small pieces per serving will suffice!
What a delightful decadent treat!

[Printable recipe follows at end of post]
Chocolate Biscuit Cake
Cake:
8 oz high quality dark chocolate, coarsely chopped
8 oz Digestive cookies (such as McVities) or, to make the cake gluten-free, 8 oz of My Island Bistro Kitchen’s Gluten-free Snickerdoodle cookies, broken into chunks by hand
6 oz Butterfinger Bars, broken or chopped into chunks
½ cup butter (no substitutes)
3 tbsp whipping cream (35%M.F.)
½ cup amber corn syrup
1 medium-sized egg, lightly beaten
2 tbsp chocolate liqueur (optional)
Chocolate Ganache Glaze:
6 oz dark chocolate, coarsely chopped
2/3 cup whipping cream (35%M.F.)
2 tbsp butter (no substitutes)
1½ tbsp chocolate liqueur (optional)
Method:
Cake: Prepare 6” springform pan (3” deep) by lining bottom with a circle of parchment paper and lining the sides of the pan with a long continuous strip of parchment paper.
Coarsely chop the chocolate. Set aside.
In large, heatproof bowl, break up the cookies, by hand, into bite-sized chunks. Do the same for the Butterfinger bars, using a knife, if necessary to break up the crisp bars. Gently toss the cookies and chocolate bars together.
On cooktop, in top of double boiler over simmering water, melt the butter. When the butter is about half melted, whisk in the whipping cream, corn syrup, and slightly beaten egg. Stir in the 8 oz of coarsely chopped chocolate until it is melted. Remove from heat and stir in the chocolate liqueur. Cool for approximately 10 minutes.
Pour the slightly cooled chocolate mixture over the broken cookies and chocolate bar chunks. Stir gently until the mixture is coated with chocolate, trying not to further break up the cookies and bars.
Transfer mixture to the prepared pan and gently pack mixture into the pan. Using an offset spatula, or a dinner knife, smooth the top of the cake as best possible. Cover pan with plastic wrap secured with an elastic band. Refrigerate for at least 3 hours.
Prepare Chocolate Ganache Glaze as follows.
Chocolate Ganache Glaze: Chop the 6 oz dark chocolate into small chunks and place in a heatproof bowl.
In small, heavy-bottomed saucepan, over medium heat, bring the whipping cream and butter just to the boiling point, stirring to prevent scorching. Pour the hot cream over the chocolate pieces, tilting and swirling the bowl to ensure all the chocolate is covered with the cream. Add the chocolate liqueur. Let stand 3-5 minutes to allow the hot cream to melt the chocolate. Stir. Using a hand-held immersion blender, blend the mixture just until all the chocolate is smooth and no chocolate chunks remain.
Let ganache stand for 12-15 minutes. Meanwhile, unmold cake and transfer to serving plate. Pour the slightly cooled ganache over the cake, letting the ganache drip down the sides. Use an offset spatula, or knife, spread the ganache over top and sides of cake. Refrigerate for about an hour to set.
Serve cake plain or decorate as desired.
Yield: Apx. 12 servings
Chocolate Biscuit Cake
Ingredients
Cake:
- 8 oz high quality dark chocolate coarsely chopped
- 8 oz Digestive cookies such as McVities or, to make the cake gluten-free, 8 oz of My Island Bistro Kitchen’s Gluten-free Snickerdoodle cookies, broken into chunks by hand
- 6 oz Butterfinger Bars broken or chopped into chunks
- ½ cup butter no substitutes
- 3 tbsp whipping cream 35%M.F.
- ½ cup amber corn syrup
- 1 medium-sized egg lightly beaten
- 2 tbsp chocolate liqueur optional
Chocolate Ganache Glaze:
- 6 oz dark chocolate coarsely chopped
- 2/3 cup whipping cream 35%M.F.
- 2 tbsp butter no substitutes
- 1½ tbsp chocolate liqueur optional
Instructions
Cake:
-
Prepare 6” springform pan (3” deep) by lining bottom with a circle of parchment paper and lining the sides of the pan with a long continuous strip of parchment paper.
-
Coarsely chop the chocolate. Set aside.
-
In large, heatproof bowl, break up the cookies, by hand, into bite-sized chunks. Do the same for the Butterfinger bars, using a knife, if necessary to break up the crisp bars. Gently toss the cookies and chocolate bars together.
-
On cooktop, in top of double boiler over simmering water, melt the butter. When the butter is about half melted, whisk in the whipping cream, corn syrup, and slightly beaten egg. Stir in the 8 oz of coarsely chopped chocolate until it is melted. Remove from heat and stir in the chocolate liqueur. Cool for approximately 10 minutes.
-
Pour the slightly cooled chocolate mixture over the broken cookies and chocolate bar chunks. Stir gently until the mixture is coated with chocolate, trying not to further break up the cookies and bars.
-
Transfer mixture to the prepared pan and gently pack mixture into the pan. Using an offset spatula, or a dinner knife, smooth the top of the cake as best possible. Cover pan with plastic wrap secured with an elastic band. Refrigerate for at least 3 hours.
-
Prepare Chocolate Ganache Glaze as follows.
Chocolate Ganache Glaze:
-
Chop the 6 oz dark chocolate into small chunks and place in a heatproof bowl.
-
In small, heavy-bottomed saucepan, over medium heat, bring the whipping cream and butter just to the boiling point, stirring to prevent scorching. Pour the hot cream over the chocolate pieces, tilting and swirling the bowl to ensure all the chocolate is covered with the cream. Add the chocolate liqueur. Let stand 3-5 minutes to allow the hot cream to melt the chocolate. Stir. Using a hand-held immersion blender, blend the mixture just until all the chocolate is smooth and no chocolate chunks remain.
-
Let ganache stand for 12-15 minutes. Meanwhile, unmold cake and transfer to serving plate. Pour the slightly cooled ganache over the cake, letting the ganache drip down the sides. Use an offset spatula, or knife, spread the ganache over top and sides of cake. Refrigerate for about an hour to set.
-
Serve cake plain or decorate as desired.
Recipe Notes
Be sure to read the accompanying blog post to this recipe as it gives hints and tips on making this Chocolate Biscuit Cake
Click this link for My Island Bistro Kitchen's GF Snickerdoodle Cookie recipe: Gluten Free Snickerdoodle Cookie Recipe
[Copyright My Island Bistro Kitchen]
If you have made this recipe and enjoyed it and/or wish to share it with your friends and family, please do so on social media but be sure to share the direct link to this posting from my website.
Connect with My Island Bistro Kitchen on Social Media
Join the Facebook page for My Island Bistro Kitchen: https://www.facebook.com/MyIslandBistroKitchen/
Follow “the Bistro” on “X” (formerly Twitter): https://twitter.com/PEIBistro/
See the drool-worthy gallery of mouth-watering food photos from My Island Bistro Kitchen on Instagram: https://www.instagram.com/peibistro/
Follow “the Bistro” on Pinterest at https://www.pinterest.ca/peibistro/ and pin the Pinterest-ready photo found at the end of this post to your favorite Pinterest boards.
PIN ME TO PINTEREST!