Cherry Loaf Recipe

Cherry Loaf
Cherry Loaf

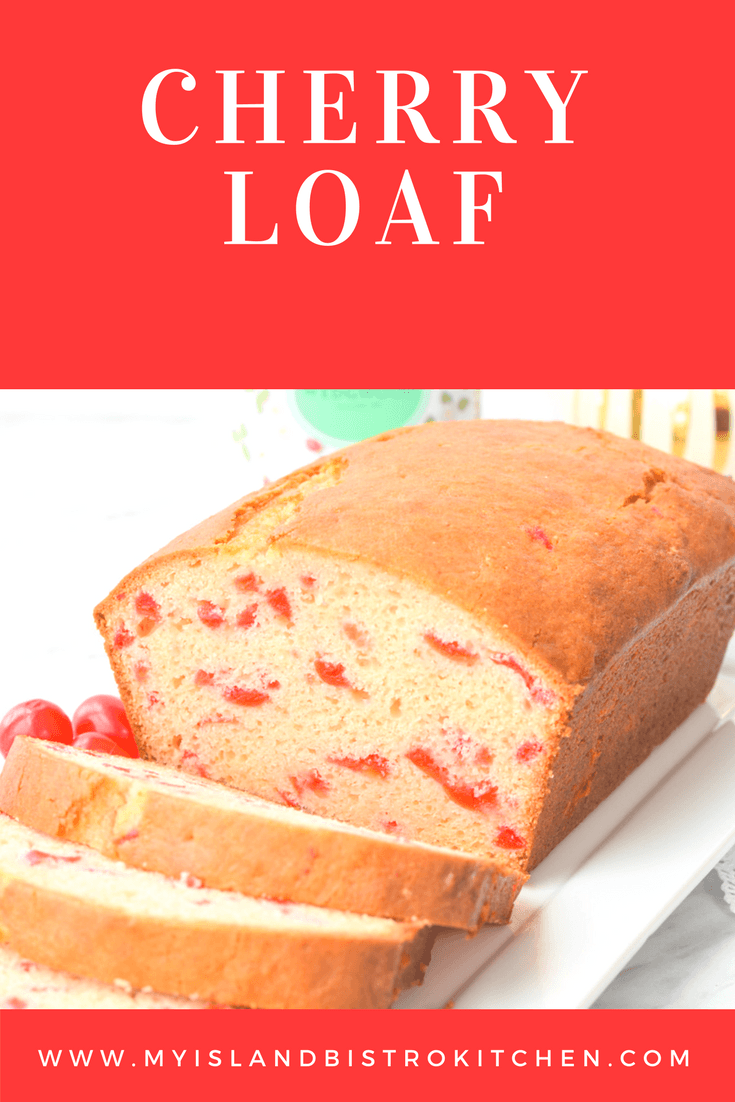
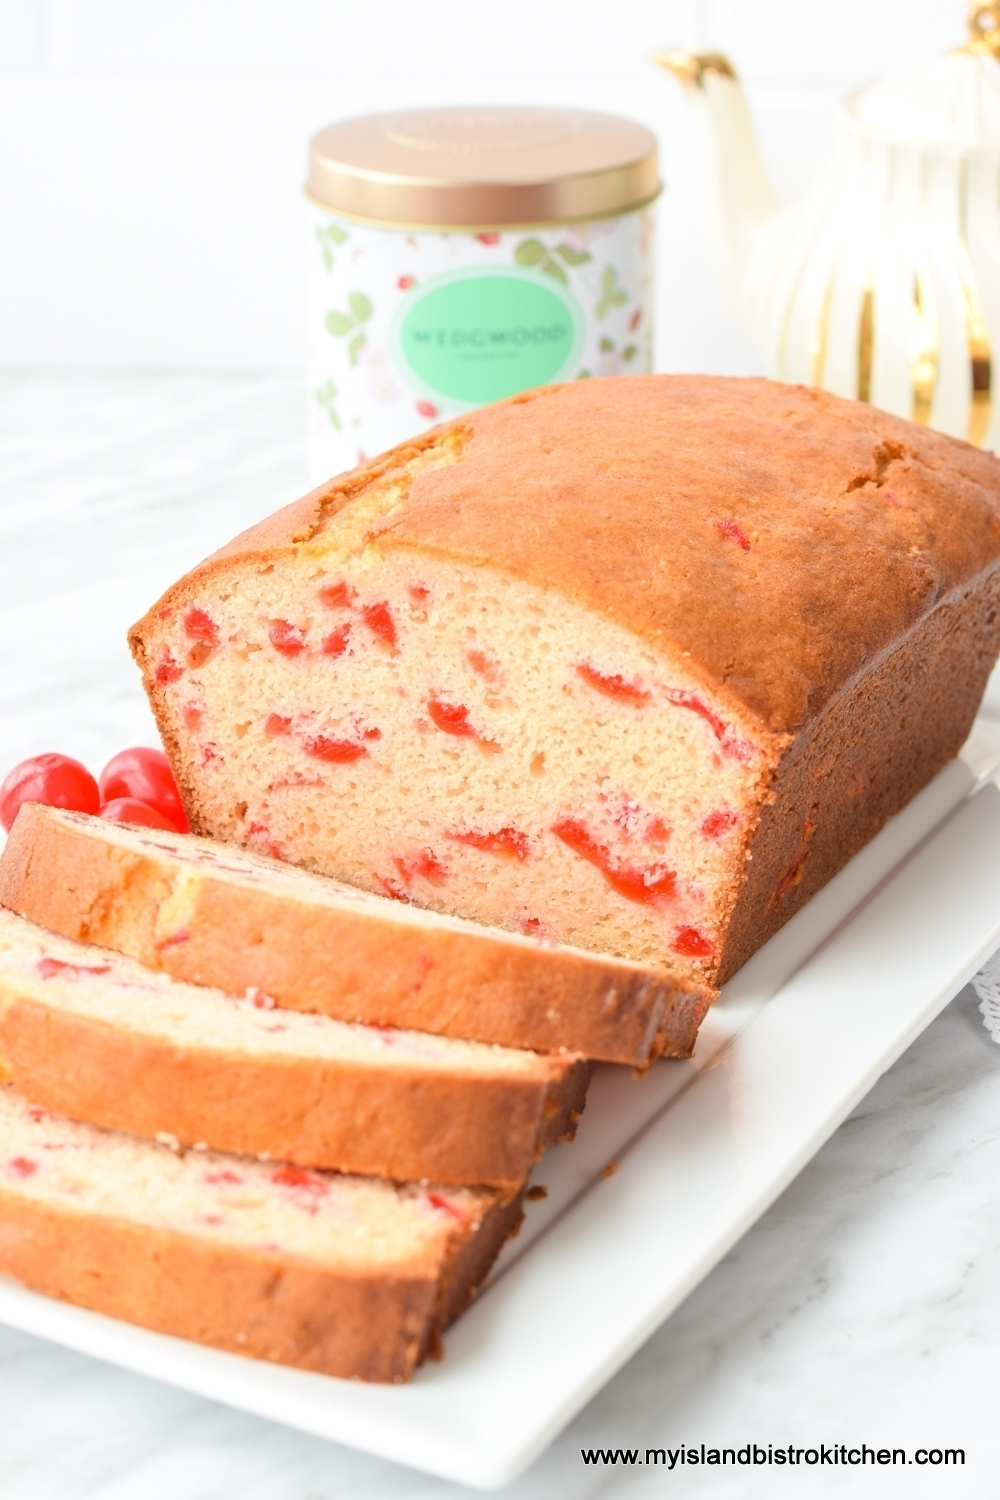
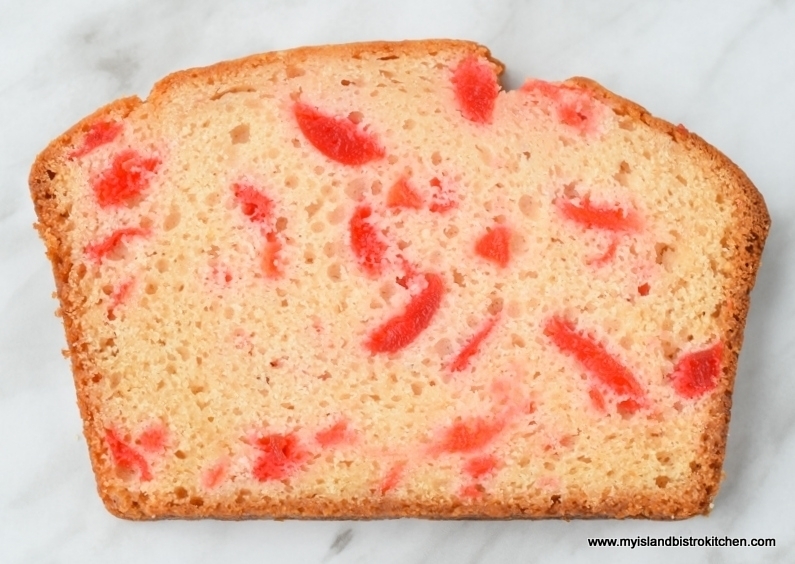
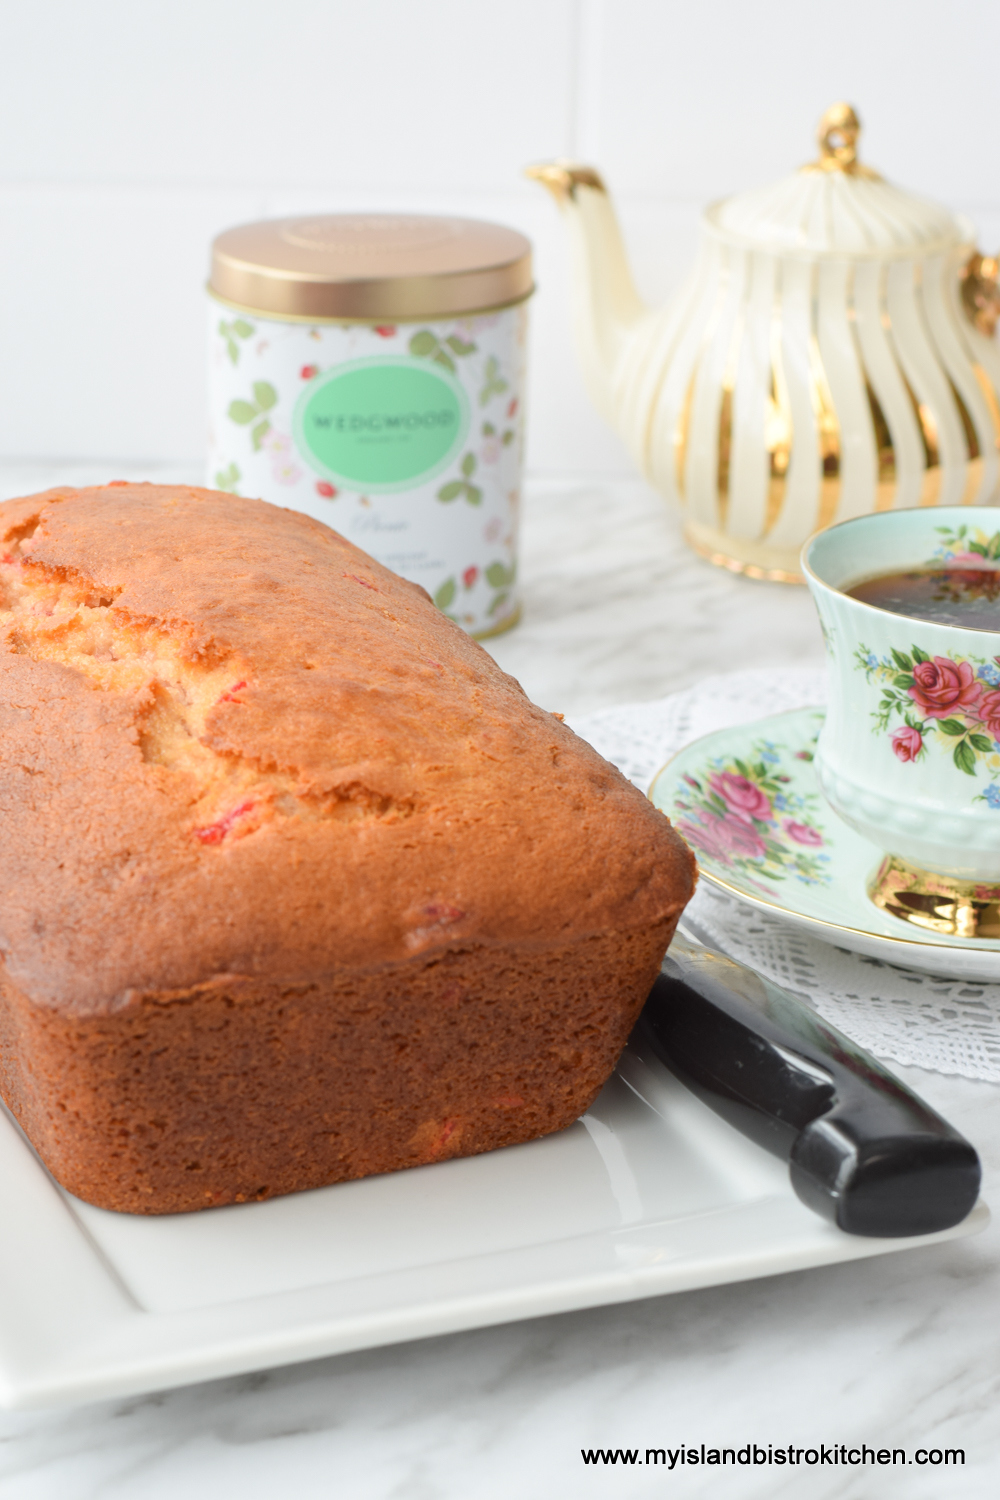
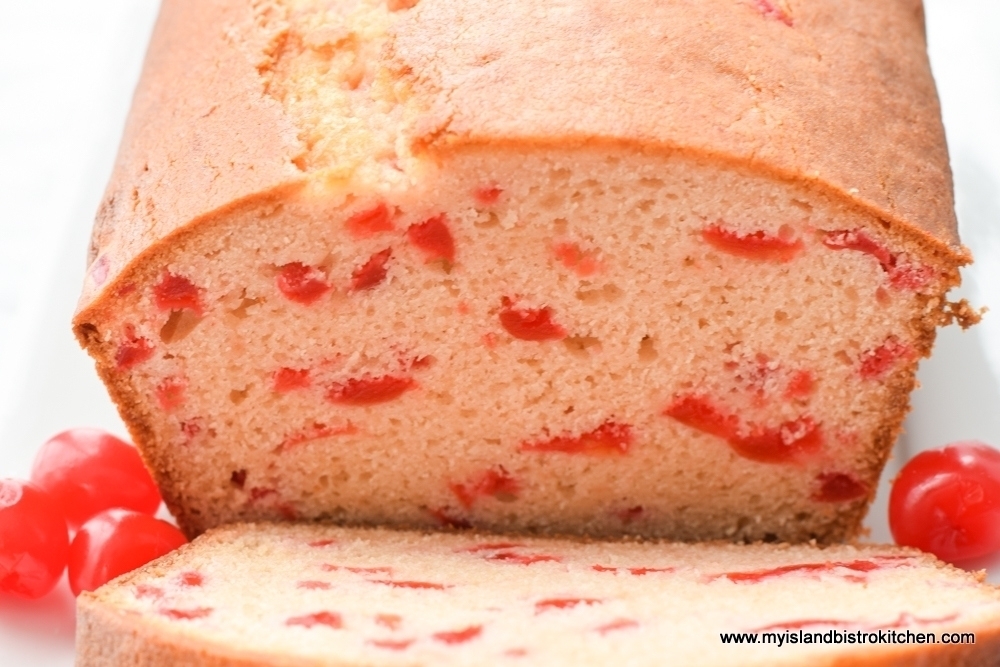
This Cherry Loaf recipe is as pretty as it is tasty, speckled with maraschino cherries that, themselves, lend great flavour to the loaf.

Quick breads, leavened with baking powder, and sometimes soda, are an easy alternative to muffins – but, they’re born of the same family!  They are quick to make (because there is no yeast involved) and are great additions to breakfast, brunch, and coffeebreaks.

There are two methods for making quick breads.

Creaming Method – This method calls for the solid fat product (shortening, butter, or margarine) to be softened at room temperature for 25-30 minutes (not microwaved which can change its properties and can cause it to quickly become liquefied). The fat is then beaten/creamed, either by hand if you are prepared to devote some elbow grease to the process, or by electric mixer on low speed. The sugar is then added and creamed with the fat product until the mixture is a pale or light colour and the texture is airy or fluffy. This “creaming’ process whips air into the batter which allows air pockets (or bubbles) to form (and expand during baking) that, in addition to leavening agents such as baking powder and soda, help the cake or loaf to rise.

The room temperature eggs are then added, one at a time.  Adding the eggs, with this technique, allows them time to, individually and slowly, mix in well with the creamed fat and sugar mixture and limit the possibility of them curdling.  The watery eggs and the fat product don’t naturally mix well, or bind, together (same principle as trying to mix water and oil together).  If all the eggs called for in the recipe are added all at once, they become more than what the fat-sugar mixture can handle at the same time and the ingredients separate and look curdled or scrambled. Adding the eggs slowly allows them to be better incorporated with the fat-sugar mixture.

With the creamed method, the liquid ingredients are combined together in one bowl or measuring cup and the dry ingredients are whisked together in a separate bowl.  The dry ingredients are added to the creamed mixture alternately with the wet ingredients, beginning and ending with the dry ingredients (three additions of dry to two additions of wet ingredients). While the stand mixer should be fitted with the paddle attachment for the creaming method, it’s important not to over-beat the batter once the flour and liquid ingredients have been added because that will cause gluten to form and a loaf with a tough crumb is likely to result. Beat only until all the ingredients are incorporated and the batter is smooth.

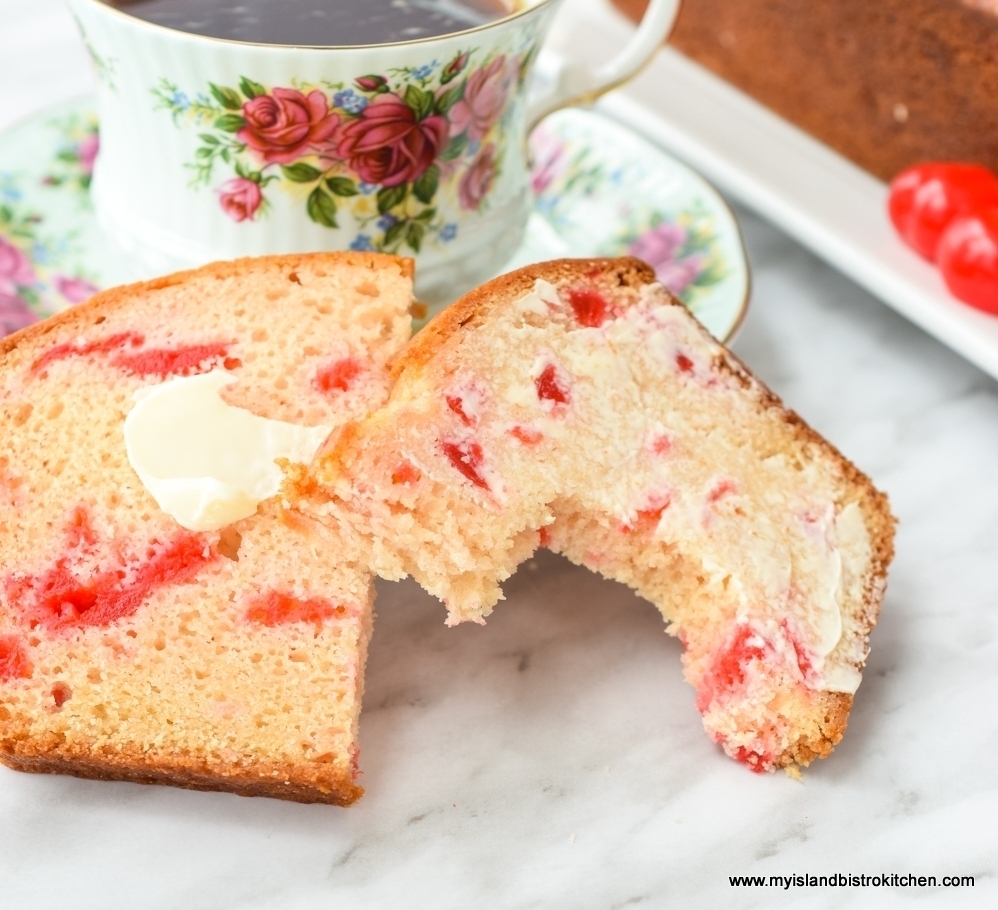
This method will yield a moist texture loaf with a fine crumb (lots of tiny holes of fairly uniform size), reminiscent of a  dense cake texture.

Cherry Loaf
Slice of Cherry Loaf

Muffin Method – This method calls for the dry ingredients to be whisked together well in one bowl.  All the liquid ingredients are mixed in a separate bowl with oil or a fat that has been liquefied (and, often, the sugar is mixed in with the liquid ingredients).  The liquid ingredients are then simply added to the dry ingredients and stirred together just until the ingredients are barely combined.

Because no creaming of butter and sugar is involved in this method, the loaf will not have the added advantage of the air pockets being formed by this process to help the loaf to rise. In this method, the loaf will rely solely on leavening agents (baking powder, soda) to rise. The batter will often be lumpy  which is okay (it will even out on its own during baking) and it’s important not to overmix the batter trying to get it smooth as this will activate the development of gluten that will result in a tough crumb.

For this method, stir the mixture by hand because an electric mixer will overmix the batter. This method will often yield a slightly drier texture (than the creaming method does) with a larger, coarser crumb in the loaf, closely resembling the texture of muffins, hence the name “muffin method”.

The muffin method is commonly used to mix up waffles and pancakes as well.

Cherry Loaf
Cherry Loaf

My recipe for Cherry Loaf uses the creamed method because I want a delicate, refined texture in this particular loaf.

Cherry Loaf
Cherry Loaf

All ingredients should be at room temperature for about 25-30 minutes before mixing the batter.  The ingredients blend better if they are at room temperature. If you think of nice soft butter or shortening being hit with cold eggs or milk, it’s obvious that the ingredients will simply clump together rather than blend in well. The result will be a loaf that does not have the best texture possible.

There is a choice of fat product in this loaf – either shortening, butter, or margarine will yield a good loaf.  Butter, however, will obviously give the most flavor 😉

This loaf calls for maraschino cherries.  These are the best option for this loaf because they are soft and beautifully bright colored.  Dried cherries are too chewy and coarse and will not create the lovely red-dotted speckles throughout the loaf.  Maraschino cherries, however, are wet and if they are not blotted dry, they will add too much excess moisture to the loaf.  I recommend blotting the cherries with a paper towel, cutting them, and blotting them again.  The idea is not to dry them out but, rather, to remove the excess moisture.

Cherry Loaf
Cherry Loaf

[Printable recipe follows at end of posting]

Cherry Loaf

Ingredients:

1/3 cup shortening, butter, or margarine
¾ cup granulated sugar
¼ cup brown sugar, lightly packed
2 large eggs, room temperature

2/3 cup milk, room temperature
1½ tbsp orange juice, room temperature
2½ tbsp maraschino cherry juice, room temperature
1 tsp vanilla
¼ tsp almond flavouring

2¼ cups all-purpose flour
2 tsp baking powder
¼ tsp baking soda
¼ tsp salt
¾ cup maraschino cherries, well-drained, blotted dry, and coarsely chopped

Method:

Bring shortening, butter, or margarine, eggs, milk, and orange and maraschino cherry juices to room temperature approximately 25-30 minutes before preparing batter.

Remove cherries from their juice and, using paper towel, blot them dry.  Cut up cherries and blot again on paper towel to remove the excess moisture. Set aside.

Preheat oven to 350°F.  Grease 9”x5”x3” loaf pan.

In 1-cup measuring cup, or small bowl, combine the milk, orange juice, cherry juice, vanilla, and almond flavouring. Stir to mix.

In medium-sized bowl, combine the flour, baking powder, baking soda, and salt. Whisk together well.

In bowl of stand mixer fitted with paddle attachment and on low speed, cream the shortening, butter, or margarine well.  Gradually add the granulated sugar, then the brown sugar.  Increase mixer speed to medium and beat until ingredients are pale-colored and mixture has an airy/fluffy texture. Stop mixer, as necessary, to scrape bowl with rubber spatula to ensure the ingredients are evenly incorporated.

Add the eggs, one at a time, beating well after each addition and using the spatula, as necessary, to scrape sides of bowl.

Add the flour mixture alternately with the milk mixture, starting and ending with the dry ingredients (three additions of dry ingredients with two additions of wet ingredients).  Periodically scrape sides of bowl with spatula to ensure all ingredients are combined. Do not overmix.

Remove bowl from mixer stand and stir in the cherries by hand, just until they are blended in.

Transfer batter to prepared pan and, using a knife, smooth the top of the loaf.  Bake for approximately 1 hour or until cake tester inserted into center of loaf comes out clean. If loaf starts to brown, it may be loosely tented with tin foil after about 45 minutes of baking; ensure loaf top is completely set before allowing the tin foil to touch it as it will peel off the top of the loaf. Let loaf rest in pan for 10 minutes then turn out on to wire rack to cool completely before cutting.

Yield:  One loaf, 14 slices (sliced approximately ½” thick)

Notes:  Loaf is best made the day before it is needed.  Let cool completely on wire rack then place in airtight plastic bag and store in refrigerator overnight to allow the flavours time to blend and the loaf to soften.  Loaf freezes well.

Cherry Loaf

This flavourful cherry loaf is an easy-to-make moist quick bread that is speckled with colorful maraschino cherries

Course Snack
Cuisine American
Servings 14
My Island Bistro Kitchen My Island Bistro Kitchen

Ingredients

  • 1/3 cup shortening, butter, or margarine
  • 3/4 cup granulated sugar
  • 1/4 cup brown sugar, lightly packed
  • 2 large eggs, room temperature
  • 2/3 cup milk, room temperature
  • 1 1/2 tbsp orange juice, room temperature
  • 2 1/2 tbsp maraschino cherry juice, room temperature
  • 1 tsp vanilla
  • 1/4 tsp almond flavouring
  • 2 1/4 cups all-purpose flour
  • 2 tsp baking powder
  • 1/4 tsp baking soda
  • 1/4 tsp salt
  • 3/4 cup maraschino cherries, well-drained, blotted dry, and coarsely chopped

Instructions

  1. Bring shortening, butter, or margarine, eggs, milk, and orange and maraschino cherry juices to room temperature approximately 25-30 minutes before preparing batter.
  2. Remove cherries from their juice and, using paper towel, blot them dry. Cut up cherries and blot again on paper towel to remove the excess moisture. Set aside.
  3. Preheat oven to 350°F. Grease 9”x5”x3” loaf pan.
  4. In 1-cup measuring cup, or small bowl, combine the milk, orange juice, cherry juice, vanilla, and almond flavouring. Stir to mix.
  5. In medium-sized bowl, combine the flour, baking powder, baking soda, and salt. Whisk together well.
  6. In bowl of stand mixer fitted with paddle attachment and on low speed, cream the shortening, butter, or margarine well. Gradually add the granulated sugar, then the brown sugar. Increase mixer speed to medium and beat until ingredients are pale-colored and mixture has an airy/fluffy texture. Stop mixer, as necessary, to scrape bowl with rubber spatula to ensure the ingredients are evenly incorporated.
  7. Add the eggs, one at a time, beating well after each addition and using the spatula, as necessary, to scrape sides of bowl.
  8. Add the flour mixture alternately with the milk mixture, starting and ending with the dry ingredients (three additions of dry ingredients with two additions of wet ingredients). Periodically scrape sides of bowl with spatula to ensure all ingredients are combined. Do not overmix.
  9. Remove bowl from mixer stand and stir in the cherries by hand, just until they are blended in.
  10. Transfer batter to prepared pan and, using a knife, smooth the top of the loaf. Bake for approximately 1 hour or until cake tester inserted into center of loaf comes out clean. If loaf starts to brown, it may be loosely tented with tin foil after about 45 minutes of baking; ensure loaf top is completely set before allowing the tin foil to touch it as it will peel off the top of the loaf. Let loaf rest in pan for 10 minutes then turn out on to wire rack to cool completely before cutting.

Recipe Notes

Notes: Loaf is best made the day before it is needed. Let cool completely on wire rack then place in airtight plastic bag and store in refrigerator overnight to allow the flavours time to blend and the loaf to soften. Loaf freezes well.


[Copyright My Island Bistro Kitchen]

For other quick bread recipes from My Island Bistro Kitchen, click on the links below:

Classic Banana Bread
Orange Date and Spice Loaf
Cranberry Orange Eggnog Loaf
Blueberry Quick Bread
Green Tomato Quick Bread
Strawberry Rhubarb Quick Bread
Cinnamon Sweet Bread
Glazed Lemon Pecan Sweet Bread

If you have made this recipe and enjoyed it and/or wish to share it with your friends and family, please do so on social media but be sure to share the direct link to this posting from my website.

Connect with My Island Bistro Kitchen on Social Media

Join the Facebook page for My Island Bistro Kitchen:  https://www.facebook.com/MyIslandBistroKitchen/

Follow “the Bistro” on “X” (formerly Twitter)https://twitter.com/PEIBistro/

See the drool-worthy gallery of mouth-watering food photos from My Island Bistro Kitchen on Instagramhttps://www.instagram.com/peibistro/

Follow “the Bistro” on Pinterest at https://www.pinterest.ca/peibistro/ and pin the Pinterest-ready photo found at the end of this post to your favorite Pinterest boards.

Pin Me To Pinterest!
Cherry Loaf
Cherry Loaf


Aw, Shucks! The Merroir of PEI Malpeque Oysters

PEI Malpeque Oysters

Prince Edward Island is well-known for its variety of high quality shellfish – think lobster, mussels, and oysters, in particular.  Today, however, my blog posting is all about the world-famous PEI Malpeque oysters. According to the PEI Government website (https://www.princeedwardisland.ca/en/information/agriculture-and-fisheries/oysters ), the Island is Canada’s second largest oyster producing province and is the largest oyster producing province in the Atlantic region. It’s not uncommon in my travels to find PEI Malpeque Oysters on a restaurant menu.  No matter the variety or brand of oysters from PEI, or what part of the Island they are fished or farmed, they are generally all referred to as “Malpeques”.  How that came to be is, itself, an interesting story.

PEI oysters have a long history with the government issuing leases for oyster fishing back as far as the mid-1800s to those wishing to fish oysters from the ocean seabed.  The oysters were made famous at the 1900 Paris World Fair where, in an oyster-tasting contest, they were crowned the world’s best oysters. The oysters were simply named for Malpeque Bay on the Island’s north shore from where the winning oysters were fished.

However, the oyster industry on PEI was stricken in 1915 when disease wiped out about 90% of the Island’s oyster population. Miraculously, however, the oysters in Malpeque Bay survived.  Seed (which is basically a tiny version of an adult oyster) from these oysters was gathered and spread throughout other bodies of water around the Island and the oyster industry rebounded. To this day, over 100 years later, all oysters produced on PEI are considered to be direct descendants of oysters from Malpeque Bay. So, that’s why all PEI oysters, regardless from what part of the Island they come, or what variety or brand they are, are called “Malpeques”.  Who knew PEI oysters had lineage and a family tree! So, while there is one species – the Malpeques – there can be any number of varieties and brands. A little more about the varieties of “Malpeques” a bit later.

To find out more about the oyster industry on PEI, I paid a visit to the Raspberry Point Oyster Co., one of the Island’s largest oyster growing operators, processors, and exporters.  At the company’s hub operations center in Bayview near Cavendish on PEI’s north shore, I caught up with James Power, oyster connoisseur and manager of the Raspberry Point Oyster Co.

James Power, Manager, Raspberry Point Oyster Co., PEI

James lives and breathes oysters and you would be hard pressed to find anyone any more passionate about the oyster industry than James.  And, with good reason.  Oyster sales are brisk for the Raspberry Point Oyster Co., growing year over year.  James tells me that more than 10M oysters are cultured annually from the company’s farming operations in New London Bay, Rustico, and Oyster Bed Bridge/Rustico Bay. While the majority (about 90%) of their sales are in North America (with Montreal, Toronto, and Boston accounting for about 75% of sales), they regularly ship internationally all over the world that includes weekly shipments to the Netherlands as well as regular shipments to places like Belgium, France, Hong Kong, China, and Singapore. Small wonder, then, why it’s generally not too surprising to find PEI oysters on restaurant menus in all corners of the world!

Both oyster fishing and oyster farming exist on PEI.  The traditional method of oyster fishing is done through the use of manually-operated large wooden tongs.

Oyster Fishing on PEI

If you travel around the shores, bays, rivers, and estuaries of PEI, a common sight from spring to fall will be dozens of little dories each manned by a lone fisher using long wooden tongs with rakes at the ends to scoop up the oysters. These are independent local oyster fishers who buy licenses from the federal government allowing them to fish wild oysters on any public fishing grounds.

Oyster Fishing
Oyster Fishing

These oysters are known as bottom culture oysters that are slow to mature taking, on average, 5-7 years to grow to the desired market size of 3” – 3½“.  Bottom culture oysters grow slowly because there is less natural food available to them. Oysters harvested by these small independent fishers are sold to oyster processing plants.

Oyster Fishing in Summerside, PEI

The other method of producing oysters is to raise, culture, or grow the oysters, a practice commonly known as “oyster farming” and that’s the method used by large commercial growers for mass production needed to meet demands from around the world. Growers lease ground, that is not public fishing ground, in which to grow their oysters.

There are two methods of oyster aquaculture – bottom culture and off-bottom (sometimes known as top, floating, or surface culture) and Raspberry Point Oyster Co. uses both methods. With bottom culture oysters, grown in water depth between 3’ and 8’, the grower spreads the oyster seed on the seabed. James says their top culture oysters are grown in water that is between 8’ and 15’ deep.  The oyster seed is purchased from hatcheries and from oyster farmers who catch wild spat, or larvae in collectors like the ones in the photo below. Once the oysters are big enough, they will be transferred to netted bags to grow, safe from predators like starfish and crabs.

Oyster Spat Collectors

All oysters at Raspberry Point Oyster Co. are started as top culture in floating mesh bags and then some are moved to bottom culture areas. The type of culture (bottom or top) used is often chosen on the basis of local growing conditions. Some parts of leased areas are too shallow for top culture and others might have too soft a seabed for bottom culture oysters. Using the two methods of farming, therefore, allows the Raspberry Point Oyster Co. to maximize the growing areas in their leases and also allows oysters to develop with different flavours, colors (they range from brown/white, gray to green), and appearance. Generally, the larger oyster seed is spread on the seabed because the oysters’ advanced size makes it more difficult for crabs and starfish to get at them.

Colors and Textures of PEI Oysters
Colors, Shapes, and Textures of PEI Oysters

When the bottom culture oysters have grown to market size, specialized oyster harvesters that use water pressure, scoop up the oysters.  The oysters come up from the seabed on to an escalator and those that are of the desired size are harvested while ones not quite of sufficient size are returned to the seabed bottom to allow them to continue to grow.  Bottom culture oysters usually take 5-7 years to grow to market size and this is because there is usually less water flow and food on the sea bed than is available for surface culture oysters. Oyster farmers do not need to provide special food for their oysters as the bivalves draw all the necessary nutrients from their seawater habitat along with naturally occurring plankton and plant life.  So long as the mollusks have clean water and care is taken to limit their predators access, oysters will grow naturally on their own.

The other method of growing oysters is top culture, often referred to as surface or floating culture. With advances in oyster growing technology and methods, today’s floating aquaculture speeds up the rate of maturation allowing for top culture oysters to be grown in about 3-5 years.  There is usually more constant water flow as the result of wave action during tidal changes and more natural food supplies nearer the water’s surface so oysters grown as top culture in floating bags just at or under the water surface are able to grow to market size sooner.  Top culture oyster farming involves growing the oysters in mesh bags that float in basket-like cages around the water surface level.

Floating Cage for Top Culture Oysters

The baskets are constructed so that the water is able to flush through, bringing food to the mollusks and keeping them cleaner than those grown in the mud on the seabed bottom. The baskets are regularly flipped and the water flow and waves rock the baskets and chip away, or manicure, the rough edges of the oysters, giving them a more desirable looking shell. This also allows for seaweed, barnacles, and other organisms that find their way into the baskets to be exposed to sunlight and dry out and not become an infestation to the growing oysters. The bags inside the floating baskets also help to protect the oysters against predators. So, if you see rows of these floating cages in a body of water around the Island, you’ll know they’re filled with growing oysters.

Floating Cages of Oysters in New London Bay, PEI

Once oysters, either bottom or top cultures, have reached their market size, they are brought into the processing plant where they are culled, graded for size and shape, washed, counted, boxed, and are shipped to customers around the world.

Oysters Arriving at the Processing Plant
Grading and Sorting Oysters
Washing the Oysters
Washing the Oysters
Quality Controlling the Oysters Just Before They Are Boxed for Shipping
A Box of "Lucky Limes" Oysters from Raspberry Point Oyster Company in PEI
A Box of “Lucky Limes” Oysters from Raspberry Point Oyster Co. in PEI
Inside the Processing Plant at Raspberry Point Oyster Company, Bayview, PEI
Bags of Oysters at the Raspberry Point Oyster Co.
Inside the Cold Storage Room at Raspberry Point Oyster Co. in Bayview, PEI

Because this industry is now year-round, oysters not needed for immediate shipment are put into trays like the ones shown to the left in the photo below and placed back out into shallow water until needed.

Oyster Trays
Oyster Trays

Since they are already graded, counted, and sorted by variety, they can quickly be retrieved and shipped when orders come in year-round.

The barge in the photo below is returning to shore with a load of trays filled with graded and sorted oysters which will soon be on their way somewhere in the world to fill orders!

Barge Returning to Shore with a Load of Oysters Ready for Market
Offloading Oysters Ready for Market

Oysters like cold water but, in PEI’s cold winters, they can’t stay up near the water’s surface where they would freeze. So, for top culture/surface grown oysters, the Raspberry Point Oyster Co. sinks aluminum cages filled with oysters into 15’ – 20’ of water each winter. At the time of writing, the company prepared upwards of 1000 aluminum cages that they filled and sunk with 7000 graded and sorted oysters per cage at the end of November. Locations of cages are marked by a metal pole and the oyster harvesters head out over the ice to retrieve the oysters to fill winter shipments, making the Island’s oyster farming a year-round industry.

Preparing to Saw Through Ice to Retrieve Oyster Cages (Photo submitted by James Power, Raspberry Point Oyster Co.)

Sometimes, the ice is so thick that workers have to use a high-powered saw (shown in photo above) to cut through the thick ice so that tethered divers can dive in and locate the cages and hook them up to a hydraulic lift that will pull them out of the water.

Diving Under the Ice to Retrieve Oyster Cages Sunk for the Winter (Photo Submitted by James Power, Raspberry Point Oyster Co.)
Retrieved Oyster Cage Filled with Oysters Ready for Market (Photo Submitted by James Power, Raspberry Point Oyster Co.)

The oysters are then hauled on a sled towed behind a four-wheeler or, if the ice is sufficiently thick, by a truck, back to the processing and shipping plant.

The varieties of oysters on PEI are often (though not always) named for the body of water in which they are grown. The Raspberry Point Oyster Co. draws its name from a little point of land on the Homestead Trail in nearby Cavendish.  Readers from outside PEI will likely associate the Cavendish name as the setting for famed authoress Lucy Maud Montgomery’s famous Anne of Green Gables series of books. A number of years ago, Scott and Charles Linkletter, the owners of Raspberry Point’s forerunner company, The PEI Oyster Company, had a lease to fish oysters in this area so they renamed the company to the Raspberry Point Oyster Co. Today, still owned and operated by the Linkletter family, Raspberry Point Oyster Co. has six varieties of Malpeque oysters on the market:

  • Raspberry Point – Bearing the company name, this variety of 3” oysters is grown as bottom culture in leases in New London Bay. The Raspberry Point variety is the company’s most popular oyster.
  • Lucky Limes – These are 3” oysters, also bottom grown in a lease along the Homestead Trail in New London Bay. The water in this area is filled with algae and that’s what turns the oyster shells green, thus the “lime” in the name.

    Box of Lucky Lime Variety of Oysters from Raspberry Point Oyster Co.
    Box of Lucky Lime Variety of Oysters from Raspberry Point Oyster Co.
  • Shiny Sea – At 2½“ in size, these are considered to be the “baby brother” of the larger 3” Raspberry Point variety. These bottom cultures are also grown in New London Bay.
  • Pickle Point – These are top-culture oysters as they are grown nearer the water’s surface in floating bags in New London Bay.
  • Daisy Bay – These 3” oysters are top-culture, or surface culture, grown in North Rustico.
  • Irish Point – Considered to be cocktail size oysters, these 2½“ oysters are also surface cultures and are grown in North Rustico.

Controls are in place to ensure sustainability of the Island’s oyster industry. Only so many leases are granted by the government to avoid overfishing.  The mollusks, themselves, help to ensure their species continue to survive as they act as great filters to clean the water of toxins by filtering algae and phytoplankton from the water.

According to James, the nature of the water flow and the shape of the seed oyster will basically determine the final shape of the oyster. While James will say that the perfect oyster is very much an individual’s own taste, he says the perfect shaped oyster, in his opinion, is a rounded tear-drop shape that is 3” long by 2” wide. The perfect flavour should consist of a clean, salty taste and a sweet finish.  The meat should be a little bit, but not too, fatty because nothing should interfere with the natural salty taste.

Power says oysters are like terroir is to wine – the flavour of each variety is built on the content of the bay or stream in which the oysters are grown and each oyster will look and taste a little different from the next one.  Since the oysters are coming from the sea and the French word for sea is “mer”, perhaps the term “merroir”, as some have coined it, might be the best description! Power says true oyster connoisseurs can identify the different flavour profiles in raw oysters.  Oysters grown in waters that have more of a rock base may have a mineral-rich flavour (though none of Raspberry Point oysters have this terroir/merroir) while others grown elsewhere may have a slight vegetable taste picked up from whatever vegetation or algae may be in their water habitat.

Power also says the oyster meat and flavour change with the seasons.  In summer, the oysters are thin and salty – the bivalves are more interested in reproduction than getting fat so keeping their svelte figure is obviously their concern!  In the fall (September – October), the waters are getting colder and the oysters will start building up fat for the cold winter months.  When the water temperature gets down to 5°C, the oysters shut down and hibernate inside their hard shells, living off the fat they built up in the fall. So, if you are eating oysters that come from icy waters, they’re likely to be quite plump and perhaps just a little sweeter.  In the spring, the oysters still stay fat but, as the snow melts, it dilutes the natural salt in the water so the oysters will taste less salty.

Oysters are low in fat, high in protein, and are a good source of iron and zinc.  They are also a source of, amongst others, Vitamins B12 and C along with Thiamin, Magnesium, and Phosphorus.

PEI Oysters
PEI Oysters

Oysters are most often served raw on the half shell on a bed of ice with freshly squeezed lemon or, sometimes, with a peppery shallot mignonette.  Chef Michael Smith often serves oysters with a Bloody Mary Ice seen in the photo below.

Shucked PEI Oysters Served with Bloody Mary Ice

Oysters are shucked using a special short, blunt knife made for this purpose. Power says he believes oysters are popular, especially eaten raw, because they are an all-natural food, not processed or transformed.  Oyster bars are very popular and an emerging trend is to pair oysters with wines, beers, and whiskey. Fresh oysters are available at most fish markets on PEI as well as the larger supermarkets. On PEI, many restaurants serve raw oysters and, at many Fall Flavours Festival events each September, oysters are a staple, like they were at the 2017 “A Taste of Rustico” event where Chef Michael Smith (in photo below) was busy shucking Raspberry Point oysters.

Chef Michael Smith Shucking Raspberry Point Oysters at "Taste of Rustico" Fall Flavours event 2017
Chef Michael Smith Shucking Raspberry Point Oysters at “Taste of Rustico” Fall Flavours event 2017
Raspberry Point Oysters at Taste of Rustico Event 2017

So, the next time you are slurping back one of the plump briny Prince Edward Island oysters, you’ll now know a little bit more about how the Island oysters are produced, the flavour profile of an Island oyster, and you’ll be enjoying a unique terroir (or perhaps it’s “merroir”) taste from waters in and around Prince Edward Island on Canada’s East Coast.

Plump PEI Oysters
Plump PEI Oysters

Pin Me To Pinterest!

Oyster Farming
Oyster Farming