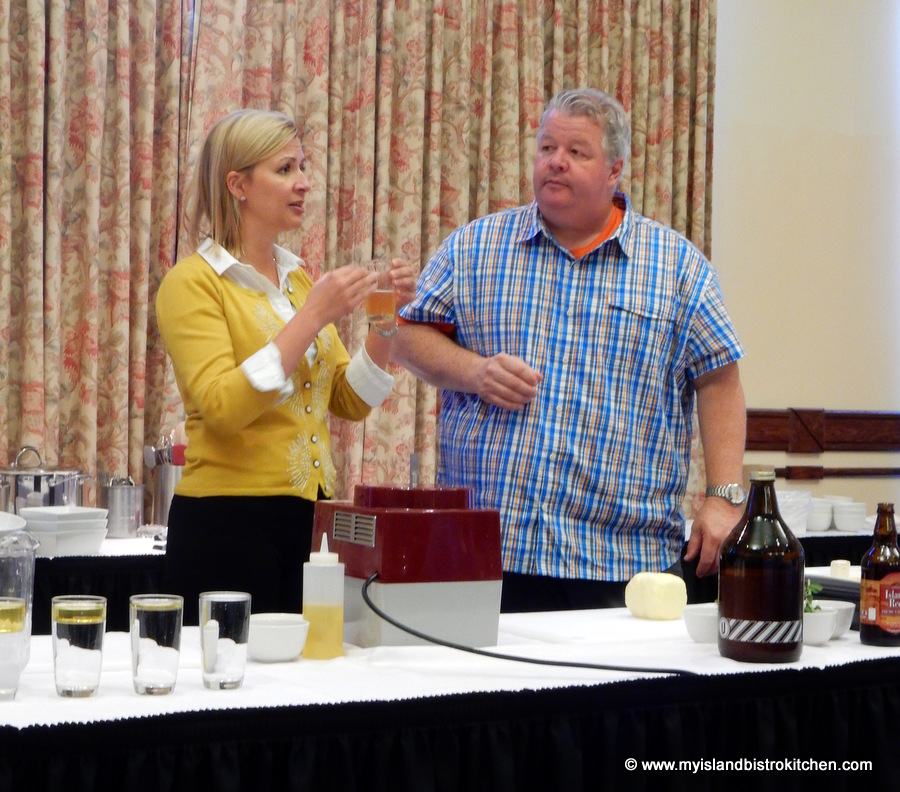
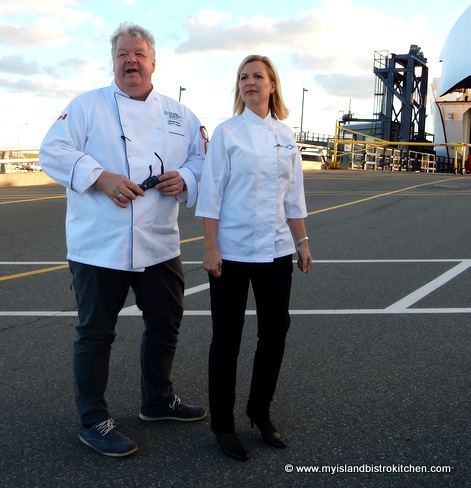
The PEI Fall Flavours Culinary Festival introduced a new culinary event in 2015. While still classed as a “signature” event, the “Cooking with Chefs Anna and Michael Olson”, was a small, intimate, casual gathering of about 50 people on a sunny Sunday afternoon at the Rodd Brudenell River Resort in Prince Edward Island. The Olsons’ relaxed and authentic style along with their sense of humour made for a lovely and informative afternoon.
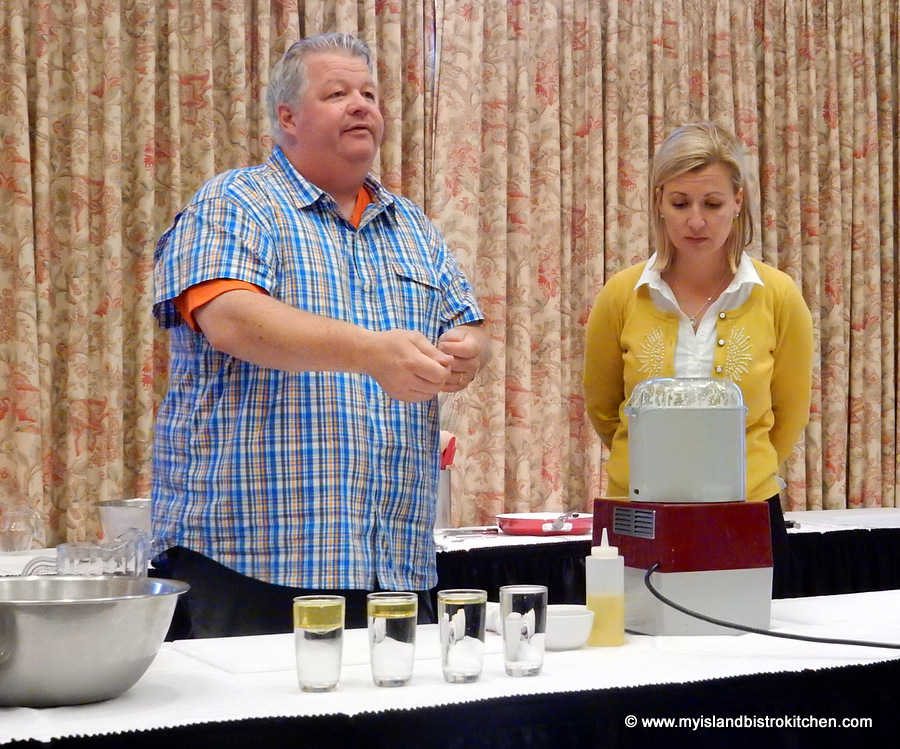
Chefs Anna & Michael Olson Cooking Demonstration, PEI Fall Flavours Culinary Festival 2015
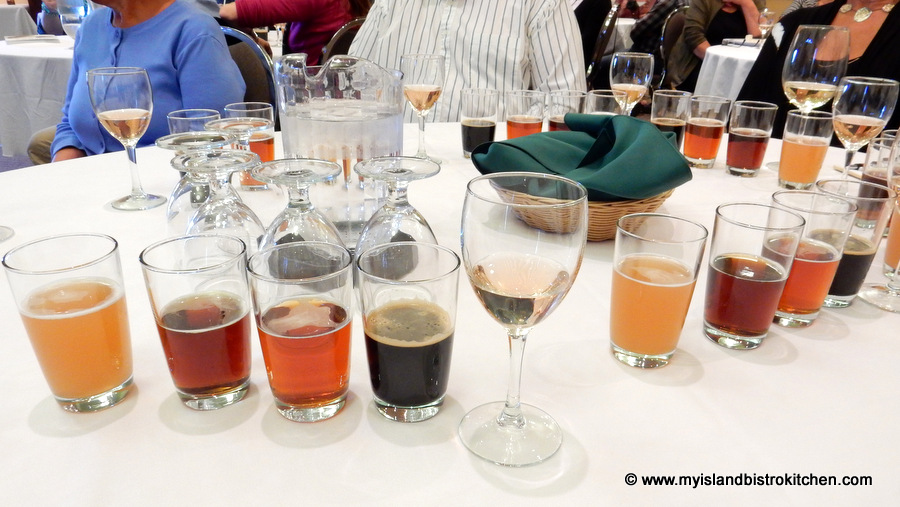
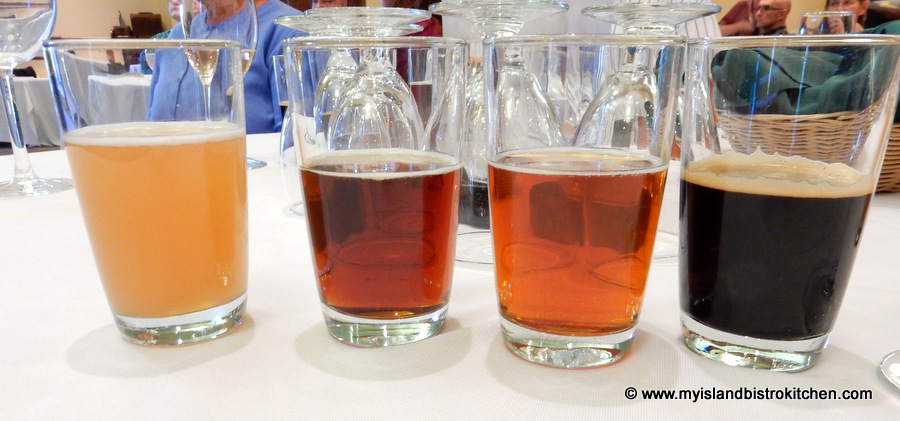
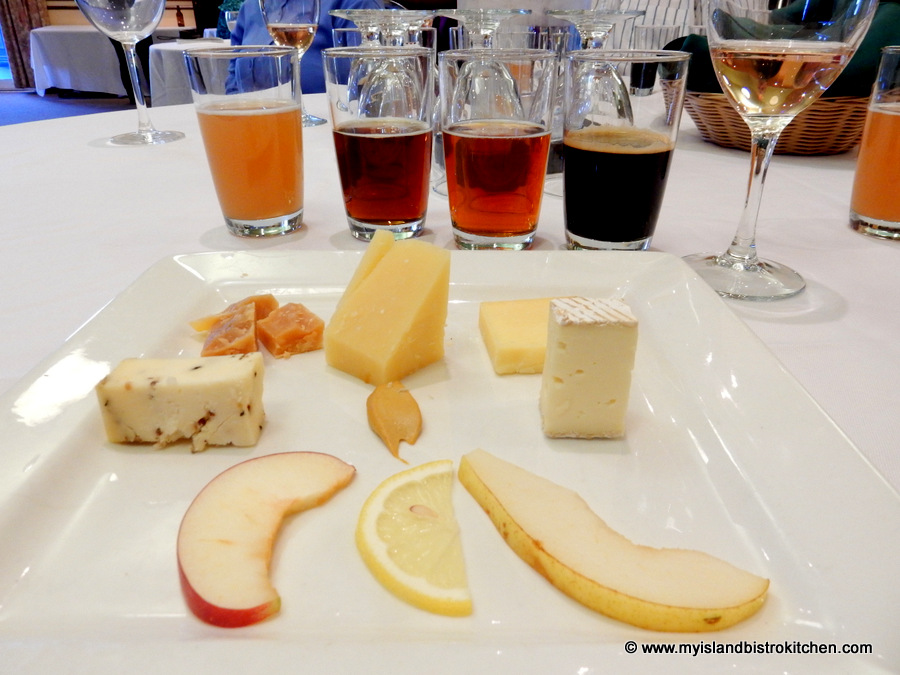
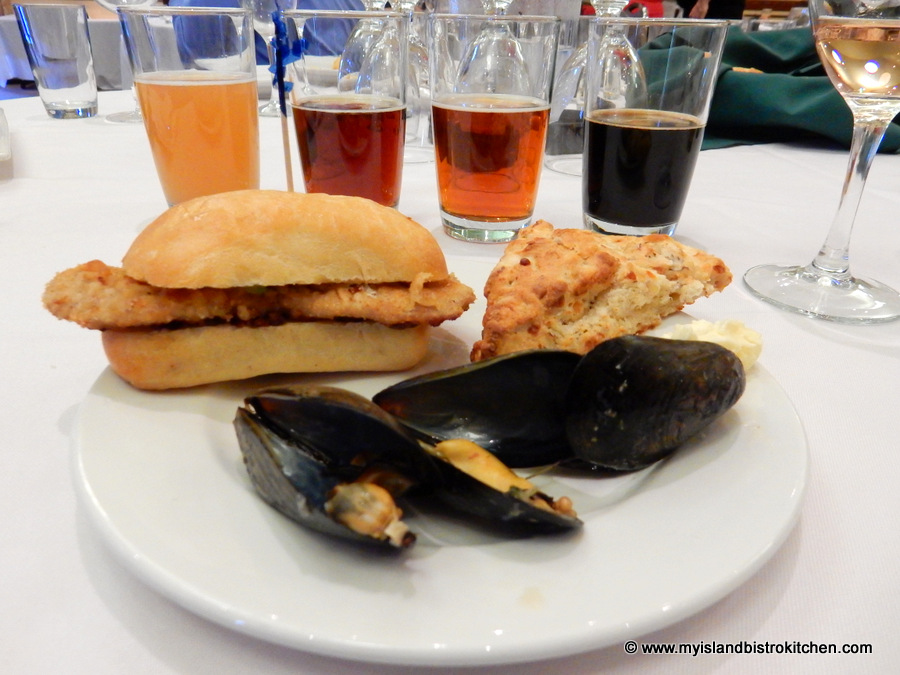
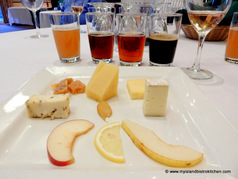
The afternoon started out with a tutoring session on beer and cheese pairing (plus one wine and cheese pairing).
Locally-brewed beers from PEI breweries were used to pair against locally-made cheeses (with the exception of the Brie cheese which came from New Brunswick because there is no Brie currently made on PEI).
The cheeses were from Glasgow Glen Farm in New Glasgow and COWS Creamery in North River on the outskirts of Charlottetown.
By way of example, some of the Chefs’ pairing suggestions included: Aged Gouda from Glasgow Glen Farm and COWS Creamery Avonlea Clothbound Cheddar pair well with the PEI Brewing Company’s “Island Red” ale. COWS Creamery Appletree Smoked Cheddar teams well with the PEI Brewing Company’s “Sydney Street Stout”.
The Olsons also suggested some food pairings with the beer. They suggest Upstreet Craft Brewing’s “Rhuby Social Strawberry Rhubarb Witbier” pairs well with seafood – in particular, mussels, clams, and white fish. “Island Red” ale compliments roasts, ribs, and barbequed foods. Chef Michael referred to the “Sydney Street Stout” as the “red wine of beers” so suggested it could be paired with a wide variety of foods including oysters, roast beef, rich cheeses, and desserts. In particular, he says that onions and stout are a great combination to make a rich sauce for meat.
The Olsons offered a cheese and wine pairing suggestion using wine from Benjamin Bridge Vineyards in Nova Scotia which was this year’s wine sponsor for the Culinary Festival. They suggest that the “Nova 7” wine, that has a hint of sweetness, pairs particularly well with double cream Brie.
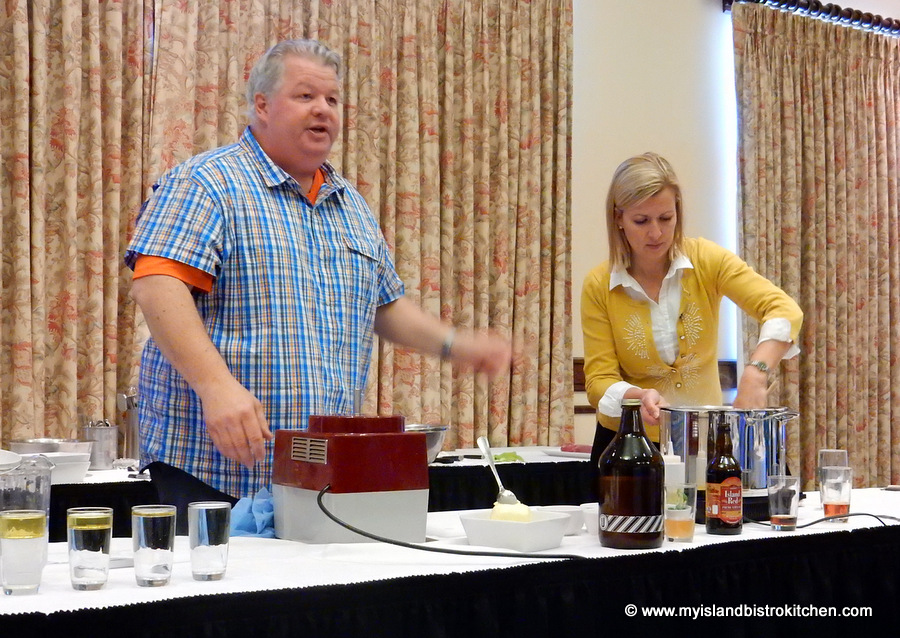
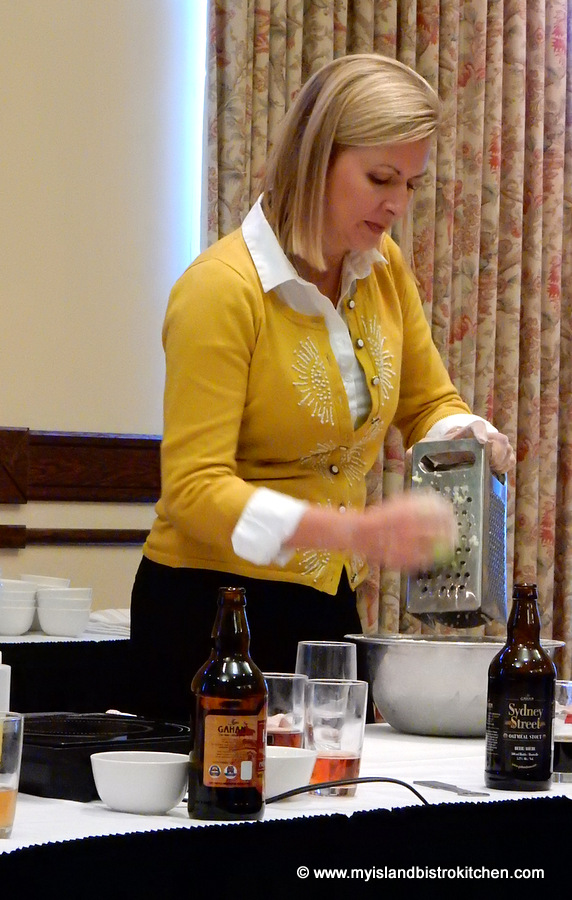
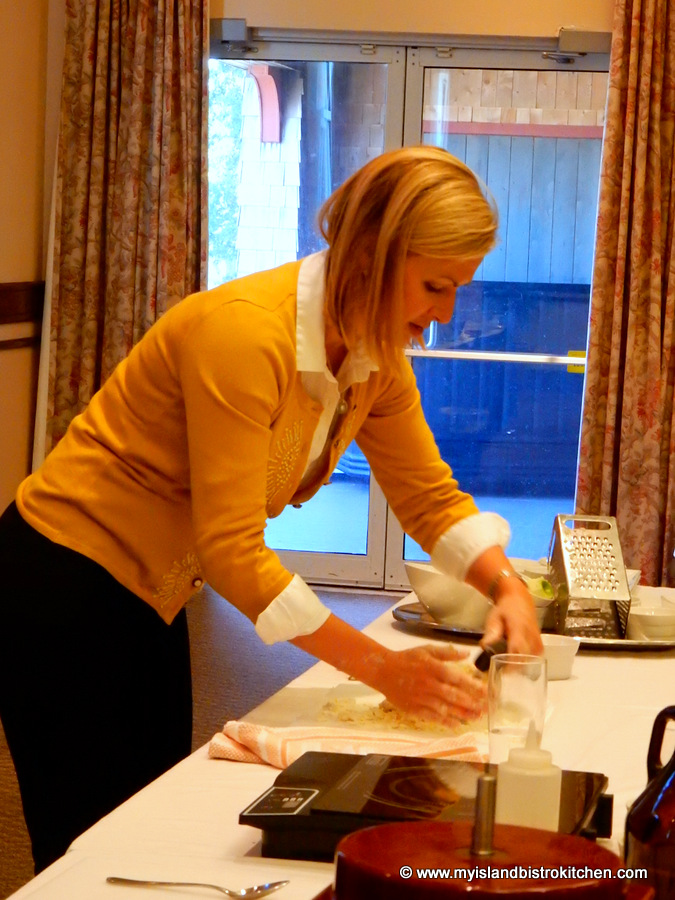
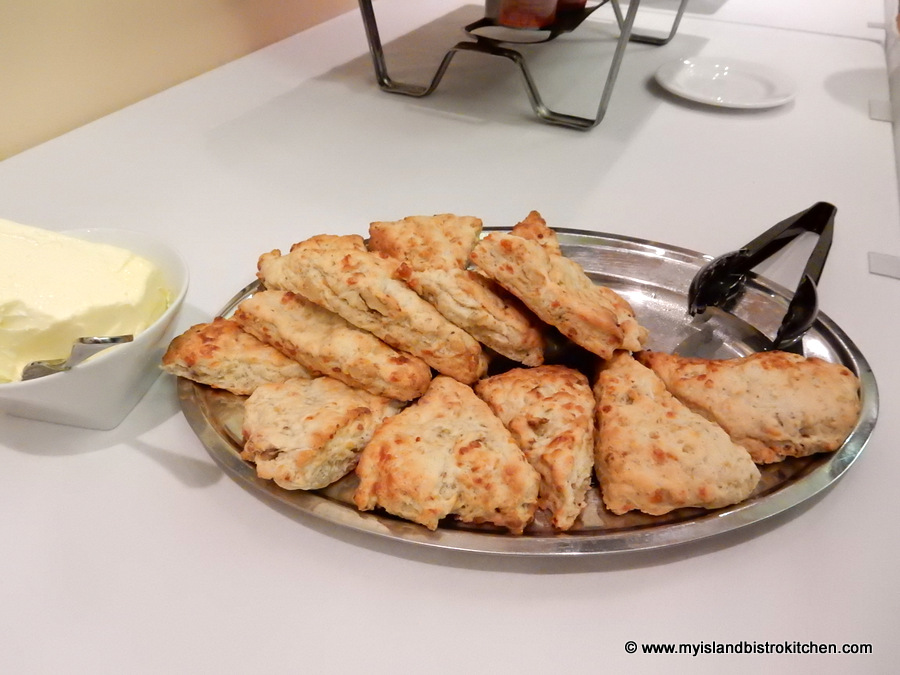
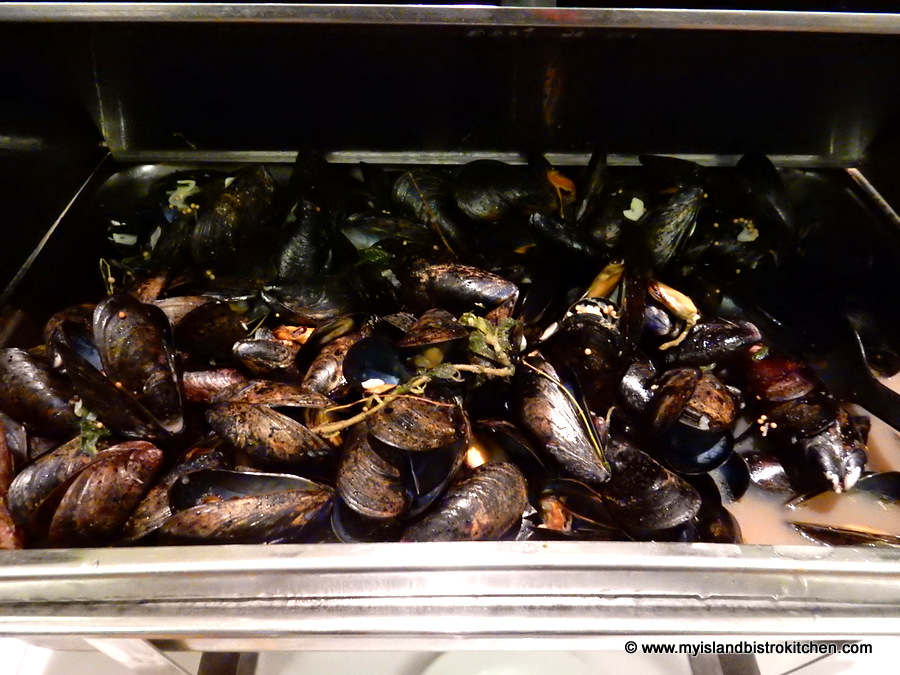
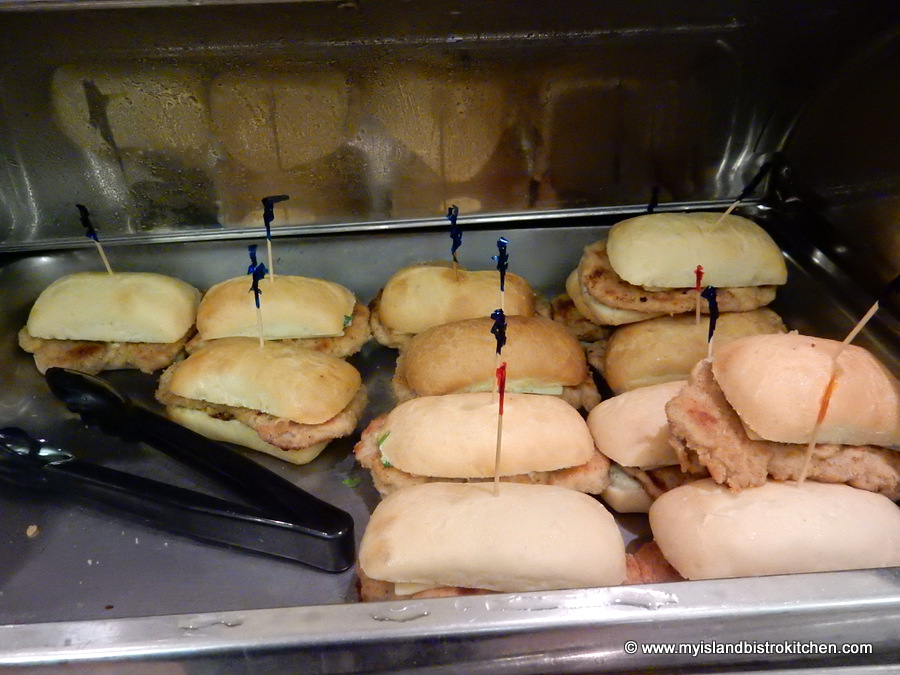
The second half of the afternoon was devoted to a cooking demonstration. Three dishes were prepared: PEI Mussels steamed in Ale with Mustard; Apple and Cheese Scones, and Schnitzel Sliders. As they demonstrated the food preparation, Chefs Anna and Michael offered cooking and baking tips.
Chef Anna Olson Demonstrating How to Make SconesAnna’s Apple and Cheese SconesPEI Mussels Steamed in BeerSchnitzel Sliders
And, yes, we did get to sample the food, too!
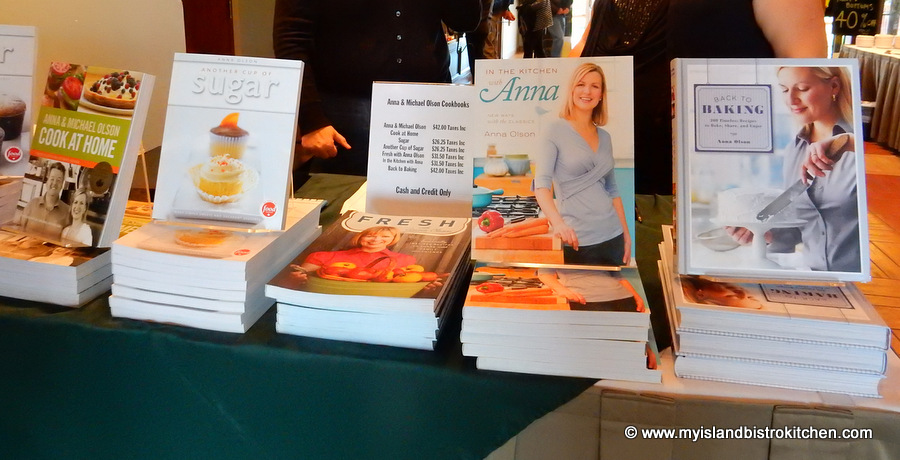
The event was also a good occasion to purchase cookbooks authored by Chefs Anna and Michael Olson and have them autographed.
I liked this culinary event because it was casual and interactive with the chefs and it was educational. As a foodie, I am always looking for new and different ways to prepare local foods so including this type of event into a culinary festival is very appealing to me. I hope more of this type of event is included in the future.
For more information on the PEI Fall Flavours Culinary Festival and information on tickets and upcoming culinary events, visit their website.
To read stories about other PEI Fall Flavours Culinary Events I have attended, click on these links:
The evening of Saturday, September 26, 2015, could not have had better weather for a short sunset sail out of Wood Islands, PEI, along the Northumberland Strait. When great PEI food is featured on a sail and dine dinner hosted by celebrity chefs Anna and Michael Olson, you just know it’s going to be an awesome event and this evening delivered on all fronts.
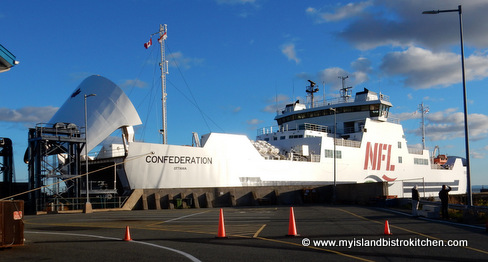
The venue was the mv Confederation which normally operates as a ferry boat between Wood Islands, PEI, and Caribou, Nova Scotia. However, on this Saturday evening, the ship was transformed into an elegant floating dining hall. Staging a PEI Fall Flavours Culinary Event aboard one of the ferry boats is very appropriate given the significance of the ferries to Island life. Before the Confederation Bridge was built and opened to traffic in 1997, the ferry service (there were two – one in Borden-Carleton and the other in Wood Islands) was the only way on or off Prince Edward Island. While the Borden-Carleton to Tormentine, New Brunswick ferry service no longer operates, the ferry service between Wood Islands, PEI, and Caribou, NS, remains in operation.
MV Confederation
Greeting guests on the pier as they arrived for dinner were celebrity chef hosts, Anna and Michael Olson.
Chefs Anna and Michael Olson
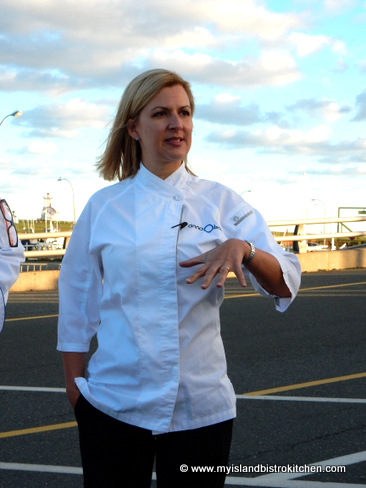
One of the things I like most about PEI Fall Flavours events is when the chef(s) interact with guests and this couple was very interactive and visible throughout the entire evening.
Chef Anna Olson giving a few hints of the evening’s fare
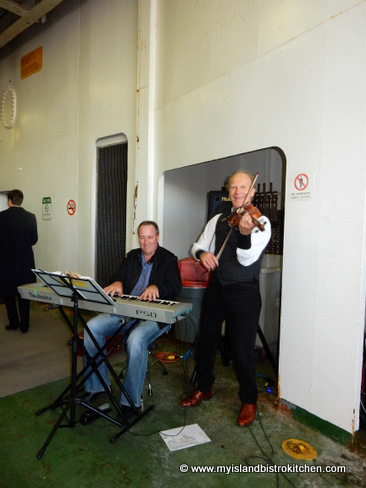
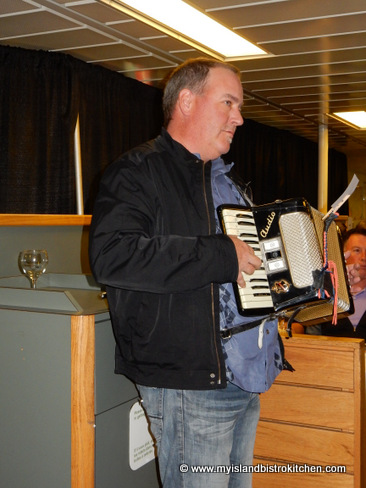
Upon entering the ship, the lively strains of the musical talents of Mark Haines and Brad Fremlin greeted guests.
Mark Haines (violin) and Brad Fremlin (keyboard)
The evening began with wine and hors d’oeuvres on the passenger deck.
Brendan MacNeill from Benjamin Bridge Winery in Nova Scotia (this year’s Festival wine sponsor) greeted each guest with a glass of wine.
Brendan MacNeill, Benjamin Bridge Winery
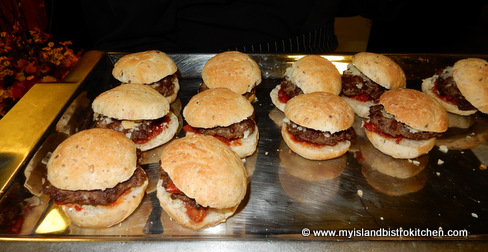
Check out these tasty sausage and gouda sliders on spent grains buns!
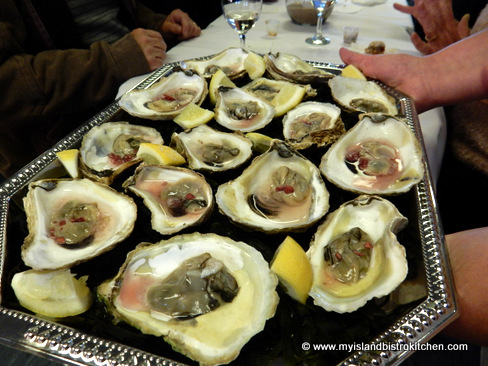
PEI Oysters on the half shell with raspberry mignonette are always a hit!
PEI Oysters
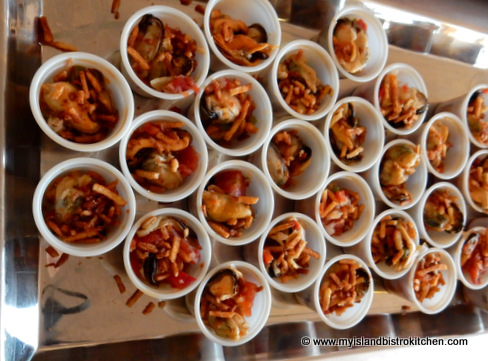
Lovers of PEI mussels were in for a real treat with these “mussel shooters” which were marinated mussels served with crispy potato bits.
“Mussel Shooters”
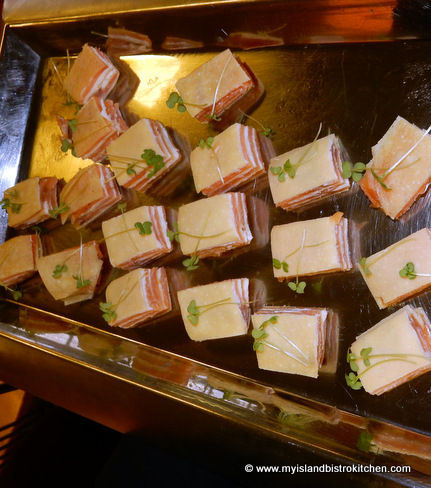
These delicate smoked salmon crepe mini tortes melted in the mouth!
Smoked Salmon Crepe Mini Tortes
And, these piping hot mini apple cheddar turnovers with honey mustard sauce added a mix of sweet and savory flavours.
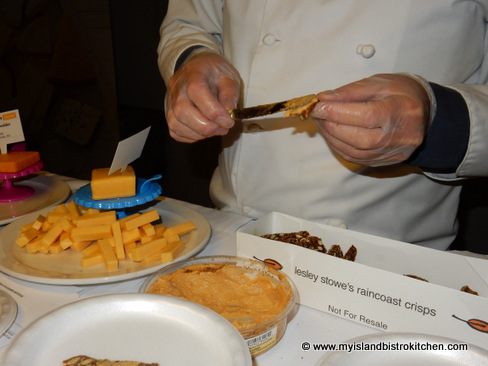
Rounding out the hors d’oeuvres was a cheese table compliments of the Dairy Farmers of Canada.
The lively musicians moved upstairs to entertain guests while they enjoyed hors d’oeuvres.
Mark HainesBrad Fremlin
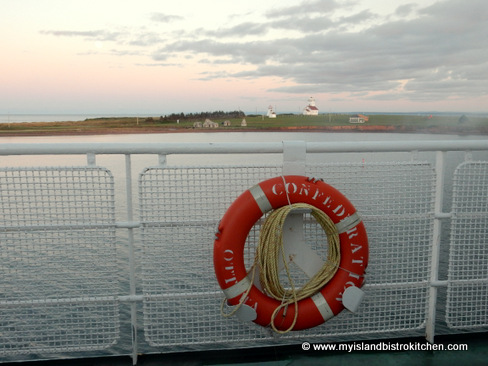
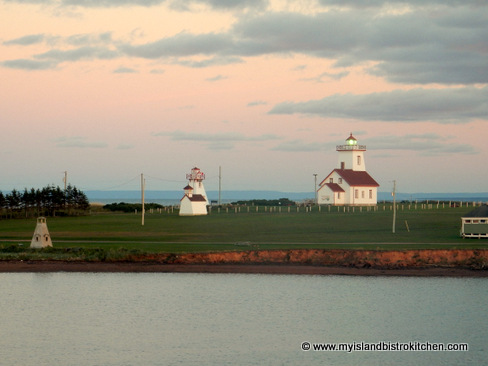
As guests sampled the hors d’oeuvres, the mvConfederation left on a short sail of the Northumberland Strait, past iconic lighthouses.
Wood Islands, PEI Lighthouses
The evening light changed quickly. Yes, our cliffs really are this ruddy red color on PEI!
How stunning was this evening sky! This was the view from the top deck of the mvConfederation (unfiltered and non-retouched).
And, as the shades of the evening sky started to fade away, and the mv Confederation made its way back to port, thoughts turned to the dinner that awaited guests.
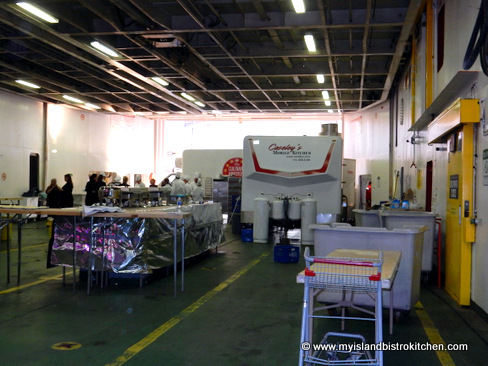
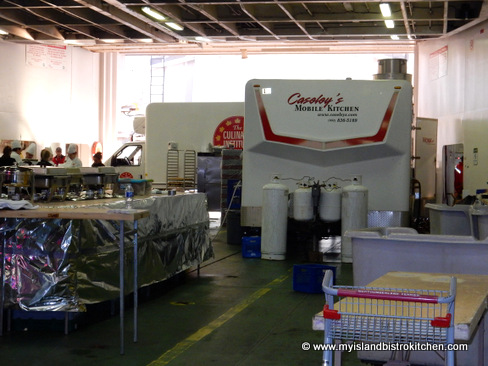
Curious to know how a ferry boat could be turned into a stunning dining hall or how food for a large number of guests could be prepared on board?
Enter a mobile kitchen and a team of chefs and professionally-trained wait staff from the Culinary Institute of Canada, part of Holland College in Charlottetown, PEI. I have been at events this group has catered to before and they are #1, hands down. I cannot even begin to imagine the level of organization and planning that would have been put in to this dinner which was very capably and efficiently executed.
I took a couple of quick photos from a distance of the mobile kitchen that had been brought on board for the event and the culinary team hard at work behind the scenes.
This food prep center was at one end of the car deck on the mvConfederation where, just mere hours before, autos would have been offloading having crossed the Northumberland Strait.
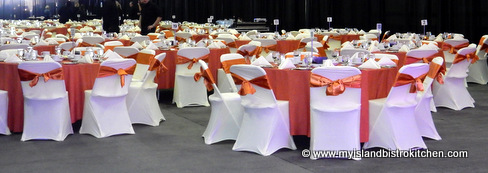
The main part of the car deck on the boat was transformed into this festive venue.
Note that this is just a small part of the dining area.
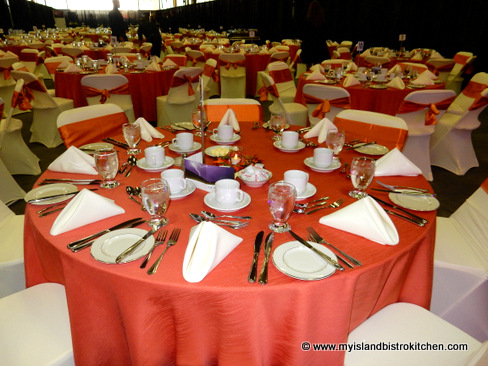
Here’s a closer look at the elegantly-set tables, resplendent in their fall rust-colored theme.
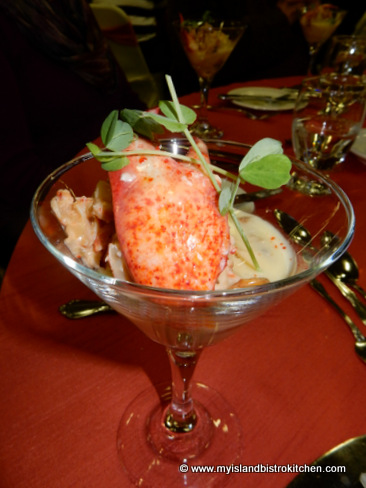
Now, for the three-course meal. Each course was served with wine pairings from Benjamin Bridge Winery.
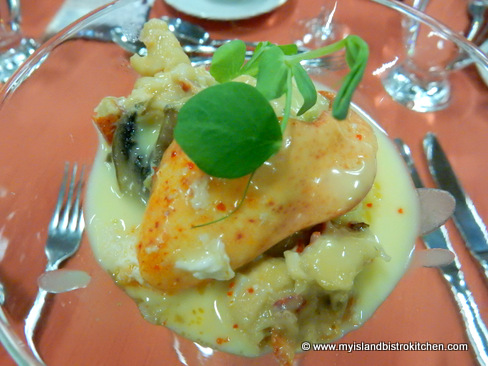
Fresh rolls and jars of homemade bread and butter pickles and chow were on each table. The appetizer consisted of warm lobster fricassee and butter-poached claw on garlic mashed potatoes cozied up with a whiskey butter sauce and garnished with baby cress.
This was beyond decadent!
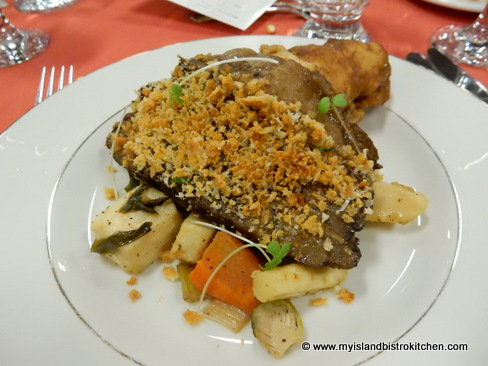
The main course consisted of “Sydney St. Premium Stout” beer-braised PEI beef short rib with cheddar crumble accompanied by a fluffy dumpling and roasted root vegetables.
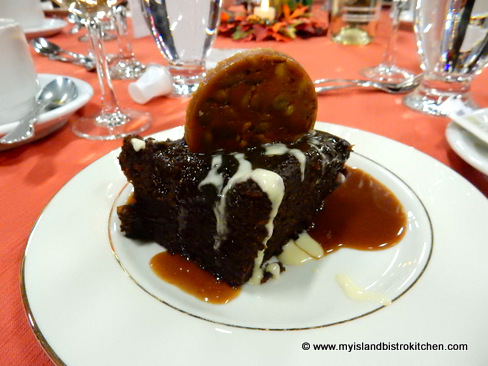
And, then of course, the pièce de résistance – Chef Anna’s warm sticky toffee pudding topped with a pumpkin spice caramel and pumpkin seed praline! Can you say ‘melt in your mouth’?
Throughout the dinner, entertainment was provided by Irish Mythen.
Irish Mythen
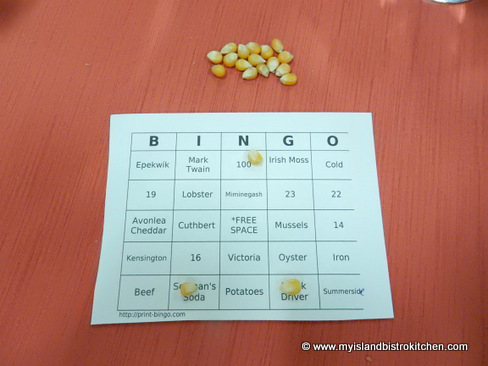
Anyone for Bingo? Our Bingo callers, Chefs Anna and Michael, engaged everyone in a lively game of PEI Bingo in between the main and dessert courses.
This was a first class event all the way and exhibited the “WOW” factor. Congratulations to the organizers, chefs, wait staff, and entertainers for yet again another fine PEI Fall Flavours Culinary Festival event.
If you have never been to one of these Festival events, I highly recommend them. They are very well done and are a great way to sample premier Island foods presented in creative ways.
For more information on the PEI Fall Flavours Culinary Festival and information on tickets and upcoming culinary events, visit their website.
To read stories about other Fall Flavours Culinary Events I have attended, click on these links:
PEI Flavours ran a Facebook contest asking folks to share their Sunday dinner traditions for a chance to win a pair of tickets to the Beef ‘n Blues event that was part of the PEI Fall Flavours Culinary Festival. I was pleased to have my name drawn so off we went to Summerside on September 18th to the Credit Union Place where the event was being held.
Even though the venue was quite dark, I was able to take some photos to share with you so you can have a “taste” of the event.
Because this was classed as a signature event of the Festival, it was hosted by a celebrity chef. This marked the first time that Chef Ricardo was part of the PEI Fall Flavours Culinary Festival.
Chef Ricardo
Chef Ricardo is very personable and was a great dinner host! He found himself in demand throughout the evening to sign autographs.
Chef Ricardo
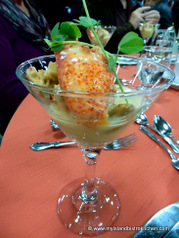
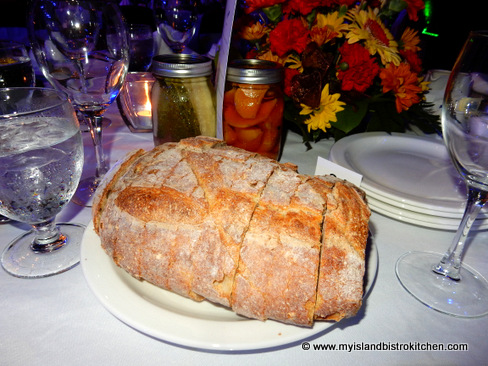
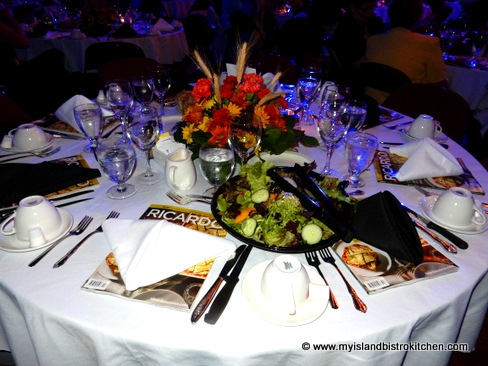
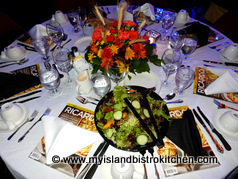
I must admit I am a fan of sit-down dinners with plated meals served. The theme of the evening revolved around the idea of a traditional Sunday family dinner so the beautifully-set tables supported this theme by having a big bowl of salad on the table along with homemade bread and jars of pickled beets and dill pickles, much like could be found on a traditional family dinner table.
This bread was still warm from the oven! Note the jars of homemade pickles!
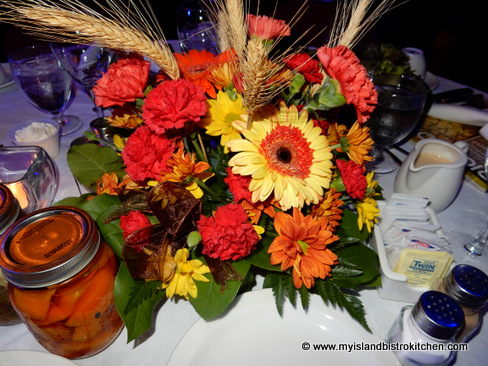
Beautiful floral arrangements with fall colors adorned each table.
Here are a couple of overviews of one of the tables:
And, a close-up of a placesetting (bonus, a copy of the current issue of Ricardo’s beautiful magazine!).
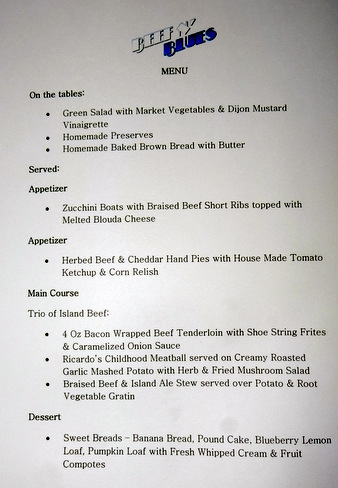
Take a look at the scrumptious menu – is your mouth watering yet?
The appetizers –
Zucchini Boats with Braised Beef Short Ribs topped with Melted Gouda Cheese
Herbed Beef & Cheddar Hand Pies with House Made Tomato Ketchup & Corn Relish
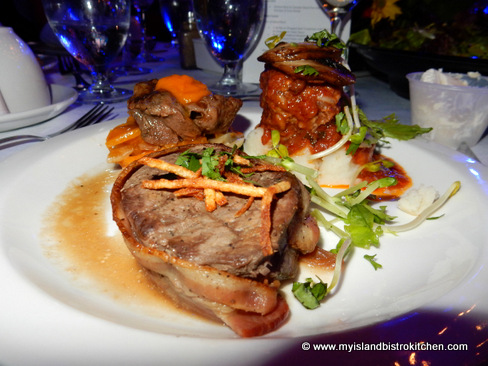
The main course – Trio of Island Beef:
4 Oz Bacon Wrapped Beef Tenderloin with Shoe String Frites & Caramelized Onion Sauce
Ricardo’s Childhood Meatball served on Creamy Roasted Garlic Mashed Potato with Herb & Fried Mushroom Salad
Braised Beef & Island Ale Stew served over Potato & Root Vegetable Gratin
Dessert –
Sweet Breads – Banana Bread, Pound Cake, Blueberry Lemon Loaf, Pumpkin Loaf with Fresh Whipped Cream & Fruit Compotes
I hope you have enjoyed this glimpse into the 2015 Beef ‘n Blues culinary event in Summerside, PEI. My thanks to PEI Flavours for the tickets to this fine event.
For more information on the PEI Fall Flavours Culinary Festival and information on tickets and upcoming culinary events, visit their website.
To read stories about other Fall Flavours Culinary Events I have attended, click on these links:
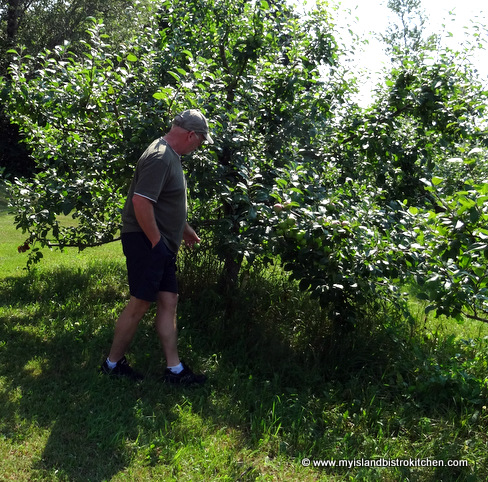
Today, I’m taking you on a tour with me to Beamish Organic Apple Orchard and Deep Roots Distillery in Warren Grove, PEI. Owner, Mike Beamish, has been growing apples since 1990 when he started with 200 trees on his hobby farm near Charlottetown.
Mike Beamish Checking on his Apple Crop
Mike’s goal was always to grow apples organically although he did initially grow them using conventional methods in the early years because it was difficult to find non-chemical controls for some pests. Once more research was done and non-chemical controls were available to growers, Beamish transitioned his orchard to be organic in 2003 following the standard three-year period to be certified organic. During the three-year period, no chemical applications can be used. Beamish is certified under Atlantic Certified Organics (ACO), a certification body which is accredited with the Canadian federal government. This body enforces the national organic standards such as buffer zone requirements from surrounding farms using conventional farming methods and it provides a list of approved substances that can be used in organic farming. The orchard is subject to annual audits by the ACO to ensure only approved substances and organic farming practices are used. Certified organic farmers are required to keep records of any products or substances used and the farmers must be re-certified each year.
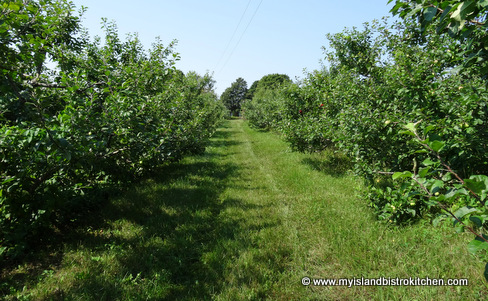
Beamish Organic Apple Orchard, Warren Grove, PEI
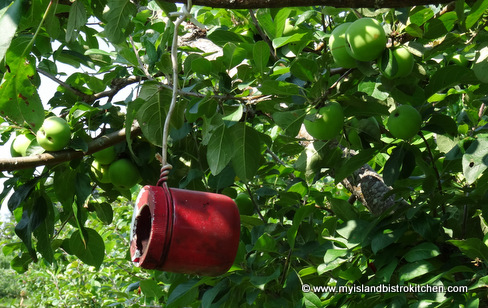
Growing apples organically does come with its challenges since farmers don’t have access to the traditional chemical treatments non-organic apple growers can use. Beamish says the biggest challenges are dealing with pests such as bugs and rodents, disease in the trees and apples, and ensuring soil nutrition. Any products applied to the ground or trees must be certified organic products only. He counters these challenges by buying and applying organic compost around the trees, installing little ground fences around each tree to deter rodents, and hanging certified organic products in the trees to fend off pests such as moths, apple fruit flies, and railroad worms.
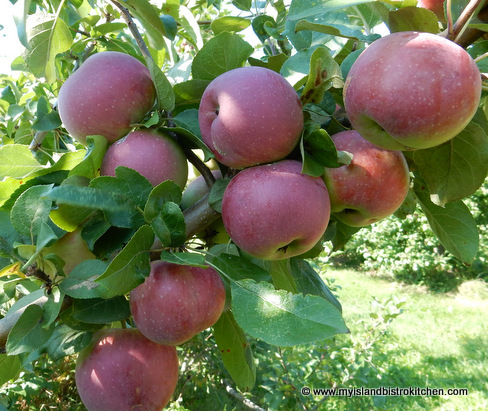
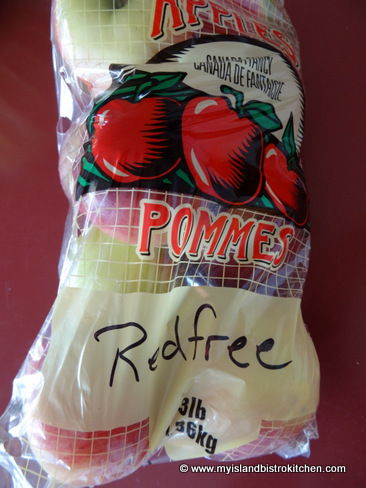
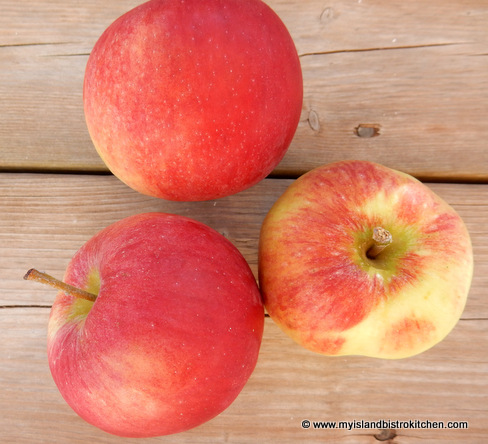
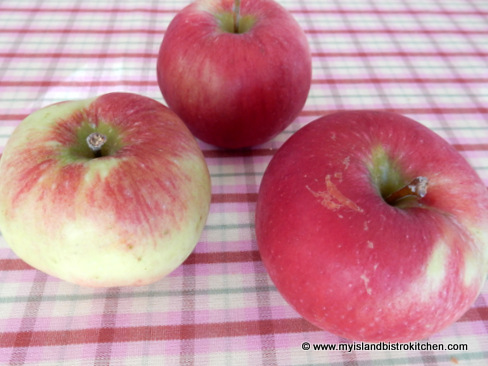
At one point, the Beamish Orchard had 800 apple trees; however, Island winters can be harsh and, in 1999, the orchard cut back to 500 trees in its U-pick orchard. The orchard currently has about 300 apple-producing trees. Beamish grows four varieties of apples – Red Free, Novamac, Liberty, and Freedom. The biggest seller are the Red Free, an early variety ready in mid-September.
The Red Free variety is particularly good for cooking as these apples keep their shape and, because they are non-acidic, there is no need for a lot of sugar.
Red Free Apples
This year (2015) will mark the first year that the Beamish Orchard will not operate as a U-pick. They will still have apples for sale at the farm but, because they have reduced the number of trees in the orchard, there will not be enough apples to operate a U-pick. In addition, Beamish has also created another usage of his apple crop as he has started a distillery.
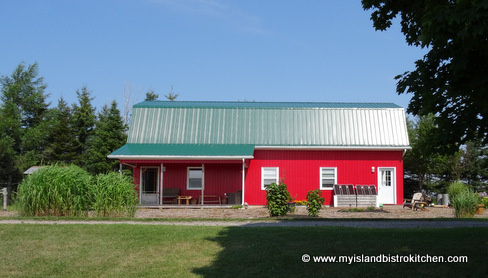
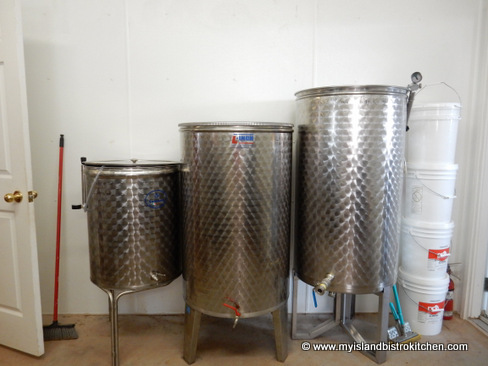
Deep Roots Distillery, Warren Grove, PEI
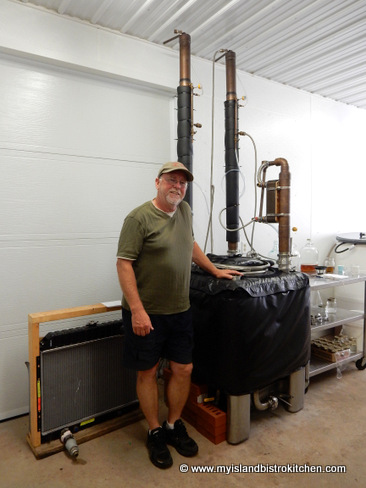
When Beamish retired three years ago from Holland College, he was looking for a retirement activity. Since he already had a ready supply of apples, he began making sweet apple cider and selling it at the Farmers Market in Charlottetown. His interest in distilling grew so he pursued a course hosted by the Bio-Food-Tech Centre in Charlottetown that focused on the science of distilling. In addition, he received some technical assistance from the New Brunswick Community College in Grand Falls. In June, 2014, Beamish obtained his license to distill and it wasn’t long before he began producing liquor, using local raw products whenever possible.
Mike Beamish at his Warren Grove, PEI, Distillery – “Deep Roots”
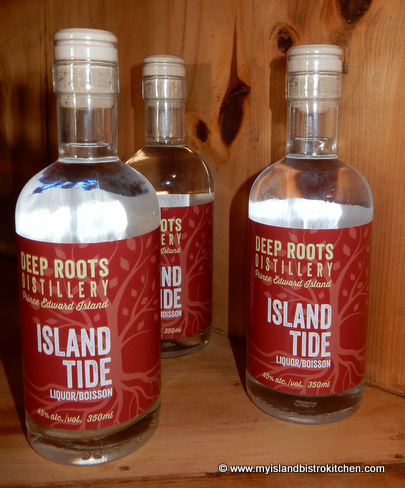
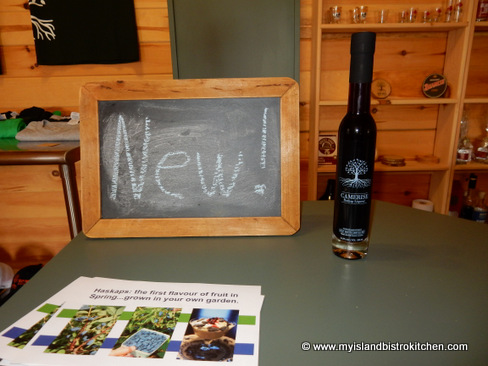
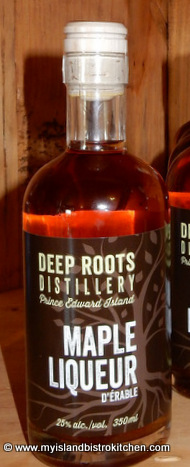
Today, Beamish has four products on the market: Island Tide (a cane-sugar spirit), Blueberry Eau de Vie, Maple Liqueur, and his newest, Camerise Haskap Liqueur.
Deeproots Distillery Products
Beamish says the Island Tide liquor moonshine, with an alcohol content of 45%, is a cross between rum and vodka and would be best suited for martinis and mojitas. Historically, much of the moonshine made in PEI was made from cane-sugar. However, with more modern distilling techniques, it is somewhat smoother than what some folks may remember!
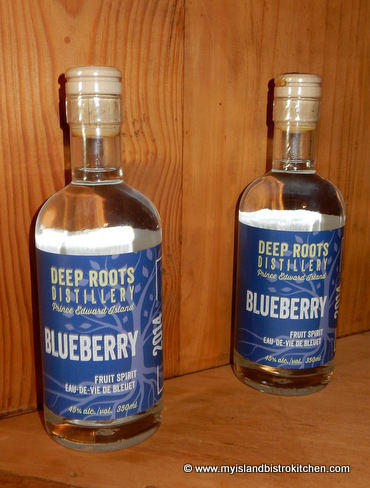
Mike Beamish says the Blueberry Eau de Vie does not have a strong blueberry taste but rather has the essence of blueberry. It has 45% alcohol content and is best served as an after dinner beverage over ice or in a fruit-based cocktail.
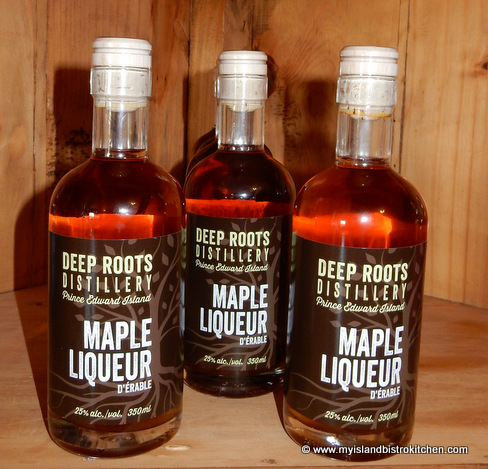
The Maple Liqueur is made from New Brunswick maple syrup and, with 25% alcohol, is stronger than most liqueurs. It is also suitable as an after dinner drink or served over vanilla ice cream or in baking.
The Camerise Haskap Liqueur is a new product from the distillery and has just been released this summer.
This liqueur, with 26.5% alcohol, is made with haskap berries which come from Phyto Cultures Inc. in nearby Clyde River. This liqueur is developed using a method by which the alcohol is infused with the whole haskap berries which sit in the alcohol for four months before being crushed. The Camerise Haskap Liqueur also is an after dinner drink and is meant to be served straight over ice.
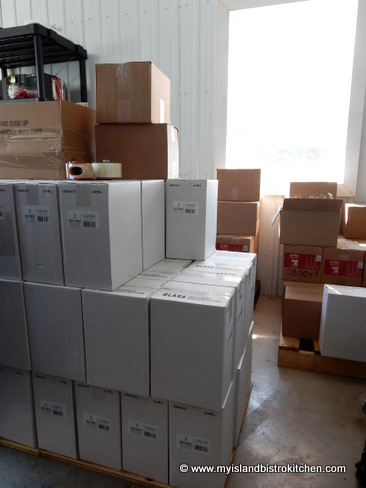
Producing liquor is government-regulated and the products have to be analyzed by a certified lab in the same way as any big brand liquors.
Boxes of product ready for shipping
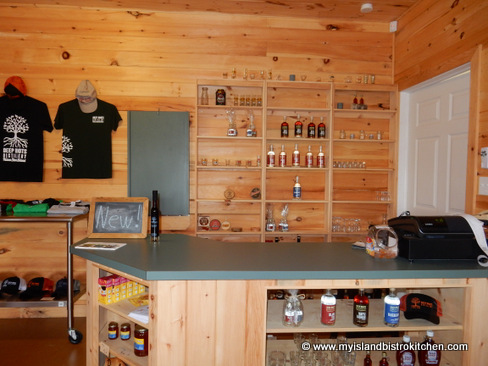
The products are labelled under the Deep Roots Distillery label and can be purchased at the Charlottetown Farmers Market and at the Distillery located at 2100 North York River Road, Route 248, in Warren Grove just outside Charlottetown. You can also find them on the shelves of many local liquor stores on the Island.
Sales Outlet at Deep Roots Distillery, Warren Grove, PEI
Tours of the apple orchards and the distillery are available for a nominal fee and Mike welcomes visitors to learn more about his organic apple orchard and new distillery. For more information, and hours of operation, visit the websites for Beamish Organic Apple Orchard and Deep Root Distillery.
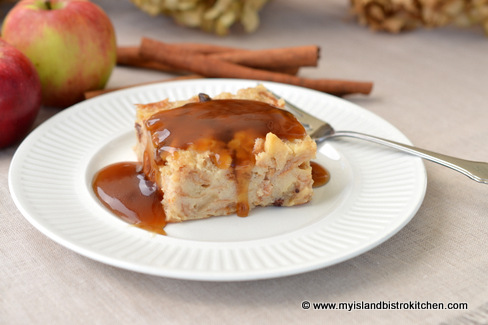
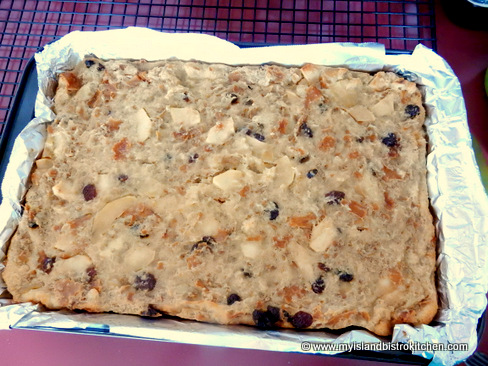
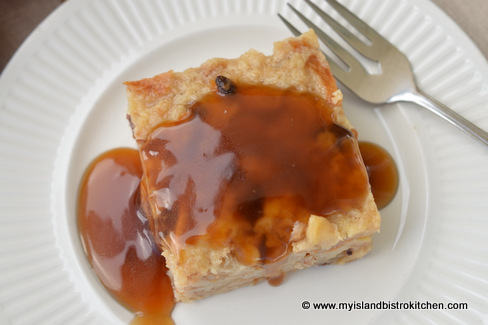
Apple-Maple Bread Pudding
As is my standard practice when I visit a local food producer, I develop a recipe using the producer’s product(s). In my Apple-Maple Bread Pudding with Maple Sauce, I have used the Red Free apples from the Beamish Orchard along with the Deep Roots Distillery Maple Liqueur.
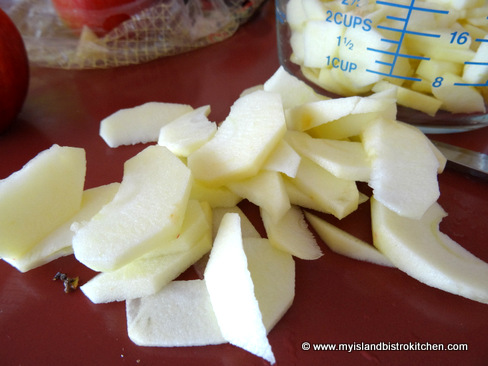
Red Free Apples
The Red Free apples are great in this recipe because they keep their shape and don’t go to “mush” or a sauce-like consistency in the pudding which would make it too soggy. The key is to sauté the apples enough that they are softened before adding them to the pudding batter. Adding some maple liqueur as the apples sauté provides additional flavour.
It’s a matter of opinion as to whether a bread pudding should be baked in a hot water bath or not. I have made bread puddings both in a water bath and without and, to be frank, don’t see any appreciable difference in quality of the baked pudding. So, for this recipe, I did not use the hot water bath baking method and the pudding was lovely and moist.
Apple-Maple Bread Pudding
Apple-Maple Bread Pudding
Ingredients:
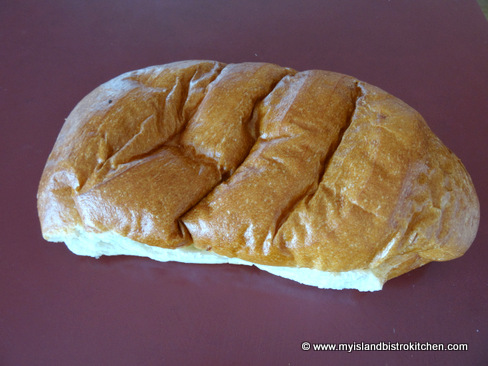
1 – 1 lb loaf French bread
3 cups whole milk
1 cup less 1½ tbsp Blend/cream (10%)
2½ cups thinly sliced baking apples (about 3 medium-sized apples)
½ tbsp butter
1 tbsp brown sugar
1 tbsp maple liqueur
3 extra-large eggs
1 cup white sugar
1/3 cup maple syrup
3 tbsp melted butter
2 tsp vanilla
3/4 tsp cinnamon
1/8 tsp nutmeg
1/8 tsp allspice
Pinch cardamom
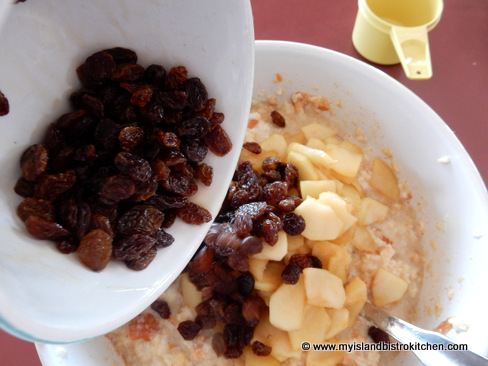
¾ cup raisins soaked in 1½ tbsp maple liqueur
Method:
Assemble ingredients.
Preheat oven to 325°F.
Grease or line 9”x13” pan with greased tin foil.
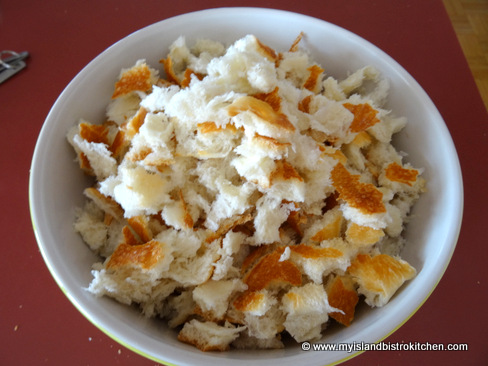
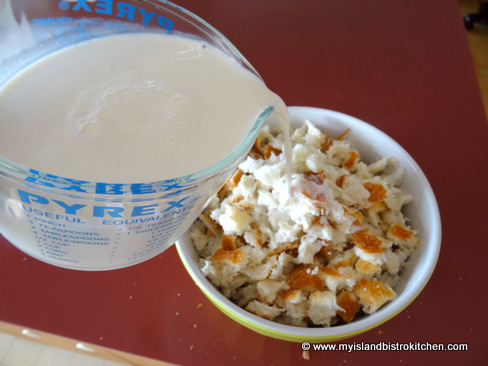
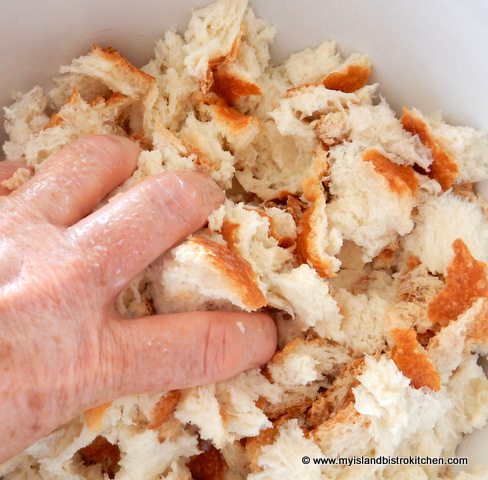
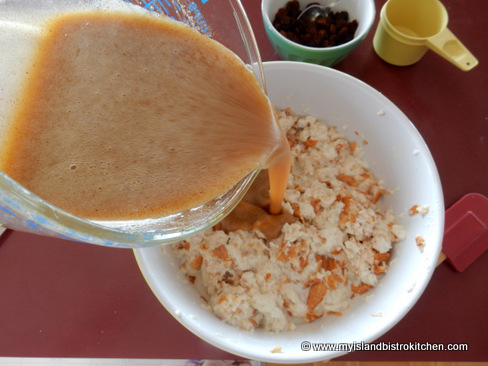
In large bowl, break the French bread into small pieces, crusts and all.
Pour the milk and blend (cream) over the bread.
Cover and let sit for 30 minutes then handcrush mixture until well blended.
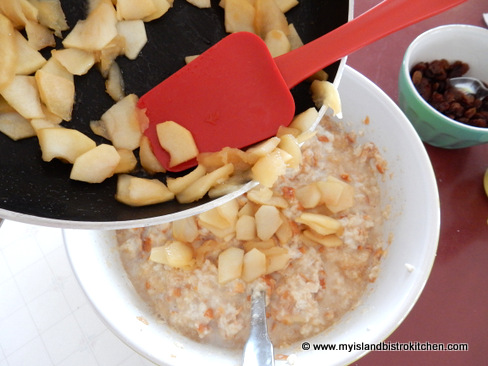
Meanwhile, peel, core, and thinly slice the apples.
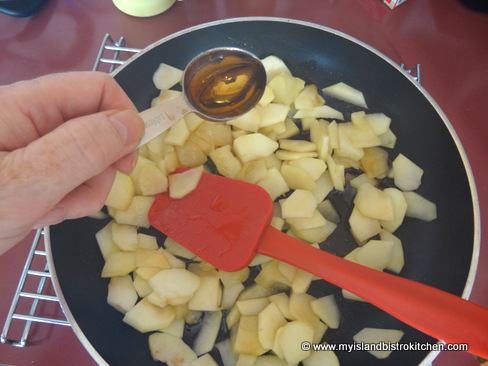
Melt butter in saucepan over medium heat. Add the apples and sauté for about 2 minutes. Sprinkle with brown sugar and sauté apples for another minute. Remove pan from heat and add liqueur. Return to heat and sauté the apples for 5-7 minutes, or until they are softened and a golden color.
In medium-sized bowl, beat the eggs well. Add the sugar and beat again. Beat in the maple syrup, melted butter, and vanilla. Add the spices and stir well. Pour over bread-milk mixture in large bowl and mix well.
Lastly, gently fold in the sautéd apples along with the raisins.
Pour mixture into prepared pan. Smooth batter evenly in pan.
Bake for about 50-60 minutes or until it springs back to a light touch and/or a cake tester (or knife) inserted into 2-3 places in the pudding comes out clean.
Remove pudding from oven and transfer pudding pan to a cooling rack to rest for 20 minutes. Slice into 12 pieces and serve warm with maple sauce (recipe below), crème anglaise, or ice cream.
Yield:12 servings
Maple Sauce
Ingredients:
1 cup brown sugar
3 tbsp cornstarch
dash of salt
2 cups boiling water
2 tbsp maple syrup
2 tbsp maple liqueur
2 tsp vanilla
¼ cup butter
Method:
In saucepan, mix the brown sugar, cornstarch, and salt together well. Add the boiling water, maple syrup, maple liqueur, and vanilla together. Mix well. Add butter. Cook until sauce boils and reaches desired consistency. Serve hot over Apple-Maple Bread Pudding.
Yield:Apx. 2½ cups
Maple Sauce on Apple-Maple Bread Pudding
—————————————————————————-
Thank you for visiting “the Bistro” today. If you enjoyed this posting and recipe, please share it on your social media websites.
Connect with “the Bistro” through the following social media:
Join My Island Bistro Kitchen on Facebook
Follow “the Bistro’s” tweets on Twitter
Follow “the Bistro” on Pinterest
Follow “the Bistro” on Instagram
Apple and maple flavours combine to make a delectable bread pudding
Ingredients
Pudding:
1 – 1 lb loaf French bread
3 cups whole milk
1 cup less 1½ tbsp Blend/cream (10%)
2½ cups thinly sliced baking apples (about 3 medium-sized apples)
½ tbsp butter
1 tbsp brown sugar
1 tbsp maple liqueur
3 extra large eggs
1 cup white sugar
1/3 cup maple syrup
3 tbsp melted butter
2 tsp vanilla
3/4 tsp cinnamon
1/8 tsp nutmeg
1/8 tsp allspice
Pinch cardamom
¾ cup raisins soaked in 1½ tbsp maple liqueur
Sauce:
1 cup brown sugar
3 tbsp cornstarch
dash of salt
2 cups boiling water
2 tbsp maple syrup
2 tbsp maple liqueur
2 tsp vanilla
¼ cup butter
Instructions
Assemble ingredients.
Preheat oven to 325°F.
Grease or line 9”x13” pan with greased tin foil.
In large bowl, break the French bread into small pieces, crusts and all. Pour the milk and blend (cream) over the bread. Cover and let sit for 30 minutes then handcrush mixture until well blended.
Meanwhile, peel, core, and thinly slice the apples. Melt butter in saucepan over medium heat. Add the apples and sauté for about 2 minutes. Sprinkle with brown sugar and sauté apples for another minute. Remove pan from heat and add liqueur. Return to heat and sauté the apples for 5-7 minutes, or until they are softened and a golden color.
In medium-sized bowl, beat the eggs well. Add the sugar and beat again. Beat in the maple syrup, melted butter, and vanilla. Add the spices and stir well. Pour over bread-milk mixture in the large bowl and mix well.
Lastly, gently fold in the sautéed apples along with the raisins. Pour mixture into prepared pan. Smooth batter evenly in pan.
Bake for about 50-60 minutes or until it springs back to a light touch and/or a cake tester (or knife) inserted into 2-3 places in the pudding comes out clean.
Remove pudding from oven and transfer pudding pan to a cooling rack to rest for 20 minutes. Slice into 12 pieces and serve warm with maple sauce, crème anglaise, or ice cream.
To make the maple sauce, combine the brown sugar, cornstarch, and salt together in saucepan. Add the boiling water, maple syrup, maple liqueur, and vanilla together. Mix well. Add butter. Cook until sauce boils and reaches desired consistency. Serve hot over Apple-Maple Bread Pudding.
New to the 2015 roster of the Prince Edward Island Fall Flavours Culinary Festival was the “Taste of New Glasgow” event. New Glasgow is a small rural community in the central part of the province. Despite its small size, it has a number of fine restaurants, chefs, and food producers and they brought their A-game to ensure festival goers had a fine “Taste of New Glasgow”, despite the challenges that the weather presented.
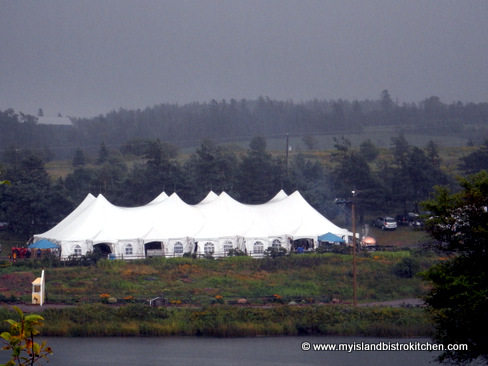
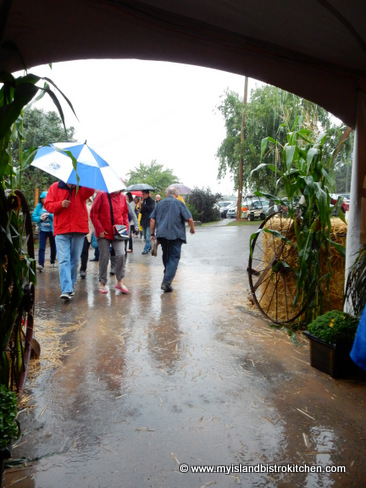
September 11th dawned with gray skies that, by late afternoon, resulted in a torrential downpour for the 2015 Festival kick-off event.
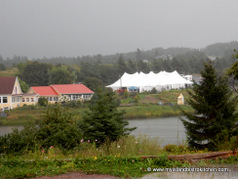
Organizers had planned to hold the event outside in the Gardens of Hope at the Prince Edward Island Preserve Company in New Glasgow, PEI. However, Mother Nature had other ideas.
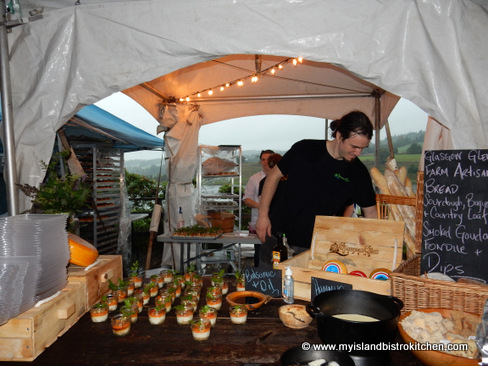
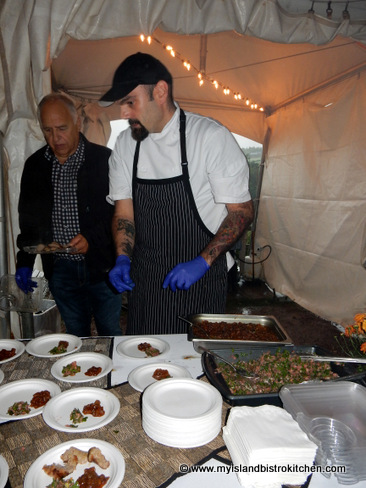
An alternative plan of action was implemented and a huge tent was erected in the parking lot of the Prince Edward Island Preserve Company and, instead of outdoor open firepits as originally planned, chefs improvised and used barbeques and other cooking appliances adjacent to the big tent.
While the rain certainly changed location plans, it did not dampen the enthusiasm of event goers or the participating chefs but umbrellas and rain gear were certainly the order of the day.
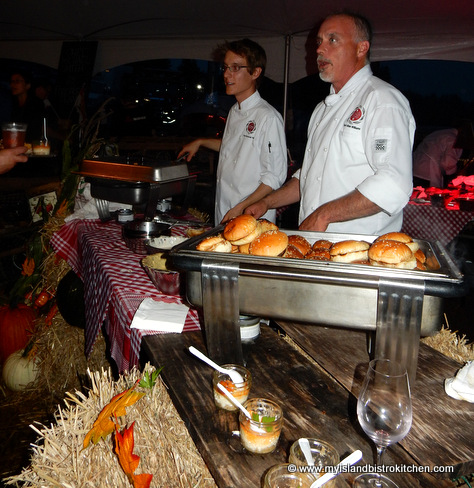
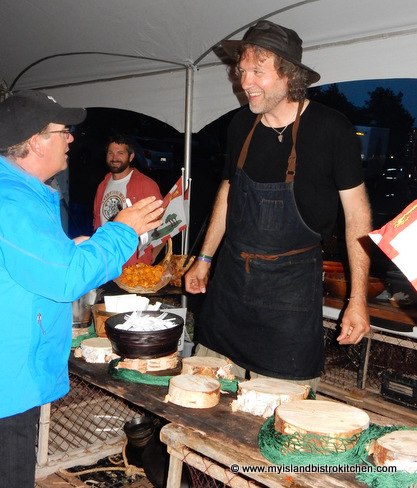
This event was classed as a signature festival event meaning it was hosted by a celebrity chef who in this case was PEI’s own Chef Michael Smith.
Chef Michael Smith, Celebrity Chef Host at “Taste of New Glasgow”, A PEI Fall Flavours Signature Culinary Event
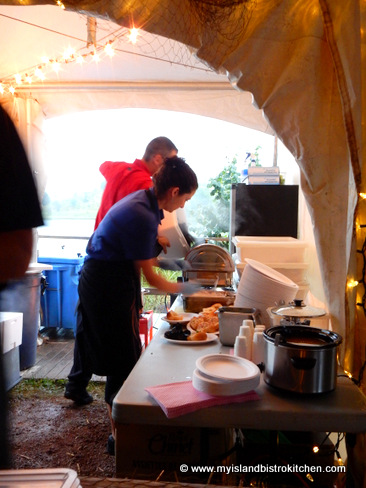
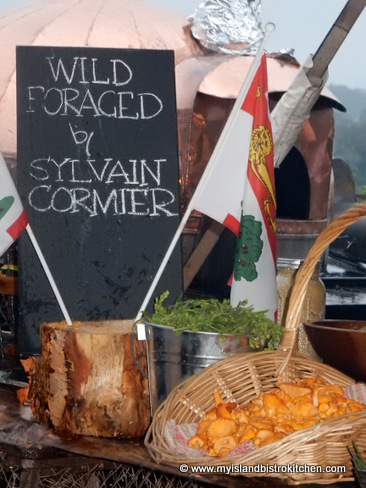
“Taste of New Glasgow” was a roaming feast which meant that several participating local restaurants/chefs/food producers each had a station where they served food to patrons who made their way, at their leisure, around the tent to sample the offerings. Participating restaurants/chefs/food producers were Prince Edward Island Preserve Company, Glasgow Glen Farm, New Glasgow Lobster Suppers, The Mill in New Glasgow, The Culinary Institute of Canada, Larkin Brothers, and Carr’s Oyster Bar. In addition, there were four Beverage Stations featuring local beers and wines – Barnone Brewery, Upstreet Craft Brewing, Prince Edward Island Brewing Co., and Matos Winery.
To give you a flavour of the feast, here’s a sampling of what was on the menu:
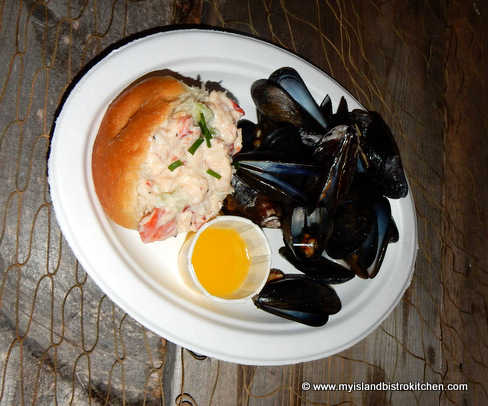
New Glasgow Lobster Suppers served up lobster salad on their famous homemade rolls alongside steamed PEI mussels and, for dessert, offered lemon meringue tarts reminiscent of their mile high lemon meringue pie.
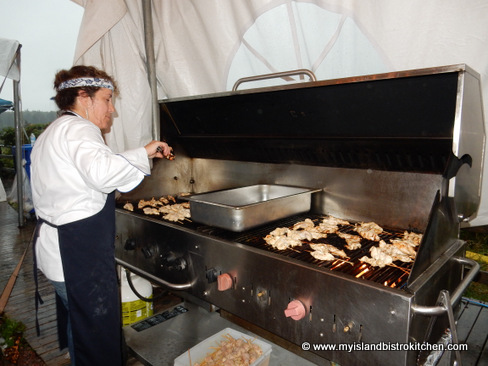
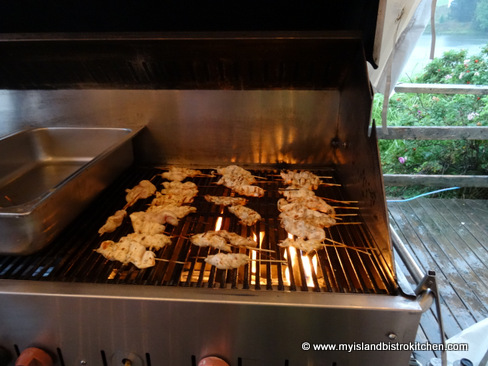
The Mill in New Glasgow offered Larkin Brothers chicken with rhubarb cranberry chutney and a blueberry mousse for dessert.
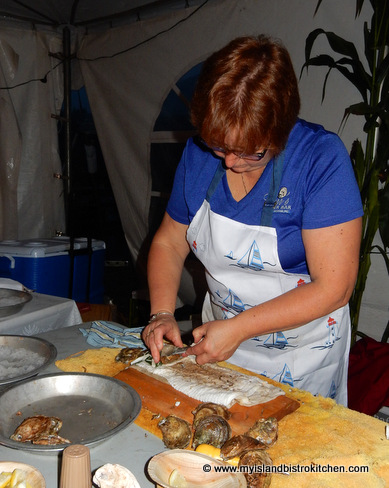
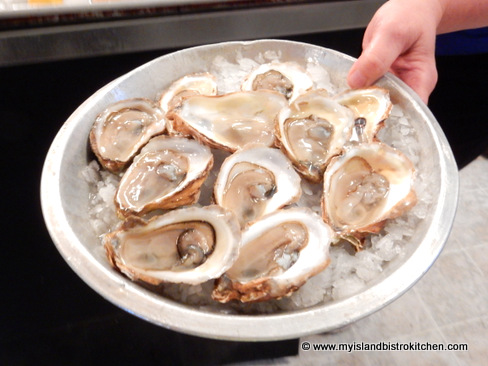
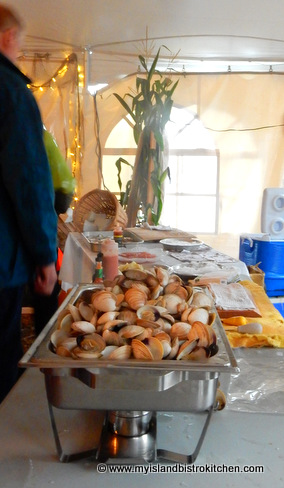
Carrs Oyster Bar hosted an oyster station and also offered lots of steamed bar clams, too.
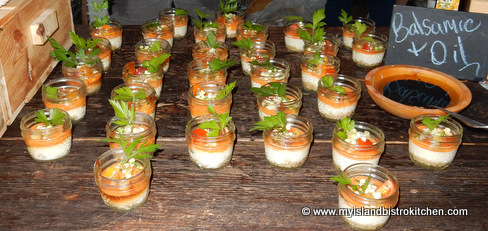
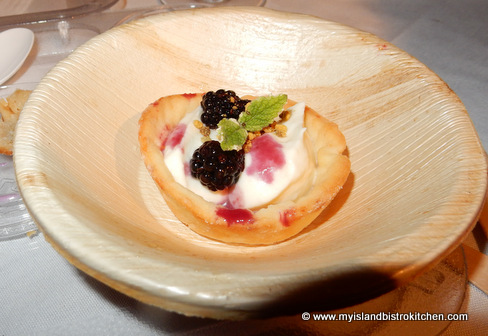
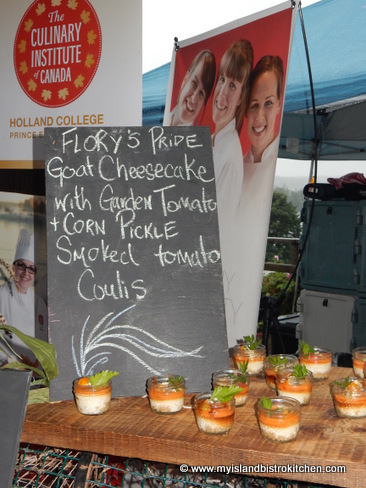
Glasgow Glen Farm had lots of breads and spreads along with a cheese fondue. They also served Florrie’s Pride Goat Cheese Cake with smoked tomato aioli, garden cherry and tomato salad, all in a small mason jar. Their dessert offering was a blackberry and honey tart with bee pollen and chokecherry syrup.
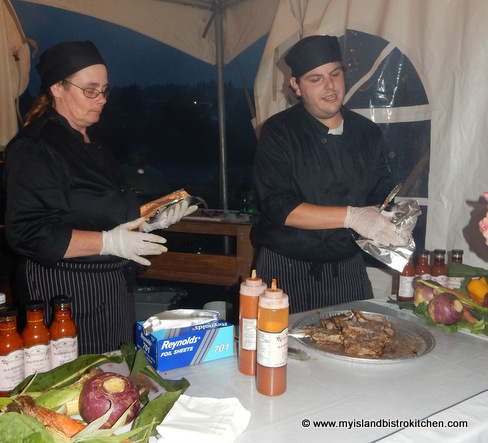
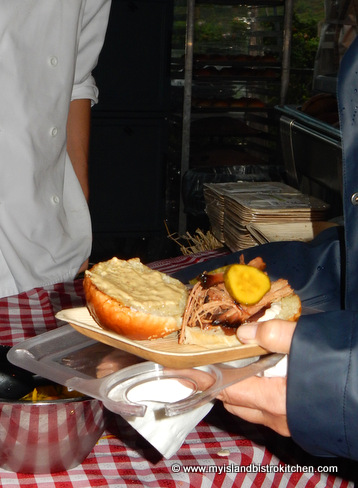
Location host, the Prince Edward Island Preserve Company, served spice-encrusted smoked pork ribs and, for dessert, offered a popular ginger cookie sandwich which was filled with homemade vanilla bean ice cream.
The Culinary Institute of Canada offered a charcoal beef brisket served with roasted onion aioli on a milk bun while Larkin Brothers provided grilled turkey sausage.
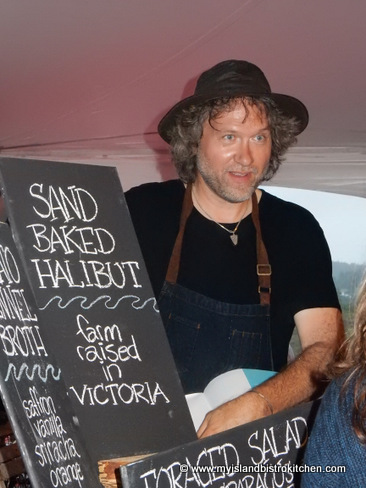
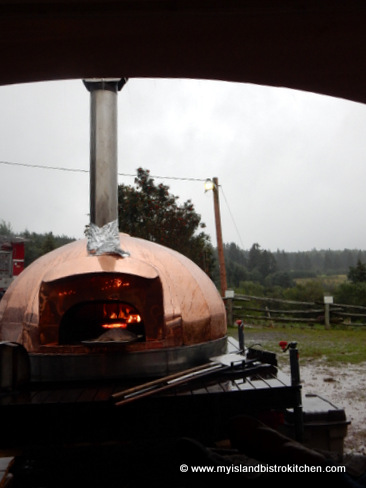
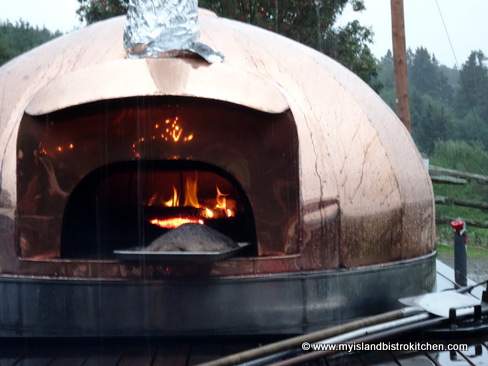
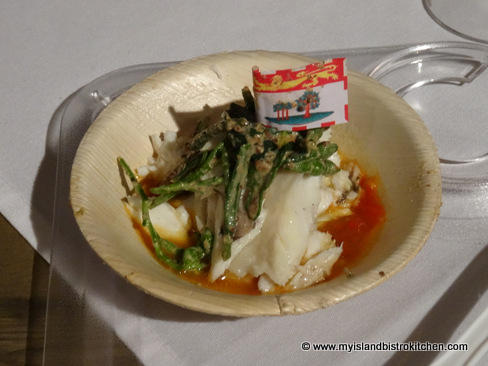
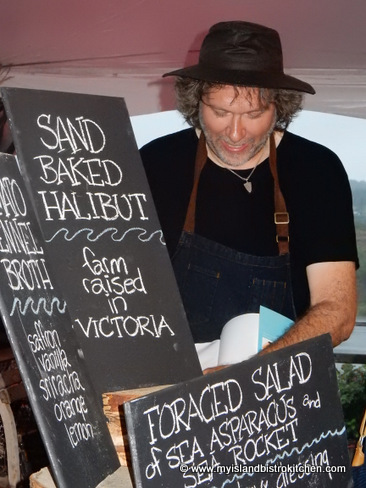
Chef Michael Smith and his crew from his new restaurant, “Fireworks”, at the Inn at Bay Fortune served up wood-fired crusted Island halibut from Victoria-by-the-Sea.
Chef Michael had a portable wood-fired oven which he used to cook the halibut near his serving station.
The halibut was accompanied by saffron tomato broth and sea rocket slaw (and, on yes, the miniature PEI flag, of course!).
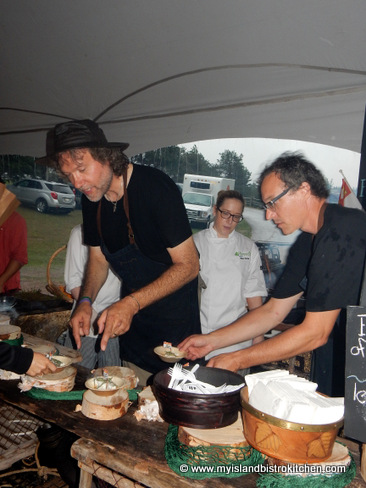
Ever personable and engaging, Chef Michael had a very long line up all evening at his station as foodie fans arrived with the chef’s cookbooks in hand ready for autographing as they picked up a sample of the halibut.
But, make no mistake about it, the master was still overseeing the preparation and presentation of the halibut.
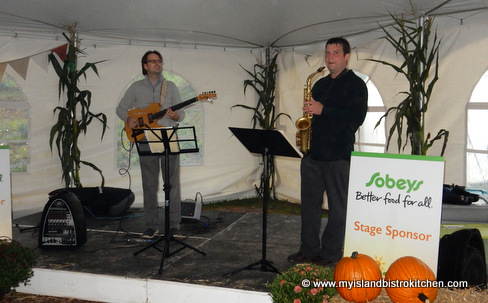
A good PEI party includes two things: Good food and entertainment.
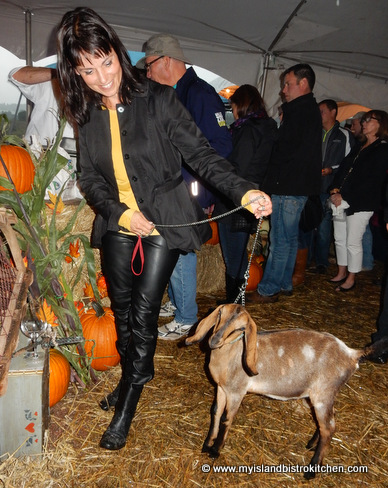
The event was also an occasion for a local food producer to create awareness with people about the source of some of the food they enjoyed during the evening. Florrie Sanderson from Island Hill Farm in Hampshire, PEI, raises a herd of some 60 goats and milks 10 goats.
Florrie Sanderson and “Bae”
Florrie sells her goat milk to Chef Jeff McCourt of Glasgow Glen Farm who uses it to make cheese, some of which was used in a feature dish at the Glasgow Glen Farm station.
Florrie brought along one of her goats, “Bae”, who quickly became a celebrity and photo star throughout the evening. “Bae” drew many smiles and chuckles throughout the evening and she was exceptionally well-behaved!
“Bae”
So, this event featured many PEI flavours – from both the rich PEI soil and the waters that surround our Island. One of the advantages of a roaming feast event is that you get to sample food prepared by different chefs, restaurants, and local food producers all in one venue. Often, it is an occasion to try foods and beverages you may not have tried before so it’s an opportunity to sample something new or, alternatively, perhaps it’s a familiar food but prepared in a new and innovative way.
For more information on the PEI Fall Flavours Culinary Festival and information on tickets and upcoming culinary events, visit their website.
To read stories about other Fall Flavours Culinary Events I have attended, click on these links:
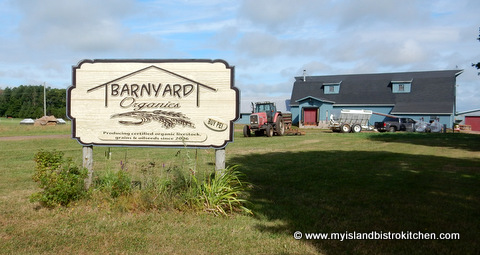
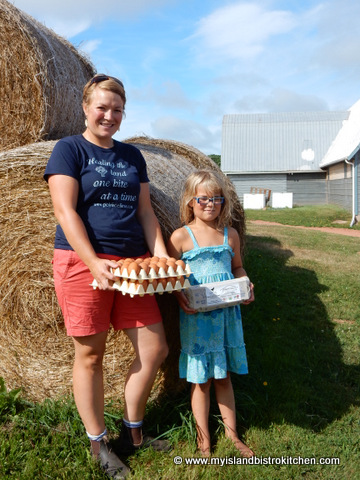
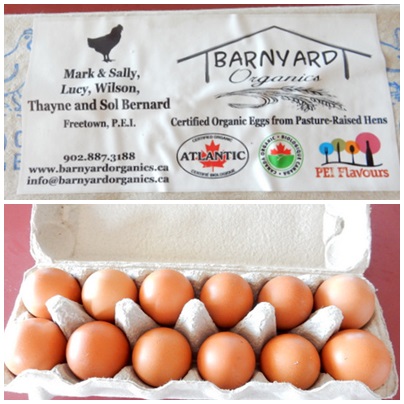
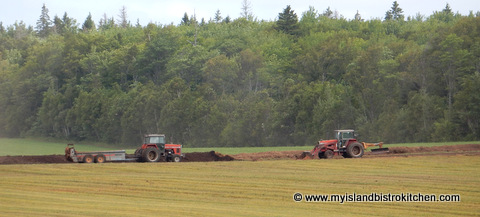
I recently paid a visit to the Bernard family at Barnyard Organics in Freetown, PEI. Sally and Mark Bernard operate one of the largest (if not the biggest) organic farms on the Island and Sally and her daughter, Lucy, were my tour guides.
Sally and Lucy Bernard from Barnyard Organics
Sally (who grew up on a farm in New Brunswick) and Mark (from an Island farming family) met at the Nova Scotia Agricultural College (NSAC) in Truro, Nova Scotia. Sally has an English degree from Mount Alison as well as a Plant Science Diploma from NSAC while Mark holds an Agricultural Business Diploma with a minor in Plant Science. In 2003, while still in college, Mark knew he wanted to pursue organic farming. His father had recently retired from farming so Mark began the groundwork for preparing the first 50 acres on his family’s farm to be taken out of conventional farming practices. The Bernards officially became certified organic farmers in 2006 and, since 2010, they have 550 organic acres on their farm and also rent additional acreage near Kensington.
Barnyard Organics, the name of the farm, is certified under Atlantic Certified Organics (ACO), a certification body which is accredited with the Canadian federal government. This body enforces the national organic standards such as buffer zone requirements from surrounding farms using conventional farming methods and it provides a list of approved substances that can be used in organic farming. As such, the farm is required to keep records of any products or substances used. In order to remain certified organic, the Bernards are subject to yearly inspections from ACO.
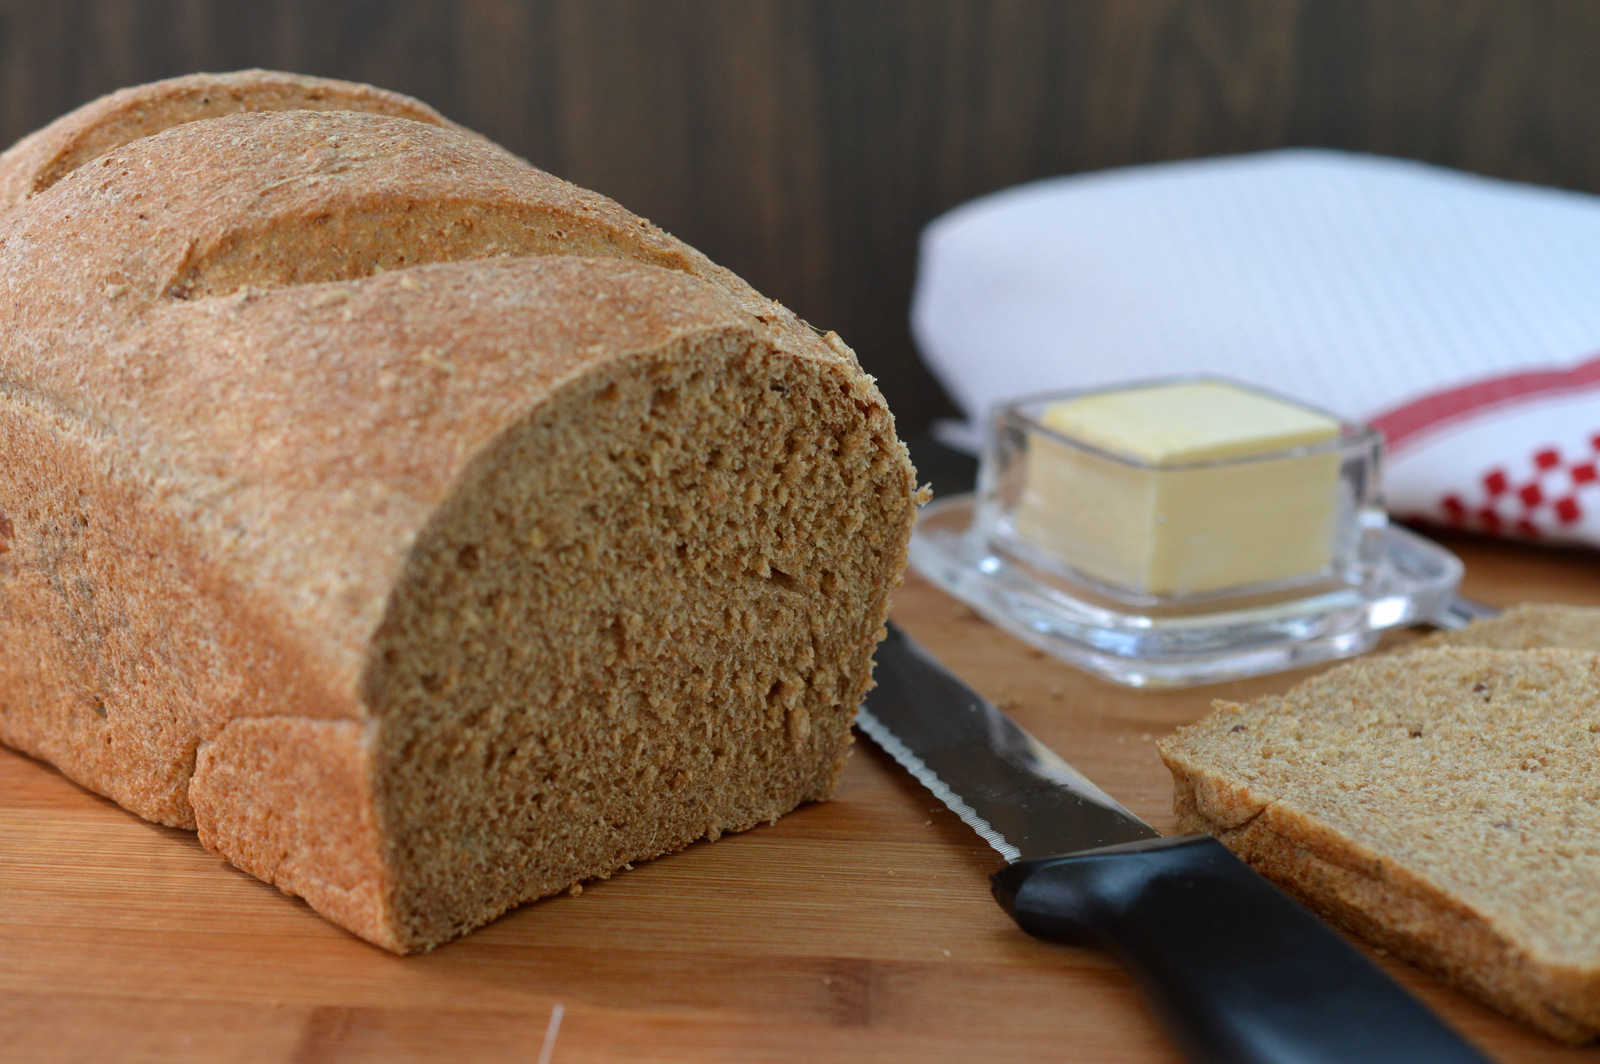
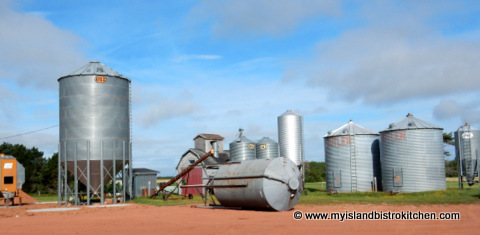
The main focus of the farm is on growing grains that include soybean, barley, wheat, oats, field peas, buckwheat, and clover. More than half of the grains are sold to small-scale organic producers in the Maritimes as a complete mixed animal feed. The remaining half goes to Speerville Flour Mill in New Brunswick and to brokers in Quebec and Ontario. Of note, 35-40 acres of the farm are dedicated to growing wheat specifically for bread.
Bread made with Wheat Grown on Barnyard Organics Farm in Freetown, PEI
In addition, the Bernards also have both meat birds and about 150 laying hens.
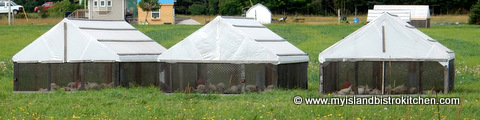
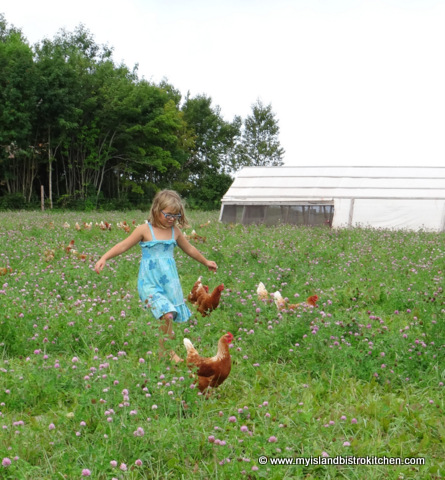
The meat birds are raised on a portable pasture system which means the shelters they live in are moved each day so the birds always have fresh grass to nibble on.
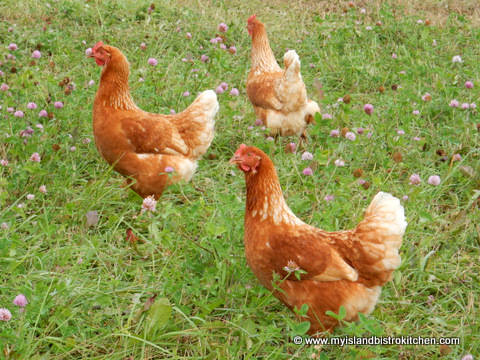
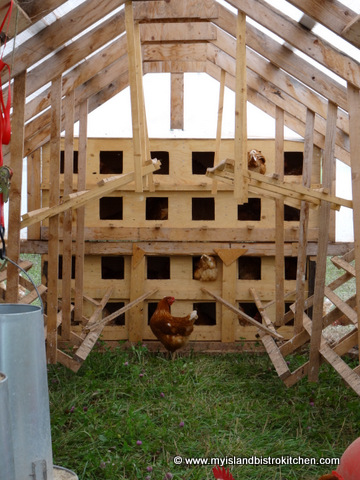
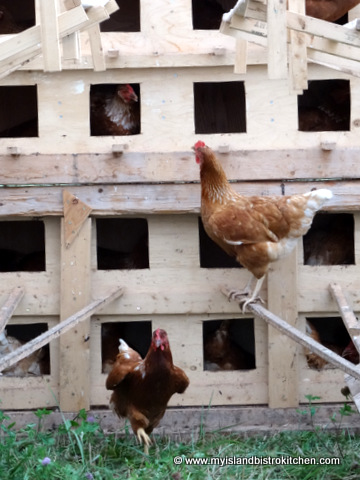
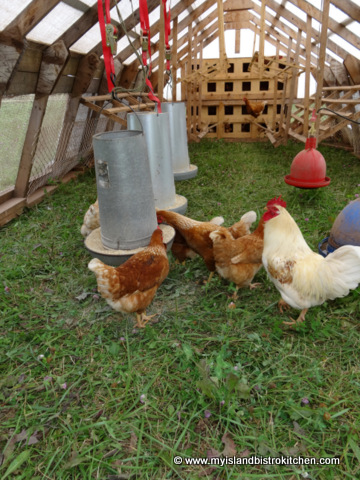
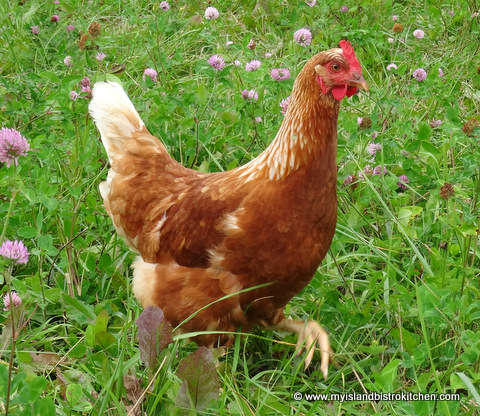
The laying hens are completely free range so they have unfettered roaming privileges in a field nearest the farm buildings. They then take up winter residence inside a barn.
These are their summer condos!
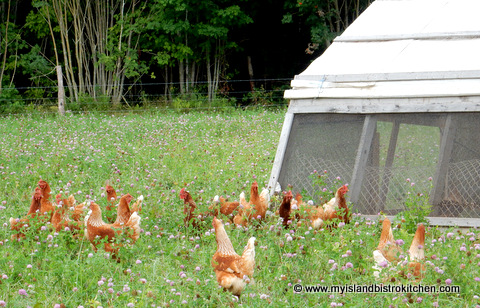
This is where the flock hangs out when they are not out roaming about the field.
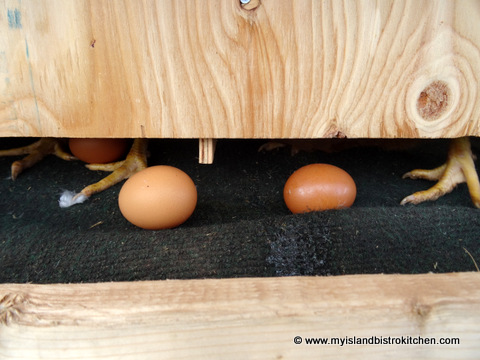
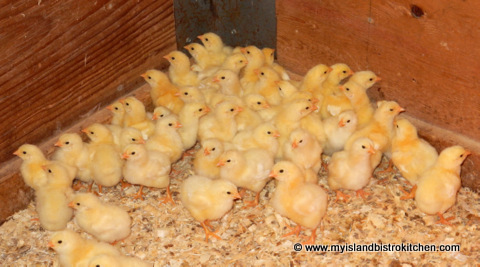
And, this is what is found on the other side of the “condos”.
Baby chicks on the farm!
Both meat and laying birds are raised on organic grains grown on the farm so the Bernards know exactly what their fowl are fed and customers can be assured the chickens and eggs are organic and of the highest quality.
About 90% of their meat birds and eggs are direct marketed to customers through CSA (Community Supported Agriculture) shares. This is a program whereby consumers (sometimes referred to as shareholders) invest in their food system by paying, the producer, upfront, for a season of fresh farm products. In exchange, the producer agrees to employ good farming practices to ensure a food supply and commits to sharing the resulting farm produce with those shareholders. This method of farming gives the farmer operating capital to buy supplies and run the farm and, in turn, CSA customers get quality fresh produce – in this case, fresh organic chickens and eggs from the Bernards.
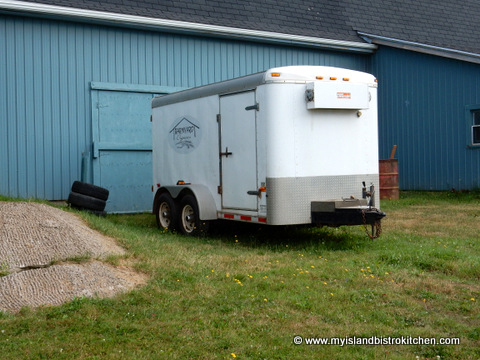
Barnyard Organics currently has 100 CSA members and delivers to customers every two weeks in both Charlottetown and Summerside, alternating week about. Sally packages her fresh chickens and eggs, loads up her trolley fitted with refrigeration, and heads off with her deliveries.
Through the CSA market method, Sally gets to know her customers directly and they get to meet with the producer of their food and have the opportunity to put money directly into the producer’s hands with no middle parties. In addition, this customer-producer interaction provides the opportunity for customers to know where their food comes from and learn how it is produced. For the producer, this method allows for face-to-face feedback on products.
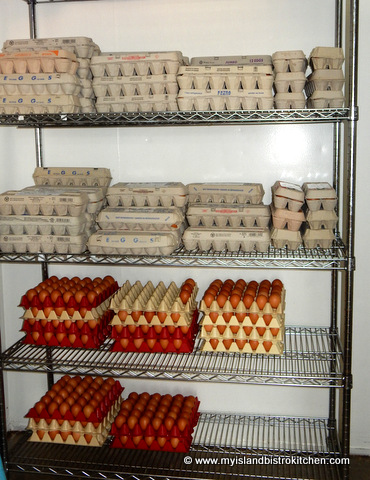
The remaining 10% of the farm’s products are sold to customers who regularly drop by the farm to pick up their farm-fresh eggs and chickens from the large cooler the family installed on the farm.
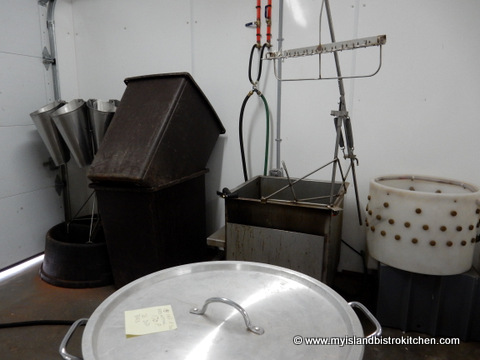
Barnyard Organics also has a small provincially-inspected processing plant where they process approximately 60 chickens a week, ready for distribution to their customers.
Farming organically is not without its challenges. For example, the Bernards don’t use chemical treatments that conventional farmers do so they can’t buy just any kind of fertilizer for their fields. Instead, they use mussel shell waste as well as manure from a nearby dairy farm; however, the manure needs to first be composted before being spread on the fields because it is not organic.
The farm also has its own grain dryer and soybean roaster which are needed because the Bernards can’t take their product to any local commercial dryers or roasters because of potential cross-contamination with non-organic grains.
Sally says their greatest satisfaction comes from knowing they have healthy soil on their farm to produce healthy food. The Bernards practice healthy crop rotation and focus on feeding the soil, not taking from it and depleting its goodness.
Lucy Bernard
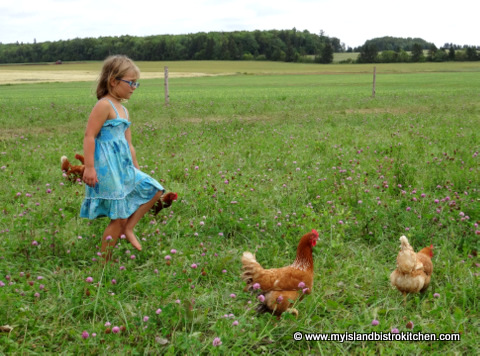
In particular, Sally derives great satisfaction from seeing their children interact with farm life. Because she home schools the children, they are exposed each and every day to experiential learning on the farm. Even 7-year old Lucy is already involved with organic farming. She takes the livers and hearts of the processed chickens, dehydrates them, and sells them for organic dog food. Lucy is also helping with the chicken business on the farm, too, and happily moves about the field of hens.
Sally jokes that Lucy could give the tour of the farm as well as she can and says their children are so acclimatized to farm life that they don’t even know that not everyone knows what life on a farm is like.
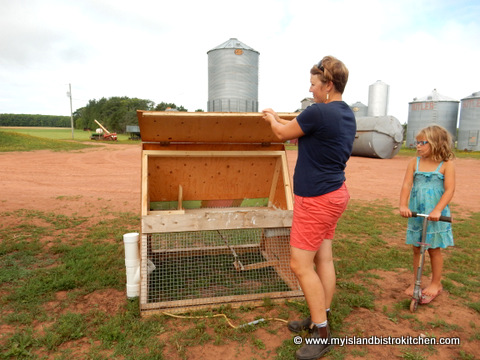
This summer Sally started a “Rent-A-Chicken” project that was so popular, she ended up with a waiting list. Essentially, the initiative allowed people to have a couple of chickens in their own backyards from June until October, enjoy the eggs, and then return the chickens to the Bernards in the fall without having to worry about what to do with the birds in the winter. The Bernards delivered, to renters, a small, portable chicken coop, two laying hens, feed and grit, food and water dishes, and a guide for raising hens.
Sally showing one of the portable chicken coops that are part of her “Rent-A-Chicken” Package
Ideally, each hen could be expected to lay six eggs a week so renters have a dozen fresh organic eggs every week.
In the fall, the Bernards will pick up the birds and take them back to the farm. Cost for the package for the 2015 season was around $300. Feedback has been very positive and, in fact, some folks have already asked that the birds be banded so they can have the same ones back next year!
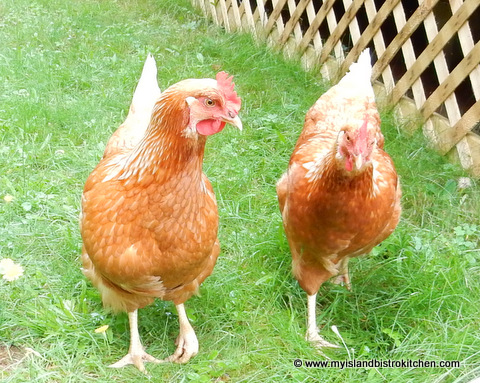
To find out, from a renter’s perspective, what the chicken rental experience was like, I met with Shirley Gallant who had two birds rented from the Bernards this summer.
As soon as she heard of the opportunity, Shirley knew it was for her as she had had a few hens in her backyard some years ago but wintering them was a problem for her. Because the Bernards will collect the two hens in the fall, Shirley has been able to have the hens for the summer and enjoy their eggs with no worries about what to do with the hens over the winter. The two hens happily roam around Shirley’s yard during the day and then retire to their coop for the night. For Shirley, the experience has been very positive and she says she would do it again because “the hens are fun to have around” and she has fresh eggs for her organic diet.
Shirley Gallant with one of her rented chickens from Barnyard Organics
Barnyard Organics farm does offer tours but the Bernards appreciate advance reservations as this is a busy working farm and family. For more information on Barnyard Organics, visit their website.
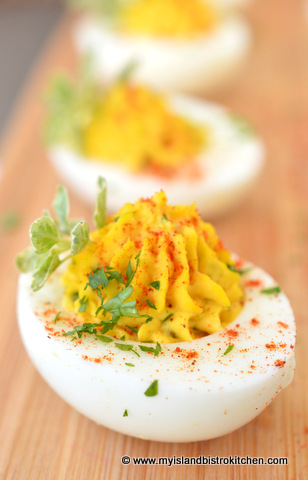
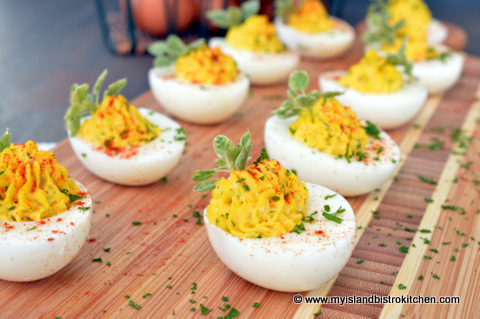
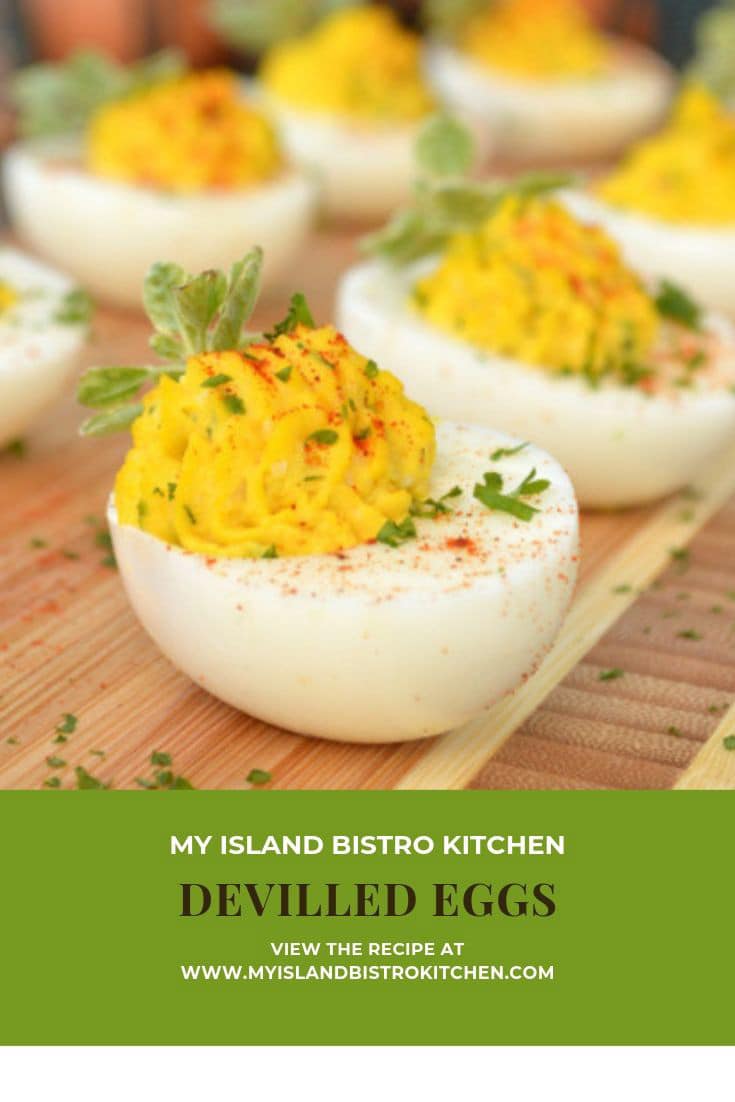
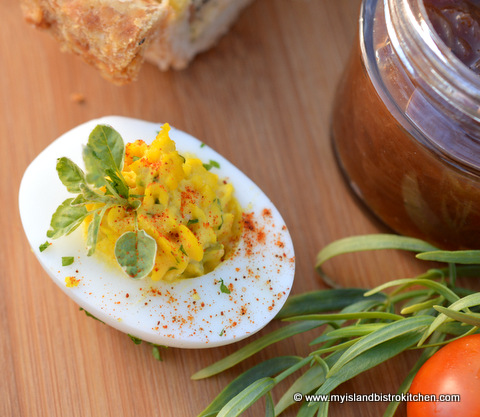
As is my standard practice when I visit a local food producer, I like to create a recipe using and featuring one of their products. I have chosen to use the brown eggs to make devilled eggs. These eggs have gorgeous vibrant yellow yolks so they make colorful devilled eggs.
Devilled Egg
The Bistro’s Devilled Eggs
Ingredients:
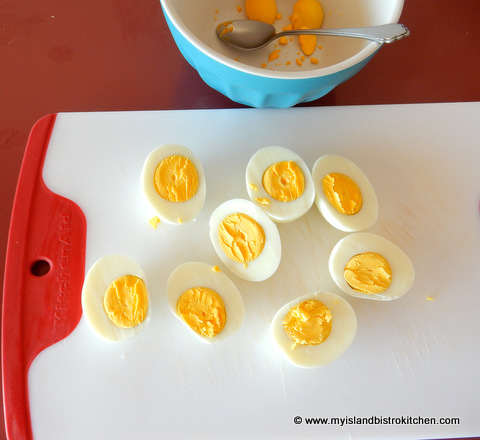
5 hard-boiled eggs, cooled, peeled, and sliced in half lengthwise
2 – 2½ tbsp mayonnaise
1 tsp sour cream
½ tsp prepared mustard
1½ tsp onion, minced
¾ tbsp sweet pickle relish
2 tsp Parmesan cheese, finely grated
Pinch garlic powder
½ tsp fresh dill, chopped fine
¾ tsp fresh parsley, chopped
Pinch cayenne
Salt and pepper, to taste
Paprika
Fresh parsley, chopped
Sprigs of fresh herbs (optional) Method:
Gently scoop out egg yolks and place in small bowl. Set egg whites aside.
Mash egg yolks with fork. Add all remaining ingredients. Mix well.
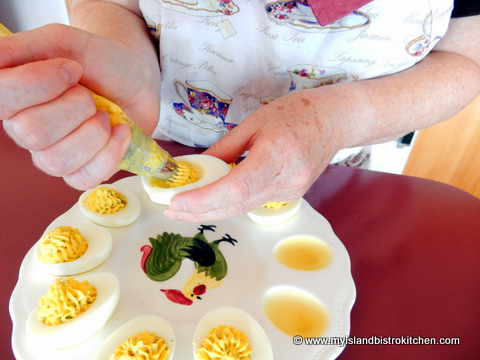
Fill egg white cavities with the devilled egg mixture using either a pastry bag fitted with a large decorative tip (I use a Wilton 6B tip) or, alternatively, use a spoon.
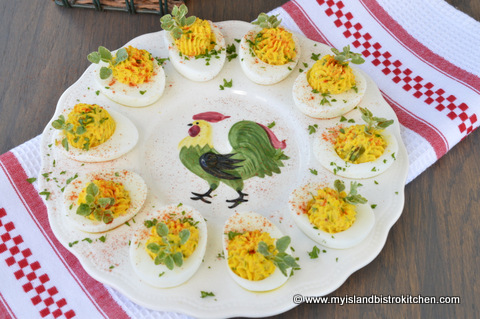
Refrigerate devilled eggs at least 1 hour before serving. At time of serving, sprinkle with chopped fresh parsley and/or paprika. Garnish each with a small sprig of a fresh herb, if desired.
Yield: 10 servings (1 devilled egg each)
Devilled EggsDevilled Eggs
—————————————————————————-
Thank you for visiting “the Bistro” today. If you enjoyed this posting and recipe, please share it on your social media websites.
Connect with “the Bistro” through the following social media:
5 hard-boiled eggs, cooled, peeled, and sliced in half lengthwise
2 – 2½ tbsp mayonnaise
1 tsp sour cream
½ tsp prepared mustard
1½ tsp onion, minced
¾ tbsp sweet pickle relish
2 tsp Parmesan cheese, finely grated
Pinch garlic powder
½ tsp fresh dill, chopped fine
¾ tsp fresh parsley, chopped
Pinch cayenne
Salt and pepper, to taste
Paprika
Fresh parsley, chopped
Sprigs of fresh herbs (optional)
Instructions
Gently scoop out egg yolks and place in small bowl. Set egg whites aside.
Mash egg yolks with fork. Add all remaining ingredients. Mix well.
Fill egg white cavities with the devilled egg mixture using either a pastry bag fitted with a large decorative tip (I use a Wilton 6B tip) or, alternatively, use a spoon.
Refrigerate devilled eggs at least 1 hour before serving. At time of serving, sprinkle with chopped fresh parsley and/or paprika. Garnish each with a small sprig of a fresh herb, if desired.
Summer is reluctant to leave Prince Edward Island this year and I’m perfectly fine with that. Today (September 19, 2015), the temperature soared to almost the 30C mark! We’re not accustomed to these kinds of temperatures in mid-September here on the Island ….but we’ll take them!
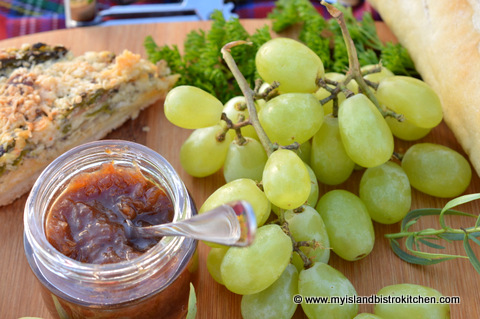
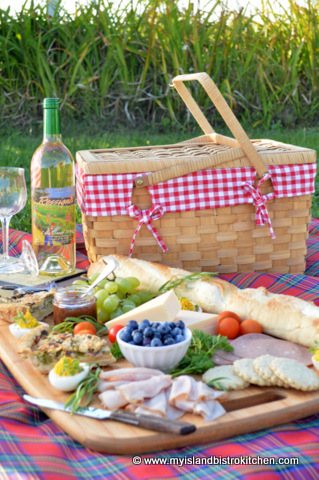
Just as summer may not be in a hurry to leave us, I’m equally reluctant to put away my picnic basket. When temperatures are still delightfully summer-like, I want to continue with my picnics.
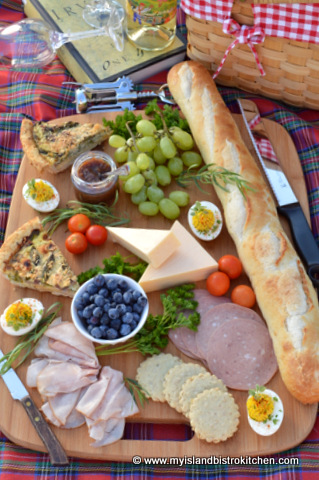
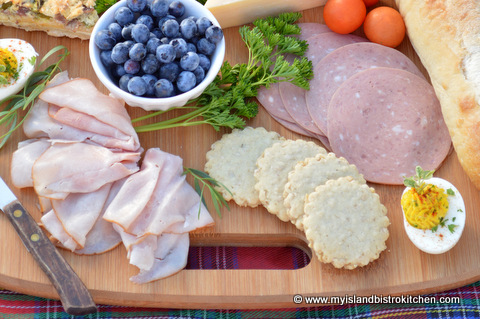
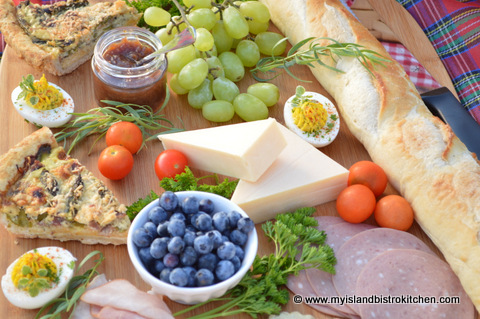
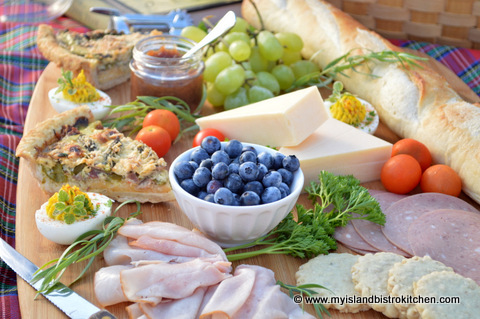
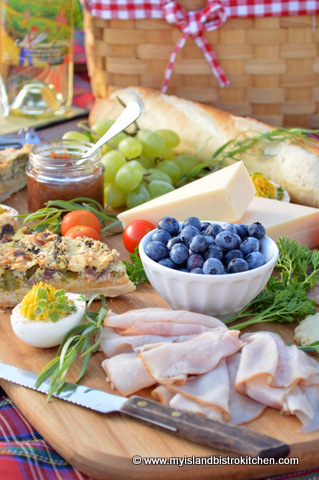
A Charcuterie board is a wonderful and easy way to prepare a light meal, whether indoors or in the great outdoors. It can be as simple or elaborate as you like. I’ve opted to prepare a fairly substantial board for our meal this evening because I’m not cooking a dinner this evening (it’s simply too warm – how great is it to be able to say that!). So, here’s our early evening charcuterie-plus board fare.
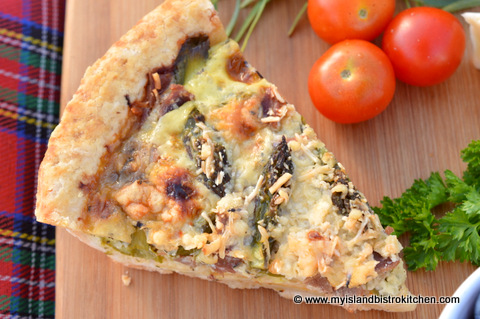
Let’s take a closer look at what’s on the board. Quiches are great additions to picnic fare since they can be eaten cold or served slightly warm and they can be prepared ahead of time. This is my asparagus quiche and you can get my recipe here.
Asparagus Quiche
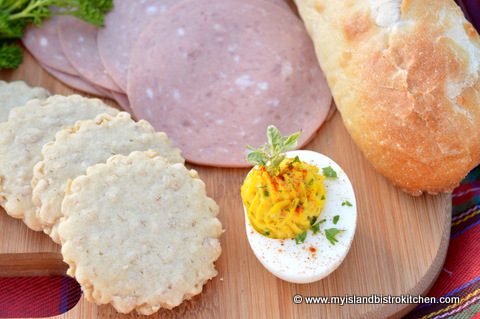
I’ve included devilled eggs on the menu since they are classic picnic fare. Besides their wonderful flavor, they also add color and texture to the board. Those are three elements I like to keep in mind when preparing a charcuterie board.
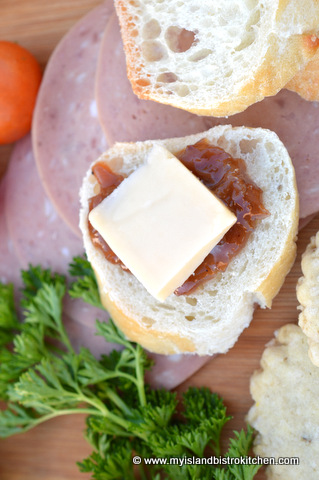
Add any cold cuts you like to the board. I’ve included salami and Tuscan ham on my board today.
I’ve only included one cheese on the board – a good quality Gouda. If I hadn’t included the quiche, I would have added more cheese and meat varieties. Adding some garden-fresh cherry or grape tomatoes adds a bright pop of color to the board. These are fresh from our garden. We have a bountiful supply of fresh herbs in the garden and they make great “fillers” to close in space on charcuterie boards.
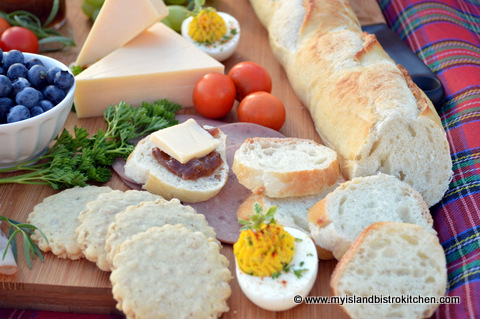
Slices from a long baguette are suitable bases for the cold cuts and cheese.
My rhubarb relish is a tasty condiment to this type of meal.
Green grapes and blueberries round out the fruit component. The blueberries are fresh picked from a local blueberries u-pick.
My staple of oatcakes can be used as either a savory or sweet aspect to the meal. Spread an oatcake with a bit of rhubarb relish and add some meat and/or cheese, and you have a savory bite. Or, eat them plain as cookies. They’re good either way.
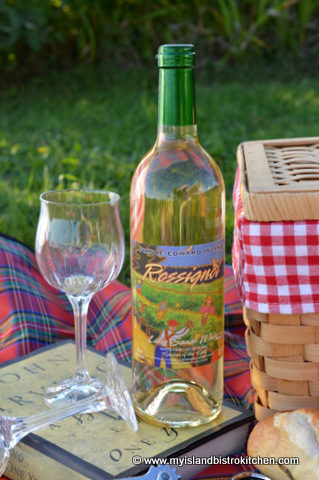
My wine pairing today is Rossignol Little Sands White Wine produced in eastern PEI.
And, there you have all the components of my colorful and tasty late summer charcuterie picnic!
Perfect for easy, relaxed casual dining anytime, anyplace.
I’m just not going to pack away that picnic basket just yet!
Connect with My Island Bistro Kitchen on Social Media
Follow “the Bistro” on Pinterest at https://www.pinterest.ca/peibistro/ and pin the Pinterest-ready photo at the end of this posting to your favorite Pinterest boards!
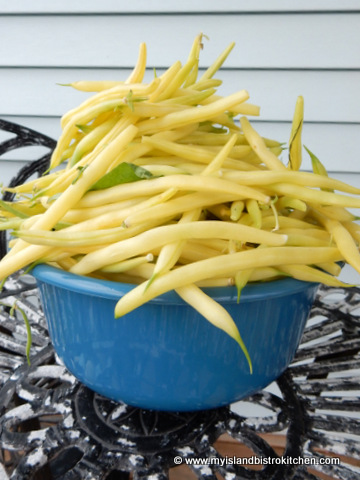
We have had an abundance of yellow wax string beans this year. They were late producing but they sure made up for their tardiness.
We can only eat so many fresh beans so one way of preserving them is to make mustard beans. This is similar to mustard pickles which are made with cucumbers.
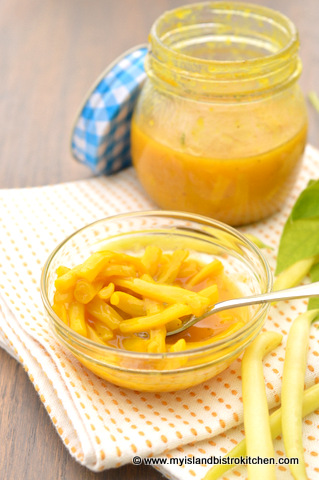
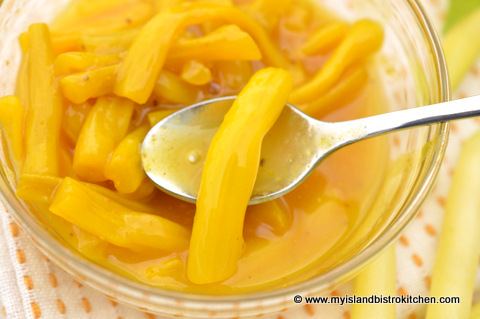
Mustard beans are actually quite easy and quick to make. The beans are par-cooked in boiling water, drained, then added to a mustard sauce . The trick is to cook the beans just until they are barely fork tender as, otherwise, they will become soggy and tough. The beans should still hold their shape but not be extremely hard when you bite into them.
Mustard beans are a great addition to many meals; we use them just like we would mustard pickles. They are simply a different texture and I make the mustard sauce a wee bit differently.
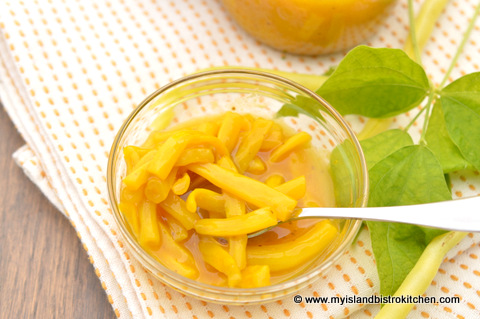
Mustard Beans
Ingredients:
1 lb yellow wax beans, cut into 1½” lengths (apx. 4 cups)
1½ – 2 cups boiling water
½ tsp table salt
1½ cups white vinegar
1 cup granulated sugar
1/3 cup brown sugar, lightly packed
¼ cup all-purpose flour
1½ tbsp dry mustard
½ tsp celery seed
1½ tsp turmeric
½ tsp. ground ginger
½ tsp table salt
Supplies and Equipment Needed:
4 half-pint glass canning jars for the mustard beans (plus 2-3 more half-pint-sized jars to take up extra space in the canner basket during the hot water bath process)
4 – two-piece lid and screw band sets (lids must be brand new and NOT previously used)
Medium-to-large sized, heavy-bottomed, stock pot for par-cooking beans and for making the mustard beans
Large colander for draining beans
Large pot for sterilizing jars
Small saucepan for heating jar lids
Large, heat-proof spoon for stirring beans
Water bath canner with basket
Jar lifter tongs
Wide-mouthed canning funnel
Large ladle or heat-proof glass measuring cup
Chopstick or small non-metallic heat-proof spatula to remove any air bubbles/air pockets from filled jars
Magnetic lid lifter
A timer
Clean cloth for wiping jar rims of filled jars
Method:
Wash jars in hot soapy water. Rinse. Fill a large-sized pot about two-thirds full of hot tap water. Place the jars, upright, into the water. Ensure the jars are fully submerged, each jar filled with water, and that the water is at least an inch over the tops of the jars, adding more if necessary. Cover, bring to a boil, and boil gently for 10 minutes. Turn off heat and leave the jars in the hot water to have ready to fill once the mustard beans are ready for bottling.
Fill the canner about half full of hot tap water. Cover and bring to a boil to have it ready for processing of the filled jars.
In medium-to-large sized heavy-bottomed pot and over medium-high heat, bring beans to a boil in salted water. Reduce heat to medium-low and par-cook beans just until they are barely fork tender. Drain in colander. Do not overcook or beans will become soft and mushy.
In the same medium-to-large sized pot in which the beans were par-cooked, heat 1 cup of the vinegar to the boiling point.
Combine sugars, flour, mustard, spices, and salt in bowl. Mix well. Add remaining 1/2 cup of vinegar to make a paste. Add and stir in 2-3 tablespoons of the hot vinegar to the mixture to temper it and then pour all the sauce ingredients into the hot vinegar in the pot. Cook sauce over medium-low heat until thickened, stirring frequently to prevent scorching. When sauce coats a spoon and drips off slowly, it is thick enough to add the par-cooked beans.
Add drained beans. Stir gently to coat beans with sauce. Heat beans over medium-low heat for about 5 minutes just to heat the beans. Gently stir beans constantly to prevent scorching. Do not overheat or overcook beans. Remove pot from heat.
Use jar lifter tongs to carefully remove the hot sterilized jars from the water, one at a time, emptying the water from the jars back into the pot. Drain jars well.
Using a large ladle, or a heat-proof glass measuring cup, and a wide-mouthed canning funnel, transfer mustard beans into the hot sterilized jars, leaving about ¼” headroom in each jar to allow for expansion during the hot water processing. Remove any trapped air bubbles in the jars with a chopstick or small heatproof, non-metallic spatula. Wipe the jar rims with a clean damp cloth to remove any stickiness or sauce particles that could prevent the lids from sealing properly to the jars.
Remove a small amount of the hot water from the stockpot in which the jars were sterilized and place in small saucepan over simmering heat. Place the lids in the hot water just long enough to heat them and to soften the rubber sealing compound. Do not boil the lids or leave in the hot water for an extended time.
Using a magnetic lid lifter, remove lids from the hot water and center the heated lids on jars so the sealing compound on the lid edges aligns with the jar rims. Fingertip tighten ring/screw bands on jars until resistance is encountered. Do not over-tighten.
Using jar lifter tongs, carefully place the hot filled jars upright in wire basket positioned in the canner, ensuring jars do not touch each other or fall over. Depending on the canner basket shape and design, it may be necessary to add some of the hot empty jars, upright, to the basket to fill up space so the filled jars do not topple over. Let the empty jars fill with water from the canner as they are submerged. Ensure the water level is at least 1” above the tops of jars, adding more boiling water as necessary. Cover with canner lid. Increase the heat to return the water to a full rolling boil then decrease the heat to just keep the water at a moderately rolling boil but not boiling over. Process jars in the hot water bath for 10 minutes, adjusting time as and if necessary for altitude. Start timing the processing from the point at which a full rolling boil is reached after jars have been added to the canner. At the end of the processing time, turn off heat and remove canner lid.
Let jars sit in the hot water for 5 minutes then, using jar lifter tongs, carefully remove the jars filled with the mustard beans, one at a time, and transfer them to a heat-proof cutting board, that has been covered with a towel to protect the board, to cool completely.
Listen for the “pop” or “ping” sound as the bottles seal over the next few minutes or hours. The lids of properly sealed jars will curve downward. Let jars rest, undisturbed, on counter for 24 hours. Then, test each jar for proper sealing by lightly pressing down on the center of each jar lid. If the lid is already pressed downward, and does not pop back up, it is properly sealed. Any jars that do not pass this test should be refrigerated and the mustard beans used within a week or so.
Store properly sealed bottles in cool, dark place. Refrigerate mustard beans once jar has been opened.
If you have made this recipe and enjoyed it and/or wish to share it with your friends and family, please do so on social media but be sure to share the direct link to this posting from my website.
Connect with “the Bistro” through the following social media:
Mustard Beans are a great way to use up excess yellow wax beans in the garden for enjoyment outside the growing season. Serve this condiment with any meal of choice.
Course
Condiment
Cuisine
Canadian
Keyword
beans, mustard beans
My Island Bistro KitchenBarbara99
Ingredients
1lbyellow wax beans, cut into 1½” lengths (apx. 4 cups)
1½– 2 cups boiling water
½tsptable salt
1½cupswhite vinegar
1cupgranulated sugar
1/3cupbrown sugar, lightly packed
¼cupall-purpose flour
1½tbspdry mustard
½tspcelery seed
1½tspturmeric
½tsp.ground ginger
½tsptable salt
Instructions
Wash jars in hot soapy water. Rinse. Fill a large-sized pot about two-thirds full of hot tap water. Place the jars, upright, into the water. Ensure the jars are fully submerged, each jar filled with water, and that the water is at least an inch over the tops of the jars, adding more if necessary. Cover, bring to a boil, and boil gently for 10 minutes. Turn off heat and leave the jars in the hot water to have ready to fill once the mustard beans are ready for bottling.
Fill the canner about half full of hot tap water. Cover and bring to a boil to have it ready for processing of the filled jars.
In medium-to-large sized heavy-bottomed pot and over medium-high heat, bring beans to a boil in salted water. Reduce heat to medium-low and par-cook beans just until they are barely fork tender. Drain in colander. Do not overcook or beans will become soft and mushy.
In the same medium-to-large sized pot in which the beans were par-cooked, heat 1 cup of the vinegar to the boiling point.
Combine sugars, flour, mustard, spices, and salt in bowl. Mix well. Add remaining 1/2 cup of vinegar to make a paste. Add and stir in 2-3 tablespoons of the hot vinegar to the mixture to temper it and then pour all the sauce ingredients into the hot vinegar in the pot. Cook sauce over medium-low heat until thickened, stirring frequently to prevent scorching. When sauce coats a spoon and drips off slowly, it is thick enough to add the par-cooked beans.
Add drained beans. Stir gently to coat beans with sauce. Heat beans over medium-low heat for about 5 minutes just to heat the beans. Gently stir beans constantly to prevent scorching. Do not overheat or overcook beans. Remove pot from heat.
Use jar lifter tongs to carefully remove the hot sterilized jars from the water, one at a time, emptying the water from the jars back into the pot. Drain jars well.
Using a large ladle, or a heat-proof glass measuring cup, and a wide-mouthed canning funnel, transfer mustard beans into the hot sterilized jars, leaving about ¼” headroom in each jar to allow for expansion during the hot water processing. Remove any trapped air bubbles in the jars with a chopstick or small heatproof, non-metallic spatula. Wipe the jar rims with a clean damp cloth to remove any stickiness or sauce particles that could prevent the lids from sealing properly to the jars.
Remove a small amount of the hot water from the stockpot in which the jars were sterilized and place in small saucepan over simmering heat. Place the lids in the hot water just long enough to heat them and to soften the rubber sealing compound. Do not boil the lids or leave in the hot water for an extended time.
Using a magnetic lid lifter, remove lids from the hot water and center the heated lids on jars so the sealing compound on the lid edges aligns with the jar rims. Fingertip tighten ring/screw bands on jars until resistance is encountered. Do not over-tighten.
Using jar lifter tongs, carefully place the hot filled jars upright in wire basket positioned in the canner, ensuring jars do not touch each other or fall over. Depending on the canner basket shape and design, it may be necessary to add some of the hot empty jars, upright, to the basket to fill up space so the filled jars do not topple over. Let the empty jars fill with water from the canner as they are submerged. Ensure the water level is at least 1” above the tops of jars, adding more boiling water as necessary. Cover with canner lid. Increase the heat to return the water to a full rolling boil then decrease the heat to just keep the water at a moderately rolling boil but not boiling over. Process jars in the hot water bath for 10 minutes, adjusting time as and if necessary for altitude. Start timing the processing from the point at which a full rolling boil is reached after jars have been added to the canner. At the end of the processing time, turn off heat and remove canner lid.
Let jars sit in the hot water for 5 minutes then, using jar lifter tongs, carefully remove the jars filled with the mustard beans, one at a time, and transfer them to a heat-proof cutting board, that has been covered with a towel to protect the board, to cool completely.
Listen for the “pop” or “ping” sound as the bottles seal over the next few minutes or hours. The lids of properly sealed jars will curve downward. Let jars rest, undisturbed, on counter for 24 hours. Then, test each jar for proper sealing by lightly pressing down on the center of each jar lid. If the lid is already pressed downward, and does not pop back up, it is properly sealed. Any jars that do not pass this test should be refrigerated and the mustard beans used within a week or so.
Store properly sealed bottles in cool, dark place. Refrigerate mustard beans once jar has been opened.
My grandmother had two small fruit-bearing bushes at the edge of her garden – a black current and a gooseberry. Both were good producers despite their relatively small size and age. I remember helping her to stem and tip the berries before they were made into jam. Every year, she would make a small amount of black current jam and the same of gooseberry, both of which would be very judiciously produced at the table throughout the year as these were considered very special jams. One did not eat these jams at the same rate as the more common strawberry and raspberry jams were consumed! I loved her black current and gooseberry jams! Continue reading Gooseberry Jam→