How to Make Bistro Style Beef Bourguignon

Beef Bourguignon
Bistro Style Beef Bourguignon

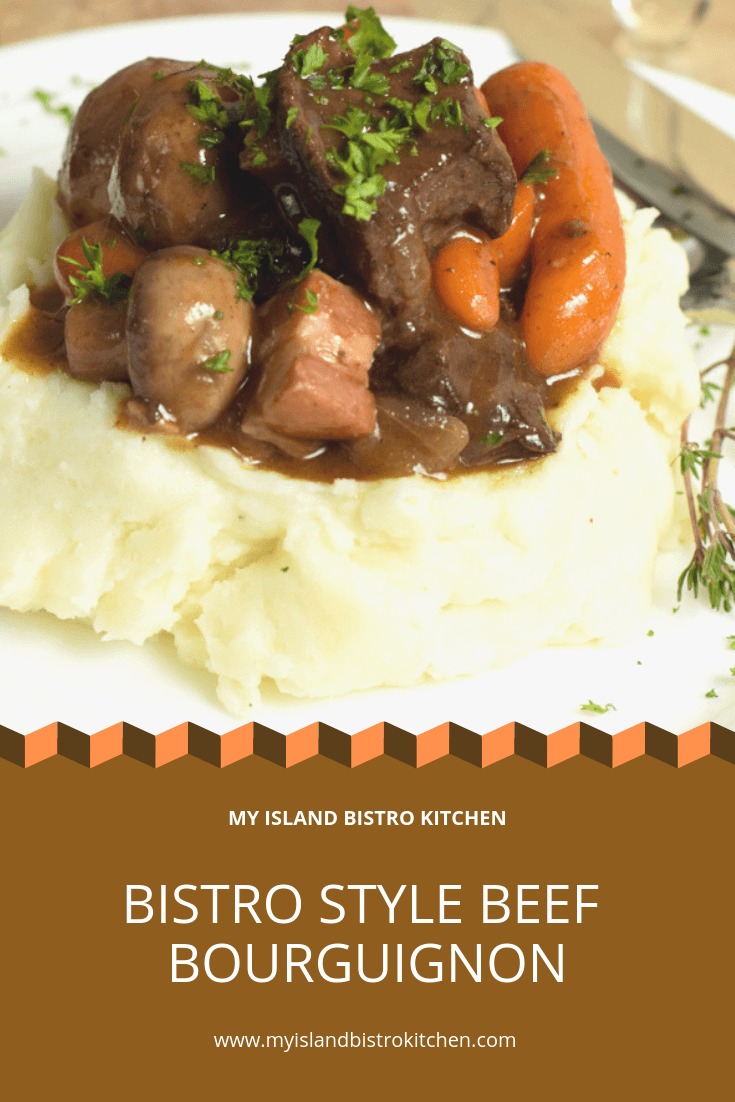
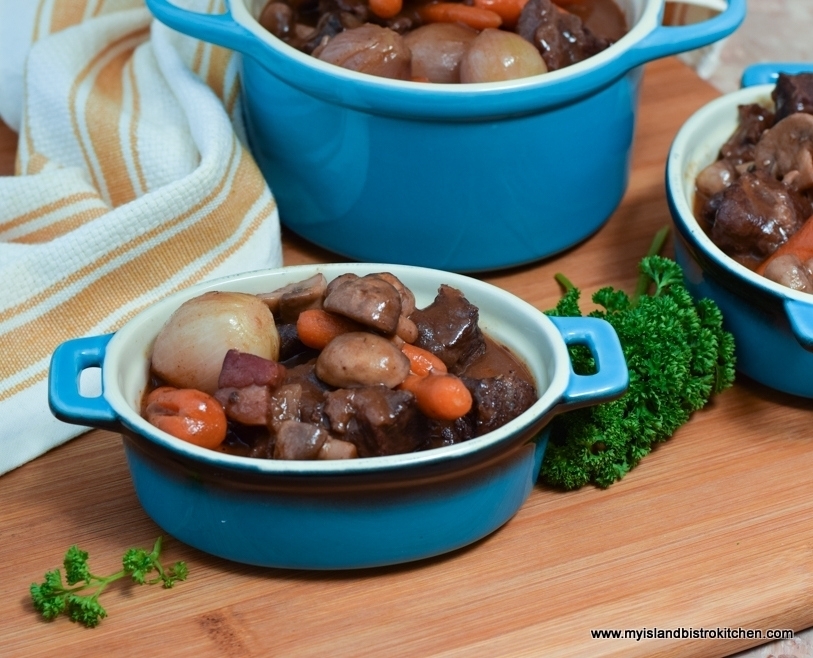
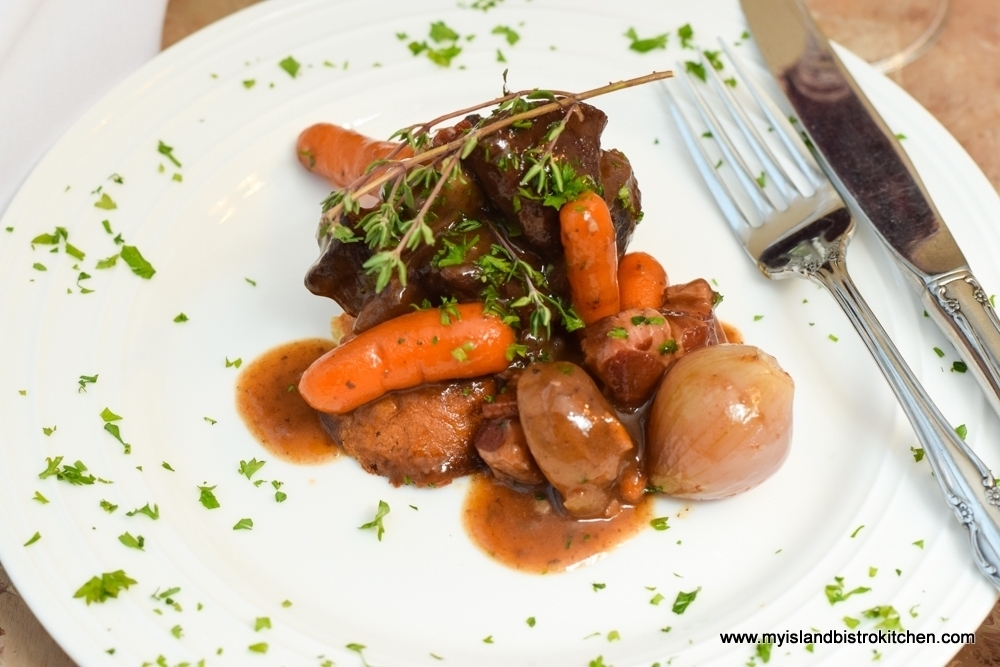
Doesn’t the mere sound of the name Beef Bourguignon conjure up the notion that it is some exotic dish you would expect to find in a French bistro?  Guess what?  You can easily make this classic French cuisine dish at home! Simple ingredients, economical cuts of beef, and time are all that is required.

Braising

Made with basic ingredients, what makes Beef Bourguignon so wonderful is the cooking method known as braising.  Used in many recipes, braising is simply using a long, slow, moist heat method of cooking tougher cuts of meat in a liquid such as red wine and/or beef stock to tenderize the meat.

This method of cooking is great to use for cuts of meat known to be on the tougher side because the combination of moist heat, low cooking temperature, lengthy cooking time, and a flavorful liquid breaks down the connective tissues (collagen) in the meat, melting it into a silky gelatin. This results in divinely tender and succulent meat that will easily break apart with a fork.

Cuts of meat suitable for braising are cuts of muscular meats like chuck or beef cheeks, for example.  These cuts from the highly exercised parts of the animal are ones known to have lots of collagen that, like magic, when cooked long and slow, turn tough cuts of meat into soft gelatin that will break apart with the touch of a fork. If you don’t need a knife to cut the meat, you have yourself a dandy Beef Bourguignon!  Using more premium cuts of beef will not become more fork tender than the cheaper cuts in this dish so, save your money, and buy the economical cuts.

Braising can be done on the cooktop over low heat but oven braising will provide more even heating and will reduce the risk of burning the meat.  Braising on the stovetop will result in more heat directly hitting the bottom of the pot specifically as opposed to oven braising where the heat is more evenly distributed to all sides of the cooking vessel.

Beef Bourguignon is not difficult to make but there are several steps involved and some time has to be dedicated to it.  It’s not a dish you would start for dinner after arriving home from work at 5:00pm.

There are many versions of this dish and various ways in which to prepare it.  What follows is the method that works well for me.

Choosing the Meat

Both pork and beef are used in this dish.

Pork

Pork lardons add a lovely texture and layer of flavour richness to Beef Bourguignon..  Lardon is another name for thick, fatty salt pork, much thicker than the thin bacon strips found, pre-packaged, in supermarkets.  While the lardons, themselves, lend wonderful texture and flavor to the dish, it is their rendered fat that is prized for the rich flavour it gives to the beef as it is seared before it is braised.

Lardons
Pork Lardons

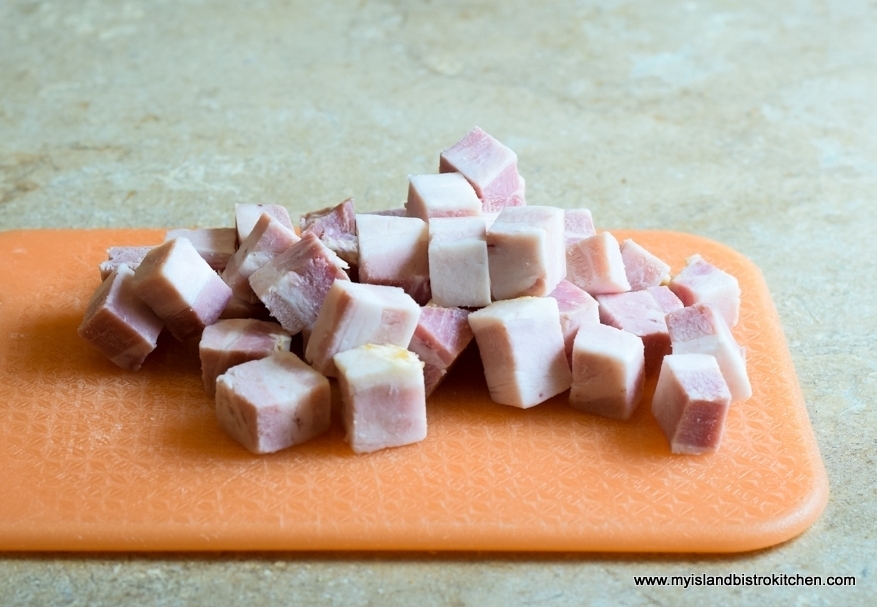
I recommend using the lardons over the thin bacon because the thickness of the lardons allows them to keep their shape when fried.  You may need to go directly to a butcher shop (as opposed to a standard supermarket) to get the lardons.  I went to a local butcher, KJL Meats, here in Charlottetown and, as soon as I said what I was making, the butcher knew exactly what I was looking for and he actually cut the lardons into suitably-sized chunks for me!

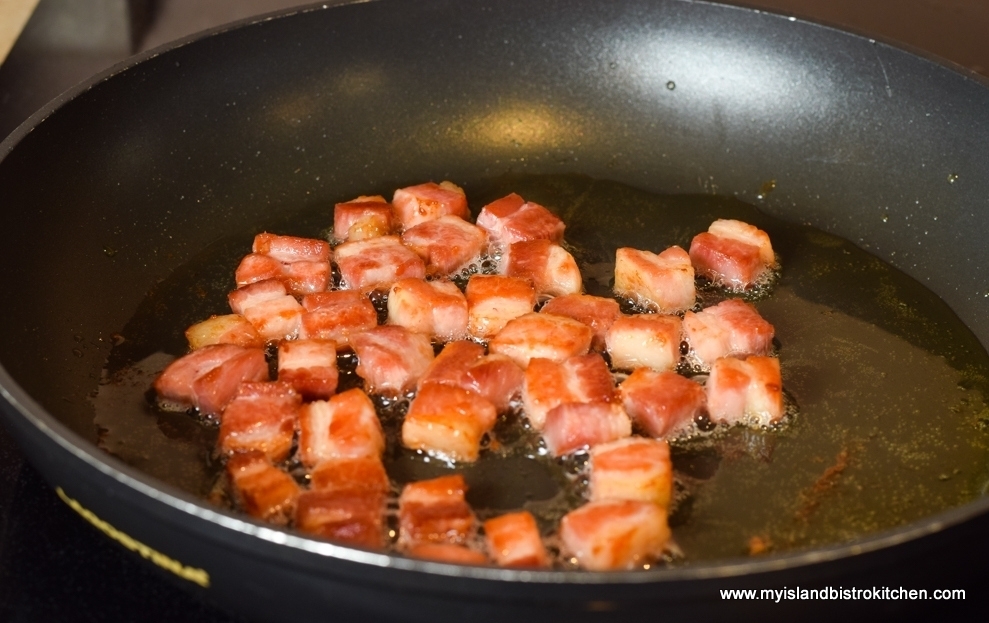
The lardons are cooked until the fat in them has been rendered out. That flavorful fat is then used to sear the beef, keeping all the wonderful flavor in the dish.

Lardons
Pork Lardons

Beef

 As mentioned, one of the best things about Beef Bourguignon is that economical cuts of beef are used.  My preference is to use beef cheeks for this recipe though chuck also works very well.  Some marbling in the meat is also beneficial as the slow cooking process will melt the fat and turn it into a melt-in-your-mouth gelatin. The transformation is absolutely amazing!

To get exactly what I want for meat, I go directly to a local butcher – it’s local PEI beef and it’s fresh.  The meat in the photographs came from MacQuarrie’s Meats in Milton, on the outskirts of Charlottetown. Depending on where you live and what your local butchers keep on hand, you may need to pre-order specific cuts, such as beef cheeks, from your local butcher.

Beef Cheeks
Beef Cheeks

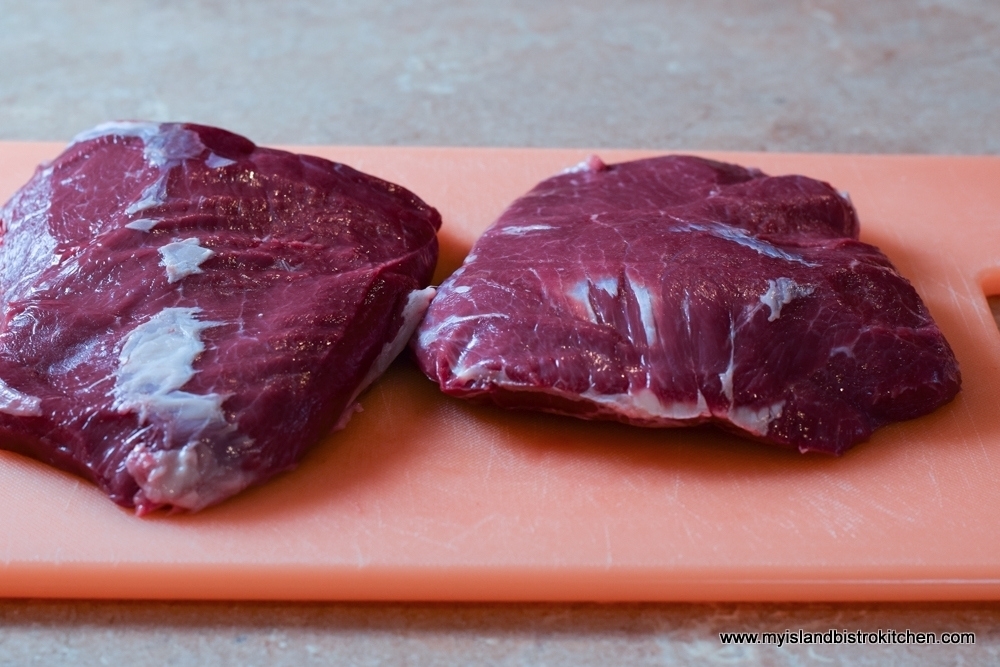
If there happens to be any excess hard fat or tendons still visible on the meat, remove them.  Pat the meat dry with paper towel – this will help the cornstarch or flour stick to the meat when it is dredged before being seared.  Season the meat with sea salt and freshly ground pepper.

Beef Cheeks
Beef Cheeks cut for Beef Bourguignon

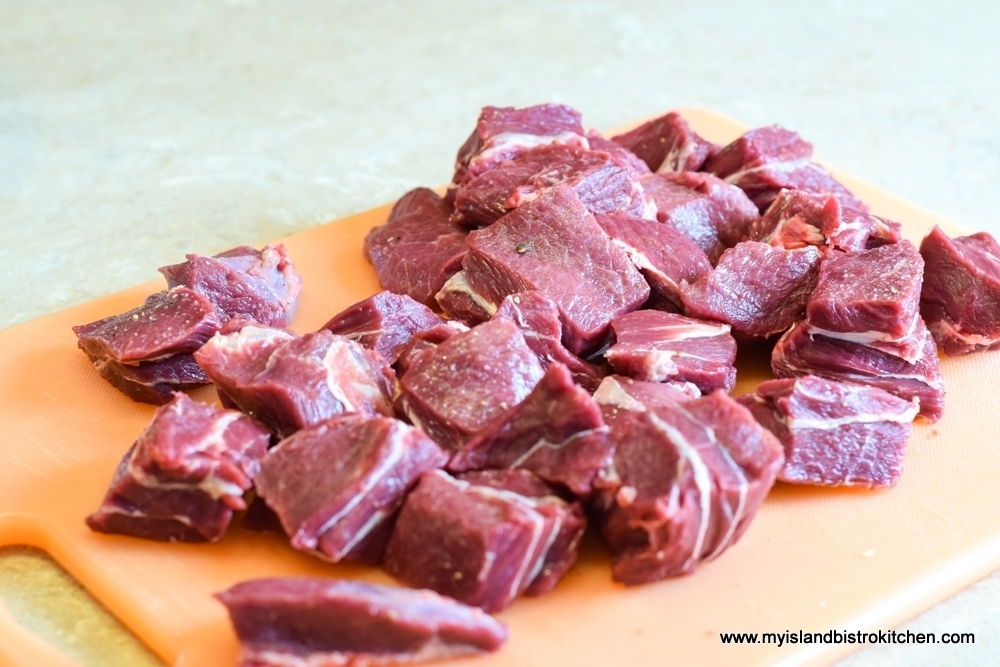
Cut the meat into rather large chunks – approximately 2” pieces.  This is meant to be a rustic dish and cutting the meat any smaller may cause the meat to dry out faster and it won’t have the same presentation as if the chunks are larger.  Once the meat is dredged in the cornstarch or flour, sear it over medium-high heat in the lardon fat.

Searing Beef for Beef Bourguignon

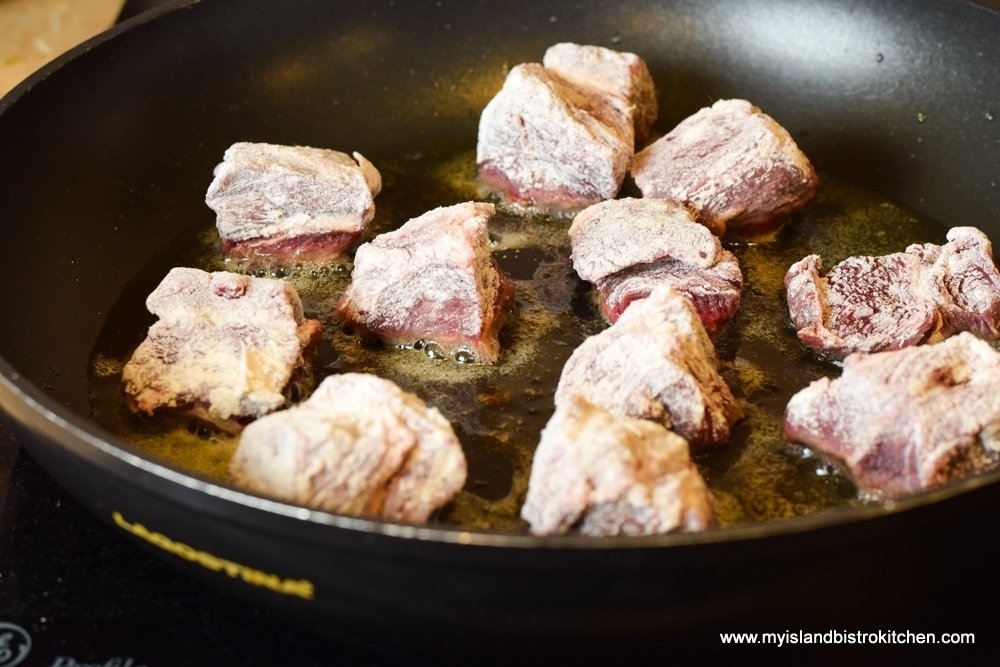
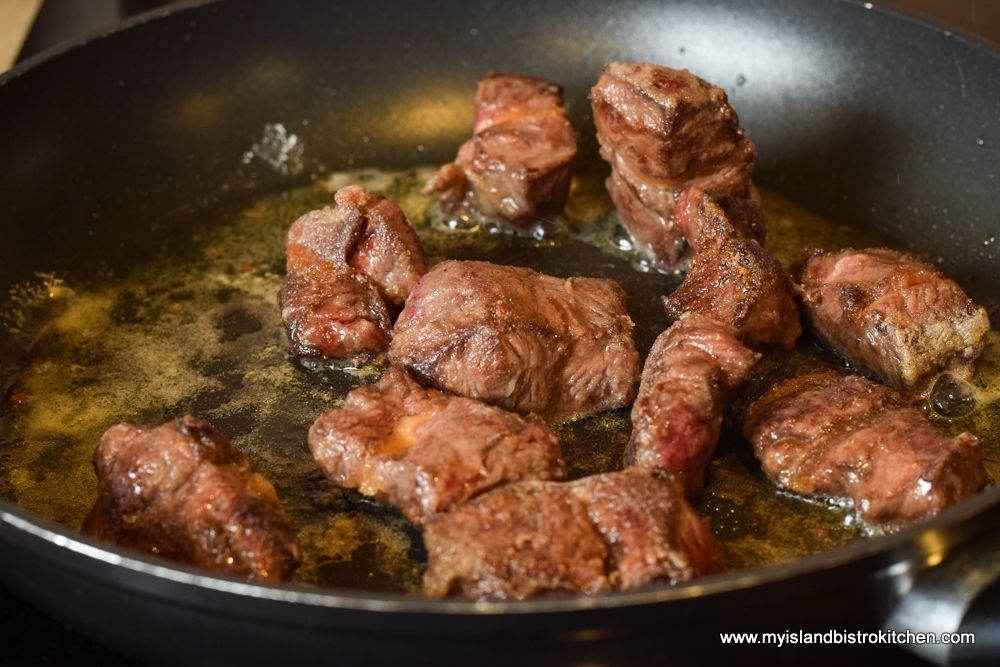
Searing the meat before simmering it in the cooking liquid is known as brown braising. This will add depth of flavour as the meat caramelizes while a brown crust forms on the beef. This ‘browning” will not only add flavor but it will help produce a rich brown sauce.  Don’t try to speed up the process by over-crowding all the meat pieces into the pan at once.  Work in batches and leave some space between the chunks of meat so they brown nicely. The aim of this process is to sear the meat, not steam it or cook it all the way through.

Searing Beef for Beef Bourguignon

Making the Bouquet Garni

Fresh herbs really do make the difference in this dish. You will need two to three sprigs each of fresh thyme and parsley along with two dried bay leaves.  These are easily tied together with kitchen string/twine.  Insert 4 whole cloves into the center of a 6” strip of celery and tie the herbs to the celery.  This bouquet will get dropped into the braising liquid to flavour it as the meat cooks.

Bouquet Garni
Bouquet Garni

When the Bourguignon is cooked, the bouquet garni is removed and discarded.

Preparing the Braising Liquid

Once the meat has been seared, there will be caramelized brown bits (known as fond) left in the pan.  This bears wonderful flavour and will help to color the braising liquid.  Deglaze the pan with either red wine, brandy, or beef stock, scraping up the flavorful brown bits. I find the brandy adds a layer of flavour complexity, richness, and depth to this dish.

Some basic aromatics always form a good basis for any braising dish.  Cook some coarsely chopped onion in some olive oil and butter.  Butter (which gives fabulous flavour) tends to burn easily which causes some flavour deterioration.  Olive oil, however, does not burn so quickly so heating it first then adding the butter prevents the butter from burning and yet still gives the dish some buttery flavour.  Add some garlic and just a bit of tomato paste and then, of course the red wine which, next to the beef, is the signature ingredient in Beef Bourguignon. It’s really not Beef Bourguignon if there is no red wine in this dish!

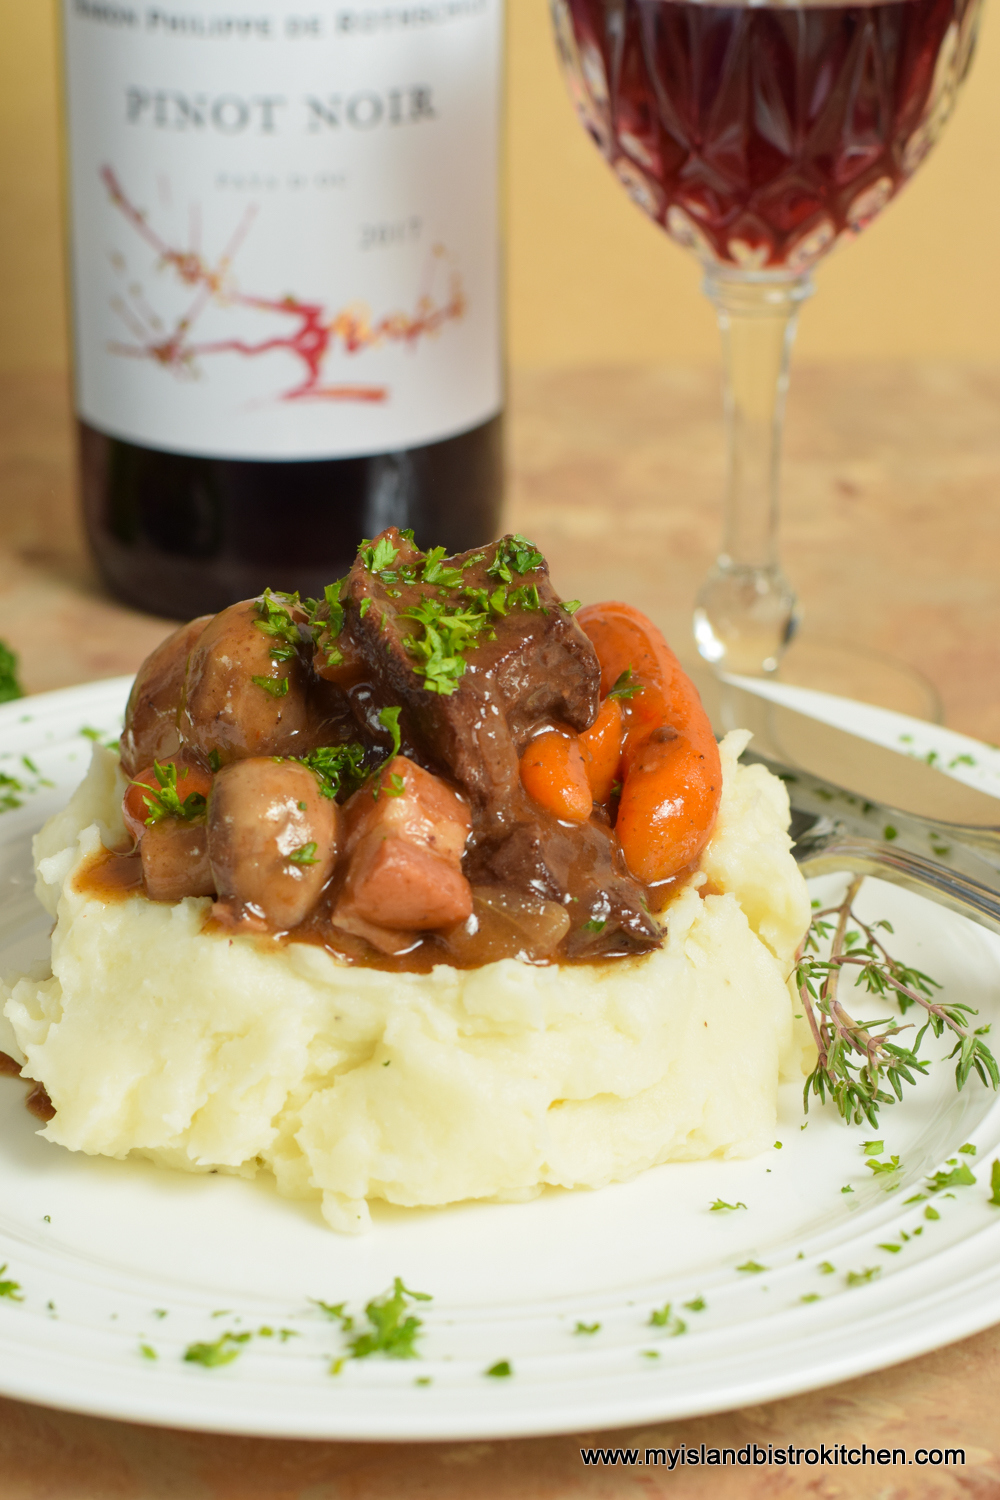
The acidic properties in the red wine not only add flavour to the dish but, importantly, soften muscle fibres and generate melt-in-your-mouth quality meat.  I recommend using a dry red wine. While technically any dry red wine will work in this dish, I like to use a Pinot Noir that has earthy notes to it – it tends to be a wine that goes well with all sorts of red meat.  There is no need to go with the best wine on the market for this dish but I do suggest using one you would be prepared to drink. When I am pairing a wine to drink with Beef Bourguignon, I use the same wine at the table as has been used in the Bourguignon.  Don’t use a supermarket “cooking wine” for Beef Bourguignon.  No, just don’t do it!

Beef Bourguignon
Bistro Style Beef Bourguignon

Slowly boiling the wine for 4-5 minutes will burn off the raw alcohol.  This dish is not meant to reek of the wine; rather, the role of the wine is, yes, partly to flavour the sauce in a good way but, more importantly, to tenderize the meat.

Any beef stock can be used in this dish, either homemade (click here for my recipe) or purchased.  Adding the beef stock (as opposed to only using wine), adds a layer of flavour.  In my opinion, using only wine would make the resulting sauce too strong.  If the first taste I get from Beef Bourguignon is a heavy wine taste, that tells me too much wine was used in the braising liquid. The hallmark of a well-prepared dish is the subtle layers of flavours that build the overall flavour profile and one flavour should not dominate the others in a negative way.

With braising, the braising liquid should not entirely cover the meat; rather, it should cover no more than about one-half to two-thirds of the meat. If you “swim” the meat, that’s a stew and, unlike with the braising method, tough cuts of meat will not tenderize using a stewing method. In addition, adding too much liquid will dilute the sauce and flavour.  It’s also important that the braising liquid just simmer, not boil. Check the Bourguignon as it braises.  If it is actively bubbling/vigorously boiling, reduce the oven temperature.

Keep the pot covered tightly to keep the moist heat in. Otherwise, the braising liquid will evaporate and the meat will be subject to some drying. Dutch ovens are often used for braising because they have the width for the contents to evenly cook and they have tight fitting covers. Other cooking vessels with tight-fitting lids, such as a high-sided casserole dish, will work equally well.  The important thing is to use a vessel that allows the sauce to surround, not completely submerge, the meat.

There are many schools of thought on what the “correct” braising temperature should be.  I am not sure there is one. My preference is around 275°F.  The aim is to keep the braising liquid from actively boiling because the premise behind braising is to let the meat cook very slowly allowing it to tenderize.  High temperatures can result in dryer meat. Additionally, since my recipe calls for a starch thickener for the braising liquid, a high cooking temperature will break down the starch causing it to lose its thickening power resulting in a watery thin sauce.  As a general rule of thumb, or frame of reference, the sauce should be thick enough to coat the back of a spoon.

Vegetables

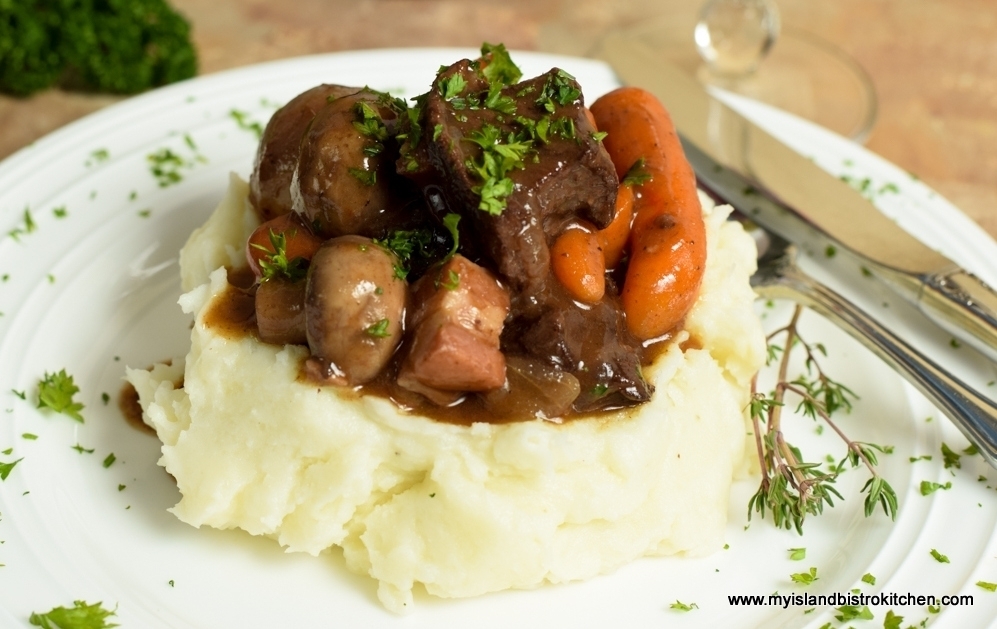
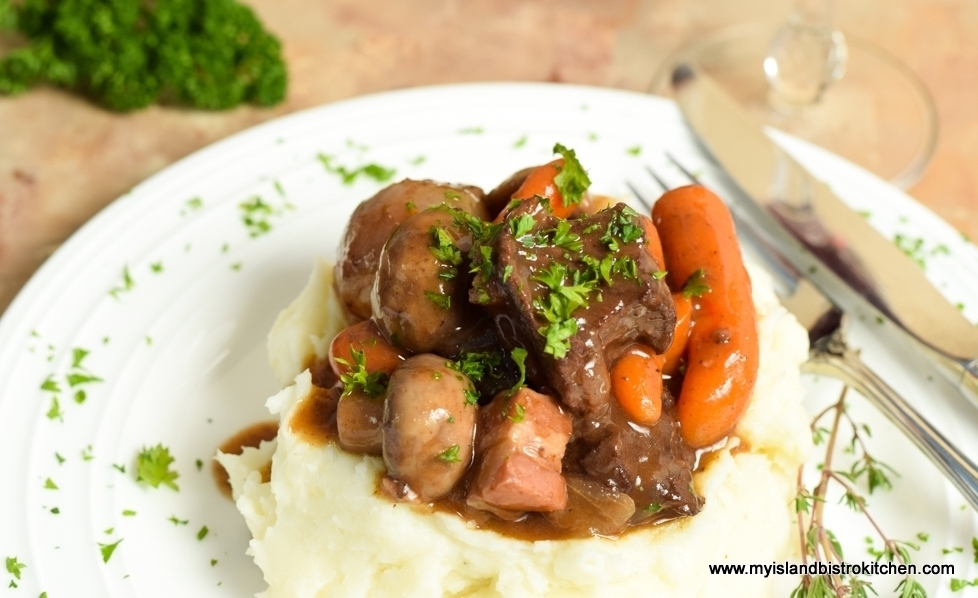
Beef Bourguignon does not contain a lot of vegetables, or varieties of vegetables.  Typically, it only has carrots, mushrooms, and either tiny pearl onions or shallots.  It’s all about the beef in this dish and the other additions serve only as flavour contributors that, themselves, absorb the wonderful savory flavours in the braising liquid.  There are enough vegetables in the Bourguignon, however, that it generally is not necessary to add a side of vegetables (except perhaps mashed potatoes) to serve with the Bourguignon.

 Beef Bourguignon
Bistro Style Beef Bourguignon

Serving Suggestions

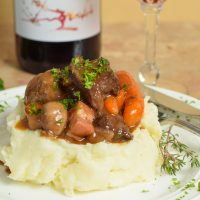
My favorite way to serve Beef Bourguignon is with whipped mashed potatoes seasoned with butter and garlic. The wonderfully rich sauce from the Bourguignon pairs very well with the potatoes.

Bistro Style Beef Bourguignon Served with Whipped Garlic Seasoned Mashed Potatoes

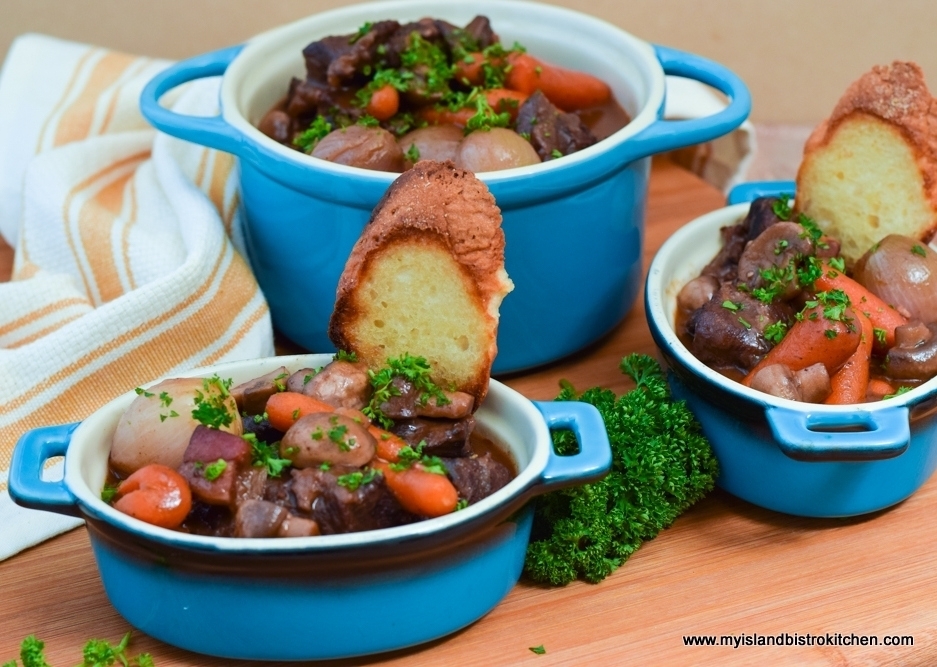
Beef Bourguignon can also be served on, or with, plain toast or garlic bread which can be used to soak up the flavorful sauce. You want to capture every last bite of this delectable sauce!

 Beef Bourguignon
Bistro Style Beef Bourguignon


This dish freezes well and is part of my batch cooking repertoire.  It reheats well in the microwave.

Beef Bourguignon
Bistro Style Beef Bourguignon

The recipe for Beef Bourguignon may look a bit complicated but it really is not if the process is organized.  Read through the recipe and plan your work and you can produce restaurant-quality food at home.  Measure out all the ingredients and do all the chopping and ingredient preparation before beginning the actual cooking.

[Printable recipe follows at end of post]

Beef Bourguignon

Ingredients:

For the bouquet garni:
3 sprigs fresh thyme
3 sprigs fresh parsley
2 large dried bay leaves
4 whole cloves
6” piece of celery rib

2 tsp olive oil
7 oz bacon lardons, cut into chunks approximately ¼“ – 1/3“ thick x 1” long

1½ – 2 lbs beef cheeks or beef chuck
3 tbsp cornstarch or flour
Fine sea salt
Freshly ground pepper

1½ tbsp brandy (or red wine)

1 tbsp olive oil
½ tbsp butter
½ cup onion, coarsely chopped
2 tbsp tomato paste
2 cloves garlic, chopped
1 2/3 cup dry red wine
1½ cups warm beef stock

1 tbsp cornstarch or flour
2 – 2½ tbsp beef stock (or water)

1 tbsp butter
½ tbsp olive oil
12 oz baby carrots
8 – 10 small shallots or pearl onions

1 tbsp olive oil
1 tbsp butter
8 oz small button mushrooms, halved or quartered (depending on size of mushrooms)
½ cup dry red wine

Method:

Make a bouquet garni consisting of 3 sprigs each of fresh thyme and parsley tied with kitchen string/twine along with 2 large bay leaves.  Insert 4 whole cloves into center of a 6” piece of celery rib. Tie the herbs and bay leaves to the celery rib. Set aside.

Heat 2 tsp olive oil in sauté pan over medium heat.  Add the bacon lardons.  Cook over medium-low heat for approximately 12-15 minutes, until lardons are crisp and brown and the fat has been rendered from the lardons.  Remove the lardons with a slotted spoon and transfer to paper towel-lined bowl or plate. Reserve the rendered fat in the pan.

Pat beef dry with paper towel. Season the beef with salt and pepper and cut into chunks approximately 2” in size, removing any excess fat, tendons, and sinew.

Place the cornstarch or flour and the sea salt and pepper into small plastic bag.  Shake well to mix.  Set aside.

Increase the heat under the sauté pan containing the lardon fat to medium-high.  Working in small batches, two to three chunks at a time, dredge the beef chunks in the cornstarch or flour mixture, shaking off any excess.  Place the beef chunks in the hot pan, leaving space between each chunk.  Sear the meat.  Using tongs, turn the meat to brown all sides.  Do not overcook – just cook long enough to brown the beef, a minute or two per side.  Transfer the seared meat to a 4-quart Dutch oven, casserole dish, or small roaster.

Preheat oven to 275°F.

With the pan (in which the beef was seared) off the heat, add either 1½ tbsp brandy, red wine, or beef stock and stir. Return pan to medium-low heat and deglaze the pan by using a wooden spoon to scrape up any caramelized brown bits remaining in the pan after the meat was seared. Once all the brown bits have been loosened and mixed in with the deglazing liquid, add 1 tablespoon of olive oil then the ½ tablespoon of butter.  Add the chopped onions and, over medium heat and stirring constantly, sauté until the onions begin to become translucent.  Add the tomato paste and chopped garlic and stir to prevent burning, about 20-30 seconds.

Remove pan from heat and add 1 2/3 cups red wine to the onion-garlic mixture.  Increase heat to high, return pan to heat, and bring mixture to a boil then immediately reduce heat to a slow boil.  Boil slowly for 4-5 minutes to boil off the raw alcohol in the wine.  Add the beef stock.  Cook over low heat 2-3 minutes. Stir in half of the bacon lardons, reserving the remainder.

Transfer the onion, wine, beef stock, and lardon mixture to the casserole containing the seared meat.  Add the prepared bouquet garni, pressing it gently into the braising liquid. The liquid should cover approximately one-half to two-thirds of the meat.  Place lid on casserole dish and transfer it to the preheated oven and cook for about 2½ hours.  If the braising liquid is still very thin at the 2½ hour point, add about 1 tablespoon of cornstarch or flour whisked together with 2 – 2½ tablespoons water or beef stock and some of the hot braising liquid to temper the mixture.  Stir into braising liquid gently. Regardless whether additional thickening agent is added, return the casserole to oven to cook for 30 more minutes, or until meat is tender to the touch of a fork.

Meanwhile, add 1 tbsp olive oil and 1 tbsp butter to a clean sauté pan placed over medium high heat.  Add the carrots and whole shallots or pearl onions.  Stir fry for about 5 minutes until the carrots are slightly beginning to soften and both the carrots and onions are lightly tanned with color.  Add the stir-fried vegetables to the meat casserole.  Return the lid to the casserole and continue slow cooking for approximately 20 minutes.  After the 20 minutes, if the braising liquid still does not coat the back of a spoon, add an additional ½ to 1 tablespoon cornstarch or flour mixed with 2 tablespoons beef stock or water and a little hot braising liquid, whisked together.

In clean sauté pan, over medium-high heat, heat 1 tbsp olive oil and 1 tbsp butter.  Add the mushrooms and stir fry for 2 minutes.  Sprinkle with salt and pepper and add the remaining lardons.  Stir fry for 2-3 minutes longer then reduce heat to medium-low and add ½ cup red wine. Cook for 4-5 minutes longer at a very slow boil.  Transfer mixture to the casserole and cook for 45 minutes longer, or until carrots are cooked and the beef breaks apart easily with the light pressure from a fork. Remove and discard the bouquet garni.  Serve with whipped garlic potatoes, toasted French bread, or a crusty bread.

Yield:  Apx. 8 servings

If you have made this recipe and enjoyed it and/or wish to share it with your friends and family, please do so on social media but be sure to share the direct link to this posting from my website.

Connect with My Island Bistro Kitchen on Social Media

Join the Facebook page for My Island Bistro Kitchen:  https://www.facebook.com/MyIslandBistroKitchen/

Follow “the Bistro” on “X” (formerly Twitter)https://twitter.com/PEIBistro/

See the drool-worthy gallery of mouth-watering food photos from My Island Bistro Kitchen on Instagramhttps://www.instagram.com/peibistro/

Follow “the Bistro” on Pinterest at https://www.pinterest.ca/peibistro/ and pin the Pinterest-ready photo found at the end of this post to your favorite Pinterest boards.

Beef Bourguignon

One of the best French classic dishes, Beef Bourguignon is made with beef, pork, carrots, onions, and mushrooms all braised and slow cooked in a rich red wine and beef stock sauce
Course Main Course
Cuisine French
Keyword Beef Bourguignon
Servings 8
My Island Bistro Kitchen My Island Bistro Kitchen

Ingredients

  • 3 sprigs fresh thyme
  • 3 sprigs fresh parsley
  • 2 large dried bay leaves
  • 4 whole cloves
  • 6 ” piece of celery rib
  • 2 tsp olive oil
  • 7 oz bacon lardons, cut into chunks approximately ¼“ – 1/3“ thick x 1” long
  • 1½ - 2 lbs beef cheeks or beef chuck
  • 3 tbsp cornstarch or flour
  • Fine sea salt
  • Freshly ground pepper
  • tbsp brandy, or red wine
  • 1 tbsp olive oil
  • ½ tbsp butter
  • ½ cup onion, coarsely chopped
  • 2 tbsp tomato paste
  • 2 cloves garlic, chopped
  • 1 2/3 cup dry red wine
  • cups warm beef stock
  • 1 tbsp cornstarch or flour
  • 2 – 2½ tbsp beef stock, or water
  • 1 tbsp butter
  • ½ tbsp olive oil
  • 12 oz baby carrots
  • 8 – 10 small shallots or pearl onions
  • 1 tbsp olive oil
  • 1 tbsp butter
  • 8 oz small button mushrooms, halved or quartered (depending on size of mushrooms)
  • ½ cup dry red wine

Instructions

  1. Make a bouquet garni consisting of 3 sprigs each of fresh thyme and parsley tied with kitchen string/twine along with 2 large bay leaves. Insert 4 whole cloves into center of a 6” piece of celery rib. Tie the herbs and bay leaves to the celery rib. Set aside.
  2. Heat 2 tsp olive oil in sauté pan over medium heat. Add the bacon lardons. Cook over medium-low heat for approximately 12-15 minutes, until lardons are crisp and brown and the fat has been rendered from the lardons. Remove the lardons with a slotted spoon and transfer to paper towel-lined bowl or plate. Reserve the rendered fat in the pan.
  3. Pat beef dry with paper towel. Season the beef with salt and pepper and cut into chunks approximately 2” in size, removing any excess fat, tendons, and sinew.
  4. Place the cornstarch or flour and the sea salt and pepper into small plastic bag. Shake well to mix. Set aside.
  5. Increase the heat under the sauté pan containing the lardon fat to medium-high. Working in small batches, two to three chunks at a time, dredge the beef chunks in the cornstarch or flour mixture, shaking off any excess. Place the beef chunks in the hot pan, leaving space between each chunk. Sear the meat. Using tongs, turn the meat to brown all sides. Do not overcook – just cook long enough to brown the beef, a minute or two per side. Transfer the seared meat to a 4-quart Dutch oven, casserole dish, or small roaster.
  6. Preheat oven to 275°F.
  7. With the pan (in which the beef was seared) off the heat, add either 1½ tbsp brandy, red wine, or beef stock and stir. Return pan to medium-low heat and deglaze the pan by using a wooden spoon to scrape up any caramelized brown bits remaining in the pan after the meat was seared. Once all the brown bits have been loosened and mixed in with the deglazing liquid, add 1 tablespoon of olive oil then the ½ tablespoon of butter. Add the chopped onions and, over medium heat and stirring constantly, sauté until the onions begin to become translucent. Add the tomato paste and chopped garlic and stir to prevent burning, about 20-30 seconds.

  8. Remove pan from heat and add 1 2/3 cups red wine to the onion-garlic mixture.  Stir. Increase heat to high, return pan to heat, and bring mixture to a boil then immediately reduce heat to a slow boil. Boil slowly for 4-5 minutes to boil off the raw alcohol in the wine. Add the beef stock. Cook over low heat 2-3 minutes. Stir in half of the bacon lardons, reserving the remainder.

  9. Transfer the onion, wine, beef stock, and lardon mixture to the casserole containing the seared meat. Add the prepared bouquet garni, pressing it gently into the braising liquid. The liquid should cover approximately one-half to two-thirds of the meat. Place lid on casserole dish and transfer it to the preheated oven and cook for about 2½ hours. If the braising liquid is still very thin at the 2½ hour point, add about 1 tablespoon of cornstarch or flour whisked together with 2 – 2½ tablespoons water or beef stock and some of the hot braising liquid to temper the mixture. Stir into braising liquid gently. Regardless whether additional thickening agent is added, return the casserole to oven to cook for 30 more minutes, or until meat is tender to the touch of a fork.
  10. Meanwhile, add 1 tbsp olive oil and 1 tbsp butter to a clean sauté pan placed over medium high heat. Add the carrots and whole shallots or pearl onions. Stir fry for about 5 minutes until the carrots are slightly beginning to soften and both the carrots and onions are lightly tanned with color. Add the stir-fried vegetables to the meat casserole. Return the lid to the casserole and continue slow cooking for approximately 20 minutes. After the 20 minutes, if the braising liquid still does not coat the back of a spoon, add an additional ½ to 1 tablespoon cornstarch or flour mixed with 2 tablespoons beef stock or water and a little hot braising liquid, whisked together.
  11. In clean sauté pan, over medium-high heat, heat 1 tbsp olive oil and 1 tbsp butter. Add the mushrooms and stir fry for 2 minutes. Sprinkle with salt and pepper and add the remaining lardons. Stir fry for 2-3 minutes longer then reduce heat to medium-low and add ½ cup red wine. Cook for 4-5 minutes longer at a very slow boil. Transfer mixture to the casserole and cook for 45 minutes longer, or until carrots are cooked and the beef breaks apart easily with the light pressure from a fork. Remove and discard the bouquet garni. Serve with whipped garlic potatoes, toasted French bread, or a crusty bread.

Recipe Notes

Yield: Apx. 8 servings


[Copyright My Island Bistro Kitchen]


Pin Me to Pinterest!
Beef Bourguignon
Bistro Style Beef Bourguignon


Chicken and Pumpkin Chili

I love a bowl of chili, especially on a cold fall or winter day.  I also like the chili to have lots of texture and flavour and to be well-filled, hearty, and not be too watery.  This recipe for Chicken and Pumpkin Chili has a lovely flavour profile owing to the selection of ingredients and a curated blend of spices to complement the core ingredients. Continue reading Chicken and Pumpkin Chili

My Island Bistro Kitchen Food Blog Celebrates 7th Blogiversary

Cupcake
Blogiversary Cupcake

Seven years ago, today, I created My Island Bistro Kitchen Food Blog.  On this, my 7th Blogiversary, I am going to take this opportunity to give a shout-out to three people who were instrumental in inspiring my love of working with food and in cultivating my culinary skills.

First, my mother.  She never shooed me away when she was preparing food.  I’d see the yellow melamine bowl and Rubbermaid spatula appearing and I’d immediately find my little apron and pull a kitchen chair to the counter, not wanting to miss a minute of the fun!  Not once did my mother ever tell me to go off and play instead of standing at her elbow as she prepared food.  Rather, she’d let me stir whatever was being made and would explain the order in which the ingredients were to be added.  Once the mixture got to the point that it needed a little more muscle than I had, my mother would take over and I’d still stand by her side, watching and absorbing all the steps and learning. Sweet culinary memories.

Second, my grandmother.  She was, by no means, a fancy cook but what she prepared was mighty tasty.  She had a really large wooden pastry board that she’d heave on to the pantry table.  I loved when it was molasses or sugar cookie baking day because I always got to cut out the cookies that Gram would bake in her wood stove oven. And, when she would be making the Christmas Scotch cookies, I’d sit in her rocking chair with the big brown crockware bowl on my knee and cream her homemade butter. I still have her floral flour sifter (still works like a charm) and her small collection of cookie cutters (she would be beyond thrilled that I kept them and still prize them).  I remember well the day she coached me through making my first batch of bread at the age of 13.  She was so incredibly proud that day that I wondered how we’d ever fit this petite woman through the door!

Third, my high school home economics teacher.  Young and fresh out of university, we hit the jackpot when an enthusiastic home economics teacher arrived at our rural high school when I was in grade 9.  Super organized and always arriving at class with a solid lesson plan, she solidified my love of learning about, and preparing, foods.  I literally spent hours pouring over my class notes.  And, I still have some of the teacher’s recipes from foods we made in class!

These three people may never have realized the influence they had on my lifelong love of everything culinary but each certainly played a key role.  So, for that reason, I am acknowledging their role in how this food blogger and passionate home cook became a lifelong foodie.

Cupcakes
Blogiversary Cupcakes


Someone probably inspired your love of food, cooking, and/or baking.  Who was your biggest influencer or culinary mentor?

To check out my previous Blogiversary celebrations, click on the links below:

First Blogiversary
Second Blogiversary
Third Blogiversary
Fourth Blogiversary
Fifth Blogiversary
Sixth Blogiversary

Did you know you can connect with My Island Bistro Kitchen through the following social media channels? Click on the hotlinks below to join “the Bistro” followers!

Facebook
Twitter
Instagram
Pinterest

Blogiversary Cupcake

10 Tips for Cutting Your Food Bill and Reducing Food Waste

With continuously rising food prices, many people find it necessary to cut corners on their grocery bill and that can be a challenge.  There are several ways in which I keep my food bill in check and reduce food waste.  Here are my 10 top tips:

  1. Cut Back on Eating Out

It’s easy to fall into the “convenience food” trap.  The old “I just don’t have time to prepare homemade food” trap comes with a hefty price – both in terms of money spent on food and in nutritional value.

It’s very easy to pick up a muffin and a coffee on the way to work, for example.  However, for the price (or very little more) of those two items on one day alone, an entire batch of a dozen muffins could be made and frozen, ready for the weekday lunch bag(s).

Zucchini Granola Muffins

For a visual of how much that daily coffeeshop tea or coffee is costing, multiple it by 365 days – if a coffee/tea costs, for example,  $3.00, a significant sum of $1095.00 a year will be spent on just one take-out coffee or tea a day (and I know some folks buy more than one a day).  If you were to make your own tea or coffee, how much would it cost? How much are you shelling out for the convenience of picking up the beverage at a coffeeshop? Add to that a bakeshop or coffeeshop muffin that generally runs about the same price as the coffee and, again, basic multiplication will reveal another $1095.00 for just the daily muffins for a year.  I can make a LOT of batches of muffins for $1095.00 a year! Together, those two simple items can run you about $2200.00 a year!

Homemade Muffin and Coffee

Spending $7.00+ for a bowl of soup or a salad at lunchtime adds up over a week, a month, and a year.  For $7.00, a big batch of healthy basic homemade soup, for example, can be made and frozen in portion-sized containers, making the lunchtime meal more healthy and economical.

Potato Leek Soup
Potato Leek Soup

I do not eat out a lot.  I’m not against it but it is expensive and dining out frequently makes it less of a special treat. For anyone on a restrictive diet, finding a restaurant that can accommodate the diet can be a real challenge. When I do eat out, it’s usually because I am traveling or, if at home, I am choosing to go to a nice restaurant as a special treat. If you normally eat out several times a week, consider cutting it back to, perhaps, only once a week and see the difference it will make in how much you spend on food. I never “order in” food and very rarely eat from a deli. Stopping at a supermarket deli on the way home from work is a temptation to scoot around the store and “pick up just a few items” while you are there.  Suddenly, the supper stop just cost $60 instead of $15.

If you can afford these conveniences, great.  However, if you need to cut your food expenditures, this might be a good place to start making adjustments. Making your own food/beverages is both cost-effective and healthier.

  1. Make a Budget

Grocery Budgeting
Grocery Budgeting

Make a realistic budget for food, based on what you really need.  Set aside that money from your income and stick to the budget.  If you only allot so much for groceries, it will force you to shop for good bargains and to only buy what you need, not what you see and are enticed by, that if truth be told, you probably really don’t need. I sometimes see shoppers using calculators as they grocery shop.  This is a great idea! If you only have so much money to spend, you’ll immediately see where you are with your budget as you select items from the grocery shelves and deduct their cost from your budget.  If you start to see you’re over budget, take a look through the grocery cart to see if there are any non-essentials that could perhaps return to the grocery shelf.

Grocery Shopping
Grocery Shopping

Keep track of what you buy and are spending on groceries.  A bit tedious but, if you need to figure out where your food dollars are going, keep a record for a few months recording what you buy. Review it to see if there are non-essential items creeping into the grocery cart that could perhaps be eliminated from future grocery orders.  If you are, for example, buying big name brand products to be used as ingredients for a casserole, could the dish be made with less pricey items such as store-brand ingredients?  Do you really need the frozen entrée dinners or could you prepare healthy homemade meals? Do you need to pay for cheese already grated or could you buy a block of cheese on sale and grate it yourself? Do you really need to buy a bottle of salad dressing or could you make a simple healthy vinaigrette from ingredients already in your pantry? Once you get a clear picture of exactly what you are buying, you will likely identify items that can be eliminated or exchanged for more economically-priced substitutes.

  1. Engage in Meal Planning

Roast Turkey
Roast Turkey

I’ve written about the merits of meal planning before.  Make a list of the foods/meals your family likes to eat.  Plan for leftovers.  For example, if you are cooking a turkey dinner on the weekend, know ahead of time what you will use the leftover meat for so that you can extend its use.

Turkey Chowder
Homemade Turkey Chowder

Transforming the meat into other dishes will generate more servings than simply plating the leftover meat. For example, you might make a turkey chowder that will yield several servings. You might substitute the turkey for chicken in creamed chicken and get a significant number of servings. Perhaps you’ll make a chicken chow mein casserole that will give several dinner servings.

Chicken Chow Mein Casserole

Save the turkey carcass and make stock that can be used as the base in soups and other dishes.  Extend that turkey to get as much use out of it as you can.

Homemade Turkey Stock

The homemade turkey stock makes a wonderful base for turkey vegetable soup in which some of the leftover turkey meat can be used.

Turkey Soup
Turkey Vegetable Soup

If you are having a boiled ham dinner, save the broth and use some of the meat to make a tasty ham and lentil soup that will yield many servings.

Ham and Lentil Soup
Ham and Lentil Soup

Or, make a ham-based casserole that will generate several servings. All of these items can be frozen in whatever serving sizes you need for your family to have on hand for weeknight dinners.

Hawaiian Fiesta Casserole

By careful planning, you’ll be amazed at how many more meals you can generate from the leftovers of just one food item.

Try to make recipes that will give at least two nights’ meals.  For example, if you are making scalloped potatoes to go with leftover ham, double the recipe so you will have the side dish prepped for another meal.  Many dishes, like scalloped potatoes actually, in my opinion, improve their flavour over a day or two.

Scalloped Potatoes
Creamy Scalloped Potatoes

The same principle of extending food usage holds true with foods like chicken breasts, for example.  To serve individual chicken breasts, it’s expensive.  However, if they are bought at a good price, they are golden for meal extension.  One 7 – 8oz boneless chicken breast will yield two to three sandwiches much more economically than buying sliced processed chicken at the deli.

Turkey, Pear, Brie, and Cranberry Sandwich

An 8 oz chicken breast will generally yield about 1 cup, or slightly more, of diced chicken which can be used in casseroles or creamed chicken that will yield far more servings than simply putting a single full chicken breast on a plate with vegetables for just one serving at one meal.

Creamed Chicken
Chicken and Mushroom Vol-au-Vent

When I know I need to prepare some make-ahead meals that will require a lot of chicken or turkey (I use them interchangeably in recipes), I have my recipes planned and I watch for turkeys on sale. I don’t go into a store and, unexpectedly, see turkeys on sale and pick them up to put in the freezer unless I know I am going to use them relatively soon.  They are big to store and take up a lot of my valuable freezer space.

I always have a plan for recipes I can make if I can get a good deal on the main ingredient like meat, for example.  If I’m shopping and I know I want to make, say, Irish Stew soon (or when I can get the beef on sale), I will check the meat section to see if they have any best-before today/tomorrow sales. Sometimes, good cuts of meat will be reduced by 25% or even 50% if it has same day, or next day, best-before date.  There is nothing wrong with the meat and, if you can use it or make it into a recipe on the same day as purchase, it’s a great saving. I keep a list of ingredients of my most common make-ahead recipes on my phone so, if I can get a good deal on the meat, for example, I know what other ingredients I need to pick up at the same time to make the dish.

Irish Stew
My Island Bistro Kitchen’s Irish Stew

If you plan your meals out, you’ll be less likely to head to the deli, take-out, or restaurant for meals. Careful meal planning is a great way to stretch food ingredients out into more servings and save money.

  1. Shop with a Grocery List and Only Buy What’s on the List

Grocery List
Grocery List

Make the grocery list before you leave home.  If you don’t have a list, the tendency will be to wander the supermarket aisles aimlessly, hoping the sight of items will trigger what you should pick up. When you get to the supermarket, DO NOT go up and down every aisle! I repeat, DO NOT go up and down every single aisle. Only visit the aisles that have items on your list.  Otherwise, the “browsing” will likely result in buying interesting looking items you may, or may not, use (and may not actually need) and that’s going to increase your grocery bill.  In fact, because I know the layout of the supermarkets well (most have the same basic layout), I actually make my grocery list in accordance with the store layout so I have a game plan when I hit the supermarket arena and I am not “backing and forthing” all over the store to pick up my groceries.  So, my grocery list starts with any needed fruits and vegetables since that’s the zone into which I enter the supermarket, then meats, and so on, as I traverse the store. The faster I can move through a zone without revisiting it (or lingering), the less likely I am to notice something that causes me to stop and explore it and potentially buy it.

Don’t stockpile food items, even if they’re on sale – you are tying up money into items that will expire and throwing them out is a waste of money. Plus, they are taking up real estate space in the pantry and/or freezer and are likely to eventually become food waste.  Most grocery items go on sale cyclically anyway so it’s not a “once in a lifetime must buy now deal”. I don’t keep a supply of canned goods on hand at all.  Rather, I choose a recipe, make my ingredient list, and go shop for the specific ingredients at the time.  This ensures my products are fresh and I have not tied up money in products I may, or may not, ever use. This method allows me to control my food budget better.

If you only need a few items, don’t take a shopping cart.  Instead, use a small hand-carried grocery basket or, better still, if you can carry all the items in your hands, you will be less likely to pick up additional products because your arms can only hold so much. I keep a grocery basket shown in the photo below) in my car.  I use this basket frequently because it will only hold so much so it helps to control my shopping.  It also doubles as my carry-out container and is easier to unpack when I arrive home.

Grocery Shopping Basket

If all you need is milk, for example, pay a few cents extra and buy it at the convenience store or gas bar because it will save you money in the long run. How so? If you travel all the way to the back of a large supermarket where the milk is usually located, you will be more likely to come out with a $60+ grocery bill than the $3.00 litre of milk you were shopping for because you will be enticed by other items along the way for which you did not go to the supermarket. If you do go to the supermarket for just an item like milk (and some of us do because the supermarkets are typically the stores that carry certain types of milk for special diets), take the route through an aisle in which you have no interest in the products. For example if you don’t have pets, pet food won’t be of interest so zoom down that aisle (as opposed to, say, the chips and snack aisle). That way, you’re not tempted to pick up excess items not on your list.  There’s a reason why grocery store designers place basic food necessities, like milk, at the very far back end of the store – they know shoppers have to pass by many, many items to get there and those other items are strategically placed to catch the shopper’s attention.  Many shoppers will pick up items as they head to that single litre of milk they actually came into the store to buy. So, once again, the risk is that the stop for a $3.00 litre of milk may turn into a $60+ grocery bill (willpower, willpower, wherefore art thou when in a supermarket!)

  1. Shop Around and Check out Sales Flyers/Price Compare Websites or Apps

If you are trying to save on your grocery bill, you will probably have to shop at more than one supermarket to get the best deals.  In most cities, supermarket chains tend to set up business in very close proximity to their competitors.  For example, in Charlottetown, we have three large supermarket chains located within about a half kilometer (or less) of each other so it makes it easy to shop around.  Now, if you had to drive 10-20 kilometers between them, the savings on the item(s) would have to be very significant to justify the gas and travel time.  But, if the grocery stores are close, savings can be found for the shrewd shopper who takes the time to find them.

Check out the weekly sales flyers to see which supermarket has the items on sale that you need (operative word here always being “need”).  Or, check out price compare websites or apps to see which grocery store chain has the best price on products you need. Not all chains will price match but some will.  It never hurts to ask.

Sales Flyers
Grocery Sales Flyers

There is one grocery store in my hometown which I would class as less glitzy and more basic than the others.  I shop for what I can get there because it’s a smaller store which makes it easier to stick to my grocery list as there are fewer items drawing me to buy them.  Another store has great regular prices on certain items so, when I need those specific products, I head first to that store and buy what I can there. For example, there is a particular brand of yogurt I like.  The regular price for this item at one supermarket has, for a long time, consistently been (at time of writing) $2.97 for 500g. The exact same brand item of the same size retails at the competitors for $4.97. A 2.63 litre of a major brand orange juice sells for $3.97 (regular price) at one store while the competitors retail it for, on average, $7.49 – a $3.52 difference.  On just these two items alone, I can save $5.52 by carefully shopping around. A third supermarket has its own name brand products that I really like and which are priced cheaper than big name brand counterparts.  That’s the store I head to for those products because I don’t particularly like either of the competitors’ own store brand products.

I am not a huge user of coupons because I find they are most often for items I don’t need.  However, they are a good way to save money if they are for items you do actually need.  That said, as a word of caution, don’t use the coupons to buy items simply to try the products.  If the items are not ones you need, then putting any money at all on to the items is adding unnecessary strain to the food budget.

While I am not against big box warehouse shopping venues, they can require a lot of willpower on the customer’s part to pass by items that aren’t on the grocery list but certainly look interesting and appear to be a good price.  BUT….are they really a great price if you look at the per unit or per weight price and factor in all the considerations around them?  Items typically come in very large quantities at these stores (there’s a reason why they have those jumbo-sized grocery carts that can hardly be pushed or navigated through the store). So, unless you have a very large family and lots of refrigeration and pantry space, many of the items are just simply too large for many households to store and use up before the items expire. Therefore, the questions to ask are:  Do you, first of all, really need the items?  Will you be able to use them all up before they expire?  If you are a household of one or two people, would you really use a 10lb bag of quinoa or rice? If you end up throwing out a good portion of the food items, that constitutes food waste and a drain on the food budget and you really haven’t saved any money.

We don’t have big box grocery warehouse stores in PEI at the time of writing but a lot of Islanders frequent them off Island. I did have a membership (which also costs an annual fee) at a big box store with locations in New Brunswick and Nova Scotia for a couple of years but discontinued it when I found I wasn’t using it enough to justify the membership fee.  Living in PEI, I had to factor into the cost of the grocery items, the Confederation Bridge toll (nearly $50. at time of writing), gas, and the time to travel to the big box warehouse stores. But, the biggest reason why I wasn’t shopping at them?  Everything was available only in way-too-large quantities and most of the products, well, I just simply did not need or I could get what I needed more economically when the standard local supermarkets put on good sales.

One previous frequent grocery warehouse shopper told me his family recently discontinued their membership as well because every time they were at one of these stores (2-3 times a month, on average), they were spending at least $500 per trip on items they really did not need (but looked enticing) and they ended up throwing out a good portion of them after their expiry date had passed because they could not use up such large quantities.  These shopping excursions were in addition to their regular grocery shopping at home, putting a huge unsustainable strain on their food budget.

To stay on a food budget, shop around and buy only what you need and can reasonably use up before the items expire.

  1. Follow Credible Well-Tested Recipes

While it’s fun to try new recipes, if you are on a strict food budget, you’ll want to ensure you choose recipes that, first of all, have ingredients you know your family will like and, second, come from a trusted source.  This is because you want a recipe that has good, clear directions and that will turn out for you.  The last thing you want is to have to walk the dreaded walk to the compost bin with a failed recipe and still have nothing prepped for dinner. That’s when you tend to order in or head out to a restaurant for the meal, really taxing the food budget.

Don’t choose complicated recipes with expensive ingredients, especially if you are a novice cook – it will be easy to become discouraged with home cooking if your efforts don’t meet with a satisfying tasty dish. Start basic and move toward more elaborate recipes as your cooking experience grows. There is no shortage of cookbooks and cooking magazines on the market and literally anyone can post any recipe on the internet.  However, there is no guarantee that any of the recipes from these sources have actually been tested for success.  Ask your friends and family for recommendations on the recipe sources they use with success and, of course, you can always check out recipes here on My Island Bistro Kitchen’s website since those recipes have been well tested several times before being published!

For those on a budget, look for recipes that call for economical ingredients and that you can get more than one meal from the recipe.  While pricey food items like lobster, scallops, and steak are wonderfully tasty, they can make a serious dent in the food budget.  To keep the budget in check, I recommend saving those types of items for a special treat or occasion and selecting other, more economically-priced, ingredients for everyday meals.

There are ways to turn everyday basic ingredients into very tasty, wholesome meals using seasonings, sauces, and so forth. A lot of the contents in my freezers are not “gourmet” by any stretch of the definition but they are mighty tasty meals and not difficult to prepare.  These include the basics like baked beans, chili, macaroni and cheese, creamed chicken, chicken and ham casseroles, soups, and so forth.

  1. Buy a Big Freezer

In my opinion, one of the best investments one can make is in a big upright freezer.  This allows for batch cooking make-ahead meal preparation to be done when food ingredients are in season or on sale.  I freeze lots of varieties of soups, main entrées, side dishes, and desserts.  This allows me to eat well, at home, and quite economically.  Plus, I know what I’m eating and the foods are not full of preservatives or ingredients I can’t pronounce.

Frozen Homemade Make-ahead Meals

Properly package items for freezing and label and date everything.  While the money has to initially be laid out for ingredients to batch cook and the prep work still has to be done, it does cut down on the grocery bill on an ongoing basis and lessens the task of meal prep on weeknights.  Plus, it discourages the old fallback of stopping at the supermarket deli for dinner on the way home from work because you will know you have quality homecooked meals already prepared.

  1. Batch Cook and Prepare Make-ahead Meals for the Freezer

I believe that, no matter how busy we are, we make time for whatever is a priority for us.  So, if healthy, affordable eating for you and your family is important to you, you’ll put some time into healthy, economical meal preparation.

Set aside a few days and prepare several make-ahead meals for the freezer – soups for lunches, muffins for breaks, entrées for main meals, and desserts for when the sweet tooth calls.

Beef Pasta Casserole
Beef Pasta Casserole Ready for the Freezer

Once I have my freezers (yes, freezers plural) filled with make-ahead meals, my ongoing grocery list just usually consists of dairy, fresh fruits and vegetables, fish, and the like. If you don’t know how to cook, or you need the motivation from others to get you going, gather together some friends to have a batch cooking session at the end of which everyone goes home with some make-ahead meals. Or, take a short cooking class.  Many larger supermarkets, for example, will frequently offer evening or Saturday cooking classes. You might also check out some community colleges or local cooking schools to see what short-term cooking classes they might offer.

If you want to tackle a new recipe you are not familiar with, engage an experienced cooking mentor to help walk you through the process.  Most experienced cooks will be more than willing to share their knowledge and experience in this field.

Batch cooking is my lifesaver – I don’t have to stop at the supermarket or takeout for dinner and I know what’s in my food that contains no preservatives or weird, hard-to-pronounce ingredients. Whether you are living alone, as a couple, or a family of several members, advance batch-cooking is a great meal preparation strategy. For singles or smaller households, it offers the benefit of having a variety of meals on hand from which to choose each day without having to individually prepare small-sized meals on a daily basis. For larger families, it provides healthy, home-cooked meals on busy weeknights when everyone is running in multiple directions to and from activities. If you have some others in the house, engage them in the meal preparation to lighten the load (it’s a great way to teach the younger generation how to prepare home-cooked meals, too).

  1. Adjust Meal Planning According to the Seasons

Create a list of favorite recipes to make when fresh local produce (perhaps from your own garden) is available and at good prices.  For example, I do a lot of soup making and freeze portion-sized containers of the soup for weekday lunches.  Some of my favorite soups are tomato, cauliflower, and broccoli.

Roasted Cream of Tomato Soup

We had an abundance of tomatoes in the garden this year and making soup with them is a great way to use up the tomatoes and cut the cost of the soup significantly.  I was able to find beautiful large heads of broccoli and cauliflower for .99 cents in the fall and, since they are the primary ingredients in two of my favorite soups, I was able to make double batches of cauliflower and broccoli soups for the freezer very economically – much more so than making cauliflower soup, for example, in the winter when a small head of imported cauliflower has run as high as $7.00 in recent years. The same holds true with fresh fruits.  I make my Blueberry Peach Crisps, Apple Crisps, and applesauce when the fruit is fresh and at a good price.  I then freeze these desserts for use throughout the year.

Summer Dessert
Perfect Peach Blueberry Crisp


  1. Shop Less Frequently

Just because it’s Saturday (or whatever day you typically do your main shopping) does not mean you automatically have to go grocery shopping if you really don’t need a grocery order.  Make it a habit not to be stopping at the supermarket every day, or every other day, throughout the week.  The more times you enter a grocery store, the harder it will be to stick to a food budget.  You might try only doing focused grocery shopping every two weeks and, in the interim, stop to pick up the necessities like milk, at a convenience store or gas bar where there will be less items calling your attention and wallet.

Conclusion

It is a challenge, for sure, to eat well when food prices continue to rise rapidly.  It does require some folks to become more creative in how to feed a family healthy meals on a budget.  I believe it can be done but it does take work, dedication, commitment, organization, planning, and shopping around for the best deals possible on food items.  For some folks, it may mean a lifestyle change by eating out less frequently and removing some non-essential items from the grocery cart.  For others, it may mean learning how to cook economical and nutritious meals from scratch at home.

I hope you have found some of my tips helpful for controlling the grocery bill and reducing food waste. What are your strategies to stretch your food dollar?

Pin Me To Pinterest!

Tips for Cutting Food Bill and Reducing Food Waste