Dinner at Chef Michael Smith’s New PEI Restaurant, “FireWorks”

If you are a fan of Chef Michael Smith, one of Canada’s top celebrity chefs and noted cookbook author, you probably know he and his wife, Chastity, bought The Inn at Bay Fortune in eastern Prince Edward Island late last spring.  This was the Inn where Chef Michael once worked and where his first TV show, The Inn Chef, was filmed.

The Inn at Bay Fortune, PEI, Canada

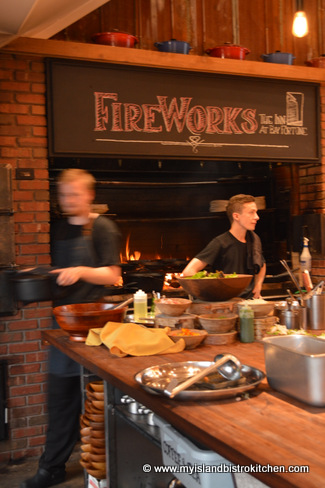
Early in the summer, Chef Michael completely renovated and transformed the kitchen and dining experience at the Inn.  Named for its newly-constructed 25-foot brick-lined, wood-burning fire over, through, and about which the meal is cooked, FireWorks Restaurant  opened for the 2015 tourist season to rave reviews.

On Sundays this fall, the Inn celebrates the harvest season by hosting what the culinary team refers to as “Islander Day“.

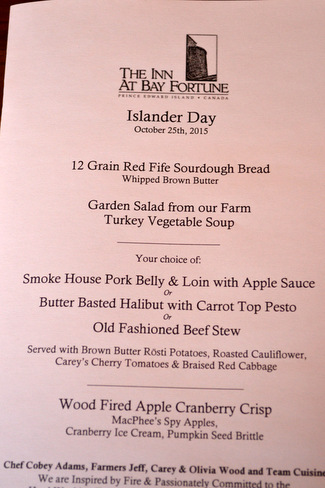
Offered on a slightly different scale and lower price point than their usual evening feast (which is priced at $80 per guest + HST at time of writing), the Sunday event offers a three-course (I’d say it’s four courses, counting the salad) harvest menu that includes fresh bread baked in their wood-fired brick oven served with brown butter, turkey-vegetable soup, green salad, a choice of entree (Beef Stew, Pork Loin, or Halibut) served with garden-fresh vegetables and, as a finale, a freshly-baked harvest dessert. Reservations are not accepted for the Sunday event but the meal is served continuously, on a first come first served basis,  from 12 noon until 7pm.  The restaurant has the capacity to serve about 50 people at a time. The cost for the Sunday meal is $40 per adult guest and $20 per child under age 12 + HST.

At the beginning of this year, we made a commitment to, once a month, dine at a restaurant we’ve not eaten at before and we’ve stuck to it so, this past Sunday, my mom and I made our way to the new FireWorks Restaurant at the Inn at Bay Fortune which is about a 45-50 minute drive east from Charlottetown.  And, the experience did not disappoint, especially since Chef Michael himself was in the kitchen on this particular day! This is one busy guy who travels a lot so we were quite thrilled that he was on the Island in his FireWorks kitchen on the day we chose to dine at his new restaurant.
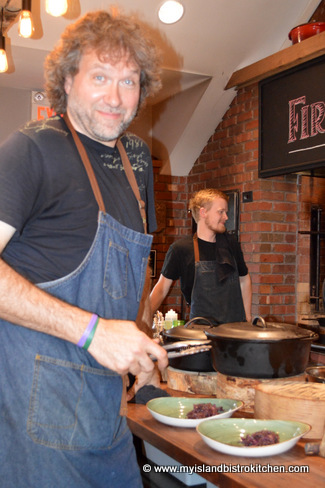
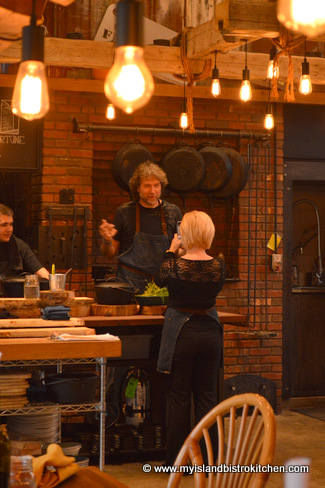
Chef Michael Smith
Chef Michael Smith

While I don’t normally write restaurant reviews per se on my food blog or write about my dining-out experiences, I felt this one is in keeping with my blog’s focus of eating local foods when possible and is sufficiently unique that it merits a blog posting so, here goes!

We arrived mid-afternoon to find a large limo and several cars in the parking lot so we weren’t the only ones who decided to head to the small country community of Bay Fortune to dine at FireWorks in the middle of a Sunday afternoon in late October.

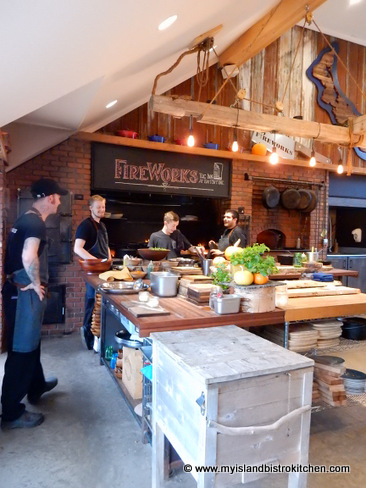
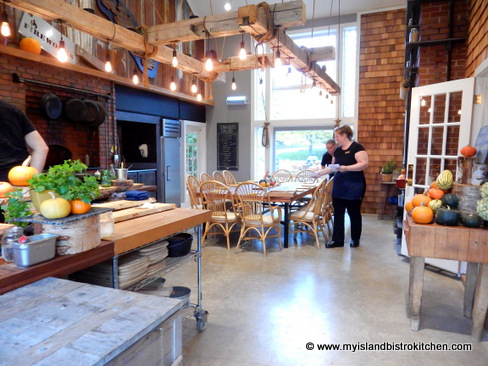
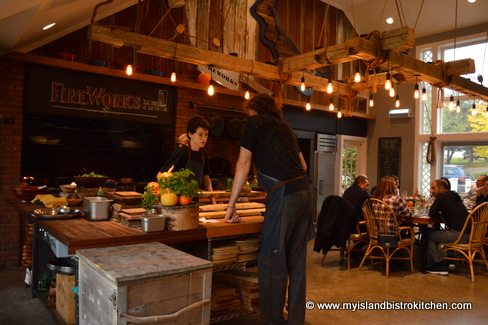
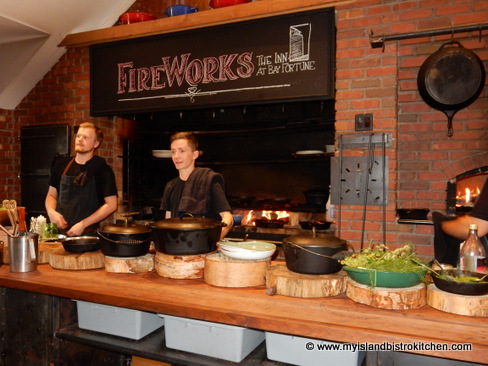
We were greeted by a very personable and friendly hostess who explained how the meal experience would unfold and she was quick to point out that we were to be sure and take all kinds of photos if we wished and we were invited to roam freely about the kitchen which was at the end of the long closed-in sunporch dining room.

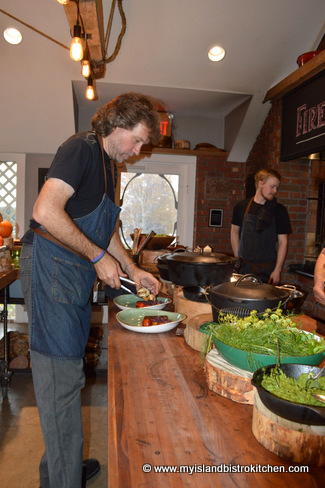
This is quite extraordinary to be offered this opportunity because this is a working kitchen and there were a number of  the team cuisine and servers busy at their work. It was a beehive of activity and no one made me feel like I was in their way as I scurried about taking photographs.

Learning from the master! I think there was a good bit of knowledge transfer and training taking place in the kitchen on Sunday and who better to learn from!

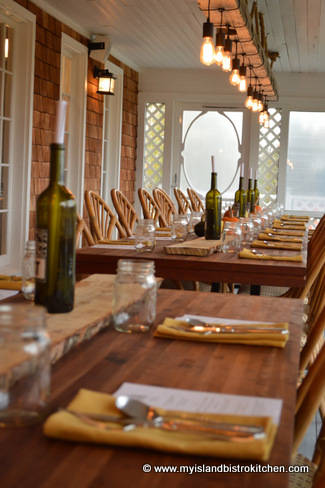
Dinner is served, family-style, at long communal block-style tables so, if you are looking for a private table for two or four, you won’t find that at FireWorks. Guests are seated as they arrive and as space is available at any of the four large tables. Two of the long tables are situated on the front of the Inn in a closed-in sunporch that overlooks Bay Fortune.

One of the tables is actually in the kitchen so you really get the feeling that dining is family style and non-pretentious.

I almost felt like I was simply dining in a friend’s home kitchen…well, except for the fact that most of us don’t have a professional culinary team catering to us nor do many of us have a brick oven or an open fire….but, other than that….

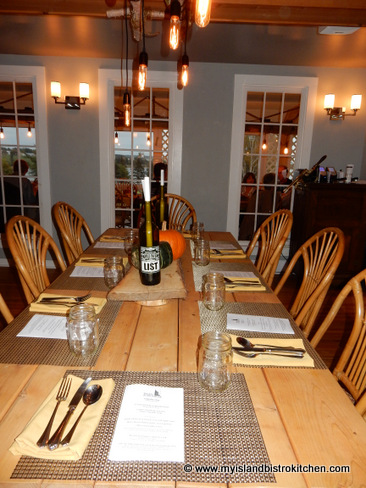
The fourth table seats eight and is in a more private dining room just off the kitchen and behind the sunporch.

I don’t mind this communal style of dining as I am quite accustomed to it as I am a regular cruiser where I’m often seated at tables for 8 or 10 with people I don’t know. On this Sunday evening, we lucked in as a group of four ladies soon joined us at one of the long tables in the sunporch and were very open to dinner conversation making for a pleasant meal and overall dining experience.

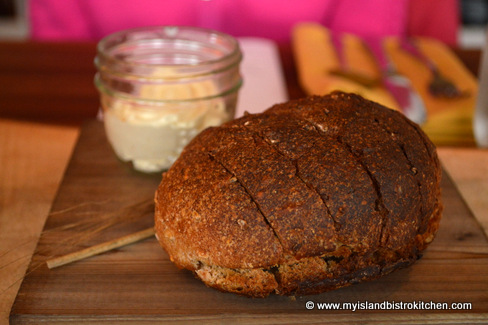
We were no sooner seated than a server brought a small loaf of fresh-baked 12-grain red fife sourdough bread and a small jar of butter. Lots of Mason jars are visible on the table as the larger ones are used as water glasses.

In keeping with FireWorks’ focus on local and regional fare, all of the vegetables used in the meal were grown onsite in the Inn’s gardens and the meat and fish locally sourced. The entire meal was cooked over an open fire or in the large brick oven.
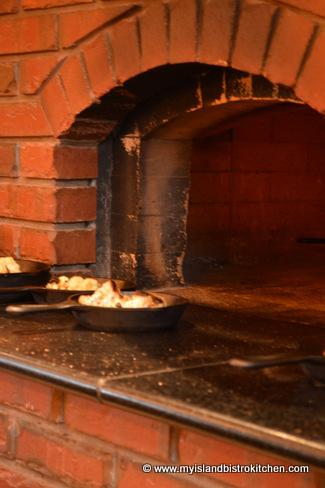
Roasted Cauliflower Emerging from the Brick Oven

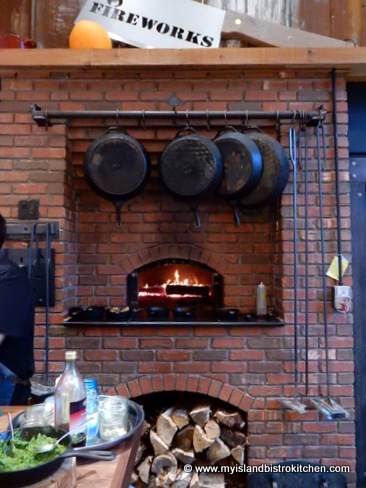
The kitchen makes use of lots of heavy cast-iron pots for cooking over the open fire seen in the background in the photo below.  In keeping with the rustic theme, note the blocks of wood that are used for stationing the hot pots.  Use of natural wood in the decor is prevalent, even on the tables.

Chef Michael soon arrived at the table with bowls of piping hot turkey vegetable soup accompanied by a light and flaky biscuit hung over the soup bowl rim.
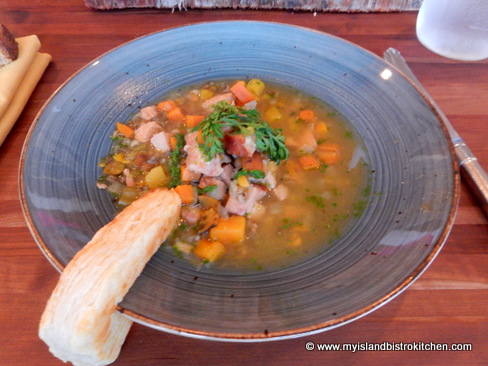
Turkey Vegetable Soup

This was followed by a small green salad that I neglected to take a photo of but here is a list of the salad’s ingredients that was posted on the wall.

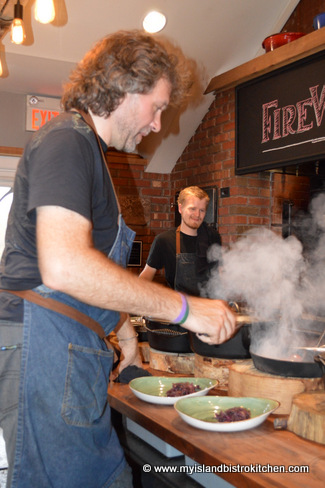
I wandered into the kitchen area just as Chef Michael was plating our meal. I just had to check up on him (lol)!


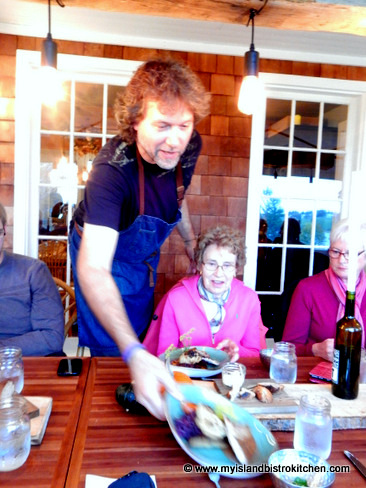
Satisfied he was doing a great job, I hurried back to the table in time for Chef Michael to arrive with our dinners. And, no, my dinner did not slide off the plate….it’s just the split second that I captured the photo of Chef Michael serving my dinner that makes it look like it’s about to slide off the plate!

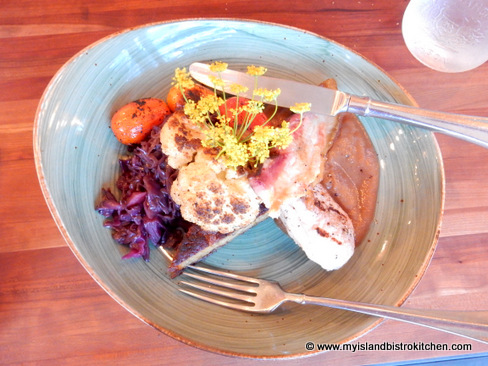
We each chose to have the smoke house pork belly and loin with apple sauce which was served with brown butter rösti potatoes which were ever so tasty. Side vegetables included roasted cauliflower straight from the wood-fired brick oven, slightly charred cherry tomatoes, and braised red cabbage.

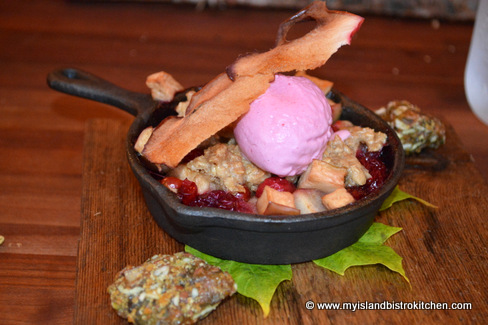
And, for dessert, we had a very seasonal dessert: Wood-fired apple cranberry crisp that was served with cranberry ice cream and pumpkin seed brittle.

Throughout the meal, Chef Michael’s wife, Chastity, accompanied by musicians Reg Ballagh and Jon Rehder, provided dinner music from the vantage point of the Inn’s nearby cozy sitting room.

So, I would class this experience as the full meal deal!  If you find yourself on Prince Edward Island on a Sunday between now and November 15, 2015, and are looking for a unique dining experience, I recommend a visit to FireWorks Restaurant at the Inn at Bay Fortune.  And, if you are planning a vacation on our lovely Island next summer, FireWorks plans to re-open in early May when they will be offering their daily full-scale feast each evening for which reservations are taken.

For more information on dining at FireWorks, visit the Inn at Bay Fortune website.

—————————————————————————-

Thank you for visiting “the Bistro” today.  If you enjoyed this posting, please share it on your social media websites.

Connect with “the Bistro” through the following social media:

Join My Island Bistro Kitchen on Facebook

Follow “the Bistro’s” tweets on Twitter

Follow “the Bistro” on Pinterest

Follow “the Bistro” on Instagram

——————————————————————————
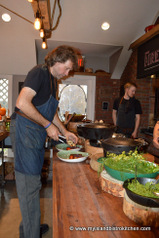
Chef Michael Smith at his FireWorks Restaurant in Bay Fortune, PEI

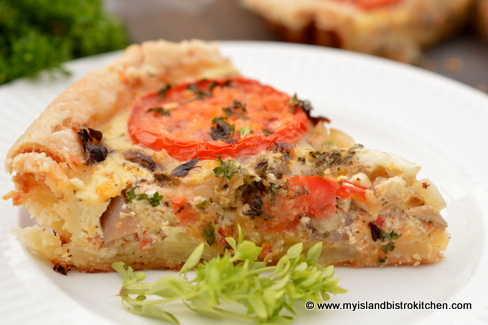
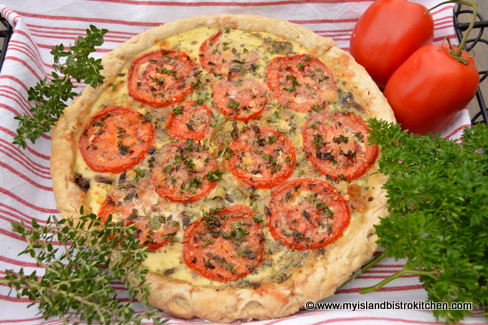
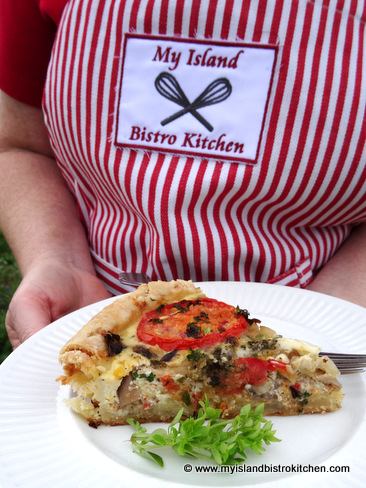
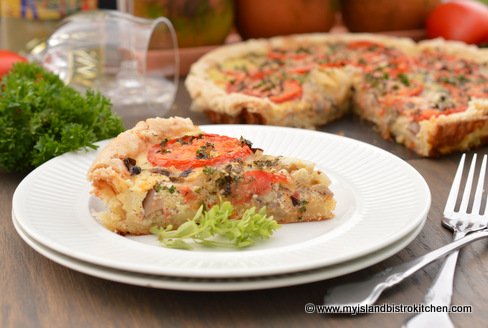
Harvest Quiche

Harvest Quiche
Harvest Quiche

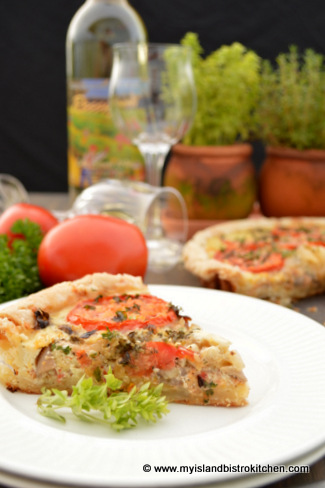
My newly-created recipe combines several wonderful flavors to create this tasty quiche – sausage meat, leeks, mushrooms, Roma tomatoes, and a mixture of cheeses. While this savory quiche can, of course, be made year-round, it is especially good in the fall when the tomatoes are fresh off the vine and leeks and mushrooms are locally harvested.

Harvest Quiche
Harvest Quiche

This quiche is a little bit time-consuming to make but the end result is so worth it!  But, first, here are some of my tips for quiche-making.

There are three key elements to a good savory quiche:  1) A tender, flaky pie crust; 2) The right combination of flavorful, fresh ingredients; 3) A custard filling that holds the ingredients together so that each slice of the quiche holds its own when cut and does not fall apart and spread all over the plate.

First, I recommend par-baking the pie shell.  This helps to keep the crust flaky and prevents it from becoming soggy when an egg mixture filling is added.  Time the preparation of this quiche so that the par-baked shell comes out of the oven when the filling is ready to be added.  Allowing the pie shell to cool first may result in a tougher crust than if the filling is added to the warm shell and the quiche immediately placed in the oven.  Either an unbaked frozen pie shell or one made from your own favorite pastry recipe will work fine for this recipe.  Adding a layer of shredded cheese on top of the par-baked pie shell before adding the other ingredients and custard filling also helps act as a barrier to prevent moisture from the filling soaking into the pie shell as the quiche bakes.

Second, use a good combination of flavorful ingredients that are as fresh as you can get them.  Part of the issue with some quiches is that the filling is simply too moist and this can come as a result of a couple of reasons – either the wrong amounts of eggs and/or milk used or ingredients that, themselves, are too wet and have not been drained enough.  Because this quiche recipe uses ingredients that already have significant moisture content in them (mushrooms, leeks, sausage, and tomato), it is important to drain the cooked sausage meat well and to blot the cooked mushrooms and leeks with paper towel before adding them to the quiche.

In fact, in addition to draining the cooked sausage meat, I often blot the cooked meat in this way, too.  It does make a difference.

The other recommendation I have is to use a “meaty” tomato, such as the Roma/plum tomato variety, as it is tends to be less watery than some other varieties of tomatoes.  It’s also important to keep the ratio of ingredients in proportion and to curb the urge to, say, add more sausage meat, mushrooms, leeks, or tomatoes than the recipe calls for as this will add more moisture to the quiche which may make it difficult for it to stay together when cut. It will also make a heavier quiche and the light, custard filling part of the quiche will be lost.

Quiches may be eaten warm or cold.  It’s important to let the quiche rest for at least 20 minutes when it comes out of the oven.  This allows it to set so that, when it is cut, each piece stays intact when plated and the rest of the quiche stays together without the filling running all over the pie plate before the next slice is cut. A quiche should not be sloppy.

Harvest Quiche
Harvest Quiche

Any combination of hard cheese can be used in this recipe so long as it can be shredded and equals 1 1/2 cups total.  Cheddar cheese is pretty much a standard addition to most of my quiche recipes. In addition, I also like to buy a bag of already-shredded mixed cheese such as mozzarella, provolone, gouda, and parmesan to add to the quiche. This is a quick way to get shredded cheese and is the most economical way to get a mixture of cheeses for a recipe.

It’s a good idea to place the pie plate on a rimmed baking sheet as this catches any drips should they occur and it also makes it easier to transfer the quiche to and from the oven.

This quiche is a great brunch dish and I also use it as a main entrée alongside a green salad and paired with a good white wine such as Rossignol’s Little Sands White Wine produced right here on Prince Edward Island.

DSC_0559

Because quiches can be eaten warm, at room temperature, or cold, I often add quiche slices to a picnic basket, especially if I’m preparing a savory picnic.

Harvest Quiche
Harvest Quiche
Harvest Quiche

Ingredients:

1 – 9” pie shell, chilled for 30 minutes before par-baking

½ tbsp butter
1½ tsp vegetable oil
2 small leeks (about 1 cup sliced), white and light green parts only
4 oz. button mushrooms, thinly sliced

1-2 tsp vegetable oil
4 oz. sweet Italian or sun-dried tomato sausage meat, removed from casing

2 extra-large eggs, lightly beaten
1 cup whole milk or blend
1 tsp liquid chicken bouillon
1 tsp. dried basil
¼ tsp garlic salt
Pinch pepper

1½ cups shredded cheese (any mix of cheddar, mozzarella, provolone, gouda, and/or parmesan)
1 medium-sized Roma tomato, thinly sliced
2-3 tbsp grated parmesan cheese
Fresh basil leaves and parley for garnish (optional)

Method:

Preheat oven to 375°F. Lay a piece of parchment paper over the unbaked chilled pie shell and add a layer of ceramic pie weights or dried baking beans to keep the pastry from puffing up while it bakes. Bake the pastry for about 12-13 minutes then remove the parchment paper and pie weights and return pastry to oven to bake for 5 minutes longer.

The pie crust should not be cooled before adding the filling so, while pastry is baking, prepare the filling. In small frypan over medium high heat, melt the butter and vegetable oil. Add the sliced leeks and mushrooms. Sauté, stirring constantly, until leeks are golden brown and mushrooms tender (about 3-5 minutes). Remove from heat and transfer leeks and mushrooms to paper towel. Blot dry to remove excess moisture. Set aside.

In clean frypan over medium high heat, add 1-2 tsp. cooking oil. Add the sausage meat and scramble-fry until browned. Remove from heat, drain well, and set meat aside.

In small bowl, beat the eggs lightly. Whisk in the milk or blend and the liquid chicken bouillon. Add the dried basil, garlic salt, and pepper.

To assemble quiche:

Reduce oven heat to 350°F.

Place pie plate with warm partially-baked shell on rimmed baking sheet.

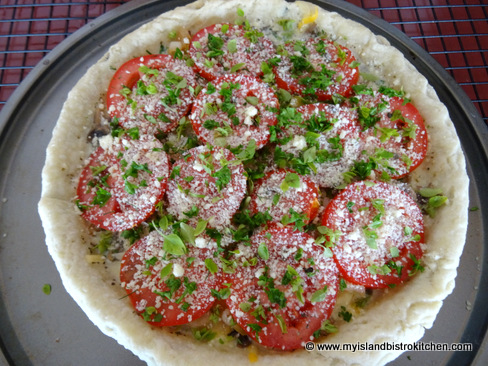
Line the pastry shell with half of the cheese mixture. Distribute the sausage meat over the cheese. Next, add the layer of leek and mushrooms followed by the remaining cheese mixture. Lay a layer of the tomato slices over the cheese. Lastly, pour the milk mixture over the quiche ingredients and sprinkle with 2-3 tbsp of grated parmesan cheese. Add some fresh basil leaves to top of quiche along with a sprinkle of chopped parsley, if desired.

Transfer quiche to oven and bake for 45-50 minutes, or until knife inserted into center of quiche comes out clean. Remove from oven and let quiche stand on wire rack for at least 20 minutes before cutting and serving. May be served warm, at room temperature, or cold.

Yield: Apx. 6-8 servings.

—————————————————————————-

Thank you for visiting “the Bistro” today.  If you enjoyed this posting and recipe, please share it on your social media websites.

Connect with “the Bistro” through the following social media:

Join My Island Bistro Kitchen on Facebook

Follow “the Bistro’s” tweets on Twitter

Follow “the Bistro” on Pinterest

Follow “the Bistro” on Instagram

——————————————————————————

Harvest Quiche

Yield: Apx. 6-8 servings

A savory quiche that combines the wonderful flavours of sausage meat, leeks, mushrooms, tomato, and cheese

Ingredients

  • 1 - 9” pie shell, chilled for 30 minutes before par-baking
  • ½ tbsp butter
  • 1½ tsp vegetable oil
  • 2 small leeks (about 1 cup sliced), white and light green parts only
  • 4 oz. button mushrooms, thinly sliced
  • 1-2 tsp vegetable oil
  • 4 oz. sweet Italian or sun-dried tomato sausage meat, removed from casing
  • 2 extra-large eggs, lightly beaten
  • 1 cup whole milk or blend
  • 1 tsp liquid chicken bouillon
  • 1 tsp. dried basil
  • ¼ tsp garlic salt
  • Pinch pepper
  • 1½ cups shredded cheese (any mix of cheddar, mozzarella, provolone, gouda, and/or parmesan)
  • 1 medium-sized Roma tomato, thinly sliced
  • 2-3 tbsp grated parmesan cheese
  • Fresh basil leaves and parley for garnish (optional)

Instructions

  1. Preheat oven to 375°F. Lay a piece of parchment paper over the unbaked chilled pie shell and add a layer of ceramic pie weights or dried baking beans to keep the pastry from puffing up while it bakes. Bake the pastry for about 12-13 minutes then remove the parchment paper and pie weights and return pastry to oven to bake for 5 minutes longer.
  2. The pie crust should not be cooled before adding the filling so, while pastry is baking, prepare the filling. In small frypan over medium high heat, melt the butter and vegetable oil. Add the sliced leeks and mushrooms. Sauté, stirring constantly, until leeks are golden brown and mushrooms tender (about 3-5 minutes). Remove from heat and transfer leeks and mushrooms to paper towel. Blot dry to remove excess moisture. Set aside.
  3. In clean frypan over medium high heat, add 1-2 tsp. cooking oil. Add the sausage meat and scramble-fry until browned. Remove from heat, drain well, and set meat aside.
  4. In small bowl, beat the eggs lightly. Whisk in the milk or blend and the liquid chicken bouillon. Add the dried basil, garlic salt, and pepper.
  5. To assemble quiche:
  6. Reduce oven heat to 350°F.
  7. Place pie plate with warm partially-baked shell on rimmed baking sheet.
  8. Line the pastry shell with half of the cheese mixture. Distribute the sausage meat over the cheese. Next, add the layer of leek and mushrooms followed by the remaining cheese mixture. Lay a layer of the tomato slices over the cheese. Lastly, pour the milk mixture over the quiche ingredients and sprinkle with 2-3 tbsp of grated parmesan cheese. Add some fresh basil leaves to top of quiche along with a sprinkle of chopped parsley, if desired.
  9. Transfer quiche to oven and bake for 45-50 minutes, or until knife inserted into center of quiche comes out clean. Remove from oven and let quiche stand on wire rack for at least 20 minutes before cutting and serving. May be served warm, at room temperature, or cold.
Schema/Recipe SEO Data Markup by Yummly Rich Recipes
https://myislandbistrokitchen.com/2015/10/26/harvest-quiche/

Harvest Quiche
Harvest Quiche

Mock Cherry Pie

Mock Cherry Pie
Mock Cherry Pie

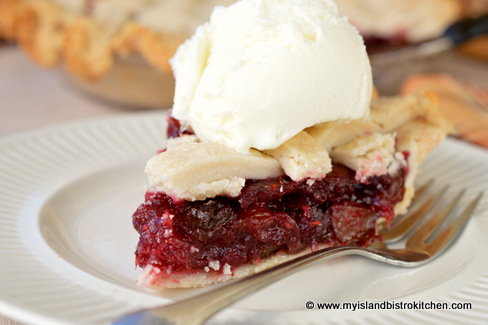
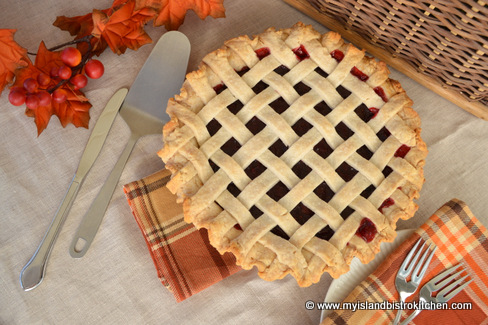
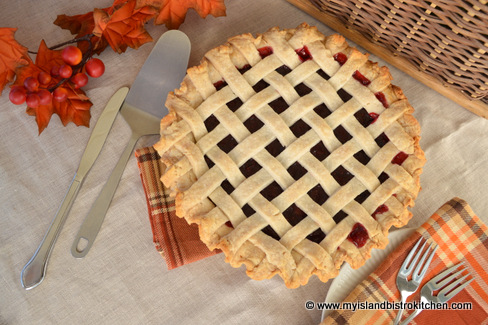
I’m not sure of the origins of Mock Cherry Pie but my grandmother made a version of this delight when I was a small child.  Sometimes called cranberry pie, it’s not an altogether common pie (at least in my circles) these days but it is very tasty and colorful with its deep ruby red color. It lends itself well to a lattice top crust but is often made with a standard full top crust.

Mock Cherry Pie
Mock Cherry Pie

Either fresh or frozen cranberries can be used for this filling.  I like to coarsely chop up most of the cranberries for the filling but leave some whole to give texture to the filling. The idea behind chopping the cranberries in half is that it quickly releases the juice from the berries in the cooking process.  But, don’t get crazy and chop them too finely as the pie won’t have texture if the berries are ground up too fine. Adding the raisins to the filling enhances flavour complexity and also makes the filling more substantial.  The sweetness of the raisins counters the tartness of the cranberries.

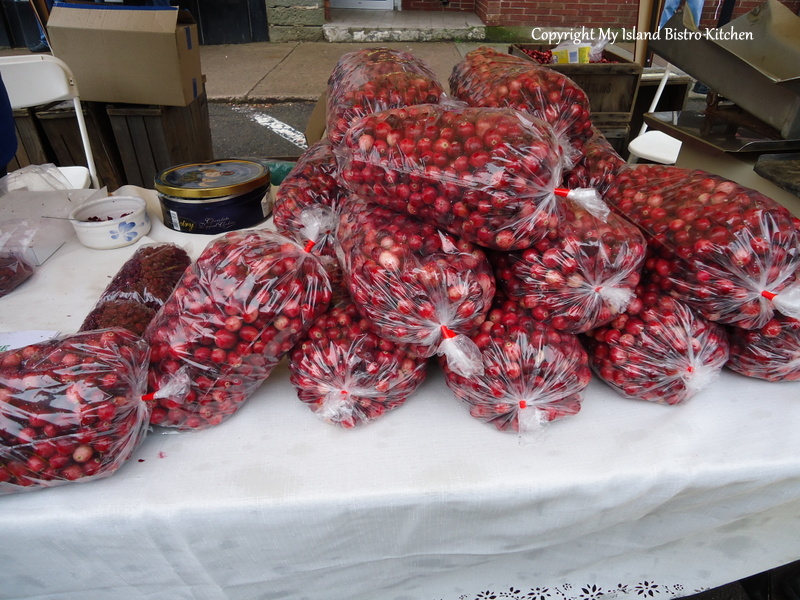
The cranberries I am using in this filling came from Mikita Farms in Farmington, near Souris in the eastern part of Prince Edward Island. To my knowledge, this is the only cranberry producer that wet harvests the berries on the Island.  To see photos I took in 2014 of the wet harvesting of cranberries, click here.

Corralling the Cranberries

Cranberries freeze really well so I keep a large bag of cranberries in my freezer for use year-round. This time of the year, many farm markets will have bags of these tasty berries available so don’t hesitate to pick up a bag and store them in the freezer for later use.

Fresh PEI Cranberries Charlottetown, PEI
Fresh PEI Cranberries

The key to making the filling for this pie is to get it thickened so that it does not run when the pie is cut.  It takes a little patience but is worth the effort.  It’s important to cool down the filling before putting it in the unbaked pie shell as, otherwise, it will break down the fat in the pastry causing it to be a soggy crust.  About 30-40 minutes of cooling time will be just right. Remember to stir the filling as it cools as this will help it to cool faster and also aid in its thickening.

Mock Cherry Pie
Mock Cherry Pie

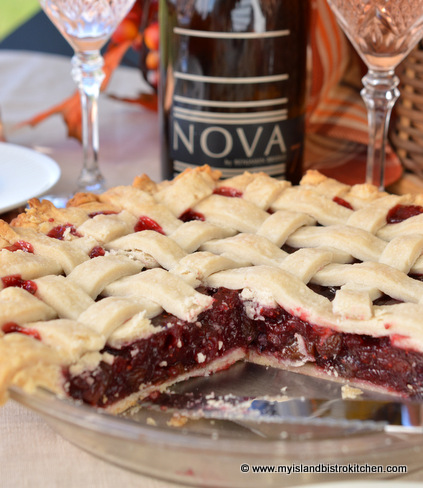
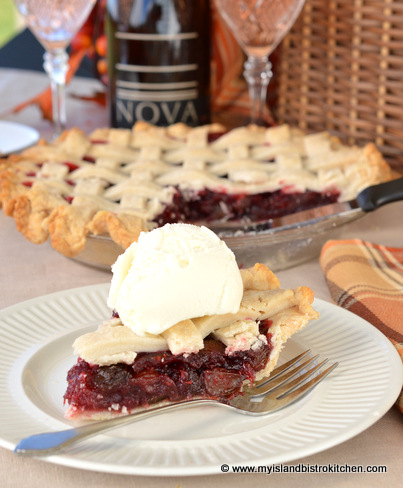
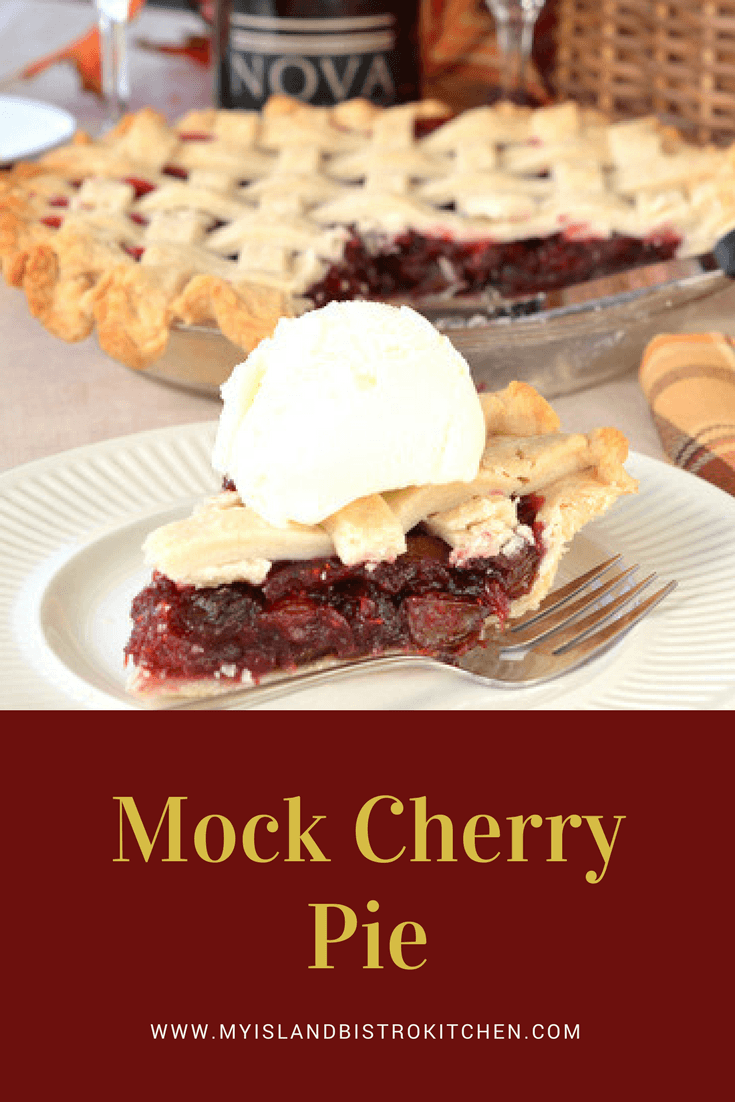
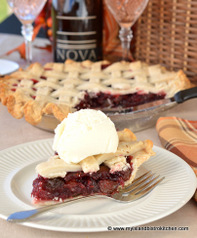
This is a lovely rich dessert, perfect for Thanksgiving or Christmas. A scoop of high quality vanilla ice cream goes particularly well with Mock Cherry Pie.  The wine I have selected to pair with this dessert for my Thanksgiving dinner this year comes from Benjamin Bridge Vineyards in Gaspereau Valley, Nova Scotia.  I discovered this wine through the 2015 PEI Fall Flavours Culinary Festival for which Benjamin Bridge was this year’s wine sponsor.  Benjamin Bridge wines were served at the signature culinary events during the month-long festival in September.  My wine selection is Nova 7. This is the perfect wine to pair with this dessert because it has a hint of sweetness to compliment the tartness of cranberries and a beautiful pale blush color. I think I will seriously have to go on a field trip and pay this winery a visit!

Mock Cherry Pie Paired with Benjamin Bridge's Nova 7 Wine
Mock Cherry Pie Paired with Benjamin Bridge’s Nova 7 Wine
For my pastry recipe, tips, and hints on making pie pastry, click here.

Mock Cherry Pie

Ingredients:

Pastry for 9” double pie crust

2 cups cranberries, fresh or frozen
1 cup sultana raisins
½ cup boiling water

1 cup sugar
3 tbsp cornstarch
Pinch salt
1/3 cup cold water

1 tsp vanilla
½ tsp almond flavouring
1 tbsp Cointreau
1 tsp finely grated orange rind
1 tbsp butter

Method:

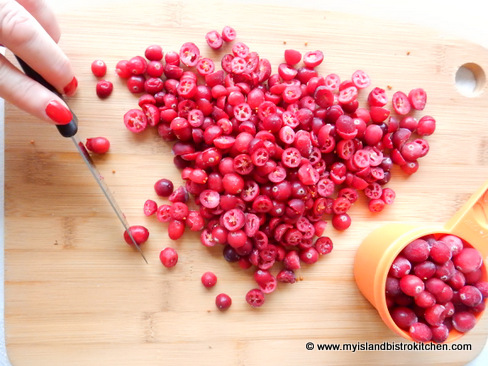
Chop 1 1/3 cups cranberries in half. Leave remaining 2/3 cup whole.

In medium-sized saucepan, combine the cranberries, raisins, and boiling water. Cook over high heat to the boiling point. Reduce heat to medium and cook 2-3 minutes, stirring occasionally.

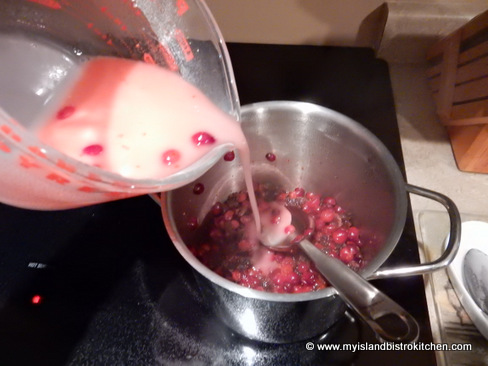
In small bowl, combine the sugar and cornstarch with 1/3 cup cold water. Whisk until smooth. Add 1-2 tbsp of the hot mixture to temper the sugar-cornstarch mixture (don’t worry if a few cranberries get scooped up, too) and pour it into the hot cranberry-raisin mixture. Stir well.

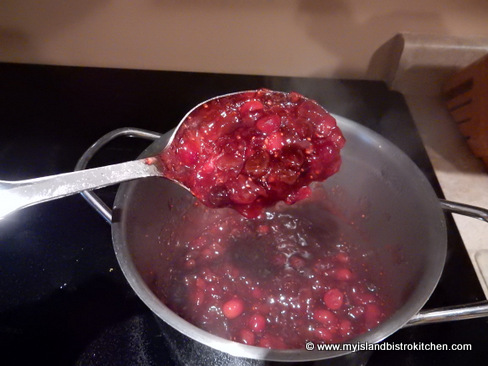
Cook over medium heat, stirring often to prevent scorching, until thickened – about 11-13 minutes. Remove from heat and stir in the vanilla, almond flavouring, Cointreau, grated orange rind, and butter. Stir well. Let cool for 30-40 minutes, stirring occasionally.

Preheat oven to 400°. Prepare pastry for bottom crust and roll to desired thickness. Transfer pastry to a greased 9” pie plate. Trim pastry.

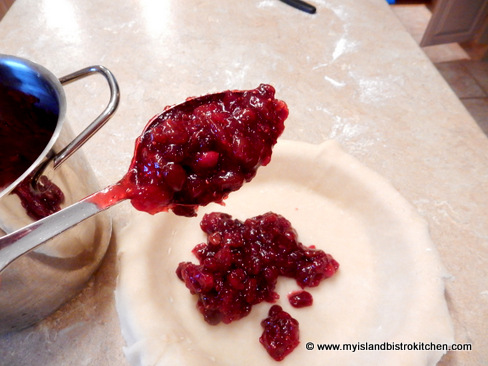
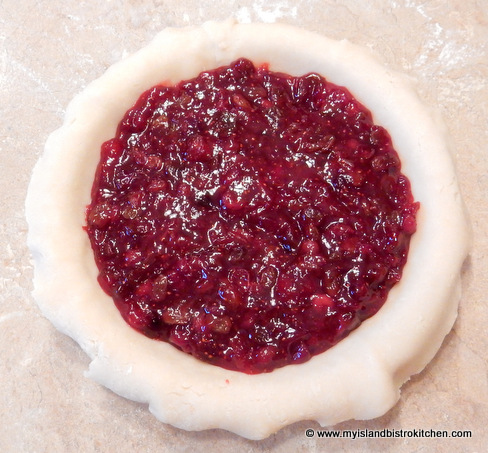
Pour cooled filling into crust.

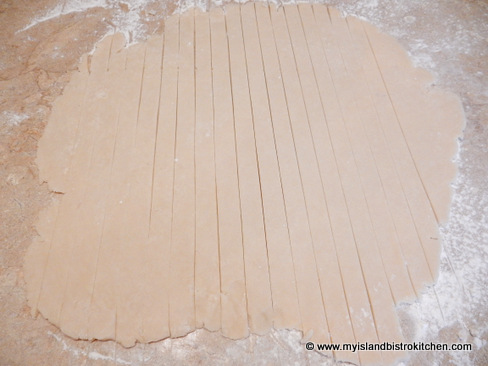
Roll out pastry for top crust. If desired, cut into strips for lattice top.

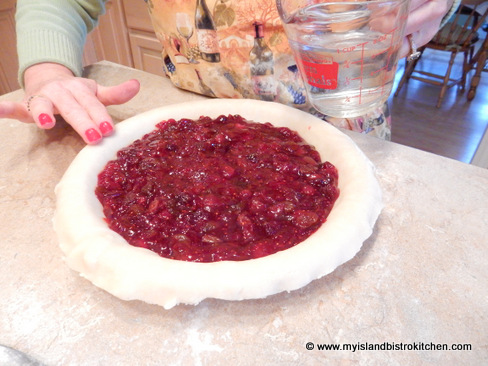
Dampen edges of bottom pie crust.

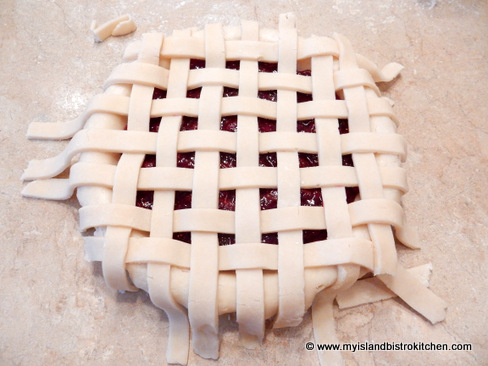
Place top crust (or, alternatively, lattice strips) over filling, gently pressing the outside edges to seal to bottom crust.

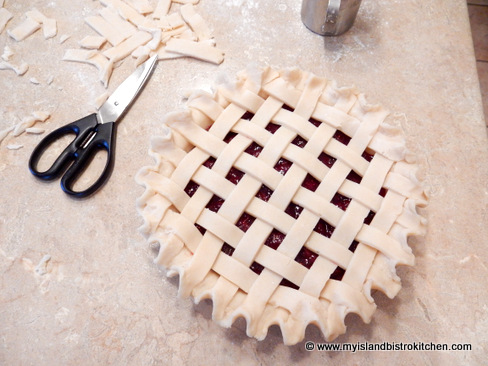
Using kitchen shears, trim excess pastry.

Crimp pastry edges or press together with the tines of a fork. If using complete top crust, cut vents in pastry to allow steam to escape as the pie cooks (omit this step if using a lattice top since there are obviously already lots of spaces for the steam to escape).

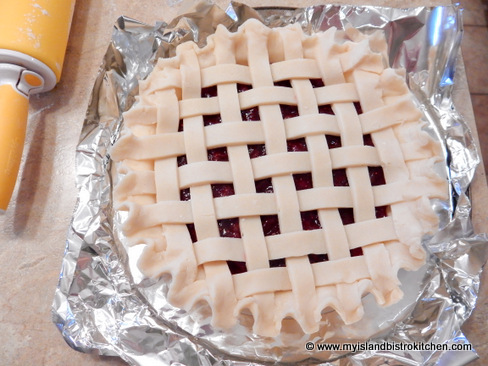
Place pie plate on a rimmed baking sheet and bake in the lower third of the oven for 10 minutes at 400° then reduce heat to 375° and bake for 45-50 minutes longer or until the crust is lightly browned and juices start to bubble from the filling.

Transfer pie to a wire rack and let cool completely before cutting and serving.

Yield: 8 servings

Mock Cherry Pie

Yield: 1 - 9" pie, apx. 8 servings

A rich and flavourful pie that combines cranberries and raisins with a hint of orange flavour.

Ingredients

  • Pastry for 9” double pie crust
  • 2 cups cranberries, fresh or frozen
  • 1 cup sultana raisins
  • ½ cup boiling water
  • 1 cup sugar
  • 3 tbsp cornstarch
  • Pinch salt
  • 1/3 cup cold water
  • 1 tsp vanilla
  • ½ tsp almond flavouring
  • 1 tbsp Cointreau
  • 1 tsp finely grated orange rind
  • 1 tbsp butter

Instructions

  1. Chop 1 1/3 cups cranberries in half. Leave remaining 2/3 cup whole.
  2. In medium-sized saucepan, combine the cranberries, raisins, and boiling water. Cook over high heat to the boiling point. Reduce heat to medium and cook 2-3 minutes, stirring occasionally.
  3. In small bowl, combine the sugar and cornstarch with 1/3 cup cold water. Whisk until smooth. Add 1-2 tbsp of the hot mixture to temper the sugar-cornstarch mixture and pour it into the hot cranberry-raisin mixture. Stir well. Cook over medium heat, stirring often to prevent scorching, until thickened – about 11-13 minutes. Remove from heat and stir in the vanilla, almond flavouring, Cointreau, grated orange rind, and butter. Stir well. Let cool for 30-40 minutes, stirring occasionally.
  4. Preheat oven to 400°. Prepare pastry for bottom crust and roll to desired thickness. Transfer pastry to a greased 9” pie plate. Trim pastry. Pour cooled filling into crust.
  5. Roll out pastry for top crust. If desired, cut into strips for lattice top. Dampen edges of bottom pie crust and place top crust (or, alternatively, lattice strips) over filling, gently pressing the outside edges to seal to bottom crust. Trim excess pastry. Crimp pastry edges or press together with the tines of a fork. If using complete top crust, cut vents in pastry to allow steam to escape as the pie cooks (omit this step if using a lattice top since there are obviously already lots of spaces for the steam to escape).
  6. Place pie plate on a rimmed baking sheet and bake in the lower third of the oven for 10 minutes at 400° then reduce heat to 375° and bake for 45-50 minutes longer or until the crust is lightly browned and juices start to bubble from the filling.
  7. Transfer pie to a wire rack and let cool completely before cutting and serving.
  8. [Copyright My Island Bistro Kitchen]
Schema/Recipe SEO Data Markup by Yummly Rich Recipes
https://myislandbistrokitchen.com/2015/10/08/mock-cherry-pie/

—————————————————————————-

If you have made this recipe and enjoyed it and/or wish to share it with your friends and family, please do so on social media but be sure to share the direct link to this posting from my website.

Connect with My Island Bistro Kitchen on Social Media

Join the Facebook page for My Island Bistro Kitchen:  https://www.facebook.com/MyIslandBistroKitchen/

Follow “the Bistro” on “X” (formerly Twitter)https://twitter.com/PEIBistro/

See the drool-worthy gallery of mouth-watering food photos from My Island Bistro Kitchen on Instagramhttps://www.instagram.com/peibistro/

Follow “the Bistro” on Pinterest at https://www.pinterest.ca/peibistro/ and pin the Pinterest-ready photo found at the end of this post to your favorite Pinterest boards.

PIN ME TO YOUR FAVORITE PINTEREST BOARDS!


DSC_0824


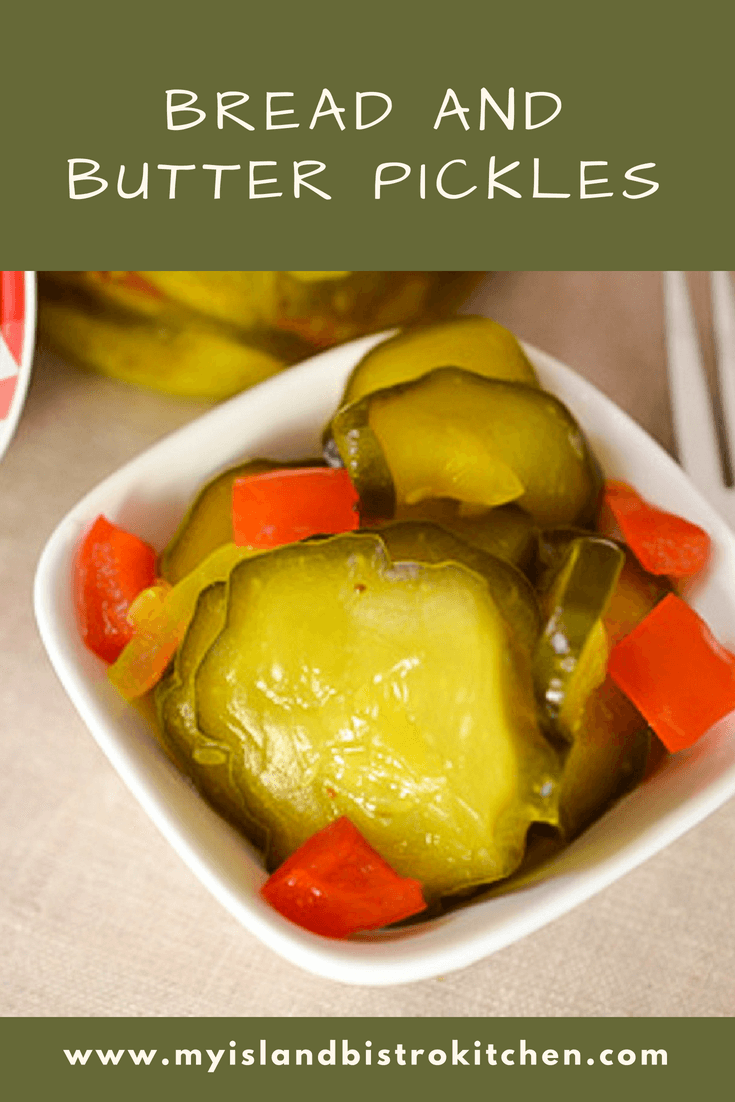
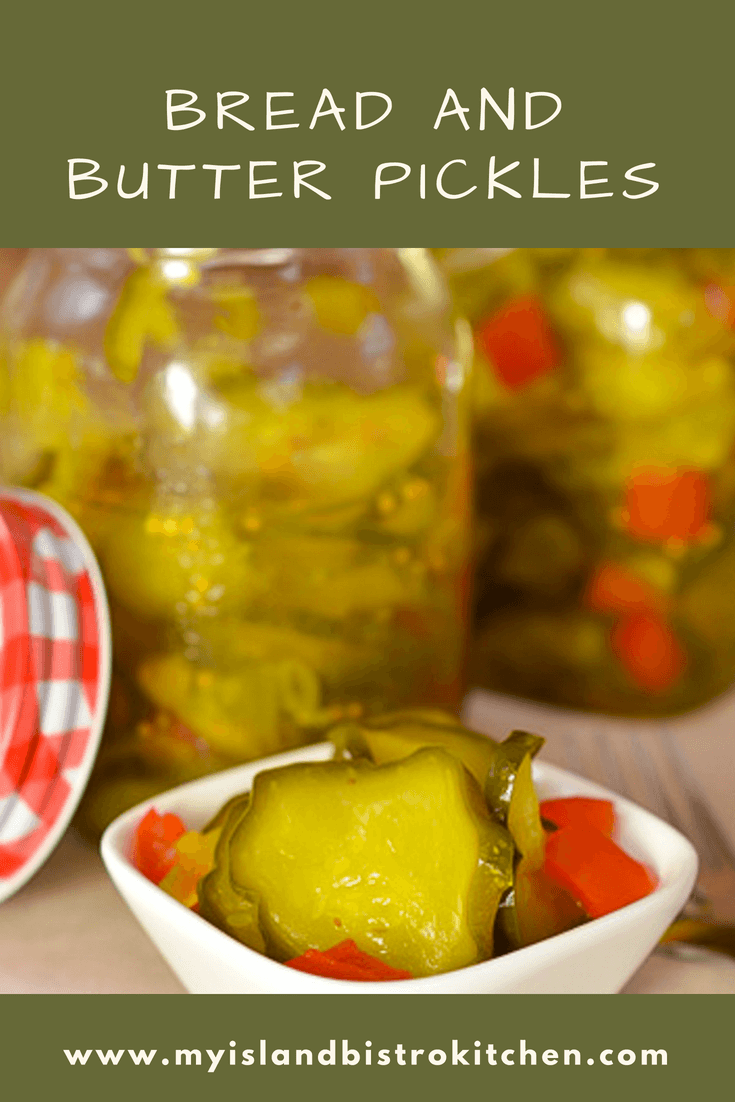
Bread and Butter Pickles

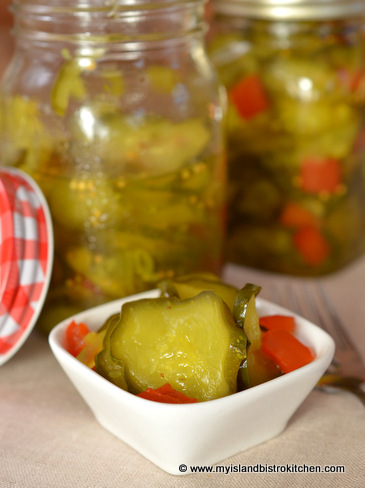
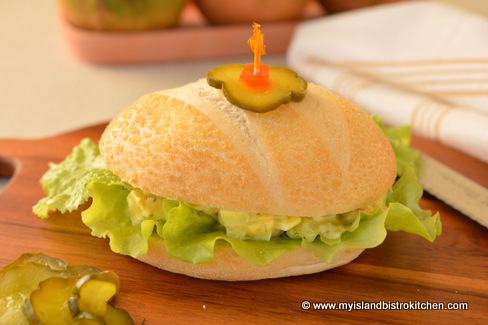
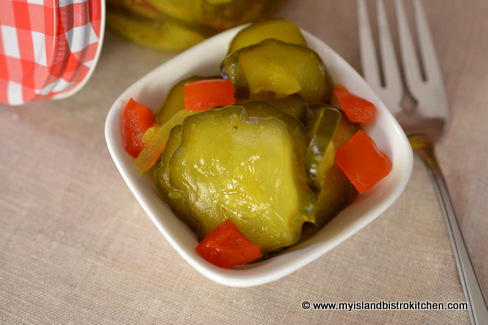
One of my very favorite kinds of pickles are the traditional sweet Bread and Butter Pickles.  If I didn’t limit myself, I could sit down and eat an entire bottle of these pickles! They are especially good with sandwiches and burgers.

Bread and Butter Pickles


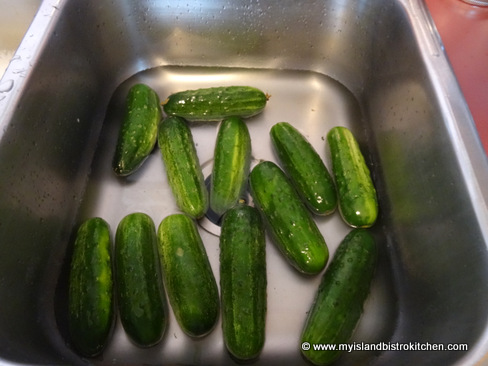
These pickles are not hard to make but, like most pickled products, they are a bit time-consuming and, sometimes, finding the right ingredients can be a bit of a challenge.  The first challenge is to get the  cucumbers that are suitably-sized for bread and butter pickles.

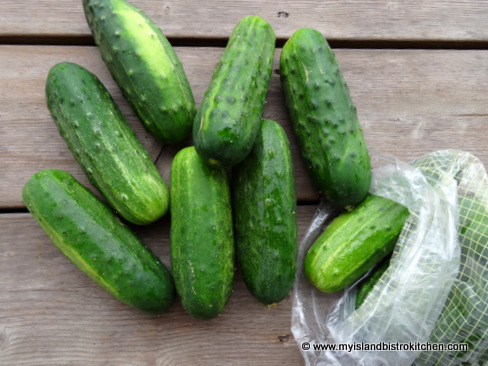
Small Pickling Cucumbers

These are small cucumbers (but bigger than those used to make dill pickles), about 6-7 inches long and only about 1 1/2″ to 2″ wide.  You don’t want to use large field cucumbers because they have too many seeds, meaning they will fall apart as opposed to holding their shape when sliced. As well, large slices of pickled cucumbers are not attractive to serve alongside a sandwich or burger.

To make quality pickles, fresh produce is needed.  I recommend using cucumbers that have not been picked any longer than 24 hours.  Cucumbers that have been picked for days start to get soft and “punky” and are not good for pickling because they have already started to deteriorate and lose their freshness. As well, the skin on the cucumbers will be very tough.

Ask for “bread and butter pickling cucumbers” at your local farm stand or market and the sellers should know what you mean. Be sure to ask when they were picked and check to make sure the cucumbers are firm to the touch. I bought mine at Balderston’s Farm Market in Stratford, PEI, and the big bin of the cucumbers had just been brought in from the field and were being bagged up while I was at the stand.

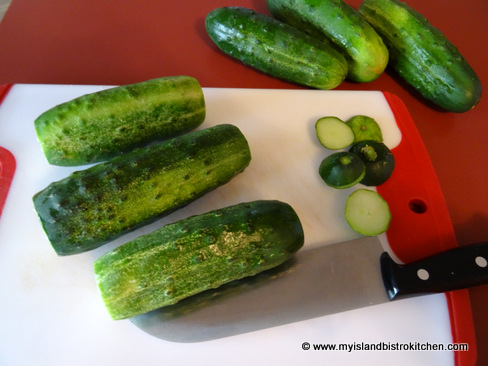
Give the cucumbers a good wash and then dry them off.

Trim and discard the cucumber ends but leave the peeling on for these pickles. Not only does the peeling give color and texture but it helps to hold the cucumber slices intact.

DSC00389 (1)

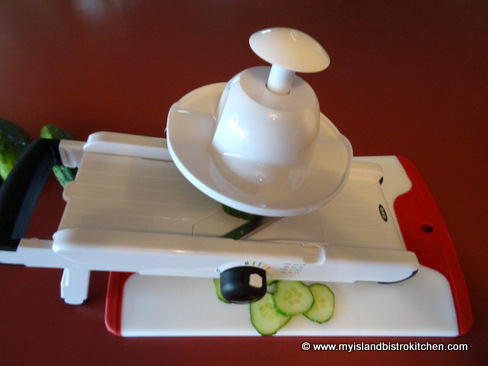
If you have a mandolin, it will make slicing the cucumbers easier and you will have uniformly-sized slices of cucumbers. I suggest cutting the cucumbers into either 3/16″ or 1/4″ thick slices, depending on how thin or thick you like pickle slices.  The 1/4″ thickness will help the pickles retain their shape the best.

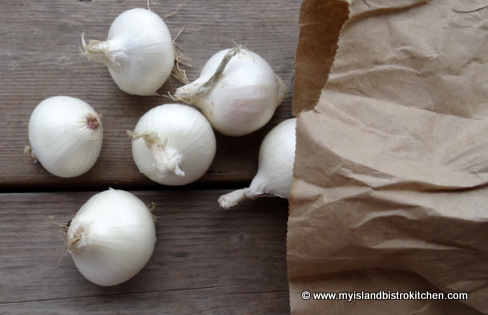
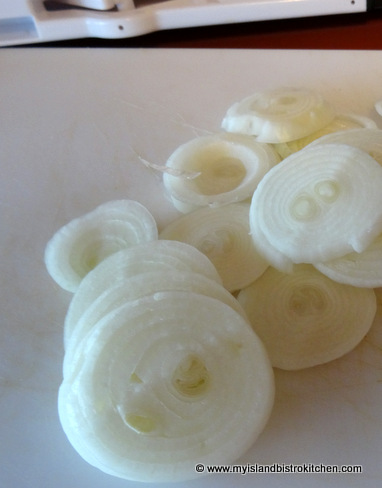
I recommend using the small silver-skinned onions (often referred to as “pickling onions”) for these pickles because, when sliced, they will be about the same size in diameter as the cucumbers. I find these onions are somewhat stronger in flavour than the standard garden variety of onions.

Silver-skinned Onions

Even if you don’t like onions, they really are needed to give these pickles flavour.

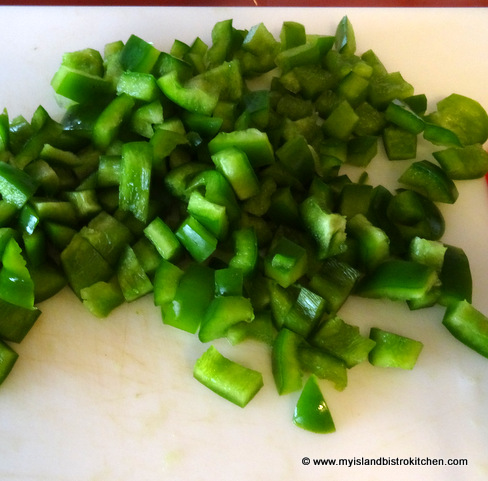
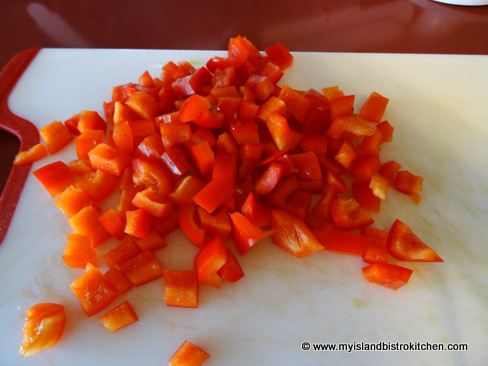
Use firm, blemish-free peppers – 1 red and 1 green – for this recipe and dice them up.

The green pepper contributes to the flavour and the red pepper adds a splash of color to the pickles (as well as taste).

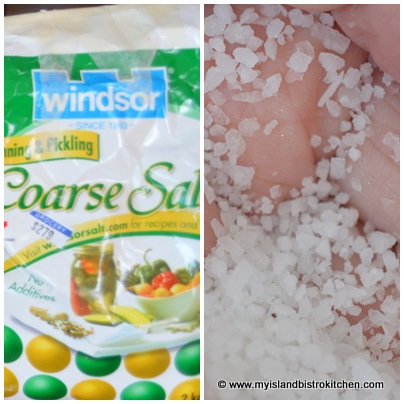
Be sure to use pickling (coarse) salt, never table salt, for the soaking of these pickles. You should be able to find this salt in the same grocery aisle as regular table salt or at your bulk food store where it may be labeled as either “pickling” or “coarse” salt.

Coarse/Pickling Salt

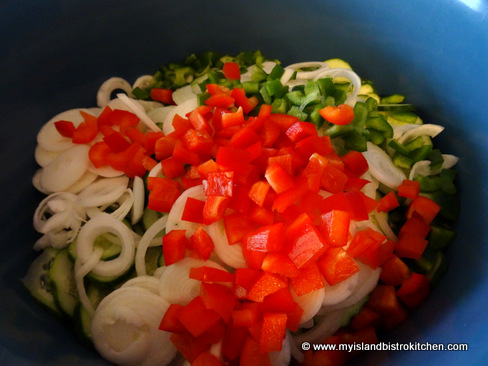
Once all the vegetables are cut up, place them in a large bowl or pot.

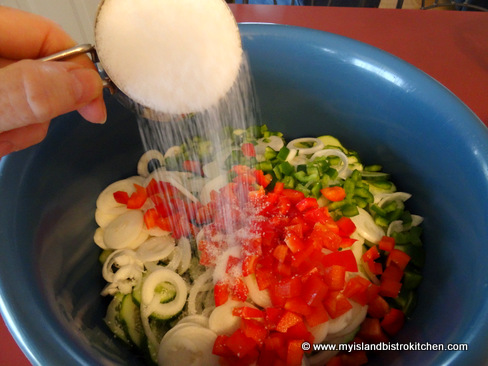
Sprinkle the vegetables with the pickling salt.

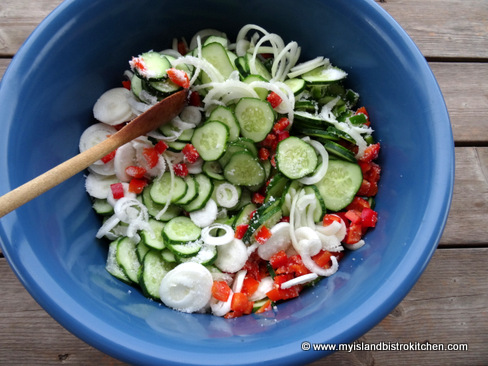
Give the vegetables a good stir to mix in the salt.

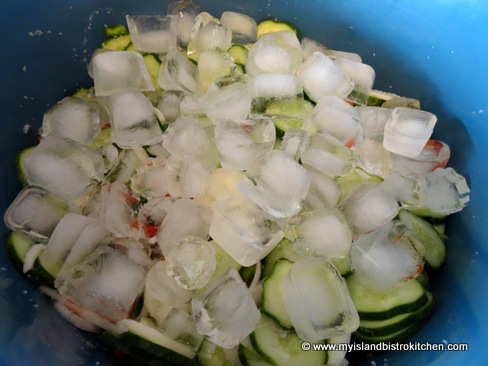
For the brine, you will need a total of about 5-6 dozen large ice cubes.  Completely cover the vegetables with a layer of ice cubes.  As these melt, they combine with the salt to make the brine in which the vegetables will soak for three hours at room temperature.  Make sure you have additional ice cubes to add to the vegetables as cubes melt. The key is to keep the vegetables ice cold as this will help the cucumbers retain their crispness.

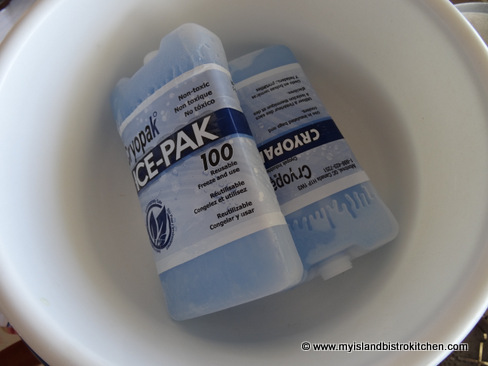
Once the ice cubes melt, the vegetables will start to float in the water if they are not weighted down so I suggest placing another lightweight plastic bowl directly on top of the vegetables and ice cubes and weighting it down with a couple of frozen freezer packs which will also help to keep the vegetables cold. Be sure to cover this top bowl to keep the cold trapped inside.

DSC00523 (1)

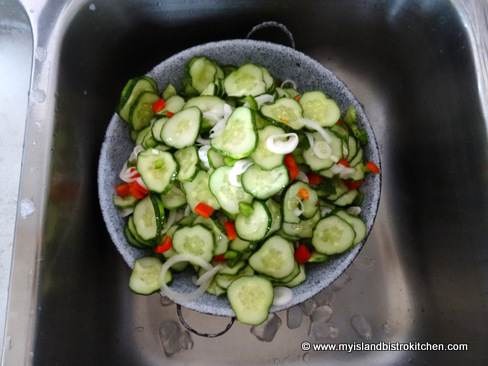
After the vegetables have soaked for three hours at room temperature, drain them in one to two large colanders and discard any ice cubes that may still remain.

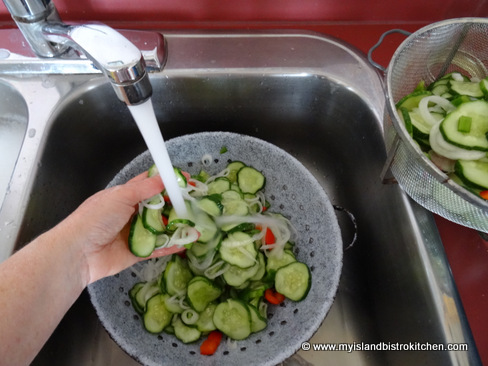
Give the vegetables a quick short rinse of fresh cold water. This will remove any salt residue that may remain. Don’t over-do the rinsing – just a quick rinse-off is all that is needed.

Drain the vegetables really well, letting them sit for at least 20 minutes or so.  If too much water is left in the vegetables, it will dilute the syrup and make for watery pickles. As they are draining, I often will scoop up a handful or two of the vegetables and move them around in the colander and then gently shake the colander to release any trapped water.

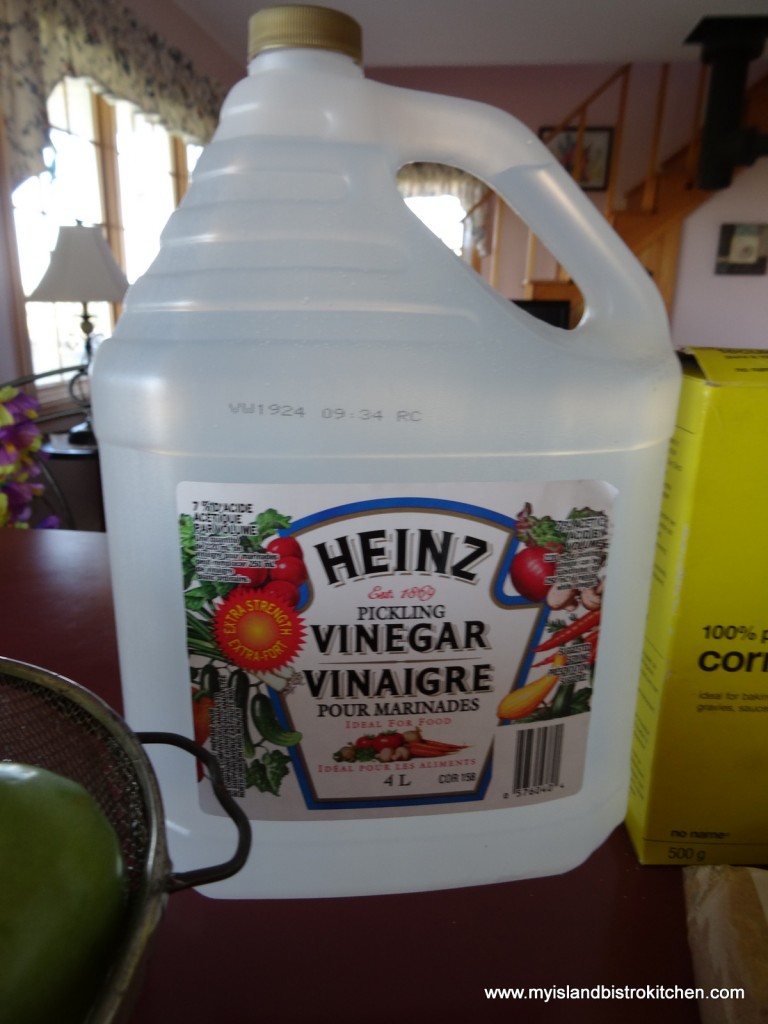
For any pickling, I recommend using vinegar that is specially labelled for pickling – it will usually have 7% acidity, making it stronger than table vinegar which will help to preserve the pickles longer.

Pickling Vinegar
Pickling Vinegar

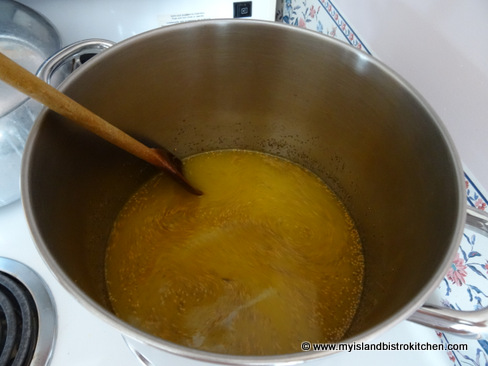
The syrup is easy to make. There is no need to bundle up all the spices into a cheesecloth sachet for the syrup as it is perfectly fine to have the spices loose in the pickle jars. Just remove and discard the cinnamon stick before bottling the pickles. To make the syrup, simply combine all the syrup ingredients in a large stock pot and bring it to a boil over medium-high heat.

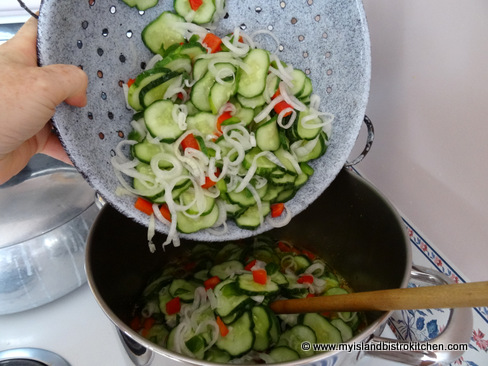
Once the syrup has reached the boiling point, add the drained vegetables.

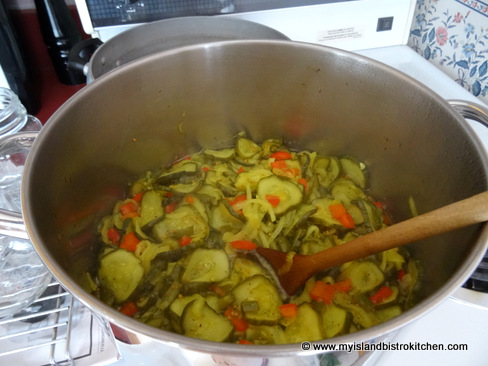
Bring the mixture back to the boiling point, occasionally stirring the vegetables. Once it reaches the boiling point, remove the pot from the heat.  All this process aims to do is to heat the vegetables and they should not be cooked until they are soft – these pickles are meant to be crispy. Overcooking will make them soft and punky.

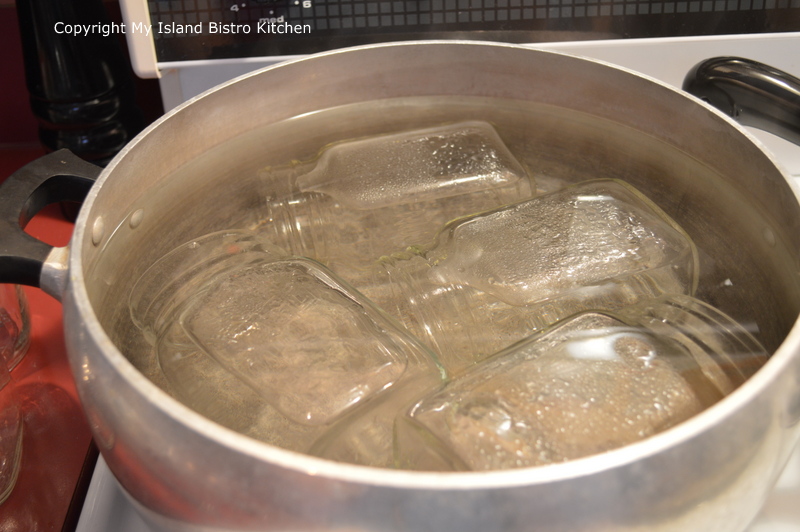
Some use the sanitizing cycle on their dishwashers to sterilize the jars. I’m still using the old traditional method of sterilizing the jars in hot water. The jars must be hot when they are filled with the vegetables.

Sterilizing Jars
Sterilizing Jars

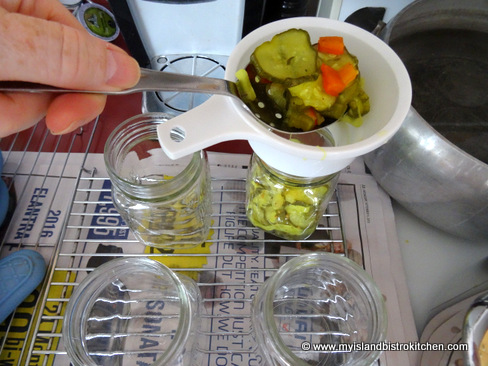
Use a slotted spoon to gather up the vegetables and place them in the hot sterilized jars. A wide-mouthed funnel is useful for this process. Fill the jars, leaving about 1″ headroom in each.

Pour the hot syrup into the jars and over the vegetables, leaving about 1/2″ headroom in each bottle. Remove any air bubbles that may appear in the jars by inserting knife into each bottle and gently moving vegetables to allow liquid to fill any pockets of air that may have formed.

Wipe the tops of the jars with a clean, damp cloth to remove any syrup.  Seal immediately with heated lids. Screw on jar bands just until resistance is met.

Process filled jars in hot water bath according to canner manufacturer’s directions for the proper time for your local altitude.

Cool jars completely and listen for the “ping/pop” sound that will tell you that the jar is sealed.  This may happen quickly or it can take several hours. The lids should also have an inward dent in the center of their tops if they have sealed to the jars properly. If a lid has not made the “popping/pinging” sound and is not dented inward, store the jar in the refrigerator and use it first.

Store the jars in a cool, dark area.

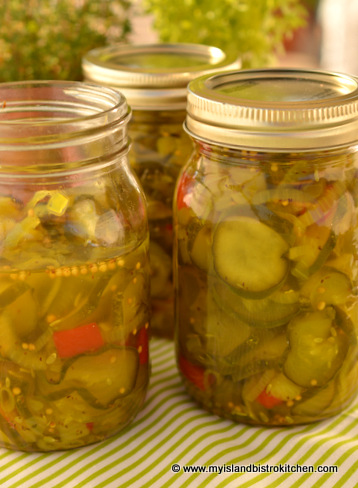
How many jars of pickles you get from this batch will be determined by how tightly or loosely you pack the cucumbers into the jars. This will also dictate how much syrup is used, too.

Bread and Butter Pickles

Ingredients:

6 – 6½ lbs small pickling cucumbers, peeling on, sliced either 3/16”  or 1/4″ thick
4 cups silver-skinned onions, peeled and thinly sliced
1 red pepper, diced
1 green pepper, diced
½ cup pickling salt
5-6 dozen ice cubes

Syrup:
5 cups white sugar
1 tsp tumeric
1 tbsp mustard seed
1 tsp celery seed
3 cups pickling white vinegar
½ cinnamon stick

Method:

Wash the cucumbers and trim and discard their ends. Slice the cucumbers either 3/16″ or 1/4″ thick, depending on the desired thickness of the pickle slices. Slice onions and dice the peppers. Combine the sliced cucumbers, onions, and peppers in a large bowl. Sprinkle pickling salt over vegetables. Stir mixture with a large wooden spoon to distribute the pickling salt. Completely cover mixture with a layer of ice cubes. Place a large bowl over the vegetables and weigh it down with a weight (a couple of freezer ice packs work well) to keep the vegetables soaking in the brine. Let sit at room temperature for 3 hours, adding more ice cubes as they melt to ensure vegetables are kept cold.

Drain vegetables into 1-2 large colanders and rinse with cold water to remove any salt residue. Drain again for several minutes.

In large stock pot, combine all of the syrup ingredients. Bring the syrup to the boiling point over medium-high heat, stirring occasionally. Add the vegetables. Bring the mixture just to the boiling point, stirring occasionally. Remove pot from heat.

Using a slotted spoon, fill hot sterilized jars with the vegetables leaving 1” headroom in each bottle. Pour hot syrup into the bottles, leaving ½” headroom in each bottle. Remove any air bubbles that may appear in the jars by inserting knife into each bottle and gently moving vegetables to allow liquid to fill any pockets of air that may have formed.

With clean, damp cloth, wipe clean each jar rim. Seal immediately with heated lids. Screw on jar bands just until resistance is met.

Process filled jars in hot water bath according to canner manufacturer’s directions for the proper time for your local altitude.

Store jars in cool dark area.

Yield: Apx. 7-9 pint bottles


For other great pickle, chow, and relish recipes from My Island Bistro Kitchen, click on the links below:

Mustard Pickles
Pickled Beets
Mustard Beans
Green Tomato Chow
Rhubarb Relish
Dill Pickles

Thank you for visiting “the Bistro” today.  If you enjoyed this posting and recipe, please share it on your social media websites.

Connect with “the Bistro” through the following social media:

Join My Island Bistro Kitchen on Facebook

Follow “the Bistro’s” tweets on Twitter

Follow “the Bistro” on Pinterest

Follow “the Bistro” on Instagram

——————————————————————————

Bread and Butter Pickles

Yield: 7-9 pint bottles

Ingredients

  • 6 – 6½ lbs small pickling cucumbers, peeling on, sliced either 3/16” or 1/4" thick
  • 4 cups silver-skinned onions, peeled and thinly sliced
  • 1 red pepper, diced
  • 1 green pepper, diced
  • ½ cup pickling salt
  • 5-6 dozen ice cubes
  • Syrup:
  • 5 cups white sugar
  • 1 tsp tumeric
  • 1 tbsp mustard seed
  • 1 tsp celery seed
  • 3 cups pickling white vinegar
  • ½ cinnamon stick

Instructions

  1. Wash the cucumbers and trim and discard their ends. Slice the cucumbers either 3/16" or 1/4" thick, depending on the desired thickness of the pickle slices. Slice onions and dice the peppers. Combine the sliced cucumbers, onions, and peppers in a large bowl. Sprinkle pickling salt over vegetables. Stir mixture with a large wooden spoon to distribute the pickling salt. Completely cover mixture with a layer of ice cubes. Place a large bowl over the vegetables and weigh it down with a weight (a couple of freezer ice packs work well) to keep the vegetables soaking in the brine. Let sit at room temperature for 3 hours, adding more ice cubes as they melt to ensure vegetables are kept cold.
  2. Drain vegetables into 1-2 large colanders and rinse with cold water to remove any salt residue. Drain again for several minutes.
  3. In large stock pot, combine all of the syrup ingredients. Bring the syrup to the boiling point over medium-high heat, stirring occasionally. Add the vegetables. Bring the mixture just to the boiling point, stirring occasionally. Remove pot from heat.
  4. Using a slotted spoon, fill hot sterilized jars with the vegetables leaving 1” headroom in each bottle. Pour hot syrup into the bottles, leaving ½” headroom in each bottle. Remove any air bubbles that may appear in the jars by inserting knife into each bottle and gently moving vegetables to allow liquid to fill any pockets of air that may have formed. Seal jars with sterilized lids and metal screw bands. Store in refrigerator or in cold storage room. For longer storage, or if storing outside a cold/refrigerated environment, process the pickle jars in a hot water bath following the canner manufacturer's directions.
Schema/Recipe SEO Data Markup by Yummly Rich Recipes
https://myislandbistrokitchen.com/2015/10/01/bread-and-butter-pickles/

Pin Me To Pinterest!

Bread and Butter Pickles