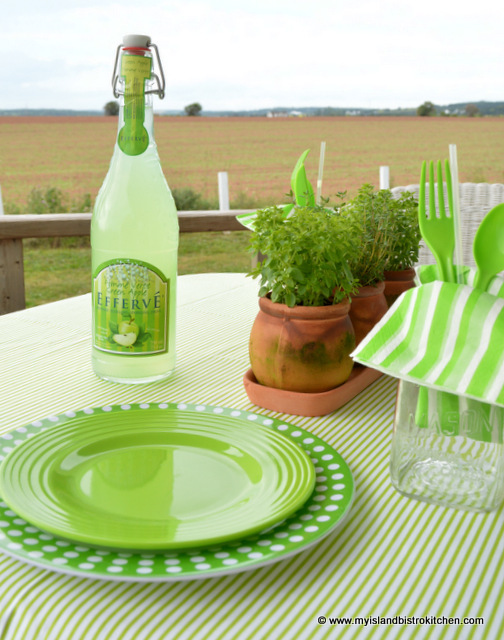
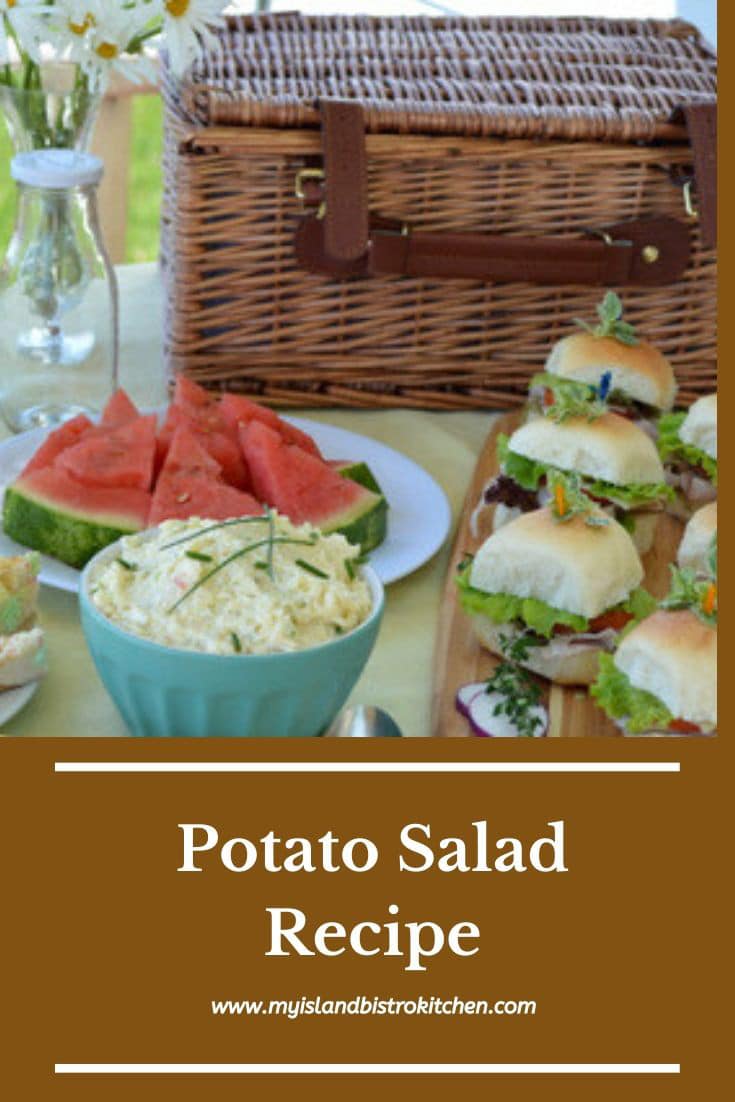
I so love a good picnic! My color theme for today’s picnic is lime green, one of my favorite summertime colors.
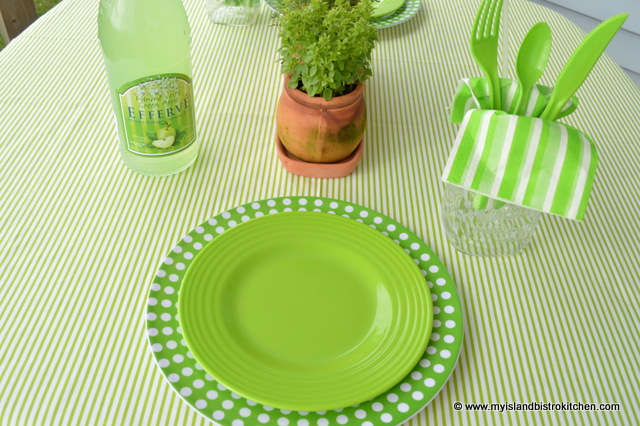
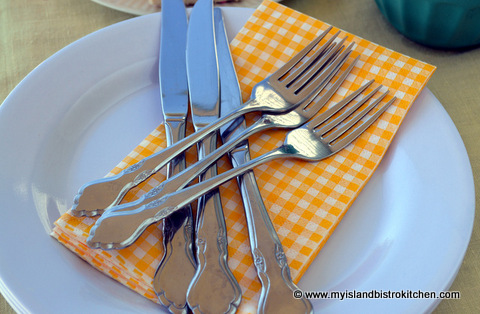
The dishes, cutlery, and napkins are all simply dollar store specials! If you are a regular follower to my blog, you will have heard me say before that you don’t need expensive dishes for lovely outdoor dining. Check out your local dollar stores but do so early in the season as these do tend to be items that get snatched up quickly. Unbreakable, these are great picnic basket staples and they are so much more sturdy (and classy) than paper plates.
Even though this table is set for two, it is very easy to prepare this setup for multiple settings.
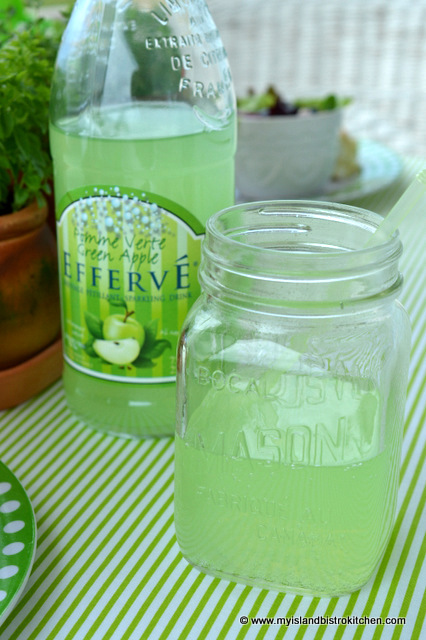
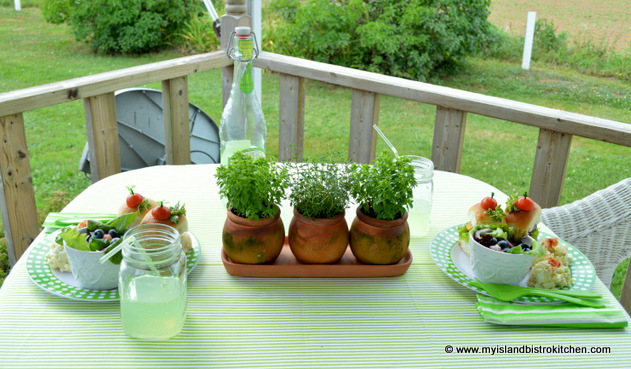
Glasses are simply Mason jars into which I have placed the napkins and plastic cutlery – a good idea if you are setting the table and it’s a bit breezy – this keeps everything in its place.
I found this lime-green colored beverage and knew it would fit in with one of my summertime picnics! Sometimes I draw my color theme inspiration for a picnic from just one simple item like this drink.
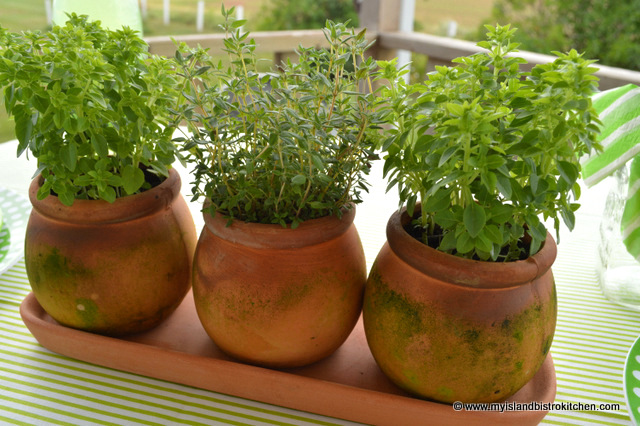
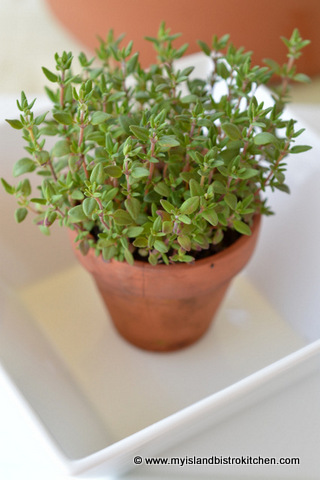
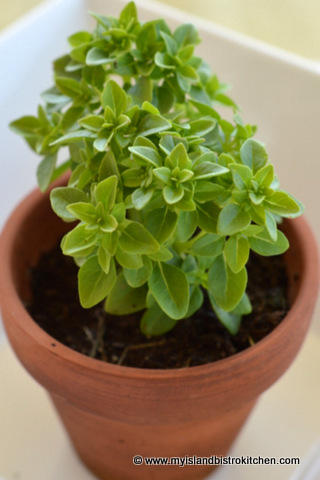
I grow a lot of herbs every summer and, this year, grew several in pots. This terracotta trio is another dollar store find. I think they look very Tuscan with their tinge of moss green color that has appeared over the summer as they’ve ‘aged’ out in the weather. This was all that was needed for a table centerpiece for an impromptu picnic.
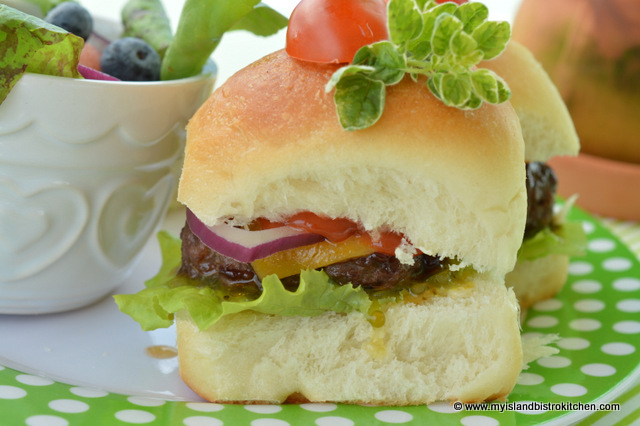
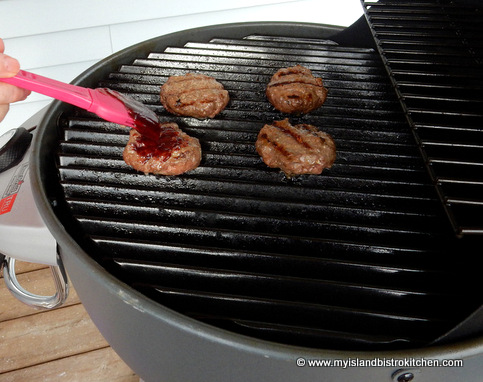
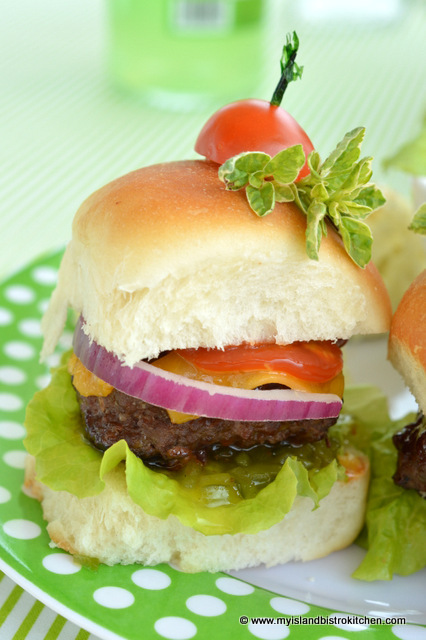
I had made a batch of pan rolls and shaped them suitably so they could be used for slider buns for the grilled hamburgers.
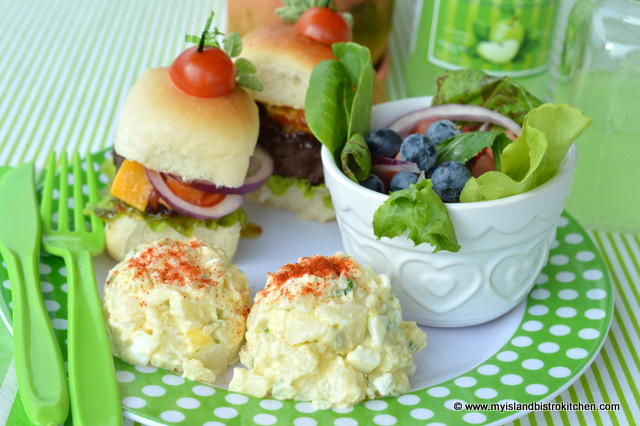
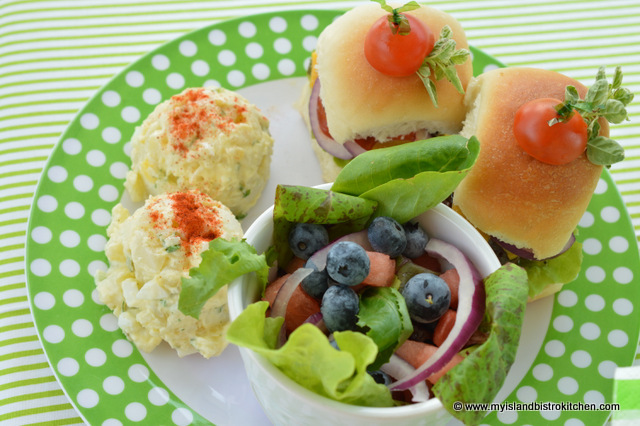
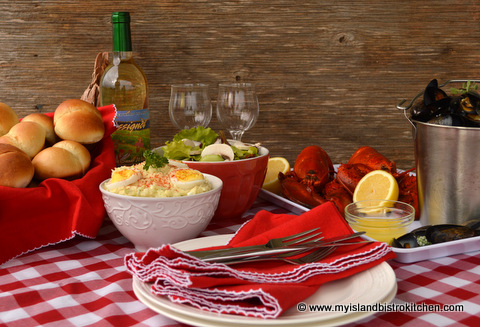
The menu for today’s picnic was simple and tasty. Slider cheeseburgers, homemade potato salad, and a green salad.
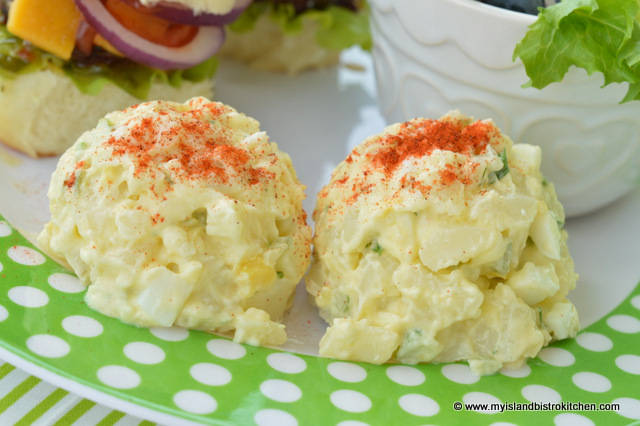
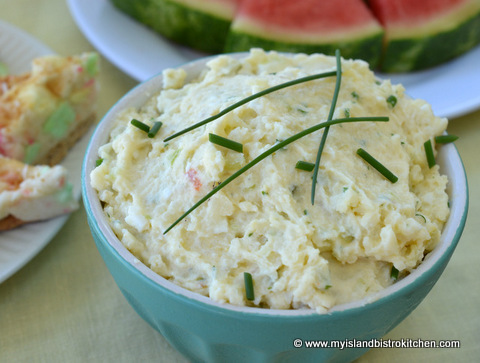
I most often mash the potatoes for my potato salad because the salad is easy to scoop and it plates well as the salad stays in perfect mounds on the plate. However, for casual picnic fare, I often like a slightly more rustic, jagged look to my salad so have cubed the potatoes and eggs. The salad mounds actually stayed in place quite well when plated.
I love slider burgers! Today’s burgers have a lime green lettuce leaf, ADL Cheddar Cheese, fresh Island tomato, a red onion ring, and the usual burger condiments. When adding tomatoes to slider burgers, try to find smaller sized tomatoes so the slices don’t have to be cut or don’t overpower the burger. For sliders, everything should be proportionately balanced. To dress up the burgers, I’ve topped each burger with a cherry tomato half along with a sprig of oregano from our garden. Sometimes, it doesn’t take a lot to take a burger from plain to dressy!
One of my favorite summertime green salads starts with a mix of salad greens topped with cubed watermelon, fresh PEI high bush blueberries, and red onion rings drizzled with a blueberry vinaigrette.
A colorful and tasty summertime picnic!
Are picnics part of your summer?
—————————————————————————-
Thank you for visiting “the Bistro” today. If you enjoyed this posting , please share it on your social media websites.
Connect with “the Bistro” through the following social media:
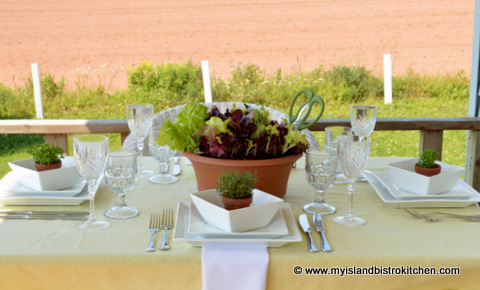
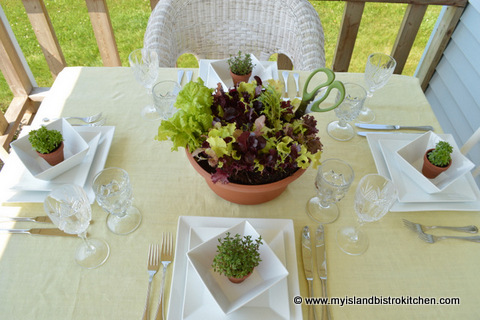
Late summer is a great time for alfresco dining. I have pulled this tablesetting together very easily by using a pot of lettuce I had growing and some tiny pots of herbs.
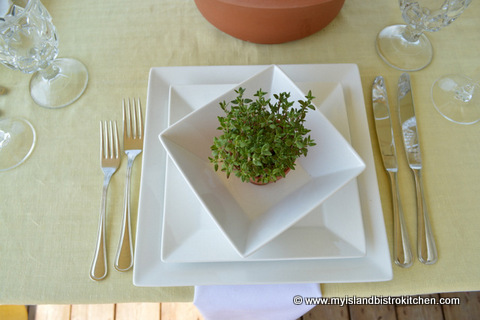
A simple plain pale yellow tablecloth makes a great summery canvas for this tablesetting. You can never go wrong with basic white dinnerware and white napkins. This is my square set of dishes and the bowls make ideal holders for the little terracotta pots of herbs that I placed at each setting. The herbs add a bright touch of green and tie in with the lettuce centerpiece. Plus, the herbs can be clipped and added to the salad!
Thyme
If you are so inclined, you can give each guest a pot of herbs to take home after your dinner party.
Basil
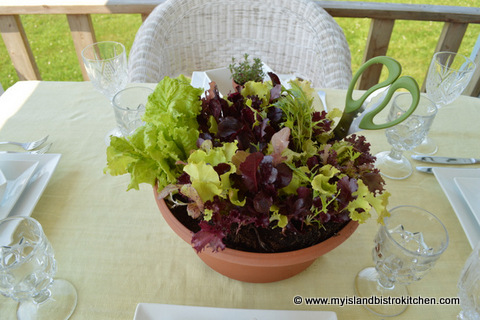
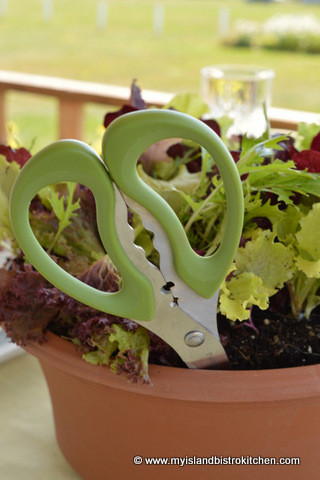
Floral centerpieces are not always necessary for tablesettings. In this setting, I am using a pot of lettuce and allowing each guest to cut his or her own lettuce and make individual salads. This always makes a great conversation piece and adds some fun to the event. I grow a number of these pots of lettuce over the summer and, if I am short on time or don’t have flowers for a centerpiece, I can always use the makings of the salad course as my table centerpiece!
Lettuce Centerpiece
Don’t forget to include the scissors in the centerpiece so guests can “harvest” the greens for their salads!
A simple and casual summer placesetting.
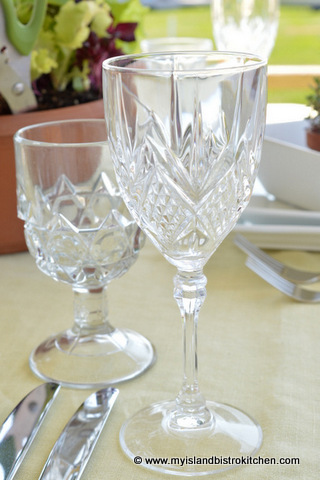
With casual alfresco dining, it’s easy to mix and match crystal pieces.
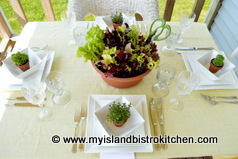
And, here’s an overhead view of the table; clean, simple lines with splashes of green for color.
I hope you have enjoyed my fresh greens and herbs tablesetting. Is alfresco dining a part of your summer?
—————————————————————————-
Thank you for visiting “the Bistro” today. If you enjoyed this posting , please share it on your social media websites.
Connect with “the Bistro” through the following social media:
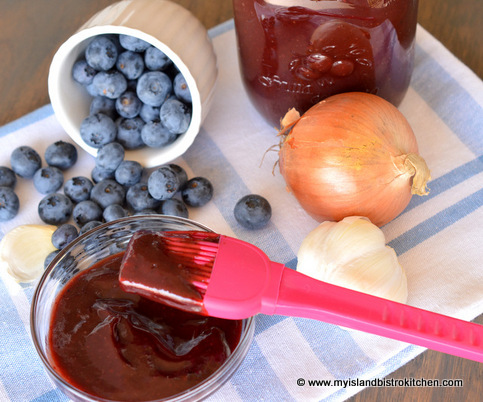
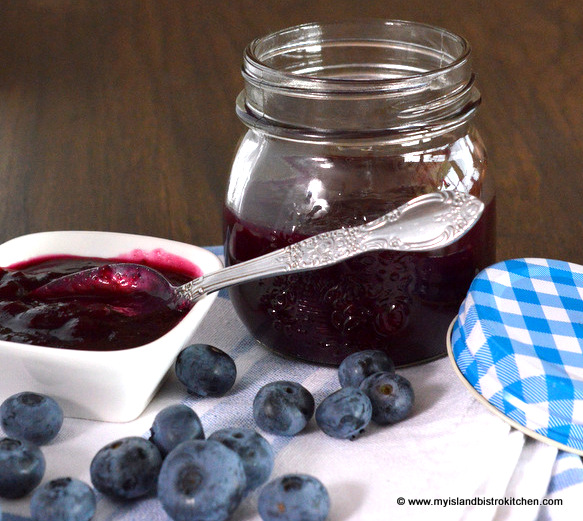
With the abundance of local blueberries in season and available locally, I try to maximize my use of them. So, today, I am introducing my recipe for Blueberry Barbeque Sauce made with high bush blueberries picked at Tryon U-Pick Blueberries in North Tryon, PEI. Continue reading Blueberry Barbeque Sauce→
There are so many ways to use blueberries, including an endless stream of desserts.
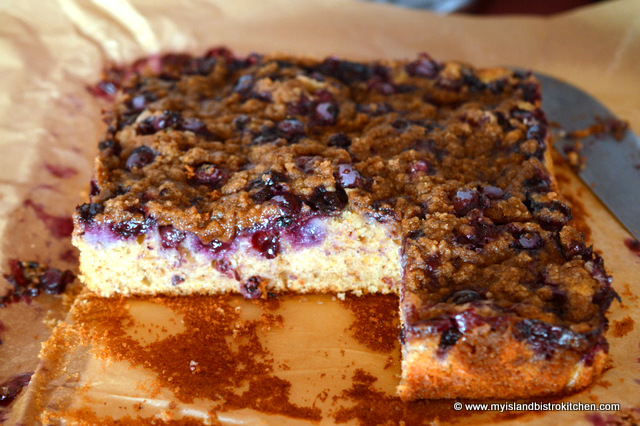
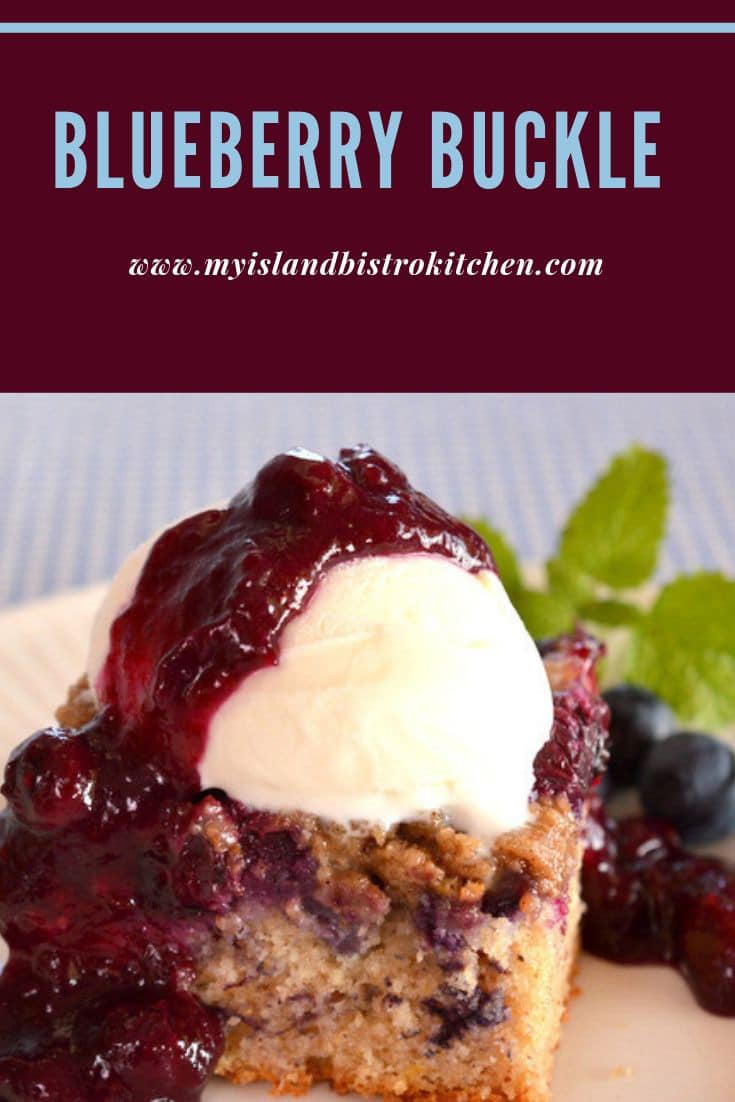
Blueberry Buckle
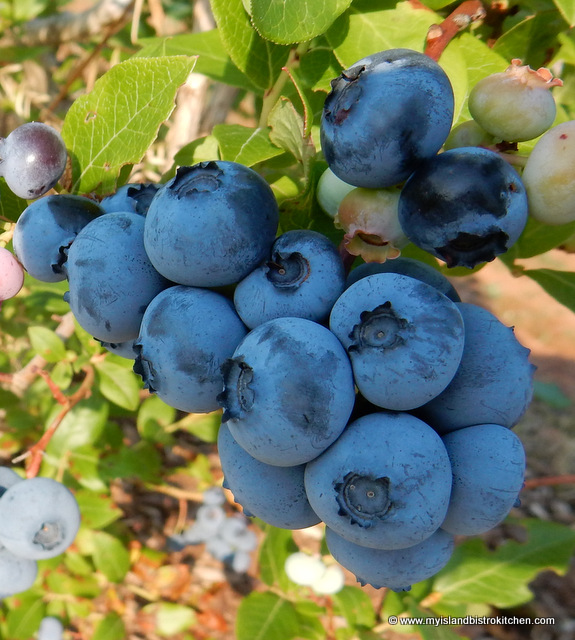
Today, I am featuring Blueberry Buckle using high bush blueberries that I picked at the Tryon Blueberries U-Pick in North Tryon, PEI.
Blueberry Buckle consists of three parts: A cake base, a sprinkle of fruit, and a streusel topping. The origin of the name “Blueberry Buckle” is not definitively known. However, it seems it may have something to do with the cake base rising up around the blueberries and meeting with the streusel ingredients that, together, form a crumpled or buckled looking appearance on the dessert top. Whether that’s truth or fiction, this is a tasty dessert!
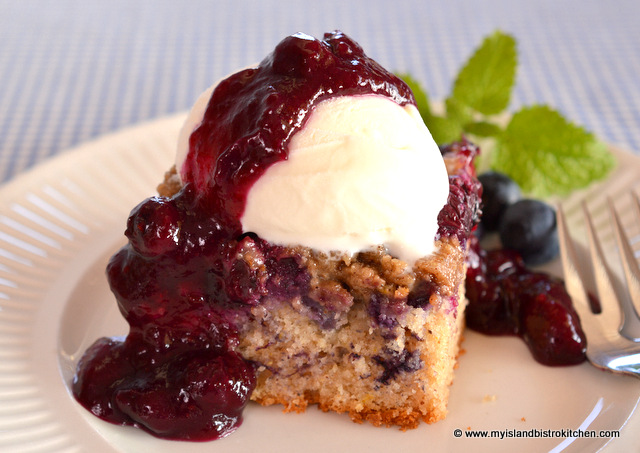
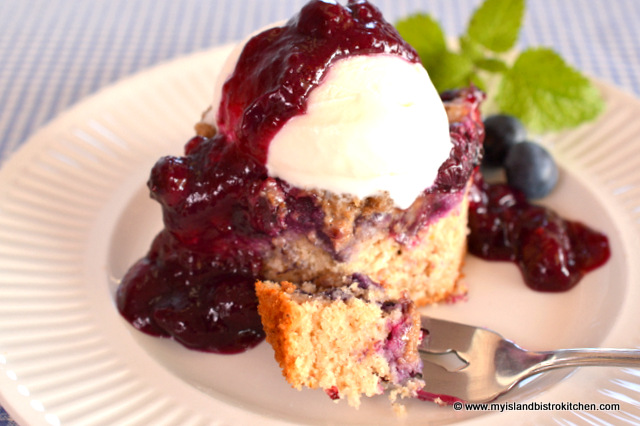
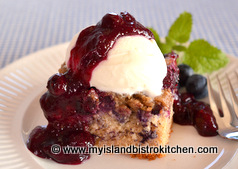
A Blueberry Buckle is very similar to a coffeecake. It is a dense cake with a moist crumb that can be served either warm or cool (i.e., at room temperature). It can also be served plain, just as it is, with its streusel topping or, alternatively, dressed up with ice cream, whipped cream, and/or drizzled with a sauce. I often serve it with brown sugar sauce or sometimes with vanilla ice cream and drizzled with blueberry sauce, as I have today. I call this blueberry overload! I maximize the use of fresh local blueberries when they are available.
Blueberry Buckle with Vanilla Ice Cream Drizzled with Blueberry Sauce
While Buckles can be made with other fruits, the most common one is made with blueberries. This dessert also freezes well so it’s a handy one to have on hand in the freezer. When I am using it from its frozen state, I take the buckle out of the freezer and allow it to thaw at room temperature, then heat it for just a few seconds in the microwave. Tastes like it is fresh from the oven!
[Printable recipe follows at end of posting]
Blueberry Buckle
Streusel Topping:
1/3 cup brown sugar, packed
¼ cup flour
½ tsp cinnamon
3 tbsp butter
Cake Batter:
½ cup butter, softened
½ cup granulated sugar
1 extra-large egg
2 tbsp orange juice
¾ tsp vanilla
1½ cup all-purpose flour
2¼ tsp baking powder
¼ tsp salt
¼ tsp cloves
½ tsp nutmeg
1½ tsp grated orange rind
½ cup milk
2 cups high-bush blueberries
Method:
Grease or line an 8” square pan with parchment paper. Preheat oven to 350°F.
Prepare the streusel topping by mixing the brown sugar, flour, and cinnamon together. Using a pastry blender, cut in the butter until mixture resembles coarse oatmeal. Set aside.
In large bowl, cream the butter and add the sugar. Beat until mixture is smooth.
Add the egg, orange juice, and vanilla. Beat until smooth.
In separate bowl, whisk together the flour, baking powder, salt, cloves, nutmeg, and grated orange rind. Add the dry ingredients to the liquid mixture along with the milk in three parts, starting and ending with the dry ingredients (i.e., three additions of the dry ingredients alternated with two additions of milk).
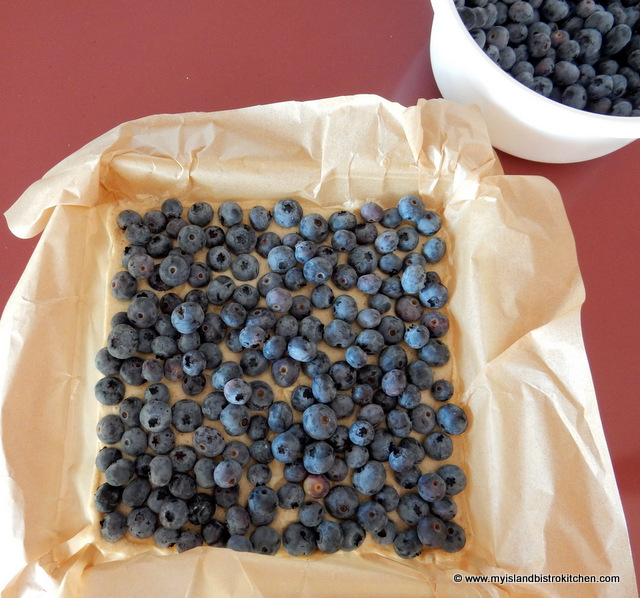
Spread batter in prepared pan.
Sprinkle mixture evening with the blueberries.
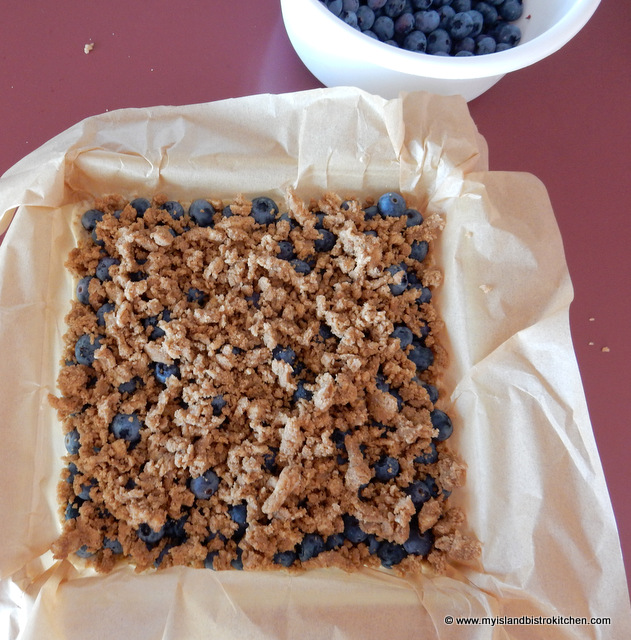
Sprinkle the streusel topping over entire mixture.
Bake for 40-45 minutes or until cake tester inserted into center of cake comes out clean. Do not overbake as cake will become dry.
Serve plain or add a dollop of ice cream and, if desired, drizzle with blueberry sauce.
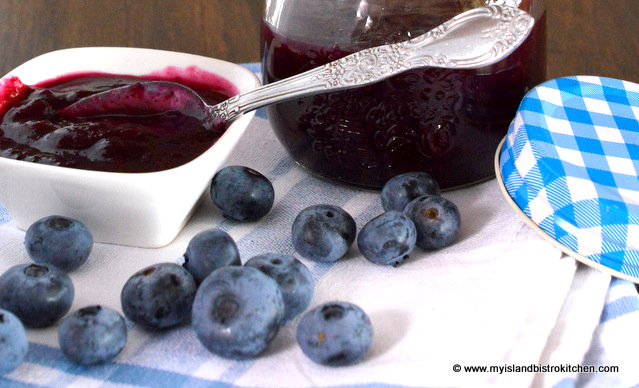
Blueberry Sauce
Yield: 9 servings
Here is my recipe for the blueberry sauce I used over this Blueberry Buckle.
Blueberry Sauce
Blueberry Sauce
Ingredients:
¾ cup granulated sugar
1 tbsp cornstarch
Pinch salt
1/8 tsp nutmeg
1/8 tsp cinnamon
1 tsp grated orange rind
2 tbsp orange juice
1/3 cup water
2 cups high bush blueberries
1½ tbsp butter
¼ tsp vanilla
Method:
Combine sugar, cornstarch, salt, nutmeg, cinnamon, orange rind, orange juice, and water in medium-sized saucepan. Heat to boiling point then add blueberries and reduce heat to medium low. Cook mixture, stirring regularly, until thickened to desired consistency. Remove from heat and stir in butter and vanilla. Serve warm over ice cream or pudding. Refrigerate unused sauce.
Yield: Apx. 1¾ cups
If you have made this recipe and enjoyed it and/or wish to share it with your friends and family, please do so on social media but be sure to share the direct link to this posting from my website.
Connect with My Island Bistro Kitchen on Social Media
Follow “the Bistro” on Pinterest at https://www.pinterest.ca/peibistro/ and pin the Pinterest-ready photo found at the end of this post to your favorite Pinterest boards.
PIN ME TO PINTEREST!
For other great blueberry desserts from My Island Bistro Kitchen, click on the links below.
An old-fashioned coffeecake-like dessert studded with blueberries and covered with a streusel topping. Best served with vanilla ice cream drizzled with blueberry sauce.
Grease or line an 8” square pan with parchment paper. Preheat oven to 350°F.
Streusel Topping:
Prepare the streusel topping by mixing the brown sugar, flour, and cinnamon together. Using a pastry blender, cut in the butter until mixture resembles coarse oatmeal. Set aside.
Cake Batter:
In large bowl, cream the butter and add the sugar. Beat until mixture is smooth.
Add the egg, orange juice, and vanilla. Beat until smooth.
In separate bowl, whisk together the flour, baking powder, salt, cloves, nutmeg, and grated orange rind. Add the dry ingredients to the liquid mixture along with the milk in three parts, starting and ending with the dry ingredients (i.e., three additions of the dry ingredients alternated with two additions of milk).
Spread batter in prepared pan.
Sprinkle mixture evening with the blueberries.
Sprinkle the streusel topping over entire mixture.
Bake for 40-45 minutes or until cake tester inserted into center of cake comes out clean. Do not overbake as cake will become dry.
Serve plain or add a dollop of ice cream and, if desired, drizzle with blueberry sauce.
Blueberry Sauce:
Combine sugar, cornstarch, salt, nutmeg, cinnamon, orange rind, orange juice, and water in medium-sized saucepan. Heat to boiling point then add blueberries and reduce heat to medium low. Cook mixture, stirring regularly, until thickened to desired consistency. Remove from heat and stir in butter and vanilla. Serve warm over ice cream or pudding. Refrigerate unused sauce.
Recipe Notes
Yield:9 servings and apx. 1¾ cups blueberry sauce.
[Copyright My Island Bistro Kitchen]
—————————————————————————-
Thank you for visiting “the Bistro” today. If you enjoyed this posting and recipe, please share it on your social media websites.
Connect with “the Bistro” through the following social media:
Grease or line an 8” square pan with parchment paper. Preheat oven to 350°F.
Prepare the streusel topping by mixing the brown sugar, flour, and cinnamon together. Using a pastry blender, cut in the butter until mixture resembles coarse oatmeal. Set aside.
In large bowl, cream the butter and add the sugar. Beat until mixture is smooth.
Add the egg, orange juice, and vanilla. Beat until smooth.
In separate bowl, whisk together the flour, baking powder, salt, cloves, nutmeg, and grated orange rind. Add the dry ingredients to the liquid mixture along with the milk in three parts, starting and ending with the dry ingredients (i.e., three additions of the dry ingredients alternated with two additions of milk).
Spread batter in prepared pan.
Sprinkle mixture evening with the blueberries.
Sprinkle the streusel topping over entire mixture.
Bake for 40-45 minutes or until cake tester inserted into center of cake comes out clean. Do not overbake as cake will become dry.
Serve plain or add a dollop of ice cream and, if desired, drizzle with blueberry sauce.
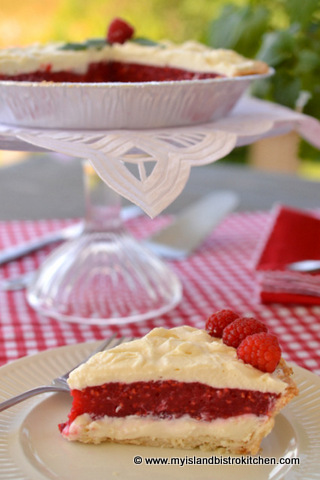
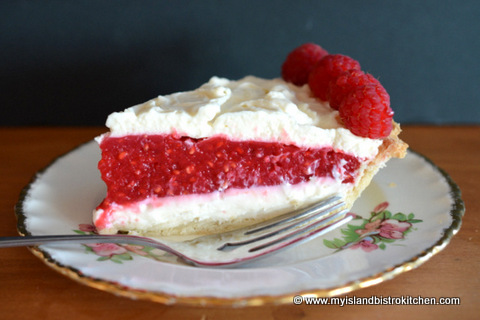
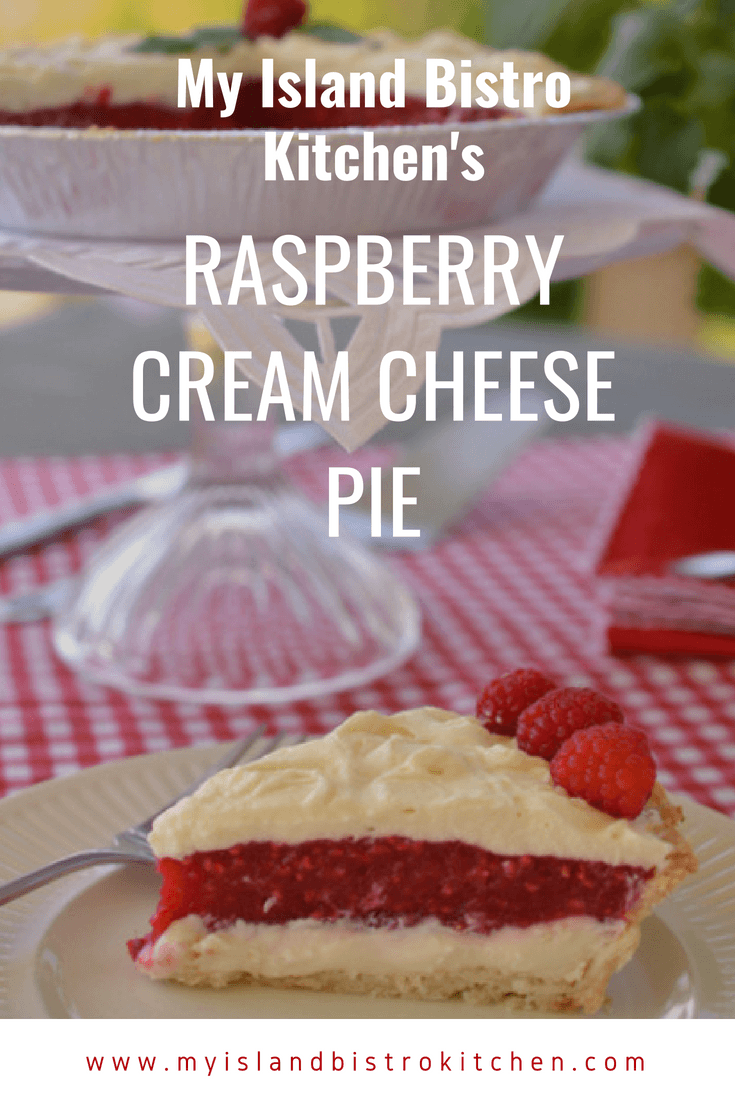
It’s summer berry pie time and that means it’s Raspberry Cream Cheese Pie time!
Raspberry Cream Cheese Pie
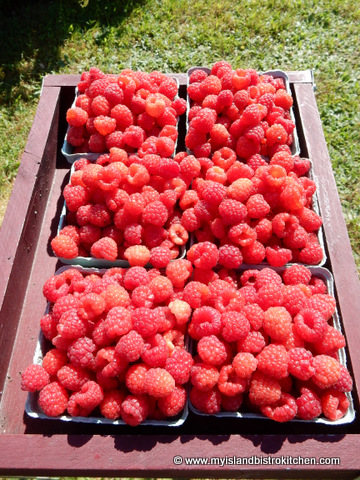
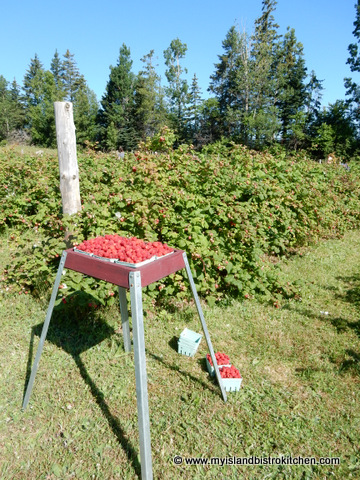
As I write this post in August, the raspberries are in full swing on Prince Edward Island so today’s posting is all about raspberries!
I never mind picking raspberries because there is no bending or crouching involved so it’s not hard on the legs or back.
These glorious and perfectly-shaped tasty red berries are versatile and can be used in many ways.
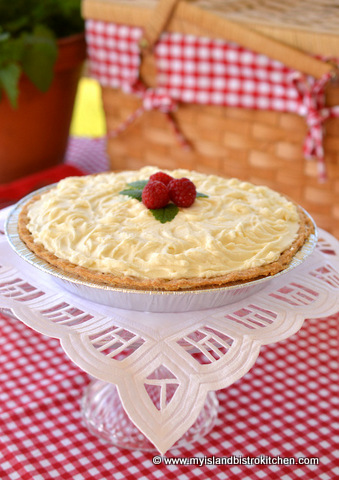
Raspberry Cream Cheese Pie
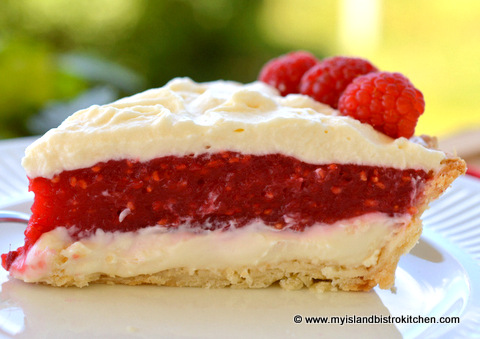
One of my favorite ways to use raspberries is in a raspberry cream cheese pie. It’s a cross between a pie and a cheesecake – the best of both worlds.
Raspberry Cream Cheese Pie
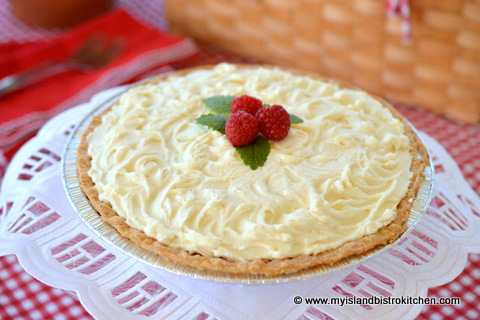
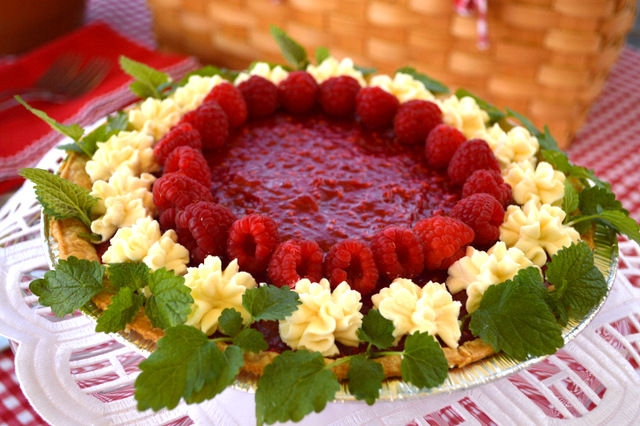
This pie is not difficult to make although it does take a bit of time. It’s also the type of pie that is best eaten the day it is made. I like to use the real whipping cream for the topping but Cool Whip works just fine, too. Sometimes, I like to just pipe the whipped cream around the outer edge of the pie because it allows the rich red raspberry filling to show which, of course, doesn’t happen if the entire top of the pie is completely covered in whipped cream. Alternatively, I sometimes don’t put any whipped cream on the pie top, preferring instead to simply drop a dollop of whipped cream on each pie serving as it is plated. Any of the three versions works just fine.
Raspberry Cream Cheese Pie
For my pastry recipe, hints, and tips on making pie pastry, clickhere.
Raspberry Cream Cheese Pie
Ingredients:
9” baked pie shell
6 oz. cream cheese, softened
3 tbsp sugar
1½ tbsp milk
½ tsp vanilla
3½ tbsp cornstarch
¾ cup granulated sugar
Dash salt
2½ cups fresh raspberries
3 tbsp pineapple juice
1½ tsp lemon juice
½ tbsp butter
1 cup whipping cream
1 tsp. vanilla
2 tbsp sugar
Method:
In small bowl, beat the cream cheese, sugar, milk, and vanilla. Spread over bottom of pie shell. Refrigerate for at least one hour.
In small bowl, combine the cornstarch, sugar, and salt together. In medium-sized saucepan, combine the raspberries, pineapple juice, lemon juice, and cornstarch-sugar mixture. Cook and stir over medium-low heat until mixture is thickened. Remove from heat and stir in the butter. Let mixture cool to room temperature then spread over chilled cream cheese base. Refrigerate for at least one hour to allow pie to set.
Beat whipping cream and vanilla until soft peaks form then slowly beat in the sugar. Pipe on to pie in decorative design or, alternatively, completely cover chilled pie with the whipped cream. Refrigerate until use. This pie is best eaten the day it is made. (Note: Cool Whip can be substituted for the whipped cream, if desired.)
Yield: One 9” pie.
—————————————————————————-
If you have made this recipe and enjoyed it and/or wish to share it with your friends and family, please do so on social media but be sure to share the direct link to this posting from my website.
Connect with My Island Bistro Kitchen on Social Media
Follow “the Bistro” on Pinterest at https://www.pinterest.ca/peibistro/ and pin the Pinterest-ready photo found at the end of this post to your favorite Pinterest boards.
You may also enjoy my Traditional Double-crusted Raspberry Pie – clickherefor the recipe.
A delectable and flavorful raspberry pie with a layer of cream cheese and a topping of whipped cream. Always a showstopper.
Ingredients
9” baked pie shell
6 oz. cream cheese, softened
3 tbsp sugar
1½ tbsp milk
½ tsp vanilla
3½ tbsp cornstarch
¾ cup granulated sugar
Dash salt
2½ cups fresh raspberries
3 tbsp pineapple juice
1½ tsp lemon juice
½ tbsp butter
1 cup whipping cream
1 tsp. vanilla
2 tbsp sugar
Instructions
In small bowl, beat the cream cheese, sugar, milk, and vanilla. Spread over bottom of pie shell. Refrigerate for at least one hour.
In small bowl, combine the cornstarch, sugar, and salt together. In medium-sized saucepan, combine the raspberries, pineapple juice, lemon juice, and cornstarch-sugar mixture. Cook and stir over medium-low heat until mixture is thickened. Remove from heat and stir in the butter. Let mixture cool to room temperature then spread over chilled cream cheese base. Refrigerate for at least one hour to allow pie to set.
Beat whipping cream and vanilla until soft peaks form then slowly beat in the sugar. Pipe on to pie in decorative design or, alternatively, completely cover chilled pie with the whipped cream. Refrigerate until use. Pie is best eaten the day it is made. (Note: Cool Whip can be substituted for the whipped cream, if desired.)
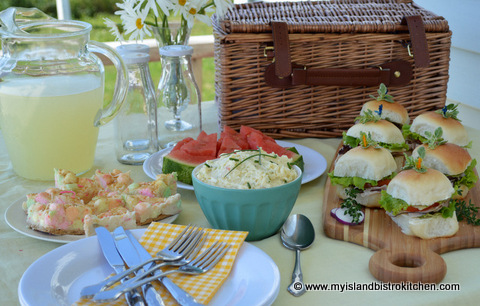
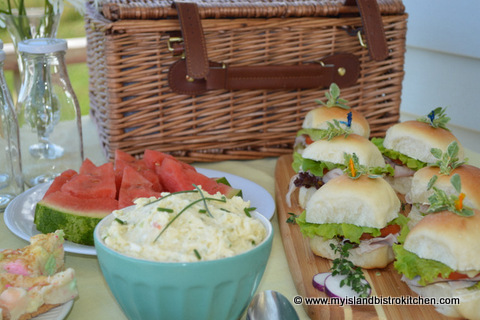
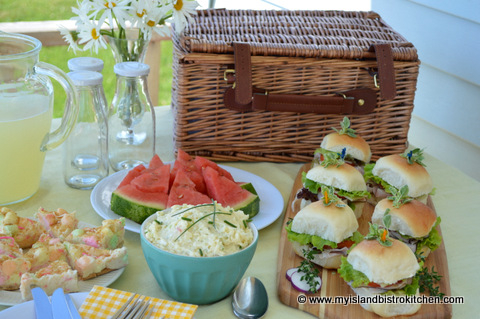
There are so many options for picnics that can range from very impromptu casual style to more elaborate events. Today, it was about 30C on Prince Edward Island so the theme for the day was casual….very casual.
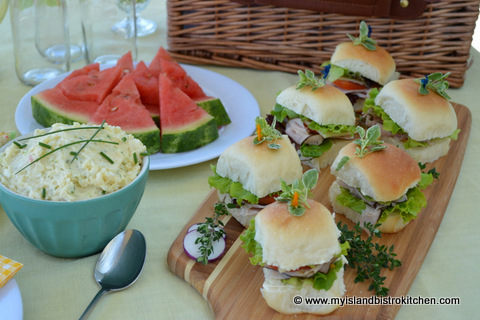
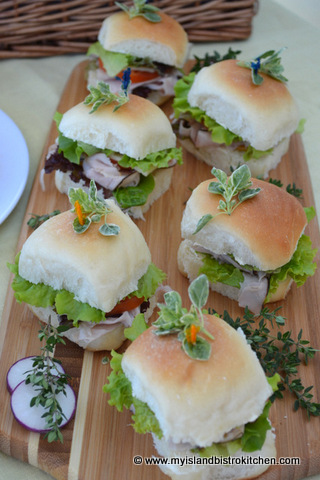
I had made a batch of pan rolls yesterday and shaped them into the perfect size and shape for slider sandwiches. These are so easy to pull together and they are very tasty. Essentially, for each one, all I used was some black forest ham, a slice of tomato, some JJ Stewart beermustard sauce, slices of cheddar and havarti cheese, and lettuce from our own garden.
Ham, Cheese, and Tomato Sliders
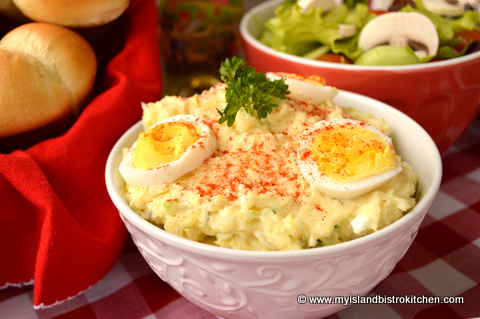
Of course, a bowl of the quintessential all-time favorite picnic salad – potato salad – provided a great side dish to the sliders and it’s always a hit. Just make sure to keep this salad refrigerated.
Potato Salad
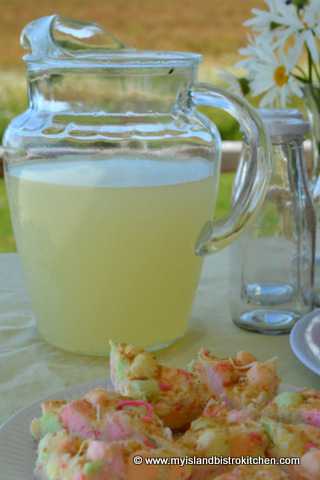
A tall pitcher of cold, refreshing lemonade proved to be a thirst-quenching drink on this hot afternoon.
Lemonade
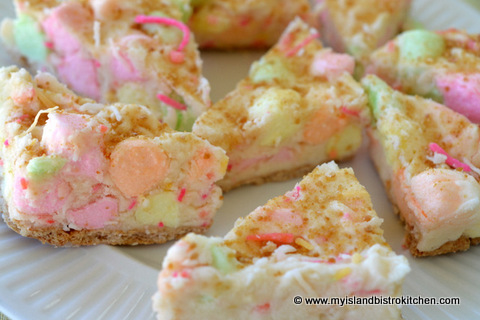
Dessert was simply colorful marshmallow squares. Nice and summery as well as yummy!
Marshmallow Squares
And, juicy watermelon always goes great on a hot summer day and it adds such a splash of color to the table.
When it is so hot, I like to keep meal prep to the minimum and go with very simplistic foods and ones that can be prepared early in the day and refrigerated until use. This picnic menu is so easy to set up buffet style whether it is for 3-4 people or several more.
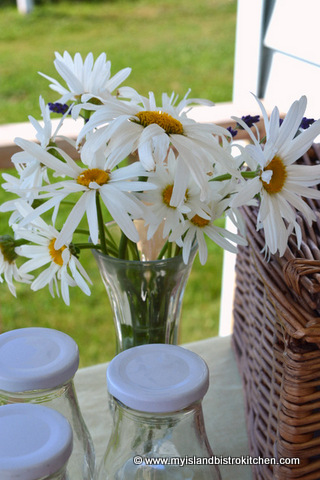
While picnics don’t necessarily require table centerpieces, they can take a picnic from mundane to wow with very little effort. Today, I simply walked to the nearest flowerbed and picked some daisies which, with their yellow centers, fit in with my summery yellow color theme. I think daisies go very well with wicker picnic baskets!
—————————————————————————-
Thank you for visiting “the Bistro” today. If you enjoyed this posting, please share it on your social media websites.
Connect with “the Bistro” through the following social media:
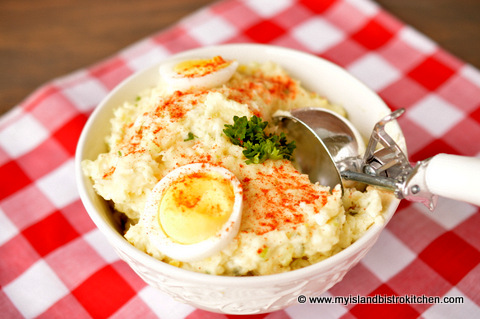
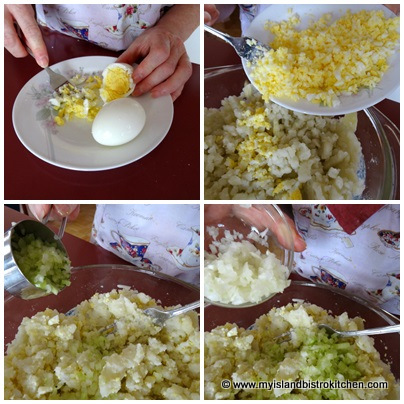
One of the most popular salads in PEI in summer is the traditional potato salad. There are several variations to this salad and, of course, the jury is still out on whether the potatoes should be diced or mashed! While the quantities of ingredients may vary somewhat and certain different seasonings may be added to potato salad, the same basic essential ingredients in most salads will be potato, egg, celery, onion, salad dressing, salt and pepper. So long as you have these common ingredients, you can make a basic potato salad. Of course, I think PEI potatoes make the best salad (but, then again, I may be just a wee bit biased on that front)!
Potato Salad
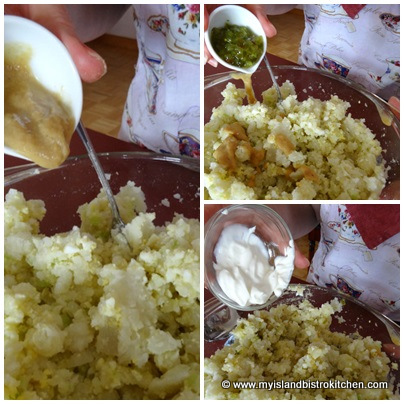
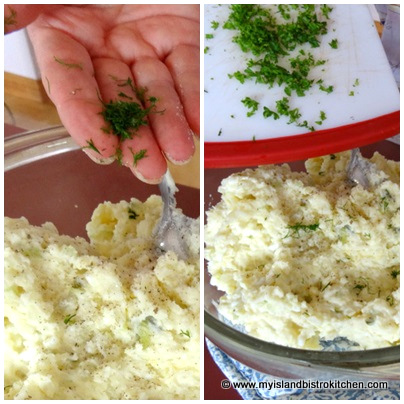
I like to use a combination of homemade and bought salad dressing as I find the flavors play well off each other – I use about 50/50 of each. However, I have made the salad with just one type of salad dressing and it turned out fine. I also like to add a bit of sour cream, sweet pickle relish, and prepared mustard. The latter two ingredients give a bit of ‘punch’ to the salad. The key, of course, is not to over-do the addition of any seasonings because the potatoes need to ‘star’ and we don’t want to do anything to detract from their flavor. In summer when I have fresh herbs in the garden, I like to add just a tiny bit of chopped fresh dill and some parsley.
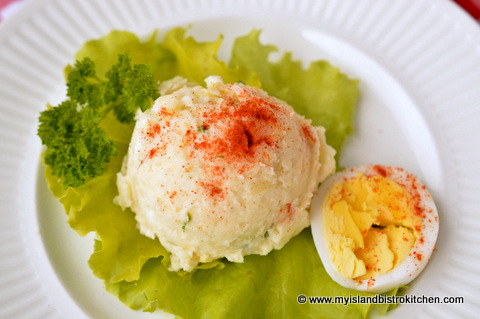
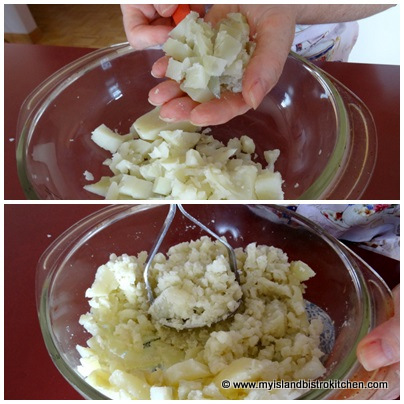
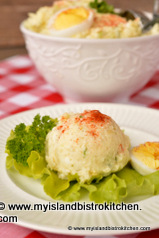
The traditional style of potato salad is to cube/dice the potato and egg as shown in the photo below.
However, my preference is to mash the potato and egg, particularly if I am looking for good plating presentation. This is because the mashed potato salad fits well into the bowl of an ice cream scoop and, therefore, looks lovely on a plate. However, if you are looking for a more rustic style potato salad, then the cubed/diced potato style is the way to go. This is purely a personal preference because, let’s face it, if you use the same ingredients, it will all taste the same! All that will be different will be the texture and appearance.
Potato Salad
As to how much salad dressing to use, this will depend on several factors so the amount I have given in my recipe below is a guide. For example, the quality of the potatoes (how dry or moist they are), the thickness of the salad dressing, and/or the consistency of the sour cream can all influence how much salad dressing is needed. As well, you may find that cubing/dicing the potatoes may take a different amount of salad dressing than do mashed potatoes. Lastly, it is personal preference as to how moist the salad should be. It should not be ‘soupy’ but there should be enough salad dressing to hold/bind the salad together. I tend to like my potato salad quite moist. I recommend starting with a good one-half of the salad dressing called for in the recipe and then adding more to reach the consistency you desire.
Plan to make the potato salad several hours ahead of when it is needed. Refrigerate it for at least three hours or more to allow the flavours to blend.
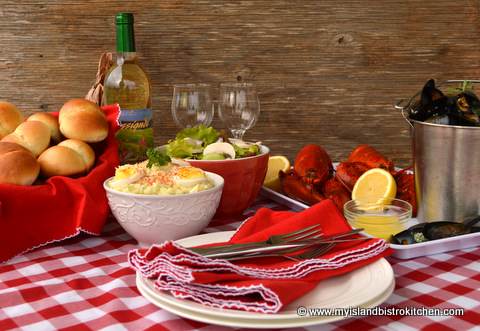
Potato salad is very versatile. It often is served as a traditional side dish for picnics and barbeques. It goes great with cold cuts, lobster, grilled pork chops, barbequed chicken, sandwiches of all kinds, and the list goes on. In my household, potato salad always has to accompany a feed of PEI lobster!
Potato Salad Is A Great Picnic Side Dish
The recipe below is my own personal potato salad recipe. I hope you enjoy it.
Potato Salad
My Island Bistro Kitchen’s PEI Potato Salad
Ingredients:
1½ lbs PEI potatoes
2 hard boiled eggs
¼ cup celery, finely chopped
2½ tbsp onion, finely chopped
⅔ cup salad dressing (apx.)
2 tbsp sour cream
3 tsp. sweet relish
2 tsp. prepared mustard
¼ tsp sugar
Salt and pepper, to taste
¼ tsp fresh dill, chopped (optional)
1½ tsp fresh parsley, chopped (optional)
Method:
Cook potatoes, skins on, in pot of boiling water just until potatoes are fork tender. Drain. Let potatoes cool enough to handle. Peel. Cube or mash potatoes, as desired, into medium-sized bowl.
Mash or dice eggs. Add to potato.
Add the celery, onion, mustard, sweet relish, sour cream, salad dressing, and sugar.
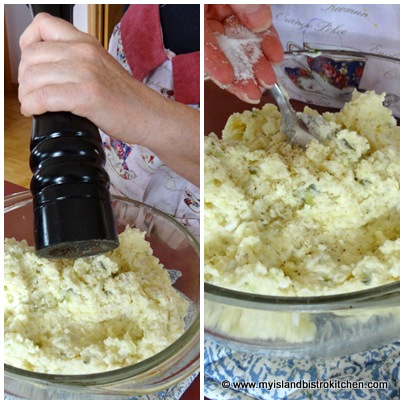
Note – Add about ½ the salad dressing to start, then continue to add enough salad dressing to reach desired consistency. Mix well. Season with salt and pepper.
Add fresh dill and parsley, if desired.
Cover and refrigerate for at least 3 hours to allow flavors to blend. Serve salad on a bed of lettuce. Refrigerate unused salad immediately.
Yield:5-6 servings (2 scoops salad per serving)
Connect with My Island Bistro Kitchen on Social Media
Follow “the Bistro” on Pinterest at https://www.pinterest.ca/peibistro/ and pin the Pinterest-ready photo found at the end of this post to your favorite Pinterest boards.
A moist and tasty potato salad that is the perfect accompaniment to any lobster feed, barbeque, or picnic
Ingredients
1½ lbs PEI potatoes
2 hard boiled eggs
¼ cup celery, finely chopped
2½ tbsp onion, finely chopped
2/3 cup salad dressing (apx.)
2 tbsp sour cream
3 tsp. sweet relish
2 tsp. prepared mustard
¼ tsp sugar
Salt and pepper, to taste
¼ tsp fresh dill, chopped (optional)
1½ tsp fresh parsley, chopped (optional)
Instructions
Cook potatoes, skins on, in pot of boiling water just until potatoes are fork tender. Drain. Let potatoes cool enough to handle. Peel. Cube or mash potatoes, as desired, into medium-sized bowl.
Mash or dice eggs. Add to potato. Add the celery, onion, mustard, sweet relish, sour cream, salad dressing, and sugar. Note – Add about ½ the salad dressing to start, then continue to add enough salad dressing to reach desired consistency. Mix well. Season with salt and pepper. Add fresh dill and parsley, if desired.
Cover and refrigerate for at least 3 hours to allow flavors to blend. Serve salad on a bed of lettuce. Refrigerate unused salad immediately.
With its beginnings in 2003, Food Day Canada has grown and evolved. Today, it is a country-wide initiative designed to showcase how a delectable entire meal can be made using Canadian-produced food. It’s a tangible and visible way to celebrate the wonderful variety of foods produced in Canada and recognize our farmers, fishers, other food producers, chefs and, indeed, those of us who are home cooks bringing locally-produced food to our tables on a regular basis. I like to use fresh locally-produced food products which have not traveled days to reach us and, at the same time, it gives me the opportunity to put dollars into the hands of local food producers to keep the local food movement alive and sustainable. Continue reading Food Day Canada 2015: A Tribute to PEI’s Great Foods→
(Mostly) PEI and Maritime Food – Good Food for a Good Life!