Gumdrop Cake

Gumdrop Cake
Gumdrop Cake

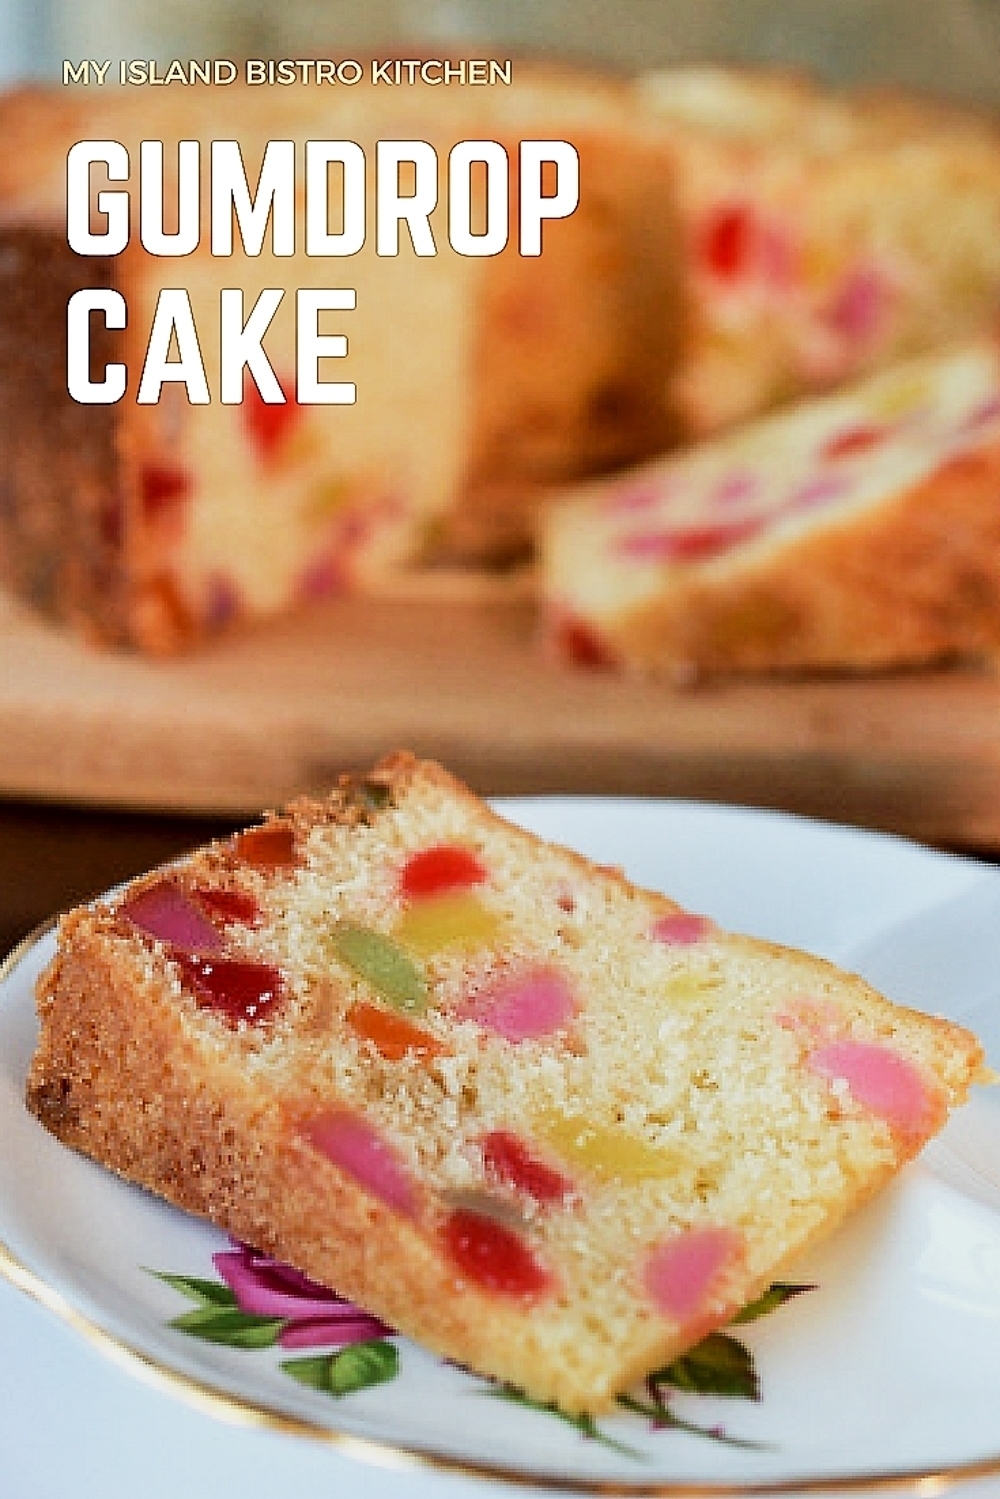
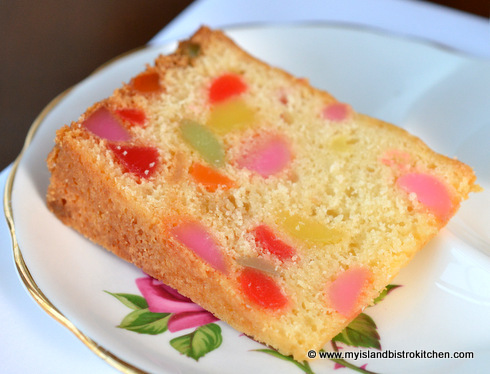
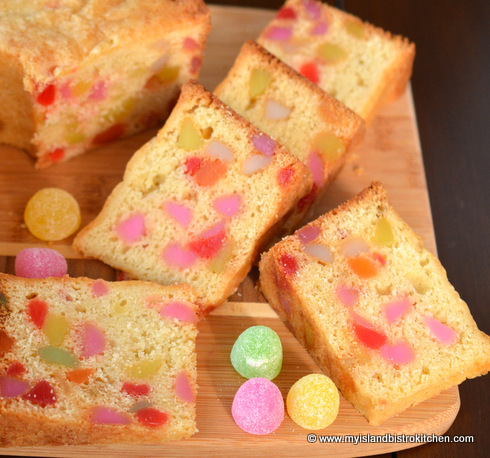
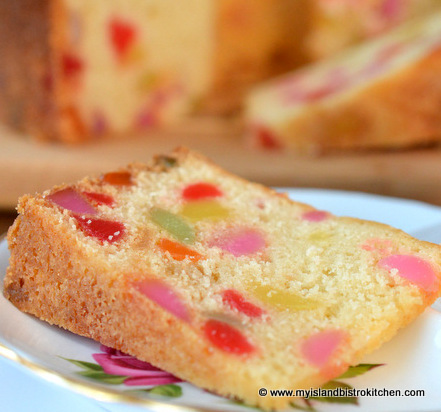
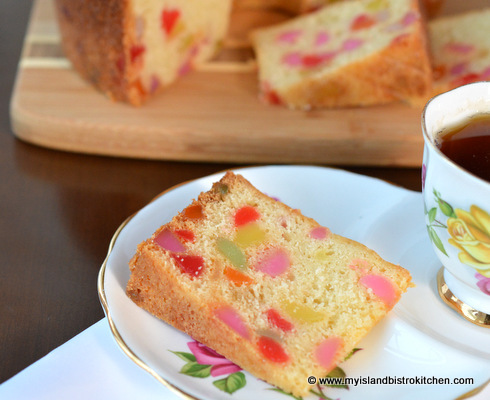
This is one of my all-time favorite cakes! It’s colorful and it’s tasty.  While I make this cake at any time of the year (and it’s often a staple in my freezer because it freezes very well), it’s a great Christmas cake because of the colorful gumdrops which give it a festive appearance.  It is also  a perfect alternative for those who do not like the traditional fruitcakes associated with the holiday season.  It’s lighter, both in the color of the cake and its texture, than a fruitcake and yet it is colorful with its myriad of shades of gumdrops.

Gumdrop Cake
Gumdrop Cake

The cake is a bit time-consuming to make because cutting the sticky gumdrops can be a bit tedious and it does take over 2 hours to bake so you do need to do some planning ahead to make this cake. That said, the method is not at all difficult.

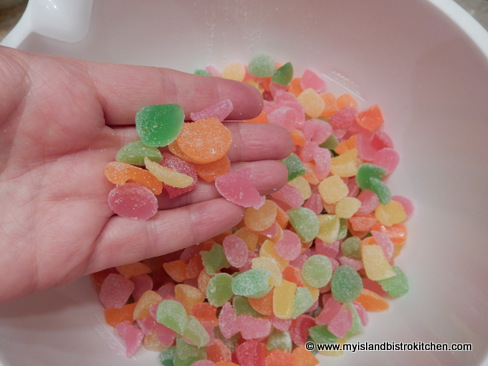
To begin, buy good sugared gumdrops. Hard to believe it but there is a difference in the quality of gumdrops.  Don’t use black gumdrops in this cake – those are good for snacking while cutting up the other colored gumdrops 😉 Black gumdrops are just plain ugly in a cake and may bleed out their intense color.  I also don’t put a lot of white gumdrops in the cake either because they are not bright and showy enough. Cut each of the gumdrops into 3-5 pieces, depending on the size of the gumdrops to begin with.

The thing about gumdrops is that they are heavy, even when they are cut. This means there is a possibility they could fall to the bottom of the cake with the top half or more of the cake having few, if any, gumdrops.  To counter this issue, make sure the gumdrops are well dredged (floured).  Dredging means some of the flour called for in the recipe is used to coat the cut sticky edges of the gumdrops so they don’t all stick to each other and fall, with their collected weight, to the bottom of the cake.

DSCN1900

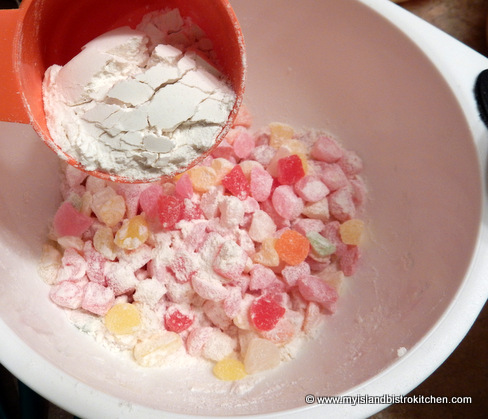
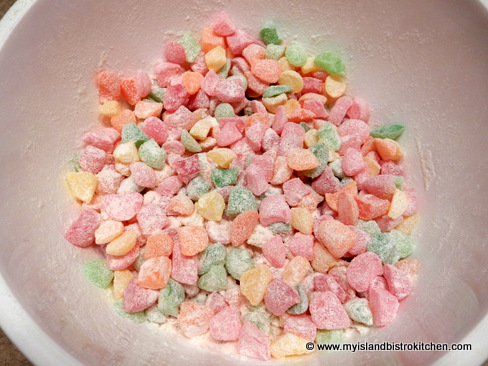
To dredge the gumdrops, simply place the cut gumdrops in a bowl and add a small amount of flour from the amount called for in the recipe.  By spoon or by hand, toss the gumdrops in the flour, making sure the cut side of each gumdrop is well floured.

The other tip to avoid ‘falling gumdrops’ is to only use a reasonable amount in the recipe. It’s tempting to add lots and lots more  gumdrops; however, those add weight to the cake and they will likely all get together and congregate to have a party at the bottom of the cake.  This cake has a light batter so it doesn’t have the power to hold up a lot of heavy gumdrops. I use 1 pound of gumdrops for this cake and find it is sufficient.

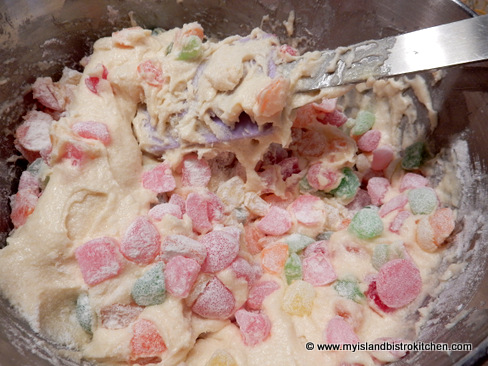
Adding the gumdrops to the batter is the last step in making this cake so, when doing so, fold them in gently with a rubber spatula and don’t over-mix. Just fold them in till there is no  flour visible.  Over-mixing them will remove the flour from their floured edges and may cause the gumdrops to fall to the bottom of the cake. The flour is meant to act as a “barrier” between the sticky gumdrops and the wet batter.  As shown in the photograph below, just keep gently rolling the spatula over and under the batter until all the gumdrops are incorporated.

Gently folding in the gumdrops

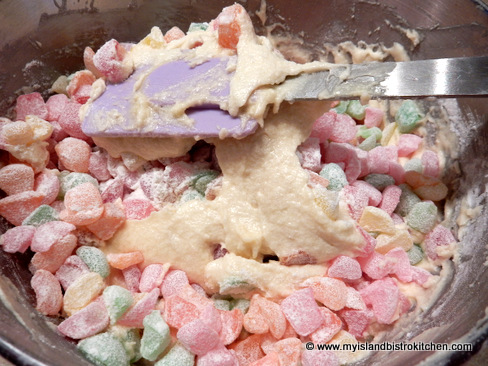
You can see how each roll of the spatula brings up more batter each time until the gumdrops are finally all blended in.

The batter for this cake will not result in a lily-white cake because it uses butter.  To get a white cake, shortening would have to be used but you would be sacrificing the butter flavour for which this cake is meant. Use the good stuff!

Gumdrop Cake
Gumdrop Cake

The butter will cream much easier and faster if it is at room temperature so take the butter out of the fridge an hour or two ahead of preparing the cake. Avoid the temptation of softening the butter in the microwave as, inevitably, some of it will melt and that causes a different texture to the butter.  I also remove the eggs and the milk from the fridge about 35-40 minutes before making the cake, bringing them to room temperature.  I find this helps the ingredients to incorporate better and more smoothly than if they are used in their refrigerated cold state.

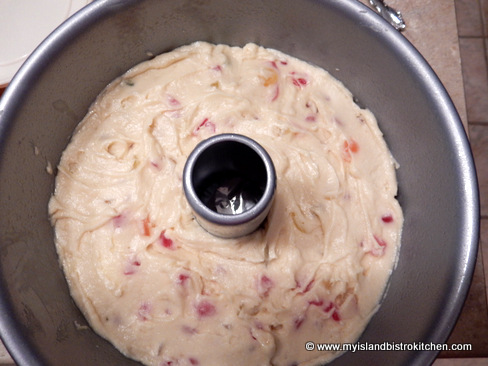
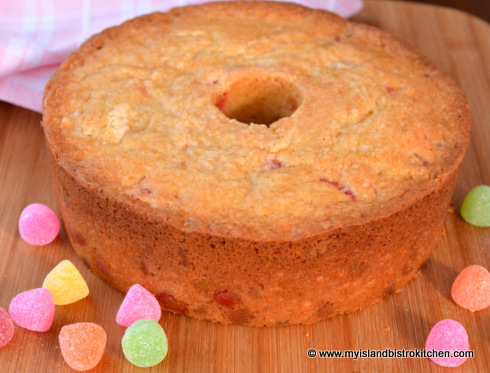
The best pan to use for this cake is a funnel cake pan. The hole in the center of this pan helps the cake to bake evenly without it falling in the center, leaving it unbaked and gummy. I use my large 16-cup angel food pan for this recipe but a slightly smaller funnel pan would accommodate the amount of batter called for in this recipe.

Place the oven rack in the center of the oven to bake the cake and place the cake pan in the center of the rack. If the cake starts to brown too quickly on the top, loosely lay a piece of tin foil over the top of the pan once the top of the cake is set.  It takes about 2 hours and 15 minutes for this cake to bake in my oven but I recommend that you start testing for doneness at the 2 hour point so the cake does not dry out.  It is done when a cake tester inserted near the center close to the funnel comes out clean and the top of the cake is no longer sticky.

Remove the cake from the oven and let it cool in the pan for 20-30 minutes then turn it out on to a wire rack, removing the parchment paper from the bottom of the cake.  Let the cake cool completely before cutting.  This cake is best left for a day or two to age before slicing it.

Gumdrop Cake
Gumdrop Cake

Gumdrop Cake

Ingredients:

1 cup butter, softened
1⅔ cups granulated sugar
3 eggs, room temperature
1¼ tsp vanilla
1 tsp almond flavouring
1 tsp lemon flavouring

3 cups flour (reserve 1/4 cup for dredging cut gumdrops)
2½ tsp baking powder
½ tsp salt

1 cup milk, room temperature

1 lb gumdrops, cut into 3-5 pieces each

Method:

Place oven rack in center of oven and preheat oven to 300°F. Grease large funnel pan and line bottom with parchment paper.

In medium-sized bowl, dredge the cut gumdrops with 1/4 cup of the flour, making sure that the cut edges of each gumdrop are well floured. Set aside. In separate bowl, sift together the remaining flour, baking powder and salt. Set aside.

In bowl of stand mixer, cream the butter. Gradually add the sugar, beating until well incorporated. Add the eggs, one at a time, beating well after each addition. Beat in the vanilla along with the almond and lemon flavourings. Add the dry and wet ingredients in three parts (3 parts dry and 2 parts wet) starting and ending with the dry ingredients. After all ingredients have been added, beat batter on medium speed for 1 minute.

Remove bowl from stand mixer and, by hand, gently fold in the floured gumdrops just until incorporated and no dry flour remains visible. Do not overmix.

Transfer batter to prepared pan and, with knife, smooth batter out even. Bake for approximately 2¼ hours or until cake tester inserted near funnel center of pan comes out clean. Remove cake from oven and let cool in pan for 20-30 minutes then turn cake out onto wire rack to cool completely. Cake  will slice better a day or two after baking.

Gumdrop Cake
Gumdrop Cake

If you have made this recipe and enjoyed it and/or wish to share it with your friends and family, please do so on social media but be sure to share the direct link to this posting from my website.

Connect with My Island Bistro Kitchen on Social Media

Join the Facebook page for My Island Bistro Kitchen:  https://www.facebook.com/MyIslandBistroKitchen/

Follow “the Bistro” on “X” (formerly Twitter)https://twitter.com/PEIBistro/

See the drool-worthy gallery of mouth-watering food photos from My Island Bistro Kitchen on Instagramhttps://www.instagram.com/peibistro/

Follow “the Bistro” on Pinterest at https://www.pinterest.ca/peibistro/ and pin the Pinterest-ready photo found at the end of this post to your favorite Pinterest boards.

PIN ME TO PINTEREST!

Gumdrop Cake


——————————————————————————

Gumdrop Cake

A buttery cake loaded with flavour and dotted with colorful gumdrops.

Ingredients

  • 1 cup butter, softened
  • 1 2/3 cups granulated sugar
  • 3 eggs, room temperature
  • 1¼ tsp vanilla
  • 1 tsp almond flavouring
  • 1 tsp lemon flavouring
  • 3 cups flour (reserve 1/4 cup for dredging cut gumdrops)
  • 2½ tsp baking powder
  • ½ tsp salt
  • 1 cup milk, room temperature
  • 1 lb gumdrops, cut into 3-5 pieces each

Instructions

  1. Place oven rack in center of oven and preheat oven to 300°F. Grease large funnel pan and line bottom with parchment paper.
  2. In medium-sized bowl, dredge the cut gumdrops with 1/4 cup of the flour, making sure that the cut edges of each gumdrop are well floured. Set aside. In separate bowl, sift together the remaining flour, baking powder and salt. Set aside.
  3. In bowl of stand mixer, cream the butter. Gradually add the sugar, beating until well incorporated. Add the eggs, one at a time, beating well after each addition. Beat in the vanilla along with the almond and lemon flavourings. Add the dry and wet ingredients in three parts (3 parts dry and 2 parts wet) starting and ending with the dry ingredients. After all ingredients have been added, beat batter on medium speed for 1 minute.
  4. Remove bowl from stand mixer and, by hand, gently fold in the floured gumdrops just until incorporated and no dry flour remains visible. Do not overmix.
  5. Transfer batter to prepared pan and, with knife, smooth batter out even. Bake for approximately 2¼ hours or until cake tester inserted near funnel center of pan comes out clean. Remove cake from oven and let cool in pan for 20-30 minutes then turn cake out onto wire rack to cool completely. Cake will slice better a day or two after baking.
  6. [Copyright My Island Bistro Kitchen]
Schema/Recipe SEO Data Markup by Yummly Rich Recipes
https://myislandbistrokitchen.com/2015/11/29/gumdrop-cake/

This gumdrop cake is loaded with flavour and dotted with colorful gumdrops.

Cream of Roasted Tomato Soup

Roasted Cream of Tomato Soup
Cream of Roasted Tomato Soup

One of my all-time favorite comfort soups is homemade tomato soup.  I have been working for the past couple of years to develop a tomato soup recipe that uses the right blend of ingredients and spices to achieve a balanced tomato soup that is pleasing to my palate. Recipe development can be a lengthy and tedious process and the recipe I am sharing today is the result of my efforts.  Once I crafted the final version of this soup, no canned tomato soup will now do!

Roasted Cream of Tomato Soup
Cream of Roasted Tomato Soup

The tomatoes I recommend to use in tomato soup are the plum tomatoes, sometimes referred to as the “Romas” or “Italian tomatoes”.

Roma Tomatoes

These are an oblong, almost egg-shaped, tomato and they are a firm tomato, quite meaty, and less watery with fewer seeds than other tomato varieties.  They also have a gorgeous vibrant red color that translates into wonderful color for soups and sauces. They are ideal for roasting because of their thick wall of flesh that does not break down and collapse quickly.  For these reasons, the Romas are often used in canning, soup-making, and for making tomato sauce and paste.

I like to roast the vegetables for this soup because the roasting draws out and heightens their flavour,  making a more flavorful soup.  It’s important to coat (but not drench or soak) the vegetables with a high quality olive oil before roasting them.  This will help to keep the vegetables from drying out during the roasting process. Although a plain olive oil can certainly be used, I like to use a flavored oil such as oregano or herbes de provence, for example, as this adds additional flavor. The only vegetable I find difficult to get roasted soft is the celery so, for this vegetable, I recommend cutting it into small chunks about 1″ long.  Through the roasting and cooking processes, the celery will eventually soften but it does take more time (but it is necessary for the flavor it provides to the soup). Use care not to burn or over-char the vegetables — there is a definite line between vegetables that are well-roasted and those that are burned. The goal is to have a flavourful soup that uses roasted vegetables but has no ‘burnt’ taste to it.

Use the freshest of ingredients you can find for this soup; it matters.  Using fresh herbs is essential for the best flavor of the soup and add them near the end of the cooking process so their flavor will be more intense and true.

I use a hand-held immersion blender to purée the vegetables although a standard food processor would also work.  How smooth to purée the mixture is a matter of preference.  For a more refined soup, purée the mixture until very smooth then strain it through a fine wire-mesh sieve; for a more rustic, artisan soup, purée less and don’t strain through a sieve.

While whole milk by itself can be used in this recipe, I like to add a mixture of whole milk and blend (or, if I want to be really extravagant, whipping cream) because it gives better flavor and texture to the soup.  I make this soup in large batches and freeze it. It will not freeze well and maintain its quality texture if anything less than whole milk is used and it freezes even better if blend or whipping cream is used along with the whole milk.

This is not a highly spiced soup because my intent is that it remain very much a tomato-flavored soup. Any ingredients added are intended to compliment and enhance the soup’s flavor, not mask or overpower the tomato flavor.

Roasted Cream of Tomato Soup
Cream of Roasted Tomato Soup

Ingredients:

1 medium-sized carrot
1 medium-sized onion
1 leek
½ celery stalk
1 – 1½ oz piece of fennel bulb
2½ lbs ripe plum tomatoes (Romas)
4-5 garlic cloves, unpeeled
Olive oil
1 tbsp butter
2 tbsp liquid chicken bouillon
2 cups hot water
1 tbsp ketchup or tomato paste
1 tsp sugar or honey
1 bay leaf
3 tbsp fresh basil, chopped
1 tbsp fresh oregano, chopped
1 tbsp fresh thyme, chopped
1¼ cups whole milk
½ – ¾ cup blend or whipping cream
Sea Salt
Pepper

Sour Cream (optional)
Seasoned Croutons (optional)
Fresh Herbs (optional)

Method:

Preheat oven to 450°F. Place oven rack in center of oven.

Peel carrot, onion, and strip outer layers from leek – use only white and light green part of the leek. Cut carrot, leek, and celery into chunks about 1” – 2”. Chop fennel bulb into 2-3 chunks. Cut tomatoes and onion into quarters. Place vegetables into a large bowl and add unpeeled garlic cloves. Drizzle vegetables and garlic cloves with enough olive oil to coat and sprinkle with sea salt and pepper. Toss gently to coat mixture with oil. Place vegetables and garlic, single layer, on greased tinfoil-lined baking pan.

Roast, uncovered for apx. 45-60 minutes, or until vegetables are cooked soft (do not burn them). Remove vegetables from oven and split garlic peeling to extract garlic.

Melt 1 tbsp of butter in a large pot over medium-high heat. Add the roasted vegetables and garlic along with the liquid chicken bouillon, hot water, ketchup or tomato paste, sugar or honey, and bay leaf.  Stir. Cover. Bring to a boil then immediately reduce heat to simmer for 20 minutes. In the last 10 minutes of simmering, add the fresh basil, oregano, and thyme.

Let mixture cool to lukewarm. Remove bayleaf, then purée mixture with immersion blender or in a food processor to desired consistency/smoothness. For an even creamier texture, strain the mixture through a fine wire mesh sieve and discard any remaining solid bits.

Return puréed mixture to large pot. Add milk and blend (or whipping cream). Stir well.

Heat gently, over medium-low heat, stirring often to prevent scorching. Season with salt and pepper to taste. Ladle into soup bowls and garnish with sour cream, seasoned croutons and fresh herbs, if desired.

Cream of Roasted Tomato Soup

Yield: Apx. 6-8 servings

—————————————————————————-

Thank you for visiting “the Bistro” today.  If you enjoyed this posting and recipe, please share it on your social media websites.

Connect with “the Bistro” through the following social media:

Join My Island Bistro Kitchen on Facebook

Follow “the Bistro’s” tweets on Twitter

Follow “the Bistro” on Pinterest

Follow “the Bistro” on Instagram

——————————————————————————


Cream of Roasted Tomato Soup

Yield: Apx. 6-8 servings

A flavorful homemade tomato soup filled with goodness.

Ingredients

  • 1 medium-sized carrot
  • 1 medium-sized onion
  • 1 leek
  • ½ celery stalk
  • 1 – 1½ oz piece of fennel bulb
  • 2½ lbs ripe plum tomatoes (Romas)
  • 4-5 garlic cloves, unpeeled
  • Olive oil
  • 1 tbsp butter
  • 2 tbsp liquid chicken bouillon
  • 2 cups hot water
  • 1 tbsp ketchup or tomato paste
  • 1 tsp sugar or honey
  • 1 bay leaf
  • 3 tbsp fresh basil, chopped
  • 1 tbsp fresh oregano, chopped
  • 1 tbsp fresh thyme, chopped
  • 1¼ cups whole milk
  • ½ - ¾ cup blend or whipping cream
  • Sea Salt
  • Pepper
  • Sour Cream (optional)
  • Seasoned Croutons (optional)
  • Fresh Herbs (optional)

Instructions

  1. Preheat oven to 450°F. Place oven rack in center of oven.
  2. Peel carrot, onion, and strip outer layers from leek – use only white and light green part of the leek. Cut carrot, leek, and celery into chunks about 1” - 2”. Chop fennel bulb into 2-3 chunks. Cut tomatoes and onion into quarters. Place vegetables into a large bowl and add unpeeled garlic cloves. Drizzle vegetables and garlic cloves with enough olive oil to coat and sprinkle with sea salt and pepper. Toss gently to coat mixture with oil. Place vegetables and garlic, single layer, on greased tinfoil-lined baking pan. Roast, uncovered for apx. 45-60 minutes, or until vegetables are cooked soft (do not burn them). Remove vegetables from oven and split garlic peeling to extract garlic.
  3. Melt 1 tbsp of butter in a large pot over medium-high heat. Add the roasted vegetables and garlic along with the liquid chicken bouillon, hot water, ketchup or tomato paste, sugar or honey, and bay leaf. Stir. Cover. Bring to a boil then immediately reduce heat to simmer for 20 minutes. In the last 10 minutes of simmering, add the fresh basil, oregano, and thyme.
  4. Let mixture cool to lukewarm. Remove bayleaf, then purée mixture with immersion blender or in a food processor to desired consistency/smoothness. For an even creamier texture, strain the mixture through a fine wire mesh sieve and discard any remaining solid bits.
  5. Return puréed mixture to large pot. Add milk and blend (or whipping cream). Stir well. Heat gently, over medium-low heat, stirring often to prevent scorching. Season with salt and pepper to taste. Ladle into soup bowls and garnish with sour cream, seasoned croutons and fresh herbs, if desired.
Schema/Recipe SEO Data Markup by Yummly Rich Recipes
https://myislandbistrokitchen.com/2015/11/15/cream-of-roasted-tomato-soup/

Pin Me To Pinterest!


Tomato Soup

Cream of Roasted Tomato Soup


Cookbook Review: Best of Bridge Home Cooking (2015)


Title: Best of Bridge Home Cooking
Author: Various
Publication Date: 2015
Publisher: Robert Rose Inc.
Cover: Hardcover
Price: $29.95
Pages: 360

Robert Rose Inc. has offered me the opportunity to conduct a review of Best of Bridge Home Cooking. This is the latest in the “Best of Bridge” series of cookbooks.

This cookbook is a collection of standard home cooking recipes that aims to get people in to the kitchen to create special memories and meals around the table. Many of the recipes would be suitable for every day meals. The book has an attractive, sturdy hardcover and the pages are spiral bound making it easy for the book to stay open and the pages to lay flat for the recipe being made.

The book features a collection of 250 recipes spread out through 13 chapters: Breakfast, Breads & Muffins; Snacks, Spreads & Dips; Soups; Salads; Sandwiches, Lunches & Light Suppers; One-pot Dinners; Pizza, Pasta & Noodles; Meatless Mains; Fish & Seafood; Chicken & Turkey; Pork, Lamb & Beef; Side Dishes; and Desserts & Sweet Treats. At the beginning of each chapter, there is also a separate table of contents outlining the recipes (and their page numbers) found in that section of the book. There is also a handy alphabetical index at the back of the book.

Each recipe is accompanied by a 1-2 sentence lead-in about the recipe and many offer serving suggestions. In addition, useful tips and suggestions for alternate ingredients or ways to vary a recipe are provided with many of the recipes.

The Best of Bridge books use capital letters in a font that I find too large and folksy. This makes the pages cluttery and difficult to read. Generally, the instructions for making the recipes are all lumped together in one long paragraph, as you’ll see in the three recipes below which the publisher has granted me permission to include with this review. This instruction-writing style makes it difficult to follow the method. I find cookbooks that lay out the instructions in separate, step-by-step paragraphs are easier to follow, particularly for less experienced cooks. Breaking down the steps of a recipe into separate short paragraphs makes them less daunting and it is easier and quicker to find your place and progress in the instructions as you go about making the recipe.

I found the ingredients in recipes are used in the instructions in the order in which they are listed and, for the most part, the instructions are easily understandable. The recipes in the book call for, what I would consider to be, ordinary ingredients which makes it easy to shop for and to prepare the dishes. Most, if not all, ingredients would be found in standard supermarkets. However, many recipes call for pre-packaged foods and, in particular, a lot of canned goods. While this may have been a trend in the 1970s – 1990s, and it is a quick way to pull together a meal, today there is a trend toward the slow food movement, cooking from scratch, and cooking healthy. Therefore, with many diets restricting the amount of salt intake, simply opening and dumping cans of salt-laden ingredients with preservatives into dishes to make a meal may not be a selling point for everyone.

The exact quantity of ingredients called for in some recipes is sometimes vague. For example, some recipes call for ingredients in measures such as 1 head of broccoli, 2 small zucchini, or 1 bunch of asparagus. These products are available in different sizes so it would have been clearer to have specified a certain pound or kilogram measure, for example. As well, some recipes call for 1 onion – onions, too, come in different sizes so, for the benefit of more inexperienced cooks, it would be preferable if the ingredients specified if it is ¼ cup, ½ cup, or 1 cup of chopped onions. Providing exact measures helps to ensure successful cooking, particularly for novice cooks.

I also found several recipes in the book for the same dish – for example, there are about 5 chili recipes and more than one recipe for shepherd’s pie. When I buy a cookbook, I expect that it has been quality controlled and recipes are not repetitive, even if there are slight ingredient differences in the recipes. Therefore, unless the cookbook is specifically a book on chili or shepherd’s pie, I suggest picking just one recipe for each when it is a general cookbook. The other thing I noted was that there were some really basic recipes like the one on page 8 for hot oatmeal calling for rolled oats, salt, and water. If I am paying $29.95 for a cookbook, I am not looking for a recipe that would be available on the back of a rolled oats package when I buy them. Recipes for basic potato salad, peanut butter cookies, macaroni and cheese, and simple stir-fries are ones that can be found in other sources such as existing cookbooks or through a quick internet search. If I am buying a cookbook today to add to my collection, I am looking for one that has new or different recipes that I don’t already have in one or more cookbooks already on my shelf or would not likely be able to find through an internet search. In short, I’m looking for something new and different or, if it is a traditional recipe, that it has been updated or jazzed up in some way.

There are a lot of slow cooker recipes in this cookbook. Not everyone owns a slow cooker, or even likes to cook by that method. My suggestion would be that with a count of about 40 slow cooker recipes in the book, perhaps those should have been reserved for a specialized slow cooker recipe book.

There are 24 color photos in the book and they are of good quality but there is obviously not a photo for each of the 250 recipes. Including photos is so important in a cookbook as, not only do photos of mouth-watering food inspire people to try the recipes but the color photos also give a frame of reference of what the finished dish should look like. Including a large book of page after page of solid print is not very inviting or inspiring, particularly when the subject matter is food.

Test-driving recipes

I tested three recipes out of the cookbook. Robert Rose Inc has given me permission to share the recipes and their photos for Carrot Raisin Muffins, Just Peachy Pork, and Creamy Tuna Pasta Bake to accompany my review of this cookbook. The recipes follow at the end of this review.

Carrot Raisin Muffins

These muffins combine a tasty combination of grated carrots and apple, raisins, coconut, cinnamon, and nutmeg. These turned out for me but they are time-consuming to make because the carrots and apple have to be grated. The recipe indicates that it yields 16 muffins; I got 15 out of the batch and they certainly were not large muffins by any means. The instructions said to bake the muffins for 25-30 minutes; however, mine were baked in 17 minutes (and my oven has true temperature) so the baking time was off substantially.

Just Peachy Pork

This recipe, in a word, was a flop and it had expensive ingredients in it. The recipe calls for 1 lb pork tenderloin, canned peaches, green pepper, barbecue sauce, and Dijon mustard. When I read the recipe, I wondered if it had enough of the right ingredients to give it flavour and I found it did not. This dish had absolutely no flavour and was not a good use of an expensive pork tenderloin. The list of ingredients caused me to wonder what color the sauce would be. The sauce turned an ugly gray-brown color (probably due to the barbeque sauce and mustard) and the green pepper discoloured and went limp as it cooked in the oven.  This dish turned out to be a very unappetizing color, did not plate well, and had zero flavour. I will not make this again.  The publisher has provided a photograph for the purposes of this review and my dish did not in any way resemble the promotional photograph.

Creamy Tuna Pasta Bake

This recipe turned out fine for me and is quite tasty. It calls for ingredients that actually give a flavour boost to a typical tuna casserole.

Concluding Thoughts

While I can appreciate that the goal of this book may be on using easy-to-find, common ingredients to prepare fast and convenient meals at home, I am not a fan or advocate of using a lot of prepared foods in dishes I cook. I found that there were many recipes in Best of Bridge Home Cooking that use pre-packaged ingredients that come with a lot of salt and preservatives.

There is substantial competition on the cookbook market and through recipes available for free on the internet. While the Best of Bridge Home Cooking does have some tasty recipes, I would have to say, overall, I didn’t find a lot of inspiration or anything really new and creative in the book. In fact, I found most recipes were ones for which I could find equally-good or better/similar ones in other cookbooks or on the internet.

The following three recipes and accompanying photos are courtesy of Best of Bridge Home Cooking by The Best of Bridge © 2015 www.bestofbridge.com Reprinted with permission. Available where books are sold.

Carrot Raisin Muffins


Carrot Raisin Muffins from “The Best of Bridge Home Cooking” (2015). Photo courtesy Robert Rose Inc., publisher.

Packed with nuts, fruits and carrots, these scrumptious muffins are perfect for breakfast. But they are just as tasty for afternoon snacks or stowed away in a lunch box.

2 cups all-purpose flour  (500 ml)
3⁄4 cup granulated sugar  (175 ml)
11⁄2 TSP ground cinnamon  (7 ml)
1 TSP baking powder  (5 ml)
1 TSP baking soda  (5 ml)
1⁄2 TSP freshly grated nutmeg  (2 ml)
1⁄4 TSP salt  (1 ml)
11⁄2 cups grated carrots (about 3 medium)   (375 ml)
1 cup grated peeled apples  (250 ml)
1⁄2 cup raisins  (125 ml)
1⁄2 cup sweetened shredded coconut  (125 ml)
1⁄2 cup chopped walnuts (optional)  (125 ml)
2 large eggs   (2)
2⁄3 cup plain yogurt   (150 ml)
1⁄3 cup vegetable oil (75 ml)

Preheat oven to 375°F (190°C). Grease 8 cups in each of two 12-cup muffin pans or line the cups with paper liners. In a large bowl, stir together flour, sugar, cinnamon, baking powder, baking soda, nutmeg and salt. Stir in carrots, apples, raisins, coconut and walnuts (if using). In another bowl, beat eggs; add yogurt and oil. Stir into flour mixture just until combined. (Batter will be very thick.) Spoon batter into prepared muffin cups, filling almost to the top. Bake for 25 to 30 minutes or until tops spring back when lightly touched. Let cool in pans for 5 minutes, then transfer muffins to a wire rack to cool.
Makes 16 muffins.
Tip: Have only one muffin pan? Place muffin paper liners in 6-oz (175 ml) glass custard cups or small ramekins and fill with extra batter. Bake alongside muffin pan.

Creamy Tuna Pasta Bake
Creamy Pasta Bake from "The Best of Bridge Home Cooking" (2015). Photo courtesy Robert Rose Inc., publisher.
Creamy Pasta Bake from “The Best of Bridge Home Cooking” (2015). Photo courtesy Robert Rose Inc., publisher.

This modern rendition of a tuna casserole includes a nutritional boost of broccoli in a creamy basil sauce.

2 bsp butter  (30 ml)
6 green onions, chopped  (6)
3 cloves garlic, finely chopped  (3)
4 cups sliced mushrooms  (1 L)
1⁄2 TSP salt  (2 ml)
1⁄2 TSP freshly ground black pepper  (2 ml)
1⁄3 cup all-purpose flour  (75 ml)
2 cups light (5%) cream or milk  (500 ml)
11⁄2 cups Chicken Stock (page 42) or ready-to-use chicken broth (375 ml)
3 tomatoes, seeded and diced  (3)
2⁄3 cup freshly grated Parmesan cheese  (150 ml)
1⁄2 cup chopped fresh basil  (125 ml)
12 oz penne  (375 g)
4 cups broccoli florets and chopped peeled stems (1 L)
2 cans (each 6 oz/170 g) solid  white tuna, drained and flaked (2)
1 1⁄2 cups soft fresh bread crumbs (375 ml)
1 cup shredded Asiago or mozzarella cheese (250 ml)

Preheat oven to 350°F (180°C). Grease a 13- by 9-inch (33 by 23 cm) baking dish. In a Dutch oven or large saucepan, melt butter over medium-high heat. Cook green onions, garlic, mushrooms, salt and pepper, stirring occasionally, for 5 minutes or until softened. In a bowl, whisk flour with 1⁄2 cup (125 ml) cream until smooth; add the remaining cream. Add to pan along with stock. Bring to a boil, stirring, for 3 minutes or until sauce thickens. Remove from heat. Stir in tomatoes, Parmesan and basil. (Can be prepared to this point, covered and refrigerated for up to 1 day.)
In a large pot of boiling salted water, cook pasta for 7 minutes or until almost tender. Add broccoli; cook for 2 minutes or until broccoli is bright green and crisp, and pasta is just tender. Drain; chill under cold water. Drain well and return to pot. Stir in tuna and sauce. Spread in baking dish. (Casserole can be prepared to this point; cover and refrigerate for up to 4 hours before serving. Increase baking time by 15 minutes.)
In a bowl, combine bread crumbs and Asiago cheese; sprinkle over top. Bake for 40 to 45 minutes or until golden and center is piping hot.
Serves 8.
Tips: If fresh basil is unavailable, substitute 2 TSP (10 ml) dried basil and cook with onions.
Assemble the dish no more than 4 hours ahead to prevent pasta from soaking up the sauce.
Variation: For a vegetarian version, omit tuna and substitute 1 can (19 oz/540 ml) kidney beans, drained and rinsed.

Just Peachy Pork
Just Peachy Pork
Just Peachy Pork from “The Best of Bridge Home Cooking” (2015). Photo courtesy Robert Rose Inc., publisher.

Loaded with peaches, this sweet and tangy sauce is a great accompaniment for pork. Serve over hot white rice and add an assortment of steamed vegetables for a delightfully different meal.

1 can (14 oz/398 mL) sliced peaches, drained, 1⁄4 cup (60 mL) syrup reserved
1 cup finely chopped green bell  pepper  (250 mL)
(or 1 1⁄2 cups/375 mL
frozen mixed bell pepper strips)
1⁄2 cup barbecue sauce  (125 mL)
1 tbsp Dijon mustard  (15 mL)
1 lb pork tenderloin, cut into 1⁄2-inch (1 cm) thick slices  (500 g)

Preheat oven to 350°F (180°C). In a saucepan over medium heat, combine peaches, reserved syrup, green pepper, barbecue sauce and mustard. Bring to a boil. Reduce heat to low and simmer for 3 minutes. Place pork slices in a single layer in an 8-cup (2 L) baking or gratin dish. Pour sauce over meat. Bake until just a hint of pink remains, about 30 minutes.
Serves 4.

Disclosure: I received a complimentary copy of Best of Bridge Home Cooking from Robert Rose Inc., for the purposes of conducting a review of the cookbook. I received no compensation for this review and was under no obligation to provide a positive review. All opinions expressed are purely my own.

Homemade Salad Dressing

Homemade Salad Dressing

Homemade salad dressing is simple to make and is a tasty addition to many salads and sandwiches. It’s also a more economical alternative to commercial varieties on the grocery store shelves. Additionally, if you find yourself in need of salad dressing and are not near a supermarket, you can quickly whip up a batch of homemade salad dressing so long as you have eggs, sugar, milk, vinegar, dry mustard, and flour.

Originally, my mother always cooked the salad dressing in a double boiler on the stove. When microwaves came on to the scene, it became easier and quicker than ever to cook salad dressing so the microwave is what I use today.

Because of all the different kinds of microwaves and their power levels, it is difficult for me to say exactly how long to cook the salad dressing. However, for starters, it will need at least 2-3 minutes just to heat the ingredients and then I suggest cooking the salad dressing and stirring it at 1 to 1½ minute intervals until it reaches the desired consistency and thickness which should be about the same as any commercial variety available.

It is important to stir the salad dressing as it cooks to prevent lumps from forming and to ensure that the ingredients stay mixed while it cooks. Be patient and expect this to take a few minutes.

The recipe I use has been in the family for many years and it is a basic recipe with little seasoning. I prefer to use the basic recipe and then, if I want it more seasoned, I take a bit of the salad dressing and add some additional seasonings for use in a particular recipe.

This is the salad dressing I use in potato salad and sandwiches. It is particularly good in lobster sandwiches and rolls! In fact, some claim that, if you don’t have the homemade dressing, it’s just not a good lobster sandwich or roll!

Homemade Salad Dressing

Ingredients:

2 eggs
1 cup granulated sugar
2 tbsp all-purpose flour
1 tbsp dry mustard
¼ tsp salt
1 cup whole milk
¾ cup white vinegar
1 tbsp butter

Method:

In microwave-safe bowl, lightly beat the eggs with a whisk. Add the sugar, continuing to whisk mixture until smooth.

In separate small bowl, combine flour, mustard, and salt. Whisk dry ingredients into egg-sugar mixture until incorporated and smooth.

Slowly whisk in the milk and then the vinegar.

Cook on high for 2 minutes in the microwave, then stir mixture. Return mixture to the microwave and cook until thickened to desired consistency, stirring mixture at 1 – 1½ minute intervals. Be patient. This will take several minutes.

Lastly, stir in the butter. Pour mixture into glass jar. Let cool slightly for about a half hour or so then cover and store in refrigerator.

Yield: 2+ cups

—————————————————————————-

Thank you for visiting “the Bistro” today.  If you enjoyed this posting and recipe, please share it on your social media websites.

Connect with “the Bistro” through the following social media:

Join My Island Bistro Kitchen on Facebook

Follow “the Bistro’s” tweets on Twitter

Follow “the Bistro” on Pinterest

Follow “the Bistro” on Instagram

——————————————————————————

Homemade Salad Dressing

Yield: 2+ cups

Ingredients

  • 2 eggs
  • 1 cup granulated sugar
  • 2 tbsp all-purpose flour
  • 1 tbsp dry mustard
  • ¼ tsp salt
  • 1 cup whole milk
  • ¾ cup white vinegar
  • 1 tbsp butter

Instructions

  1. In microwave-safe bowl, lightly beat the eggs with a whisk. Add the sugar, continuing to whisk mixture until smooth.
  2. In separate small bowl, combine flour, mustard, and salt. Whisk dry ingredients into egg-sugar mixture until incorporated and smooth.
  3. Slowly whisk in the milk and then the vinegar.
  4. Cook on high for 2 minutes in the microwave, then stir mixture. Return mixture to the microwave and cook until thickened to desired consistency, stirring mixture at 1 - 1½ minute intervals. Be patient. This will take several minutes.
  5. Lastly, stir in the butter. Pour mixture into glass jar. Let cool slightly for about a half hour or so then cover and store in refrigerator.
Schema/Recipe SEO Data Markup by Yummly Rich Recipes
https://myislandbistrokitchen.com/2015/11/01/homemade-salad-dressing/

Homemade Salad Dressing