Four Great Places for Breakfast on Prince Edward Island

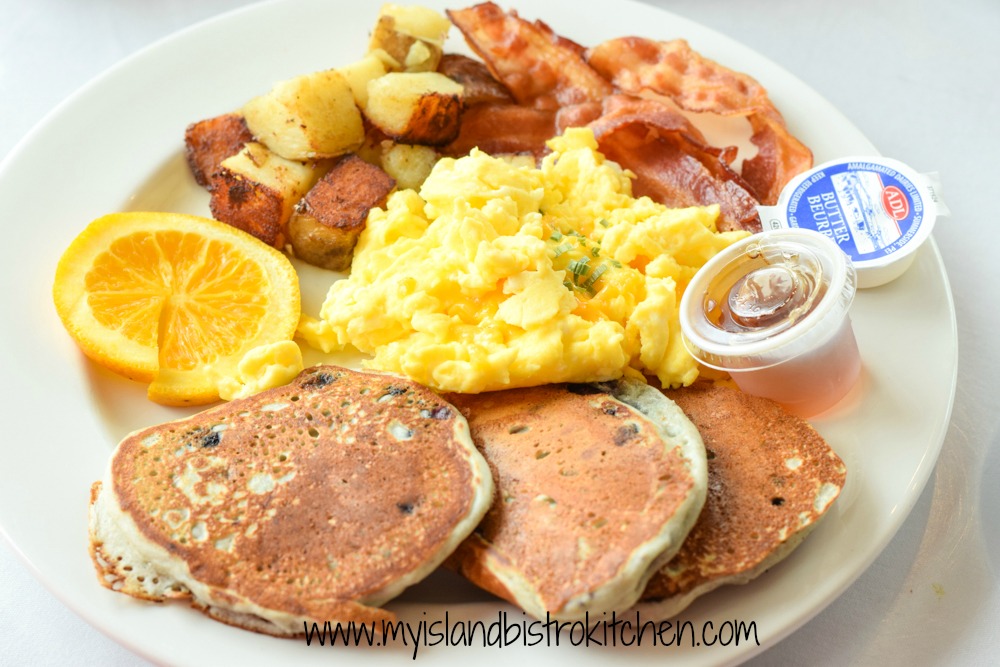
Given a choice of which meal of the day to eat out, hands down, I’ll choose breakfast every time! I love eating breakfast out and sipping on that first cup of coffee as the tantalizing scents of breakfast preparation waft through the air in the dining room.
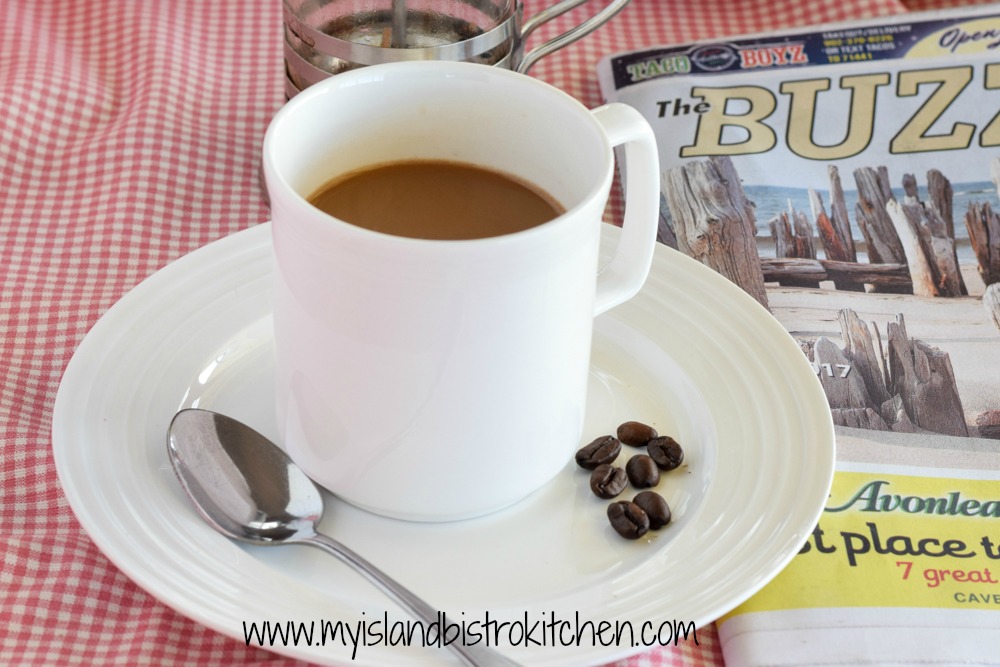
Coffee
French-Press Coffee

When I choose a restaurant for breakfast, I’m not looking for greasy diner fare. I’m looking for places that:

  • have a selection of breakfast menu items that extend beyond the standard/usual run-of-the-mill bacon, eggs, hashbrowns, and toast (although, admittedly, that’s sometimes exactly what I crave!);
  • cater to a gluten-free diet since one in our party follows this diet;
  • offer a dining experience which is to say the restaurant has some kind of ambiance – that could be energy and vibrancy, scenery, décor, etc;
  • support local food producers and use fresh, locally-produced ingredients;
  • provide consistency which is to say their food and service are consistently good over several visits; and
  • put some effort into food presentation.

Right out of the gate, I’ll tell you this is not a sponsored post and I wasn’t paid to do it. In fact, the restaurants I’m about to tell you about have no idea I was checking out their restaurants and writing about them on my food blog. So, what follows are my own personal impressions of four (4) great places on PEI that I choose for breakfast and we travel from Summerside to Murray Harbour to find them.

Barbara’s Choices:

  • Samuels Coffee House, Summerside
  • #5 Café, Murray Harbour
  • PEI Preserve Company, New Glasgow
  • Kettle Black, Charlottetown

Samuel’s Coffee House, 4 Queen Street, Summerside

Price Range: $2 – $10  (at time of writing)

I seriously love this place that opened in 2011 and I personally think they have the best coffee on the Island! Their coffee house is small and quaint (yes, you can even eat in the little vault!) but they pack big flavor in their light fare menu items and desserts.
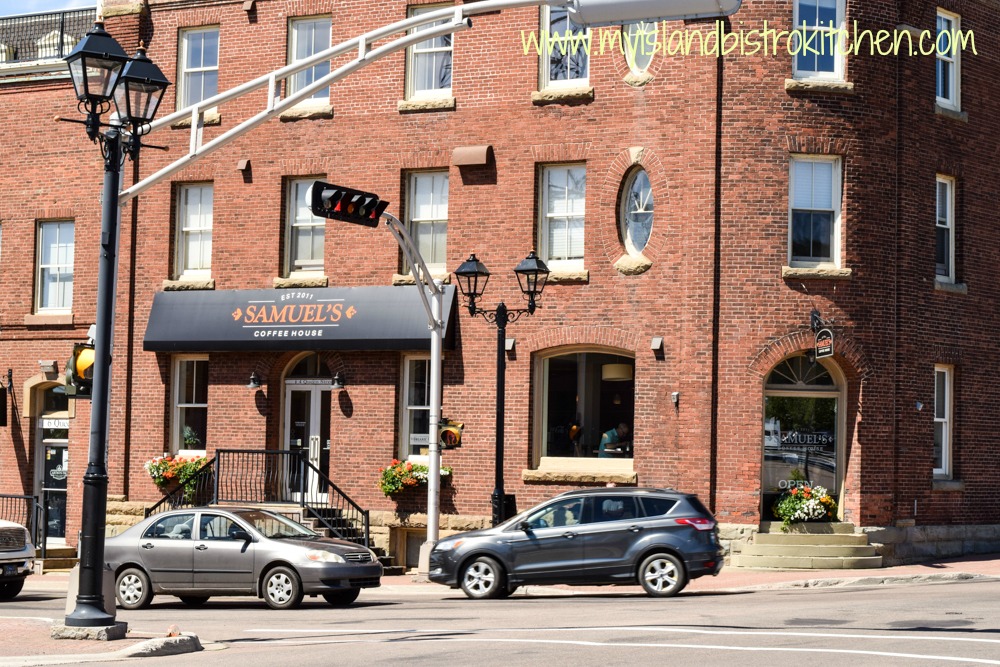
Samuel's of Summerside, PEI
Samuel’s Coffee House, Summerside, PEI

Housed in the former, and now refurbished, Journal-Pioneer building, the large windows allow lots of natural light to permeate the dining area. This is casual style dining. You place your order at the counter, receive a table number and, when the food is ready, a server delivers it to your table. Complimentary Wifi is available.

A good selection of coffee types are available that include espresso, café mocha, café latte, espresso macchiato, cappuccino, and americano. They also, in my view, make the best paninis on the Island using local ingredients. These are perfect for brunch or a light lunch. If you check out their menu board, they’ll often list the food producer’s name by the ingredients they use so you know you are getting good, fresh, local fare.
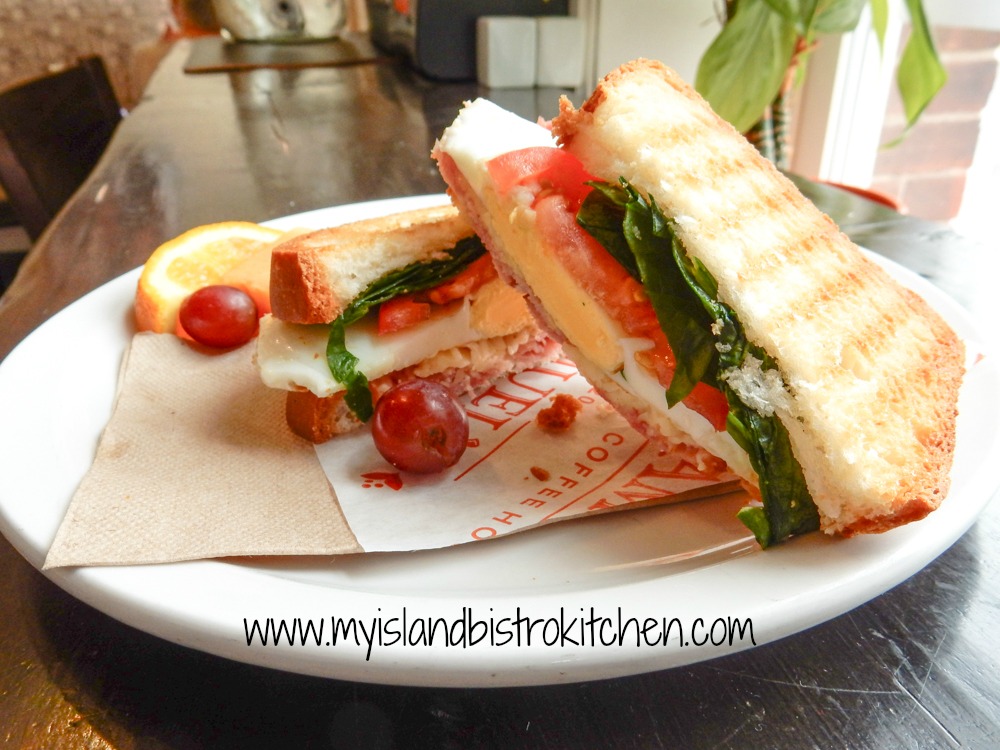
Breakfast Sandwich
Breakfast Sam at Samuel’s Coffee House, Summerside, PEI

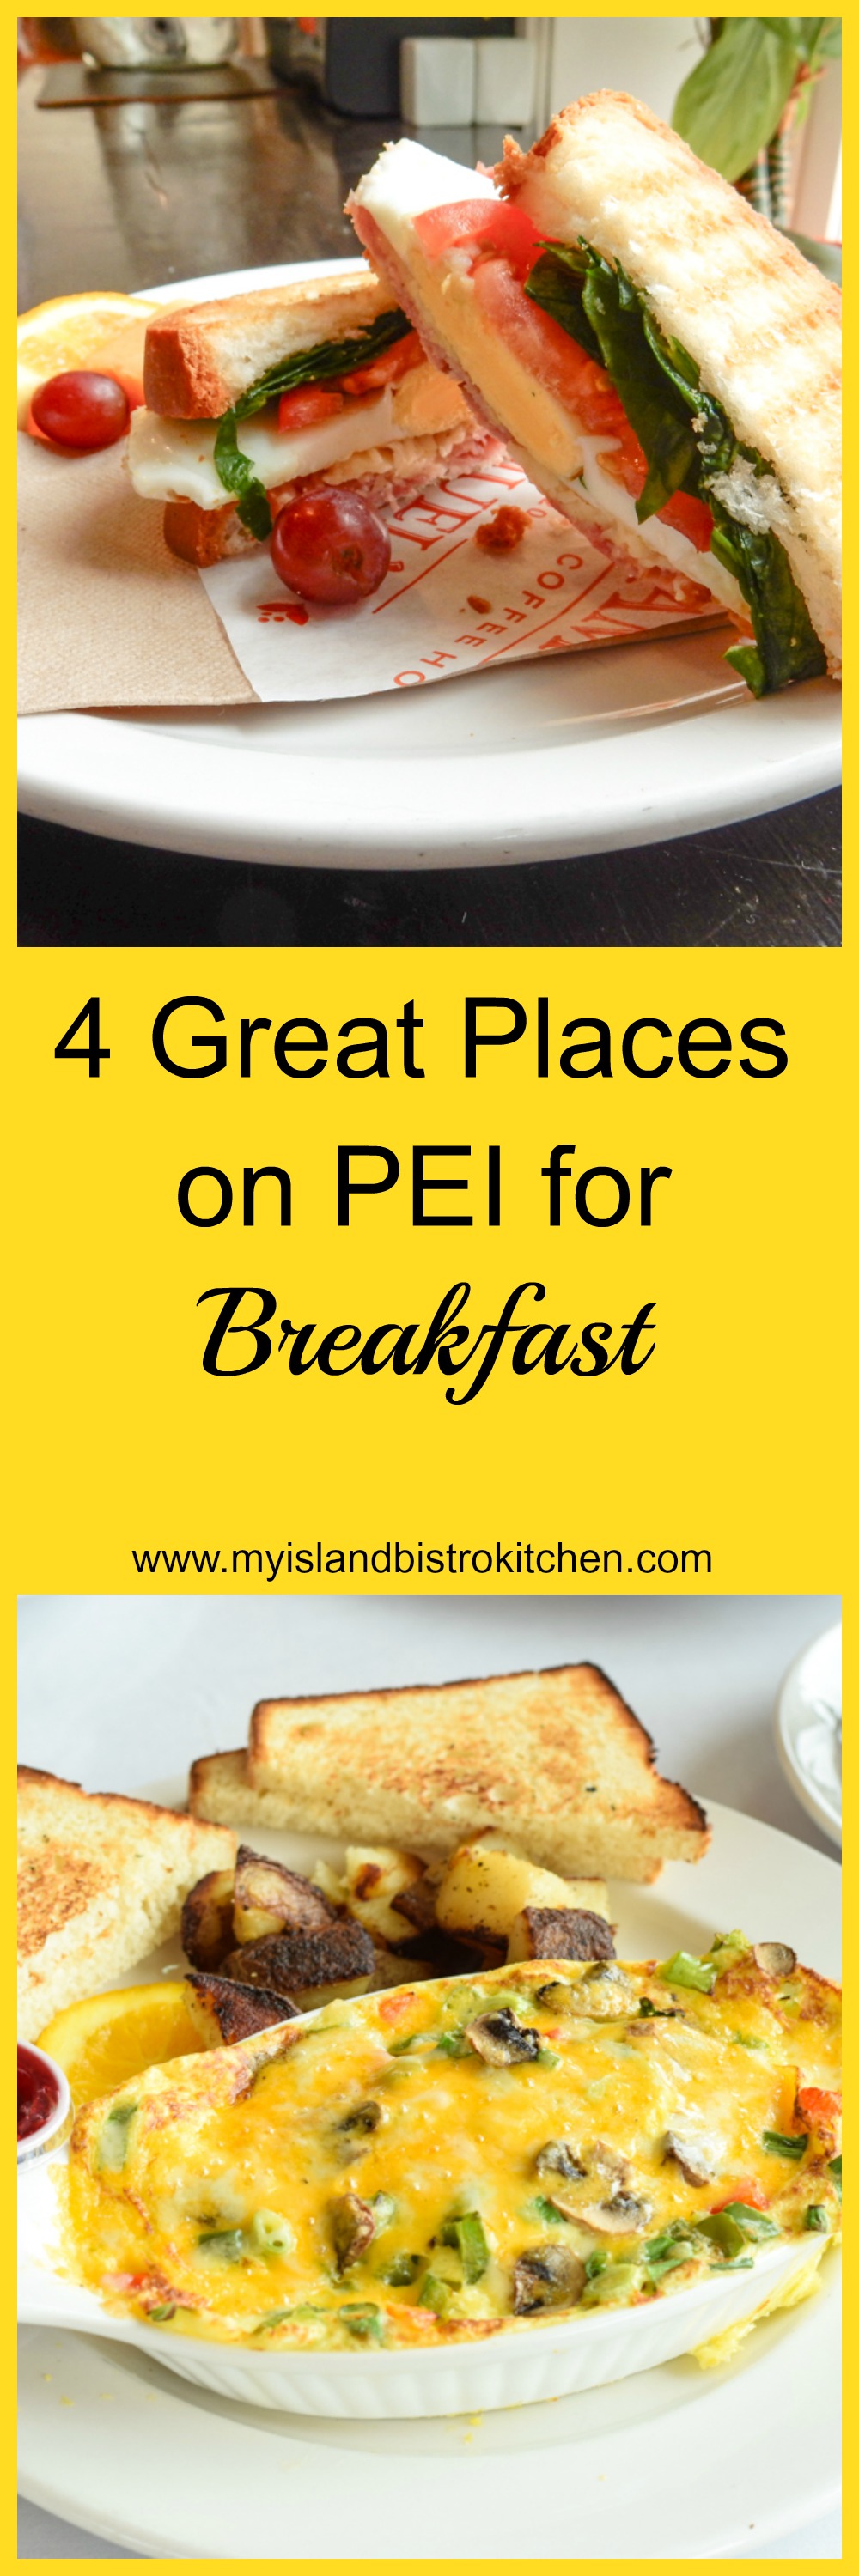
Their “Breakfast Sam” is a great breakfast or brunch choice and it is available in a gluten-free version as well (shown in the photo above).  With eggs, cheddar, ham, tomato, and spinach on a cheese bun (gluten version only with this particular bun; gluten-free is on toasted bread), this is simply a lovely way to start the day. Other breakfast items include their own house-made granola, homemade bread for toast, muffins and cinnamon rolls, and oatmeal.

In the summer months, Samuel’s also operates a coffee house at Avonlea Village in the resort municipality of Cavendish.

Samuel's in Cavendish, PEI
Samuel’s Coffee House Cavendish Location at Avonlea Village

#5 Café, 5 Church Street, Murray Harbour

Price Point: $9 – $11.50 (at time of writing)

Oh, this is a real little gem in the picturesque fishing village of Murray Harbour and absolutely worth the drive to eastern PEI.

#5 Cafe, Murray Harbour, PEI

Located in a decommissioned and repurposed church, the owner has kept much of the ambiance of the former church including the matched board walls and ceiling.  The small open- concept kitchen (seen in the photo below) now takes up the former altar and choir loft.
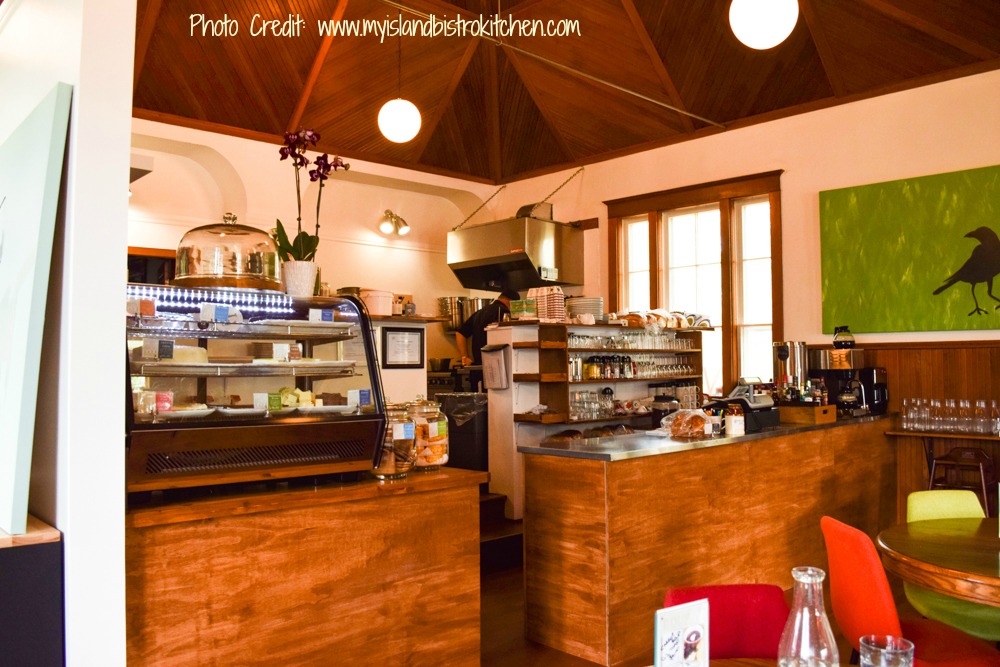
#5 Cafe, Murray Harbour, PEI
Open-concept Kitchen at #5 Cafe, Murray Harbour, PEI

The focus of food preparation at #5 Café is very much on the concept of clean food that is not full of additives and preservatives and that is made from scratch in their own kitchen.

#5 Café offers a wide variety of casual fare items on their menu but, bar none, their omelette is the best I’ve ever had!  Toast is made with their own homemade bread and you’ll often find locals dropping in to buy some of the bread to take home.  Gluten-free bread, though not made in-house, is also available with breakfast items.
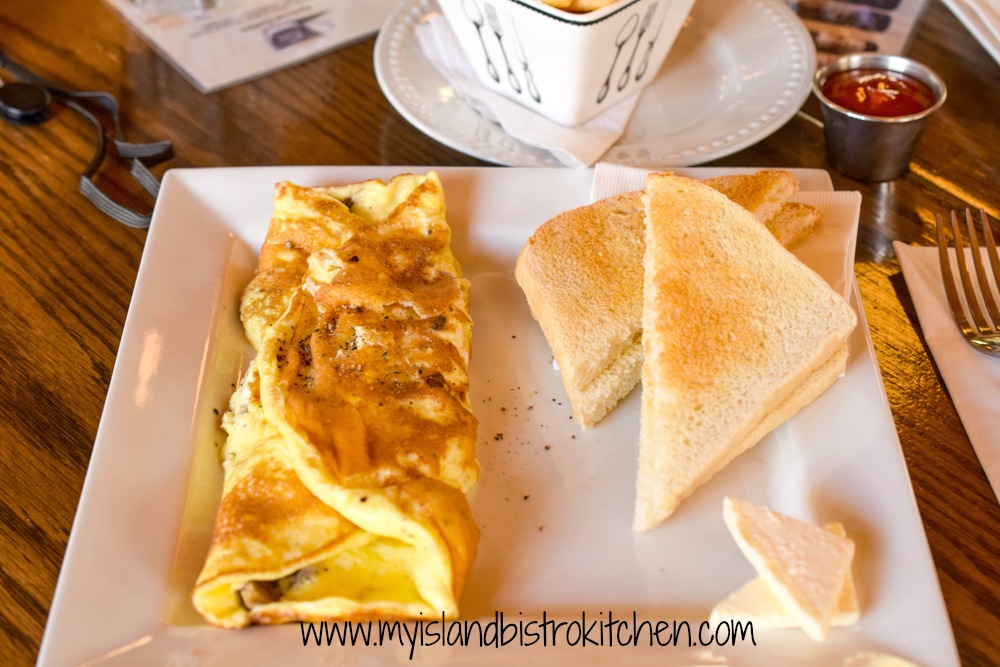
Omelette at #5 Cafe, Murray Harbour, PEI

Regardless the time of day, I’ll bet you can’t leave without checking out their dessert case and large glass jars filled with delectable cookies and other sweets! You just might find some homemade fudge in that dessert case as a sweet ending to breakfast or brunch!

#5 Café, Murray Harbour, PEI

Prince Edward Island Preserve Company, 2841 New Glasgow Road, New Glasgow

Price Point: $6 – $11 (at time of writing)

In operation since 1985, this restaurant is the “go-to” place for many Islanders (including me) for breakie on weekend mornings. You know the old saying “Go where the locals go and you’ll find good food”. Breakfast is served daily until 11:00am.
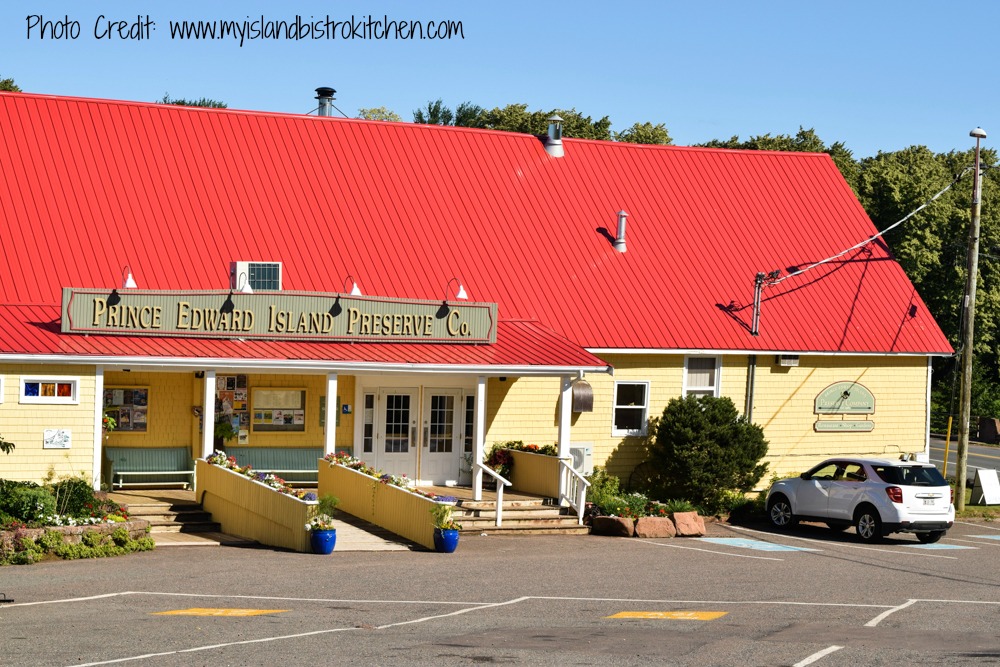
Prince Edward Island Preserve Company, New Glasgow, PEI

Open seasonally from the end of May to early October, be sure to look through the windows to the right as you enter the front doors. Here, most days, you can see the preserve-making process in action. This company is well-known for its production of preserves and spreads and many breakfast menu items are served with their own house-made preserves.
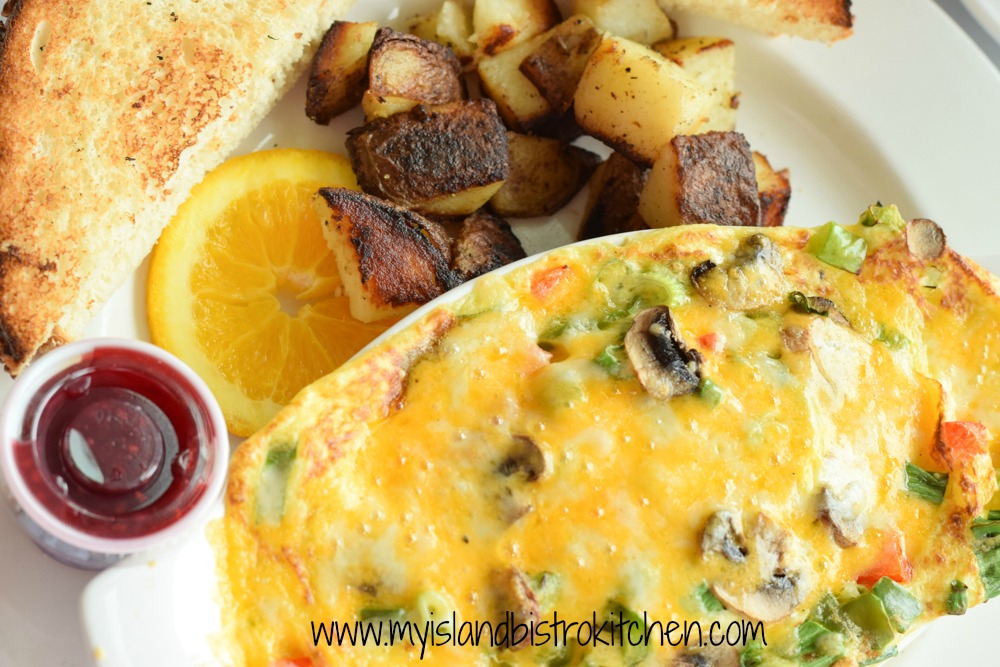
Breakfast Frittata, Prince Edward Island Preserve Company

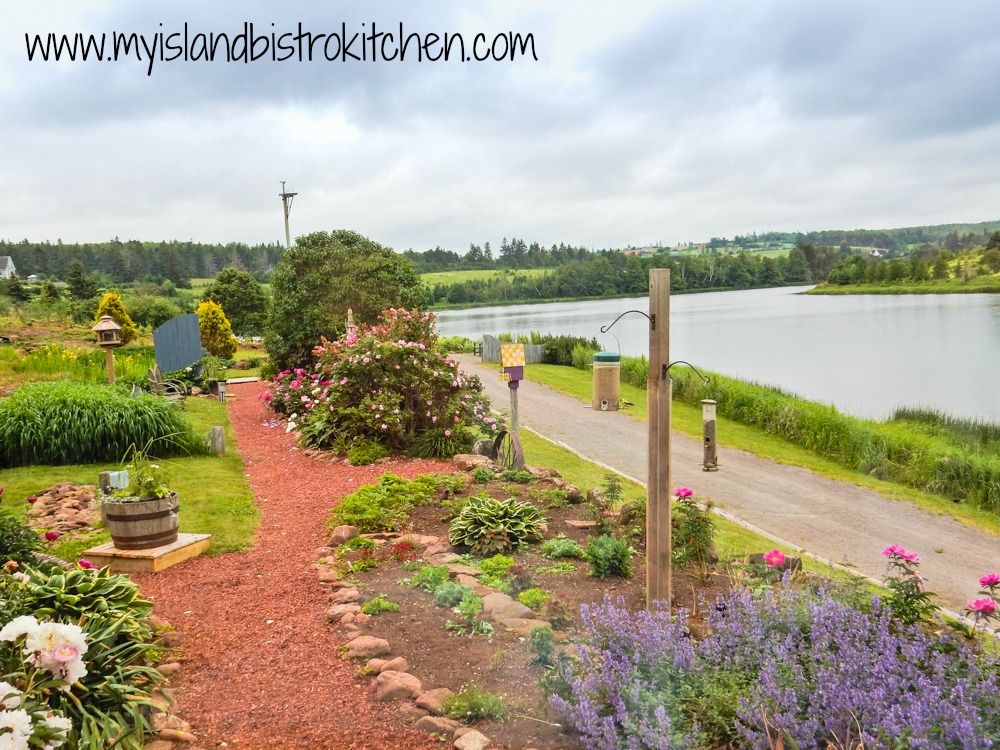
The bright open-concept dining room is surrounded by windows. Boasting a phenomenal view of the River Clyde, try to snag a table by the window so you can watch the many different birds at the feeders and fluttering amongst the beautiful flowers of the nearby Gardens of Hope. Complimentary Wifi is available in the dining room.
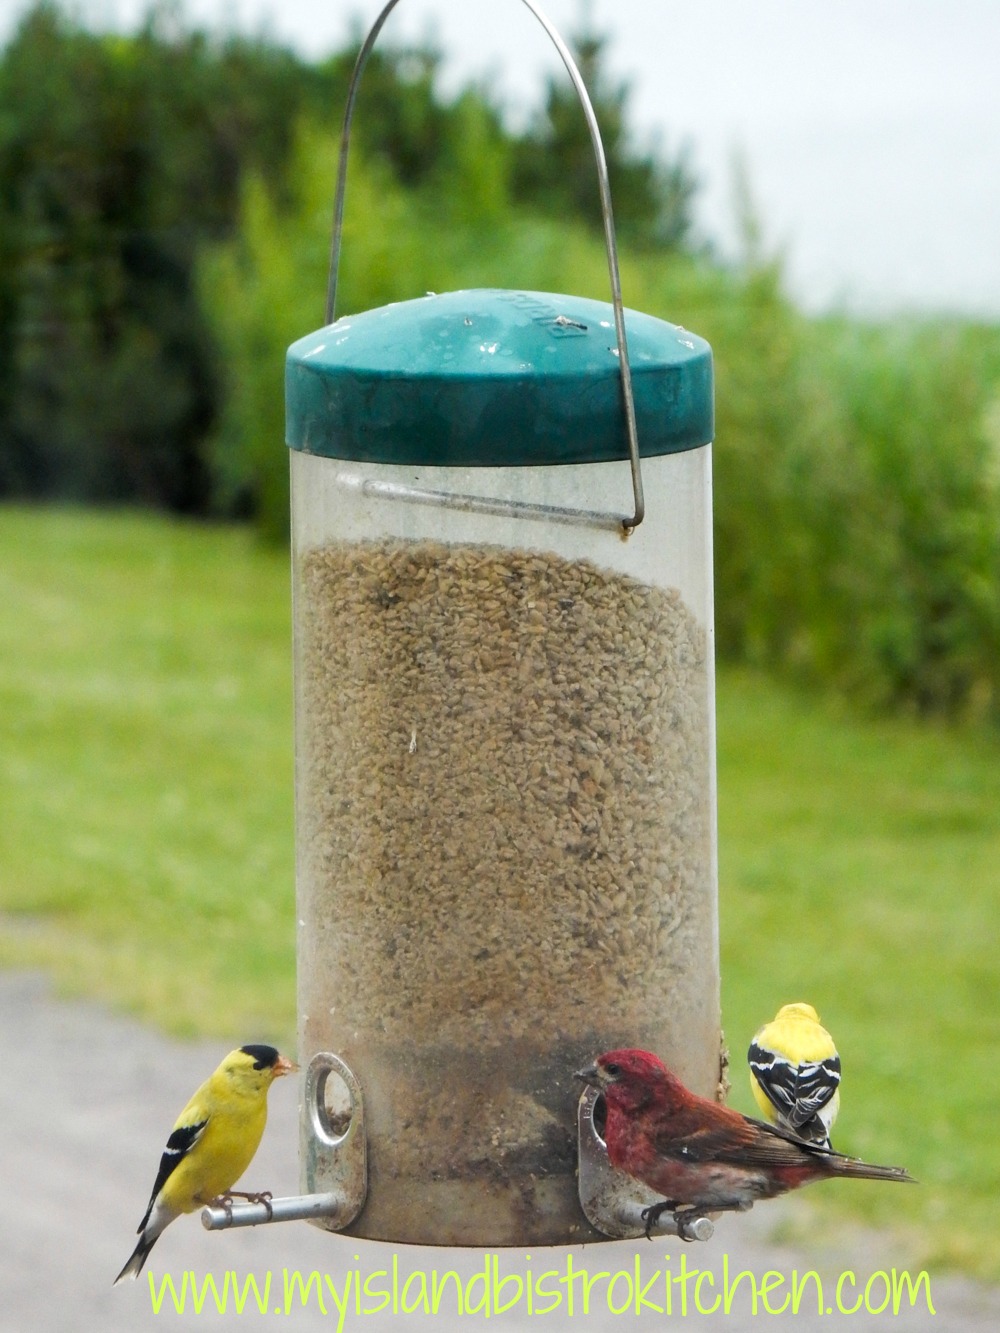
Breakfast Time!
It’s Breakfast Time for Everybody at the Prince Edward Island Preserve Company, New Glasgow, PEI
View from the window of the Prince Edward Island Preserve Company Restaurant alongside the River Clyde
Traditional Country Breakfast
Traditional Country Breakfast at the Prince Edward Island Preserve Company, New Glasgow, PEI

This full-service restaurant has a great menu selection for breakfast and I’ve sampled most of them!
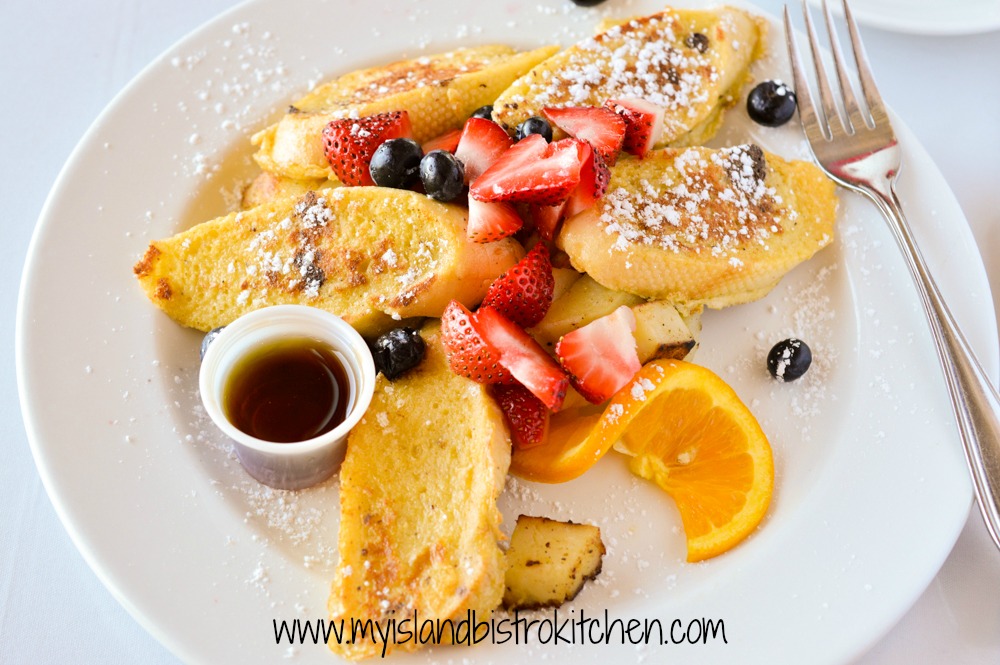
French Toast
French Toast, Prince Edward Island Preserve Company

Many items can be prepared gluten-free or vegetarian. Items range from granola to the standard country breakfast to French toast, pancakes, Belgian waffles, egg croissant to the breakfast frittata which is seriously the best I’ve ever had. Served in an au gratin dish, it’s filled with peppers, green onions, mushrooms, and three cheeses.  Served with sautéed potatoes and toast, this is the full meal deal and you won’t need to eat for the rest of the day!
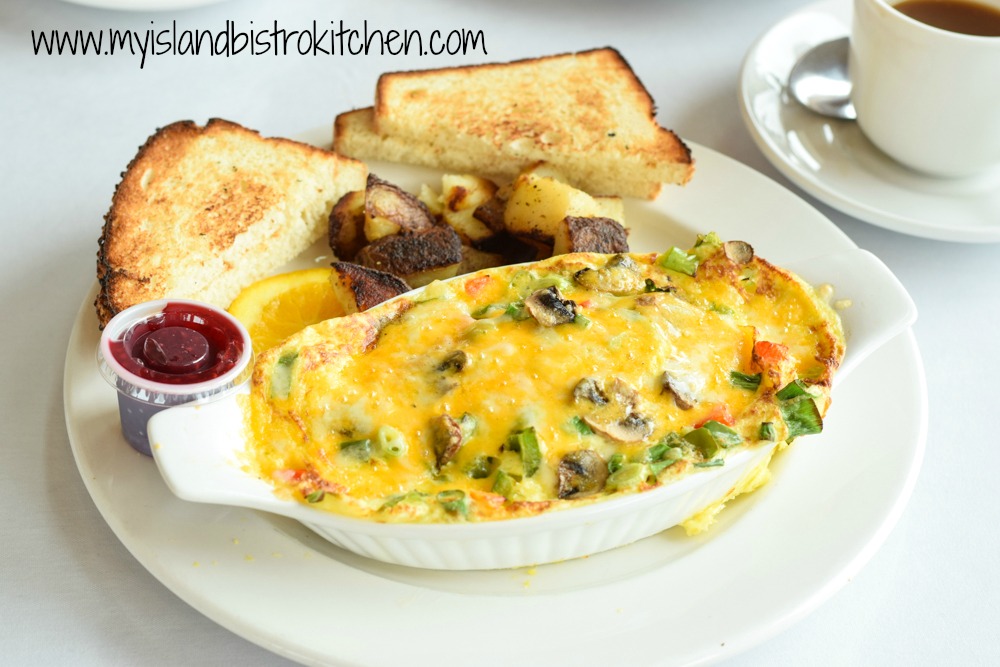
Breakfast Frittata
Breakfast Frittata at the Prince Edward Island Preserve Company, PEI

Kettle Black, 45 Queen Street, Charlottetown

Price Point: $3.50 – $12 (at time of writing)

Located not far from the Charlottetown waterfront, this independently-owned coffee shop is housed in a refurbished historic building. Look for the bright sunflower yellow store front.

Inside, the exposed brick walls and high ceilings lend a European look and feel. A variety of seating options is available – tables, padded benches, bar stool and counter, and easy chairs.  This is casual dining where you place your order at the register, pick up your beverage, find a table, and a server will then deliver your order to your table. Complimentary Wifi is available.

Breakfast is served all day! Breakfast items range from bagels, Belgian-style waffle, homemade granola and yogurt, and frittata.  Known especially for their types of coffees, they roast organic coffee beans in-house and you can get your lattés, cappuccinos and mochaccinos as well as standard americano coffees here.

My choice at Kettle Black is the frittata that is served with a tasty side salad and toast (gluten-free bread is available).
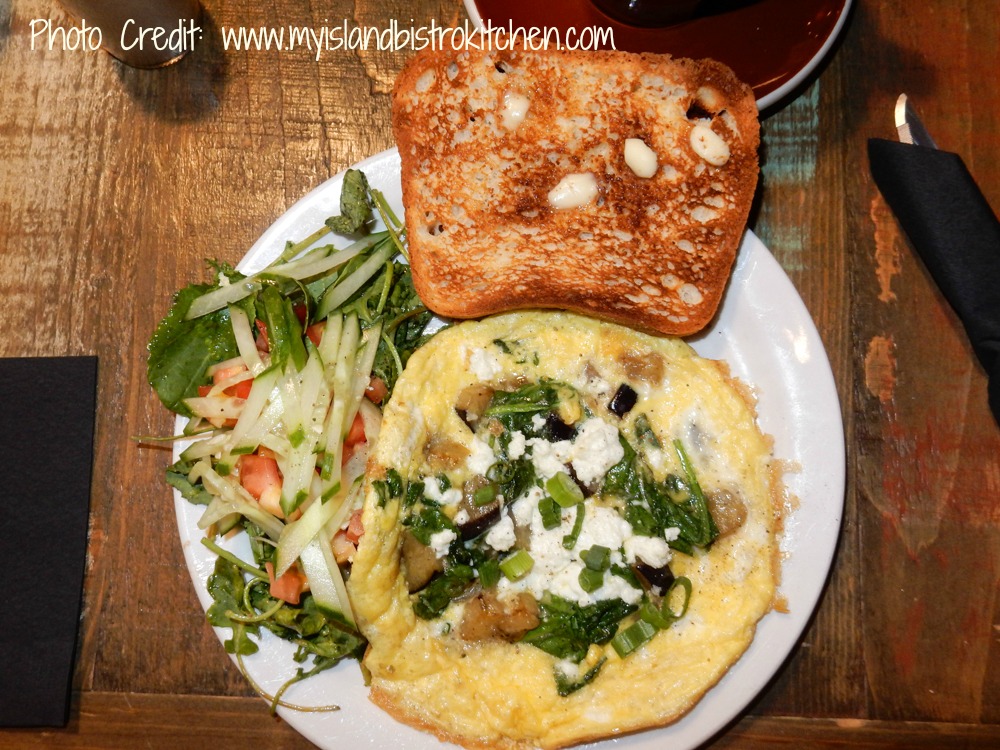
Breakfast Frittata
Breakfast Frittata at Kettle Black, Charlottetown, PEI

Together, these four establishments offer a wide variety of tasty breakfast fare.

Four Great Places on PEI for Breakfast


Old-fashioned Strawberry Rhubarb Ripple Ice Cream

Homemade Ice Cream
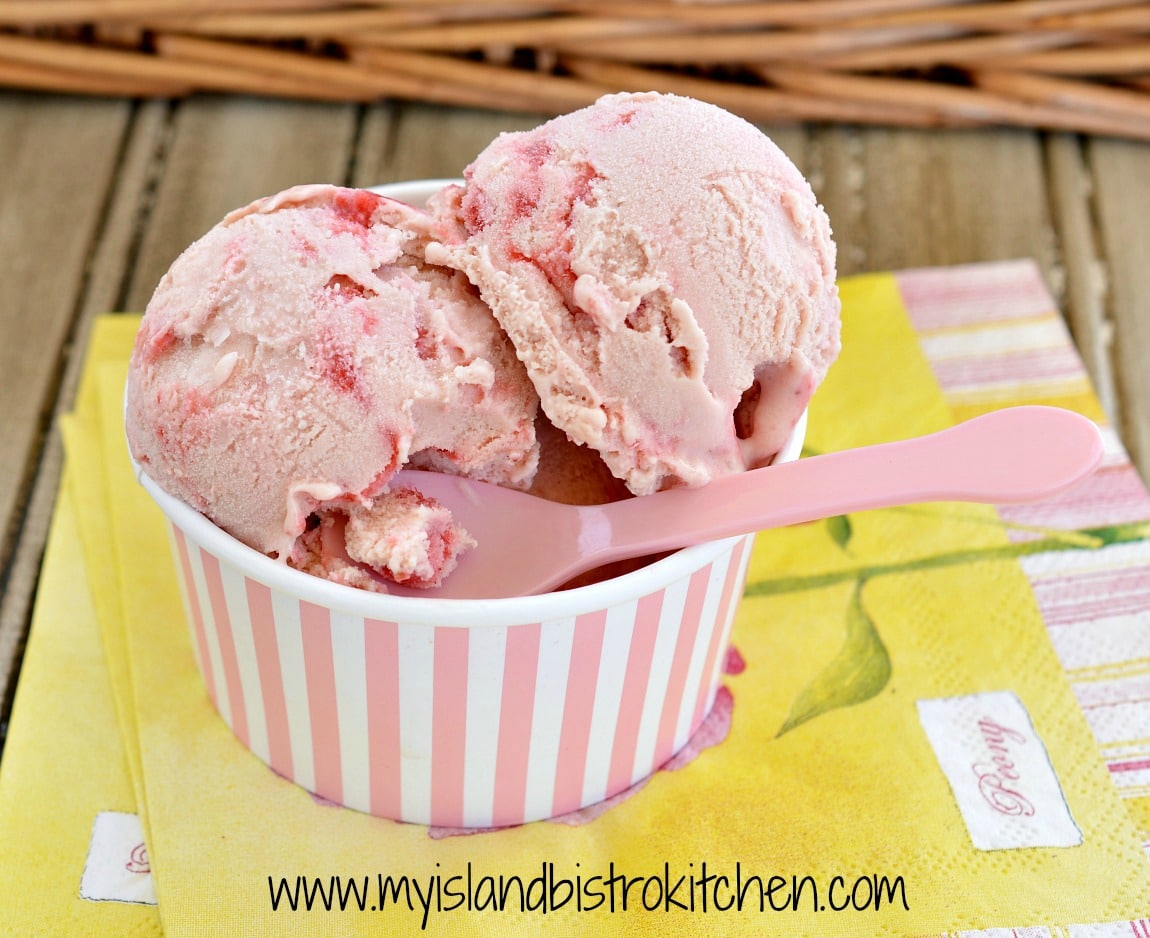
Strawberry Rhubarb Ripple Ice Cream

Summer just would not be summer without ice cream and what better way to enjoy it than to combine two of the season’s best flavors – strawberry and rhubarb – into homemade Strawberry Rhubarb Ripple Ice Cream!

I have been making ice cream for a long time. I have an electric churn that has been in the family for probably close to 50 years.  I keep thinking that, one of these days, I will have the custard made and the motor will give out on the churn.  But, amazingly, it always works!  It’s not fancy but it does the job. There are various types and styles of ice cream makers on the market today but I like my old faithful electric churn. It may look rusty on the outside from all the contact it has had over many years with rock salt that sloshes around with ice in the bucket but the canister is in perfect condition and the churn still makes great smooth ice cream!

Ice Cream Maker
Electric Ice Cream Maker

It usually takes about 20-25 minutes for the ice cream to churn.  The ice cream will come out of the canister quite soft textured but placing it in the deep freeze for about 3 hours will result in it firming up very well.

Homemade Ice Cream
Homemade Churned Ice Cream

I use the traditional custard method for making ice cream. It’s amazing how such basic, simple ingredients can turn out such a delectable treat.  Milk/cream, sugar, egg yolks, and vanilla form the standard base for the custard and then other flavorings may be added.

Strawberry Rhubarb Ripple Ice Cream

The trick to making homemade ice cream is to use the good stuff! Yes, the real cream, whipping cream, and whole milk.  This will give the custard the rich base and the ice cream its smooth texture. While granulated sugar can be used, my preference is to use the super-fine caster sugar as there is no grit at all to it. I always make my custard the night before I churn the ice cream and place it in the refrigerator overnight as it gives the flavors time to develop as they “mix and mingle” and the custard needs to be very cold to start the churning. In fact, I put the churn canister and beaters in the freezer for an hour or so before churning so they are cold as well.

Strawberry Rhubarb Ripple Ice Cream

One ingredient I add to this particular ice cream recipe is strawberry balsamic vinegar – yes, vinegar goes in this recipe but not just any vinegar and not a lot of it. One tablespoon of high quality strawberry balsamic will deepen and enhance the strawberry flavor and, no, it will not leave a lingering vinegar taste in the ice cream. If you have rose water, the addition of just 1 1/2 teaspoons will give a hint of floral flavor. Don’t over-do the rose water or it will start to taste like perfume.  All this small addition is doing is adding a subtle layer of flavoring.

Use the freshest ingredients you can – i.e., make this ice cream when the local rhubarb and strawberries are available as they have the best flavor.

Strawberries
Fresh From the Field PEI Strawberries

Choose the reddest stalks of rhubarb you can find. This recipe does not call for any artificial food coloring (and I don’t use any) so the pink color comes naturally from the red rhubarb and strawberries.  Each batch I make has a slightly different tint of pink to it depending on the quality of the strawberries and rhubarb.

Rhubarb
Rhubarb

I recommend reading through the recipe a couple of times before starting to make the ice cream to organize the prep work and to be sure you have all the required ingredients and understand the method and the sequence for preparing the ingredients.

I have made this Strawberry Rhubarb Ice Cream both rippled (shown in the photo at the beginning of this posting) using some of the strawberry-rhubarb purée to weave through the ice cream and plain (shown in the ice cream cones in the photo below) where I incorporate all of the purée into the custard.  The ice cream is good either way. This homemade ice cream freezes rock solid hard so I recommend removing it from the freezer 7-10 minutes before using as, otherwise, it will be difficult to scoop.

Strawberry Rhubarb Ice Cream
Strawberry Rhubarb Ice Cream Plain (no rippling/marbling)

Strawberry Rhubarb Ice Cream makes a great sundae, especially if you drizzle it with crushed strawberries or strawberry-rhubarb sauce.

Ice Cream Sundae
Strawberry Rhubarb Ice Cream Sundae

And, it makes dandy milkshakes.  Simply combine 3 scoops of the strawberry rhubarb ice cream in a blender with 1/4 cup milk per serving.  Blend until smooth and serve in fancy tall glasses with colorful straws and a strawberry garnish.

Milkshake
Strawberry Rhubarb Milkshake

Oh, this is a special treat on a hot summer day!

Milkshake
Strawberry Rhubarb Milkshake

Homemade ice cream sandwiches are also a wonderful summer treat. I use my gluten-free snickerdoodle cookies for these sandwiches because they are a lovely soft-textured cookie.

Ice Cream Sandwiches
Strawberry Rhubarb Ice Cream Sandwiches

For these sandwiches, freeze the ice cream in a 9×13 baking pan lined with tin foil. Fill the pan with the ice cream to a depth of 3/4″ to 1″ thick.  Place in freezer for a couple of hours then remove the ice cream from the pan and cut round circles of the ice cream with a cookie cutter that is slightly smaller than the cookie size.

Homemade Ice Cream Sandwiches
Strawberry Rhubarb Ice Cream Sandwiches

[Printable recipe follows at end of posting]

Strawberry Rhubarb Ripple Ice Cream

Ingredients:

10 oz strawberries, chopped
1 tbsp strawberry balsamic vinegar (optional but recommended)
3 tbsp caster sugar
1½ tsp rose water (optional)

1 lb rhubarb, chopped
2 tbsp orange juice
2 tbsp water
3 tbsp caster sugar

1 cup whipping cream (36%)
1 cup half-and-half or coffee cream (at least 18%)
1 cup whole milk
Scant ¾ cup caster sugar
4 extra-large egg yolks
1/8 tsp fine sea salt
2 tsp vanilla

Method:

Place chopped strawberries in small bowl and sprinkle with 3 tbsp caster sugar, balsamic vinegar, and rose water. Set aside.

Place chopped rhubarb in small saucepan and add the 2 tbsp orange juice, 2 tbsp water and 3 tbsp caster sugar.  Cover and cook over medium heat for 7-10 minutes, until rhubarb is softened. Remove from heat and strain through medium mesh wire sieve.  Reserve the rhubarb pulp and transfer to heat-proof bowl.

Return the strained rhubarb juice to saucepan and cook over medium heat until juice is reduced to about 1/3 cup.  Pour the syrup over the reserved rhubarb pulp. Let cool to room temperature.

Transfer the strawberries and cooled rhubarb mixture to a blender and purée until very smooth.  Strain mixture through medium mesh sieve, squeezing as much juice as possible out of the rhubarb by gently pressing it down with the back of a spoon. This should yield approximately 2⅔ – 3 cups purée. Discard any remaining pulp. Cool strained mixture in refrigerator.

In heavy bottomed saucepan, over medium-high heat, bring whipping cream, half-and-half, and whole milk to the scalding point (small bubbles should start to appear around the edges of the mixture) – 180°F, stirring constantly to prevent scorching. Do not boil. Transfer mixture to top of double boiler.

In bottom of double boiler, bring about 2” of water to the simmer point (around 200°F). Maintain the water at this simmer point over medium-low heat. Place top of double boiler containing the milk over the simmering water.

In bowl, whisk the egg yolks, sugar and salt together until pale and creamy.  Gradually add about ¾ cup of the hot milk mixture to the egg mixture and whisk to blend well.  Pour the egg mixture into the remaining hot milk mixture in top of double boiler, whisking continuously.  Cook over the simmering water, stirring constantly until the mixture coats the back of a wood spoon or reaches a temperature of 175°F on a candy thermometer.  Do not allow mixture to boil.

Set large clean bowl in a sink of cold water filled to about half the depth of the bowl.  Pour the custard mixture through a wire sieve into the bowl to remove any bits of egg that may have coagulated.  Stir in the vanilla.

Set aside about ½ cup of the puréed strawberry-rhubarb mixture and whisk the remaining puréed fruit mixture into the custard until it is well blended.  Chill, covered, in refrigerator for at least 3 hours or more (can be chilled overnight and up to 24 hours).

Churn custard in ice cream maker according to manufacturer’s directions. Transfer about a third of the ice cream to an airtight freezer container. Drizzle half of the reserved purée over the ice cream.  Repeat the process with another layer of ice cream and purée and ending with a layer of the ice cream.  With the thin blade of a knife, or using a wooden skewer, swirl the purée through the ice cream to incorporate it in a marble effect. Do not overmix or the ripple/marble effect will be lost. Cover container tightly and allow ice cream to freeze for at least 3 hours, or until very firm, before serving.

Yield: Apx. 1 quart

Note 1: This ice cream will freeze rock solid hard. Recommend removing ice cream from freezer 7-10 minutes before serving.
Note 2: This ice cream may be made without the rippling effect. Simply incorporate all of the strawberry-rhubarb purée into the custard instead of reserving ½ cup for the rippling/marbling.

Old-fashioned Strawberry Rhubarb Ripple Ice Cream

Yield: Apx. 1 qt

Delectable old-fashioned homemade ice cream combines two of summer's best flavors - strawberry and rhubarb.

Ingredients

  • 10 oz strawberries, chopped
  • 1 tbsp strawberry balsamic vinegar (optional but recommended)
  • 3 tbsp caster sugar
  • 1½ tsp rose water (optional)
  • 1 lb rhubarb, chopped
  • 2 tbsp orange juice
  • 2 tbsp water
  • 3 tbsp caster sugar
  • 1 cup whipping cream (36%)
  • 1 cup half-and-half or coffee cream (at least 18%)
  • 1 cup whole milk
  • Scant ¾ cup caster sugar
  • 4 extra-large egg yolks
  • 1/8 tsp fine sea salt
  • 2 tsp vanilla

Instructions

  1. Place chopped strawberries in small bowl and sprinkle with 3 tbsp caster sugar, balsamic vinegar, and rose water. Set aside.
  2. Place chopped rhubarb in small saucepan and add the 2 tbsp orange juice, 2 tbsp water and 3 tbsp caster sugar. Cover and cook over medium heat for 7-10 minutes, until rhubarb is softened. Remove from heat and strain through medium mesh wire sieve. Reserve the rhubarb pulp and transfer to heat-proof bowl.
  3. Return the strained rhubarb juice to saucepan and cook over medium heat until juice is reduced to about 1/3 cup. Pour the syrup over the reserved rhubarb pulp. Let cool to room temperature.
  4. Transfer the strawberries and cooled rhubarb mixture to a blender and purée until very smooth. Strain mixture through medium mesh sieve, squeezing as much juice as possible out of the rhubarb by gently pressing it down with the back of a spoon. This should yield approximately 2 2/3 – 3 cups purée. Discard any remaining pulp. Cool strained mixture in refrigerator.
  5. In heavy bottomed saucepan, over medium-high heat, bring whipping cream, half-and-half, and whole milk to the scalding point (small bubbles should start to appear around the edges of the mixture) - 180°F, stirring constantly to prevent scorching. Do not boil. Transfer mixture to top of double boiler.
  6. In bottom of double boiler, bring about 2” of water to the simmer point (around 200°F). Maintain the water at this simmer point over medium-low heat. Place top of double boiler containing the milk over the simmering water.
  7. In bowl, whisk the egg yolks, sugar and salt together until pale and creamy. Gradually add about ¾ cup of the hot milk mixture to the egg mixture and whisk to blend well. Pour the egg mixture into the remaining hot milk mixture in top of double boiler, whisking continuously. Cook over the simmering water, stirring constantly until the mixture coats the back of a wood spoon or reaches a temperature of 175°F on a candy thermometer. Do not allow mixture to boil.
  8. Set large clean bowl in a sink of cold water filled to about half the depth of the bowl. Pour the custard mixture through a wire sieve into the bowl to remove any bits of egg that may have coagulated. Stir in the vanilla.
  9. Set aside about ½ cup of the puréed strawberry-rhubarb mixture and whisk the remaining puréed fruit mixture into the custard until it is well blended. Chill, covered, in refrigerator for at least 3 hours or more (can be chilled overnight and up to 24 hours).
  10. Churn custard in ice cream maker according to manufacturer’s directions. Transfer about a third of the ice cream to an airtight freezer container. Drizzle half of the reserved purée over the ice cream. Repeat the process with another layer of ice cream and purée and ending with a layer of the ice cream. With the thin blade of a knife, or using a wooden skewer, swirl the purée through the ice cream to incorporate it in a marble effect. Do not overmix or the ripple/marble effect will be lost. Cover container tightly and allow ice cream to freeze for at least 3 hours, or until very firm, before serving.

Notes

Note 1: This ice cream will freeze rock solid hard. Recommend removing ice cream from freezer 7-10 minutes before serving.

Note 2: This ice cream may be made without the rippling effect. Simply incorporate all of the strawberry-rhubarb purée into the custard instead of reserving ½ cup for the rippling/marbling.

Schema/Recipe SEO Data Markup by Yummly Rich Recipes
https://myislandbistrokitchen.com/2017/07/19/old-fashioned-strawberry-rhubarb-ripple-ice-cream/


Strawberry Rhubarb Ice Cream Sundae
Strawberry Rhubarb Ice Cream

PIN ME TO PINTEREST!

Waffle cones of pretty pink strawberry rhubarb ripple ice cream

Gluten Free Snickerdoodle Cookie Recipe

Snickerdoodles
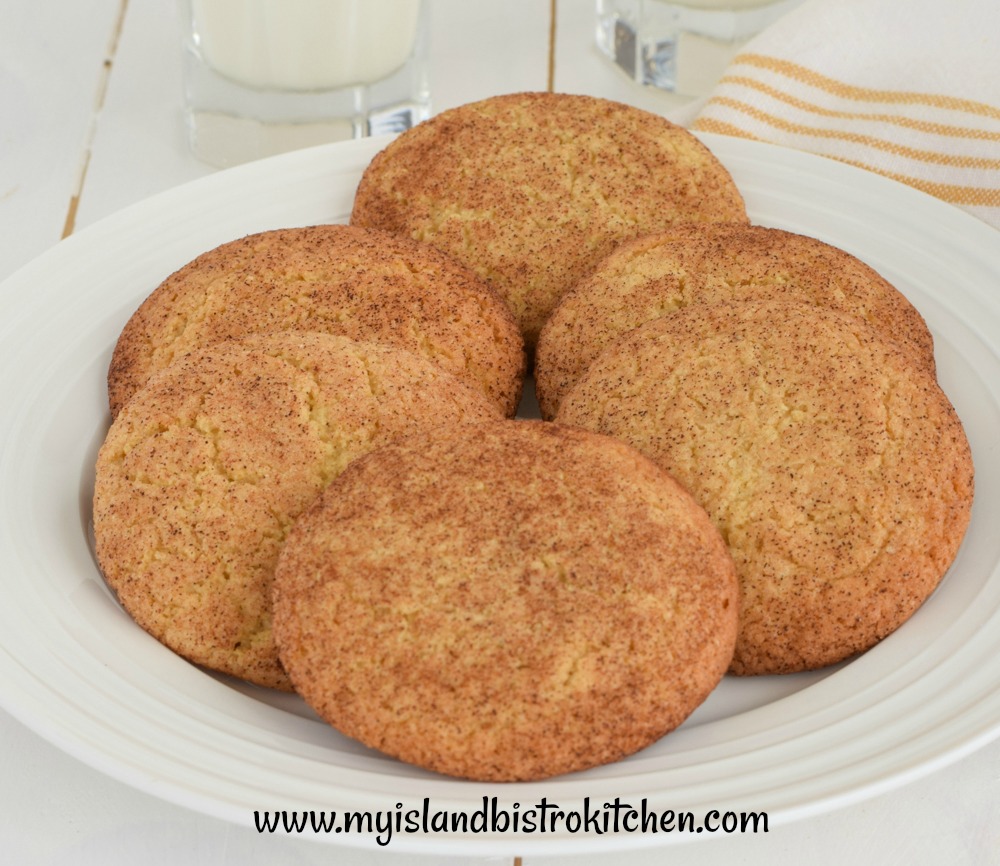
Gluten Free Snickerdoodle Cookies

If you like cookies that are super tasty but not overly sweet then you will like these gluten free snickerdoodle cookies. They sport a lovely soft crumb texture and have superb flavor with the cardamon and nutmeg in the cookies and then the cinnamon-sugar mixture in which they are rolled.

I have been doing a lot of recipe development and testing for gluten free baked goods and have developed several cookie recipes that are suitable for those that have gluten sensitivity or intolerance.  In my view, there is no need for those following a gluten-free diet to be deprived of some fine tasting baked products.

Snickerdoodles
Gluten Free Snickerdoodle Cookies

This snickerdoodle cookie recipe does not take any unusual or difficult-to-find ingredients.  It calls for gluten free all-purpose flour and a small amount of almond flour. The almond flour adds both flavor and a lovely texture to baked products. It is not an inexpensive flour, by any means, but fortunately not a lot of it is needed to achieve great results.

When using gluten free flours and xanthan gum, it is very important that they be combined very well before incorporating them into the batter. I recommend sifting these products along with the leavening and any spices together into a large bowl  and then whisk them really well.

The snickerdoodle cookie dough will be very soft when all ingredients are mixed in.  Cover the dough and place it in the refrigerator for 40-60 minutes to allow it to firm up so it will be easier to form the cookie balls.

Snickerdoodle Cookies
Gluten Free Snickerdoodle Cookies

I’m a big fan of digital scales for my kitchen work. I like the look of uniform cookies so I often use the scales to ensure that the same amount of dough goes into each cookie.  I use approximately 20grams, or about 3/4 ounce, of dough for each cookie.  Roll the cookie balls in the cinnamon-sugar mixture and place them on the prepared cookie sheets (parchment lined), spacing them at least 2 1/2 inches apart. Do not flatten the cookie balls – they will automatically flatten as they bake.  These cookies usually bake in about 10 minutes.  Snickerdoodles are great picnic cookies as they travel well.

Cookies
Gluten Free Snickerdoodle Cookies

Because of their soft texture, they are an ideal choice for homemade ice cream sandwiches.

Homemade Ice Cream Sandwiches
Snickerdoodle Ice Cream Sandwiches

And, of course, they are always a popular choice for the cookie jar or lunch box. These cookies freeze really well and are great to have on hand.

[Printable recipe follows at end of posting]

Gluten-free Snickerdoodle Cookies

 Ingredients:

½ cup butter, softened at room temperature
6 tbsp granulated sugar
6 tbsp brown sugar
1 extra-large egg
½ tsp vanilla
¼ tsp almond flavoring
¼ tsp lemon flavoring

1 1/3 cup gluten-free all-purpose flour
¼ cup almond flour
¼ tsp xanthan gum
¼ tsp salt
½ tsp baking powder
½ tsp baking soda
½ tsp cream of tartar
¼ tsp cardamom
1/8 tsp nutmeg

1 tbsp granulated sugar
1 tsp cinnamon

Method:

Preheat oven to 375°F.  Line two cookie sheets with parchment paper. Set aside.

In bowl of stand mixer, cream butter with 6 tbsp granulated sugar and 6 tbsp brown sugar.  Beat in the egg and vanilla along with the almond and lemon flavorings.

In separate bowl, sift together the next 9 dry ingredients then whisk the mixture several times to ensure the ingredients are well incorporated.  Mix into creamed mixture until well blended.  Cover and place dough in refrigerator for 40-60 minutes to firm. Shape into balls using about 20g, or about .75 oz, of dough.  Mix the remaining tablespoon of sugar with the cinnamon in small bowl.  Roll cookie balls in sugar mixture and place on prepared cookie sheets, spacing cookies at least 2½ inches apart.  Do not flatten cookie balls. Bake for approximately 10-12 minutes. Remove from oven and let cool on cookie sheet for 3-4 minutes then transfer to wire rack to cool completely. These cookies freeze well.

Yield: Apx. 2 dozen

These cookies are supremely good with a glass of cold milk.

Snickerdoodle Cookies
Gluten Free Snickerdoodle Cookies

Gluten Free Snickerdoodle Cookie Recipe

Yield: Apx. 2 dozen

A gluten free version of an old-fashioned favorite cookie, lightly spiced with cardamon and nutmeg, and rolled in cinnamon sugar. A cookie jar favorite for sure!

Ingredients

  • ½ cup butter, softened at room temperature
  • 6 tbsp granulated sugar
  • 6 tbsp brown sugar
  • 1 extra-large egg
  • ½ tsp vanilla
  • ¼ tsp almond flavoring
  • ¼ tsp lemon flavoring
  • 1 1/3 cup gluten-free all-purpose flour
  • ¼ cup almond flour
  • ¼ tsp xanthan gum
  • ¼ tsp salt
  • ½ tsp baking powder
  • ½ tsp baking soda
  • ½ tsp cream of tartar
  • ¼ tsp cardamom
  • 1/8 tsp nutmeg
  • 1 tbsp granulated sugar
  • 1 tsp cinnamon

Instructions

  1. Preheat oven to 375°F. Line two cookie sheets with parchment paper. Set aside.
  2. In bowl of stand mixer, cream butter with 6 tbsp granulated sugar and 6 tbsp brown sugar. Beat in the egg and vanilla along with the almond and lemon flavorings.
  3. In separate bowl, sift together the next 9 dry ingredients then whisk the mixture several times to ensure the ingredients are well incorporated. Mix into creamed mixture until well blended. Cover and place dough in refrigerator for 40-60 minutes to firm. Shape into balls using about 20g, or about .75 oz, of dough. Mix the remaining tablespoon of sugar with the cinnamon in small bowl. Roll cookie balls in sugar mixture and place on prepared cookie sheets, spacing cookies at least 2½ inches apart. Do not flatten cookie balls. Bake for approximately 10-12 minutes. Remove from oven and let cool on cookie sheet for 3-4 minutes then transfer to wire rack to cool completely. These cookies freeze well.
Schema/Recipe SEO Data Markup by Yummly Rich Recipes
https://myislandbistrokitchen.com/2017/07/17/gluten-free-snickerdoodle-cookie-recipe/

Snickerdoodle Cookies
Gluten Free Snickerdoodle Cookies
Snickerdoodle Cookies


Rhubarb Curd Recipe

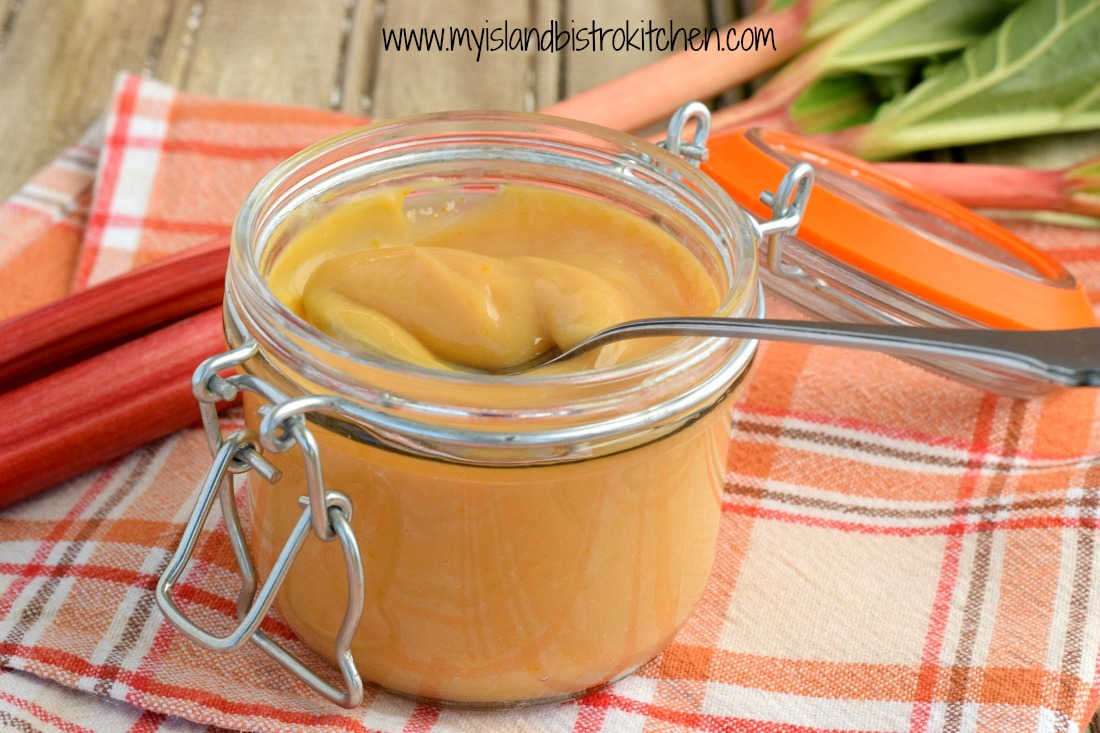
Rhubarb Curd
Rhubarb Curd

I love rhubarb and use it in a multitude of ways.  Being a lover of lemon curd, I figured I would also like rhubarb curd so I set about developing and testing a recipe for it.  This delightful creamy curd can be used in the same ways as lemon curd  – sandwiching cakes together, spreading on scones, filling cookies, eclairs, macarons, and tarts, stirring into (or topping on) Greek yogurt for quick parfaits, and, well, its uses are only limited by your imagination!

Rhubarb Curd
Rhubarb Curd and Coconut Yogurt Parfait

Rhubarb curd is made with only five (5) ingredients – rhubarb, orange (juice and zest), sugar, eggs, and butter. The recipe I am including with this posting is the result of several testings. Here are my tips for successfully making rhubarb curd.

Rhubarb

Rhubarb
Rhubarb Patch

Either fresh or frozen rhubarb can be used for this recipe; however, I always advocate for fresh.  Try to select the reddest stalks you can find and ones that are blemish free.

Rhubarb
Rhubarb

Orange Juice and Zest

Wash the orange really well in hot, soapy water and scrub it with a vegetable brush. Rinse the orange well and dry it before zesting.

Use a citrus fruit zester to zest the orange. This should yield about 2 teaspoons of zest. This zesting process will release the aromatic oils from the orange that will enhance the flavor of the curd. When zesting the orange, take care only to remove the thin outside orange skin of the fruit and not the underlying white pith which is bitter.

Cut the orange in half and squeeze it to extract the juice. Alternatively, bottled orange juice may also be used.

Eggs

I have tested this curd using various amounts and combinations of eggs -i.e., different sized eggs, egg yolks only, and combining egg yolks with some egg white.

Eggs
Eggs

While all combinations I tried were acceptable, I found that my preference is to use 3 extra-large egg yolks combined with one medium-sized whole egg.  I always keep three sizes of eggs in my refrigerator – extra-large, large, and medium – because I use different sizes in different recipes and various combinations of egg sizes in recipes.  I find adding a bit of egg white to the curd gives a bit more fluidity and makes it more silky smooth.  Making the curd with only egg yolks tends to result in slightly thicker textured curd that has a more gelatin-like consistency which is not quite as satiny smooth as can be achieved by adding a bit of egg white.  It’s still tasty but just not as creamy. The photo below is of a curd made with egg yolks only.

Rhubarb Curd
Rhubarb Curd

Adding a whole extra-large egg adds too much liquid to the curd but I found that the addition of a medium-sized egg is perfect as there is just enough white in the medium egg to give the curd that little bit of fluidity without making it overly runny. The photo below is of a curd made with 3 extra-large egg yolks and 1 whole medium-sized egg.

Rhubarb Curd
Rhubarb Curd

I like the rhubarb curd to be soft but not overly runny or too thick – it should more or less stay in place when a dollop of it is added to the top of yogurt or dropped on to a scone or biscuit, for example.

Rhubarb Curd
Rhubarb Curd

The problem that often occurs with adding an egg white to a curd is that the white, or parts of it, can coagulate before being fully incorporated into the curd meaning the white goes from liquid form to a solid. Egg whites cook faster than the yolks so, no matter how much stirring, there can still be little bits of the coagulated egg white in the curd because, once the white has turned into solid mass, it can’t be liquified again. This is easily remedied, however, by straining the cooked curd through a fine wire mesh sieve to remove any little bits of egg white remaining. You would think the thickened curd would not drip through the sieve but, amazingly, it does! Don’t skip this step.

Sugar

This curd is best made with caster sugar which you may know by any of the following names: Fruit sugar, instant dissolving sugar, berry sugar, or super fine sugar. This sugar is extra fine. It dissolves much faster than granulated sugar and is commonly used in making simple syrups used in cocktails because it leaves no “gritty” texture. Regular granulated sugar may be used but, if a pure silky smooth curd is the goal, I recommend using the caster sugar.

Method

Making rhubarb curd takes time. I do not recommend making the rhubarb curd in a pot directly over the heat source because it is very easy to scorch the curd with the amount of sugar in it. My preference is to use a double boiler. If you don’t have one of these sets of pots, simply set a heatproof bowl over a pot of simmering water.

It’s very important that the top pot/bowl in the double boiler not touch the water in the bottom pot. The curd cooks from the steam heating the top saucepan of the boiler, not by contact with water. About 2” of water in the bottom of the pot is all that is required. Heat this water to the simmering point (around 200°F) and do not let it boil as this will cook the eggs in the curd too fast. This is when curdling can occur and the mixture will become lumpy and lose its smooth texture. The water should be kept at this 200°F temperature throughout the cooking process.  (Note that temperatures for the simmering water may need to be adjusted according to altitude.  The important thing is that the water not boil.)

I add the orange zest at the beginning of the cooking process because that’s when I think the zest can do the most to enhance the flavor of the curd. Simply stir the orange zest into the sugar in the top of the double boiler then whisk in the rhubarb juice.  Mix the egg yolks and the whole egg together in a small bowl, using a fork to lightly break them up. Whisk the eggs and softened butter into the sugar-juice mixture. Place this pot/heatproof bowl on top of the pot of simmering water.

The mixture needs to be stirred regularly as it cooks.  A whisk or a wooden spoon can be used to stir the curd. Be patient. This cooking process can easily take 20-25 minutes for the curd to thicken. Resist the urge to increase the heat to hurry the cooking process along. The curd, when cooked, will coat the back of a wooden spoon. However, the most accurate test is to use a candy thermometer – the curd is cooked when the temperature reaches 170°F.

The curd needs to be strained through a very fine wire mesh sieve to remove any bits of the coagulated egg white along with the orange zest. The zest has done its duty by releasing flavor into the curd. There is no harm in leaving the zest in the curd; however, if the goal is to have a perfect silky finish to the curd, strain out the zest.

Color and Texture

The color of the cooked curd will not be a vibrant red as was the rhubarb juice to start. The color becomes a paler salmon pink/soft orange color because of the addition of the eggs which dilutes the ruby red color of the rhubarb juice. The texture of the perfectly cooked curd should be silky smooth and very creamy, and the curd should bear a slightly glossy sheen.  The rhubarb curd will thicken slightly more as it cools. A true curd does not have any thickening agent (e.g., flour or cornstarch) added to it. The egg yolks are what naturally thickens the curd.

Rhubarb Curd
Rhubarb Curd

Storage

Transfer the strained curd to a hot sterilized jar.  Immediately place a piece of plastic wrap on the exposed surface of the curd in the jar, pressing it gently to ensure it is in direct contact with the entire surface of the curd. This will prevent a skin from forming on the curd as it cools.  Let the curd cool to room temperature then remove the plastic wrap, cover tightly with jar lid, and store in the refrigerate for up to a week.

Rhubarb Curd Spread on Muffins

[Printable recipe follows at end of posting]

Rhubarb Curd

Ingredients:

10 oz rhubarb, chopped into ½” chunks
2 tbsp orange juice

2/3 cup caster sugar
2 tsp orange zest
3 extra-large egg yolks, room temperature
1 whole medium egg, room temperature
3 tbsp unsalted butter, softened

Method:

Place chopped rhubarb and orange juice in medium-sized saucepan.  Cover. Bring to a boil over medium-high heat. Immediately reduce heat to medium-low and cook, stirring occasionally, until rhubarb is soft and mushy (about 5-8 minutes). Remove from heat and strain through fine wire mesh sieve to extract the rhubarb juice, squeezing as much juice as possible out of the rhubarb by gently pressing it down with the back of a spoon. This should yield approximately ½ cup rhubarb juice. Cool. Discard the strained pulp.

In bottom of double boiler, bring about 2” of water to the simmer point (around 200°F). Maintain the water at this simmer point over medium-low heat.  Place sugar in top of double boiler or heat-proof bowl.  Mix in the orange zest.  Whisk the ½ cup rhubarb juice into sugar.

In small bowl, lightly beat the 3 egg yolks and the whole egg together with a fork, just enough to break up the yolks and blend with the whole egg.  Whisk the eggs into the sugar and rhubarb juice mixture. Add the soft butter.  Place this pot or bowl over the simmering water. Stir the mixture continuously as it cooks until it is thickened and the temperature of the mixture registers 170°F on a candy thermometer.  Be patient as this may take 20-25 minutes. Make sure the water in the bottom of the boiler does not boil and stays only at the simmer point.

Remove curd from heat and strain through a mesh strainer to remove any of the egg white that may have coagulated as well as the orange zest.  Pour strained curd into a sterilized jar.  Place a piece of plastic wrap directly on the surface of the curd to prevent it from forming a skin on top. Cool at room temperature. Remove plastic wrap. Cover jar tightly and refrigerate for up to 1 week.

Yield: Apx. 1 cup

*caster sugar may also be known as fruit sugar, berry sugar, super fine sugar, or instant dissolving sugar.
Note:  Altitude may affect the temperature at which the water reaches the simmering point. The important thing is that the water in the bottom of the double boiler does not boil or touch the top of the double boiler/heatproof bowl during the cooking of the curd.


Rhubarb Curd Recipe

Yield: Apx. 1 cup

A delightful creamy smooth rhubarb curd that is perfect for spreading on muffins, scones, or biscuit or adding to yogurt parfaits

Ingredients

  • 10 oz rhubarb, chopped into ½” chunks
  • 2 tbsp orange juice
  • 2/3 cup caster sugar*
  • 2 tsp orange zest
  • 3 extra-large egg yolks, room temperature
  • 1 whole medium egg, room temperature
  • 3 tbsp unsalted butter, softened
  • *caster sugar may also be known as fruit sugar, berry sugar, super fine sugar, or instant dissolving sugar

Instructions

  1. Place chopped rhubarb and orange juice in medium-sized saucepan. Cover. Bring to a boil over medium-high heat. Immediately reduce heat to medium-low and cook, stirring occasionally, until rhubarb is soft and mushy (about 5-8 minutes). Remove from heat and strain through fine wire mesh sieve to extract the rhubarb juice, squeezing as much juice as possible out of the rhubarb by gently pressing it down with the back of a spoon. This should yield approximately ½ cup rhubarb juice. Cool. Discard the strained pulp.
  2. In bottom of double boiler, bring about 2” of water to the simmer point (around 200°F). Maintain the water at this simmer point over medium-low heat. Place sugar in top of double boiler or heat-proof bowl. Mix in the orange zest. Whisk the ½ cup rhubarb juice into sugar.
  3. In small bowl, lightly beat the 3 egg yolks and the whole egg together with a fork, just enough to break up the yolks and blend with the whole egg. Whisk the eggs into the sugar and rhubarb juice mixture. Add the soft butter. Place this pot or bowl over the simmering water. Stir the mixture continuously as it cooks until it is thickened and the temperature of the mixture registers 170°F on a candy thermometer. Be patient as this may take 20-25 minutes. Make sure the water in the bottom of the boiler does not boil and stays only at the simmer point.
  4. Remove curd from heat and strain through a mesh strainer to remove any of the egg white that may have coagulated as well as the orange zest. Pour strained curd into a sterilized jar. Place a piece of plastic wrap directly on the surface of the curd to prevent it from forming a skin on top. Cool at room temperature. Remove plastic wrap. Cover jar tightly and refrigerate for up to 1 week.

Notes

Note: Altitude may affect the temperature at which the water reaches the simmering point. The important thing is that the water in the bottom of the double boiler does not boil or touch the top of the double boiler/heatproof bowl during the cooking of the curd.

Schema/Recipe SEO Data Markup by Yummly Rich Recipes
https://myislandbistrokitchen.com/2017/07/12/rhubarb-curd-recipe/

PIN ME TO PINTEREST!

Rhubarb Curd

Rhubarb Curd and Greek Yogurt Parfait

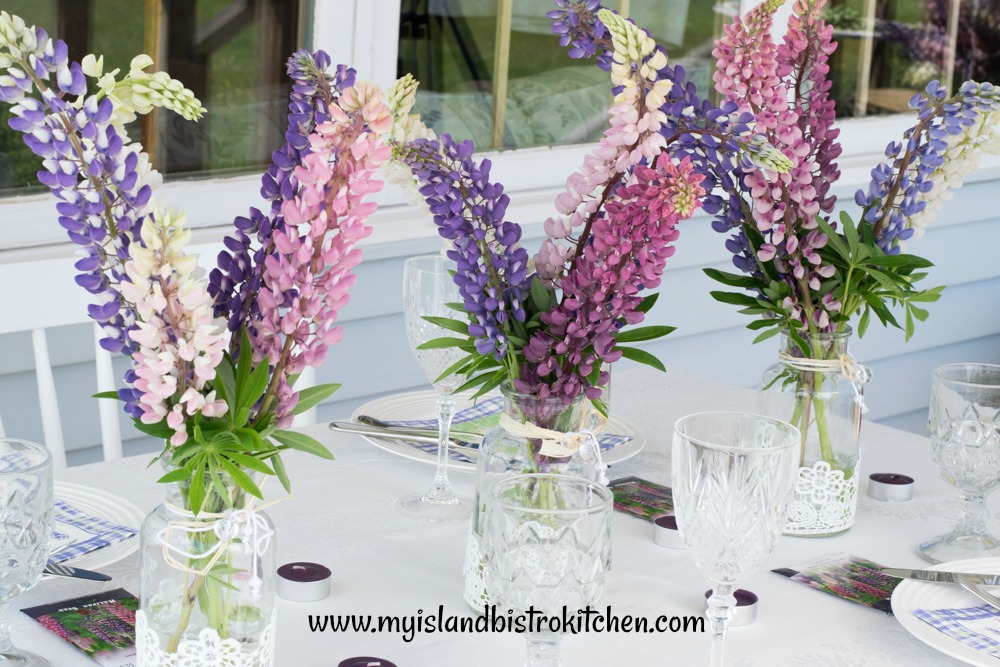
Lady Lupine Tablesetting

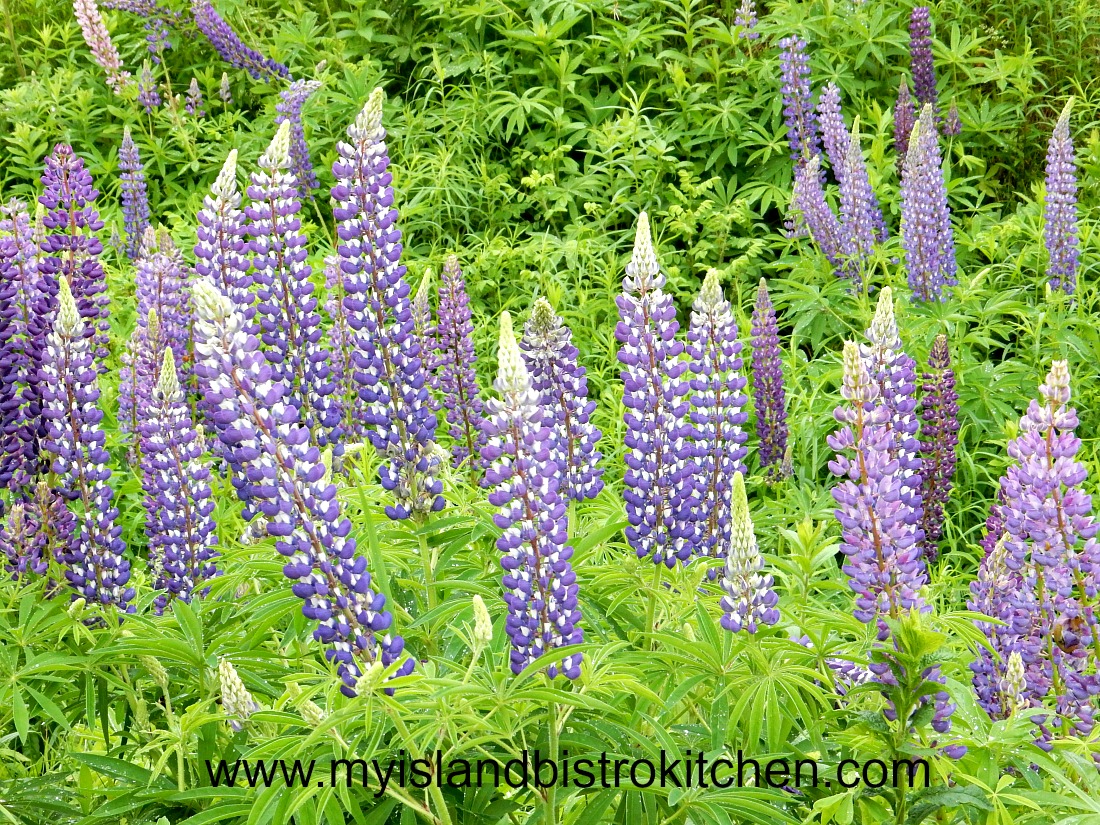
Lupines
Wild lupines along a red dirt country road in Prince Edward Island, Canada

Every year in late June, the countryside in Prince Edward Island is  blooming with the wild lupines that grow in a vast array of colors.

Lupines and Pholx
Wild PEI Lupines and Summer Pholx

Lupines usher in summer on the Island as their blooms are one of the first signs of the season’s arrival. They don’t have a long season in which to bloom and they don’t last long but they range in shades of purples, pinks, white, salmon, yellow, white, and varigated.

Lupines
Varigated Lupines

Somewhere around the 20-25th of June is typically when they are in full bloom and at their best.

Lupines
Lupines

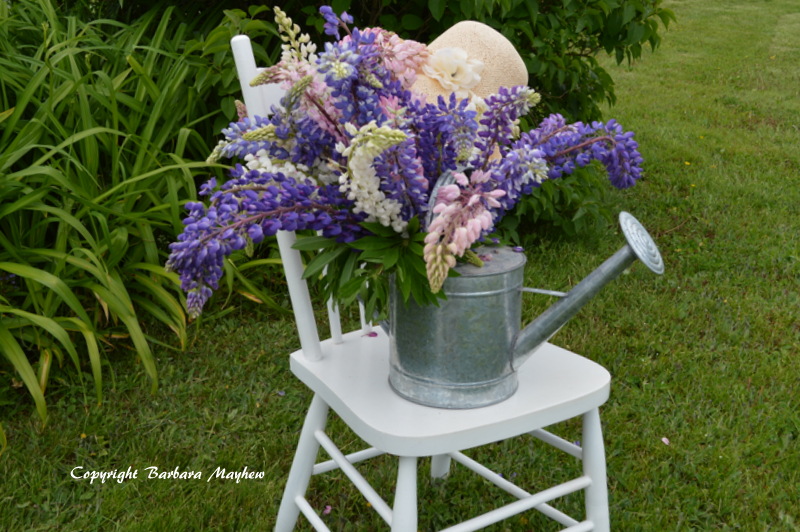
From the time I was a small child, I was in love with these tall elegant flowers. I loved to pick baskets of them and they are so easy to arrange.

Lupines
Lupines

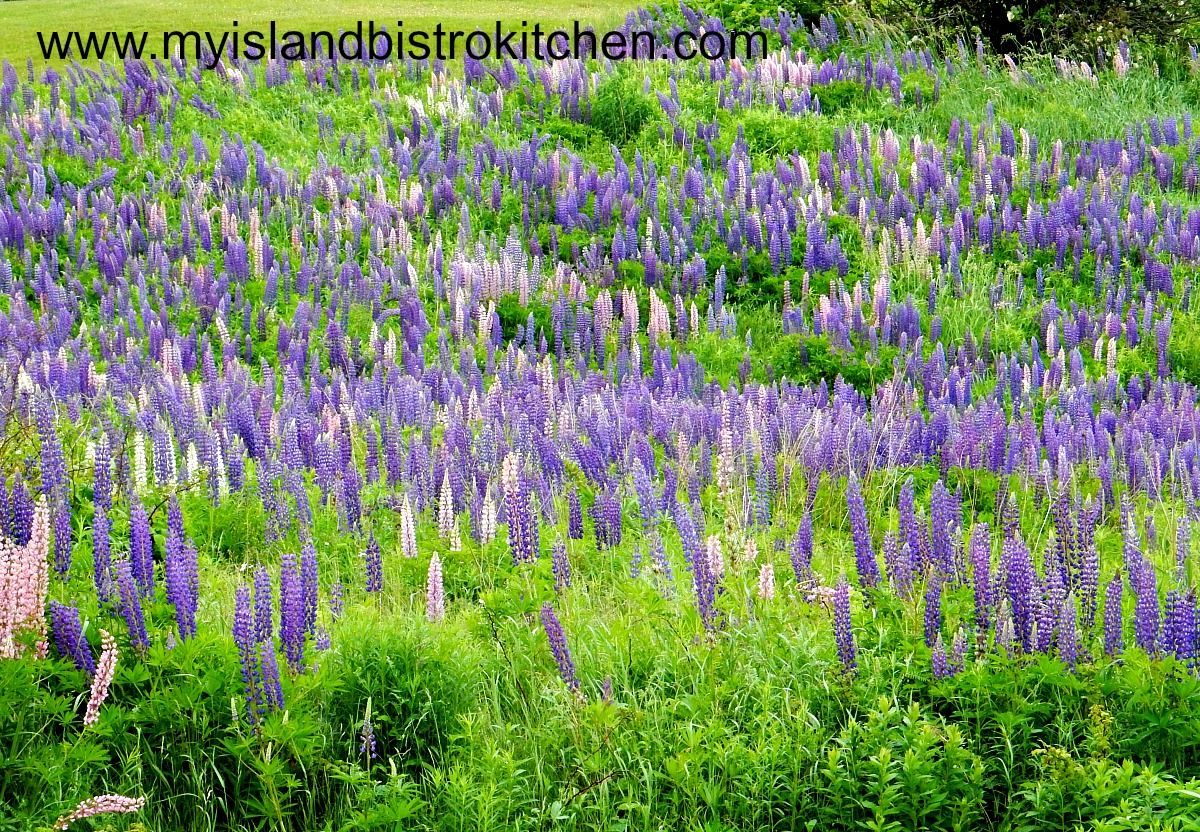
On the south side of the Island, the deep purple tends to be the predominant color although other shades as they have on the north side are starting to take hold.  The field in the photo below is beside my mother’s house.

Lupines
A Field of PEI Lupines

Many, many years ago, I picked huge amounts of seed pods in shades of pink, shelled them (clearly I did not have enough to do at the time!) and threw them out alongside the road to the cottage.  They take a long time to take root but, every year, we have more and more bunches of them growing, albeit they are mostly in the purple shades.  From time to time, I will buy a few packages of seeds in other colors and plant them where there are none currently growing.

Lupines
Lupines

You might even find a lighthouse on PEI that is surrounded by lupines.

Victoria by the Sea Lighthouse

Today, I am featuring these glorious long-stemmed beauties in a  tablesetting. I simply clipped some of these wildflowers along the roadside by my mother’s home for a pretty casual arrangement.

Lupine Tablesetting
Lupine Tablesetting

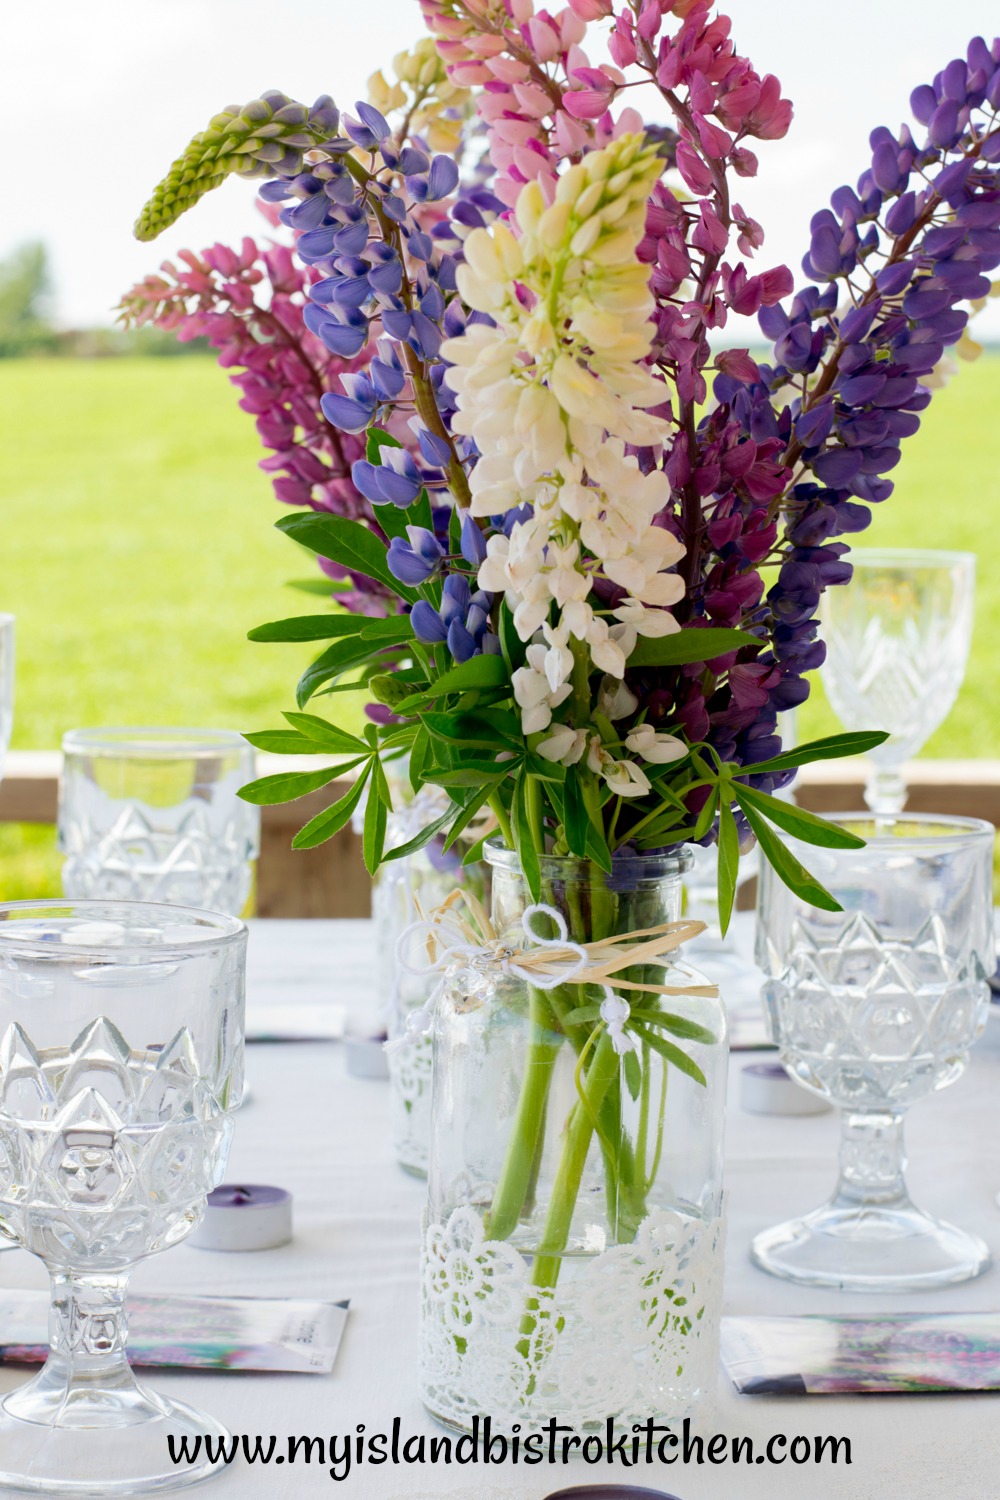
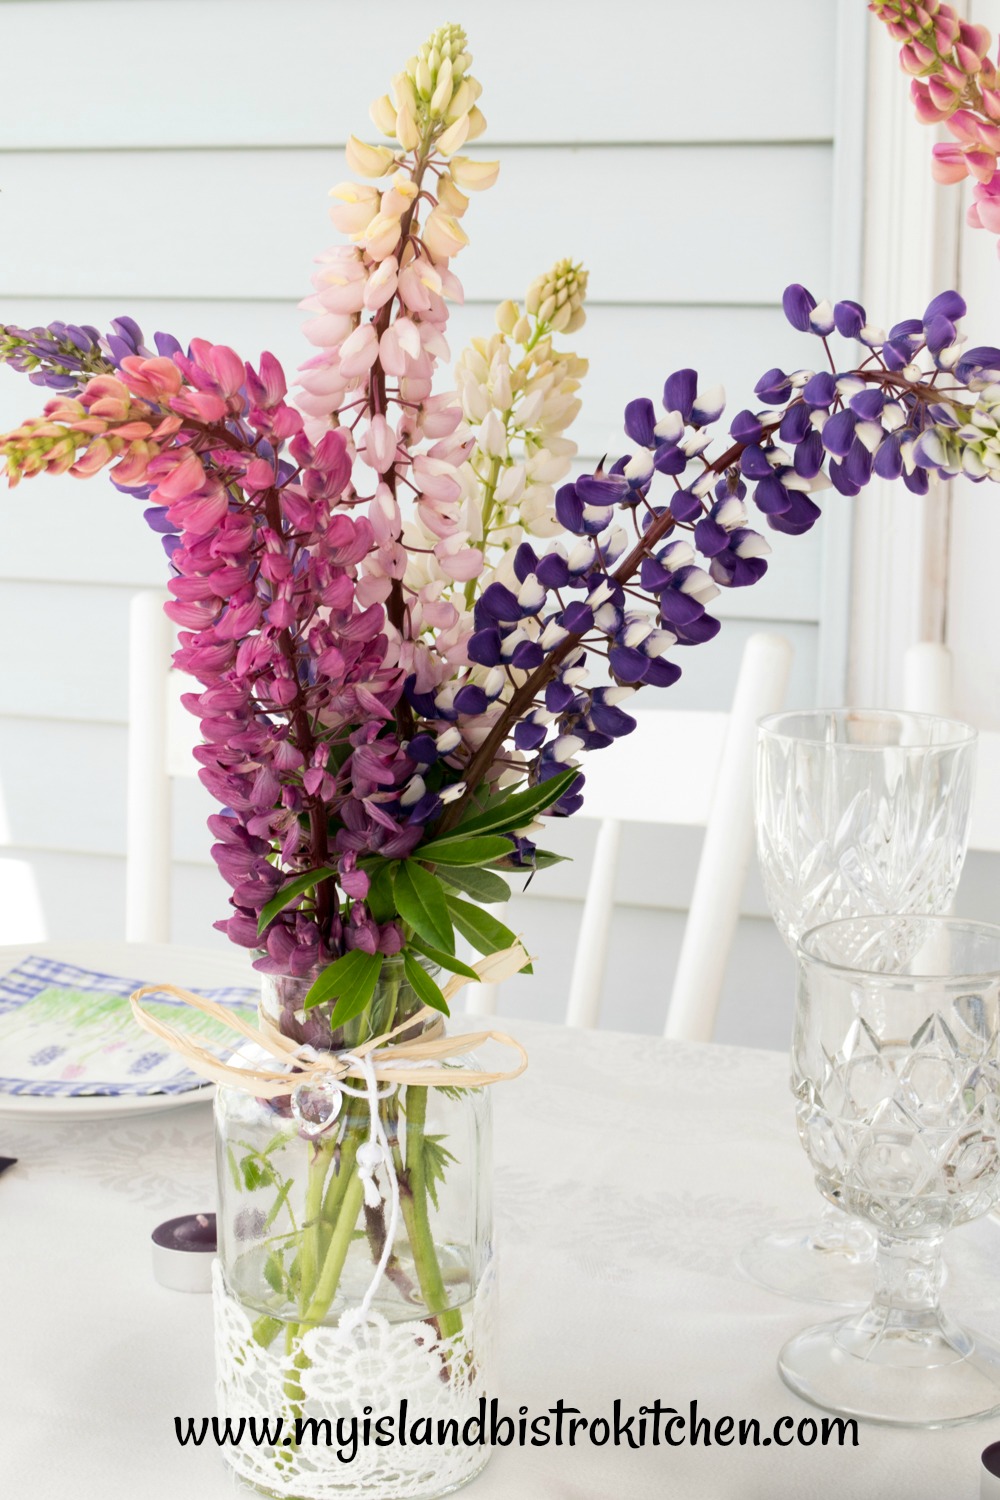
Summer tends to mean more casual dining and it’s fun to move the dinner party outside to the front verandah or porch or the back deck.  Lupines are perfect for a casual al fresco dining event. I used small jars decorated with a bit of lace and rafia and, of course, used an odd number of jars for aesthetic purposes.

Lupine Bouquets
Lupine Bouquets

The great thing about having individual bouquets like these is that they can easily be re-positioned or clustered into different formats.  Here, I have used them equally spaced in a single row along the center of the table. No need to fuss much with arranging these flowers – they are stately enough on their own that they seem to just almost automatically fall into pleasing designs and take on a personality of their own.

When I want color to pop on my table and attention to be drawn to the tablesetting’s focal point which, in this case, would be the colorful lupines, I start with a plain white tablecloth as a blank canvas.  Colors always pop on white backgrounds and white provides a non-distracting background. I have several old white linen tablecloths that have been in the family for years and I make good use of them. I am noticing that many second-hand shops will often have some old vintage white linen tablecloths so they are available.

Lupine Bouquet
Lupine Bouquet

I can’t take credit for crafting these glass vases – they came from a local dollar store. I make great use of dollar stores and thrift/second hand shops for a lot of the props for my tablesettings. I interspersed little purple votives throughout the tablescape to coordinate with the color scheme.

Lupine Bouquet
Lupine Bouquet

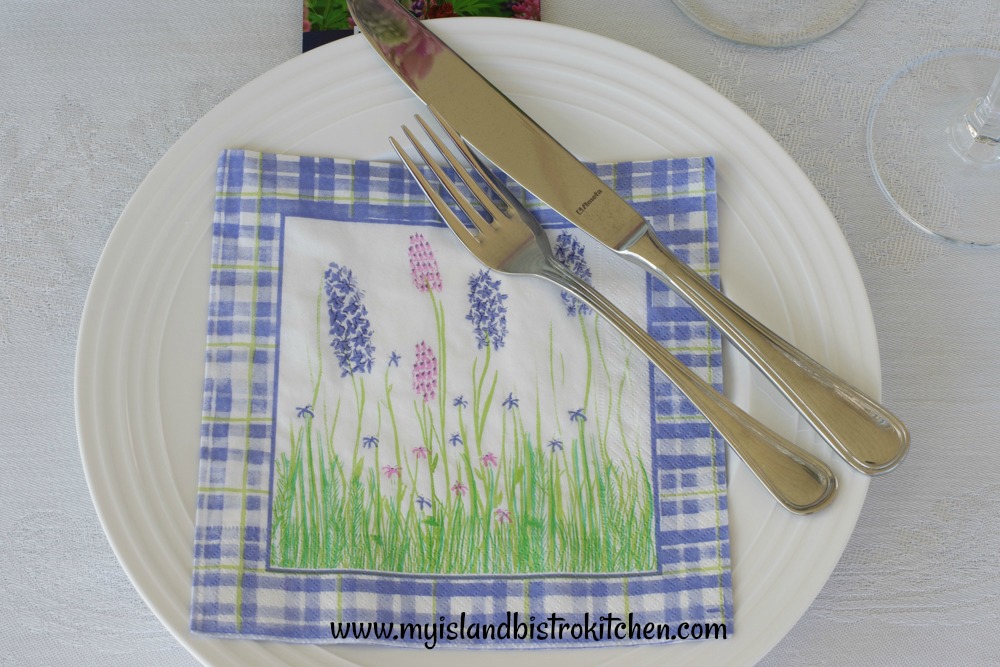
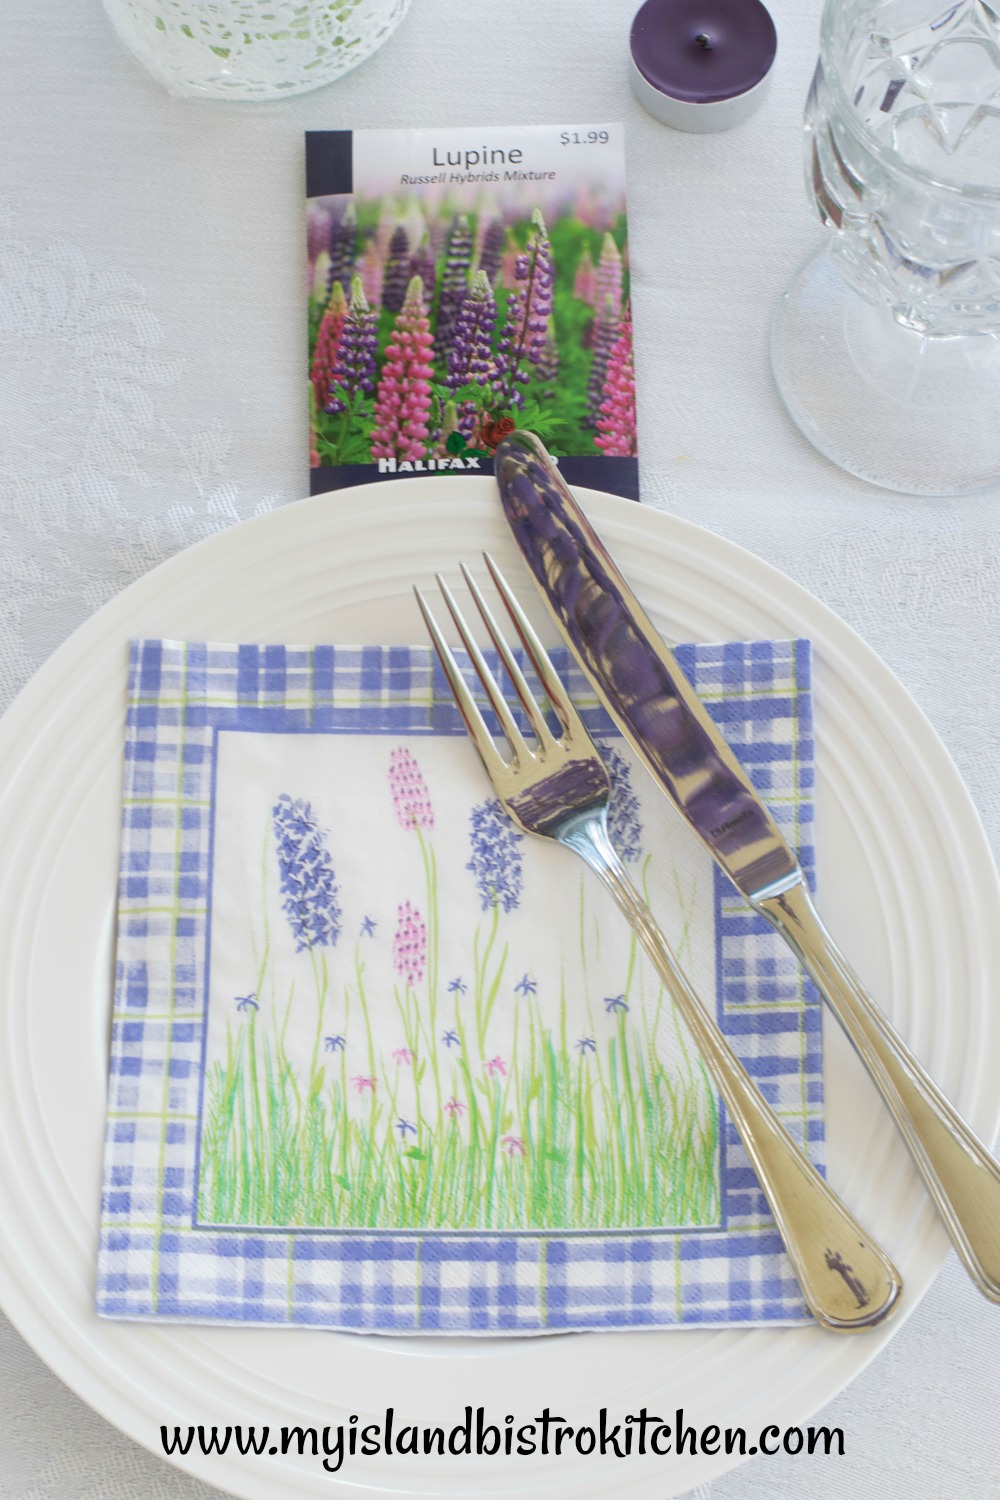
The lupine napkins shown in the photo below coordinate with the lupine theme.  Knowing that, if I tried to form them into a napkin fold, I would lose the pretty lupine design, I simply laid one over each plate. That’s the beauty of using simple, crisp white plates – they form a great clean canvas for other decorative (and useful) elements of a tablesetting.

Lupine Napkins
Lupine Napkins

When dining outside, contending with the weather elements can always be a challenge and, on PEI and living near the water, summer breeze is a common factor.  Using the cutlery to hold the napkin in place does double duty: It secures the napkin and also lends a casual look and feel to the placesetting. Al fresco dining is meant to be casual so go ahead and break the rules of formal tablesettings!

While lupines grow wild on the Island, many visitors like to take home packages of the lupine seeds to plant in their gardens.  These colorful seed packages make a nice take-home gift for guests at an early summer dinner.

Lupine Placesetting
Lupine Placesetting

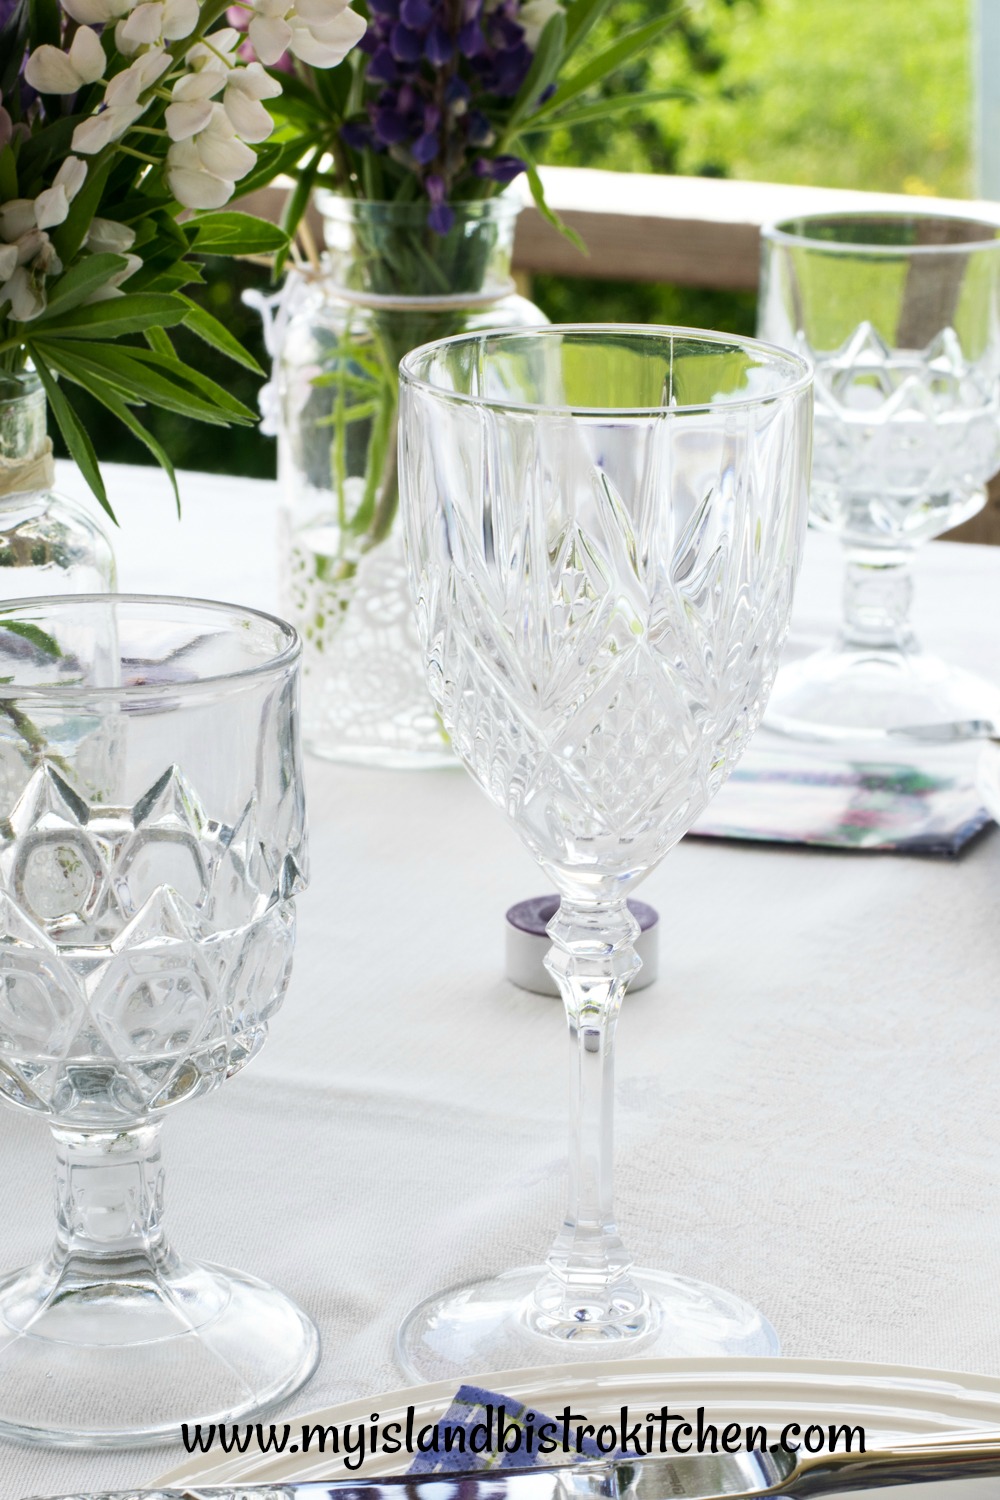
The sparkle and shine of glass that has lots of cuts adds to a table on a bright summer’s day. Glass will always add a light and airy look to a tablescape.

Glassware
Glassware

I hope you have enjoyed a glimpse into my al fresco tablesetting that features the famous lupines of Prince Edward Island.

Colorful wild lupines of Prince Edward Island, Canada, are theme for this early summer al fresco tablesetting