Rosy Rhubarb Jelly Recipe

Dish and Jars of Red Jelly
Rosy Rhubarb Jelly

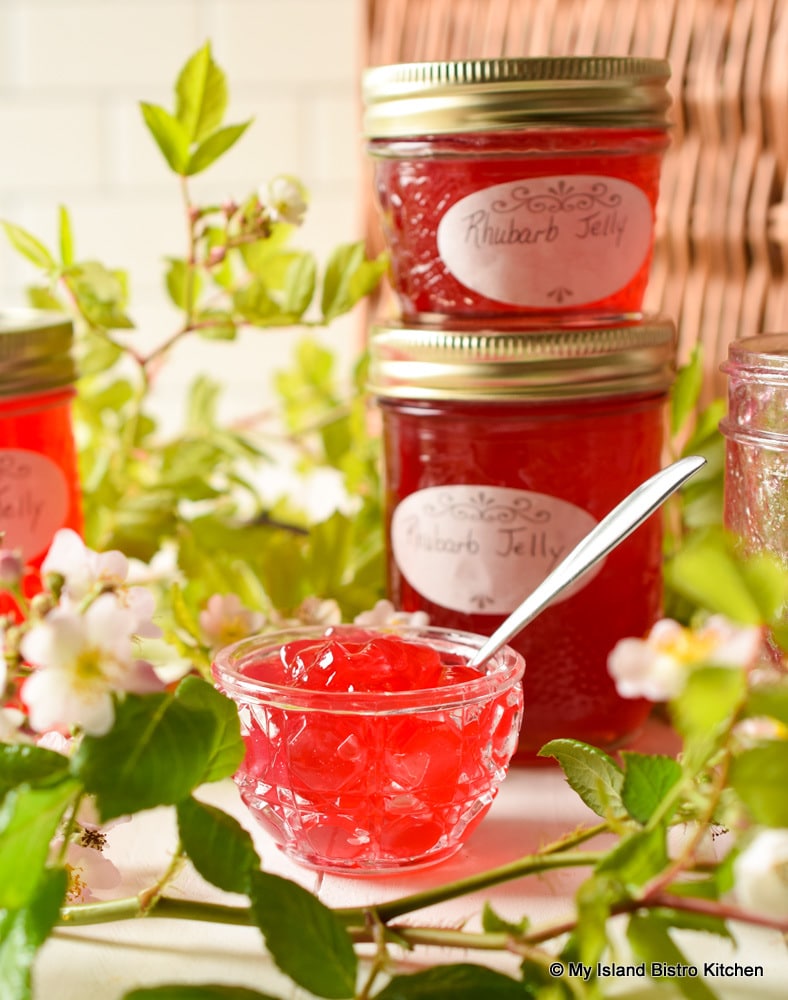
For those of you who are regular followers of my food blog, you know my love of rhubarb! I am always creating new recipes for it and that includes this fabulous beautiful-colored Rosy Rhubarb Jelly made from the strained juice of cooked rhubarb. With the smaller household in mind, I have created this stunning Rhubarb Jelly recipe to be a small batch – it should yield 3 half-pint and 1 quarter-pint jars.

Spoonful of red jelly
Rosy Rhubarb Jelly

A properly made jelly will be transparent, free from impurities like bits of fruits or their seeds. That’s why it is very important to place the cooked rhubarb pulp in a dampened fine mesh jelly bag through which the juice drips and is strained. The jelly should have a shimmer to it and a bit of jiggle but still be firm enough to hold its shape yet  spreadable. While this Rhubarb Jelly is good on toast, it really shines on scones! You can find my regular scone recipe here and my gluten-free version here.

Scone with jelly
Rosy Rhubarb Jelly with Scone

How great does this bright clear jelly look on a scone! It’s look is only matched by the fabulous flavor!

Scone with Jelly
Rosy Rhubarb Jelly on Scone

Jelly making is very process oriented and sequential in nature. For this reason, I recommend taking several reads of the method for making this Rhubarb Jelly before beginning. It is not particularly difficult but it does take time and attention. Good organization helps so I suggest setting out all the supplies and equipment needed before beginning.

Getting the exact amount of rhubarb to generate precisely 1½ cups of strained juice can be tricky. This is because the amount of juice extracted will depend on the age and quality of the rhubarb as well as the growing conditions in which it was grown – for example, if it is a wet or dry climate or season. While up to 1/3 cup of water can be added to the strained juice to bring it to the required 1½ cups, it may be a good idea to cook a wee bit extra rhubarb if you are unsure if the rhubarb you are using is of the quality that you can be assured it will juice out 1½ cups. However, if your rhubarb produces more than 1½ cups strained juice, only use the 1½ cups called for in the recipe as adding more liquid will affect the gelling process. I try to add as little water as possible to the rhubarb as it will dilute or weaken the true rhubarb flavor.

Pretty red jelly in glass bowl with jars of the jelly in the background
Rosy Rhubarb Jelly

Try this jelly on top of your favorite spreadable cheese on crackers.

Jelly and Cheese on Crackers
Rosy Rhubarb Jelly with Cheese and Crackers

And a wee bit of a closer look!

Jelly with Crackers and Cheese
Rosy Rhubarb Jelly with Cheese and Crackers

[Printable recipe follows at end of post]

Rosy Rhubarb Jelly

Ingredients:

1¾ lb deep red rhubarb stalks, chopped into ½“ chunks (1¾ lbs weighed after leaves and root ends removed)
2/3 cup water
¼ cup orange juice

3¼ cups granulated sugar
1 tsp butter
1 – 85ml pkg liquid pectin

Supplies and Equipment Needed:

3 half-pint and 1 quarter-pint glass canning jars for the jelly (plus 3 – 4 more half-pint jars to take up extra space in the canner basket during the hot water process (exact number needed will depend on size of canner))
4 – two-piece lid and screw band sets (lids must be brand new and not previously used); screw bands to be checked to ensure no rust or dents
Medium-sized pot for cooking rhubarb
Fine mesh jelly bag for straining cooked rhubarb
Small, heavy-bottomed stock pot for cooking jelly
Large-sized pot for sterilizing jars
Small saucepan for heating jar lids
Water bath canner with basket
Fine mesh jelly bag to filter the rhubarb pulp and strain the rhubarb juice of impurities
Jar lifter tongs
Wide-mouthed canning funnel
Ladle or heat-proof glass measuring cup
Chopstick or small non-metallic heat-proof spatula
Magnetic lid lifter
A timer

Method:

Place rhubarb, water, and orange juice in medium-sized stockpot. Cover and bring to a boil over medium-high heat. Reduce heat to low and simmer for 8-10 minutes, or until rhubarb is very soft and mushy, stirring occasionally. Remove from heat and, using a potato masher, further break down the cooked rhubarb.

Transfer the cooked rhubarb to a dampened fine mesh jelly bag. If you have a jelly bag stand, affix the jelly bag to it suspended over a bowl or pot. However, if you don’t have the formal stand, simply hang jelly bag over a broom handle suspended between two chairs with jelly bag positioned over a bowl or large measuring cup to catch the juice as it extracts.

Let jelly bag containing the rhubarb suspend, undisturbed, to allow the juice to extract and strain on its own. This may take anywhere from an hour or so to a couple of hours or longer, depending on the quality and age of the rhubarb as well as the local climate growing conditions in which the rhubarb was grown. Do not squeeze the jelly bag or try to force the juice through quicker as this will result in a cloudy/murky jelly. The rhubarb pulp should yield 1½ cups of strained juice. However, if it is short the 1½ cups, up to 1/3 cup water may be added to yield 1½ cups liquid. If it yields more than 1½ cups of juice, only use the 1½ cups called for in the recipe as adding more juice will affect the gelling process.

When the rhubarb is nearing the end of its straining, prepare the bottles and canner. Wash jars and lids in hot soapy water, first checking to ensure that the jars have no cracks or chips in them. Rinse. Fill a large pot with hot tap water, about ¾ full. Place the half-pint and quarter pint jars, upright, into the water (the extra bottles will be go into the canner to fill it up so the filled jars do not topple over during the hot water process). While the extra jars do not need to be sterilized, they do need to be hot going into the canner of boiling water as, otherwise, they may crack with the temperature change. Ensure the jars are fully submerged, each jar filled with water, and that the water is at least an inch over the tops of the jars. Cover, bring to a boil, and boil for 10 minutes. Turn off heat and leave the jars in the hot water to have ready to fill once the jelly finishes cooking.

Fill the canner about half full of hot tap water. Cover and bring to a boil to have it ready for processing of the filled jars as the filled jelly jars must immediately go into the canner to be processed while the jelly is still hot. Ensure the canner water is boiling before beginning to cook the jelly as there will not be enough time to get it to the boiling point once the jelly is in the bottles and ready for immediate processing. Boil a kettle of extra water to have ready, if needed, to top up the canner water after filled jars are added.

Place 1½ cups rhubarb juice and the sugar in a small stockpot over medium-high heat. Add the butter. Bring to a full rolling boil, stirring frequently. Add the liquid pectin and boil hard for 1 minute, stirring continuously. Immediately remove stockpot from heat and skim off any residual foam.

Use jar lifter tongs to carefully remove three half pints and the quarter pint hot sterilized jars from the water, one at a time, emptying the water from the jars back into the pot. Drain jars well.

Remove a small amount of the hot water from the stockpot in which the jars were sterilized and place in small saucepan over simmering heat. Place the lids in the hot water to soften the rubber sealing compound. Do not boil the lids.

Using a ladle, or a heat-proof glass measuring cup, and a wide-mouthed canning funnel, pour jelly into the hot sterilized jars, leaving about ¼” headroom in each jar to allow for expansion during the hot water processing. Remove any trapped air bubbles in the jars with a chopstick or small heatproof, non-metallic spatula. Wipe the jar rims with a clean damp cloth to remove any stickiness or jelly particles that could prevent the lids from sealing properly to the jars.

Using a magnetic lid lifter, remove lids from the hot water and center the heated lids on jars so the sealing compound on the lid edges aligns with the jar rims. Fingertip tighten the ring/screw bands until resistance is encountered. Do not over-tighten.

Using jar lifter tongs, carefully place filled jars upright in wire basket positioned in the canner, ensuring jars do not touch each other or fall over. Add some of the hot empty jars, upright, to the basket to fill up space so the filled jars do not topple over. Let the empty jars fill with water from the canner as they are submerged. Ensure the water level is at least 1” above the tops of jars, adding more boiling water as necessary. Cover with canner lid. Return the water to a full rolling boil over high heat then decrease the heat to just keep the water at a moderately rolling boil but not boiling over. Process jars in the hot water bath for 10 minutes, adjusting time as and if necessary for altitude. Start timing the processing from the point at which a full rolling boil is reached after jars have been added to the canner. At the end of the processing time, turn off heat and remove canner lid.

Let jars sit in the hot water for 5 minutes then, using jar lifter tongs, carefully remove the jars filled with jelly, upright and one at a time, and transfer them to a heat-proof cutting board that has been covered with a towel, to cool completely. Listen for the “pop” or “ping” sound as the bottles seal over the next few minutes or hours. The lids of properly sealed jars will curve downward. Let jars rest, undisturbed, on counter for 24 hours. Then, test each jar for proper sealing by pressing down gently on the center of each jar lid. If the lid is already pressed downward, and does not pop back up, it is properly sealed. Any jars that do not pass this test should be refrigerated and the jelly used within a week or so. Store properly sealed jelly bottles in cool, dark place. Refrigerate jelly once jar has been opened.

Yield: Apx. 3 half-pint bottles and 1 quarter-pint bottle

NOTE 1: The small ½-cup (quarter-pint) jar does not actually need the full 10 minutes of hot water canning. However, to remove it partway through, at the 5-minute point in the boiling process, would disturb the rolling boil and timing and thus interfere with the proper canning of the larger half-pint jars so, there are a couple of options. The first is to let the small jar remain in the hot water bath with the half-pint jars for the full 10-minute period. The second option is not to process the tiny jar in the hot water and to, instead, use it as the “tasting jar”, refrigerating and consuming the jelly within a couple of days. However, if the desire is to can the entire batch of jelly into the small ½-cup (quarter-pint) jars, then process the basket of them for 5 minutes, instead of 10. These tiny bottles make great gifts, especially if they are accompanied by fresh scones!

Connect with My Island Bistro Kitchen on Social Media

Join the Facebook page for My Island Bistro Kitchen:  https://www.facebook.com/MyIslandBistroKitchen/

Follow “the Bistro” on Twitterhttps://twitter.com/PEIBistro/

See the drool-worthy gallery of mouth-watering food photos from My Island Bistro Kitchen on Instagramhttps://www.instagram.com/peibistro/

Follow “the Bistro” on Pinterest at https://www.pinterest.ca/peibistro/ and pin the Pinterest-ready photo at the end of this posting to your favorite Pinterest boards!

Rosy Rhubarb Jelly

This beautiful Rosy Rhubarb Jelly is the perfect springtime treat. Lovely on toast for a breakfast treat; delightful on scones.
Course Jelly
Cuisine Canadian
Keyword jelly, rhubarb, rhubarb jelly
My Island Bistro Kitchen Barbara99

Ingredients

  • lb deep red rhubarb stalks, chopped into ½“ chunks (1¾ lbs weighed after leaves and root ends removed)
  • 2/3 cup water
  • ¼ cup orange juice
  • cups granulated sugar
  • 1 tsp butter
  • 1 – 85ml pkg liquid pectin

Instructions

  1. Place rhubarb, water, and orange juice in medium-sized stockpot. Cover and bring to a boil over medium-high heat. Reduce heat to low and simmer for 8-10 minutes, or until rhubarb is very soft and mushy, stirring occasionally. Remove from heat and, using a potato masher, further break down the cooked rhubarb.
  2. Transfer the cooked rhubarb to a dampened fine mesh jelly bag. If you have a jelly bag stand, affix the jelly bag to it suspended over a bowl or pot. However, if you don’t have the formal stand, simply hang jelly bag over a broom handle suspended between two chairs with jelly bag positioned over a bowl or large measuring cup to catch the juice as it extracts.
  3. Let jelly bag containing the rhubarb suspend, undisturbed, to allow the juice to extract and strain on its own. This may take anywhere from an hour or so to a couple of hours or longer, depending on the quality and age of the rhubarb as well as the local climate growing conditions in which the rhubarb was grown. Do not squeeze the jelly bag or try to force the juice through quicker as this will result in a cloudy/murky jelly. The rhubarb pulp should yield 1½ cups of strained juice. However, if it is short the 1½ cups, up to 1/3 cup water may be added to yield 1½ cups liquid. If it yields more than 1½ cups of juice, only use the 1½ cups called for in the recipe as adding more juice will affect the gelling process.
  4. When the rhubarb is nearing the end of its straining, prepare the bottles and canner. Wash jars and lids in hot soapy water, first checking to ensure that the jars have no cracks or chips in them. Rinse. Fill a large pot with hot tap water, about ¾ full. Place the half-pint and quarter pint jars, upright, into the water (the extra bottles will be go into the canner to fill it up so the filled jars do not topple over during the hot water process). While the extra jars do not need to be sterilized, they do need to be hot going into the canner of boiling water as, otherwise, they may crack with the temperature change. Ensure the jars are fully submerged, each jar filled with water, and that the water is at least an inch over the tops of the jars. Cover, bring to a boil, and boil for 10 minutes. Turn off heat and leave the jars in the hot water to have ready to fill once the jelly finishes cooking.
  5. Fill the canner about half full of hot tap water. Cover and bring to a boil to have it ready for processing of the filled jars as the filled jelly jars must immediately go into the canner to be processed while the jelly is still hot. Ensure the canner water is boiling before beginning to cook the jelly as there will not be enough time to get it to the boiling point once the jelly is in the bottles and ready for immediate processing. Boil a kettle of extra water to have ready, if needed, to top up the canner water after filled jars are added.
  6. Place 1½ cups rhubarb juice and the sugar in a small stockpot over medium-high heat. Add the butter. Bring to a full rolling boil, stirring frequently. Add the liquid pectin and boil hard for 1 minute, stirring continuously. Immediately remove stockpot from heat and skim off any residual foam.
  7. Use jar lifter tongs to carefully remove three half pints and the quarter pint hot sterilized jars from the water, one at a time, emptying the water from the jars back into the pot. Drain jars well.
  8. Remove a small amount of the hot water from the stockpot in which the jars were sterilized and place in small saucepan over simmering heat. Place the lids in the hot water to soften the rubber sealing compound. Do not boil the lids.
  9. Using a ladle, or a heat-proof glass measuring cup, and a wide-mouthed canning funnel, pour jelly into the hot sterilized jars, leaving about ¼” headroom in each jar to allow for expansion during the hot water processing. Remove any trapped air bubbles in the jars with a chopstick or small heatproof, non-metallic spatula. Wipe the jar rims with a clean damp cloth to remove any stickiness or jelly particles that could prevent the lids from sealing properly to the jars.
  10. Using a magnetic lid lifter, remove lids from the hot water and center the heated lids on jars so the sealing compound on the lid edges aligns with the jar rims. Fingertip tighten the ring/screw bands until resistance is encountered. Do not over-tighten.
  11. Using jar lifter tongs, carefully place filled jars upright in wire basket positioned in the canner, ensuring jars do not touch each other or fall over. Add some of the hot empty jars, upright, to the basket to fill up space so the filled jars do not topple over. Let the empty jars fill with water from the canner as they are submerged. Ensure the water level is at least 1” above the tops of jars, adding more boiling water as necessary. Cover with canner lid. Return the water to a full rolling boil over high heat then decrease the heat to just keep the water at a moderately rolling boil but not boiling over. Process jars in the hot water bath for 10 minutes, adjusting time as and if necessary for altitude. Start timing the processing from the point at which a full rolling boil is reached after jars have been added to the canner. At the end of the processing time, turn off heat and remove canner lid.
  12. Let jars sit in the hot water for 5 minutes then, using jar lifter tongs, carefully remove the jars filled with jelly, upright and one at a time, and transfer them to a heat-proof cutting board that has been covered with a towel, to cool completely. Listen for the “pop” or “ping” sound as the bottles seal over the next few minutes or hours. The lids of properly sealed jars will curve downward. Let jars rest, undisturbed, on counter for 24 hours. Then, test each jar for proper sealing by pressing down gently on the center of each jar lid. If the lid is already pressed downward, and does not pop back up, it is properly sealed. Any jars that do not pass this test should be refrigerated and the jelly used within a week or so. Store properly sealed jelly bottles in cool, dark place. Refrigerate jelly once jar has been opened.

Recipe Notes

Yield: Apx. 3 half-pint bottles and 1 quarter-pint bottle

NOTE 1: The small ½-cup (quarter-pint) jar does not actually need the full 10 minutes of hot water canning. However, to remove it partway through, at the 5-minute point in the boiling process, would disturb the rolling boil and timing and thus interfere with the proper canning of the larger half-pint jars so, there are a couple of options. The first is to let the small jar remain in the hot water bath with the half-pint jars for the full 10-minute period. The second option is not to process the tiny jar in the hot water and to, instead, use it as the “tasting jar”, refrigerating and consuming the jelly within a couple of days. However, if the desire is to can the entire batch of jelly into the small ½-cup (quarter-pint) jars, then process the basket of them for 5 minutes, instead of 10. These tiny bottles make great gifts, especially if they are accompanied by fresh scones!

PIN ME TO PINTEREST!

Small bowl of bright red jelly


You may also enjoy these other jam and jelly recipes from My Island Bistro Kitchen:

Jams
Strawberry Rhubarb Freezer Jam
Blueberry and Grand Marnier Jam
Gooseberry Jam
Zucchini Jam
Pumpkin Jam
Small Batch Cherry Jam

Jelly
Crabapple Jelly

Marmalade
Green Tomato Marmalade
Rhubarb Marmalade
Peach Marmalade