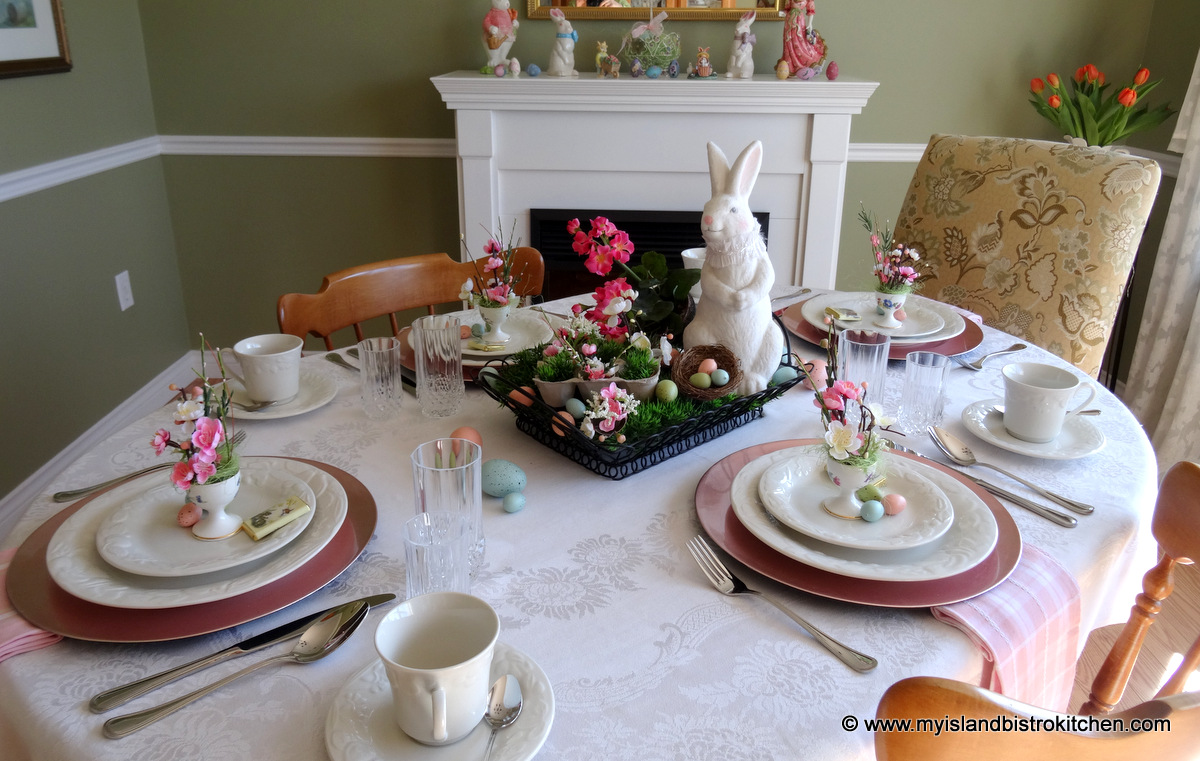
Easter offers so many options for tablescapes and tablesettings. Today, I am sharing a more casual, yet fun, tablescape.
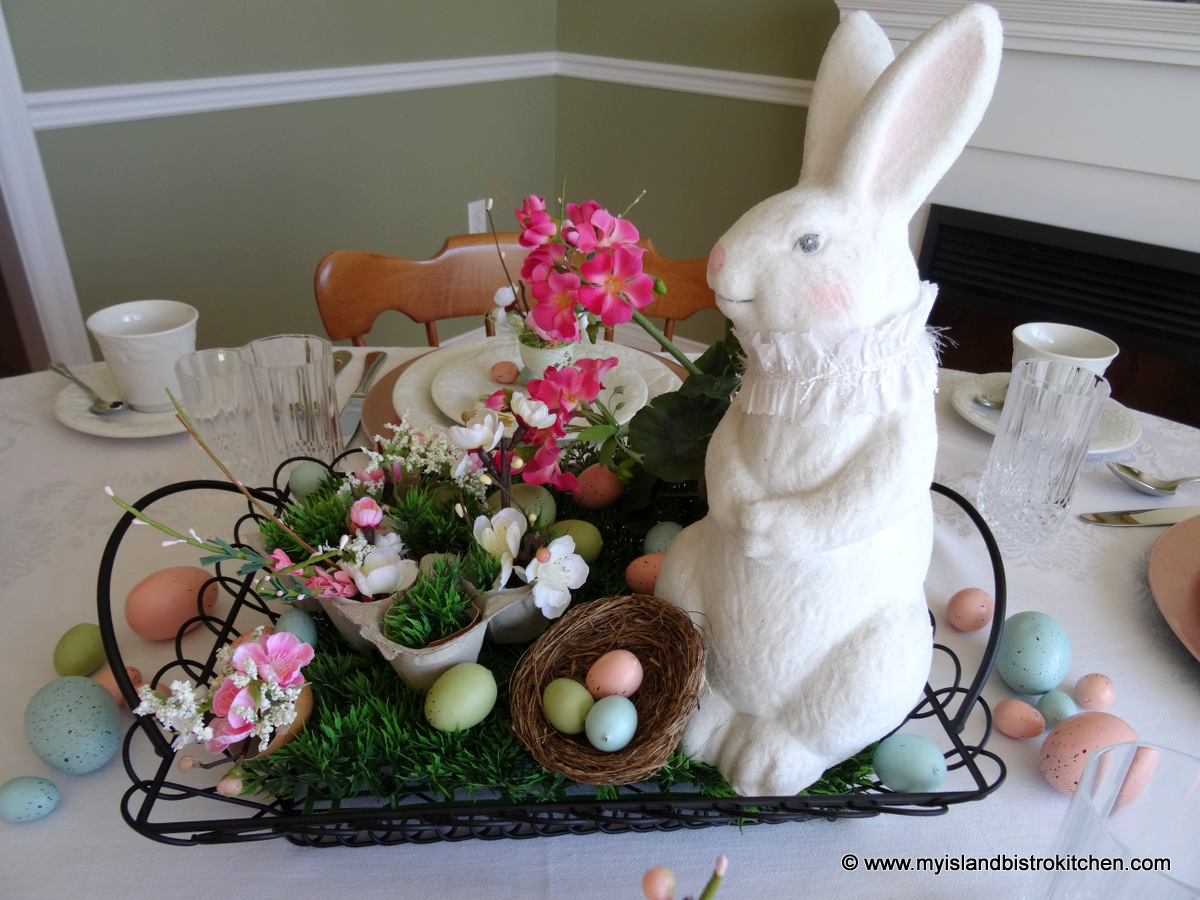
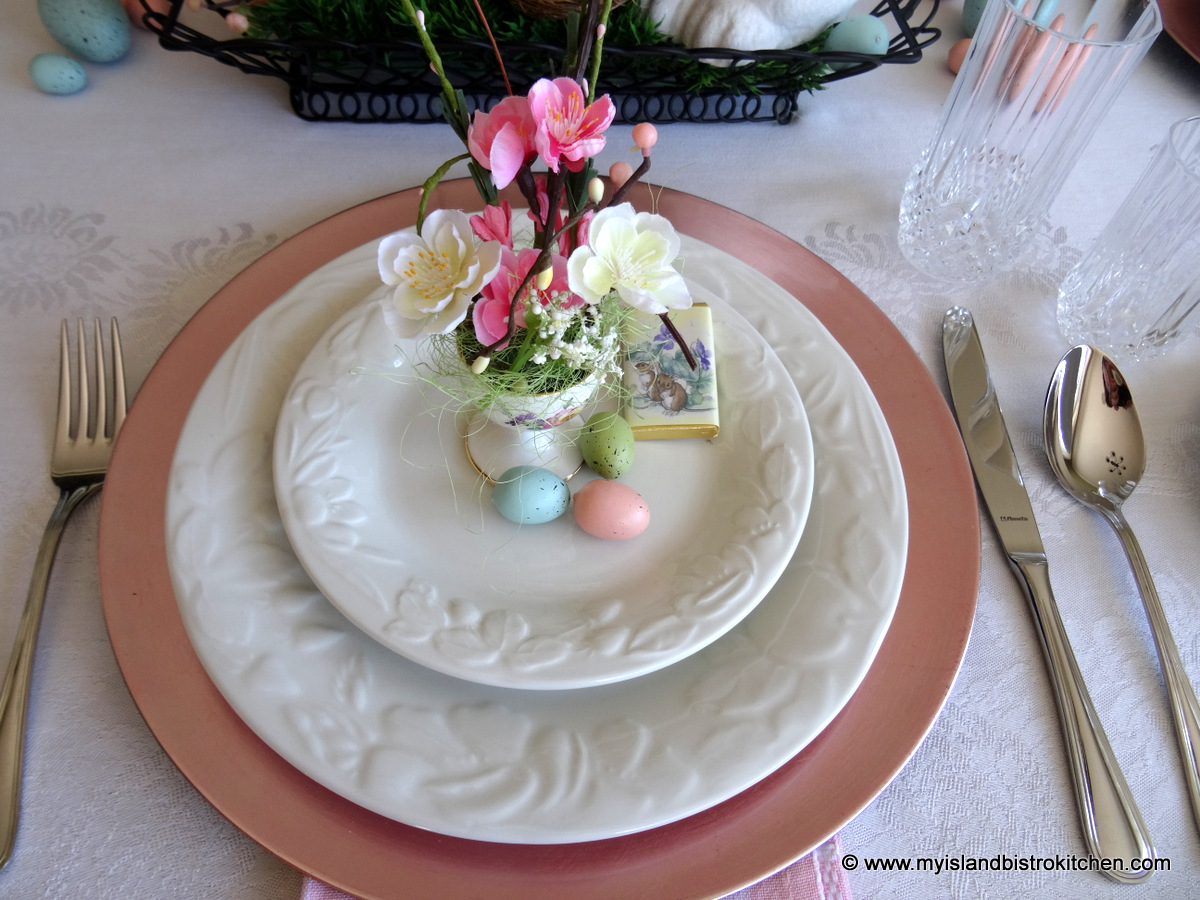
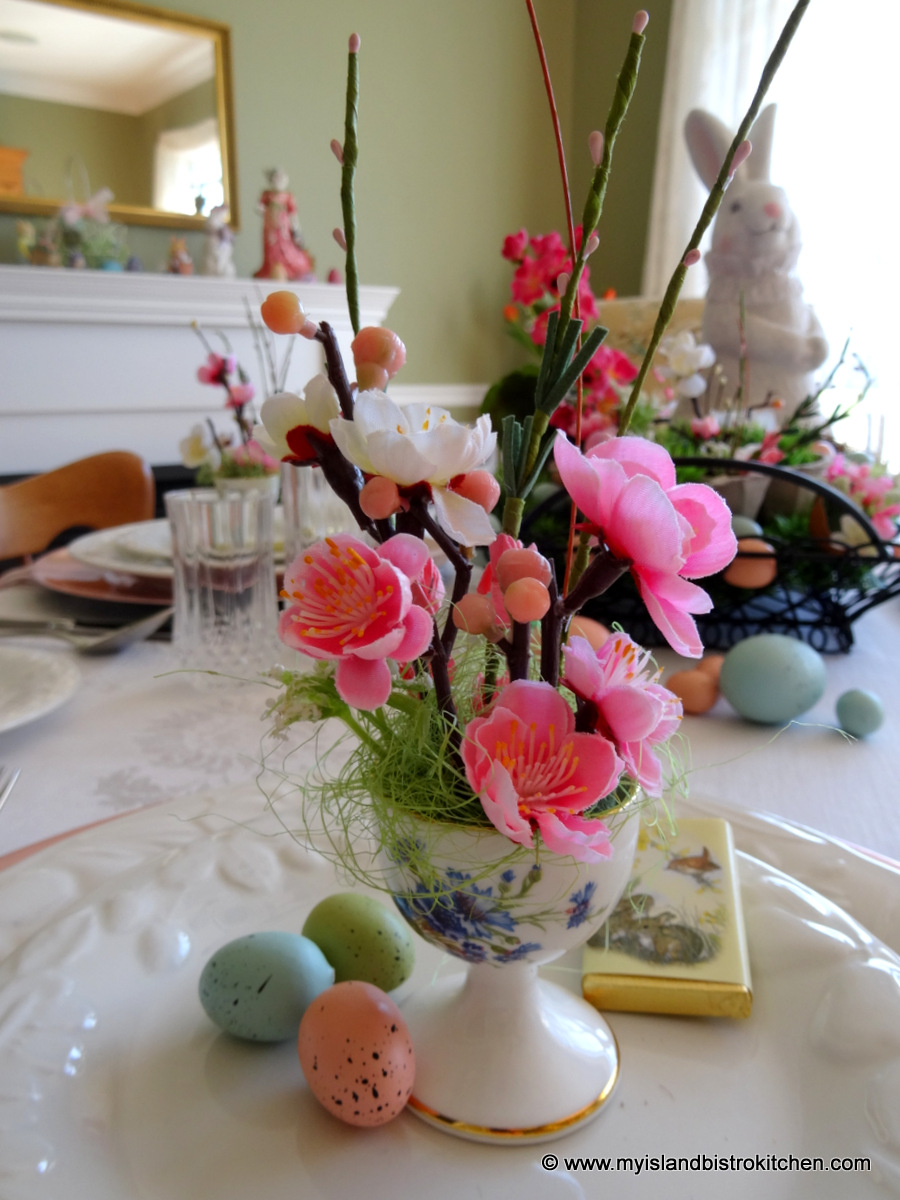
My focus with this tablesetting is the “corralled” tablescape. I have used a wire tray as the base into which I have clustered the elements of the table centerpiece. Corralling keeps the elements tidy and together instead of having them spread out over the table.
This is an ideal option if you plan to bring, during the meal, a platter of roast turkey or ham, for example, to be carved at the table. It is easy to lift off the basket or tray with the centerpiece on it and replace it with the meat platter. The centerpiece can then easily be returned to the table for the dessert course so the table is never without a focal centerpiece during the meal.
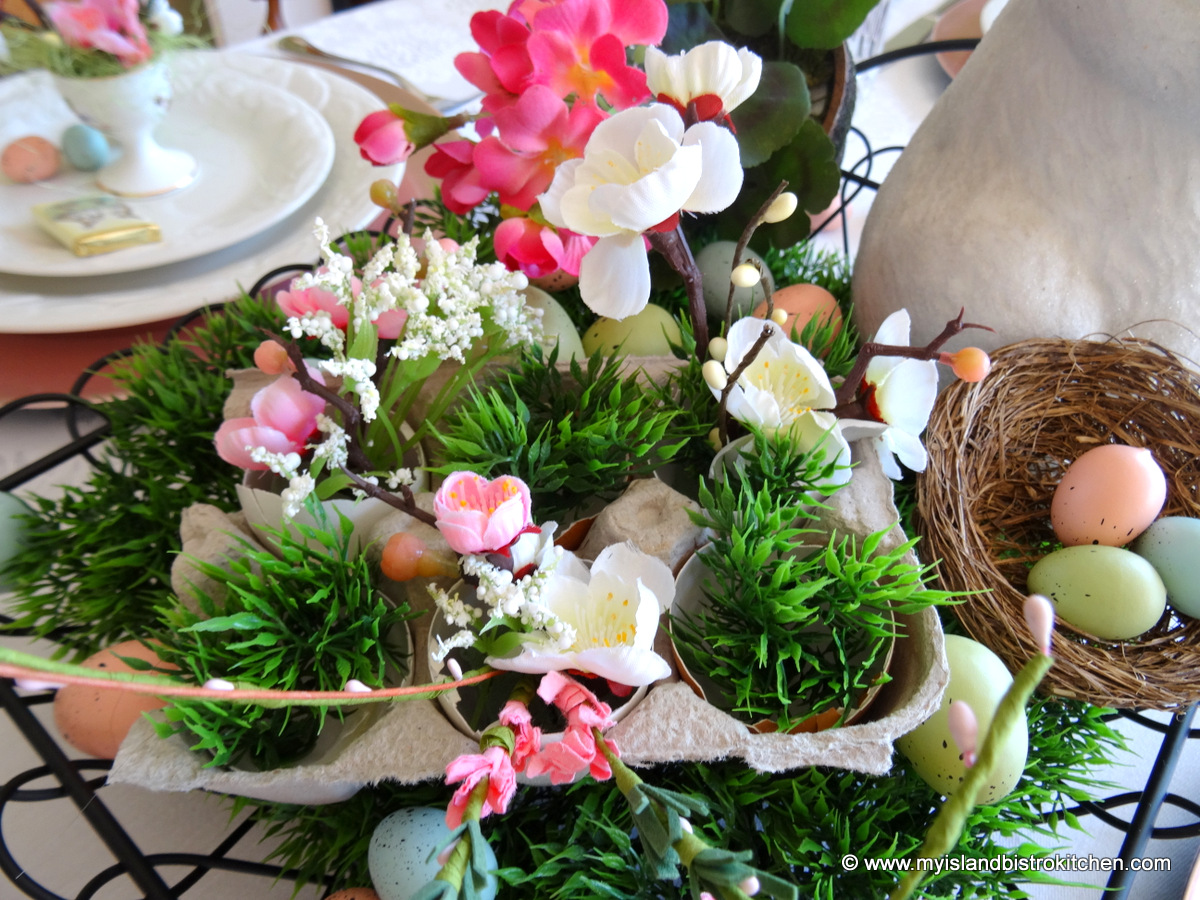
I have simply used some faux grass in the bottom of the tray and added a substantial-sized bunny to give the centerpiece prominence and height. Then, I filled in the rest of the basket with a small bright pink geranium, a tiny bird’s nest, some Easter eggs, and some egg shells filled with tiny flowers and faux grass. A piece of egg carton provides a nesting spot for the egg shells.
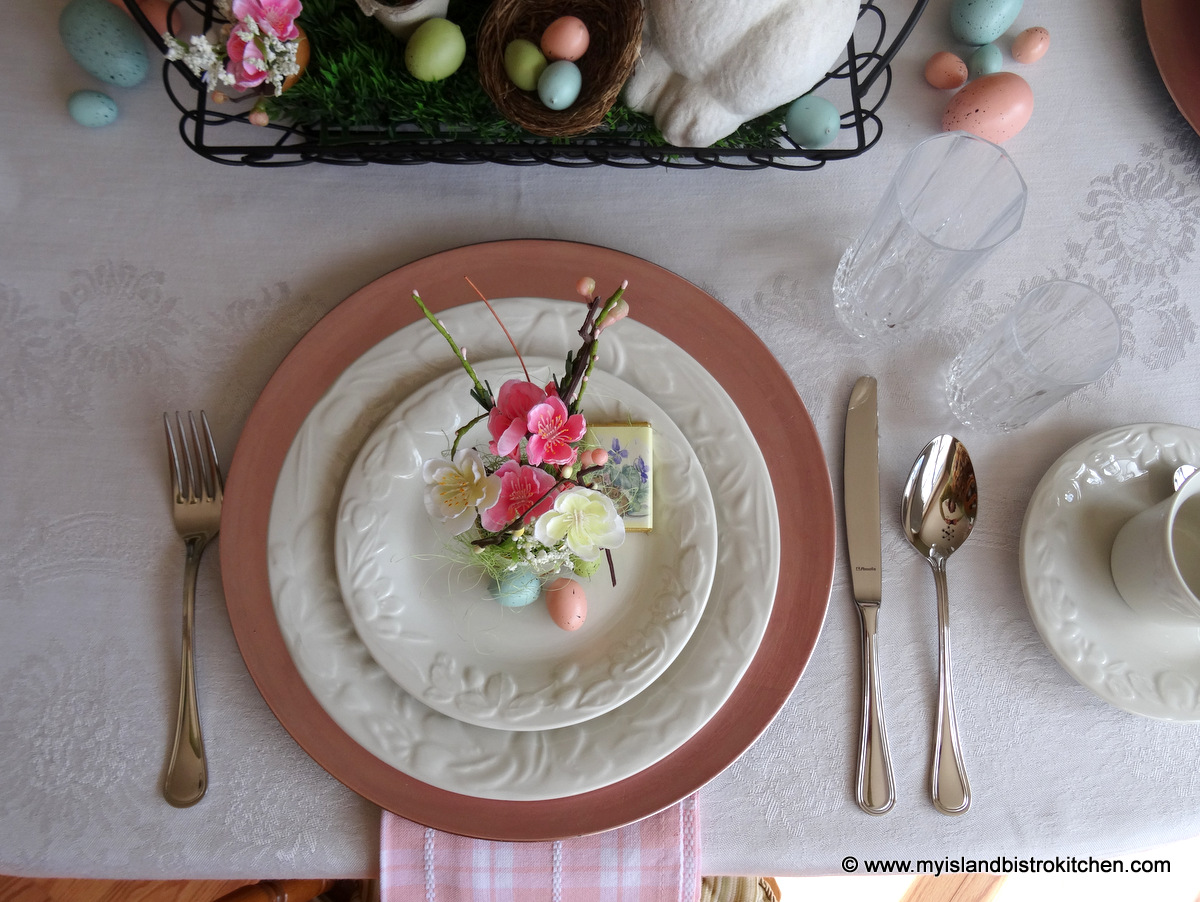
It is not necessary to have fine china to set an attractive table. This table is set for Easter brunch so I have used everyday stoneware and, instead of formal napkins, have opted to use pastel-colored tea towels that match the color scheme of the centerpiece. Tucked underneath the charger plates, the tea towels take up no room on the table and do not compete with the tablescape or place settings.
I have dressed up each place setting with an egg cup filled with tiny flowers that connect each place setting to the centerpiece.
A few tiny Easter eggs and a small chocolate bar complete the place setting.
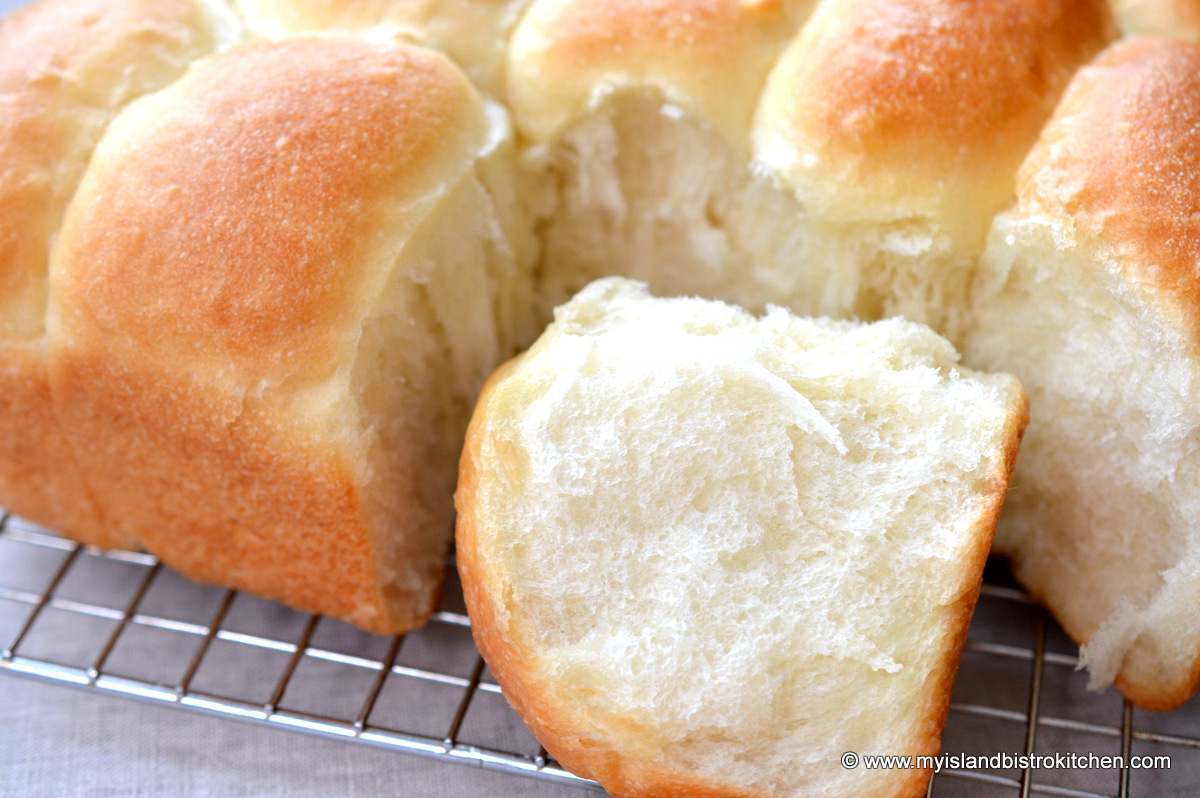
There is something so homey and cozy about homemade bread and rolls! And, of course, the scent throughout the house of them baking makes the taste buds jump in anticipation of a hot roll, or slice of bread, fresh from the oven and slathered in melting butter. Continue reading Pan Rolls→
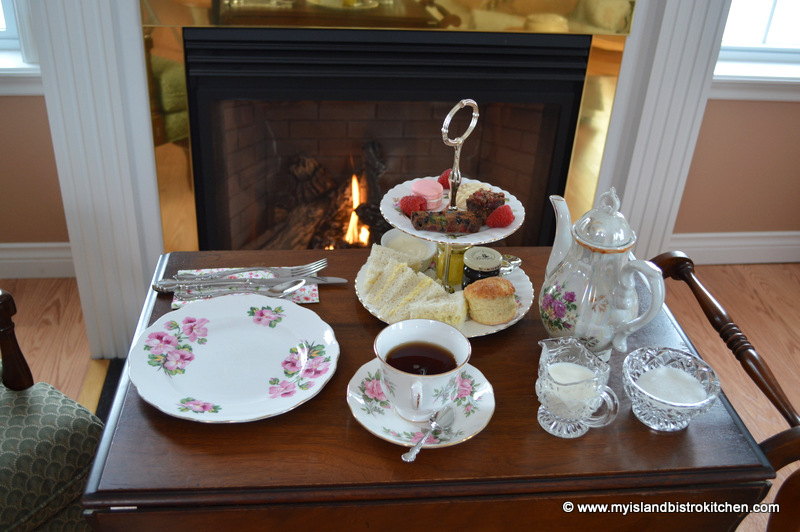
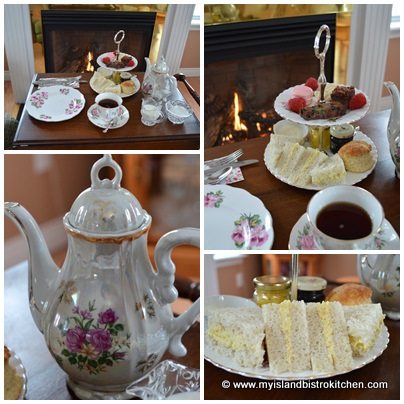
Sometimes, amidst the hustle and bustle of everyday life, it’s nice to simply curl up by the fire with a good book and a fine cup of tea. But why stop at a cup of tea when you can while away the afternoon with tasty fare served up in style. So, when you have no one else to please but yourself, you can still pamper yourself and enjoy a fine afternoon tea.
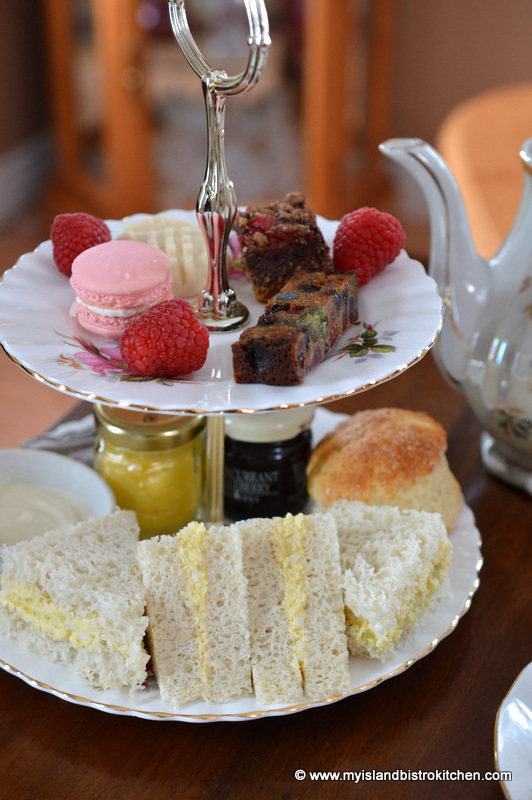
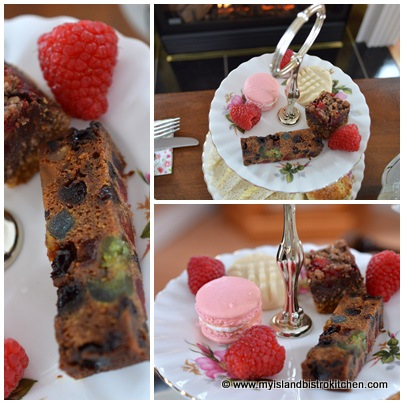
Curious about what’s on the tea table today? Let’s have a look-see what’s on the two-tier server. Anyone who knows me really well knows I love my tiered servers!
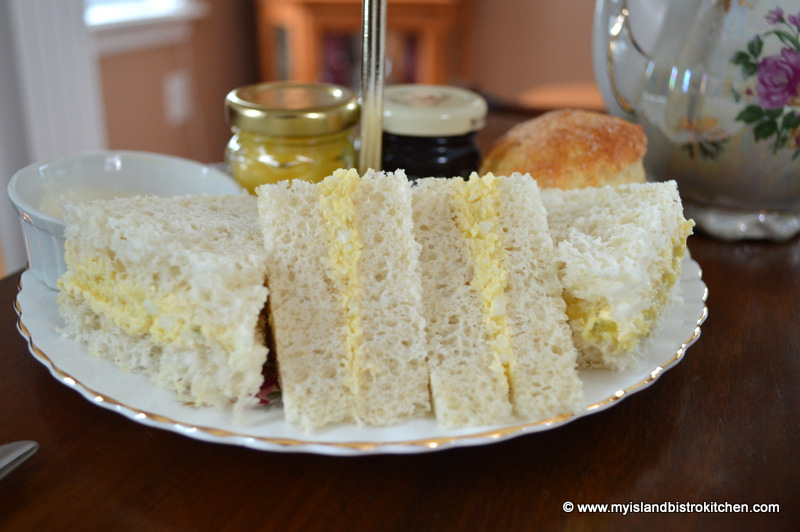
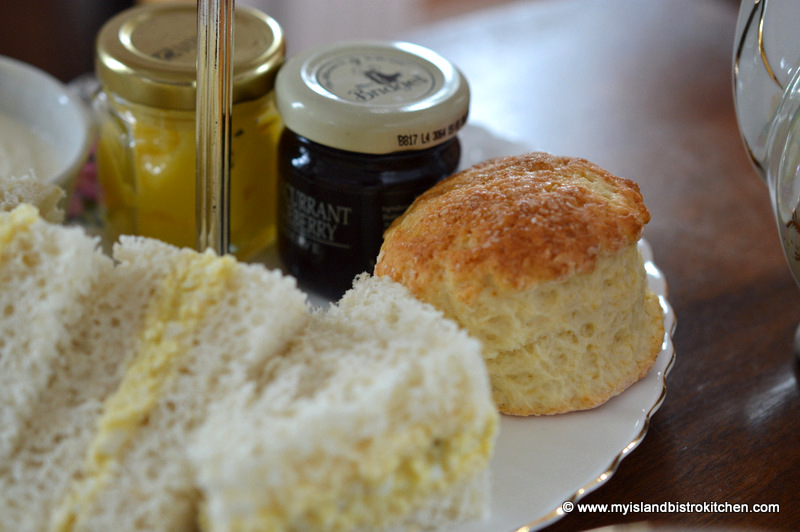
Let’s start with the sandwiches. Today’s offering is a simple egg salad sandwich, nice and easy to prepare, but ever so tasty!
Today I am serving a traditional scone with clotted cream, blackcurrant and blueberry jam, and my own lemon curd.
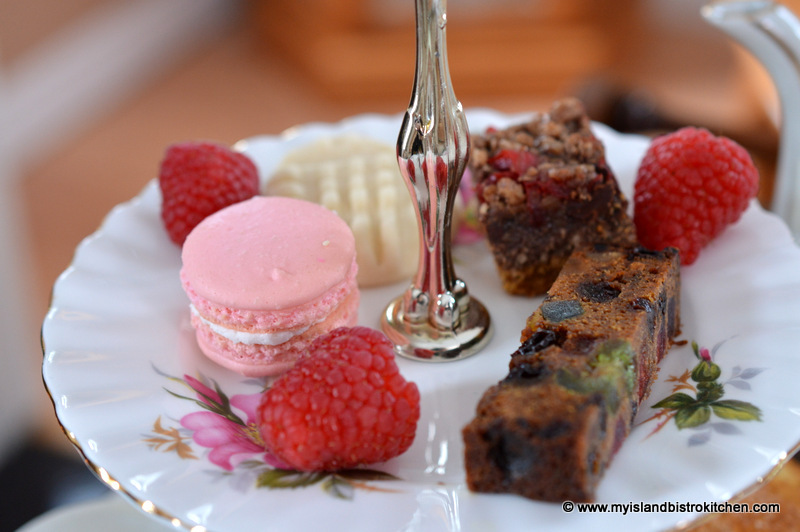
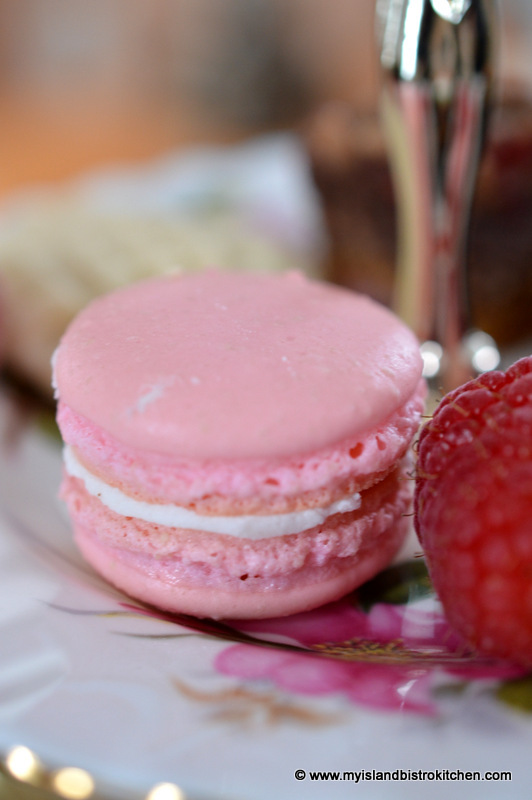
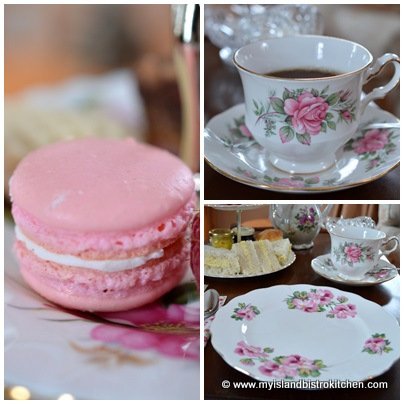
On the sweet plate, a selection of treats that include a macaron, melting moment cookie, Hello Dolly square, fruitcake, and some fresh raspberries. Are you drooling yet?
The macaron is filled with just a wee bit of buttercream icing.
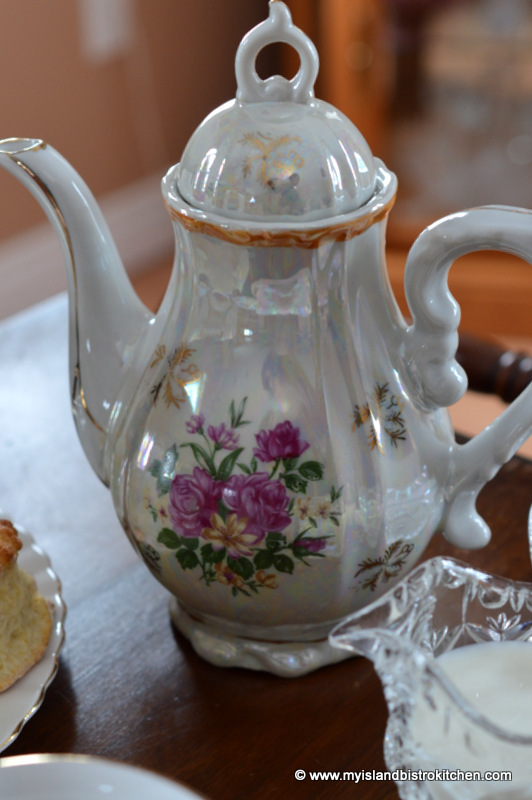
This personal-sized teapot was a thrift shop find several years ago. It holds just two cups of tea, perfect for one person.
Today’s tea is Stash’s Decaf English Breakfast, one of my all-time favorites.
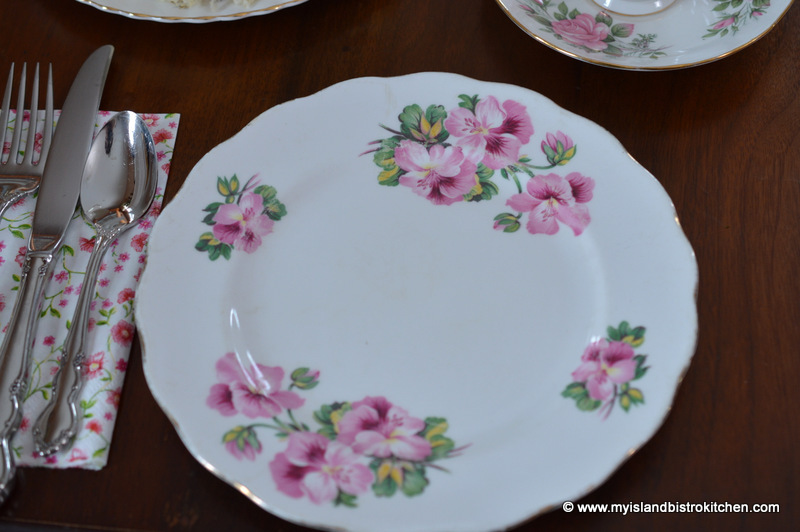
While they are not a matched set, these tea plates work with the cup and saucer. Sometimes, mismatched china actually adds charm and character to a tea setting.
I love the blending of the pink shades! It’s very girly!
Thanks for dropping in for a spot of tea. Enjoy your week!
————————–
Thank you for visiting “the Bistro” today. There are lots of ways to connect with “the Bistro” through social media:
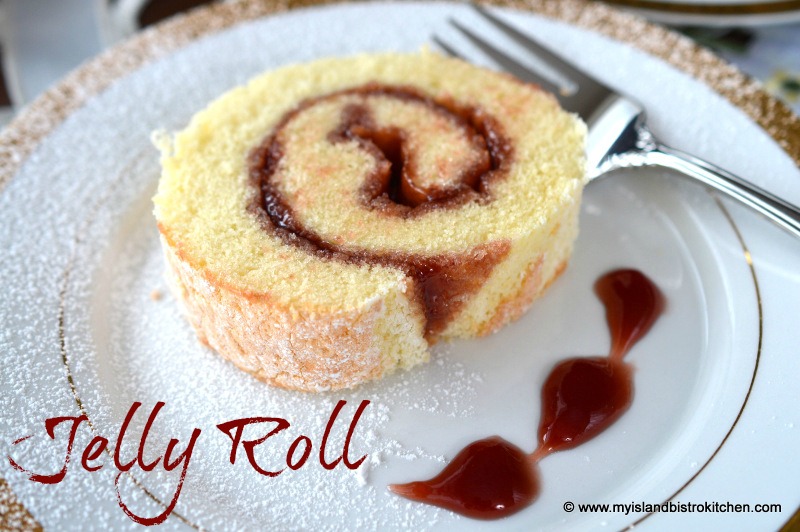
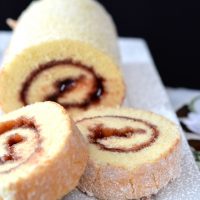
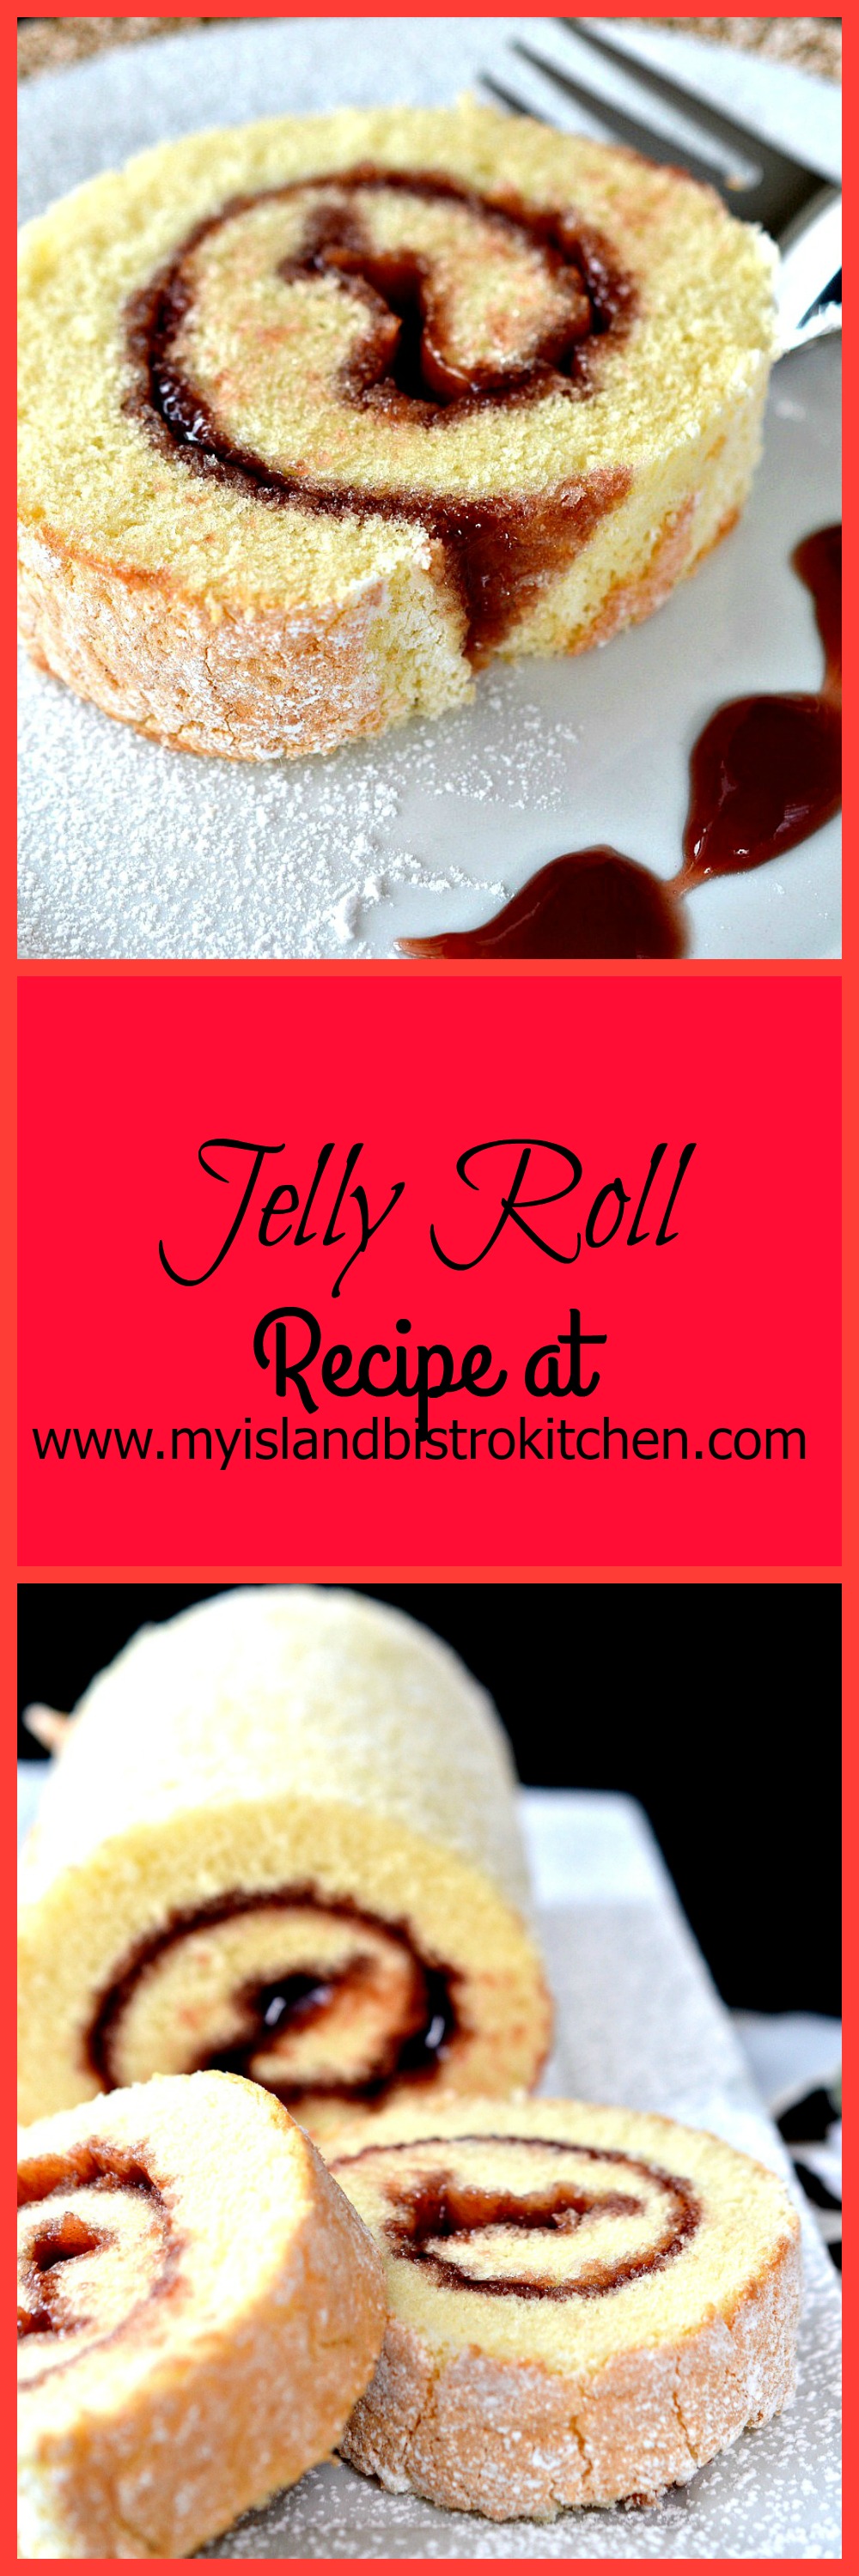
I grew up with jelly rolls being regularly made in my home. They’re a quick dessert, best eaten on the day they are made. This is because a jelly roll is really a sponge-type cake and, when the jam or jelly is spread on it, it tends to seep into the cake and after several hours can become somewhat soggy. Jelly rolls don’t take a lot of ingredients. So long as you have basic baking supplies and some jam or jelly, you can make a jelly roll.
Here are my tips for making jelly rolls:
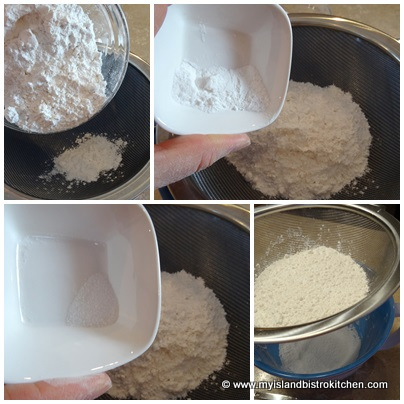
1. Use cake and pastry flour as it gives a finer texture than all-purpose flour.
2. Don’t let the cake cool for too long before spreading it with jam or jelly as it may crack as you try to roll the jelly roll up. About 15-20 minutes cooling time is about right. If you put the jam or jelly on the cake when it is still too warm, though, it will cause it to seep into the cake too quickly, creating a soggy jelly roll.
3. Use a good quality jam or jelly. If using jam, choose one that does not have big chunks of fruit in it; otherwise, it will make it more difficult to slice and plate presentation will not be optimal. I prefer colorful red jams and ones that are seedless – for example, seedless raspberry jam.
4. The jelly roll may be dusted with either granulated sugar or icing sugar. However, icing sugar stands up better than granulated sugar which tends to dissolve into the cake more quickly.
Jelly Roll
Ingredients:
1 cup + 3 tbsp cake and pastry flour
1¼ tsp baking powder
¼ tsp salt
4 large eggs
1 cup sugar
1 tsp vanilla
¼ tsp almond flavouring
2 tbsp cold water
¾ – 1 cup jam or jelly
Icing sugar for dusting
Method:
Preheat oven to 400°F.
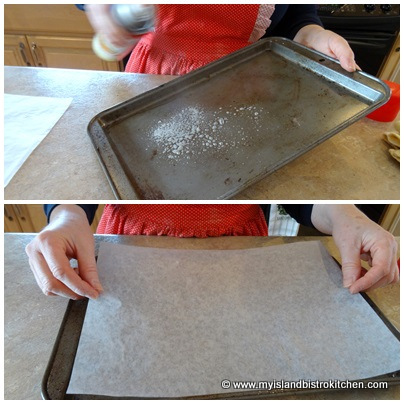
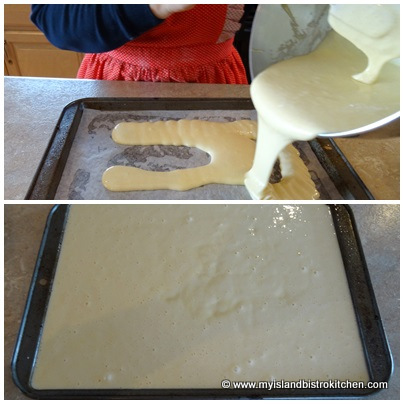
Grease, or spray cooking oil on 10”x15” rimmed baking sheet, ensuring sides are well-greased. Line bottom of pan with parchment paper. Lightly spray parchment paper with cooking oil.
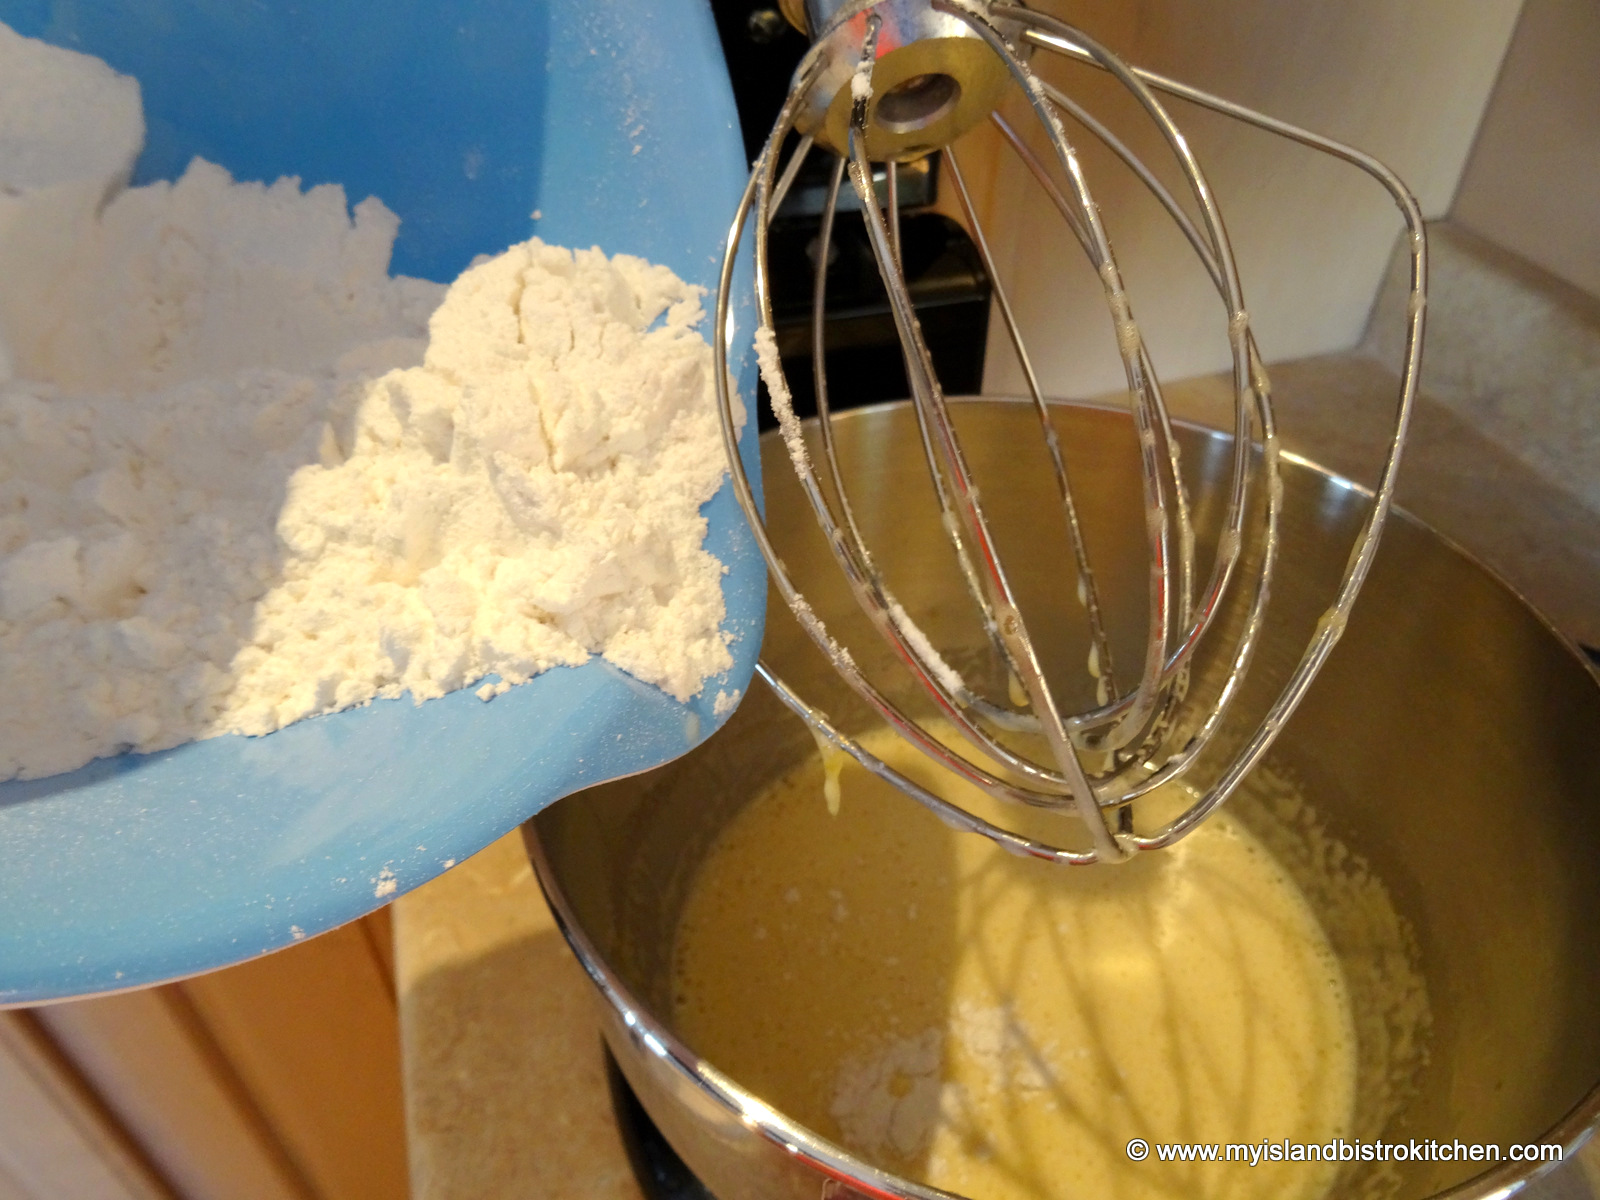
Sift flour, baking powder, and salt together. Set aside.
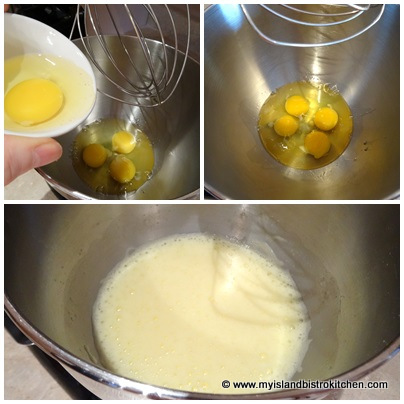
Beat eggs until frothy.
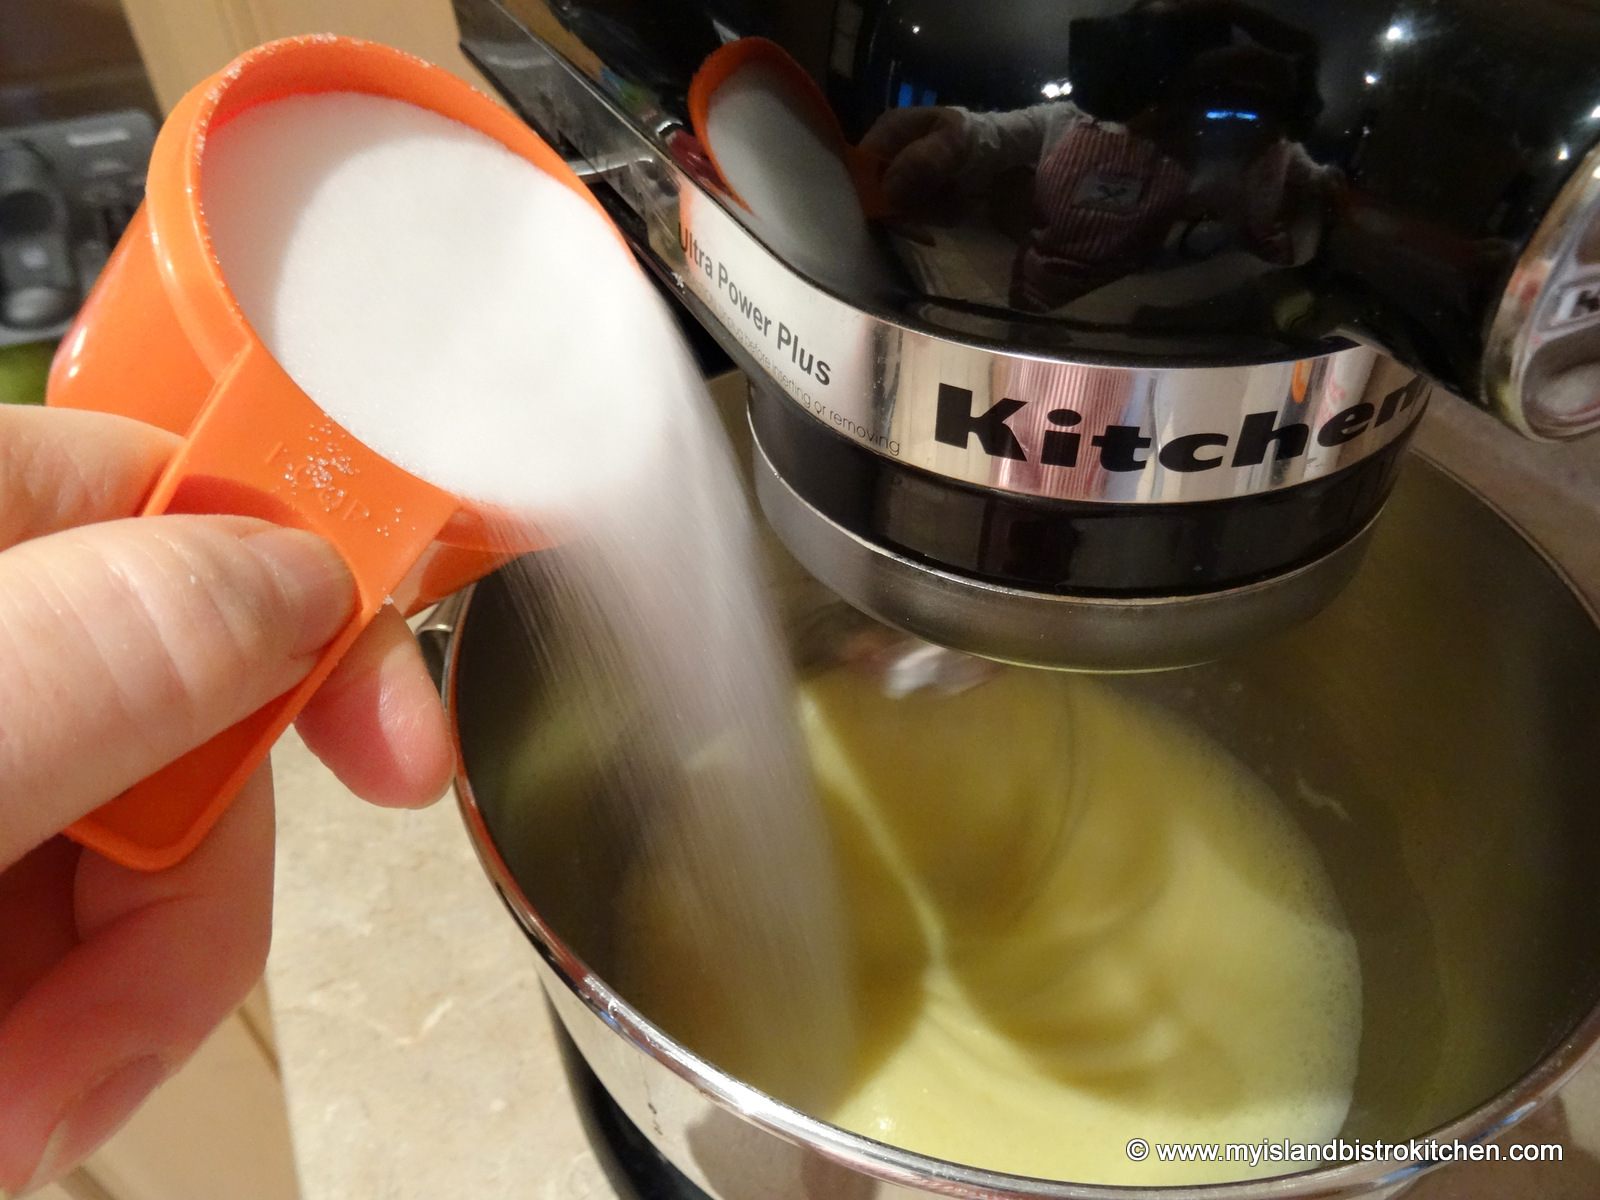
Slowly and steadily add the sugar and beat until light-colored and slightly thickened.
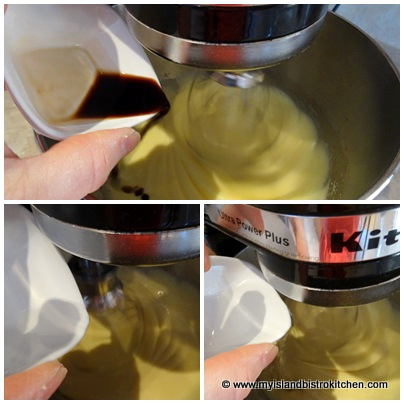
Beat in vanilla, almond flavouring, and water.
Add the sifted dry ingredients to the egg-sugar mixture. Stir just until incorporated.
Pour batter into prepared pan.
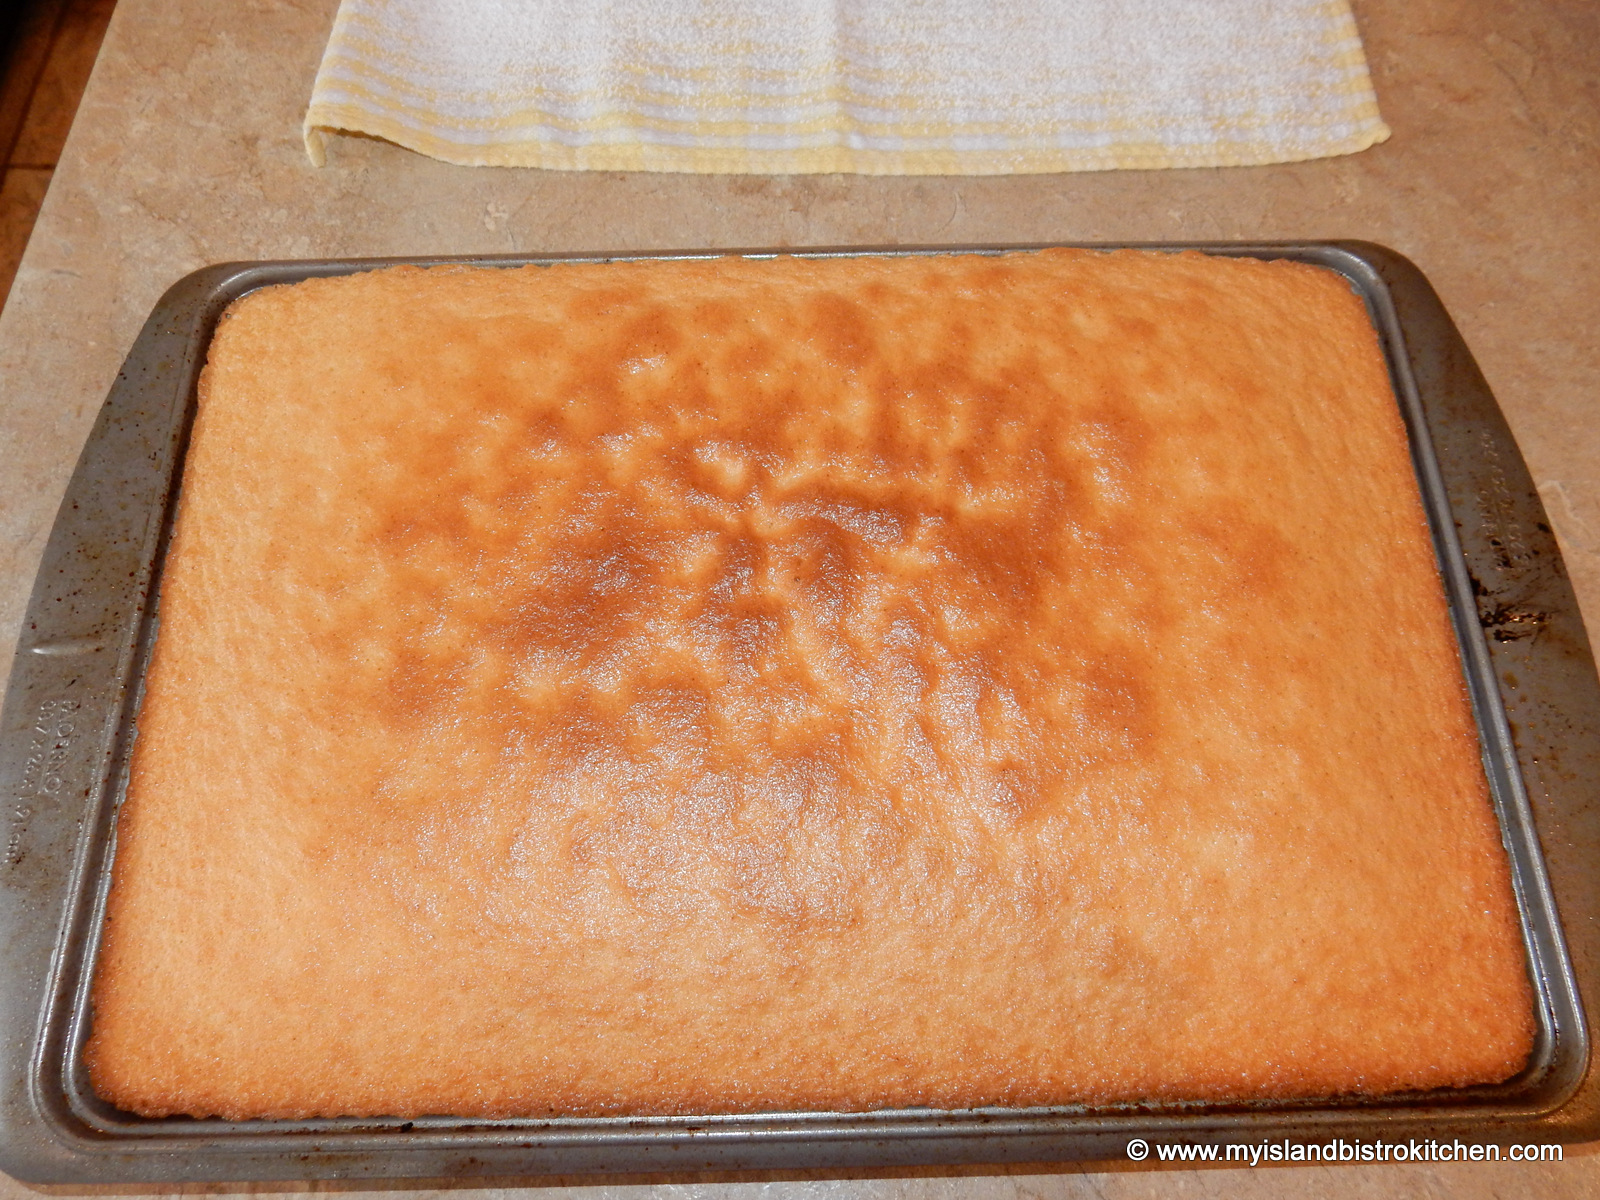
Bake 9-12 minutes or until cake tester inserted into cake comes out clean and cake springs back to a light touch. Do not overbake.
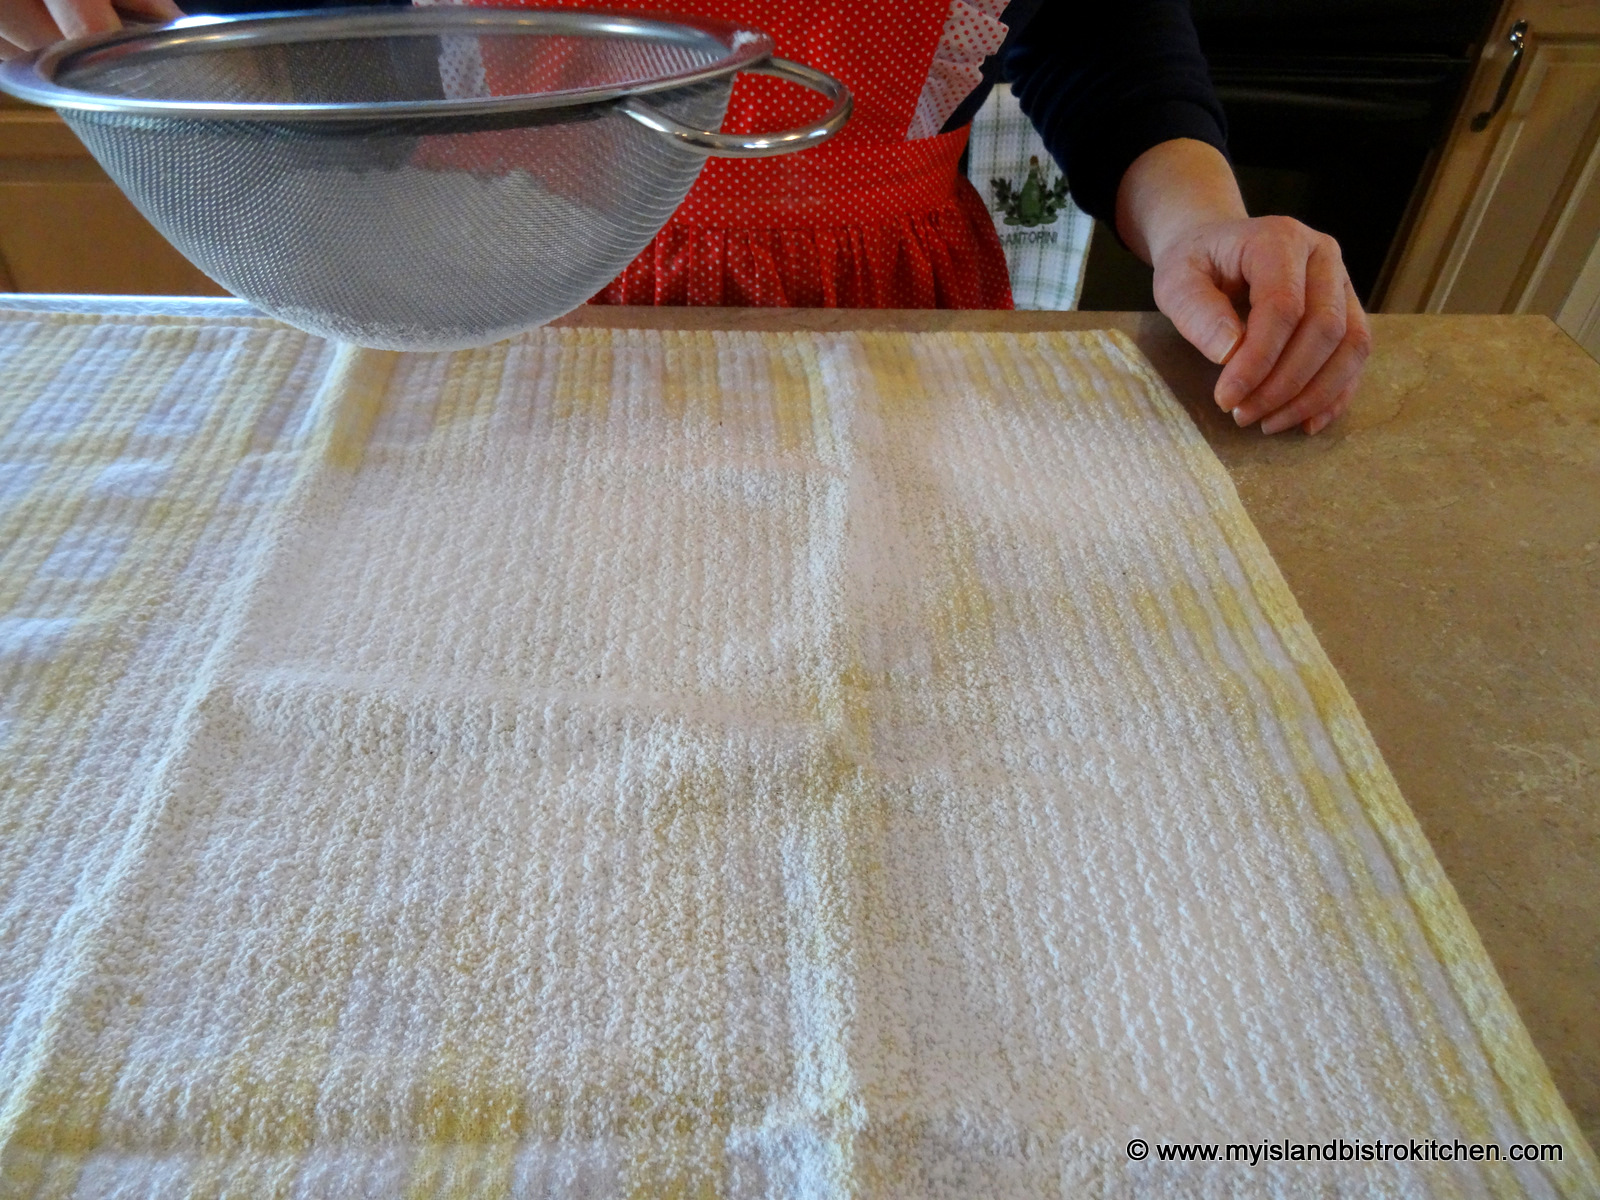
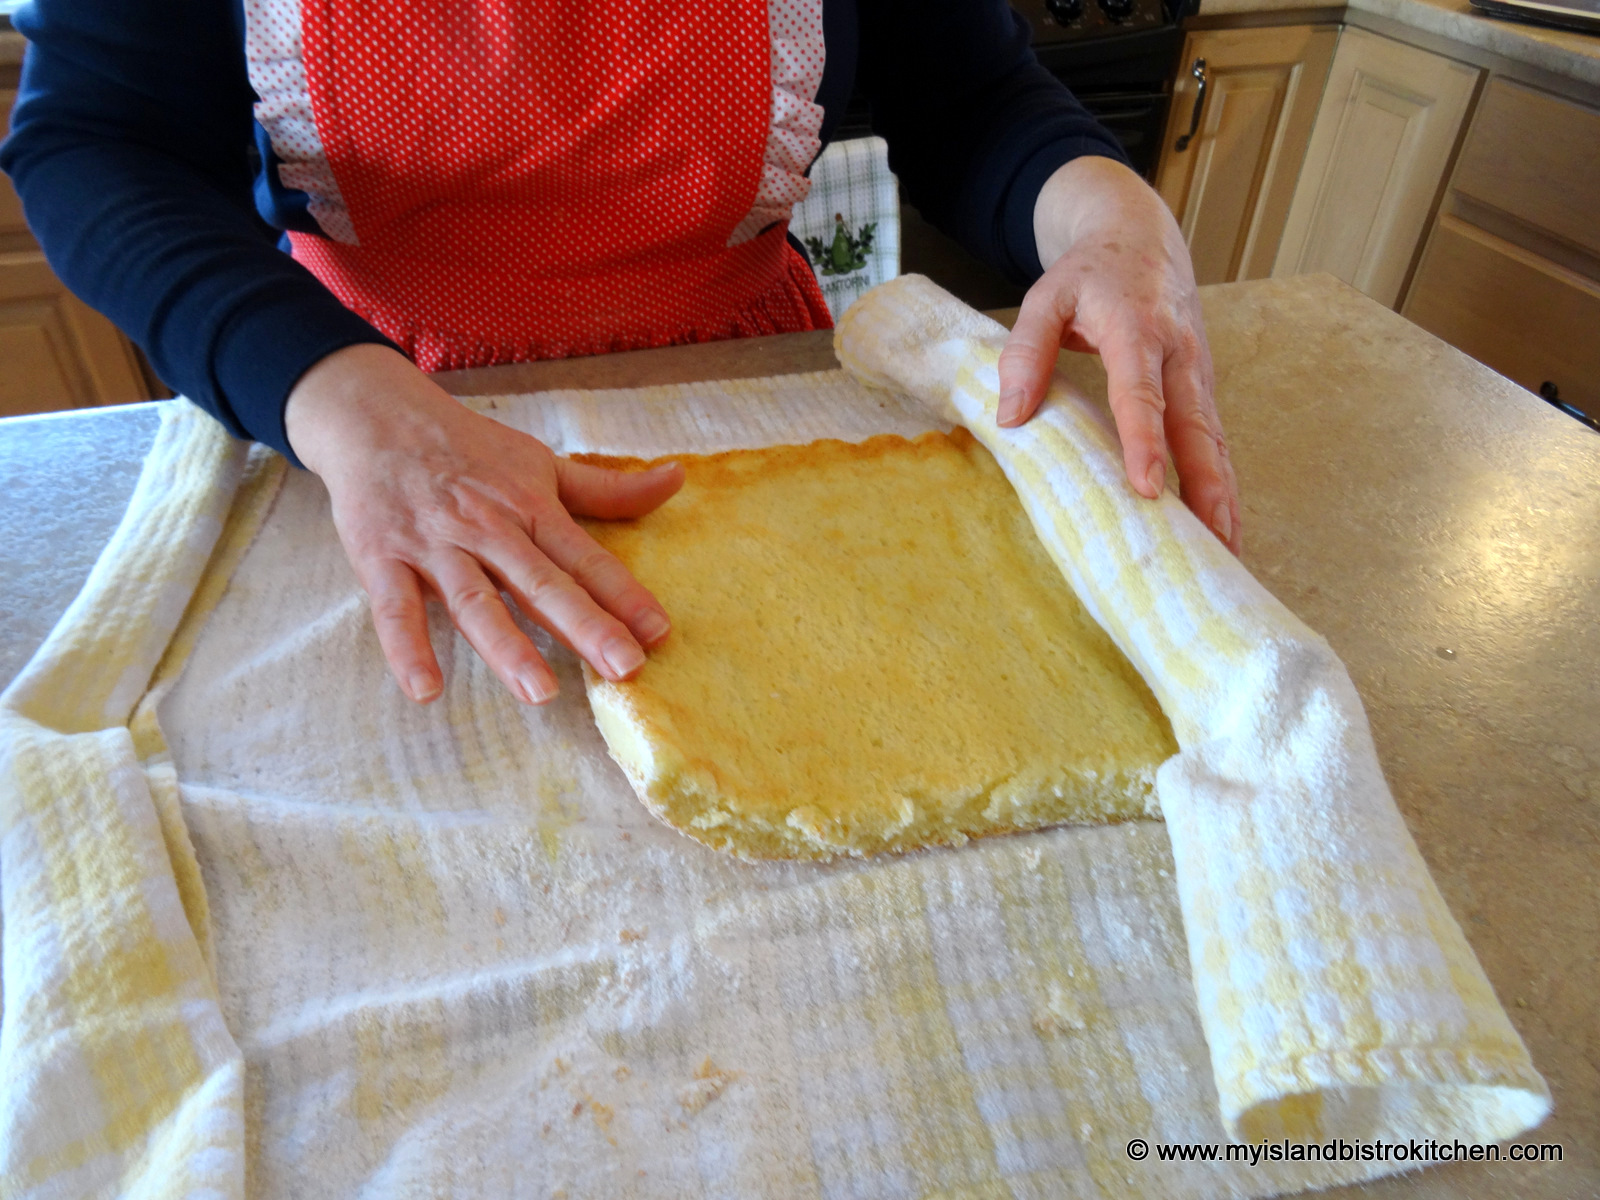
While cake is baking, lay a clean tea towel on counter and generously sprinkle with sifted icing sugar.
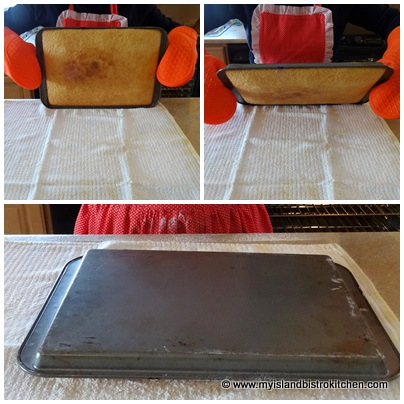
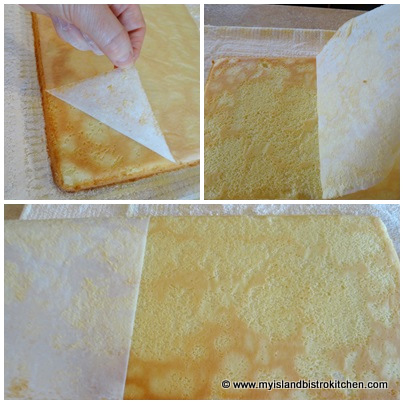
Remove cake from oven and run knife around all four edges to loosen cake from pan sides. Invert baked cake on sugar-dusted tea towel.
Peel off parchment paper, being careful not to tear cake.
Trim off outside edges of cake.
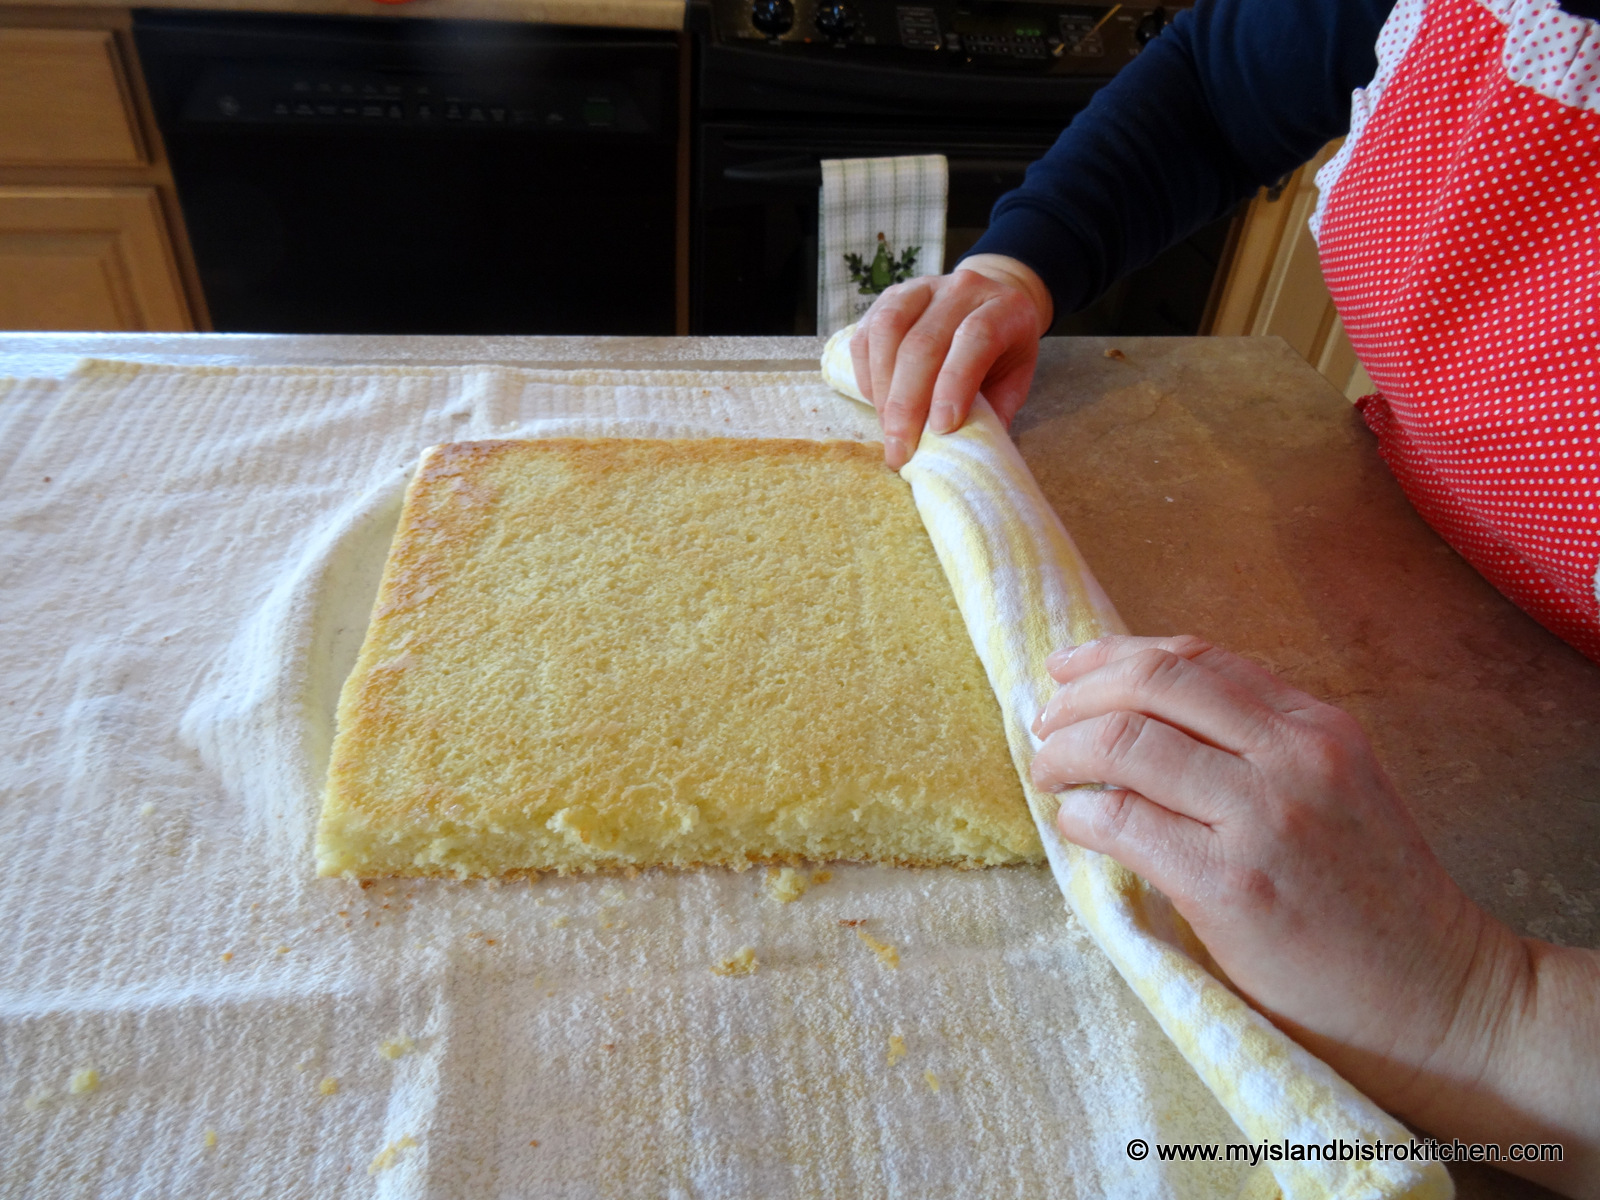
Rolling from the narrow end of the cake, roll up cake and tea towel together.
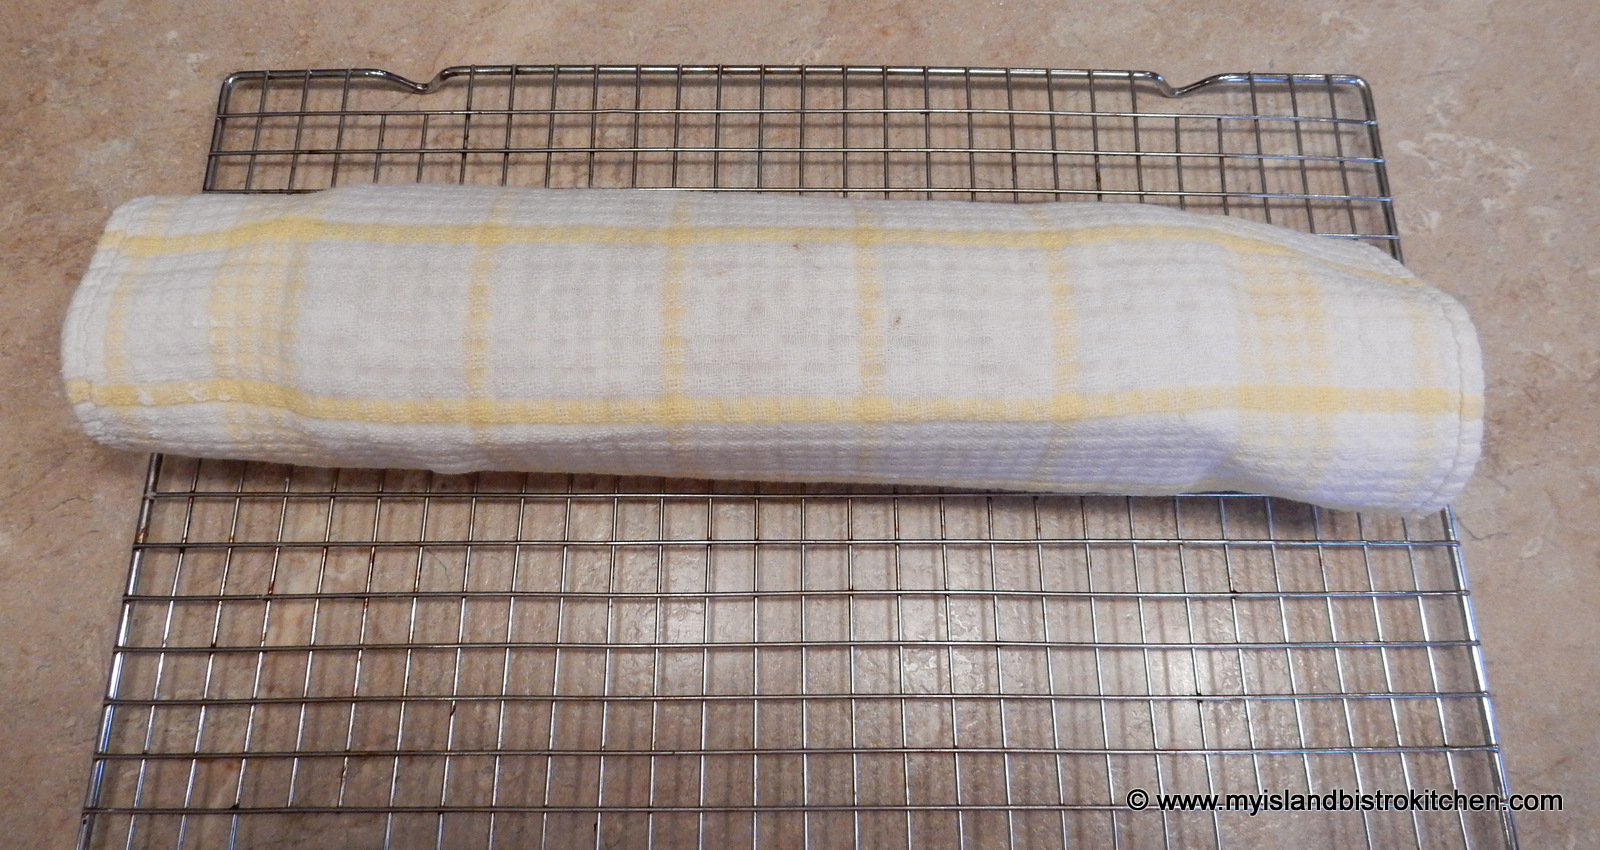
Transfer to wire rack and cool for about 15-20 minutes.
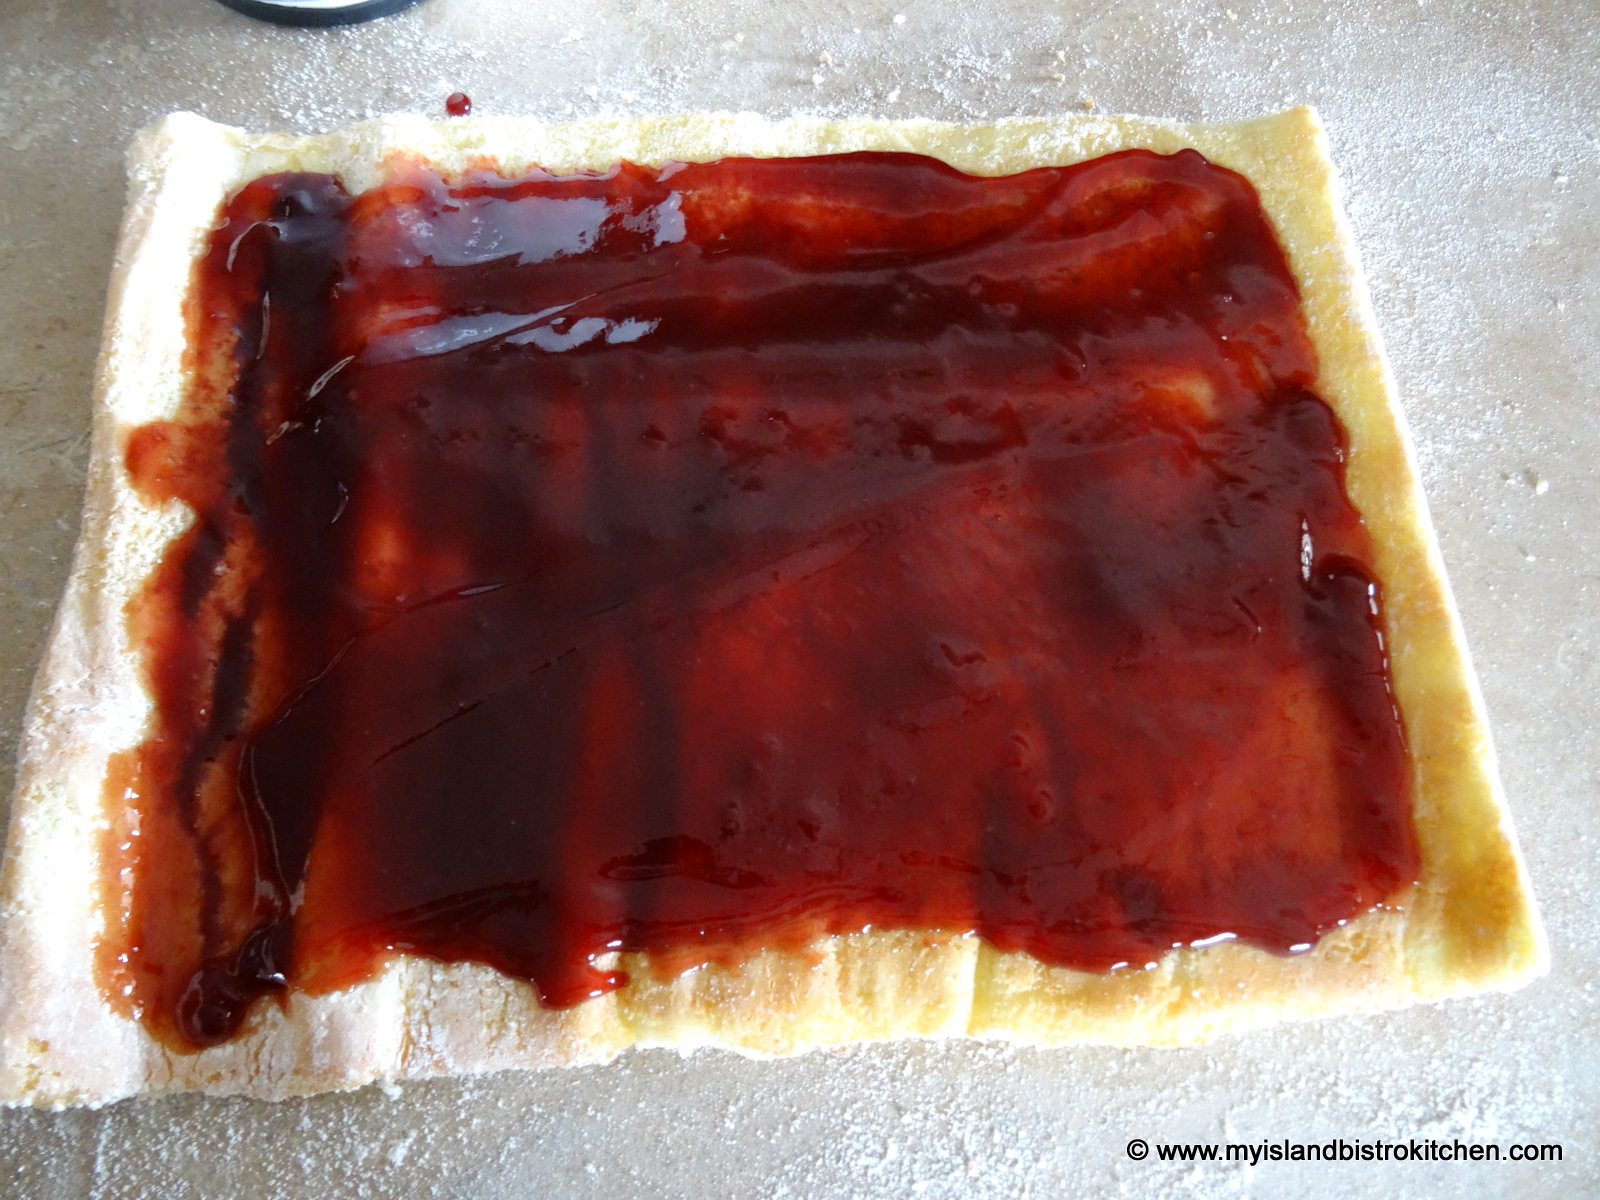
Carefully unroll the cake.
Spread cake with jam or jelly, leaving about ½” on sides of cake free of jam or jelly.
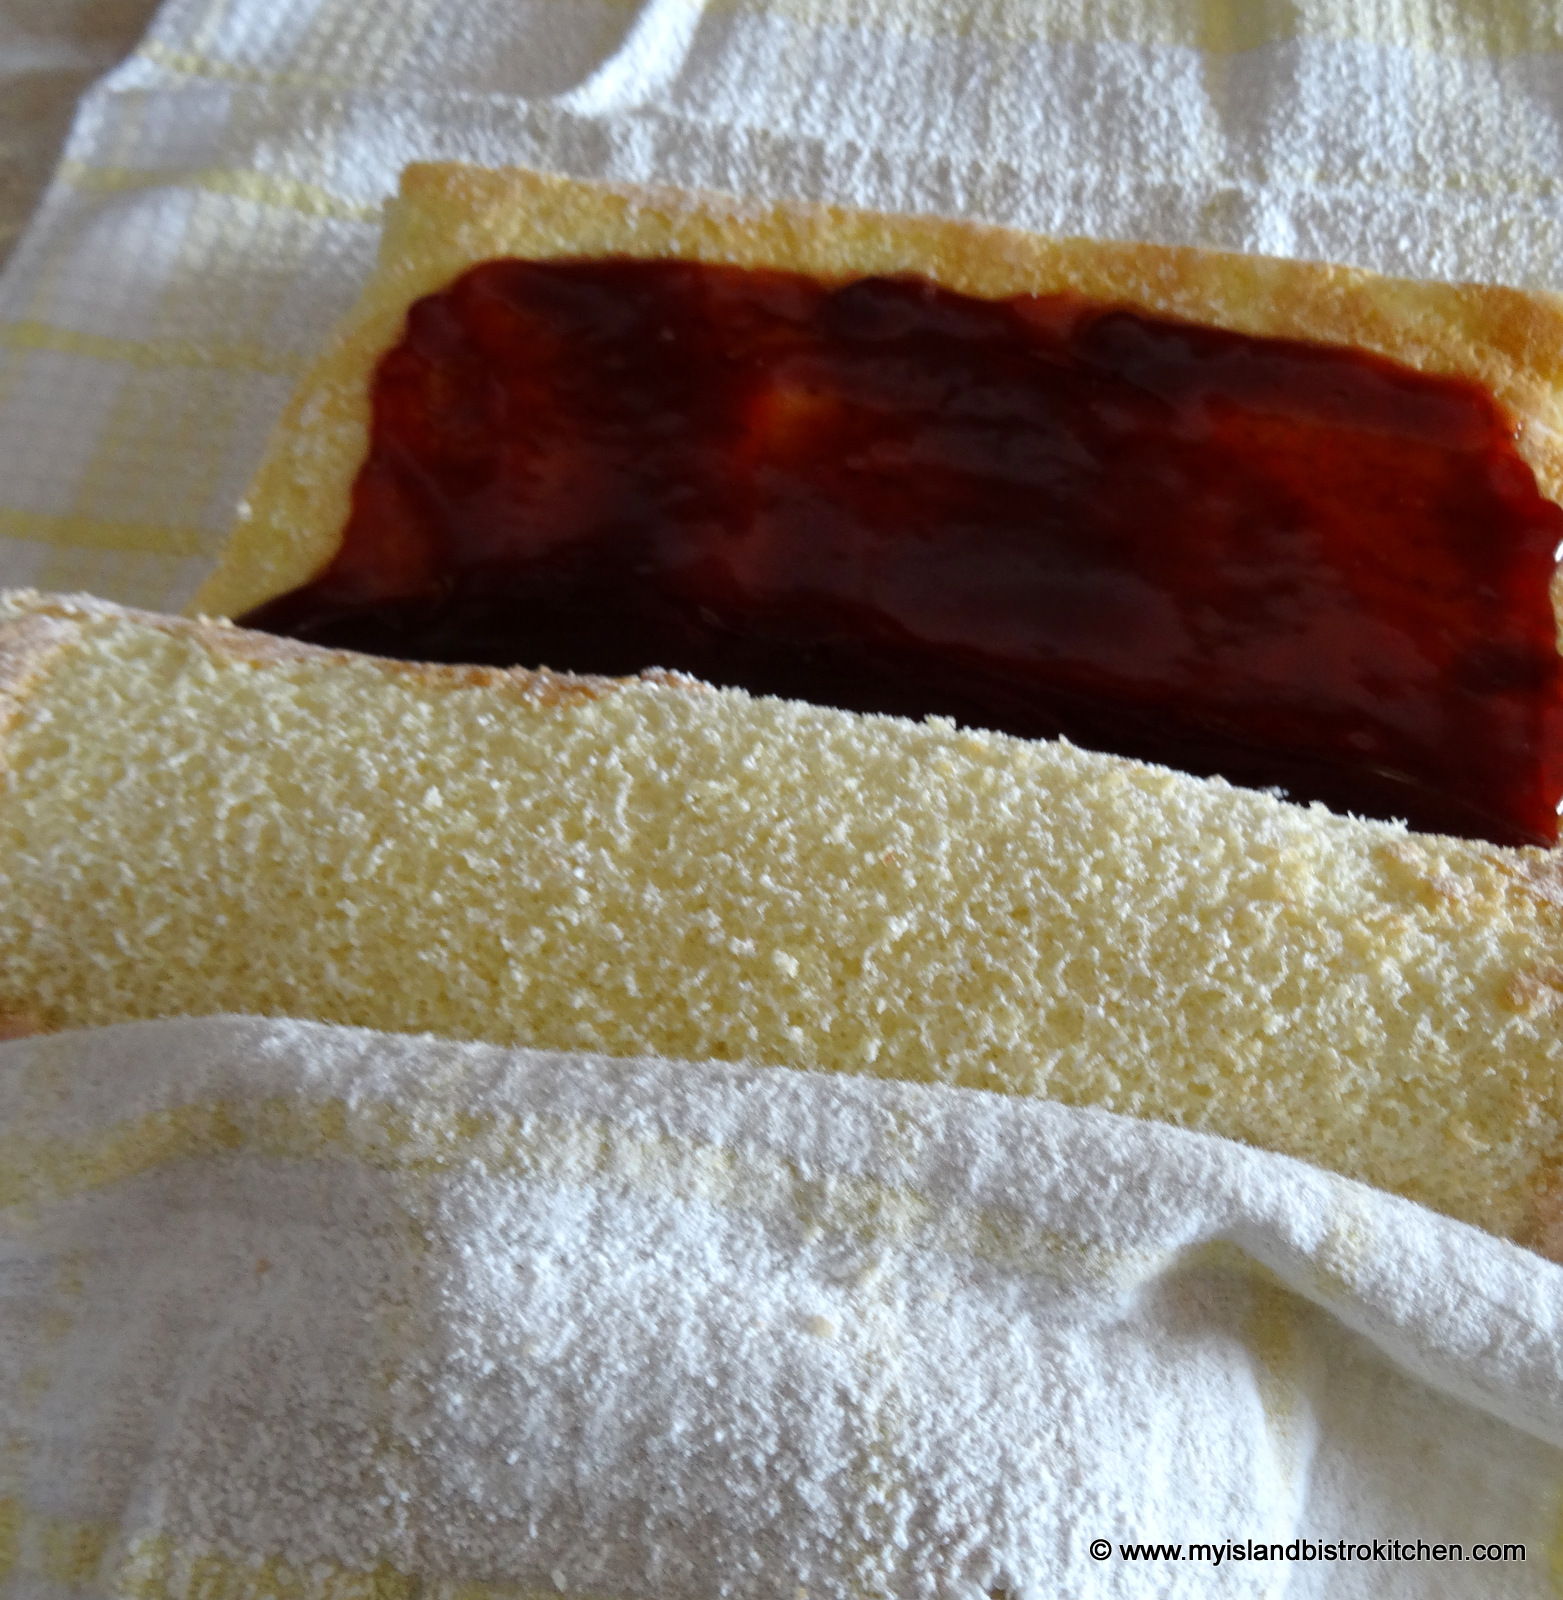
Using the tea towel as a guide, re-roll the filled cake.
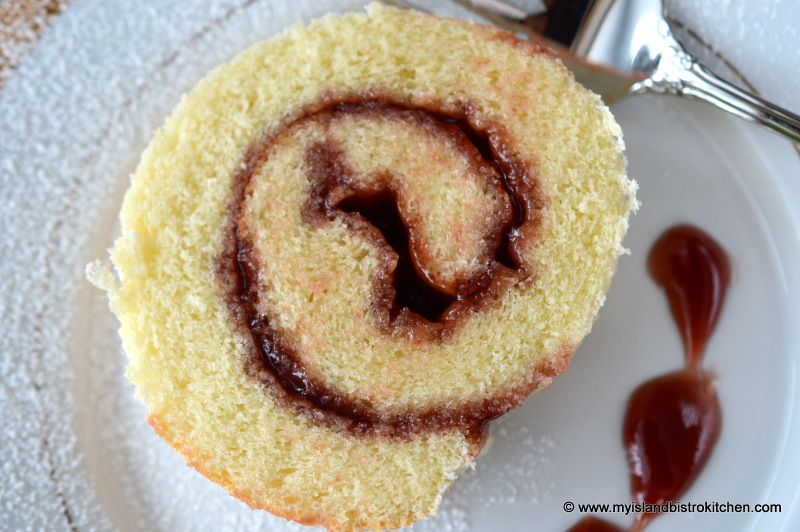
Refrigerate for at least 30 minutes. Dust with icing sugar, cut, and serve.
Yield:Apx. 10-12 servings
If you have made this recipe and enjoyed it and/or wish to share it with your friends and family, please do so on social media but be sure to share the direct link to this posting from my website.
Connect with My Island Bistro Kitchen on Social Media
Follow “the Bistro” on Pinterest at https://www.pinterest.ca/peibistro/ and pin the Pinterest-ready photo found at the end of this post to your favorite Pinterest boards.
A Jelly Roll is an impressive dessert made with a thin sponge cake spread with a favorite jam or jelly and then rolled up, dusted with icing sugar, and sliced.
Course
Dessert
Keyword
jelly roll
Servings10
My Island Bistro KitchenMy Island Bistro Kitchen
Ingredients
1cup+ 3 tbsp cake flour
1¼tspbaking powder
¼tspsalt
4large eggs
1cupsugar
1tspvanilla
¼tspalmond flavouring
2tbspcold water
¾ - 1cupjam or jelly
Icing sugar for dusting
Instructions
Preheat oven to 400°F.
Grease, or spray cooking oil on 10”x15” rimmed baking sheet, ensuring sides are well-greased. Line bottom of pan with parchment paper. Lightly spray parchment paper with cooking oil.
Sift flour, baking powder, and salt together. Set aside.
Beat eggs until frothy. Slowly and steadily add the sugar and beat until light-colored and slightly thickened. Beat in vanilla, almond flavouring, and water.
Add the sifted dry ingredients to the egg-sugar mixture. Stir just until incorporated.
Pour batter into prepared pan. Bake 9-12 minutes or until cake tester inserted into cake comes out clean and cake springs back from a light touch. Do not overbake.
While cake is baking, lay a clean tea towel on counter and generously sprinkle with sifted icing sugar. Remove cake from oven and run knife around all four edges to loosen cake from pan sides. Invert baked cake on sugar-dusted tea towel. Peel off parchment paper being careful not to tear cake.
Trim off outside edges of cake. Rolling from the narrow end of the cake, roll up cake and tea towel together. Transfer to wire rack and cool for about 15 minutes. Carefully unroll the cake and spread with jam or jelly, leaving about ½” on sides of cake free of jam or jelly. Re-roll. Refrigerate for at least 30 minutes. Dust with icing sugar, cut, and serve.
Recipe Notes
Yield: Apx. 10-11 servings
NOTE: Be sure to read the accompanying blog post to this recipe as it contains tips for making the jelly roll successfully as well as step-by-step photos of the method used to make the jelly roll.
[Copyright My Island Bistro Kitchen]
Try one of these Jellies or Fruit Curds in your next Jelly Roll: