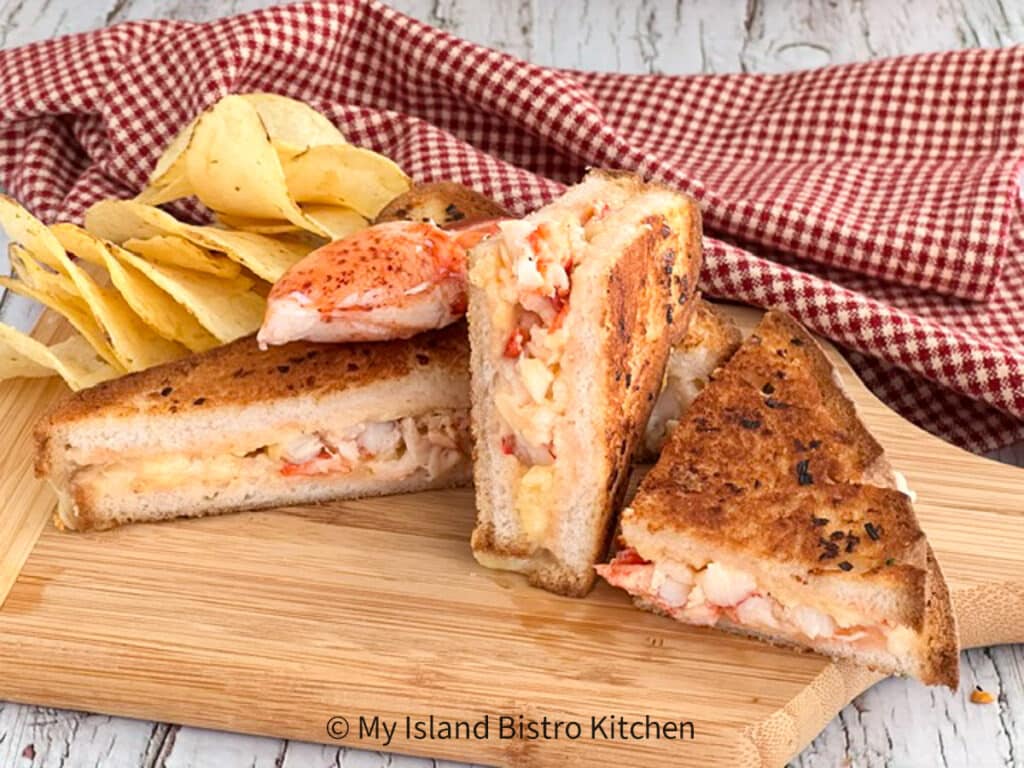
Living in PEI where lobster is one the Island’s primary seafoods, it’s a common food and one I find quite versatile and an easy ingredient with which to create tasty recipes. This Lobster Grilled Cheese Sandwich features tender, succulent chunks of lobster paired with a trio of melting cheeses, all enhanced with a spread made with mayonnaise/salad dressing mixed with red pepper jelly, Dijon mustard, and a dash of Old Bay Seasoning. Garlic and Onion Chive Butter rounds out the flavor notes in this divine gourmet sandwich.
Today, I am sharing my recipe for a classic dessert known as the French Lemon Tart (tarte au citron). This iconic tart features a silky-smooth tangy lemon filling which is placed in a buttery rich, tender, and slightly crisp Pâte Sucrée shell. Simply, this tart – a staple found in many French Patisseries – is an elegant and simplistic dessert that can be made in your own kitchen! It’s a lemon lover’s dream come true!
This Roasted Sweet Potato and Leek Soup is a lovely gently seasoned soup. Made with roasted sweet potatoes, a leek, a head of roasted garlic, and some curated seasonings, this is a comforting soup, especially when served with fresh bread (plain, crusty, or garlic), rolls, focaccia, biscuits, or savory crackers. Whether enjoyed for lunch or a light supper, this thick and creamy soup makes for a comforting meal. The soup freezes and reheats well, too, so is handy to have on hand in the freezer for when needed.
On January 25th, we enjoyed an afternoon tea to celebrate the 18th-century Scottish poet, Robert Burns. January 25th is known as Robert (or Robbie) Burns Day so that seemed like a good reason to have a special afternoon tea. If you have been a long time follower of my website and social media channels, you know I have a genuine passion for afternoon teas and any reason at all to enjoy one is just fine with me! Today, our afternoon tea included a nod to some traditional Scottish foods, including Shortbread and Dundee Cake.
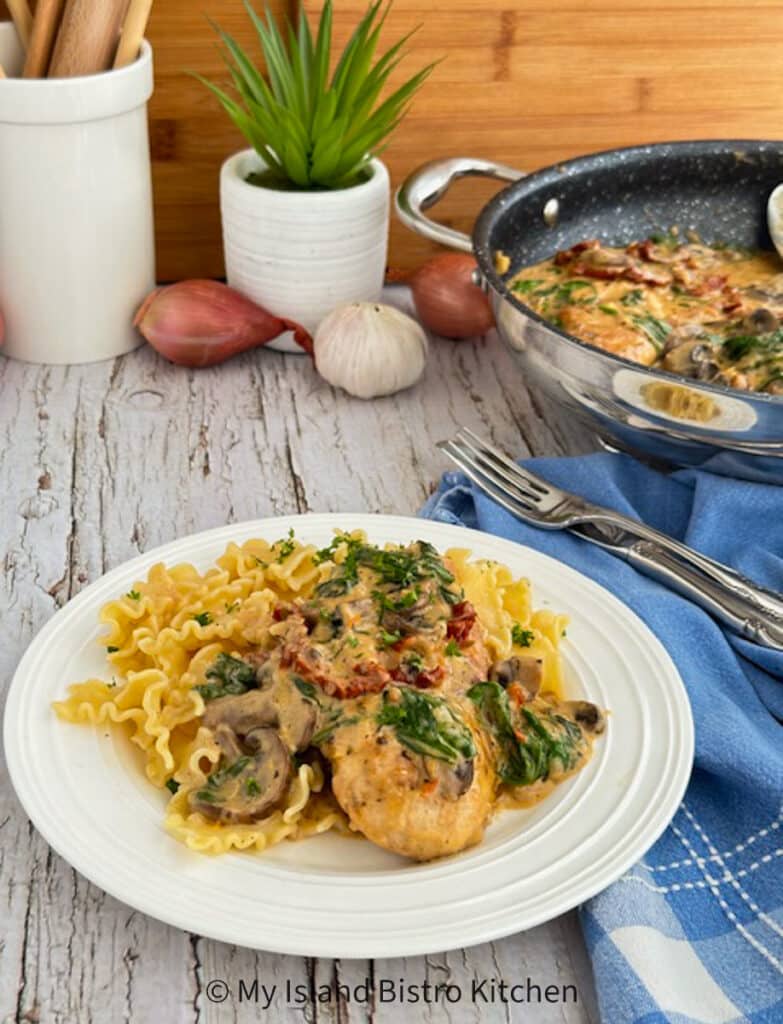
This Creamy Tuscan Chicken dish, in my opinion, certainly qualifies as a restaurant-quality entrée that can be made in one pan right in your own kitchen. The dish consists of boneless skinless chicken breasts combined with mushrooms, sun-dried tomatoes, and nutrient-rich spinach in a delectable creamy sauce. It’s packed with lovely flavor and is wonderful served with pasta, rice, or potato of choice.
Christmas is one of my favorite times of the year to create tablesettings. This red and white festive holiday tablesetting features Royal Albert’s “Poinsettia” Bone China dinnerware produced by the company from c.1976-1997. I am fortunate enough to have six placesettings of this pretty china.
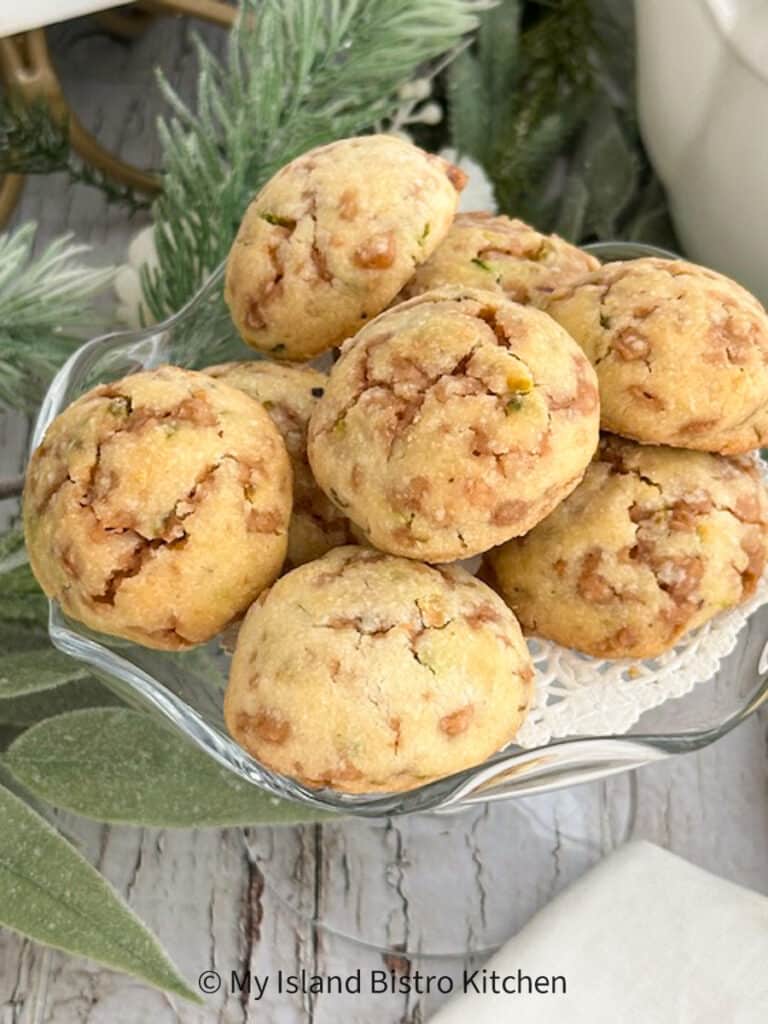
These delightful Toffee Bits and Pistachio Cookies have a short tender texture owing to the cornstarch in the ingredients. Fabulously tasty bites, they are great on cookie trays, packaged in tins or boxes for gifts, and suitable for cookie exchange events. They go very well with a fine cup of tea or coffee, too.
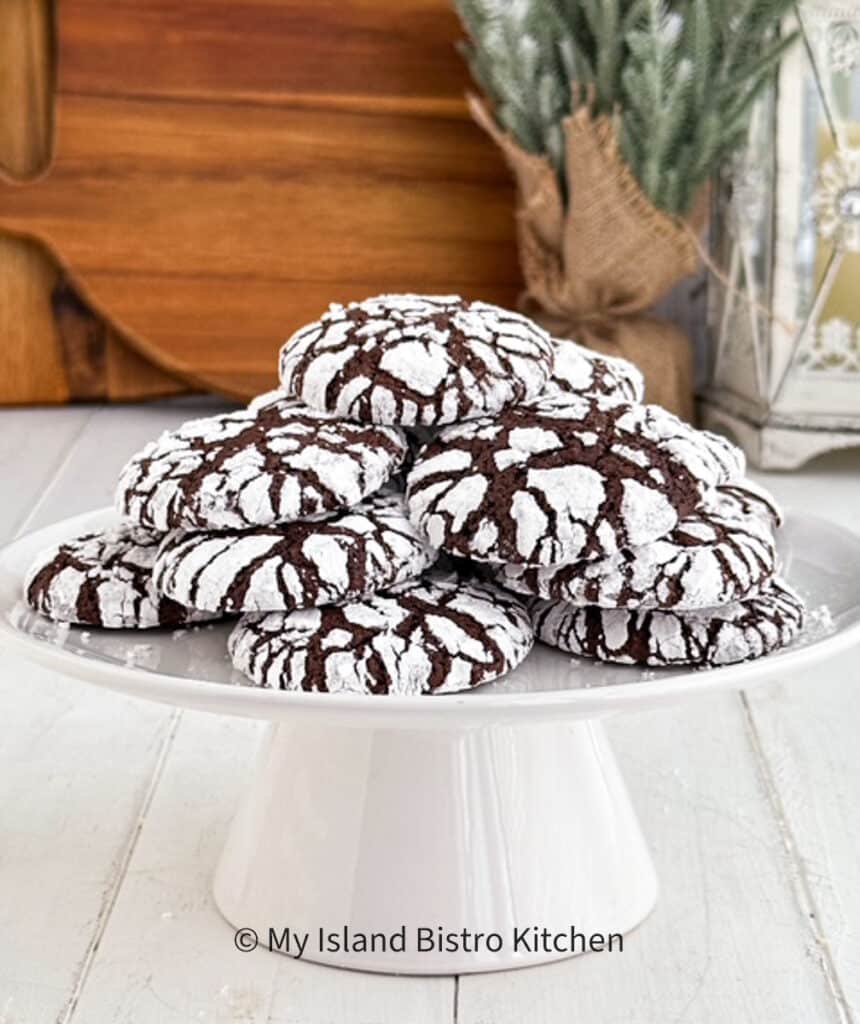
These Chocolate Crinkle Cookies are such fun cookies with their frosty white crinkles contrasting the chocolate. But the real bonus is how tasty they are. When the cookies expand as they rise in the oven, they split on the top to form the characteristic “crinkle” appearance from the icing sugar in which they were rolled.
I think Panna Cotta is one of the simplest desserts to make. It’s seriously nothing more complicated than heating cream and sugar and stirring in some “bloomed” gelatine to set the mixture. There are many variations to the basic Panna Cotta and, today, I am sharing my recipe for a divine seasonal Eggnog and Pomegranate Panna Cotta.
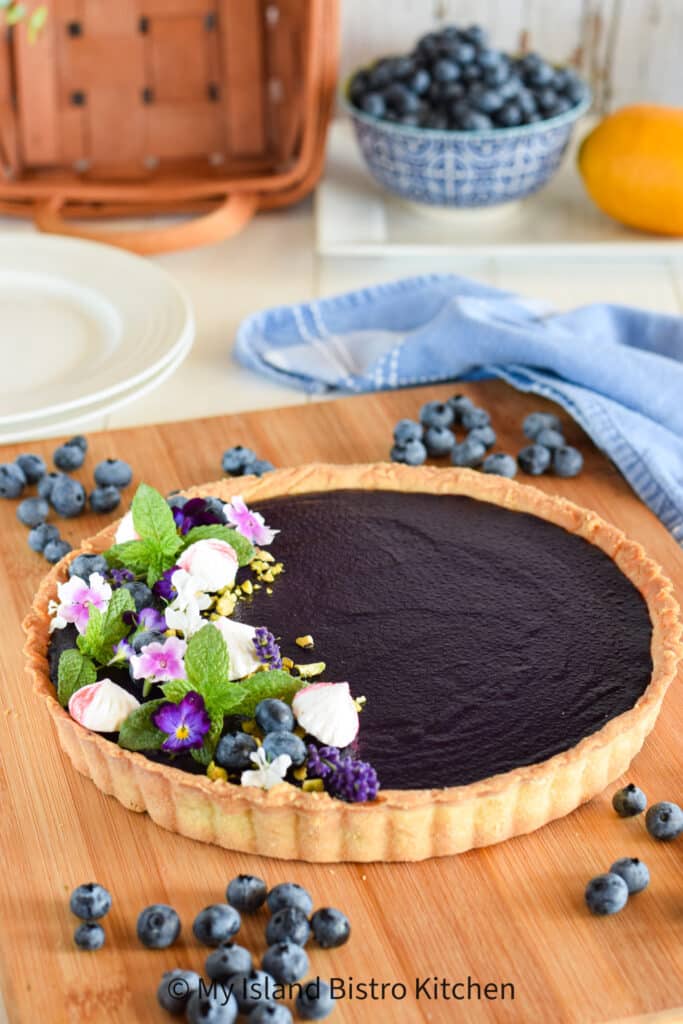
Today’s dessert is the lovely Earl Grey Blueberry and Lemon Tart. This divine tart features highbush blueberries (infused with Earl Grey tea) in a silky-smooth filling which is then placed in a buttery rich and tender Pâte Sucrée shell. Simply, this is a decadent dessert of fine restaurant quality!
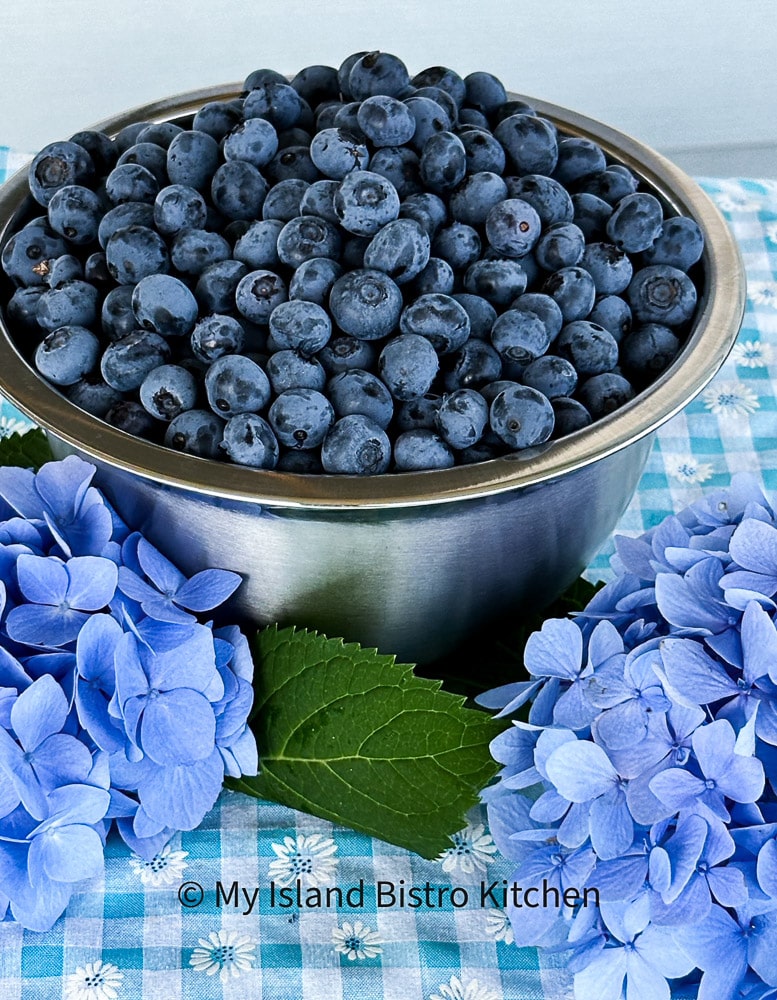
This recipe has been developed using the large highbush blueberries. In the cobbler for the photos that accompany this post, I had two varieties of blueberries on hand – Patriots and Burlingtons — so I used a mixture of both but any variety of highbush blueberries can be used.
Highbush blueberries
Frozen blueberries can be used instead of fresh ones. Do note, however, that additional thickener may be required due to the extra moisture found in berries that have been frozen. Start with perhaps adding one-half to one additional tablespoon of cornstarch, depending on how much water is in the frozen berries.
I use my 1-quart/1-litre rectangular-shaped baking dish for this dessert as I find the dessert portions out well from that shape of dish. However, if you don’t have one of these dishes but have a square or round baking dish, either of those would work, too.
Blueberry Cobbler
The cobbler topping calls for buttermilk. However, if you don’t have any on hand, an equal amount of whole milk may be substituted. I do not recommend fat-reduced milk in the cobbler topping.
The recipe can be expected to yield four generous servings. Smaller appetites may see 1-2 additional servings. Vanilla ice cream is always a good choice to dress up this dessert but other flavors will work, too.
Blueberry Cobbler
Blueberry Cobbler
Ingredients:
Blueberry Base:
1 lb/454g highbush blueberries 1¾ tbsp orange juice ½ tsp pure vanilla extract 2 tsp finely grated orange rind
¾ cup all-purpose flour ¼ cup granulated sugar 1¾ tsp baking powder ¼ tsp baking soda 1/8 tsp nutmeg pinch salt 1½ tsp finely grated orange rind 3½ tbsp cold butter ¼ cup buttermilk
1 tbsp buttermilk for brushing cobbler top
1½ – 2 tsp turbinado or granulated sugar for sprinkling on top of cobbler (optional)
Method:
Position oven rack in center of oven and preheat oven to 375°F. Lightly grease a 1-quart/1-litre rectangular-shaped baking dish.
To make Blueberry Base:
Mix the sugar, cornstarch, spices, and salt together in a small bowl. Set aside.
Place blueberries in large bowl. Drizzle with the orange juice and pure vanilla extract. Add the finely grated orange rind and stir. Mix in the sugar-cornstarch-spice dry ingredient mixture. Transfer mixture into prepared baking dish. Dot with cubed butter.
To make the cobbler topping:
In small bowl, whisk flour, sugar, baking powder, baking soda, nutmeg, and salt together. Stir in the grated orange rind. Cut in the cold butter using a small pastry cutter. Stir in the buttermilk and incorporate ingredients to make a shaggy dough. Do not overwork dough. Pat dough into ½“ thickness, and shape into a rough rectangular shape the size to fit the baking dish. Cut dough into 6-8 equal-sized pieces and place on top of blueberry base, leaving a small amount of space between each square. Using a pastry brush, lightly brush the cobbler topping with buttermilk. Sprinkle turbinado sugar over cobbler topping, if desired.
Place baking dish on a foil-lined baking sheet (in case of any boil-overs) and transfer cobbler to oven. Bake for approximately 35-40 minutes or until blueberry base is bubbling and cobbler topping is golden tanned. Let cobbler sit for about 15-20 minutes to allow it to set before serving. Serve plain or with a scoop of ice cream or a dob of whipped cream.
Yield: Apx. 4+ servings
NOTES:
Frozen blueberries (unthawed) may be used in this recipe; however, additional thickener may be required due to the increased moisture in frozen berries.
The cobbler topping calls for buttermilk; however, whole milk, in an equal amount, may be substituted.
To make the recipe gluten-free, use an equal amount of a cup-for-cup all-purpose gluten-free flour instead of the wheat-based all-purpose flour called for in the recipe.
Any 1-quart/1-litre baking dish will work for this dessert; the rectangular-shaped baking dish (shown in the photos) is a very easy dish from which to portion out the dessert.
If you have made this recipe and enjoyed it and/or wish to share it with your friends and family, please do so on social media but be sure to share the direct link to this posting from my website.
With large, plump highbush blueberries baked under a cobbler topping, this Blueberry Cobbler is tasty simply plain on its own but is divine with a scoop of ice cream or a dob of whipped cream
My Island Bistro KitchenBarbara -My Island Bistro Kitchen
Ingredients
Blueberry Base:
1lb/454g highbush blueberries
1¾tbsporange juice
½tsppure vanilla extract
2tspfinely grated orange rind
2tbspbutter, diced into small cubes
3tbspgranulated sugar
2½tbspcornstarch
¼tspcinnamon
¼tspnutmeg
1/8tspcardamom
Pinchsalt
Cobbler Topping:
¾cupall-purpose flour
¼cupgranulated sugar
1¾tspbaking powder
¼tspbaking soda
1/8tspnutmeg
pinchsalt
1½tspfinely grated orange rind
3½tbspcold butter
¼cupbuttermilk
1tbspbuttermilk for brushing cobbler top
1½ – 2tspturbinado or granulated sugar for sprinkling on top of cobbler (optional)
Instructions
Position oven rack in center of oven and preheat oven to 375°F. Lightly grease a 1-quart/1-litre rectangular-shaped baking dish.
To make Blueberry Base:
Mix the sugar, cornstarch, spices, and salt together in a small bowl. Set aside.
Place blueberries in large bowl. Drizzle with the orange juice and pure vanilla extract. Add the finely grated orange rind and stir. Mix in the sugar-cornstarch-spice dry ingredient mixture. Transfer mixture into prepared baking dish. Dot with cubed butter.
To make the cobbler topping:
In small bowl, whisk flour, sugar, baking powder, baking soda, nutmeg, and salt together. Stir in the grated orange rind. Cut in the cold butter using a small pastry cutter. Stir in the buttermilk and incorporate ingredients to make a shaggy dough. Transfer dough to lightly floured work surface. Pat dough into ½“ thickness, and shape into a rough rectangular shape the size to fit the baking dish. Do not overwork dough. Cut dough into 6-8 equal-sized pieces and place on top of blueberry base, leaving a small amount of space between each square. Using a pastry brush, lightly brush the cobbler topping with buttermilk. Sprinkle turbinado sugar over cobbler topping, if desired.
Place baking dish on a foil-lined baking sheet (in case of any boil-overs) and transfer cobbler to oven. Bake for approximately 35-40 minutes or until blueberry base is bubbling and cobbler topping is golden tanned. Let cobbler sit for about 15-20 minutes to allow it to set before serving. Serve plain or with a scoop of ice cream or a dob of whipped cream.
Recipe Notes
Yield: Apx. 4+ servings
[Copyright My Island Bistro Kitchen]
NOTES: 1. Frozen blueberries (unthawed) may be used in this recipe; however, additional thickener may be required due to the increased moisture in frozen berries. 2. The cobbler topping calls for buttermilk; however, whole milk, in an equal amount, may be substituted. 3. To make the recipe gluten-free, use an equal amount of a cup-for-cup all-purpose gluten-free flour instead of the wheat-based all-purpose flour called for in the recipe. 4. Any 1-quart/1-litre baking dish will work for this dessert; the rectangular-shaped baking dish (shown in the photos) is a very easy dish from which to portion out the dessert.
Connect with My Island Bistro Kitchen on Social Media
Follow “the Bistro” on Pinterest at https://www.pinterest.ca/peibistro/ and pin one of the Pinterest-ready photos at the end of this posting to your favorite Pinterest boards!
You May Also Enjoy These Other Cobbler Dessert Recipes from My Island Bistro Kitchen:
I love scones and am always developing new recipes for them. Today, I am sharing my recipe for Date and Orange Buttermilk Scones. These are a lovely treat served warm from the oven with a favorite jam and/or fruit curd with, of course, some clotted cream or English double cream. That said, they are also tasty with just a good slather of fine butter.
Gooseberries are not altogether common today but some gardeners grow a few gooseberry bushes for their own use. Otherwise, the berries are more likely to be found at local farmers’ markets than in large supermarkets.
Gooseberries
Gooseberry bushes have different varieties that produce berries that range in color from green to almost black. Generally speaking, the darker the color, the sweeter the flavor with the green berries being unripe and very tart. The ones I used in the pie in the photos that accompany this post were mostly a rosy pink color with a few green ones added in for tartness.
I consider it a great privilege to live in Prince Edward Island that boasts fabulous fresh seafood. Lobster fishing is a significant economic driver for the Island with many Islanders working in different aspects of the industry. Having access to fine fresh seafood, such as lobster, means I get to develop all kinds of wonderful tasty recipes for seafood. Today, I am sharing my recipe for Lobster, Asparagus, and Mushroom Quiche. This quiche makes a lovely meal for brunch, lunch, or supper, served with a simple green salad dressed with a light vinaigrette.
If you are a lemon lover and have never had a true homemade, made-from-scratch, Lemon Meringue Pie, you’re in for a real treat. There are some steps involving in making a Lemon Meringue Pie (i.e., the pastry, filling, and meringue) but the reward of a fabulously tasty and silky smooth Lemon Meringue Pie that cuts out while holding its shape and plates well, will justify it.
It’s no secret that I love ham and a good sale on a large ham. While we will enjoy some of the ham sliced, I like to take a large portion of the ham and stretch it out by using it in other dishes as this stretches the food budget. If, like me, you like delicious recipes to use leftover ham, this Macaroni and Cheese with Ham recipe is for you.
These no-bake Roasted Cashew and Coconut Bliss Bites are a substantial snack. Whether enjoyed with a lovely cup of tea or coffee or as on-the-go snacks, they are a great pick-up refreshment anywhere and any time.