
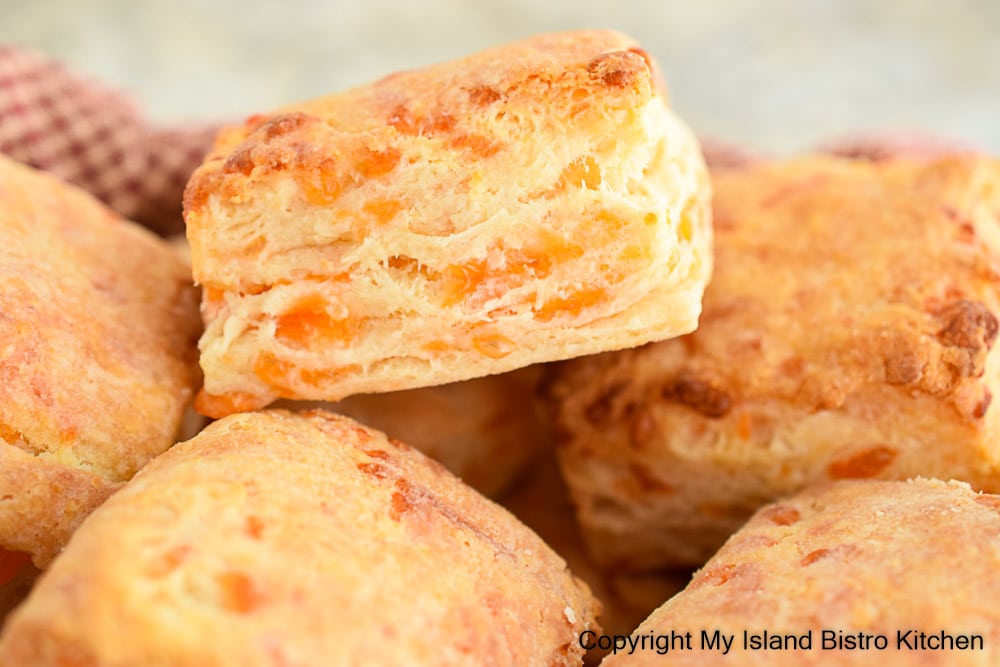
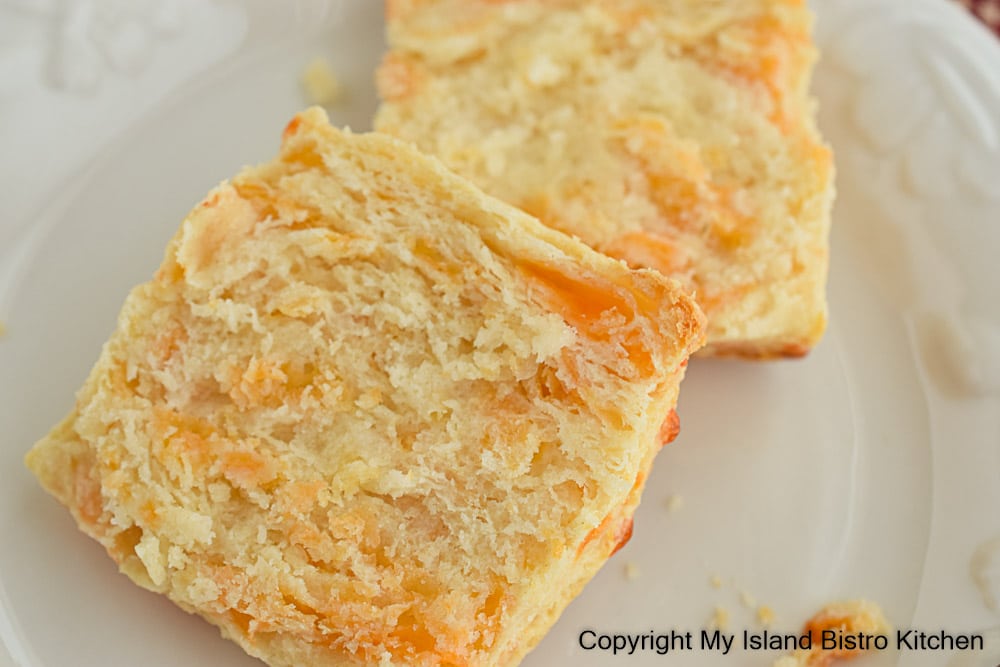
Today, I am sharing my recipe for Cheddar Cheese Biscuits. With layers of flakiness and a soft and tender crumb, these Cheddar Cheese Biscuits are full of delicious butter and cheese flavors. They are best served slightly warm with a good slather of fine butter.
These biscuits can be made entirely with butter as the fat component or they may be made with shortening or a combination of both. Butter and shortening each have their own attributes when it comes to biscuits but the choice of fat will alter the flavor and texture of the biscuits.
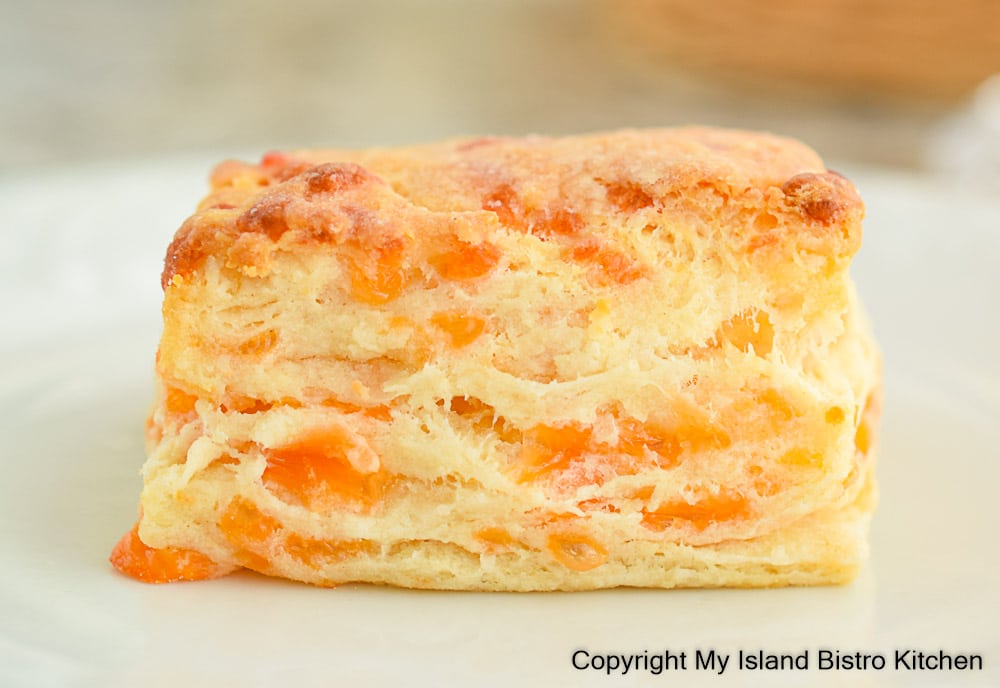
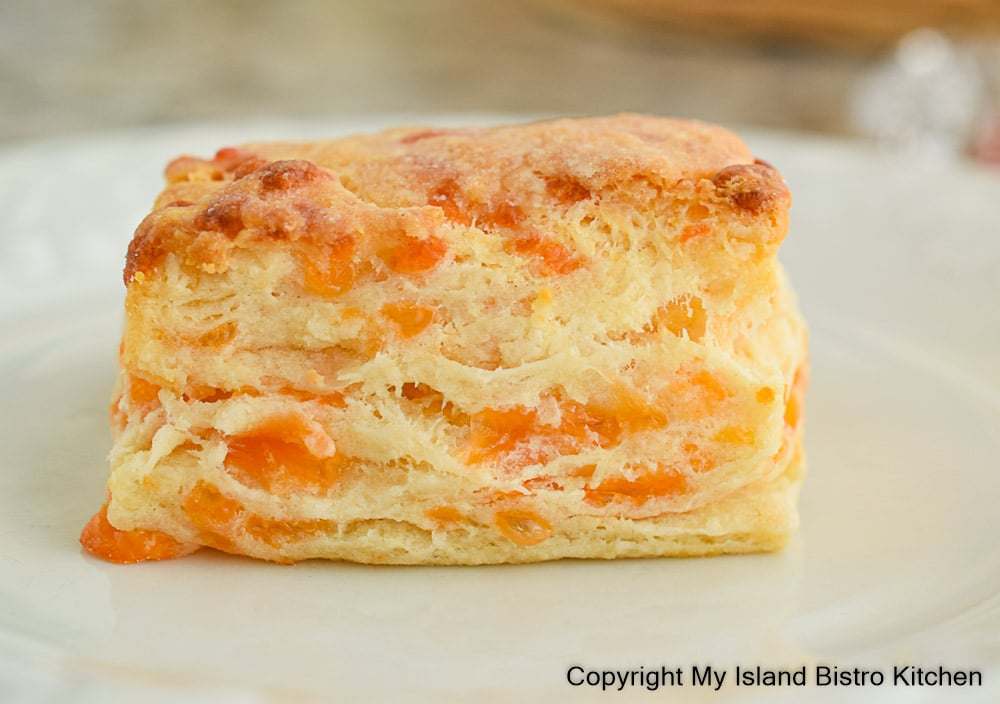
It’s hard to dispute that biscuits made with pure butter are rich and have wonderful buttery flavor. Butter has a percentage of water content and, as the cold butter melts during the baking process, it will create pockets of steam which will help the biscuits rise into lovely, distinctively visible, flaky layers with a tender biscuit crumb. The baked biscuits should easily break apart, without being cut with a knife, at any one of the flaky layers.
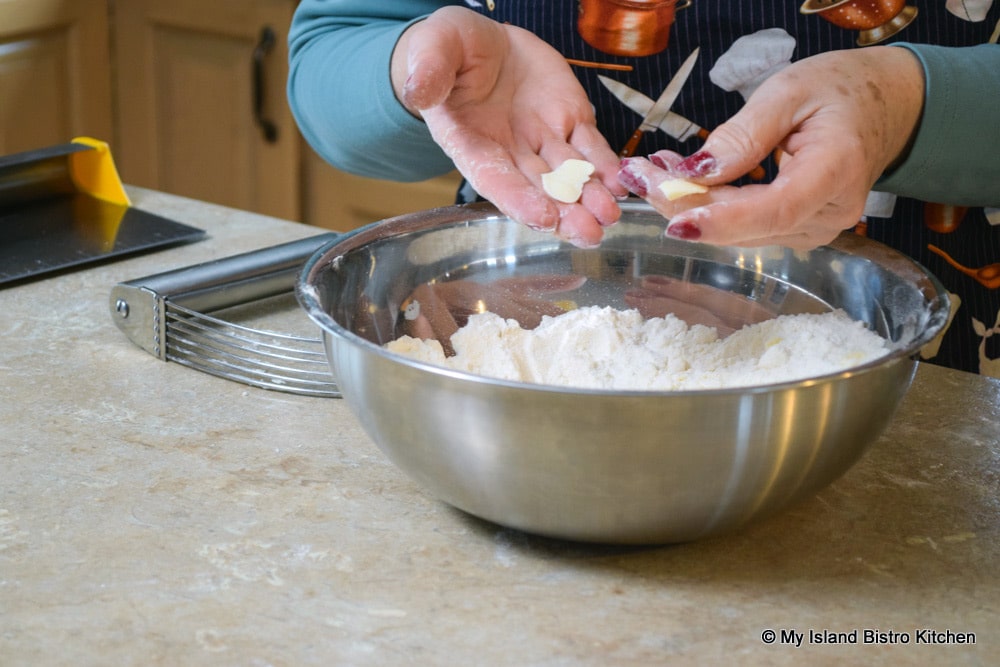
Forming some of the larger pieces of butter into paper-thin slivers between the thumb and forefinger will also help the flaky layers to develop. These slivers will provide strips of solid butter fat that will fall in between layers of the biscuit dough and, as the butter melts in the oven, the steam from the water’s butter content will push or lift the dough up into layers of tender texture.
I recommend unsalted butter in this recipe though salted butter may be substituted, in which case, reduce the amount of salt called for in the recipe to a scant ½ teaspoon.
Shortening, on the other hand, has no flavor so will not be a contributor on that front. It also lacks water content so is likely to result in a more dense and potentially more crumbly textured biscuit because there will be no steam to lift the dough into flaky layers. That said, biscuit dough made with shortening (that has a higher melting point than butter) may result in biscuits that hold their shape somewhat better than those made with butter that has a lower melting point. However, I find that no matter what fat is used in biscuits, chilling them prior to baking helps to retain their shape.
I always chill my biscuits before baking them to ensure that the fat is cold and hard. This will inhibit it quickly melting as soon as the biscuits go into the oven. This delayed melting time allows the biscuits time to start to rise, take shape, and begin to bake before the fat inside the dough melts. If the biscuits are not chilled prior to baking, and if the fat is already warm from room temperature and the hands working the dough, the fat will quickly melt and the biscuits may start to spread and topple over. As an aside tip, if you experience issues with biscuits toppling, you may find, turning them upside down when placing them on the baking sheet, might also help in this regard.

I have made these biscuits using all butter, all shortening, and a mix of both fats and all yielded good biscuits though with different textures and flavor. So, it depends on the goal for the biscuits – some like soft textured, rich biscuits with buttery flavor and lots of layers of flaky texture (like those shown in photo below) while others prefer biscuits with a denser, more tight, crumbly texture.
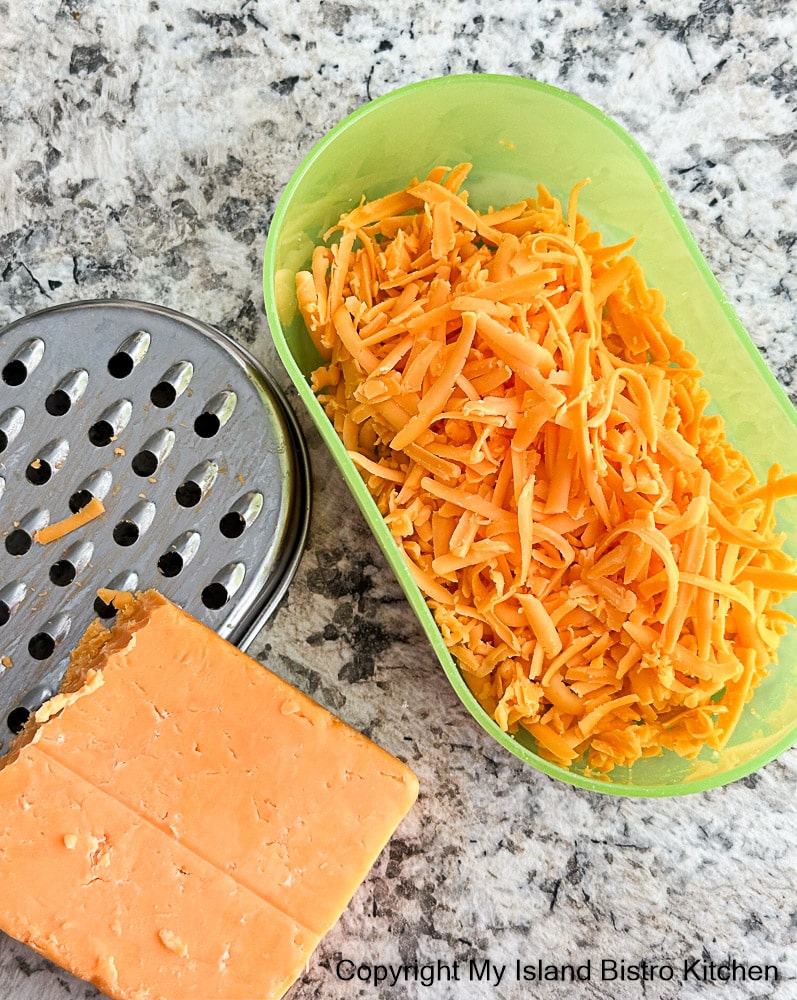
For best flavor, choose a good quality aged/old cheddar cheese for these biscuits as it will have more flavor than will mild or medium cheese. The photo below shows the size of grater hole I used to grate the cheese for these biscuits.
In previous biscuit recipes I have published, I have written extensively about tips and hints for making biscuits so won’t repeat them here. Instead, I’ll direct readers here for more of my tips and hints on biscuit making.
I am using a slightly different method for making these biscuits that involves no kneading and it more closely resembles (with some modification) my method for preparing dough for scones. I find this method gives lovely layers of flakiness (as seen in photo below) with biscuits made with butter or at least part butter as the fat content.
Basically, for lack of a better term for it, I am using what I call the roll-over dough or letter-folding method, or dough stacking method. That is to say that the dry and wet ingredients are mixed just enough that the dough barely clings together. The dough is then transferred to a lightly floured work surface and, using a light touch, is patted down into a rectangular shape, about ¾“ thick. Then, from one of the long sides of the rectangle, one-third of the dough is folded into the center of the larger dough mass.
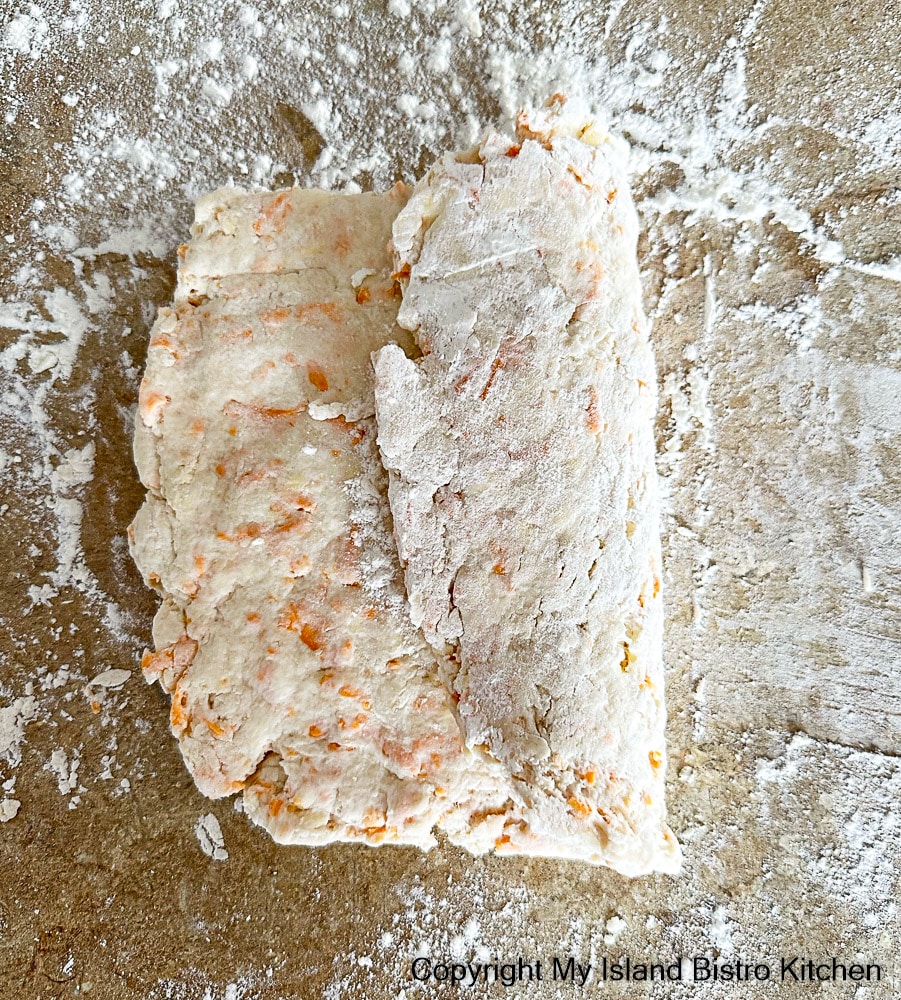
Then, the remaining third of the dough is folded into the center, on top of the two-thirds already folded or stacked.

The dough is, again, patted down into another rectangle shape, ¾“ thick, and the fold-over/letter-folding exercise is repeated again.
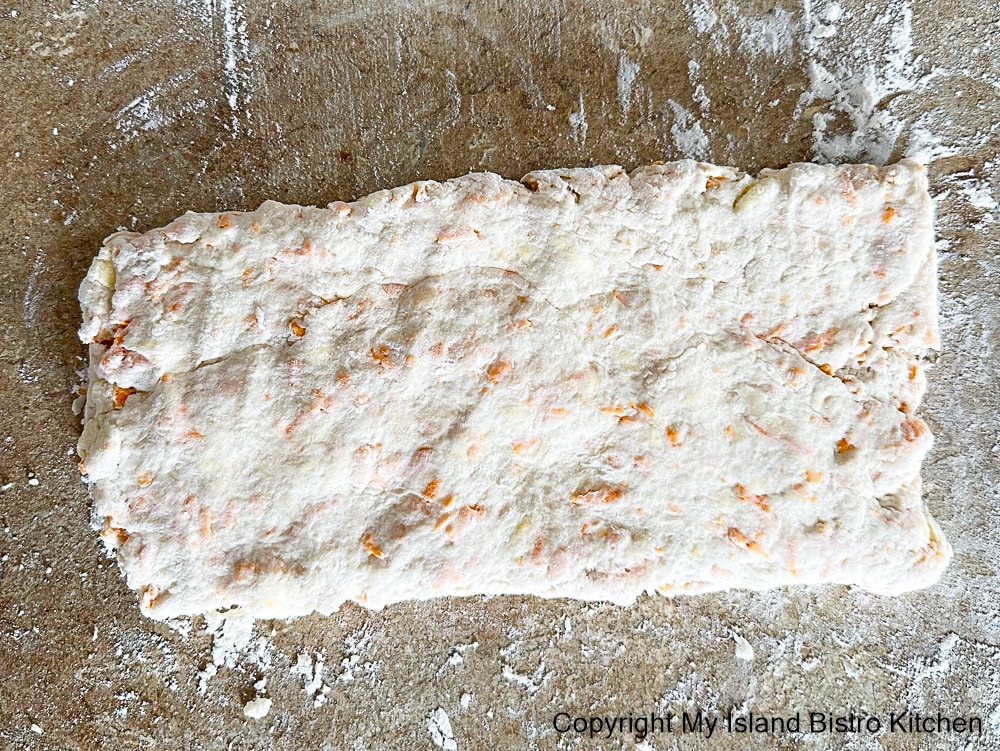
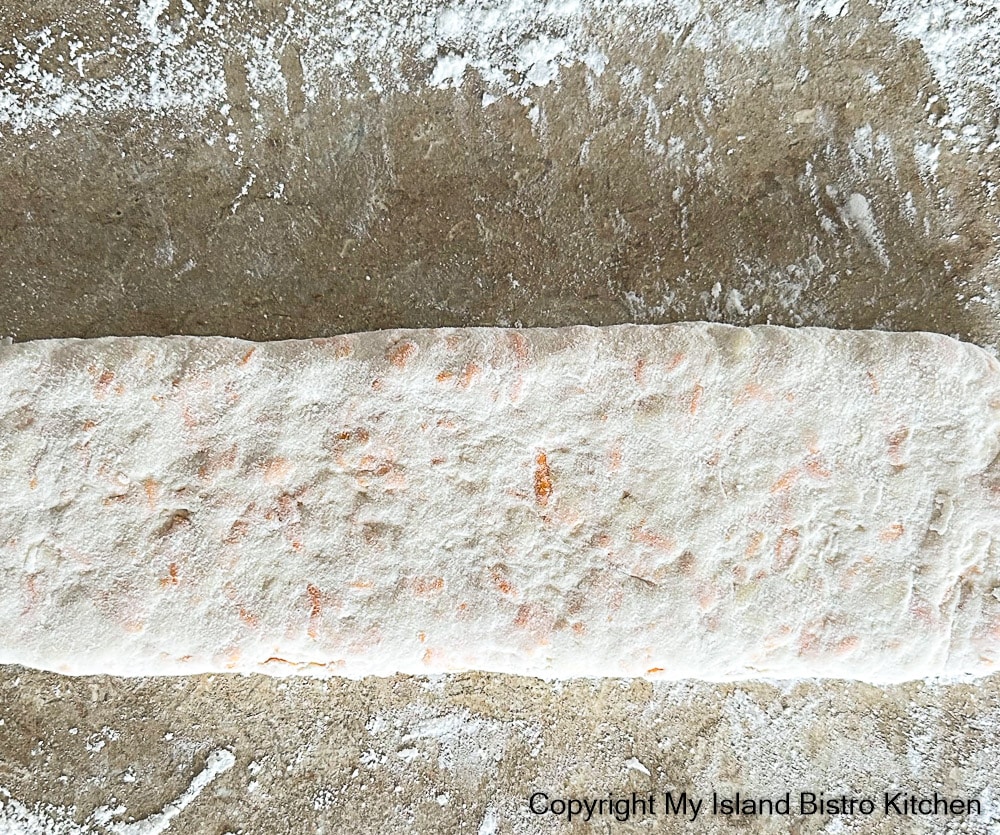
This exercise is repeated once or twice more, but no more than four times, in total. It’s important not to overwork the dough any more than necessary as this is going to stir up the gluten, potentially causing tough biscuits. The final patted down dough is then formed into a tidy rectangle ¾” – 1” thick.
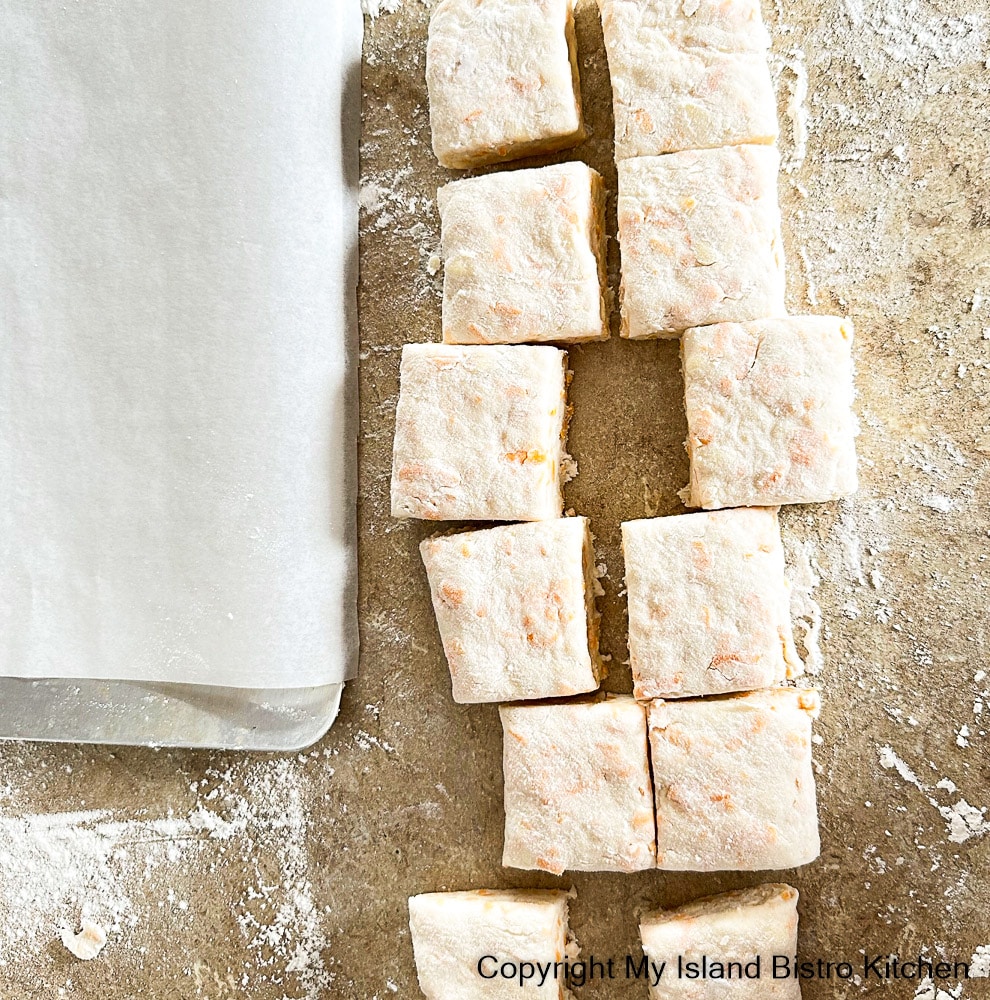
What I have done with this batch of biscuits is cut them into squares using a sharp knife or bench scraper – either works. It’s a slick and easy way to cut out biscuits and there are no dough scraps to be gathered and reworked for cutting out remaining biscuits. Sometimes, for variety, I like to vary the shapes of biscuits. And, of course, the less handling of the dough, the less likely the biscuits will be tough textured.
A sharp-edged round cutter (about 2” in diameter) can be used to cut traditional round-shaped biscuits, if desired. This will require the leftover dough scraps to be gathered and formed into a mass from which to cut out the remaining biscuits. The shape of biscuits is, of course, a personal preference and will have no bearing on the taste!

Cheddar Cheese Biscuits
Ingredients:
2 cups all-purpose flour (10 oz/282g – See Note 1 below)
4 tsp baking powder
¾ tsp fine sea salt
¼ tsp (slightly rounded) baking soda
1 tbsp granulated sugar
½ cup cold unsalted butter, cut into ½“ cubes (See Note 2 below)
3 oz (84g) shredded aged cheddar cheese
1 cup minus 1 tbsp cold milk
2 – 2½ tbsp cooled melted butter for brushing tops of biscuits (optional)
Method:
Line baking sheet with parchment paper. Assemble and measure out ingredients.
In large bowl, sift or sieve together the flour, baking powder, salt, and baking soda. Whisk in the sugar.
Use a wire pastry cutter to cut the cubed butter into the dry ingredients until mixture resembles the size of peas. Quickly run fingers through the mixture several times, scooping up the bigger bits of the butter and rubbing them into flat, paper-thin slivers between the thumb and forefinger. It is not necessary to do this with every piece of butter – just quickly pick several at random. Ensure butter slivers are coated with the dry ingredients.
Make a well in the center of the dry ingredients.
Using a fork, stir in the shredded cheddar cheese.
Pour milk, all at once, into well in center of dry ingredients. Using a Danish dough whisk or fork, mix ingredients just enough that the liquid is absorbed into the dry ingredients, no liquid remains visible in the bowl, and the dough starts to pull away from the sides of the bowl and can be roughly brought together. Dough will be soft and sticky and some floury spots may remain at this point. Transfer dough onto lightly floured work surface, gently working it just until a shaggy dough mass forms. Do not knead or overmix dough.
Using a light touch, pat dough into a rectangle, about ¾” thick. From one long side of the dough rectangle, fold one third of the dough into the center and then fold the other third from the opposite side on top of the two-thirds of dough, just as if folding a letter. Press the dough down into another rectangle, again, about ¾“ thick and folding the dough into thirds like a letter. Repeat the folding exercise once or twice more, finally shaping the dough into a tidy rectangle about ¾“ – 1” in thickness.
Using a sharp knife or bench scraper, cut the dough into 12-14 equal-sized squares (See Note 3 below). Place biscuits, about 1” or so apart, on prepared baking sheet and place in freezer for about 20 minutes (or in refrigerator for 30-35 minutes) to chill.
While biscuits are chilling, position oven rack in the middle-to-upper third of oven and preheat oven to 425°F.
Remove biscuits from refrigerator or freezer and lightly brush tops of biscuits with melted butter. Bake for apx. 14-16 minutes, or until biscuits are lightly browned on top, rotating the baking sheet partway through the baking. Remove biscuits from oven and let cool on baking sheet for 3-4 minutes then transfer to wire rack. If desired, brush biscuits one more time with melted butter as soon as they come out of the oven.
Yield: Apx. 12-14 biscuits (depending on thickness of dough from which biscuits are cut and the size of each cut biscuit)
Note 1: While different sources may list 1 cup of all-purpose flour as weighing slightly more or less than the weight measures I list for this recipe, the weights I have given in this recipe are based on 1 cup of all-purpose flour (properly filled and levelled), the contents of which weigh 5 ounces on my digital scales. Therefore, if 10 ounces (or 282 grams) of all-purpose flour is used, it will be the correct amount for this particular biscuit recipe.
Note 2: Biscuits may be made with salted butter in which case, reduce amount of salt called for in recipe to a scant ½ teaspoon. These biscuits can be made with either all butter or all shortening or a blend of ¼ cup of each, though the texture and flavor will differ.
Note 3: In lieu of using the fold-over dough, or letter-folding/stacking method, traditional kneading of the dough method may be used. Knead dough 8-10 times. Do not over-knead. Pat dough to approximately ¾“ – 1” thickness. Using a 2” floured round, sharp-edged, cutter, cut out biscuits, re-flouring cutter before cutting out each biscuit. Push the cutter straight down and up and out of the dough without twisting the cutter in the process. Gather dough scraps and pat dough to ¾“ – 1” thickness, from which to cut remaining biscuits, being careful to work the dough no more than absolutely necessary to bring it together. Transfer biscuits to prepared baking sheet, spacing biscuits about 1” or so apart. Place the baking sheet of biscuits in the freezer for about 20 minutes (or in refrigerator for 30-35 minutes) to chill to ensure the butter/shortening is cold before baking biscuits.
If you have made this recipe and enjoyed it and/or wish to share it with your friends and family, please do so on social media but be sure to share the direct link to this posting from my website.
Connect with My Island Bistro Kitchen on Social Media
Join the Facebook page for My Island Bistro Kitchen: https://www.facebook.com/MyIslandBistroKitchen/
Follow “the Bistro” on “X” (formerly Twitter): https://twitter.com/PEIBistro/
See the drool-worthy gallery of mouth-watering food photos from My Island Bistro Kitchen on Instagram: https://www.instagram.com/peibistro/
Follow “the Bistro” on Pinterest at https://www.pinterest.ca/peibistro/ and pin the Pinterest-ready photo found at the end of this post to your favorite Pinterest boards.

Cheddar Cheese Biscuits
Ingredients
- 2 cups all-purpose flour (10 oz/282g – See Note 1 below)
- 4 tsp baking powder
- ¾ tsp fine sea salt
- ¼ tsp (slightly rounded) baking soda
- 1 tbsp granulated sugar
- ½ cup cold unsalted butter, cut into ½“ cubes (See Note 2 below)
- 3 oz (84g) shredded aged cheddar cheese
- 1 cup minus 1 tbsp cold milk
- 2 - 2½ tbsp cooled melted butter for brushing tops of biscuits (optional)
Instructions
-
Line baking sheet with parchment paper. Assemble and measure out ingredients.
-
In large bowl, sift or sieve together the flour, baking powder, salt, and baking soda. Whisk in the sugar.
-
Use a wire pastry cutter to cut the cubed butter into the dry ingredients until mixture resembles the size of peas. Quickly run fingers through the mixture several times, scooping up the bigger bits of the butter and rubbing them into flat, paper-thin slivers between the thumb and forefinger. It is not necessary to do this with every piece of butter – just quickly pick several at random. Ensure butter slivers are coated with the dry ingredients. Make a well in the center of the dry ingredients.
-
Using a fork, stir in the shredded cheddar cheese.
-
Pour milk, all at once, into well in center of dry ingredients. Using a Danish dough whisk or fork, mix ingredients just enough that the liquid is absorbed into the dry ingredients, no liquid remains visible in the bowl, and the dough starts to pull away from the sides of the bowl and can be roughly brought together. Dough will be soft and sticky and some floury spots may remain at this point. Transfer dough onto lightly floured work surface, gently working it just until a shaggy dough mass forms. Do not knead or overmix the dough.
-
Using a light touch, pat dough into a rectangle, about ¾” thick. From one long side of the dough rectangle, fold one third of the dough into the center and then fold the other third from the opposite side on top of the two-thirds of dough, just as if folding a letter. Press the dough down into another rectangle, again, about ¾“ thick and folding the dough into thirds like a letter. Repeat the folding exercise once or twice more, finally shaping the dough into a tidy rectangle about ¾“ - 1” in thickness.
-
Using a sharp knife or bench scraper, cut the dough into 12-14 equal-sized squares (See Note 3 below). Place biscuits, about 1” or so apart, on prepared baking sheet and place in freezer for about 20 minutes (or in refrigerator for 30-35 minutes) to chill.
-
While biscuits are chilling, position oven rack in the middle-to-upper third of oven and preheat oven to 425°F.
-
Remove biscuits from refrigerator or freezer and lightly brush tops of biscuits with melted butter. Bake for apx. 14-16 minutes, or until biscuits are lightly browned on top, rotating the baking sheet partway through the baking. Remove biscuits from oven and let cool on baking sheet for 3-4 minutes then transfer to wire rack. If desired, brush biscuits one more time with melted butter as soon as they come out of the oven.
Recipe Notes
Yield: Apx. 12-14 biscuits (depending on thickness of dough from which biscuits are cut and the size of each cut biscuit)
Note 1: While different sources may list 1 cup of all-purpose flour as weighing slightly more or less than the weight measures I list for this recipe, the weights I have given in this recipe are based on 1 cup of all-purpose flour (properly filled and leveled), the contents of which weigh 5 ounces on my digital scales. Therefore, if 10 ounces (or 282 grams) of all-purpose flour is used, it will be the correct amount for this particular biscuit recipe.
Note 2: Biscuits may be made with salted butter in which case, reduce amount of salt called for in recipe to a scant ½ teaspoon. These biscuits can be made with either all butter or all shortening or a blend of ¼ cup of each, though the texture and flavor will differ.
Note 3: In lieu of using the fold-over dough, or letter-folding/stacking method, traditional kneading of the dough method may be used. Knead dough 8-10 times. Do not over-knead. Pat dough to approximately ¾“ – 1” thickness. Using a 2” floured round, sharp-edged, cutter, cut out biscuits, re-flouring cutter before cutting out each biscuit. Push the cutter straight down and up and out of the dough without twisting the cutter in the process. Gather dough scraps and pat dough to ¾“ - 1” thickness, from which to cut remaining biscuits, being careful to work the dough no more than absolutely necessary to bring it together. Transfer biscuits to prepared baking sheet, spacing biscuits about 1” or so apart. Place the baking sheet of biscuits in the freezer for about 20 minutes (or in refrigerator for 30-35 minutes) to chill to ensure the butter/shortening is cold before baking biscuits.
[Copyright My Island Bistro Kitchen 2024]
For other great Biscuit recipes from My Island Bistro Kitchen, click on the links below.
Buttermilk Biscuits
Tea Biscuits
Whole Wheat Biscuits
Rustic Oat Bran Biscuits
PIN ME TO PINTEREST!
