Grilled Chicken, Strawberry, and Feta Cheese Salad

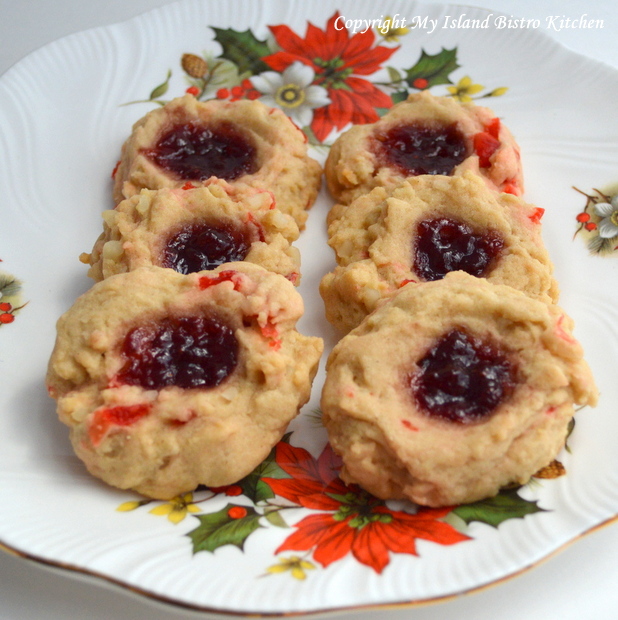
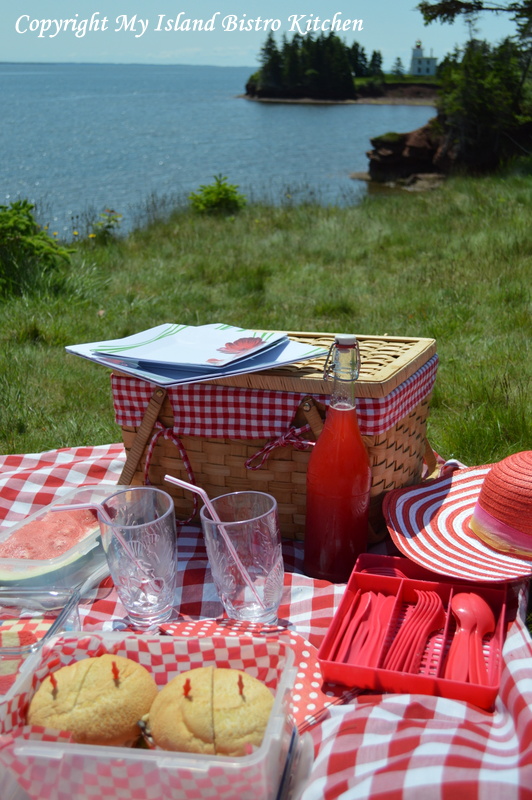
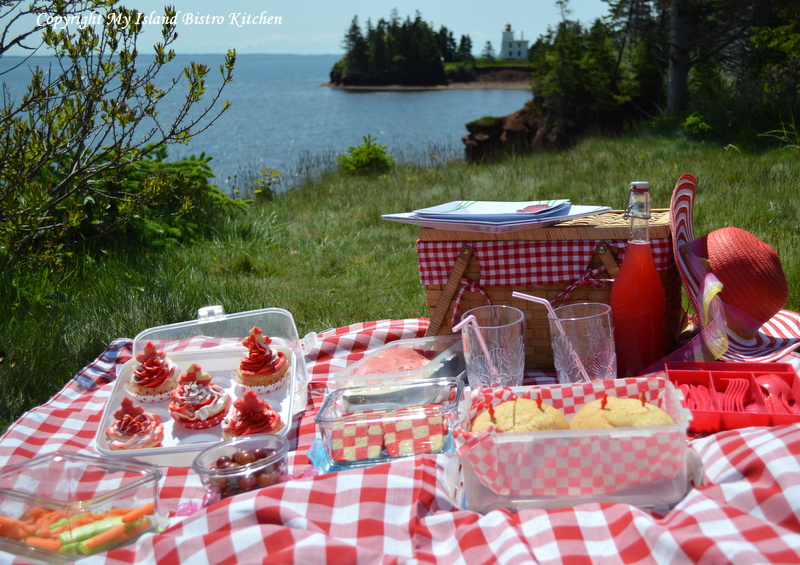
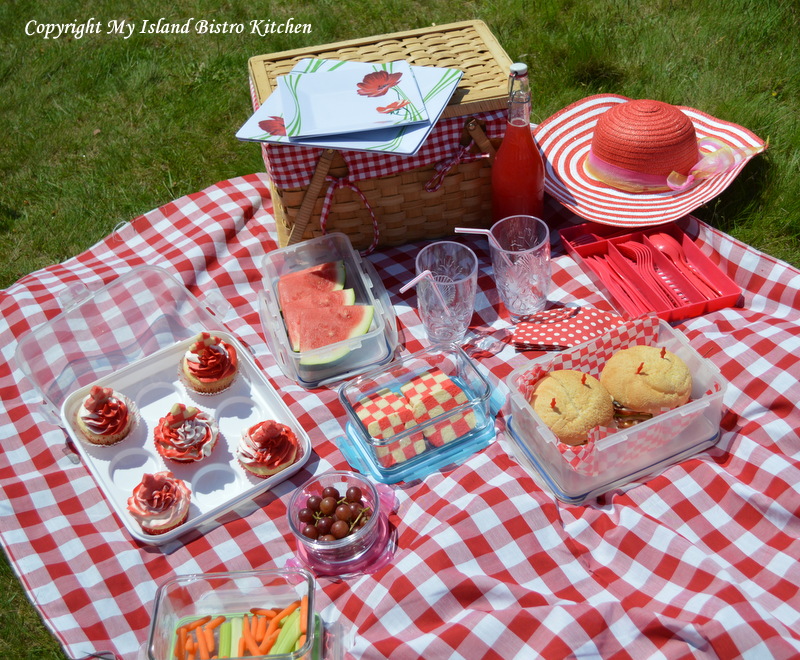
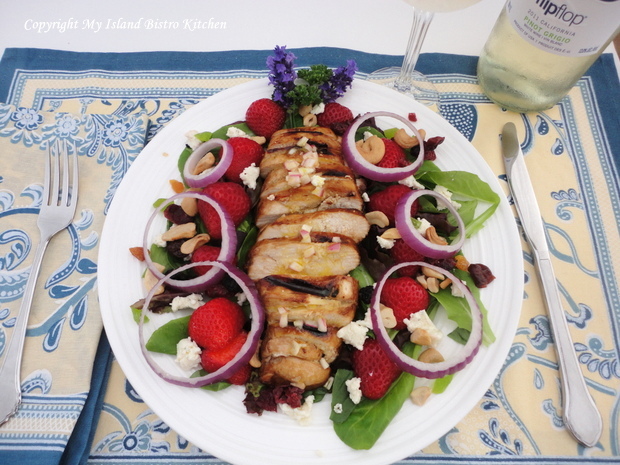
With warm summer evenings, it’s nice to have a go-to recipe for an easy-to-prepare, light yet filling, entrée.  One of my favorite summertime evening meals is warm grilled chicken served over a strawberry, feta cheese, and green salad and drizzled with a good balsamic vinaigrette.

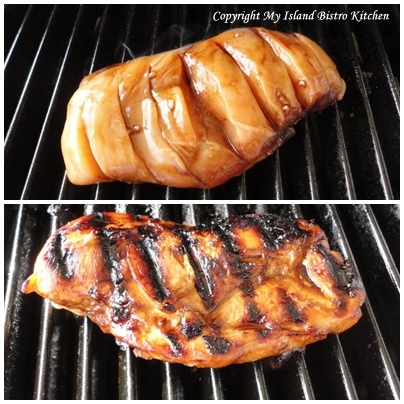
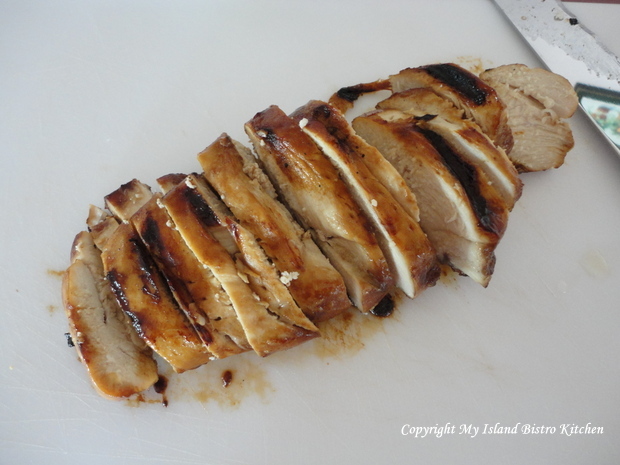
The option is yours to choose to marinade the boneless, skinless chicken breasts or not.  I usually do and I don’t follow a precise recipe for the marinade but these are the usual ingredients:  brown sugar, olive oil, balsamic vinegar, garlic, minced onion, soya sauce, salt, and pepper.  As for quantities of each ingredient, I don’t actually measure them out and add more or less, depending on how many chicken breasts I am marinating.  I make several horizontal cuts in the chicken breasts to allow the marinade to permeate through the meat.  Place the chicken breasts in a ziplok bag, mix together the marinade and pour it into the bag, making sure the entire chicken breasts are covered.  Zip up the bag and place it in the fridge for several hours (I usually aim for between 2 and 4 hours).  Heat up the grill and cook the chicken breasts until they are done.

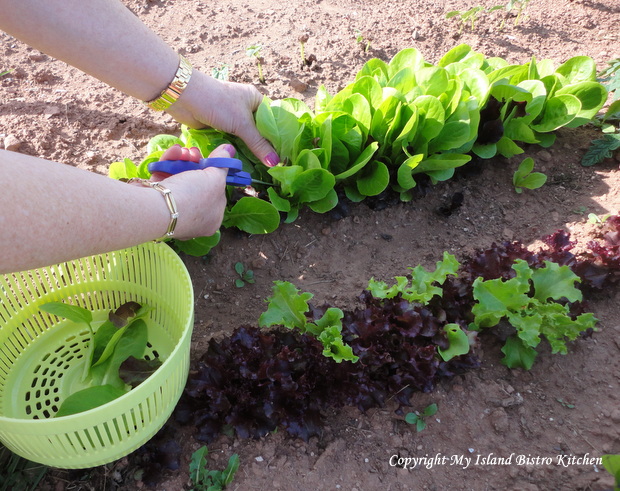
One of the pleasures of summer is having our own garden.  We eat a lot of salads and there is nothing better than running to the garden right before meal time and gathering a medley of fresh lettuce as well as some herbs from our little herb garden.

Slice the warm grilled chicken breast horizontally into slices about ¼” thick.

Cover the plate with a medley of greens.  Transfer the cut-up chicken breast to centre of the plate on top of the lettuce bed.  Slice up and add some fresh strawberries and red onion rings. Sprinkle with feta cheese and a few nuts such as cashews or sunflower seeds (or both!).  Add a balsamic vinaigrette and voila, a tasty and light dinner.  Serve with baguette slices and a refreshing glass of your favorite white wine.  Here I have selected “flipflop”, a California Pinot Grigio which made a fine accompaniment to a summer salad.

My recipe for the vinaigrette follows.  Of course, you know the secret to a really good vinaigrette – the best quality of olive oil and balsamic vinegar you can find.  Because we have a “Liquid Gold Tasting Bar & All Things Olive” store in Charlottetown, I buy their olive oil and vinegar products because they are superior and fresh quality.

Peach and Mandarin Balsamic Vinaigrette

¼ cup Mandarin-infused olive oil

2 tbsp peach white balsamic vinegar

4 tsp Dijon mustard

1 tsp minced garlic

1 small green onion or 1 – 2 tsp finely chopped red onion

2 tsp freshly-squeezed lemon juice

1 ½ – 2 tsp sugar, to taste

Freshly ground pepper

Kosher salt, to taste

Mix and shake all ingredients together until well mixed. Drizzle over salad at time of serving.


Thank you for visiting “the Bistro” today. There are lots of ways to connect with “the Bistro” through social media:

Join My Island Bistro Kitchen on Facebook
Follow the Bistro’s tweets on twitter @PEIBistro
Find the Bistro on Pinterest at “Island Bistro Kitchen”
Follow along on Instagram at “peibistro”

A Beach-Themed Picnic

Ever heard of the expression “the best laid plans of mice and men often go astray”?   Well, that was somewhat my case today.

It’s been a hot, dry summer so far on PEI, and today was forecast to be 31C and very humid.  I had been planning a beach picnic for some time and last evening rolled out the plans for the day and began preparations.  This morning, while it seemed a little breezy, I didn’t think it was particularly windy so off we set for a mid-day picnic on the beach.  However, when we arrived at our destination, the whitecaps were rolling in to shore at a reasonably good clip.  Suffice it to say it was breezy and it was going to be difficult (read ‘impossible’ and ‘frustrating’) to hold things in place for a picnic on the beach.

So, I had a “Plan B” ready just in case, for some reason, a beach location would not be suitable – good thing to do when the food has all been prepared!  So, my beach picnic became a beach-“themed” picnic in a calm location not many yards from the beach where we could still hear the waves rolling in to shore.

On the menu for the picnic:

Turkey, Egg, and Cheese Baguettes (recipe follows)

Green Salad

Brownies

Brown Sugar Jelly-filled Cookies

Seashell Chocolates

So, let’s assemble the elements of the picnic and see what is in the picnic basket.

I like to wrap the cutlery in napkins.  This can be done ahead of time and it’s also a great way to remember to bring along the napkins!

The highlight of today’s picnic were the baguettes – they were really tasty and very filling!

Turkey, Egg, and Cheese Baguettes

These looked extra special wrapped in parchment paper and dressed with a string bow and a sprig of lemon thyme from my herb garden.

We have lots of fresh leafy lettuce in the garden these days and salads always taste better with produce freshly picked.  It doesn’t get any more local than the backyard garden!

Food always seems to taste so much better outside and there is no reason why a picnic can’t be as stylish as a table setting.  All you need is a pretty tablecloth, a posy of wild flowers, a few props, some tasty food and you have an instant picnicscape.

I live near water so a lot of my inspiration for tablescapes and picnics comes from the sea.

A tasty lunch!  Are you hungry yet?

Brownies are the quintessential picnic food!

But Brown Sugar Jam-filled Cookies are good too!

And sea-inspired chocolates are a great way to finish off the picnic!

Here is my recipe for Turkey, Egg, and Cheese Baguettes:

3-4 tbsp. mayonnaise

1 – 1 1/2 tbsp Basil Pesto

1 1/2 – 2 tbsp soft goat cheese

Shaved turkey breast

Lettuce

Red Onion

Sliced Cheddar Cheese

2 sliced hard-boiled eggs

1 baguette

Butter

Directions:

Cut baguette in two or three pieces, depending on length of baguette. Slice baguette pieces in half, lengthwise.   Butter both sides of the sliced baguette pieces.

Mix mayonnaise, pesto, and goat cheese.  Spread on both sides of baguette.

On one side of bread, add a layer of lettuce, followed by the shaved turkey breast, red onion, cheese slices, hard-boiled egg slices, and second layer of lettuce.  Place second slice of bread on top.

Wrap in parchment paper and tie with string.  It may be necessary to use toothpicks to help hold the filled baguette together, particularly if you are going to be traveling a distance with them.

Yield:  2-3 servings

So, even if you live in a big city and dream of being near a beach or water, you can still have a beach-themed picnic inland wherever you are, as I have done here.

I hope you have enjoyed coming along on my picnic today.

Thank you for visiting “the Bistro” today. There are lots of ways to connect with “the Bistro” through social media:

Join My Island Bistro Kitchen on Facebook
Follow the Bistro’s tweets on twitter @PEIBistro
Find the Bistro on Pinterest at “Island Bistro Kitchen”
Follow along on Instagram at “peibistro”


Glazed Strawberry Pie

Glazed Strawberry Pie

There are so many things I like about summer in Prince Edward Island but one of my very favorite things is glazed strawberry pie made with fresh, local Island berries.  After I have had a couple of “feeds” of plain berries, sugar, and milk, I am ready for them in other recipes.  One of those recipes always has to be fresh strawberry pie.

Glazed Strawberry Pie

The strawberry pie recipe below is the one my family has used for decades.  I have no idea what prompted us to start making strawberry pie or where the recipe came from.  I just know it has been around for a good long time and I have yet to find any other that matches or beats it.

To make this pie, you will need the freshest strawberries possible and ones that are not overly ripe.  A slightly firm variety of berry is best.

A single 9″ baked pie crust will be needed for this recipe. For hints, tips, and a recipe for pie pastry, click here.

Ingredients:

Apx. 1 1/4 – 1 1/2 qts fresh strawberries, hulled, washed, and dried
2 tbsp cornstarch
3/4 cup sugar
1/8 tsp salt
1 tbsp butter
1 tsp lemon juice
1 – 9″ baked pie shell

Directions:

Hull, wash, and dry strawberries (use a paper towel to gently blot the berries dry).  Set aside enough to cover the bottom of the pie crust.

Cut up berries to prepare them for crushing – it’s hard to say exactly how many because berries vary in size and water content.  Start with a few berries at a time.

Using a potato masher, crush enough strawberries to make 1 1/2 cups.

Assemble all ingredients.

In medium-sized saucepan, combine cornstarch, sugar, and salt.  Mix well.  Add crushed berries and stir to blend well.

Place mixture over medium heat and stir constantly until it becomes somewhat clear and it starts to thicken, about 5-7 minutes.  Watch that mixture does not scorch as this can easily and quickly happen.

Reduce heat to low, cover mixture, and continue to cook for 5 minutes, stirring occasionally to prevent mixture from sticking to pan.  Remove from heat.  Add butter and lemon juice.  Stir well.

page 2 - Finishing Sauce

Arrange whole strawberries in baked pie shell.  If necessary, fill in any gaps between berries with a few cut-up berries.

Spoon hot glaze mixture over the berries.

Completely cover berries with the glaze.

Place pie in refrigerator and let chill several hours (at least 3 hrs) before serving.  Add whipped cream at time of serving and decorate with additional berries as desired.

Yield:  Apx. 8 servings

Tips and Notes This pie is best served the day it is made as the pie crust tends to become somewhat soggy the next day.  Leaving the berries whole helps contain the amount of moisture that soaks into the pie crust as cutting the berries up releases their juices and lessens the lifespan of the pie crust.

Glazed Strawberry Pie

This Glazed Strawberry Pie is a wonderful summertime treat when the local strawberries are in-season. Add a dollop of whipped cream to dress the pie for dessert.
Course Dessert
Cuisine Canadian
Keyword pie, strawberries, strawberry pie
Servings 6
My Island Bistro Kitchen Barbara99

Ingredients

  • Apx. 1 1/4 - 1 1/2 qts fresh strawberries, hulled, washed, and dried
  • 2 tbsp cornstarch
  • 3/4 cup granulated sugar
  • 1/8 tsp salt
  • 1 tbsp butter
  • 1 tsp lemon juice
  • 1 - 9" baked pie shell

Instructions

  1. Hull, wash, and dry strawberries (use a paper towel to gently blot the berries dry). Set aside enough whole berries to cover the bottom of the pie crust.
  2. One and one-half cups of crushed berries will be needed for the glaze. Cut up berries to prepare them for crushing - it's hard to say exactly how many will be required because berries vary in size and water content. Start with a few berries at a time. Using a potato masher, crush enough strawberries to make 1 1/2 cups.
  3. In medium-sized saucepan, combine cornstarch, sugar, and salt. Mix well. Add the crushed berries and stir to blend well.
  4. Place mixture over medium heat and stir constantly until it becomes somewhat clear and it starts to thicken, about 5-7 minutes. Watch that mixture does not scorch as this can easily and quickly happen.
  5. Reduce heat to low, cover mixture, and continue to cook for about 5 minutes, stirring occasionally to prevent mixture from sticking to pan. Remove from heat. Add butter and lemon juice. Stir well.
  6. Arrange the whole strawberries in baked pie shell. If necessary, fill in any gaps between berries with a few cut-up berries.
  7. Spoon hot glaze mixture over the berries. Completely cover berries with the glaze.
  8. Place pie in refrigerator and let chill several hours (at least 3 hrs) before serving. Add whipped cream at time of serving and decorate with additional whole berries, if desired.

Recipe Notes

Yield: Apx. 6-8 servings

Tips and Notes: This pie is best served the day it is made as the pie crust tends to become somewhat soggy the next day. Leaving the berries whole helps contain the amount of moisture that soaks into the pie crust as cutting the berries up releases their juices and reduces the lifespan of the pie crust.

Thank you for visiting “the Bistro” today. There are lots of ways to connect with “the Bistro” through social media:

Join My Island Bistro Kitchen on Facebook
Follow the Bistro’s tweets on twitter @PEIBistro
Find the Bistro on Pinterest at “Island Bistro Kitchen”
Follow along on Instagram at “peibistro”

Old Country Rose Afternoon Tea

I love afternoon tea any time of the year.  However, I especially like a good cup of tea, dainty sandwiches, and of course, a sweet or two, outside on a warm and calm day in the summer.  Here on PEI, where we are surrounded by water, it is hard to find a day where there is not a breeze blowing.  However, last Saturday was such a day when the temperatures were soaring slightly past the 30C mark with hardly a breeze!   It was a good day for a summer tea under the shade of some big old trees.

My inspiration for my teascapes comes from many sources, often from the season of the year, flowers in bloom, or a particular food item that I envision on a tea table.  My Old Country Rose Tea was inspired by an old rose tree we planted at the back door of the cottage 20 years ago.  It blooms profusely and every year we think it may just break apart or stop blooming but each year, it produces a bountiful profusion of beautiful deep rose-colored roses.  These roses are the kind that the blooms only last a day or two.  Our Atlantic winters are not kind and, being so close to the Northumberland Strait, salt spray is also an element our trees, shrubs, and bushes must contend with.  So, today’s teascape began with a small bouquet of roses from outside the back door.

I looked through my collection of teapots to find one that would be suitable and selected this Sadler that seems very summery.

The teacups I chose featured roses as well.

Why does tea always seem to taste better in a china cup and saucer?

Teacups are too pretty not to be used.  I look for ways and opportunities to use and enjoy them rather than storing them away.

Because it was so hot, I chose to serve cool and refreshing cucumber sandwiches.

I love to decorate food with flowers….just make sure they are the edible kind!

Add cubes of melon, cheese, and some grapes.

This year, I made several bottles of Rhubarb Cordial so served some of this refreshing drink as well as Assam tea.

Naturally, there had to be something for the sweet tooth.  I made another batch of my Lemon Spritz Shortbread Cookies (my April 2013 “Cookie of the Month”) because they remind me so much of summer and are so light tasting.

And, for the finale, vanilla cupcakes iced in rich buttercream icing.

Cupcakes are a simple and more informal way to serve cake at an event.

And, when it was all assembled, this is what the tiered tea tray looked like.

And, here is an overview of the tea table.

I hope you have enjoyed a glimpse into my early summer tea.

Thank you for visiting “the Bistro” today. There are lots of ways to connect with “the Bistro” through social media:

Join My Island Bistro Kitchen on Facebook
Follow the Bistro’s tweets on twitter @PEIBistro
Find the Bistro on Pinterest at “Island Bistro Kitchen”
Follow along on Instagram at “peibistro”


Canada Day Picnic

Happy Birthday, Canada!  Let’s celebrate with a picnic!

In keeping with the colors of the Canadian flag, as you can see, my color theme for the Canada Day picnic is red and white.

Prince Edward Island may be the smallest province in Canada but it boasts being the “Cradle of the Canadian Confederation” because Charlottetown, the capital city, was the location for the first meeting of the Fathers of Confederation in 1864 as they laid the groundwork for Canada to become its own country on July 1, 1867.  The Maritime Colonies (now Prince Edward Island, Nova Scotia, and New Brunswick) were meeting in Charlottetown in early September, 1864, to discuss the possibility of Maritime Union.   Representatives from Upper and Lower Canada (present-day Ontario and Quebec), upon hearing of this meeting, journeyed down the St. Lawrence River to Charlottetown to pitch the idea of a Canadian Union.   The individuals who attended this historic meeting became known as the Fathers of Confederation.

As these Fathers of Confederation landed at the Charlottetown Harbour, they disembarked and headed up Great George Street to what is now known as Province House where the meetings were held to discuss the possibility of Canadian Confederation.  The photograph below of Province House is taken from Great George Street and depicts what the Fathers would have seen as they made their way from the waterfront to this now historic site.

Province House - Charlottetown, PEI
Province House – Charlottetown, PEI

There are many celebrations happening across the Island and across Canada, to celebrate the birth of our nation.  One of the most colorful celebrations on PEI is the parade of fishing boats out of North Rustico Harbour, on the North side of the Island.  The photographs below are from the 2012 parade but, this being an annual event, a similar one will take place this year as well.

Fishing Boats on Canada Day Parade out of North Rustico Harbour, PEI

The parade of fishing boats is quite a spectacular event that always draws a large crowd as dozens of fishing boats from North Rustico and neighbouring harbours are decorated in red and white and sail out of the harbour with Canadian flags waving in the breeze.  If you are on the Island on Canada Day and have never attended this event, I recommend it as a must-see festivity for Canada Day as it shows true Canadian spirit.

This year, I am on the South side of the Island, having chosen the National Historic Site of Port-la-Joye/Fort Amherst that overlooks beautiful Charlottetown Harbour, as the scenic location for a Canada Day picnic as our celebration of Canada’s birthday.

Port-la-Joye/Fort Amherst is located in Rocky Point, PEI.  In the background of the photo below, you can see the Blockhouse Point Lighthouse, established in 1851, the second oldest lighthouse on the shores of PEI.  This lighthouse is on the west side of the entrance to Charlottetown Harbour and guides ships entering the Harbour.  Many ships come and go past this historic lighthouse, including dozens of cruise ships that make Charlottetown one of their port stops.

Canada Day Picnic at the Port-la-Joye/Fort Amherst National Historic Site in Rocky Point, Prince Edward Island

Here is the menu for the picnic:  Rhubarb Cordial, Kaiser Roll sandwiches, fresh veggies, grapes, watermelon, checkerboard sugar cookies, and vanilla cupcakes dressed in red and white buttercream icing and topped with miniature maple-leaf shaped sugar cookies.

I love the country look and feel of checkered tablecloths.  My antique picnic basket just happened to be lined with red checkered fabric so it fit right into the color theme.

For the sandwiches, I chose good quality Kaiser rolls and filled them with tasty ingredients.  I started with a spread of mustard on one half of the roll and mayo on the other half.  On the bottom half of the roll, I then added several pieces of shaved Tuscan ham, followed by a layer of cucumber slices, a slice of cheddar cheese, leaf lettuce, sliced tomato, a slice of Havarti cheese, and topped it off with shaved turkey breast.

Because this is a rather thick roll, I held it all together with piks to make it easier to handle.

Plastic picnicware has improved greatly over the past few years.  Some, like the ones in the photograph above, even have the look of fine dinnerware.  These durable and colorful plates actually just came from a local dollar store.  Using unbreakable dinnerware for picnics makes the occasion much more relaxed for everybody as there are no worries about breakage.

For beverage, I selected my Rhubarb Cordial to which I added fizzy lemon-lime soda.  The red color fit right in and the refreshing taste is unbeatable on a warm summer day.

Rhubarb Cordial
Rhubarb Cordial

Of course, every picnic menu has to have something for the sweet tooth.  I selected two offerings, the first being checkerboard sugar cookies – always a show-stopper and conversation piece.

Cupcakes always make a fitting end to any picnic, especially when they are laden with lots of tasty buttercream icing.

Canada Day Celebration Cupcakes

And the cupcakes are always better when they come with an extra treat of a tiny sugar cookie shaped like a maple leaf.

These would surely put anyone in the Canada Day spirit, don’t you think!

I hope you have enjoyed coming along on our Canada Day picnic.

Thank you for visiting “the Bistro” today.  

There are lots of ways to connect with “the Bistro” through social media:


Join My Island Bistro Kitchen on Facebook
Follow the Bistro’s tweets on twitter @PEIBistro
Find the Bistro on Pinterest at “Island Bistro Kitchen”
Follow along on Instagram at “peibistro”