
I am often asked for my recipe for pie pastry so that is the focus of this posting. There are many different kinds of pastry but, today, I am focusing on a basic all-purpose pastry suitable for both sweet and savory pies. But, first, let’s start with some hints and tips on making the pastry. There are many sources of information on pastry making and what follows is the method I have used for years with success to make my pastry. Hope it is of use.
The Pastry
Flour
Any good quality all-purpose flour can be used for my pastry recipe. Like all ingredients for pastry, even the flour should be chilled in the refrigerator before being used in a pastry recipe. I recommend measuring out the dry ingredients and sieving or whisking the flour, salt, and small amount of sugar together into a big bowl and popping it into the refrigerator for 30-40 minutes.
It is important to measure the flour correctly and accurately: Spoon the flour into the measuring cup and level it off with the flat side of a kitchen knife. Do not stir the flour into the cup, pack it in, tamp or press it down, or tap or shake the cup on the counter and then continue to fill the cup as this will add more flour not needed for the recipe. Ingredients need to be proportionate in pastry so adding more flour without proportionately increasing the amount of fat and liquid content will not yield a good quality pastry.
Fat
There are various schools of thought on the type of fat to use in pastry — butter, lard, or shortening. Using all butter in pastry will give a wonderful flavor and a lovely tanned crust. It can, however, be a bit finicky to work with because it softens very easily and can quickly be over-blended with the flour. If overworked, a tough crust is likely. While lard is easy to work with and will give layers of flakiness in the pastry, it lacks the flavour that butter gives. Using shortening will yield a nice tender crust but, like lard, has little flavor. As with butter, shortening softens extremely easily as it is being worked with so, is easy for the dough to become overworked, yielding a tough crust.
I find the best combination of fats to provide flakiness, tenderness, flavour, and structure to pastry is to use one part lard and one part butter and they both must be super cold. Coarsely chop/cube the cold butter and lard into chunks approximately ½” – ¾“ in size and toss them with the flour to coat the fats. Then, use a pastry cutter to further cut up the fats to the consistency of large peas. There is no need to ensure they are all similarly sized and they should not be mashed or blended to a fine crumb. In fact, some pieces of fat can be left bigger than large peas as, when the dough is rolled out, these larger chunks will even out creating slivers of fat in the dough. As the cold, flour-coated fats melt during the baking process, they will create steam that will help the pastry achieve a flaky and tender texture. The heat during the baking process will evaporate the moisture created from the steam, leaving a dry, crisp, and desired flaky crust.
The cold or frozen fats can be grated but I find holding the butter or lard in my hands as I grate the fats warms them up and defeats the purpose of trying to keep all ingredients cold. I find, simply cubing the fat and using a wire-edged pastry cutter will do the trick effectively.
Liquid
For liquid, combine and whisk a large cold egg and vinegar together well then whisk in enough ice-cold water to equal a scant 3/4 cup. The addition of an egg to the liquid mixture will act as a binder of sorts, supply additional moisture, and contribute to the creation of a richer dough with more structure and stability.
There are several schools of thought and theories as to what the addition of a small amount of vinegar contributes to pastry dough. Some suggest the vinegar is an inhibitor to gluten creation while others claim it stabilizes the dough making it more pliable, and still other theories suggest its acidic content prevents the dough from turning an ugly gray color. Whether these are myths or if they have been scientifically proven or not is a subject for debate. Many recipes call for vinegar as an ingredient in pastry and I have always included it in mine. It is a really small amount of a common pantry ingredient, does not give the pastry any sharp vinegar taste, and I have always had great luck with my pastry. Therefore, I have adopted the attitude, ‘if it’s working, why mess with it’. If vinegar achieves any of the foregoing benefits, that’s a bonus, in my view.
It’s important to point out that it is unlikely that all of the 3/4 cup of liquid will be required to get the dough to cling together and form into a ball. It’s critically important to use only enough of the liquid that the dry ingredients are incorporated and will cling together such that the dough can be formed into a ball. In order to dilute the whole egg enough for this size of recipe, a certain amount of water is required, hence the scant 3/4 cup measurement. Different flour brands may require different amounts of the liquid but, suffice it to say, this recipe should not require any more than 3/4 cup of liquid and, in all likelihood, won’t take close to all of it.
Don’t add too much liquid or you will end up with a gummy mess that will yield a tough pastry. This is because the water will work with the flour to form gluten and the more liquid the flour gets, the more gluten and elasticity will be created. For a tender crust, that gluten needs to be quieted down so use only the minimal amount of liquid needed and do not overwork the dough. Start with a couple of tablespoons of the liquid and mix it into the dry ingredients with a fork. Add additional liquid by the scant tablespoonful, being careful to only add the least amount of liquid absolutely necessary for the dough to cling together. If, when rolling out the dough, it does not stay the size it was rolled out to but, instead, starts to immediately shrink back, that means it’s too elastic and has too much “stirred up” gluten in it and that may be due, at least in part, to having had too much liquid added to the dough. (Note that the shrinking can also be due, in part, to insufficient resting/chilling time before the dough is rolled out as well as having an overworked dough).
I don’t use a food processor to make the pastry as I find it is too easy to over-process the dough. Mixing the pastry manually gives more control. However, if a food processor works well for your pastry making, well then, by all means use it.
Exercise caution when it comes to forming the dough into a ball. Overworking the dough will stir up the gluten resulting in hard, tough pastry. I don’t actually knead pastry dough but, instead, pull it together and carefully form it into a ball shape. Once the dough clings together, divide it into two parts with one part (for the bottom crust) slightly larger than the other (for the top crust). Form each part into a disk about ¾” – 1” thick. To the extent possible, and without overhandling the dough, try to form smooth, tidy edges (as opposed to jagged) around the disks. This will help keep the dough in a tidy, circular shape when it is rolled out.
Wrap the disks in plastic wrap and refrigerate for 15-20 minutes. This resting/chill time settles down, or tames, the stirred-up gluten and allows the liquid a bit of time to be absorbed more fully into the dry ingredients. It also helps to firm up the dough for rolling. Rolling out dough that has not been chilled will have excessive elasticity (owing to the stirred-up gluten) and this will cause it to potentially shrink. If you have ever had the experience of rolling out pastry dough only to watch it start to shrink back to meet you, it’s quite possibly because (at least in part) the dough has not had a “resting” chill period to allow the gluten to tame down. The chilled dough should not be hard but, rather, still pliable enough for easy rolling. If, for some reason, you have left the dough in the refrigerator for a longer period, you will find that it will need to be at room temperature for approximately 8-10 minutes in order to be able to roll it out. Be careful, though, not to fully let the dough come back to room temperature which, of course, would defeat the purpose of chilling it.
Rolling the Dough
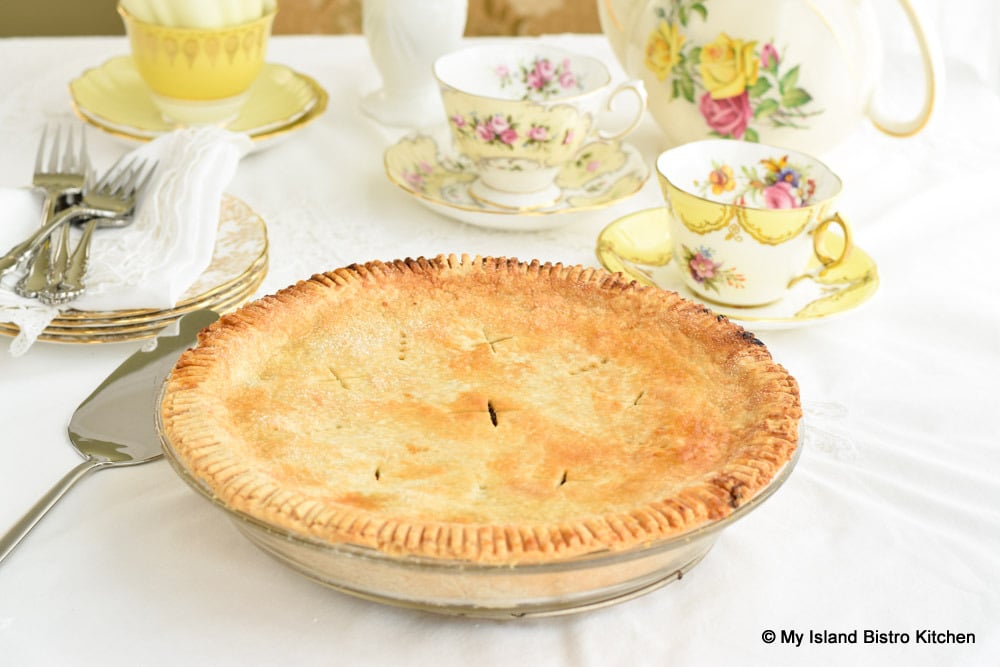
Once chilled, it’s time to roll out the dough to fit the pie plate. Use the exact size of pie plate that the recipe calls for. I recommend using a glass pie plate as it allows you to see when the bottom crust is tanned and baked. While some will argue the pie plate does not need to be greased, for extra assurance that the pie will cut out intact, I do give the pie plate a light spray with non-stick cooking oil.
I am not a fan of thick pastry. In a pie, I see the pastry as the vessel that holds the tasty filling and the filling should be the star. That said, the pastry does have to be a certain thickness to hold together and not tear while getting it into the pie plate and/or split during baking which would cause the filling to leak out and stick to the pie plate. Generally, I roll pastry somewhere between 1/16” and 1/8” thick on a lightly floured surface. This is a personal preference so, if you like a thicker crust, by all means, go ahead and roll the pastry a little bit thicker.
Roll the dough outward from the center away from you and rotate the dough by quarter turns as it is being rolled out into a circle. If necessary, and to prevent the dough from sticking to the work surface, add a bit of extra flour to the work surface as you slide the dough in quarter turns. Make sure the dough is rolled out sufficiently large enough to fit into the pie plate and up the sides and over the pie plate rim. That’s why one part of the dough needs to be a bit bigger than that needed for the top crust. Once the pastry has been rolled out, gently and carefully wrap or drape it around the rolling pin and transfer it to the prepared pie plate, carefully unrolling the dough over the plate. Fit the dough snugly into the pie plate, ensuring there are no air bubbles under the dough. Don’t stretch, pull, or forcefully manipulate the dough into the pie plate as that may cause it to start shrinking. Simply and carefully, fit the dough into the shape of the pie plate.
There are many ways to seal and decorate the edges of the pie but, for ease of explanation here, I’ll suggest using the simplest and easiest method – pressing the edges of the bottom and top pastry together with the tines of a fork. So, at this stage, simply use a sharp knife to trim the excess pastry to be flush with the pie plate edge.
Place the pie shell into the refrigerator for approximately 15-20 minutes to chill while preparing the filling and rolling out the top crust pastry. If you are using a cooked filling such as, for example, raisin pie filling, ensure that the filling is cooled to room temperature and then refrigerated for about an hour before placing it in the pie. Again, the goal is to keep everything as cold as possible so that the fats in the pastry do not get softened or melted before the pie goes into the hot oven. Filling the pie with a warm filling will start the fat in the pastry to soften before the pastry has a chance to bake and that may result in a soggy bottom pie crust. Additionally, shrinkage is an enemy of pastry and ensuring all components of the pie are kept cold will help to reduce the amount of pastry shrinkage. While shrinkage cannot be eliminated altogether, it can be mitigated.
The pastry for the top pie crust is rolled out in the same manner as the bottom crust. If you think the second disk of pastry dough is not enough to form a circle large enough to cover the top of the pie, gather up the cut-off excess dough from the bottom crust and, being careful not to overwork the dough, incorporate the excess dough into the remaining dough disk and refrigerate it for about 15 minutes to firm up. Remove the dough from the refrigerator and, on a lightly floured work surface, roll the top crust pastry the same as for the bottom crust, ensuring it is a large enough circle to cover the top of the pie.
Fill the chilled pie shell with the filling, dampen the outside rim of the bottom pie pastry with water so the top crust pastry will stick to it and then transfer the top crust pastry over the filling. Cut off the excess pastry to be flush with the pie plate edge.
After the top pie pastry has been placed over the filling, the edges of the top and bottom pastries need to be pressed together to seal in the filling. As mentioned above, there are various ways the pie edges can be joined. I tend to go with the simple pressing of the bottom and top pastry with the tines of a fork.
I think this is also the easiest method to ensure the pie cuts out with the edges intact. Other methods, such as crimping, though attractive, are raised up and can burn more quickly during baking and are also at risk of breaking off as the pie is cut.
It’s important that the top pie pastry be vented for baking. Otherwise, the crusts may be soggy from too much steam trapped in the pie. The extra steam created as the pie bakes will have nowhere to go so it may also cause the top crust to leave the filling and puff up, leaving a hollow space between crust and filling. This will cause the crust to break when the pie is sliced and, for presentation purposes, the pie slice will not be visually pleasing when plated.
To vent a pie, use a sharp-tipped paring knife to cut criss-crosses in the pie pastry starting in the center with a slightly large “X” and then adding smaller ones here and there around the circumference of the pie. I also use the tines of a fork to prick the pie pastry in various places in the top crust pastry for added venting. If desired, fancy cut-out vent designs can be used for decorative purposes. However, the basic “X” and fork tine marks will do the trick.

Because the pastry has been out of the refrigerator for awhile during the time that it was being rolled out and assembled, the pastry has obviously warmed up to room temperature. To ensure the pastry is as cold as possible going into the hot oven, and to reduce the amount of pastry shrinkage that is likely to occur, I recommend placing the filled pie back into the refrigerator for a minimum of 30 minutes or so. The pie can, alternatively, be placed in the freezer for approximately 15 minutes to speed up the process. Chilling the pie will help reduce the amount of pastry shrinkage when the pie bakes. Some shrinkage is to be expected but keeping the pie and its pastry fats as cold as possible will help to reduce the amount of shrinkage.
Brushing a very light coating of an egg-milk wash on the top crust will yield a crust with more “tan”. A sprinkle of granulated sugar may also be added but note this may cause the top crust to brown fast and before the pie is baked. If this happens, tent the pie loosely with tin foil (shiny side up).
Any leftover pastry can be formed into a small disk, wrapped in plastic wrap, then stored in an airtight freezer bag in the freezer for 2-3 months.
Baking the Pie
Follow the recipe instructions for baking times applicable to a particular pie recipe. Always preheat the oven. Putting the pastry into an oven that is in the process of heating up to temperature will cause the fats in the pastry to start melting before the pastry starts to bake and the flaky texture of the pie will be affected. The goal is to get the pie baking before the fats in the pie start melting. For this reason, many pie recipes will indicate starting the pie off in a very hot oven for a few minutes then reducing the temperature for the remainder of the baking time. So, while the pie is chilling in the refrigerator or freezer before being baked, start the oven to preheat and have it ready for the pie
Bake pies in the lower third of the oven, near the bottom shelf. This will help the bottom pastry in the pie to bake better and be crispier than placing it in the center of the oven, for example. My stove has 7 rack positions with the lowest one sitting almost on the bottom shelf of the oven. For pies, I use the rack position up one level from this. This rack is up approximately 2¾“ from the bottom shelf in the oven.
If the pie edges start to brown too quickly, pie shields can be positioned over the edges of the pie. However, the same function can be accomplished by taking narrow strips of tin foil and molding them into semi-circle shapes and carefully placing them around the edges of the pie. Whether you choose to use pie shields or tin foil, before applying them to the pie, you will want to make sure that the pie edges are baked enough to be set so the dough won’t stick to the shields or tin foil. If the entire pie starts to brown too quickly and before the bottom crust and filling are baked, loosely tent a piece of tin foil (shiny side up) over the entire pie to slow down the browning of the top crust.
Pies, especially fresh fruit pies, are notorious for boiling out as they bake, even if they are well vented and the filling pre-cooked, and who likes cleaning a sticky, burnt-on mess in the oven. To catch any boil-over or drips, I recommend placing the pie on a rimmed baking sheet that has been lined with tin foil for easy cleanup.
When the pie is baked, transfer it to a cooling rack and allow it cool completely for several hours before cutting. This allows the filling to settle so it thickens a bit more and stays intact (instead of running) when the pie is cut.
Summary
So, in sum, the three main take-aways from my tips and hints on pastry making are these:
1. Chill, chill, chill the pastry dough at every step along the way.
2. Use no more liquid than absolutely necessary to get the dough to cling together enough to roll out.
3. Don’t overwork the dough.
As indicated earlier, there are several different kinds of pastry used for various purposes. What follows is my “go-to” basic pastry recipe that will accommodate a deep dish, double-crusted 9” pie. I use this pastry for sweet pies, savory pies, quiches, and tarts like my butter tarts, for example. If only a single pie crust is needed, I use this recipe and either make a second single crust and freeze it or freeze the remaining half of the dough for later use. If a larger batch of pastry is needed, click here for the recipe.
Pastry for 1 double-crusted 9” pie
Ingredients:
2½ cups all-purpose flour
Scant ¾ tsp salt
1¾ tsp sugar
5 tbsp (¼ cup + 1 tbsp) cold butter
5 tbsp (¼ cup + 1 tbsp) cold lard
1 large egg (reserve apx 1 tsp of the yolk for the egg wash)
1¼ tsp white vinegar
Enough water to make scant ¾ cup liquid
1-2 tsp milk
Method:
In medium-sized bowl, sieve or whisk the flour, salt, and sugar together. Chill mixture in refrigerator for 30-40 minutes. Cut the butter and lard into chunks about ½” – ¾“ in size and add to the flour. Toss to coat the fat with the flour mixture. With a pastry cutter, cut the butter and lard into the flour until the fats resemble the size of large peas.
In a measuring cup, whisk the egg and vinegar together. Add enough ice-cold water to measure a scant 3/4 cup. Add the egg-vinegar-water mixture to the flour, starting with 2 tablespoonfuls and mix with a fork. Add additional liquid necessary by a scant tablespoonful at a time, being careful to add only enough liquid that the dough clings together and can be formed into a ball. It is unlikely that the entire 3/4 cup of liquid will be needed.
Divide the dough into two parts with one part (for the bottom crust) slightly larger than the other (for the top crust). Form dough into disk shapes, approximately ¾” – 1” thick. Wrap disks in plastic wrap and place in the refrigerator for about 15-20 minutes to chill. Remove the larger pastry disk from the refrigerator and place on a lightly floured work surface. Roll pastry to desired thickness, generally between 1/16” and 1/8” thickness.
Roll the dough from the center outward and rotate the dough in quarter turns each time the dough is rolled, sprinkling the work surface with additional flour as necessary to slide the pastry in quarter turns. Gently wrap or drape the pastry around the rolling pin and carefully transfer it to a 9” pie plate that has been lightly sprayed with non-stick cooking spray, or very lightly greased. Unroll the pastry onto the plate, fitting it snugly into the pie plate and ensuring there are no air bubbles under the dough. Cut off excess dough so pastry is flush with the pie plate edge. Place pie shell in refrigerator for 15-20 minutes to chill.
Remove second disk of pastry from refrigerator. Prepare pastry for the top crust in the same manner as for the bottom crust, ensuring it is a large enough circle to cover the top of the pie. The excess pastry cut from the edge of the bottom crust may be combined with the second pastry disk if more dough is needed. If this is necessary, refrigerate dough for approximately 15 minutes after combining the pastries and before rolling out the dough for the top crust.
Remove pie shell from the refrigerator and arrange pie filling in prepared cold shell. Note that, if a cooked pie filling is being used, it should be chilled before filling the pie with it. Brush edges of bottom crust along pie plate edge with a bit of water to moisten. Transfer pastry to the top of pie filling. Trim excess pastry from the pie plate edge. Press the edge of the pastry all around the pie plate rim with tines of fork to adhere top crust to bottom crust. Cut slits in top of pie pastry to allow steam to escape as pie bakes. For additional venting, prick the pie in several places with tines of a fork.
Place pie in refrigerator for 30 minutes to allow filling to settle and to chill pastry to reduce shrinkage while it bakes. Alternatively, the pie may be placed in the freezer for approximately 15 minutes to speed up the chilling process.
While pie is chilling, position oven rack in bottom third of oven and preheat oven to temperature indicated in the recipe.
In small prep bowl, lightly whisk the reserved egg yolk with 1-2 tsp milk. With a pastry brush, lightly brush the pie top with the egg-milk mixture. Sprinkle with granulated sugar, if desired.
Transfer pie to the oven and bake according to recipe directions. Placing the pie on a foil-lined baking sheet will catch any boil-overs or drips should they occur and will make clean-up easier. If the pie edges start to brown too quickly, pie shields can be positioned over the edges of the pie. However, the same function can be accomplished by taking narrow strips of tin foil and molding them into semi-circle shapes and carefully placing them around the edge of the pie. If the entire pie browns too quickly before it is baked, loosely tent pie with tin foil (shiny side up). Remove pie from oven and transfer to cooling rack to cool completely for several hours before cutting and serving.
Yield: Pastry for 1 – 9” double-crusted pie
You may enjoy making this pastry for one of these double-crusted pie recipes from My Island Bistro Kitchen:
Rustic Apple Pie
Classic Peach Pie
Mock Cherry Pie
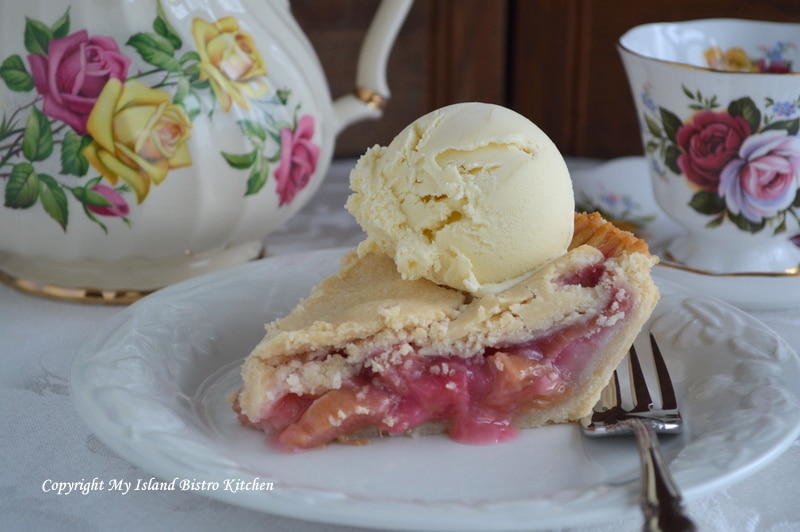
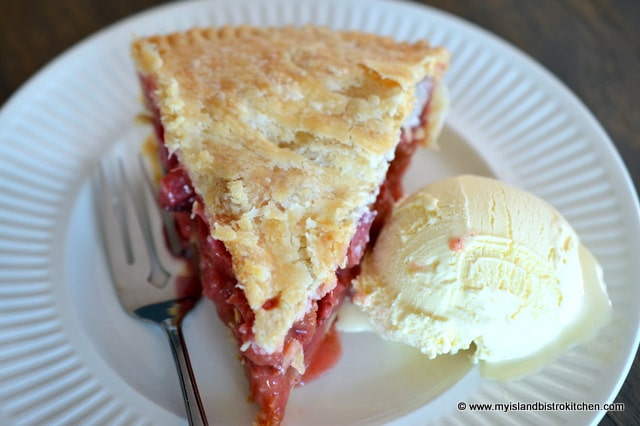
Strawberry Rhubarb Pie
Rustic Rhubarb Pie
Raisin Pie
Peach Blackberry Pie
Raspberry Pie
For My Island Bistro Kitchen’s gluten-free pastry recipe, click here.
Connect with My Island Bistro Kitchen on Social Media
Join the Facebook page for My Island Bistro Kitchen: https://www.facebook.com/MyIslandBistroKitchen/
Follow “the Bistro” on “X” (formerly Twitter): https://twitter.com/PEIBistro/
See the drool-worthy gallery of mouth-watering food photos from My Island Bistro Kitchen on Instagram: https://www.instagram.com/peibistro/
Follow “the Bistro” on Pinterest at https://www.pinterest.ca/peibistro/ and pin the Pinterest-ready photo at the end of this posting to your favorite Pinterest boards!

Pastry for 1 double-crusted 9” pie
Ingredients
- 2½ cups all-purpose flour
- Scant ¾ tsp salt
- 1¾ tsp sugar
- 5 tbsp (¼ cup + 1 tbsp) cold butter
- 5 tbsp (¼ cup + 1 tbsp) cold lard
- 1 large egg (reserve apx 1 tsp of the yolk for the egg wash)
- 1¼ tsp white vinegar
- Enough water to make scant 3/4 cup liquid
- 1-2 tsp milk
Instructions
-
In medium-sized bowl, sieve or whisk the flour, salt, and sugar together. Chill mixture in refrigerator for 30-40 minutes. Cut the butter and lard into chunks about ½” - ¾“ in size and add to the flour. Toss to coat the fat with the flour mixture. With a pastry cutter, cut the butter and lard into the flour until the fats resemble the size of large peas.
-
In a measuring cup, whisk the egg and vinegar together. Add enough ice-cold water to measure scant ¾ cup. Add the egg-vinegar-water mixture to the flour, starting with 2 tablespoonfuls and mix with a fork. Add additional liquid necessary by a scant tablespoonful at a time, being careful to add only enough liquid that the dough clings together and can be formed into a ball. It is unlikely that the entire ¾ cup of liquid will be needed.
-
Divide the dough into two parts with one part (for the bottom crust) slightly larger than the other (for the top crust). Form dough into disk shapes, approximately ¾” - 1” thick. Wrap disks in plastic wrap and place in the refrigerator for about 15-20 minutes to chill. Remove the larger pastry disk from the refrigerator and place on a lightly floured work surface. Roll pastry to desired thickness, generally between 1/16” and 1/8” thickness. Roll the dough from the center outward and rotate the dough in quarter turns each time the dough is rolled, sprinkling the work surface with additional flour as necessary to slide the pastry in quarter turns. Gently wrap or drape the pastry around the rolling pin and carefully transfer it to a 9” pie plate that has been lightly sprayed with non-stick cooking spray, or very lightly greased. Unroll the pastry onto the plate, fitting it snugly into the pie plate and ensuring there are no air bubbles under the dough. Cut off excess dough so pastry is flush with the pie plate edge. Place pie shell in refrigerator for 15-20 minutes to chill.
-
Remove second disk of pastry from refrigerator. Prepare pastry for the top crust in the same manner as for the bottom crust, ensuring it is a large enough circle to cover the top of the pie. The excess pastry cut from the edge of the bottom crust may be combined with the second pastry disk if more dough is needed. If this is necessary, refrigerate dough for approximately 15 minutes after combining the pastries and before rolling out the dough for the top crust.
-
Remove pie shell from the refrigerator and arrange pie filling in prepared cold shell. Note that, if a cooked pie filling is being used, it should be chilled before filling the pie with it. Brush edges of bottom crust along pie plate edge with a bit of water to moisten. Transfer pastry to the top of pie filling. Trim excess pastry from the pie plate edge. Press the edge of the pastry all around the pie plate rim with tines of fork to adhere top crust to bottom crust. Cut slits in top of pie pastry to allow steam to escape as pie bakes. For additional venting, prick the pie in several places with tines of a fork.
-
Place pie in refrigerator for 30 minutes to allow filling to settle and to chill pastry to reduce shrinkage while it bakes. Alternatively, the pie may be placed in the freezer for approximately 15 minutes to speed up the chilling process.
-
While pie is chilling, position oven rack in bottom third of oven and preheat oven to temperature indicated in the recipe.
-
In small prep bowl, lightly whisk the reserved egg yolk with 1-2 tsp milk. With a pastry brush, lightly brush the pie top with the egg-milk mixture. Sprinkle with granulated sugar, if desired.
-
Transfer pie to the oven and bake according to recipe directions. Placing the pie on a foil-lined baking sheet will catch any boil-overs or drips should they occur and will make clean-up easier. If the pie edges start to brown too quickly, pie shields can be positioned over the edges of the pie. However, the same function can be accomplished by taking narrow strips of tin foil and molding them into semi-circle shapes and carefully placing them around the edge of the pie. If the entire pie browns too quickly before it is baked, loosely tent pie with tin foil (shiny side up). Remove pie from oven and transfer to cooling rack to cool completely for several hours before cutting and serving.
Recipe Notes
Yield: 1 – 9” pie
[Copyright My Island Bistro Kitchen]
PIN ME TO PINTEREST!
[This posting and recipe were last updated July 25, 2024]