
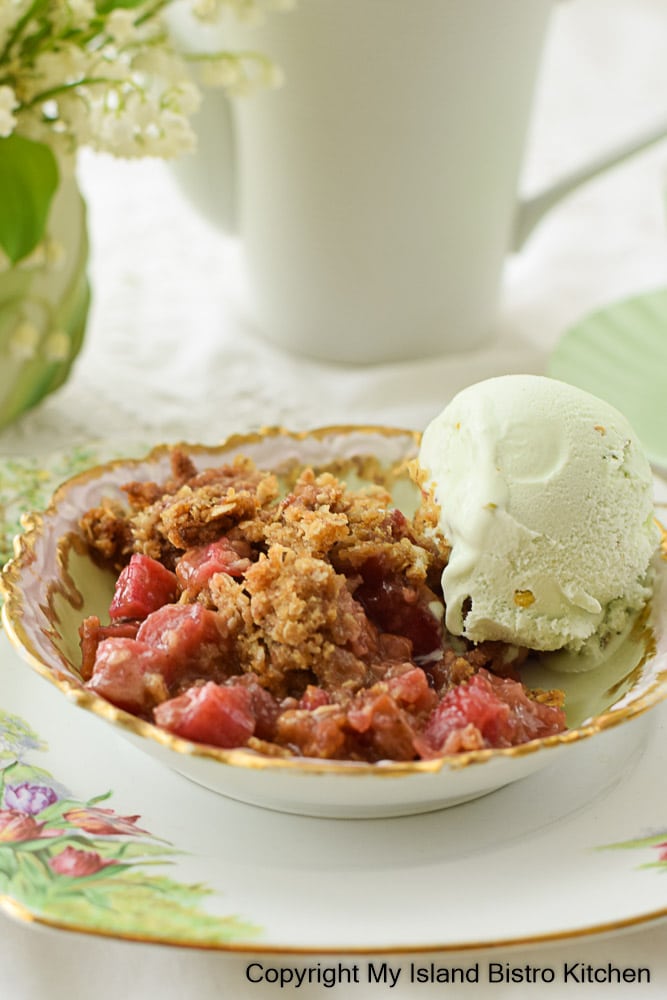
Strawberries and rhubarb have long been a compatible flavor combination in baked goods and this Strawberry Rhubarb Crisp proves that to be so. Continue reading Strawberry Rhubarb Crisp Recipe

Strawberries and rhubarb have long been a compatible flavor combination in baked goods and this Strawberry Rhubarb Crisp proves that to be so. Continue reading Strawberry Rhubarb Crisp Recipe
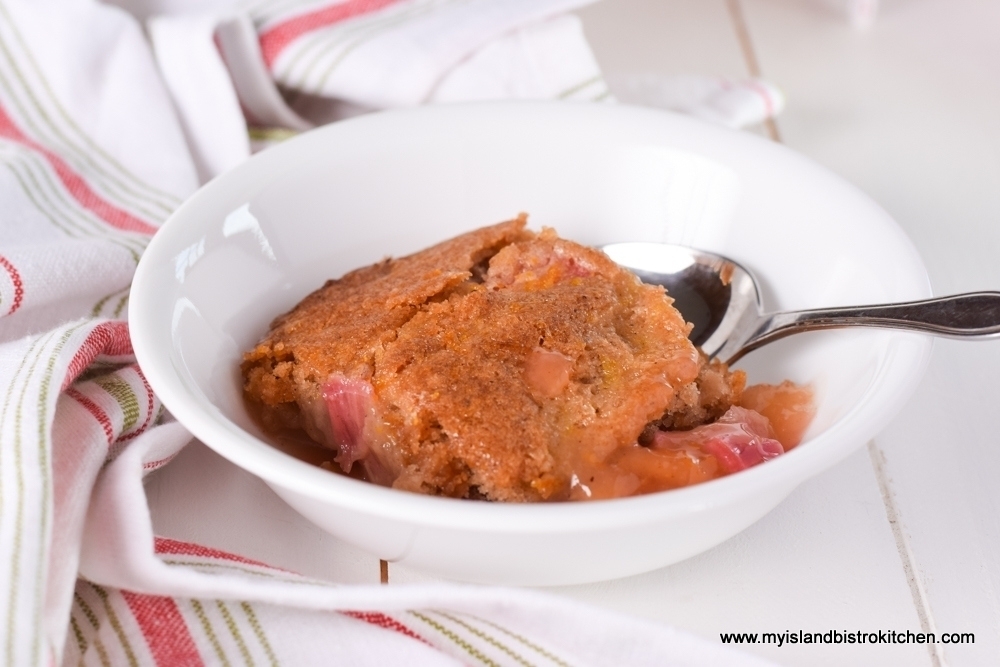
Those of us who love rhubarb eagerly await its appearance in springtime as it is, at least in my zone, the first produce to be harvested from the garden. Today, I am sharing my recipe for Rhubarb Crisp. While this is a lovely springtime treat when the fresh rhubarb is available, it can also be made any time throughout the year using frozen rhubarb. Continue reading Rhubarb Crisp Recipe
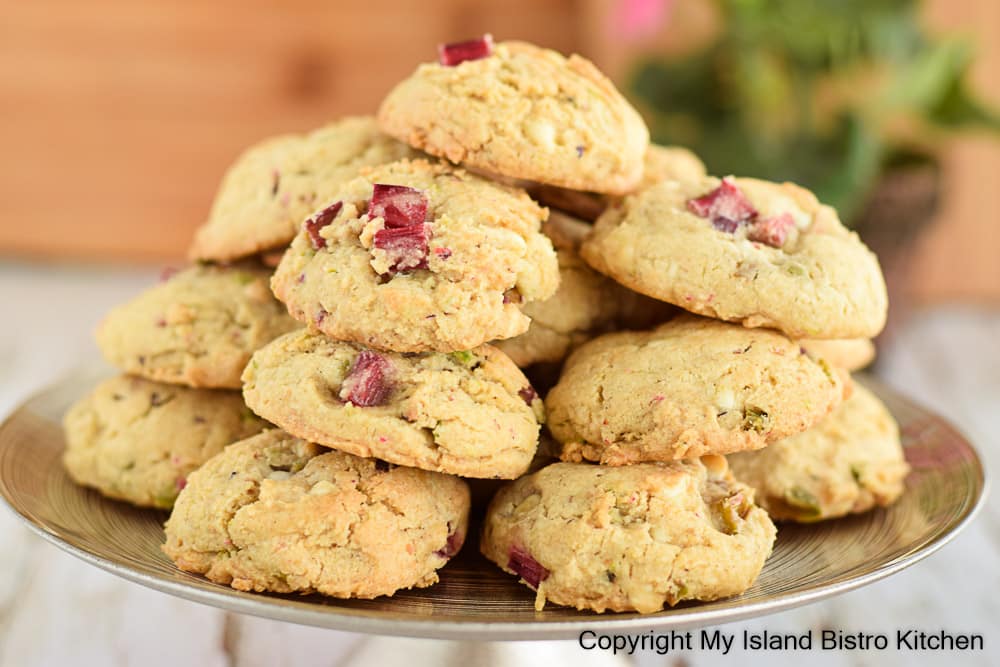
Rhubarb is the first produce to be harvested from my garden and is one of the springtime treats I most look forward to each year. I have developed a lot of recipes using rhubarb and, today, present my recipe for Rhubarb and Pistachio Cookies with White Chocolate Chips. These are tasty drop cookies that are loaded with complementary flavors. Continue reading Rhubarb and Pistachio Cookies with White Chocolate Chips
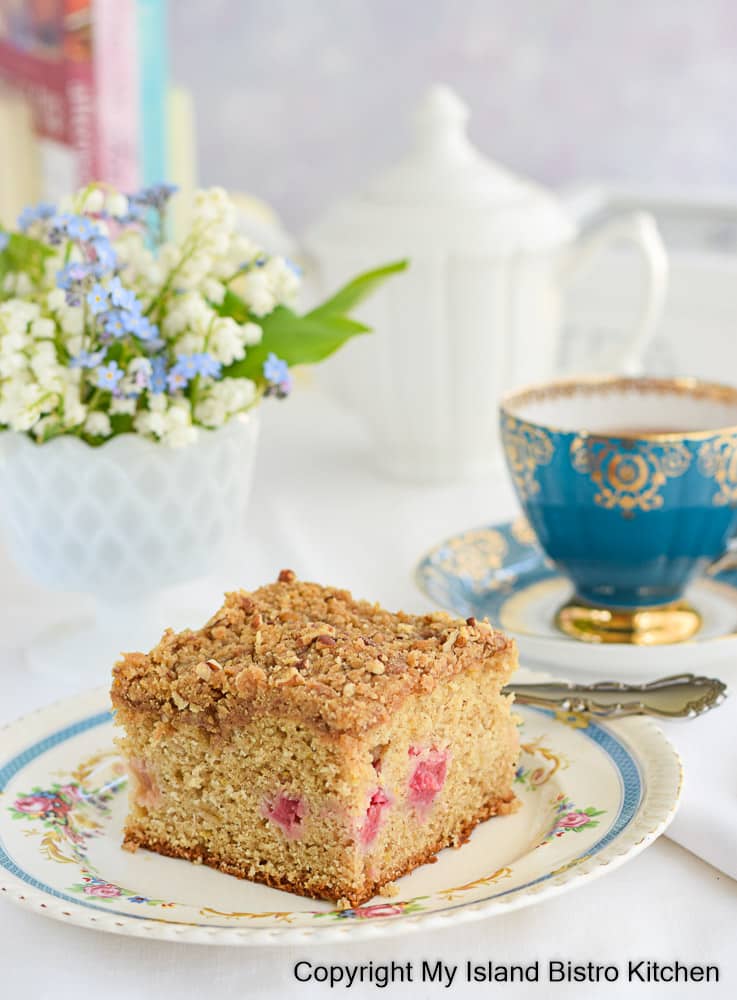
Coffee cake is a simple cake characterized by its streusel topping. While it is typically served alongside a cup of coffee, a fine cup of tea is lovely to enjoy with this type of cake, too. Today, I am sharing my recipe for Rhubarb Sour Cream Coffee Cake. Continue reading Rhubarb Sour Cream Coffee Cake
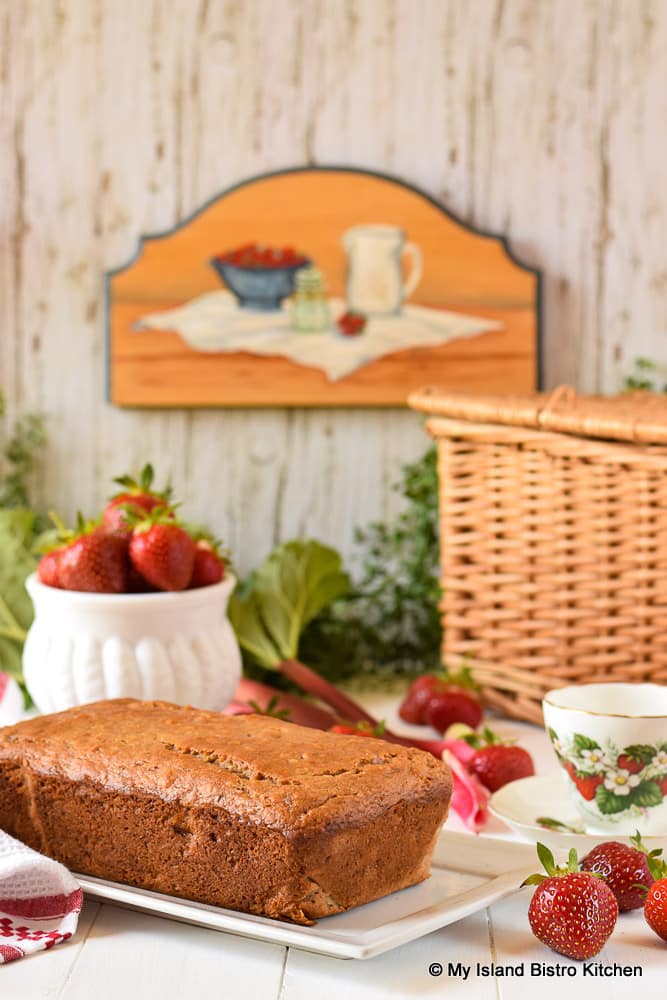
Quick breads are easy to make and are lovely for tea or coffeebreaks. Today’s quick bread combines strawberry and rhubarb with some flavorful spices (nutmeg and cardamom) to make a delightful treat. While this Strawberry Rhubarb Quick Bread can certainly be made with frozen strawberries and rhubarb since they are cooked into a sauce before being added to the bread batter, it is an extra-special treat to make when both are in season locally. Continue reading Strawberry Rhubarb Quick Bread Recipe
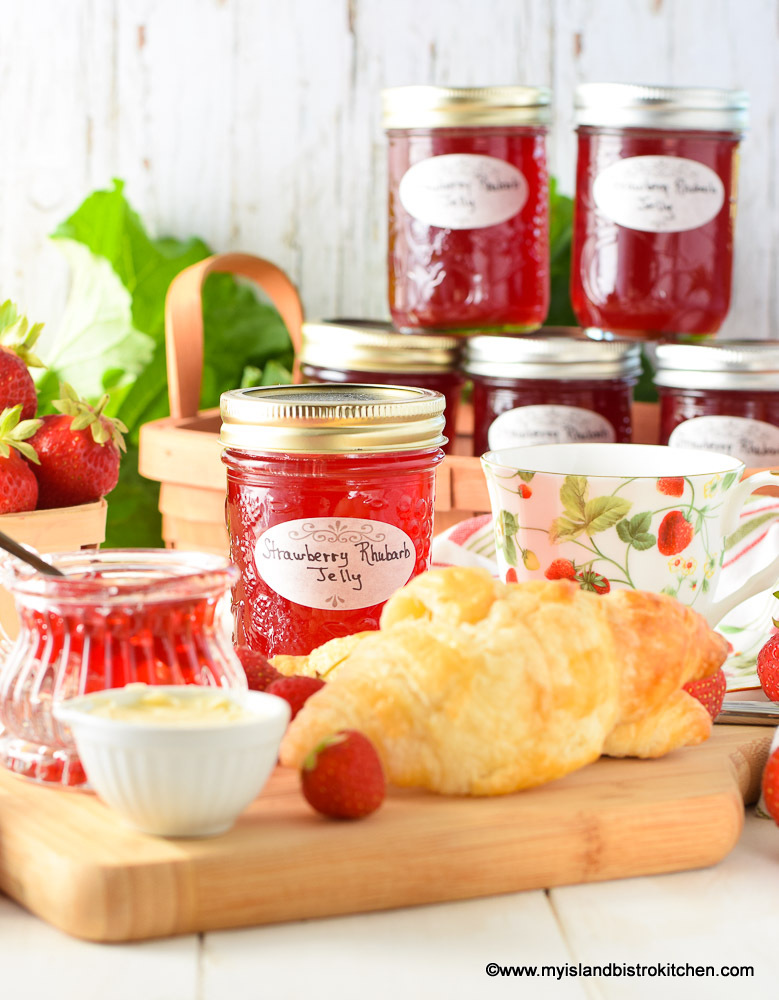
Strawberry and rhubarb are two of my favorite flavor combinations. It should come as no surprise, then, that I would create a Strawberry Rhubarb Jelly recipe. With its stunning color and beautiful flavor, this jelly is sure to become a family favorite. Continue reading Strawberry Rhubarb Jelly Recipe
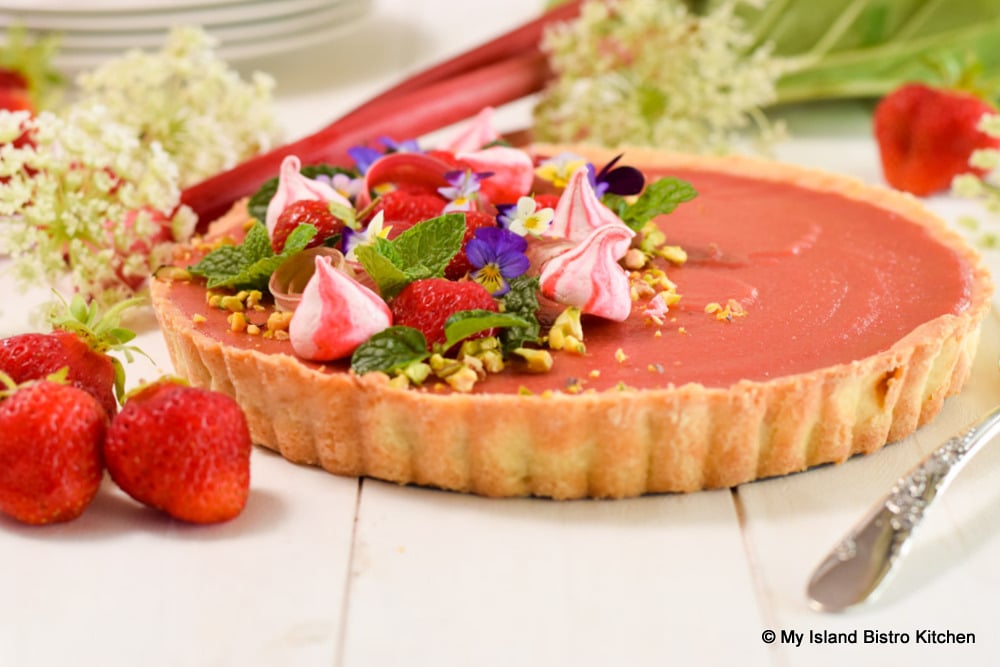
Today’s dessert is the lovely Strawberry Rhubarb Tart modeled after the famous French Lemon Tart. This divine tart combines two of the season’s best flavors into a silky-smooth filling which is then placed in a buttery rich and tender Pâte Sucrée shell. Simply, this is a decadent dessert of restaurant quality that can be made at home!
While a “Jump to Recipe” button has been activated on this post, it is highly recommended that the entire text of this post be read before making the Strawberry Rhubarb Tart as it contains additional information that is not included in the printable version of the recipe. Continue reading Strawberry Rhubarb Tart Recipe
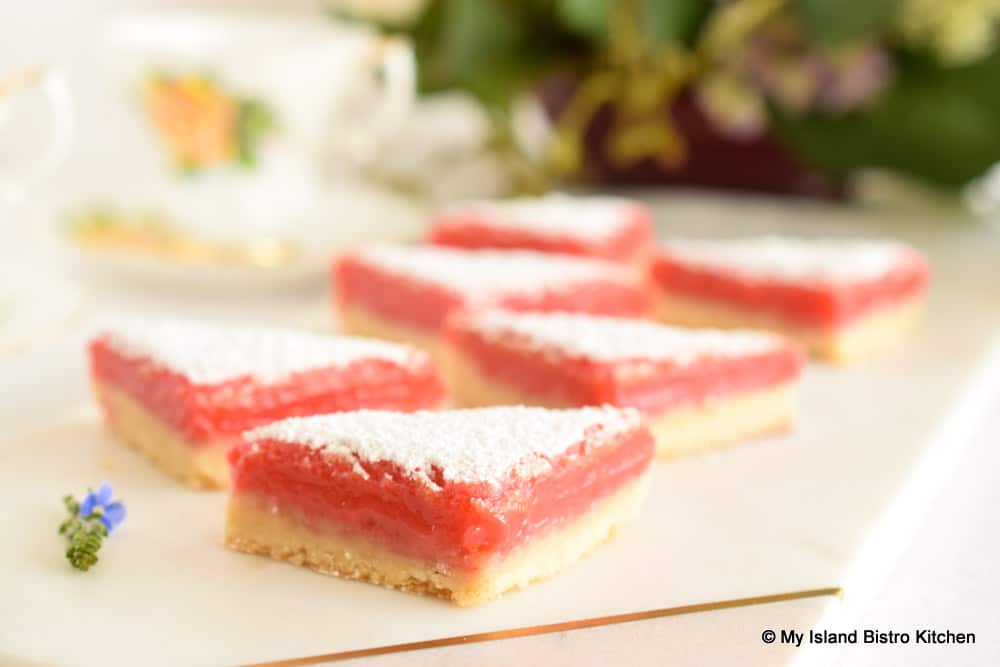
Two of the season’s best treats – strawberries and rhubarb – combine to make a luscious topping for Scrumptious Strawberry Rhubarb Bars with a rich buttery shortbread base. Continue reading Scrumptious Strawberry Rhubarb Bars

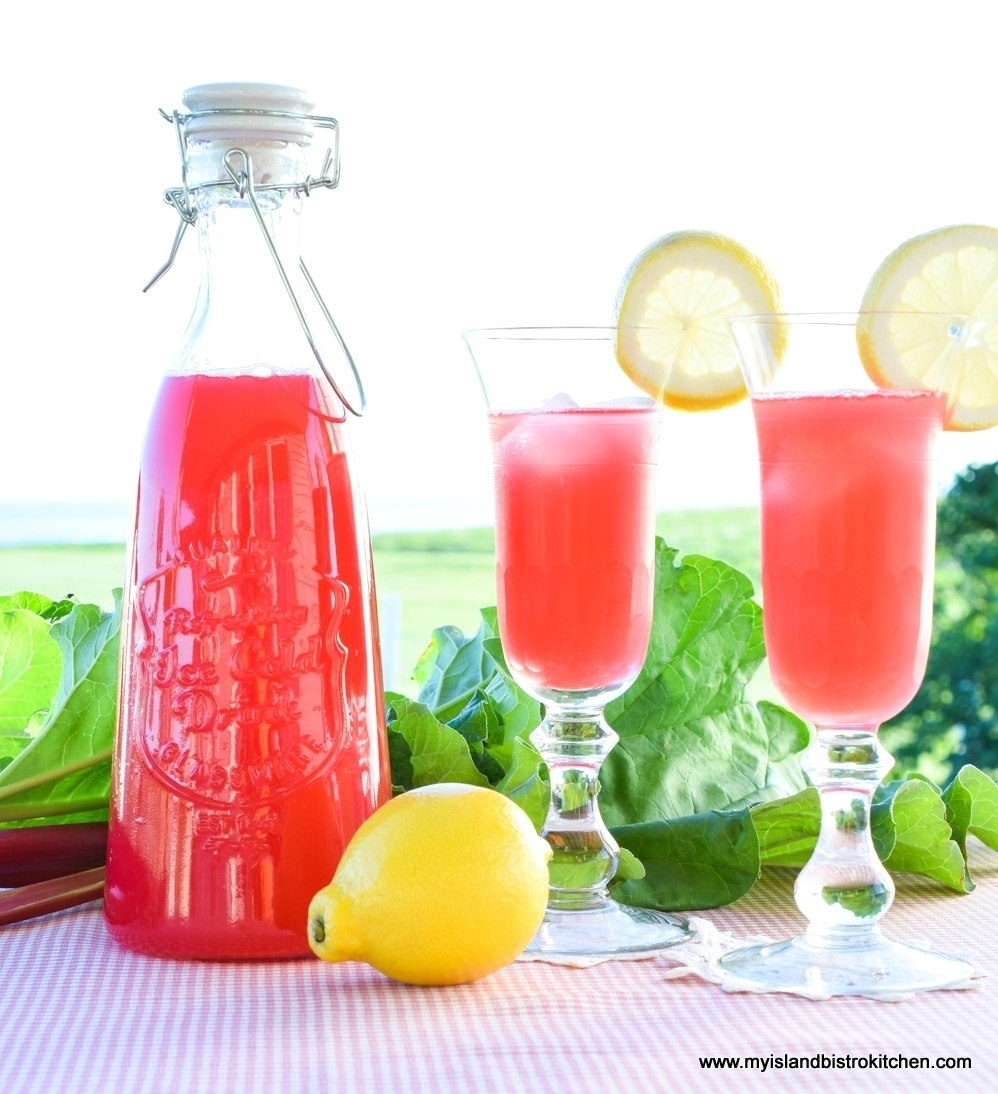
Two of summer’s best flavors marry to create a wonderful summertime drink. This Rhubarb and Strawberry Cordial checks off all of the boxes one would expect to find in a non-alcoholic summertime drink. It’s super tasty, has fabulous color, is refreshing and thirst-quenching, and can be made ahead and frozen. Continue reading Rhubarb and Strawberry Cordial
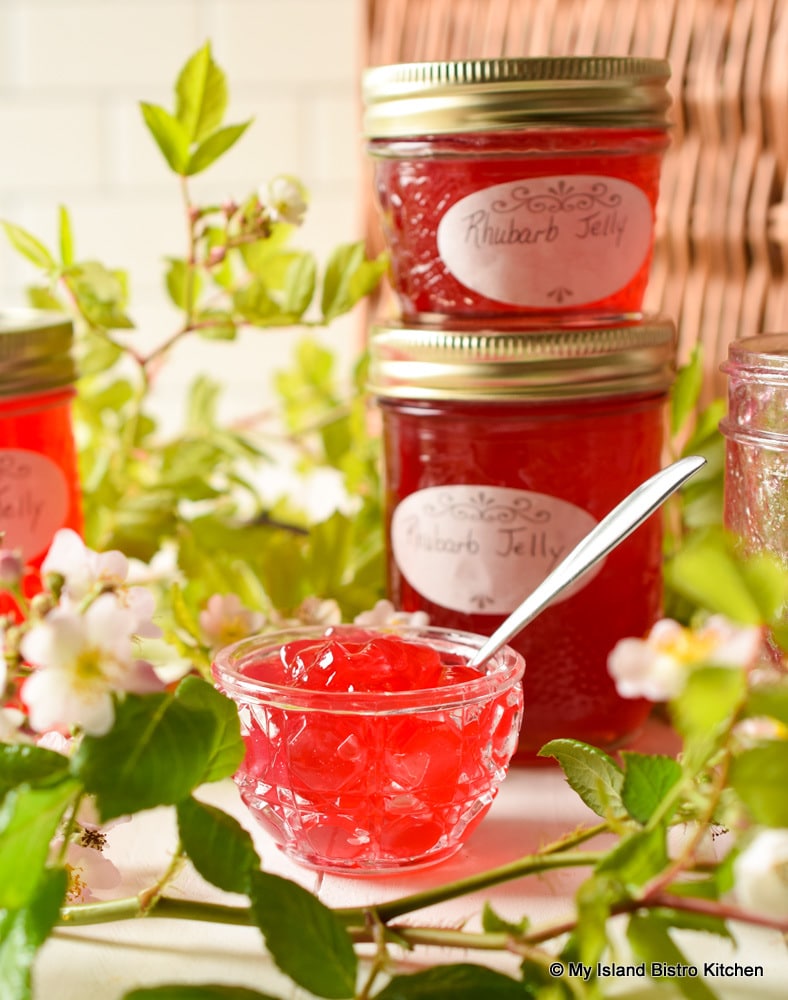
For those of you who are regular followers of my food blog, you know my love of rhubarb! I am always creating new recipes for it and that includes this fabulous beautiful-colored Rosy Rhubarb Jelly made from the strained juice of cooked rhubarb. With the smaller household in mind, I have created this stunning Rhubarb Jelly recipe to be a small batch – it should yield 3 half-pint and 1 quarter-pint jars. Continue reading Rosy Rhubarb Jelly Recipe
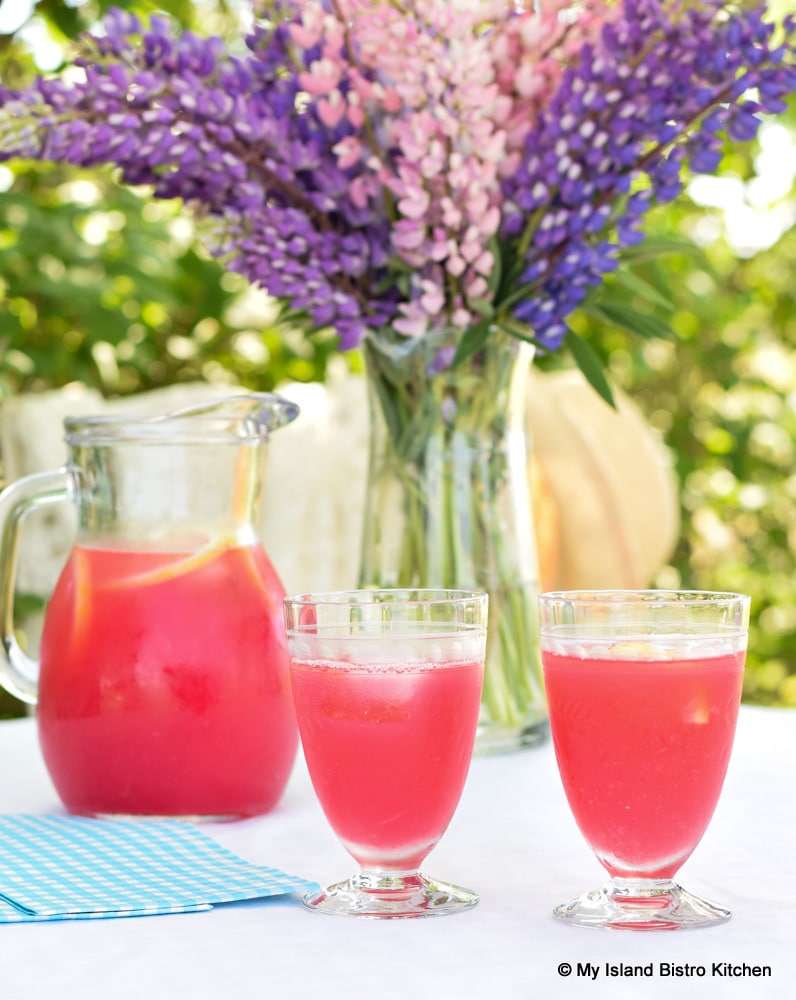
Lemonade is always a lovely refreshing and thirst-quenching summertime drink. And, of course, nothing beats the made-from-scratch lemonade. I always have lots of cold drinks on hand during the hot summer days, including this Rhubarb Peach Lemonade. Continue reading Rhubarb Peach Lemonade
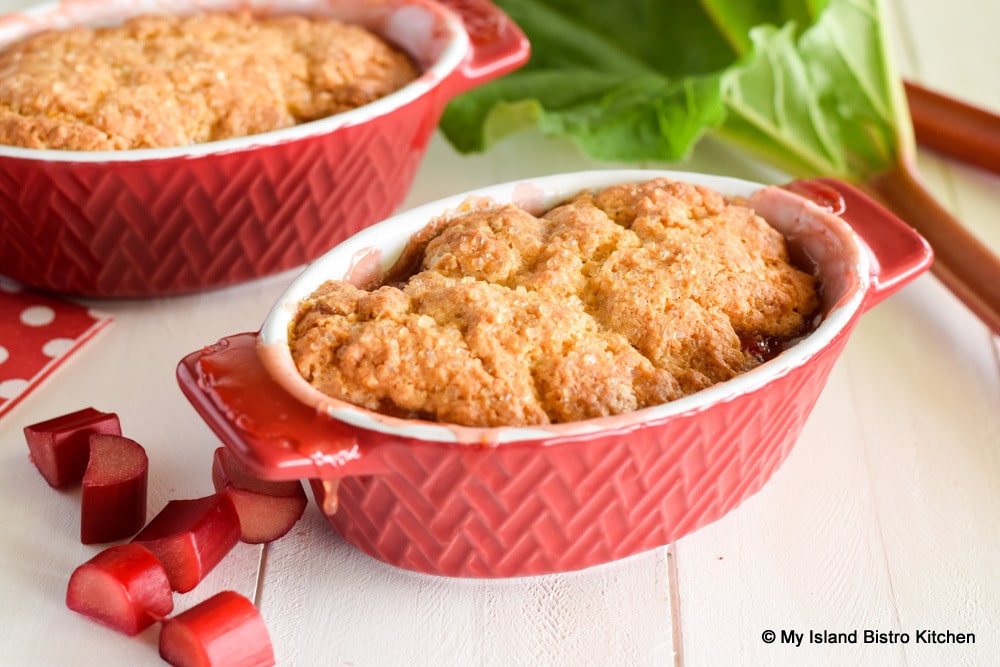
One of the things I most look forward to in spring is rhubarb from the garden. I certainly make good use of it as I find it is very versatile. Today, with the smaller household in mind, I am sharing my recipe for a delicious Rhubarb Cobbler perfectly sized just for two servings. Continue reading Rhubarb Cobbler For Two
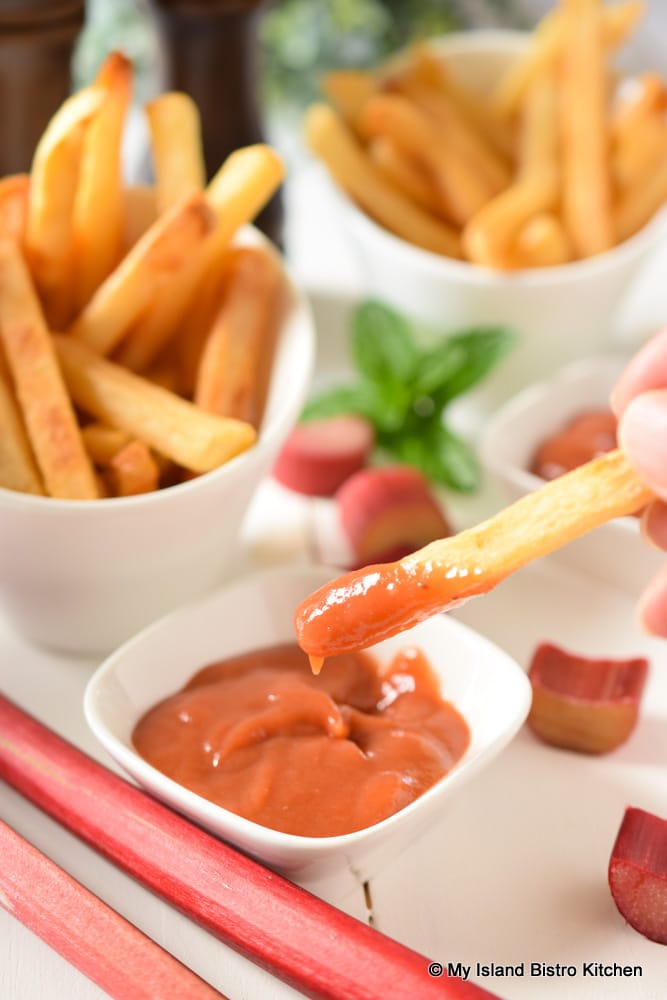
I am always looking for ways to use rhubarb as it’s one of my favorite ingredients to cook with and to eat. It’s a versatile ingredient and I have discovered, when combined with tomatoes, it makes a tasty Rhubarb Tomato Ketchup. Use this condiment just as you would a typical tomato-based ketchup. Continue reading Homemade Rhubarb Tomato Ketchup
Jamming and preserving season here in PEI starts with rhubarb, one of the first treats from the garden. The two crowns of rhubarb in our garden produce lots of rhubarb for use when it is in season and to freeze for later enjoyment.

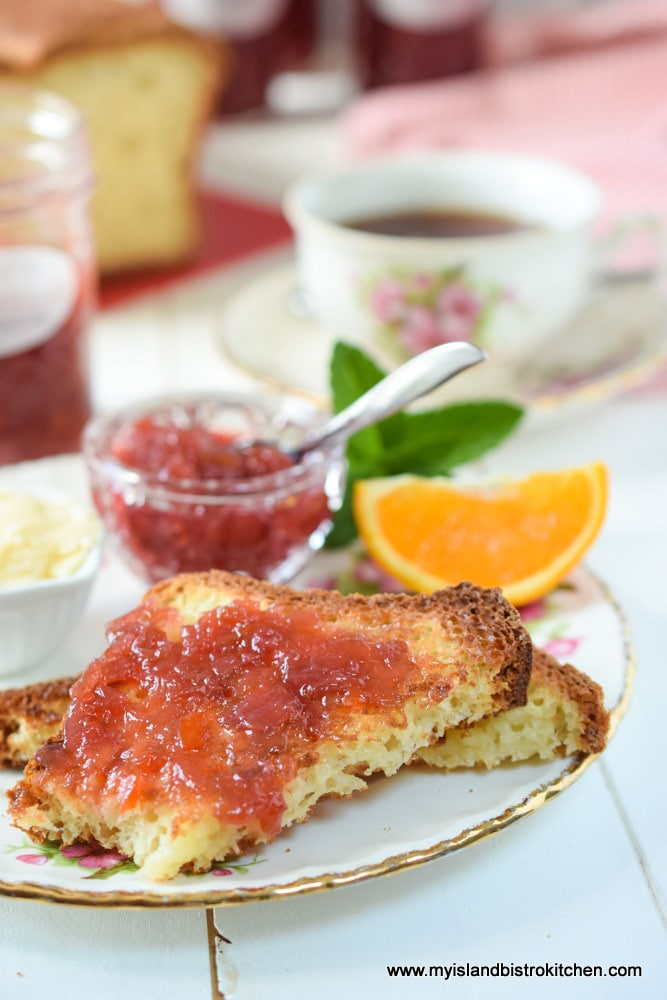
One of the first things I make with rhubarb as soon as it is ready is this wonderful Rhubarb Marmalade I have been making for years. The marmalade only takes five ingredients – rhubarb, granulated sugar, an orange, half a pink grapefruit, and half of a lemon. The color of the rhubarb marmalade is a lovely deep shade and its flavour is fresh and slightly tart. Continue reading Rhubarb Marmalade Recipe
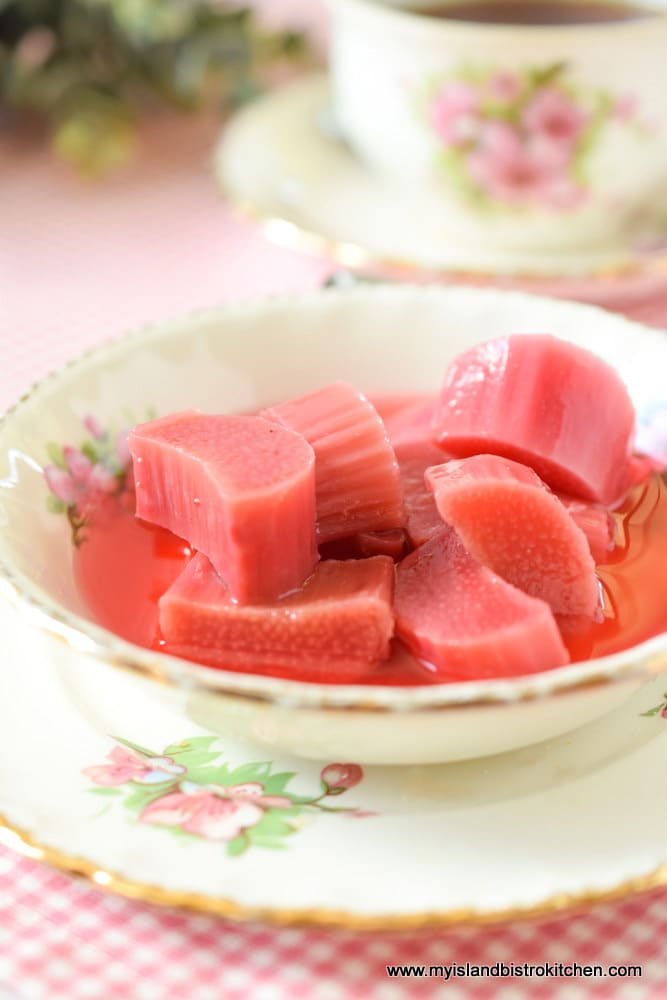
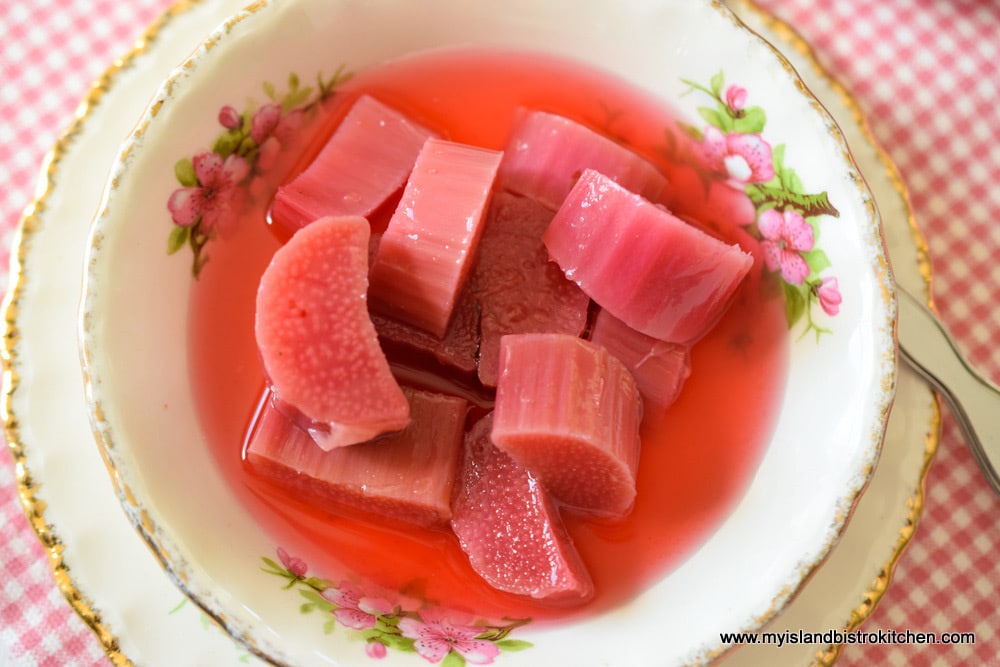
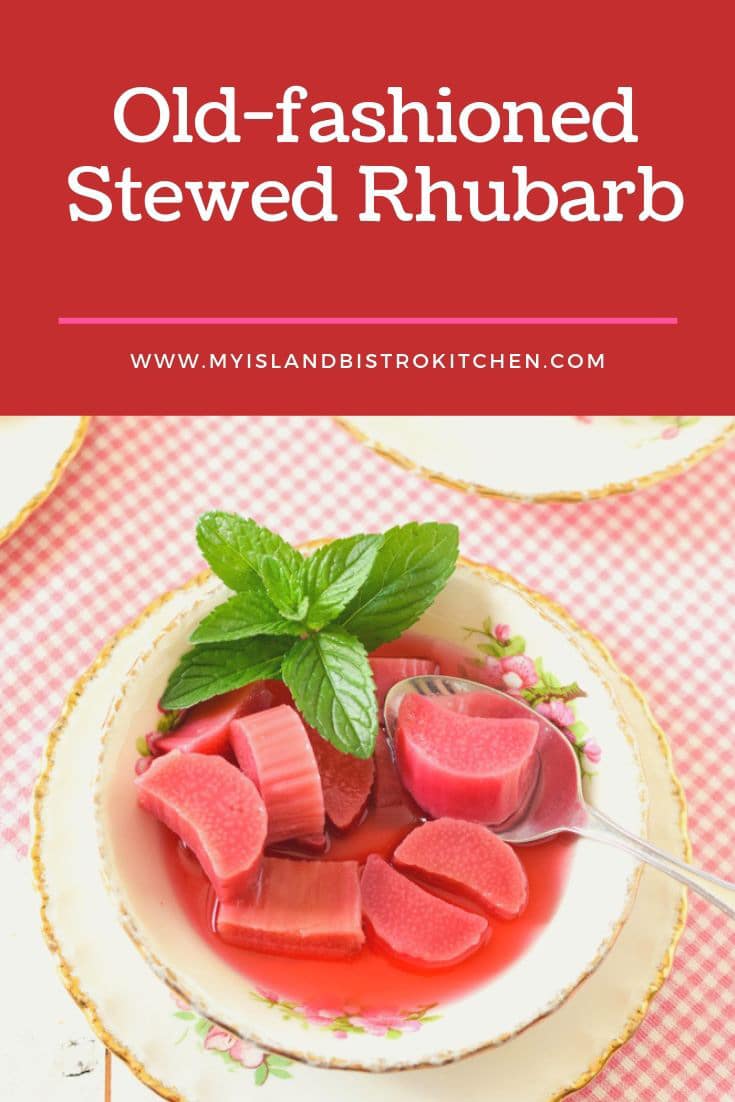
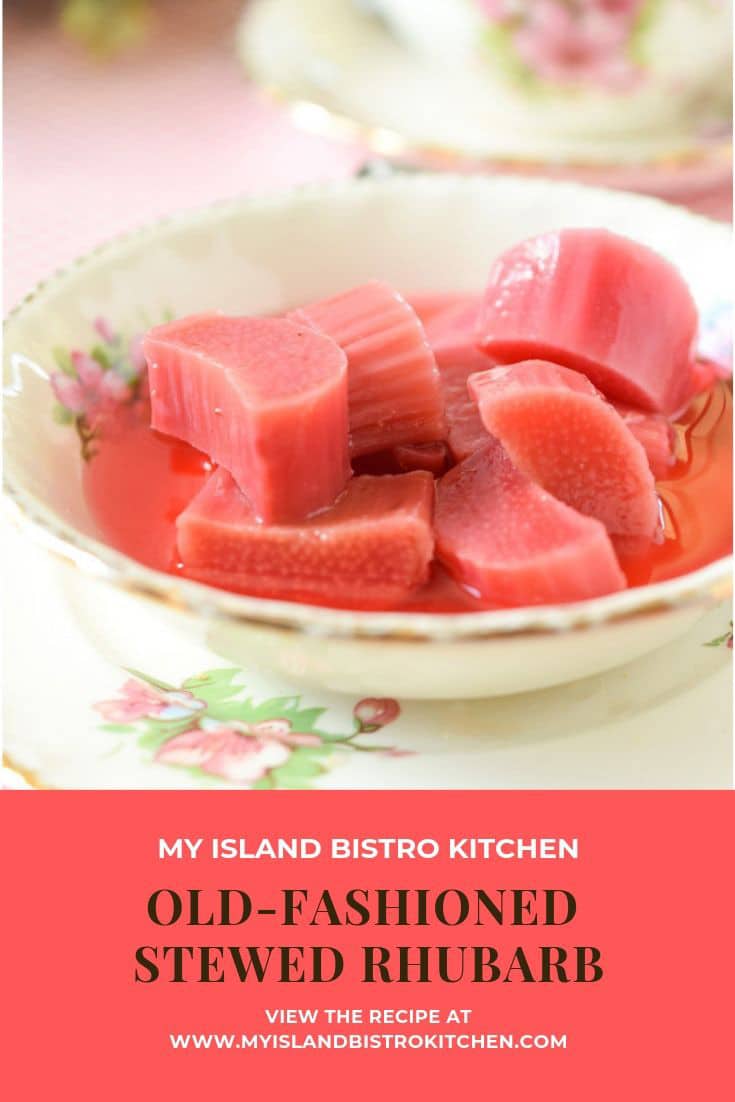
Old-fashioned stewed rhubarb is so simple to make and so tasty. During my growing up years, stewed rhubarb was a staple in the refrigerator during rhubarb season. My mother and grandmother both cooked the rhubarb slowly in a water and sugar mixture in the oven. This helped to retain the shape of the rhubarb and also its lovely rosy color. Cooking it on the stove, or in the oven at a higher temperature, would turn the rhubarb into sauce which is entirely different from this stewed rhubarb recipe.
While neither my mother or grandmother added anything to their stewed rhubarb, I add a small amount of pulp-free orange juice and a sprinkle of nutmeg which I think enhances the syrup in which the rhubarb is stewed and with which it is served.
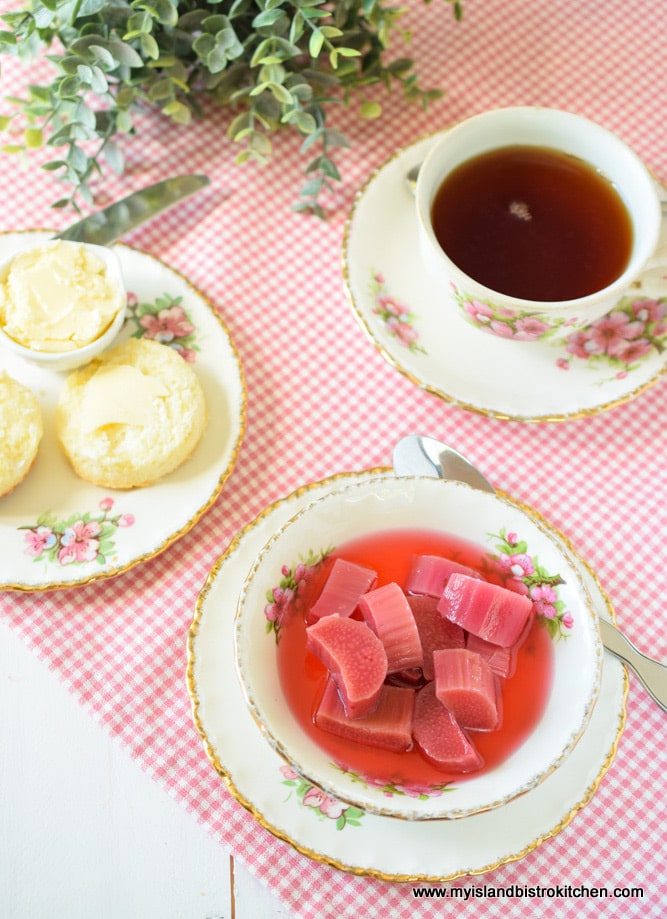
My grandmother would often serve this stewed rhubarb with biscuits made with homemade cream and slathered with homemade butter. She lived on a farm so had fresh cream daily and it was used liberally. (You can find my tea biscuit recipe here.) Stewed rhubarb would often be dessert after supper.
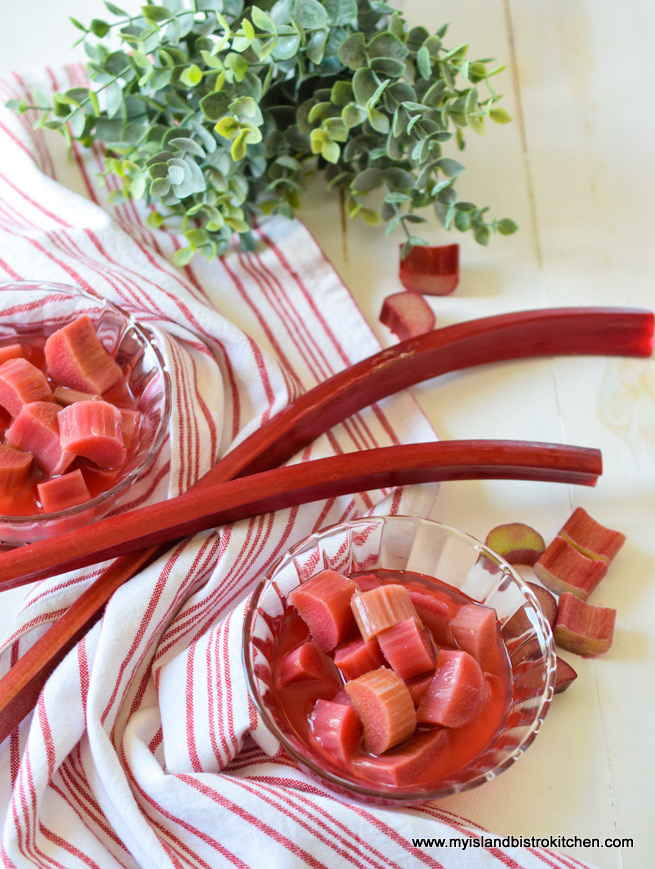
I freeze a lot of rhubarb for winter usage and will often have a dish of stewed rhubarb in the fridge any time over the year because it can easily be made with frozen rhubarb.
Made with only five basic ingredients, it doesn’t get much simpler (or more tasty) than Old-fashioned Stewed Rhubarb.
[Printable recipe follows at end of post]
Ingredients:
1 lb rhubarb, chopped into ¾“ pieces (approximately 3¾ cups chopped)
¾ cup hot water
1 cup + 1 tbsp granulated sugar
1½ tbsp pulp-free orange juice
1/8 tsp nutmeg
Method:
Preheat oven to 235°F oven.
In small saucepan over medium high heat, bring the hot water and sugar to a boil then reduce heat to simmer for 4 minutes.
Place rhubarb in casserole (apx. 2-quart size). Add the orange juice and nutmeg to the hot water and sugar mixture and pour over the rhubarb. Cover and place in oven for approximately 55-65 minutes, or until rhubarb is fork tender. Do not overcook or rhubarb will lose its shape and turn into sauce.
Yield: Apx. 5-6 servings
Join the Facebook page for My Island Bistro Kitchen: https://www.facebook.com/MyIslandBistroKitchen/
Follow “the Bistro” on “X” (formerly Twitter): https://twitter.com/PEIBistro/
See the drool-worthy gallery of mouth-watering food photos from My Island Bistro Kitchen on Instagram: https://www.instagram.com/peibistro/
Follow “the Bistro” on Pinterest at https://www.pinterest.ca/peibistro/ and pin the Pinterest-ready photo found at the end of this post to your favorite Pinterest boards.
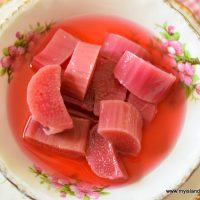
Ruby red rhubarb stewed slowly in the oven to retain its shape and color makes a wonderful light dessert, especially when served with homemade biscuits. May be made with either fresh or frozen rhubarb.
Yield: Apx. 5-6 servings
[Copyright My Island Bistro Kitchen]
Rhubarb Custard Torte
Rhubarb Pudding Cake
Strawberry Rhubarb Pie
Rhubarb Pie
Rhubarb Cobbler for Two
Strawberry Rhubarb Tart
Scrumptious Strawberry-Rhubarb Bars

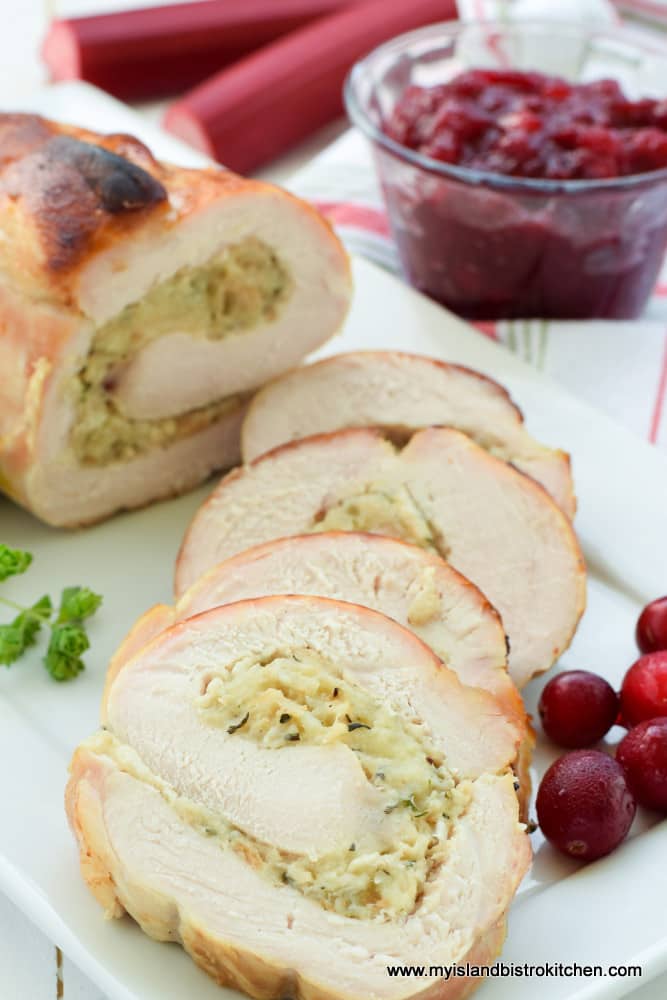
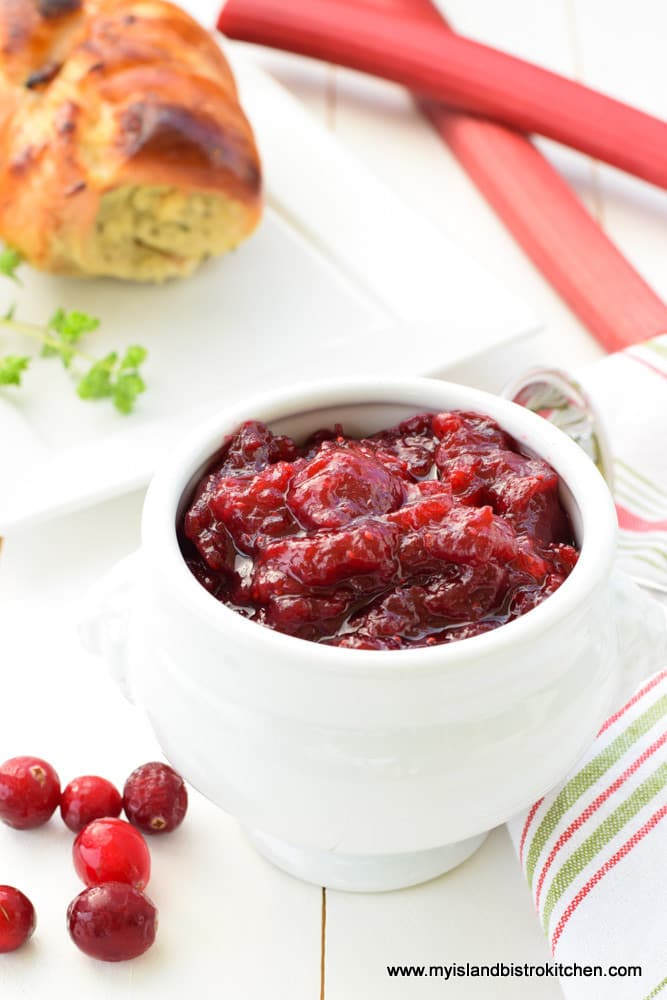
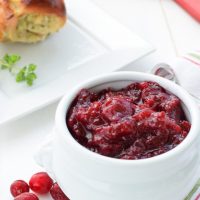
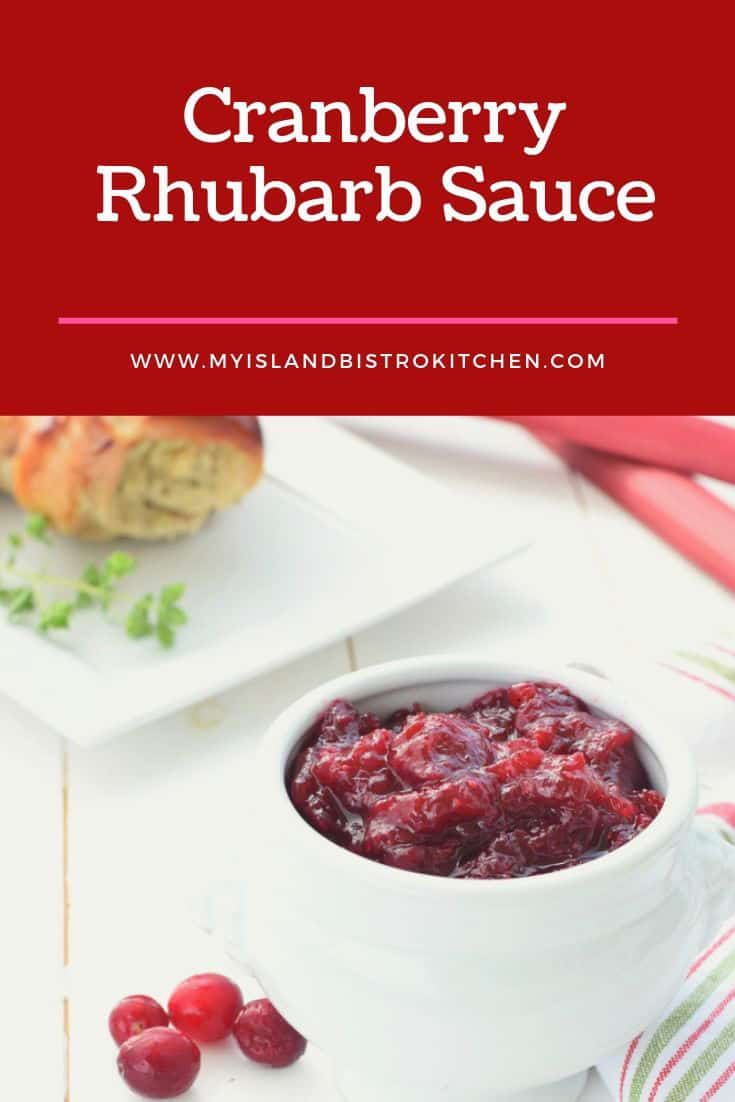
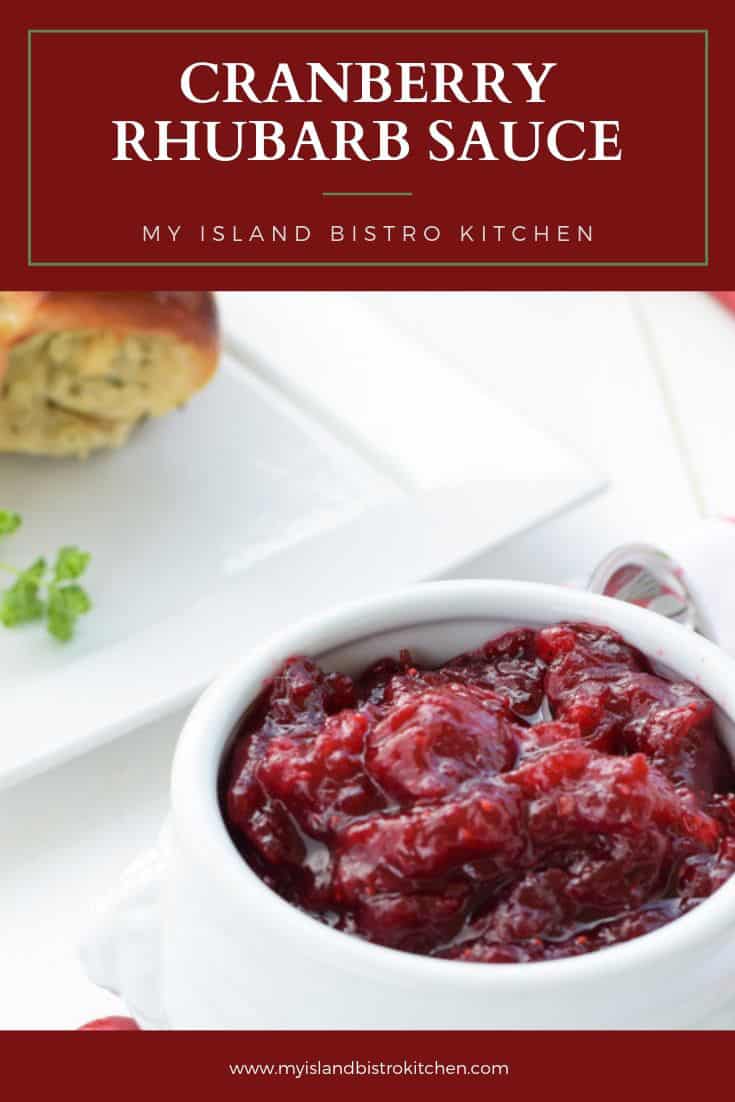
It’s hard for me to imagine a roast turkey or chicken dinner without homemade cranberry sauce. Sometimes, I will make the sauce with just cranberries while other times, I will blend flavours as in the case of this Cranberry Rhubarb Sauce which combines the tart cranberries with the equally tart rhubarb. Lovely tang and extraordinarily rich color to this tasty sauce.
This Cranberry Rhubarb Sauce may be made with either fresh or frozen cranberries and rhubarb so it’s possible to make it year-round. This is a good thing because cranberries and rhubarb are not in-season locally together at the same time.
This condiment complements a roast poultry dinner very well. Try mixing it with some mayonnaise for a lovely spread on a cold chicken or turkey sandwich.
I like my cranberry sauces to be very thick and not runny. The secret to making a thick cranberry sauce is to, first, make a simple syrup of water and sugar before adding the cranberries and rhubarb. The trick to getting a thickened sauce is to stir it both while it is cooking and cooling. Stir it plenty during the cooling process – it will appear somewhat watery when it comes off the stove but, by stirring it frequently as it cools, it will thicken well.
This sauce, like my other cranberry sauces, freezes well. I often make up a batch or two at a time and freeze it in airtight serving-size dishes of desired size. To thaw, simply remove the sauce from the freezer and thaw at room temperature for an hour or so (depending on the size of container, of course).
[Printable recipe follows at end of posting]
Ingredients:
2/3 cup granulated sugar
1/3 cup light brown sugar
1 cup water minus 1 tablespoon
1½ cups cranberries, fresh or frozen (approximately 6 oz)
¾ cup rhubarb, fresh or frozen, chopped into ¼“ chunks (approximately 3 oz)
2 tbsp peeled apple, finely chopped
1/4 cup orange juice
1 tsp lime juice (optional)
¼ tsp cinnamon
1/8 tsp nutmeg
1/16 tsp ginger
1 star anise pod (optional)
2 tsp finely grated orange rind
Method:
In medium-sized saucepan, over medium heat, bring sugars and water to boil. Boil, uncovered, for 5 minutes over medium-high heat, stirring occasionally.
Add cranberries, rhubarb, apple, and orange and lime juices. Bring to a boil. Cook, uncovered, over medium-low heat, stirring periodically throughout the cooking process, for about 8 minutes. Add the spices and star anise pod. Increase heat to return mixture to the boiling point then reduce heat to medium-low and continue to stir the sauce periodically while cooking it for another 10 minutes or until mixture thickens.
Remove saucepan from heat and discard the star anise pod. Add orange rind. Stir frequently as the sauce cools to help it to thicken.
Store, covered, in refrigerator for up to 5 days or freeze for longer storage.
Yield: Apx. 1 2/3 cups
Zesty Cranberry-Orange Sauce
Cranberry Blueberry Sauce
Red Wine Cranberry Pear Sauce
Yield: Apx. 1 2/3 cups
[Copyright My Island Bistro Kitchen]
Join the Facebook page for My Island Bistro Kitchen: https://www.facebook.com/MyIslandBistroKitchen/
Follow “the Bistro” on “X” (formerly Twitter): https://twitter.com/PEIBistro/
See the drool-worthy gallery of mouth-watering food photos from My Island Bistro Kitchen on Instagram: https://www.instagram.com/peibistro/
Follow “the Bistro” on Pinterest at https://www.pinterest.ca/peibistro/ and pin the Pinterest-ready photo found at the end of this post to your favorite Pinterest boards.
Lemonade is one of the most common of summer drinks. Served cold, it’s very refreshing on a hot summer’s day. Sometimes, I like to flavour my lemonades as I am doing today with rhubarb in the form of Rhubarb Lemonade. Continue reading Rhubarb Lemonade
Today, I am sharing my recipe for a real old-fashioned type of dessert – Rhubarb Pudding Cake. The cake is “self-saucing” which means that the delectable sauce forms underneath the simple cake batter as the cake bakes. It’s an “all-in-one” pudding and cake! It may not be the most extravagant looking dessert but it sure is mighty tasty! If you are a rhubarb lover, you will love this dessert. Continue reading Old-fashioned Rhubarb Pudding Cake
I love the produce our garden generates and its earliest treat is rhubarb. It is so versatile and I make lots of recipes using rhubarb. Today, a treat for my gluten-free diet followers — a new recipe for Deli-style Gluten-free Rhubarb Granola Muffins. Continue reading Deli-style Gluten-Free Rhubarb Granola Muffins
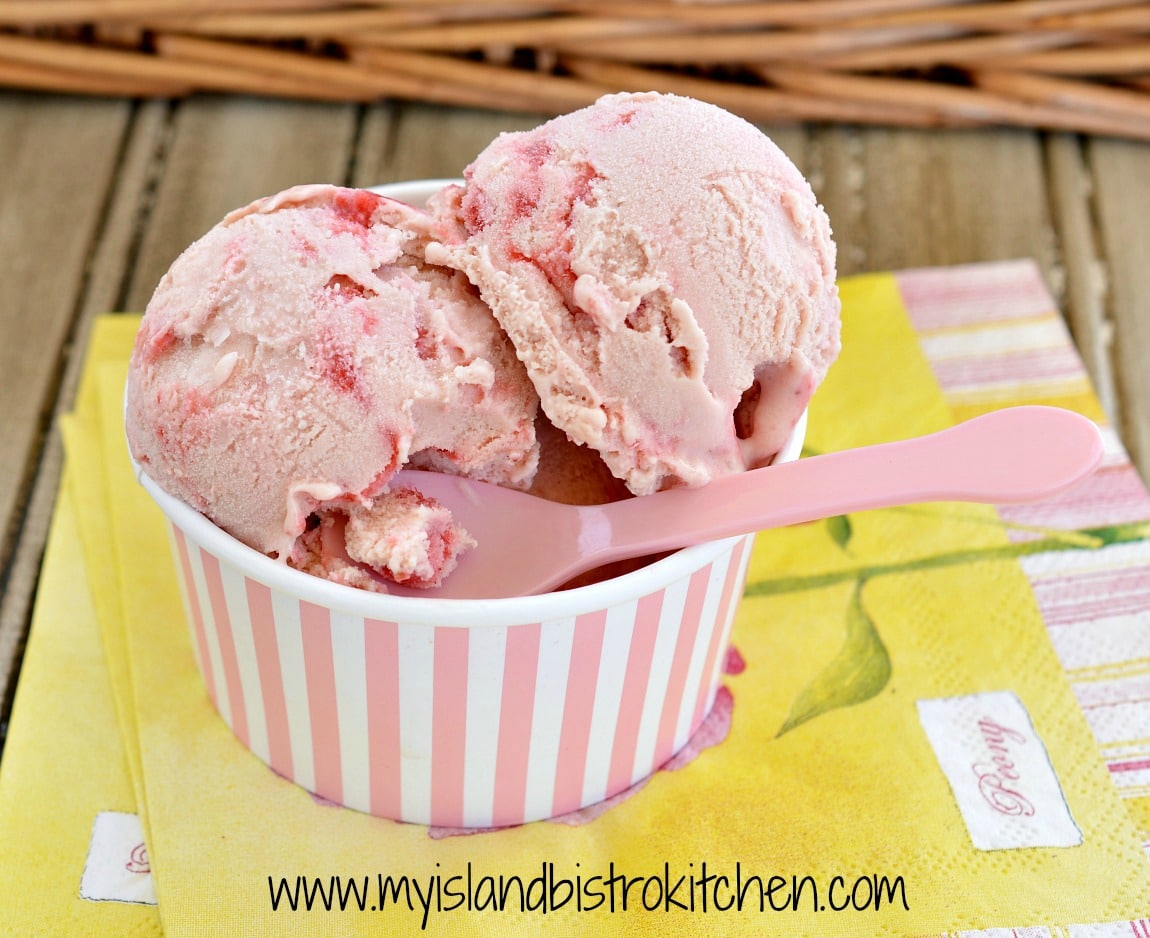
Summer just would not be summer without ice cream and what better way to enjoy it than to combine two of the season’s best flavors – strawberry and rhubarb – into homemade Strawberry Rhubarb Ripple Ice Cream! Continue reading Old-fashioned Strawberry Rhubarb Ripple Ice Cream