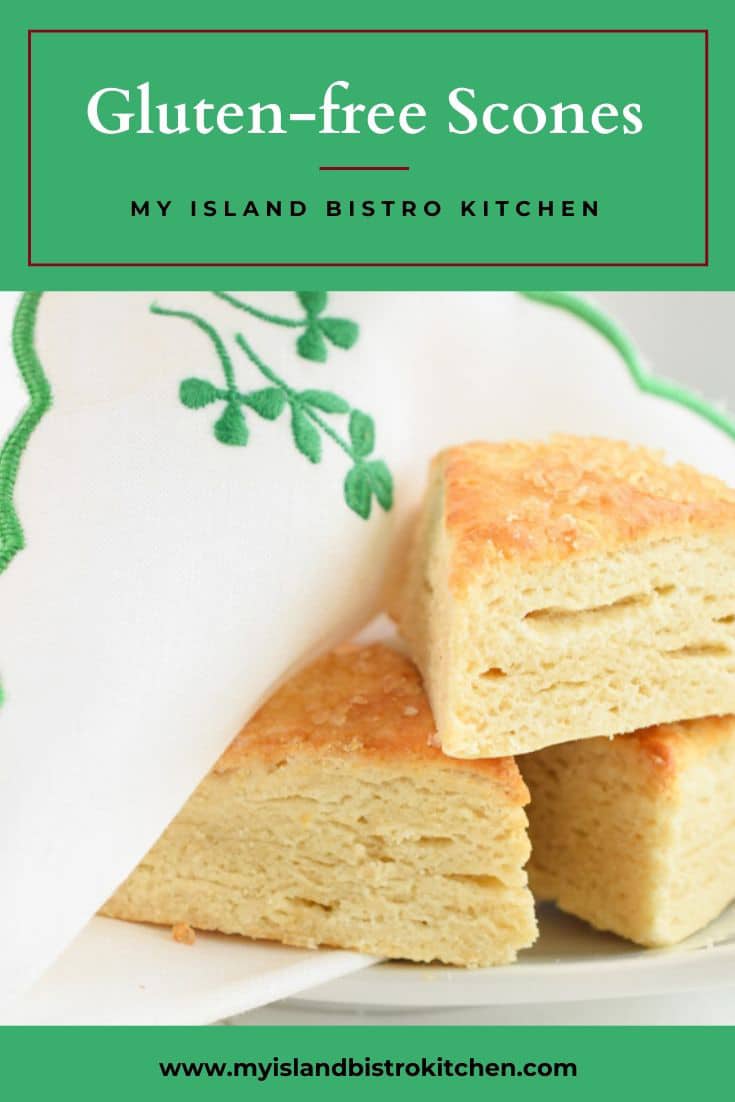
It can be a challenge to develop quality gluten-free baked products, especially if one compares them to their wheat-based counterparts. However, the good news is quality gluten-free baked goods are possible! I hope you find these gluten-free scones proof of that.
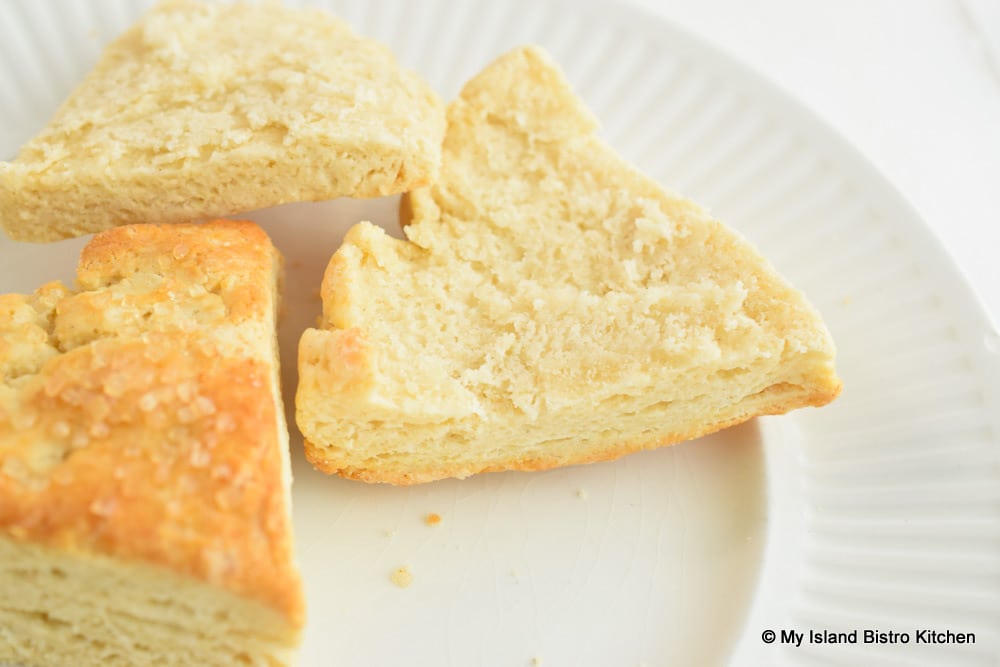
It’s important, in my view, though, not to do a direct comparison between gluten and non-gluten counterparts as it is not always possible to achieve a gluten-free product of the exact same quality as one made with wheat flour. This to say that, while I find my gluten-free scones tasty, they will not look or taste the same as my puffy wheat-based scones. This is largely because there is no gluten to work with in gluten-free ingredients and the gluten-free flours just don’t rise in the same way as wheat-based ones do.
As with many gluten-free baked goods, a better result is most often gotten if a blend of flours is used as opposed to using a single all-purpose gluten-free flour. Two of my most favorite flours to work with in gluten-free baking are almond flour and coconut flour. Both give great texture in the final product and add wonderful flavor. I also find that gluten-free baked products tend to require more leavening than do the wheat-based products.
So, through testing over several months, I have developed a recipe for gluten-free scones that have a light texture and great flavor. In an earlier post titled “How to Make Perfect Scones”, which you can access here, I wrote extensively about making scones in general. Rather than repeat that information in this post, I will simply direct readers to that earlier post for details on making scones.
The same technique applies to the gluten-free scones with the exception of not having to worry about overworking the dough. That said, however, I still do not overwork the dough in the gluten-free scones either; rather, I just work the dough enough to bring it together to the point that the scones can be cut out and I use the fold-over method versus the traditional kneading.
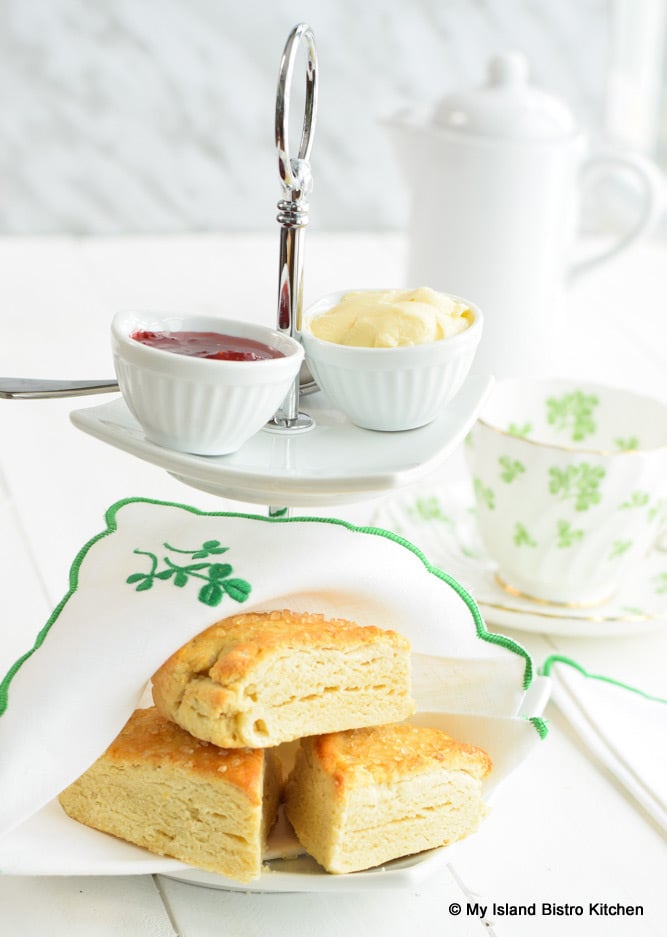
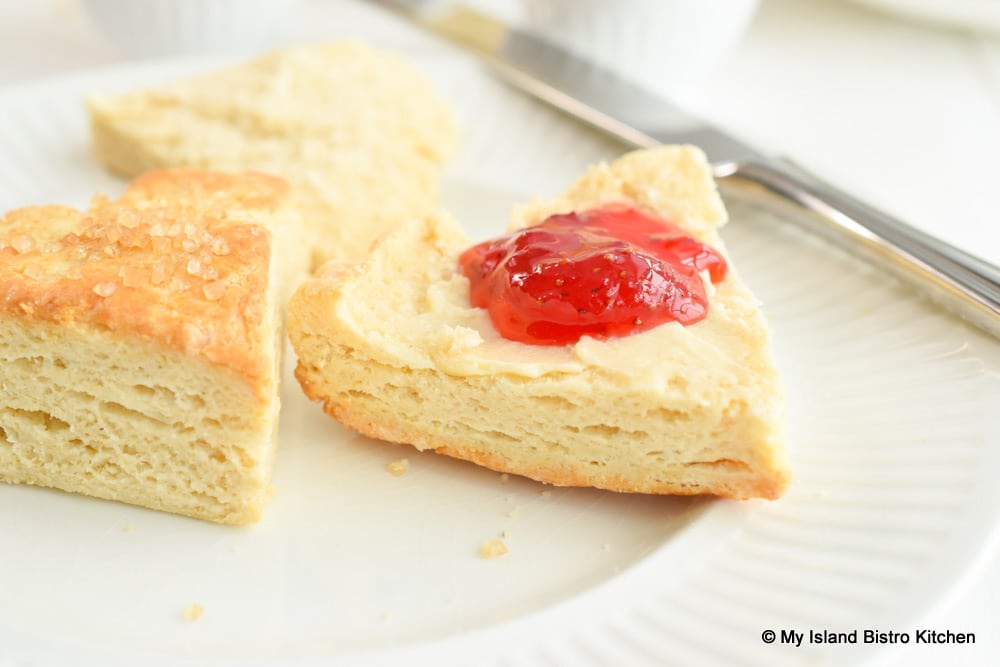
If you are on a gluten-free diet, I hope you enjoy these scones. I didn’t have any clotted cream or English double cream on hand when I was doing the photoshoot of these scones though I know either would be divine on them. They are tasty, all the same, with a good slather of butter along with a favorite jam or lemon curd.
Gluten-free Scones
Ingredients:
1 1/3 cups gluten-free 1-to-1 baking flour
1/3 cup finely ground almond flour
1/3 cup coconut flour
1 tbsp potato starch
½ tsp xanthan gum
¼ cup granulated sugar
4 tsp baking powder
½ tsp salt
1/3 cup cold unsalted* butter, cut into ½“ cubes
1 extra-large egg (cold), lightly beaten with fork
½ cup whipping cream (cold) with ¾ tbsp removed and reserved for brushing tops of scones
¼ cup 2% milk (cold)
1 – 2 tsp granulated or turbinado sugar for sprinkling tops of scones (optional)
Method:
Position oven rack in center of oven and preheat oven to 400°F. Line baking sheet with parchment paper.
In large bowl, sieve or sift the flours, potato starch, xanthan gum, sugar, baking powder, and salt together. Drop the cubes of butter into the dry ingredients and toss to coat the butter. Cut in the butter with a wire pastry cutter until mixture resembles coarse crumbs or pea-sized pieces. Quickly run fingers through the mixture several times, scooping up bits of the butter and rubbing them into long paper-thin slivers between the thumb and forefinger. It is not necessary to do this with every piece of butter – just quickly pick several at random.
Make a well in the center of the dry ingredients.
In a small bowl or large measuring cup, lightly whisk the egg, whipping cream, and milk together. Pour liquid ingredients all at once into well in center of dry ingredients. Using a fork, stir dough just enough that the liquid is absorbed into the dry ingredients and the dough can be roughly brought together. Dough will be soft and sticky and some floury spots may remain. Transfer dough onto lightly floured work surface, gently working it just until the dry ingredients are barely incorporated and a shaggy dough mass forms.
Fold the dough in half over onto itself. Lightly press the dough down. Turn the dough a half turn and repeat the folding exercise. Do this 3-4 times.
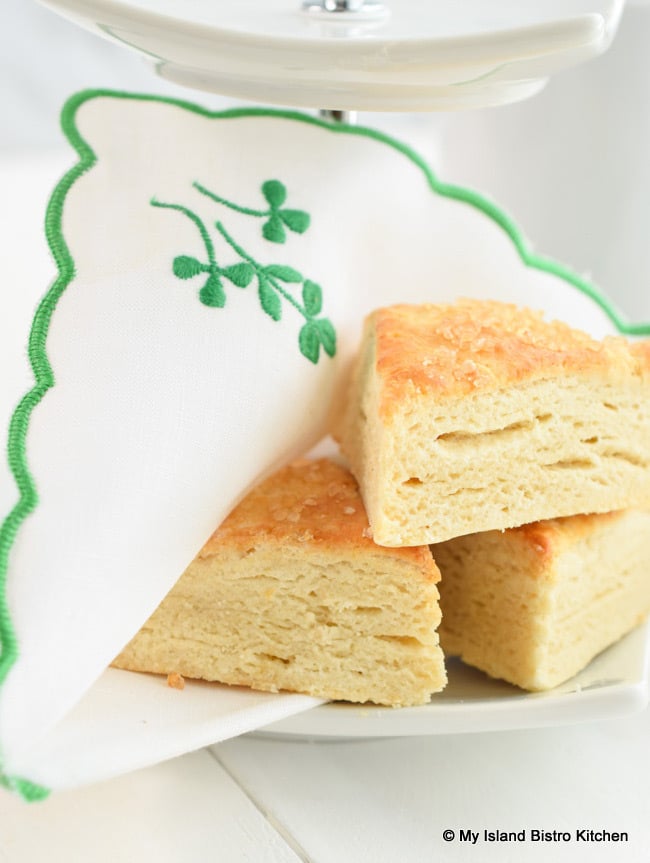
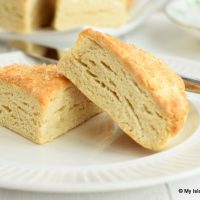
To make wedge-style scones: With a bench/pastry scraper or sharp knife, divide the dough into two equal parts. Lightly press and form each part into a small circle about ¾” thick. Transfer to prepared baking sheet. Cut each circle into six equal wedges and separate the scones by about ¾”, still keeping each group of six wedges in a circular shape for baking.
Using a pastry brush, lightly brush the reserved whipping cream on tops of scones and sprinkle with sugar.
To make round-shaped scones: Lightly press dough into circle about ¾“ thick. Use a lightly floured 1¾” – 2” round cutter to cut scones from dough. Push the cutter straight down and out of the dough without twisting the cutter in the process. Re-flour the cutter before cutting out each scone. Gather dough scraps and form into a circle from which to cut remaining scones. Transfer scones to prepared baking sheet, placing scones about 1” apart.
Lightly brush the reserved whipping cream on tops of scones and sprinkle with sugar.
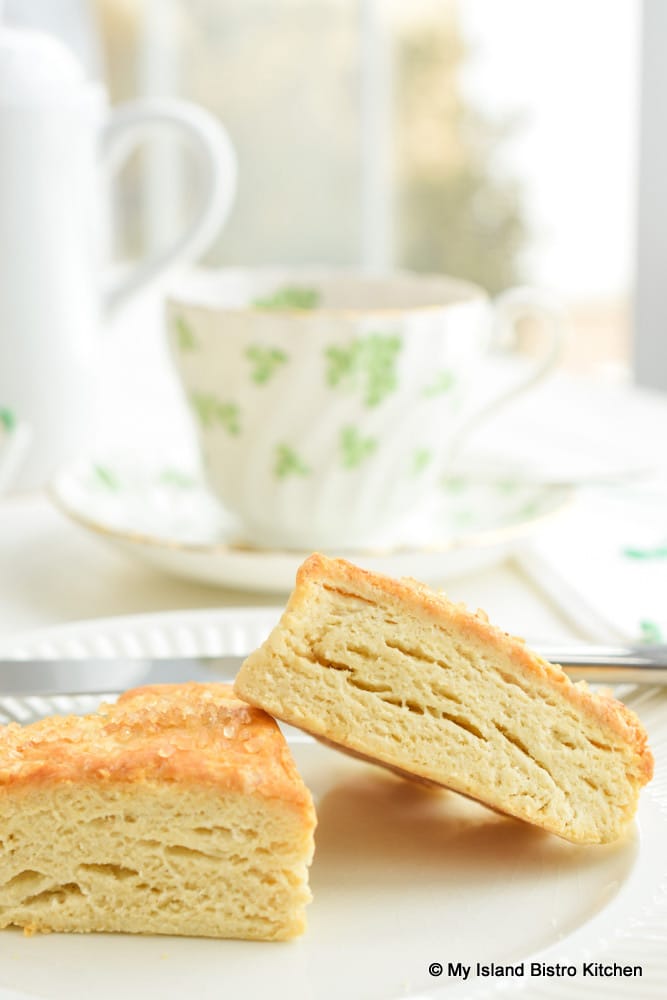
Bake scones 15-17 minutes or until they are just light golden brown on the edges and tops are golden tanned. Rotate the baking sheet partway through the baking. Remove scones from oven and leave them on the baking sheet for 3-4 minutes before transferring them to a wire rack.
*salted butter may be substituted for the unsalted butter in which case, reduce the ½ teaspoon of salt called for in the recipe to ¼ teaspoon.
To serve: Serve warm scones along with clotted or English double cream and a favorite jam and/or lemon curd. Or, simply enjoy with a good slather or butter on the scones.
Yield: 1 dozen wedge-shaped scones or 10 – 2” round scones (exact number will depend on size of cutter used and thickness of dough)
A word of caution …..
To the best of my knowledge, the ingredients called for in this recipe are gluten free. However, your health is your responsibility and you should always read the labels and confirm the gluten-free status of each ingredient yourself to ensure your own comfort level. Even if I have not specifically stated “gluten-free” in front of every single ingredient, it is understood that the intent is that each ingredient is to be gluten-free if used in this recipe.
I am not a medical professional and have no medical training. The recipes on my website are based on my own experiences along with information obtained through my own research. Use of this recipe, as well as any others, from my food blog are at the user’s own sole risk. If you are not comfortable with the recipe, or are uncertain of the gluten-free status of any of the ingredients called for in the recipe, please do not use the recipe.
Gluten-free Scones
Ingredients
- 1 1/3 cups gluten-free 1-to-1 baking flour
- 1/3 cup finely ground almond flour
- 1/3 cup coconut flour
- 1 tbsp potato starch
- ½ tsp xanthan gum
- ¼ cup granulated sugar
- 4 tsp baking powder
- ½ tsp salt
- 1/3 cup cold unsalted* butter, cut into ½“ cubes
- 1 extra-large egg (cold), lightly beaten with fork
- ½ cup whipping cream (cold) with ¾ tbsp removed and reserved for brushing tops of scones
- ¼ cup 2% milk (cold)
- 1 – 2 tsp granulated or turbinado sugar for sprinkling tops of scones (optional)
Instructions
-
Position oven rack in center of oven and preheat oven to 400°F. Line baking sheet with parchment paper.
-
In large bowl, sieve or sift the flours, potato starch, xanthan gum, sugar, baking powder, and salt together. Drop the cubes of butter into the dry ingredients and toss to coat the butter. Cut in the butter with a wire pastry cutter until mixture resembles coarse crumbs or pea-sized pieces. Quickly run fingers through the mixture several times, scooping up bits of the butter and rubbing them into long paper-thin slivers between the thumb and forefinger. It is not necessary to do this with every piece of butter – just quickly pick several at random.
-
Make a well in the center of the dry ingredients.
-
In a small bowl or large measuring cup, lightly whisk the egg, whipping cream, and milk together. Pour liquid ingredients all at once into well in center of dry ingredients. Using a fork, stir dough just enough that the liquid is absorbed into the dry ingredients and the dough can be roughly brought together. Dough will be soft and sticky and some floury spots may remain. Transfer dough onto lightly floured work surface, gently working it just until the dry ingredients are barely incorporated and a shaggy dough mass forms.
-
Fold the dough in half over onto itself. Lightly press the dough down. Turn the dough a half turn and repeat the folding exercise. Do this 3-4 times.
-
To make wedge-style scones: With a bench/pastry scraper or sharp knife, divide the dough into two equal parts. Lightly press and form each part into a small circle about ¾” thick. Transfer to prepared baking sheet. Cut each circle into six equal wedges and separate the scones by about ¾”, still keeping each group of six wedges in a circular shape for baking.
-
Using a pastry brush, lightly brush the reserved whipping cream on tops of scones and sprinkle with sugar.
-
To make round-shaped scones: Lightly press dough into circle about ¾“ thick. Use a lightly floured 1¾” – 2” round cutter to cut scones from dough. Push the cutter straight down and out of the dough without twisting the cutter in the process. Re-flour the cutter before cutting out each scone. Gather dough scraps and form into a circle from which to cut remaining scones. Transfer scones to prepared baking sheet, placing scones about 1” apart.
-
Lightly brush the reserved whipping cream on tops of scones and sprinkle with sugar.
-
Bake scones 15-17 minutes or until they are just light golden brown on the edges and tops are golden tanned. Rotate the baking sheet partway through the baking. Remove scones from oven and leave them on the baking sheet for 3-4 minutes before transferring them to a wire rack.
-
*salted butter may be substituted for the unsalted butter in which case, reduce the ½ teaspoon of salt called for in the recipe to ¼ teaspoon.
Recipe Notes
To serve: Serve warm scones along with clotted or English double cream and a favorite jam. Or, simply enjoy with a good slather or butter on the scones.
Yield: 1 dozen wedge-shaped scones or 10 – 2” round scones (exact number will depend on size of cutter used and thickness of dough)
Copyright My Island Bistro Kitchen 2020
If you make this recipe, or any other from this site, be sure to share the link to it on social media through any of the channels listed below or by clicking the “Share” button above.
Connect on social media with My Island Bistro Kitchen:
Join the Facebook page for My Island Bistro Kitchen: https://www.facebook.com/MyIslandBistroKitchen/
Follow “the Bistro” on Twitter: https://twitter.com/PEIBistro/
See the drool-worthy gallery of mouth-watering food photos from My Island Bistro Kitchen on Instagram: https://www.instagram.com/peibistro/
Follow “the Bistro” on Pinterest at https://www.pinterest.ca/peibistro/ and pin the Pinterest-ready photo at the end of this posting to your favorite Pinterest boards!
Pin Me To Pinterest!