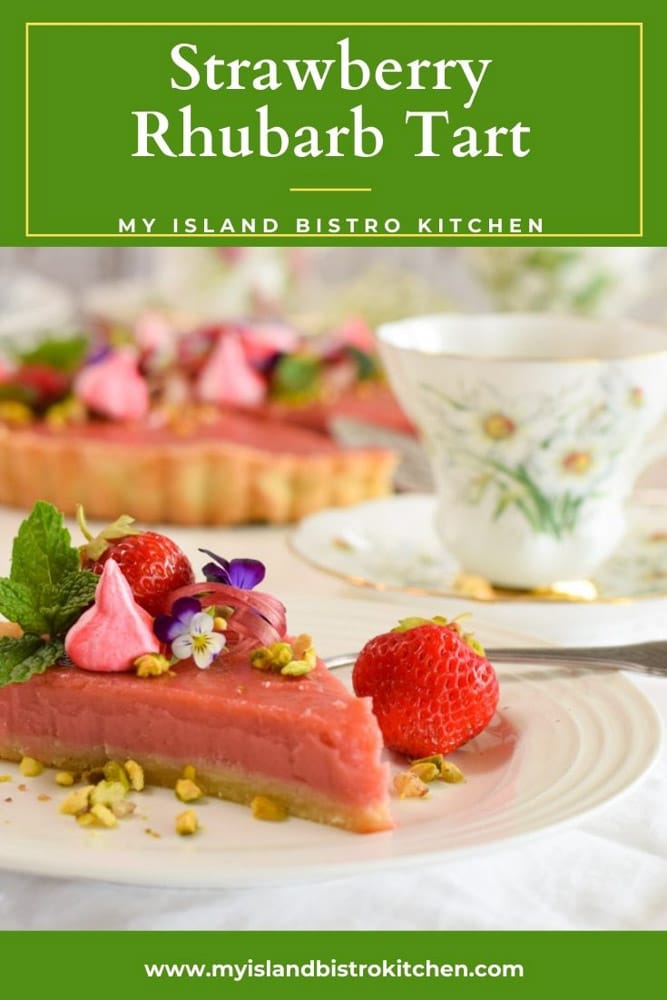
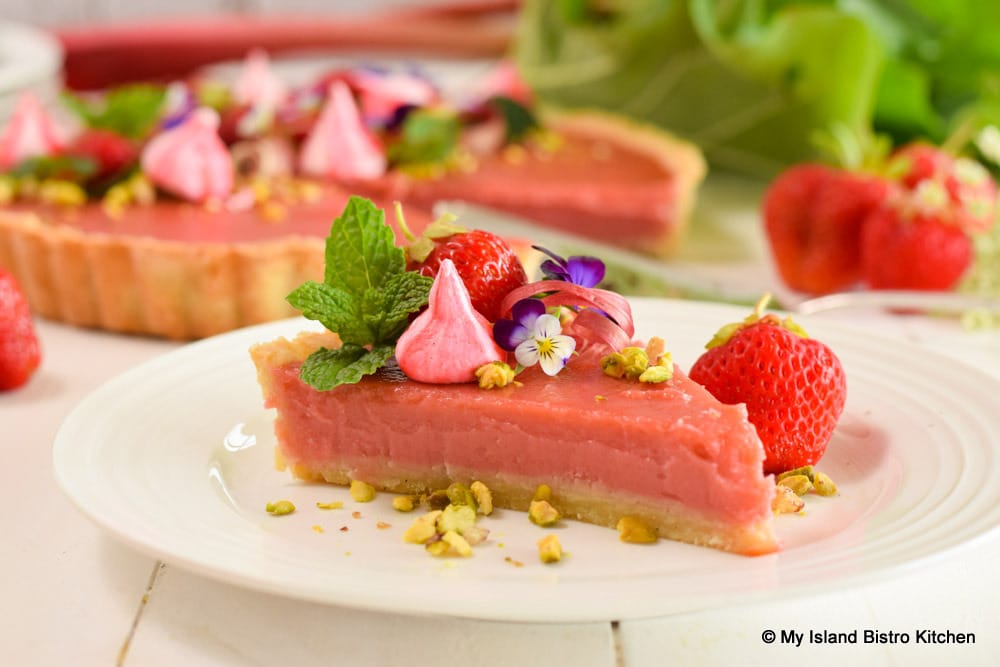
Today’s dessert is the lovely Strawberry Rhubarb Tart modeled after the famous French Lemon Tart. This divine tart combines two of the season’s best flavors into a silky-smooth filling which is then placed in a buttery rich and tender Pâte Sucrée shell. Simply, this is a decadent dessert of restaurant quality that can be made at home!
While a “Jump to Recipe” button has been activated on this post, it is highly recommended that the entire text of this post be read before making the Strawberry Rhubarb Tart as it contains additional information that is not included in the printable version of the recipe.
This dessert is a tart, not a pie, so let’s begin by explaining the difference between the two.
Differences between Tarts and Pies
While tarts and pies bear resemblances, there are some defining features that differentiate a tart from a pie.
Pies may be double or single-crusted but tarts are single-crusted which allows the filling to be visible. This is why it is not common to see tarts completely covered in meringue as would be the case for a lemon meringue pie, for example. Tarts are also thinner/more shallow than a typical pie would be.
Pastry for standard pies (e.g., apple, cherry, lemon meringue, etc.) is less rich than the sweet pastry typically used for tarts containing creamy or custard-like fillings as in this Strawberry-Rhubarb Tart. With standard pie pastry, there is less sugar (and sometimes none) included and there can be a variety of fats used – i.e., lard, shortening, butter, or a combination thereof. With tarts, the pastry is almost inevitably made with pure butter and more sugar.
With standard pie pastry used for both sweet and savory pies, the goal is to achieve a pie crust that is light and flaky. Tarts, conversely, have a firmer, more crumbly crust, often likened to a shortbread type of crust. In addition, the pastry shells for tarts typically have a slightly thicker crust than do standard pies.
Pies are made in pans with slanted sides and they are served directly from the pie plate in which they were baked. Tarts, on the other hand, are made in special tart pans that have removable bottoms. These pans often have decorative fluted sides and the tart pan will not be slanted as is a pie plate; rather it will have straight sides. The intent is to unmold and remove the tart from the pan for cutting and serving.
Pâte Sucrée
For the Strawberry Rhubarb Tart, we will be making a sweet pastry dough known as Pâte Sucrée which, simply translated, means a sweet dough.
For this recipe, a 9”x 1” tart pan with removable bottom is needed (fluted tart pan pictured below). These pans are quite common and readily available at department stores, speciality kitchen supply stores, and online and often, as well, as at big box stores like HomeSense, Winners, Marshalls, and HomeGoods (US).
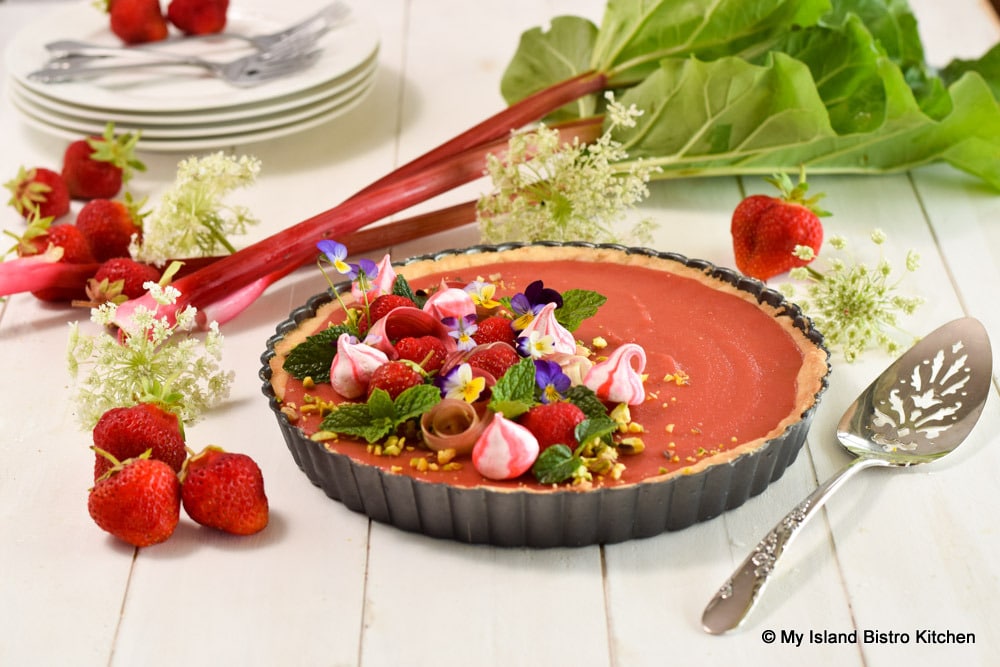
Because tart pans, with their signature fluted sides, can be a source of the tart shell sticking to the pan sides, I recommend greasing the tart pan well, paying particular attention to ensuring each of the fluted sides of the pan is well greased. This will aid greatly in the tart’s intact removal from the pan when the outer ring of the pan is removed.
For those who are not familiar with Pâte Sucrée, it is a sweet dough that produces a shortbread-like texture crust that is tender but yet has some crispness to it. It will be somewhat more crumbly than a shell made with standard pie pastry from which flakiness is desired. Pâte Sucrée differs from standard pie pastry in that it is much richer and has more sugar which makes it perfect for custard-style or fresh fruit tarts. My recipe calls for icing sugar (aka confectioner’s or powdered sugar) as I find it yields a more tender crust than does granulated sugar. I find the soft-textured icing sugar blends into the dough faster and better than does granulated sugar. I also use a small amount of almond flour in the pastry for its flavor and tenderness properties. Almond flour is one of my favorite flours and I frequently use it in my baking. The egg yolk and cream act as binders for the dough and also impart a richness to the crust.
Expect Pâte Sucrée dough to be a bit softer to work with than standard pie pastry. Made exactly with the ingredients specified in the recipe (no substitutions), this crust is both flavorful and strong enough to withstand heavy custard-like fillings without becoming soggy. As such, I recommend no substitutions for the ingredients in this tested recipe.
There is a choice of methods (e.g., creaming or sanding) for making Pâte Sucrée and what follows is the method I use. Whatever method is used, as is the case for any pastry dough, it is important not to overwork it as that will result in a tough crust. The method I use for making the Pâte Sucrée is the same as I use for making my basic all-purpose pastry dough – the sanding method. Essentially, with this method, the dry ingredients are whisked together and then the cold butter is cut in until the mixture resembles coarse oatmeal. The egg yolk and cream are mixed together and slowly added to the dry ingredients while stirring the mixture with a fork. Expect the mixture to be a shaggy texture at this point. Transfer it to a lightly floured work surface and just work it enough to bring it together and form it into 5”- 6” disk shape. Be careful not to overwork the dough and stir up the gluten as this will result in a tough, hard crust. (Note that this is not an issue if gluten-free flour is used as there is no gluten to stir up.)
As with standard pie dough, the pastry benefits from being chilled, both before it is rolled out and again after it is in the pan. This allows time for the wet ingredients to be more fully incorporated into the dry ingredients and it also helps to reduce pastry shrinkage during baking. So, wrap the disk of pastry tightly in plastic wrap and refrigerate it for about 1 hour before rolling it out into a circle big enough to fit the 9” tart pan. Dock the bottom of the pastry shell with the tines of a fork to allow the steam to escape while the shell bakes and to avoid air pockets from forming and puffing up the shell with hollows resulting. Then, after the dough has been rolled out and fitted into the tart pan, chill the shell in the refrigerator for about 1 hour before baking. The dough can actually be made the day before it is needed and refrigerated before prepping it for the pan. If refrigerated for a lengthy period of time, the dough may need to be at room temperature for a few minutes in order to make it sufficiently pliable to be rolled out.
Blind Baking the Shell
The pastry shell is blind baked meaning it is pre-baked before being filled and thus reducing the likelihood of it becoming soggy once a heavy custard-type filling is added. Pie weights of some sort are used for part of the baking. Their weight helps to keep air pockets from forming in the tart shell. Ceramic pie weights, specifically manufactured for blind baking pastry, may be used but they can be expensive and sometimes hard to find. I use dry uncooked beans which I find work well. I keep these beans stored in a jar and use them over and over again for blind baking pastry.
A liner will need to be prepared to fit the tart pan to hold the pie weights. I suggest crumpling up and distressing a piece of parchment paper that is large enough to mold around the inside edges of the tart pan (with the chilled pie shell in it). Parchment paper, as is, is stiff and not pliable and, without weakening it by crumpling and uncrumpling it a few times, it will not mold well into the pans. The idea is to get the pie weights well distributed throughout the tart pan so that air pockets don’t form and the pastry puff up during baking. Weakened/distressed parchment paper is much more pliable for fitting into the pan for this purpose. Be sure to allow enough parchment paper overhang by which to grasp it to remove the beans or pie weights that will be placed in it and that will be removed part way through the crust baking process. Depending on the quality of parchment paper, repeat with a second piece of distressed parchment paper, if necessary. The paper lining needs to be strong enough to hold the beans when they are being lifted from the tart shell part way through the baking.
After the tart shell has chilled for about an hour, remove it from the refrigerator and place it on a rimmed cookie sheet or pizza pan. Carefully fit the distressed parchment paper inside the tart shell so that it is molded flush with the bottom and sides of the shell. Repeat with the second layer of parchment paper, if necessary. Fill the parchment-lined tart shell about 2/3 to ¾ full of pie weights, ensuring the weights are well distributed in the pan and placed as far as possible up the sides of the tart pan. Bake the shell for about 15 minutes at 350°F then remove the pie weights and return the shell to the oven to finish baking until it is a light golden color and set (i.e., has a dry appearance), usually about 18-20 minutes. Do be careful when removing the pie weights or beans from the pan as they will be very hot so have a heatproof container ready to transfer them into when they come out of the tart pan.
Once the shell is baked, remove it from the oven and cool it completely on a wire cooling rack. The pie shell needs to cool completely before the filling is added.
Note that not all of the pastry in the recipe may be required for the tart as the amount used will depend on personal preference for thickness of crust. Any leftover pastry may be tightly wrapped in plastic wrap, placed in an airtight freezer bag, labelled, and frozen for another purpose later.
Filling
The juice for the filling comes from cooking strawberries and rhubarb until they are soft and mushy and then straining them through a fine wire mesh sieve to extract the juice. One cup of juice is required for this recipe and ample quantity measurements have been given for the berries and rhubarb such that they should yield one cup of strained juice. That said, the exact amount of rhubarb/strawberry juice extracted from the rhubarb and strawberries is difficult to predict with 100% accuracy because so much depends on the quality and age of the rhubarb and strawberries and their water content as well as their growing conditions.
To strain the juice, just let the pulp drain through a fine wire mesh sieve on its own. If it doesn’t quite yield 1 cup of juice, the back of a large spoon may be used to gently press the pulp to extract enough more juice. I recommend a second straining of the juice through a clean wire mesh sieve to remove any remaining impurities. Discard the pulp left from the strained juice as the remaining mash is no longer required.
If the strained amount is slightly less than the 1 cup required for the filling in this recipe, up to 1 tablespoon of fresh, strained lemon juice can be added to equal 1 cup of juice. If the amount of strained juice results in more than 1 cup, only use the 1 cup called for in the recipe as it has been tested to achieve the optimal amount for, and texture of, the filling. Adding more juice than called for in the recipe is likely to yield a filling that is too runny to cut and plate well and will likely be too much for the tart pan capacity.
I make a significant amount of strawberry rhubarb juice and freeze it in 1/2 cup and 1 cup freezer containers, ready to be used year-round to make recipes like this Strawberry Rhubarb Tart and the Strawberry Rhubarb Bars. It’s a great way to use up rhubarb near the end of the season as well as take advantage of the local strawberries when they are in season.
Making the filling is not difficult. It is a matter of combining the strawberry-rhubarb juice and the caster sugar in a heavy bottomed pan and stirring it over moderate heat until the sugar has dissolved.
I recommend using caster sugar (also known as instant dissolving sugar or berry sugar) in this tart as it is a finer grain sugar than the traditional granulated sugar and will produce a smoother textured and more luscious filling. Whisk the four whole eggs with the four egg yolks in a bowl and then temper them with a bit of the hot juice so that the eggs won’t curdle when mixed in their entirety with the juice. It is important to keep stirring the filling very frequently (almost continuously) while it is cooking so it does not scorch. If you don’t have a heavy bottomed saucepan, the filling can alternatively be made in a double boiler or in a heatproof bowl set over a pot of simmering water and this method will alleviate any potential scorching issues.
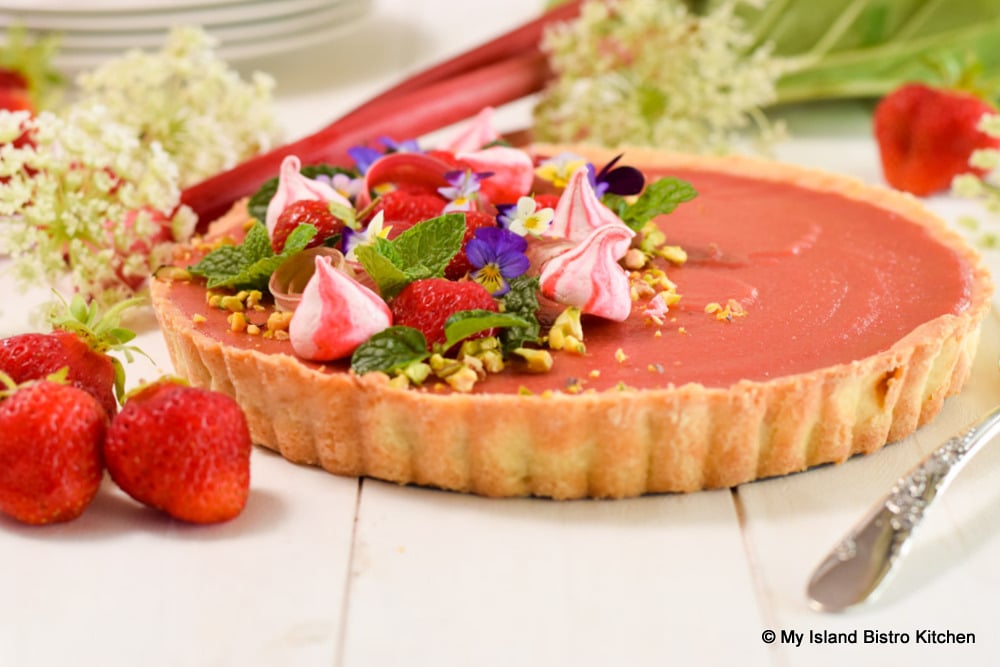
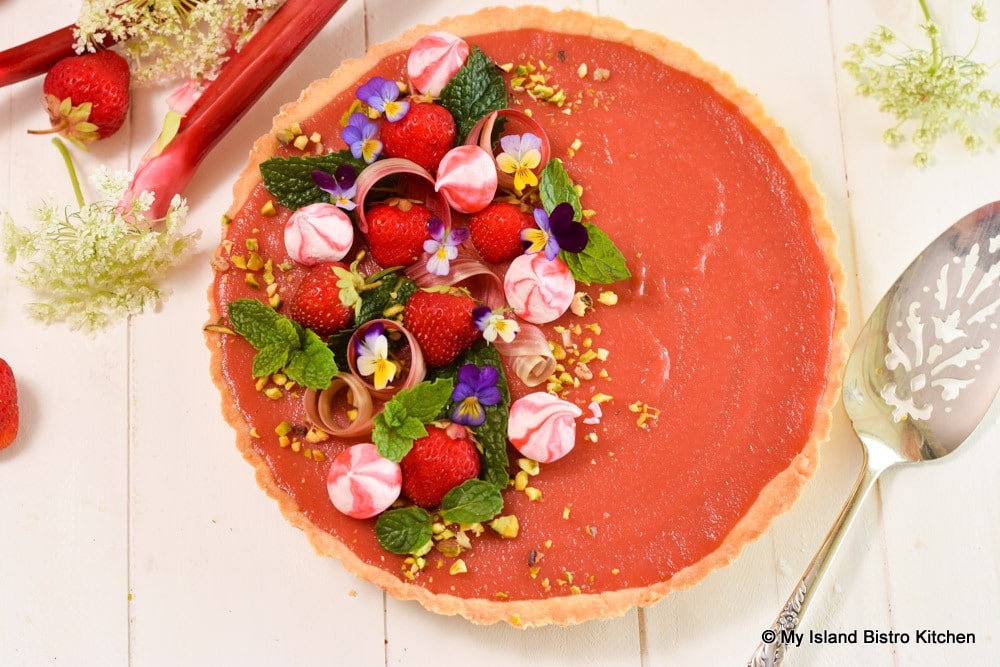
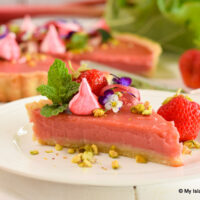
Left in its natural state, the filling will be a salmon color. I like the filling to have a lovely rosy pink blush color, so I add a bit of pink gel food color to tint it to a desired shade as shown in the photos that accompany this post. If using gel colors, only use a smidgeon at a time on the tip of a toothpick as these are highly pigmented colors. Add any additional color by very small bits until the color of choice is achieved. This is purely personal preference and the filling can certainly be left in its natural color.
I recommend using a candy thermometer when making this filling as, when it reaches 185°F on a thermometer, the filling is the right thickness and it takes the guesswork out of when it is ready. Remove the mixture from the stove and strain it through a fine wire mesh sieve to remove any remaining coagulated egg or other impurities. You want this to be a completely smooth filling. Stir in the butter until it is melted and thoroughly blended into the filling.
Transfer the filling to the cooled tart shell and smooth it out with an offset spatula. Place the tart on a rimmed cookie sheet or pizza pan and place in a preheated 350°F oven for 6 minutes, just for the purposes of setting it.
French tarts do not typically have complete coverage meringue toppings such as, for example, a standard Lemon Meringue Pie would and I do not cover my tart with meringue. Who would want to cover up such a pretty filling!
The egg whites left over from the recipe can be used for other purposes such as making meringues (click here for my recipe) or French Macarons, for example.
Let the tart cool completely at room temperature then refrigerate for at least four hours before serving. This gives the tart time to set before it is unmolded from the pan and served.
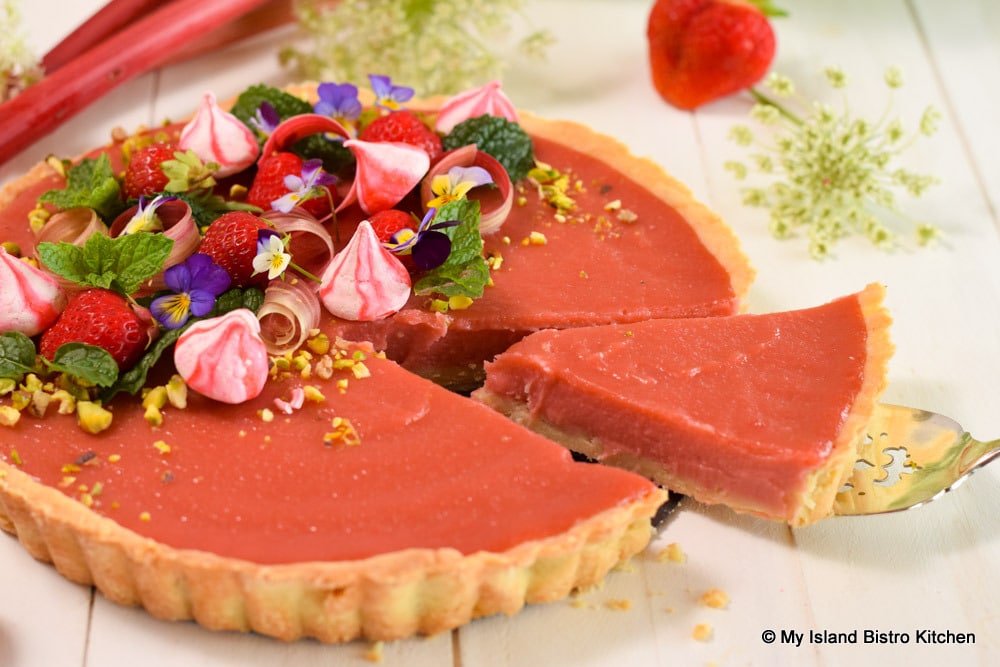
When ready to serve the tart, remove the outer ring of the tart pan to unmold it. If you wish to present the tart on a pretty serving plate, tray, or board, use a large bench scraper to slide the tart off the tart pan bottom and then onto the serving dish. I find the easiest way to unmold the tart is to sit it on an upside down bowl that is just slightly smaller than the tart pan bottom. The outer ring, if well greased, should simply drop off.
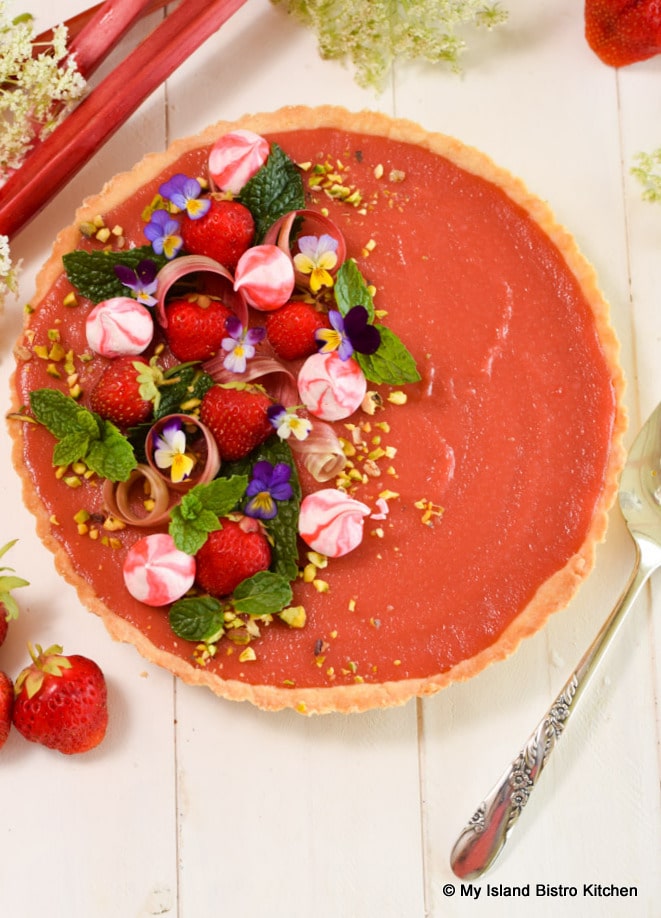
Sometimes, I leave the top of these kinds of tarts perfectly plain and, other times, I decorate them to the hilt and yet, other times, I will simply dust the tart with icing sugar just at the time of serving. Doing so any earlier will give the sugar the opportunity to dissolve into the tart top creating a murky looking tart. Cut the tart into wedges for serving. Fresh fruit and/or a dollop of whipped cream make a great garnish to this Strawberry Rhubarb Tart. Unused portions of the tart should be kept refrigerated.

While this Strawberry Rhubarb Tart is best served fresh, I have frozen it, with success. All it needs is a few minutes at room temperature and it is ready for serving.
Don’t be daunted to try this delectable recipe of restaurant quality. The foregoing text is long and detailed I know but it is intended to help those with no knowledge, background, or experience making French style tarts. A couple of reads through the post text and the recipe is recommended before making the tart to ensure complete understanding of the method and to efficiently organize the work.

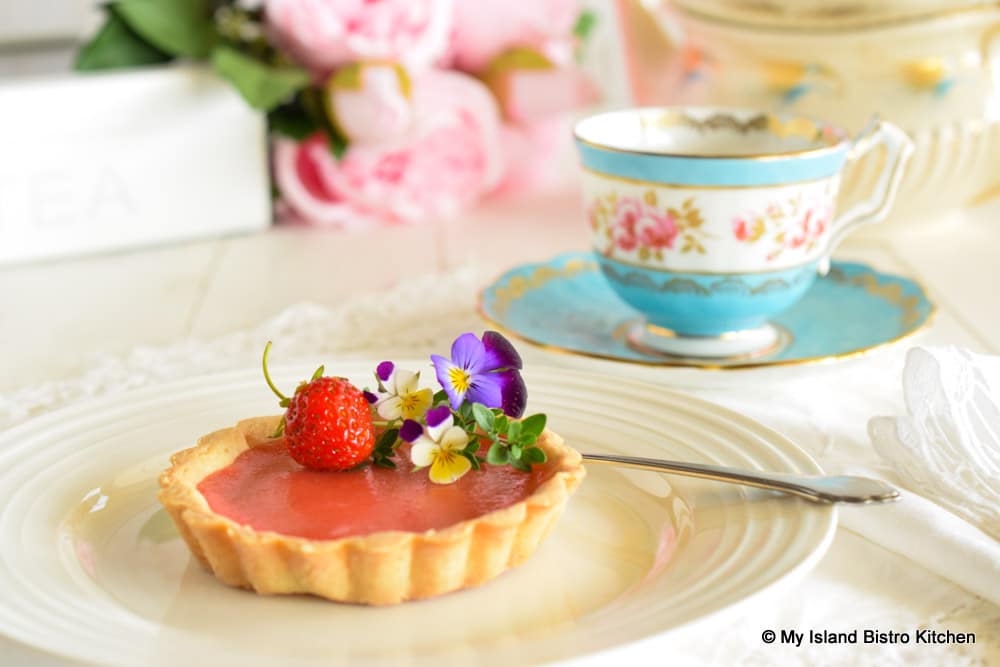
This tart recipe can also be made using small individual-sized fluted tart pans, about 3” – 3½ “ round. They plate well and are particularly suitable for afternoon tea events.
Strawberry Rhubarb Tart
Pâte Sucrée:
1 1/8 cups all-purpose flour (or gluten-free 1-to-1 or cup-for-cup baking flour, if required)
1/8 cup almond flour
1/3 cup sifted icing sugar (aka powdered sugar or confectioner’s sugar)
¼ tsp salt
½ cup cold unsalted butter, diced into ½“ pieces
1 cold egg yolk
2 tbsp cold cream
Filling:
10 oz rhubarb, chopped into ½“ pieces
10 oz strawberries, coarsely chopped and mashed
3 tbsp freshly squeezed and strained lemon juice
2 tsp finely grated lemon zest
4 large eggs, room temperature
4 large egg yolks, room temperature
¾ cup caster sugar (aka instant dissolving sugar or berry sugar)
1/8 tsp salt
½ cup butter (room temperature), cubed
Pink Food Coloring (optional)
Equipment and Supplies Required:
Digital Scales for weighing fruit
9”x1” fluted tart pan with removable bottom
Microplane for zesting lemon
Pastry Cutter
Rolling Pin
Fine wire mesh sieve for straining fruit for juice and cooked filling
Candy Thermometer for testing doneness of filling
Pie weights or dry beans
Parchment Paper
Offset Spatula
Method:
Pâte Sucrée:
Measure all-purpose flour, almond flour, icing sugar, and salt into medium-sized bowl. Combine with a whisk.
Toss the cold butter pieces into the dry ingredients to coat them. Using a pastry cutter, cut the butter into the dry ingredients until mixture resembles the size and texture of coarse rolled oats.
In measuring cup, combine the egg yolk with the cream. Stir with fork to break up yolk and combine with the cream. Slowly add the liquid ingredients to the pastry ingredients, stirring with a fork. Mixture will be a shaggy texture at this point. Transfer mixture to a lightly floured work surface and, with hands, bring mixture together to form a disk shape about 5”- 6” in diameter. Do not overwork dough. Wrap dough tightly in plastic wrap and refrigerate for about 1 hour.
Grease a 9”x1” fluted tart pan, ensuring each crevice is well greased.
On a lightly floured work surface, roll chilled dough of desired thickness into a circle, large enough to fit the tart pan (note that not all of the pastry may be required, depending on desired thickness of crust – see Note 1 below). Transfer pastry to tart pan, gently pushing the pastry down to fit into each of the pan’s fluted edges without stretching the pastry. Roll the rolling pin across the top of the tart pan to remove excess pastry and create a tidy edge flush with pan rim. Dock pastry bottom in several places with fork tines to prevent air pockets from forming while the crust bakes. Refrigerate shell for about 1 hour.
While pastry shell is chilling, position oven rack in lower third of oven and preheat oven to 350°F.
Crumple and distress a piece of parchment paper large enough to mold around the inside of the tart pan, allowing enough overhang by which to grasp it to remove the beans or pie weights that will be placed in it for blind baking and that will be removed part way through the crust baking process. This crumpling/distressing procedure will weaken the parchment paper, allowing it to be more pliable for fitting into the tart pan. Depending on the quality of parchment paper, repeat with a second piece of distressed parchment paper, if necessary. The paper lining needs to be strong enough to hold the beans when they are being lifted from the tart shell part way through the baking.
Remove the tart shell from the refrigerator and place on a rimmed cookie sheet or pizza pan. Carefully fit the distressed parchment paper inside the tart shell. Repeat with the second layer of parchment paper, if necessary. Add ceramic pie weights or dry uncooked beans, filling the tart pan about 2/3 to ¾ full, ensuring the weights are evenly distributed and placed as far as possible up the sides of the tart pan.
Transfer tart shell to the oven and bake for 15 minutes. Remove shell from oven and carefully remove the pie weights and parchment paper and transfer them to a heatproof bowl. Be very careful as the pie weights will be hot! As some of the earlier pierced holes in the shell bottom may have filled in during the blind baking process with the pie weights, further pierce the tart shell in several places, if necessary, to prevent it from forming air bubbles as it continues to bake. Return tart shell to oven and bake for another 18-20 minutes or until pastry has a dry appearance and is lightly golden brown. Cool shell completely in pan on wire rack before adding filling.
Filling:
Combine rhubarb, mashed strawberries, lemon juice, and lemon zest into a saucepan. Cover and bring mixture just to the boiling point over medium heat then immediately reduce to a simmer. Cook slowly, stirring occasionally, for approximately 12-15 minutes, or until rhubarb and strawberry mixture is soft and mushy. Using a potato masher, mash the mixture to further break down the rhubarb and strawberries as much as possible.
Strain rhubarb/strawberry mixture through a fine wire mesh sieve into a heatproof bowl to extract the juice. If this does not yield 1 cup of juice on its own, the back of a large spoon may be used to very gently press the pulp to extract more juice. Discard the rhubarb/strawberry pulp. Straining the juice a second time through a clean fine wire mesh sieve to refine it further and remove any traces of the fruit pulp impurities is recommended. Discard any remaining pulp and solids. This should equal 1 cup of strained strawberry-rhubarb juice needed for the recipe. If it strains out more than 1 cup of juice, only use the 1 cup called for in the recipe. If it strains out slightly less than 1 cup of juice, up to 1 tablespoon of strained freshly squeezed lemon juice may be added to equal 1 cup of juice. (See Note 1 below)
Whisk the egg yolks and whole eggs together. Set aside.
Combine the strained strawberry-rhubarb juice with the caster sugar and salt in a heavy-bottomed saucepan over medium heat (See Note 3 below). Cook, stirring frequently, until the sugar dissolves then reduce heat to low. Slowly drizzle and whisk approximately ¼ cup of the hot juice into the eggs to temper them so they do not curdle then whisk the entire egg mixture into the juice in saucepan. If a deeper pink color is desired, add a small amount of pink food coloring until depth of color choice is obtained. Stir mixture frequently with a whisk until mixture is smooth and thickened and temperature registers 185°F on a candy thermometer.
When the filling is nearly ready, position oven rack in center of oven and preheat oven to 350°F.
Remove filling from heat and strain mixture through a fine wire mesh sieve into large measuring cup or bowl. Stir in the butter until melted and combined with filling. Transfer filling to cooled pastry shell and level out and smooth filling with an offset spatula. Bake tart at 350°F for about 6 minutes to set. Cool tart completely on wire rack then refrigerate until set, approximately 4 hours.
Remove outer ring of tart pan. If desired, slide large bench scraper under tart to remove it from pan bottom and transfer to serving plate or tray.
Top of tart may be decorated as desired or left plain. Dust tart top with icing (confectioner’s) sugar, if desired, just at time of serving. Slice into wedges and garnish with fresh fruit of choice and/or a dollop of whipped cream. Keep tart refrigerated until serving time.
Yield: Apx. 8 slices
NOTE 1: Not all of the pastry may be required for the tart as amount used will depend on personal preference for thickness of crust. Any leftover pastry may be tightly wrapped in plastic wrap, placed in an airtight freezer bag, labelled, and frozen for another purpose.
NOTE 2: The exact amount of rhubarb/strawberry juice extracted from the rhubarb and strawberries is hard to predict with 100% accuracy because so much depends on the quality and age of the rhubarb and strawberries and their water content as well as their growing conditions. If the strained amount is slightly less than the 1 cup required for the filling in this recipe, up to 1 tbsp of fresh, strained lemon juice can be added to equal 1 cup of juice. If the amount of strained juice results in more than 1 cup, only use the 1 cup called for in the recipe as this amount has been tested to achieve the optimal texture of the topping. Adding more juice than called for in the recipe is likely to yield a filling that is too runny to cut and plate well and may result in too much filling for the tart pan capacity.
NOTE 3: If you don’t have a heavy bottomed saucepan in which to make the filling, the filling can be made in a double boiler or in a heatproof bowl set over simmering water to ensure it does not scorch during cooking.
If you have made this recipe and enjoyed it and/or wish to share it with your friends and family, please do so on social media and share the direct link to this posting from my website.
Connect with My Island Bistro Kitchen by:
Joining the Facebook page for My Island Bistro Kitchen: https://www.facebook.com/MyIslandBistroKitchen/
Following “the Bistro” on “X” (formerly Twitter): https://twitter.com/PEIBistro/
Seeing the drool-worthy gallery of mouth-watering food photos from My Island Bistro Kitchen on Instagram: https://www.instagram.com/peibistro/
Following “the Bistro” on Pinterest at https://www.pinterest.ca/peibistro/
(and you can pin the Pinterest-ready photo at the end of this posting to your favorite Pinterest boards)
Strawberry Rhubarb Tart
Ingredients
- Pâte Sucrée:
- 1 1/8 cups all-purpose flour (or gluten-free 1-to-1 or cup-for-cup baking flour, if required)
- 1/8 cup almond flour
- 1/3 cup sifted icing sugar (aka powdered sugar or confectioner’s sugar)
- ¼ tsp salt
- ½ cup cold unsalted butter, diced into ½“ pieces
- 1 cold egg yolk
- 2 tbsp cold cream
- Filling:
- 10 oz rhubarb, chopped into ½“ pieces
- 10 oz strawberries, coarsely chopped and mashed
- 3 tbsp freshly squeezed and strained lemon juice
- 2 tsp finely grated lemon zest
- 4 large eggs, room temperature
- 4 large egg yolks, room temperature
- ¾ cup caster sugar (aka instant dissolving sugar or berry sugar)
- 1/8 tsp salt
- ½ cup butter (room temperature), cubed
- Pink Food Coloring (optional)
Instructions
-
Pâte Sucrée:
-
Measure all-purpose flour, almond flour, icing sugar, and salt into medium-sized bowl. Combine with a whisk.
-
Toss the cold butter pieces into the dry ingredients to coat them. Using a pastry cutter, cut the butter into the dry ingredients until mixture resembles the size and texture of coarse rolled oats.
-
In measuring cup, combine the egg yolk with the cream. Stir with fork to break up yolk and combine with the cream. Slowly add the liquid ingredients to the pastry ingredients, stirring with a fork. Mixture will be a shaggy texture at this point. Transfer mixture to a lightly floured work surface and, with hands, bring mixture together to form a disk shape about 5”- 6” in diameter. Do not overwork dough. Wrap dough tightly in plastic wrap and refrigerate for about 1 hour.
-
Grease a 9”x1” fluted tart pan, ensuring each crevice is well greased.
-
On a lightly floured work surface, roll chilled dough of desired thickness into a circle, large enough to fit the tart pan (note that not all of the pastry may be required, depending on desired thickness of crust – see Note 1 below). Transfer pastry to tart pan, gently pushing the pastry down to fit into each of the pan’s fluted edges without stretching the pastry. Roll the rolling pin across the top of the tart pan to remove excess pastry and create a tidy edge flush with pan rim. Dock pastry bottom in several places with fork tines to prevent air pockets from forming while the crust bakes. Refrigerate shell for about 1 hour.
-
While pastry shell is chilling, position oven rack in lower third of oven and preheat oven to 350°F.
-
Crumple and distress a piece of parchment paper large enough to mold around the inside of the tart pan, allowing enough overhang by which to grasp it to remove the beans or pie weights that will be placed in it for blind baking and that will be removed part way through the crust baking process. This crumpling/distressing procedure will weaken the parchment paper, allowing it to be more pliable for fitting into the tart pan. Depending on the quality of parchment paper, repeat with a second piece of distressed parchment paper, if necessary. The paper lining needs to be strong enough to hold the beans when they are being lifted from the tart shell part way through the baking.
-
Remove the tart shell from the refrigerator and place on a rimmed cookie sheet or pizza pan. Carefully fit the distressed parchment paper inside the tart shell. Repeat with the second layer of parchment paper, if necessary. Add ceramic pie weights or dry uncooked beans, filling the tart pan about 2/3 to ¾ full, ensuring the weights are evenly distributed and placed as far as possible up the sides of the tart pan.
-
Transfer tart shell to the oven and bake for 15 minutes. Remove shell from oven and carefully remove the pie weights and parchment paper and transfer them to a heatproof bowl. Be very careful as the pie weights will be hot! As some of the earlier pierced holes in the shell bottom may have filled in during the blind baking process with the pie weights, further pierce the tart shell in several places, if necessary, to prevent it from forming air bubbles as it continues to bake. Return tart shell to oven and bake for another 18-20 minutes or until pastry has a dry appearance and is lightly golden brown. Cool shell completely in pan on wire rack before adding filling.
-
Filling:
-
Combine rhubarb, mashed strawberries, lemon juice, and lemon zest into a saucepan. Cover and bring mixture just to the boiling point over medium heat then immediately reduce to a simmer. Cook slowly, stirring occasionally, for approximately 12-15 minutes, or until rhubarb and strawberry mixture is soft and mushy. Using a potato masher, mash the mixture to further break down the rhubarb and strawberries as much as possible.
-
Strain rhubarb/strawberry mixture through a fine wire mesh sieve into a heatproof bowl to extract the juice. If this does not yield 1 cup of juice on its own, the back of a large spoon may be used to very gently press the pulp to extract more juice. Discard the rhubarb/strawberry pulp. Straining the juice a second time through a clean fine wire mesh sieve to refine it further and remove any traces of the fruit pulp impurities is recommended. Discard any remaining pulp and solids. This should equal 1 cup of strained strawberry-rhubarb juice needed for the recipe. If it strains out more than 1 cup of juice, only use the 1 cup called for in the recipe. If it strains out slightly less than 1 cup of juice, up to 1 tablespoon of strained freshly squeezed lemon juice may be added to equal 1 cup of juice. (See Note 2 below)
-
Whisk the egg yolks and whole eggs together. Set aside.
-
Combine the strained strawberry-rhubarb juice with the caster sugar and salt in a heavy-bottomed saucepan over medium heat (See Note 3 below). Cook, stirring frequently, until the sugar dissolves then reduce heat to low. Slowly drizzle and whisk approximately ¼ cup of the hot juice into the eggs to temper them so they do not curdle then whisk the entire egg mixture into the juice in saucepan. If a deeper pink color is desired, add a small amount of pink food coloring until depth of color choice is obtained. Stir mixture frequently with a whisk until mixture is smooth and thickened and temperature registers 185°F on a candy thermometer.
-
When the filling is nearly ready, position oven rack in center of oven and preheat oven to 350°F.
-
Remove filling from heat and strain mixture through a fine wire mesh sieve into large measuring cup or bowl. Stir in the butter until melted and combined with filling. Transfer filling to cooled pastry shell and level out and smooth filling with an offset spatula. Bake tart at 350°F for about 6 minutes to set. Cool tart completely on wire rack then refrigerate until set, approximately 4 hours.
-
Remove outer ring of tart pan. If desired, slide large bench scraper under tart to remove it from pan bottom and transfer to serving plate or tray.
-
Top of tart may be decorated as desired or left plain. Dust tart top with icing (confectioner’s) sugar, if desired, just at time of serving. Slice into wedges and garnish with fresh fruit of choice and/or a dollop of whipped cream. Keep tart refrigerated until serving time.
Recipe Notes
Yield: Apx. 8 slices
NOTE 1: Not all of the pastry may be required for the tart as amount used will depend on personal preference for thickness of crust. Any leftover pastry may be tightly wrapped in plastic wrap, placed in an airtight freezer bag, labelled, and frozen for another purpose.
NOTE 2: The exact amount of rhubarb/strawberry juice extracted from the rhubarb and strawberries is hard to predict with 100% accuracy because so much depends on the quality and age of the rhubarb and strawberries and their water content as well as their growing conditions. If the strained amount is slightly less than the 1 cup required for the filling in this recipe, up to 1 tbsp of fresh, strained lemon juice can be added to equal 1 cup of juice. If the amount of strained juice results in more than 1 cup, only use the 1 cup called for in the recipe as this amount has been tested to achieve the optimal texture of the topping. Adding more juice than called for in the recipe is likely to yield a filling that is too runny to cut and plate well and may result in too much filling for the tart pan capacity.
NOTE 3: If you don’t have a heavy bottomed saucepan in which to make the filling, the filling can be made in a heatproof bowl set over simmering water to ensure it does not scorch during cooking.
[Copyright My Island Bistro Kitchen 2022]
PIN ME TO PINTEREST!