My cooking is sometimes inspired by my travels. Often, before traveling, I will do some research to find out what foods and dishes are local to the area so I know what dishes to try when visiting those places or what foods to look for to bring back as mementos of the visit. Continue reading Creamy Scallop Carbonara Recipe
Monthly Archives: February 2019
Gluten-free Gumdrop Cookies
These gluten-free Gumdrop Cookies are very easy to make and are super tasty. They are soft and chewy, studded with colorful fruit-flavored gumdrops. Continue reading Gluten-free Gumdrop Cookies
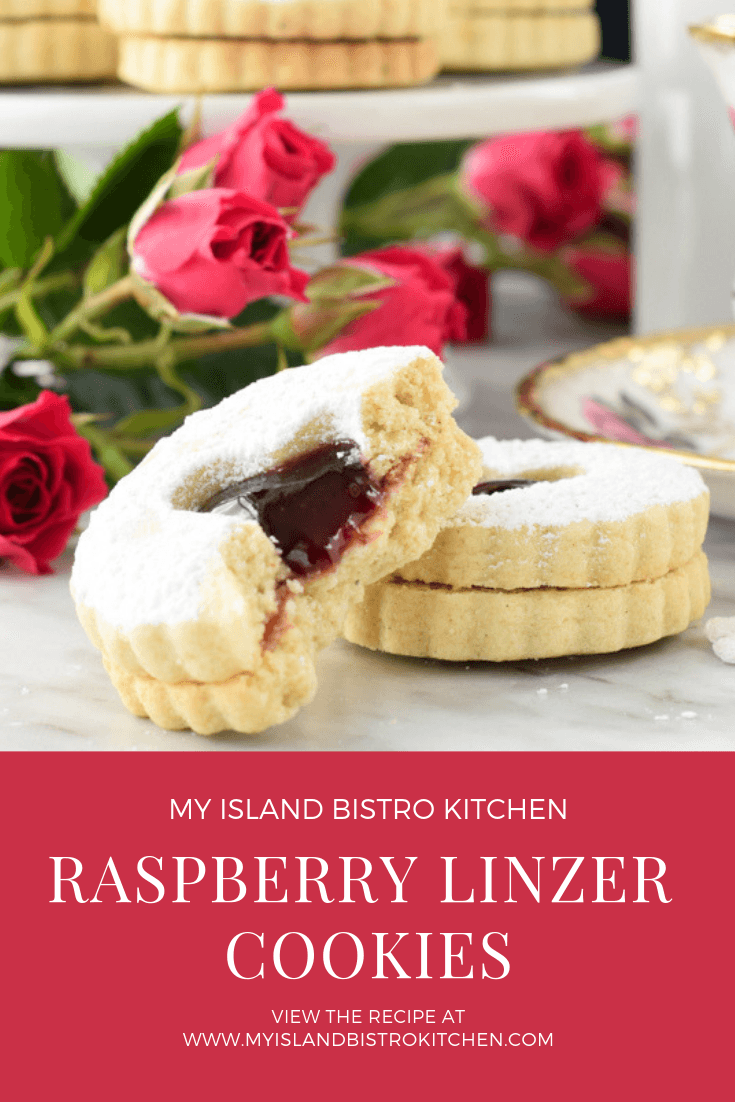
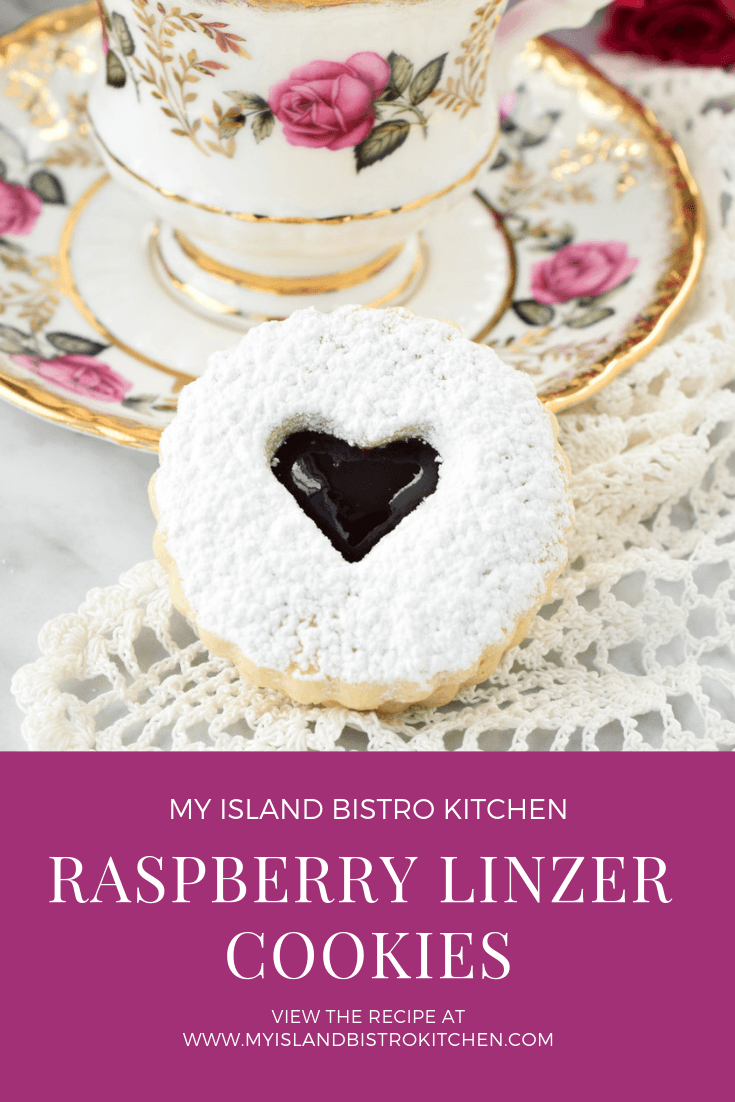
Classic Raspberry Linzer Cookies
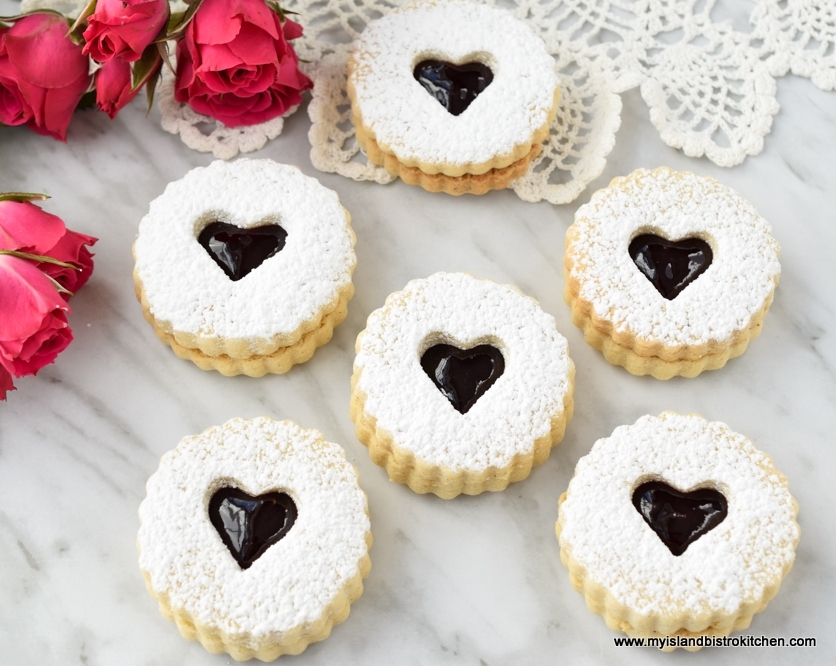
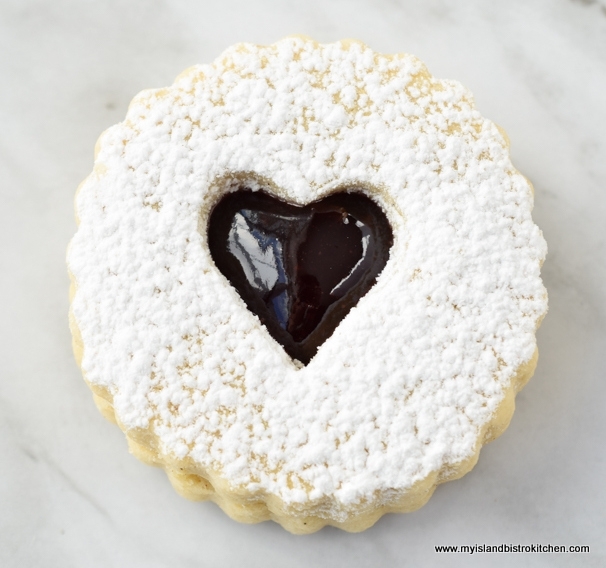
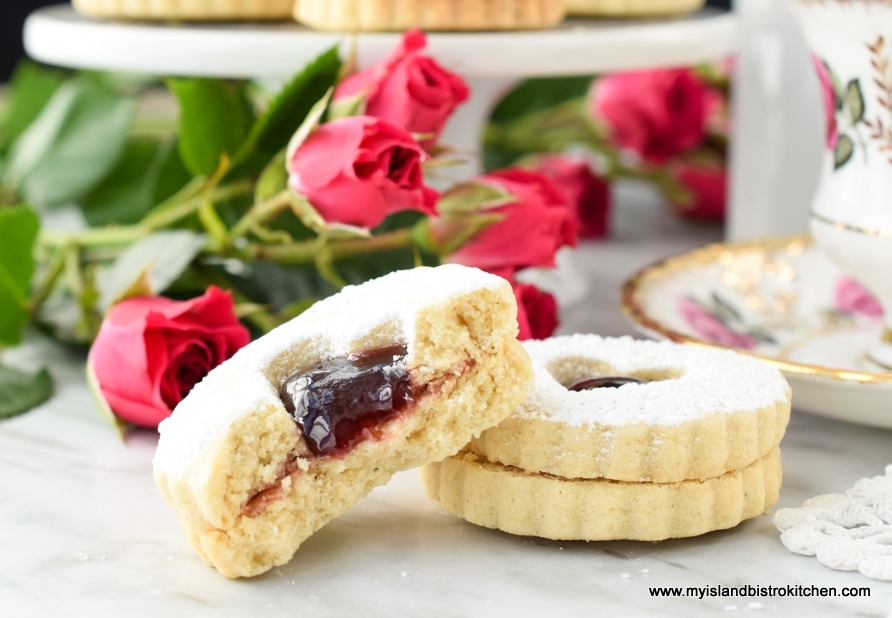
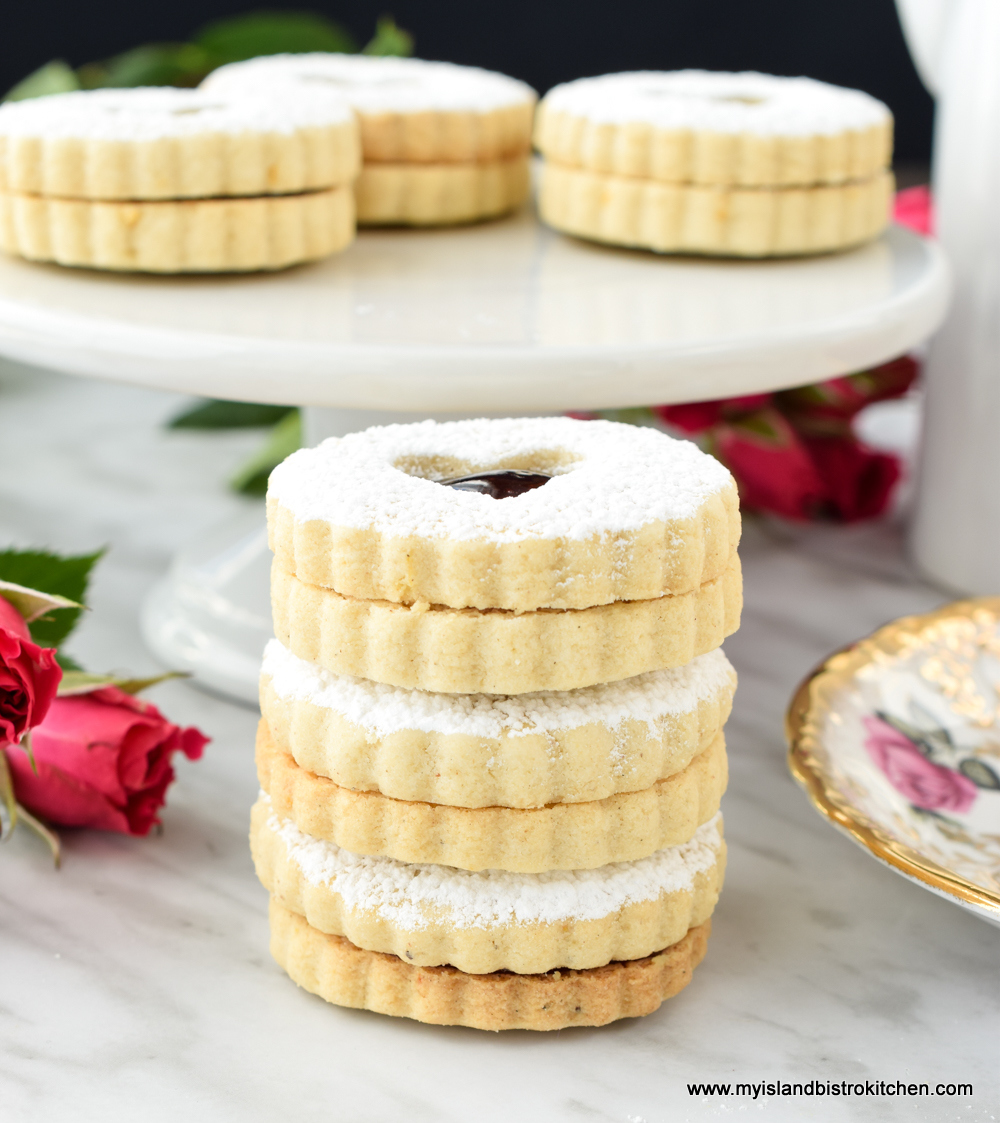
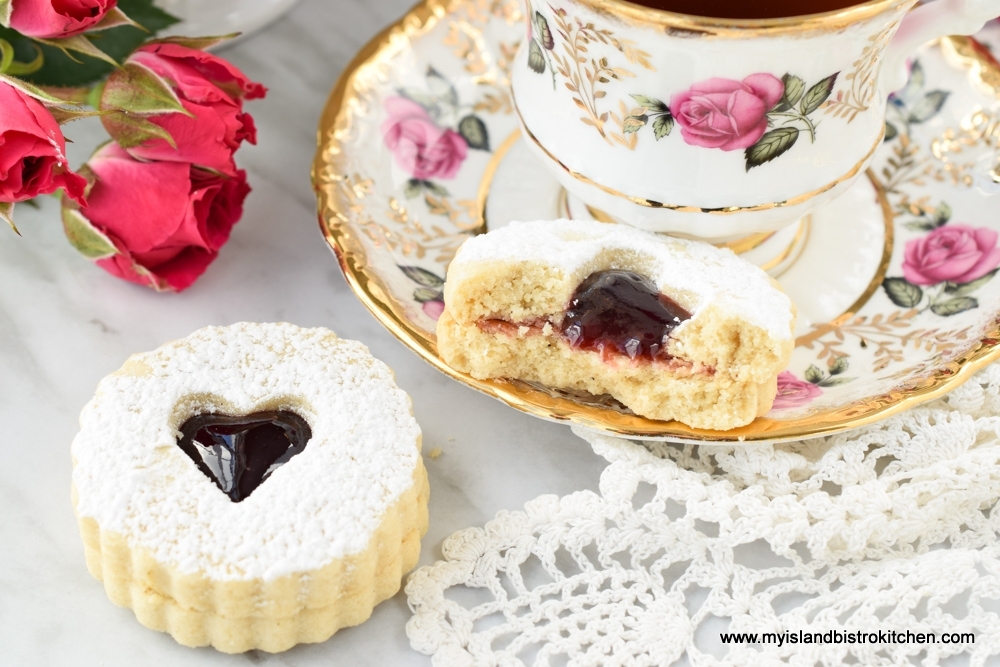
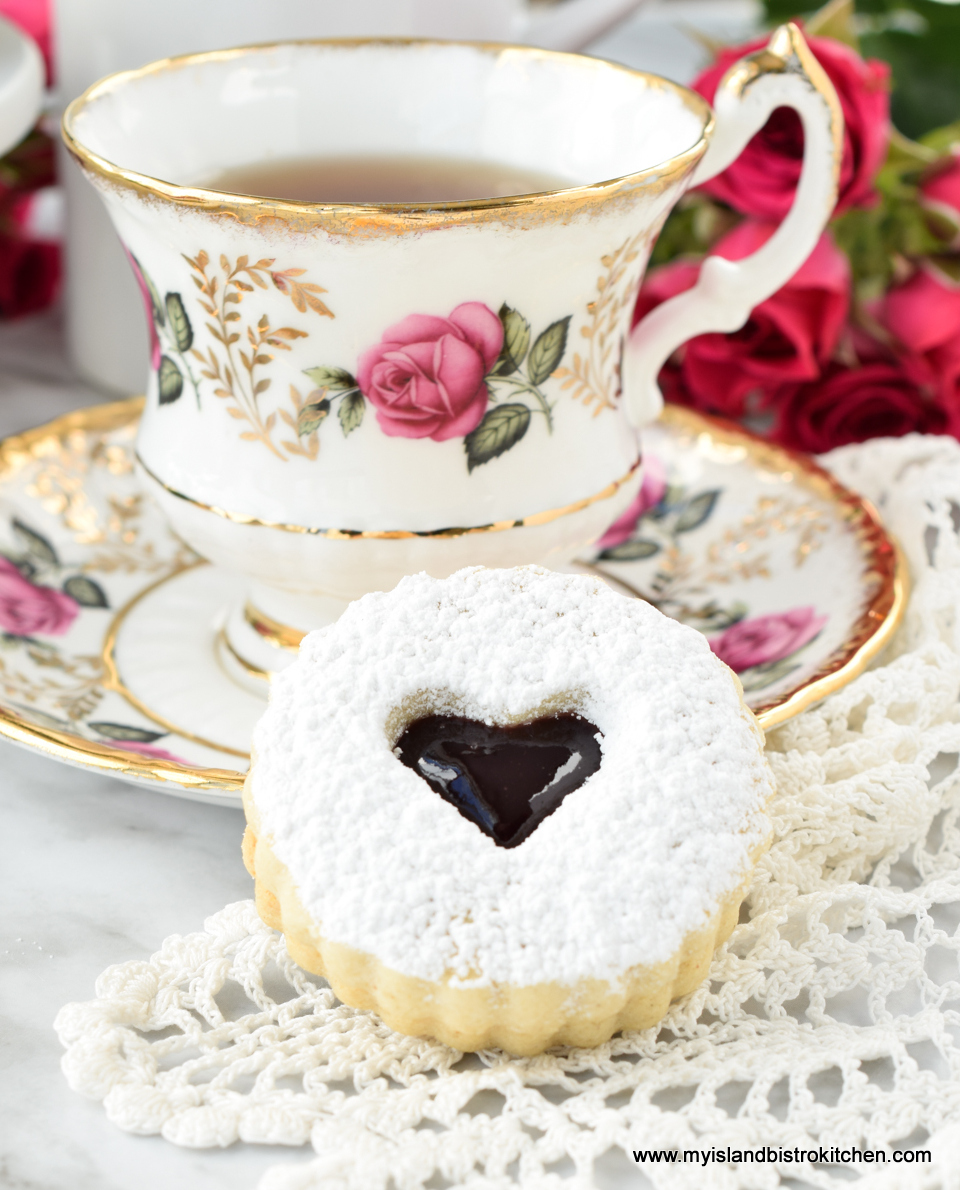
Today, I am featuring Classic Raspberry Linzer Cookies. These cookies, so-named for the Austrian Linzer Torte they replicate, are simply two shortbread-type cookies sandwiched together with jam. The cookies are commonly filled with raspberry jam which produces a very showy cookie. These cookies are traditionally found on sweet trays at Christmas but they are wonderful any time of the year. So, there is no need to wait for Christmas to enjoy them! You can legitimately actually have two cookies without feeling guilty when you eat one of these sandwich cookies – bonus!

The Linzer Torte, said to be the oldest cake recipe in the world and dating back to the late 1600s, is believed to have originated in the City of Linz in Austria. Made with a rich buttery crust of primarily butter, flour, and ground nuts, the torte was traditionally filled with black currant preserves and topped with a lattice crust that allowed the preserves to shine through.
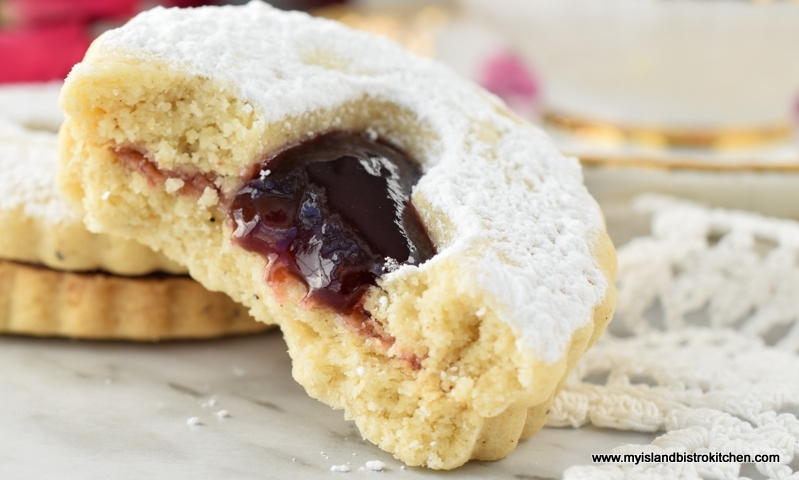
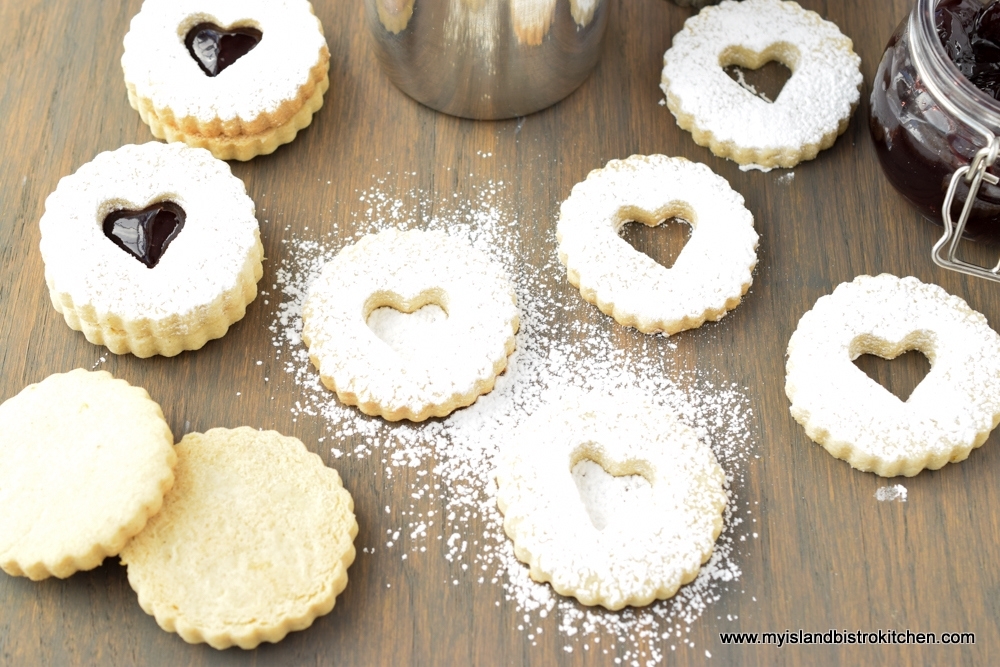
Linzer cookies are a take on the Linzer Torte put into a cookie format. Two cookies are sandwiched together with jam and the top cookie is generously dusted with powdered sugar making it very showy. To keep the jam filling visible, a simple cut-out is made in the top cookie.
The ingredients for the cookies are fairly basic and the texture closely resembles shortbread. That is to say, the cookies have a short, crisp, yet tender texture.
While Linzer Cookies are obviously different than a torte, several of the ingredients are the same – butter, flour, and ground almonds. I add small amounts of cinnamon, cardamom, and cloves but in such small amounts that the flavours are very subtle. Some grated orange rind, vanilla, and almond flavoring are the only other injections of flavour into the rich buttery dough.
To make these cookies gluten free, replace the 2¼ cups all-purpose flour with an equal amount of gluten-free 1-to-1 baking flour.
Tips for Making Linzer Cookies
- Make sure all ingredients are at room temperature.
- Do not overmix or overhandle the dough. Just mix it enough so it will cling together.
- Divide the dough in half and form each half into a disc. Wrap the discs, separately, in plastic wrap and chill the dough for 35-45 minutes or until dough is firm enough to roll out. This will make the dough less sticky and easier to handle. The dough can be made up to a day ahead but it will need to be removed from the refrigerator for several minutes before rolling it out as it will be far too hard to allow the dough to be rolled out without it cracking or breaking apart.
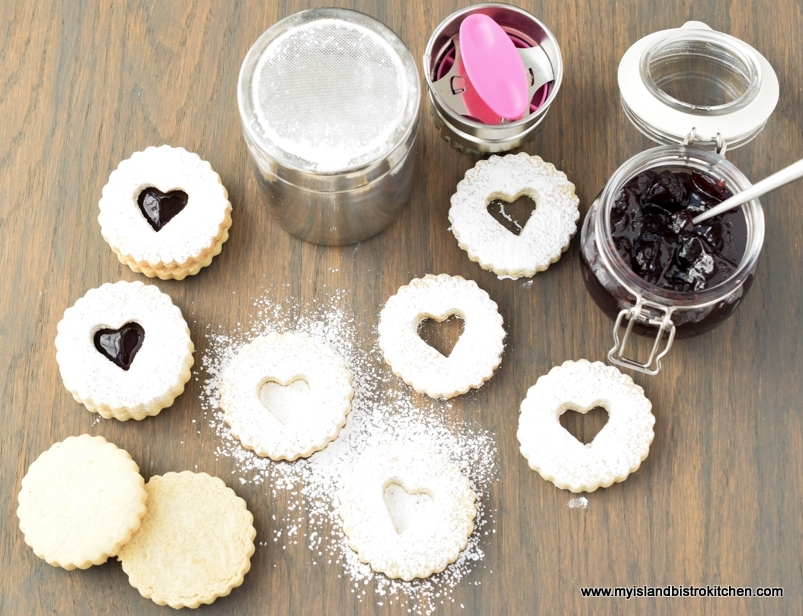
- Special Linzer cookie cutters (seen at top of photo below) exist for cutting out these two-part cookies. These cutters have a plunger attachment that allows different interchangeable cut-out inserts to be used to cut out small shapes, like hearts, circles, and diamonds, in the centers of cookies. This cut-out, of course, allows the pretty jam or preserves to show through. If you don’t have a Linzer cutter, simply cut out the shape of the cookie with any 2” cookie cutter and then use a small 1” cookie cutter to cut out the center hole in half the cookie batch. Many sets of nesting cookie cutters have various sizes of cutters suitable for this purpose.
- Work with one dough disc at a time. Roll the dough to about 1/8” thick. Two cookies will be sandwiched together so about 1/8” thickness is thick enough for each cookie half. Make sure you cut out an even number of whole cookies and cookies with the cut-outs so you will have matched pairs.
- The cookies, once cut out and placed 1” apart on parchment-lined baking sheets need to go back into the refrigerator for about 20 minutes. This is an important step because the fat in the chilled cookies will take longer to melt once the cookies are placed in the oven than would room-temperature cookies. The chilling will mean the cookies will spread less as they bake and we want these cookies to hold their shape perfectly, especially the cut-out centers in the top cookies.
- Do not overbake the cookies. Bake them for 11-13 minutes, just until the cookies are set and have a light golden color.
- Dust the cut-out cookie tops with powdered sugar BEFORE placing them over the filled cookie bottoms (a small fine wire mesh sieve works well for this or a small metal mesh-topped can can also be used (seen in photo above)). If you wait to sugar-coat the cookies until after they have been assembled, the sugar will cover the jam filling and cause it to become cloudy and lose its clear, shimmery appearance.
- Any red jam or black currant jam can be used in these cookies. My preference is to use raspberry as the flavour blends well with the ground almonds and the orange flavoring in the cookies. I do recommend, whatever type of jam is used, that it be seedless. Do not spread the jam right to the outside edge of the bottom cookies as the jam will ooze out. Keep the jam in the center of the cookie bottoms. When the top cookie is placed on the jam-filled bottom, it will spread the jam further out in the cookie. No jam should be visible on the outside edges of Linzer cookies. If a bit more jam is desired in the cookies, use a tiny coffee spoon to carefully drop a bit more jam into the center of the assembled sandwich cookies.
- It is not recommended to freeze the assembled cookies for a couple of reasons. First, the jam is likely to soak into the cookies, especially as they thaw. This will cause the cookies to lose their crisp texture. Second, it takes up more container and freezer space to freeze the cookies in single layers so that the powdered sugar does not fall off the cookies or transfer onto the jam-filled centers, marring the look of the cookies.
- Store filled cookies in airtight container in refrigerator for up to 3-4 days.
[Printable recipe follows at end of posting]
Classic Raspberry Linzer Cookies
Ingredients:
2¼ cups all-purpose flour (to make them gluten free, substitute an equal amount of gluten-free 1-to-1 baking flour
¾ cup finely ground almonds
1 tbsp cornstarch
¾ tsp baking powder
¼ tsp cinnamon
¼ tsp cardamom
Pinch cloves
1 cup butter, room temperature (no substitutes)
2/3 cup granulated sugar
3 tbsp powdered sugar (aka icing sugar or confectioner’s sugar)
2 large egg yolks, room temperature
1 tsp vanilla
¼ tsp almond flavoring
1 tsp finely grated orange rind
Seedless raspberry jam (1/2 – ¾ cup)
Additional powdered sugar for dusting cookies
Method:
Sift dry ingredients together. Set aside.
In bowl of stand mixer fitted with paddle attachment, cream the butter at medium speed until fluffy and pale yellow. Slowly add the sugars and cream well for 2-3 minutes, scraping the sides of the bowl as necessary. Reduce speed to low and add the egg yolks, one at a time, beating well after each addition. Add the vanilla and almond flavoring as well as the grated orange rind. Mix to combine well.
With mixer set on low speed, gradually blend in the dry ingredients, mixing just until dry ingredients are fully incorporated. Do not overmix. Turn dough on to a lightly floured surface and gather the dough, working it just enough that it clings together. Divide the dough into two equal portions and form each half into a round disc. Wrap discs separately in plastic wrap and refrigerate for 35-45 minutes, or until firm enough to roll.
On lightly floured surface, roll a dough disc into 1/8” thickness. Using a 2” Linzer cookie cutter (either straight edged or fluted), cut cookies from one half the dough. Gather dough scrapes and continue cutting out the cookies until the dough is used up. These will be the cookie bottoms. Roll out remaining dough disc in the same manner for the cookie tops. To cut out the cookie tops, use the same Linzer cutter but fitted with one of the insert shapes to cut out a small 1” shape in the center of each cookie. Repeat until an equal number of cookies with cut out centers have been cut as there are whole cookies. If you do not have a Linzer cookie cutter, use any 2” cookie cutter and a 1” cutter of any shape for the center cut-out of half the cookies.
Place cookies about 1” apart on parchment-lined baking sheets. Refrigerate cookies for about 20 minutes.
Meanwhile, preheat oven to 350°F. Bake cookies on the middle oven rack for 11-13 minutes, or just until cookies are set and a light golden color. Do not overbake. Remove cookies from oven and cool on baking sheet for about 3-4 minutes then, using a flat lifter/spatula, transfer them to a wire rack to cool completely.
To assemble sandwich cookies, place the cookie halves that have the cut-out centers on a cutting board (these will be the top cookies). Dust the cookies generously with sifted powdered sugar, covering the cookies with an even coating of the sugar. On the flat side (i.e., the underneath side) of the whole cookies, spread about 1 – 1½ teaspoons jam in the center of each cookie, being careful not to spread the jam all the way to the cookie edges (stay within ¼” of the cookie edge). Place the cut-out sugar-dusted cookie tops over the jam-spread bottom cookies to create the sandwich. If desired, use a tiny spoon to carefully add a bit more jam into the center cut-out of each cookie.
Store cookies in an airtight container in the refrigerator for up to 3-4 days. To freeze cookies, package unassembled cookies between layers of parchment paper in an airtight container. Bring cookies to room temperature before filling with jam and assembling as above described.
Yield: Approximately 26 sandwiched cookies.

Classic Raspberry Linzer Cookies
Sugar-dusted jam-filled Linzer Cookies have a tender and crisp texture and buttery flavour complemented by ground almonds and subtle spice seasonings.
Servings 26
Ingredients
- 2¼ cups all-purpose flour (to make them gluten free substitute an equal amount of gluten-free 1-to-1 baking flour
- ¾ cup finely ground almonds
- 1 tbsp cornstarch
- ¾ tsp baking powder
- ¼ tsp cinnamon
- ¼ tsp cardamom
- Pinch cloves
- 1 cup butter room temperature (no substitutes)
- 2/3 cup granulated sugar
- 3 tbsp powdered sugar aka icing sugar or confectioner’s sugar
- 2 large egg yolks room temperature
- 1 tsp vanilla
- ¼ tsp almond flavoring
- 1 tsp finely grated orange rind
- Seedless raspberry jam 1/2 – ¾ cup
- Additional powdered sugar for dusting cookies
Instructions
- Sift dry ingredients together. Set aside.
- In bowl of stand mixer fitted with paddle attachment, cream the butter at medium speed until fluffy and pale yellow. Slowly add the sugars and cream well for 2-3 minutes, scraping the sides of the bowl as necessary. Reduce speed to low and add the egg yolks, one at a time, beating well after each addition. Add the vanilla and almond flavoring as well as the grated orange rind. Mix to combine well.
- With mixer set on low speed, gradually blend in the dry ingredients, mixing just until dry ingredients are fully incorporated. Do not overmix. Turn dough on to a lightly floured surface and gather the dough, working it just enough that it clings together. Divide the dough into two equal portions and form each half into a round disc. Wrap discs separately in plastic wrap and refrigerate for 35-45 minutes, or until firm enough to roll.
- On lightly floured surface, roll a dough disc into 1/8” thickness. Using a 2” Linzer cookie cutter (either straight edged or fluted), cut cookies from one half the dough. Gather dough scrapes and continue cutting out the cookies until the dough is used up. These will be the cookie bottoms. Roll out remaining dough disc in the same manner for the cookie tops. To cut out the cookie tops, use the same Linzer cutter but fitted with one of the insert shapes to cut out a small 1” shape in the center of each cookie. Repeat until an equal number of cookies with cut out centers have been cut as there are whole cookies. If you do not have a Linzer cookie cutter, use any 2” cookie cutter and a 1” cutter of any shape for the center cut-out of half the cookies.
- Place cookies about 1” apart on parchment-lined baking sheets. Refrigerate cookies for about 20 minutes.
- Meanwhile, preheat oven to 350°F. Bake cookies on the middle oven rack for 11-13 minutes, or just until cookies are set and a light golden color. Do not overbake. Remove cookies from oven and cool on baking sheet for about 3-4 minutes then, using a flat lifter/spatula, transfer them to a wire rack to cool completely.
- To assemble sandwich cookies, place the cookie halves that have the cut-out centers on a cutting board (these will be the top cookies). Dust the cookies generously with sifted powdered sugar, covering the cookies with an even coating of the sugar. On the flat side (i.e., the underneath side) of the whole cookies, spread about 1 – 1½ teaspoons jam in the center of each cookie, being careful not to spread the jam all the way to the cookie edges (stay within ¼” of the cookie edge). Place the cut-out sugar-dusted cookie tops over the jam-spread bottom cookies to create the sandwich. If desired, use a tiny spoon to carefully add a bit more jam into the center cut-out of each cookie.
- Store cookies in an airtight container in the refrigerator for up to 3-4 days. To freeze cookies, package unassembled cookies between layers of parchment paper in an airtight container. Bring cookies to room temperature before filling with jam and assembling as above described.
Recipe Notes
Yield: Approximately 26 sandwiched cookies.
[Copyright My Island Bistro Kitchen]
If you have made this recipe and enjoyed it and/or wish to share it with your friends and family, please do so on social media but be sure to share the direct link to this posting from my website.
Connect on social media with My Island Bistro Kitchen:
Join the Facebook page for My Island Bistro Kitchen: https://www.facebook.com/MyIslandBistroKitchen/
Follow “the Bistro” on “X” (formerly Twitter): https://twitter.com/PEIBistro/
See the drool-worthy gallery of mouth-watering food photos from My Island Bistro Kitchen on Instagram: https://www.instagram.com/peibistro/
Follow “the Bistro” on Pinterest at https://www.pinterest.ca/peibistro/
Pin The Photos Below To Your Favorite Pinterest Boards!