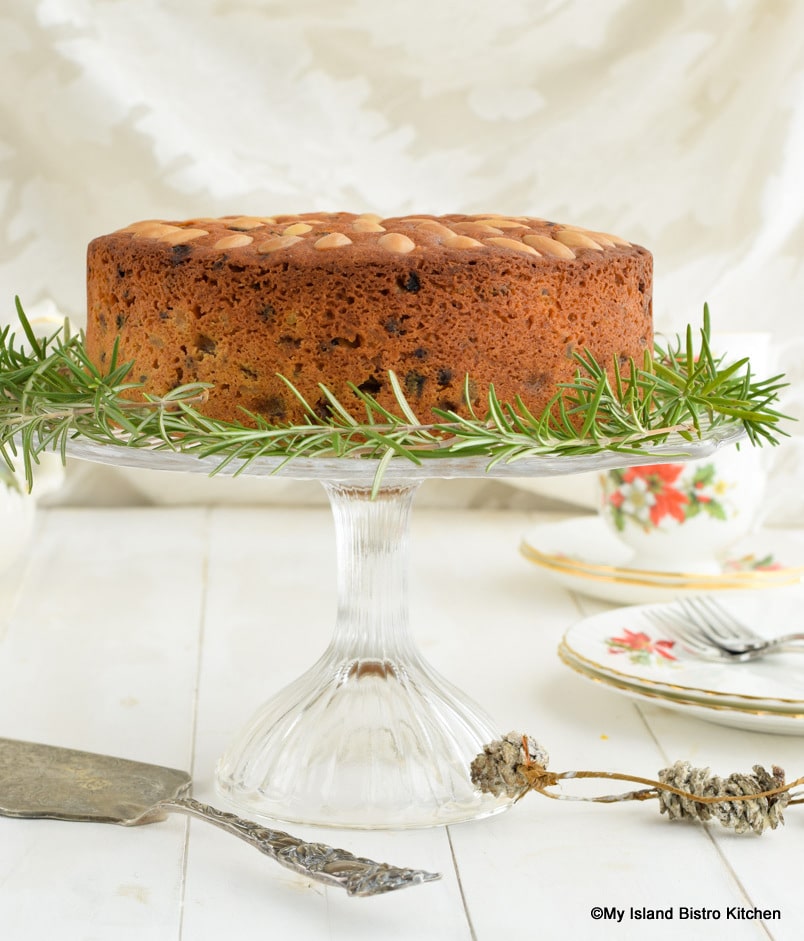
Less rich than a traditional fruitcake, a Dundee Cake still retains some of the elements of a fruitcake and makes a fine treat at Christmas or anytime, for that matter. It’s especially lovely as a teatime cake.
Originating from Scotland, there are a couple of theories on the origin of Dundee Cake. One is that it was created by the Keiller Marmalade Company that began mass producing it in Dundee, Scotland, in the late 1700s. However, there is also a story that, much earlier, a Scottish baker (or perhaps a royal chef) developed the cherry-less cake for Mary Queen of Scots who was said not to have been a fan of cherries typically found in a traditional fruit cake. Whoever developed the original Dundee Cake was certainly onto a good thing!
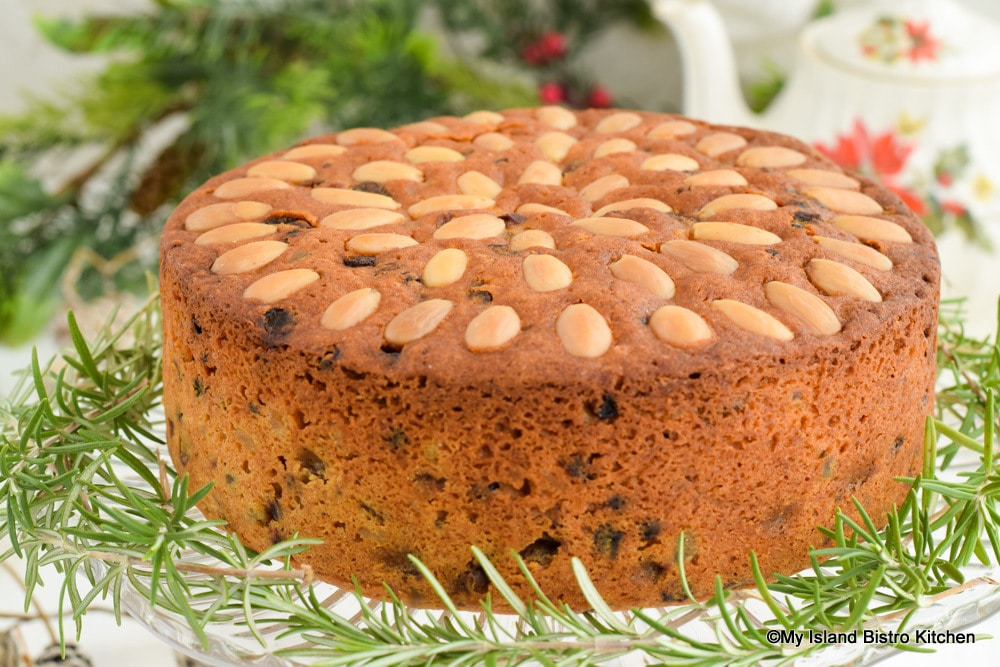
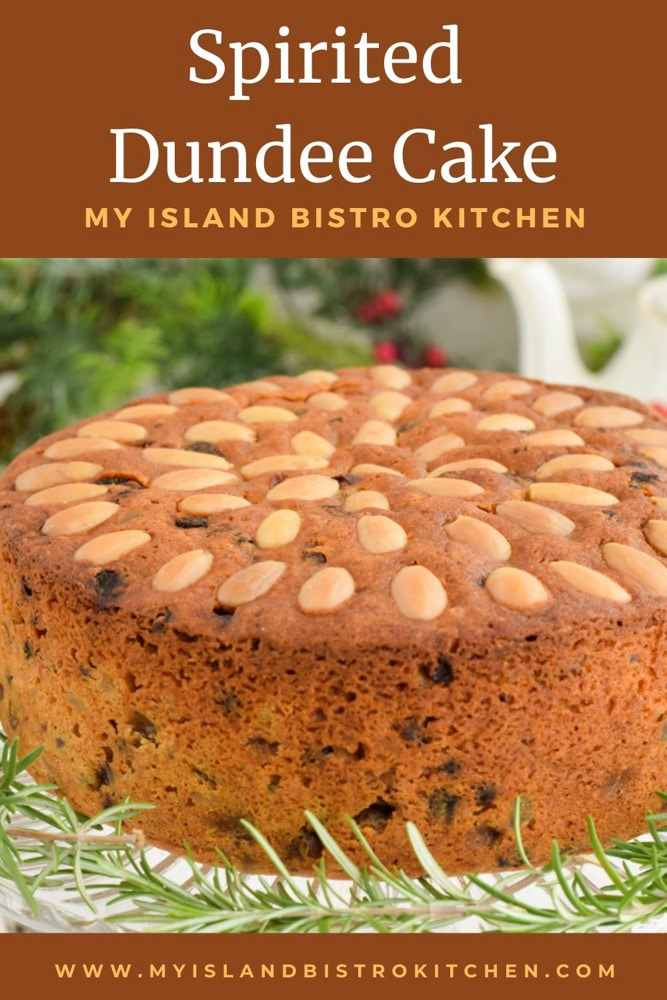
There are many versions of, and recipes for, the Dundee Cake – some with and some without glazed cherries; some with whisky and some without. What follows is my version of this wonderful cake with its distinctive and iconic pattern of concentric circles of whole almonds studding the top of the cake.
Ingredients
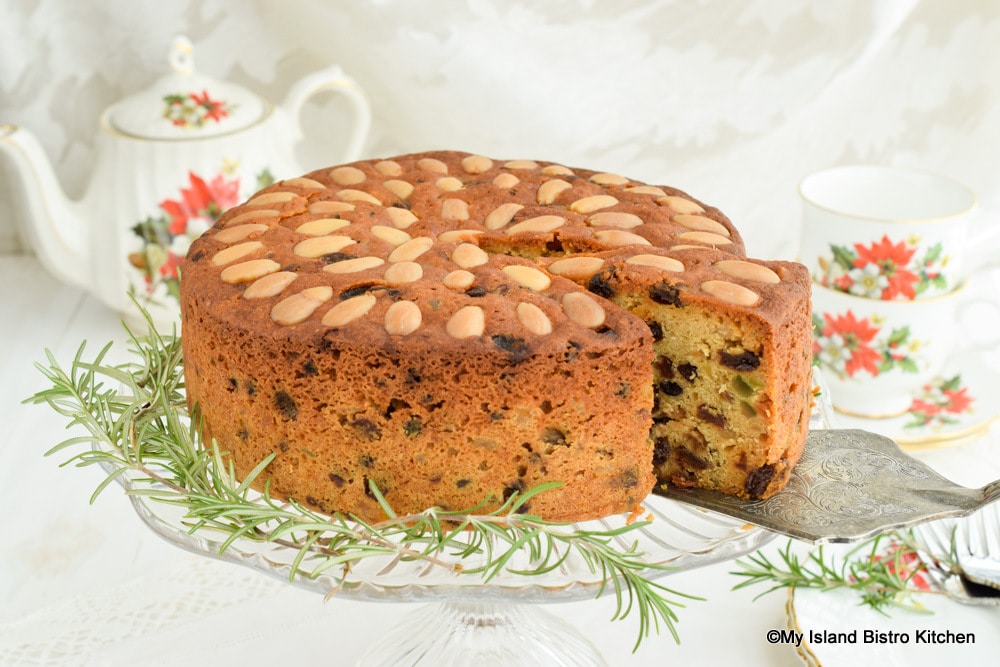
The ingredients for Dundee Cake are actually quite basic. The fruit component consists of raisins (I use a mix of sultanas and golden), currants, mixed peel, and sometimes candied citron. While some recipes call for glazed cherries, I do not add them to my cake as I think that is making the cake more like a traditional fruitcake and I want to keep the Dundee Cake a lighter version.
As raisins and currants are dry by nature, they benefit from rehydration prior to being baked into the cake. I use 1/3 cup whisky for this purpose and add the mixed peel and candied citron in with the raisins and currants. The idea here is not to soak or bathe the fruit in the liquid but rather use the whisky as the rehydrating agent that will also add a “whisper of spirit” to the cake. After giving the fruit and whisky a good stir, cover the bowl tightly and let the fruit sit for about 24 hours, stirring the mixture 2-3 times.
Citrus notes are a characteristic of the Dundee Cake. These come from grated orange and lemon rind and, of course, orange marmalade, also a standard ingredient in most Dundee Cake recipes. If you have a microplane, it is very useful for grating the citrus fruits. Ensure just the rind is grated and no bitter pith makes its way into the cake. The addition of candied citron made from the tropical fruit of the same name along with mixed peel (typically made from lemons and oranges and, sometimes, grapefruit) all contribute to the citrus notes in the cake.
The batter for this cake is buttery so don’t substitute anything for the butter – use the good stuff for optimal results and ultimate flavor. My recipe calls for 1/8 cup almond flour and I do not recommend any substitutes. Almond flour is a beautiful flavorful flour and also contributes lovely texture to the cake. Many bulk food stores sell this flour (sometimes called “almond meal”) in bulk making it convenient and economical to buy just the amount needed for a recipe if this is not a flour regularly used in your kitchen. If you have a small food processor or grinder that can grind food superfine – i.e., to a flour consistency, you can grind blanched almonds to the texture needed for the cake.
Many Dundee Cake recipes do not call for the addition of any spices at all. However, I add small amounts of cardamom, allspice, and mace to my cake, not in quantities to turn this into a spice cake but rather to give a tiny hint of their flavor.
Just at the time the fruit is added to the batter, toss the fruit quickly with 1/3 cup of the reserved all-purpose flour called for in the recipe. The flour dredging helps to keep the fruit suspended in the cake as it bakes instead of sinking to the bottom. The reason this is done quickly and only at the time of adding the fruit to the batter is because the fruit is moist from the whisky and, if the flour is added too far in advance, it will cause the fruit to become “gummy” and soggy thus defeating the objective of flour dredging. Mix the fruit into the batter manually, not by mixer which can “mush” the fruit.

Preparing the Pans
The Dundee Cake is traditionally a round cake. An 8” round pan that is at least 3” deep and has a removable bottom is recommended for this recipe as it makes the cake’s removal simple. An 8” springform pan can also be used.
I use triple paper lining for the pan as the layers give a bit of extra “insulation” to prevent the cake sides from darkening during the cake’s long baking period. This lining also helps in the easy removal of the cake from the pan since there is no sticking of batter to the pan itself. A layer of medium-to-heavy weight brown paper is recommended for the first layer followed by two layers of parchment paper. Make sure the brown paper does not have waxy sides – a porous brown paper is what is needed. Cut three circles, each the size of the pan’s removable bottom – one circle from brown paper and two from parchment paper.
Measure all around the pan and cut three long strips (one from brown paper and two from parchment), each the length of the pan’s circumference plus 3” for overlap with each strip being approximately 3½“deep.
Because pans with removable bottoms are not always 100% tight, cover the bottom of the pan’s exterior snugly with a layer of heavy-weight tinfoil, extending the foil about one-half way up the sides of the pan to ensure no batter escapes while the cake bakes.
Using a spray cooking oil, very lightly spray the oil here and there on the pan’s interior – both bottom and sides. This will help hold the paper liner in place. Position the brown paper pieces in the pan then very lightly spray the brown paper, again just here and there and enough to hold the first layer of parchment pieces in place. Repeat with the last parchment paper layer. When ready to add the batter, lightly spray cooking oil on the last parchment bottom and side layers. Lightly dust the last layer of parchment paper with flour just prior to adding the batter. Do not saturate any of the paper layers with cooking oil.
Cutting out and carefully positioning the paper layers in the pan ensures a lovely smooth exterior to the cake. This would be in contrast to simply stuffing a big piece of parchment paper into the pan and creating creases to make it fit as these creases are places for the batter to flow and, consequently, dent the sides of the cake. This will result in a rough looking exterior cake. This could also cause some of the cake to peel away with the paper creases once the parchment paper would be removed from the cake after baking. Take the time to properly cut the paper and line the pan for best results.
Baking the Cake
Just before preheating the oven to 300°F, position the oven rack one level lower than the oven’s dead center. Fill a small pan with hot tap water and place it on the oven floor, near the back of the oven. The steam from the hot water will provide moisture to help keep the cake moist as it bakes.
Evenly spread the batter into the prepared pan. Smooth top of cake with a spatula or with a hand lightly moistened with water. The top of the cake should be completely smooth and even.
Beginning on the outside edge of the cake, arrange the whole almonds all around the cake, spacing as desired, and ever-so-gently placing each onto the batter just to position them in place. Do not press almonds into the batter as they will sink and disappear into the cake’s batter during baking. Follow with a second circle of almonds above the first circle and finish with a smaller circle around the cake’s center. I used a count of 52 almonds for the cake in the photos.
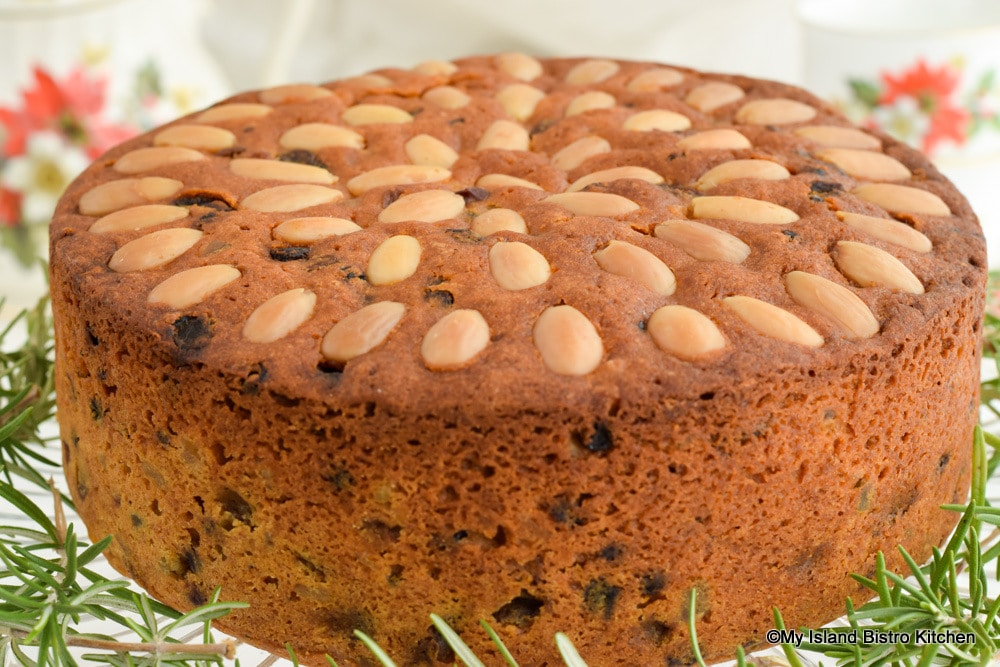
Bake the cake in the center of the oven rack. This will allow adequate air flow for the cake to bake evenly on all sides and in its center so it does not fall/sink. The Dundee Cake will bake for approximately 2½ hours. This, however, is a guide only as every oven bakes differently. The cake will be done when a cake tester inserted into the center of the cake comes out clean and the top of the cake is set.
If, during baking, the cake begins to brown too quickly, loosely tent a piece of tinfoil over the cake, ensuring it does not touch the unset cake top. This is also a reason why the depth of the cake pan side strips of paper are slightly higher than the pan edge – they provide a buffer, or a ledge, above the cake top if a tent of tinfoil has to be used during baking.
When the cake comes out of the oven, let it rest in the pan for at least 45-60 minutes to give the cake a chance to “set”. Removing it too quickly could cause the cake to split and break apart and/or fall in the middle. The strength of the layers of paper lining will also help in the cake’s removal from the pan and in keeping it intact. Once the cake is removed from the pan, carefully peel off and discard all the layers of paper lining. Let the cake cool completely at room temperature on a wire cooling rack.
“Feeding” the Cake
Once the cake has cooled completely, give the cake a brushing of whisky on all sides – about 2 tbsp of whisky should suffice. I find a silicone pastry brush works best for applying the liquid to the cake. The whisky will help to keep the sides of the cake soft and moist and, of course, adds some flavor notes to the cake.
Take a piece of cheesecloth that is large enough to completely cover and wrap the cake and soak the cheesecloth in whisky. Cheesecloth comes in various weaves, some quite loose and others more closely woven. Up to ¼ cup of whisky will be needed, depending on the weave of the cheesecloth used. Wrap the cake in the damp cheesecloth then wrap it tightly in two layers of plastic wrap followed by two layers of tinfoil. Place the wrapped cake in a zippered plastic bag and store it in a cool, dry, dark place for a week. Then, unwrap the cake and give it another brushing (or “feeding”) with whiskey and re-dampen the cheesecloth with the liquor. Do not overdo it on the whisky treatment as too much of the liquor will make a soggy cake and it may negatively alter the underlying flavor of the cake. Re-wrap and store the cake for another week before cutting and serving. The cake may, after the two-week period, be refrigerated for up to two weeks or can be frozen for longer storage. There is no need to keep “feeding” this Dundee Cake with whiskey when it goes into the refrigerator or freezer as it won’t mellow any further in the cold temperatures.
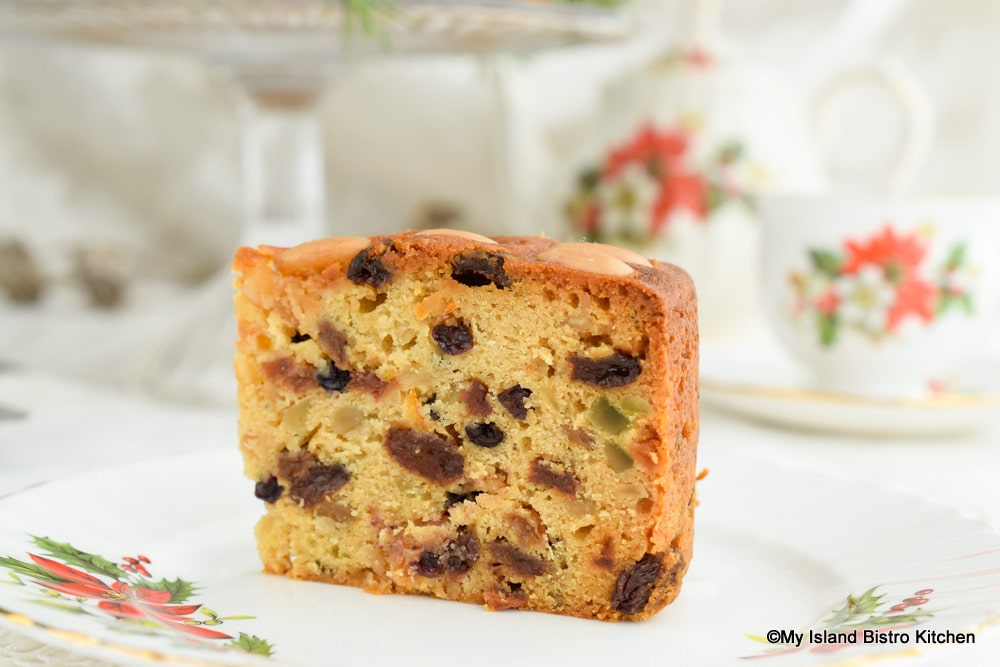
Unlike a traditional fruitcake filled with fruit, a Dundee Cake does not require a long period to “age”, “ripen”, and “mellow”. It’s, therefore, a great cake to make if it’s closer to Christmas and there is no time to make and age a traditional fruitcake. It’s also a great option for those looking for a light version of a Christmas cake and one that is less costly to make than a traditional fruitcake.
[Printable Recipe Follows at end of Post]
Spirited Dundee Cake
Ingredients:
1¼ cups sultana raisins
2/3 cup golden raisins
½ cup currants
½ cup mixed peel
1/3 cup candied citron
1/3 cup whisky
1 cup salted butter, softened at room temperature
2/3 cup light brown sugar, packed
½ cup granulated sugar
4 large eggs, room temperature
1 tsp pure vanilla extract
¾ – 1 tbsp finely grated orange rind (from one medium-sized orange)
¾ – 1 tbsp finely grated lemon rind (from one medium-sized lemon)
3 tbsp orange marmalade
2 cups all-purpose flour (1/3 cup removed and reserved for dredging fruit)
1/8 cup almond flour
1¼ tsp baking powder
¼ tsp cardamom
¼ tsp allspice
¼ tsp mace
Apx. 2½ – 3 oz whole blanched almonds
Apx. 2/3 cup additional whisky (for brushing on cake and soaking its cheesecloth wrap)
Method:
In medium-sized bowl, combine the raisins, currants, mixed peel, and candied citron. Drizzle 1/3 cup whisky over fruit to rehydrate the fruit, stirring well as the whisky is added. Cover tightly and let stand for about 24 hours, stirring mixture 2-3 times.
Bring butter and eggs to room temperature.
Prepare, as follows, an 8” round cake pan that is at least 3” deep and has a removable bottom. Cut 3 circles (one from medium-to-heavy weight brown paper and two from parchment paper) each the size of the removable pan bottom.
Measure the distance all around the pan and cut 3 strips (one from brown paper and two from parchment paper) equal to the measurement of the pan circumference + 3” for overlap, each strip apx. 3½“ deep.
As not all pans with removable bottoms are 100% tight, cover the bottom of the exterior of the pan with a layer of heavy-duty tinfoil, extending the coverage about halfway up the side of the pan to ensure no batter escapes during baking.
Using a spray cooking oil, very lightly spray the oil here and there on the pan’s interior – both bottom and sides. This will help hold the paper in place. Position the brown paper circle on the pan bottom and the long brown paper strip along the interior sides. Very lightly spray the brown paper in spots and position the first layer of parchment bottom and side pieces in place. Repeat with the last parchment layer. When ready to add the batter, lightly spray cooking oil on the last parchment bottom and side layers and dust lightly with flour.
Sift 1 2/3 cups all-purpose flour, almond flour, baking powder, and spices together. Set aside.
Using a microplane, or other fine grater, grate the orange and lemon rind. Cover tightly to keep the rind moist until using.
Place oven rack one level lower than dead center in the oven, and preheat oven to 300°F. Place a small pan filled with hot tap water on the floor of the oven at the back to keep the cake moist as it bakes.
In stand mixer fitted with paddle attachment and set at medium-low speed, cream the butter and sugars together until combined. Increase speed to medium-high and beat until mixture becomes pale in color, about 3-4 minutes, stopping periodically to scrape sides of bowl as necessary.
Beat in the eggs, one at a time, beating well after each addition. Scrape bowl as necessary. Beat in the vanilla then beat in the grated orange and lemon rind followed by the marmalade.
With mixer set at lowest speed, gradually add the sifted dry ingredients about one-half cup at a time. Increase speed slightly to completely blend ingredients.
Dredge the fruit mixture with the reserved 1/3 cup of flour. Stir quickly but gently to coat the fruit. Remove bowl from mixer and manually fold in the fruit until combined with the batter.
Transfer batter to prepared pan. Spread batter evenly with a spatula. Batter may also be smoothened with a hand lightly moistened with water. Beginning at the outside edge of the cake, arrange the whole almonds in concentric circles, spacing them as desired. Arrange almonds into place with a very light touch so they do not sink into the batter as the cake bakes. Bake cake in the center of the positioned oven rack for apx. 2½ hours or until cake is set and cake tester inserted into center of cake comes out clean. If cake starts to brown too quickly, loosely tent cake with tin foil, being careful not to let the foil touch the top of the cake before it is set. Remove cake from oven and let cake stand in pan for at least 45-60 minutes before removing. Remove cake from pan and carefully peel off and discard brown and parchment papers. Set cake upright on wire rack to cool completely.
When cake is completely cooled, brush all sides of cake with apx. 2 tbsp whisky then wrap in cheesecloth that has been dampened with apx. ¼ cup whisky (exact amount needed will depend on how closely woven the cheesecloth is). Wrap cake tightly in double layer of plastic wrap followed by a double layer of tinfoil. Place cake in zippered plastic bag and store in cool, dark, dry place for a week then unwrap cake and brush about 1½ tbsp of whisky over sides and top of cake. Re-dampen cheesecloth with apx. 3 tbsp whisky and re-wrap cake as previously described. Store at room temperature for a week longer after which time the cake can then be cut and served or transferred to refrigerator for up to two weeks or frozen for longer storage.
Yield: 1 – 8” cake
If you have made this recipe and enjoyed it and/or wish to share it with your friends and family, please do so on social media but be sure to share the direct link to this posting from my website.
Connect with My Island Bistro Kitchen on Social Media
Join the Facebook page for My Island Bistro Kitchen: https://www.facebook.com/MyIslandBistroKitchen/
Follow “the Bistro” on Twitter: https://twitter.com/PEIBistro/
See the drool-worthy gallery of mouth-watering food photos from My Island Bistro Kitchen on Instagram: https://www.instagram.com/peibistro/
Follow “the Bistro” on Pinterest at https://www.pinterest.ca/peibistro/ and pin the Pinterest-ready photo at the end of this posting to your favorite Pinterest boards!
Printable Recipe
Spirited Dundee Cake
Ingredients
- 1¼ cups sultana raisins
- 2/3 cup golden raisins
- ½ cup currants
- ½ cup mixed peel
- 1/3 cup candied citron
- 1/3 cup whisky
- 1 cup salted butter, softened at room temperature
- 2/3 cup light brown sugar, packed
- ½ cup granulated sugar
- 4 large eggs, room temperature
- 1 tsp pure vanilla extract
- ¾ - 1 tbsp finely grated orange rind (from one medium-sized orange)
- ¾ - 1 tbsp finely grated lemon rind (from one medium-sized lemon)
- 3 tbsp orange marmalade
- 2 cups all-purpose flour (1/3 cup removed and reserved for dredging fruit)
- 1/8 cup almond flour
- 1¼ tsp baking powder
- ¼ tsp cardamom
- ¼ tsp allspice
- ¼ tsp mace
- Apx. 2½ - 3 oz whole blanched almonds
- Apx. 2/3 cup additional whisky (for brushing on cake and soaking its cheesecloth wrap)
Instructions
-
In medium-sized bowl, combine the raisins, currants, mixed peel, and candied citron. Drizzle 1/3 cup whisky over fruit to rehydrate the fruit, stirring well as the whisky is added. Cover tightly and let stand for about 24 hours, stirring mixture 2-3 times.
-
Bring butter and eggs to room temperature.
-
Prepare, as follows, an 8” round cake pan that is at least 3” deep and has a removable bottom. Cut 3 circles (one from medium-to-heavy weight brown paper and two from parchment paper) each the size of the removable pan bottom.
-
Measure the distance all around the pan and cut 3 strips (one from brown paper and two from parchment paper) equal to the measurement of the pan circumference + 3” for overlap, each strip apx. 3½“ deep.
-
As not all pans with removable bottoms are 100% tight, cover the bottom of the exterior of the pan with a layer of heavy-duty tinfoil, extending the coverage about halfway up the side of the pan to ensure no batter escapes during baking.
-
Using a spray cooking oil, very lightly spray the oil here and there on the pan’s interior – both bottom and sides. This will help hold the paper in place. Position the brown paper circle on the pan bottom and the long brown paper strip along the interior sides. Very lightly spray the brown paper in spots and position the first layer of parchment bottom and side pieces in place. Repeat with the last parchment layer. When ready to add the batter, lightly spray cooking oil on the last parchment bottom and side layers and dust lightly with flour.
-
Sift 1 2/3 cups all-purpose flour, almond flour, baking powder, and spices together. Set aside.
-
Using a microplane, or other fine grater, grate the orange and lemon rind. Cover tightly to keep the rind moist until using.
-
Place oven rack one level lower than dead center in the oven, and preheat oven to 300°F. Place a small pan filled with hot tap water on the floor of the oven at the back to keep the cake moist as it bakes.
-
In stand mixer fitted with paddle attachment and set at medium-low speed, cream the butter and sugars together until combined. Increase speed to medium-high and beat until mixture becomes pale in color, about 3-4 minutes, stopping periodically to scrape sides of bowl as necessary.
-
Beat in the eggs, one at a time, beating well after each addition. Scrape bowl as necessary. Beat in the vanilla then beat in the grated orange and lemon rind followed by the marmalade.
-
With mixer set at lowest speed, gradually add the sifted dry ingredients about one-half cup at a time. Increase speed slightly to completely blend ingredients.
-
Dredge the fruit mixture with the reserved 1/3 cup of flour. Stir quickly but gently to coat the fruit. Remove bowl from mixer and manually fold in the fruit until combined with the batter.
-
Transfer batter to prepared pan. Spread batter evenly with a spatula. Batter may also be smoothened with a hand lightly moistened with water. Beginning at the outside edge of the cake, arrange the whole almonds in concentric circles, spacing them as desired. Arrange almonds into place with a very light touch so they do not sink into the batter as the cake bakes. Bake cake in the center of the positioned oven rack for apx. 2½ hours or until cake is set and cake tester inserted into center of cake comes out clean. If cake starts to brown too quickly, loosely tent cake with tin foil, being careful not to let the foil touch the top of the cake before it is set. Remove cake from oven and let cake stand in pan for at least 45-60 minutes before removing. Remove cake from pan and carefully peel off and discard brown and parchment papers. Set cake upright on wire rack to cool completely.
-
When cake is completely cooled, brush all sides of cake with apx. 2 tbsp whisky then wrap in cheesecloth that has been dampened with apx. ¼ cup whisky (exact amount needed will depend on how closely woven the cheesecloth is). Wrap cake tightly in double layer of plastic wrap followed by a double layer of tinfoil. Place cake in zippered plastic bag and store in cool, dark, dry place for a week then unwrap cake and brush about 1½ tbsp of whisky over sides and top of cake. Re-dampen cheesecloth with apx. 3 tbsp whisky and re-wrap cake as previously described. Store at room temperature for a week longer after which time the cake can then be cut and served or transferred to refrigerator for up to two weeks or frozen for longer storage.
Recipe Notes
Yield: 1 – 8” cake
NOTE: Refer to blog post for hints and tips on making Dundee Cake
Copyright My Island Bistro Kitchen
PIN ME TO PINTEREST
You may also enjoy these Fruitcakes and Christmas-themed Cakes from My Island Bistro Kitchen:
Dark Fruitcake
Festive Light Fruitcake
Sultana Cake
Gluten-free Light Fruitcake
Gumdrop Cake
Rum and Eggnog Cake
