

PEI has long been known for growing world-class potatoes – they are, after all, our primary cash crop, injecting more than one billion dollars annually into the Island economy, directly and through spin-offs[i]. We all know potatoes as a vegetable on dinner tables and are familiar with them boiled, mashed, baked, as French fries and potato chips, and as the key ingredient in scalloped potatoes. But, would you think of potatoes as a main ingredient in a beverage? Well, there are a couple of industrious and innovative women who have figured out a new use for PEI spuds. Julie Shore and Arla Johnson own and operate Prince Edward Distillery where potato vodka is their flagship product.

Drive east from the Island’s capital city of Charlottetown along the northeastern shore of the Island and you will find Hermanville, a small rural district not far from the town of Souris in the eastern end of PEI. Late this past summer, I travelled to Hermanville to visit Prince Edward Distillery to find out about this potato vodka. In addition to learning how potato vodka is made, I learned the Distillery is diversifying its operation. They are now producing gin, rye whiskey, rum, and a bourbon-style corn whiskey that sells under the label of IC Shore and that’s in addition to the potato vodka and wild blueberry vodka. Also new this year (2012) are their decadent rum cakes made locally with the Distillery’s Merchantman 1897 rum.

The story of Julie and Arla’s arrival on PEI is similar to several others who have come to the Island and made it their home. They came to PEI on holiday in 1997, fell in love with the Island, and decided to move here. Leaving their jobs behind – Julie as a dental hygiene sales representative and Arla as a psychologist – they built an Inn (Johnson Shore Inn) in Hermanville in 1999, down a long, secluded, and narrow, unpaved lane that leads to a spectacular unobstructed view of the Gulf of St. Lawrence. However, they soon discovered the tourist, and by extension the innkeeper’s, season is short in rural PEI (usually late May to the end of September). That extra time on her hands got Julie thinking about the business her ancestors had been in, pre-prohibition, in North Carolina – distilling apple brandy and bourbon. Living in the land of potatoes, Julie had the idea to set up a distillery to produce potato vodka. Thus, in 2007, Prince Edward Distillery was born with the first batch of potato vodka running from the still’s spigot in 2008.

Julie is the master distiller. In 2011, the Distillery produced 10,000 bottles of the six different liquors the Distillery produces. Apart from her ancestral history of distilling (she’ll tell you distilling is in her blood!), I asked Julie if she had to have special training to be a distiller. She tells me she has taken a distilling course at Cornell University and yeast-making courses in Montreal and France. She and Arla travel the world over visiting distilleries and learning more about the art of fine distilling. Visit their onsite retail outlet and look at the large map on the wall that points out the impressive world travels Julie and Arla have journeyed.
Julie says the best variety of potatoes for potato vodka is Russet Burbank. These spuds are the highest starch potato grown on the Island and the starch content is important for the yeast to work in the fermentation process. The Distillery buys approximately 50,000 pounds of locally-grown potatoes, on an annual basis, to use as the base for potato vodka. Julie explains that it takes about 18 pounds of potatoes to produce one 750 ml bottle of the potato vodka so, as you can imagine, it takes a lot of spuds to yield any amount of vodka. While potato vodka is not unheard of, it is more rare since 99% of vodkas on the market are grain-based. That’s probably because, as Julie says, potato vodka is difficult to distill due to the fact that potatoes are approximately 80% water, have to be cooked, and it takes such a volume of the raw ingredient (potatoes) to produce the final product.


Making potato vodka is very labour intensive. The potatoes are ground and cooked to break down their starch into fermentable sugars so that fermentation will occur with the addition of yeast (wait till you hear what is done with the leftover mash from the potatoes and who the benefactors are!). The mixture is fermented for four days in 1000-gallon tanks to form alcohol.

Using a 680-litre German-made Holstein copper vertical still that Julie had imported from Germany and capably assembled herself (since it came in parts and didn’t come with an instruction book), this fermentation mixture is distilled three times to remove impurities, achieve a neutrality of the alcohol, and to get the perfect alcohol content for the vodka. Julie tells me it takes 10-14 days to produce a batch of vodka from start to finish, raw product (potatoes) to bottling.
The Distillery has enjoyed sweet success and very early in its operation. Their products rank among the best. Just a year after producing their first vodka for market, the potato vodka won gold in the 2009 San Francisco World Spirits Competition and, in the same year, the wild blueberry vodka won silver in the UK International Spirits Challenge in London, England. Yes, our locally-produced Island wines and spirits can match any on the market!
Prince Edward Distillery supports local producers, buying and using locally-produced potatoes, grains, and blueberries in their liquor production. The Distillery employs between 4-6 full time employees and 1 part-time employee on a seasonal basis. Currently, their products are sold in PEI and Nova Scotia markets. However, they are exploring markets farther afield.

This past summer, the Distillery decided to open a spirits outlet shop at Peakes Quay on the Charlottetown waterfront, a popular tourist attraction of small shops and not far from the seaport where dozens of cruise ships dock each year. In addition to the Peakes Quay location (open seasonally), the Distillery’s products are available at the onsite retail shop in Hermanville and in PEI and Nova Scotia liquor stores.
So, about that mash I mentioned earlier – the left-over potato product after the liquid has been extracted for the vodka. Well, behind the distillery may well be what many have dubbed as the most cheerful hogs on the Island! Yes, that’s right, hogs or, more specifically, Heritage Berkshire pigs which Julie raises on the mash. She says there are lots of nutrients left in the potato mash so why throw it out when she can raise pigs on it!

The Distillery is open daily, May – October, for tours and taste-testing; from October – May, it is open by appointment or by chance. A tour of the Distillery and taste-testing of two spirits costs $10. (or, if you simply want to taste any spirit, it is $3./taste). For more information on the Prince Edward Distillery, visit their website, call them at 902-687-2586, or, better still (pun intended!), take the scenic northeastern shoreline route to Hermanville and visit the Distillery at 9985, Route 16.


True to tradition, when I visit a local producer, I bring home their product and create a recipe with it. I decided to create a Vodka Tomato Sauce for pasta using Prince Edward Distillery’s potato vodka. I find the vodka actually goes well with tomatoes and draws out the tomato flavour and makes it pop without adding a competing flavour to the dish. The key, of course, is not to over-do it – less is often more and the idea is that the vodka enhance and contribute to the taste of the sauce, not overpower it. My recipe creation follows.

Thank you for visiting “the Bistro” today. There are lots of ways to connect with “the Bistro” through social media:
Join My Island Bistro Kitchen on Facebook
Follow the Bistro’s tweets on twitter @PEIBistro
Find the Bistro on Pinterest at “Island Bistro Kitchen”
Follow along on Instagram at “peibistro”
Tomato Vodka Pasta Sauce
By Published: November 15, 2012
- Yield:
- Prep: 10 mins
- Cook: 50 mins
- Ready In: 60 mins
A rich, flavourful tomato sauce suitable for various types of pasta
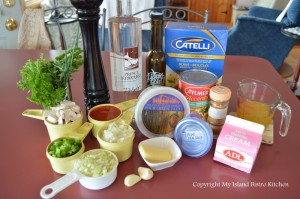
Ingredients
- 1 tbsp olive oil
- 1 tbsp butter
- 2/3 cup onion, chopped
- 1/2 cup celery, chopped
- 1/2 cup green pepper, chopped
- 1 cup mushrooms, chopped
- 3 cloves garlic, minced
- 1 540ml can diced tomatoes, undrained
- 2 1/2 tbsp corn starch
- 1/2 cup chicken stock, cooled
- 1/2 cup tomato sauce
- 2/3 cup Prince Edward Distillery Potato Vodka
- 1/2 cup whipping cream
- 1/2 tsp dried oregano (or 2-3 tsp fresh)
- 1 tbsp dried basil (or 2 - 2 1/2 tbsp fresh)
- 2 tsp fresh chives, chopped
- 1/8 tsp cayenne pepper
- 1/8 tsp red pepper flakes
- 1 tbsp fresh parsley, chopped
- 1/2 cup freshly grated Parmesan cheese
- sea salt, to taste
- pepper, to taste
Instructions
 Heat oil and butter in large pot. Add onion, celery, green pepper, mushrooms, and garlic. Sauté 2-3 minutes over medium heat.
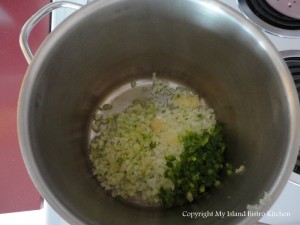 Add diced tomatoes, salt, and pepper. Simmer over low heat 5-7 minutes.
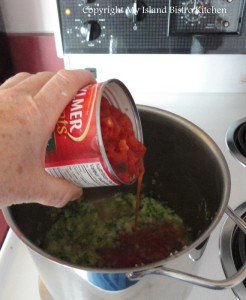 Whisk the corn starch with the cooled chicken stock until smooth.
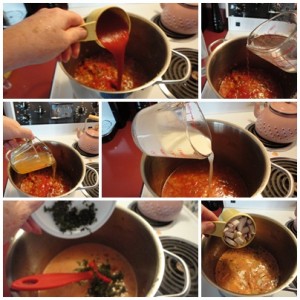 Stir tomato sauce, vodka, and chicken stock/cornstarch into mixture. Simmer 18-20 minutes, until slightly thickened.
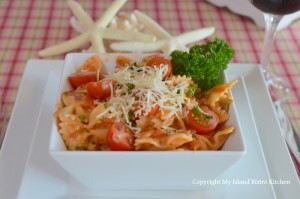 Stir in whipping cream, oregano, basil, chives, cayenne, red pepper flakes, and parsley. Simmer 7-10 minutes.
- Meanwhile, cook pasta according to package directions and drain. Add drained pasta to tomato sauce and toss to coat.
- Spoon pasta into serving dishes. Garnish with freshly grated Parmesan cheese, fresh basil, a spring of parsley, and halved cherry tomatoes.
WordPress Recipe Plugin by ReciPress
