

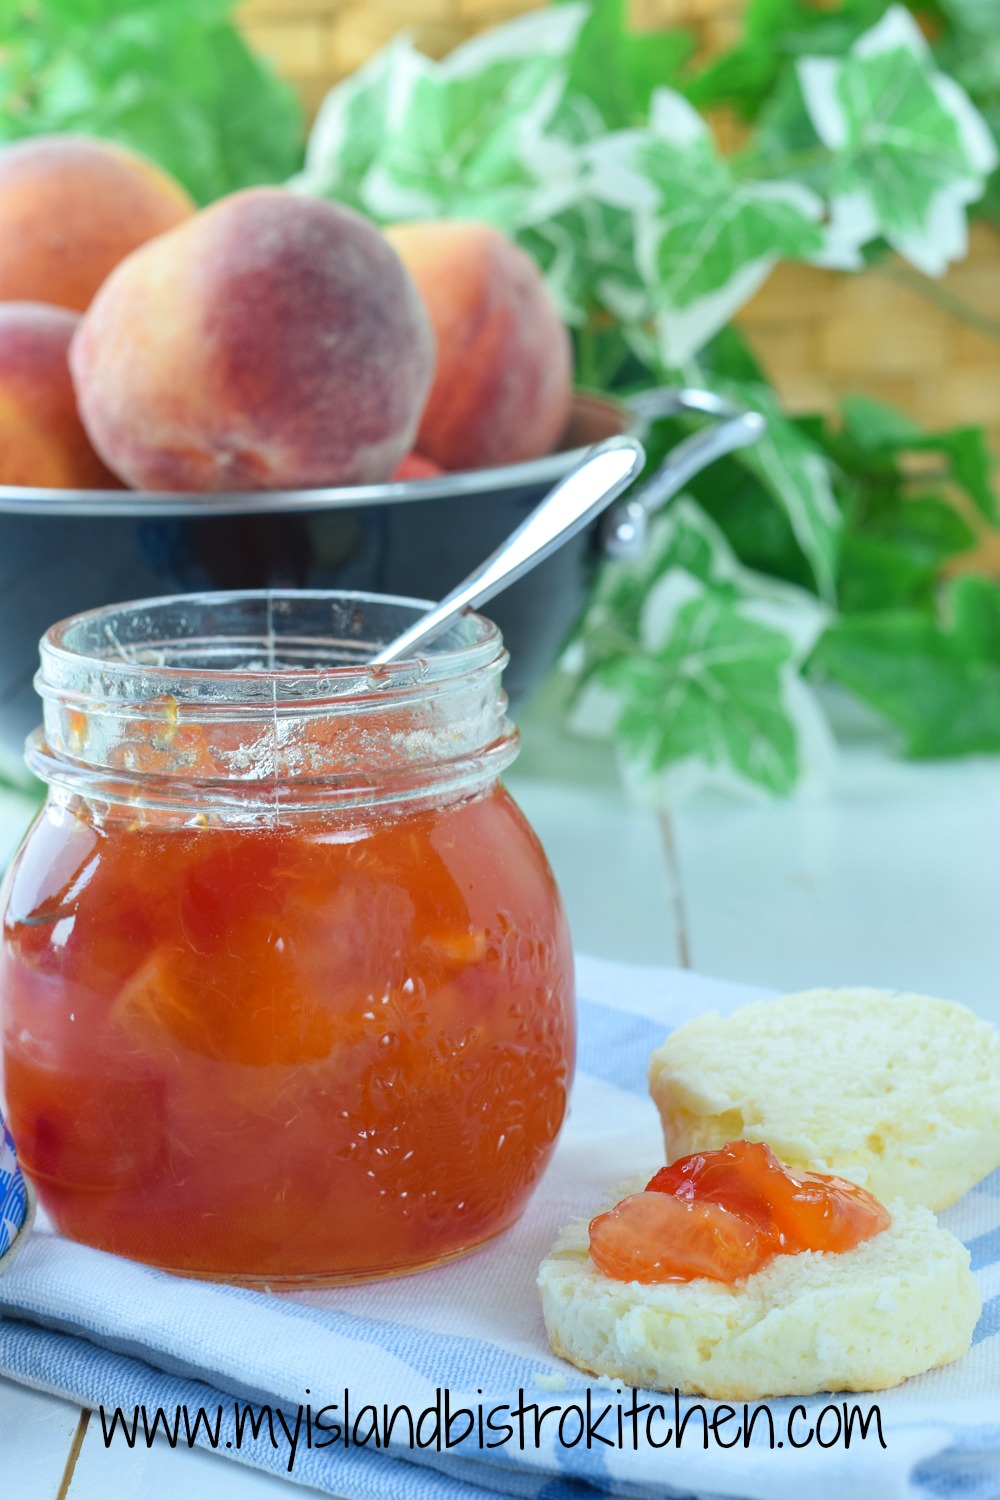
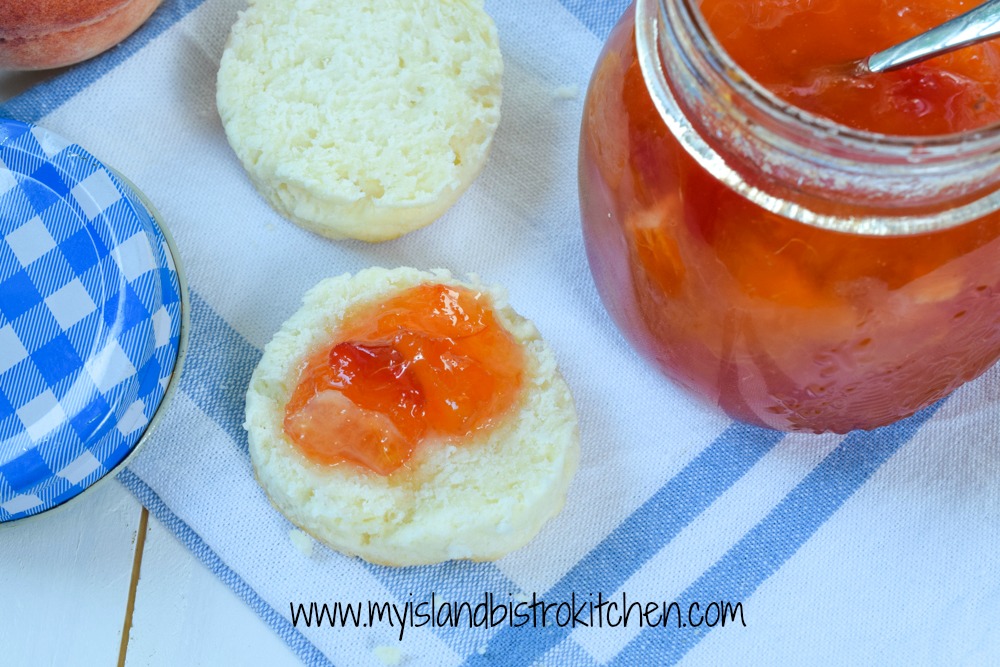
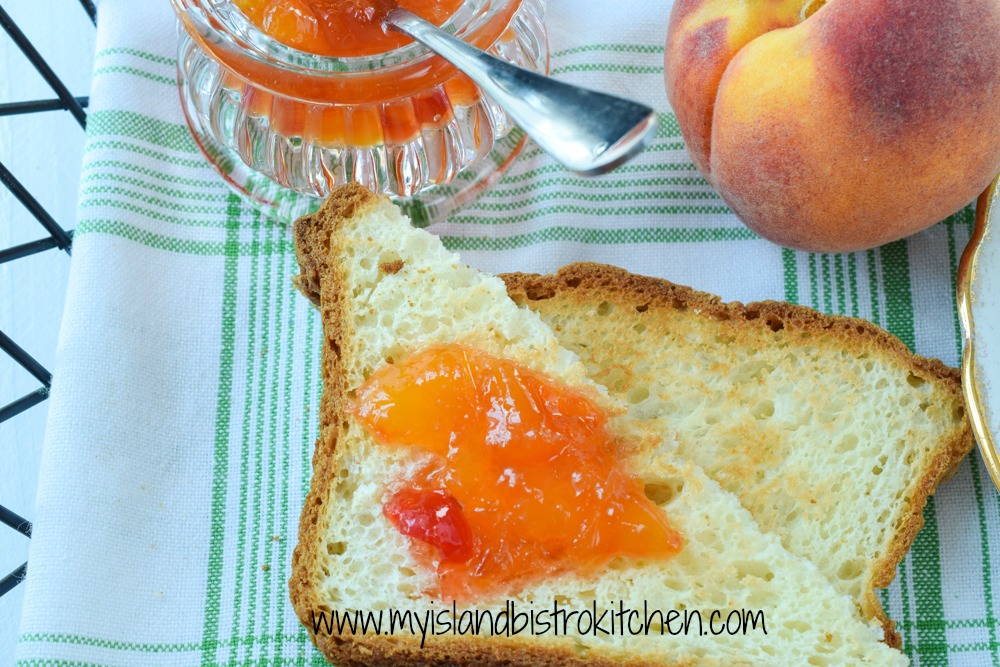
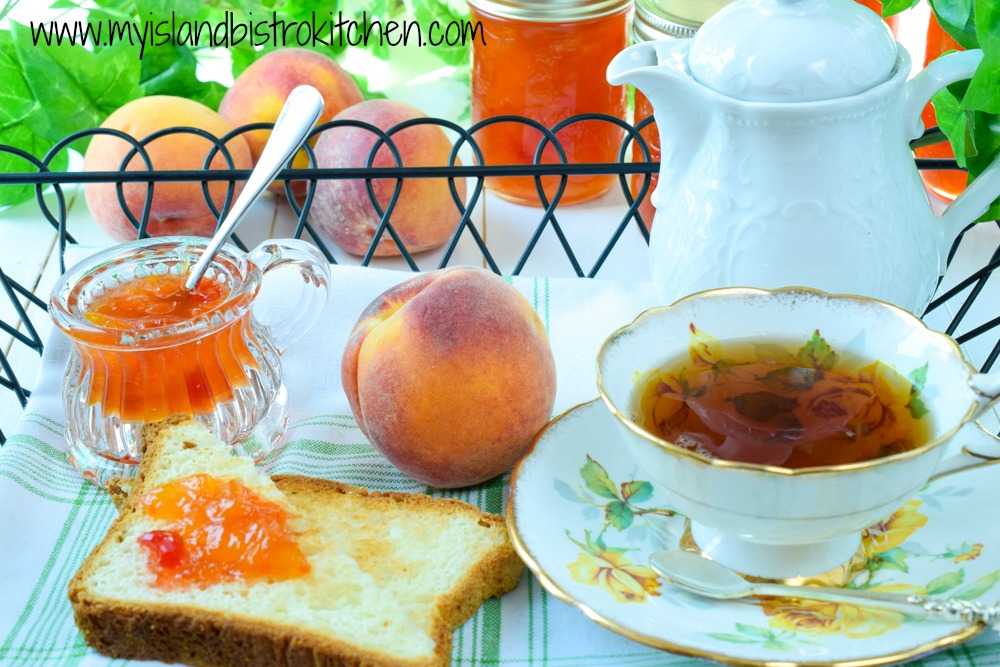
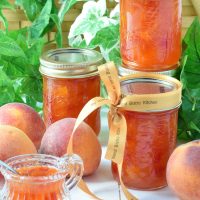
For as long as I can remember, Peach Marmalade has been part of our family’s pantry of preserves. Today, I am sharing my recipe for this delicious marmalade which is lovely on toast, biscuits, and scones.
But, before sharing the recipe, I will share some necessary information about making this Peach Marmalade. So, even though there is a “Jump to Recipe” button above, if you are planning to make this recipe, I recommend reading the information in this post first as it contains a lot of detail and explanation of the processes that are not included in the printable recipe.
TIPS FOR SUCCESSFUL MARMALADE MAKING
Get Organized
Marmalade making, like any jam or jelly making, is a sequential process and it pays to take the time to get organized for the task. The first step is to read and re-read the recipe to ensure complete understanding of the process and that you have all the necessary ingredients and equipment.
The second step in organization is to assemble all equipment and ingredients needed for the marmalade-making and canning processes. A list of equipment and utensils needed to make the marmalade can be found further down in this post.
The third step is to start the bottle sterilization process before beginning to make the marmalade as the sterilized bottles must be ready when the marmalade is finished cooking. Cooking the marmalade takes some attention and stirring so it’s best if the bottle sterilization is done before the process of cooking the marmalade begins.
Set the hot water canner out and, when the marmalade has been cooking for about 20-30 minutes, fill the canner about one-half full of hot tap water and bring it to a boil over medium-high heat. Immediately reduce the heat to keep the water hot and ready for when the jars have been filled with marmalade for hot water processing.
Follow the Recipe Exactly – No Substituting, Omitting, or Altering of Ingredient Amounts
For success, follow the recipe exactly, without substituting, omitting, or altering amounts of ingredients (unless, of course, an ingredient is listed as “optional” as is the case with Peach Schnapps in this recipe). Each ingredient contributes something valuable to the finished product. For example, it is well-known that jam and marmalade recipes call for a lot of sugar. Some will ask if they can significantly reduce the amount of sugar called for in a recipe and the simple answer is, no, not without potentially affecting the gelling properties of the end product and sacrificing the quality and preservative functions of the jam or marmalade. Apart from the sweetness sugar imparts on jam and marmalade, it also acts as a preservative, protecting the product against the development of bacteria, yeast, and mold. It is, along with the hot water processing of the jam or marmalade, what will make the jam/marmalade shelf stable for several months.
Peach Schnapps is listed as an optional ingredient in this marmalade. The liqueur, however, does deepen the peach flavor a bit. That said, if you are using the Peach Schnapps, don’t go overboard on the liqueur as it not only will be too intense but the liquid content will alter the consistency of the marmalade potentially causing issues with the gelling properties of the marmalade. If you choose not to include the liqueur, you may wish to add a half teaspoon of almond extract, although that is not mandatory either. Almond extract is a very strong flavor so, again, don’t be tempted to add more than the ½ teaspoon called for in the recipe as it will create an overpowering almond flavor in the marmalade.
Use Only Proper Canning Jars for Marmalade
Ensure that proper canning jars, approved for hot water processing, are used for the marmalade. These are bottles under labels such as Mason or Ball brand jars that are made of specially tempered glass capable of withstanding heat that will be necessary in the hot water canner for safe home canning of products. The glass jars have a wide mouth top and consist of a two-part lid and screw/ring band. Exercise caution when purchasing jars, that look very much like canning jars, at places like discount stores or thrift/second hand shops as they may not, in fact, be tempered glass suitable for canning.
While our ancestors may have used just any old bottles they had at hand, using recycled bottles from store-bought products like pasta sauce or bought pickles, for example, is not recommended for food safe home canning. First, these jars, having already been sealed by the manufacturer and the seals having been broken by the consumer to reveal the jar contents, no longer have proper sealing covers considered safe for home canning of products. Second, the bottles are generally made of glass not as thick as proper canning jars and, therefore, are not considered to be resistant to heat extremes. This means they could shatter or explode when placed in the hot water canner.
With the potential for so many air- and food-borne illnesses to occur today and with the changing conditions in which our foods are grown (or modified), along with the fact that most homes today do not have dedicated temperature-controlled cold rooms (or cold cellars like many of our ancestors had) in which to store home canned goods, it is all the more reason why both the proper canning jars and home canning procedures are an essential component to marmalade making. Do not skip the proper bottle sterilization and hot water canning processes.
Sterilizing the Jars
There are various methods for sterilizing the jars for the marmalade. I use the traditional method of sterilizing the jars in hot water as I find I can better control the timing of having the hot jars ready at the express moment the marmalade is ready for bottling. The jars must be hot when they are filled with the marmalade as they will be immediately going into the hot water canner of boiling water and cold jars subjected to this are likely to crack.
Approximately five (5) half-pint sized glass canning jars will be required for this recipe. Begin by inspecting each jar before using it to ensure there are no chips or cracks.
Because the sterilized jars must be ready at the moment the marmalade is cooked, you will want to get the jar sterilization process underway before you start cooking the marmalade as it takes time to get a big pot of water to the boiling point and the marmalade will need your attention while it is cooking.
Wash the jars in hot soapy water. Rinse well and drain jars. Fill a large-sized pot (fitted with a wire rack to keep the jars up off the bottom of the pot), capable of holding at least 7-8 half-pint jars upright, about two-thirds full of hot tap water. Use two large pots for this process, if necessary. Do not stack jars, one on top of another as they will click together when the water is boiling and potentially crack.
Place the jars, upright and in single layer, into the water. Placing the jars upright for sterilization also makes it easy to grasp the jars with the jar lifter tongs to remove them from the water when it comes time to bottle the marmalade. Ensure the jars are fully submerged, each jar filled with water, and that the water is at least an inch over the tops of the jars, adding more if necessary. Cover, bring to a boil, and boil gently for 10 minutes. Turn off heat and leave the jars in the hot water (covered) to have ready to fill once the marmalade is ready.
Because so many factors can determine exactly how many jars will be needed to accommodate the marmalade, I recommend having at least 2-3 extra jars sanitized in case they are needed. Even if they aren’t needed to be filled with marmalade, the hot empty jars may be needed to fill up space in the hot water canner if it is not completely filled to capacity with jars containing the marmalade. This is to ensure that the filled jars do not topple over during the hot water processing.
To protect your countertop from the hot wet bottles and marmalade drippings, use a heatproof cutting board covered with newspaper to protect the board while the jars are being filled with the marmalade. Set a wire rack on top of the board and set the hot drained jars upright on the rack.

Lids and Screw Bands/Rings
The flat metal lids for the canning jars are for single use only and are NEVER to be reused for canning food. Always, always use new lids for each canning session. The lids are inexpensive so don’t risk re-using them. Once you finish a bottle of marmalade, turf the lid.
While, historically, the lids (with the orange-rust colored gasket on their underside) were preheated in simmering hot water for 1-2 minutes to soften the lid gasket before applying the lids to the hot jars, Bernardin® (the company that manufactures canning lids available here in Canada) is now saying that preheating their own particular brand of lids is no longer necessary to provide a proper seal as the sealing compound they use in their lid manufacturing performs better at room temperature. They recommend washing the lids in hot soapy water, rinsing them, and setting the lids aside until needed in the canning process.
Note this pertains specifically to the Bernardin® brand of lids. Other manufacturers’ lids may differ so, if you are using another brand of lids, do check the manufacturer’s instructions with respect to heating lids or not for their particular brand lids. Typically, if the lids need to be preheated, the method is simply to place the lids in a small pan of simmering hot water over low heat just long enough to heat the rubber piece. This won’t take longer than a minute or two at most. Do not boil the lids.
The screw bands (aka rings) can be re-used so long as they don’t have any rust spots on them or any dents.
Cooking the Marmalade to the “Set” Stage
Marmalade typically sets at between 217°F and 220°F. At 217°F, the marmalade will be a bit more pliable than at 220°F when it will have a slightly firmer consistency/texture. A candy thermometer or instant read thermometer is needed for taking the marmalade’s temperature and is a more sure way to know when the marmalade has reached the setting stage.
However, if you don’t have either type of thermometer, there is an alternate way to determine marmalade doneness and that is using what is known as the “chill test”.
To conduct this test, place 2-3 freezer-safe saucers in the freezer before starting to cook the marmalade. Somewhere around the 45-50 minutes of cooking, remove a small amount of the marmalade and place it on a chilled saucer and swirl the saucer around. Let marmalade sit, untouched, for about a minute, then gently push your finger through the marmalade. If the marmalade holds its shape (i.e., does not run back together after the finger has been removed from the marmalade), it is set and ready to bottle. If it does not hold its shape, continue to cook mixture, repeating the “chill” test about every 3 minutes or so (always removing the pot from the heat while conducting the chill test) until the marmalade passes the “chill” test. Do not overcook as it will result in a very thick marmalade, dark in color.
Filling the Jars with Marmalade
When the marmalade is ready to be bottled, use a jar lifter to remove the hot sanitized jars from the water and carefully empty out the hot water back into the stock pot. Drain jars well and transfer them to the wire rack on the heatproof board. Do be very careful as this is scalding hot water.
Use a heatproof glass measuring cup or ladle to scoop up the marmalade and transfer it into the hot sterilized jars. A wide-mouthed funnel is useful for this process. Fill the jars, leaving about ¼″ headroom in each.
Remove any air bubbles that may appear in the jars by inserting a chopstick or small heat-proof spatula into each bottle and gently move the marmalade to remove any pockets of air that may have formed. Add more marmalade, if necessary, to bring the marmalade up to ¼“ from jar rim.
Make sure the rims of the filled jars have been wiped with a damp clean cloth to remove any marmalade residue. Even a small drop of it may prevent the lids from sealing properly and keeping out harmful bacteria that could cause the marmalade to spoil or someone to become ill from consuming it.
Center the washed and rinsed room temperature lids on jars so the sealing compound on the lid edges aligns with the jar rims. Once the jars have been filled with marmalade, fingertip tighten ring/screw bands on jars until resistance is encountered. Do not over-tighten.
Hot Water Processing of Filled Marmalade Jars
The jars of hot marmalade need to be processed in a hot water bath to ensure that any microorganisms are destroyed and the marmalade is shelf-stable for several months. At its most basic, home canning of marmalade is the process of heating the hot sealed jars of marmalade in a canner of boiling water to destroy microorganisms that can cause the jar contents to spoil or people to become ill from consuming the contents contained in the jars. The process of hot water canning also gives the marmalade shelf stability over several months. Note that hot water processing times vary according to the altitude of the area in which you live and, of course, the size of jars used. The processing time indicated in this recipe are for half-pint sized jars and for altitudes up to 1000 ft (305 m).
As mentioned above, with the potential for so many air- and food-borne illnesses to occur today and with the changing conditions in which our foods are grown (or modified) and stored in homes, proper home canning procedures are an essential component to safe marmalade making. Do not skip the proper hot water canning process for this marmalade.
Hot water canners come in different sizes and depths to accommodate different sizes of jars. The canner must have the capacity to hold jars the size called for in a recipe and allow for boiling water to cover the jars by 1″ when they are placed in the canner basket inside the canner. Here, in Canada, hot water canners are relatively inexpensive and can usually be found at stores like Walmart, hardware stores (e.g., Home Hardware and Canadian Tire) as well as some large supermarkets and other places.
For any one wishing to learn more about home canning, there are a number of reputable and reliable sources of information available on the current proper methods of canning. Books on the topic are available at libraries, bookstores, and online. The internet is also a good place to start your research but do ensure you consult reputable sites. I find a lot of university extension department websites contain good information on proper home canning procedures as do canning jar manufacturing sites.
Once the marmalade has been cooking for about 20-30 minutes, fill the canner about one-half full of hot tap water and, over medium-high heat, bring it to the boiling stage to have ready when the marmalade is finished and ready for its hot water bath. Reduce heat to keep the water hot while the marmalade is being made.
As the marmalade is near being ready to be bottled, it’s also a good idea to get a kettle of boiling water ready in case extra is needed to top up the canner after the filled jars are added. The hot jars of marmalade need to immediately go into the hot water bath so, after the marmalade is bottled, there will be no time then to start boiling the canner water which can take a significant period of time to get the water to the boiling stage.
Note that I recommend adding 2 to 3 extra half-pint jars to the pot with those being sterilized for the marmalade. This is for a couple of reasons. First, an extra jar may be needed should the marmalade yield more than 5 half-pints. This can occur for several reasons, including the quality of fruit, heat at which the marmalade was cooked, and so on. Second, an extra hot jar or two may be needed (depending on canner size and design) to fill up extra space in the canner basket so those jars filled with marmalade do not topple over in the hot water process.
Most canner baskets will hold 6 – 7 half-pint jars and, if a batch of marmalade has less quantity than that, the bottles will fall over unless the basket is filled with bottles to take up the excess empty space in the canner. While the empty jars for this latter purpose do not need to be sanitized, they must be hot going into the boiling water in the canner as, otherwise, the temperature change could cause cold jars to crack when they are submerged into the boiling water. The easiest way I find to heat them is to simply put them in the pot with the jars being sterilized.
Using jar lifter tongs, carefully place filled jars upright and in a single layer in the wire basket or rack positioned in the canner, ensuring jars do not touch each other or fall over. If a canner is not completely full to capacity of filled jars, add one or more hot empty jars, upright, to the basket to fill up space so the filled jars do not topple over during processing. Should this be necessary, let the empty jars fill with water from the canner as they are submerged.
Ensure the water level is at least 1” above the tops of jars, adding more boiling water as necessary. When it gets to this stage in the process, I recommend having a kettle of boiled water already available if it is needed to top up the canner water levels.
Cover the canner with its lid. Increase the heat to return the water to a full rolling boil then decrease the heat to just keep the water at a moderately rolling boil but not boiling over. Process the half pint jars in the hot water bath for 10 minutes, adjusting time as and if necessary for altitude. Start timing the processing from the point at which a full rolling boil is reached after filled jars have been added to the canner. At the end of the processing time, turn off heat and remove canner lid.
Let jars sit in the hot water for 5 minutes then, using jar lifter tongs, carefully remove the jars filled with marmalade, one at a time, upright and without tipping them, and transfer the jars to a heat-proof cutting board, that has been covered with a towel to protect it, to cool completely. Listen for the “pop” or “ping” sound as the bottles seal over the next few minutes or hours. The lids of properly sealed jars will curve downward.
Check Processed Jars for Proper Sealing
Let jars rest, undisturbed and covered with a towel to keep light out, on counter for 24 hours. Then, test each jar for proper sealing by very lightly pressing down on the center of each jar lid. If the lid is already pressed downward, and does not pop back up, it is properly sealed. Any jars that do not pass this test should be refrigerated and the marmalade used within a week or so.
Storing Marmalade
Store properly sealed marmalade bottles in cool, dark place and let rest for at least 1 -2 weeks before opening to allow flavors to develop. Use marmalade within one year of bottling. Refrigerate marmalade once jar has been opened.
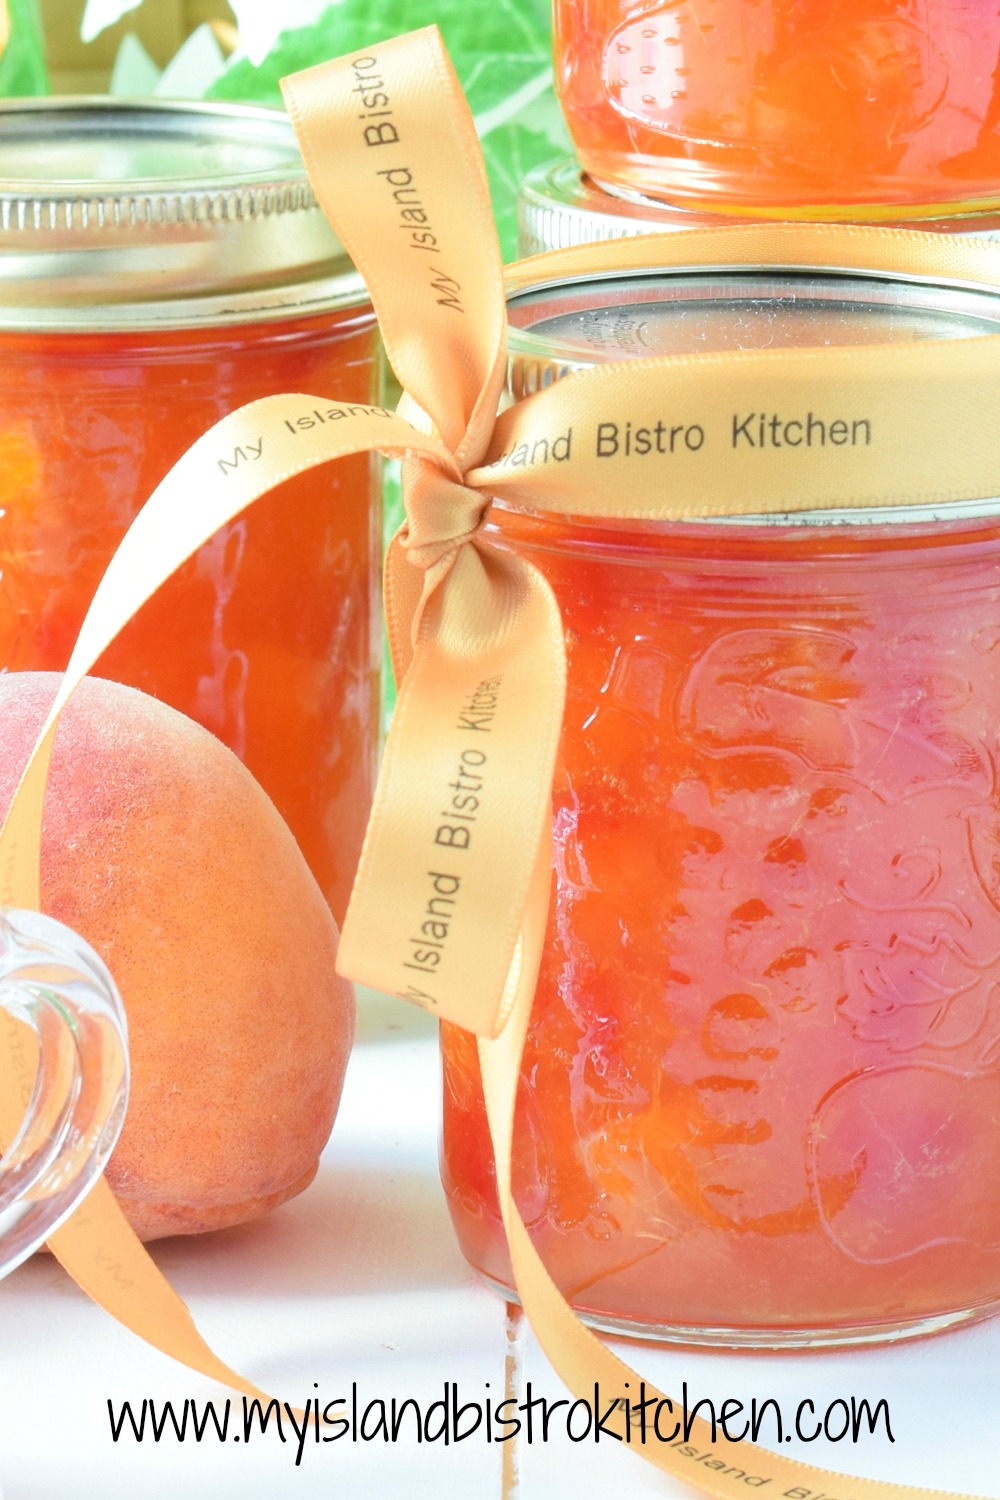
PEACH MARMALADE
Supplies and Equipment Needed:
5 half-pint glass canning jars for the marmalade (plus 2 – 3 more half-pint-sized jars to take up extra space in the canner basket, if needed, during the hot water process)
5 – two-piece lid and screw band sets (lids must be brand new and NOT previously used)
Small saucepan for heating peaches
Large measuring cup or bowl for fruit pulp
Kitchen scales for weighing fruit and sugar
Candy or instant read food thermometer for testing doneness of marmalade
Heat-proof cutting board(s) and wire rack for sitting hot jars on
Medium-sized, heavy-bottomed, stock pot for cooking marmalade
Large-sized pot fitted with wire rack for sterilizing jars
Large, heat-proof spoon for stirring marmalade
Water bath canner with basket or rack
Jar lifter tongs
Wide-mouthed canning funnel
Ladle or heat-proof glass measuring cup
Chopstick or small non-metallic heat-proof spatula to remove any air bubbles/air pockets from filled jars
Clean cloth for wiping jar rims of marmalade-filled jars
A timer
Ingredients:
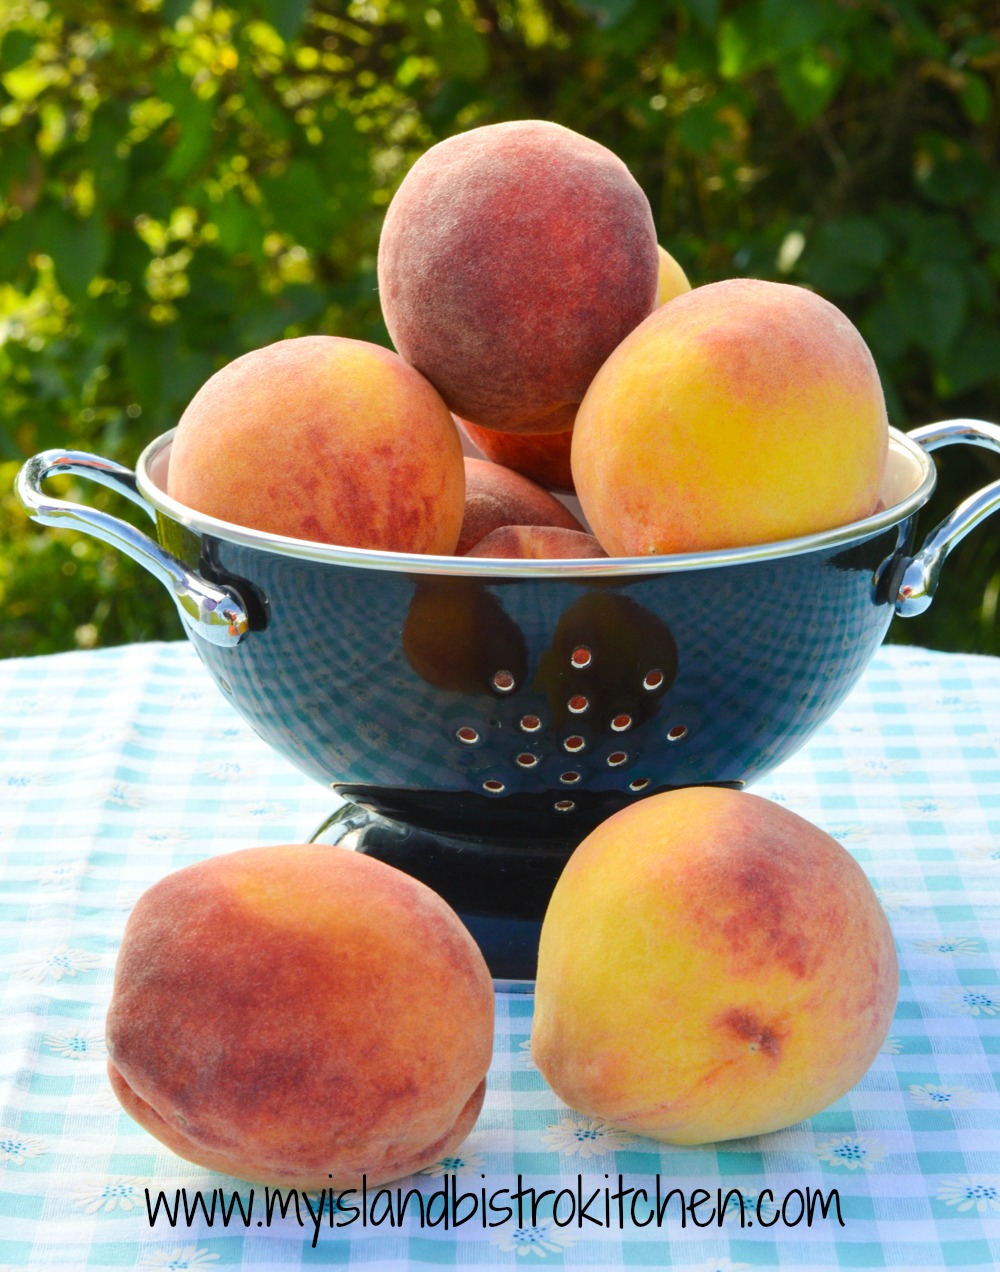
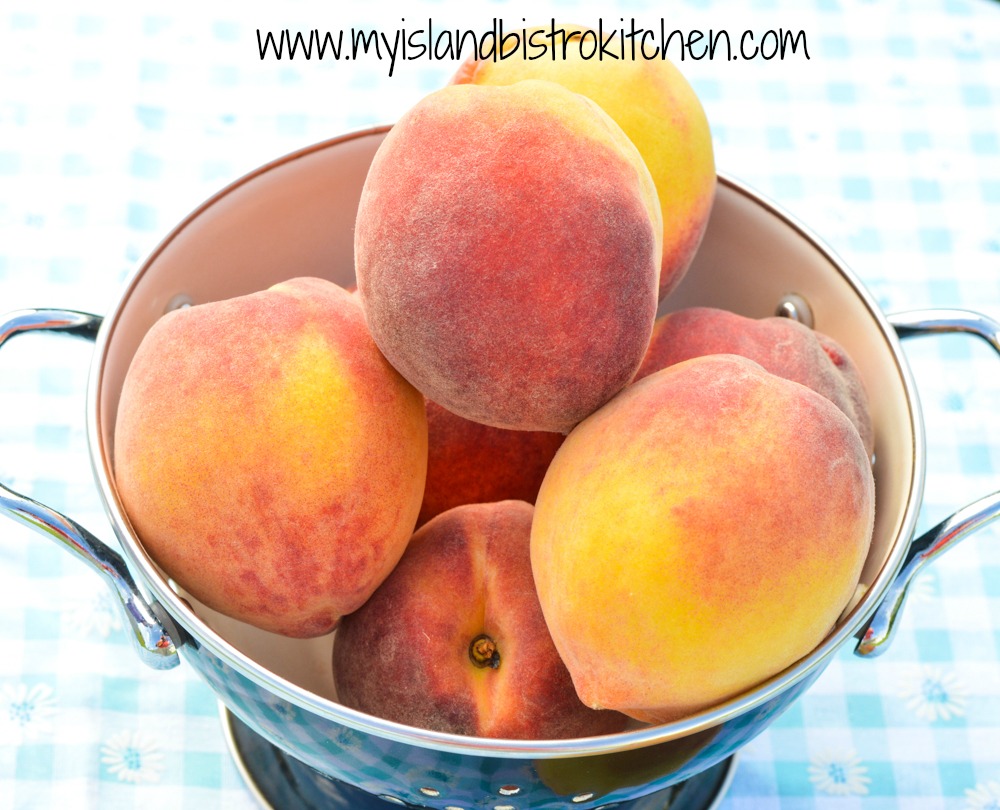
7 large peaches, washed
Zest of one orange
1 medium-sized orange, seeded and chopped into small pieces
Zest of ½ lemon
½ medium-sized lemon, seeded and chopped into small pieces
1/3 cup maraschino cherries, chopped
1½ tbsp Peach Schnapps (optional) or ½ tsp almond flavoring (optional)
Granulated sugar equal to weight of fruit pulp
Method:
Wash canning jars and lids in hot soapy water. Rinse. Drain jars.
Fill a large-sized stockpot about two-thirds full of hot tap water. Fit stockpot with wire rack. Place the jars, on the rack, upright and in single layer, into the water. Use more than one stockpot if necessary to accommodate all jars needed for the recipe. Do not stack jars on top of each other in stockpot. Ensure the jars are fully submerged, each jar filled with water, and that the water is at least an inch over the tops of the jars, adding more if necessary. Cover, bring to a boil over medium-high heat, then reduce heat slightly and boil gently for 10 minutes. Turn off heat and leave the jars in the hot water to have ready to fill once the marmalade is ready.
Heat 2-3 cups of water in saucepan over medium-high heat. When boiling, reduce heat to low and, one at a time, plunge peaches in boiling water for about 1 minute to loosen skin. Peel each peach as soon as it comes out of the hot water. Halve the peaches and remove and discard stones. Dice the peaches into small pieces, about ½“ in size.
Place cut-up peaches in large measuring cup or bowl. Add the chopped orange and lemon along with the orange and lemon zest. Weigh the amount of fruit and use the same weight of granulated sugar. For example, if the total amount of the pulp equals 1 pound, then 1 pound of sugar will be required.
Place pulp and sugar into a medium-sized stockpot. Stir. Bring mixture to a boil over medium-high heat, stirring frequently to prevent scorching. Immediately reduce heat and cook, uncovered, at a slow gentle boil until mixture thickens and reaches a temperature of 217°F on a candy thermometer (see Note below for alternative method for testing marmalade doneness). Stir mixture frequently to prevent scorching. Be patient, this can be expected to take an hour or so. The marmalade may be cooked to a temperature of 220°F but it will be a thicker marmalade and less pliable to spread than if it is cooked to 217°F.
When the marmalade has been cooking for about 20-30 minutes, fill the hot water canner about half full of hot tap water. Cover and bring to a boil over medium-high heat to have it ready for processing of the filled jars. Reduce heat to keep canner water hot.
When marmalade has reached 217°F, remove the stockpot from heat and skim off any foam that may still remain on the marmalade. Stir in cherries and Peach Schnapps (or almond flavoring), if using.
Boil a kettle of water to have ready, if needed, to top up water levels in the canner once the filled jars are added.
Use jar lifter tongs to carefully remove the hot sterilized jars from the water, one at a time, emptying the water from the jars back into the pot. Drain jars well and place on heat-proof board. Do be very careful as this is scalding hot water.
Using a ladle, or a heat-proof glass measuring cup, and a wide-mouthed canning funnel, fill the hot sterilized jars with the marmalade, leaving about ¼” headroom in each jar to allow for expansion during the hot water processing. Remove any trapped air bubbles in the jars with a chopstick or small heatproof spatula. Add more marmalade to jars, if necessary, to bring marmalade up to ¼“ from jar rims. Wipe the jar rims with a clean damp cloth to remove any stickiness that could prevent the lids from sealing properly to the jars.
Center the lids on jars so the sealing compound on the lid edges aligns with the jar rims. Fingertip tighten the ring/screw bands until resistance is encountered. Do not over-tighten.
Using jar lifter tongs, carefully place filled jars upright in wire basket positioned in the canner, ensuring jars do not touch each other or fall over. If a canner is not completely full of filled jars, add enough hot empty jars to fill it to capacity to prevent filled jars from toppling over during processing. Make sure the empty jars are already hot as cold jars immersed in boiling hot water are likely to crack. Let the empty jars fill with water from the canner as they are submerged.
Ensure the water level is at least 1” above the tops of jars, adding more boiling water as necessary. Cover with canner lid. Increase the heat to return the water to a full rolling boil then decrease the heat to just keep the water at a moderately rolling boil but not boiling over. Process jars in the hot water bath for 10 minutes, adjusting time as and if necessary for altitude. Start timing the processing from the point at which a full rolling boil is reached after filled jars have been added to the canner. At the end of the processing time, turn off heat and remove canner lid.
Let jars sit in the hot water for 5 minutes then, using jar lifter tongs, carefully remove the jars filled with marmalade, one at a time, upright and without tipping them, and transfer them to a heat-proof cutting board, that has been covered with a towel, to cool completely. Listen for the “pop” or “ping” sound as the bottles seal over the next few minutes or hours. The lids of properly sealed jars will curve downward.
Cover jars with a towel to keep light out and let jars rest, undisturbed, on counter for 24 hours. Then, test each jar for proper sealing by very lightly pressing down on the center of each jar lid. If the lid is already pressed downward, and does not pop back up, it is properly sealed. Any jars that do not pass this test should be refrigerated and the marmalade used within a week or so.
Store properly sealed marmalade bottles in cool, dark place and allow to rest for at least 1-2 weeks to allow flavor to fully develop before opening. Use marmalade within 1 year of bottling. Refrigerate marmalade once jar has been opened.
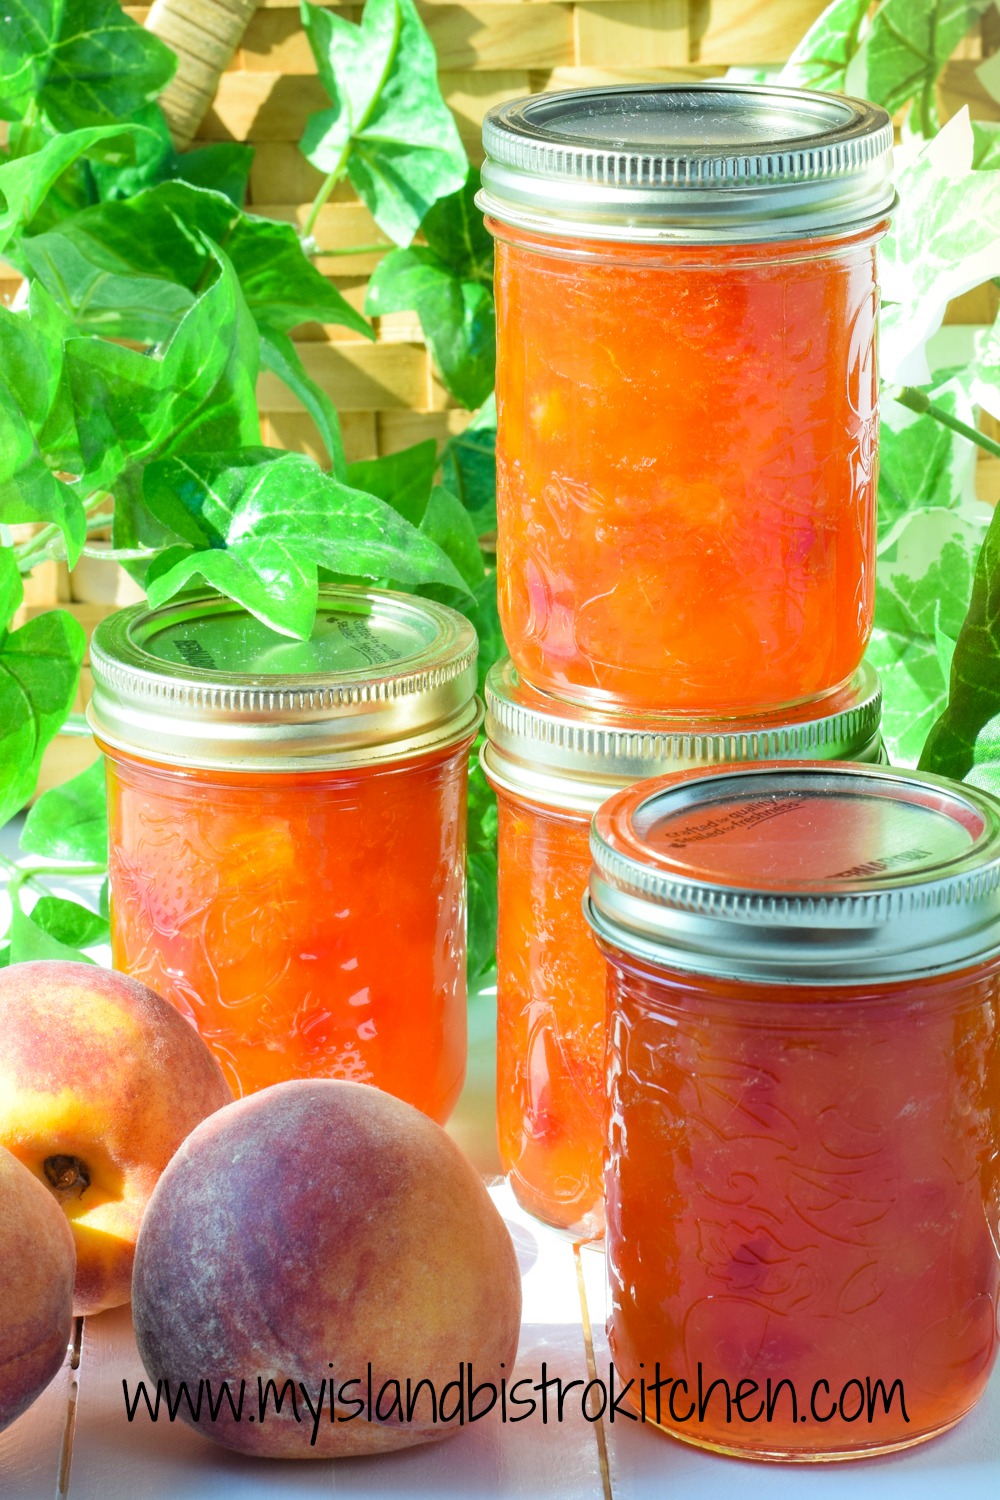
Yield: Apx. 5 half-pints
*Note that it is difficult to give a precise cooking time for the marmalade since various factors, including the pectin level of the fruit and heat level of stove, can vary significantly and may affect cooking and marmalade-setting times. If you don’t have a candy thermometer or instant read thermometer to check doneness of marmalade at 217°F-220°F, place 2-3 freezer-proof saucers in the freezer when beginning to cook the marmalade. To test for doneness, place a small amount of marmalade on chilled saucer and swirl saucer around. Let marmalade sit, untouched, for about a minute, then gently push your finger through the marmalade. If the marmalade holds its shape (i.e., does not run back together after the finger has been removed from the marmalade), it is set and ready to bottle. If not, continue to cook mixture, repeating the “chill” test about every 3 minutes or so (always removing the pot from the heat while conducting the chill test) until the marmalade passes the “chill” test. Do not overcook as it will result in a very thick marmalade, dark in color.
It is recommended that the first “chill” test be conducted somewhere around the 45-50 minute point in the cooking process. It does not necessarily mean that the marmalade will be done in that timeframe and more than one “chill” test may need to be performed.
If you have made this recipe and enjoyed it and/or wish to share it with your friends and family, please do so on social media but be sure to share the direct link to this posting from my website.
Connect with My Island Bistro Kitchen on Social Media
Join the Facebook page for My Island Bistro Kitchen: https://www.facebook.com/MyIslandBistroKitchen/
Follow “the Bistro” on “X” (formerly Twitter): https://twitter.com/PEIBistro/
See the drool-worthy gallery of mouth-watering food photos from My Island Bistro Kitchen on Instagram: https://www.instagram.com/peibistro/
Follow “the Bistro” on Pinterest at https://www.pinterest.ca/peibistro/ and pin the Pinterest-ready photos at the end of this posting to your favorite Pinterest boards!
Peach Marmalade
Ingredients
- 7 large peaches, washed
- Zest of one orange
- 1 medium-sized orange, seeded and chopped into small pieces
- Zest of ½ lemon
- ½ medium-sized lemon, seeded and chopped into small pieces
- 1/3 cup maraschino cherries, chopped
- 1½ tbsp Peach Schnapps (optional) or ½ tsp almond flavoring (optional)
- Granulated sugar equal to weight of fruit pulp
Instructions
- Wash canning jars and lids in hot soapy water. Rinse. Drain jars.
- Fill a large-sized stockpot about two-thirds full of hot tap water. Fit stockpot with wire rack. Place the jars, on the rack, upright and in single layer, into the water. Use more than one stockpot if necessary to accommodate all jars needed for the recipe. Do not stack jars on top of each other in stockpot. Ensure the jars are fully submerged, each jar filled with water, and that the water is at least an inch over the tops of the jars, adding more if necessary. Cover, bring to a boil over medium-high heat, then reduce heat slightly and boil gently for 10 minutes. Turn off heat and leave the jars in the hot water to have ready to fill once the marmalade is ready.
- Heat 2-3 cups of water in saucepan over medium-high heat. When boiling, reduce heat to low and, one at a time, plunge peaches in boiling water for about 1 minute to loosen skin. Peel each peach as soon as it comes out of the hot water. Halve the peaches and remove and discard stones. Dice the peaches into small pieces, about ½“ in size.
Place cut-up peaches in large measuring cup or bowl. Add the chopped orange and lemon along with the orange and lemon zest. Weigh the amount of fruit and use the same weight of granulated sugar. For example, if the total amount of the pulp equals 1 pound, then 1 pound of sugar will be required.
Place pulp and sugar into a medium-sized stockpot. Stir. Bring mixture to a boil over medium-high heat, stirring frequently to prevent scorching. Immediately reduce heat and cook, uncovered, at a slow gentle boil until mixture thickens and reaches a temperature of 217°F on a candy thermometer (see Note below for alternative method for testing marmalade doneness). Stir mixture frequently to prevent scorching. Be patient, this can be expected to take an hour or so. The marmalade may be cooked to a temperature of 220°F but it will be a thicker marmalade and less pliable to spread than if it is cooked to 217°F.
- When the marmalade has been cooking for about 20-30 minutes, fill the hot water canner about half full of hot tap water. Cover and bring to a boil over medium-high heat to have it ready for processing of the filled jars. Reduce heat to keep canner water hot.
When marmalade has reached 217°F (or 220°F, if you wish) , remove the stockpot from heat and skim off any foam that may still remain on the marmalade. Stir in cherries and Peach Schnapps (or almond flavoring), if using.
- Boil a kettle of water to have ready, if needed, to top up water levels in the canner once the filled jars are added.
- Use jar lifter tongs to carefully remove the hot sterilized jars from the water, one at a time, emptying the water from the jars back into the pot. Drain jars well and place on heat-proof board. Do be very careful as this is scalding hot water.
- Using a ladle, or a heat-proof glass measuring cup, and a wide-mouthed canning funnel, fill the hot sterilized jars with the marmalade, leaving about ¼” headroom in each jar to allow for expansion during the hot water processing. Remove any trapped air bubbles in the jars with a chopstick or small heatproof spatula. Add more marmalade to jars, if necessary, to bring marmalade up to ¼“ from jar rims. Wipe the jar rims with a clean damp cloth to remove any stickiness that could prevent the lids from sealing properly to the jars.
- Center the lids on jars so the sealing compound on the lid edges aligns with the jar rims. Fingertip tighten the ring/screw bands until resistance is encountered. Do not over-tighten.
- Using jar lifter tongs, carefully place filled jars upright in wire basket positioned in the canner, ensuring jars do not touch each other or fall over. If a canner is not completely full of filled jars, add enough hot empty jars to fill it to capacity to prevent filled jars from toppling over during processing. Make sure the empty jars are already hot as cold jars immersed in boiling hot water are likely to crack. Let the empty jars fill with water from the canner as they are submerged.
- Ensure the water level is at least 1” above the tops of jars, adding more boiling water as necessary. Cover with canner lid. Increase the heat to return the water to a full rolling boil then decrease the heat to just keep the water at a moderately rolling boil but not boiling over. Process jars in the hot water bath for 10 minutes, adjusting time as and if necessary for altitude. Start timing the processing from the point at which a full rolling boil is reached after jars have been added to the canner. At the end of the processing time, turn off heat and remove canner lid.
Let jars sit in the hot water for 5 minutes then, using jar lifter tongs, carefully remove the jars filled with marmalade, one at a time, upright and without tipping them over, and transfer them to a heat-proof cutting board, that has been covered with a towel, to cool completely. Listen for the “pop” or “ping” sound as the bottles seal over the next few minutes or hours. The lids of properly sealed jars will curve downward.
Cover jars with a towel to keep light out and let jars rest, undisturbed, on counter for 24 hours. Then, test each jar for proper sealing by very lightly pressing down on the center of each jar lid. If the lid is already pressed downward, and does not pop back up, it is properly sealed. Any jars that do not pass this test should be refrigerated and the marmalade used within a week or so.
- Store properly sealed marmalade bottles in cool, dark place and allow to rest for at least 1-2 weeks to allow flavor to fully develop before opening. Use marmalade within 1 year of bottling. Refrigerate marmalade once jar has been opened.
Recipe Notes
Yield: Apx. 5 half-pints
*Note that it is difficult to give a precise cooking time for the marmalade since various factors, including the pectin level of the fruit and heat level of stove, can vary significantly and may affect cooking and marmalade-setting times. If you don’t have a candy thermometer or instant read thermometer to check doneness of marmalade at 217°F-220°F, place 2-3 freezer-proof saucers in the freezer before beginning to cook the marmalade. To test for doneness, place a small amount of marmalade on chilled saucer and swirl saucer around. Let marmalade sit, untouched, for about a minute, then gently push your finger through the marmalade. If the marmalade holds its shape (i.e., does not run back together after the finger has been removed from the marmalade), it is set and ready to bottle. If not, continue to cook mixture, repeating the “chill” test about every 3 minutes or so (always removing the pot from the heat while conducting the chill test) until the marmalade passes the “chill” test. Do not overcook as it will result in a very thick marmalade, dark in color.
It is recommended that the first “chill” test be conducted somewhere around the 45-50 minute point in the cooking process. It does not necessarily mean that the marmalade will be done in that timeframe and more than one “chill” test may need to be performed.
[Copyright My Island Bistro Kitchen]
Pin Me To Pinterest!
You may also enjoy these other Marmalade recipes from My Island Bistro Kitchen:
Rhubarb Marmalade
Green Tomato Marmalade
[This post and recipe were last updated on August 26, 2024]
