

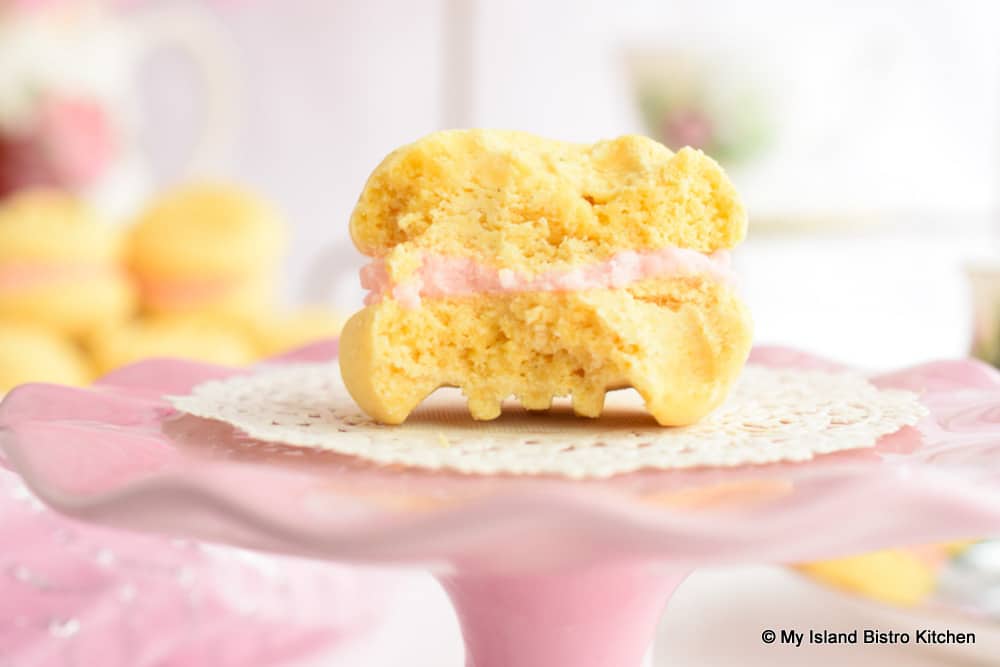
These Custard Sandwich Cookies bear some resemblance to those that many know as Melting Moments, my recipe for which can be found here. The primary difference between these Custard Sandwich Cookies and Melting Moments is that the latter contains cornstarch giving the cookies what is commonly known as a “short”, ever-so-slightly crisp, texture while the Custard Sandwich Cookies contain vanilla custard powder that gives them a wonderful soft, creamy, and slightly crumbly texture as well as additional flavor and a more yellowish color.

Apart from the custard powder, the ingredients called for in this recipe are all, what I could class as, basic pantry staples. Custard powder can be found in most large supermarkets, usually either in the baking supplies aisle or where dry jello and instant pudding mixes are found. Here in Canada, the most common brand of custard powder is Bird’s Custard Powder. This is also the powder used in the filling for Nanaimo Bars (my recipe here) so it’s great to have a couple of uses for the container of custard powder which, of course, can always be used to make a simple custard dessert.
I recommend the use of unsalted butter in this recipe because it allows me to control how much salt is added. These Custard Sandwich Cookies should not have a salty taste as they melt in the mouth. However, if all you have on hand is salted butter, it may be used but omit the ¼ tsp salt called for in the recipe. Whatever butter is used (salted or unsalted), ensure it is softened well at room temperature before use in this recipe. Since the butter flavor is a key aspect of these cookies, I recommend no substitutions for butter.
The method for making Custard Sandwich Cookies is simple. The butter is creamed and then the icing sugar is added and creamed with the butter. The dry ingredients are blended in and the dough is formed into small balls which are then flattened with fork tines. If, by chance, you find the dough is too soft for forming into balls, it can be refrigerated, tightly covered, for 10-15 minutes.

I highly recommend the use of digital scales in making this recipe. My digital scales are one of the most important and frequently used tools in my kitchen and I recommend every cook/baker invest in them as they give the most accurate measurements of ingredients and weights of consistent-sized balls and cookies, like these.
For sandwich cookies, it is important to have equally sized cookies so that the cookies match up perfectly when they are paired and sandwiched together. Therefore, I suggest weighing out the dough in equal portions and then forming the balls. For the cookies in the photos in this post, I used 20 grams of dough per single cookie ball though I have made them with 18 grams of dough and they are somewhat daintier, perfectly sized for sweet trays or afternoon tea.
These cookies do not need to be overly large as, remember, there will be two cookies to every one sandwiched cookie. Isn’t it great that you can trick your mind into thinking you’re only eating one cookie when, in fact, you’re actually consuming two and you don’t have to feel guilty about doing so!
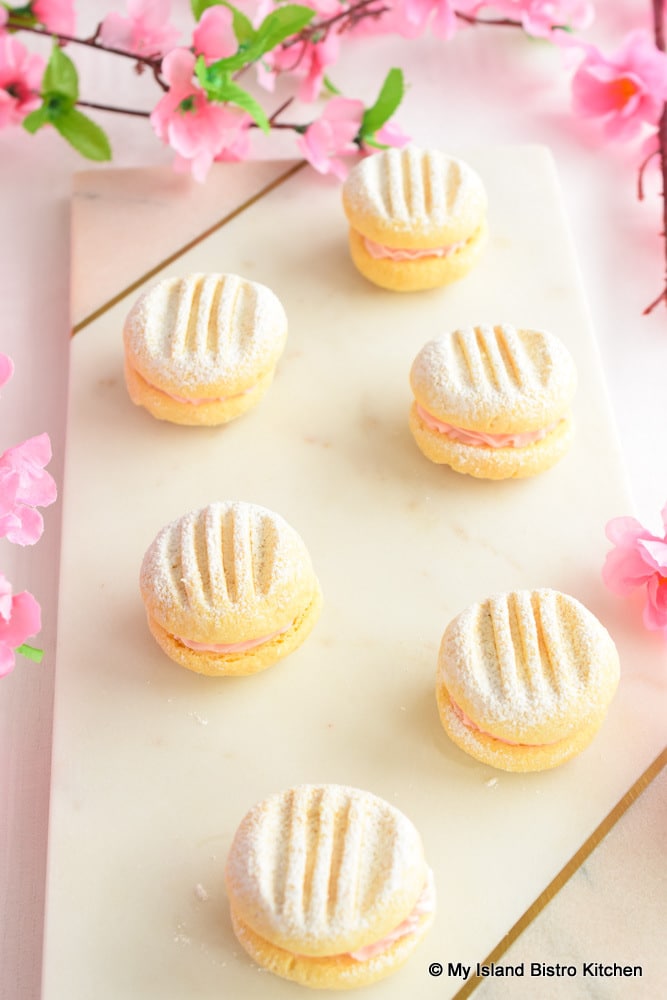
Once the dough balls are placed, about 1¾“ apart, on parchment-lined baking sheet(s), dip the tines of a fork into dry custard powder and then lightly press each ball down with the custard powder-dusted fork tines, to about ¼“ thick. The ridges formed by the fork tines (shown in photo below) add an interesting appearance to the cookies.
Bake the cookies in a preheated 300°F oven for approximately 15-18 minutes, turning the pan once halfway through the baking process. It’s important that these cookies are not over-baked as they will become dry. They will basically be almost the same color coming out of the oven as they were going in and they should not be browned on any side. The texture of the cookies is meant to be quite soft and creamy, and somewhat dense, as these will melt in the mouth!
Because the hot cookies are quite delicate and fragile coming out of the oven, it’s best to let them cool on the baking sheet for apx. 8-10 minutes to set before carefully transferring them to a wire rack to cool completely before assembling them into sandwich cookies. If using flat, unrimmed baking sheets, the simplest way to do this is to place a large wire cooling rack right beside the cookie sheet and simply slide the parchment paper and cookies straight onto the wire rack.
The Custard Sandwich Cookies are assembled in pairs with buttercream icing. I like to color the icing using gel icing coloring but this is totally optional. If using gel coloring, know that it is highly pigmented and only a small tidbit on the tip of a toothpick will be needed to color the icing. Start with a lot less color than you think you need – you can always add more but you can’t remove it if you add too much coloring for your liking. I think these cookies look lovely with soft pastel shades of icing. My preference is to use gel icing colors versus liquid food coloring as gel colors are more true colors and do not add any extra liquid to whatever is being colored as is the case with liquid food colors.

I use an icing bag and a cake decorating piping tip (the cookies in the photos were done with a closed star decorating tip #30) to pipe the icing around the outside edges of the flat sides of half the cookies with a dob of icing in the cookie center. The icing can, however, certainly be applied with a knife or an offset metal spatula. The advantage of piping the icing versus spreading it on to the cookies with a knife/offset spatula is that it gives a more tidy and decorative appearance to the cookies.
I recommend piping the icing in about 1/16” from the cookie edge to allow for slight icing spread when the top cookie is lightly pressed on to the icing. To complete the sandwich cookie assembly, place a plain, non-iced, cookie, flat side down, on top of the icing, pressing it very gently into the icing but not so much as to destroy the pretty piped icing.

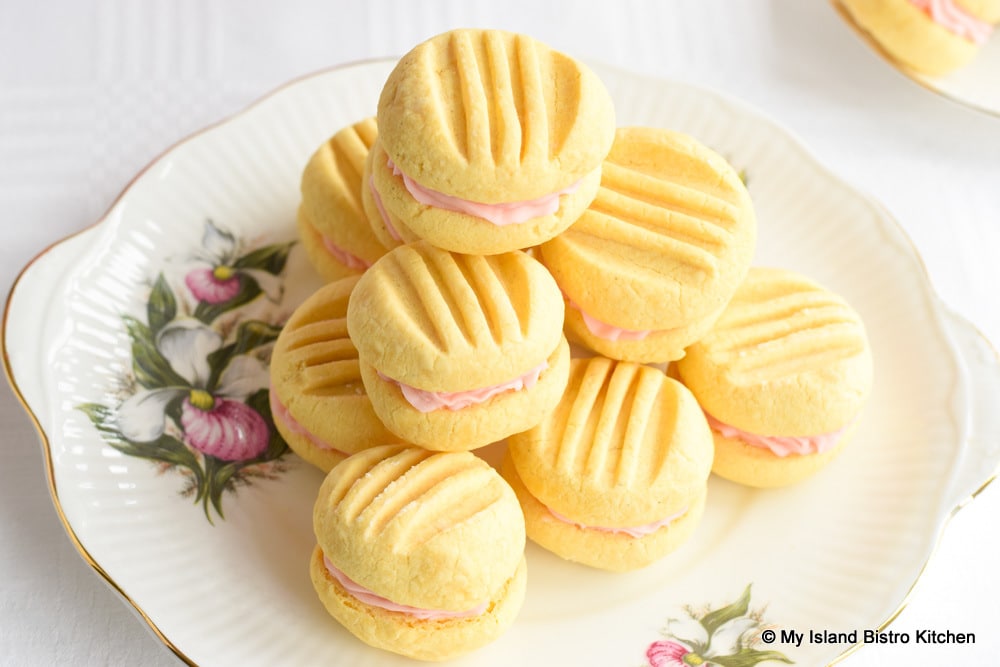
These cookies are best served at room temperature but best stored in the refrigerator (or freezer for longer storage) until needed, especially if milk or whipping cream is an ingredient in the icing. They can be served plain (as seen in photo below) or dusted with icing sugar at time of serving (shown in photo above). While these cookies are typically presented as sandwich cookies (that little burst of buttercream icing just takes these cookies up a notch!), they can certainly be left perfectly plain and served as single cookies, too.

No matter how they’re served, these cookies are divine and they are absolutely splendid with a fine cup of tea of choice! The pretty cup I have chosen from my teacup collection today is Elizabethan Fine Bone China’s “Lady Slipper” pattern from their Canadian Provincial Flowers series. It pairs well with the cake plate I have used in some of the photos and that has the same pattern from the same china company. The Lady’s Slipper is, of course, the provincial floral emblem of Prince Edward Island so has significant meaning to me.

[Scroll to bottom of post for printable recipe]
Custard Sandwich Cookies
Ingredients:
Cookies:
1 cup unsalted butter, room temperature
½ cup icing sugar (aka powdered sugar or confectioner’s sugar)
1 tsp pure vanilla extract
1½ cups all-purpose flour
½ cup custard powder
1½ tsp baking powder
1/4 tsp salt
Icing:
3 tbsp butter (salted or unsalted), room temperature
1/8 tsp pure almond extract
Dash of pure vanilla extract
1 cup sifted icing sugar
1 tbsp+ water, milk, or whipping cream
Food coloring of choice (optional)
Method:
Cookies:
Preheat oven to 300°F. Line baking sheet(s) with parchment paper.
Sift or sieve the flour, custard powder, baking powder, and salt into a bowl. Set aside.
In bowl of stand mixer fitted with paddle attachment, and with mixer speed set to medium-high, cream the butter, until smooth and creamy, stopping as necessary to scrape sides of bowl. With mixer set on slow speed, add the icing sugar, ¼ cup at a time. Increase mixer speed to medium-high when all of the icing sugar has been added and cream the sugar well with the butter, for about 2-3 minutes. Beat in vanilla.
With mixer on low speed, add the dry ingredients to the creamed mixture and blend until well incorporated.
Form dough into small round balls (either 18 or 20 grams dough per ball make lovely sized cookies). Place balls on prepared baking sheet(s), spacing the balls about 1¾” apart. With tines of a fork dipped in custard powder, flatten each ball to apx. ¼“ thick.
Bake for approximately 15-17 minutes, turning the pan once halfway through the baking process. Don’t over-bake as cookies will become dry. Let cookies cool on baking sheet for apx. 8-10 minutes then transfer cookies to wire rack to cool completely before adding icing and assembling into sandwich cookies.
Icing:
Place butter in bowl of stand mixer fitted with paddle attachment and beat at medium speed until creamy, stopping to scrape sides of bowl, if necessary. Blend in the almond and vanilla extracts. Reduce mixer speed to low and gradually add the sifted icing sugar, about ¼ cup at a time. Add the water (or milk or whipping cream), a teaspoon at a time as the icing sugar is being blended in. If tinting icing, add a very tiny amount of gel icing color of choice. Increase speed to medium-low to blend ingredients then increase speed to high and beat an additional minute to ensure ingredients are well combined and icing is smooth. Additional liquid may be required to make icing of desired spreading/piping consistency. If adding additional liquid, add by ½ teaspoon at a time. Icing should be of spreading/piping consistency but not “soupy”.
Assembly:
Using a cake decorating tip of choice and piping bag filled with the icing, pipe icing all around outer edge (in about 1/16” from edge) of the flat side of half the cookies. Pipe a dob of icing in center of cookie. Alternatively, the icing can be applied using a knife or offset metal spatula. Top each iced cookie with a plain cookie, flat side toward icing. Press very gently to adhere cookie to icing. Cookies are now ready for serving. Cookies may be refrigerated in tightly sealed container for up to 3 days prior to serving or, for longer storage, freeze in airtight freezer-safe container. Cookies are best served at room temperature. Serve plain or dust with icing sugar at time serving.
Yield: Apx. 13-14 double/paired cookies (depending on amount of dough used per cookie)
If you have made this recipe and enjoyed it and/or wish to share it with your friends and family, please do so on social media but be sure to share the direct link to this posting from my website.
Connect with My Island Bistro Kitchen on Social Media
Join the Facebook page for My Island Bistro Kitchen: https://www.facebook.com/MyIslandBistroKitchen/
Follow “the Bistro” on “X” (formerly Twitter): https://twitter.com/PEIBistro/
See the drool-worthy gallery of mouth-watering food photos from My Island Bistro Kitchen on Instagram: https://www.instagram.com/peibistro/
Follow “the Bistro” on Pinterest at https://www.pinterest.ca/peibistro/ and pin the Pinterest-ready photo at the end of this posting to your favorite Pinterest boards!
PIN ME TO PINTEREST!


Custard Sandwich Cookies
Ingredients
Cookies:
- 1 cup unsalted butter, room temperature
- ½ cup icing sugar (aka powdered sugar or confectioner’s sugar)
- 1 tsp pure vanilla extract
- 1½ cups all-purpose flour
- ½ cup custard powder
- 1½ tsp baking powder
- 1/4 tsp salt
Icing:
- 3 tbsp butter (salted or unsalted), room temperature
- 1/8 tsp pure almond extract
- Dash of pure vanilla extract
- 1 cup sifted icing sugar
- 1 tbsp+ water, milk, or whipping cream
- Food coloring of choice (optional)
Instructions
Cookies:
-
Preheat oven to 300°F. Line baking sheet(s) with parchment paper.
-
Sift or sieve the flour, custard powder, baking powder, and salt into a bowl. Set aside.
-
In bowl of stand mixer fitted with paddle attachment, and with mixer speed set to medium-high, cream the butter, until smooth and creamy, stopping as necessary to scrape sides of bowl. With mixer set on slow speed, add the icing sugar, ¼ cup at a time. Increase mixer speed to medium-high when all of the icing sugar has been added and cream the sugar well with the butter, for about 2-3 minutes. Beat in vanilla.
-
With mixer on low speed, add the dry ingredients to the creamed mixture and blend until well incorporated.
-
Form dough into small round balls (either 18 or 20 grams dough per ball make lovely sized cookies). Place balls on prepared baking sheet(s), spacing the balls about 1¾” apart. With tines of a fork dipped in custard powder, flatten each ball to apx. ¼“ thick.
-
Bake for approximately 15-17 minutes, turning the pan once halfway through the baking process. Don’t over-bake as cookies will become dry. Let cookies cool on baking sheet for apx. 8-10 minutes then transfer cookies to wire rack to cool completely before adding icing and assembling into sandwich cookies.
Icing:
-
Place butter in bowl of stand mixer fitted with paddle attachment and beat at medium speed until creamy, stopping to scrape sides of bowl, if necessary. Blend in the almond and vanilla extracts. Reduce mixer speed to low and gradually add the sifted icing sugar, about ¼ cup at a time. Add the water (or milk or whipping cream), a teaspoon at a time as the icing sugar is being blended in. If tinting icing, add a very tiny amount of gel icing color of choice. Increase speed to medium-low to blend ingredients then increase speed to high and beat an additional minute to ensure ingredients are well combined and icing is smooth. Additional liquid may be required to make icing of desired spreading/piping consistency. If adding additional liquid, add by ½ teaspoon at a time. Icing should be of spreading/piping consistency but not “soupy”.
Assembly:
-
Using a cake decorating tip of choice and piping bag filled with the icing, pipe icing all around outer edge (in about 1/16” from edge) of the flat side of half the cookies. Pipe a dob of icing in center of cookie. Alternatively, the icing can be applied using a knife or offset metal spatula. Top each iced cookie with a plain cookie, flat side toward icing. Press very gently to adhere cookie to icing. Cookies are now ready for serving. Cookies may be refrigerated in tightly sealed container for up to 3 days prior to serving or, for longer storage, freeze in airtight freezer-safe container. Cookies are best served at room temperature. Serve plain or dust with icing sugar at time serving.
Recipe Notes
Yield: Apx. 13-14 double/paired cookies (depending on amount of dough used per cookie)
[Copyright My Island Bistro Kitchen]