Victoria Sponge Cake – sometimes called Victoria Sandwich – is one of the most basic, simple cake recipes. Essentially, it is made with basic pantry ingredients, filled with a favorite jam and whipped cream, and is unfrosted.
Why is it sometimes called a Victoria Sandwich? Well, there is a delectable filling of jam and whipped cream sandwiched in between two layers of cake so, when sliced, it does somewhat visually resemble a sandwich made with two bread slices with a filling in between. So, I guess you could call it a sweet sandwich!
Queen Victoria was said to have enjoyed sponge cake with her afternoon tea and it is believed the cake was named in her honor. The Victoria Sponge is one of the most recognized and quintessential teatime cakes that has endured throughout time. It’s a cake that never goes out of style.
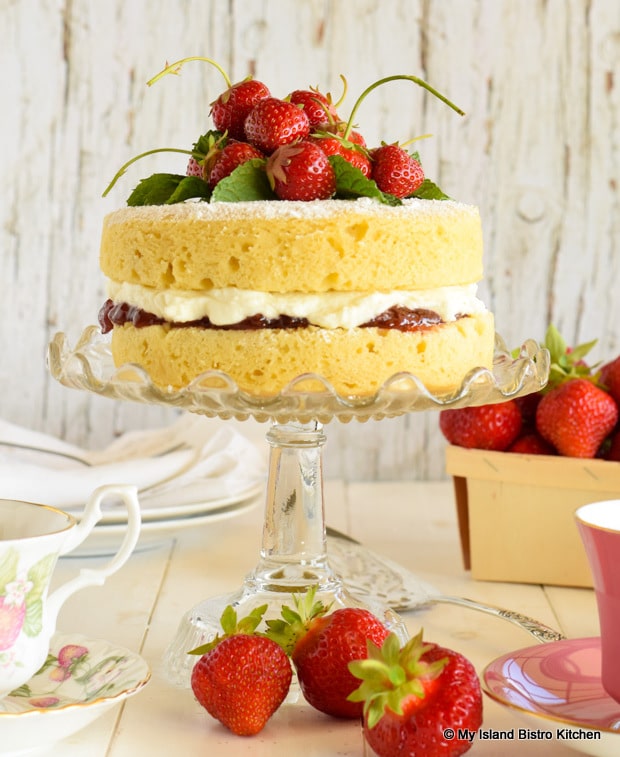
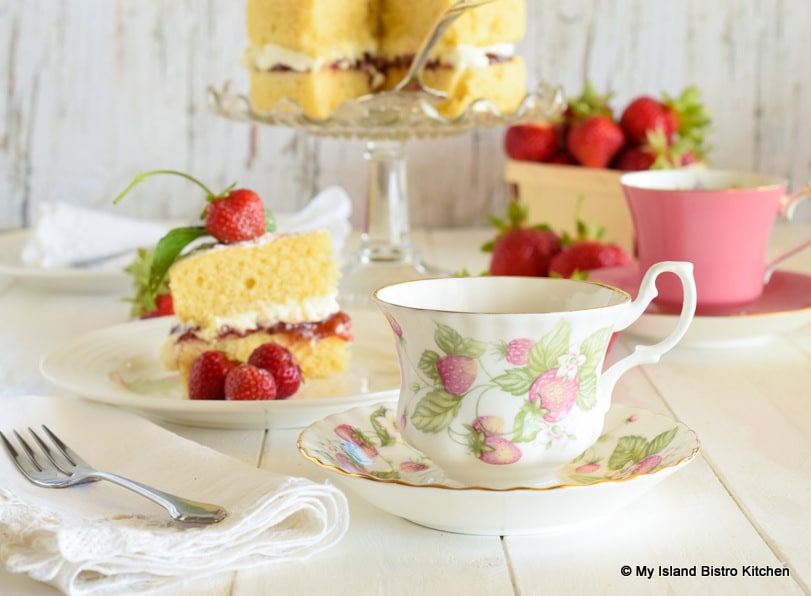
The cake can be whipped up in little time and all it has to do is cool to room temperature, be filled and assembled, and it is ready for teatime, or any time, for that matter. I love a slice of a really good, fresh sponge cake, especially when served with a fine cup of tea in, of course, a china teacup (it appears I may have a few in my collection)! One of my favorite teas to enjoy with a slice of a Victoria Sponge is Darjeeling.
There are as many variations to the Victoria Sponge Cake — in filling, ingredient content, method, and shape of pan in which the cake is baked – as there are bakers. What follows is my recipe and I will proceed to share my tips for making this simple but tasty cake.
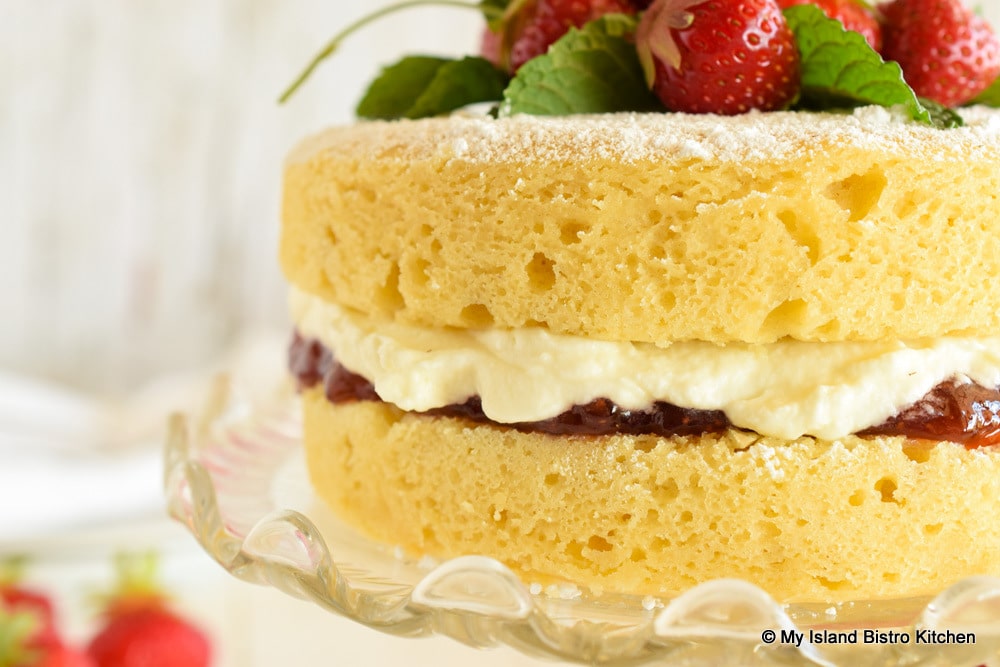
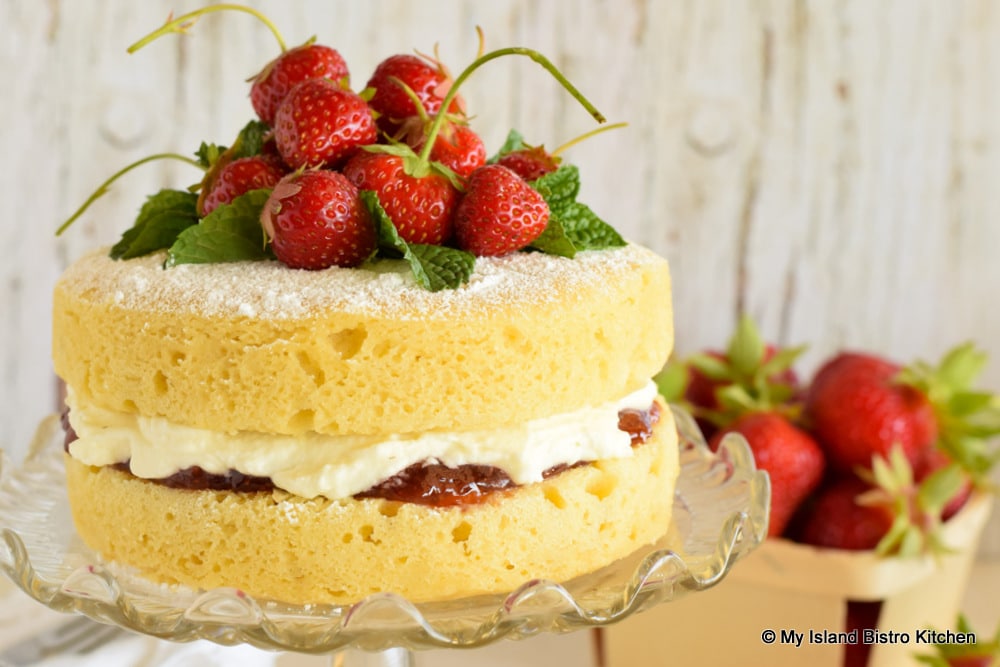
Apart from the lovely taste and light and airy texture of a good sponge cake (which, if you look closely in the photo above, does actually resemble a sponge) and the fact that it is made with basic pantry ingredients that don’t generally require a special trip to the supermarket, there is one other advantage to a simple sponge cake: It follows a very simple 1:1:1:1 ratio which makes the cake easily scalable if more servings are needed. Just know that, if making a larger version of the cake than this recipe, larger pans will be required, and all ingredients (in addition to the four basic ones) must also be scaled upward accordingly. More batter and larger pans than called for in my recipe below may also affect baking time so the old “it’s done when the cake tester inserted into the center of the cake comes out clean” test will need to be applied.
So, let’s explain the significance of ratio to making this sponge cake. First, determine the size of cake you want and how many eggs would be appropriate for that size of cake. Weigh the eggs in their shells and that weight then becomes the weight requirement for the butter, sugar, and flour. So, the ratio is the exact same weight for each of the four main ingredients – eggs, butter, flour, and sugar.
Yes, you will need a set of scales (preferably digital) for my cake recipe since the quantities needed are given in weight (ounce) measurements, not in cups. I could not get along in my kitchen without my digital scales. They provide the most accurate measurement of ingredients and I highly recommend anyone doing cooking or baking invest in such scales. They are readily available at quite reasonable prices, in my view, especially considering how useful they are. Scales remove the guesswork and/or inaccuracy in ingredient measurement.
Due to the cake’s absorbent sponge tendencies, and the fact that it does not hold over well for leftovers, I typically make just a small 6” sponge cake unless, of course, I am serving a large number of people in which case, I will scale the ingredients according to the above-explained ratio and use larger pans. A six-inch double layer cake cuts lovely sized pieces, especially for teatime fare. It will cut into approximately six slices, plus or minus depending on the size of slices cut.
So, because I know that each of my 6” cake pans will require batter that has one egg, I use two large eggs for the entire cake, each weighing (in their shell – make sure they are weighed in the shell), 2 ounces. My egg weight for the 6” cake will, therefore, be 4 ounces. Using the 1:1:1:1 ratio, that means I will also be using 4 ounces each of butter, sugar, and flour. Easy-peasy….and it also demonstrates the importance of having a set of scales so the exact measurements are used.
I am using caster sugar in this recipe because it is a superfine sugar and that type of sugar lends lovely texture to the cake. The sugar is also sold under the names of “berry sugar”, “superfine sugar”, or “instant dissolving” sugar. Regular granulated sugar, in the same amount, can be used with good results but I believe caster sugar will give better results.
It is very important that all ingredients (unless otherwise indicated in the recipe) be at room temperature for this cake so remove the eggs, butter, and milk from the refrigerator and bring them to room temperature before beginning to make the cake. Having all ingredients at the same room temperature will help them to blend together better. It will aid in preventing the batter from curdling which is likely to happen if cold ingredients come into contact with others that are at room temperature.
Sift the dry ingredients together. This action helps to aerate the dry ingredients that will, in turn, incorporate air into the batter which will give volume and rise to the cake. Don’t skip this step.
This cake recipe uses the creaming method which means that the butter is beaten until smooth and pliable and then the sugar is added and the butter and sugar beaten until the mixture is pale in color and fluffy in texture. This action incorporates air bubbles or pockets into the batter to aid in cake rising and will also help achieve a lighter textured cake.
Crack each egg, individually, into small separate prep bowls. Beat eggs lightly with either a fork or small whisk, just enough to break up the egg and combine the yolk and white. Add the eggs to the creamed butter and sugar, one at a time, along with about 1/2 tablespoon of the flour, beating well after each egg addition. This will help the eggs to emulsify better and is a measure to help prevent the batter from curdling.
Using the folding technique, the remaining flour mixture is folded, about half at a time, gently into the batter by hand using a rubber or silicone spatula, and only until the dry ingredients are barely incorporated. Don’t overmix as the air pockets that have been built into the batter will be lost and the cake is likely to have a denser, more heavy texture which is not characteristic of a good sponge cake. Lastly, a small amount of liquid (milk) is added to the batter to give some additional moisture to the cake and I, basically, use the same folding technique to incorporate the milk gently as stirring it in would destroy the air pockets. Again, don’t overmix the batter.
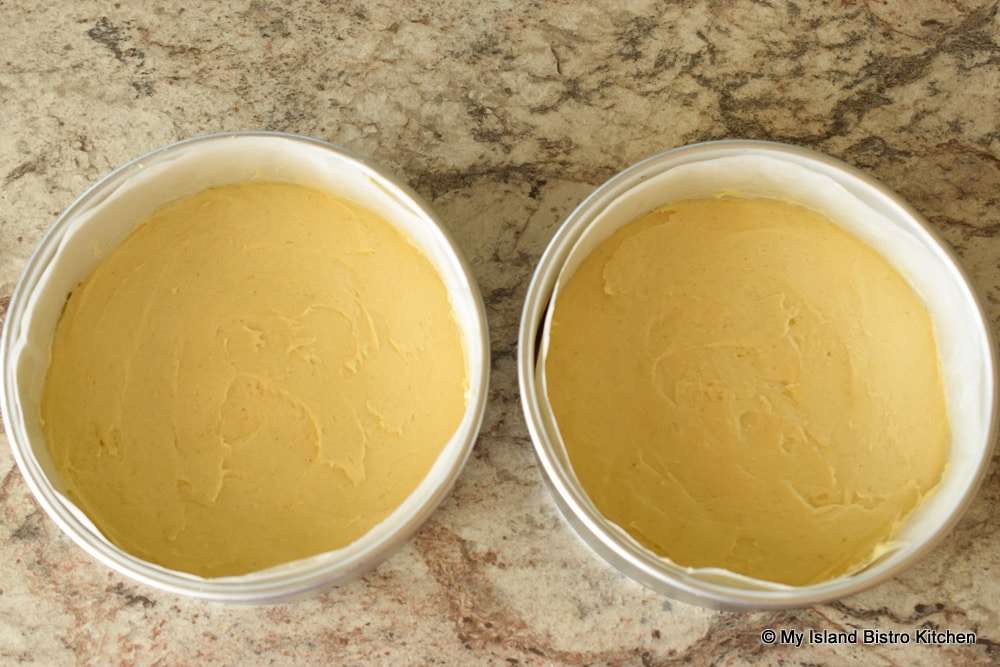
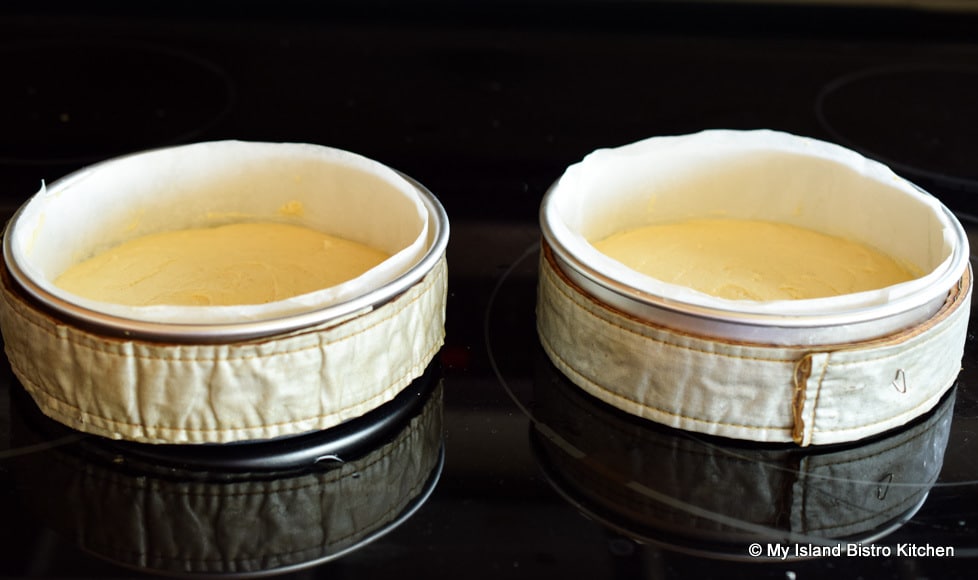
I like to line my baking pans with parchment paper for easy removal of the cake after baking. I cut a circle the size of the pan bottom and then strips that go around the interior sides of the pan and overlap slightly. This is a cake with a delicate crumb and it is best, if possible, to avoid running a knife around the cake edges to remove it from a pan that has not been lined with parchment paper as this can tear the delicate sides of the sponge cake. Since the cake is not frosted, such tears will be obvious and will spoil the look of the sponge cake. I, therefore, recommend lining the pans with parchment paper.
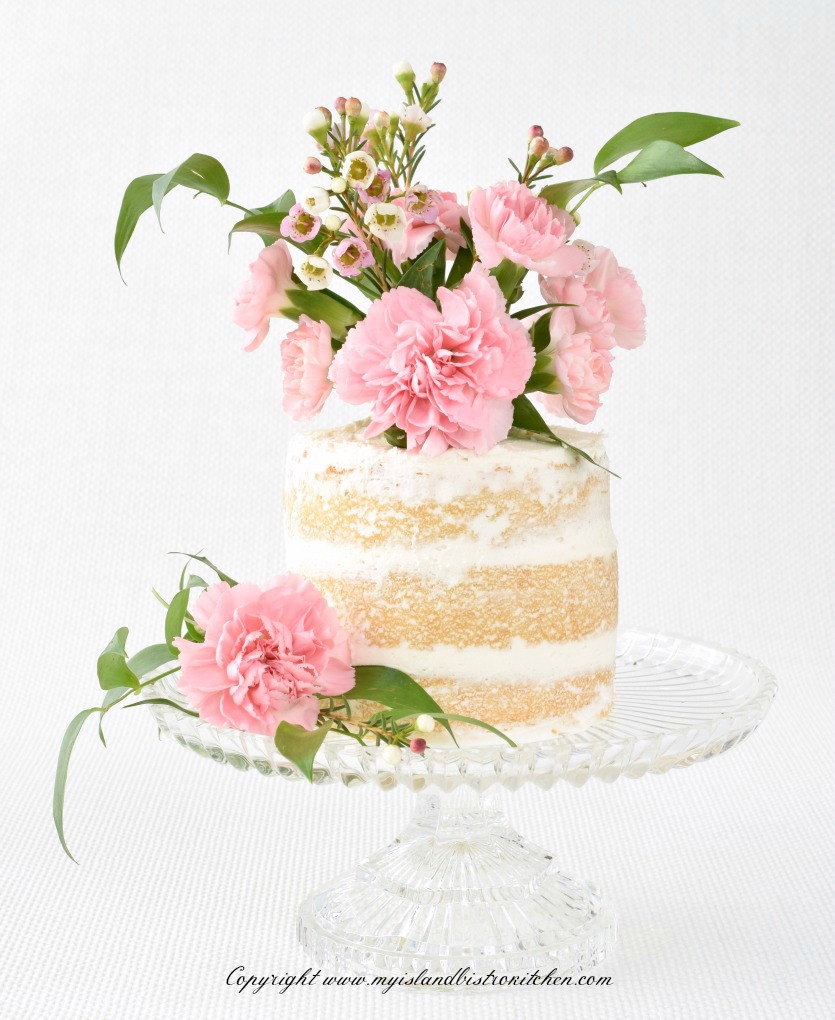
The traditional Victoria Sponge Cake is a true naked cake (meaning it has no frosting) that was way ahead of its time in style, long before the trendy rough-frosted “naked” cakes (like the one below) with very little frosting became popular.
As the Victoria Sponge Cake is typically not frosted but, rather, is simply dusted with confectioner’s sugar (aka icing sugar or powdered sugar), the aim should be to have a cake that has a lovely top as level as possible.
As you have likely discovered, many cakes have a tendency to “dome” as they bake. Now, if a cake is being frosted, the cake can be leveled off with a cake leveler and the raw slice cut into the top of the cake will be covered and concealed with frosting. With an unfrosted sponge cake, however, it does not look very pretty to see the center of the cake top sliced off to make it even and leaving it as a domed cake just does not have the visual presentation that a level, flat topped professional bakery-style cake has.
For this reason, I highly recommend the use of insulated baking strips. Mine are from Wilton and are called Bake Even Strips. These are dampened in water then placed and secured around the exterior of each pan. They help cakes to rise evenly as they bake. I have been using these strips for many years and have had great success with them. There are different brands and names of these strips on the market but they all aim to do the same thing.
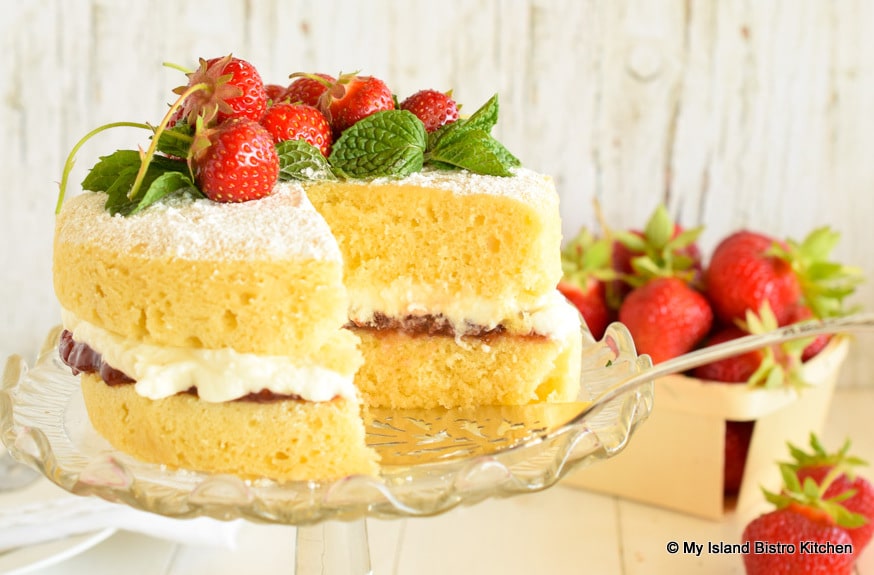
The top of the cake, after it is assembled, can be lightly dusted all over with icing sugar or a stencil can be used to create a design with the sugar if the cake will not have fresh fruit on top. It is quite common to dress the cake up with some fresh fruit that matches the jam used in the cake filling. This cake has a strawberry jam filling so fresh strawberries were the obvious choice to dress up the cake.

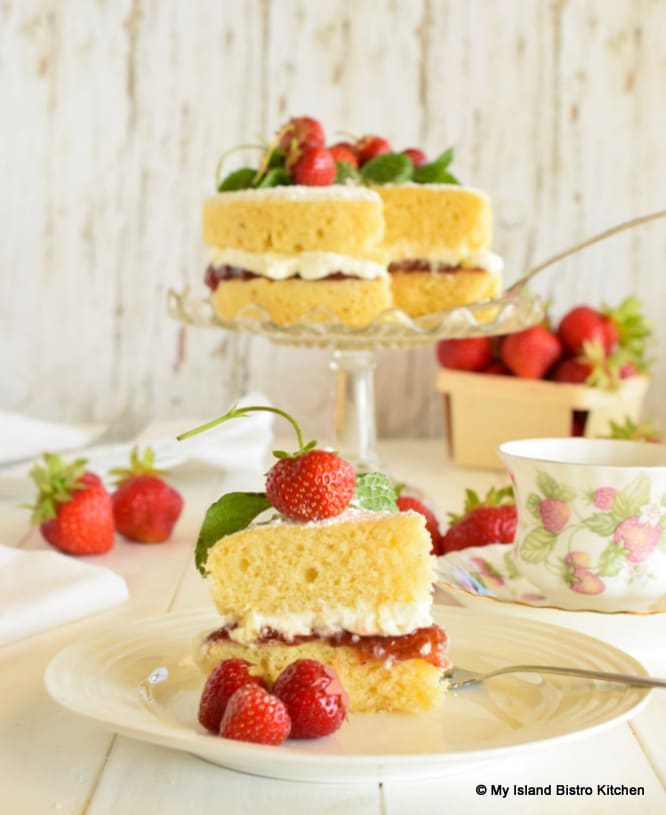
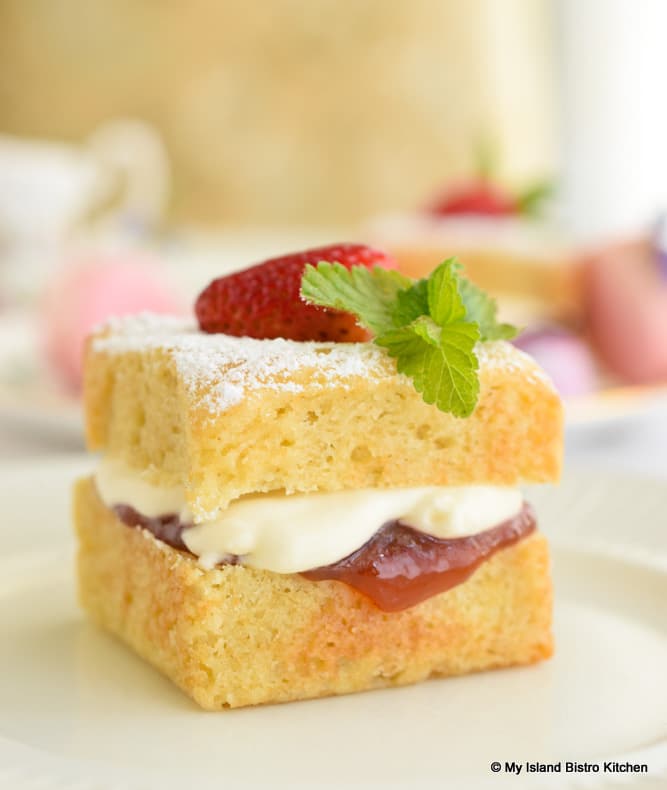
I sometimes make this cake into small, individual-sized cakes (as shown below), especially for presentation on the dessert tray for an afternoon tea event.
Either raspberry or strawberry jam are the typical and common jams used in a Victoria Sponge filling although any other favorite jam could certainly be used. There are variations to the filling that can be made. For example, a layer of curd could be substituted for the jam. Any of my curds would work well – lemon, clementine, rhubarb, or lime, for example. Some curd could also be folded directly into the whipped cream and applied on top of a layer of jam – the best of both worlds, in my opinion! What I have shown here is my version of a very traditional classic Victoria Sponge Cake – a layer of a showy red jam topped with whipped cream in between two layers of sponge cake and decorated with a dusting of icing sugar and fresh fruit on top.
Because of the sponge cake’s tendency to be quite absorbent, the cake is best made and consumed on the same day as it does not hold over well. Once the jam and whipped cream are placed between the two layers of sponge, they start seeping into the cake and can cause the cake to become quite soggy. For this reason, I highly recommend that the cake only be assembled just at the time of serving so it is in its best form.
[Printable recipe follows at end of post]
Victoria Sponge Cake
Ingredients:
Cake:
4 oz butter, room temperature
4 oz caster sugar (aka instant dissolving sugar/berry sugar/superfine sugar)
2 large eggs (each 2 oz, totaling 4 oz), room temperature
1 tsp pure vanilla extract
¼ tsp pure almond extract
4 oz all-purpose flour
1 tbsp cornstarch
1½ tsp baking powder
Scant ½ tsp salt
2 tbsp milk, room temperature
Filling:
1/3 – ½ cup cold whipping cream (36% M.F.)
¾ – 1 tbsp caster sugar
¼ tsp pure vanilla extract or 1/8 tsp pure almond extract
Apx. ¼ cup (plus or minus) raspberry or strawberry jam
Icing sugar (aka powdered sugar or confectioner’s sugar) for decorating cake top
Fresh strawberries or raspberries for decorating cake (optional)
Method:
Bring butter, eggs, and milk to room temperature.
With oven rack positioned in center of oven, preheat oven to 350°F. Lightly spray bottoms and sides of two 6” round cake pans with cooking oil or grease with butter. Line bottom of pan with parchment paper circle. Line interior sides of pans with strips of parchment paper, overlapping ends. Spray lightly with cooking spray.
In order to keep cakes level and even while baking, it is recommended that insulated baking strips (e.g., Bake Even Strips) be applied to the exterior sides of the cake pans, following manufacturer’s directions that usually involves soaking them in water for several minutes.
In small bowl, sift the flour, cornstarch, baking powder, and salt together to aerate the dry ingredients. Set aside.
Crack each egg, individually, into small separate prep bowls. Beat each egg lightly with either a fork or small whisk, just enough to break up the egg and combine the yolk and white.
In bowl of stand mixer fitted with paddle attachment, cream the butter at medium high speed until it is soft and pliable. Reduce speed to medium and add the sugar and beat for 2-3 minutes, stopping to scrape sides of bowl as necessary, until mixture is pale in color and fluffy in texture.
Add the eggs, one at a time, along with approximately ½ tablespoon of the flour mixture with each egg addition. This will help to prevent the batter from curdling. Beat mixture well after each egg addition. Add the vanilla and almond extracts. Beat just until combined.
Remove bowl from stand mixer and, by hand using a rubber or silicone spatula, gently fold half of the remaining flour mixture into the batter. Repeat with the rest of the flour mixture, folding in the dry ingredients just until they are incorporated into the batter. Lastly, add the milk in the same manner to incorporate with the dry ingredients. Do not overmix. Divide batter equally between the two prepared pans, smoothing out the batter evenly.
Bake cakes in center of oven rack for approximately 20-22 minutes, or until cake tester inserted into center of cake comes out clean. Remove cakes from oven and transfer pans to wire cooling rack. Let cakes rest in pans for about 8-10 minutes before removing from pans. Peel off and discard parchment paper and carefully turn cakes right side up onto a wire rack. Cool cakes completely before filling and assembling cake.
Filling: Beat the whipping cream on high speed until very soft peaks show signs of starting to form (see Note 2 below). Reduce speed slightly and slowly add the caster sugar followed by the vanilla or almond extract and beat until soft peaks form.
Assembly: Place one cake, top side down, on serving plate. Spread with the jam followed by the whipping cream. Top with remaining cake, top side up. If desired, sprinkle with icing sugar at time of serving. Decorate with fresh strawberries or raspberries, if desired.
Note 1: Because this is a sponge cake, it means it is quite absorbent. Therefore, it is recommended that the cake be assembled just at the time of serving as, otherwise, the jam and whipped cream will soak into the cake potentially making it soggy.
Note 2: As the whipped cream part of the filling only requires a small amount of whipping cream and sugar, a small hand mixer (versus a large stand mixer) works best to whip the cream. Alternatively, the cream can be vigorously whipped by hand using a whisk.
Yield: 1 – 6” two-layer cake
Connect with My Island Bistro Kitchen on Social Media
Join the Facebook page for My Island Bistro Kitchen: https://www.facebook.com/MyIslandBistroKitchen/
Follow “the Bistro” on “X” (formerly Twitter): https://twitter.com/PEIBistro/
See the drool-worthy gallery of mouth-watering food photos from My Island Bistro Kitchen on Instagram: https://www.instagram.com/peibistro/
Follow “the Bistro” on Pinterest at https://www.pinterest.ca/peibistro/ and pin the Pinterest-ready photo at the end of this posting to your favorite Pinterest boards!
Victoria Sponge Cake
Always a classic, this traditional Victoria Sponge Cake is the quintessential teatime cake with two layers of sponge cake sandwiched together with a filling of a favorite jam and whipped cream.
Ingredients
- 4 oz butter, room temperature
- 4 oz caster sugar (aka instant dissolving sugar/berry sugar/superfine sugar)
- 2 large eggs (each 2 oz, totaling 4 oz), room temperature
- 1 tsp pure vanilla extract
- ¼ tsp pure almond extract
- 4 oz all-purpose flour
- 1 tbsp cornstarch
- 1½ tsp baking powder
- Scant ½ tsp salt
- 2 tbsp milk, room temperature
Filling:
- 1/3 - ½ cup cold whipping cream (36% M.F.)
- ¾ - 1 tbsp caster sugar
- ¼ tsp pure vanilla extract or 1/8 tsp pure almond extract
- Apx. ¼ cup (plus or minus) raspberry or strawberry jam
- Icing sugar (aka powdered sugar or confectioner’s sugar) for decorating cake top
- Fresh strawberries or raspberries for decorating cake (optional)
Instructions
-
Bring butter, eggs, and milk to room temperature.
-
With oven rack positioned in center of oven, preheat oven to 350°F. Lightly spray bottoms and sides of two 6” round cake pans with cooking oil or grease with butter. Line bottom of pan with parchment paper circle. Line interior sides of pans with strips of parchment paper, overlapping ends. Spray lightly with cooking spray.
-
In order to keep cakes level and even while baking, it is recommended that insulated baking strips (e.g., Bake Even Strips) be applied to the exterior sides of the cake pans, following manufacturer’s directions that usually involves soaking them in water for several minutes.
-
In small bowl, sift the flour, cornstarch, baking powder, and salt together to aerate the dry ingredients. Set aside.
-
Crack each egg, individually, into small separate prep bowls. Beat lightly with either a fork or small whisk, just enough to break up the egg and combine the yolk and white.
-
In bowl of stand mixer fitted with paddle attachment, cream the butter at medium high speed until it is soft and pliable. Reduce speed to medium and gradually add the sugar and beat for 2-3 minutes, stopping to scrape sides of bowl as necessary, until mixture is pale in color and fluffy in texture.
-
Add the eggs, one at a time, along with approximately ½ tablespoon of the flour mixture with each egg addition. This will help prevent the batter from curdling. Beat mixture well after each egg addition. Add the vanilla and almond extracts. Beat just until combined.
-
Remove bowl from stand mixer and, by hand using a rubber or silicone spatula, gently fold in half of the remaining flour mixture into the batter. Repeat with the rest of the flour mixture, folding the ingredients just until they are incorporated into the batter. Lastly, add the milk in the same manner to incorporate with the dry ingredients. Do not overmix. Divide batter equally between the two prepared pans, smoothing out the batter evenly.
-
Bake cakes in center of oven rack for approximately 20-22 minutes, or until cake tester inserted into center of cake comes out clean. Remove cakes from oven and transfer pans to wire cooling rack. Let cakes rest in pans for about 8-10 minutes before removing from pans. Peel off and discard parchment paper and carefully turn cakes right side up onto a wire rack. Cool cakes completely before filling and assembling cake.
Filling: Beat the whipping cream on high speed until very soft peaks show signs of starting to form (see Note 2 below). Reduce speed slightly and slowly add the caster sugar followed by the vanilla or almond extract and beat until soft peaks form.
Assembly: Place one cake, top side down, on serving plate. Spread with the jam followed by the whipping cream. Top with remaining cake, top side up. If desired, sprinkle with icing sugar at time of serving. Decorate with fresh strawberries or raspberries, if desired.
Recipe Notes
Note 1: Because this is a sponge cake, it means it is quite absorbent. Therefore, it is recommended that the cake be assembled just at the time of serving as, otherwise, the jam and whipped cream will soak into the cake potentially making it soggy.
Note 2: As the whipped cream part of the filling only requires a small amount of whipping cream and sugar, a small hand mixer (versus a large stand mixer) works best to whip the cream. Alternatively, the whipping cream can be vigorously whipped by hand using a whisk.
Yield: 1 – 6” two-layer cake
[Copyright My Island Bistro Kitchen]
PIN ME TO PINTEREST!