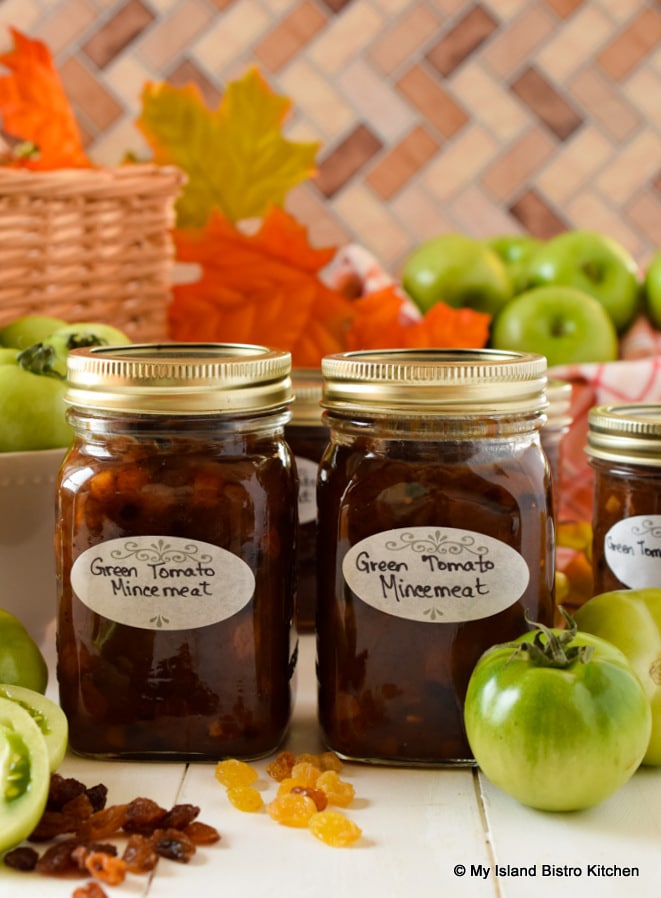
One of the most versatile foods in the garden has to be tomatoes – enjoy the ripe ones fresh or make into into sauce. Use the green tomatoes to make Green Tomato Marmalade, chow, and the list of possibilities for their use is practically endless. Today, I am sharing my recipe for another use of green tomatoes – Green Tomato Mincemeat, the uses for which are extensive.
Years ago, mincemeat was made with minced animal meat (hence its name) and suet (animal fat) as the two key ingredients. Minced meats that would have been used here in PEI would likely have been primarily beef and pork raised on the farm. Molasses, sugar, vinegar, spices, some kind of raisins, and perhaps some fruits like wild apples from the orchard would have been added to “sweeten up” the mincemeat which would typically have been used to make mincemeat pies, most likely around the Christmas period.
Today, the use of animal meat in mincemeat is less common, at least in my region. Commonly, the “meat” of green tomatoes is, instead, used as the primary base for mincemeat. This would be the outer part of the tomatoes, minus the gelatinous sacs and seeds. So, in that way, I think it is fair to still call the product mincemeat albeit a much less fatty version. You want to make sure the gelatinous sacs and seeds are removed from the tomatoes before they are cut up. The seeds don’t make a very attractive mincemeat and the gelatinous sacs will add too much moisture, in relation to the liquid ingredients called for in the mincemeat recipe.
Green Tomato Mincemeat is not particularly difficult to make but it is time-consuming so you will need to set aside the best part of the day to make it. It’s a process and there are several steps. I recommend taking several good reads through the recipe before beginning to ensure complete understanding of the process and sequencing of activities as well as to ensure you have the equipment and supplies needed for the project.

Any kind of green tomatoes can be used for the mincemeat so it’s a great opportunity to use up excess green tomatoes from the garden. Plum, or Roma tomatoes, are perhaps the best because they typically have fewer seeds and gelatinous sacs so you get more meat from the tomato. However, I use whatever tomatoes I have and the ones used in the photos in this post are the Early Girl variety, a mid-sized tomato. Remove the gelatinous sacs and seeds and dice the tomato “meat” into small pieces between 1/8” and ¼”. There is no need to be overly precise in getting tiny, perfect little squares of the tomatoes (as well as the apples and pear) cut into exactly 1/8” or ¼” squares but this reference is intended to provide a “general” guideline of roughly what the cut-up product size should be for this particular recipe.
Tart apples with a very firm flesh are best for this recipe. I use Granny Smith, peeled and diced into small pieces about the same size as the tomatoes. Avoid soft-flesh apples that will go mushy during cooking.
I like to add a pear to the mincemeat for flavor. Choose one with firm flesh, such as a Bosc pear. Don’t choose one, like a Bartlett pear, for example, that has soft flesh and will go to pure mush as the mixture cooks. The pear is diced into small pieces similar in size to the tomatoes and apples.
My recipe calls for two kinds of raisins – sultana and golden – as well as currants. What we here in Canada know as the very light golden-colored raisins are more soft, plump, and juicy than the darker, more shriveled-looking sultanas. The currants, of course, are a bit more tart than the raisins so, in combination, the three add a lovely blend of flavor as well as great texture and “bulk” to the mincemeat.
Either candied citron or candied peel (or a mixture of both) can be used in the recipe. I have made the recipe using candied citron and I have made it using just candied peel. I have also made it using a mixture of the two. These products will usually come diced small and that’s a good indicator of the general size the tomato, apple, and pear pieces should be cut for size uniformity. The fruits and vegetables don’t need to be super finely diced but they should not be big and chunky for this recipe as the mincemeat will be used in small mincemeat tarts and other baked products so keep that texture in mind when cutting up the ingredients for the mincemeat. If you are familiar with the bottled or canned versions of mincemeat from the supermarket, the size of the ingredients should be about the size of those used in those commercial products.

I use a mix of sweeteners for the mincemeat – brown and white sugars, and molasses as each imparts a different flavor note. The molasses, of course, will help to give the mincemeat its characteristic dark brown color.
I have curated a blend of suitable spices for the mincemeat – cinnamon, nutmeg, allspice, cloves, and ginger. I always add a tiny bit of mace as well but I have listed it as an optional ingredient. If you have this spice, use it but, if you don’t, I wouldn’t suggest going out and buying some for just 1/8 teaspoon. The mincemeat will certainly still be tasty without it.
Once the tomatoes and other core ingredients go into the pot and on to the stove, there needs to be some moisture content added. I pump up the flavor with apple juice, apple cider vinegar, and some lemon juice. So, a blend of sweetness contrasted with some acidic notes. The inclusion of the vinegar (as well as the brandy or rum) will also contribute to the preservation of the mincemeat.
The mincemeat needs to cook at a very low, slow boil for at least a couple of hours or more, until it is reduced/cooked down and thickened. It is done when it is no longer watery/runny and does not have a lot of thin liquid still surfacing on the mincemeat. Be patient and don’t try to rush this by turning up the heat. Let it do its thing on its own time. It needs to cook at a steady, slow boil (more than a simmer but not a hard rolling boil). This “low and slow” cooking is what will contribute to the depth of the mincemeat flavor and texture. Be sure to regularly stir the mincemeat as it cooks to ensure it is not sticking to the bottom of the pot and scorching. Adjust the heat accordingly if you start to notice the mincemeat sticking to the pot.
When you are satisfied that the mincemeat is thickened, remove the pot from the heat and stir in the butter, orange and lemon rinds, and the brandy or rum. Adding the liquor at the end of the process will give the mincemeat a more pronounced and richer flavor than will adding it earlier in the process and cooking off the alcohol.

With this mincemeat, you have a choice as to how to process it once it is fully cooked. It can be bottled and processed in a hot water bath or it can be frozen in airtight freezer containers. Certainly, the freezing option is the least work but it will largely depend on how much freezer space you have available for freezing the mincemeat – there should be 10-12 cups of mincemeat to be stored. If you have the freezer space, this is the quicker and easier option. If you plan to do the hot water processing, be sure to read my recipe carefully to know, at what point, the bottles need to be sterilized and the canner of hot water boiling to have ready to process the hot mincemeat as soon as it comes off the stove and is bottled, as well as how long the filled bottles need to be in the hot water bath.
My preference is to can the mincemeat and put it through the hot water processing and let the bottles of mincemeat sit for at least a month before using. This allows the flavor to deepen. Freezing the mincemeat, while it will still be tasty, does not allow for any further maturing or development of flavor. The flavor, as it is coming out of the pot, is locked in at the point of freezing.
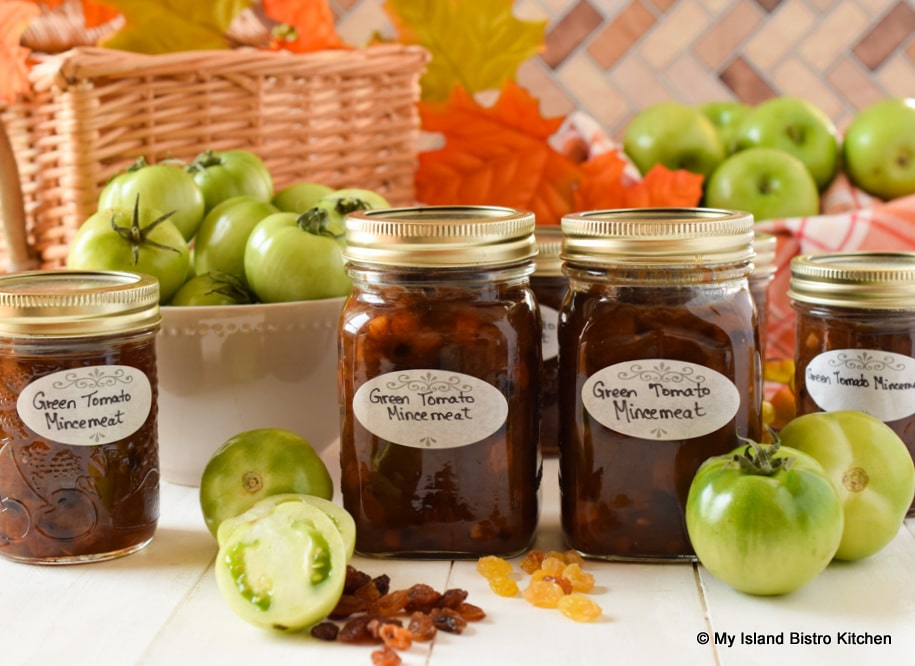
If you are freezing the mincemeat, cool the mincemeat to room temperature then transfer to proper airtight freezer containers. Be sure to leave enough headspace at the top of each container to allow for expansion during freezing. I recommend freezing the mincemeat in exact amounts you know you will need for specific recipes and label it as such. That way, you will not be thawing more mincemeat than needed at a time. Thaw the mincemeat naturally. I do not recommend defrosting it in the microwave as it may liquify the mincemeat which would change its properties, potentially making it more runny which could have a negative impact on whatever recipe you would be using it in.
While the mincemeat can be canned in the 1-cup, half-pint bottles (and I have done it), it is more efficient to use the pint-sized (2-cup) jars as they will all fit in the one canner at the same time. You would really need to have two canners going on the stove at the same time to can the half-pint jars as there would be twice as many of them and more than what would fit it one standard canner. The jars need to be processed as soon as the mincemeat is in them and not left sitting, waiting for one batch to be hot water processed and the canner freed up for a second round. If a pint, 2-cup bottle is opened and, say, only 1 cup of the mincemeat is needed, I will often freeze the remaining cup at that time, or simply plan to make more than one recipe using the mincemeat when the bottle is opened.
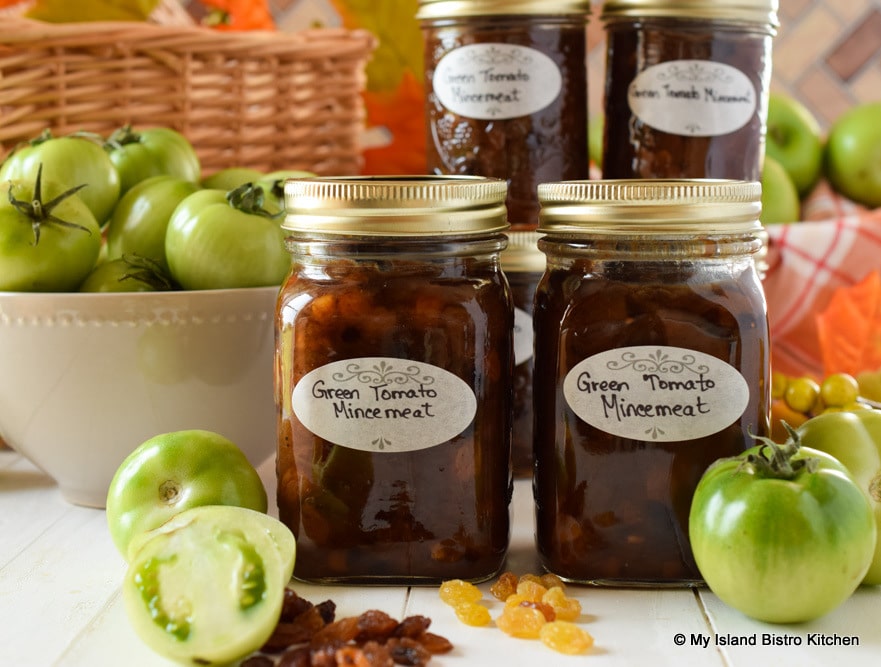
It’s difficult to project the exact yield of mincemeat from this recipe as it depends on the quality and maturity of the green tomatoes, the rate and heat at which the mincemeat is cooked, and how cooked down the mixture is. The recipe should yield 10-12 cups so, if processing the jars in the hot water, prepare six (6) pints jars for the canning – you may only need five or you might require six. It’s better to have more bottles than needed sterilized as, at the point of bottling, there is no time for starting to sterilize an extra bottle at that time.
At the end of bottling, if there is insufficient mincemeat to completely fill another bottle, either refrigerate and use the fresh mincemeat in a recipe within a few days or freeze it for later use. Bottles should be filled to ½“ from rim when preparing them for processing in the hot water and I do not recommend hot water processing partially filled jars.
I also always have a couple of extra jars in the hot water along with those sterilized to be filled. This is to have them hot (don’t place cold bottles in boiling water as they may crack) and at the ready to be used in the canner if, after all the filled jars are in place in the canner, there is extra space and not enough filled bottles to completely fill the canner. Allow the empty jar(s) to submerge, upright, and fill with the hot water and take up empty space in the canner preventing the filled jars from tipping over on their sides during the boiling process.

Use this mincemeat in any recipe that calls for mincemeat as an ingredient.
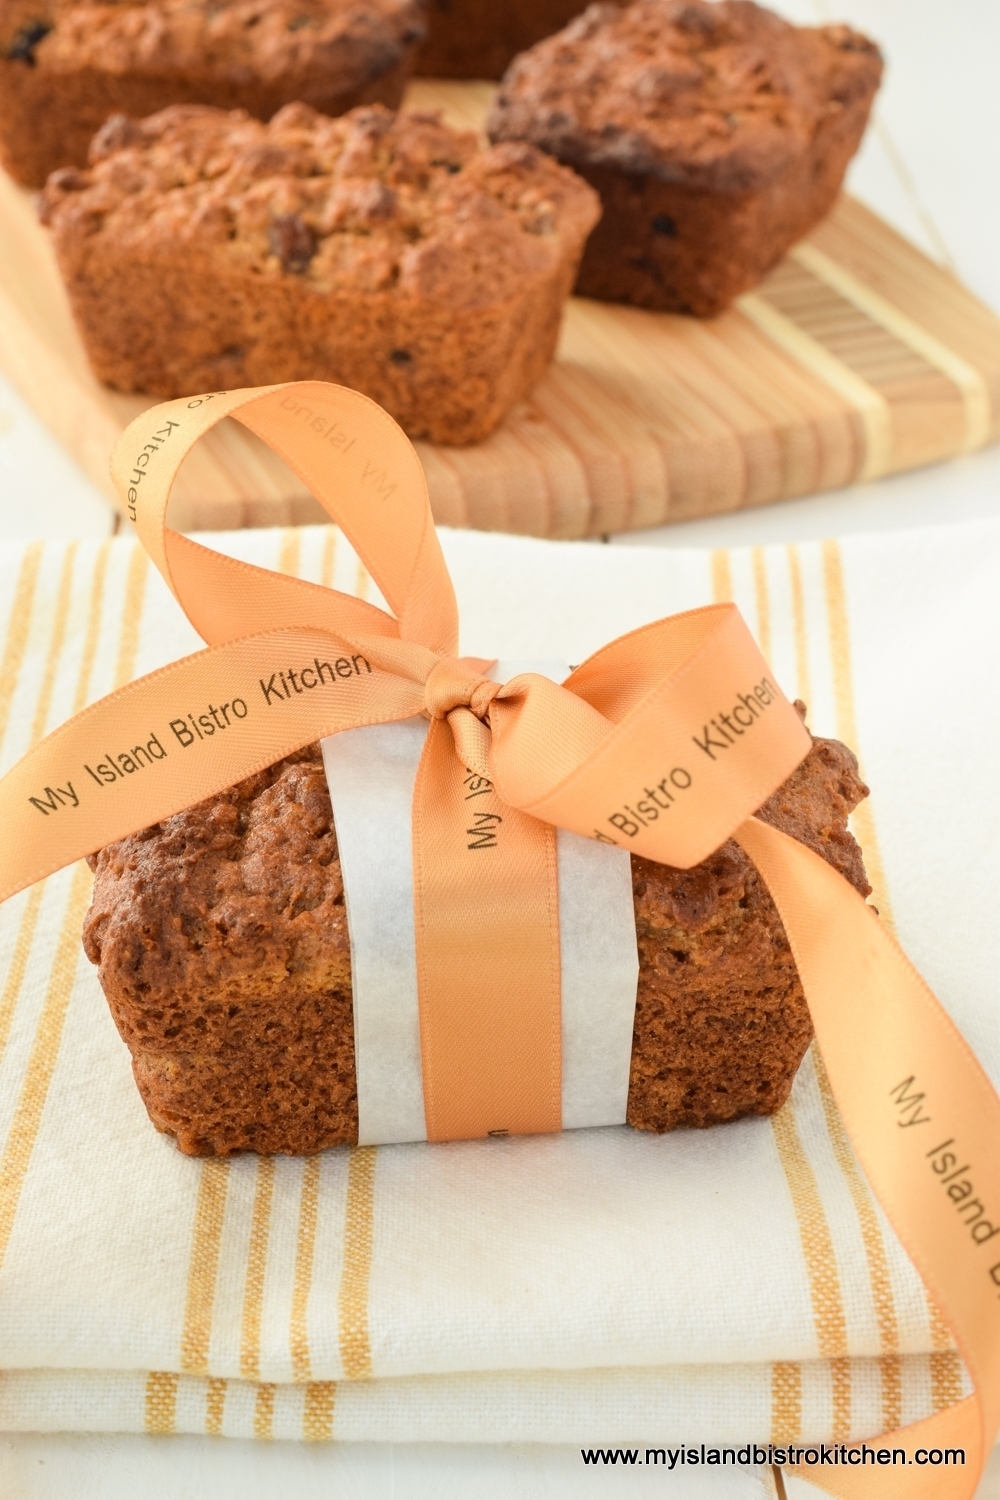
It is especially lovely made into a mincemeat pie or tarts and is wonderful in muffins, quick breads, cookies, and other baked goods.

[Printable recipe follows at end of post]
Green Tomato Mincemeat
Ingredients:
4 pounds whole green tomatoes, washed, seeds and gelatinous sacs removed, and diced small (Note: Tomatoes are weighed whole, before being cut up)
2 pounds tart, firm-fleshed apples (e.g., Granny Smith), washed, peeled, cored, and diced small (Note: Apples are weighed whole before being cored and cut up)
1 Bosc pear, washed, peeled, cored, and diced small
1 cup sultana raisins
1 cup golden raisins
1½ cups mixed diced candied peel, diced candied citron, or a combination of both
¾ cup currants
1¾ cups brown sugar, firmly packed
1¼ cups granulated sugar
¾ tsp salt
1 tbsp cinnamon
1½ tsp nutmeg
1 tsp allspice
1 tsp cloves
¼ tsp ginger
1/8 tsp mace (optional)
1 cup apple juice
½ cup apple cider vinegar
¼ cup molasses
2½ tbsp freshly squeezed and strained lemon juice
½ cup butter, room temperature
2 tsp finely grated orange rind
1 tsp finely grated lemon rind
2/3 cup brandy or rum
Supplies and Equipment Needed:
Scales for measuring ingredients
6 – pint-sized (2 cup) glass canning jars for the mincemeat (plus 1-2 additional pint jars to take up extra space, if needed, in the canner basket during the hot water processing)
6 – two-piece lid and screw band sets (lids must be brand new and not previously used); screw bands can be re-used so long as they have no rust or dents on them
Large stock pot for cooking mincemeat
Large pot for sterilizing jars
Large heat-proof cutting board (wooden is best) to set hot jars of mincemeat on to cool after they come out of the hot water bath
Water bath canner with basket
Jar lifter tongs
Wide-mouthed canning funnel
Ladle or heat-proof glass measuring cup
Chopstick or small non-metallic heat-proof spatula to remove any trapped air bubbles from mincemeat once bottled
A timer
Method:
Wash jars in hot soapy water, first checking to ensure that the jars have no cracks or chips in them. Rinse well. Inspect the screw bands and discard any that have dents or rust on them. Use only brand-new lids for canning. The lids give the jars the vacuum seal and are designed for single use only. Once they have been used, the rubber sealing compound is no longer considered effective for proper sealing so the lids should never be re-used. The screw bands, on the other hand, are reusable provided they have no dents or evidence of rust. Set out required pots and canner along with other equipment specified in the “Supplies and Equipment” section above.
Measure out the raisins, candied peel/citron, currants, sugar, salt, spices, apple juice, vinegar, molasses, and lemon juice.
Prepare and dice the tomatoes, apples and pear and place, along with the raisins, candied peel/citron, currants, sugars, salt, and spices, into large stockpot. Stir to mix.
Add the apple juice, apple cider vinegar, molasses, and lemon juice. Stir mixture well to combine. Bring just to the boiling point over medium-high heat then reduce heat to keep mixture at a low, very gentle, steady boil. Cook mixture, uncovered, for a total of approximately 2 – 2½ hours, or until thickened, stirring regularly to ensure it is not sticking to the pot. Adjust heat, if necessary, to ensure the mixture does not burn or scorch. Mixture should be thick yet moist but not thin/runny when it is ready to be bottled.
After the mincemeat has been simmering for about 1½ hours, start sterilizing the bottles and preparing the hot water canner. Fill a large pot of hot tap water, about ¾ full. Place pint jars upright, into the water (include 1-2 extra jars in case they are needed to take up space in the canner so the filled jars do not topple over during processing). Ensure the jars are fully submerged, each jar filled with water, and that the water is at least an inch over the tops of the jars. Cover, bring to a boil, and boil for 10 minutes. Turn off heat and leave the jars in the hot water to have ready to fill once the mincemeat finishes cooking.
While the jars are sterilizing, fill the canner about half full of hot tap water. Cover and bring to a boil to have it ready for processing of the filled jars as they must immediately go into the canner to be processed while the mincemeat is still hot. Reduce heat to keep the canner water very hot. When the mincemeat is ready to bottle, boil a kettle of extra water to have ready, if needed, to top up the canner water with boiling water after filled jars are added.
When mincemeat is cooked and thickened, remove from heat and stir in the butter and orange and lemon rind along with the brandy or rum.
Use jar lifter tongs to carefully remove 6 of the hot sterilized jars from the water, one at a time, emptying the water from the jars back into the pot. Drain jars well.
Using a ladle, or a heat-proof glass measuring cup, and a wide-mouthed canning funnel, transfer mincemeat into the hot sterilized jars, leaving 1/2” headroom in each jar to allow for expansion during the hot water processing. Remove any trapped air bubbles in the jars with a chopstick or small heatproof, non-metallic spatula. Add more mincemeat, if necessary, to top up the jars to ½“ from rim. Wipe the jar rims with a clean damp cloth to remove any stickiness or mincemeat particles that could prevent the lids from sealing properly to the jars.
Center the lids on jars so the sealing compound on the lid edges aligns with the jar rims. Fingertip tighten the ring/screw bands until resistance is encountered. Do not over-tighten.
Using jar lifter tongs, carefully place filled jars upright in wire basket positioned in the canner, ensuring jars do not touch each other or fall over. If necessary, depending on your style of canner, and how many filled jars of mincemeat there are, add the extra hot empty jar(s), upright, to the basket to fill up space so the filled jars do not topple over. Let the empty jar(s) fill with water from the canner as they are submerged. Ensure the water level is at least 1” above the tops of jars, adding more boiling water as necessary. Cover with canner lid. Return the water to a full rolling boil over high heat then decrease the heat to just keep the water at a good strong rolling boil but not boiling over. Process jars in the hot water bath for 15 minutes, adjusting time as and if necessary for altitude. Start timing the processing from the point at which a full rolling boil is reached after jars have been added to the canner. At the end of the processing time, turn off heat and remove canner lid.
Let jars sit in the hot water for 5 minutes then, using jar lifter tongs, carefully remove the jars filled with mincemeat, upright and one at a time, and transfer them to a heat-proof cutting board, that has been covered with a towel, to cool completely. Listen for the “pop” or “ping” sound as the bottles seal over the next few minutes or hours. The lids of properly sealed jars will curve downward. Let jars rest, undisturbed, on counter for 24 hours. Then, test each jar for proper sealing by gently pressing down on the center of each jar lid. If the lid is already pressed downward, and does not pop back up, it is properly sealed. Any jars that do not pass this test should have the mincemeat transferred to a freezer container and frozen for later use or, alternatively, refrigerated when cooled and used in a recipe within a few days. Store properly sealed bottles in cool, dark place. The mincemeat benefits from maturing for at least a month before using. This allows the flavors to develop and deepen. Refrigerate any leftover mincemeat for up to 5 days once jar has been opened.
In lieu of hot water processing, the mincemeat may be frozen in airtight freezer containers. To freeze, allow the mincemeat to cool to room temperature then transfer into freezer containers of desired size, leaving sufficient headroom at top of each container to allow for expansion during freezing. To use, thaw mincemeat naturally and then use as directed in any recipe calling for mincemeat as an ingredient.
Yield: Apx. 10 – 12 cups
NOTE: Exact yield is difficult to project as it depends on the quality and maturity of the green tomatoes, the rate and heat at which the mincemeat is cooked, and how cooked down the mixture is. The recipe should yield 10-12 cups so prepare 6 pint jars for the canning. At the end of bottling, if there is insufficient mincemeat to completely fill another bottle, either refrigerate and use the fresh mincemeat in a recipe within a few days or freeze it for later use. Bottles should be filled to ½“ from rim when preparing them for processing in the hot water.
If you have made this recipe and enjoyed it and/or wish to share it with your friends, please do so on social media and share the direct link to the Green Tomato Mincemeat Recipe on my website.
Connect with My Island Bistro Kitchen on Social Media
Join the Facebook page for My Island Bistro Kitchen: https://www.facebook.com/MyIslandBistroKitchen/
Follow “the Bistro” on “X” (formerly Twitter): https://twitter.com/PEIBistro/
See the drool-worthy gallery of mouth-watering food photos from My Island Bistro Kitchen on Instagram: https://www.instagram.com/peibistro/
Follow “the Bistro” on Pinterest at https://www.pinterest.ca/peibistro/ and pin the Pinterest-ready photo at the end of this posting to your favorite Pinterest boards!
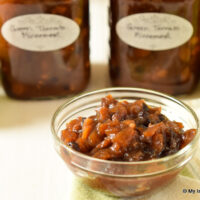
Green Tomato Mincemeat
Ingredients
- 4 pounds whole green tomatoes, washed, seeds and gelatinous sacs removed, and diced small (Note: Tomatoes are weighed whole, before being cut up)
- 2 pounds tart, firm-fleshed apples (e.g., Granny Smith), washed, peeled, cored, and diced small (Note: Apples are weighed whole before being cored and cut up)
- 1 Bosc pear, washed, peeled, cored, and diced small
- 1 cup sultana raisins
- 1 cup golden raisins
- 1½ cups mixed diced candied peel, diced candied citron, or a combination of both
- ¾ cup currants
- 1¾ cups brown sugar, firmly packed
- 1¼ cups granulated sugar
- ¾ tsp salt
- 1 tbsp cinnamon
- 1½ tsp nutmeg
- 1 tsp allspice
- 1 tsp cloves
- ¼ tsp ginger
- 1/8 tsp mace (optional)
- 1 cup apple juice
- ½ cup apple cider vinegar
- ¼ cup molasses
- 2½ tbsp freshly squeezed and strained lemon juice
- ½ cup butter, room temperature
- 2 tsp finely grated orange rind
- 1 tsp finely grated lemon rind
- 2/3 cup brandy or rum
Instructions
Wash jars in hot soapy water, first checking to ensure that the jars have no cracks or chips in them. Rinse well. Inspect the screw bands and discard any that have dents or rust on them. Use only brand-new lids for canning. Wash and rinse lids and set aside until needed. The lids give the jars the vacuum seal and are designed for single use only. Once they have been used, the rubber sealing compound is no longer considered effective for proper sealing so the lids should never be re-used. The screw bands, on the other hand, are reusable provided they have no dents or evidence of rust. Set out required pots and canner along with other equipment specified in the “Supplies and Equipment” section above.
- Measure out the raisins, candied peel/citron, currants, sugar, salt, spices, apple juice, vinegar, molasses, and lemon juice.
- Prepare and dice the tomatoes, apples and pear and place, along with the raisins, candied peel/citron, currants, sugars, salt, and spices, into large stockpot. Stir to mix.
- Add the apple juice, apple cider vinegar, molasses, and lemon juice. Stir mixture well to combine. Bring just to the boiling point over medium-high heat then reduce heat to keep mixture at a low, very gentle, steady boil. Cook mixture, uncovered, for a total of approximately 2 – 2½ hours, or until thickened, stirring regularly to ensure it is not sticking to the pot. Adjust heat, if necessary, to ensure the mixture does not burn or scorch. Mixture should be thick yet moist but not thin/runny when it is ready to be bottled.
After the mincemeat has been simmering for about 1½ hours, start sterilizing the bottles and preparing the hot water canner. Fill a large pot of hot tap water, about ¾ full. Place pint jars upright, into the water (include 1-2 extra jars in case they are needed to take up space in the canner so the filled jars do not topple over during processing). Ensure the jars are fully submerged, each jar filled with water, and that the water is at least an inch over the tops of the jars. Cover, bring to a boil, and boil for 10 minutes. Turn off heat and leave the jars, covered, in the hot water to have ready to fill once the mincemeat finishes cooking.
While the jars are sterilizing, fill the canner about half full of hot tap water. Cover and bring to a boil to have it ready for processing of the filled jars as they must immediately go into the canner to be processed while the mincemeat is still hot. Reduce heat to keep canner water hot until needed. When the mincemeat is ready to bottle, boil a kettle of extra water to have ready, if needed, to top up the canner water with boiling water after filled jars are added.
- When mincemeat is cooked and thickened, remove from heat and stir in the butter and orange and lemon rind along with the brandy or rum.
- Use jar lifter tongs to carefully remove 6 of the hot sterilized jars from the water, one at a time, emptying the water from the jars back into the pot. Drain jars well.
- Using a ladle, or a heat-proof glass measuring cup, and a wide-mouthed canning funnel, transfer mincemeat into the hot sterilized jars, leaving 1/2” headroom in each jar to allow for expansion during the hot water processing. Remove any trapped air bubbles in the jars with a chopstick or small heatproof, non-metallic spatula. Add more mincemeat, if necessary, to top up the jars to ½“ from rim. Wipe the jar rims with a clean damp cloth to remove any stickiness or mincemeat particles that could prevent the lids from sealing properly to the jars.
Center washed lids on jars so the sealing compound on the lid edges aligns with the jar rims. Fingertip tighten the ring/screw bands until resistance is encountered. Do not over-tighten.
- Using jar lifter tongs, carefully place filled jars upright in wire basket positioned in the canner, ensuring jars do not touch each other or fall over. If necessary, depending on your style of canner, and how many filled jars of mincemeat there are, add the extra hot empty jar(s), upright, to the basket to fill up space so the filled jars do not topple over. Let the empty jar(s) fill with water from the canner as they are submerged. Ensure the water level is at least 1” above the tops of jars, adding more boiling water as necessary. Cover with canner lid. Return the water to a full rolling boil over high heat then decrease the heat to just keep the water at a good strong rolling boil but not boiling over. Process jars in the hot water bath for 15 minutes, adjusting time as and if necessary for altitude. Start timing the processing from the point at which a full rolling boil is reached after jars have been added to the canner. At the end of the processing time, turn off heat and remove canner lid.
Let jars sit in the hot water for 5 minutes then, using jar lifter tongs, carefully remove the jars filled with mincemeat, upright and one at a time, and transfer them to a heat-proof cutting board, that has been covered with a towel, to cool completely. Listen for the “pop” or “ping” sound as the bottles seal over the next few minutes or hours. The lids of properly sealed jars will curve downward. Let jars rest, undisturbed, on counter for 24 hours. Then, test each jar for proper sealing by gently pressing down on the center of each jar lid. If the lid is already pressed downward, and does not pop back up, it is properly sealed. Any jars that do not pass this test should have the mincemeat transferred to a freezer container and frozen for later use or, alternatively, refrigerated when cooled and used in a recipe within a few days. Store properly sealed bottles in cool, dark place. The mincemeat benefits from maturing for at least a month before using. This allows the flavors to develop and deepen. Refrigerate any leftover mincemeat for up to 5 days once jar has been opened.
- In lieu of hot water processing, the mincemeat may be frozen in airtight freezer containers. To freeze, allow the mincemeat to cool to room temperature then transfer into freezer containers of desired size, leaving sufficient headroom at top of each container to allow for expansion during freezing. To use, thaw mincemeat naturally and then use as directed in any recipe calling for mincemeat as an ingredient.
Recipe Notes
Yield: Apx. 10 – 12 cups
NOTE: Exact yield is difficult to project as it depends on the quality and maturity of the green tomatoes, the rate and heat at which the mincemeat is cooked, and how cooked down the mixture is. The recipe should yield 10-12 cups so prepare 6 pint jars for the canning. At the end of bottling, if there is insufficient mincemeat to completely fill another bottle, either refrigerate and use the fresh mincemeat in a recipe within a few days or freeze it for later use. Bottles should be filled to ½“ from rim when preparing them for processing in the hot water.
[Copyright My Island Bistro Kitchen]
PIN ME TO PINTEREST!
