This old-fashioned homestyle Raisin Bread is made mostly in the traditional way of kneading by hand….with a little help at the front end from a stand mixer.
If you have access to a sturdy stand mixer that has a dough hook, it can lessen the amount of hand kneading of the dough, either totally or partially. However, if like me, you have a standard sized stand mixer, like a Kitchen Aid Classic, for example, I think you will find it difficult to have the mixer completely knead the dough well enough given the amount of flour called for in the Raisin Bread recipe. I let the mixer do the work of kneading for me to a point and then I take over to manually knead the dough the rest of the way and, quite frankly, I find the exercise oddly therapeutic! If you have an extra large, or a professional, mixer, the dough could be completely kneaded by the mixer.
I have a posting on my website for traditional White Bread which you can find here. In that posting, I detail the basics of traditional bread making so I won’t repeat them here but, rather, will direct readers unfamiliar with bread making to that source for details on the process. The technique for making this Raisin Bread is quite similar. In this posting, I will concentrate on explaining the importance of protein in flour used for yeast breads and the difference between all-purpose and bread flours.
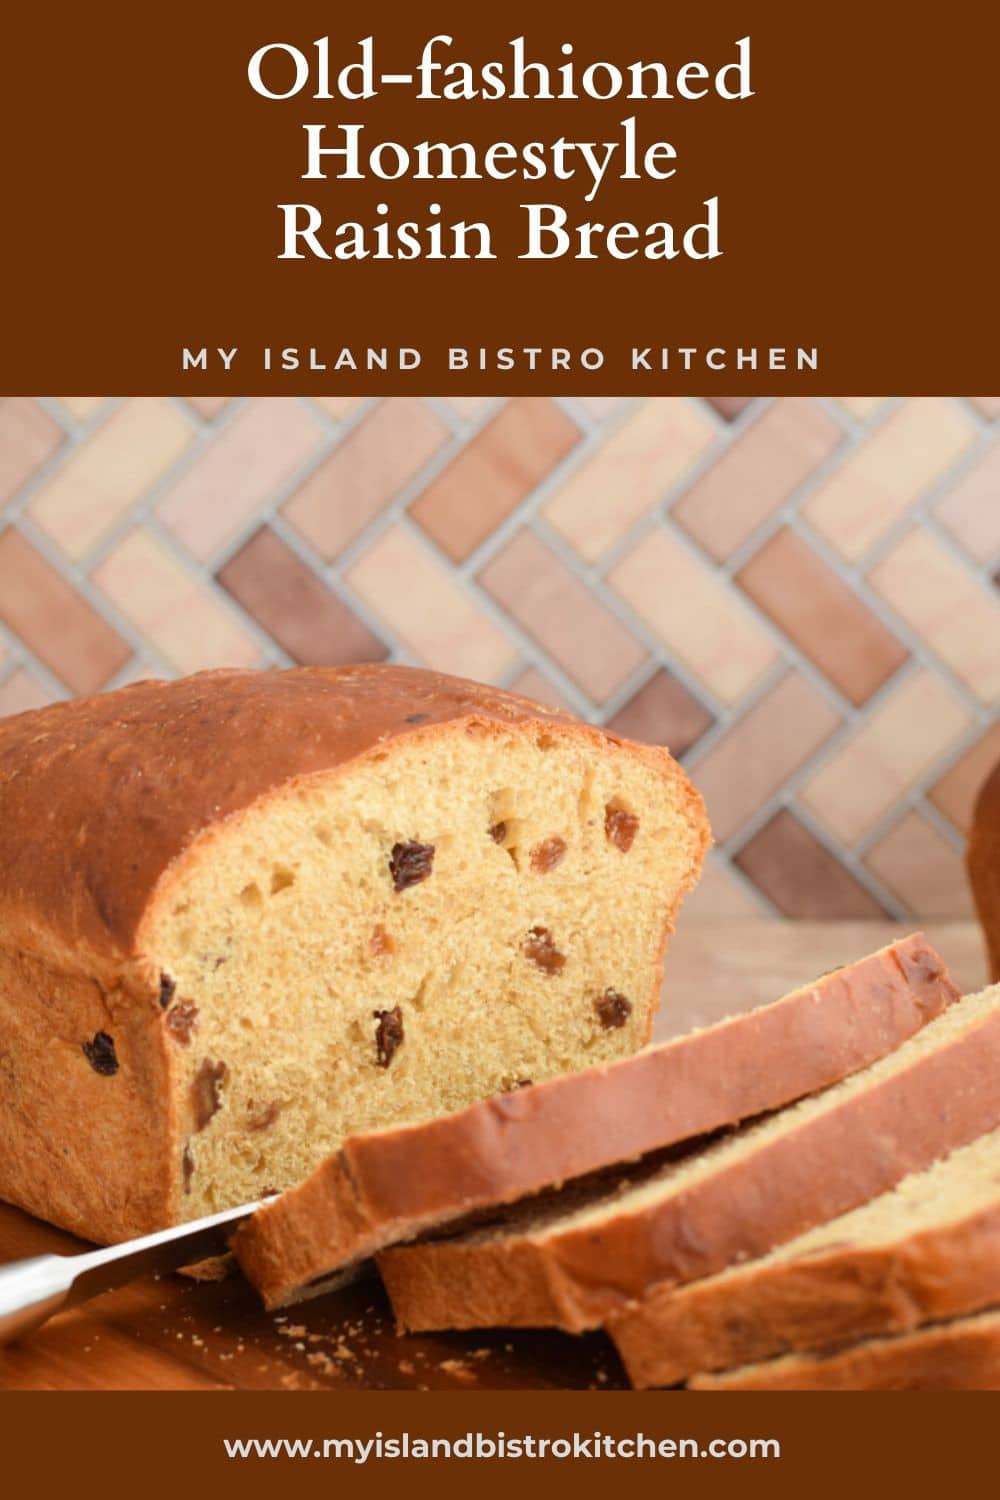
I have been making Raisin Bread for more years that I care to admit. My recipe is loosely based on one that has been passed down through the generations and I have tweaked it through my own experiences.
Basically, the original recipe had a list of ingredients with few exact measurements and that was it. No method was given as it was just generally assumed that everyone simply knew the process for making bread. Yeast was written as “1 yeast” – no size or quantity mentioned. Presumably, this referred to a yeast cake (aka fresh yeast) and not the traditional dry active yeast we are quite familiar with today. I particularly liked how the quantity of flour and raisins listed – “add raisins and flour” – no clue as to quantity of either! And, there was no indication how many loaves the recipe would yield.
For many years, I made Raisin Bread with all-purpose flour and had very good results. However, when I switched to using a bread flour, I found that my loaves of bread had better rise and loft with a more chewy, elastic crumb. This is because bread flour has a higher protein content than the standard all-purpose flour. While there are variances between brands, bread flour tends to have somewhere between 12%-14% protein content while all-purpose flour will be somewhat lower with approximately 8%-11% protein.
So, if you see a bag of flour labeled “Bread Flour”, you’ll know the flour has a higher protein content and the manufacturer has produced the flour specifically to work for yeast baking. Flours with higher protein content are considered to be stronger flours while those with lower protein content are softer flours. So, why is the protein content in flour important to bread making? Can’t a simple all-purpose flour be used to make good bread?
Importance of Protein Content in Flour For Bread-making
First, the importance of protein content in flour …… without getting too scientific! It all has to do with gluten. Gluten gives bread dough its structure as well as its pliability, stretch, and elasticity when kneaded and, ultimately, determines the texture of the baked bread. The higher the protein content in flour (as is the case with bread flour), the more gluten will be produced when liquid is added, and worked in, to the flour.
Kneading the dough transforms the flour’s protein into gluten strands that do two things. The gluten strands give the dough its elasticity and ability to stretch and rise and also provide stability and sturdiness that allow the dough to hold its shape during the rising processes. Dough that holds its shape bakes into a lovely straight loaf with good volume.
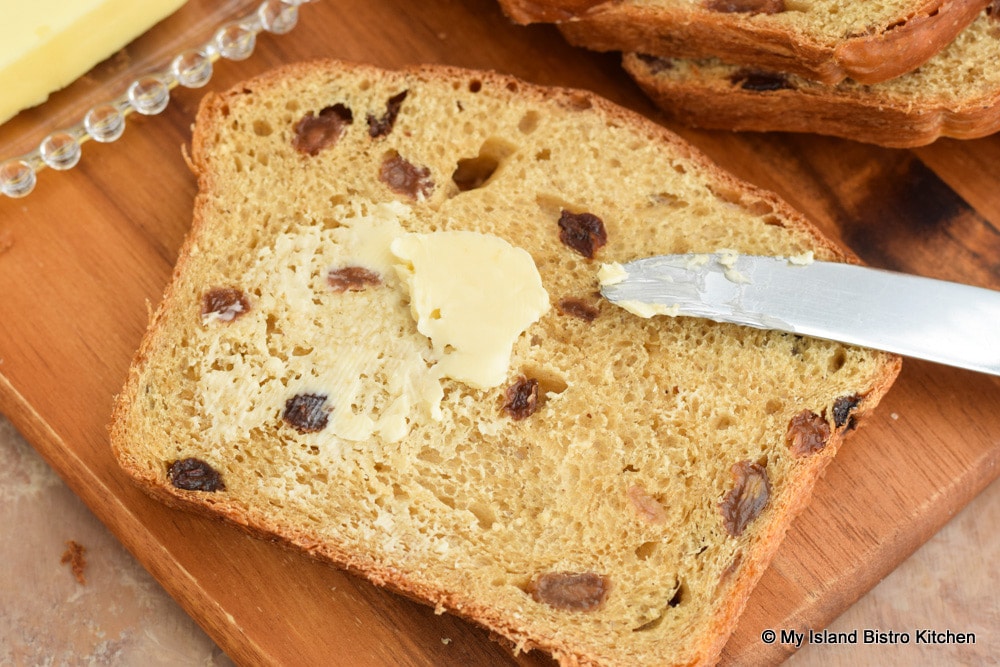
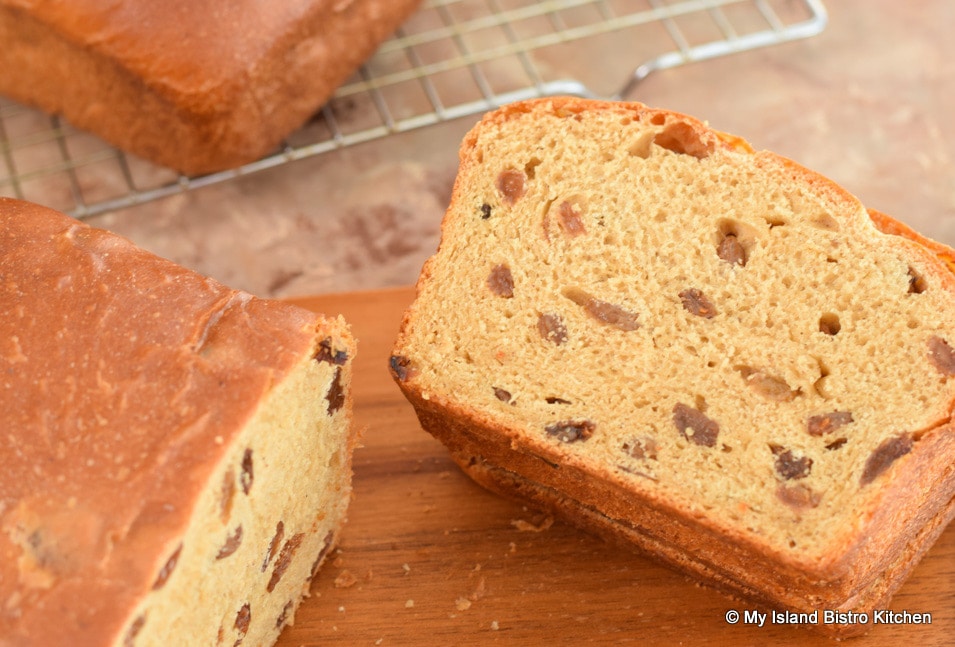
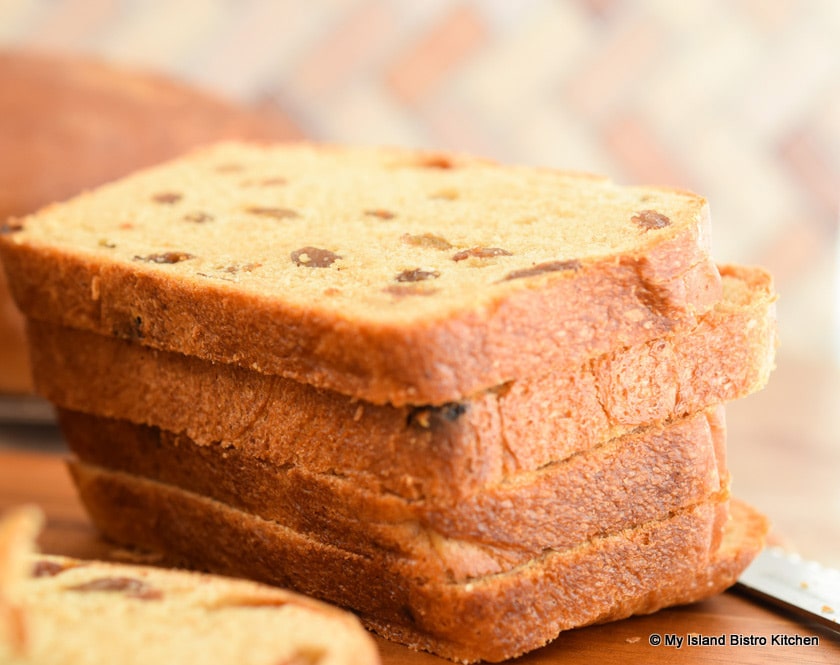
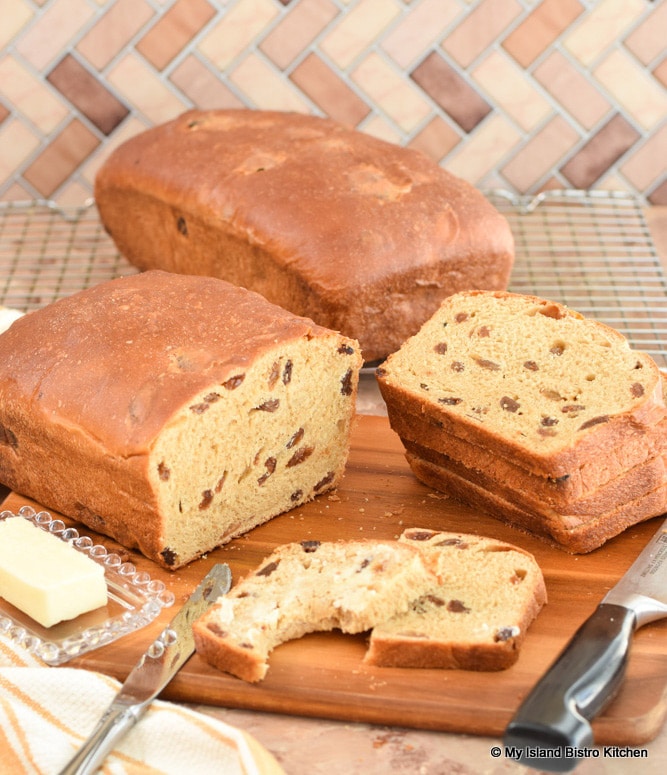
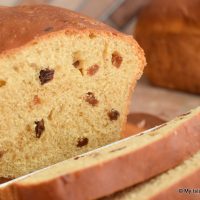
Bread flour, with its higher protein content, can be expected to produce bread with good rise and a texture that has a chewy bite to it along with some characteristic “air holes” visible in the slices of baked bread as shown in the photos below. This is because bread flours are specifically created to encourage elasticity from the gluten formed in the dough.

Using All-Purpose Flour in Bread-Making
Now, to the question about using all-purpose flour in bread making. All-purpose flour is, just as its name suggests, a good all-round general flour that can be used for various purposes in everyday baking. For example, it’s suitable for pie pastry, biscuits, cakes, and cookies and, in some cases, yes, yeast breads. In fact, I still often use all-purpose flour for my standard white bread (a good basic sandwich bread) with good results in terms of both texture and well-risen loaves. For that type of bread, I am looking for a close, dense, tender, and soft texture. All-purpose flour, with its medium protein content, is sufficiently strong enough to give me this result.
That said, though, the all-purpose flour with its lower protein content, does not produce as much gluten and so the dough will not be as light and elastic as can be expected when bread flour is used. As a result, I find that breads made with all-purpose flour tend to have a bit less volume, a slightly more dense texture with fewer “air holes”, and a less chewy crumb than when made with bread flour.
So, in my view, the answer is ‘yes’, all-purpose flour can be used for bread making, However, the results are likely to be somewhat different than when bread flour, which is specially formulated for baking yeast breads, is used. Just know that the more protein your flour contains, the more gluten that will be able to be developed. In sum, then, the main difference between bread flour and all-purpose flour will be in the texture of the baked bread and in its rise volume.
All-purpose flour will give a more tender texture while bread flour will produce bread that is slightly firmer and more chewy in texture. You will still get a good loaf of bread but you may find you will get a superior end result if specific bread flour is used. A good general rule is to use the specific flour the recipe calls for as this will be the flour the recipe developer has used to create and test the recipe and has found to achieve the best results.[pullquote]A good general rule is to use the specific flour the recipe calls for as this will be the flour the recipe developer has used to create and test the recipe and has found to achieve the best results.[/pullquote]
Kneading the Dough
With biscuits and scones, you try to handle the dough as little as possible so the gluten does not get stirred up and developed. This would make those baked products, that are chemically-leavened with baking powder, tough and flat. With bread leavened with yeast, on the other hand, you want to do the opposite – you want the gluten developed because it will help the yeast rise and the dough to stretch and become elastic. How do you develop the gluten in bread? Add liquid and the yeast to the flour and knead, knead, knead the dough!
Yeast, as we know, is the catalyst agent that causes the bread to rise. The yeast produces carbon dioxide which creates air bubbles. The gluten strands that are formed when liquid and the yeast are added to the protein-containing flour go to work during the kneading process. This is when air is worked into the dough and the air bubbles get trapped into that dough. The kneading action creates a sturdy, stable dough that will rise and not collapse.
How Long to Knead Dough
There is no magic number of precise minutes to knead bread dough that I know of. I find knowing when the bread has been kneaded enough basically comes with experience about the feel of the dough as it is being kneaded – i.e., how smooth, soft, elastic, and pliable it feels as it is being worked. Typically, however, as a general benchmark, the kneading process by hand will take, depending on the bread and quantity of ingredients, somewhere in the vicinity of 8-12+ minutes but I hasten to add, this is a just a generality and does not necessarily apply to all types of bread.
The important test for adequate kneading is when sufficient gluten has been developed in the dough. There are several tests bakers use to determine this point. Some use the “poke” test where they stick a couple of fingers into the dough and, if it springs back, there is enough gluten in the dough. If not, keep kneading.
Another test some use is to pull off a small piece of the dough. If it does not easily tear when stretched between the fingers and if there is translucency to the dough, there is sufficient gluten developed to hold the dough together. If not, knead some more and test again.
I also use a “tackiness” test. That’s when there is still some slight tackiness to the dough which will be tacky to the work surface as it is being kneaded but no dough is peeling off, sticking and staying on the surface. Regardless what test is used, the dough should feel quite smooth, soft, pliable, and elastic at the end of the kneading process.
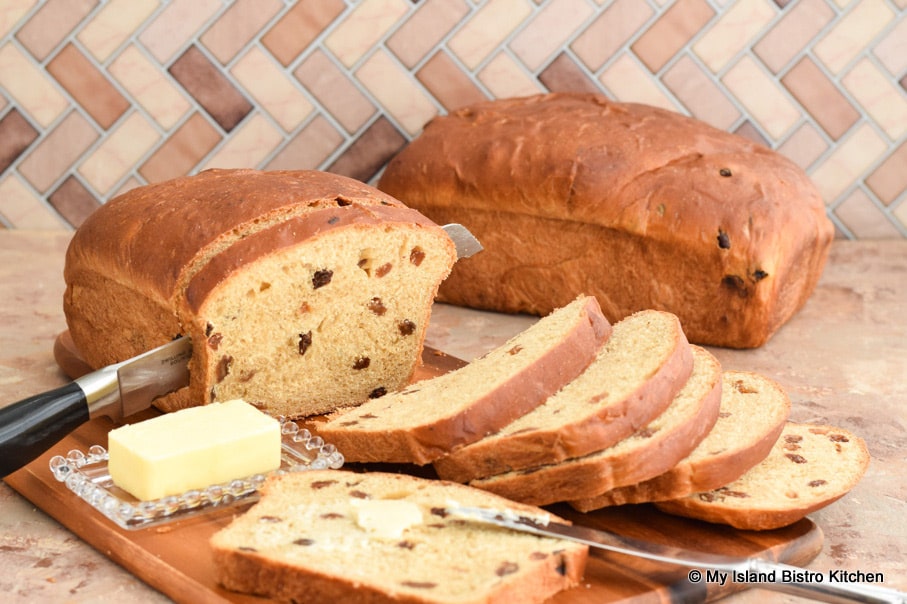
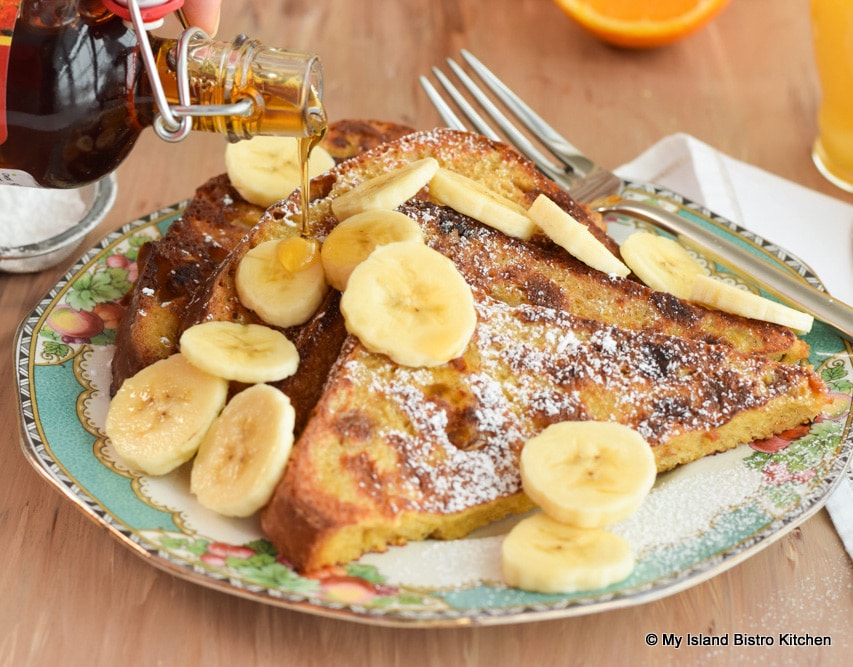
So, let’s get the ingredients ready and make a batch of Raisin Bread which, by the way, makes great toast and superb French Toast!
Old-fashioned Raisin Bread
Ingredients:
¾ cup milk (no less than 2%M.F.)
¾ cup warm water (110°F)
2½ tbsp molasses
1/3 cup + 1 tbsp brown sugar, packed
3 tbsp butter, room temperature
½ tbsp salt
1 tsp cinnamon
½ tsp nutmeg
1 large egg, room temperature, lightly beaten
½ cup warm water (110°F)
1 tsp granulated sugar
1 tbsp + 1 tsp traditional active dry yeast
1¾ cups raisins
5 – 5½ cups bread flour (*see note below)
2 tsp butter, room temperature, for greasing tops of loaves (optional)
Cooking oil for hands
Method:
Assemble and measure out all ingredients before beginning.
In medium-sized saucepan, over medium-high heat, bring milk to the scalding point (180°F), stirring frequently to prevent milk from scorching. Do not boil the milk. Remove from heat and stir in the warm water, molasses, brown sugar, butter, salt, cinnamon, and nutmeg. Stir until sugar has dissolved and butter has melted. Let mixture cool to about 110°F then whisk in the lightly beaten egg.
While the milk mixture is cooling, place ½ cup warm water (110°F) in large 2-cup measuring cup or bowl. Stir 1 tsp sugar into the warm water until sugar is dissolved. Sprinkle yeast over the water and quickly, but gently, stir in the yeast. Let yeast stand, undisturbed with no stirring, for about 10-12 minutes, or until yeast is foamy and bubbly. Stir down yeast.
In bowl of stand mixer fitted with dough hook, combine the liquid ingredients with the yeast along with 2 cups of the flour gradually added, one cup at a time. Beat on slow speed to blend ingredients then increase speed to medium (e.g., the “6” setting on KitchenAid Classic mixer) and beat for 1 minute. Scrape the bowl to ensure all ingredients are incorporated. Add the raisins. Again, with mixer on slow speed, gradually add 2 more cups of flour, about a cup at a time. Increase speed to medium and beat mixture for 1 minute. Transfer mixture to a lightly floured surface, using some of the remaining flour to flour the work surface. With hands greased with a small amount of vegetable oil, begin kneading the dough by hand, continuing to add more of the flour called for in the recipe until the dough is smooth, elastic, and pliable, about 8-10 minutes. Periodically re-grease hands with the oil as necessary to prevent them from sticking to the dough. (Note: If you have a very large mixer, the dough could be completely kneaded by mixer; however, if you have a standard-sized stand mixer, it will be difficult to get the dough perfectly kneaded by mixer with the quantity of flour called for in this recipe).
Grease a bowl large enough to allow the dough to double in size. Grease all sides of dough with vegetable oil to prevent it from drying out and transfer dough to prepared bowl. Cover the top of the bowl loosely with plastic wrap that has been sprayed with cooking oil. Cover bowl completely with a towel or lightweight blanket and place in warm, draft-free location to rise until dough doubles in size, about 1¼ – 1¾ hours.
Prepare two 9”x5”x3” loaf pans by greasing all sides of pans.
Using vegetable oil, grease the work surface. Punch down dough in bowl with fist and turn dough out onto greased surface. Divide dough into two equal portions.
Shape each portion of dough into an oval loaf shape and place in prepared pans.
Cover loaves loosely with a tea towel and place in warm, draft-free location to rise again for between 45 and 60 minutes.
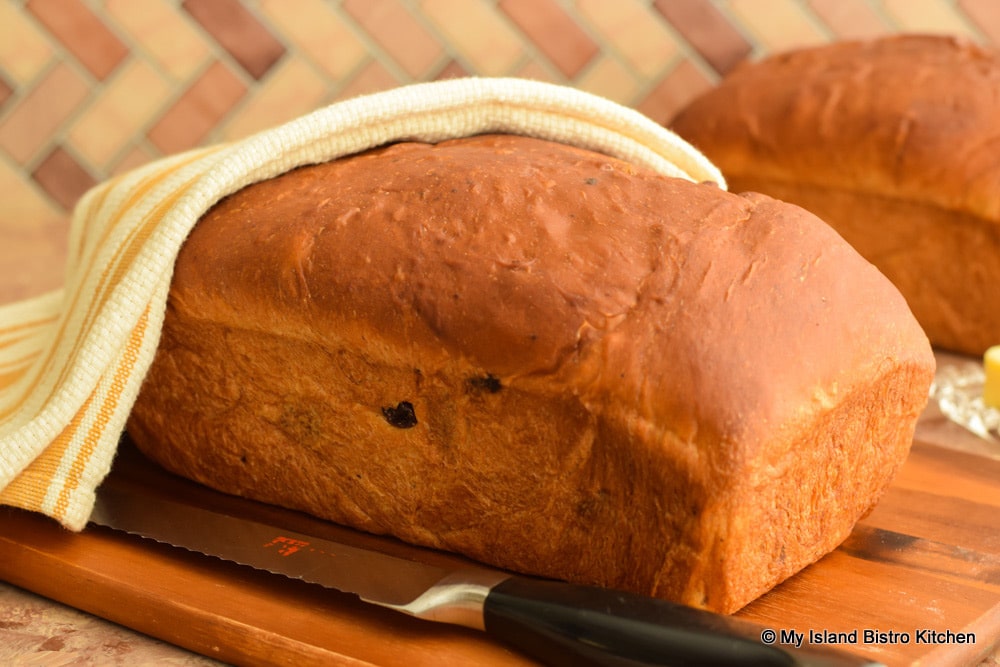
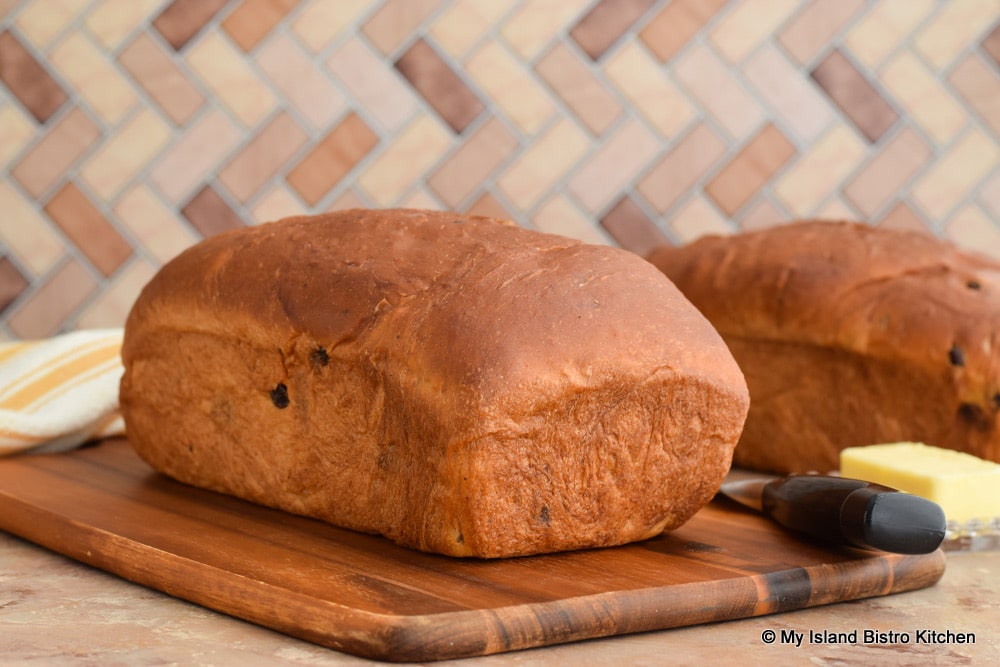
About 20 minutes before bread is expected to be ready to be baked, preheat oven to 350°F. Transfer bread to oven and bake for 30-35 minutes, or until bread is nicely browned on top and loaves sound hollow when tapped. Immediately transfer bread from pans to wire racks to cool. If desired, gently grease tops of the hot bread with butter. Cool bread completely before cutting and serving.
Yield: 2 loaves
Note: Bread flour is recommended for this recipe; however, all-purpose flour may be substituted (cup-for-cup) for the bread flour. Results may differ with substituted flour product – see accompanying blog post for details and explanation.
Old-fashioned Raisin Bread
Ingredients
- ¾ cup milk (no less than 2%M.F.)
- ¾ cup warm water (110°F)
- 2½ tbsp molasses
- 1/3 cup + 1 tbsp brown sugar, packed
- 3 tbsp butter, room temperature
- ½ tbsp salt
- 1 tsp cinnamon
- ½ tsp nutmeg
- 1 large egg, room temperature, lightly beaten
- ½ cup warm water (110°F)
- 1 tsp granulated sugar
- 1 tbsp + 1 tsp traditional active dry yeast
- 1¾ cups raisins
- 5 – 5½ cups bread flour (*see note below)
- 2 tsp butter, room temperature, for greasing tops of loaves (optional)
- Cooking oil (for hands when kneading dough)
Instructions
-
Assemble and measure out all ingredients before beginning.
-
In medium-sized saucepan, over medium-high heat, bring milk to the scalding point (180°F), stirring frequently to prevent milk from scorching. Do not boil the milk. Remove from heat and stir in the warm water, molasses, brown sugar, butter, salt, cinnamon, and nutmeg. Stir until sugar has dissolved and butter has melted. Let mixture cool to about 110°F then whisk in the lightly beaten egg.
-
While the milk mixture is cooling, place ½ cup warm water (110°F) in large 2-cup measuring cup or bowl. Stir 1 tsp sugar into the warm water until sugar is dissolved. Sprinkle yeast over the water and quickly, but gently, stir in the yeast. Let yeast stand, undisturbed with no stirring, for about 10-12 minutes, or until yeast is foamy and bubbly. Stir down yeast.
-
In bowl of stand mixer fitted with dough hook, combine the liquid ingredients with the yeast along with 2 cups of the flour gradually added, one cup at a time. Beat on slow speed to blend ingredients then increase speed to medium (e.g., the “6” setting on KitchenAid Classic mixer) and beat for 1 minute. Scrape the bowl to ensure all ingredients are incorporated. Add the raisins. Again, with mixer on slow speed, gradually add 2 more cups of flour, about a cup at a time. Increase speed to medium and beat mixture for 1 minute. Transfer mixture to a lightly floured surface, using some of the remaining flour to flour the work surface. With hands greased with a small amount of vegetable oil, begin kneading the dough by hand, continuing to add more of the flour called for in the recipe until the dough is smooth, elastic, and pliable, about 8-10 minutes. Periodically re-grease hands with the oil as necessary to prevent them from sticking to the dough. (Note: If you have a very large mixer, the dough could be completely kneaded by mixer; however, if you have a standard-sized stand mixer, it will be difficult to get the dough perfectly kneaded by mixer with the quantity of flour called for in this recipe).
-
Grease a bowl large enough to allow the dough to double in size. Grease all sides of dough with vegetable oil to prevent it from drying out and transfer dough to prepared bowl. Cover the top of the bowl loosely with plastic wrap that has been sprayed with cooking oil. Cover bowl completely with a towel or lightweight blanket and place in warm, draft-free location to rise until dough doubles in size, about 1¼ - 1¾ hours.
-
Prepare two 9”x5”x3” loaf pans by greasing all sides of pans.
-
Using vegetable oil, grease the work surface. Punch down dough in bowl with fist and turn dough out onto greased surface. Divide dough into two equal portions.
-
Shape each portion of dough into an oval loaf shape and place in prepared pans.
-
Cover loaves loosely with a tea towel and place in warm, draft-free location to rise again for between 45 and 60 minutes.
-
About 20 minutes before bread is expected to be ready to be baked, preheat oven to 350°F. Transfer bread to oven and bake for 30-35 minutes, or until bread is nicely browned on top and loaves sound hollow when tapped. Immediately transfer bread from pans to wire racks to cool. If desired, gently grease tops of the hot bread with butter. Cool bread completely before cutting and serving.
Recipe Notes
Copyright My Island Bistro Kitchen 2020
Yield: 2 loaves
Note: Bread flour is recommended for this recipe; however, all-purpose flour may be substituted (cup-for-cup) for the bread flour. Results may differ with substituted flour product – see accompanying blog post for details and explanation.
You may also enjoy these other bread recipes from My Island Bistro Kitchen:
Homemade White Bread
Rustic Oatmeal Bread (aka Porridge Bread)
Whole Wheat Bread
Connect on social media with My Island Bistro Kitchen:
Join the Facebook page for My Island Bistro Kitchen: https://www.facebook.com/MyIslandBistroKitchen/
Follow “the Bistro” on “X” (formerly Twitter): https://twitter.com/PEIBistro/
See the drool-worthy gallery of mouth-watering food photos from My Island Bistro Kitchen on Instagram: https://www.instagram.com/peibistro/
Follow “the Bistro” on Pinterest at https://www.pinterest.ca/peibistro/ and pin the Pinterest-ready photo below to your favorite Pinterest boards!
PIN ME TO PINTEREST!