
From my vintage files comes the recipe for this old-fashioned treat known as Rice Krispies Squares.
Continue reading RICE KRISPIES SQUARE RECIPE
From my vintage files comes the recipe for this old-fashioned treat known as Rice Krispies Squares.
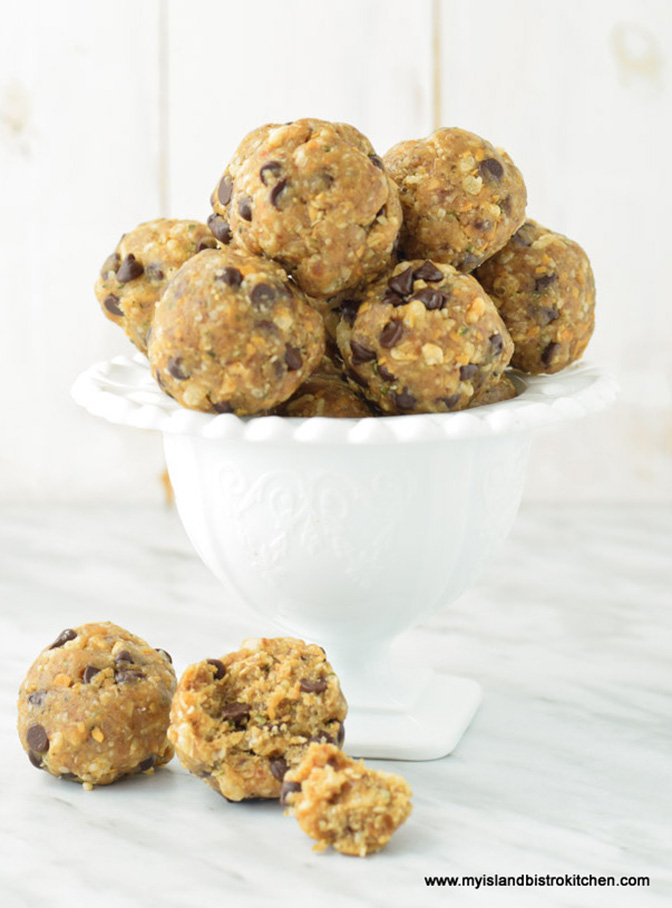
Continue reading RICE KRISPIES SQUARE RECIPEThese no-bake Roasted Cashew and Coconut Bliss Bites are a substantial snack. Whether enjoyed with a lovely cup of tea or coffee or as on-the-go snacks, they are a great pick-up refreshment anywhere and any time.
These Chinese Chews are super tasty – a little chewy and a little crunchy. Apart from basic pantry ingredients, the two key ingredients in Chinese Chews are dates and nuts.
This recipe is also versatile in that it can, instead of being formed into balls, be left as a square when it comes out of the oven and then, once it has cooled, sprinkled with icing sugar (aka powdered sugar or confectioner’s sugar) and cut into squares. Continue reading Chinese Chews Recipe

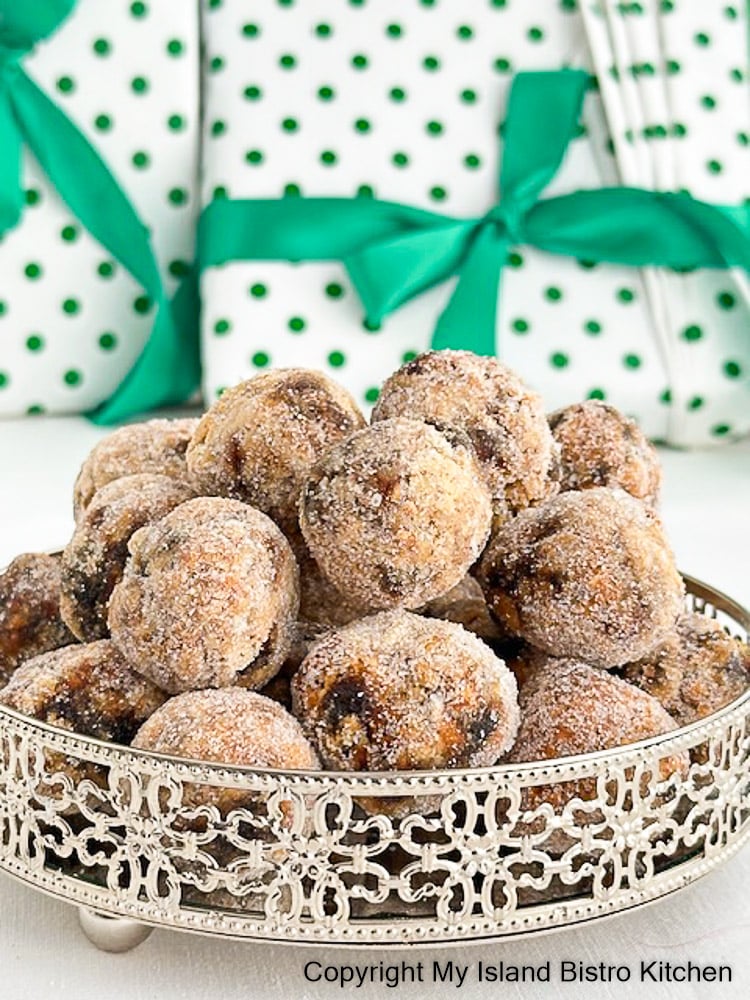
These Rum Balls are adult-only treats. They are not intended for consumption by children. So, yay, the adults get to have their very own secret treats they don’t have to share with the kids! These rum-infused balls are a classic adult treat around the holidays. Continue reading Right Some Good Rum Balls
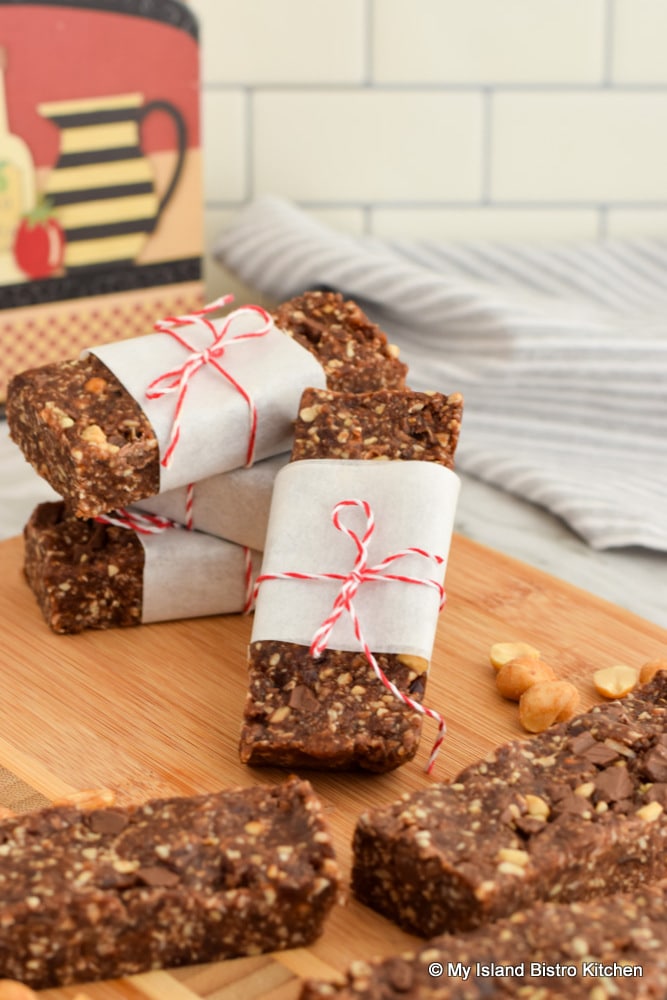
These powerhouse Roasted Peanut and Mocha Energy Bars are a substantial snack. They are a great pick-up snack anywhere and any time. Continue reading Roasted Peanut and Mocha Energy Bars Recipe
These Coffee Hazelnut Energy Bites prove there is more than one way to enjoy coffee! Continue reading Coffee Hazelnut Energy Bites
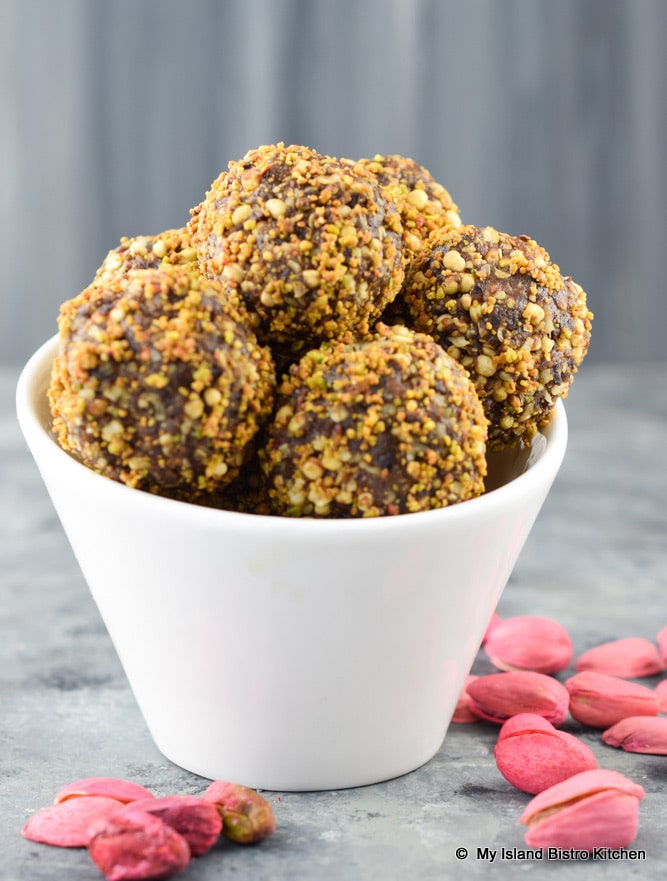
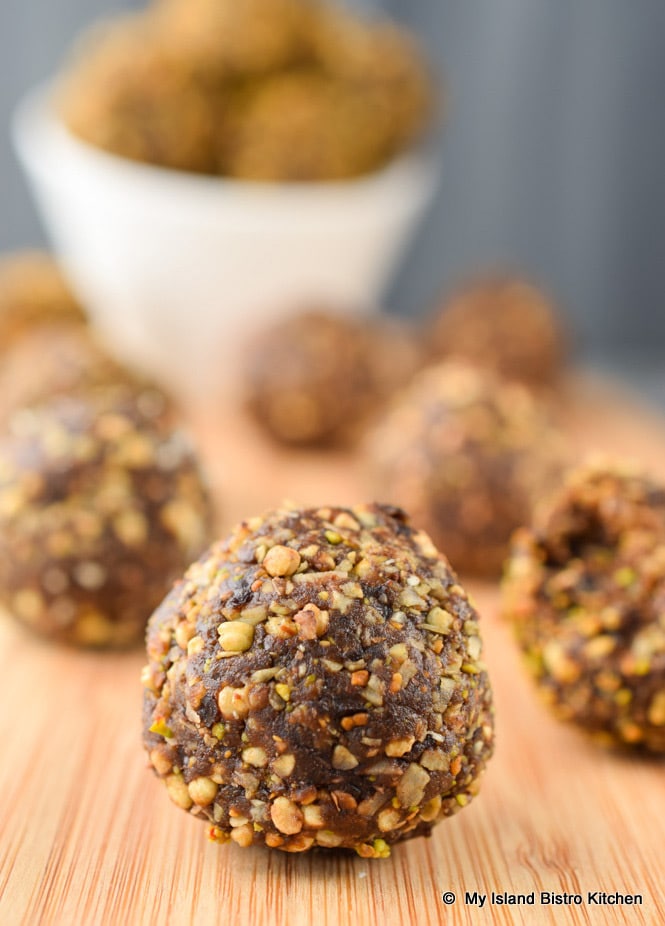
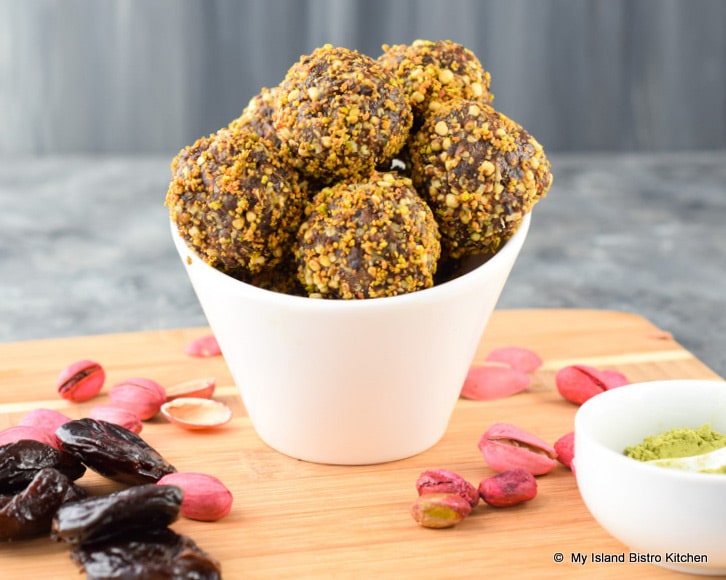
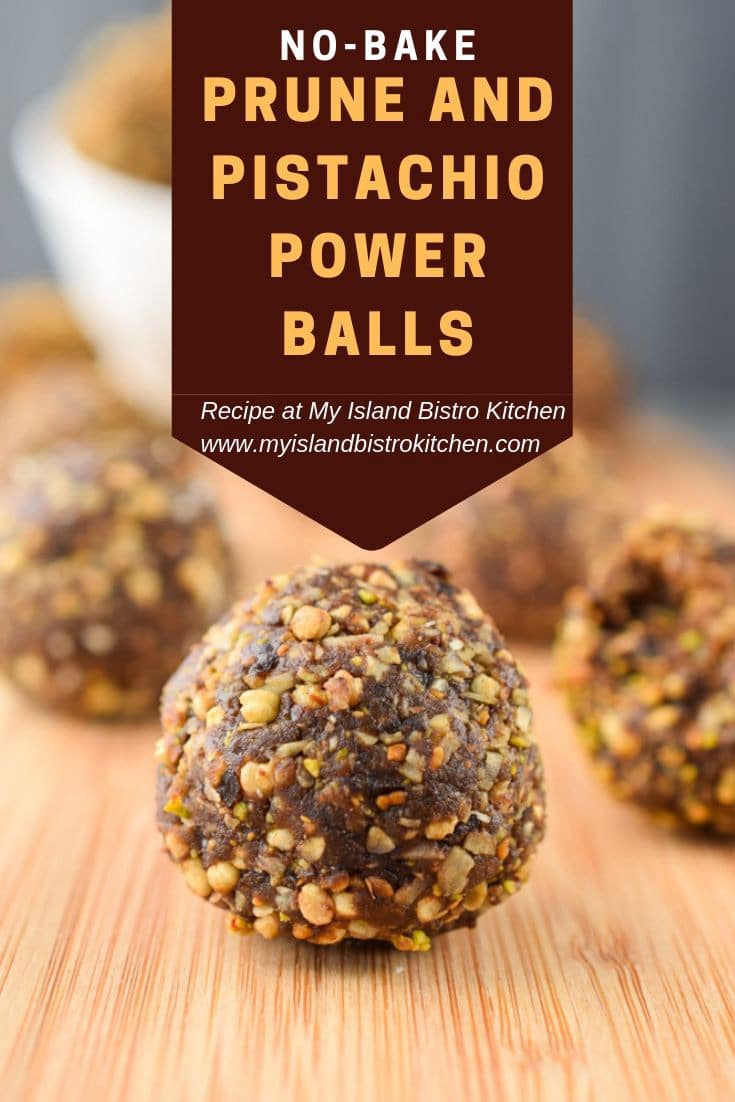
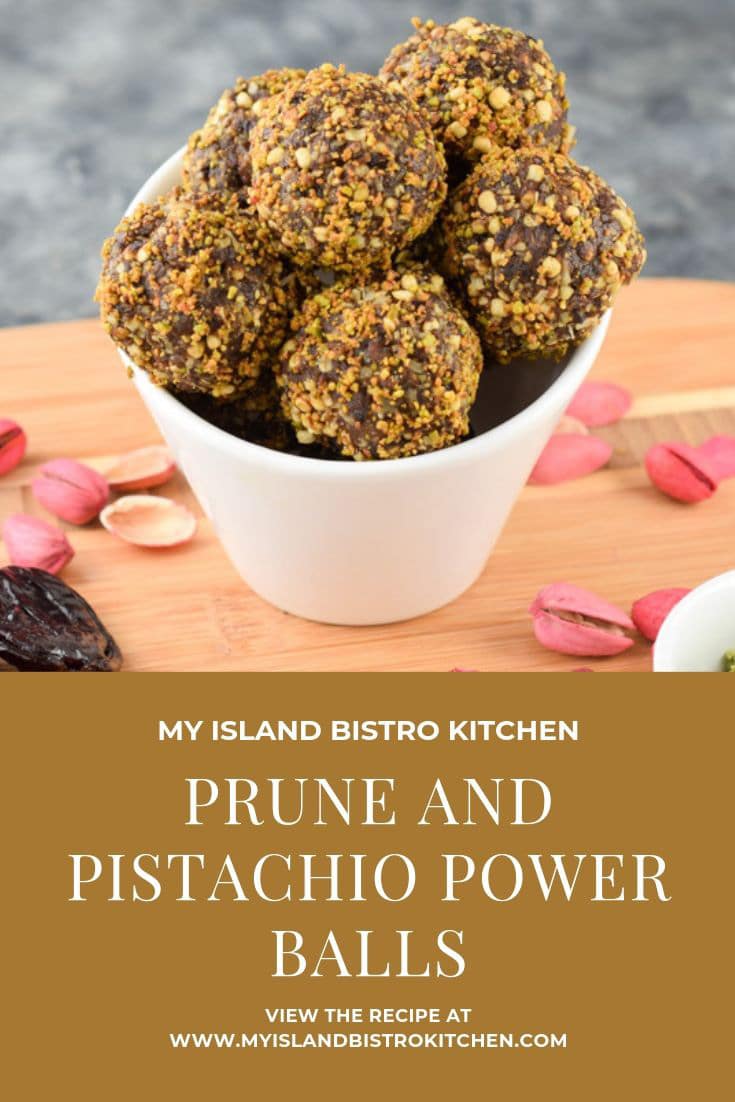
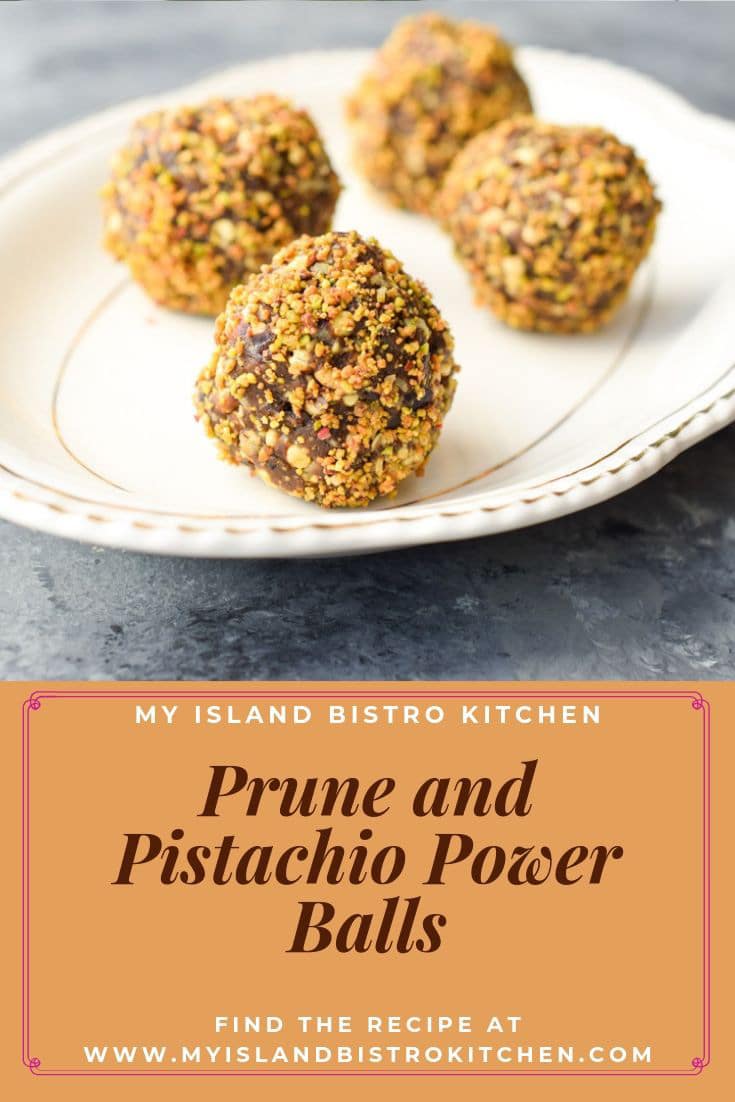
Power balls (sometimes called energy balls, energy bites, or bliss balls) are a super tasty, portable, and convenient on-the-go snack. They are great for the lunch bags and they are the perfect pre- or post-workout snack.
Made with a blend of carefully selected ingredients, these tasty Prune and Pistachio Power Balls provide a great energy boost, particularly during the mid-afternoon slump when energy typically starts to wane for many.
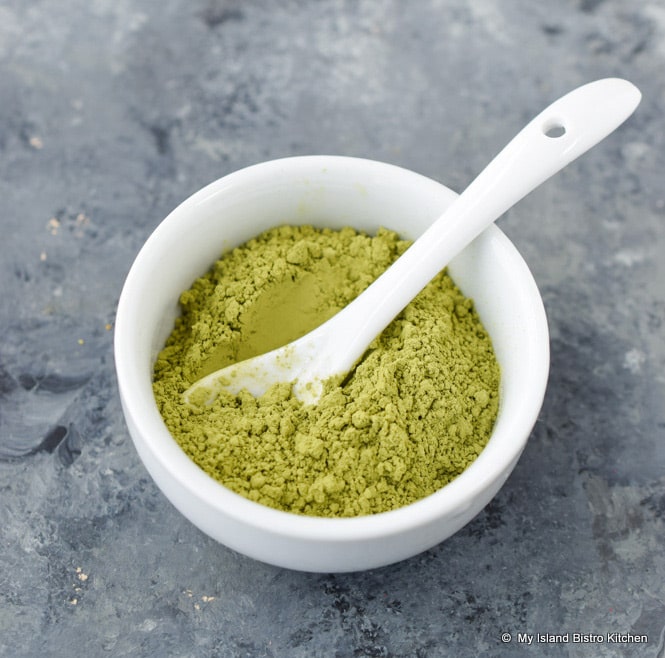
Apart from the usual pantry staples, I bought all of the ingredients for the balls at my local bulk food store. It’s an ideal store for recipes like this one that call for small amounts of ingredients, such as green tea matcha powder, that some people might not have in their cupboards.
It saves money, too, since you only need to buy what the specific recipe calls for and, in some cases, the ingredients might not be ones the home cook would use up if an entire package or bottle had to be purchased.
These power balls freeze well and are great to have in the freezer for on-the-go snacks. Check out my posting for Peanut Butter Coconut Energy Bites for an explanation of the four main sets of ingredients typically found in these types of balls. In that posting, you will also find my tips for making energy balls.
[Printable Recipe Follows at end of Posting]
Ingredients:
6 oz dried prunes, coarsely chopped (apx 1 cup chopped)
½ cup quick rolled oats (gluten-free, if required)
1/3 cup sunflower butter
½ cup pistachios, shelled and finely ground (apx. 4 oz unshelled)
1 tbsp ground chia seeds
1 tbsp cocoa
2 tsp chocolate whey protein powder
1½ tsp green tea matcha powder
pinch fine sea salt
2 tbsp maple syrup
1 tbsp coconut oil
1 tsp vanilla
2/3 cup puffed quinoa cereal
½ cup sweetened shredded coconut
Additional finely chopped pistachios for rolling balls (optional)
Method:
Pulse prunes in food processor until they become paste-like or clump into a ball. Add the rolled oats, sunflower butter, pistachios, ground chia seeds, cocoa, chocolate whey protein powder, green tea matcha powder, salt, maple syrup coconut oil, and vanilla. Pulse mixture until ingredients are completely blended.
Add the puffed quinoa cereal and coconut and pulse just until combined. If mixture seems too dry, two to three teaspoons of water may be blended into ingredients. Place mixture in the refrigerator for about 20 minutes to chill.
Roll mixture by hand into bite-sized balls. For frame of reference, each ball should weigh approximately 27 grams. Roll balls in finely chopped pistachio nuts, if desired. Place balls on parchment-lined baking sheet and freeze for 20-25 minutes to firmly set. Store balls, in single layers separated by waxed paper, in airtight container for up to five days in the refrigerator or freeze up to three months for longer storage.
Yield: Apx. 18 balls
You can join the Facebook page for My Island Bistro Kitchen: https://www.facebook.com/MyIslandBistroKitchen/
Follow “the Bistro” on “X“ (formerlyTwitter): https://twitter.com/PEIBistro/
See the drool-worthy gallery of mouth-watering food photos from My Island Bistro Kitchen on Instagram: https://www.instagram.com/peibistro/
Follow “the Bistro” on Pinterest at https://www.pinterest.ca/peibistro/
(and you can pin any of the Pinterest-ready photos below to your favorite Pinterest boards)
No-bake Chocolate Almond Bliss Balls
Peanut Butter Coconut Energy Bites

Yield: Apx. 18 balls
[Copyright My Island Bistro Kitchen]
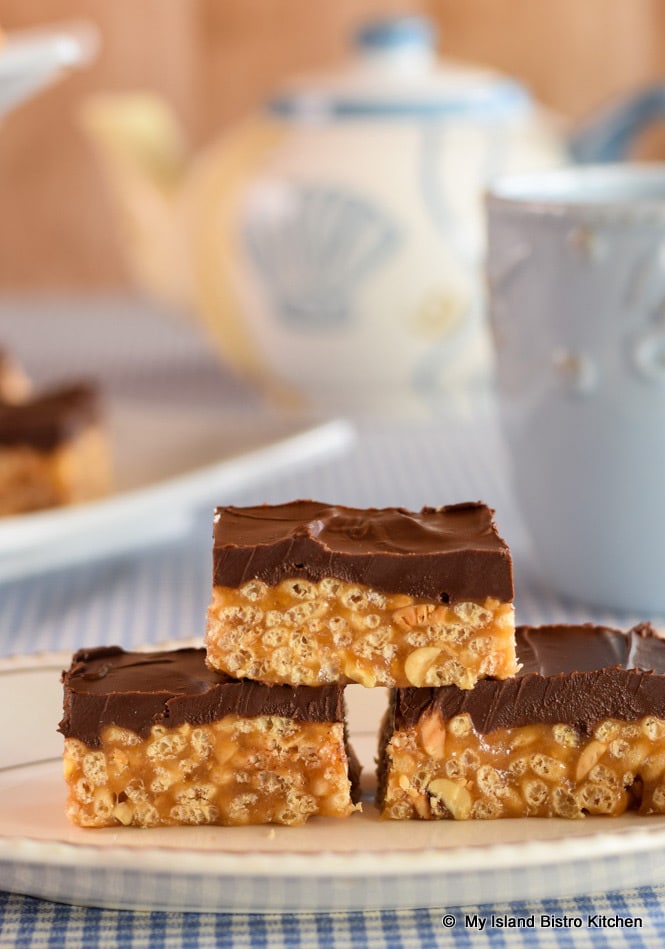
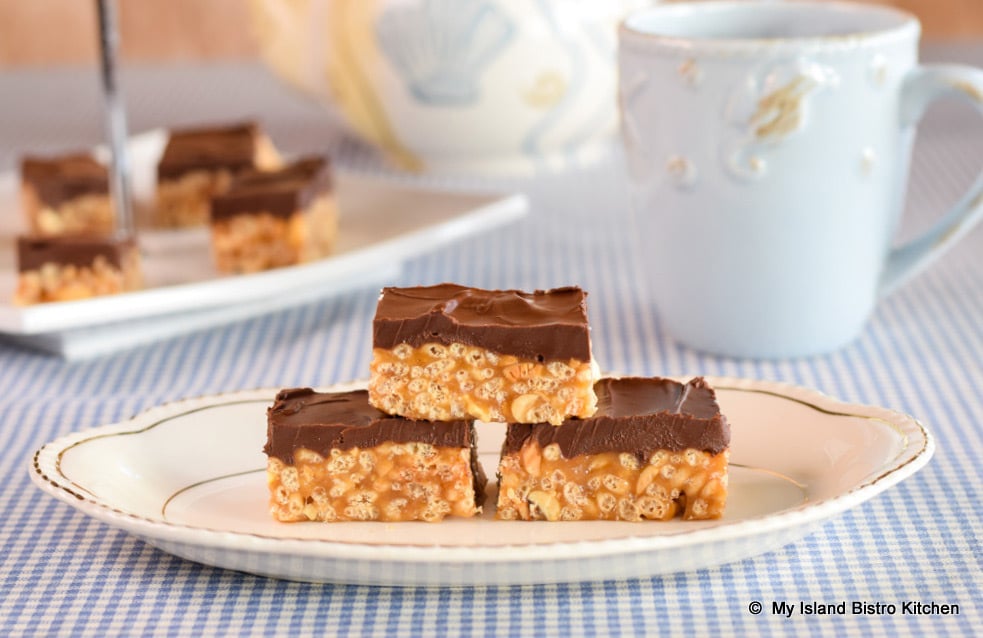
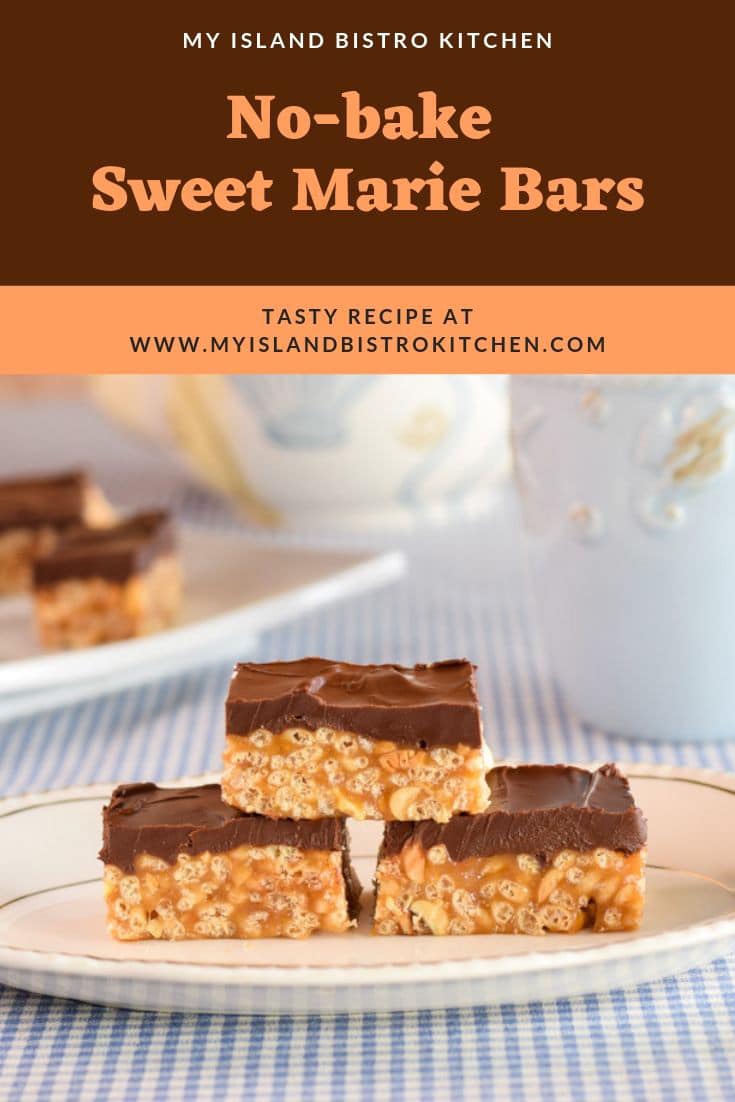
Everybody loves an easy square or bar to make that does not require careful watching as it bakes in the oven and that does not have to be frosted. Sweet Marie Bars fit nicely in that category. Taking only a few very basic ingredients, the result is one delectable treat that often finds its way on to sweet trays, particularly at Christmas.
Sweet Marie Bars have made their way into my picnic basket on more than one occasion since they are more like candy, in my opinion, than what we traditionally think of as squares or cookie bars.
This bar recipe has been around for a long time and is known by names other than Sweet Marie Bars. The core ingredients do not tend to change though the quantities may and, sometimes, the bars are iced with traditional frosting. I have seen them called Peanut Krispie Bars and a variation called Scotheroos that call for some butterscotch chips. There are probably other names for these bars and their variation(s). Regardless what they are called, they are one delectable treat any time of the year!
[Printable recipe follows]
Ingredients:
2 cups crispy rice cereal (e.g., Rice Krispies)
¾ cup salted peanuts
½ cup peanut butter
½ cup golden corn syrup
½ cup brown sugar, packed
1 tbsp butter
8 oz semi-sweet chocolate pieces or squares
¼ cup peanut butter
2 tsp butter
Method:
Line a 9”x9” square baking pan with tin foil and spray lightly with cooking spray (or grease with butter).
Stir the crispy rice cereal and salted peanuts together in a large heat-proof bowl (e.g., glass or stainless steel). Set aside.
In medium-sized, heavy-bottomed saucepan placed over low heat, combine the peanut butter, corn syrup, brown sugar, and butter. Stir until mixture is blended and heated. Do not boil.
Remove saucepan from heat and pour mixture over the cereal and peanut mixture. Stir to mix. Press mixture into prepared baking pan.
For topping, melt the chocolate in a microwave-safe bowl, a few seconds at a time. When chocolate is about half melted, stir in the peanut butter and butter. Continue to microwave in short bursts of seconds until chocolate is melted. Pour the topping over the square in pan and smooth with a knife or small flat metal spatula. Let cool completely to room temperature before lifting square from pan and cutting it into squares or bars of desired size. Square may cut out better if cooled square has been placed in the refrigerator for 15-20 minutes.
Yield: One (1) 9” pan of squares/bars

Yield: One (1) 9” pan of squares/bars
[Copyright My Island Bistro Kitchen]
Join the Facebook page for My Island Bistro Kitchen: https://www.facebook.com/MyIslandBistroKitchen/
Follow “the Bistro” on “X” (formerly Twitter): https://twitter.com/PEIBistro/
See the drool-worthy gallery of mouth-watering food photos from My Island Bistro Kitchen on Instagram: https://www.instagram.com/peibistro/
Follow “the Bistro” on Pinterest at https://www.pinterest.ca/peibistro/ and pin the Pinterest-ready photo at the end


Energy bites (sometimes called energy balls, power balls, protein balls, or bliss balls) are a super tasty and convenient on-the-go snack.
My recipe for Peanut Butter Coconut Energy Bites is easy to make. They require no cooking or baking (provided, of course, that you buy the coconut already toasted and you don’t have to turn on the oven to toast coconut) — bonus ! Made with a blend of carefully selected ingredients that pair well together, these tasty treats provide a great energy boost, particularly mid-afternoon when energy typically starts to wane for many. Continue reading Peanut Butter Coconut Energy Bites
Sometimes called energy balls, power balls, protein balls, or bliss balls, these trendy snacks are tasty little morsels. The recipe I am sharing today is for No-bake Chocolate Almond Bliss Balls, so named because they are, well, blissfully divine! Continue reading No-bake Chocolate Almond Bliss Balls