Tag Archives: Queen Elizabeth II

Gluten-Free Queen Elizabeth Cake

Gluten-free Queen Elizabeth Cake

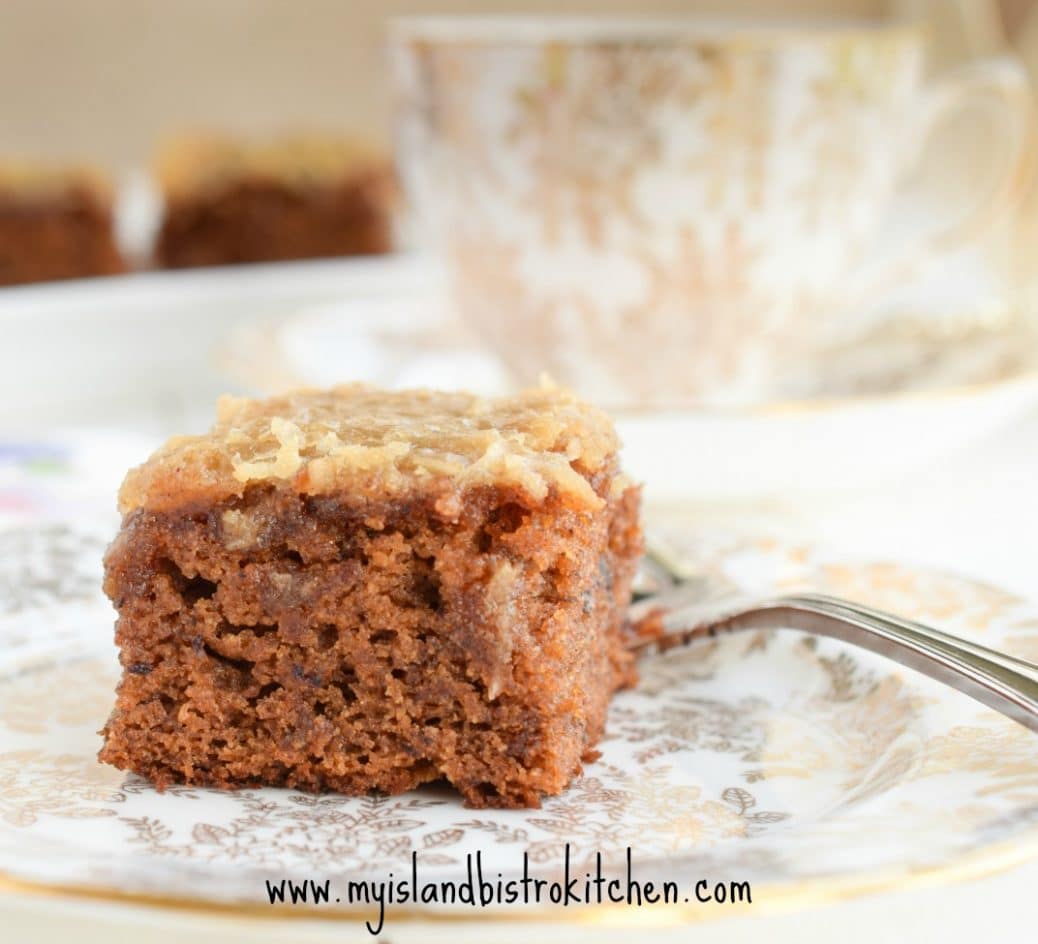
In an earlier posting, I shared my recipe for the regular gluten version of Queen Elizabeth Cake to coincide with Queen Elizabeth II’s actual birthday on April 21st.  Today, I have a special treat for my food blog followers who must follow a gluten-free diet! I have adapted my regular version of this cake to make it gluten-free.  It has passed my testing standards so I am pleased to share the recipe for this wonderfully moist and tasty Queen Elizabeth Cake that is made with very simple, basic ingredients. In fact, I’d even go so far as to suggest that it would be quite difficult to be able to tell that this version is gluten-free and, in my view, it certainly rivals its gluten version cousin in taste, texture, and overall quality.

I am timing the original publication of this gluten-free Queen Elizabeth Cake recipe with the annual Trooping of the Colour celebrations celebrated in London in June of each year. The Trooping of the Colour, a major military ceremony filled with pomp and pageantry, is often referred to as the Queen’s Birthday Parade. This tradition is said to have started in 1748 when then King George II decided to combine his birthday parade with the annual spring military parade in June because he apparently felt his actual November birthday was too cold to have a birthday parade. This tradition has endured since then, regardless when the reigning monarch’s actual birthday is and this event is considered the official celebration of the sovereign’s birthday. Held annually on a Saturday in June, the Queen attends, arriving by horse and carriage from Buckingham Palace and traveling along the Mall to the Horse Guard’s Parade behind Whitehall.

The colorful display of pageantry involves several hundred officers and men, horses, and bands.  The Queen takes the salute and inspects the troops dressed in ceremonial uniform.  “Colours” refers to the regimental flags of the various troops and the colours correspond to the colours and insignia of the uniforms of the soldiers of the different units. The colours (flags) served a purpose on the battlefields as they provided a rallying or gathering point for troops and hence the title “trooping of the colours”.

London Pagentry
London Pagentry

So, thus ends the brief history lesson!  Now, on to the Gluten-free Queen Elizabeth Cake, believed to have been named for either the Queen Mother or the reigning monarch, Queen Elizabeth II.  When I earlier shared my recipe for the gluten version of this cake, I conducted some research to try and determine the origins of the cake and its name. Click here to read the information I was able to find about the different stories about the naming of this cake.

The texture of the gluten-free Queen Elizabeth Cake, like the gluten version, is somewhat dense and owes its lovely moist texture to the cooked dates. The combination of coconut and almond flours with the gluten-free 1-to-1 baking flour are the key to this cake’s texture. The almond and coconut flours really do provide a pleasing flavor to the cake.

Gluten-free Queen Elizabeth Cake

The following hints may be of use when making this cake:

  • This is a single layer cake. Use an 8” square baking pan to ensure this cake has a good height. A 9” square pan may be used but the cake will lack depth and more closely resemble a square as opposed to a cake. I find gluten-free flours take more leavening than gluten flours do and, even at that, it can still be difficult to get baked goods to rise to the height of a similar recipe that calls for gluten flour products. Grease the pan or line it with parchment paper or greased tin foil. Leaving an overhang of extra parchment paper or tin foil over the edge of the pan will make it easier to lift the entire baked cake from the pan and facilitate its  cutting.
  • Let the date mixture cool completely at room temperature before incorporating it with the dry ingredients. If it is mixed with the dry ingredients while the mixture is either hot or warm, it may result in a “gummy” texture or soggy cake.
  • Mix the wet and dry ingredients using the rule of 3 parts dry and 2 parts wet ingredients, starting and ending with the dry ingredients.
  • Mix the ingredients well but don’t beat them as this may create a “tough crumb” cake.
  • Use cream to make the topping. I used 35% cream which gives a luxurious topping but 18% cream may also be used.
  • Start checking the cake for doneness at the point where the cake has been baking for 25 minutes then, if it is not baked, check it every 3-4 minutes after. The cake will be done when the cake tester, inserted into the center of the cake, comes out completely clean and dry.
  • When the cake tests almost baked (about 5 minutes before it is expected to come out of the oven), start making the topping. It needs to go on the warm cake that will go back in the oven for 3-4 minutes after the topping has been added.
  • The topping, like making homemade fudge, can set up really fast. Don’t leave it unattended. Stir the ingredients as they boil gently for the 3 minutes. Watch it carefully and, if you see if starting to “set up” and thicken really fast (even if it is before the 3 minutes of boiling is up), remove it from the stove and quickly stir in the vanilla and coconut. The mixture should be of the consistency that it can be poured from the saucepan and spread over the cake with a knife. If it becomes too thick, it will be too sugary and won’t be of spreading consistency. It will also become brittle and crack.

[Printable version of the recipe follows at end of posting]

Gluten-Free Queen Elizabeth Cake

Ingredients:

¾ cup dates, chopped (apx. 4¼ oz)
¾ tsp baking soda
¾ cup boiling water

¾ cup of 1-to-1 gluten free baking flour
1/3 cup almond flour
2½ tbsp coconut flour
1 tsp baking powder
1/8 tsp salt
¾ tsp cinnamon
¼ tsp nutmeg
Pinch allspice
¼ cup butter, softened at room temperature
2/3 cup granulated sugar
1 extra large egg
¼ tsp orange extract
¾ tsp vanilla

Topping:
2½ tbsp melted butter
½ cup brown sugar
2¼ tbsp cream
¾ tsp vanilla
½ cup shredded coconut

Method:
Cake:
Place dates and soda in medium-sized saucepan.  Add the boiling water. Simmer for about 4-5 minutes then cool completely at room temperature.

Position oven rack in centre of oven and preheat oven to 350°F.  Grease 8” baking pan or line with parchment paper (or even greased tin foil).

Sift 1-to-1 gluten free baking flour, almond flour, coconut flour, baking powder, salt, and spices together. Set aside.

In bowl of stand mixer, cream the butter and sugar.  Beat in the egg, orange extract, and vanilla. Transfer mixture to cooled dates. Stir well.

Transfer one-third of the sifted dry ingredients to the mixer bowl.  Beat in one-half of the wet ingredients. Add another third of the dry ingredients. Blend well. Mix in the remainder of the wet ingredients.  Finish by incorporating the remaining dry ingredients. Mix well to combine. Don’t overmix.

Spread batter evenly in prepared baking pan.  Transfer to preheated oven and bake for approximately 25-30 minutes or until a cake tester inserted into center of cake comes out clean. Remove the cake from the oven. Increase oven temperature to 400°F to prepare for browning of cake’s topping.

Topping:
About 5 minutes before the cake is due to be removed from the oven, begin to prepare the cake topping.  In medium-sized saucepan, melt the butter.  Blend in the brown sugar and cream. Bring to a boil over medium heat and boil for 3 minutes, stirring regularly to prevent scorching. Remove from heat and quickly stir in the vanilla and coconut. Pour and spread this mixture evenly over the warm cake and return it to the oven to brown slightly for 3-4 minutes. Remove cake from oven and place on wire rack to cool completely before cutting and serving.

Yield:  1 – 8” single layer cake

This cake is suitable as a snacking cake, dessert, tea cake, or even a picnic cake. The cake freezes well.

The Queen Elizabeth Cake pairs particularly well with a good cup of tea.  My recommendation for a tea pairing would be an Earl Grey blend.  The citrus notes in this black tea complement the sweetness of the cake. Earl Grey tea has a high concentration of tannins which makes it a suitable tea to cleanse the mouth after each bite of the cake so that each bite of this moist and flavorful cake is as equally tasty as the first!

Gluten-free Queen Elizabeth Cake on gold and white plate with matching cup and saucer and a gold and white teapot in the background
Gluten-free Queen Elizabeth Cake

Gluten-Free Queen Elizabeth Cake

Yield: 1 - 8" square single-layer cake

A moist and tasty gluten-free cake featuring dates, spices, and a toffee-like topping.

Ingredients

  • ¾ cup dates, chopped (apx. 4¼ oz)
  • ¾ tsp baking soda
  • ¾ cup boiling water
  • ¾ cup of 1-to-1 gluten free baking flour
  • 1/3 cup almond flour
  • 2½ tbsp coconut flour
  • 1 tsp baking powder
  • 1/8 tsp salt
  • ¾ tsp cinnamon
  • ¼ tsp nutmeg
  • Pinch allspice
  • ¼ cup butter, softened at room temperature
  • 2/3 cup granulated sugar
  • 1 extra large egg
  • ¼ tsp orange extract
  • ¾ tsp vanilla
  • Topping:
  • 2½ tbsp melted butter
  • ½ cup brown sugar
  • 2¼ tbsp cream
  • ¾ tsp vanilla
  • ½ cup shredded coconut

Instructions

  1. Cake:
  2. Place dates and soda in medium-sized saucepan. Add the boiling water. Simmer for about 4-5 minutes then cool completely at room temperature.
  3. Position oven rack in centre of oven and preheat oven to 350°F. Grease 8” baking pan or line with parchment paper (or even greased tin foil).
  4. Sift 1-to-1 gluten free baking flour, almond flour, coconut flour, baking powder, salt, and spices together. Set aside.
  5. In bowl of stand mixer, cream the butter and sugar. Beat in the egg, orange extract, and vanilla. Transfer mixture to cooled dates. Stir well.
  6. Transfer one-third of the sifted dry ingredients to the mixer bowl. Beat in one-half of the wet ingredients. Add another third of the dry ingredients. Blend well. Mix in the remainder of the wet ingredients. Finish by incorporating the remaining dry ingredients. Mix well to combine. Don’t overmix.
  7. Spread batter evenly in prepared baking pan. Transfer to preheated oven and bake for approximately 25-30 minutes or until a cake tester inserted into center of cake comes out clean. Remove the cake from the oven. Increase oven temperature to 400°F to prepare for browning of cake’s topping.
  8. Topping:
  9. About 5 minutes before the cake is due to be removed from the oven, begin to prepare the cake topping. In medium-sized saucepan, melt the butter. Blend in the brown sugar and cream. Bring to a boil over medium heat and boil for 3 minutes, stirring regularly to prevent scorching. Remove from heat and quickly stir in the vanilla and coconut. Pour and spread this mixture evenly over the warm cake and return it to the oven to brown slightly for 3-4 minutes. Remove cake from oven and place on wire rack to cool completely before cutting and serving.
Schema/Recipe SEO Data Markup by Yummly Rich Recipes
https://myislandbistrokitchen.com/2017/06/17/gluten-free-queen-elizabeth-cake/

This gluten-free Queen Elizabeth Cake features dates, spices, and a delectable toffee-like topping

Gluten-free Queen Elizabeth Cake

Queen Elizabeth Cake Recipe

Ever wonder about the history of old vintage recipes?  I so wish that accurate records existed about the origins of some of the old nostalgic recipes like the one for Queen Elizabeth Cake, for example.

Queen Elizabeth Square
Queen Elizabeth Cake

This is one recipe that has some history to it but just how much is fact and how much is fable, myth, or folklore is up for certain debate.

Queen Elizabeth Cake is, next to a plain white vanilla or simple chocolate cake, probably one of the most basic, nondescript cakes you could come by. Made with a simple batter with some dates and mild spices mixed in, its glory comes from the topping made of butter, brown sugar, cream, vanilla, and coconut that almost borders on toffee. Yes, this will remind you of a cold version of sticky date pudding.

Now, sometimes, you may see this referred to as Queen Elizabeth “Square” versus “Cake”. However, I think it most closely resembles a cake more so than a square. This is because the texture is light and tender, the crumb an even grain, and the body of the cake has a springiness to the touch. This is in contrast to what defines a typical square (or bars) – i.e., a dense texture and chewy consistency. I would class this cake as a hearty, substantial cake.

Queen Elizabeth Square
Queen Elizabeth Cake

So, just where and when did Queen Elizabeth Cake originate?  This is where fact and fiction intertwine and become somewhat blurry.  I did quite a bit of research on this cake. One intriguing story is that it is Her Majesty Queen Elizabeth II’s own recipe from which she made cakes herself and sold them for charitable purposes. This claim suggests the recipe originated in Buckingham Palace after the 1953 Coronation. I could find no information or evidence to substantiate this claim and neither could I find any reference to this history on the Buckingham Palace website.

In the June 1953 issue of the Canadian magazine, Chatelaine, a recipe for Queen Elizabeth II Cake was published. Chatelaine’s April 20, 2016, online posting which shared a photo of the 1953 published recipe claims it “was created specifically for the Queen’s Coronation” but gives no indication of who the actual creator was or any detail about how or why the specific ingredients were chosen.

Other information suggests the cake may have been created much earlier to commemorate Queen Elizabeth, the Queen Mother’s popularity and her historic visit with her husband, King George VI, to Canada in 1939.

Yet, other information suggests the cake was appearing in local community cookbooks in the 1940s when it was known as “Princess Elizabeth Cake” and there is suggestion that the name may have been changed to “Queen Elizabeth Cake” after the 1953 Coronation of Her Majesty Queen Elizabeth II.

So, all this to say, I could not definitively, with any degree of accuracy, determine the exact origins of this cake. I do personally recall childhood memories of this cake appearing at community and church events in the 1960s and 1970s in the part of Prince Edward Island in which I grew up.  Plates of sweets inevitably always had this cake on it, although I believe it was referred to as Queen Elizabeth “Square”.  I am reasonably certain of the specific ladies who would, most likely, have been the makers of this cake but they have, unfortunately, all passed on, taking with them whatever memories they may have had associated with the Queen Elizabeth Cake/Square.

Queen Elizabeth Cake

Granted, I’ll admit the Queen Elizabeth Cake is not the most attractive cake but, boy oh boy, do the flavor, moist texture, and the kicker topping more than make up for it! This is one cake that, as the old saying goes, you ought not judge the book by the cover!  While this is not a cake that my mother made, she does have it in a handwritten recipe “scribbler” that was started in 1963. There is no indication on the handwritten recipe whose it was or where it came from. It cryptically lists the ingredients but contains no method, baking pan size, or baking temperature. This is typical because cooks, in years gone by, simply knew how to pull together a cake and, from whomever the recipe was gotten, it was probably baked in the cook’s wood stove oven (I’ll never know how they regulated the temperature in those). My mother says the cake was probably popular because it needed no frosting/icing since the topping is the “dressing” on the cake.

Queen Elizabeth Cake

I have taken the basic recipe, adapted some of the ingredients and proportions, added some additional flavoring and spices (the recipe I adapted this one from had no spices listed) and tested the recipe out using different baking pan sizes, writing down the instructions as I worked. What has resulted is this recipe for one of the most tasty tray/slab cakes imaginable given that it is made with such simple, basic kitchen staple ingredients.

Some tips on making Queen Elizabeth Cake:

  • You may think there isn’t enough batter for a 9”x13” cake but there is – there is 1 teaspoon each of baking powder and soda so this cake will rise to a nice height in this size of pan. I tested it first in a 9″x9″ pan but found the cake was too tall in it.
  • The pan may be greased or it may be lined with parchment paper (or even greased tin foil). If using either of the latter, make sure you leave enough paper or tin foil overhang which can be used as “handles” to lift the cake out of the pan. Hint – This method makes both the cutting and removal of the cake from the pan easier than doing so while it is still in the pan.
  • Let the date mixture cool completely at room temperature. Adding it to the dry ingredients while it is either hot or warm can make for a “gummy” texture or soggy cake.
  • Mix the wet and dry ingredients using the rule of 3 parts dry and 2 parts wet ingredients, starting and ending with the dry ingredients.
  • Mix the ingredients well but don’t beat them as this may create a “tough crumb” cake.
  • Use cream to make the topping. I used 18% cream but 35% cream will create an even more luxurious topping (but also add a few more calories!).
  • Start checking the cake for doneness at the point where the cake has been baking for 30 minutes then, if it is not baked, check it every 4-5 minutes after. The cake will be done when the cake tester, inserted into the center of the cake, comes out completely clean and dry.
  • When the cake tests almost baked (about 5 minutes before it is expected to come out of the oven), start making the topping. It needs to go on the warm cake that will go back in the oven for 3-4 minutes after the topping has been added.
  • The topping is a little bit like making candy. It can set up really fast. Don’t leave it unattended. Stir the ingredients as they boil gently for the 3 minutes. Watch it carefully – if you see if starting to “set up” and thicken really fast (even if it is before the 3 minutes of boiling is up), remove it from the stove and stir in the vanilla and coconut. The mixture should be of the consistency that it can be poured from the saucepan and spread over the cake with a knife. If it becomes too thick, it will be too sugary and won’t be of spreading consistency.

Splendid, no matter its history or how it’s served, this cake pairs particularly well with a spot of tea…. perhaps Earl Grey blend.  This is a smooth black tea that has citrus notes that complement the sweetness of the cake. With its high concentration of tannins, it’s also a great tea to cleanse the mouth after each bite of the cake so that every bite of this moist and flavorful cake tastes as good as the first one!

Queen Elizabeth Square
Queen Elizabeth Cake

[Printable Recipe Follows at end of Posting]

Queen Elizabeth Cake

 Ingredients:
1 cup dates, chopped
1 tsp soda
1 cup boiling water

1½ cups all-purpose flour
1 tsp baking powder
¼ tsp salt
1 tsp cinnamon
¼ tsp nutmeg
Pinch allspice

¼ cup butter
1 cup granulated sugar
1 extra large egg, lightly beaten
¼ tsp orange extract
1 tsp vanilla

Topping:
3 tbsp melted butter
2/3 cup brown sugar
3 tbsp cream (18%)
½ tsp vanilla
2/3 cup shredded coconut

Method:

Cake:

Place dates and soda in medium-sized saucepan.  Add the boiling water. Simmer for about 4-5 minutes then cool completely at room temperature.

Position oven rack in centre of oven and preheat oven to 350°F.  Grease 9”x13” baking pan or line with parchment paper (or even greased tin foil).

Sift flour, baking powder, salt, and spices together. Set aside.

In bowl of stand mixer, cream the butter and sugar.  Beat in the egg, orange extract, and vanilla. Transfer mixture to cooled dates. Stir well.

Transfer one-third of the sifted dry ingredients to the mixer bowl.  Beat in one-half of the wet ingredients. Add another third of the dry ingredients. Blend well. Mix in the remainder of the wet ingredients.  Finish by incorporating the remaining dry ingredients. Mix well to combine. Don’t overmix.

Spread batter evenly in prepared baking pan.  Transfer to preheated oven and bake for approximately 30-40 minutes, until a cake tester inserted into center of cake comes out clean. Remove the cake from the oven.

Topping:

About 5 minutes before the cake is due to be removed from the oven, begin to prepare the cake topping.  In medium-sized saucepan, melt the 3 tablespoons of butter.  Blend in the brown sugar and cream. Bring to a boil over medium heat and boil for 3 minutes, stirring regularly to prevent scorching. Remove from heat and quickly stir in the vanilla and coconut. Pour and spread this mixture evenly over the warm cake and return it to the oven to brown slightly for 3-4 minutes. Remove cake from oven and place on wire rack to cool completely before cutting and serving.

This cake freezes well.

Yield:  1 – 9”x13” single layer cake

For my Gluten-free version of Queen Elizabeth Cake, click here.

Queen Elizabeth Cake

Yield: 1 - 9"x13" cake

This moist and flavorful cake is made with dates and spices and features a delectable toffee-like topping

Ingredients

  • 1 cup dates, chopped
  • 1 tsp soda
  • 1 cup boiling water
  • 1½ cups all-purpose flour
  • 1 tsp baking powder
  • ¼ tsp salt
  • 1 tsp cinnamon
  • ¼ tsp nutmeg
  • Pinch allspice
  • ¼ cup butter
  • 1 cup granulated sugar
  • 1 extra large egg, lightly beaten
  • ¼ tsp orange extract
  • 1 tsp vanilla
  • Topping:
  • 3 tbsp melted butter
  • 2/3 cup brown sugar
  • 3 tbsp cream (18%)
  • ½ tsp vanilla
  • 2/3 cup shredded coconut

Instructions

  1. Cake:
  2. Place dates and soda in medium-sized saucepan. Add the boiling water. Simmer for about 4-5 minutes then cool completely at room temperature.
  3. Position oven rack in centre of oven and preheat oven to 350°F. Grease 9”x13” baking pan or line with parchment paper (or even greased tin foil).
  4. Sift flour, baking powder, salt, and spices together. Set aside.
  5. In bowl of stand mixer, cream the butter and sugar. Beat in the egg, orange extract, and vanilla. Transfer mixture to cooled dates. Stir well.
  6. Transfer one-third of the sifted dry ingredients to the mixer bowl. Beat in one-half of the wet ingredients. Add another third of the dry ingredients. Blend well. Mix in the remainder of the wet ingredients. Finish by incorporating the remaining dry ingredients. Mix well to combine. Don’t overmix.
  7. Spread batter evenly in prepared baking pan. Transfer to preheated oven and bake for approximately 30-40 minutes, until a cake tester inserted into center of cake comes out clean. Remove the cake from the oven.
  8. Topping:
  9. About 5 minutes before the cake is due to be removed from the oven, begin to prepare the cake topping. In medium-sized saucepan, melt the 3 tablespoons of butter. Blend in the brown sugar and cream. Bring to a boil over medium heat and boil for 3 minutes, stirring regularly to prevent scorching. Remove from heat and quickly stir in the vanilla and coconut. Pour and spread this mixture evenly over the warm cake and return it to the oven to brown slightly for 3-4 minutes. Remove cake from oven and place on wire rack to cool completely before cutting and serving.

Notes

Please refer to entire blog posting for hints and tips on making this cake.

Schema/Recipe SEO Data Markup by Yummly Rich Recipes
https://myislandbistrokitchen.com/2017/04/19/queen-elizabeth-cake-recipe/

Queen Elizabeth Cake

PIN ME TO PINTEREST!

Queen Elizabeth Cake


Queen Elizabeth Cake