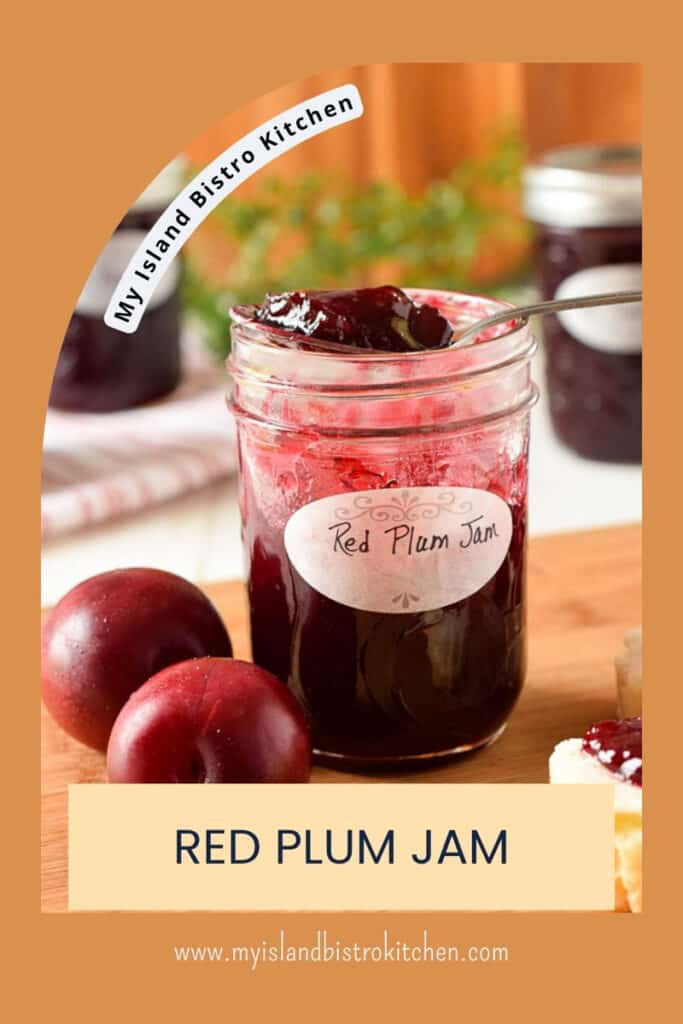
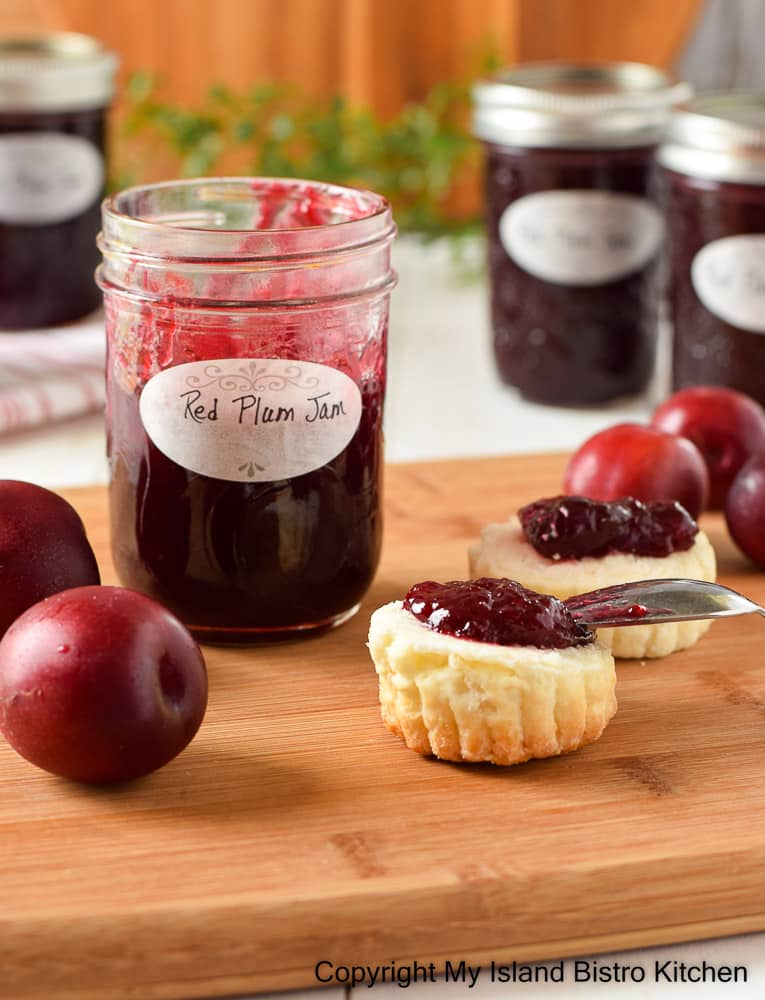
One of the best ways to preserve fresh, locally grown fruit is to make it into jam that can be enjoyed over the forthcoming months. Today, I am sharing my recipe for Red Plum Jam.
I use the Vampire variety of red plums (shown below) for this jam.
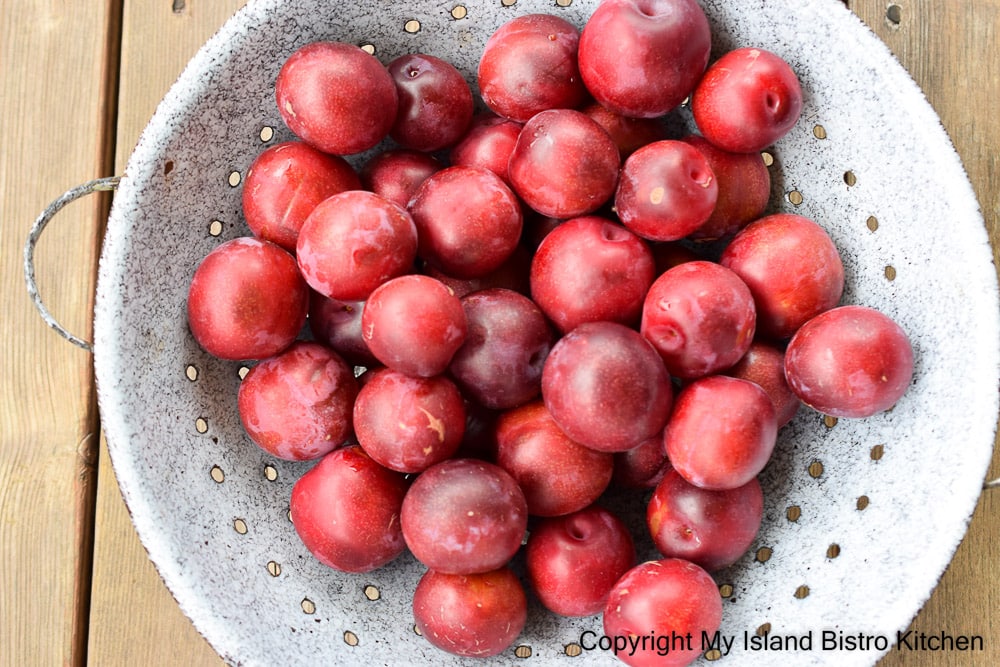
These red-skinned plums have a deep crimson flesh and lovely flavor. When transformed into jam, expect it to be a dark, rich burgundy color. Other varieties of red plums suitable for jamming may work well, too. The Vampire red plums are grown by a local orchard farmer here in PEI and I have been using this variety, with success, for several years for my Red Plum Jam.
For this recipe, I recommend the cut-up plums and sugar be macerated in the refrigerator for at least six hours, or overnight, so some advance planning and work is required before the actual jam making. The maceration process allows the sugar to break down, the fruit to soften, the natural sweetness of the plums to be extracted intensifying the flavor of the jam, and generates a rich syrup to give the jam a head start when it is placed on the heat.
Macerating the fruit for a jam is particularly a good idea when the fruit is a sturdy fruit, like plums for example, where their natural juices don’t tend to be otherwise released until they are on the stove. Placing dry granulated sugar over heat, in such case, to coax the fruit to release its juices to create the moisture for the jam to cook, runs the risk of scorching as it takes time for the sugar to break down. Maceration eliminates this risk and may also result in shorter cooking times for the jam to reach the gelling stage.
The reason for removing stones from the plums before cooking the jam is obvious – no one wants to bite into a hard stone! However, when the plums are cut in half, the stones usually pull away with some fruit bits still attached and that is flavor we want to have in the jam. Simply put the stones in a small saucepan with ½ cup of water and heat them until the stones appear cleaned off. Strain the mixture and use ¼ to 1/3 cup of the strained liquid in the jam making.
Jam making is a process and takes time and patience, especially getting it cooked to the aimed temperature of 218°F -220°F. This Plum Jam is a traditional cooked jam with no pectin added. This method of jam making is sometimes called the “long boil jam” because it is cooked on the stovetop until the jam has cooked down/reduced and thickened.
Red Plum Jam does not have a long list of ingredients but each of the ingredients does provide essential functions to the jam setting/gelling, flavor, and preservation.
I think my method is self-explanatory so I won’t repeat it here but, at the bottom of this post, I will share some of my tips for jam making in general and that apply to this recipe.
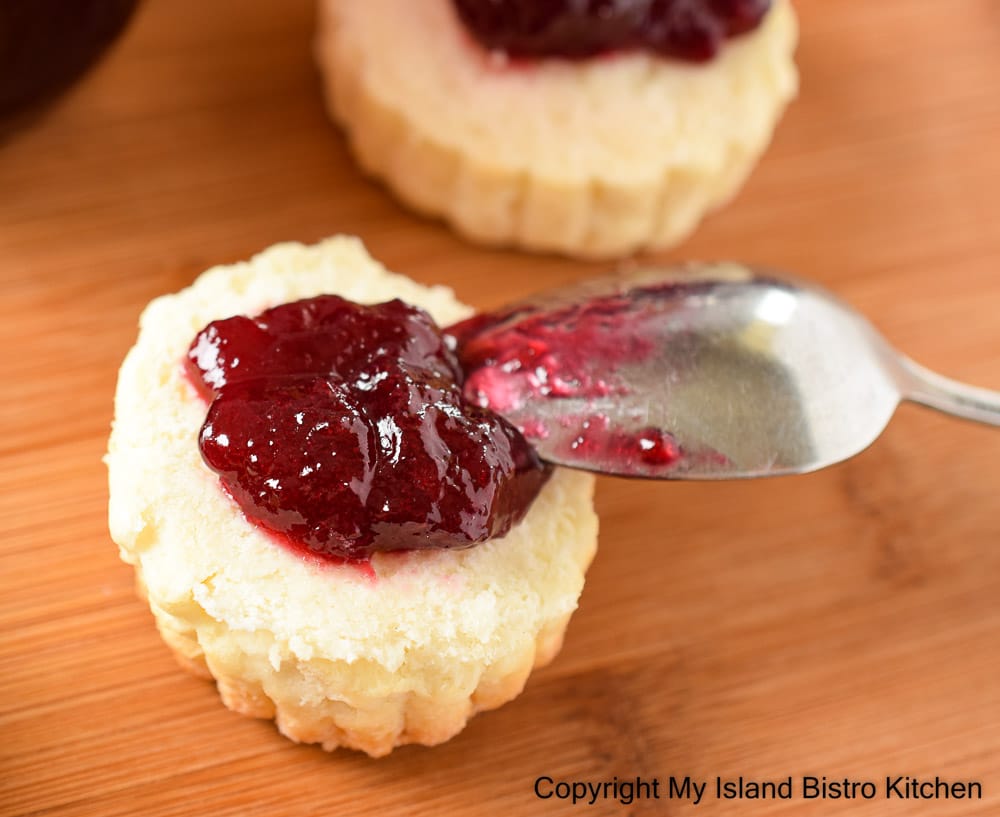
Red Plum Jam
Supplies and Equipment Needed:
Digital scales for weighing fruit and sugar
4 half-pint and 1 quarter-pint glass canning jars for the jam [See Note below]
5 – two-piece lid and screw band sets (lids must be brand new and not previously used); screw bands to be checked to ensure no rust or dents
Medium-sized heavy-bottomed stockpot for cooking jam
Large heat-proof spoon for stirring jam
Large-sized pot for sterilizing jars and wire rack to keep jars off bottom of pot
Small saucepan for plum stones
Water bath canner with basket
Jar lifter tongs
Wide-mouthed canning funnel
Ladle or heat-proof glass measuring cup
Chopstick or small non-metallic heat-proof spatula to remove any trapped air bubbles in the filled jars
A timer
Candy or instant read thermometer
Clean damp cloth for wiping jar rims of jam-filled jars
Heat-proof board and wire rack for cooling bottles of processed jam
Ingredients:
3 lbs/1.3kg ripe red plums suitable for jam making (e.g., Vampire Red Plums variety), pitted and quartered or coarsely chopped
1½ lbs/680g granulated sugar
½ cup water
¼ cup bottled lemon juice
1½ tsp butter
Method:
Preparing the Plums:
Wash plums. Cut in half. Remove and place stones in small saucepan. Cut plum halves (unpeeled) into half again with larger plums cut further into smaller bite-sized pieces, as necessary. Place cut-up plums into large bowl.
Add ½ cup water to the plum stones in the saucepan. Cover and bring to a boil over medium heat then reduce heat and simmer for approximately 10 minutes or until stones have all cleaned off of any fruit bits remaining on them. Stir occasionally. Strain out and measure ¼ – 1/3 cup of the plum liquid. Cool slightly then add strained plum liquid to the cut up plums. Discard the stones and any remaining liquid.
Stir the sugar into the plums and gently mix well. Cover bowl with plastic wrap and place in refrigerator for at least 6 hours, or overnight, to allow the fruit to macerate. Stir a couple of times during this process.
Preparing and Sterilizing the Bottles:
When plums are nearing the end of the maceration time, prepare the bottles and hot water canner. Wash jars and lids in hot soapy water, first checking to ensure that the jars have no cracks or chips in them. Rinse well and drain. Fill a large pot about half full of hot tap water. Place a wire rack on bottom of pot to hold jars. Place the jars, upright, into the water. Ensure the jars are fully submerged, each jar filled with water, and add more hot tap water as necessary to ensure that the water is at least an inch over the tops of the jars. Cover, bring to a boil, and boil the jars for 10 minutes. Turn off heat and leave the jars in the hot water to have ready to fill once the jam finishes cooking. Examine screw bands to ensure there are no dents or rust.
Preparing the Canner:
Once the jam is underway on the stove, fill the canner about half full of hot tap water. Cover and bring to a boil to have it ready for processing of the filled jars as the jars filled with jam must immediately go into the canner to be processed while the jam is still hot. Ensure the canner water is boiling before the jam has finished cooking as there will not be enough time to get it to the boiling point once the jam is in the bottles and ready for immediate processing. As the jam is nearing the end of its cooking, boil a kettle of extra water to have ready, if needed, to top up the canner water after filled jars are added.
Making the Jam:
Place macerated plums (do not drain) in medium-sized stock pot. Add lemon juice and butter. Stir well. Cook, uncovered, over medium heat until mixture reaches 218°F – 220°F on a candy thermometer or instant read thermometer, stirring frequently and skimming off and discarding any foam that appears. Stir more frequently as jam thickens and gets closer to 218°F – 220°F to prevent it from sticking to the bottom of pot and scorching. Reduce heat slightly if jam boils too fast. Keep jam at a good steady moderate boil, but not boiling vigorously. Remove jam from heat while testing temperature as this will give a more stable reading than testing it on the heat. Once jam has reached 218°F – 220°F, immediately remove stockpot from heat and skim off and discard any residual foam from the jam.
If a candy thermometer or instant read thermometer is not available, place 2-3 freezer-safe saucers in freezer. When jam has reduced and thickened well, remove pot from heat and place a small amount of jam on chilled saucer and slightly ‘tilt and swirl’ saucer around to distribute the jam to determine if it has set. Let jam sit, untouched, for about a minute, then gently push your finger through the jam. If the jam holds its shape (i.e., does not immediately run back together after the finger has been removed from the jam), it is set and ready to bottle. If not, continue to cook mixture, repeating the “chill” test about every 3 – 5 minutes or so (always removing the pot from the heat while conducting the chill test) until the jam passes the “chill” test.
Bottling the Jam:
Use jar lifter tongs to carefully remove the hot sterilized jars from the water, one at a time, emptying the water from the jars back into the pot. Drain jars well.
Using a ladle, or a heat-proof glass measuring cup, and a wide-mouthed canning funnel, transfer jam into the hot sterilized jars, leaving about ¼“ headroom in each jar to allow for expansion during the hot water processing. Remove any trapped air bubbles in the jars with a chopstick or small heatproof, non-metallic spatula. Wipe the jar rims with a clean damp cloth to remove any stickiness or jam particles that could prevent the lids from sealing properly to the jars.
Hot Water Processing the Jam:
Using jar lifter tongs, carefully place filled jars upright in wire basket positioned in the canner, ensuring jars do not touch each other or fall over. If canner is not filled to capacity with jam-filled jars, fill up empty spaces with hot empty jars to prevent the filled jars from toppling during the hot water processing. Ensure the water level is at least 1” above the tops of jars, adding more boiling water as necessary. Cover with canner lid. Return the water to a full rolling boil over high heat then decrease the heat to just keep the water at a moderately rolling boil but not boiling over. Process jars in the hot water bath for 10 minutes, adjusting time as and if necessary for altitude. Start timing the processing from the point at which a full rolling boil is reached after jars have been added to the canner. At the end of the processing time, turn off heat and remove canner lid.
Let jars sit in the hot water for 5 minutes then, using jar lifter tongs, carefully remove the jars filled with jam, upright and one at a time, and transfer them to a wire cooling rack set on a heat-proof board to cool completely. Listen for the “pop” or “ping” sound as the bottle lids seal over the next few minutes or hours. The lids of properly sealed jars will curve downward. Let jars rest, undisturbed, on counter for 24 hours. Then, test each jar for proper sealing by pressing down gently on the center of each jar lid. If the lid is already pressed downward, and does not pop back up, it is properly sealed. Any jars that do not pass this test should be refrigerated and the jam used within a week or so. Store properly sealed jam bottles in cool, dark place. Refrigerate jam once jar has been opened.
Yield: Apx. 4 half-pint bottles and 1 quarter-pint bottle
NOTE: Because so many factors can affect yield (e.g., quality of plums, variety, and how much the jam is cooked down), it is difficult to say, with certainty, the exact yield. That said, four (4) half-pint bottles and one (1) quarter-pint bottle have been the consistent yield from the recipe developer’s testings. However, it’s a good idea to have a couple more bottles ready and sterilized in case yield is greater. It’s also good to have a couple of extra bottles heated anyway to use, if needed, as empty vessels to fill the canner to its capacity to prevent filled jars from toppling over during the hot water processing.
If you have made this recipe and enjoyed it and/or wish to share it with your friends and family, please do so on social media but be sure to share the direct link to this posting from my website.
Connect with My Island Bistro Kitchen on Social Media
Join the Facebook page for My Island Bistro Kitchen: https://www.facebook.com/MyIslandBistroKitchen/
Follow “the Bistro” on “X” (formerly Twitter): https://twitter.com/PEIBistro/
See the drool-worthy gallery of mouth-watering food photos from My Island Bistro Kitchen on Instagram: https://www.instagram.com/peibistro/
Follow “the Bistro” on Pinterest at https://www.pinterest.ca/peibistro/ and pin the Pinterest-ready photo at the end of this posting to your favorite Pinterest boards!
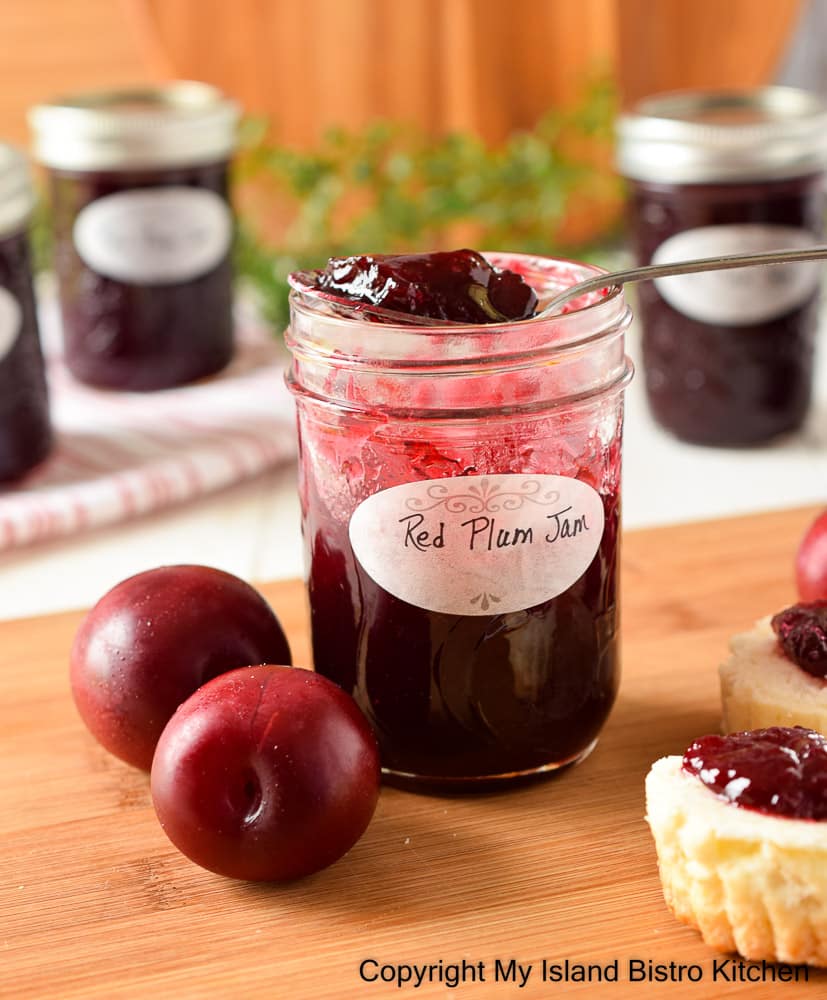
TIPS FOR SUCCESSFUL JAM MAKING
1) Prepare the Groundwork Before Beginning to Make the Jam
It is always a good idea to read and re-read the recipe to ensure complete understanding of the process. It’s also advisable to do an inventory check to ensure you have all the necessary ingredients and equipment. I strongly recommend taking the time to assemble all equipment and ingredients needed for the jam making and canning processes before starting the actual jam-making process.
2) Follow the Recipe Exactly – No Substituting, Omitting, or Reducing of Ingredients
For best success, follow the recipe exactly, without substituting, omitting, or reducing amounts of ingredients (unless an ingredient is listed as “optional”). The recipe developer has determined that each ingredient contributes something valuable to the finished product. By way of an example, it is well-known that jam recipes call for a lot of sugar. Some may ask if they can significantly reduce the amount of sugar called for in a jam recipe and the simple answer is, no, not without potentially affecting the gelling properties of the jam and sacrificing the quality and preservative aspects of the jam. Apart from the sweetness that sugar imparts on jam, it also acts as a preservative, protecting the jam against the development of bacteria, yeast, and mold. It helps to keep the jam shelf stable for several months.
The addition of lemon juice, when called for in a jam recipe, helps the natural pectin found in the fruit to gel or set properly. The acidic properties of the lemon juice also balance out the sweetness of the jam and add flavor notes. Bottled lemon juice (as opposed to freshly squeezed lemon juice) is preferred by many jam makers because its acidity level is regulated and thus consistent. This is in contrast to fresh lemons that vary in quality and ripeness.
Adding a small amount of butter helps to reduce the amount of foam that will naturally occur during the cooking process. It is normal to expect some foam to occur that will need to be skimmed off and discarded but you want the foam formation to be as little as possible as that amounts to waste and the jam should not have a sugary-foamy texture or appearance.
3) Use Only Proper Canning Jars for Jam
Use only proper tempered glass canning jars. In Canada, the bottles are mostly sold, I believe, under the brand name “Mason” and in the United States, I understand the common brand is “Ball”. Never use old used bottles that a commercial product (e.g., instant coffee, pasta sauce, processed cheese spread, etc.) has been bought in as these are not suitable jars for home canning. Exercise caution purchasing jars, that look like canning jars, at places like discount stores, thrift stores, or yard sales, for example, as they may not, in fact, be tempered glass suitable for hot water canning.
Inspect the jars to ensure there are no chips or cracks in them. Wash the jars and lids in hot soapy water and rinse well.
Inspect the screw bands and discard any that have dents or rust on them. Use only brand-new lids for canning. The lids give the jars the vacuum seal and are designed for single use only. Once they have been used, the rubber sealing compound is no longer considered effective for proper sealing so the lids should not be re-used. The screw bands, on the other hand, are reusable provided they have no dents or evidence of rust.
4) Sterilizing the Jars
There are various methods for sterilizing the bottles for the jam. I use the traditional method of boiling the jars in a pot of hot water on the stove. I recommend getting this process going before getting the jam underway and letting the bottles remain in the hot water (heat turned off) after they have been boiled 10 minutes and until the jam is ready to be bottled.
5) Determining When Jam is Set/Gelled
I recommend the use of a candy thermometer and/or instant read thermometer for jam-making as I find, with knowing the temperature of set jam, it gives me a more accurate test of when the jam has reached the setting stage. I use a couple of thermometers in my jam-making. One is clipped to the side of the pot and lets me monitor the temperature of the jam continuously as it cooks. The second is an instant read thermometer that I use with the pot removed from the heat to have the jam’s temperature taken. I use this thermometer when the jam has really boiled down and reduced in volume and has started to thicken significantly and the clip-on thermometer indicates it is very near to its aimed final temperature. Jam sets from 218°F – 220°F. I typically cook my jams to 220°F but 218°F is fine and the jam may be very slightly less thick than if cooked to 220°F. While the jam should be stirred frequently as it cooks, to avoid scorching, it will require more frequent stirring as it boils down and starts to thicken.
If you don’t have a thermometer, the chilling method of jam on a cold saucer may also be used to test the jam for setting stage. Place 2-3 freezer-safe saucers in freezer. To determine if jam is set, remove jam pot from heat when jam has reduced and thickened and place a small amount of jam on a chilled saucer and slightly ‘tilt and swirl’ saucer around to distribute the jam. Let jam sit, untouched, for about a minute, then gently push your finger through the jam. If the jam “wrinkles” but holds its shape (i.e., does not immediately run back together after the finger has been removed from the jam), it is set and ready to bottle. If not, put the jam back over heat and continue to cook mixture, repeating the “chill” test about every 3 – 5 minutes or so (always removing the pot from the heat while conducting the chill test) until the jam passes the “chill” test.
6) Hot Water Processing of Filled Jam Jars
The jars of hot jam need to be processed in a hot water bath as a safe-guard to prevent the growth of mold, yeasts, and bacteria and ensure a proper vacuum seal so that the jam is shelf-stable for several months. Do not skip this step. Once you have the jam underway with the cooking process, fill the canner about one-half full of hot tap water and start to bring it to the boiling stage to have ready when the jam is finished and ready for its hot water bath.
As the jam is nearly at the setting stage, it’s also a good idea to get a kettle of boiling water ready in case extra is needed to top up the canner after the filled jars are added. The hot jars of jam need to immediately go into the hot water bath so, after the jam is bottled, there will be no time then to start boiling extra water for the canner.
Most canner baskets have capacity for 6 -7 half-pint jars and, if a batch of jam has less quantity than that, the bottles may fall over unless the basket is filled with bottles. In order to avoid the possibility of filled jam jars toppling over during the hot water processing, it is advisable, therefore, to have the canner filled to capacity with bottles. As such, I recommend adding 1 to 2 extra half-pint jars to the pot with those being sterilized for the jam. The extra bottles do not, themselves, need to be sterilized if they are not going to be filled with jam but are, instead, going to be used to fill up extra space in the canner basket, if needed. However, the empty jars must be hot going into the boiling water in the canner as, otherwise, the temperature change could cause cold jars to crack when they are submerged into the boiling water. The easiest way I find to heat them is to simply put them in the pot with the jars being sterilized.
7) Confirming Jar Lids Are Properly Sealed to Jars
After the jam jars have been hot water processed and removed from the canner to a cooling rack positioned on a heat-proof board, listen for the “pop” or “ping” sound as the bottles seal over the next few minutes or hours. The lids of properly sealed jars will curve downward. Let jars rest, undisturbed, on counter for 24 hours. Then, test each jar for proper sealing by pressing down gently on the center of each jar lid. If the lid is already pressed downward, and does not pop back up, it is properly sealed. Any jars that do not pass this test should be refrigerated and the jam used within a week or so. Store properly sealed jam bottles in cool, dark place. Refrigerate jam once jar has been opened.
FOR OTHER GREAT JAM, MARMALADE, AND JELLY RECIPES FROM MY ISLAND BISTRO KITCHEN, CLICK THE LINKS BELOW:
Jams
Small Batch Cherry Jam
Strawberry-Rhubarb Freezer Jam
Blueberry and Grand Marnier Jam
Gooseberry Jam
Zucchini Jam
Pumpkin Jam
Raspberry Jam
Marmalades
Rhubarb Marmalade
Green Tomato Marmalade
Peach Marmalade
Jelly
Strawberry-Rhubarb Jelly
Rosy Rhubarb Jelly
Crabapple Jelly
Red Plum Jam
Ingredients
- 3 lbs/1.3kg ripe red plums suitable for jam making (e.g., Vampire Red Plums variety), pitted and quartered or coarsely chopped
- 1½ lbs/680g granulated sugar
- ½ cup water
- ¼ cup bottled lemon juice
- 1½ tsp butter
Instructions
Preparing the Plums:
-
Wash plums. Cut in half. Remove and place stones in small saucepan. Cut plum halves (unpeeled) into half again with larger plums cut further into smaller bite-sized pieces. Place cut-up plums into large bowl.
-
Add ½ cup water to the plum stones in the saucepan. Cover and bring to a boil over medium heat then reduce heat and simmer for approximately 10 minutes or until stones have all cleaned off of any fruit bits. Stir occasionally. Strain out and measure ¼ – 1/3 cup of the plum liquid. Cool slightly then add strained plum liquid to the cut up plums. Discard the stones and any remaining liquid.
-
Stir the sugar into the plums and gently mix well. Cover bowl with plastic wrap and place in refrigerator for at least 6 hours, or overnight, to allow the fruit to macerate. Stir a couple of times during this process.
Preparing and Sterilizing the Bottles:
-
When plums are nearing the end of the maceration time, prepare the bottles and hot water canner. Wash jars and lids in hot soapy water, first checking to ensure that the jars have no cracks or chips in them. Rinse well and drain. Fill a large pot about half full of hot tap water. Place a wire rack on bottom of pot to hold jars. Place the jars, upright, into the water. Ensure the jars are fully submerged, each jar filled with water, and add more hot tap water as necessary to ensure that the water is at least an inch over the tops of the jars. Cover, bring to a boil, and boil the jars for 10 minutes. Turn off heat and leave the jars in the hot water to have ready to fill once the jam finishes cooking. Examine screw bands to ensure there are no dents or rust.
Preparing the Canner:
-
Once the jam is underway on the stove, fill the canner about half full of hot tap water. Cover and bring to a boil to have it ready for processing of the filled jars as the jars filled with jam must immediately go into the canner to be processed while the jam is still hot. Ensure the canner water is boiling before the jam has finished cooking as there will not be enough time to get it to the boiling point once the jam is in the bottles and ready for immediate processing. As the jam is nearing the end of its cooking, boil a kettle of extra water to have ready, if needed, to top up the canner water after filled jars are added.
Making the Jam:
-
Place macerated plums (do not drain) in medium-sized stock pot. Add lemon juice and butter. Stir well. Cook, uncovered, over medium heat until mixture reaches 218°F – 220°F on a candy thermometer or instant read thermometer, stirring frequently and skimming off and discarding any foam that appears. Stir more frequently as jam thickens and gets closer to 218°F – 220°F to prevent it from sticking to the bottom of pot and scorching. Reduce heat slightly if jam boils too fast. Keep jam at a good steady moderate boil, but not boiling vigorously. Remove jam from heat while testing temperature as this will give a more stable reading than testing it on the heat. Once jam has reached 218°F – 220°F, immediately remove stockpot from heat and skim off and discard any residual foam from the jam.
-
If a candy thermometer or instant read thermometer is not available, place 2-3 freezer-safe saucers in freezer. When jam has reduced and thickened well, remove pot from heat and place a small amount of jam on chilled saucer and slightly ‘tilt and swirl’ saucer around to distribute the jam to determine if it has set. Let jam sit, untouched, for about a minute, then gently push your finger through the jam. If the jam holds its shape (i.e., does not immediately run back together after the finger has been removed from the jam), it is set and ready to bottle. If not, continue to cook mixture, repeating the “chill” test about every 3 – 5 minutes or so (always removing the pot from the heat while conducting the chill test) until the jam passes the “chill” test.
Bottling the Jam:
-
Use jar lifter tongs to carefully remove the hot sterilized jars from the water, one at a time, emptying the water from the jars back into the pot. Drain jars well.
-
Using a ladle, or a heat-proof glass measuring cup, and a wide-mouthed canning funnel, transfer jam into the hot sterilized jars, leaving about ¼“ headroom in each jar to allow for expansion during the hot water processing. Remove any trapped air bubbles in the jars with a chopstick or small heatproof, non-metallic spatula. Wipe the jar rims with a clean damp cloth to remove any stickiness or jam particles that could prevent the lids from sealing properly to the jars.
Hot Water Processing the Jam:
-
Using jar lifter tongs, carefully place filled jars upright in wire basket positioned in the canner, ensuring jars do not touch each other or fall over. If canner is not filled to capacity with jam-filled jars, fill up empty spaces with hot empty jars to prevent the filled jars from toppling during the hot water processing. Ensure the water level is at least 1” above the tops of jars, adding more boiling water as necessary. Cover with canner lid. Return the water to a full rolling boil over high heat then decrease the heat to just keep the water at a moderately rolling boil but not boiling over. Process jars in the hot water bath for 10 minutes, adjusting time as and if necessary for altitude. Start timing the processing from the point at which a full rolling boil is reached after jars have been added to the canner. At the end of the processing time, turn off heat and remove canner lid.
-
Let jars sit in the hot water for 5 minutes then, using jar lifter tongs, carefully remove the jars filled with jam, upright and one at a time, and transfer them to a wire cooling rack set on a heat-proof board to cool completely. Listen for the “pop” or “ping” sound as the bottle lids seal over the next few minutes or hours. The lids of properly sealed jars will curve downward. Let jars rest, undisturbed, on counter for 24 hours. Then, test each jar for proper sealing by pressing down gently on the center of each jar lid. If the lid is already pressed downward, and does not pop back up, it is properly sealed. Any jars that do not pass this test should be refrigerated and the jam used within a week or so. Store properly sealed jam bottles in cool, dark place. Refrigerate jam once jar has been opened.
Recipe Notes
Yield: Apx. 4 half-pint bottles and 1 quarter-pint bottle
(Copyright My Island Bistro Kitchen)
NOTE: Because so many factors can affect yield (e.g., quality of plums, variety, and how much the jam is cooked down), it is difficult to say, with certainty, the exact yield. That said, four (4) half-pint bottles and one (1) quarter-pint bottle have been the consistent yield from the recipe developer’s testings. However, it’s a good idea to have a couple more bottles ready and sterilized in case yield is greater. It’s also good to have a couple of extra bottles heated to use, if needed, as empty vessels to fill the canner to its capacity to prevent filled jars from toppling over during the hot water processing.
PIN ME TO PINTEREST!