
One of the most popular pie recipes on my website is the Raspberry Cream Cheese Pie, a cross between a pie and a cheesecake. The full-scale 9” pie is a good-sized pie that can be expected to serve 6-8 people and, being in a small household myself, I often find a large pie is more than what is needed. With the smaller household in mind, I have sized my classic Raspberry Cream Cheese Pie down to fit a 7” pie plate. Just because we may be in a small household doesn’t mean we have to go without special treats and this pie is definitely a special treat!
Depending on the size of pieces cut, this pie could yield 4-6 servings, with 4 being for the more hearty appetite and 5-6 servings being suitable for a smaller dessert. Anywhere between 4-6 pieces from this decadent 7” pie should slice well and hold together nicely.
This is not a difficult pie to make though it does take a bit of time because there are some steps (including chilling periods) involved – the baking of the pie shell, allowing each of the cream cheese and cooked raspberry filling layers to set before adding each successive layer, then a final chilling in preparation for serving, and the making of the whipped cream.
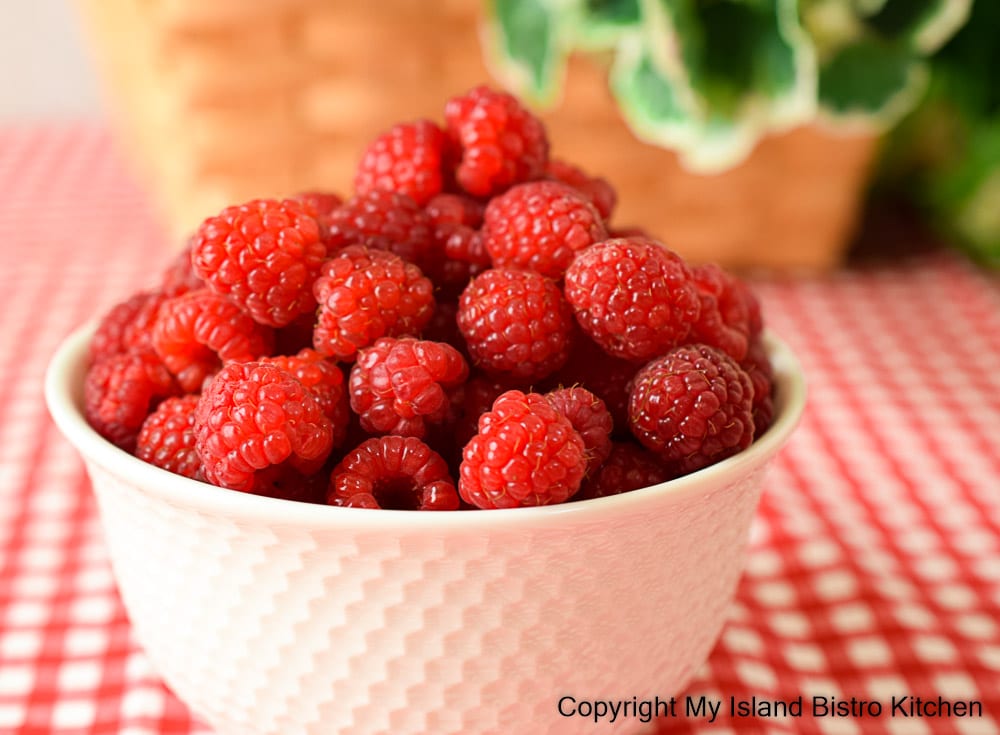
Either fresh or frozen raspberries may be used in the cooked raspberry filling. If using frozen berries, note that a bit more thickener may be required due to the excess moisture often found in frozen berries.
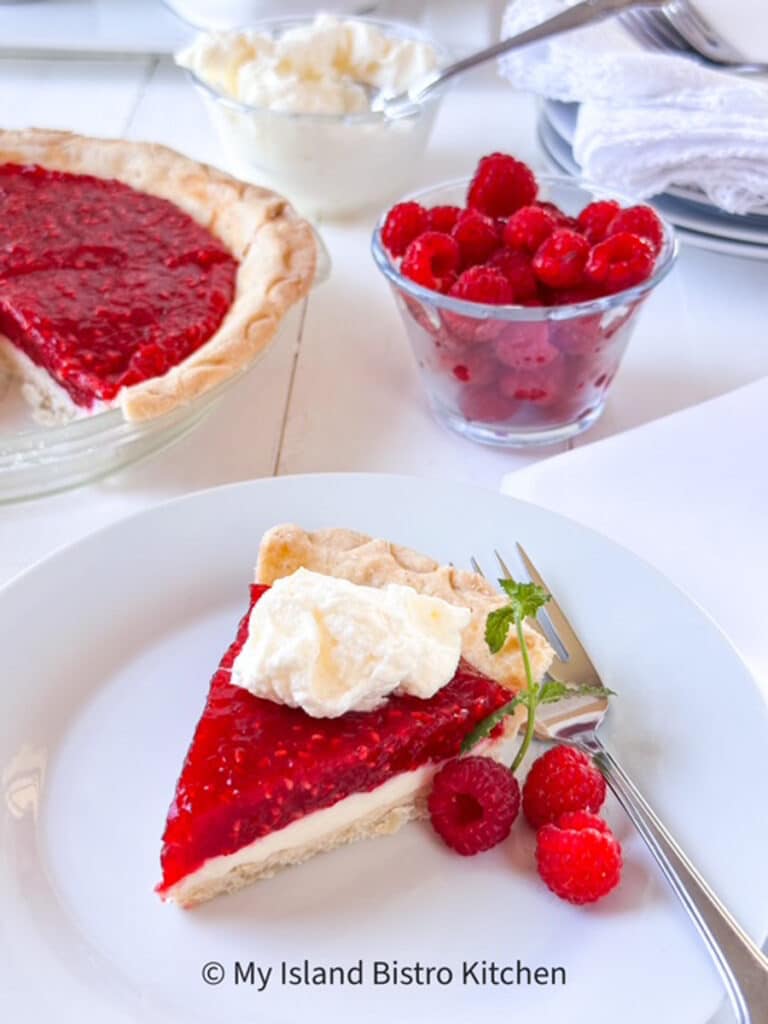
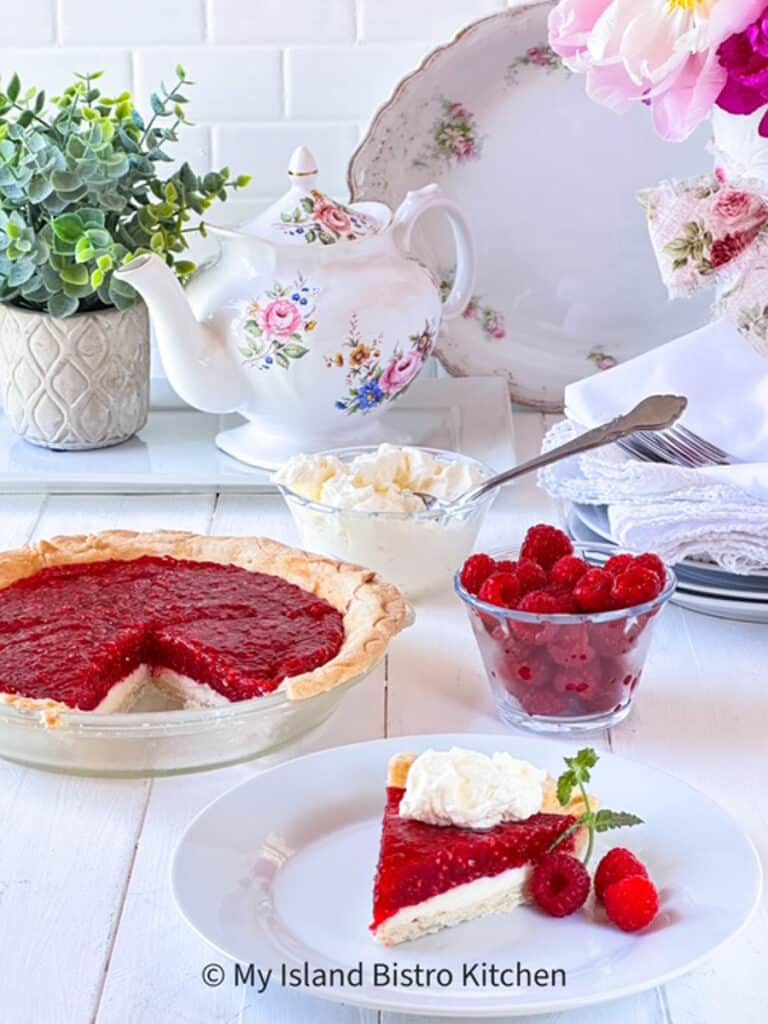
My preference is to use real whipped cream for the topping, either dolloped on each cut slice (as shown in the photos that accompany this post), piped around the pie edges, or spread over the entire pie. Cool Whip, if preferred, would be a suitable alternative to the traditional whipped cream.
The goal is to see two sharply defined layers – the red raspberry and the white cream cheese. As such, this pie is best eaten the day it is made to eliminate possible seeping of the raspberry filling into the white cream cheese layer. That said, leftovers (if there are any) can be refrigerated and enjoyed the next day.
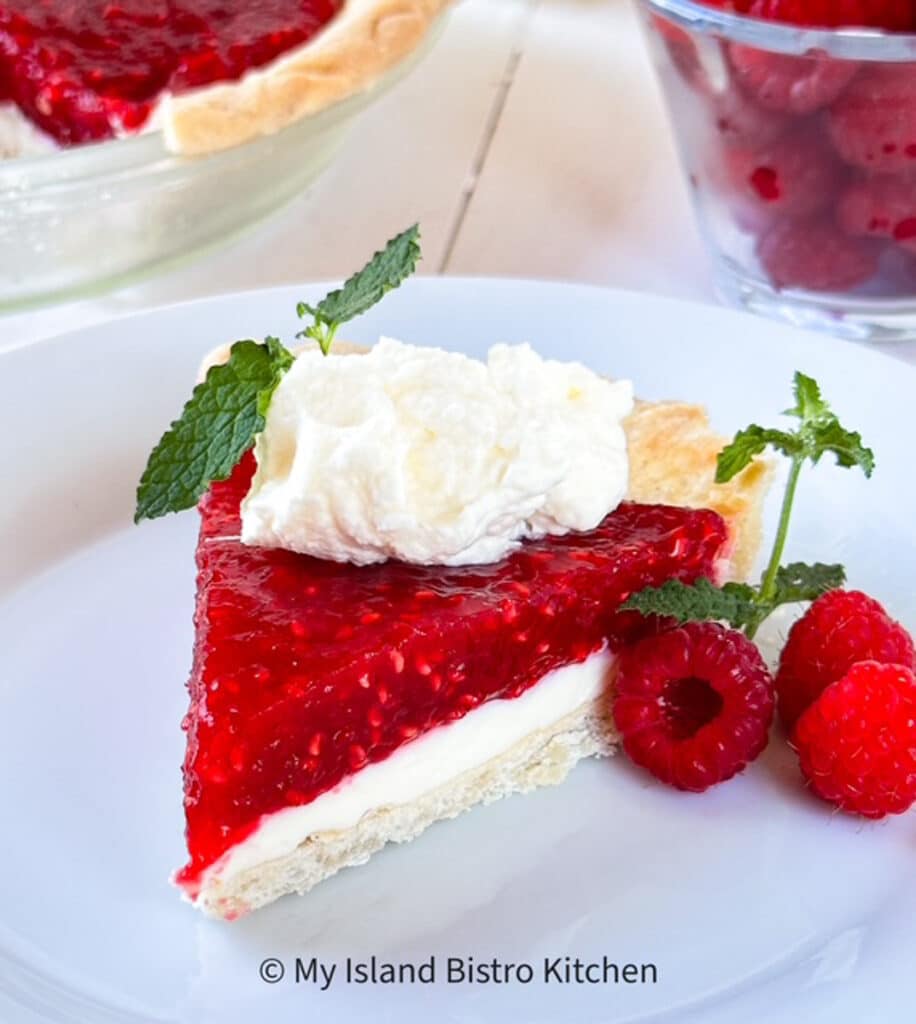
This pie can be made gluten free by using gluten-free 1-to-1/cup-for-cup baking flour in the same amount as the regular wheat-based all-purpose flour called for in the pastry recipe. The pie crust in the photos in this post was made using gluten-free 1-to-1 baking flour. The pie can also be made lactose-free by using lactose free cream cheese, milk, and whipping cream.
Small Raspberry Cream Cheese Pie (7 inch)
Ingredients:
One – 7″ baked and cooled pie shell (recipe below)
Cream Cheese Layer:
3oz/86g cream cheese, softened
1½ tbsp granulated sugar
¾ tsp milk
¼ tsp vanilla
Raspberry Filling Layer:
2 tbsp cornstarch
6 tbsp granulated sugar
Pinch salt
6½ oz/184g fresh or frozen raspberries
1½ tbsp pineapple or orange juice
¾ tsp lemon juice
1 tsp butter
Whipped Cream:
½ cup cold whipping cream
½ tsp vanilla
1 tbsp granulated or super-fine sugar
Fresh raspberries and mint leaves for garnishes (optional)
Method:
In small bowl, beat the cream cheese, sugar, milk, and vanilla together, either by hand or with a small hand mixer. Spread over bottom of cooled, pre-baked pie shell. Refrigerate for at least one hour to set.
In small bowl, combine the cornstarch, sugar, and salt together. In small saucepan, combine the raspberries, pineapple or orange juice, lemon juice, and cornstarch-sugar mixture. Cook and stir over medium-low heat until mixture is thickened. Remove from heat and stir in the butter. Let mixture cool to room temperature then spread over chilled cream cheese base. Refrigerate for at least one hour to allow pie to set.
At time of serving, beat whipping cream and vanilla in small chilled bowl at medium speed until soft peaks form then slowly beat in the sugar. Increase speed to medium-high and beat just until medium peaks form. Pipe on to pie in decorative design, completely cover chilled pie with the whipped cream, or dollop a spoonful on each cut slice. Garnish servings with fresh raspberries and/or mint leaves, if desired. This pie is best eaten the day it is made but any leftovers may be refrigerated for enjoyment the following day.
Yield: One – 7” pie.
Note: Cool Whip can be substituted for the whipped cream, if desired
Single Crust Pastry
Ingredients:
1 cup all-purpose flour (or same amount of gluten-free 1-to-1 baking flour, if gluten-free pastry is required)
¼ tsp salt
¾ tsp sugar
2 tbsp cold butter
2 tbsp cold lard
1 tbsp beaten egg (reserve and set aside remaining beaten egg)
½ tsp white vinegar
Enough ice cold water to make 1/3 cup liquid
Method:
In medium-sized bowl, whisk the flour, sugar, and salt together. Cut the butter and lard into small chunks and add to the flour. Toss to coat the fats with the flour mixture. With a wire pastry cutter, cut the butter and lard into the flour until the fats resemble the size of large peas.
In a measuring cup, whisk 1 tablespoon of beaten egg and vinegar together. Add enough ice cold water to measure 1/3 cup. Add the egg-vinegar-water mixture to the flour, small amounts at a time, and mix with a fork. Add only enough liquid that the dough clings together and can be formed into a ball. Note that not all of the entire 1/3 cup of liquid will likely be needed. Using too much liquid will result in a hard, tough crust. Do not overwork dough as it will become tough. Set remaining beaten egg aside until called for in recipe.
Form dough into a small disk shape and place in sealed plastic bag, or an airtight container, and transfer pastry to refrigerator for about 15-20 minutes to chill. Remove pastry from the refrigerator and, on lightly floured surface, roll pastry to desired thickness, generally between 1/16”and 1/8” (2-3mm) thick, and large enough in diameter to line pie plate. Transfer pastry into a 7”/18cm diameter pie plate that has been lightly sprayed with cooking spray or very lightly greased. Trim off excess dough and finish pastry edges as desired. Dock pastry bottom in several places with fork tines to allow steam to escape and prevent the pie shell from puffing up during baking and thus creating an uneven shell for the filling. Refrigerate pie shell for a minimum of 25 minutes (or place in freezer for about 20 minutes or so) to chill in order to reduce pastry shrinkage during baking. Any leftover pastry can be formed into a small disk shape, wrapped in plastic wrap, and stored in an airtight freezer bag in the freezer for a future use.
While pastry shell is chilling, position oven rack in lowest position in oven and preheat oven to 400°F.
Crumple and distress a piece of parchment paper large enough to mold around the inside of the pie plate, being careful not to tear the paper and allowing enough overhang by which to grasp it to remove the ceramic pie weights or dried beans that will be placed in it for blind baking and which will be removed part way through the crust baking process. This crumpling/distressing procedure will weaken the parchment paper, allowing it to be more pliable for fitting into the pie plate. Depending on the quality of parchment paper, repeat with a second piece of distressed parchment paper, if necessary.
Remove the pie shell from the refrigerator (or freezer) and place on a rimmed cookie sheet or pizza pan for ease of transfer to and from oven. Carefully fit the distressed parchment paper inside the pie shell. Repeat with the second layer of parchment paper, if necessary. Add ceramic pie weights or dry uncooked beans, filling the pie plate about 2/3 to ¾ full, and ensuring the pie weights/dried beans are evenly distributed.
Transfer pie shell to the oven. Bake pie shell for 18-20 minutes. Remove shell from oven and carefully remove the pie weights/dried beans and parchment paper and transfer them to a heatproof bowl. Be very careful as the pie weights/dried beans will be very hot! As some of the earlier pierced holes in the pie shell may have filled in during the blind baking process, further pierce the pie shell in several places with the tines of a fork, if necessary, to prevent it from forming air pockets as it continues to bake.
Beat the reserved beaten egg with ½ tablespoon of milk or water. Using a silicone pastry brush, very lightly brush egg wash over the pastry. This will form a barrier so the pie filling does not seep into the crust, creating a soggy pastry.
Return pie shell to oven and bake for another 10-15 minutes, or until pastry appears dry and crisp and is a light-medium golden color. Cool shell in pan on wire rack until completely cooled before adding filling. Pie shell may be made a day in advance, if desired.
Yield: One single 7” pie shell
If you have made this recipe and enjoyed it and/or wish to share it with your friends and family, please do so on social media but be sure to share the direct link to this posting from my website.
Connect with My Island Bistro Kitchen on Social Media
Join the Facebook page for My Island Bistro Kitchen: https://www.facebook.com/MyIslandBistroKitchen/
Follow “the Bistro” on “X” (formerly Twitter): https://twitter.com/PEIBistro/
See the drool-worthy gallery of mouth-watering food photos from My Island Bistro Kitchen on Instagram: https://www.instagram.com/peibistro/
Follow “the Bistro” on Pinterest at https://www.pinterest.ca/peibistro/ and pin the Pinterest-ready photo at the end of this posting to your favorite Pinterest boards!
For My Island Bistro Kitchen’s Full-sized 9″ Raspberry Cream Cheese Pie Recipe, click the link below.
Small Raspberry Cream Cheese Pie (7 inch)
Ingredients
- One – 7″ baked and cooled pie shell (recipe below)
Cream Cheese Layer:
- 3 oz/86g cream cheese, softened
- 1½ tbsp granulated sugar
- ¾ tsp milk
- ¼ tsp vanilla
Raspberry Filling Layer:
- 2 tbsp cornstarch
- 6 tbsp granulated sugar
- Pinch salt
- 6½ oz/184g fresh or frozen raspberries
- 1½ tbsp pineapple or orange juice
- ¾ tsp lemon juice
- 1 tsp butter
Whipped Cream:
- ½ cup ice cold whipping cream
- ½ tsp vanilla
- 1 tbsp granulated or super-fine sugar
- Fresh raspberries and mint leaves for garnishes (optional)
Instructions
-
In small bowl, beat the cream cheese, sugar, milk, and vanilla together, either by hand or with a small hand mixer. Spread over bottom of cooled, pre-baked pie shell. Refrigerate for at least one hour to set.
-
In small bowl, combine the cornstarch, sugar, and salt together. In small saucepan, combine the raspberries, pineapple or orange juice, lemon juice, and cornstarch-sugar mixture. Cook and stir over medium-low heat until mixture is thickened. Remove from heat and stir in the butter. Let mixture cool to room temperature then spread over chilled cream cheese base. Refrigerate for at least one hour to allow pie to set.
-
At time of serving, beat whipping cream and vanilla in small chilled bowl at medium speed until soft peaks form then slowly beat in the sugar. Increase speed to medium-high and beat just until medium peaks form. Pipe on to pie in decorative design, completely cover chilled pie with the whipped cream, or dollop a spoonful on each cut slice. Garnish servings with fresh raspberries and/or mint leaves, if desired. This pie is best eaten the day it is made but any leftovers may be refrigerated for enjoyment the following day.
Recipe Notes
Yield: One – 7” pie.
(Copyright My Island Bistro Kitchen)
Note: Cool Whip can be substituted for the whipped cream, if desired
Single Crust Pastry For 7-inch Pie
Ingredients
- 1 cup all-purpose flour (or same amount of gluten-free 1-to-1 baking flour, if gluten-free pastry is required)
- ¼ tsp salt
- ¾ tsp sugar
- 2 tbsp cold butter
- 2 tbsp cold lard
- 1 tbsp beaten egg (reserve and set aside remaining beaten egg)
- ½ tsp white vinegar
- Enough ice cold water to make 1/3 cup liquid
Instructions
-
In medium-sized bowl, whisk the flour, sugar, and salt together. Cut the butter and lard into small chunks and add to the flour. Toss to coat the fats with the flour mixture. With a wire pastry cutter, cut the butter and lard into the flour until the fats resemble the size of large peas.
-
In a measuring cup, whisk 1 tablespoon of beaten egg and vinegar together. Add enough ice cold water to measure 1/3 cup. Add the egg-vinegar-water mixture to the flour, small amounts at a time, and mix with a fork. Add only enough liquid that the dough clings together and can be formed into a ball. Note that not all of the entire 1/3 cup of liquid will likely be needed. Using too much liquid will result in a hard, tough crust. Do not overwork dough as it will become tough. Set remaining beaten egg aside until called for in recipe.
-
Form dough into a small disk shape and place in sealed plastic bag, or an airtight container, and transfer pastry to refrigerator for about 15-20 minutes to chill. Remove pastry from the refrigerator and, on lightly floured surface, roll pastry to desired thickness, generally between 1/16”and 1/8” (2-3mm) thick, and large enough in diameter to line pie plate. Transfer pastry into a 7”/18cm diameter pie plate that has been lightly sprayed with cooking spray or very lightly greased. Trim off excess dough and finish pastry edges as desired. Dock pastry bottom in several places with fork tines to allow steam to escape and prevent the pie shell from puffing up during baking and thus creating an uneven shell for the filling. Refrigerate pie shell for a minimum of 25 minutes (or place in freezer for about 20 minutes or so) to chill in order to reduce pastry shrinkage during baking. Any leftover pastry can be formed into a small disk shape, wrapped in plastic wrap, and stored in an airtight freezer bag in the freezer for a future use.
-
While pastry shell is chilling, position oven rack in lowest position in oven and preheat oven to 400°F.
-
Crumple and distress a piece of parchment paper large enough to mold around the inside of the pie plate, being careful not to tear the paper and allowing enough overhang by which to grasp it to remove the ceramic pie weights or dried beans that will be placed in it for blind baking and which will be removed part way through the crust baking process. This crumpling/distressing procedure will weaken the parchment paper, allowing it to be more pliable for fitting into the pie plate. Depending on the quality of parchment paper, repeat with a second piece of distressed parchment paper, if necessary.
-
Remove the pie shell from the refrigerator (or freezer) and place on a rimmed cookie sheet or pizza pan for ease of transfer to and from oven. Carefully fit the distressed parchment paper inside the pie shell. Repeat with the second layer of parchment paper, if necessary. Add ceramic pie weights or dry uncooked beans, filling the pie plate about 2/3 to ¾ full, and ensuring the pie weights/dried beans are evenly distributed.
-
Transfer pie shell to the oven. Bake pie shell for 18-20 minutes. Remove shell from oven and carefully remove the pie weights/dried beans and parchment paper and transfer them to a heatproof bowl. Be very careful as the pie weights/dried beans will be very hot! As some of the earlier pierced holes in the pie shell may have filled in during the blind baking process, further pierce the pie shell in several places with the tines of a fork, if necessary, to prevent it from forming air pockets as it continues to bake.
-
Beat the reserved beaten egg with ½ tablespoon of milk or water. Using a silicone pastry brush, very lightly brush egg wash over the pastry. This will form a barrier so the pie filling does not seep into the crust, creating a soggy pastry.
-
Return pie shell to oven and bake for another 10-15 minutes, or until pastry appears dry and crisp and is a light-medium golden color. Cool shell in pan on wire rack until completely cooled before adding filling. Pie shell may be made a day in advance, if desired.
Recipe Notes
Yield: One single 7” pie shell
(Copyright My Island Bistro Kitchen)
PIN ME TO PINTEREST!