Zucchini is one vegetable that seems to grow prolifically. Come fall and many gardeners have an abundance of zucchini they don’t know what to do with. Zucchini, because it doesn’t have a particularly strong flavor, is actually a very versatile veggie that can be used in cakes, cookies, muffins, and jams as it lends itself to pairing well with other flavors like chocolate and citrus flavors, for example.
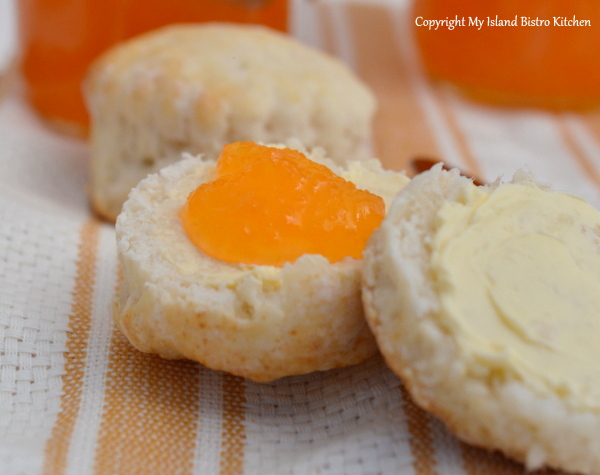
Another recipe I like to use fresh zucchini in is this one for Zucchini Jam. It is a great spread on toast, biscuits, muffins and scones, or as a dollop on vanilla custard for an easy dessert. Its bright orange color makes it a showy jam. Continue reading Zucchini Jam→
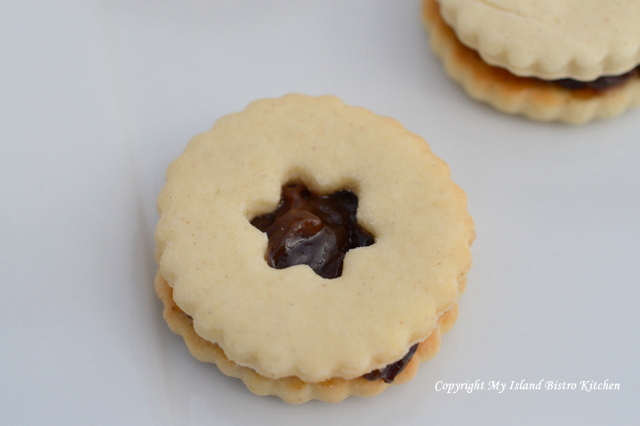
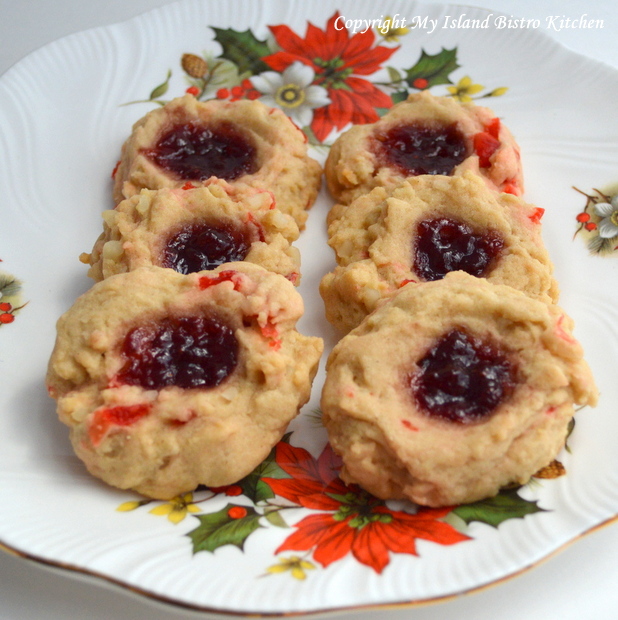
Plum Puff Cookies are hearty cookies because each one is actually two cookies sandwiched together with a tasty raisin filling. If desired, these cookies can, alternatively be filled with your favorite jam, date filling, or even a favorite curd such as either my lemon, rhubarb, or cranberry curd. Continue reading Plum Puff Cookies→
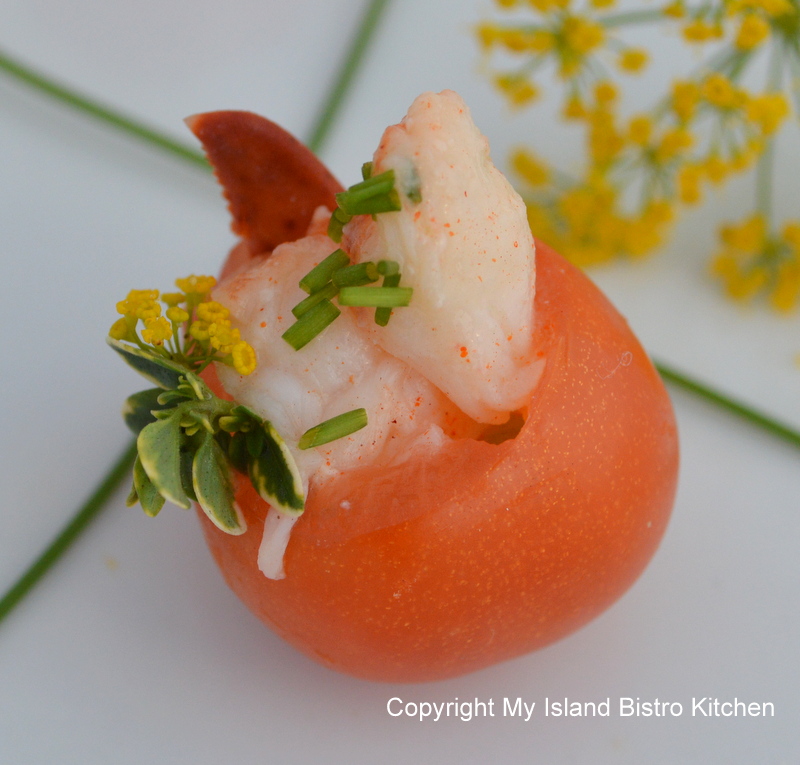
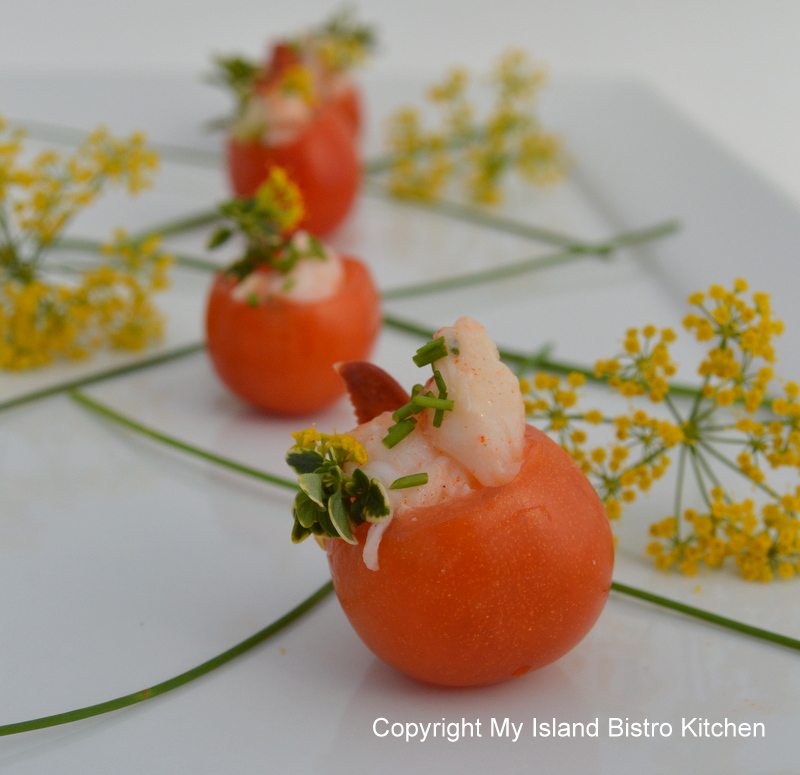
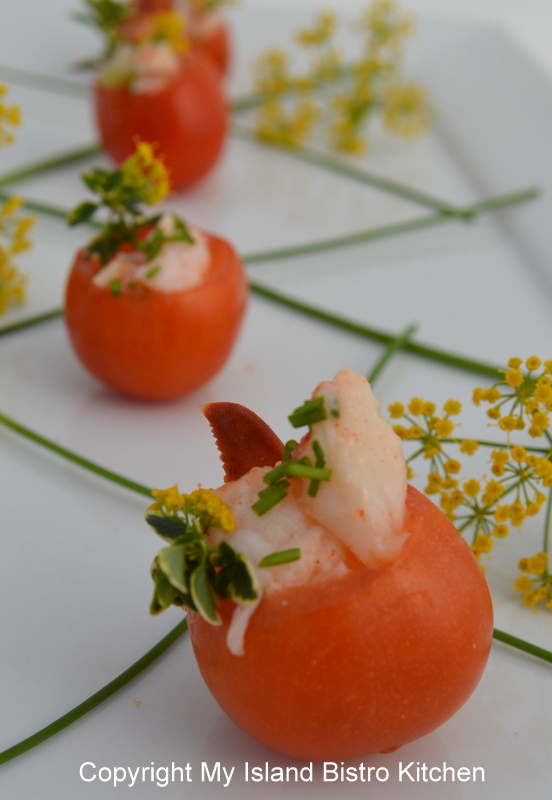
Our garden produced hundreds of tiny cherry tomatoes this summer. It’s always a challenge as to what to do with them and it seems everyone I know also has an abundance of them, too. Cherry tomatoes make great bases for appetizers or hors d’oeurves. They are particularly tasty when filled with lobster salad! This weekend, there is a huge shellfish festival in Charlottetown, PEI, so I thought this was an appropriate time to post a recipe using one of my favorite shellfish, lobster.
I used the same lobster salad recipe as I used for the filling in the lobster croissants that were featured for my labour day picnic. The only thing I did differently was to chop the lobster into smaller pieces so the salad would fit into the cherry tomatoes.
To assemble, slice off the stem end of the tomato. With a small coffee spoon, carefully hollow out and discard the seeds and juicy pulp of the tomatoes. Fill with lobster salad. Garnish with fresh herbs such as chives, thyme, and/or dill.
Thank you for visiting “the Bistro” today.
Be sure to visit my new Facebook page atMy Island Bistro Kitchen.You may also wish to follow me on twitter @PEIBistro and on Pinterest at “Island Bistro Kitchen”.
Butter Tarts that melt in your mouth. Is there anything better? There are as many recipes for Butter Tarts as there are bakers and pastry chefs making them. Essentially, these are the basic, core ingredients that will normally be common to all Butter Tart recipes: Brown sugar, eggs, butter (absolutely no substitutes), and usually some kind of syrup (e.g., maple, corn, or both). The ingredients may vary in different amounts from recipe to recipe and this will impact the flavor and texture of the filling. Continue reading Butter Tarts – A Quintessential Canadian Dessert→
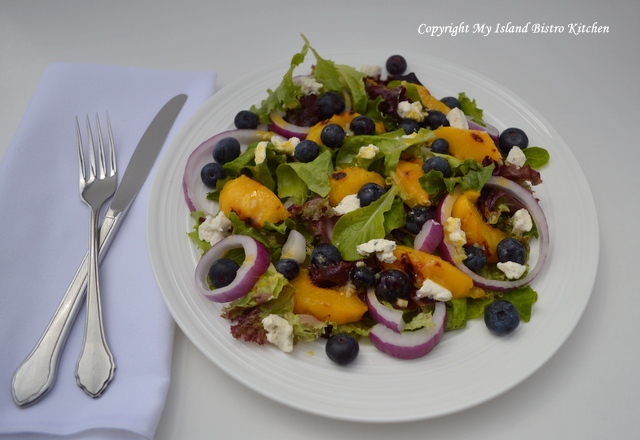
We have eaten a lot of salads from our garden produce this summer and I must admit I am starting to get a bit tired of the traditional green salad with tomatoes, cucumber, etc. The peaches have been divine this late summer so, for a change, I decided to grill them and make a fruit salad on fresh garden greens.
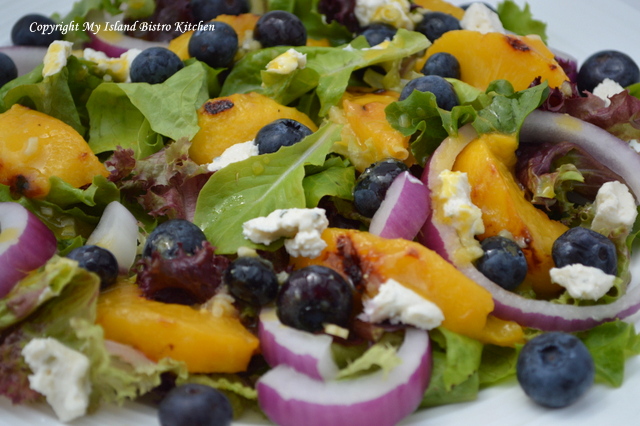
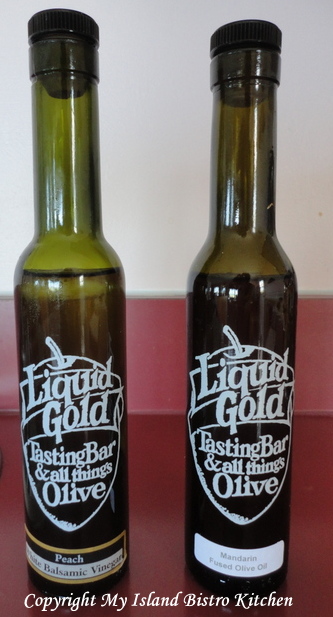
This is a tasty salad with the grilled peaches, fresh blueberries, red onion rings, and feta cheese on a bed of mixed greens. I topped it off with a peach balsamic vinaigrette made with peach balsamic vinegar and mandarin-infused olive oil from the Liquid Gold store here in Charlottetown.
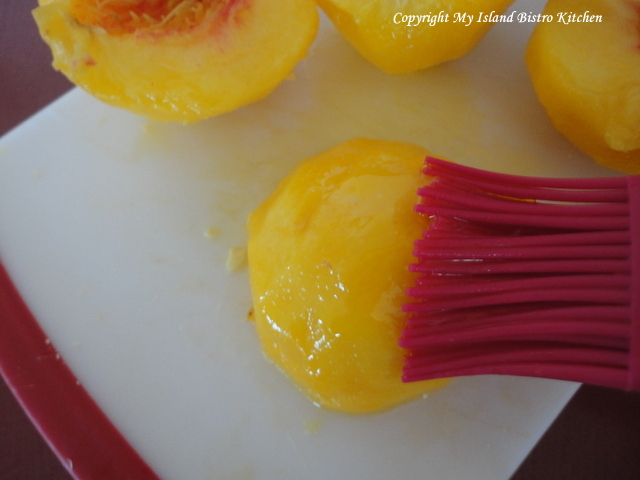
To grill the peaches, I cut each in half, removed the stone, and brushed both sides of the peaches with the mandarin- infused olive oil. Make sure the grill is greased as well.
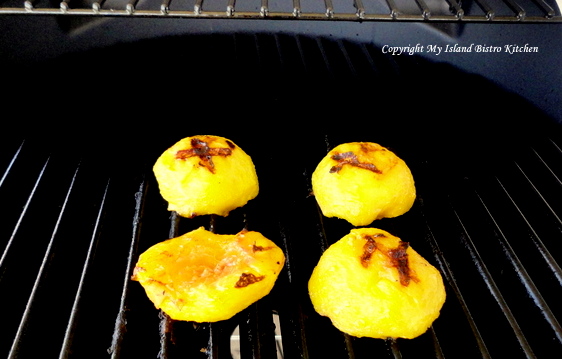
On a pre-heated grill (medium-high), the peaches only take 2-3 minutes, each side (use tongs to turn the fruit). Don’t overcook the fruit as it will become too soft and mushy. Grilling fresh fruit brings out the deep flavor of the fruit and intensifies the sweet taste. Plus, the grill marks on the peaches, enhance the presentation.
For salad for two:
mixed greens
2 grilled peaches
blueberries
red onion rings
feta cheese
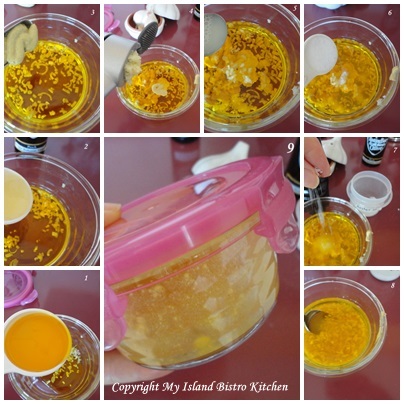
To make the dressing:
1/4 cup mandarin-infused olive oil
2 tbsp peach balsamic vinegar
4 tsp Dijon mustard
1 tsp minced garlic
1 green onion, finely sliced
2 tsp fresh lemon juice
2 tsp sugar
pepper, to taste
Kosher salt, to taste
Mix all ingredients together. Shake well. Drizzle over salad when ready to serve.
To assemble salad:
Make a bed of mixed greens on each plate. Place sliced grilled peaches on greens. Add red onion rings. Sprinkle with blueberries and feta cheese. Drizzle with Peach Balsamic Vinaigrette.
Thank you for visiting “the Bistro” today.
Be sure to visit my new Facebook page at My Island Bistro Kitchen. You may also wish to follow me on twitter @PEIBistro and on Pinterest at “Island Bistro Kitchen”.
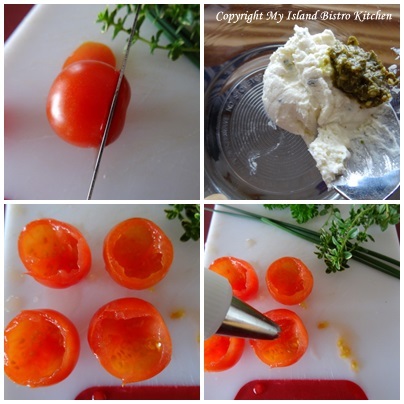
We have a bumper crop of cherry tomatoes in our garden this year. It’s always a challenge as to what to do with them because, let’s face it, there are only so many salads and cherry tomatoes one can eat. I have taken some to work colleagues, given some to neighbours, and still the tomato plants keep multiplying these Tiny Tim tomatoes. Here is one of my favorite ways to stuff cherry tomatoes for hors d’oeuvres or appetizers.
To be frank, I don’t really use a precise recipe for these tasty little morsels. Mix up some soft cheese such as boursin garlic herb – probably a couple of tablespoonfuls for the four tomatoes you see below. To that, add about 1/2 tsp of basil pesto and mix it together. Cut top of each tomato and scoop out tomato pulp leaving just the tomato shell. Using a small spoon or pastry bag with decorator tip, fill each tomato with cheese-basil mixture. Garnish with fresh herbs such as thyme, parsley, dill, and/or chives.
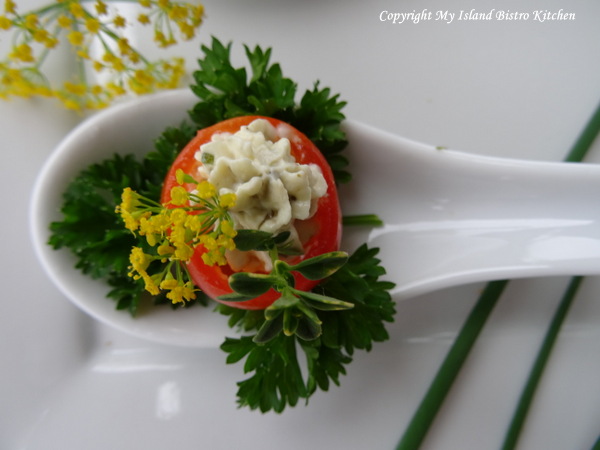
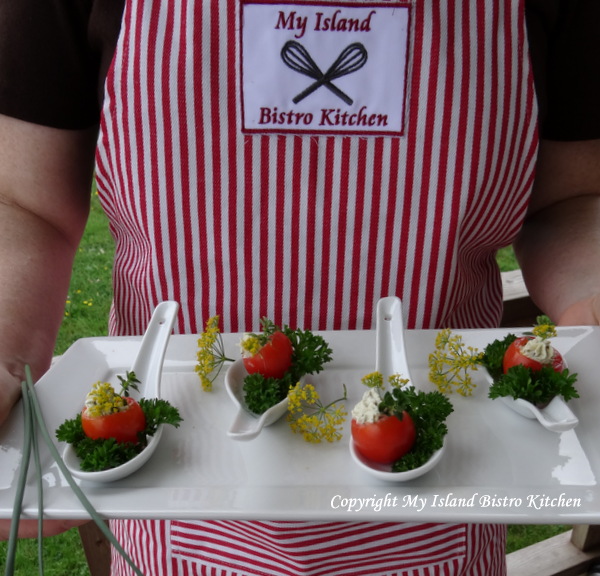
I like to serve these on a bed of parsley in small tasting spoons. It dresses them up.
They are as colorful in presentation as they are tasty.
Thank you for visiting “the Bistro” today. There are lots of ways to connect with “the Bistro” through social media:
Join My Island Bistro Kitchen on Facebook
Follow the Bistro’s tweets on twitter @PEIBistro
Find the Bistro on Pinterest at “Island Bistro Kitchen”
Follow along on Instagram at “peibistro”
I’ve had a great summer of picnics this year! Haven’t gone on this many picnics in many years. I had forgotten how much fun and relaxed al fresco dining can be. This posting will feature my Labour Day Weekend Picnic but, first, a little trip down memory lane.
One of my favorite summertime memories involves a picnic. I was visiting a neighbour playmate and we were probably about 8 or 9 years old. We took a notion one hot summer day that we would have a picnic by the little stream across the road from my friend’s place. The two of us stood by the friend’s mother at the kitchen counter as she whipped up some gourmet peanut butter and jelly sandwiches, placed them in an old tin school lunchbox, filled a thermos with Kool-aid (anybody remember Kool-aid?), and sent us off on our big adventure to the picnic by the stream. Off we went across the little country road, down through the cow pasture to a little stream which, at its deepest point was probably all of 4″ or 5″ deep. We situated ourselves, had our picnic, and probably returned to the house all in the span of about 15 minutes, no doubt ready for another activity! Yet, we had been on a picnic adventure and made a memory. That was back in the days when kids played outside all day and found numerous ways to amuse themselves and none of them involved cell phones or computers.
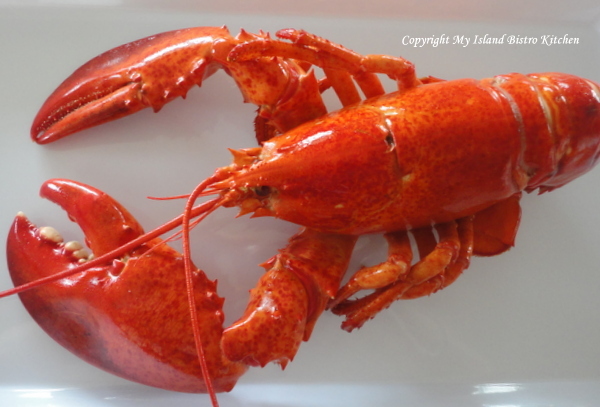
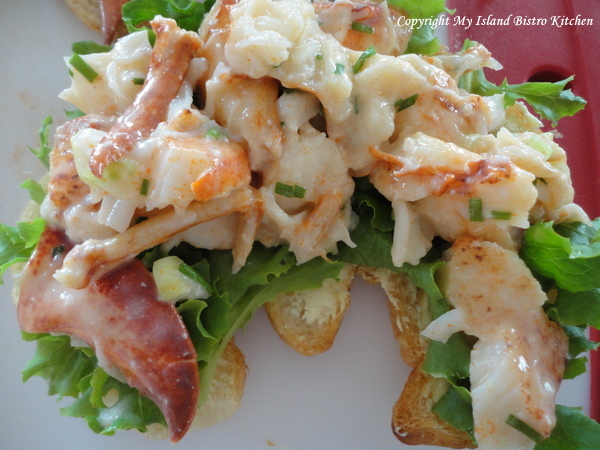
I will admit my picnic adventures have progressed and become a bit more sophisticated. There are so many options for picnic foods, particularly when it comes to sandwiches – there are traditional sandwiches with any number of different kinds of breads as options, wraps, baguettes, different kinds of rolls, bagels, etc. For my picnic by the sea today, I have chosen croissants. They are tasty and have a nice, soft texture. Because I live near the water and close to a small fishing village that has a fresh seafood market open daily in the summer, lobster was a logical choice for a croissant filling. The late summer fishing season has opened in Victoria-by-the-Sea on the south shore of PEI so buying lobster at the seafood market means the lobster is really, really fresh. Take a look at this 1 1/2+ pound lobster that I took home with me to make the filling for the croissants!
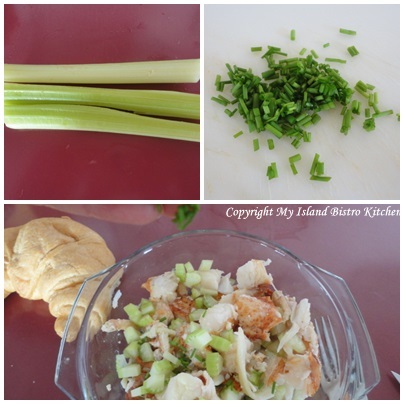
I don’t really have a defined recipe for lobster filling for sandwiches or croissants. I chop the lobster meat into fairly large chunks as I like to see good-sized pieces of lobster in a lobster roll or croissant — no mashed-up or shredded pieces of lobster meat will do for me!
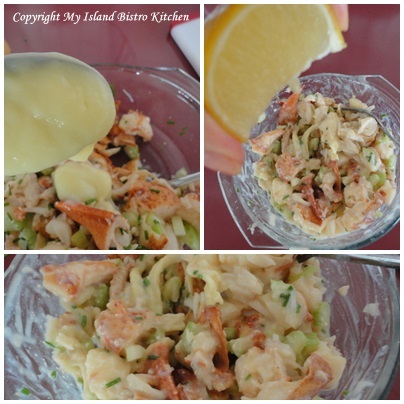
I add a bit of celery, some pepper, some fresh chopped chives, a splash of fresh lemon juice, and some homemade mayonnaise – just enough to hold the meat together and give it flavour. That’s it, nothing more as I don’t like anything that detracts from that rich lobster flavour.
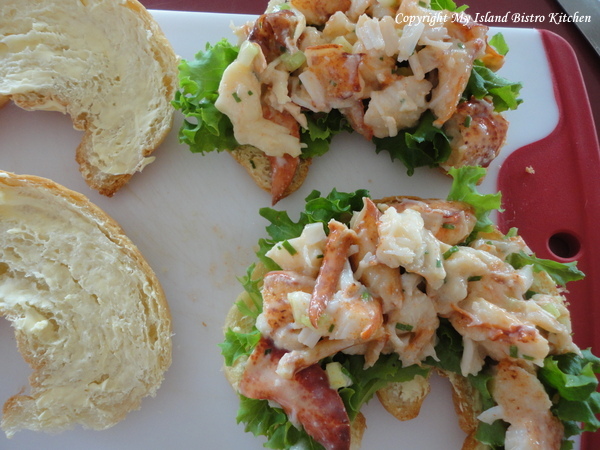
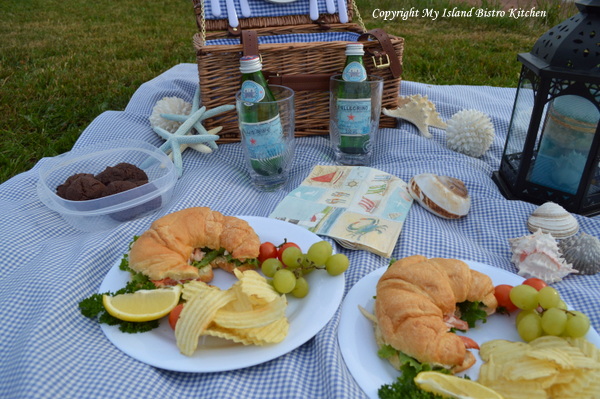
I buttered the croissants, added a bed of fresh lettuce from our garden and then heaped on the lobster filling. Yes, it was very yummy!
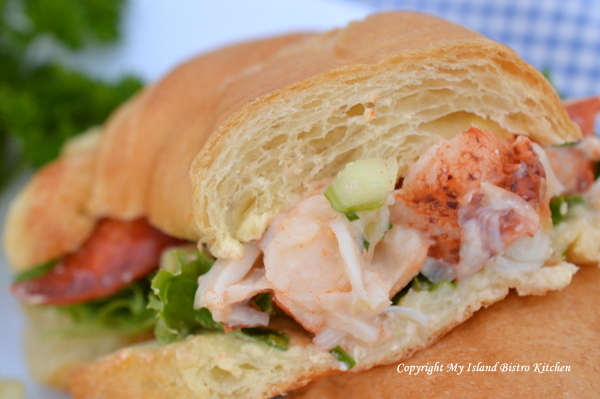
A little closer look….
And, this is what I mean about wanting to see nice big pieces of lobster in the sandwich. Isn’t it mouthwatering and colorful!
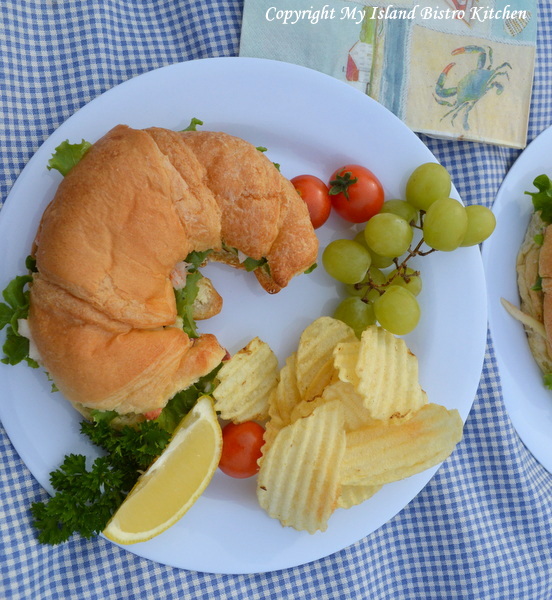
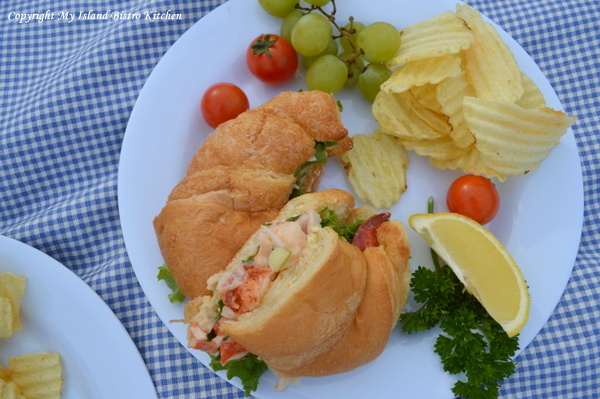
Add some potato chips and picnic fare doesn’t get much better than this, particularly when the picnic location is beside the water. With something as special as lobster, the menu does not have to be extensive. Let the lobster star all on its own!
Croissants are so easy to handle and eat…particularly when filled with lobster 🙂
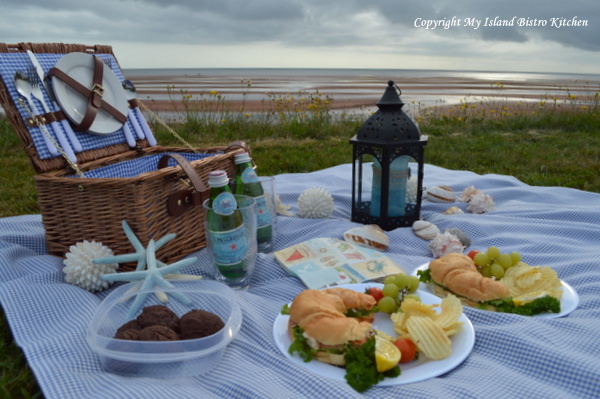
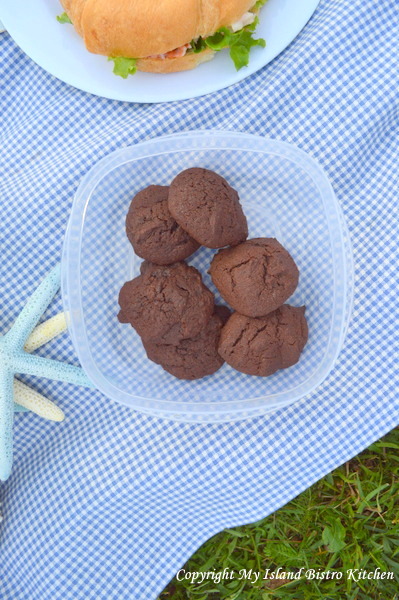
I added some fresh fruit – this time, some green grapes – and the picnic basket was ready to go.
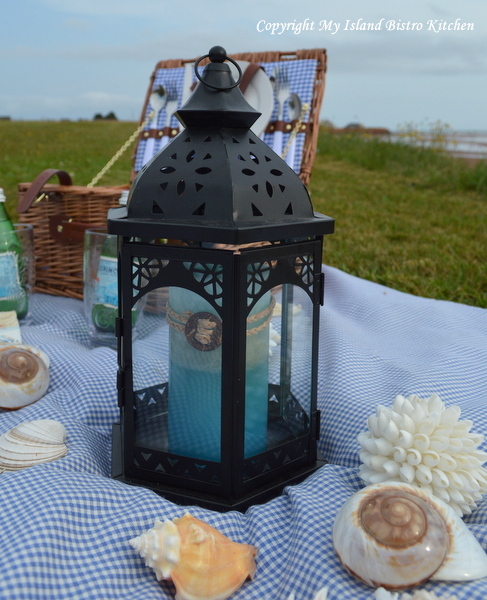
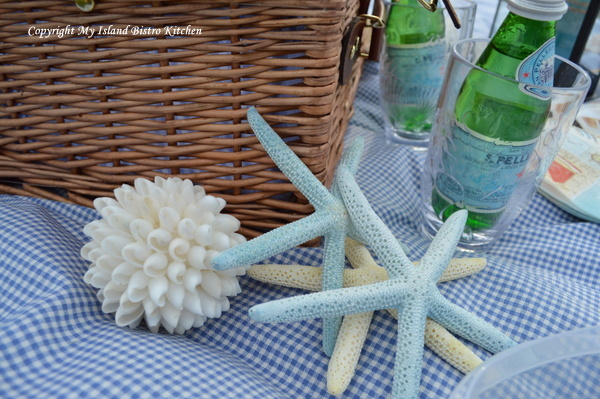
I always like to take along some props to dress up the picnic spread, regardless whether it is at a picnic table or on the ground as is the case here by the beach. It doesn’t matter whether I am in my dining room setting a formal table or outside, I like to think of setting the stage for a feast for the eye as well as for the stomach. A few props really can make an ordinary picnic a bit more special.
For my seaside picnic, all it took was a blue-checked cloth, a stylish matching wicker picnic basket, a lantern with a blue candle, and some seashells and starfish, to dress up the dining experience.
I love the patterns in the pink-red sandbars on PEI. Our Island beaches are extraordinary – on the south side, they tend to be more the pink-red color you see in the photo below while, on the north side, the sand is more of a soft pink color. This is definitely a dining room with a water view!
However, the sky began to look somewhat ominous so we thought we had better hurry up and eat in case a rain shower came along and spoiled the picnic.
I hope you have enjoyed some of the scenes from our seaside picnic that featured PEI lobster. Enjoy your Labour Day weekend.
Thank you for visiting “the Bistro” today. There are lots of ways to connect with “the Bistro” through social media:
Join My Island Bistro Kitchen on Facebook
Follow the Bistro’s tweets on twitter @PEIBistro
Find the Bistro on Pinterest at “Island Bistro Kitchen”
Follow along on Instagram at “peibistro”
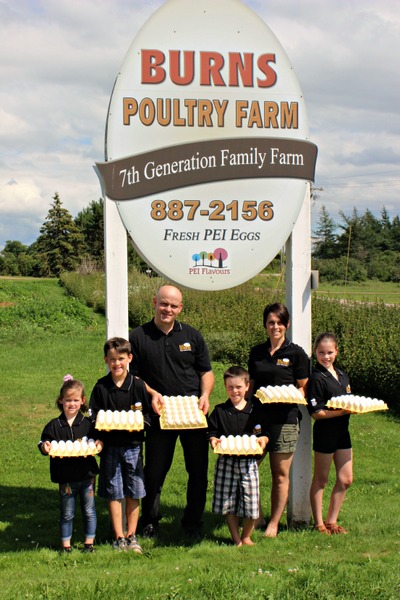
The Burns Family – 7th Generation PEI Egg Farmers (Photo: Lynda MacSwain. Submitted by Wendy Burns with permission.)
I have a keen interest in where the food I eat is produced. Recently, I visited Burns Poultry Farm in Freetown, PEI, to find out about egg production. There are five active registered egg-producing poultry farms on PEI, one of which is the Burns farm.
Before seeing the egg grading process in action, I sat down with Wendy Burns to find out about their poultry farm. Wendy’s husband, Nathan, is a 7th generation egg farmer on PEI so the Burns family knows a thing or two about egg production! Wendy and Nathan bought the poultry farm from Nathan’s parents in 2001. Wendy remarks that, from the time he was very young, Nathan had a keen interest in poultry farming and knew what his future vocation was going to be! Wendy manages the office, the accounting, and payroll while Nathan tends to the feed formulations, egg production, and egg grading.
The couple met while attending Nova Scotia Agricultural College, from which they both graduated – Nathan from the Agricultural Engineering Program and Wendy with a Bachelor of Science in Agriculture. In addition to being parents to four active growing children, this couple has transformed their egg farm into a very efficient family business. They have expanded existing barns; built a new barn for the laying hens; added a bigger generator with an automatic switch that kicks in if the farm is without power for 5 seconds; expanded their cooler capacity; invested in a new egg packer that packs eggs each day from their laying barns; upgraded their water systems to provide ozonated water for the hens which aids in their digestion; purchased a Pulsefog machine to disinfect the barns faster and more efficiently; and installed a state-of-the-art grading machine into their newly-renovated, federally-inspected egg grading station.
Burns Poultry Farm
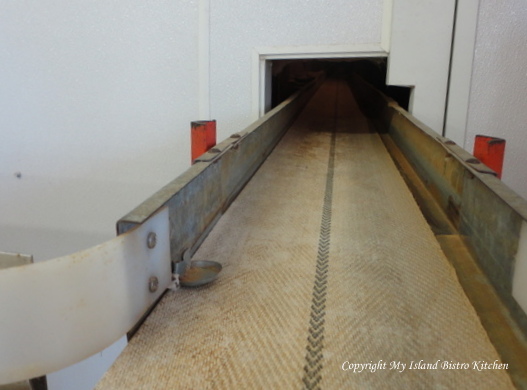
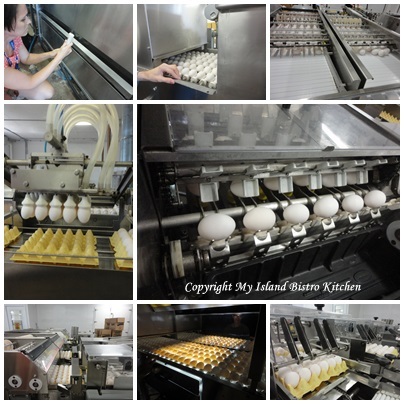
The Burns family holds quota for about 32,000 laying hens and they have three equally-sized barns that house the flock. With over 90% of the hens laying one egg per day, it is a lot of eggs to gather. Every time an egg is handled or moved, it increases the potential for damage or cracks. Wendy explains that, with their efficient collection system, it is possible for a hen to lay an egg and the egg not be touched by a human hand until the consumer takes it out of the carton or the restaurant chef cracks the egg on the grill. This is because the Burns’ have an “in-line” system that transfers the eggs from the barns via a conveyer belt to the grading station.
Conveyer belt connects all barns on Burns farm and transports the eggs to the grading station
The system the Burns have installed is all computerized so it allows the eggs to come from the barns, be counted, washed, candled, graded, packed, and in their cooler in approximately 15 minutes. Now, that’s what I call farm-fresh eggs!
I wasn’t able to go inside the barns where the hens are housed so I did not see any of the laying hens. This is because of their on-farm food safety program and biosecurity protocol. Wendy says “the goal is to maintain a consistent, undisturbed environment for the birds because deviations from their normal habitat could affect their well-being and, consequently, egg production”. On a daily basis, only Nathan and two workers are permitted inside the barns. A walk-through of each barn is done twice per day and each row of hens is checked to ensure the birds have enough water and feed and that their environment is comfortable. Nathan also checks the barns each evening after all the feedings are finished to ensure all is well before lights out. Wendy explains that the only other person permitted to enter the barns is the inspector from the Egg Farmers of Canada. “The inspector makes several site visits each year where the birds are counted and swabs are taken for testing to ensure there are no diseases present”, explains Wendy. The inspector also audits their Start-Clean/Stay-Clean records to ensure all protocols follow the guidelines of their On Farm Food Safety Program.
Wendy was able to tell me about their flock. At the time of my visit, the hens were all one breed – Lohmanns. They all lay white eggs but Wendy says that the farm placed some brown egg layers in the grow barn last cycle and those hens will begin to lay brown eggs in September. The highest expense in the operation is the feed. The Burns monitor feed consumption to ensure the hens are getting adequate nutrition. The hens need different levels of nutrients, such as calcium and protein, at different ages. This ensures bird health is maintained and the hens produce the best quality of eggs possible.
It takes 18-19 weeks for a chick to become a laying hen. The chicks arrive in batches of about 12,000, two or three times a year. Wendy says that it is always an exciting day on the farm, as you can imagine, with four young children seeing 12,000 baby chicks arriving all at once! The Burns have three production barns that house the hens, each containing a flock of hens of a certain age – i.e., 20 weeks apart in age. This means their farm can ensure a steady supply of high-quality fresh eggs for customers year round.
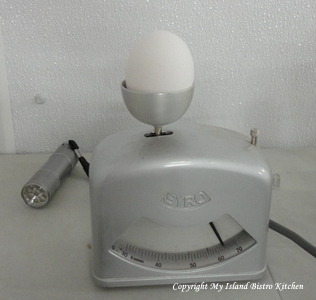
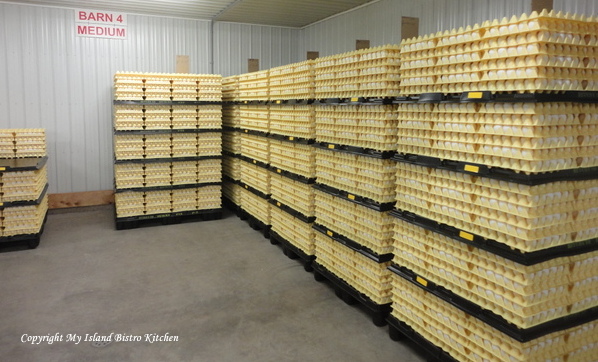
I asked Wendy what determines the different sizes of eggs. She tells me that it is the weight of the egg that will determine if it is a small, medium, large, or extra large egg. Younger hens typically lay smaller eggs and the average egg size increases as the hens age. Generally, medium, large, and extra large eggs are packed for the fresh shell egg market while the other sizes are sent off for industrial use – for example, dried for cake mixes, frozen, liquid whole egg, or whites only. No eggs, regardless of size, are wasted.
Weight of an egg determines if it is a small, medium, large, or extra-large egg
Eggs are a supply-managed commodity. The egg industry is heavily regulated and the Burns must comply with the regulations of the Egg Farmers of Canada and the Canadian Food Inspection Agency, in terms of housing the hens, cage density, sanitation programs, welfare of the birds, and pest control. There is a lot of record-keeping involved in the operation of an egg farm and egg-grading station. All food safety-based programs are in place to ensure the safest possible supply of eggs for consumers.
Wendy tells me that the “Best Before” date of graded eggs is six (6) weeks from the date they are graded. She also explains that washing the eggs, which is an obvious necessity, reduces the shelf life of eggs as it removes the natural sealant that the hens leave on the eggs when they are laid.
I asked Wendy what their biggest challenge is as egg farmers. She says she has concerns over the possibility that, at some point, supply management of the egg industry could be disbanded. This is the Canadian system that regulates quota and, consequently, egg production. If that was to happen, anybody could build a barn and start large-scale egg production, with no food safety procedures, no testing protocol, or no rules. As Wendy explains, “currently, registered egg producers pay levies that pay for their food safety protocols, testing, and ensure there is no surplus of eggs on the market which could impact negatively on their chance of a fair return for their investments and hard work.” As Wendy says, “being a regulated producer is a big investment but it provides stability without relying on government dollars as it is producer-funded”.
As for their greatest source of satisfaction as egg farmers, Wendy says she and Nathan work well together and the couple enjoy being their own boss. They like the challenge that comes with no two days being the same on the farm. Wendy tells me she really enjoys the lifestyle of living and working on the farm as it allows her to be home with her children before they catch the school bus and greet them when they return home in the afternoon.
The day I visited the Burns farm, they were busy with their egg grading which takes place once a week. By the end of the day, they would have graded approximately 55,000 eggs for market!
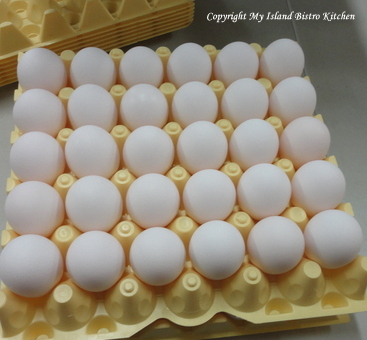
Some of the activities in the egg grading process
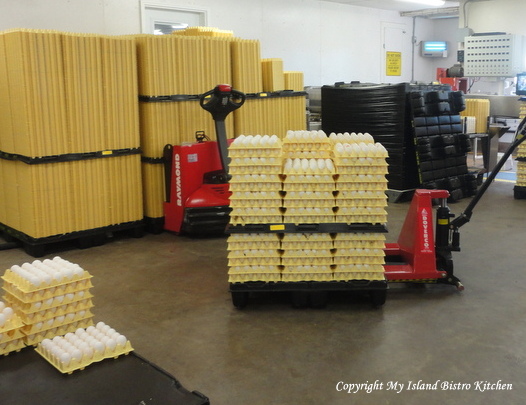
The number of eggs graded is determined by what the farm can sell as graded product. On days when no grading is taking place, the eggs are packed on to plastic trays by a farm packer machine, loaded on to pallets, and refrigerated. Eggs that are surplus to fresh markets are sold as industrial product.
Graded Eggs Heading to RefrigerationEggs Stored in RefrigeratorLarge Cartons of Eggs Ready for Shipping
The farm employs three individuals full-time on a year-round basis and six individuals on a part-time basis.
So, some interesting egg trivia I learned:
– egg shells are made up mostly of calcium – the better the quality of egg shell, the less likelihood there will be of cracked eggs.
– the color of the egg shell (white or brown) is determined by the genetics of the hen, not by diet.
– the color of the egg yolk is determined by what grains the hens are fed (yes, there really is a difference in the color of egg yolks — paler yolks result when paler grains are fed, such as barley or wheat, and a richer yolk color results when corn is in the feed)
The Many Colors of Egg Yolks
– according to the Egg Farmers of PEI Website, Island egg farmers produced 3,304,300 dozen eggs in 2012 and about 50% of those were consumed by Islanders! That’s a lot of eggs!
Nathan and Wendy are marketing their eggs through ADL Foods. The public may purchase the eggs on-site at the ADL Foods Retail Outlet in Reads Corner on Highway 1A in Summerside. ADL Foods also sells Burns Poultry Farm’s eggs by the box to many Island restaurants so, chances are, if you have eaten an egg at an Island restaurant that gets its eggs from ADL Foods, you may have eaten an egg produced by this 7th generation PEI family farm.
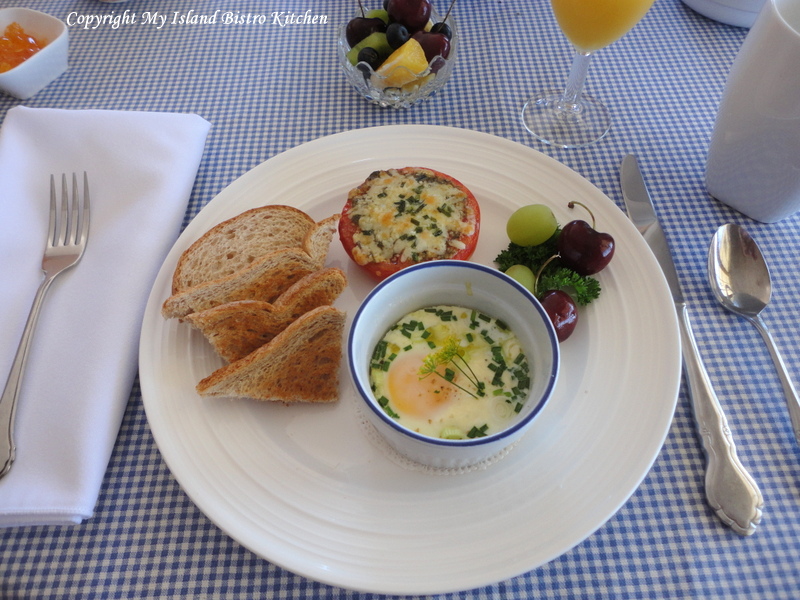
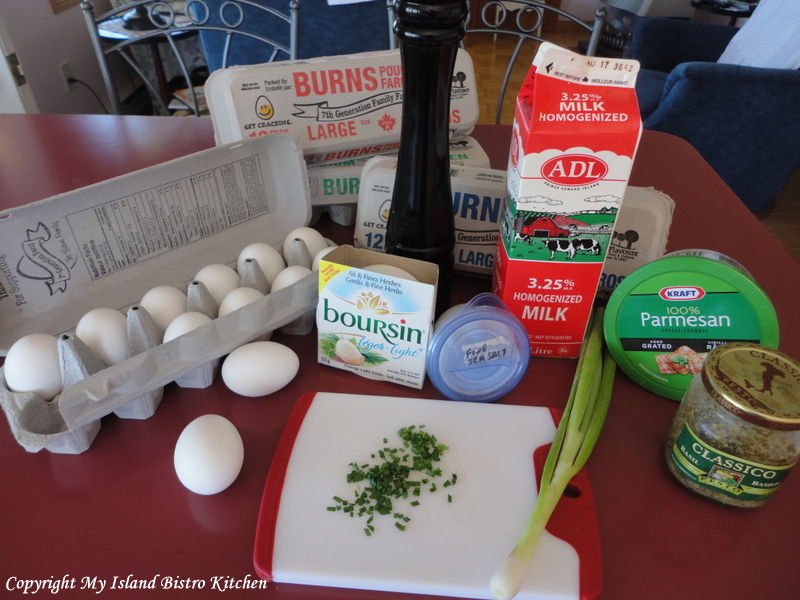
I used Burns’ eggs in the following recipe for Baked Eggs with Basil Pesto and Cheese.
Baked Eggs with Basil Pesto and Cheese
Baked Eggs with Basil Pesto and Cheese
Ingredients:
2 large eggs
3 tsp basil pesto
4 tsp grated Parmesan cheese
2 tbsp milk or cream
1 green onion, sliced
Fresh chives, chopped
Salt and pepper, to taste
2-3 tsp Boursin Garlic and Fine Herbs cheese, or your favorite feta cheese
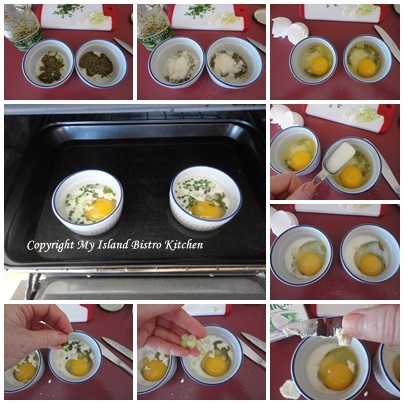
Method:
Assemble ingredients.
Preheat oven to 325C.
Spray two ramekins dishes with cooking spray. Place 1 ½ tsp pesto in bottom of each dish and swirl it around so bottom of ramekin are covered with pesto. Sprinkle 1 – 2 tsp parmesan cheese on top of pesto. Crack one egg into each ramekin without breaking the yolk. Add 1 tbsp milk or cream to each dish. Sprinkle each with sliced green onions and fresh chives. Add salt and pepper to taste. Top with 1 to 1 ½ tsp soft cheese.
Place ramekins in oven-proof baking pan. Fill up pan with boiling water until it reaches the half-way point on the sides of the ramekins.
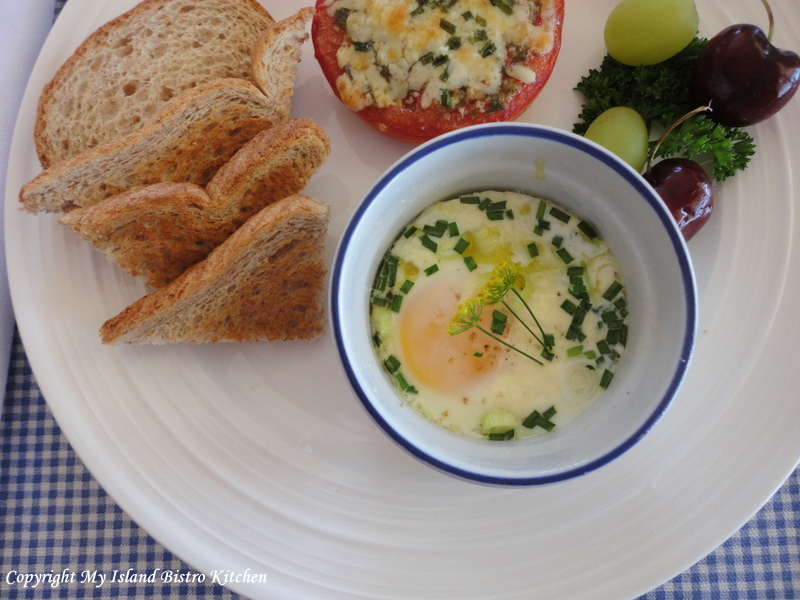
Bake eggs for 10-20 minutes, depending on whether you like eggs runny, medium, or well done.
Serves: 2
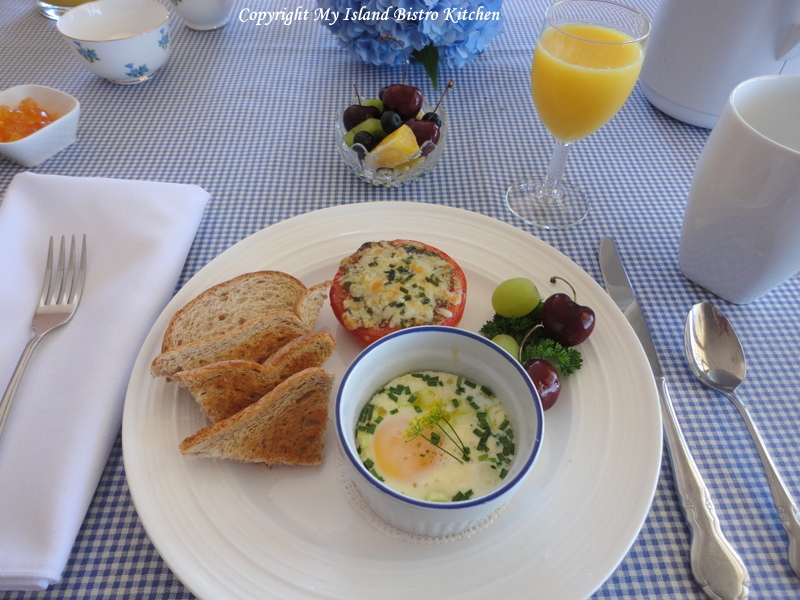
This egg dish is perfect for a special weekend morning breakfast or brunch or even for a light supper.
My thanks to Nathan and Wendy Burns for taking time out of a busy day to meet with me and explain the egg production process at their farm.
This egg dish is perfect for a special weekend morning breakfast or brunch or even for a light supper.
Course
Breakfast
Cuisine
Canadian
Keyword
baked eggs, eggs
Servings2
My Island Bistro KitchenBarbara99
Ingredients
2large eggs
3tspbasil pesto
4tspgrated Parmesan cheese
2tbspmilk or cream
1green onion, sliced
Fresh chives, chopped
Salt and pepper, to taste
2-3tspBoursin Garlic and Fine Herbs cheese, or your favorite feta cheese
Instructions
Assemble ingredients.
Preheat oven to 325C.
Spray two ramekins dishes with cooking spray. Place 1½ tsp pesto in bottom of each dish and swirl it around so bottom of ramekin are covered with pesto. Sprinkle 2 tsp parmesan cheese on top of pesto in each ramekin. Crack one egg into each ramekin without breaking the yolk. Add 1 tbsp milk or cream to each dish. Sprinkle each with sliced green onions and fresh chives. Add salt and pepper to taste. Top with 1 to 1½ tsp soft cheese.
Place ramekins in oven-proof baking pan. Fill up pan with boiling water until it reaches the half-way point on the sides of the ramekins.
Bake eggs for 10-20 minutes, depending on whether you like eggs runny, medium, or well done.
Recipe Notes
Serves:2
Thank you for visiting “the Bistro” today. There are lots of ways to connect with “the Bistro” through social media:
Join My Island Bistro Kitchen on Facebook
Follow the Bistro’s tweets on twitter @PEIBistro
Find the Bistro on Pinterest at “Island Bistro Kitchen”
Follow along on Instagram at “peibistro”
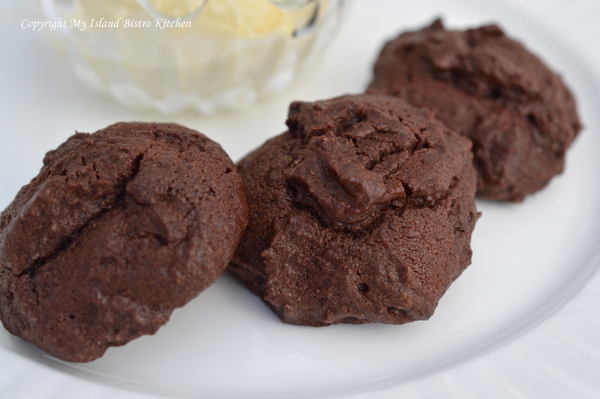
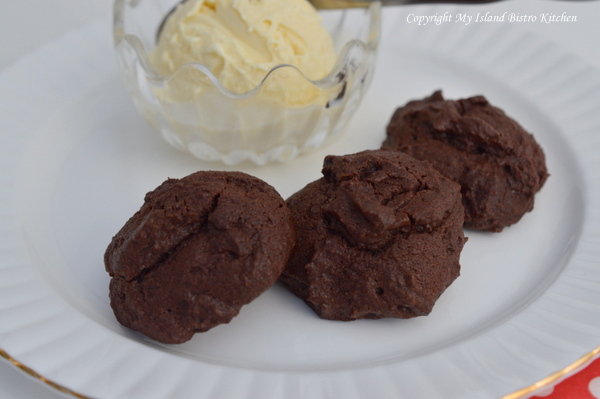
I have always been a chocolate lover. These chocolate cookies were ones my Mother often made when I was a child. I like the rich chocolate flavour and somewhat chewy center they have. These cookies don’t take any uncommon ingredients or ones most serious bakers wouldn’t have in their cupboards. Of course, using the best cocoa you can find will make for a richer, more flavourful cookie.
This cookie recipe calls for shortening (as opposed to butter). While some think that butter is the only fat to use in baking, I would disagree. There are times when the flavorless shortening can actually produce a better quality baked good with sought-after attributes.
For these cookies, I wanted puffy cookies with a soft, tender texture so shortening was my fat ingredient of choice. This is because shortening has no water content so, unlike butter with its water content, there is no water to create steam. Less steam means less gluten is likely to be formed thus giving the cookies their soft, tender texture.
In addition, shortening has a higher melting point that does butter. This gives the cookie dough a longer chance to set and establish its shape before the fat melts and spreads the cookies out flat. The result? Cookies with a higher rise and a softer, more tender texture. You can read more about the choice of using butter and/or shortening in cookie baking by clicking here.
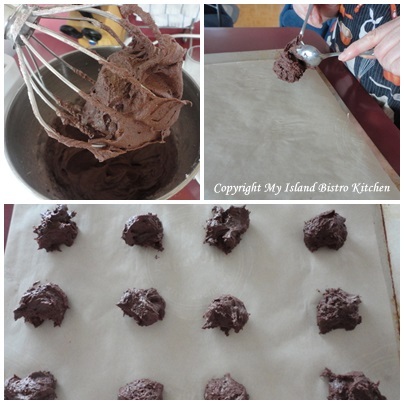
These cookies are very easy to make and, being drop cookies, there is no rolling the dough and cutting out shapes and no need for any icing. Simply scoop up some dough with a teaspoon and use another to slide the dough off the spoon and on to the cookie sheet. These cookies can be dressed up with 1/2 cup of either chopped nuts, dates, raisins, or even chocolate chips. However, I don’t add any extras to them as I like the smooth texture and flavour they have on their own without any further additions.
[Printable recipe follows at end of posting]
Chocolate Drop Cookies
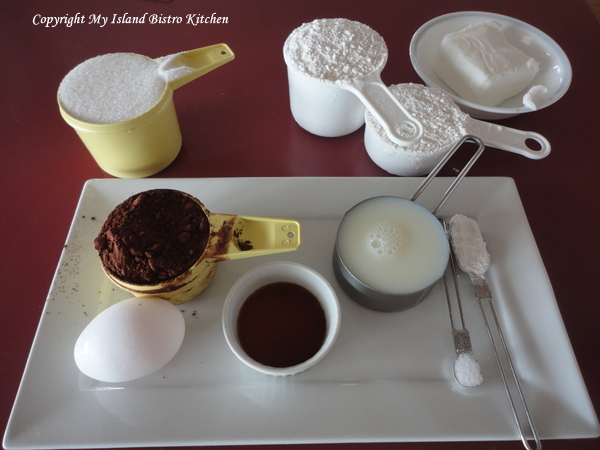
Ingredients:
1/2 cup shortening, softened
1 cup white sugar
1 egg
1 tsp vanilla
1/2 cup milk
1 1/2 cups flour
1/2 cup cocoa
1 tsp baking powder
1/4 tsp salt
Method:
Preheat oven to 375F.
With electric mixer, beat shortening and sugar together until light and fluffy (1-2 minutes). Beat in egg, vanilla, and milk.
Into separate bowl, sift together the flour, cocoa, baking powder, and salt. Add to wet ingredients and stir just until dry ingredients are incorporated.
Drop by teaspoonfuls onto parchment-lined baking sheet.
Bake 10-11 minutes. Do not overbake or cookies will be dry.
Yield: Apx. 3 dozen
These cookies are good any time and make good lunch box treats as well as picnic basket fare. They are especially good with a dish of vanilla ice cream!
If you have made this recipe and enjoyed it and/or wish to share it with your friends and family, please do so on social media but be sure to share the direct link to this posting from my website.
Connect with My Island Bistro Kitchen on Social Media
Follow “the Bistro” on Pinterest at https://www.pinterest.ca/peibistro/ and pin the Pinterest-ready photo found at the end of this post to your favorite Pinterest boards.
Chocolate lovers will love these easy-to-make rich Chocolate Drop Cookies with their slightly chewy interior
Course
Cookies
Keyword
chocolate cookies, cookies,
My Island Bistro KitchenBarbara99
Ingredients
1/2cupshortening, softened
1cupwhite sugar
1egg
1tspvanilla
1/2cupmilk
1 1/2cupsflour
1/2cupcocoa
1tspbaking powder
1/4tspsalt
Instructions
Preheat oven to 375F. Line baking sheet with parchment paper.
With electric mixer, beat shortening and sugar together until light and fluffy (1-2 minutes). Beat in egg, vanilla, and milk.
Into separate bowl, sift together the flour, cocoa, baking powder, and salt. Add to creamed mixture and stir just until dry ingredients are incorporated.
Drop by teaspoonfuls onto prepared baking sheet.
Bake 10-11 minutes. Do not overbake or cookies will be dry. Let cookies rest on baking sheet for 3-4 minutes then transfer to wire rack to cool completely.
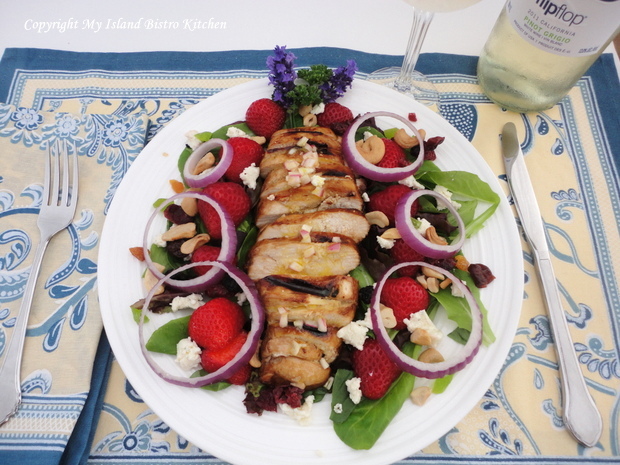
Grilled Chicken, Strawberries, and Feta Cheese Salad
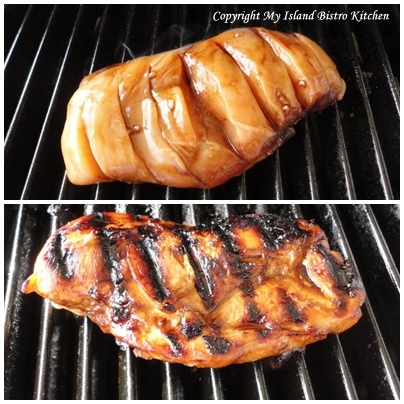
With warm summer evenings, it’s nice to have a go-to recipe for an easy-to-prepare, light yet filling, entrée. One of my favorite summertime evening meals is warm grilled chicken served over a strawberry, feta cheese, and green salad and drizzled with a good balsamic vinaigrette.
The option is yours to choose to marinade the boneless, skinless chicken breasts or not. I usually do and I don’t follow a precise recipe for the marinade but these are the usual ingredients: brown sugar, olive oil, balsamic vinegar, garlic, minced onion, soya sauce, salt, and pepper. As for quantities of each ingredient, I don’t actually measure them out and add more or less, depending on how many chicken breasts I am marinating. I make several horizontal cuts in the chicken breasts to allow the marinade to permeate through the meat. Place the chicken breasts in a ziplok bag, mix together the marinade and pour it into the bag, making sure the entire chicken breasts are covered. Zip up the bag and place it in the fridge for several hours (I usually aim for between 2 and 4 hours). Heat up the grill and cook the chicken breasts until they are done.
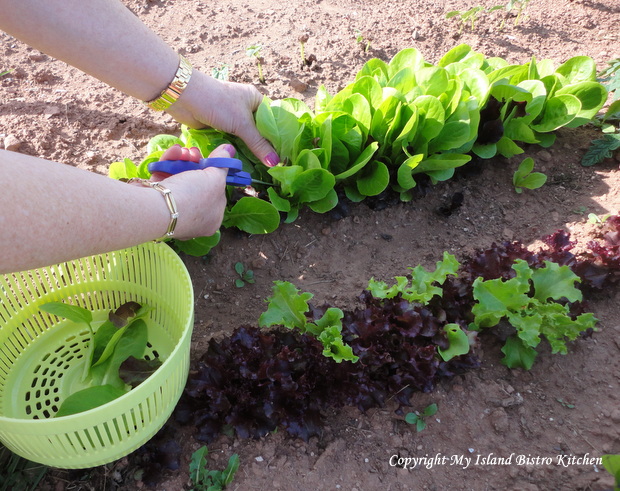
One of the pleasures of summer is having our own garden. We eat a lot of salads and there is nothing better than running to the garden right before meal time and gathering a medley of fresh lettuce as well as some herbs from our little herb garden.
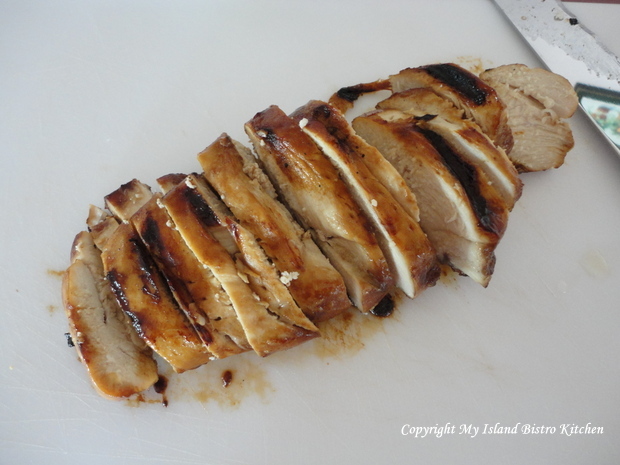
Slice the warm grilled chicken breast horizontally into slices about ¼” thick.
Cover the plate with a medley of greens. Transfer the cut-up chicken breast to centre of the plate on top of the lettuce bed. Slice up and add some fresh strawberries and red onion rings. Sprinkle with feta cheese and a few nuts such as cashews or sunflower seeds (or both!). Add a balsamic vinaigrette and voila, a tasty and light dinner. Serve with baguette slices and a refreshing glass of your favorite white wine. Here I have selected “flipflop”, a California Pinot Grigio which made a fine accompaniment to a summer salad.
Grilled Chicken, Strawberries, and Feta Cheese Salad
My recipe for the vinaigrette follows. Of course, you know the secret to a really good vinaigrette – the best quality of olive oil and balsamic vinegar you can find. Because we have a “Liquid Gold Tasting Bar & All Things Olive” store in Charlottetown, I buy their olive oil and vinegar products because they are superior and fresh quality.
Peach and Mandarin Balsamic Vinaigrette
¼ cup Mandarin-infused olive oil
2 tbsp peach white balsamic vinegar
4 tsp Dijon mustard
1 tsp minced garlic
1 small green onion or 1 – 2 tsp finely chopped red onion
2 tsp freshly-squeezed lemon juice
1 ½ – 2 tsp sugar, to taste
Freshly ground pepper
Kosher salt, to taste
Mix and shake all ingredients together until well mixed. Drizzle over salad at time of serving.
Thank you for visiting “the Bistro” today. There are lots of ways to connect with “the Bistro” through social media:
Join My Island Bistro Kitchen on Facebook
Follow the Bistro’s tweets on twitter @PEIBistro
Find the Bistro on Pinterest at “Island Bistro Kitchen”
Follow along on Instagram at “peibistro”
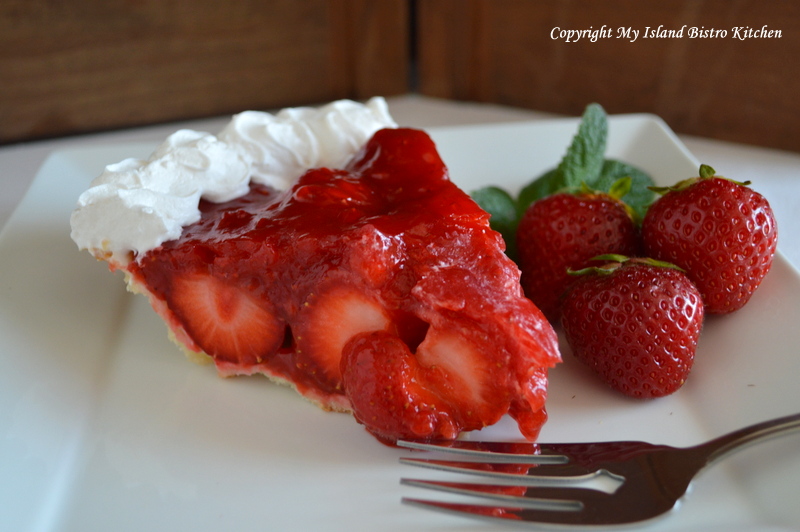
There are so many things I like about summer in Prince Edward Island but one of my very favorite things is Glazed Strawberry Pie made with fresh, locally-grown Island berries. After I have had a couple of “feeds” of plain berries, sugar, and milk, I am ready for them in other recipes. One of those recipes always has to be fresh strawberry pie. Continue reading Glazed Strawberry Pie→
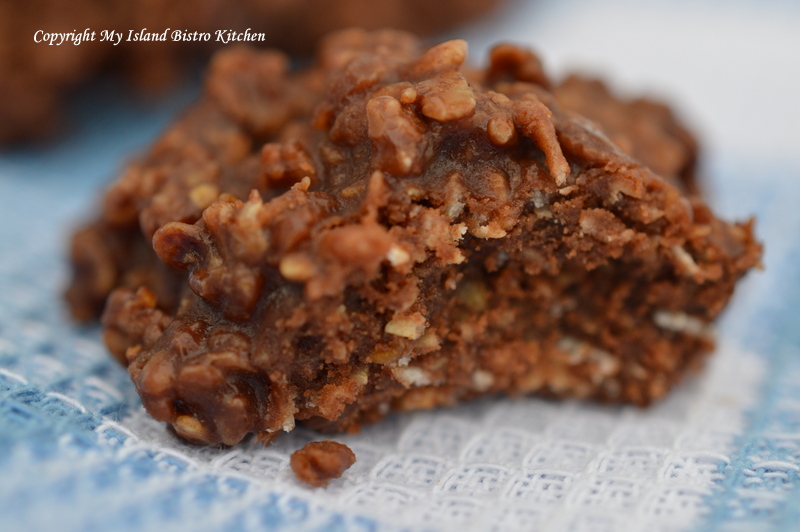
Oh, these bring back sweet childhood memories! I grew up knowing these as “Spider Cookies” though they are known by a host of other names, too. Sometimes, they are simply called “Uncooked Chocolate Cookies”. Regardless their name, they are simple to make and very tasty; in fact, I’d say they are a close neighbour to candy. Continue reading Spider Cookies Recipe→
Oh, those lazy, hazy hot days of summer! They sure can work up a thirst. One of the most refreshing summertime drinks in my repertoire is Rhubarb Cordial. Not only is it refreshing, but it is tasty and a very showy drink with its bright orange/red color. Continue reading Rhubarb Cordial→
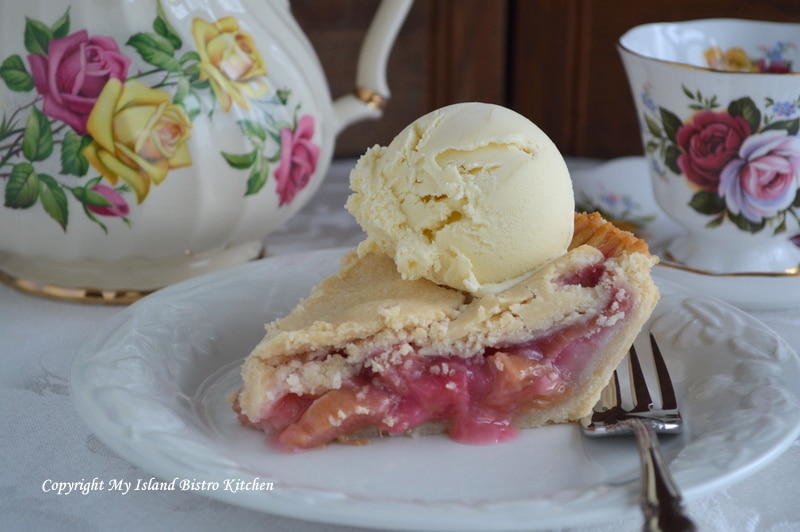
Rustic Rhubarb Pie Served with French Vanilla Ice Cream
The rhubarb is at its prime on PEI right now and, of course, I am busy making the usual repertoire of my favorite recipes while the rhubarb stalks are at their best. Used too early before they have some maturity and the stalks won’t have much flavour; left too long and they go woody and lose their flavour.
It’s always a spring-time boost when I start to see the rhubarb shoots poking their way through the ground and, within a short period of time, they grow into very large plants. We have two rhubarb crowns and, with leaves, they measure a little more than three feet tall with stalks that are about 20-22″ long. It doesn’t take many to make a rhubarb pie! For the pie below, I used 2 1/2 stalks. Continue reading Rustic Rhubarb Pie Recipe→
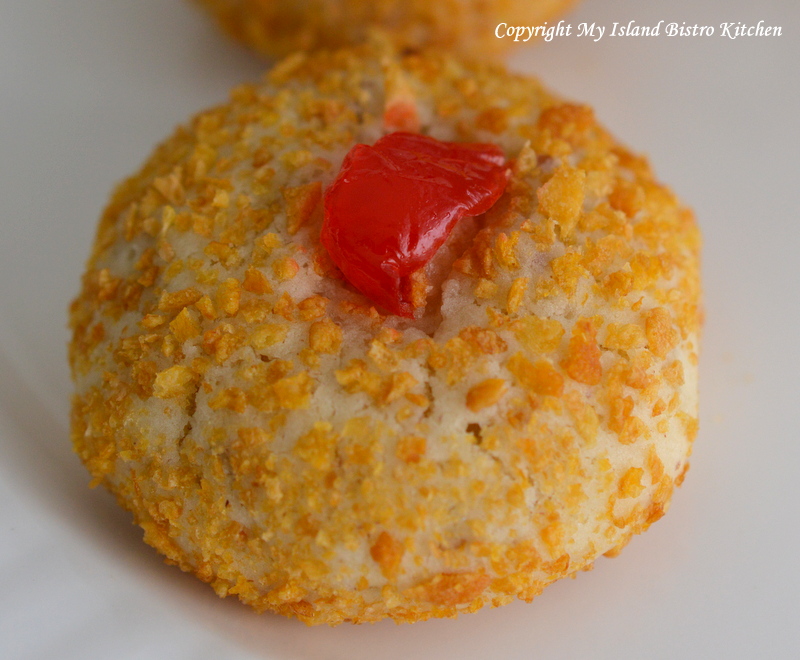
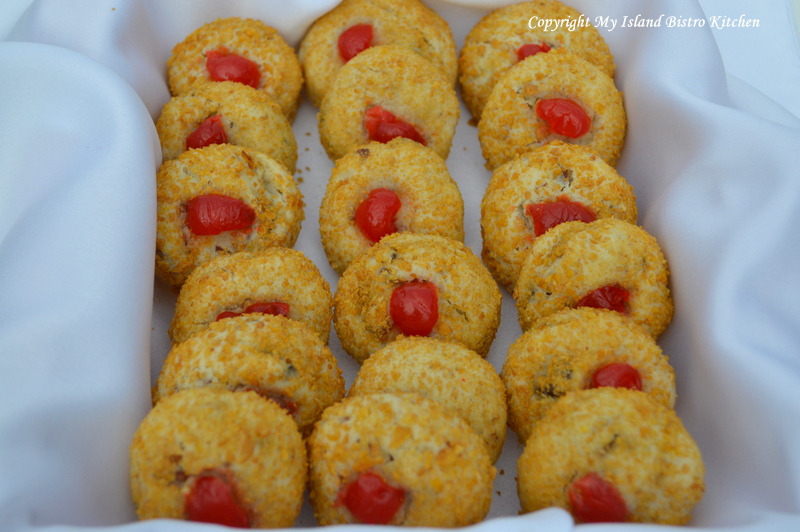
My Mother often made Cherry Wink Cookies when I was a small child so they have been a family favorite for many years. They are not difficult to make and don’t take any hard-to-find or unusual ingredients.
[Printable recipe follows at end of posting]
Cherry Winks
Ingredients:
3/4 cup shortening or butter, softened at room temperature
1 cup white sugar
2 eggs, unbeaten, room temperature
4 tbsp milk, room temperature
1 tsp vanilla
2 1/4 cups all-purpose flour
1 tsp baking powder
1/2 tsp soda
1/2 tsp salt
1 cup chopped dates
3/4 cup chopped pecans
apx. 2 1/2 – 3 cups cornflakes
apx. 15 maraschino cherries, blotted dry in paper towel, and cut into quarters
Method:
Preheat oven to 375F.
In bowl of stand mixer, cream shortening or butter. Add sugar and cream until light and fluffy. Add eggs, one at a time, and beat well after each addition. Beat in milk and vanilla.
In separate bowl, combine flour, baking powder, soda, and salt. Whisk together to blend. Mix in the dates and pecans. Add to creamed mixture and stir until well combined.
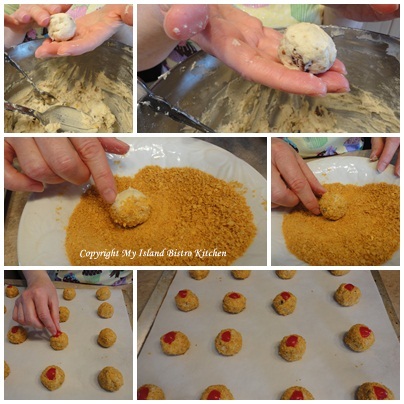
Crush cornflakes crumbs by placing in a sealed ziplock bag and crushing with a rolling pin.
Transfer crumbs to shallow bowl. Shape dough into small balls. Roll each cookie ball in the crumbs to coat. Place on parchment-lined baking sheets. Top each cookie with piece of cherry.
Bake for 10-12 minutes. Do not overbake. Let cool on cookie sheet for 2 minutes then transfer to wire rack to finish cooling.
Makes approximately 4 dozen cookies.
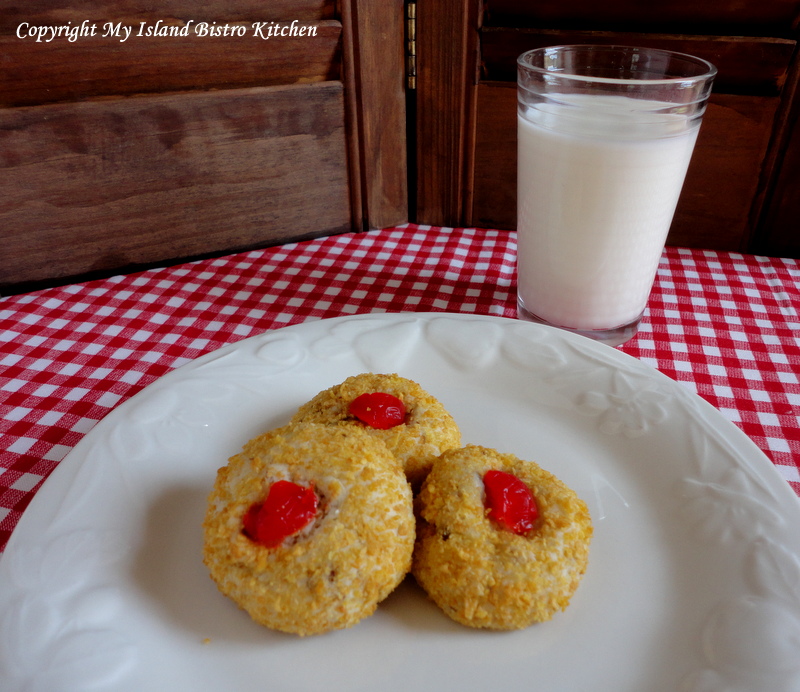
These cookies go especially well with a glass of cold milk!
…and one is never enough!
A box of these cookies makes a wonderful, tasty gift!
Cherry Winks are a cookie jar favorite! Cookies are coated in crushed cornflake crumbs and topped with a cherry. Both showy and tasty!
Course
Snack
Keyword
cherry winks, cookies,
My Island Bistro KitchenMy Island Bistro Kitchen
Ingredients
¾cupshortening or butter, softened at room temperature
1cupwhite sugar
2eggs, unbeaten (room temperature)
4tbspmilk, room temperature
1tspvanilla
2¼cupsall-purpose flour
1tspbaking powder
½tspsoda
½tspsalt
1cupchopped dates
¾cupchopped pecans
apx. 2½ - 3 cups cornflakes
apx. 15 maraschino cherries, blotted dry in paper towel, and cut into quarters
Instructions
Position oven rack in center of oven and preheat oven to 375°F.
In bowl of stand mixer, cream shortening or butter. Add sugar and cream until light and fluffy. Add eggs, one at a time, and beat well after each addition. Beat in milk and vanilla.
In separate bowl, combine flour, baking powder, soda, and salt. Whisk together to blend. Mix in the dates and pecans. Add to creamed mixture and stir until well combined.
Crush cornflake crumbs by placing in a sealed ziplock bag and crushing with a rolling pin.
Transfer crumbs to shallow bowl. Shape dough into small balls. Roll each cookie ball in the crumbs to coat. Place on parchment-lined baking sheets. Top each cookie with piece of cherry.
Bake for 10-12 minutes. Do not overbake. Let cool on cookie sheet for 2 minutes then transfer to wire rack to finish cooling.
Recipe Notes
Yield:Apx. 4 dozen cookies.
[Copyright My Island Bistro Kitchen]
Pin Me To Pinterest!
Cherry Winks
If you have made this recipe and enjoyed it and/or wish to share it with your friends and family, please do so on social media but be sure to share the direct link to this posting from my website.
Connect with My Island Bistro Kitchen on Social Media
June 2019 Update: Tim Dixon, mentioned in this blog post, is no longer producing asparagus for sale.
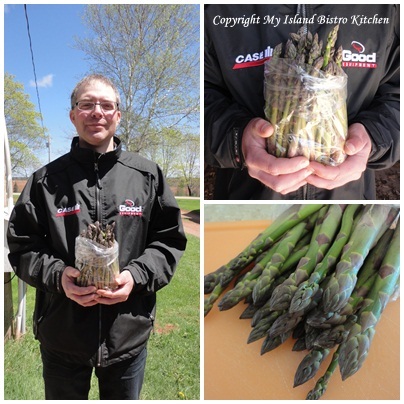
Yesterday, I paid a visit to Tim Dixon in North Tryon, PEI. Amongst other crops grown on the family farm, Tim grows a small acreage of asparagus which he markets to Island restaurants and also sells at the farm gate.
Tim Dixon with freshly picked asparagus from his North Tryon, PEI, Farm
Below is a photo of an asparagus spear just about ready to be harvested.
Asparagus Spear
Tim has been growing asparagus since 2000 and presently has acreage that yields between 500-700 pounds of this spring vegetable annually. I asked Tim why he decided to grow asparagus and he tells me he was looking to diversify his crop planting and was also looking for a market niche.
There are several varieties of asparagus but the bulk of Tim’s crop is the Jersey Giant variety. The asparagus is planted in springtime and is grown from crowns planted 1 foot deep in the rich red soil not far from the Tryon River. It usually takes a couple of years for the asparagus from a crown to be fully ready to be harvested.
Despite its Mediterranean origins and liking heat, Tim says asparagus is a hardy plant that only requires a light discing in the spring, a coating of manure, and some weed control. Tim says winter kill is not an issue for asparagus and a crown will generally produce spears for about 15 years.
Asparagus is one of the first vegetables of spring on PEI. Harvesting usually begins around Victoria Day in mid-May and continues until the end of June/first of July. When the spears are 6”-8” tall, Tim hand-picks them by snapping the spears off the stock, not cutting them. He tells me that the rule of thumb for harvesting asparagus is to pick for one week in the first year after planting, then 2 weeks the next, 3 weeks in year 3, up to 6 weeks of harvesting for mature asparagus.
Tim says the local community is very supportive and neighbours are amongst his best customers. On the farm, he sells both 1-pound and 2-pound bags of fresh asparagus. I asked him if he knew how his neighbours were preparing the asparagus and he says, typically, many steam or sauté the spears.
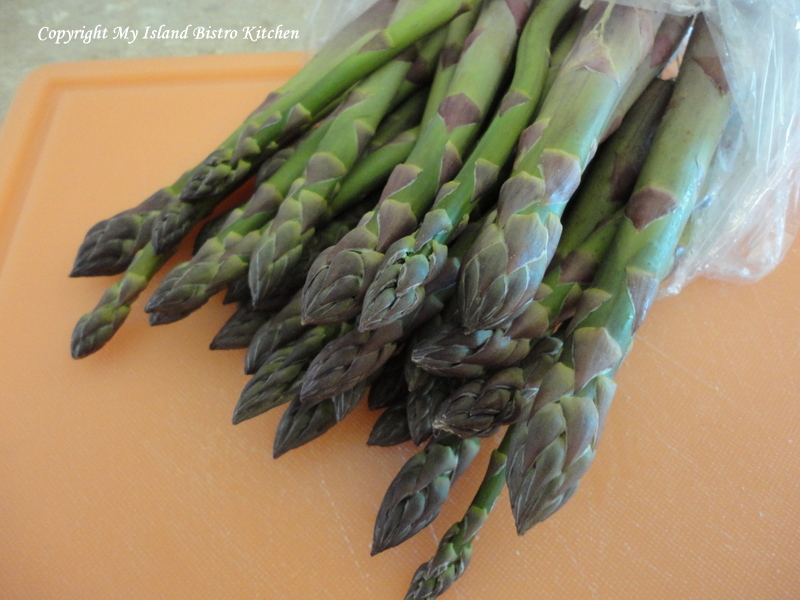
Fresh Asparagus
A standard-sized portion serving is 5 spears. Asparagus plates well because of its long, slender, vivid green spears and pointed flower heads that can range in color from dark green to tints of deep purple. It adds presentation, texture, and flavour to a meal. Asparagus has an earthy, unique taste and pairs well with poultry, seafood, and pasta. There are endless ways to prepare asparagus. One of my favourite ways to prepare asparagus is to mist it with a good quality olive oil, sprinkle it with freshly ground pepper, sea salt, and finely grated parmesan cheese and then barbeque it in a veggie basket over the open flame.
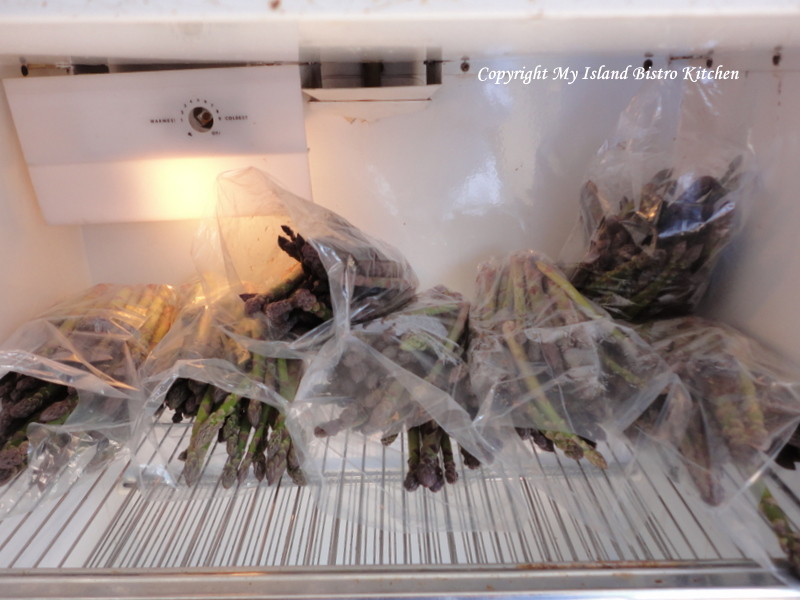
For maximum freshness, this vegetable is best used within 2-3 days of picking; however, asparagus will last up to near a week if stored in an open-ended plastic bag in the refrigerator. Wrap the woody ends of the spears in a damp paper towel to prolong their freshness. Be sure to trim off the woody ends before cooking.
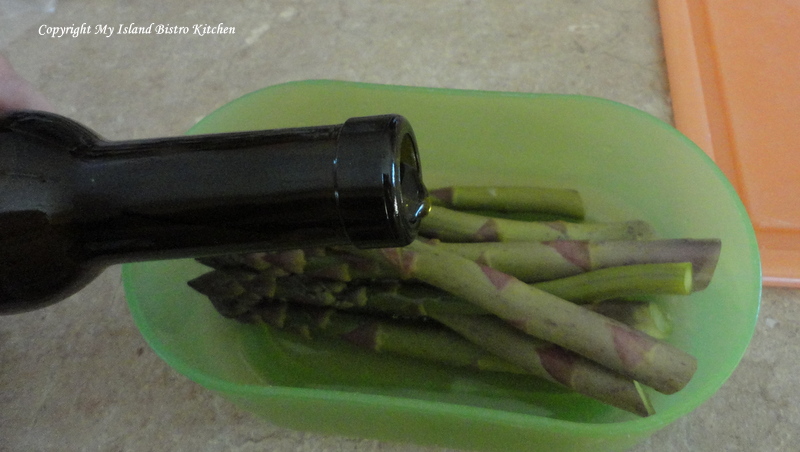
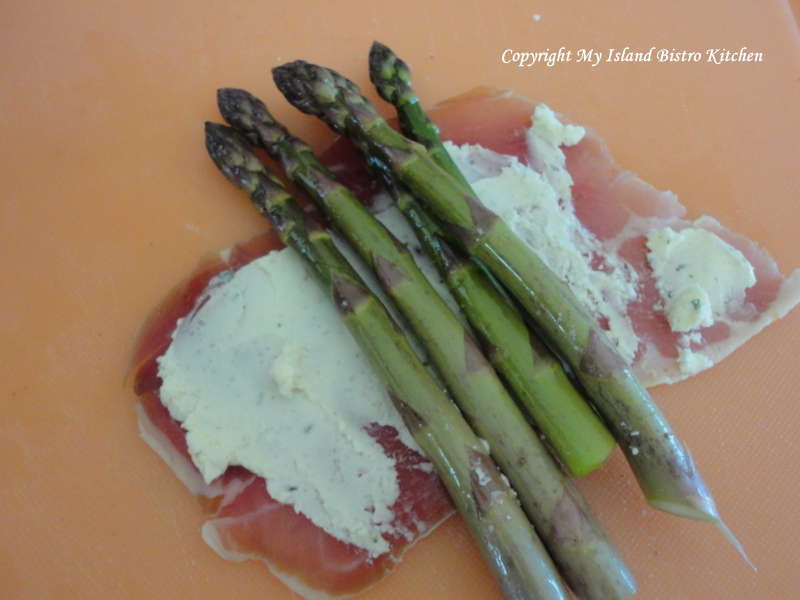
My feature recipe today for asparagus is very simple. I tossed the spears with a light drizzle of Liquid Gold’s Arbequina extra virgin olive oil. Make sure you use a high quality olive oil for this dish.
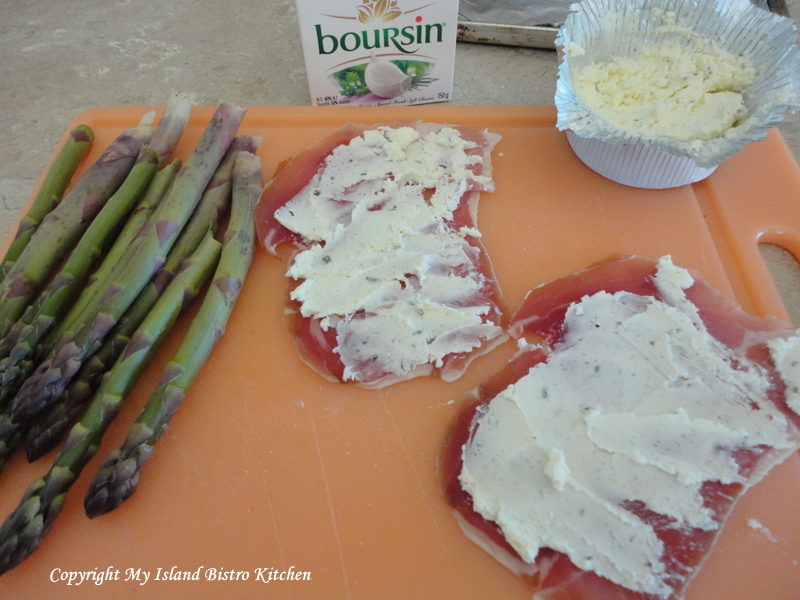
For each serving I used a super-thin slice of prosciutto onto which I carefully spread a thin layer of spiced garlic and herb soft goat cheese. Be very gentle and careful with this step as prosciutto is very delicate and breaks apart easily.
Bundle together five spears and place them on the prosciutto slice. Sprinkle with freshly ground pepper and sea salt.
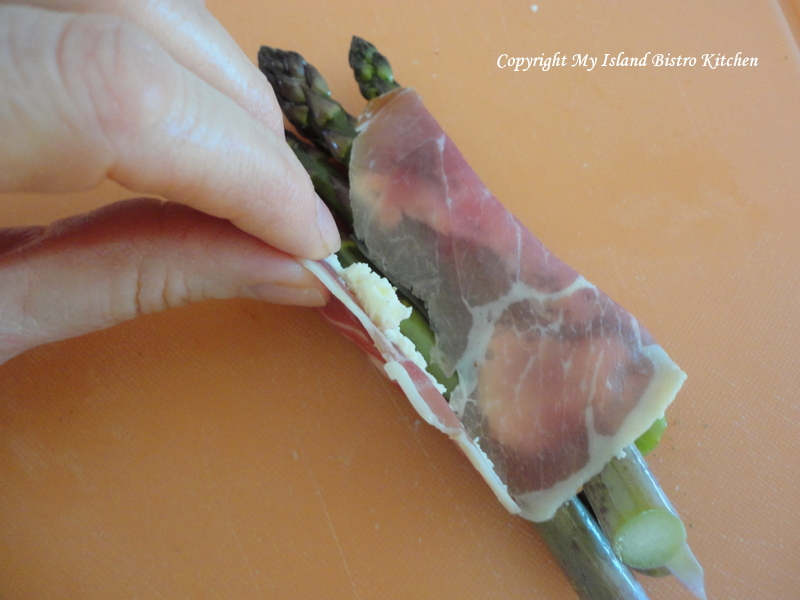
Gently wrap the prosciutto around the asparagus spears.
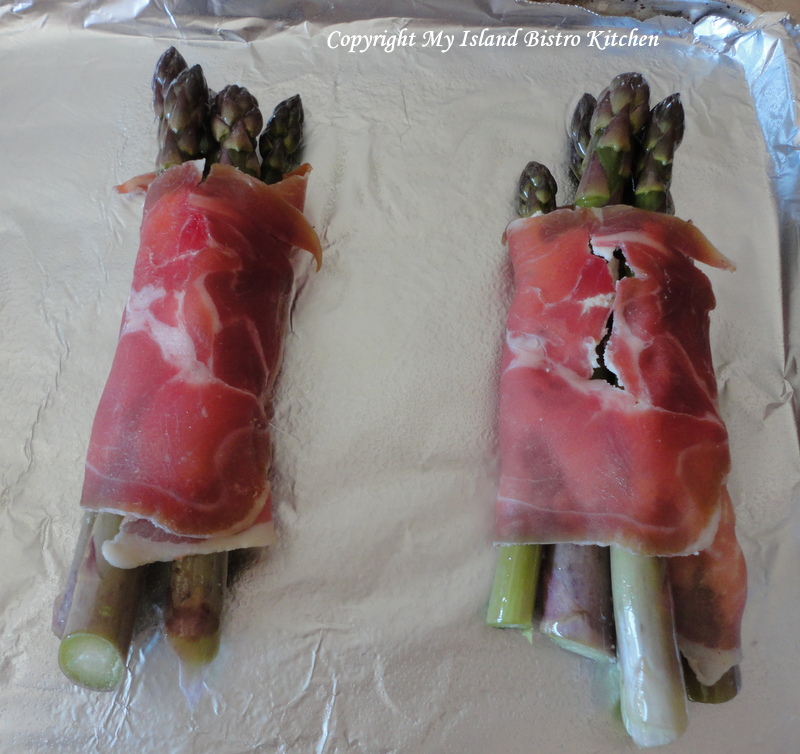
Transfer each bundle to a lightly greased baking sheet.
Bake at 375F for about 15 minutes.
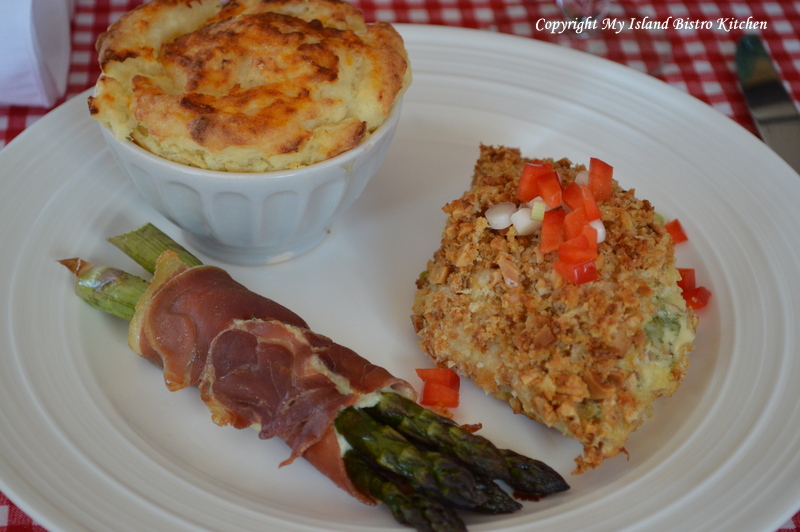
I served the asparagus bundles with an almond-crusted stuffed chicken breast and duchess potatoes.
The Dixon Farm is located at 140 North Tryon Cross Road in North Tryon, PEI. To make arrangements to buy fresh Island asparagus, visit the farm or contact Tim Dixon by phone at 902-432-4771 or by email at dixonfarms1@live.com. Be sure to visit Tim’s website to learn more about the Dixon Farm.
Thank you for visiting “the Bistro” today. There are lots of ways to connect with “the Bistro” through social media:
Join My Island Bistro Kitchen on Facebook
Follow the Bistro’s tweets on twitter @PEIBistro
Find the Bistro on Pinterest at “Island Bistro Kitchen”
Follow along on Instagram at “peibistro”
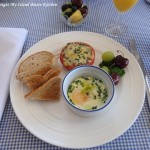
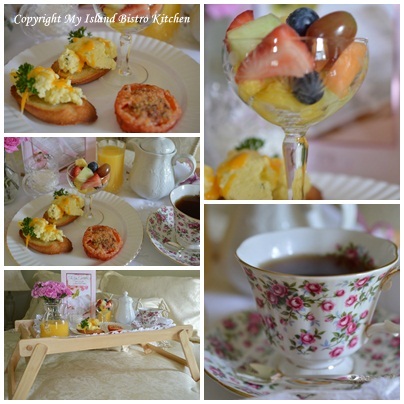
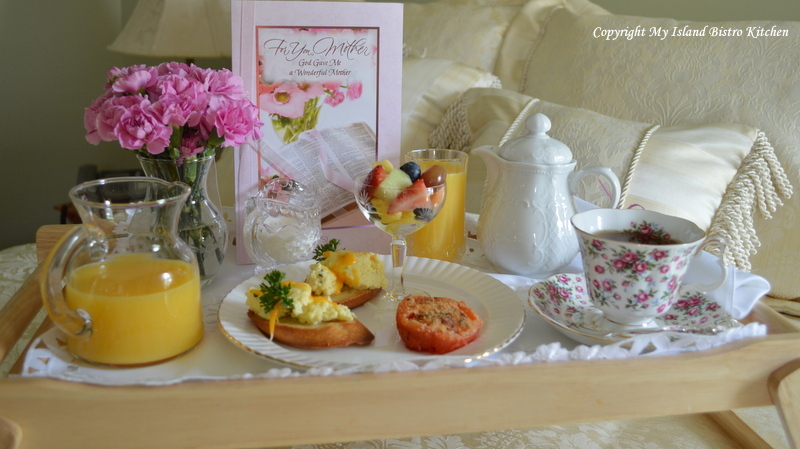
What mom doesn’t like to be pampered on Mother’s Day and what says pampering more than breakfast in bed! Dress up an ordinary bed tray with a lovely napkin or pretty placemat and prepare a scrumptious breakfast for Mom.
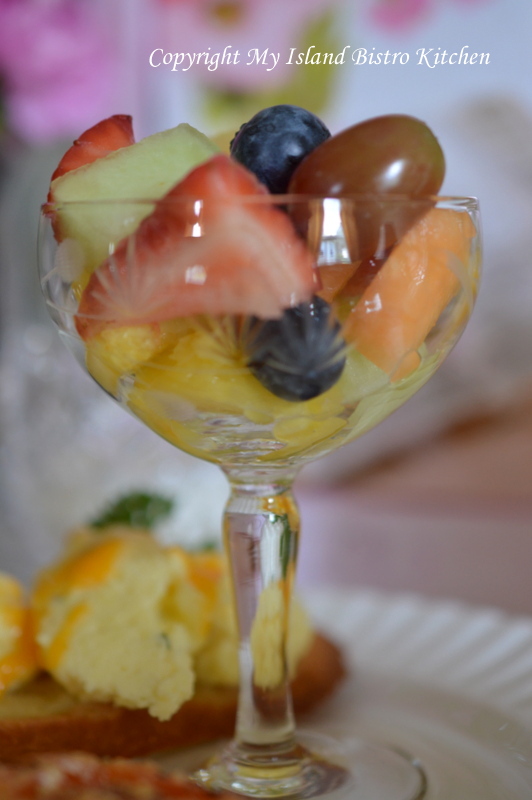
The Menu: Start with a fresh fruit cup presented in the prettiest, daintiest pedestal dessert dish. Choose a variety of fruits of different colors, shapes, and textures.
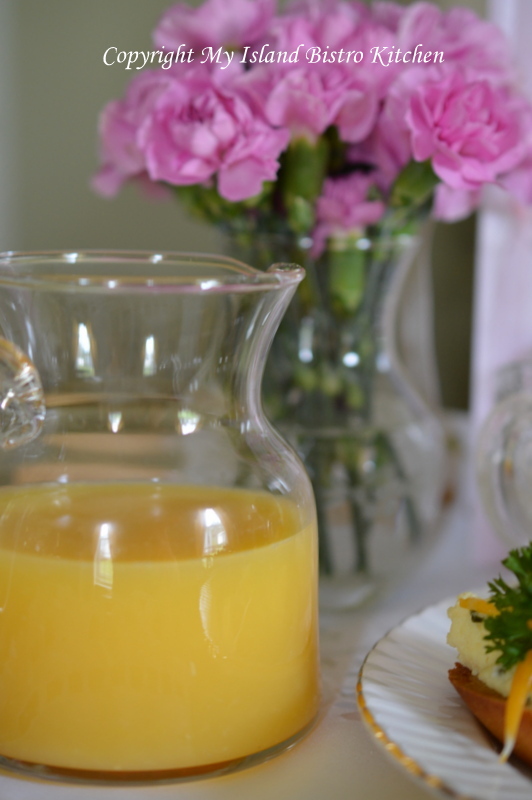
Fresh squeezed orange juice adds an element of sophistication to the breakfast tray.
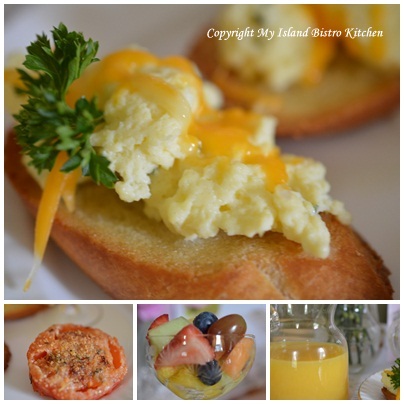
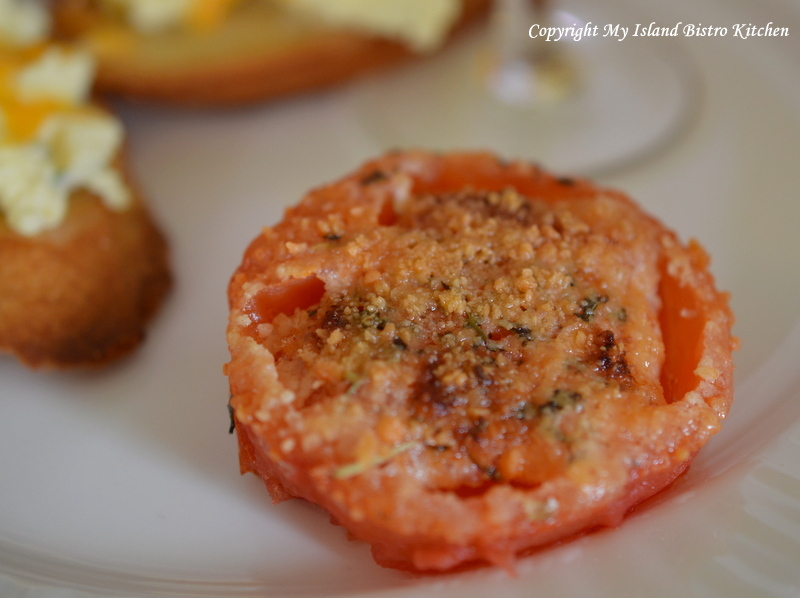
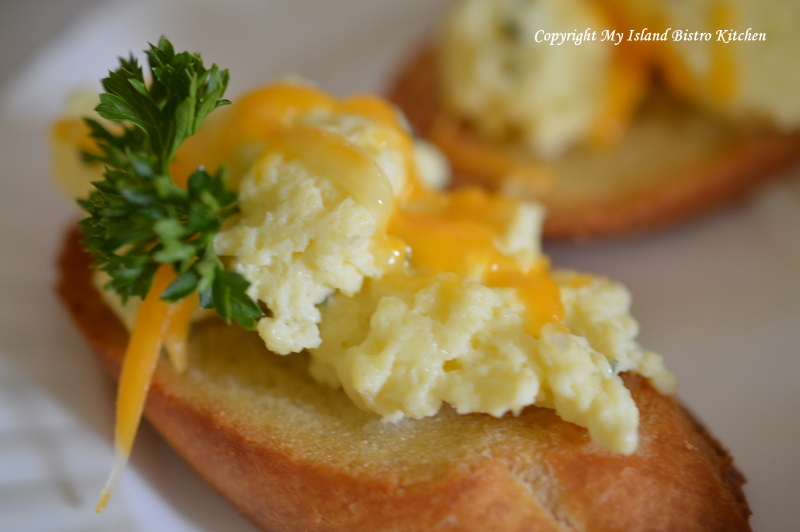
For the main course, I chose to serve scrambled eggs on crostini with a roasted Parmesan tomato half. The roasted tomato is so simple to make. Simply cut a tomato in half. A sprinkle of Italian seasoning, salt, pepper, and a shake of Parmesan cheese is all it takes to season the tomatoes. Drizzle each half tomato with a good quality olive oil – I used Liquid Gold’s Organic Tuscan Herb Infused Olive Oil. Roast the tomato on a lightly greased baking sheet in a 450F oven for about 10 minutes, just until tomato is heated and the Parmesan starts to turn golden in color.
How yummy does this tomato look!
A few herbs and a topping of grated cheddar cheese take scrambled eggs to a whole new level, particularly when served on a tasty crostini.
Look for lots of color to add to the breakfast tray. Color makes the tray look so much more vibrant, interesting, and appealing.
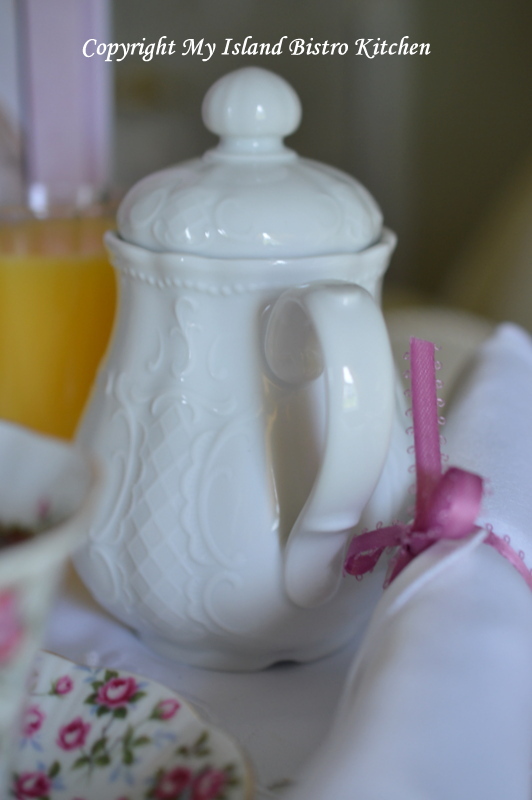
I like these petite individual-sized teapots. They are very versatile and don’t take up much room on a bed tray.
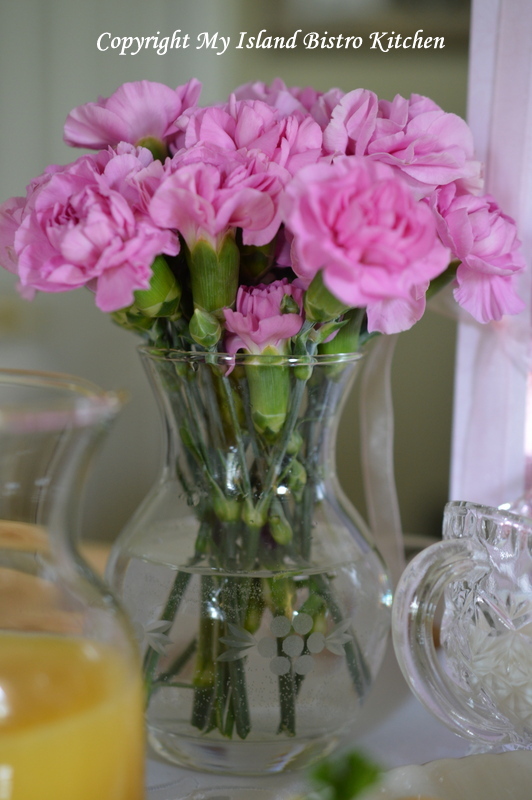
Fresh flowers are a must for any special breakfast in bed tray. Miniature carnations are very suitable for bed trays. Everything should be to scale in order for it to fit on the tray.
Lastly, you’ll want to add the finishing touch of a lovely and carefully chosen Mother’s Day Card.
A beautiful card for a beautiful Mom!
It’s all about Mom on Mother’s Day. It’s not always the big, fancy gifts that touch the heart. Most often, it is something like the care and attention that goes into planning something special, like breakfast in bed and, most importantly spending time together, that means the most.
Thank you for visiting “the Bistro” today. There are lots of ways to connect with “the Bistro” through social media:
Join My Island Bistro Kitchen on Facebook
Follow the Bistro’s tweets on twitter @PEIBistro
Find the Bistro on Pinterest at “Island Bistro Kitchen”
Follow along on Instagram at “peibistro”
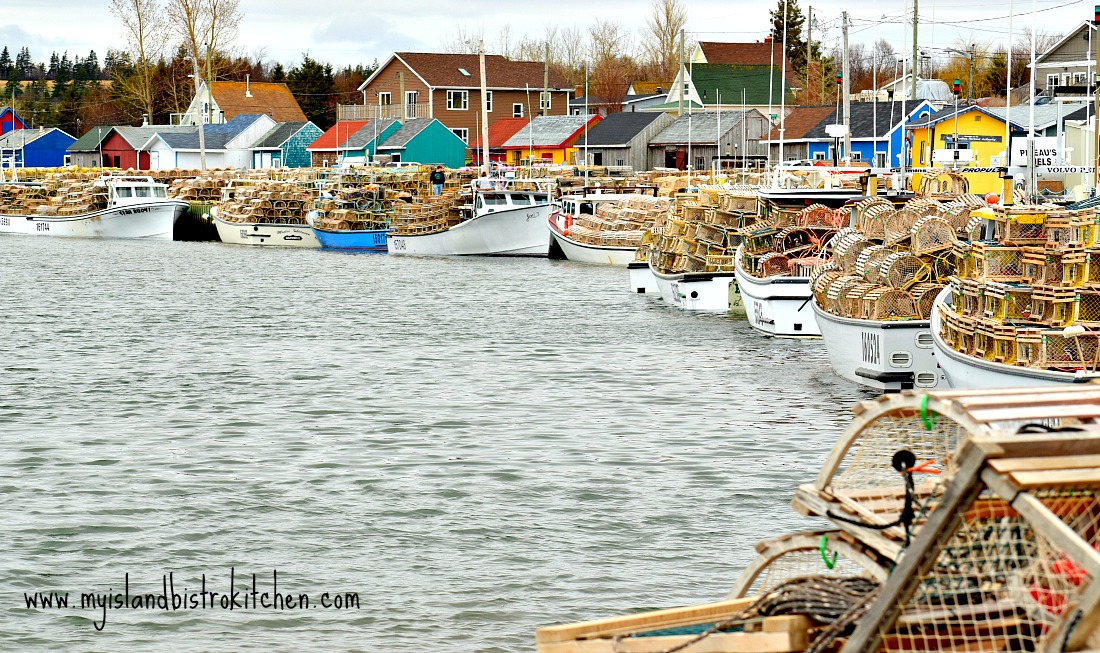
The opening of the spring lobster season on Prince Edward Island is always an event.
Eve of Setting Day in the Fishing Village of North Rustico, PEI, Canada
Fishing boats, laden with lobster traps like those in the photo above, depart wharves around the Island in the very early morning to set their traps. This is called “Setting Day” and marks the official opening of the spring lobster fishing season. It is not uncommon for people in the local fishing communities to head to their local wharves or nearby beaches to see the fishing boats off.
Early Morning Gathering in French River, PEI, to Watch Parade of Lobster Boats on Setting Day
It’s a sight to see a parade of boats, heavy laden with traps, heading out at sunrise from a wharf.
Heading out to Drop off the Lobster Traps on Setting Day
Several communities also have church services known as the “Blessing of the Fleet” services on the Sunday before setting day. These are sometimes held inside nearby local churches but, most frequently, they are held on the wharves of the fishing ports.
“Landing Day” follows Setting Day and is the day the first catches of the season land on the wharves. Daily catches occur for the duration of the lobster season. The photos below were taken at North Lake Harbour, PEI on June 1, 2012; however, the same scene would be playing out at many harbours across PEI.
Lobster Fishing Boats Filled With Their Day’s Catch Returning to Port at North Lake, PEI [June 1, 2012]
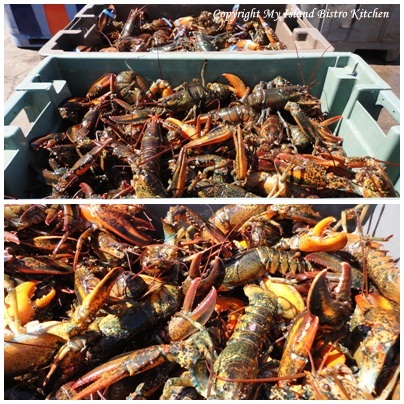
Lobster Fishing Boats, North Lake, PEI [June 1, 2012]Unloading the Day’s Catch at North Lake Harbour, PEI [June 1, 2012]And, here are the “goods”!
“The Prized Cargo” – Fresh PEI Lobster!
Boats at rest after their day’s work fetching the catch.
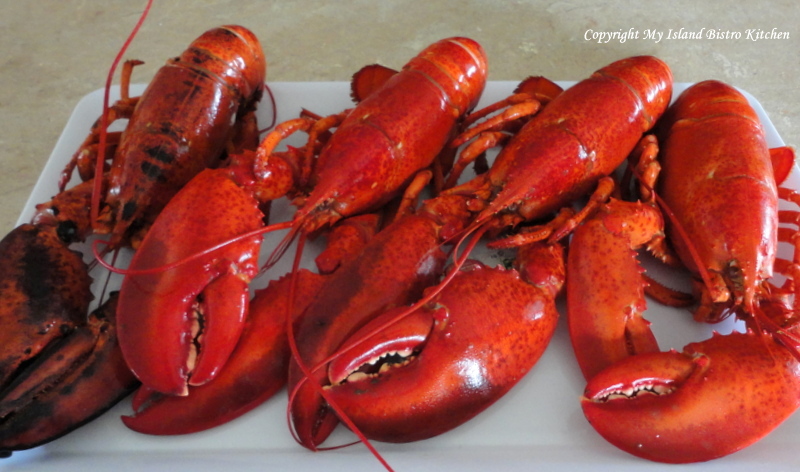
North Lake Harbour, PEI [June 1, 2012]And, once they are cooked, look at the fabulous rich color of these freshly caught PEI lobsters!
Cooked Lobsters
Many Islanders will enjoy lobster straight from the shell for their first “feed” of the season. For many, it is a tradition to have fresh lobster on the first day of the catch. This is one of the benefits of living on an Island – we have plenty of fresh seafood. Many (including myself) will argue that lobster from the spring fishery is better than lobster fished later in the summer from waters that have warmed up over the season (even though lobster from the later catch is very good, too). I don’t know why it is but lobster from the cold waters that surround the Island always does seem to taste better and I think even has a better texture meat.
I remember the first time I was on a Caribbean cruise many years ago, ordering lobster from the dinner menu. My taste buds were salivating for what I knew to be lobster taste. Oh my! It didn’t taste like lobster at all as I know it. That’s when I discovered the difference in taste of lobster that comes out of cold water and that out of very warm waters! I never ordered lobster from a cruise ship menu again. I wait for the good PEI lobster at home!
The ironic part of this is that I never liked lobster when I was growing up. In fact, when the family would be chowing down on lobster, my mother always roasted me a chicken (maybe a wee bit spoiled)! However, they convinced me to try a bite of it when I was probably about 18 years old and I’ve never looked back and have more than made up for it since! I love lobster by itself and in just about any other recipe imaginable!
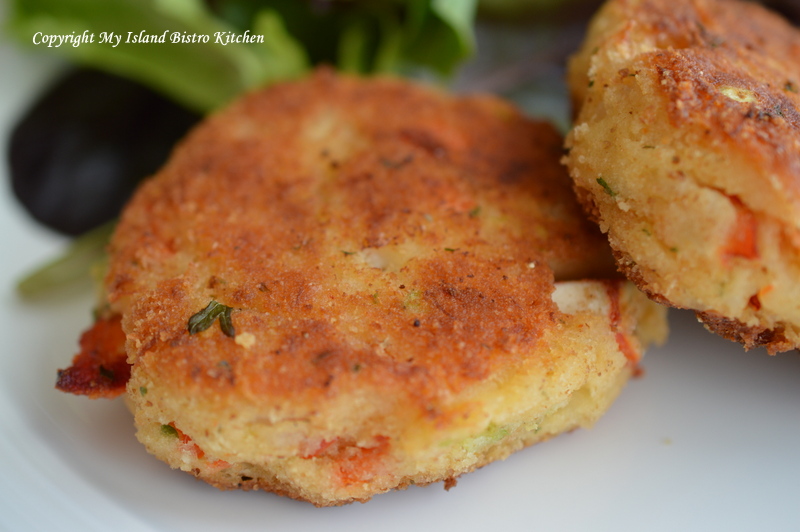
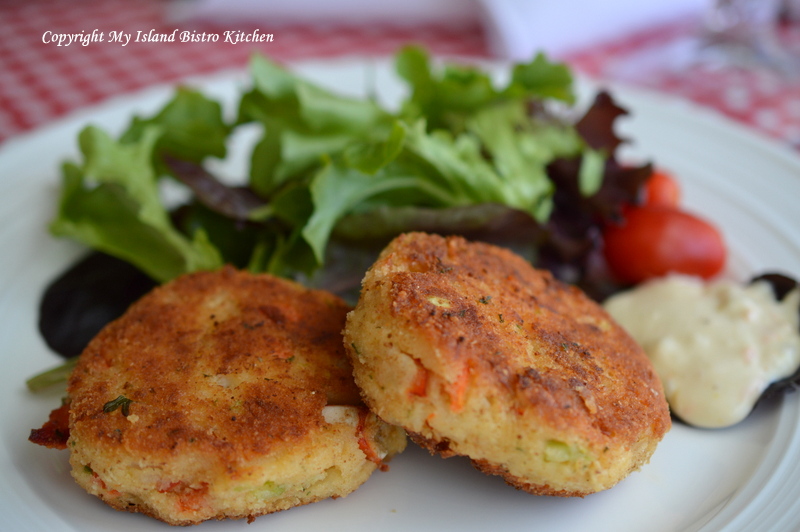
So, today, I am sharing my recipe for Lobster Cakes to celebrate the opening of the PEI lobster fishery season.
8 oz. cooked lobster meat (fresh or frozen), cut into bite-sized chunks
½ – 1 cup fine bread crumbs
Apx. ¾ cup finely ground bread crumbs for coating lobster patties
2+ tbsp vegetable oil
Method:
Place warm mashed potatoes in large bowl. Add beaten egg and mix well. Add tartar sauce and Dijon mustard.
Stir in grated cheddar cheese.
Add parsley, garlic powder, dillweed, and pepper. Stir in onion, celery, and red pepper.
Lastly, add the lobster and mix well. Add just enough of the first amount of bread crumbs so the mixture will hold together and can be formed into patties.
Using a ¼ cup measuring cup, scoop up mixture and form into round patties. In shallow bowl, place the second amount of bread crumbs. Coat each patty in the bread crumbs until completely covered on all sides. Place on wax-paper lined baking sheet and chill for 1 hour to allow flavours to blend and for patties to become firm so they won’t break apart when cooked.
Preheat oven to 375F.
Heat oil in non-stick skillet over medium-high heat. When oil is hot, reduce heat to medium and cook the lobster cakes 2-3 minutes on each side, until golden brown. Transfer browned cakes to greased baking sheet. Bake in oven 6-7 minutes to finish the cooking process.
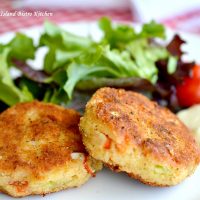
Serve lobster cakes, 2 per person, hot with your favorite tartar sauce and a side green salad.
Lobster Cakes with Citrus Aioli
These cakes freeze well, uncooked. Cakes may be cooked directly from frozen state, adding a few more minutes to the cooking process or they may be thawed in the refrigerator for several hours before cooking.
Yield: Apx. 1 dozen cakes
If you have made this recipe and enjoyed it and/or wish to share it with your friends and family, please do so on social media but be sure to share the direct link to this posting from my website.
Connect with My Island Bistro Kitchen on Social Media
Follow “the Bistro” on Pinterest at https://www.pinterest.ca/peibistro/ and pin the Pinterest-ready photo found at the end of this post to your favorite Pinterest boards.
8oz.cooked lobster meat (fresh or frozen), cut into bite-sized chunks
½ - 1cupfine bread crumbs
Apx. ¾ cup finely ground bread crumbs for coating lobster patties
2+tbspvegetable oil
Instructions
Place warm mashed potatoes in large bowl. Add beaten egg and mix well. Add tartar sauce and Dijon mustard.
Stir in grated cheddar cheese.
Add parsley, garlic powder, dillweed, and pepper. Stir in onion, celery, and red pepper.
Lastly, add the lobster meat and mix well. Add just enough of the first amount of bread crumbs so the mixture will hold together and can be formed into patties.
Using a ¼ cup measuring cup, scoop up mixture and form into round patties. In shallow bowl, place the second amount of bread crumbs. Coat each patty in the bread crumbs until completely covered on all sides. Place on wax-paper lined baking sheet and chill for 1 hour to allow flavours to blend and for patties to become firm so they won't break apart when cooked.
Preheat oven to 375F.
Heat oil in non-stick skillet over medium-high heat. When oil is hot, reduce heat to medium and cook the lobster cakes 2-3 minutes on each side, until golden brown. Transfer browned cakes to greased baking sheet. Bake in oven 6-7 minutes to finish the cooking process.
Serve lobster cakes, 2 per person, hot with your favorite tartar sauce and a side green salad.
Recipe Notes
These cakes freeze well, uncooked. Cakes may be cooked directly from frozen state, adding a few more minutes to the cooking process or they may be thawed in the refrigerator for several hours before cooking.
Yield: Apx. 1 dozen cakes
[Copyright My Island Bistro Kitchen]
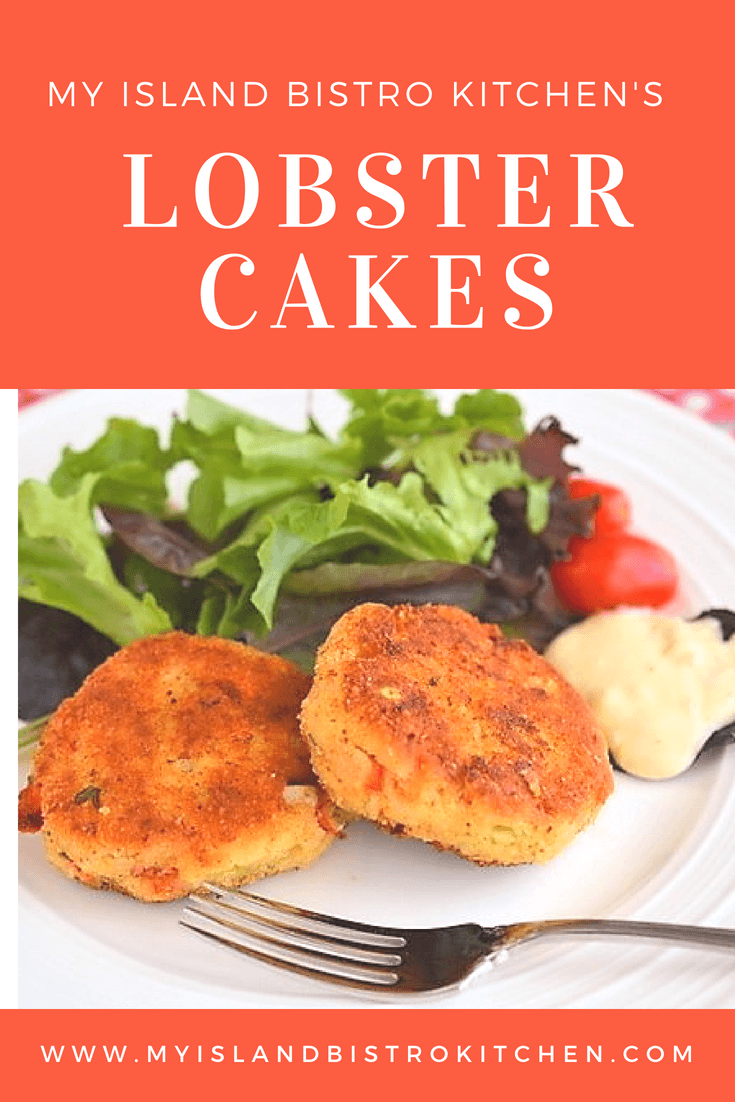
Pin Me To Pinterest!
Lobster Cakes
[This post was last updated on April 30, 2024]
(Mostly) PEI and Maritime Food – Good Food for a Good Life!


![Lobster Fishing Boats Filled With Their Day's Catch Returning to Port at North Lake, PEI [June 1, 2012]](http://myislandbistrokitchen.com/wp-content/uploads/2013/04/DSC04908.jpg)
![Lobster Fishing Boats, North Lake, PEI [June 1, 2012]](http://myislandbistrokitchen.com/wp-content/uploads/2013/04/page-1-Boats-in-North-Lake-001.jpg)
![Unloading the Day's Catch at North Lake Harbour [June 1, 2012]](http://myislandbistrokitchen.com/wp-content/uploads/2013/04/page-2-Boats-in-North-Lake.jpg)
![North Lake Harbour, PEI [June 1, 2012]](http://myislandbistrokitchen.com/wp-content/uploads/2013/04/DSC04926-001.jpg)