All posts by Barbara99

A Visit to Burns Poultry Farm in Freetown, PEI

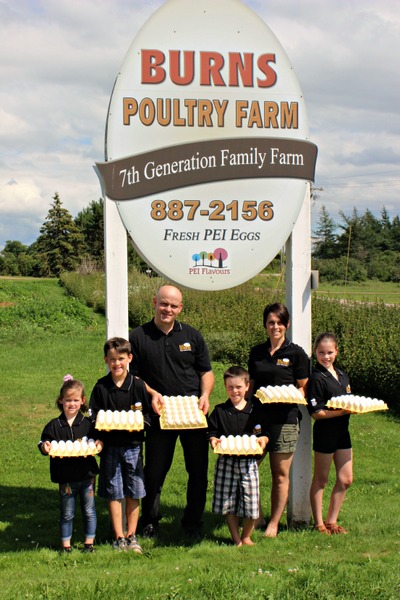
The Burns Family (Photo: Lynda MacSwain. Submitted by Wendy Burns with permission.)
The Burns Family – 7th Generation PEI Egg Farmers
(Photo: Lynda MacSwain. Submitted by Wendy Burns with permission.)


I have a keen interest in where the food I eat is produced.  Recently, I visited Burns Poultry Farm in Freetown, PEI, to find out about egg production.  There are five active registered egg-producing poultry farms on PEI, one of which is the Burns farm.

Before seeing the egg grading process in action, I sat down with Wendy Burns to find out about their poultry farm.  Wendy’s husband, Nathan, is a 7th generation egg farmer on PEI so the Burns family knows a thing or two about egg production!  Wendy and Nathan bought the poultry farm from Nathan’s parents in 2001.  Wendy remarks that, from the time he was very young, Nathan had a keen interest in poultry farming and knew what his future vocation was going to be!  Wendy manages the office, the accounting, and payroll while Nathan tends to the feed formulations, egg production, and egg grading.

The couple met while attending Nova Scotia Agricultural College, from which they both graduated – Nathan from the Agricultural Engineering Program and Wendy with a Bachelor of Science in Agriculture.  In addition to being parents to four active growing children, this couple has transformed their egg farm into a very efficient family business.  They have expanded existing barns; built a new barn for the laying hens; added a bigger generator with an automatic switch that kicks in if the farm is without power for 5 seconds; expanded their cooler capacity; invested in a new egg packer that packs eggs each day from their laying barns; upgraded their water systems to provide ozonated water for the hens which aids in their digestion; purchased a Pulsefog machine to disinfect the barns faster and more efficiently; and installed a state-of-the-art grading machine into their newly-renovated, federally-inspected egg grading station.
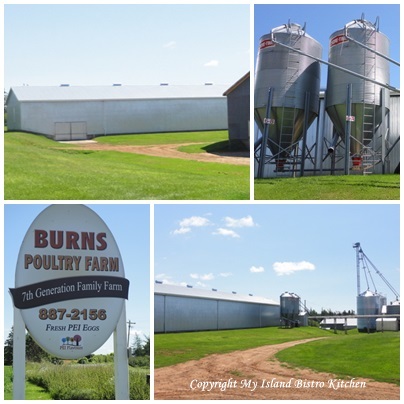
Burns Poultry Farm
Burns Poultry Farm

The Burns family holds quota for about 32,000 laying hens and they have three equally-sized barns that house the flock. With over 90% of the hens laying one egg per day, it is a lot of eggs to gather. Every time an egg is handled or moved, it increases the potential for damage or cracks. Wendy explains that, with their efficient collection system, it is possible for a  hen to lay an egg and the egg not be touched by a human hand until the consumer takes it out of the carton or the restaurant chef cracks the egg on the grill. This is because the Burns’ have an “in-line” system that transfers the eggs from the barns via a conveyer belt to the grading station.
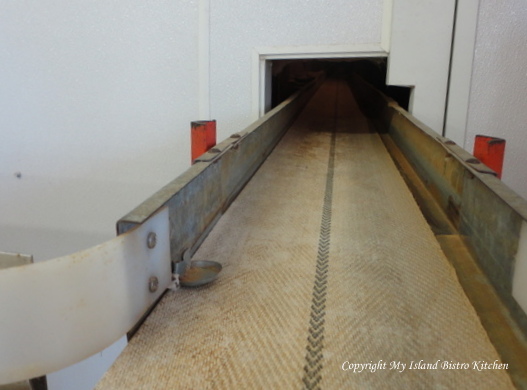
Conveyer belt connects all barns on Burns farm and transports the eggs to the grading station

The system the Burns have installed is all computerized so it allows the eggs to come from the barns, be counted, washed, candled, graded, packed, and in their cooler in approximately 15 minutes.  Now, that’s what I call farm-fresh eggs!

I wasn’t able to go inside the barns where the hens are housed so I did not see any of the laying hens.  This is because of their on-farm food safety program and biosecurity protocol.  Wendy says “the goal is to maintain a consistent, undisturbed environment for the birds because deviations from their normal habitat could affect their well-being and, consequently, egg production”.  On a daily basis, only Nathan and two workers are permitted inside the barns.  A walk-through of each barn is done twice per day and each row of hens is checked to ensure the birds have enough water and feed and that their environment is comfortable. Nathan also checks the barns each evening after all the feedings are finished to ensure all is well before lights out.  Wendy explains that the only other person permitted to enter the barns is the inspector from the Egg Farmers of Canada.  “The inspector makes several site visits each year where the birds are counted and swabs are taken for testing to ensure there are no diseases present”, explains Wendy. The inspector also audits their Start-Clean/Stay-Clean records to ensure all protocols follow the guidelines of their On Farm Food Safety Program.
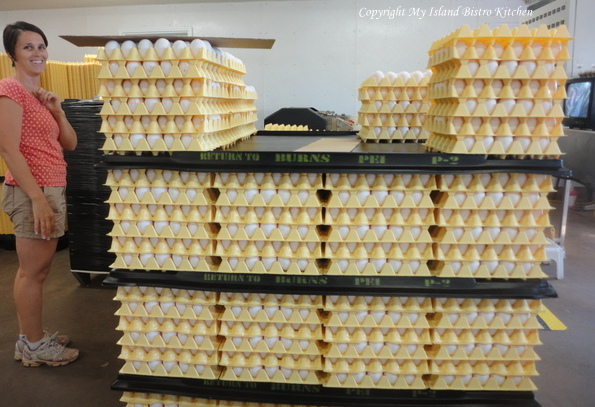
Wendy was able to tell me about their flock.  At the time of my visit, the hens were all one breed – Lohmanns. They all lay white eggs but Wendy says that the farm placed some brown egg layers in the grow barn last cycle and those hens will begin to lay brown eggs in September.  The highest expense in the operation is the feed. The Burns monitor feed consumption to ensure the hens are getting adequate nutrition.  The hens need different levels of nutrients, such as calcium and protein, at different ages.  This ensures bird health is maintained and the hens produce the best quality of eggs possible.

It takes 18-19 weeks for a chick to become a laying hen.  The chicks arrive in batches of about 12,000, two or three times a year. Wendy says that it is always an exciting day on the farm, as you can imagine, with four young children seeing 12,000 baby chicks arriving all at once!  The Burns have three production barns that house the hens, each containing a flock of hens of a certain age – i.e., 20 weeks apart in age.  This means their farm can ensure a steady supply of high-quality fresh eggs for customers year round.

I asked Wendy what determines the different sizes of eggs.  She tells me that it is the weight of the egg that will determine if it is a small, medium, large, or extra large egg.  Younger hens typically lay smaller eggs and the average egg size increases as the hens age. Generally, medium, large, and extra large eggs are packed for the fresh shell egg market while the other sizes are sent off for industrial use – for example, dried for cake mixes, frozen, liquid whole egg, or whites only.  No eggs, regardless of size, are wasted.
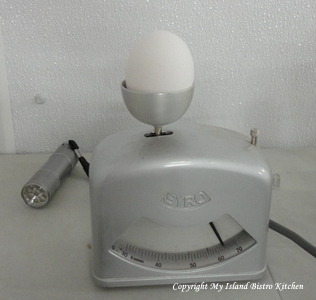
Weight of an egg determines if it is a small, medium, large, or extra-large egg

Eggs are a supply-managed commodity. The egg industry is heavily regulated and the Burns must comply with the regulations of the Egg Farmers of Canada and the Canadian Food Inspection Agency, in terms of housing the hens, cage density, sanitation programs, welfare of the birds, and pest control.  There is a lot of record-keeping involved in the operation of an egg farm and egg-grading station. All food safety-based programs are in place to ensure the safest possible supply of eggs for consumers.

Wendy tells me that the “Best Before” date of graded eggs is six (6) weeks from the date they are graded.  She also explains that washing the eggs, which is an obvious necessity, reduces the shelf life of eggs as it removes the natural sealant that the hens leave on the eggs when they are laid.
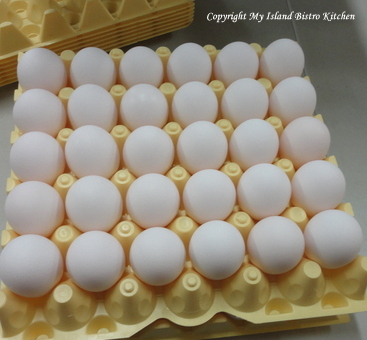
I asked Wendy what their biggest challenge is as egg farmers.  She says she has concerns over the possibility that, at some point, supply management of the egg industry could be disbanded.  This is the Canadian system that regulates quota and, consequently, egg production.  If that was to happen, anybody could build a barn and start large-scale egg production, with no food safety procedures, no testing protocol, or no rules.  As Wendy explains, “currently, registered egg producers pay levies that pay for their food safety protocols, testing, and ensure there is no surplus of eggs on the market which could impact negatively on their chance of a fair return for their investments and hard work.”  As Wendy says, “being a regulated producer is a big investment but it provides stability without relying on government dollars as it is producer-funded”.

As for their greatest source of satisfaction as egg farmers, Wendy says she and Nathan work well together and the couple enjoy being their own boss.  They like the challenge that comes with no two days being the same on the farm.  Wendy tells me she really enjoys the lifestyle of living and working on the farm as it allows her to be home with her children before they catch the school bus and greet them when they return home in the afternoon.

The day I visited the Burns farm, they were busy with their egg grading which takes place once a week.  By the end of the day, they would have graded approximately 55,000 eggs for market!
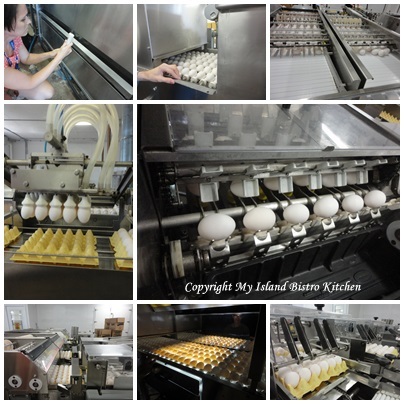
Some of the activities in the egg grading process

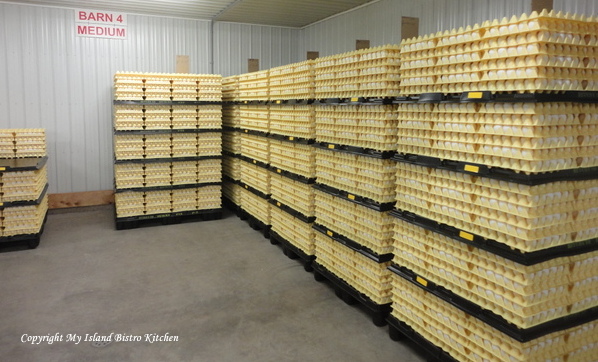
The number of eggs graded is determined by what the farm can sell as graded product. On days when no grading is taking place, the eggs are packed on to plastic trays by a farm packer machine, loaded on to pallets, and refrigerated. Eggs that are surplus to fresh markets are sold as industrial product.
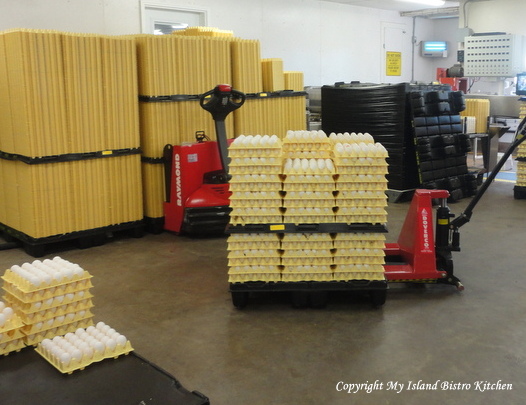
Graded Eggs Heading to Refrigeration
Eggs Stored in Refrigerator
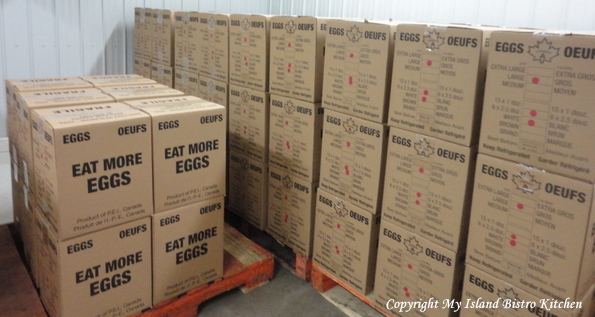
Large Cartons of Eggs Ready for Shipping

The farm employs three individuals full-time on a year-round basis and six individuals on a part-time basis.

So, some interesting egg trivia I learned:

–          egg shells are made up mostly of calcium – the better the quality of egg shell, the less likelihood there will be of cracked eggs.

–          the color of the egg shell (white or brown) is determined by the genetics of the hen, not by diet.

–          the color of the egg yolk is determined by what grains the hens are fed (yes, there really is a difference in the color of egg yolks — paler yolks result when paler grains are fed, such as barley or wheat, and a richer yolk color results when corn is in the feed)
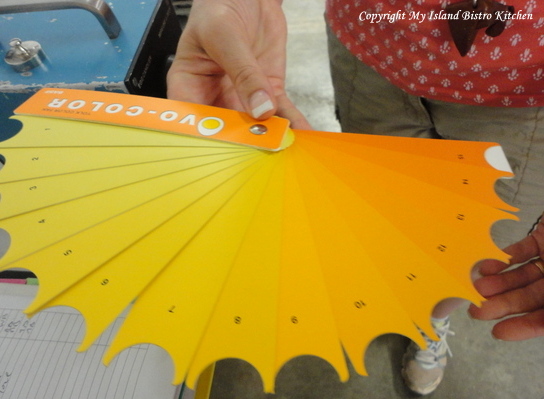
The Many Colors of Egg Yolks

–          according to the Egg Farmers of PEI Website, Island egg farmers produced 3,304,300 dozen eggs in 2012 and about 50% of those were consumed by Islanders!  That’s a lot of eggs!

Nathan and Wendy are marketing their eggs through ADL Foods.  The public may purchase the eggs on-site at the ADL Foods Retail Outlet in Reads Corner on Highway 1A in Summerside.  ADL Foods also sells Burns Poultry Farm’s eggs by the box to many Island restaurants so, chances are, if you have eaten an egg at an Island restaurant that gets its eggs from ADL Foods, you may have eaten an egg produced by this 7th generation PEI family farm.

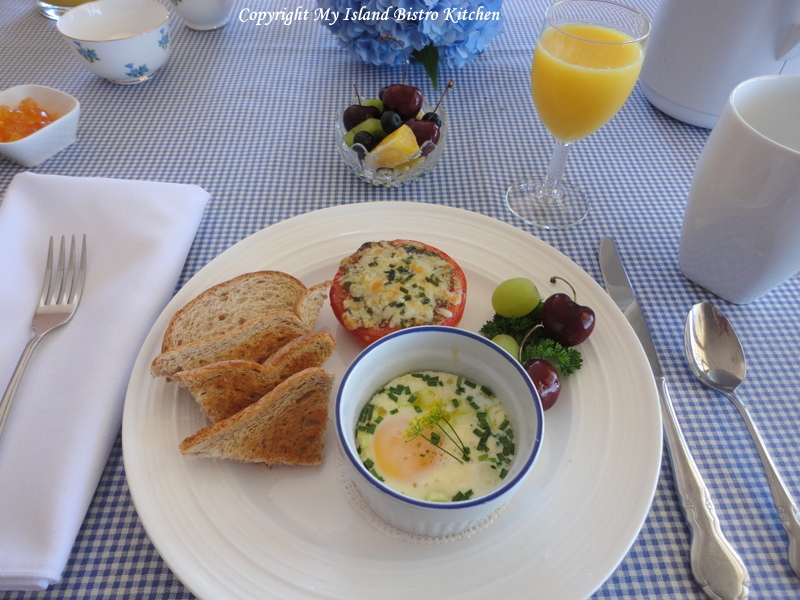
I used Burns’ eggs in the following recipe for Baked Eggs with Basil Pesto and Cheese.
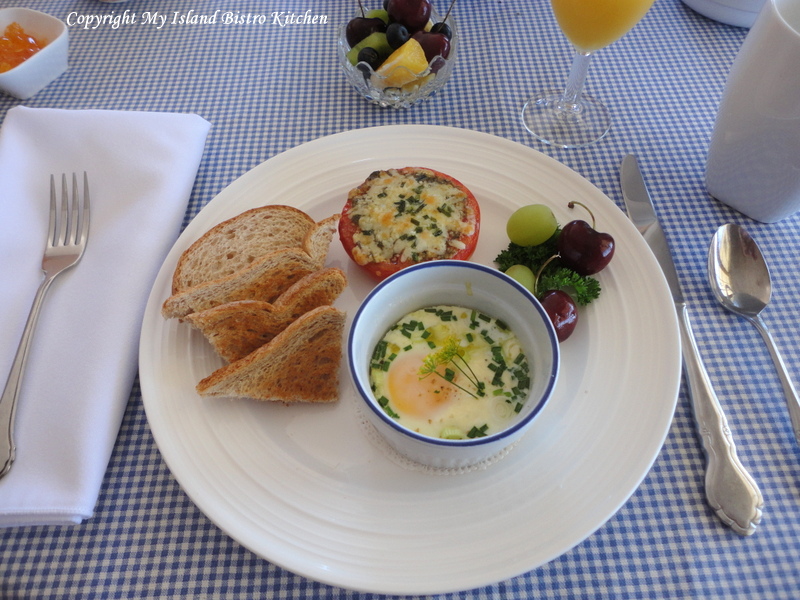
Baked Eggs with Basil Pesto and Cheese

Baked Eggs with Basil Pesto and Cheese

Ingredients:

2 large eggs

3 tsp basil pesto

4 tsp grated Parmesan cheese

2 tbsp milk or cream

1 green onion, sliced

Fresh chives, chopped

Salt and pepper, to taste

2-3 tsp Boursin Garlic and Fine Herbs cheese, or your favorite feta cheese

Method:

Assemble ingredients.
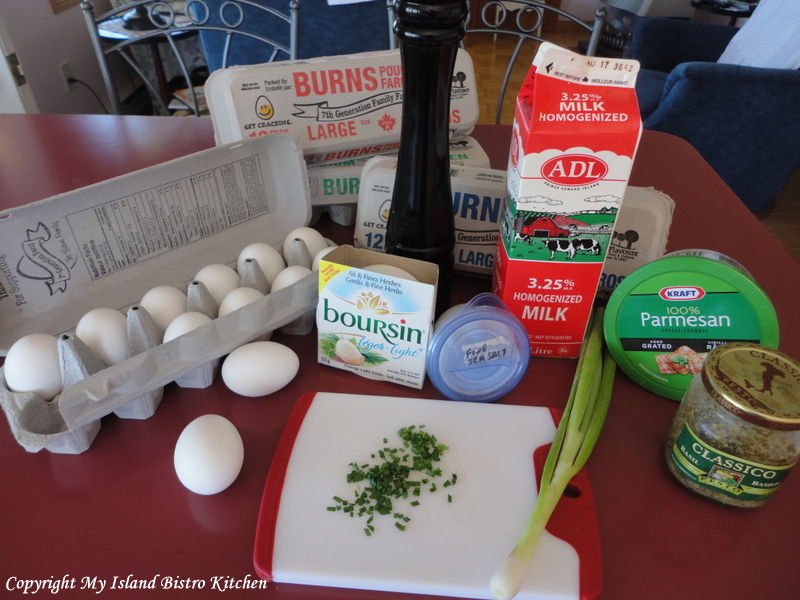
Preheat oven to 325C.

Spray two ramekins dishes with cooking spray.  Place 1 ½ tsp pesto in bottom of each dish and swirl it around so bottom of ramekin are covered with pesto.  Sprinkle 1 – 2 tsp parmesan cheese on top of pesto.  Crack one egg into each ramekin without breaking the yolk.  Add 1 tbsp milk or cream to each dish.  Sprinkle each with sliced green onions and fresh chives.  Add salt and pepper to taste.  Top with 1 to 1 ½ tsp soft cheese.
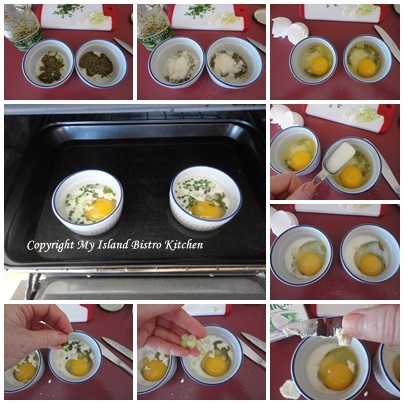
Place ramekins in oven-proof baking pan.  Fill up pan with boiling water until it reaches the half-way point on the sides of the ramekins.

Bake eggs for 10-20 minutes, depending on whether you like eggs runny, medium, or well done.

Serves:  2
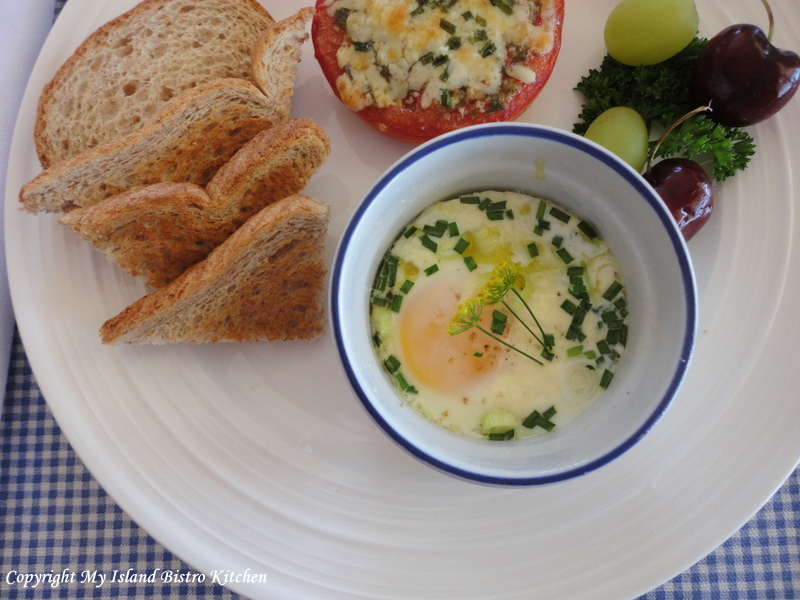
 

This egg dish is perfect for a special weekend morning breakfast or brunch or even for a light supper.
My thanks to Nathan and Wendy Burns for taking time out of a busy day to meet with me and explain the egg production process at their farm.
Baked Eggs with Basil Pesto and Cheese

This egg dish is perfect for a special weekend morning breakfast or brunch or even for a light supper.
Course Breakfast
Cuisine Canadian
Keyword baked eggs, eggs
Servings 2
My Island Bistro Kitchen Barbara99

Ingredients

  • 2 large eggs
  • 3 tsp basil pesto
  • 4 tsp grated Parmesan cheese
  • 2 tbsp milk or cream
  • 1 green onion, sliced
  • Fresh chives, chopped
  • Salt and pepper, to taste
  • 2-3 tsp Boursin Garlic and Fine Herbs cheese, or your favorite feta cheese

Instructions

  1. Assemble ingredients.
  2. Preheat oven to 325C.
  3. Spray two ramekins dishes with cooking spray. Place 1½ tsp pesto in bottom of each dish and swirl it around so bottom of ramekin are covered with pesto. Sprinkle 2 tsp parmesan cheese on top of pesto in each ramekin. Crack one egg into each ramekin without breaking the yolk. Add 1 tbsp milk or cream to each dish. Sprinkle each with sliced green onions and fresh chives. Add salt and pepper to taste. Top with 1 to 1½ tsp soft cheese.
  4. Place ramekins in oven-proof baking pan. Fill up pan with boiling water until it reaches the half-way point on the sides of the ramekins.
  5. Bake eggs for 10-20 minutes, depending on whether you like eggs runny, medium, or well done.

Recipe Notes

Serves: 2

Thank you for visiting “the Bistro” today. There are lots of ways to connect with “the Bistro” through social media:

Join My Island Bistro Kitchen on Facebook
Follow the Bistro’s tweets on twitter @PEIBistro
Find the Bistro on Pinterest at “Island Bistro Kitchen”
Follow along on Instagram at “peibistro”
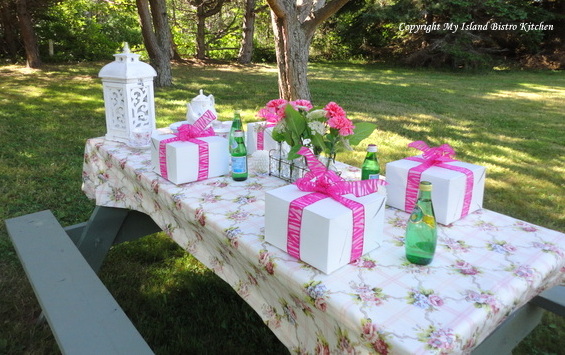
A Pretty Pink Picnic

Our summers here in Prince Edward Island are always far too short; however, we do try to make the most of them and that, for us, means lots of picnics in the great outdoors.  Today, I am hosting a catch-up and chat picnic/tea for some friends.  Read on to find out what is on my menu for the Pretty Pink Picnic. Continue reading A Pretty Pink Picnic →

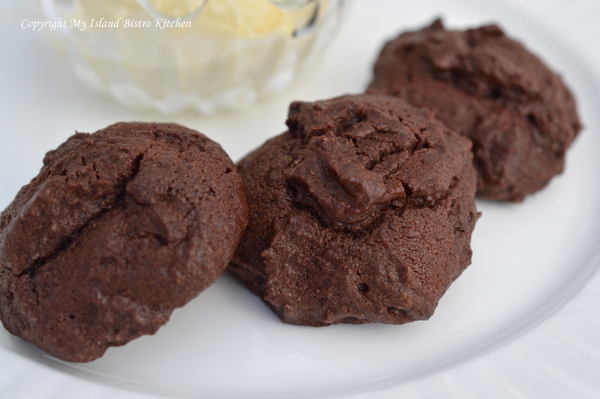
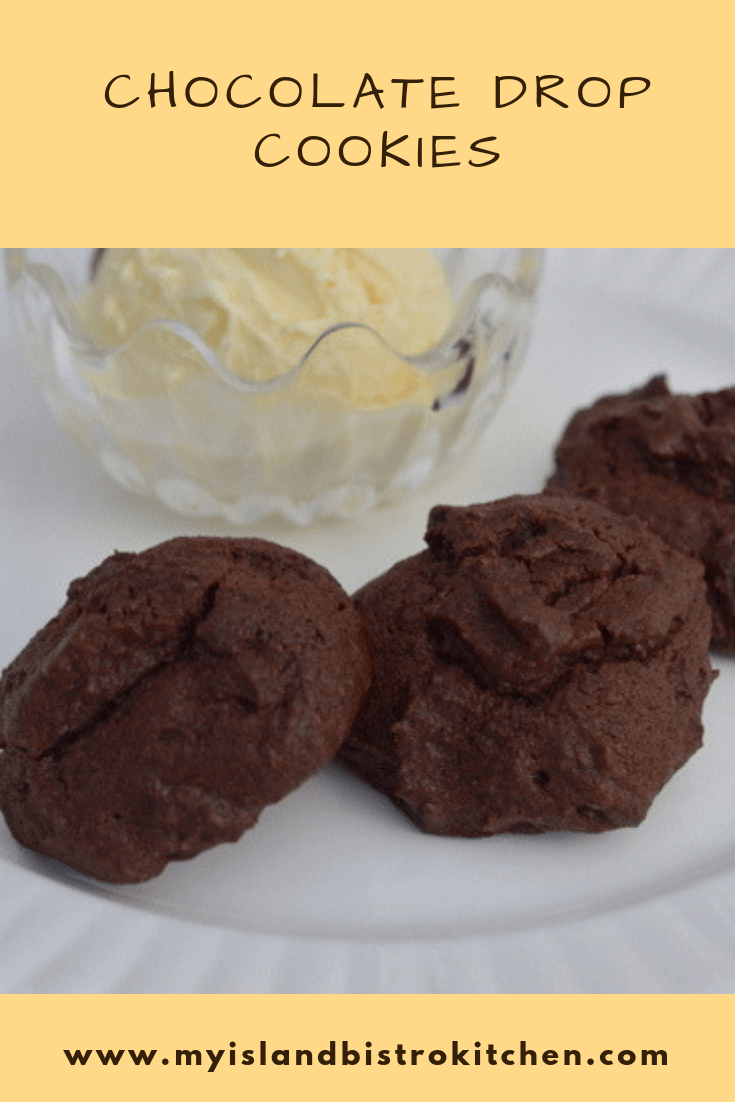
Chocolate Drop Cookies

I have always been a chocolate lover.  These chocolate cookies were ones my Mother often made when I was a child.  I like the rich chocolate flavour and somewhat chewy center they have.  These cookies don’t take any uncommon ingredients or ones most serious  bakers wouldn’t have in their cupboards.  Of course, using the best cocoa you can find will make for a richer, more flavourful cookie.

This cookie recipe calls for shortening (as opposed to butter). While some think that butter is the only fat to use in baking, I would disagree. There are times when the flavorless shortening  can actually produce a better quality baked good with sought-after attributes.

For these cookies, I wanted puffy cookies with a soft, tender texture so shortening was my fat ingredient of choice. This is because shortening has no water content so, unlike butter with its water content, there is no water to create steam. Less steam means less gluten is likely to be formed thus giving the cookies their soft, tender texture.

In addition, shortening has a higher melting point that does butter. This gives the cookie dough a longer chance to set and establish its shape before the fat melts and spreads the cookies out flat. The result? Cookies with a higher rise and a softer, more tender texture.  You can read more about the choice of using butter and/or shortening in cookie baking by clicking here.

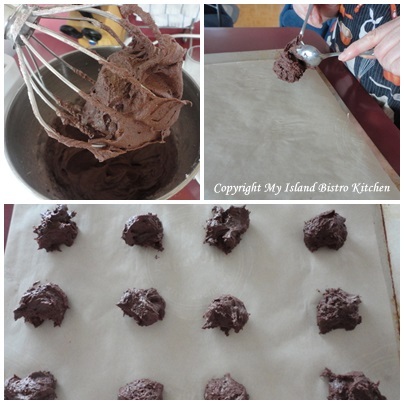
These cookies are very easy to make and, being drop cookies, there is no rolling the dough and cutting out shapes and no need for any icing.  Simply scoop up some dough with a teaspoon and use another to slide the dough off the spoon and on to the cookie sheet.  These cookies can be dressed up with 1/2 cup of either chopped nuts, dates, raisins, or even chocolate chips.  However, I don’t add any extras to them as I like the smooth texture and flavour they have on their own without any further additions.

[Printable recipe follows at end of posting]

Chocolate Drop Cookies

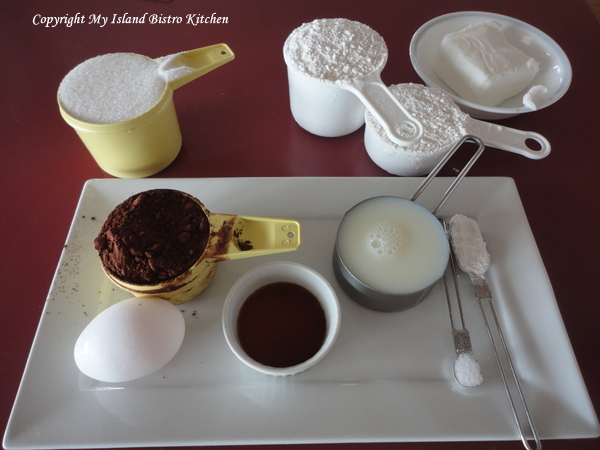
Ingredients:
1/2 cup shortening, softened
1 cup white sugar
1 egg
1 tsp vanilla
1/2 cup milk
1 1/2 cups flour
1/2 cup cocoa
1 tsp baking powder
1/4 tsp salt

Method:

Preheat oven to 375F.

With electric mixer, beat shortening and sugar together until light and fluffy (1-2 minutes).  Beat in egg, vanilla, and milk.

Into separate bowl, sift together the flour, cocoa, baking powder, and salt.  Add to wet ingredients and stir just until dry ingredients are incorporated.

Drop by teaspoonfuls onto parchment-lined baking sheet.

Bake 10-11 minutes.  Do not overbake or cookies will be dry.

Yield:  Apx. 3 dozen

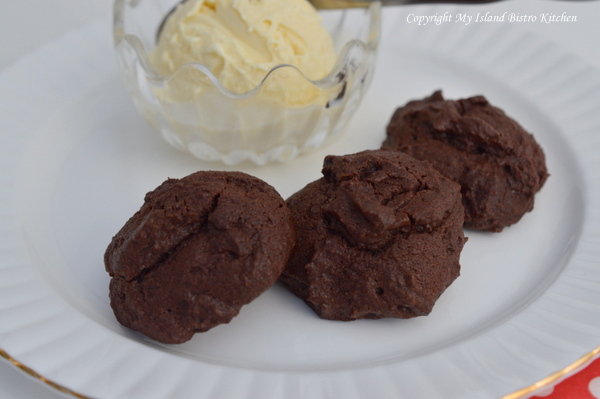
These cookies are good any time and make good lunch box treats as well as picnic basket fare.  They are especially good with a dish of vanilla ice cream!

1-DSC_0694

If you have made this recipe and enjoyed it and/or wish to share it with your friends and family, please do so on social media but be sure to share the direct link to this posting from my website.

Connect with My Island Bistro Kitchen on Social Media

Join the Facebook page for My Island Bistro Kitchen:  https://www.facebook.com/MyIslandBistroKitchen/

Follow “the Bistro” on “X” (formerly Twitter):  https://twitter.com/PEIBistro/

See the drool-worthy gallery of mouth-watering food photos from My Island Bistro Kitchen on Instagram: https://www.instagram.com/peibistro/

Follow “the Bistro” on Pinterest at https://www.pinterest.ca/peibistro/ and pin the Pinterest-ready photo found at the end of this post to your favorite Pinterest boards.

Chocolate Drop Cookies

Chocolate lovers will love these easy-to-make rich Chocolate Drop Cookies with their slightly chewy interior
Course Cookies
Keyword chocolate cookies, cookies,
My Island Bistro Kitchen Barbara99

Ingredients

  • 1/2 cup shortening, softened
  • 1 cup white sugar
  • 1 egg
  • 1 tsp vanilla
  • 1/2 cup milk
  • 1 1/2 cups flour
  • 1/2 cup cocoa
  • 1 tsp baking powder
  • 1/4 tsp salt

Instructions

  1. Preheat oven to 375F. Line baking sheet with parchment paper.
  2. With electric mixer, beat shortening and sugar together until light and fluffy (1-2 minutes). Beat in egg, vanilla, and milk.
  3. Into separate bowl, sift together the flour, cocoa, baking powder, and salt. Add to creamed mixture and stir just until dry ingredients are incorporated.
  4. Drop by teaspoonfuls onto prepared baking sheet.
  5. Bake 10-11 minutes. Do not overbake or cookies will be dry. Let cookies rest on baking sheet for 3-4 minutes then transfer to wire rack to cool completely.

Recipe Notes

Yield: Apx. 3 dozen


[Copyright My Island Bistro Kitchen]

Pin Me To Pinterest!
Chocolate Cookies
Chocolate Drop Cookies


Anne of Green Gables-Themed Afternoon Tea

Today, I am joining Sandi at Rose Chintz Cottage who is hosting an Anne of Green Gables-themed afternoon tea.  Many of you will, undoubtedly, associate both Anne and Lucy Maud Montgomery, the famed Island authoress of the “Anne” series of books, with Prince Edward Island.  As many of you will already know, Lucy Maud was an Islander and she set her fictional story about the little orphan, Anne, on PEI.

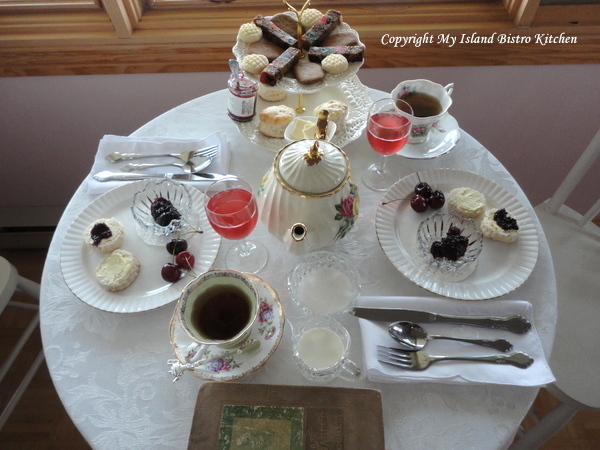
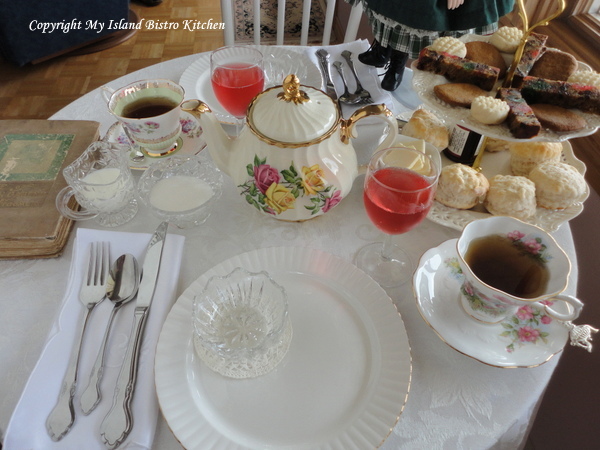
To the extent possible, I have tried to include elements in the tea that Anne and her bosom friend, Diana, would have had at the afternoon tea that Lucy Maud Montgomery wrote about in chapter XVI in the “Anne of Green Gables” book:  Raspberry cordial, cherry preserves, fruit cake, cookies, snaps, and tea.

I visited the Anne of Green Gables store in downtown Charlottetown this morning and picked up some raspberry cordial for the tea.

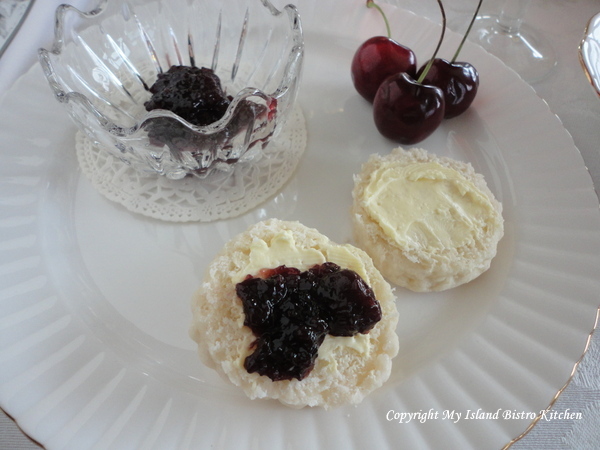
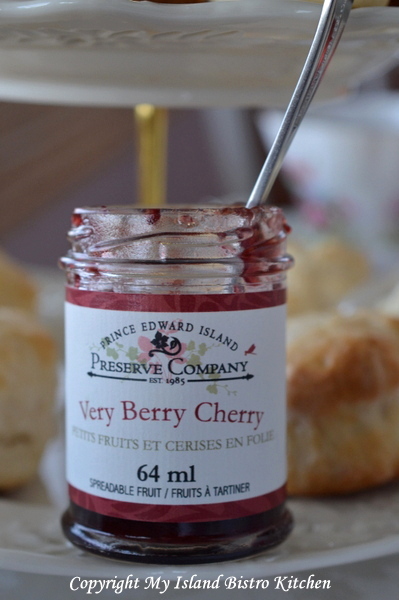
The other featured Island-made product at my tea today is the “Very Berry Cherry” jam produced by the Prince Edward Island Preserve Company in New Glasgow, PEI.

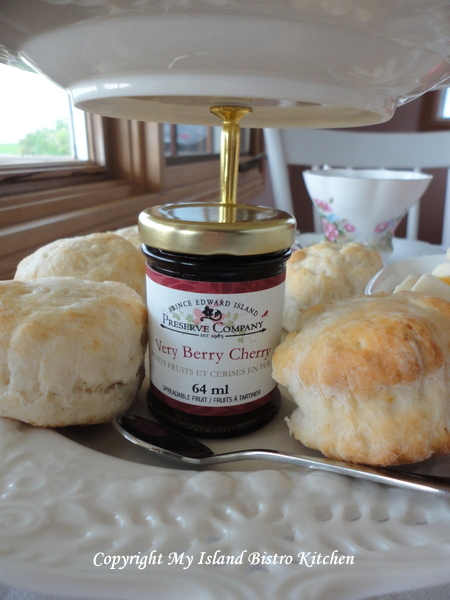
While biscuits weren’t mentioned as part of the menu for the tea in the “Anne” story, I’d be surprised if they were not standard fare at an afternoon tea of that era, particularly when preserves were included.  Homemade biscuits are still a very common staple today in many Island households, mine included.  Therefore, I have chosen to serve my homemade biscuits with the cherry jam.

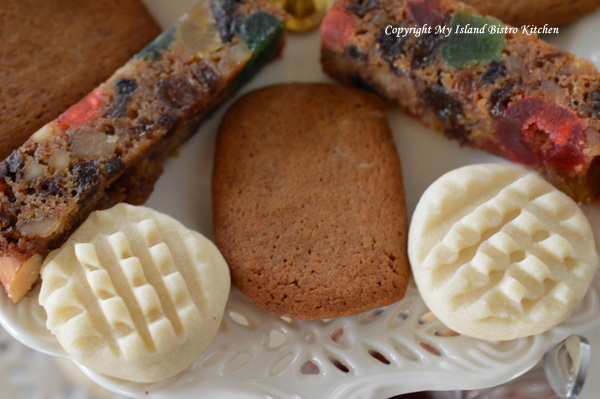
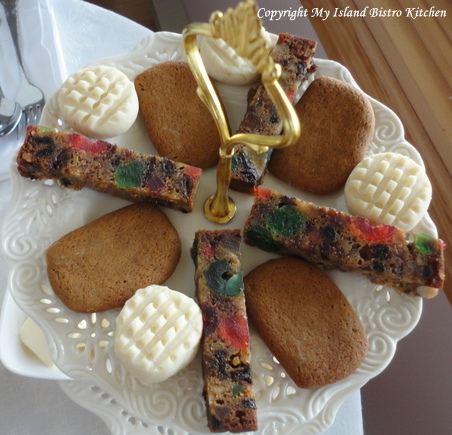
I always tuck away a piece of my Christmas fruit cake in the freezer.  It is such a treat in late summer or early fall.  It made its way on to the tea table today along with some freshly made gingersnaps and melting moments, all of which would have been quite common tea fare back in the early 1900s when L.M. Montgomery was penning the “Anne” books.  As I went through some of my ancestors’ hand-written recipe books, these were indeed items they had recipes for in their collections.

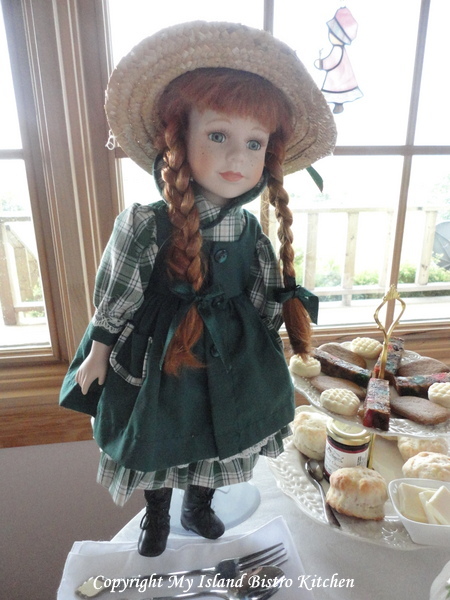
And, of course, the guest of honour would have to be Anne, herself!  My mother gave me this collector’s doll for Christmas several years ago.

Anne looks like she might be eyeing those biscuits….perhaps it is time to eat.

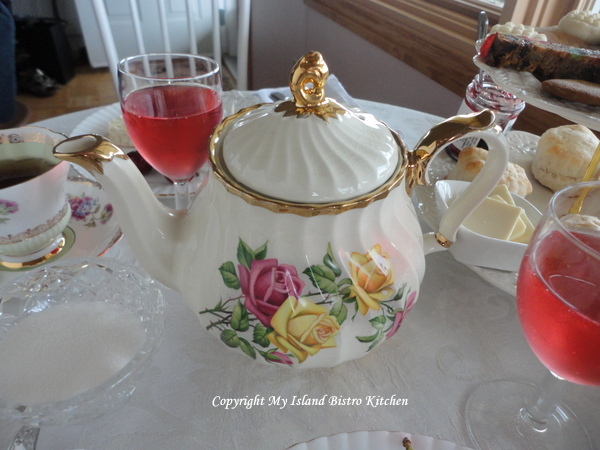
This afternoon’s tea is Orange Pekoe and it is being served from my pretty pink and yellow rose Sadler teapot.

I am not sure Marilla would have trusted Anne and Diana with these delicate teacups but these were my choices from my teacup collection for today’s event.  The one below is Royal Albert Sunnyside Series and is called “Petula”.  I love the exquisite and elegant shape of the cup.

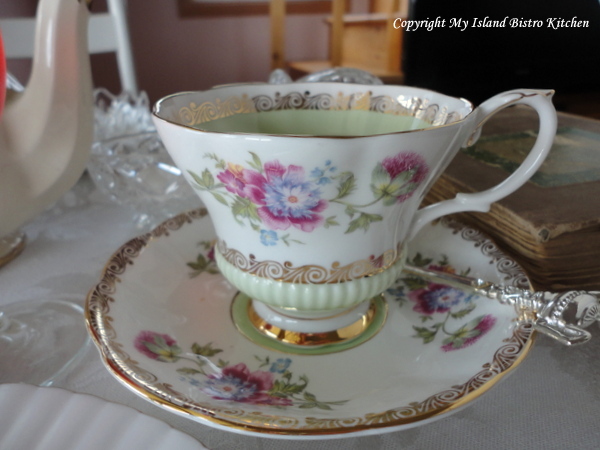
The beautiful cup and saucer below is also Royal Albert, Reverie Series.

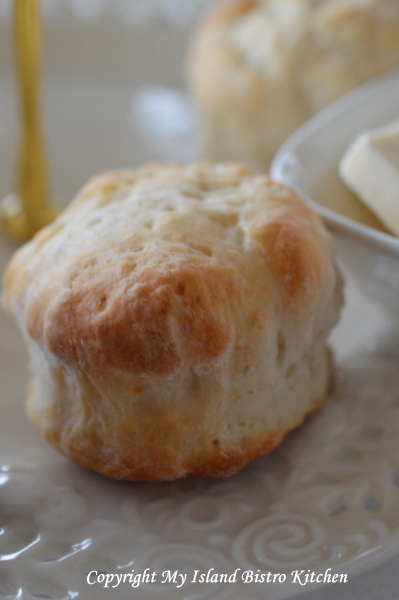
Warm biscuits, not too many minutes out of the oven, are always so tasty!

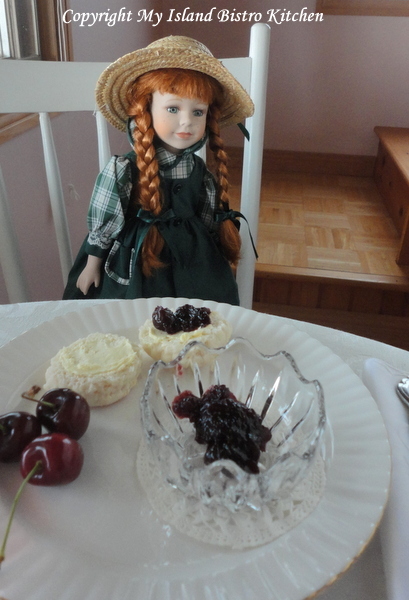
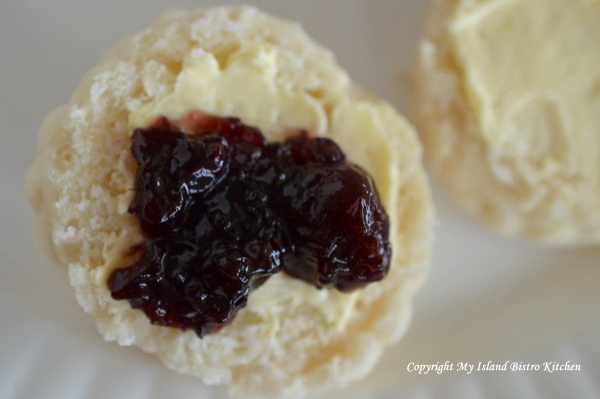
And, with fresh creamery butter and a good slather of cherry jam, they melt in the mouth!

It’s hard to stop at just one homemade biscuit and jam!

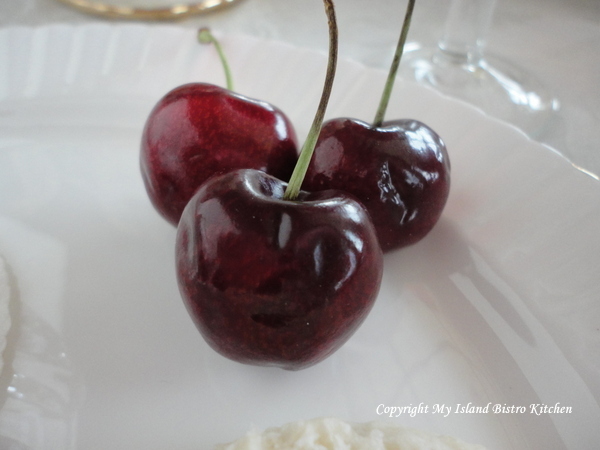
Some fresh cherries before checking out the sweet tray.

Now, which will I try first?  The fruitcake?  A ginger snap? A melting moment?

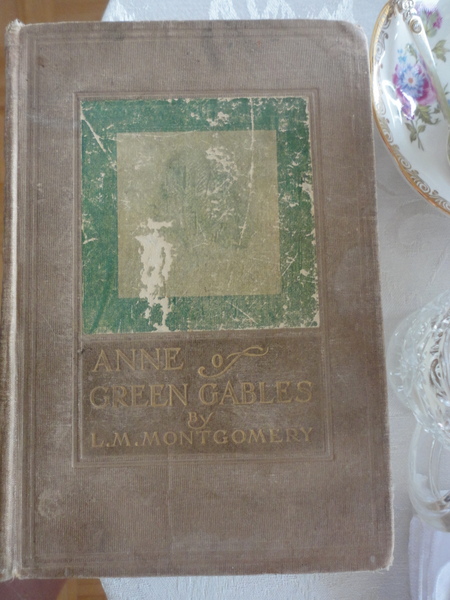
Also on the tea table this afternoon is a Third Impression August 1908 version of the “Anne of Green Gables” book.  A great conversation piece.

I hope you have enjoyed coming along on my Anne-themed afternoon tea.

Thank you for visiting “the Bistro” today. There are lots of ways to connect with “the Bistro” through social media:

Join My Island Bistro Kitchen on Facebook
Follow the Bistro’s tweets on twitter @PEIBistro
Find the Bistro on Pinterest at “Island Bistro Kitchen”
Follow along on Instagram at “peibistro”
Sunday Afternoon Wine and Cheese Picnic

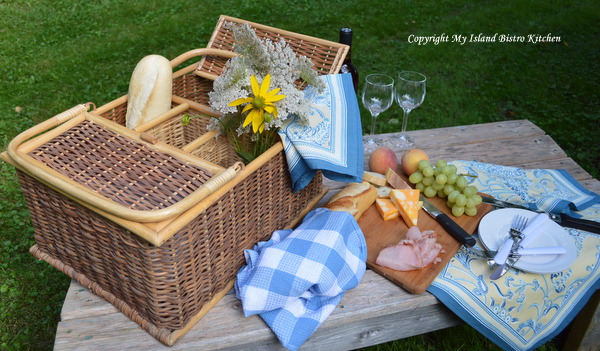
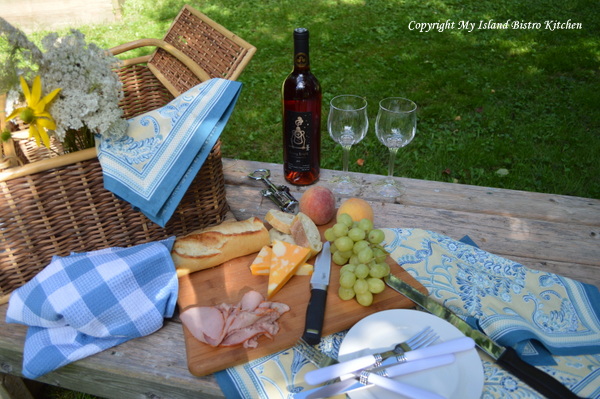
My Sunday afternoon picnic today is a simple one.  Not every picnic needs to be elaborate and involve a lot of food.  This one would be considered a light refreshment type picnic, not a “full meal deal”.

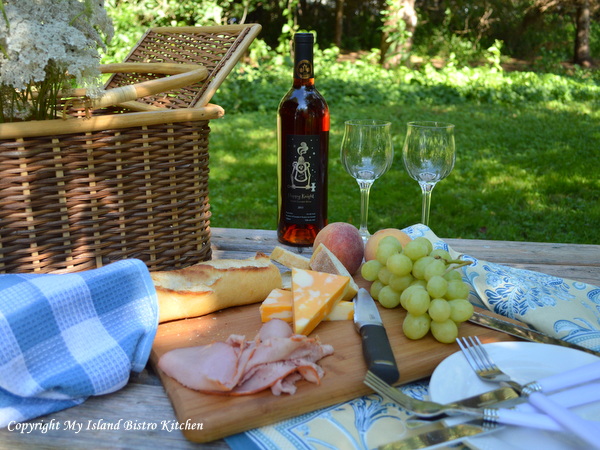
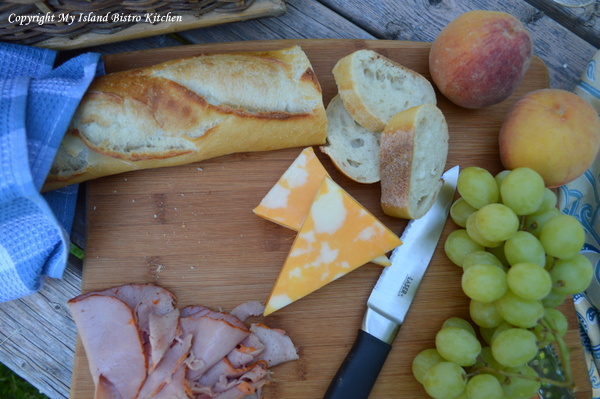
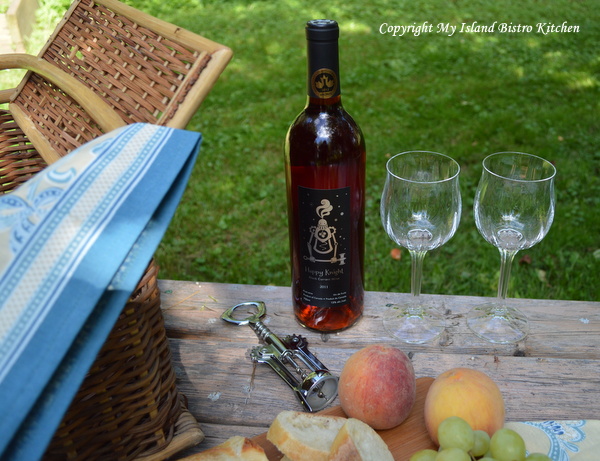
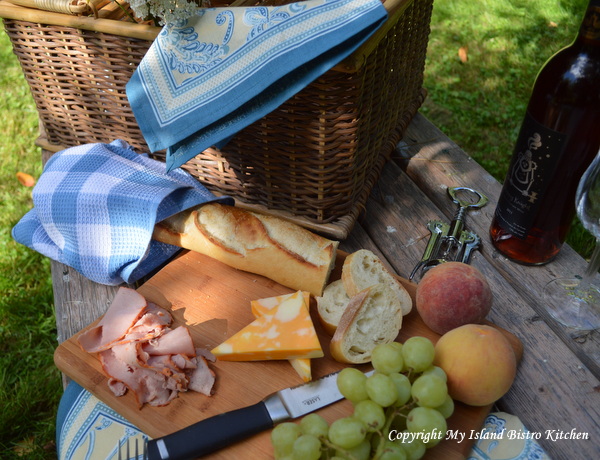
Really, all that is needed for this picnic is a good quality baguette, some cold cuts, tasty cheese of your favorite variety, grapes, and a good wine.  I also brought along some fresh peaches because they are so vine-fresh and tasty this time of the year.

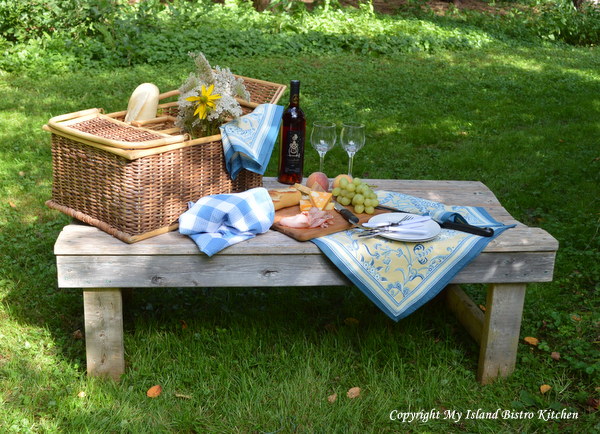
You don’t even need a table for this kind of picnic.  Here, an old rustic wooden bench serves the purpose.  Of course, a couple of cloth placemats and napkins will always dress up any table….even if it is just an old wooden bench!

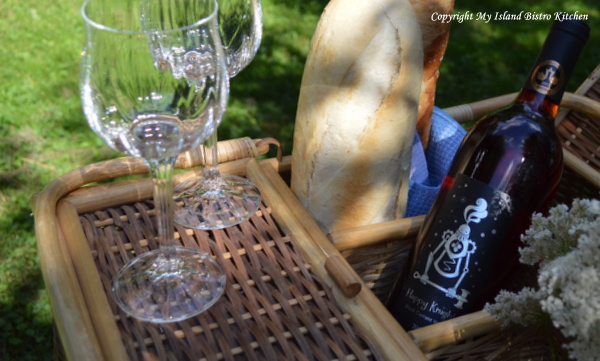
I chose a black current wine produced by Happy Knight Wines in Hatfield Pt., New Brunswick.  I discovered this fine wine at PEI’s New Festival of Wines this past spring.  We have a growing number of small wineries that are producing some mighty fine quality wines in the Maritime provinces.

I love the configuration of this large picnic basket.  In the center are three slots which easily hold the bread, the bottle of wine, rolled placemats and napkins, and a posy of wild flowers.  There are two covered side holders for the food, dishes, cutlery, and glasses.

The manufacturers of this basket knew what they were doing when they designed it!

Find a nice quiet, relaxing spot on a warm summer late afternoon for the picnic.

I hope you have enjoyed coming along on my Sunday afternoon picnic today.

Thank you for visiting “the Bistro” today. There are lots of ways to connect with “the Bistro” through social media:

Join My Island Bistro Kitchen on Facebook
Follow the Bistro’s tweets on twitter @PEIBistro
Find the Bistro on Pinterest at “Island Bistro Kitchen”
Follow along on Instagram at “peibistro”
Tea for Three Tablescape

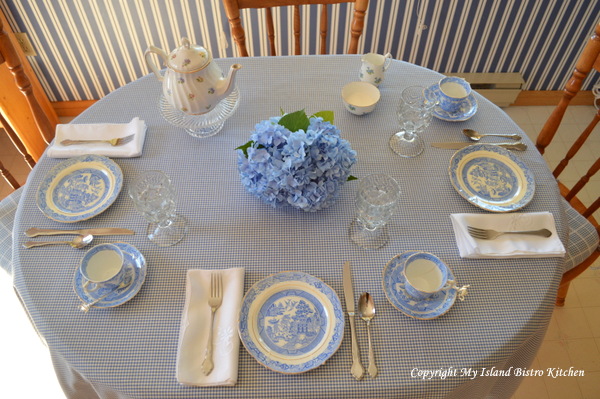
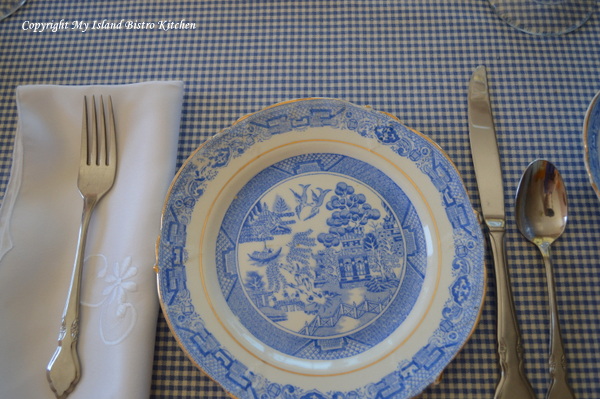
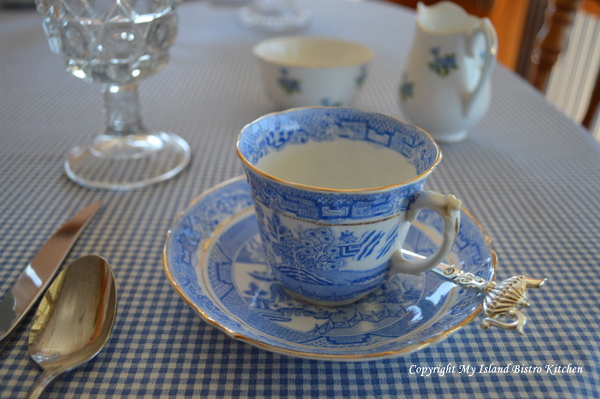
On this beautiful warm, sunny Prince Edward Island day, I am sharing a simple tablescape for teatime with you.  I have a three-piece setting of a very old blue tea set.  It has no markings on it to tell me anything about what kind of china/porcelain it is or where it was made.  If any of you recognize the pattern/manufacturer, please do let me know.  It is very delicate and a cherished set to own.

I love both the daintily-designed teacups and their shape.  I imagine some Victorian ladies enjoying their afternoon tea with this tea set.

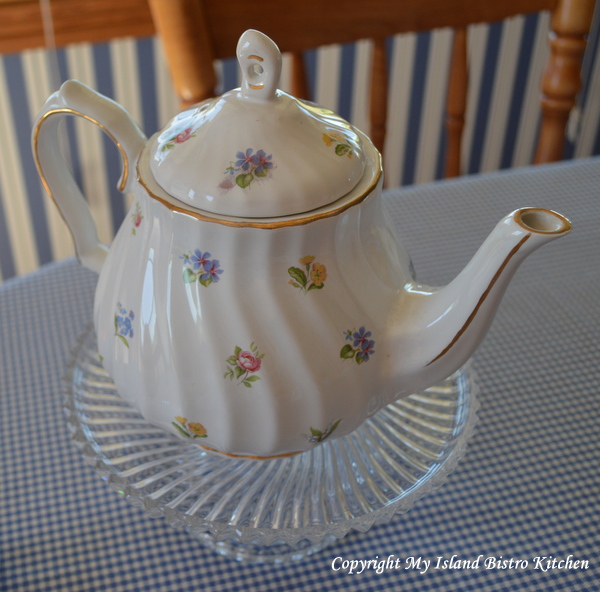
My choice of teapot for today’s tea setting is one that has tiny flowers of several different colors.  It is my go-to teapot for tea settings when I don’t have a teapot in the specific color of the dishes I am using.  It is a versatile teapot because it is of no particular predominant color.

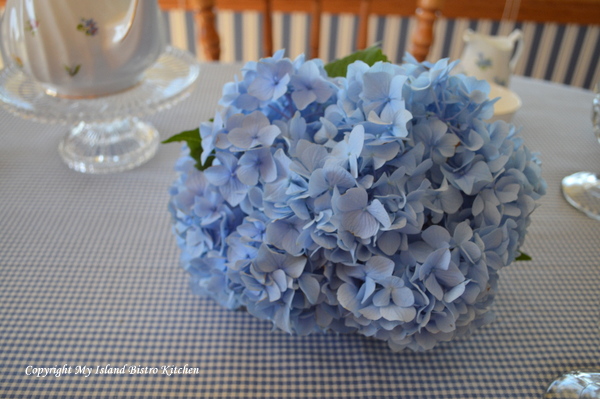
We have a wonderful blue hydrangea bush that blooms prolifically at the back door of the cottage so I thought two or three of the magnificent blue blooms would make a lovely centerpiece that would compliment the tea set.

The hydrangea are actually in a small square vase even though they look like they are just lying on the table!

I felt the tea set was elegant enough on its own that it really needed no further adornment on the table other than the blue hydrangea centerpiece.

I am belatedly joining Sandi’s Teatime Tuesday event at Rose Chintz Cottage this week.

Thank you for visiting “the Bistro” today. There are lots of ways to connect with “the Bistro” through social media:

Join My Island Bistro Kitchen on Facebook
Follow the Bistro’s tweets on twitter @PEIBistro
Find the Bistro on Pinterest at “Island Bistro Kitchen”
Follow along on Instagram at “peibistro”
A Plaid Picnic on the Verandah

Those of you who follow my blog regularly may recall that I mentioned in my last posting about picnics that you don’t have to leave home to have a picnic.  To prove this point, I decided to have a picnic supper this evening out on the front verandah.

There are advantages to having a picnic at home — for example, you can use regular dinnerware, glassware, and cutlery (not that you can’t when you pack a picnic basket but most of us tend to use the unbreakables for offsite picnics).  You are handy to the fridge and cupboard so don’t need to worry about forgetting to pack something when going off on a picnic.  The menu can be more extensive…particularly if part of the meal involves cooking and hot foods.  And, of course, a picnic at home can be spur-of-the-moment with no advance planning — so long as the weather is cooperative, a picnic on the verandah or back deck is do-able.

To start, I decided I would go with a bistro theme, using one of my favorite plaid tablecloths and then choosing the coordinating colors from it — the yellow flowers, the peaches, and so forth.

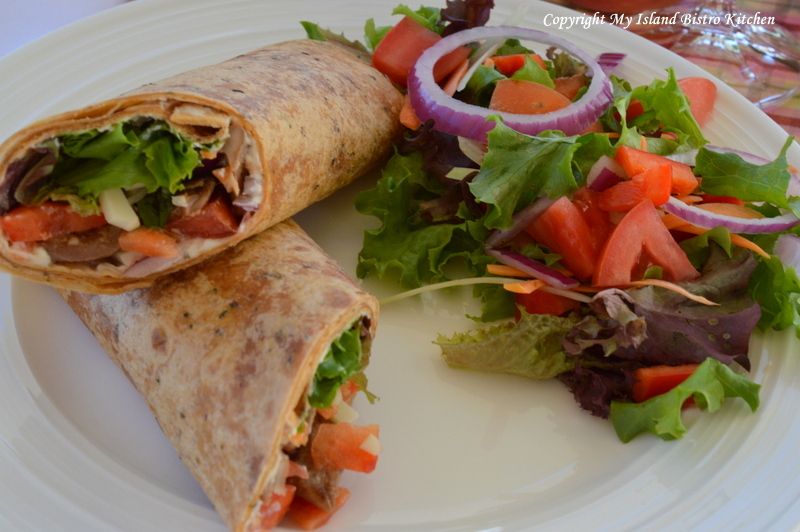
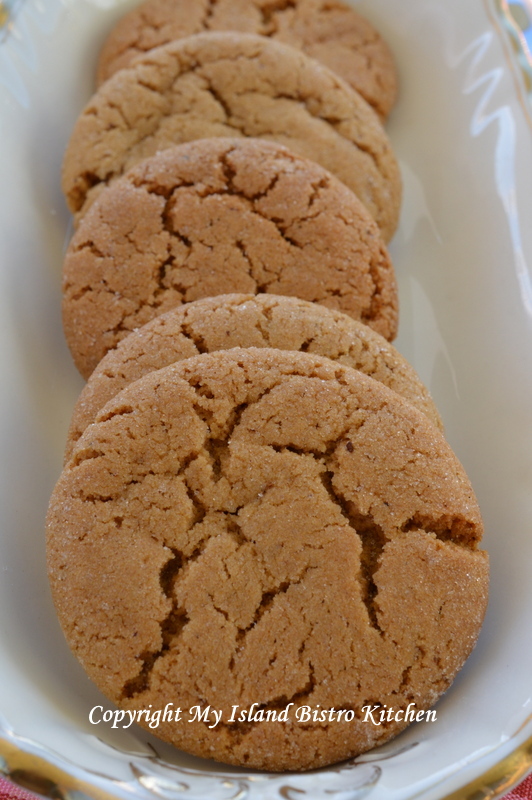
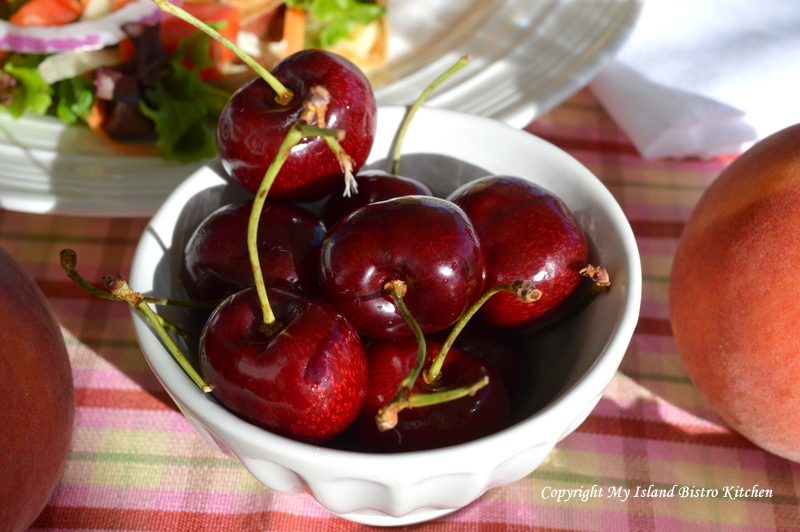
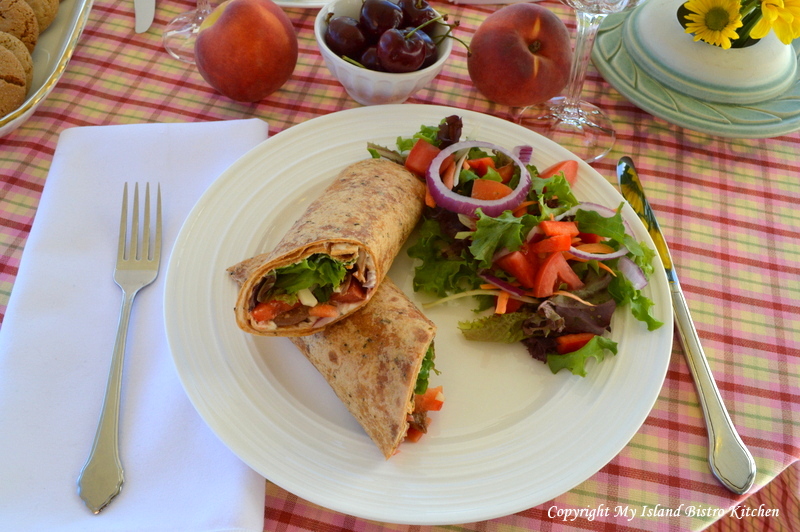
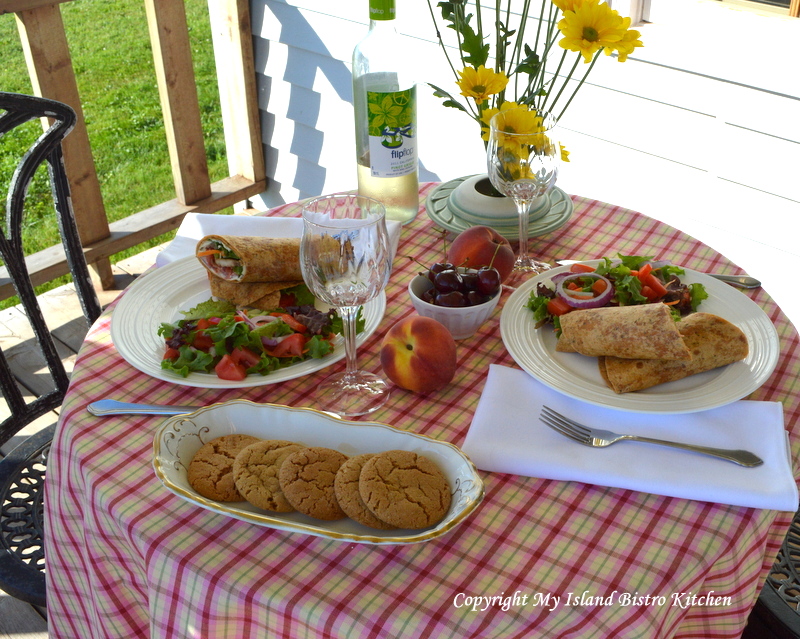
For the main course of the picnic, I chose chicken and veggie wraps (recipe follows) and a garden salad which I paired with flipflop Pinot Grigio wine.  And, for dessert, ginger cookies and for fresh fruits, in-season peaches and sweet cherries.  Nice, easy, and tasty Saturday evening summer meal.

I love all the fresh veggies available this time of the year….and how colorful they make a plate!

Ginger cookies are always good, no matter what time of the year it is!

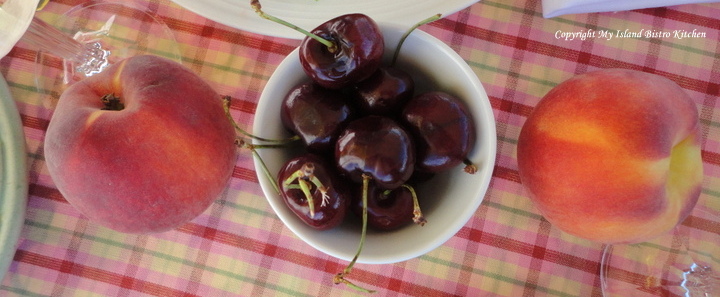
I always try to include fresh seasonal fruit in my picnic menus.

Peaches and cherries make a lovely pairing.

Chicken and Vegetable Wraps

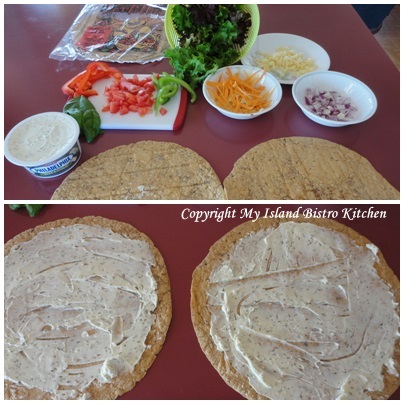
2 Tomato-Basil Tortillas

1 chicken breast, chopped, marinated, and stir-fried

Cream cheese (your favorite flavor – I used Herb & Garlic)

Red and green pepper, chopped

Tomato, chopped

Grated carrot

Red Onion, chopped

Chopped Cheese slices (e.g., Provolone, Monteray Jack, Cheddar, Havarti)

Leafy lettuce

Method:

Chop one small-medium sized chicken breast.  Marinate in your favorite marinade for 3-4 hours (I use soya sauce, oil, brown sugar, garlic, and chopped onion).  Remove chicken from marinade and stir-fry till cooked.

Spread desired amount of cream cheese on each tortilla, leaving about 1″ edge around each tortilla.

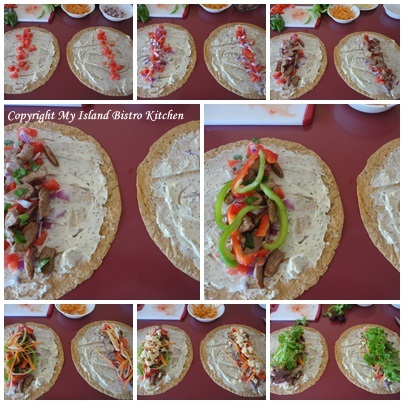
Along center line of each tortilla, place the remaining ingredients — peppers, tomato, onion, chicken, carrot, cheese, and lettuce.

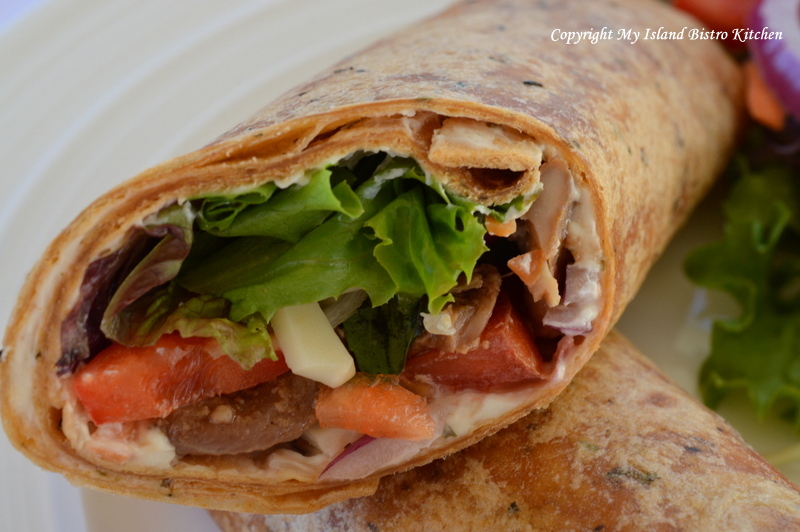
Roll up each tortilla, cut in half, and plate.

Serves:  2

Bon appetit!

Thank you for visiting “the Bistro” today. There are lots of ways to connect with “the Bistro” through social media:

Join My Island Bistro Kitchen on Facebook
Follow the Bistro’s tweets on twitter @PEIBistro
Find the Bistro on Pinterest at “Island Bistro Kitchen”
Follow along on Instagram at “peibistro”
My Island Bistro Kitchen Has A New Facebook Page

Have you visited My Island Bistro Kitchen’s new Facebook page yet?  Why not head on over to Facebook and check out My Island Bistro Kitchen.  Be sure to click on the “Like” button to receive notifications of new postings – if you place the cursor over the blue “Liked” button, a drop-down menu will appear.  If you place checkmarks beside both the “Get Notifications” and “Show in Newsfeed” options, you should automatically be notified of new postings to My Island Bistro Kitchen Facebook page.

A PEI Picnic in the Park

I like picnics.  My earliest memories of picnics consist of Sunday family drives on the Island with a stop at a park for a picnic lunch.  My Mom would have prepared the traditional picnic fare of tomato sandwiches along with ham and cheese sandwiches, too.  These would have been packed up in the airtight Tupperware containers and placed in the old blue Coleman cooler with ice (I’ll bet some of you remember those coolers!).  There would be cookies and squares for dessert.  Often plums and pears would be included in late summer outings because that would be their “in-season” time on PEI.  We had a large thermos that would have been filled with some kind of juice and lots of ice cubes and off we’d go touring around our province.

Picnic food always seems to taste so good …. whether it is the fresh air or what it is, I don’t know.  It’s also a great way to casual dine.  But that doesn’t mean it has to be boring or ordinary.  With a little planning, organization, and effort, picnics can be gourmet and they can be an event.  And, the best part is that you don’t even need to leave home to have a picnic!  You can picnic right in your own backyard, on your front verandah, or on your apartment or condo balcony.

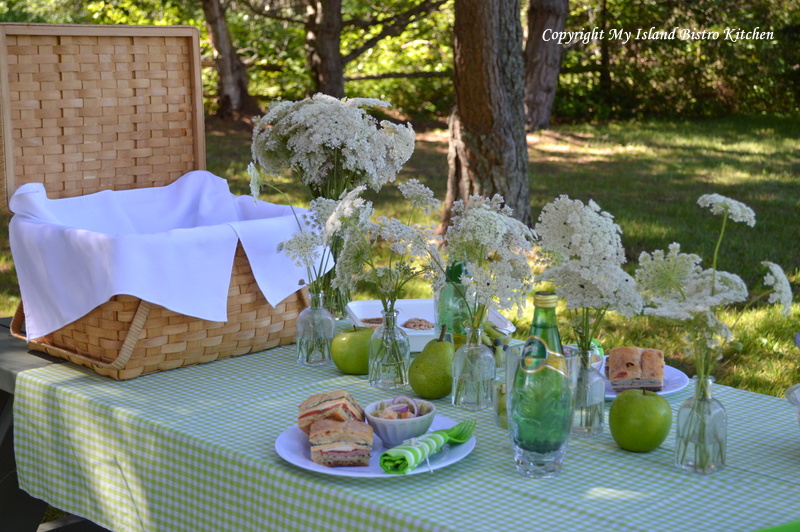
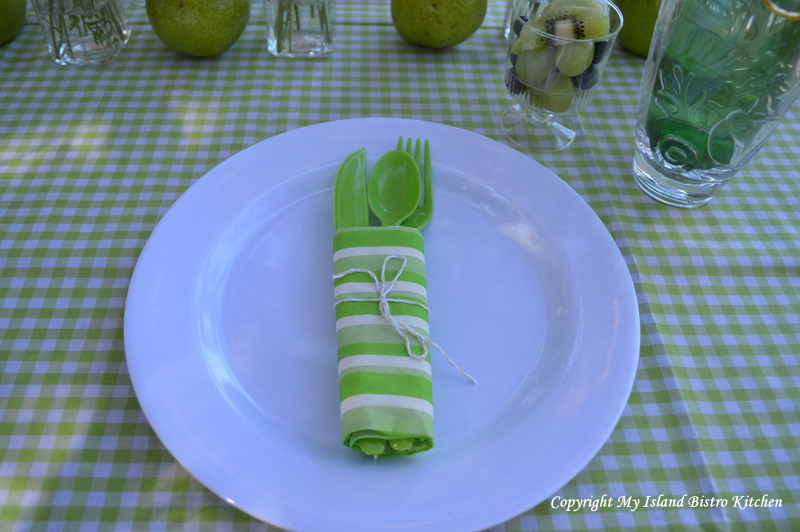
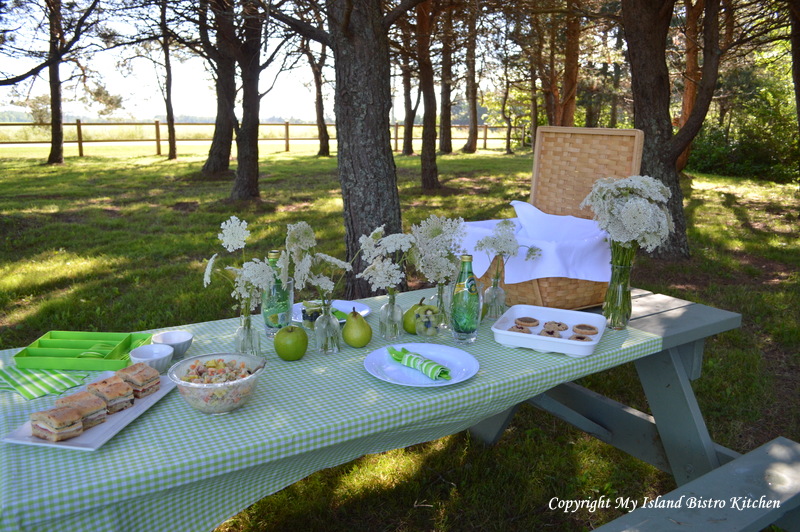
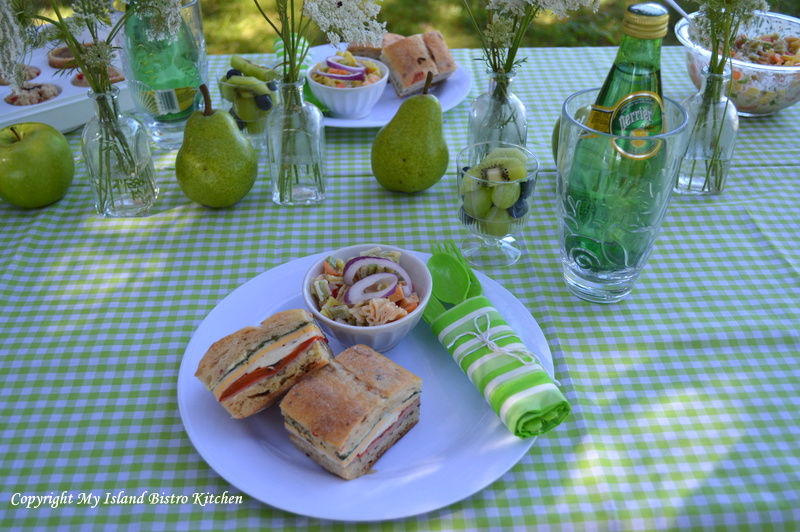
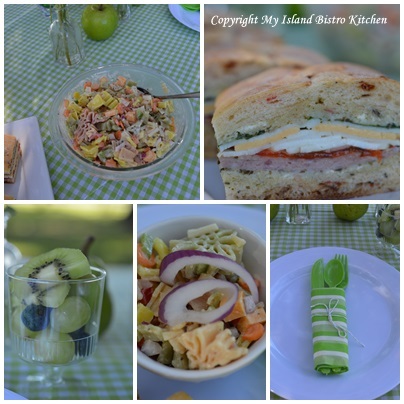
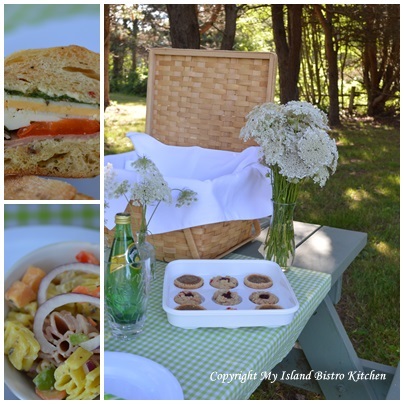
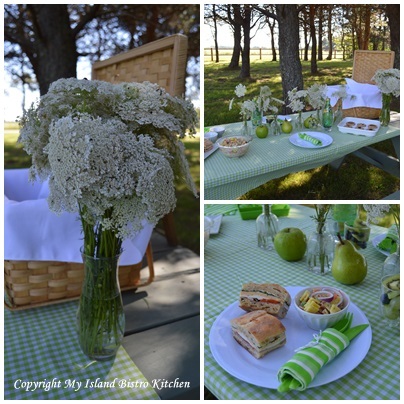
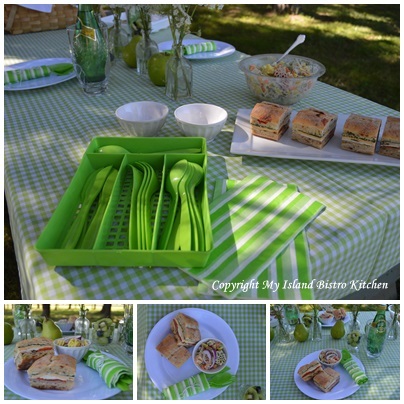
The color theme for today’s picnic is lime green with white accents.  Just because we dine outside doesn’t mean we can’t add some polish to the dining table which, in my case today, just happened to be a traditional old wooden picnic table in a park.  As those of you who regularly follow my blog will have heard me say before….you don’t need high-end dinnerware and cutlery for picnics.  Simply visit your local dollar stores and you’ll find lots of things that will make your table look very dressy and you won’t have spent a fortune on the items.  The white plates, napkins, lime-green cutlery, and small salad bowls I used today all came from my local dollar store.

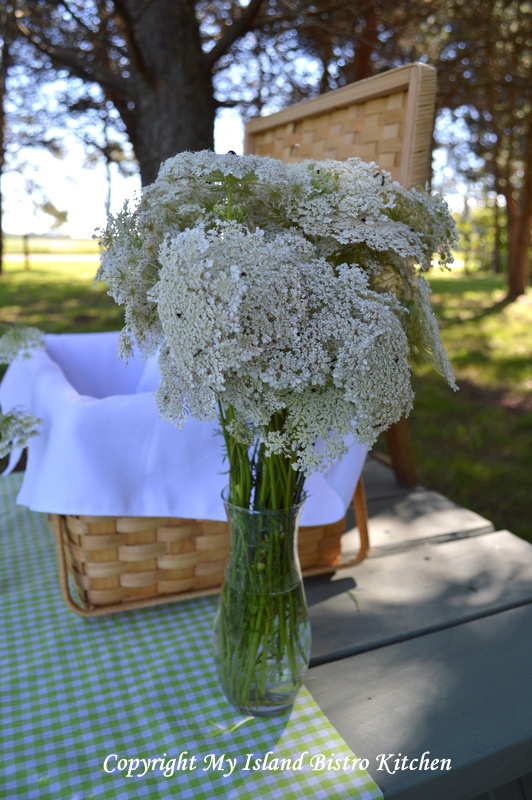
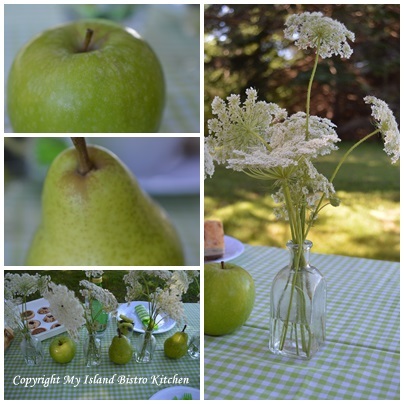
I debated about what flowers to dress the table with but knew I wanted them to be white.  Queen Anne’s Lace blooms prolifically on PEI this time of the year so I stopped on the country roadside on my way to the park and claimed some Queen Anne’s Lace from the ditch.

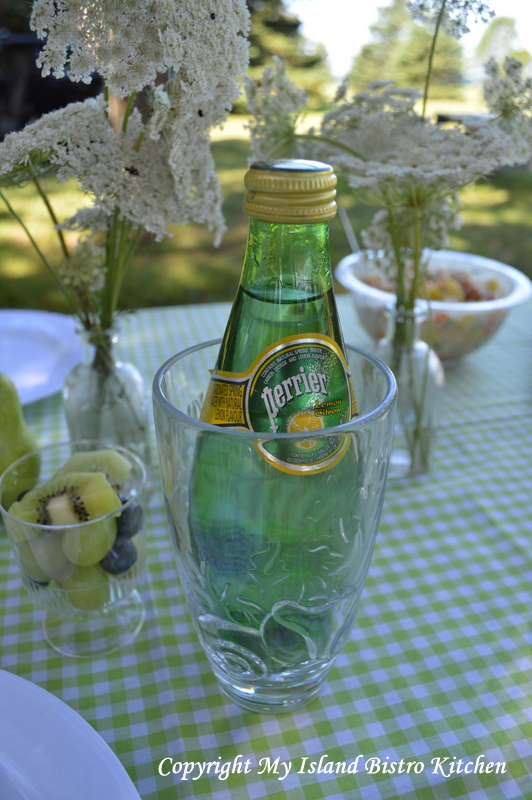
I added some green Granny Smith apples and green pears and, voilà, I had an easy, carefree centerpiece that took the picnic table from blah to one that looks attractive and oh-so-summery.  You don’t need to spend a lot on tablesettings for it to look attractive and, bonus, the apples and pears can be part of the meal!

The Picnic in the Park Menu

Pressed Italian Sandwiches

Pasta Salad

Fruit Cup

Homemade Butter Tarts

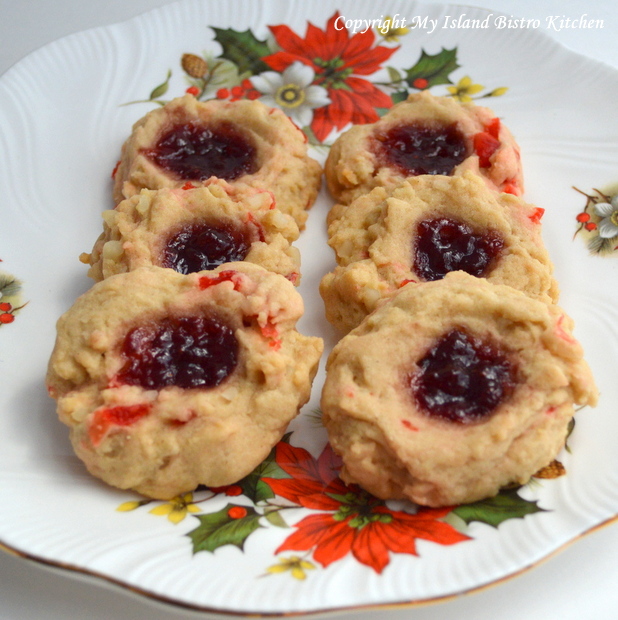
Jam-Filled Brown Sugar Cookies

Perrier

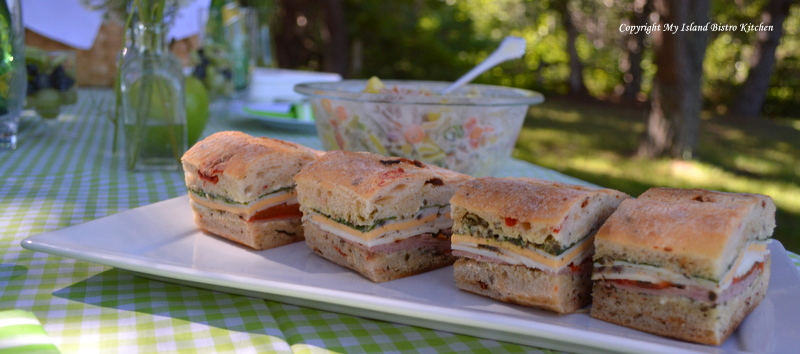
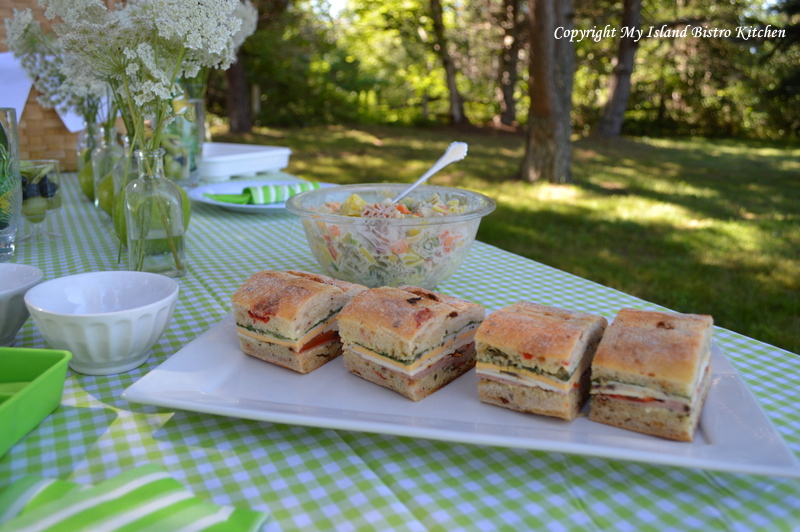
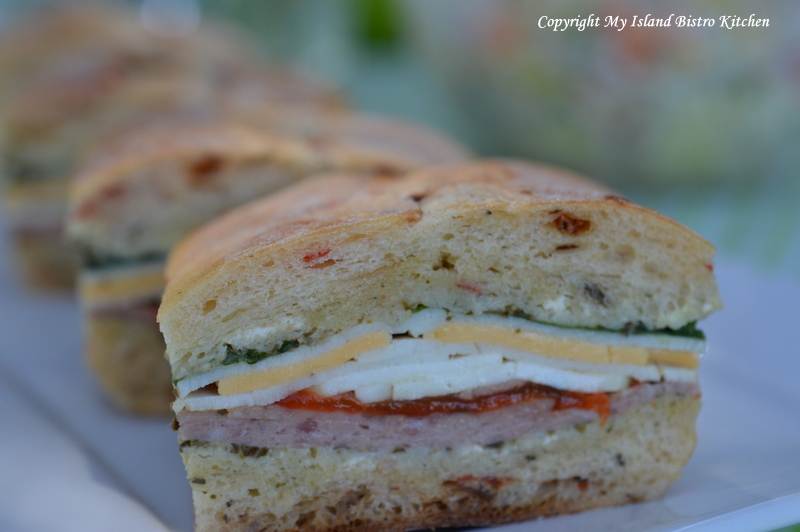
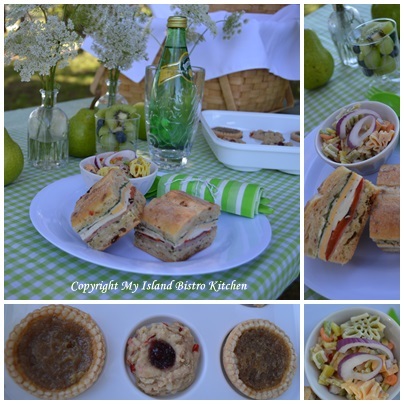
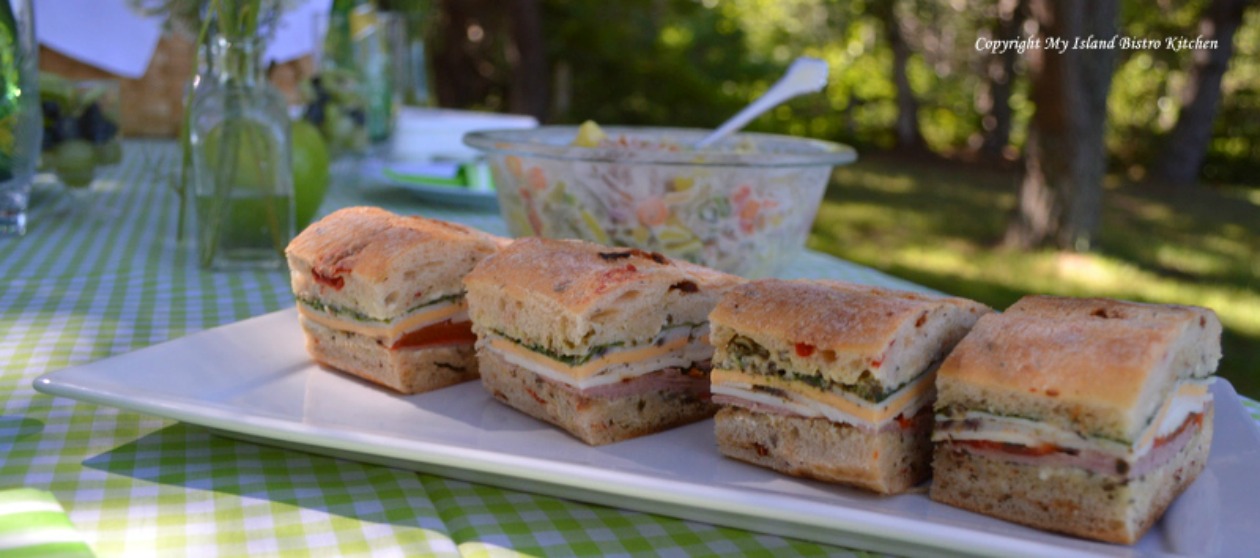
For my picnic outing in the park today, I am highlighting pressed Italian sandwiches. While my Mother would have gone to take great pains to ensure the picnic sandwiches were carefully packed so they would not get squashed, I actually purposely squashed mine today!  These sandwiches are incredibly tasty, not as difficult to make as you might think, and they look so attractive on the plate.

The idea of pressing the sandwich is that it helps all the flavours to blend.  You will need to press the sandwich for several hours or overnight.  The recipe for these sandwiches follows at the end of this posting.

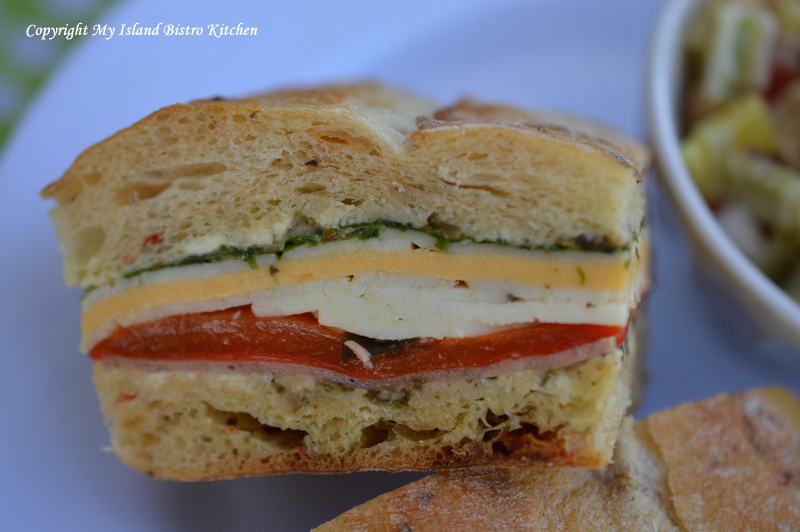
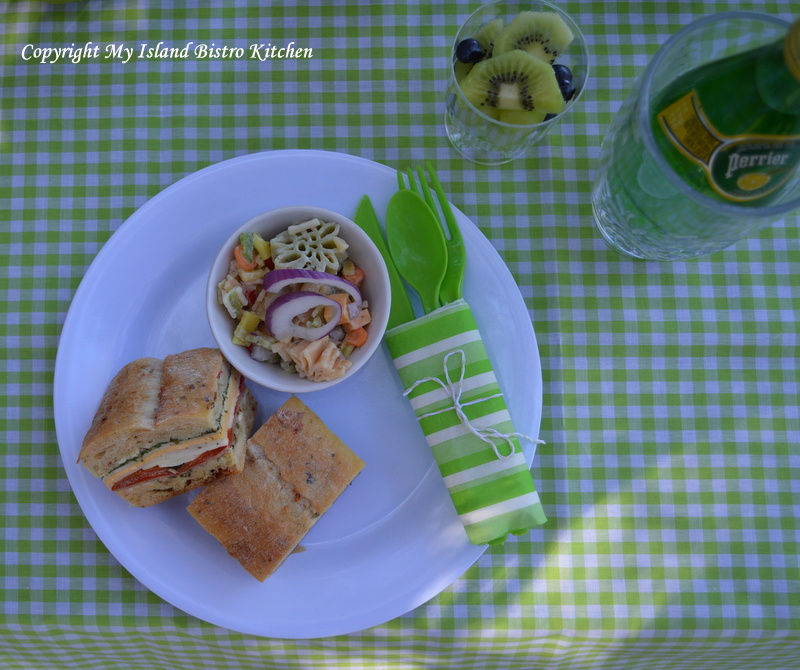
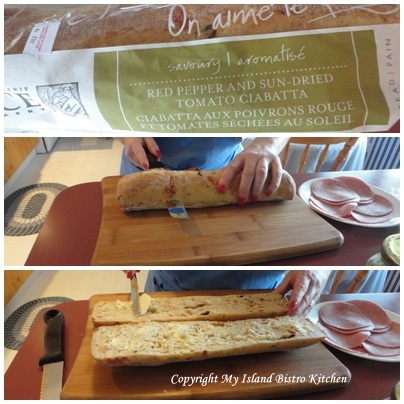
Make sure you use a good quality bread for this sandwich and one that is not too soft.  Here, I have used a Ciabatta.  I love the ribbons of color that the sandwich ingredients make!

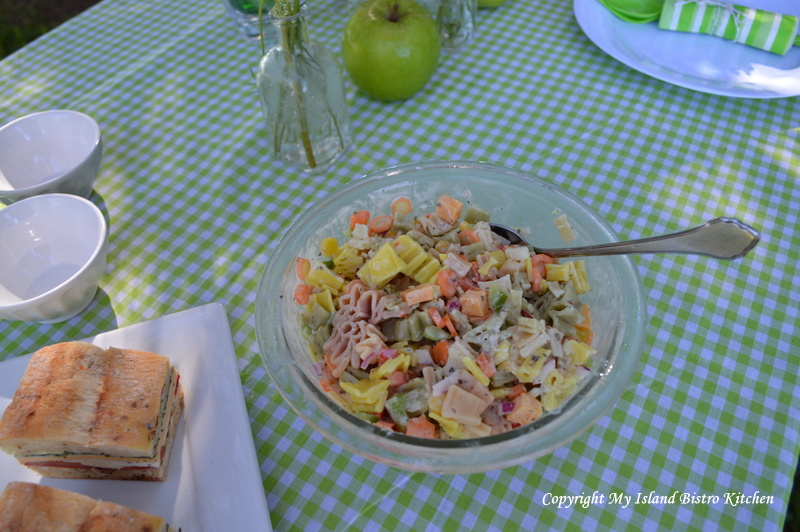
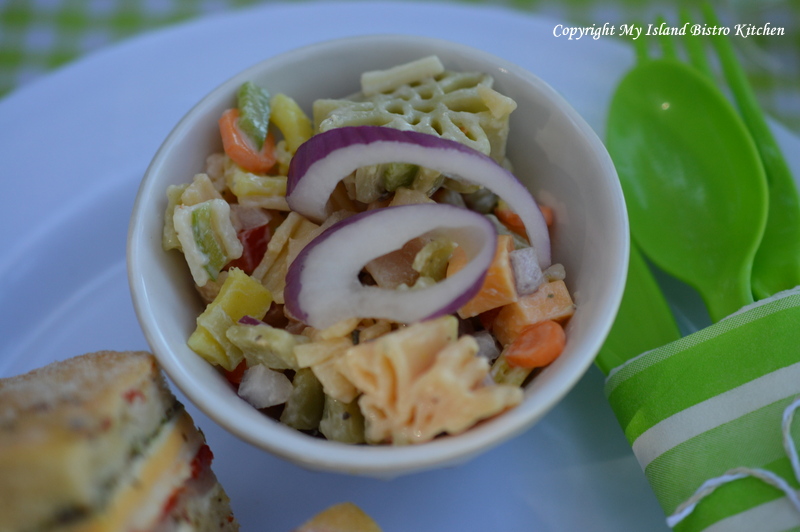
As a side dish, I chose to serve a pasta salad.  I found a great bag of colored, flower-shaped pasta at our local Winners store and I thought it would be great in a pasta salad which it was.

Pasta salads are easy to make and travel well – that’s probably why we often see them making an appearance on picnic menus.

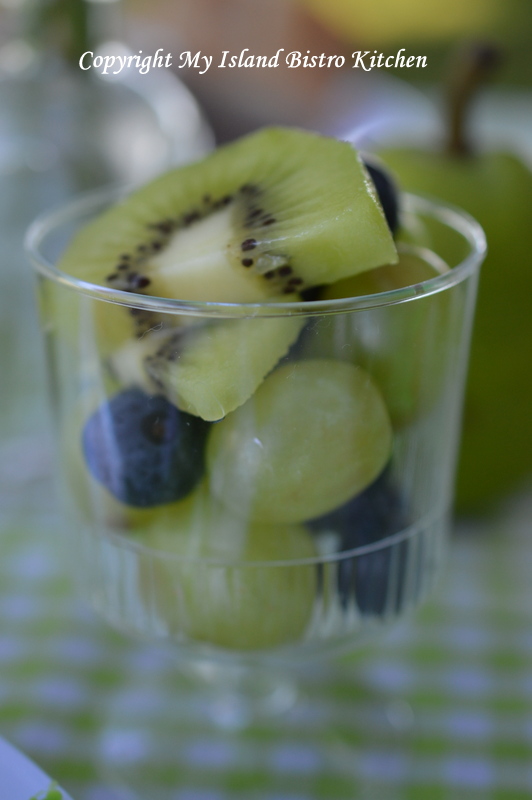
Dessert consisted of a small fruit cup of green grapes, kiwi, and blueberries….again, the focus was on green with the blue for contrast.

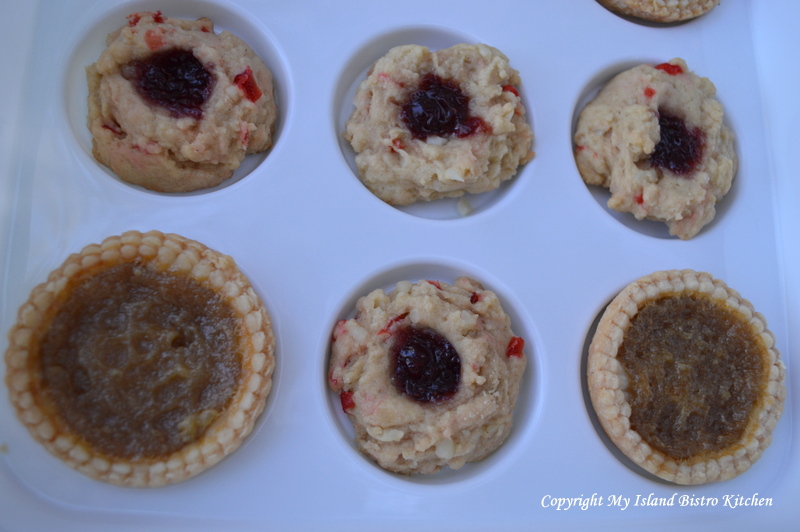
Of course, there always has to be something for the sweet tooth on the picnic menu!  I used my dollar store cupcake carrier for the Jam-Filled Brown Sugar Cookies and the butter tarts.  This proved a good way to transport them and keep them in place.

Serving Perrier steps the picnic up a notch (plus, doesn’t the green bottle look great in this color scheme!)

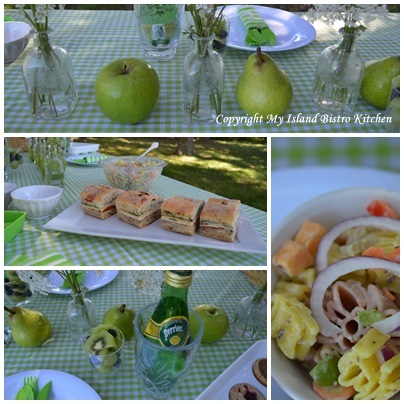
And, when it all got pulled together, this is what it looked like.

Can you taste those good Italian cold cuts in the sandwich!

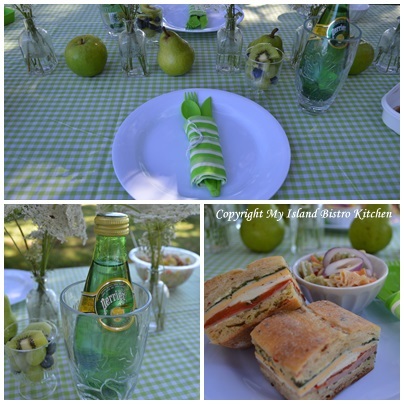
Now, here are some collages of today’s picnic.

Keeping color schemes simplistic makes the picnic table look coordinated.

A tasty meal, for sure on a warm PEI summer day!

PEI offers many great venues for picnic lunches, from our parks to our beaches.

I like to include edible components to table centerpieces.

Using wildflowers in the tablesetting is a great way to enjoy local flora.

Mix and match patterns (e.g., checks and stripes) for interest but just keep them in the same color family.

I love how the sun peaked through the trees.  I am going to look at these picnic photos some day in cold January and try to remember what a beautiful day today was for a picnic.

Pressed Italian Sandwiches

Ingredients:

Ciabatta loaf (I used Red Pepper & Sun-dried Tomato)

Butter

Basil Pesto

Mayonnaise

Roasted Red Pepper

Selection of deli cold cuts (I used salami and Mediterranean Turkey Breast), sliced very thin

Selection of cheese slices (I used Provolone and Cheddar)

Fresh basil leaves

Balsamic Vinegar (I used Liquid Gold’s Cranberry-Pear)

Olive Oil

Leafy Lettuce

Method:

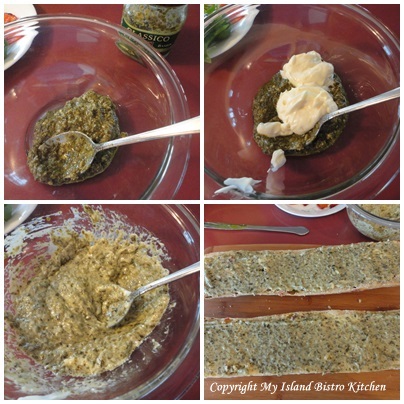
Slice bread in half, lengthwise as shown in photo below.  Butter both sides of bread.

In small bowl, mix about 3 tbsp pesto with about 1 – 2 tbsp mayonnaise.  Spread on both sides of bread.

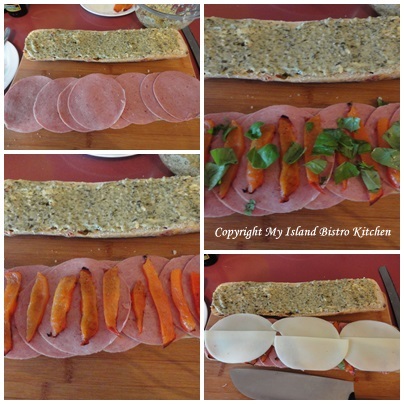
On bottom half of bread, add a layer of salami, followed by the roasted red pepper.  Add torn pieces of basil leaves.  Add a layer of Provolone cheese.

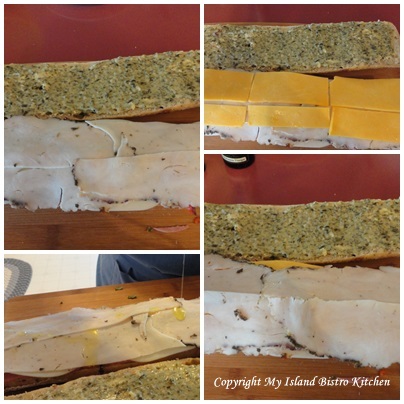
Add a layer of turkey breast.  Drizzle just a bit of olive oil, about 1 tsp or so, over the turkey breast.  Add a layer of cheddar cheese followed by a second layer of turkey breast.

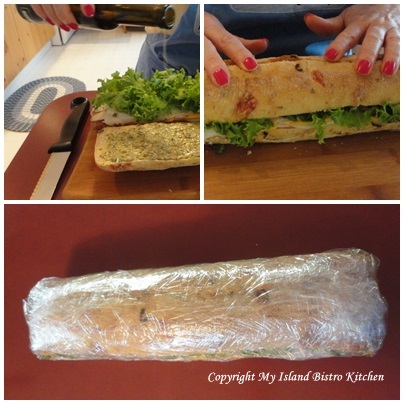
Add fresh leafy lettuce and drizzle a bit of your favorite balsamic vinegar, about 1 tsp, over the lettuce .

Place the top half of the bread on top of the sandwich ingredients and press down on the sandwich.

Wrap entire filled loaf of bread as tightly as possible in plastic wrap.  Place in refrigerator and place a weight on top of the sandwich to “press” it.  This could be a couple of heavy books, for example, or anything that will press the sandwich down.  Let this rest in the refrigerator overnight or for at least 4-5 hours to let the flavours blend and to ensure that the sandwich is pressed.

Remove the sandwich from the refrigerator.  Remove the plastic wrap.  Cut into desired widths of individual sandwiches.  Out of this size of loaf, I got six sliced individual sandwiches.  For presentation, I also like to cut off the outside edges all around the sandwich loaf as it makes it more even and tidy and the layers of the sandwich are more visible.

Yield:  3 servings, 2 sandwiches per person

Thank you for visiting “the Bistro” today. There are lots of ways to connect with “the Bistro” through social media:

Join My Island Bistro Kitchen on Facebook
Follow the Bistro’s tweets on twitter @PEIBistro
Find the Bistro on Pinterest at “Island Bistro Kitchen”
Follow along on Instagram at “peibistro”
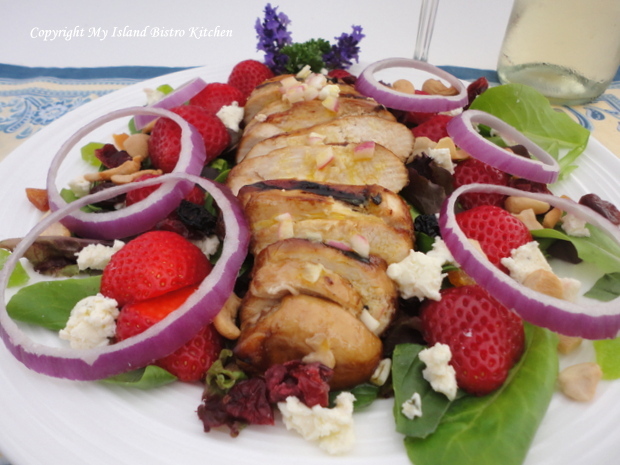
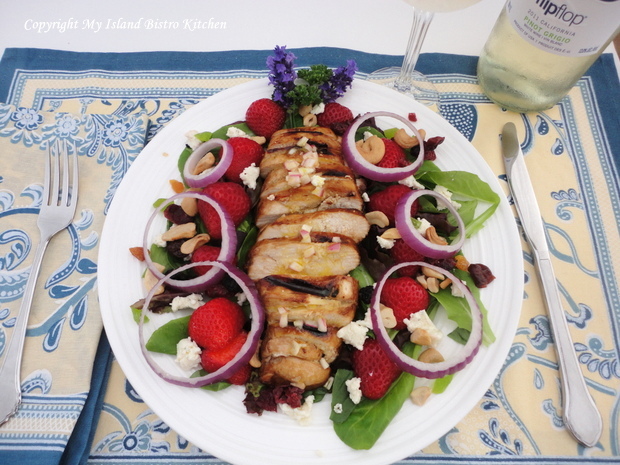
Grilled Chicken, Strawberry, and Feta Cheese Salad

Grilled Chicken, Strawberries, and Feta Cheese Salad

With warm summer evenings, it’s nice to have a go-to recipe for an easy-to-prepare, light yet filling, entrée.  One of my favorite summertime evening meals is warm grilled chicken served over a strawberry, feta cheese, and green salad and drizzled with a good balsamic vinaigrette.

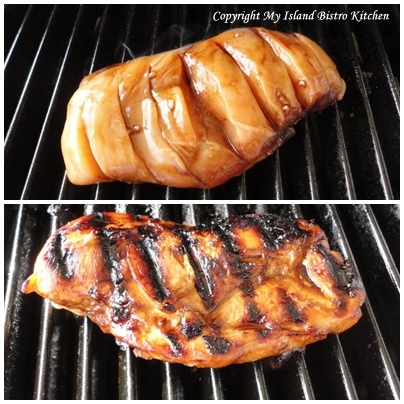
The option is yours to choose to marinade the boneless, skinless chicken breasts or not.  I usually do and I don’t follow a precise recipe for the marinade but these are the usual ingredients:  brown sugar, olive oil, balsamic vinegar, garlic, minced onion, soya sauce, salt, and pepper.  As for quantities of each ingredient, I don’t actually measure them out and add more or less, depending on how many chicken breasts I am marinating.  I make several horizontal cuts in the chicken breasts to allow the marinade to permeate through the meat.  Place the chicken breasts in a ziplok bag, mix together the marinade and pour it into the bag, making sure the entire chicken breasts are covered.  Zip up the bag and place it in the fridge for several hours (I usually aim for between 2 and 4 hours).  Heat up the grill and cook the chicken breasts until they are done.

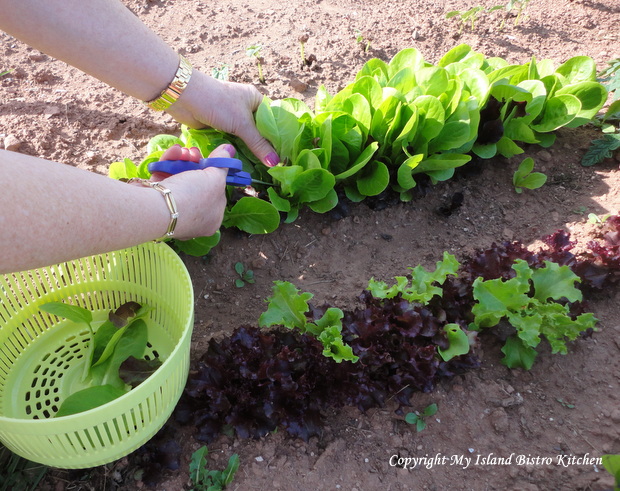
One of the pleasures of summer is having our own garden.  We eat a lot of salads and there is nothing better than running to the garden right before meal time and gathering a medley of fresh lettuce as well as some herbs from our little herb garden.

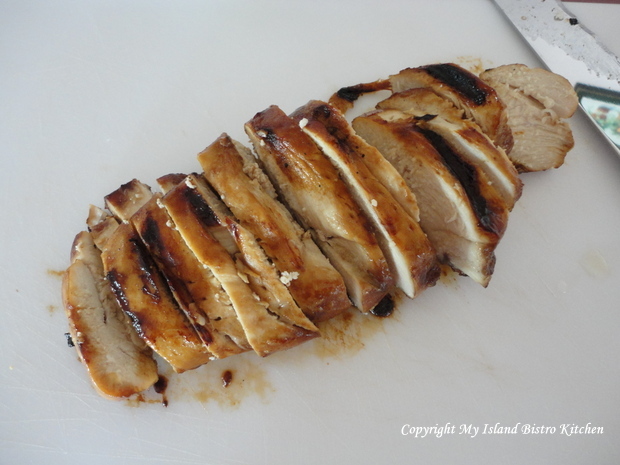
Slice the warm grilled chicken breast horizontally into slices about ¼” thick.

Cover the plate with a medley of greens.  Transfer the cut-up chicken breast to centre of the plate on top of the lettuce bed.  Slice up and add some fresh strawberries and red onion rings. Sprinkle with feta cheese and a few nuts such as cashews or sunflower seeds (or both!).  Add a balsamic vinaigrette and voila, a tasty and light dinner.  Serve with baguette slices and a refreshing glass of your favorite white wine.  Here I have selected “flipflop”, a California Pinot Grigio which made a fine accompaniment to a summer salad.

Grilled Chicken, Strawberries, and Feta Cheese Salad

My recipe for the vinaigrette follows.  Of course, you know the secret to a really good vinaigrette – the best quality of olive oil and balsamic vinegar you can find.  Because we have a “Liquid Gold Tasting Bar & All Things Olive” store in Charlottetown, I buy their olive oil and vinegar products because they are superior and fresh quality.

Peach and Mandarin Balsamic Vinaigrette

¼ cup Mandarin-infused olive oil

2 tbsp peach white balsamic vinegar

4 tsp Dijon mustard

1 tsp minced garlic

1 small green onion or 1 – 2 tsp finely chopped red onion

2 tsp freshly-squeezed lemon juice

1 ½ – 2 tsp sugar, to taste

Freshly ground pepper

Kosher salt, to taste

Mix and shake all ingredients together until well mixed. Drizzle over salad at time of serving.

Thank you for visiting “the Bistro” today. There are lots of ways to connect with “the Bistro” through social media:

Join My Island Bistro Kitchen on Facebook
Follow the Bistro’s tweets on twitter @PEIBistro
Find the Bistro on Pinterest at “Island Bistro Kitchen”
Follow along on Instagram at “peibistro”
A Beach-Themed Picnic

Ever heard of the expression “the best laid plans of mice and men often go astray”?   Well, that was somewhat my case today.

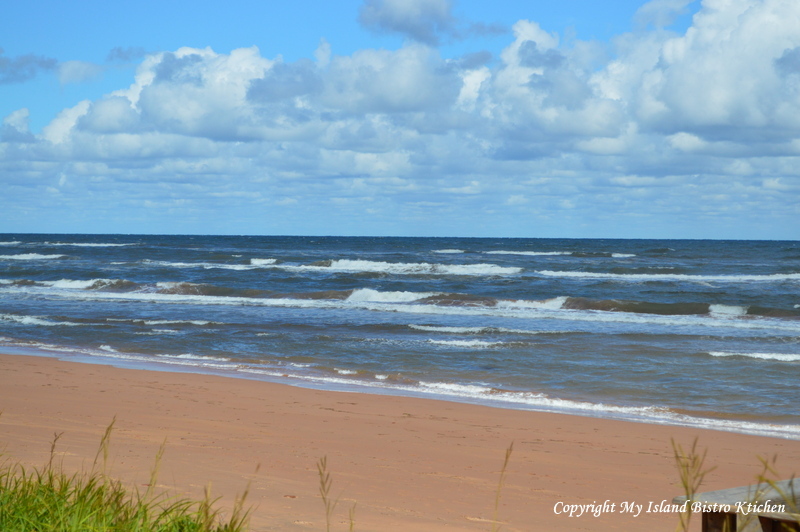
It’s been a hot, dry summer so far on PEI, and today was forecast to be 31C and very humid.  I had been planning a beach picnic for some time and last evening rolled out the plans for the day and began preparations.  This morning, while it seemed a little breezy, I didn’t think it was particularly windy so off we set for a mid-day picnic on the beach.  However, when we arrived at our destination, the whitecaps were rolling in to shore at a reasonably good clip.  Suffice it to say it was breezy and it was going to be difficult (read ‘impossible’ and ‘frustrating’) to hold things in place for a picnic on the beach.

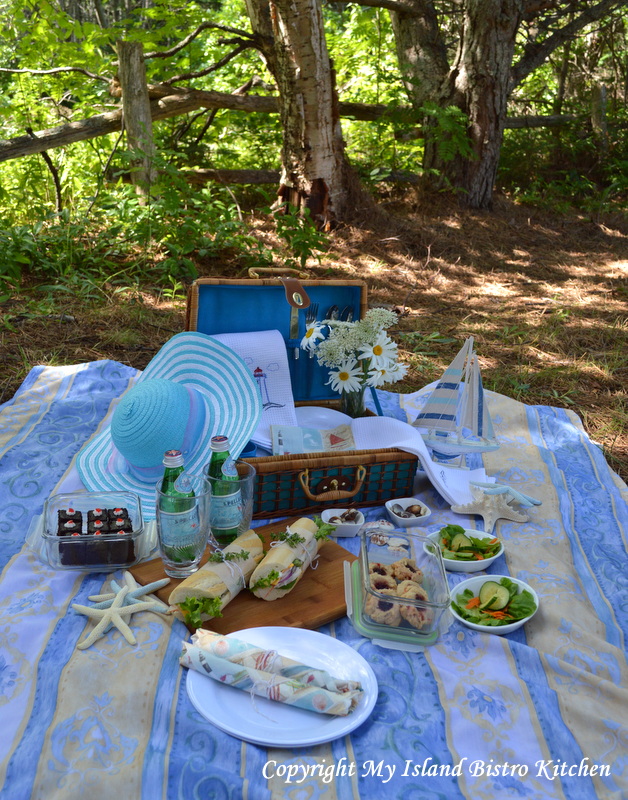
So, I had a “Plan B” ready just in case, for some reason, a beach location would not be suitable – good thing to do when the food has all been prepared!  So, my beach picnic became a beach-“themed” picnic in a calm location not many yards from the beach where we could still hear the waves rolling in to shore.

On the menu for the picnic:

Turkey, Egg, and Cheese Baguettes (recipe follows)

Green Salad

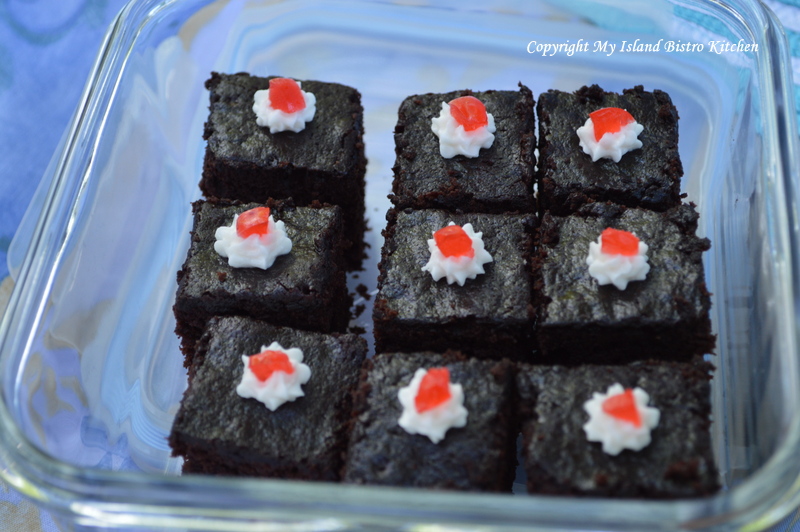
Brownies

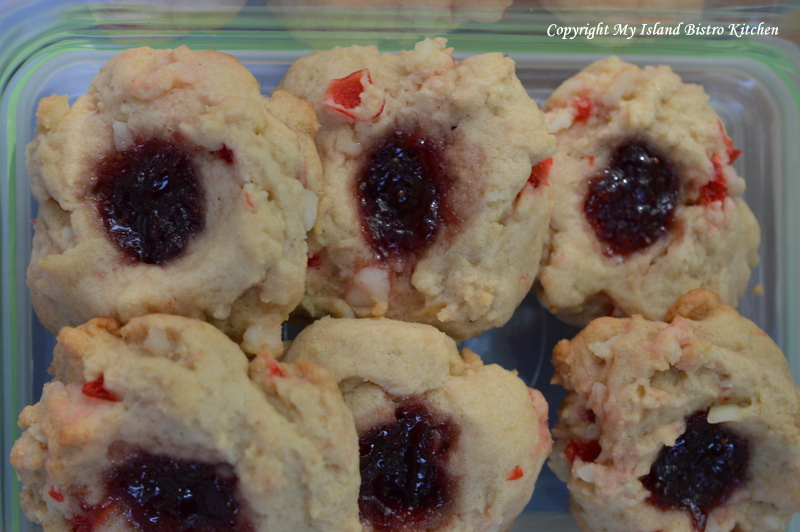
Brown Sugar Jelly-filled Cookies

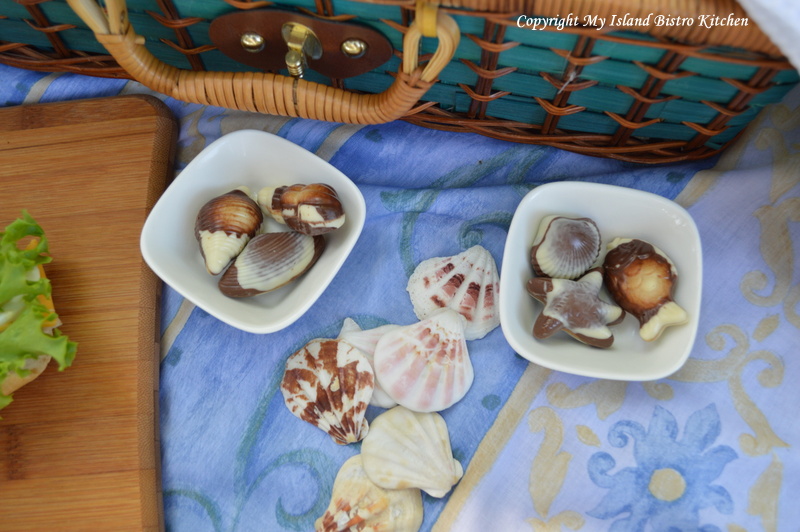
Seashell Chocolates

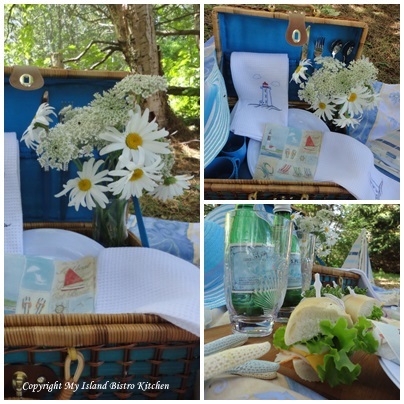
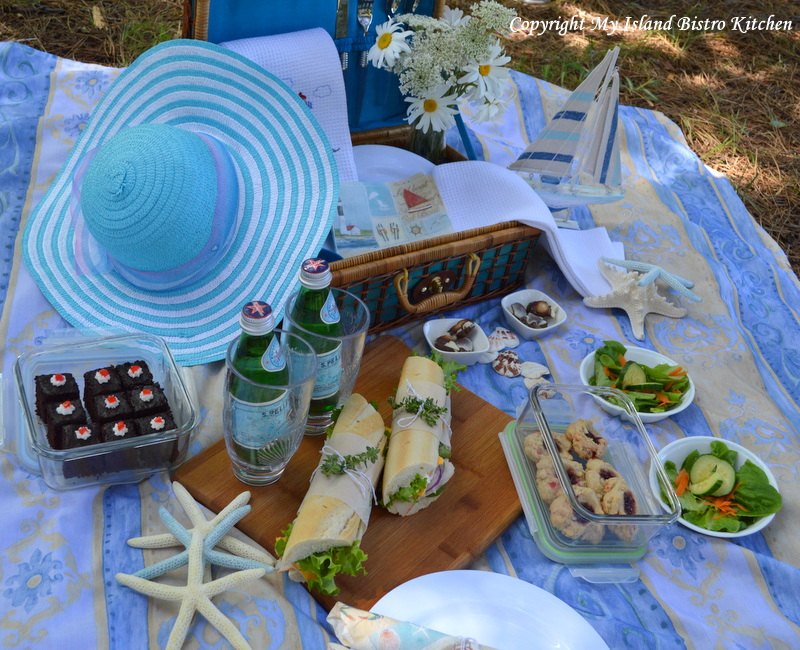
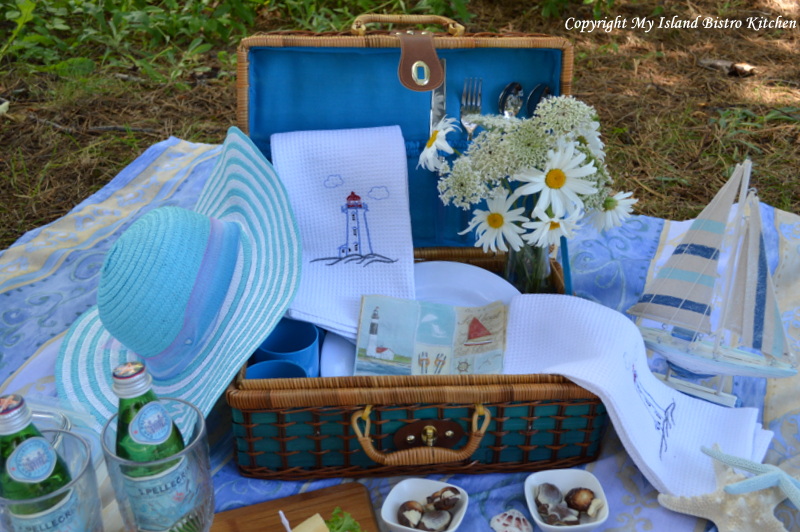
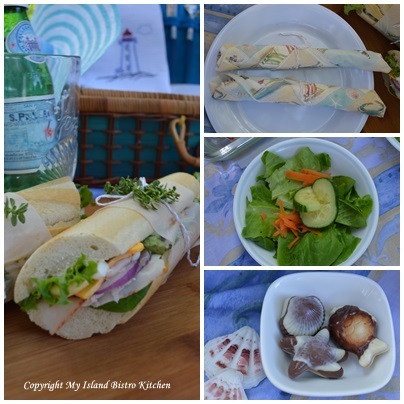
So, let’s assemble the elements of the picnic and see what is in the picnic basket.

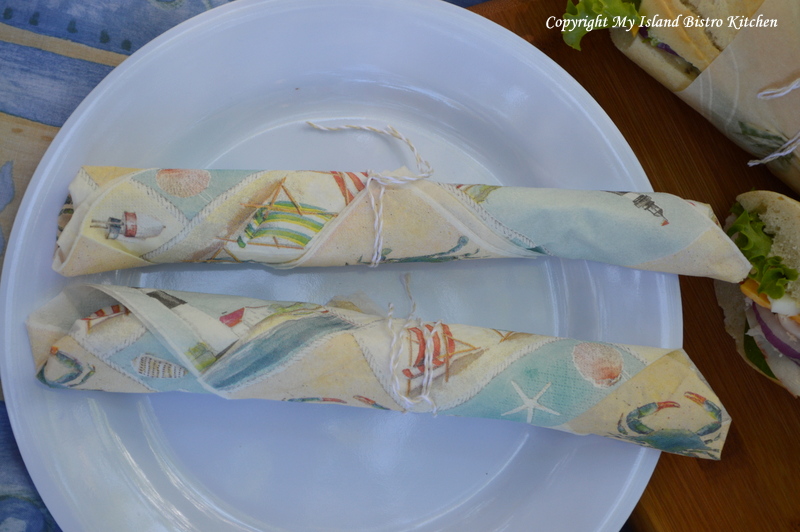
I like to wrap the cutlery in napkins.  This can be done ahead of time and it’s also a great way to remember to bring along the napkins!

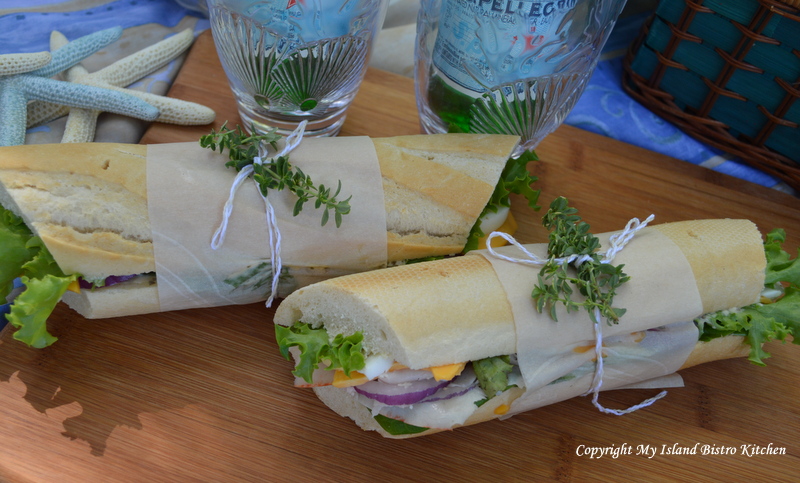
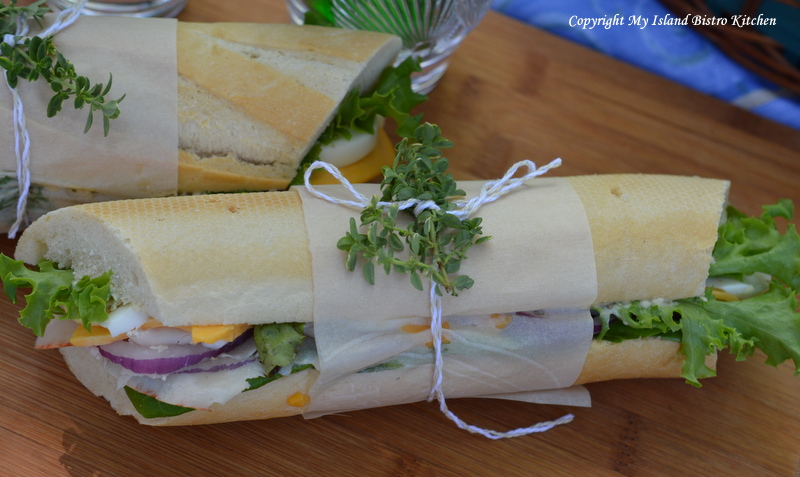
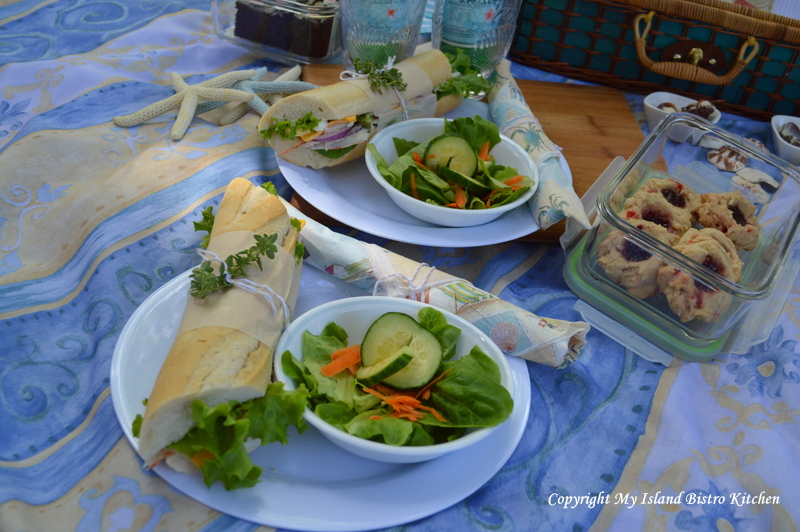
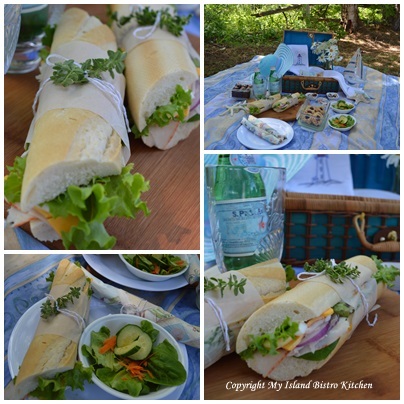
The highlight of today’s picnic were the baguettes – they were really tasty and very filling!

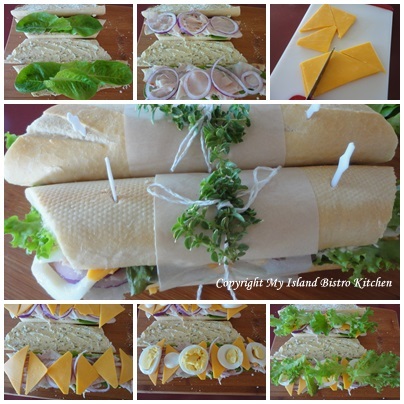
Turkey, Egg, and Cheese Baguettes

These looked extra special wrapped in parchment paper and dressed with a string bow and a sprig of lemon thyme from my herb garden.

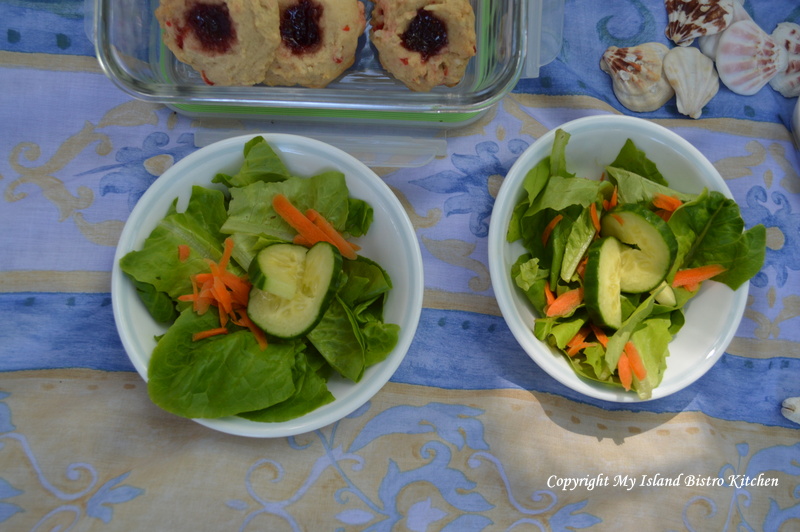
We have lots of fresh leafy lettuce in the garden these days and salads always taste better with produce freshly picked.  It doesn’t get any more local than the backyard garden!

Food always seems to taste so much better outside and there is no reason why a picnic can’t be as stylish as a table setting.  All you need is a pretty tablecloth, a posy of wild flowers, a few props, some tasty food and you have an instant picnicscape.

I live near water so a lot of my inspiration for tablescapes and picnics comes from the sea.

A tasty lunch!  Are you hungry yet?

Brownies are the quintessential picnic food!

But Brown Sugar Jam-filled Cookies are good too!

And sea-inspired chocolates are a great way to finish off the picnic!

Here is my recipe for Turkey, Egg, and Cheese Baguettes:

3-4 tbsp. mayonnaise

1 – 1 1/2 tbsp Basil Pesto

1 1/2 – 2 tbsp soft goat cheese

Shaved turkey breast

Lettuce

Red Onion

Sliced Cheddar Cheese

2 sliced hard-boiled eggs

1 baguette

Butter

Directions:

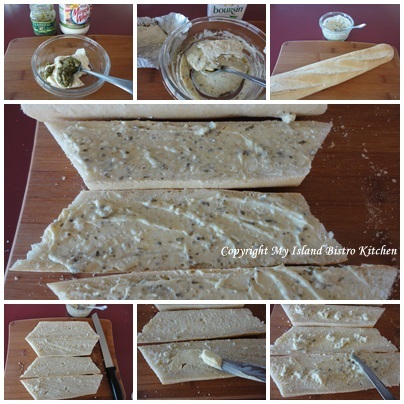
Cut baguette in two or three pieces, depending on length of baguette. Slice baguette pieces in half, lengthwise.   Butter both sides of the sliced baguette pieces.

Mix mayonnaise, pesto, and goat cheese.  Spread on both sides of baguette.

On one side of bread, add a layer of lettuce, followed by the shaved turkey breast, red onion, cheese slices, hard-boiled egg slices, and second layer of lettuce.  Place second slice of bread on top.

Wrap in parchment paper and tie with string.  It may be necessary to use toothpicks to help hold the filled baguette together, particularly if you are going to be traveling a distance with them.

Yield:  2-3 servings

So, even if you live in a big city and dream of being near a beach or water, you can still have a beach-themed picnic inland wherever you are, as I have done here.

I hope you have enjoyed coming along on my picnic today.

Thank you for visiting “the Bistro” today. There are lots of ways to connect with “the Bistro” through social media:

Join My Island Bistro Kitchen on Facebook
Follow the Bistro’s tweets on twitter @PEIBistro
Find the Bistro on Pinterest at “Island Bistro Kitchen”
Follow along on Instagram at “peibistro”


Glazed Strawberry Pie

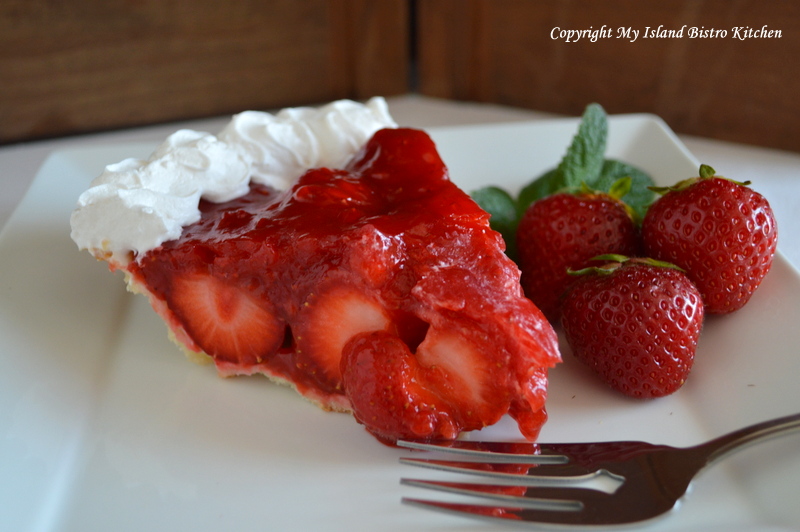
Glazed Strawberry Pie

There are so many things I like about summer in Prince Edward Island but one of my very favorite things is Glazed Strawberry Pie made with fresh, locally-grown Island berries.  After I have had a couple of “feeds” of plain berries, sugar, and milk, I am ready for them in other recipes.  One of those recipes always has to be fresh strawberry pie. Continue reading Glazed Strawberry Pie →

Old Country Rose Afternoon Tea

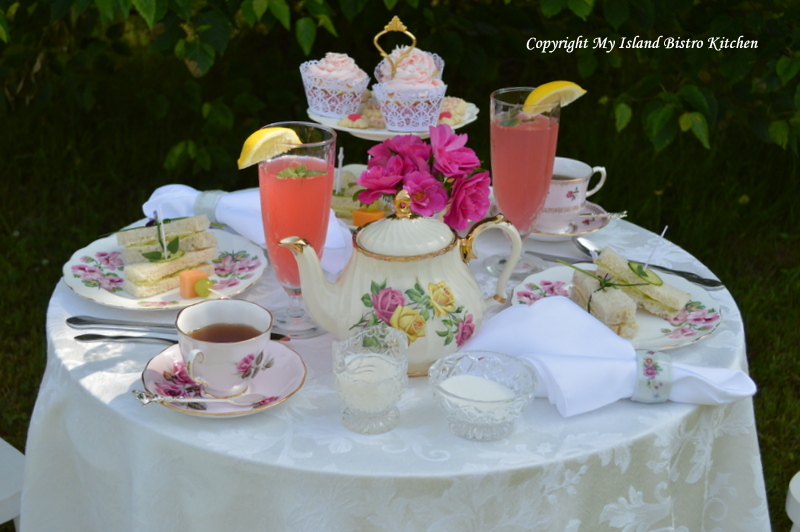
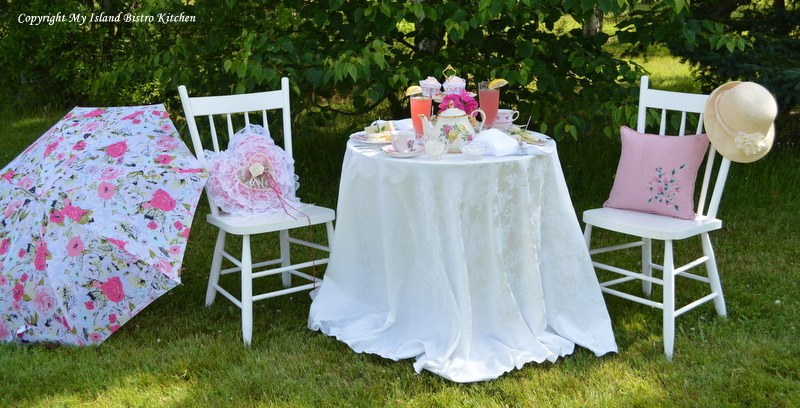
I love afternoon tea any time of the year.  However, I especially like a good cup of tea, dainty sandwiches, and of course, a sweet or two, outside on a warm and calm day in the summer.  Here on PEI, where we are surrounded by water, it is hard to find a day where there is not a breeze blowing.  However, last Saturday was such a day when the temperatures were soaring slightly past the 30C mark with hardly a breeze!   It was a good day for a summer tea under the shade of some big old trees.

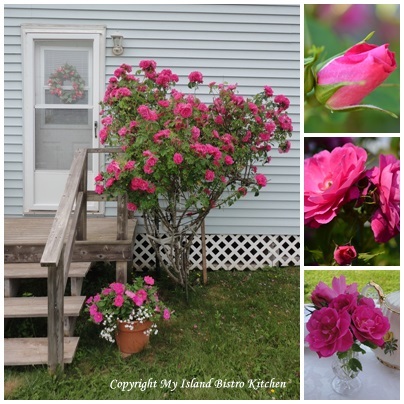
My inspiration for my teascapes comes from many sources, often from the season of the year, flowers in bloom, or a particular food item that I envision on a tea table.  My Old Country Rose Tea was inspired by an old rose tree we planted at the back door of the cottage 20 years ago.  It blooms profusely and every year we think it may just break apart or stop blooming but each year, it produces a bountiful profusion of beautiful deep rose-colored roses.  These roses are the kind that the blooms only last a day or two.  Our Atlantic winters are not kind and, being so close to the Northumberland Strait, salt spray is also an element our trees, shrubs, and bushes must contend with.  So, today’s teascape began with a small bouquet of roses from outside the back door.

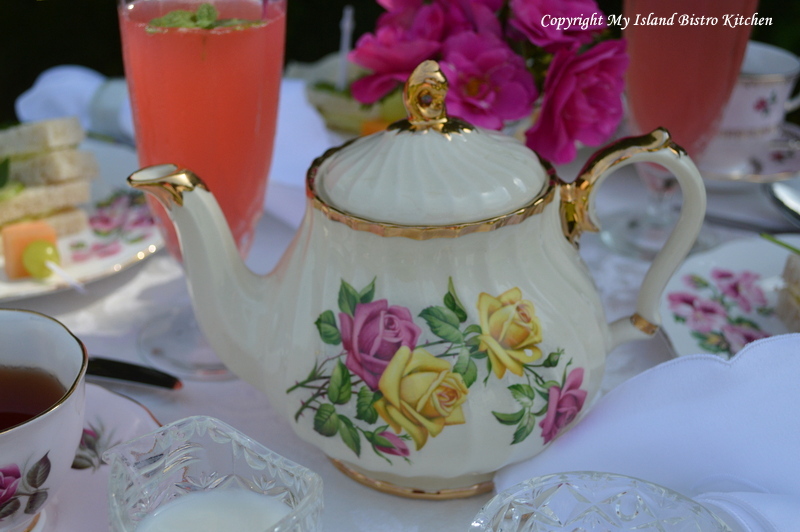
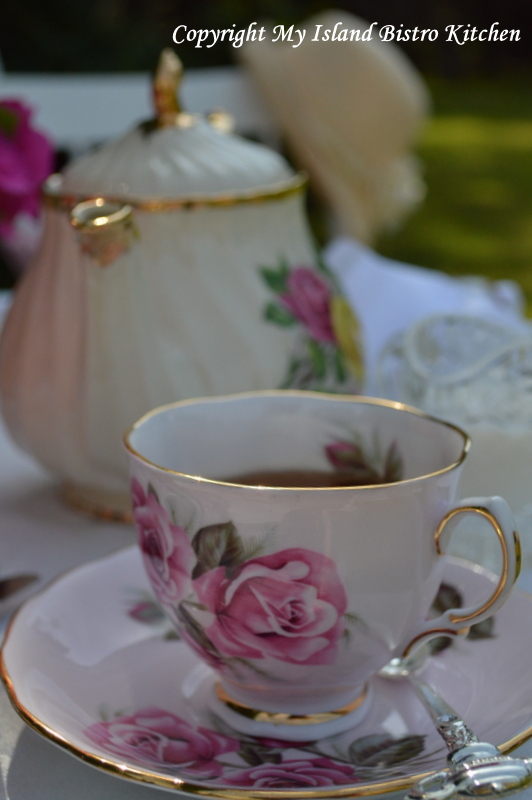
I looked through my collection of teapots to find one that would be suitable and selected this Sadler that seems very summery.

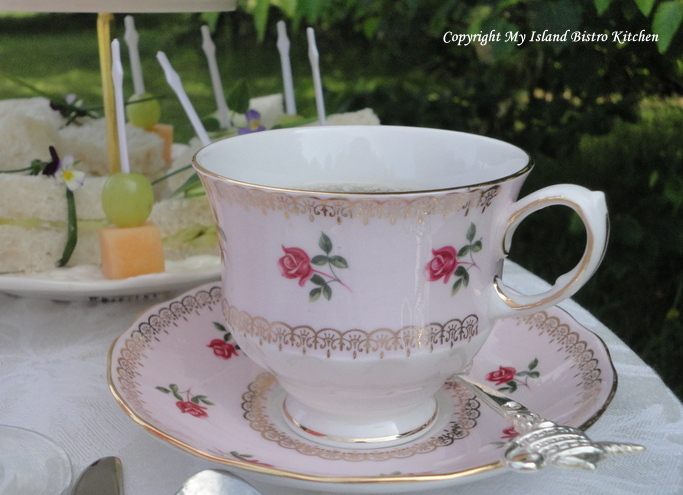
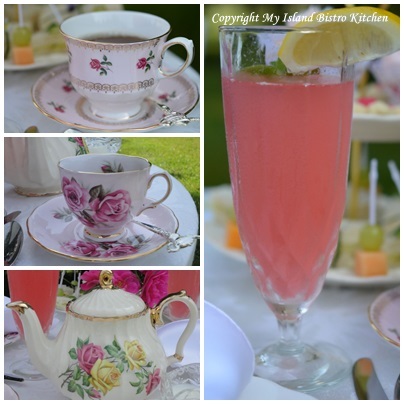
The teacups I chose featured roses as well.

Why does tea always seem to taste better in a china cup and saucer?

Teacups are too pretty not to be used.  I look for ways and opportunities to use and enjoy them rather than storing them away.

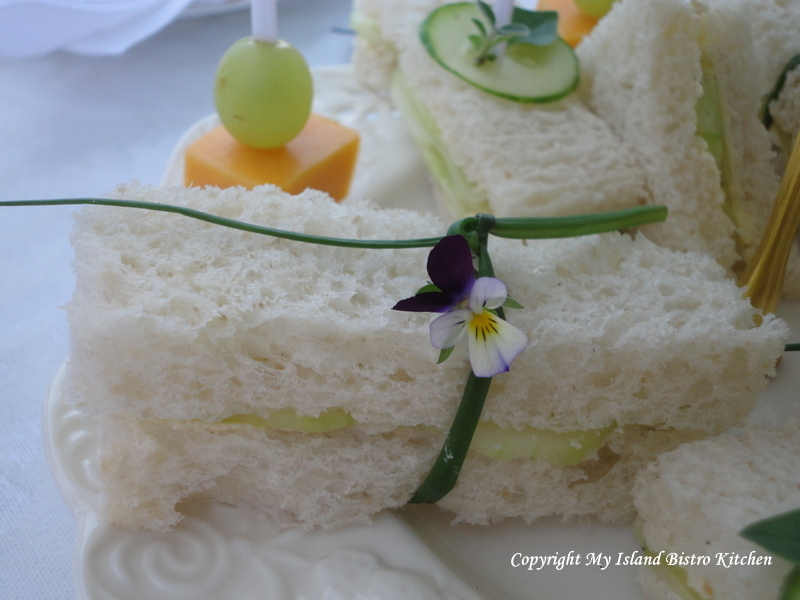
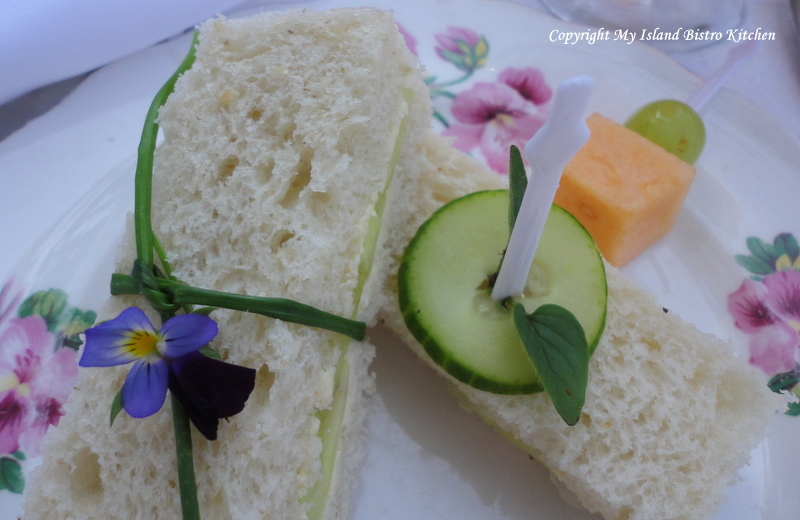
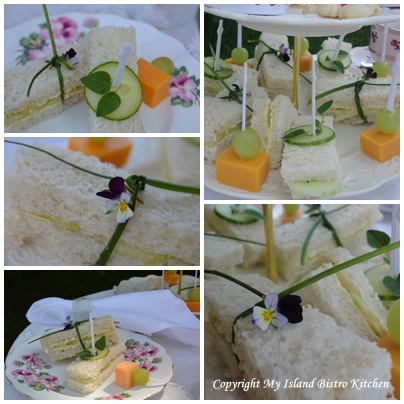
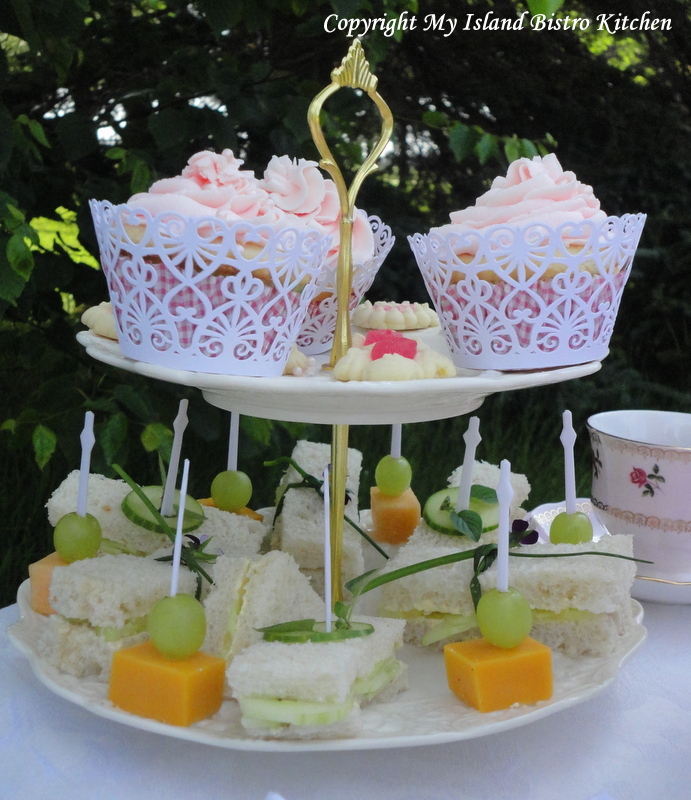
Because it was so hot, I chose to serve cool and refreshing cucumber sandwiches.

I love to decorate food with flowers….just make sure they are the edible kind!

Add cubes of melon, cheese, and some grapes.

This year, I made several bottles of Rhubarb Cordial so served some of this refreshing drink as well as Assam tea.

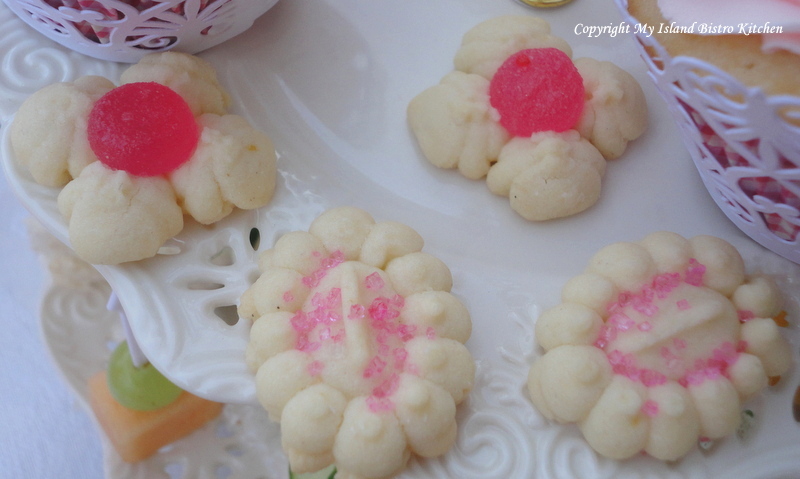
Naturally, there had to be something for the sweet tooth.  I made another batch of my Lemon Spritz Shortbread Cookies (my April 2013 “Cookie of the Month”) because they remind me so much of summer and are so light tasting.

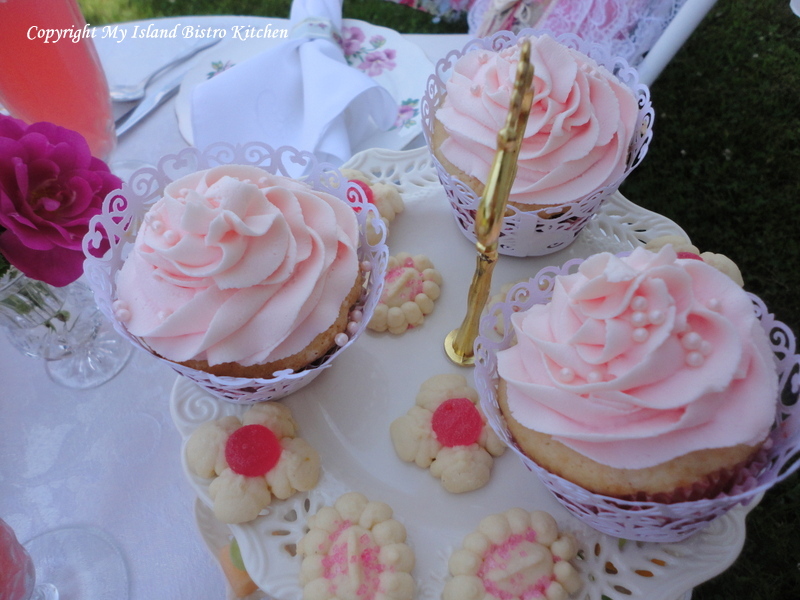
And, for the finale, vanilla cupcakes iced in rich buttercream icing.

Cupcakes are a simple and more informal way to serve cake at an event.

And, when it was all assembled, this is what the tiered tea tray looked like.

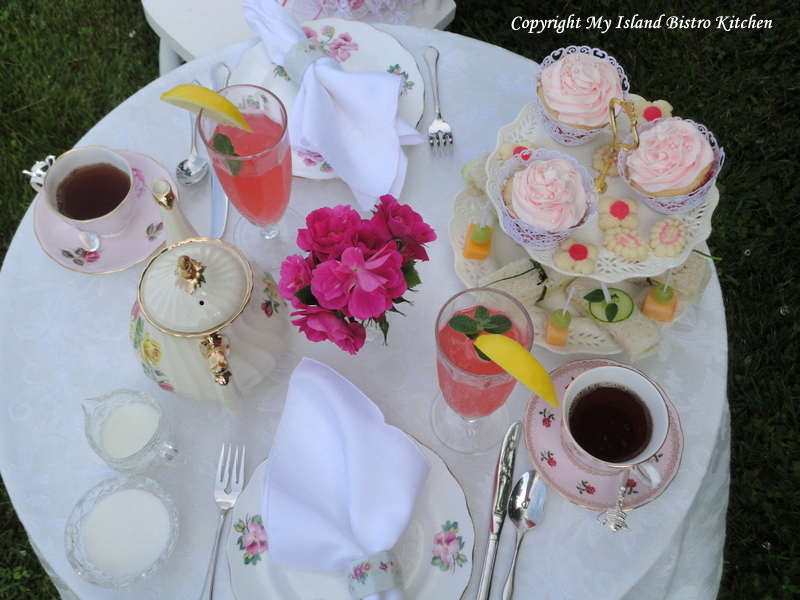
And, here is an overview of the tea table.

I hope you have enjoyed a glimpse into my early summer tea.

Thank you for visiting “the Bistro” today. There are lots of ways to connect with “the Bistro” through social media:

Join My Island Bistro Kitchen on Facebook
Follow the Bistro’s tweets on twitter @PEIBistro
Find the Bistro on Pinterest at “Island Bistro Kitchen”
Follow along on Instagram at “peibistro”
 

Canada Day Picnic

Happy Birthday, Canada!  Let’s celebrate with a picnic!

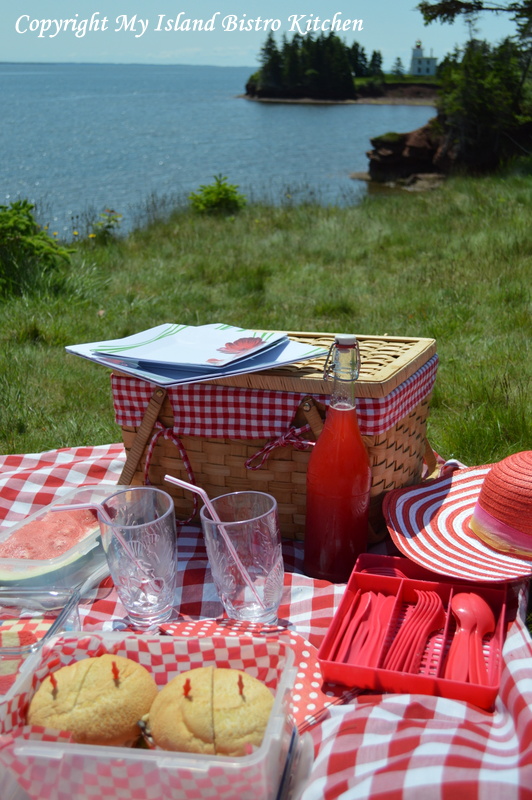
In keeping with the colors of the Canadian flag, as you can see, my color theme for the Canada Day picnic is red and white.

Prince Edward Island may be the smallest province in Canada but it boasts being the “Cradle of the Canadian Confederation” because Charlottetown, the capital city, was the location for the first meeting of the Fathers of Confederation in 1864 as they laid the groundwork for Canada to become its own country on July 1, 1867.  The Maritime Colonies (now Prince Edward Island, Nova Scotia, and New Brunswick) were meeting in Charlottetown in early September, 1864, to discuss the possibility of Maritime Union.   Representatives from Upper and Lower Canada (present-day Ontario and Quebec), upon hearing of this meeting, journeyed down the St. Lawrence River to Charlottetown to pitch the idea of a Canadian Union.   The individuals who attended this historic meeting became known as the Fathers of Confederation.

As these Fathers of Confederation landed at the Charlottetown Harbour, they disembarked and headed up Great George Street to what is now known as Province House where the meetings were held to discuss the possibility of Canadian Confederation.  The photograph below of Province House is taken from Great George Street and depicts what the Fathers would have seen as they made their way from the waterfront to this now historic site.

Province House - Charlottetown, PEI
Province House – Charlottetown, PEI

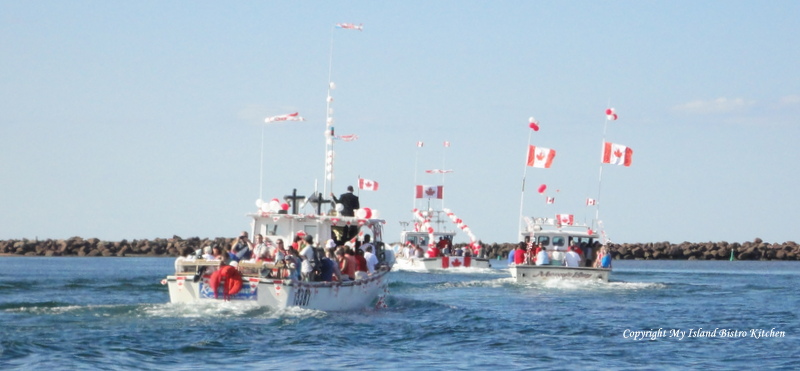
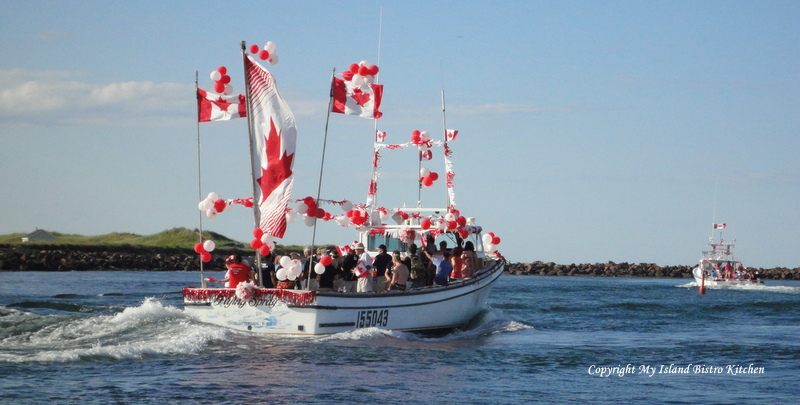
There are many celebrations happening across the Island and across Canada, to celebrate the birth of our nation.  One of the most colorful celebrations on PEI is the parade of fishing boats out of North Rustico Harbour, on the North side of the Island.  The photographs below are from the 2012 parade but, this being an annual event, a similar one will take place this year as well.

Fishing Boats on Canada Day Parade out of North Rustico Harbour, PEI

The parade of fishing boats is quite a spectacular event that always draws a large crowd as dozens of fishing boats from North Rustico and neighbouring harbours are decorated in red and white and sail out of the harbour with Canadian flags waving in the breeze.  If you are on the Island on Canada Day and have never attended this event, I recommend it as a must-see festivity for Canada Day as it shows true Canadian spirit.

This year, I am on the South side of the Island, having chosen the National Historic Site of Port-la-Joye/Fort Amherst that overlooks beautiful Charlottetown Harbour, as the scenic location for a Canada Day picnic as our celebration of Canada’s birthday.

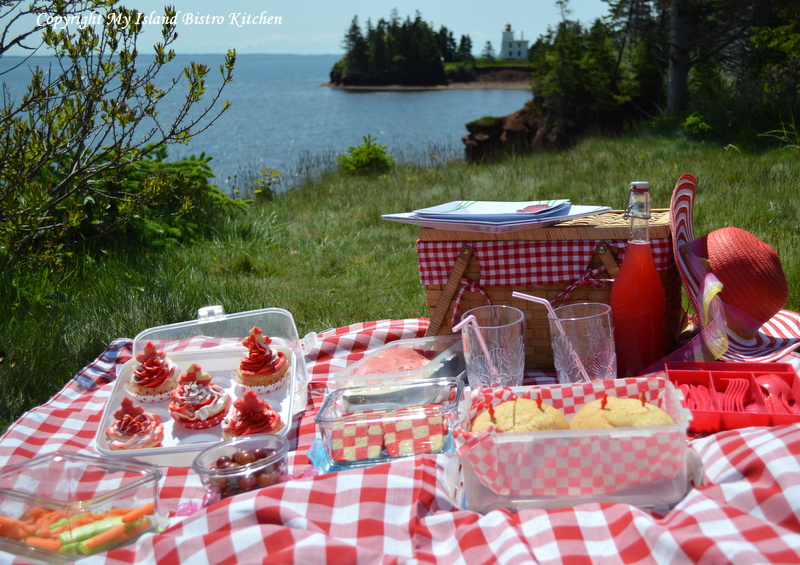
Port-la-Joye/Fort Amherst is located in Rocky Point, PEI.  In the background of the photo below, you can see the Blockhouse Point Lighthouse, established in 1851, the second oldest lighthouse on the shores of PEI.  This lighthouse is on the west side of the entrance to Charlottetown Harbour and guides ships entering the Harbour.  Many ships come and go past this historic lighthouse, including dozens of cruise ships that make Charlottetown one of their port stops.

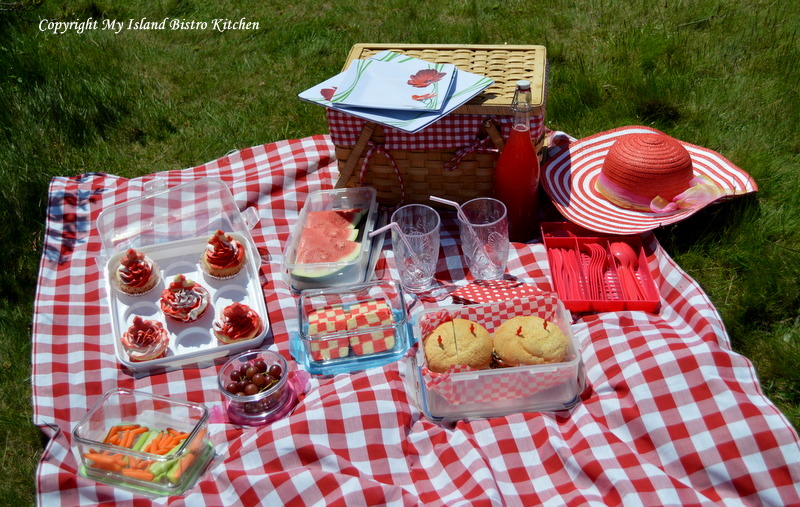
Canada Day Picnic at the Port-la-Joye/Fort Amherst National Historic Site in Rocky Point, Prince Edward Island

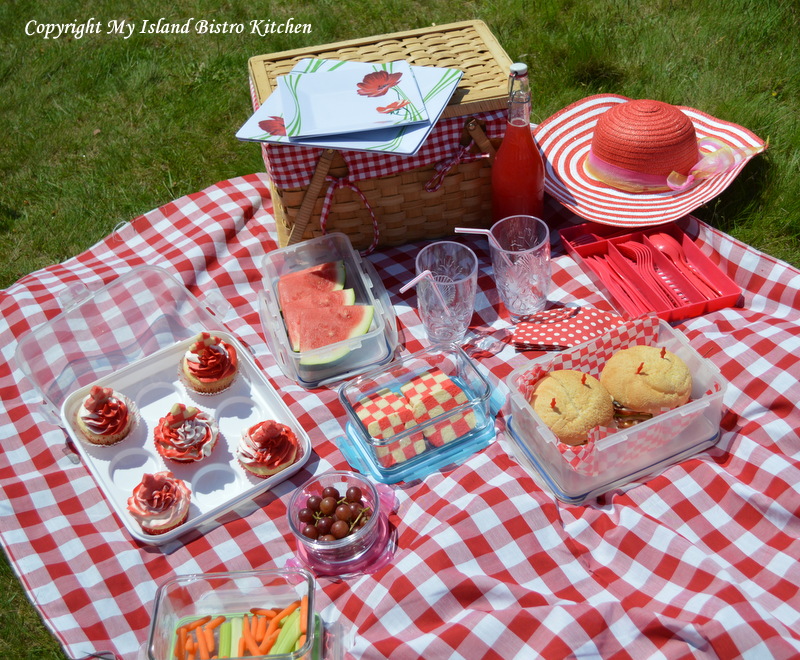
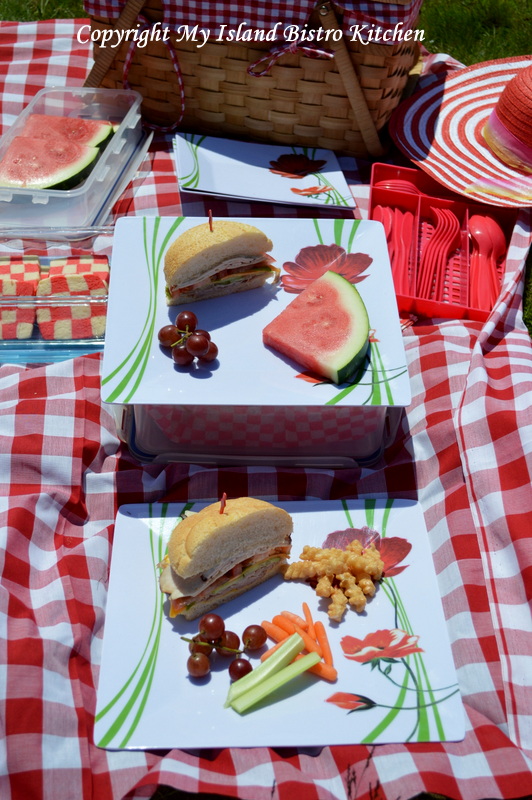
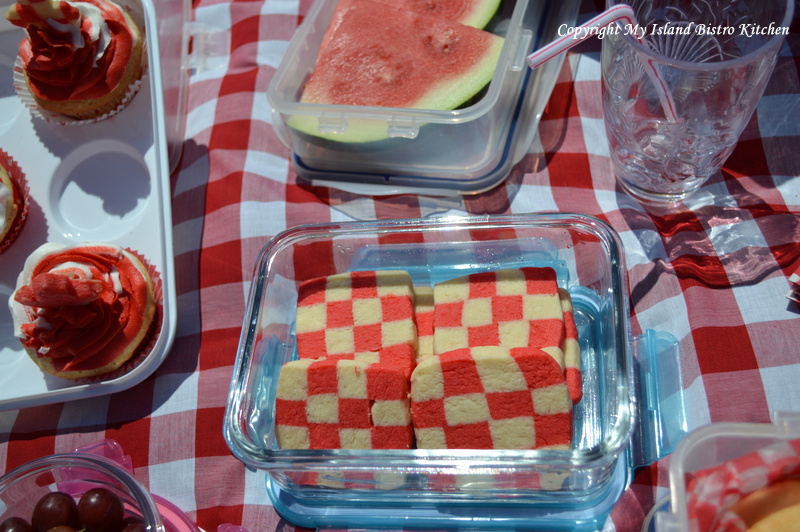
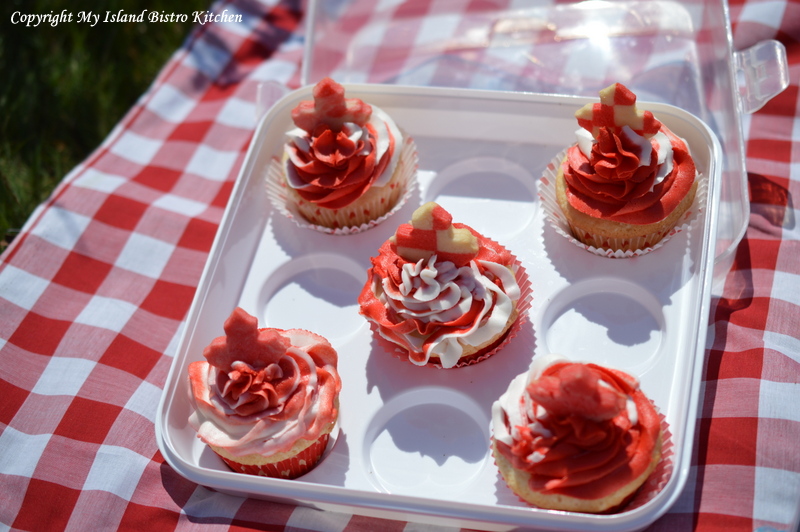
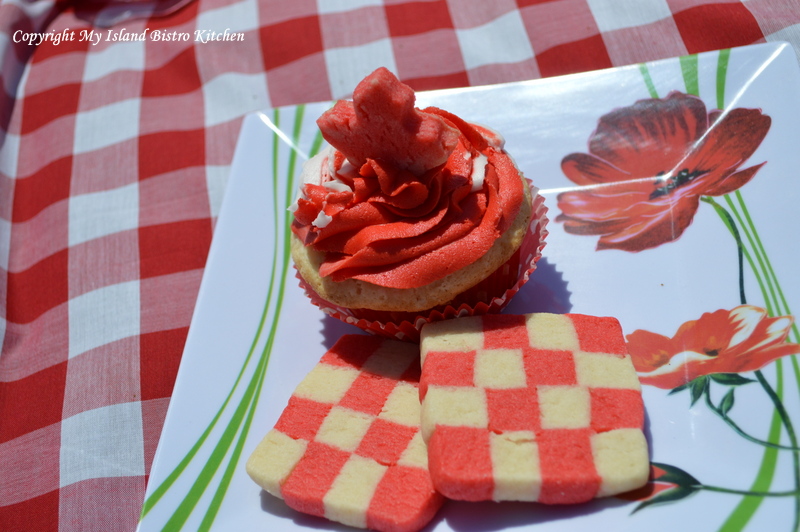
Here is the menu for the picnic:  Rhubarb Cordial, Kaiser Roll sandwiches, fresh veggies, grapes, watermelon, checkerboard sugar cookies, and vanilla cupcakes dressed in red and white buttercream icing and topped with miniature maple-leaf shaped sugar cookies.

I love the country look and feel of checkered tablecloths.  My antique picnic basket just happened to be lined with red checkered fabric so it fit right into the color theme.

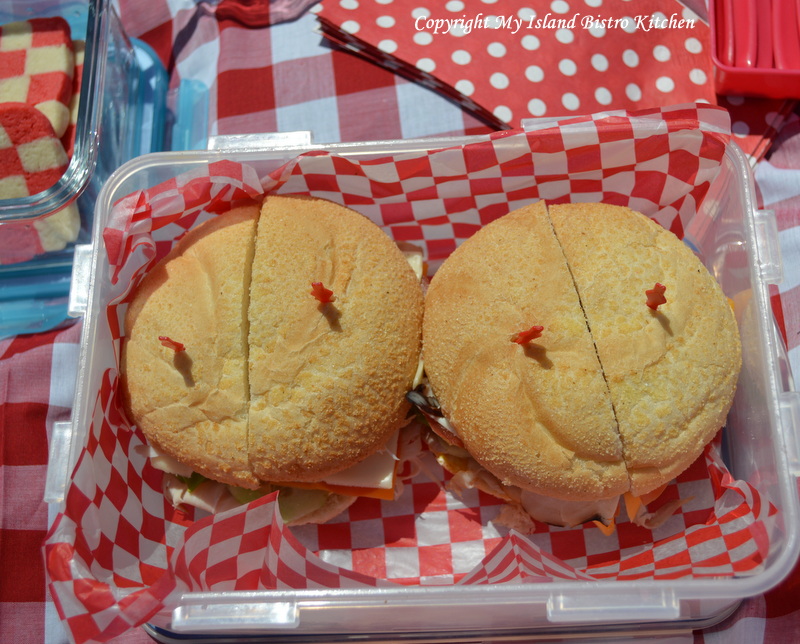
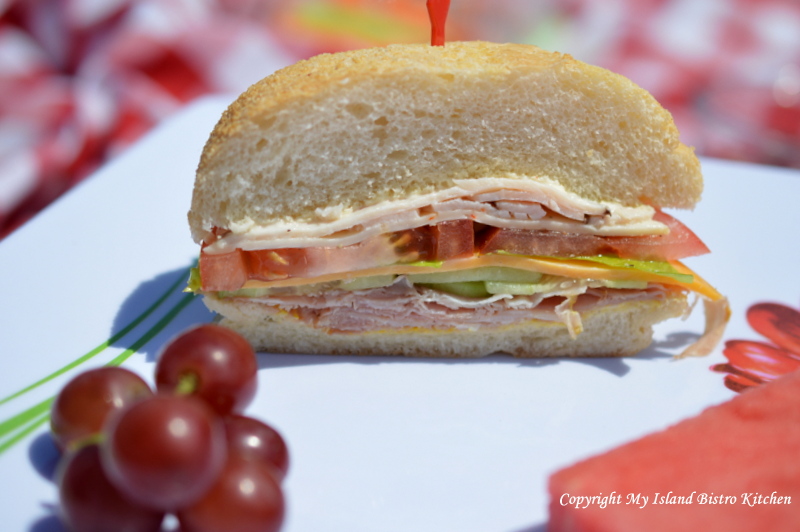
For the sandwiches, I chose good quality Kaiser rolls and filled them with tasty ingredients.  I started with a spread of mustard on one half of the roll and mayo on the other half.  On the bottom half of the roll, I then added several pieces of shaved Tuscan ham, followed by a layer of cucumber slices, a slice of cheddar cheese, leaf lettuce, sliced tomato, a slice of Havarti cheese, and topped it off with shaved turkey breast.

Because this is a rather thick roll, I held it all together with piks to make it easier to handle.

Plastic picnicware has improved greatly over the past few years.  Some, like the ones in the photograph above, even have the look of fine dinnerware.  These durable and colorful plates actually just came from a local dollar store.  Using unbreakable dinnerware for picnics makes the occasion much more relaxed for everybody as there are no worries about breakage.

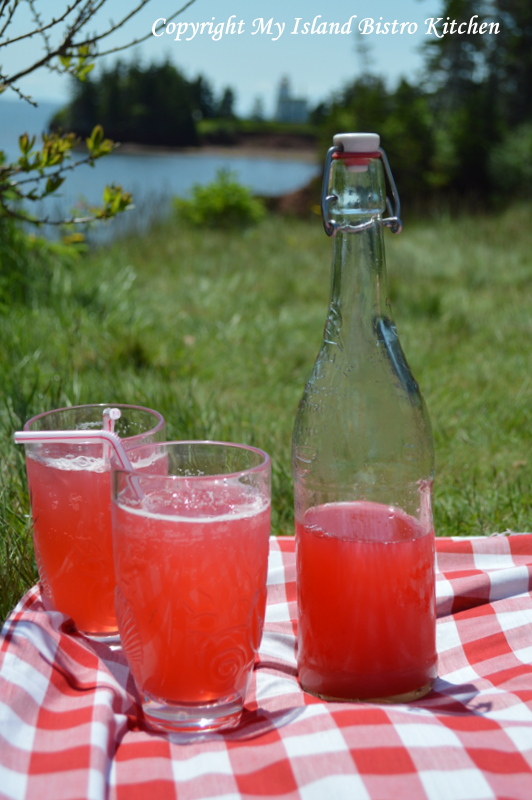
For beverage, I selected my Rhubarb Cordial to which I added fizzy lemon-lime soda.  The red color fit right in and the refreshing taste is unbeatable on a warm summer day.

Rhubarb Cordial
Rhubarb Cordial

Of course, every picnic menu has to have something for the sweet tooth.  I selected two offerings, the first being checkerboard sugar cookies – always a show-stopper and conversation piece.

Cupcakes always make a fitting end to any picnic, especially when they are laden with lots of tasty buttercream icing.

Canada Day Celebration Cupcakes

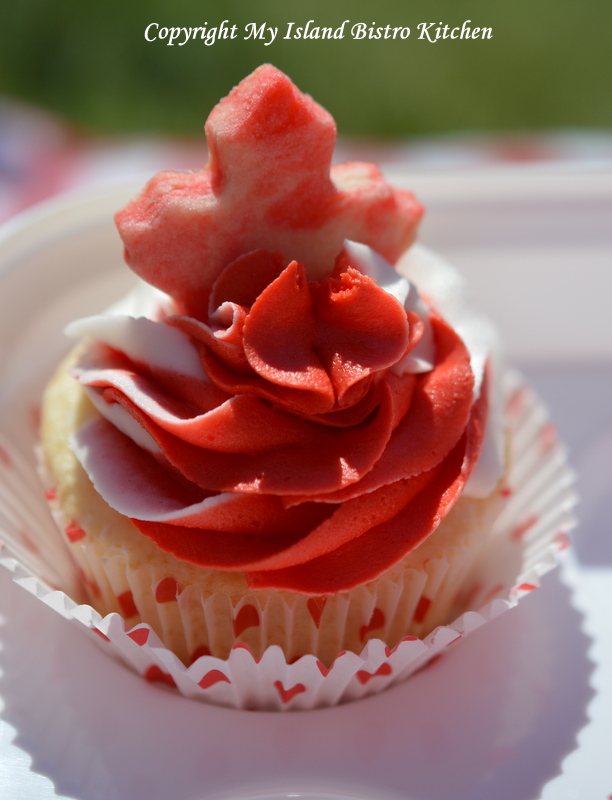
And the cupcakes are always better when they come with an extra treat of a tiny sugar cookie shaped like a maple leaf.

These would surely put anyone in the Canada Day spirit, don’t you think!

I hope you have enjoyed coming along on our Canada Day picnic.

Thank you for visiting “the Bistro” today.  

There are lots of ways to connect with “the Bistro” through social media:


Join My Island Bistro Kitchen on Facebook
Follow the Bistro’s tweets on twitter @PEIBistro
Find the Bistro on Pinterest at “Island Bistro Kitchen”
Follow along on Instagram at “peibistro”


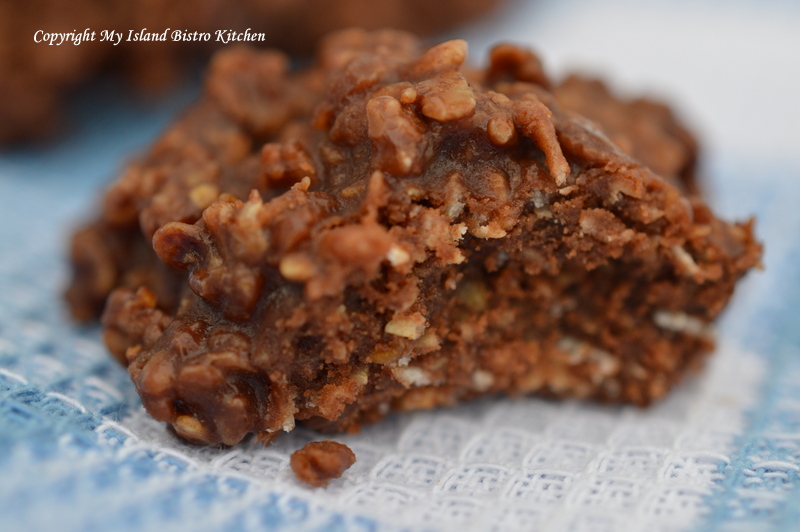
Spider Cookies Recipe


Oh, these bring back sweet childhood memories!  I grew up knowing these as “Spider Cookies” though they are known by a host of other names, too.  Sometimes, they are simply called “Uncooked Chocolate Cookies”.  Regardless their name, they are simple to make and very tasty; in fact, I’d say they are a close neighbour to candy. Continue reading Spider Cookies Recipe →

Lady’s Slipper Afternoon Tea

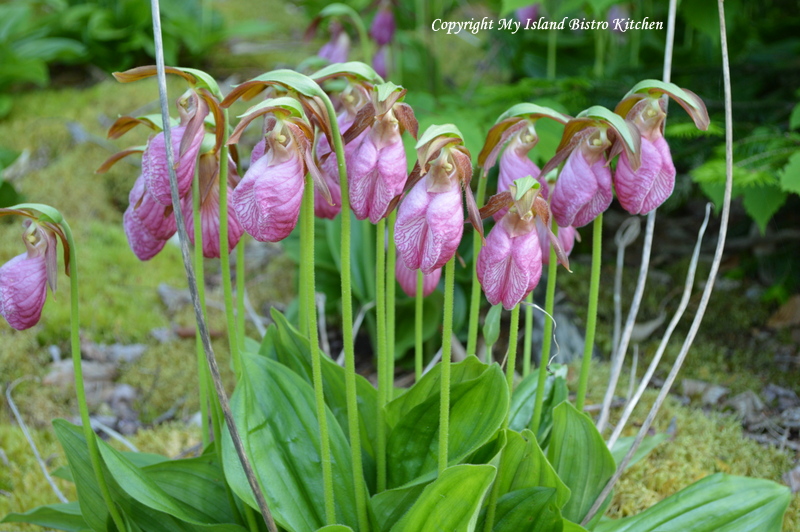
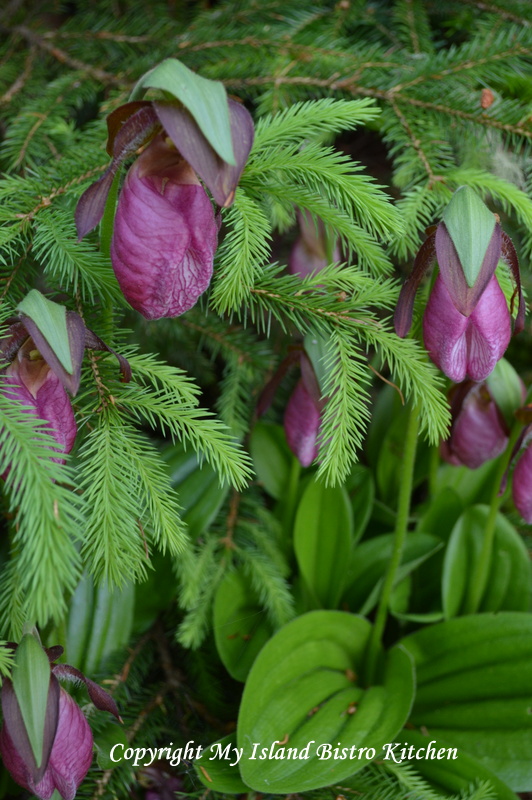
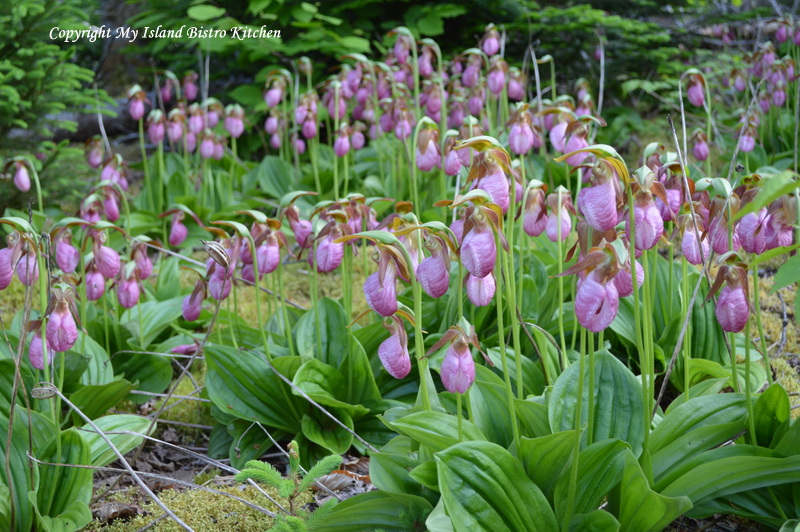
Lady's Slipper - The Provincial Flower of Prince Edward Island
Lady’s Slipper – The Provincial Flower of Prince Edward Island

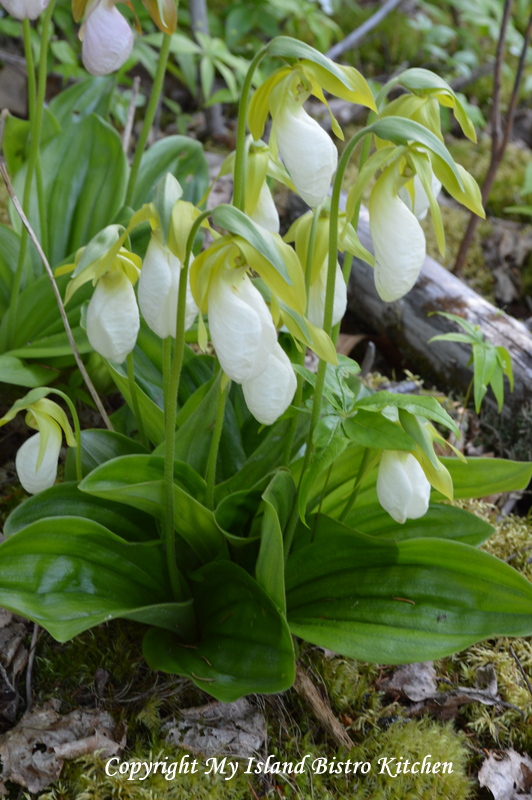
June brings a plethora of flowers to bloom on Prince Edward Island.  None are more exquisite than the Lady’s Slipper, so named because its petals form a shape that resembles a slipper.  This member of the orchid family blooms on the Island in late May – June in moist, wooded areas, often under spruce, beechwood, or pine trees.

The Lady’s Slipper was adopted as the Island’s provincial flower on April 24, 1947.

If you come across these beautiful orchids that bloom in both pink and white in PEI, please just admire and enjoy them in their natural surroundings or take some photographs of them.  Please do not pick these natural flowers as that will affect their seed for continued growth on the Island.  They also do not transplant well and generally do not survive outside their natural habitat.  All the more reason why they should just be enjoyed where they are found.

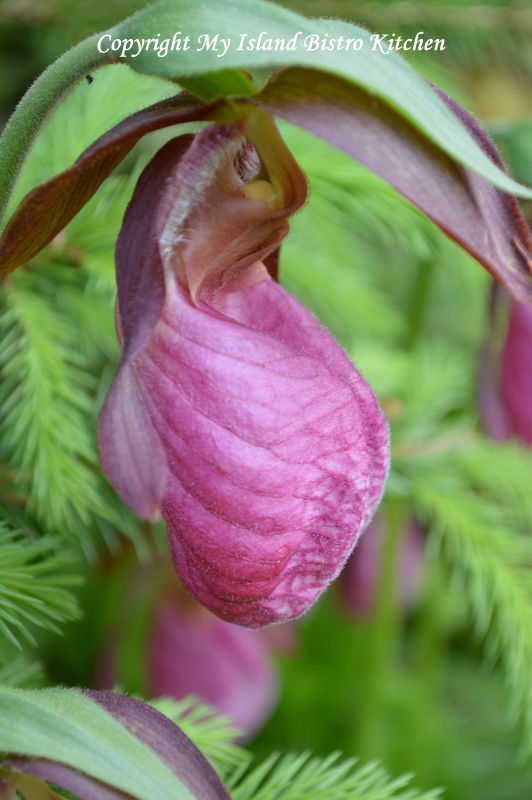
The close-up photograph below shows the petals of the Lady’s Slipper.  I think the shape resembles an animal of some sort!

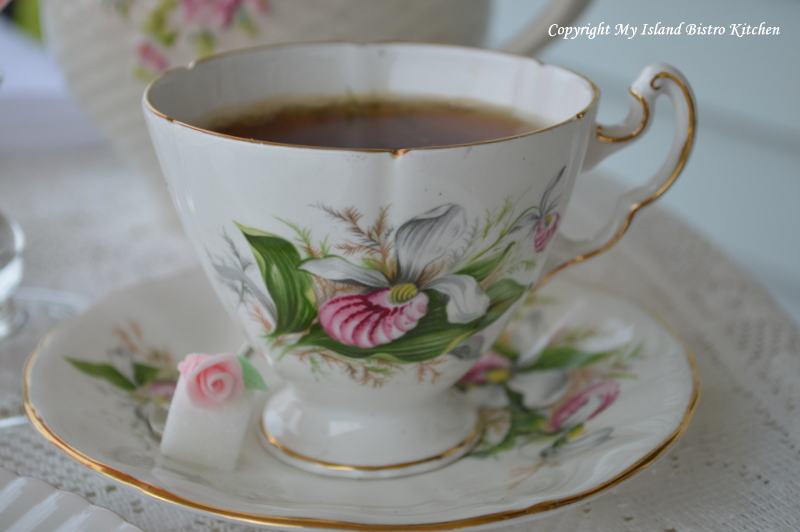
A few months ago, at a flea market, I came across a lovely plate with the Lady’s Slipper on it.  It is by Royal Adderley of England.  I bought the cake plate and moved along a few tables where I discovered a matching cup and saucer from a different vendor.  Of course, those purchases set my mind to thinking about an afternoon tea featuring the Lady’s Slipper china.

For the menu, I wanted to also feature some local, seasonal food product.  Rhubarb is still available on the Island so my choice was to start with a refreshing Rhubarb Cordial and serve a Rhubarb Torte with a good quality Assam tea.

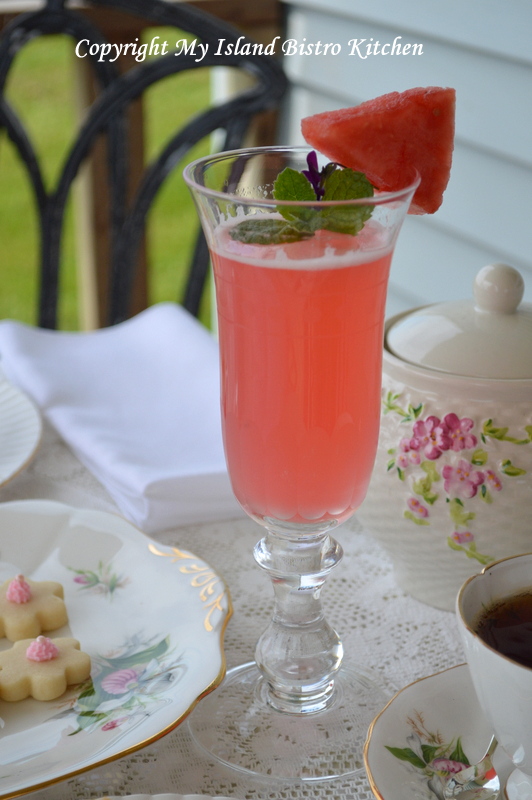
Rhubarb Cordial
Rhubarb Cordial

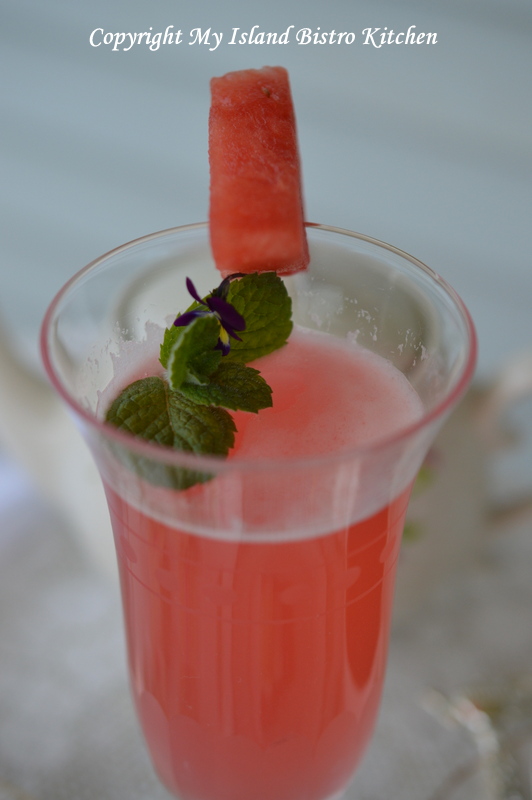
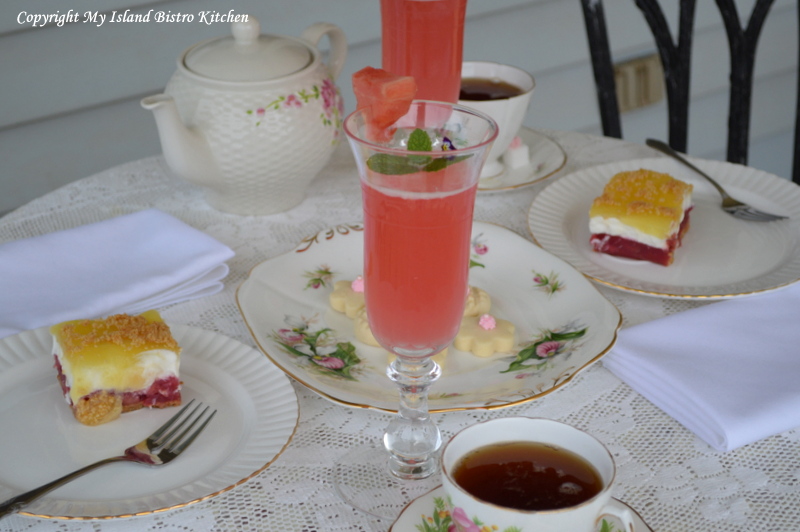
Rhubarb Cordial makes a wonderful, refreshing drink on a hot summer’s day.  I garnished the drink with a wedge of watermelon, a sprig of mint from our herb garden, and a tiny pansy.

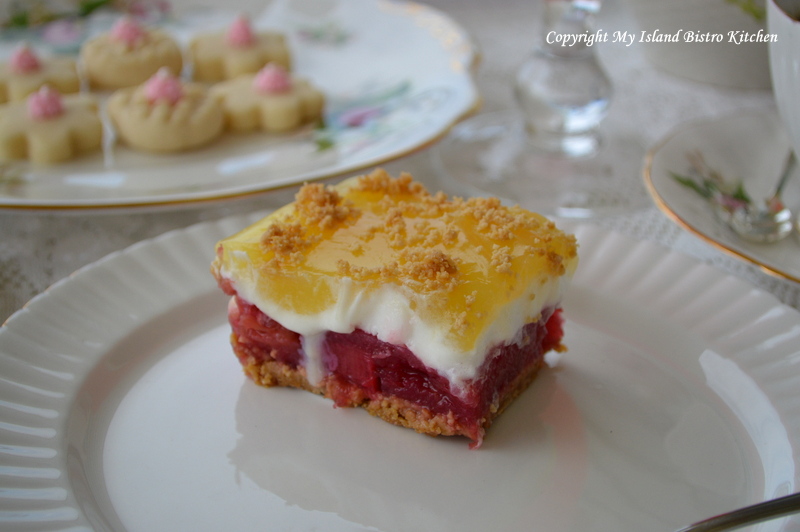
The “pièce de résistance” is the luscious Rhubarb Torte.  Our rhubarb season will soon be drawing to a close but I just had to have one more rhubarb dessert before that happens.  Of course, I have bags of it stored away in my freezer to enjoy throughout the year.

Rhubarb Torte
Rhubarb Torte

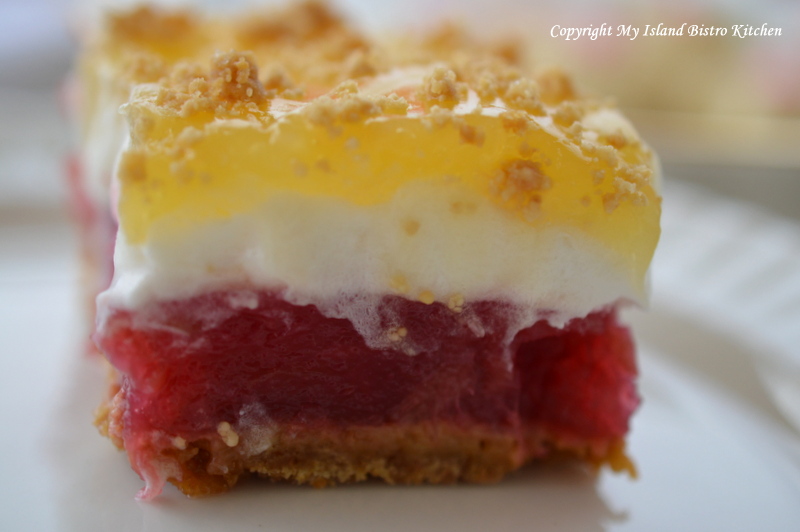
This torte features a graham wafer crumb base, followed by rhubarb sauce, smothered in whipped cream and marshmallows, and topped with vanilla pudding.  It’s as showy and colorful as it is tasty!  I love how the pudding on top looks translucent.

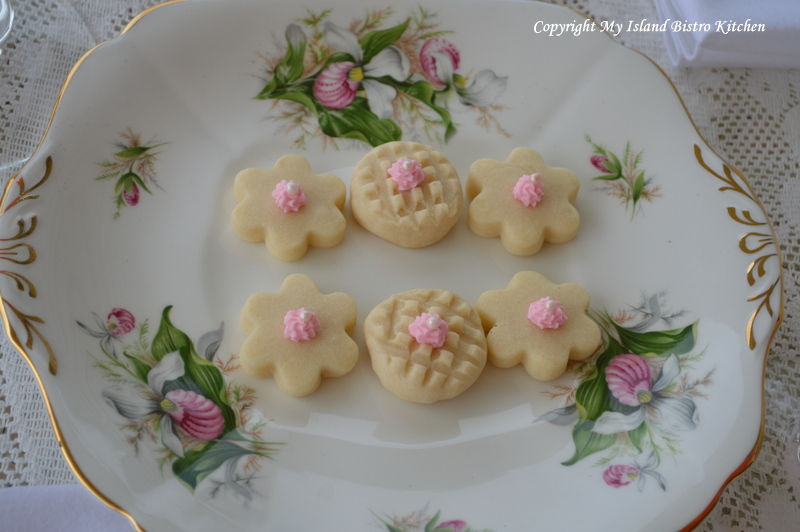
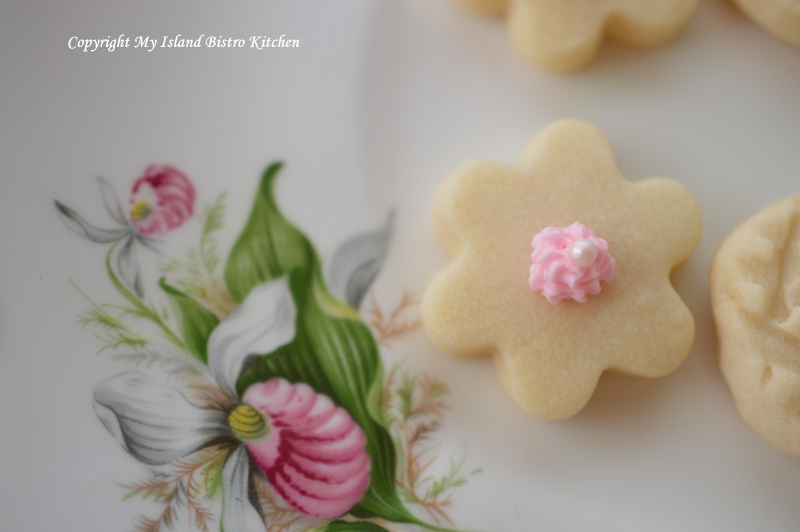
These tiny shortbread cookies, decorated in pink, just seemed the fitting addition for the Lady’s Slipper plate.

The photo below shows the detail in the plate design.

And the matching cup and saucer is filled with Assam tea.

The Rhubarb Cordial and the Rhubarb Torte make for a colorful tea table!

Thank you for visiting “the Bistro” today. There are lots of ways to connect with “the Bistro” through social media:

Join My Island Bistro Kitchen on Facebook
Follow the Bistro’s tweets on twitter @PEIBistro
Find the Bistro on Pinterest at “Island Bistro Kitchen”
Follow along on Instagram at “peibistro”
 

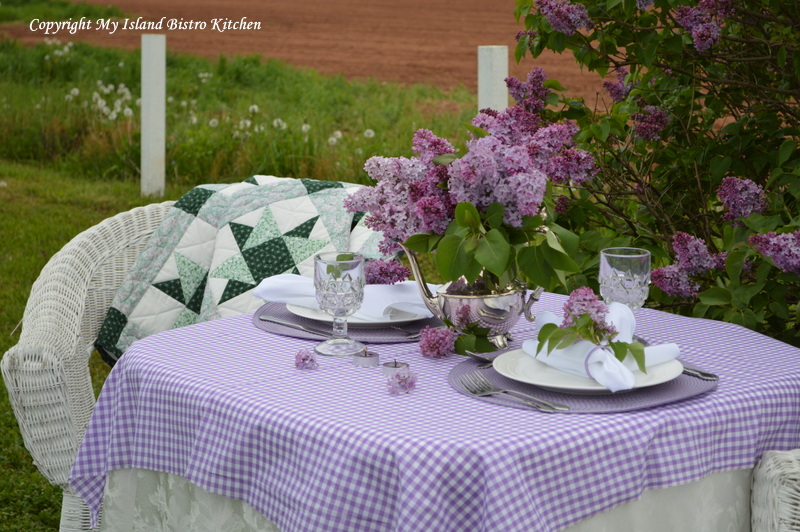
Lovely Lilac Tablescape

I adore lilacs!  I love their scent, color, and shape.  I will admit they do have a very strong scent so I rarely bring them indoors.  So, that causes me to use them in tablescapes for Al fresco dining.  Lilacs are always something I look forward to in June.

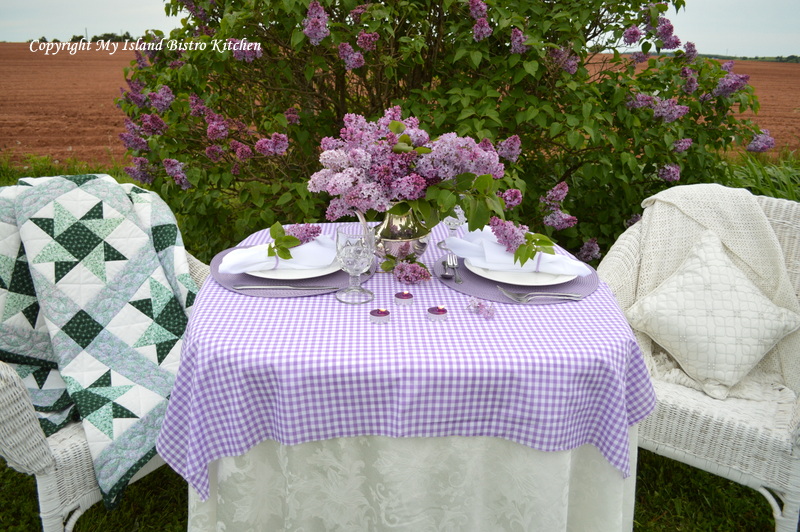
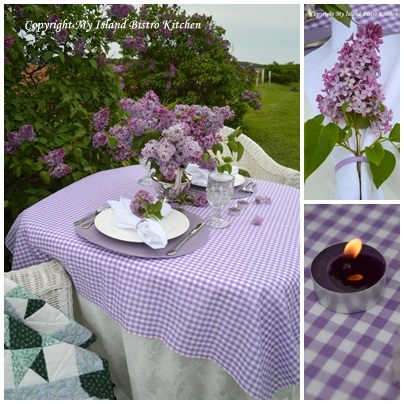
We have a number of lilac trees and they make a wonderful backdrop for a June dinner.  In the background, you’ll notice the  red soil, characteristic of Prince Edward Island!  This field has just been planted with potatoes.

Although it doesn’t show in the photo above, there is mauve in the quilt on the chair.  Purple and all its shades, tints, and hues – yes, my favorite color!  The quilt, entirely hand-quilted, was made by my mother.

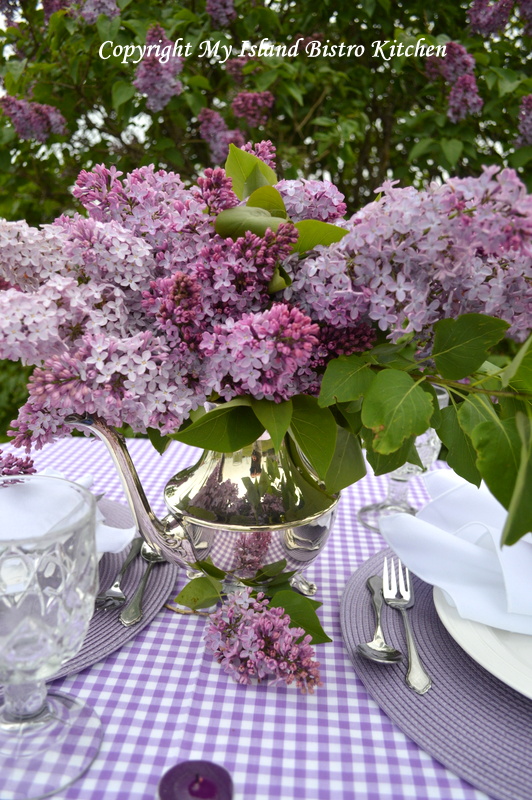
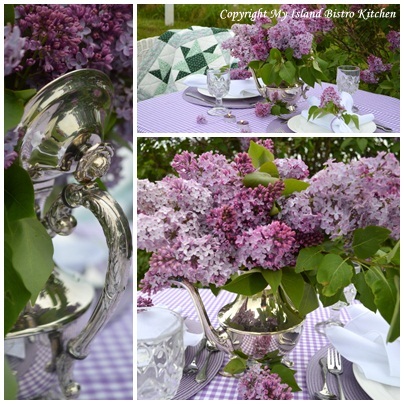
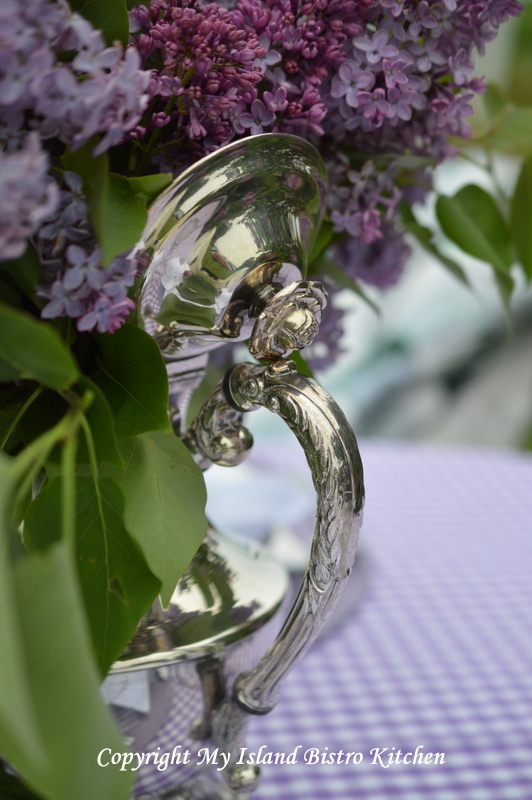
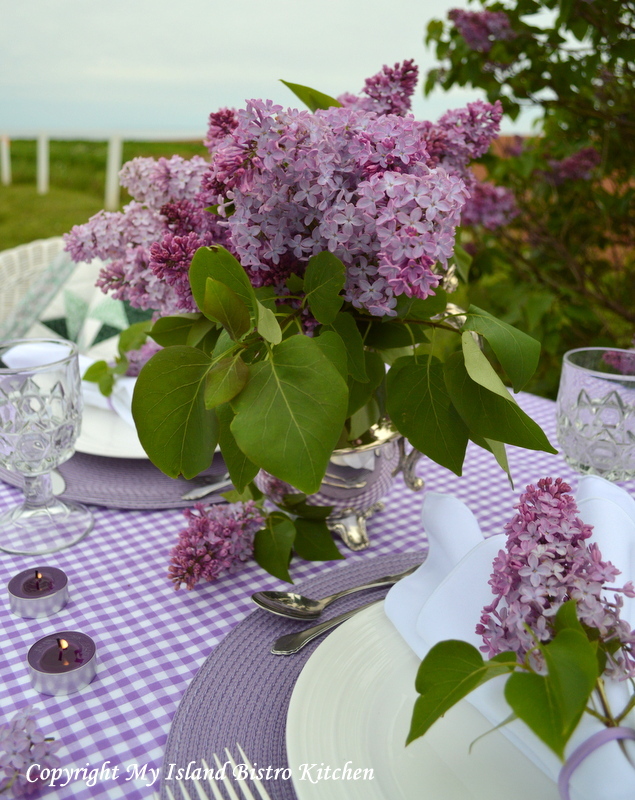
I have an old silver coffeepot that has seen better days so I have re-purposed it and it now makes a ready vase for flowing flowers such as lilacs.

Lilacs do not require a lot of arranging since nature has pretty much arranged them beautifully in bunches on the tree already!

Some day in the winter, I will look at these photos and try and remember it really was warm enough to dine Al fresco in PEI!

The old coffeepot has such lovely detail on it that it was a shame not to find another purpose for it.

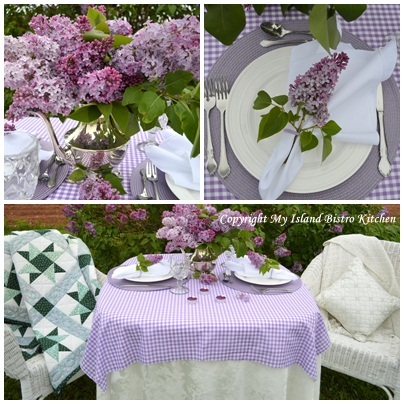
I have always liked checked tableclothes.  This mauve one just seemed the perfect match for the lilacs.

When you like a color, it’s never hard to find matching accessories around the house, like the purple tealights and mauve placemats.

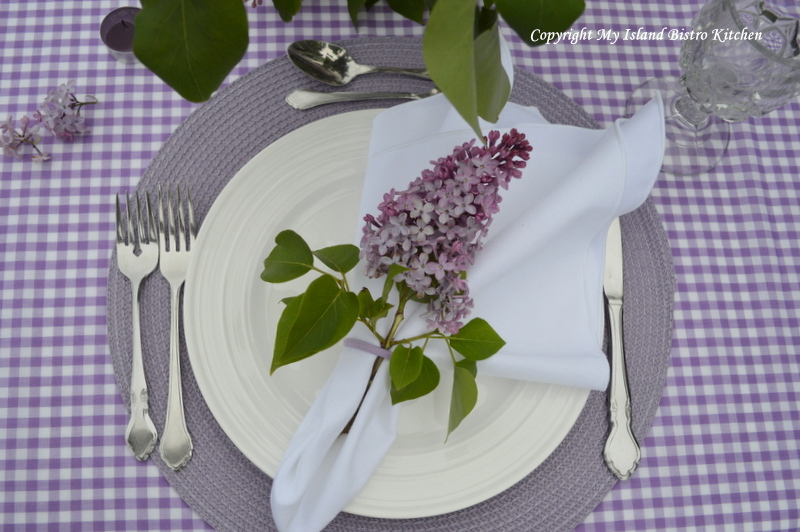
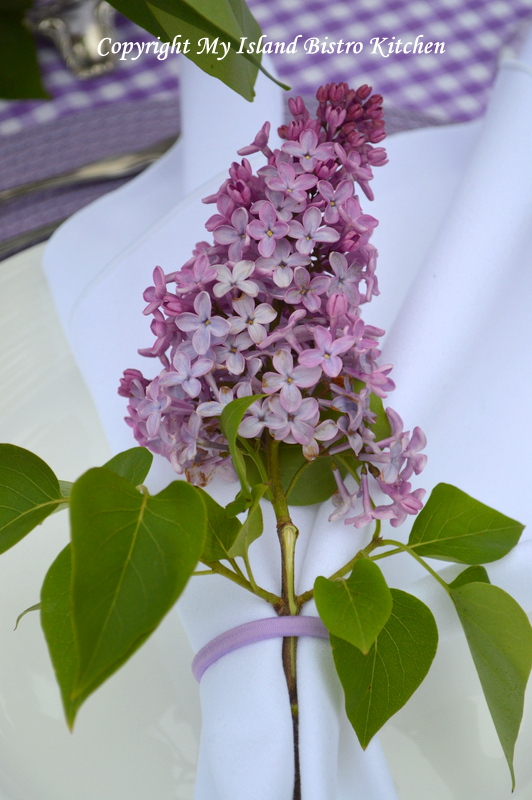
For the napkin, I loosely gathered the fabric, used a mauve hair elastic (yes a new one!), and inserted a lilac stem into the fold.

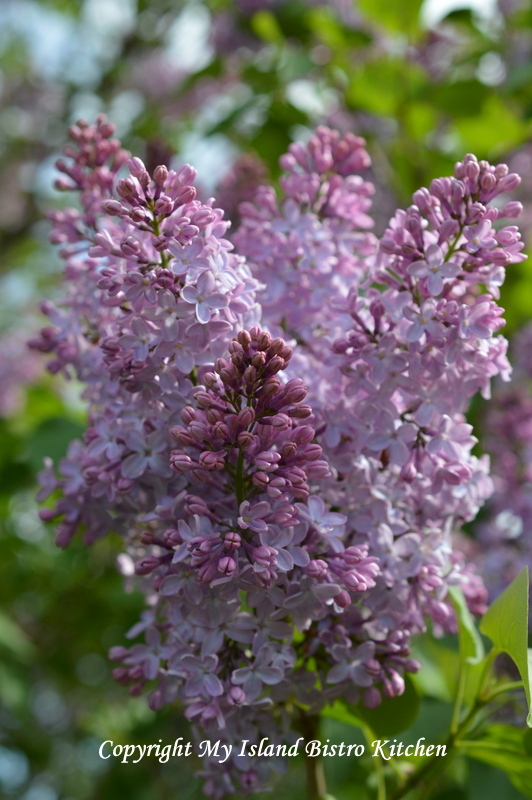
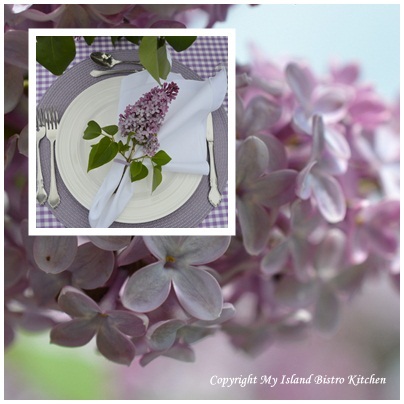
Lilacs don’t last long.  They are here and gone before we know it.

These are just a standard lilac, no particular variety.  Last year, I planted two French lilac trees and was surprised to see both bloom this year.

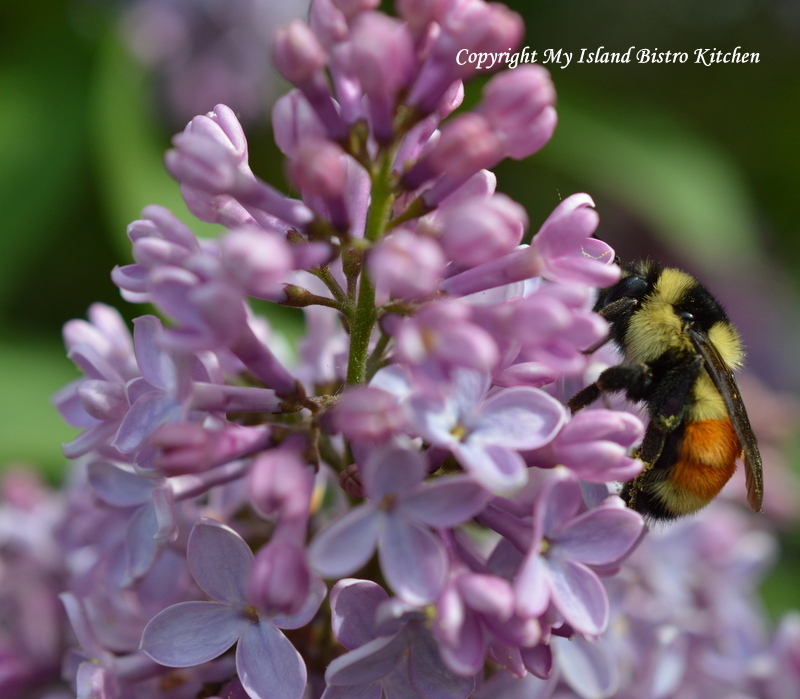
The bumblebees love the lilacs and are frequent visitors to our trees!

Thank you for visiting “the Bistro” today. There are lots of ways to connect with “the Bistro” through social media:
Join My Island Bistro Kitchen on Facebook
Follow the Bistro’s tweets on twitter @PEIBistro
Find the Bistro on Pinterest at “Island Bistro Kitchen”
Follow along on Instagram at “peibistro”