These gluten-free melting moments cookies prove that being on a gluten-free diet does not mean one has to compromise on favorite sweet treats!
I use a 1-to-1 gluten-free baking flour, such as Bob’s Red Mills brand, for these cookies. I also add a small amount of very finely ground almonds to the batter as this lends a tenderness to the cookie crumb which justifies the name of the cookies because they do melt in the mouth!
Gluten-free Melting Moments
These cookies are very easy to make. Mix up the dough. Pinch off small amounts of the dough and form into small balls. Place on parchment-lined baking sheets and flatten with the tines of a fork. Bake. It’s really no more complicated than that!
Gluten-free Melting Moment Cookie
[Printable recipe follows at end of posting]
Gluten-Free Melting Moments
Ingredients:
½ cup butter, softened at room temperature
¼ cup icing sugar (aka confectioner’s sugar or powdered sugar)
¼ tsp pure vanilla
½ cup 1-to-1 gluten-free baking flour
¼ cup finely ground almonds
¼ cup cornstarch
Method:
Preheat oven to 325°F. Line baking sheets with parchment paper.
Cream butter. Add the icing sugar and cream well with the butter. Mix in vanilla.
In separate bowl, whisk the flour, ground almonds, and cornstarch together. Add to the creamed mixture and blend until well incorporated.
Form dough into small round balls (apx. 5/8 oz dough per ball). Place balls on prepared baking sheets, about 2“ apart, and flatten each ball with the tines of a fork. Decorate with small bits of maraschino cherries, if desired.
Bake for approximately 15-18 minutes, just until edges of cookies start to tint a golden tan color. Don’t over-bake. Let cool on baking sheet for 2-3 minutes then transfer cookies to wire rack to cool completely.
These melt-in-your-mouth gluten-free melting moments cookies have a tender crumb and delicate butter and almond flavor.
Ingredients
½ cup butter, softened at room temperature
¼ cup icing sugar (aka confectioner’s sugar or powdered sugar)
¼ tsp pure vanilla
½ cup 1-to-1 gluten-free baking flour
¼ cup finely ground almonds
¼ cup cornstarch
Instructions
Preheat oven to 325°F. Line baking sheets with parchment paper
Cream butter. Add the icing sugar and cream well with the butter. Mix in vanilla.
In separate bowl, whisk the flour, ground almonds, and cornstarch together. Add to the creamed mixture and blend until well incorporated.
Form dough into small round balls (apx. 5/8 oz dough per ball). Place balls on prepared baking sheets, about 2“ apart, and flatten each ball with the tines of a fork. Decorate with small bits of maraschino cherries, if desired.
Bake for approximately 15-18 minutes, just until edges of cookies start to tint a golden tan color. Don’t over-bake. Let cool on baking sheet for 2-3 minutes then transfer cookies to wire rack to cool completely.
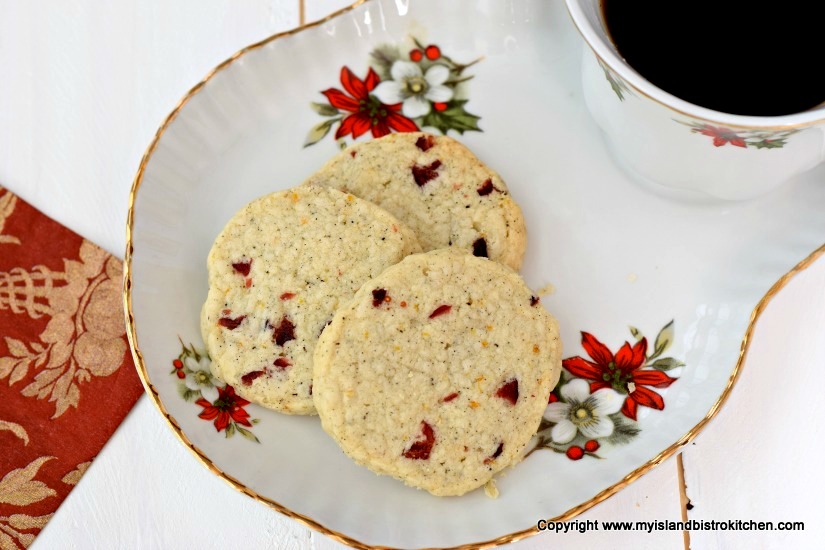
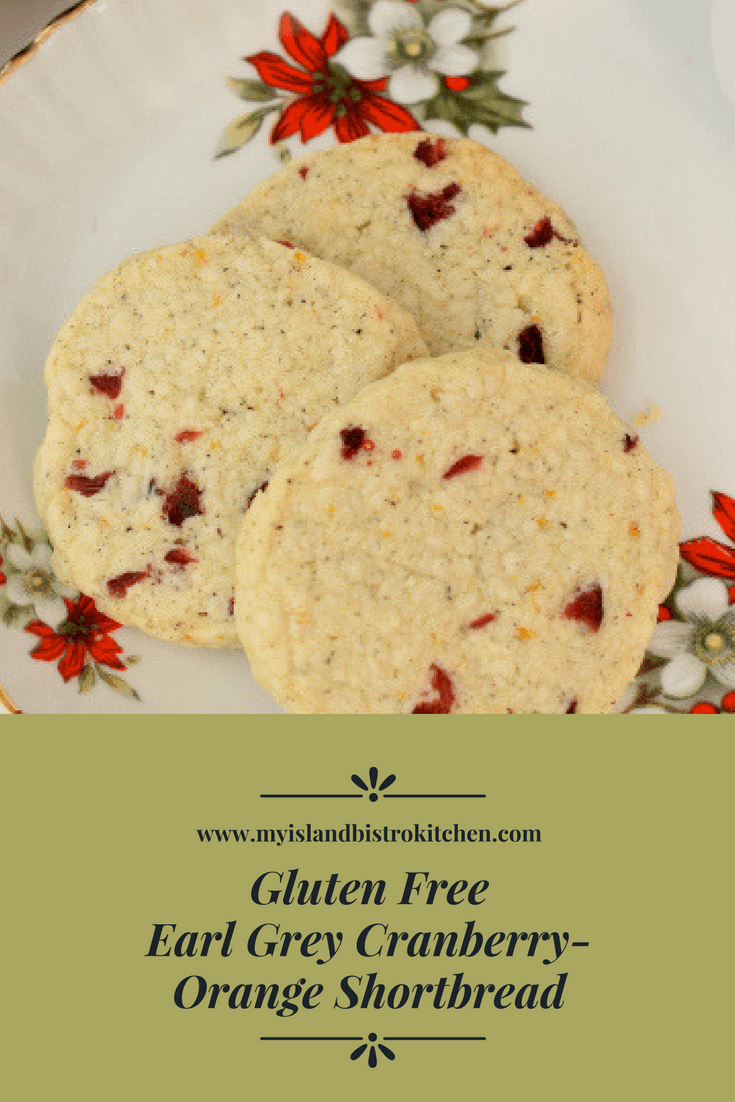
These easy-to-make Gluten-free Earl Grey Cranberry-Orange Shortbread cookies are brimming with flavor. The ground Earl Grey tea leaves lend a subtle hint of tea flavor as well as add wonderful specks of interest in the cookies. The addition of the dried cranberries and grated orange rind make these very flavorful and tasty cookies.
Gluten-Free Earl Grey Cranberry-Orange Shortbread
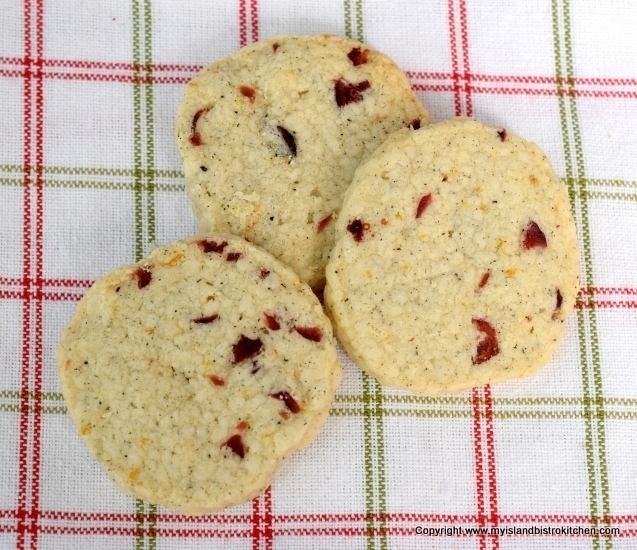
I have been having very good success using gluten-free baking flour, such as Bob’s Red Mill, Namaste, and Cup4Cup, for my gluten-free baking. The addition of the fine almond flour adds both flavor and a layer of tenderness to the shortbread crumb.
Gluten-Free Earl Grey Cranberry-Orange Shortbread
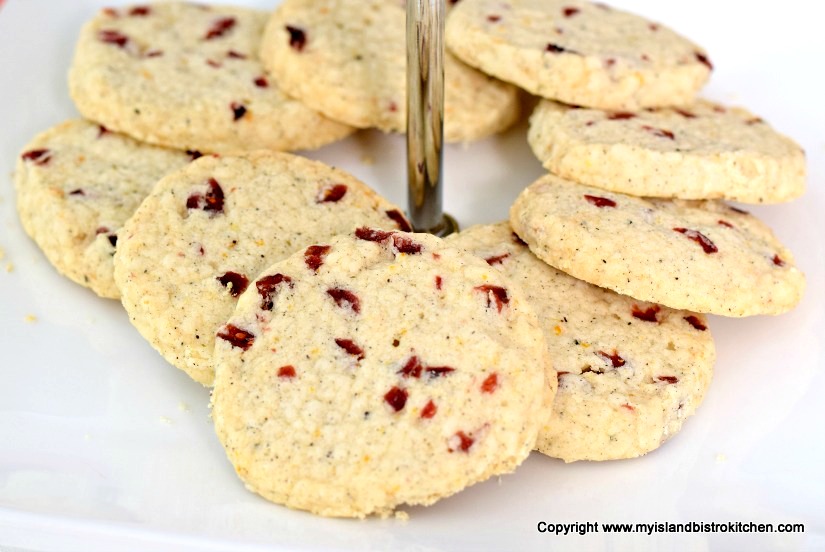
I use an old coffee grinder to grind the loose tea leaves very finely. This releases their essence which, in turn, infuses the dough with the tea aromatic. Use dried, not fresh or frozen, cranberries for these cookies and make sure they are chopped quite finely.
The dough will be quite soft so form it into a round log shape, wrap it tightly in plastic wrap or waxed paper, and refrigerate it for 2-3 hours before slicing and baking. Refrigerating the dough helps to firm it up enough so that, when sliced with a sharp knife, the slices cut cleanly. Empty cardboard paper towel rolls make great cylinder “sleeves” in which to chill the cookie dough because they help to keep the round shape. Simply slit open the paper towel roll, place the wrapped cookie log inside the “sleeve”, draw the edges of the cylinder together, and secure with tape. Rotate the cookie dough log a couple of times during the chilling process to distribute its weight and help to keep the round shape.
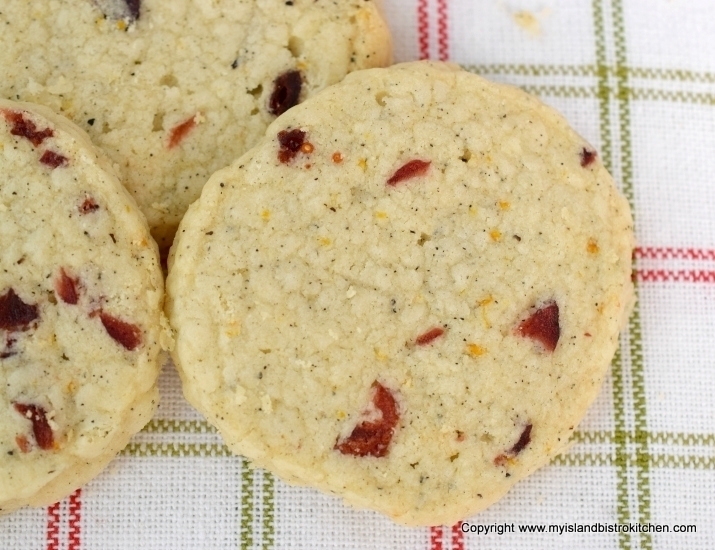
These cookies are a great addition to the menu of anyone on a gluten-free diet. In fact, anyone can enjoy these cookies, regardless whether they have a sensitivity or intolerance to gluten or not – I’ll bet you’d never guess they’re made with gluten-free flour!
Gluten-Free Earl Grey Cranberry-Orange Shortbread
[Printable recipe follows at end of posting]
Gluten-Free Earl Grey Cranberry-Orange Shortbread
Ingredients:
½ cup unsalted butter, softened at room temperature
½ cup sifted icing sugar (aka confectioner’s or powdered sugar)
¾ tsp finely grated orange rind
1/2 tsp pure vanilla
1/8 tsp almond flavoring
¾ cup gluten-free baking flour (e.g., Bob’s Red Mill, Namaste, or Cup4Cup)
¼ cup fine almond flour
1½ tbsp cornstarch
¼ tsp salt
¾ tsp finely ground Earl Grey tea leaves
¼ cup finely chopped dried cranberries
Method:
Cream butter and sugar together until smooth. Beat in orange rind, vanilla, and almond flavoring.
Whisk flours, cornstarch, salt, and ground tea leaves together. Blend dry ingredients into creamed mixture until just combined. Stir in cranberries.
Form dough into log approximately 1½” in diameter. Wrap tightly in wax paper or plastic wrap. Slit open an empty paper towel cardboard cylinder and place cookie log in cylinder. Draw cylinder sides together and secure with masking tape. Refrigerate cookie log for 2-3 hours, turning roll every hour or so to distribute the weight of the log and to keep the shape round. (Unbaked cookie logs may be stored for 2-3 days in the refrigerator before baking, provided they are stored in sealed plastic bags or airtight containers.)
Preheat oven to 325°F. Line baking sheets with parchment paper. With a sharp knife, slice cookie log into ¼” thick slices. Place cookies on prepared baking sheets, spacing the cookies about 1½” apart. Bake for 20-21 minutes, or until edges of cookies start to tint golden brown, rotating baking sheet half way through the baking. Let cookies cool on sheets for 3-4 minutes and then transfer to wire rack to finish cooling completely.
Store in airtight container at room temperature for up to 2 weeks or freeze for longer storage.
These gluten-free Earl Grey Cranberry-Orange Shortbread cookies are infused with a hint of tea and flavored with grated orange rind and dried cranberries.
My Island Bistro KitchenMy Island Bistro Kitchen - Barbara
Ingredients
½cupunsalted butter, softened at room temperature
½cupsifted icing sugar (aka confectioner’s or powdered sugar)
¾tspfinely grated orange rind
1/2tsppure vanilla
1/8tspalmond flavoring
¾cupgluten-free baking flour (e.g., Bob's Red Mill, Namaste, or Cup4Cup)
¼cupfine almond flour
1½tbspcornstarch
¼tspsalt
¾tspfinely ground Earl Grey tea leaves
¼cupfinely chopped dried cranberries
Instructions
Cream butter and sugar together until smooth. Beat in orange rind, vanilla, and almond flavoring.
Whisk flours, cornstarch, salt, and ground tea leaves together. Blend dry ingredients into creamed mixture until just combined. Stir in cranberries.
Form dough into log approximately 1½” in diameter. Wrap tightly in wax paper or plastic wrap. Slit open an empty paper towel cardboard cylinder and place cookie log in cylinder. Draw cylinder sides together and secure with masking tape. Refrigerate cookie log for 2-3 hours, turning roll every hour or so to distribute the weight of the log and to keep the shape round. (Unbaked cookie logs may be stored for 2-3 days in the refrigerator before baking, provided they are stored in sealed plastic bags or airtight containers.)
Preheat oven to 325°F. Line baking sheets with parchment paper. With a sharp knife, slice cookie log into ¼” thick slices. Place cookies on prepared baking sheets, spacing the cookies about 1½” apart. Bake for 20-21 minutes, or until edges of cookies start to tint golden brown, rotating baking sheet half way through the baking. Let cookies cool on sheets for 3-4 minutes and then transfer to wire rack to finish cooling completely.
Store in airtight container at room temperature for up to 2 weeks or freeze for longer storage.
Recipe Notes
[Copyright My Island Bistro Kitchen]
Yield: Approximately 24 cookies
If you have made this recipe and enjoyed it and/or wish to share it with your friends and family, please do so on social media but be sure to share the direct link to this posting from my website.
Connect with My Island Bistro Kitchen on Social Media
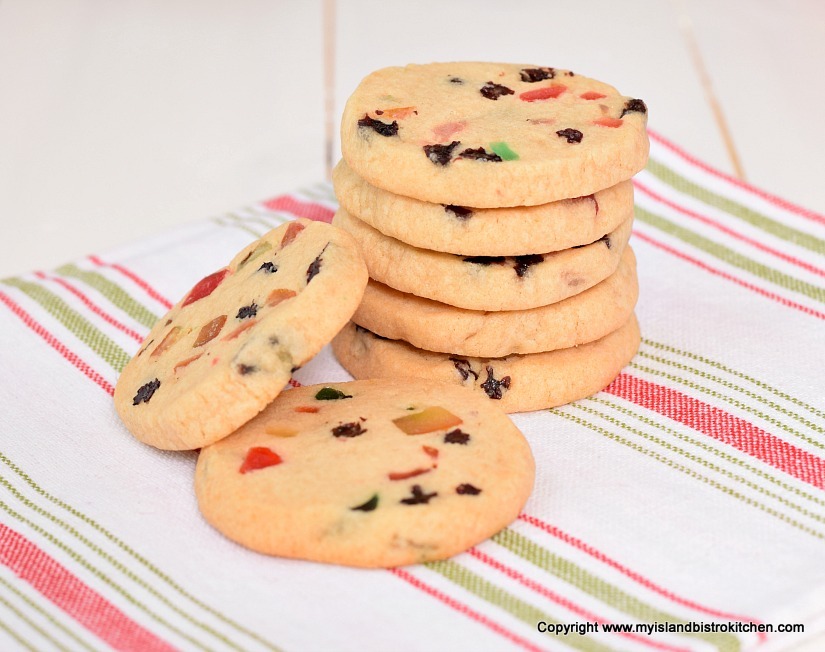
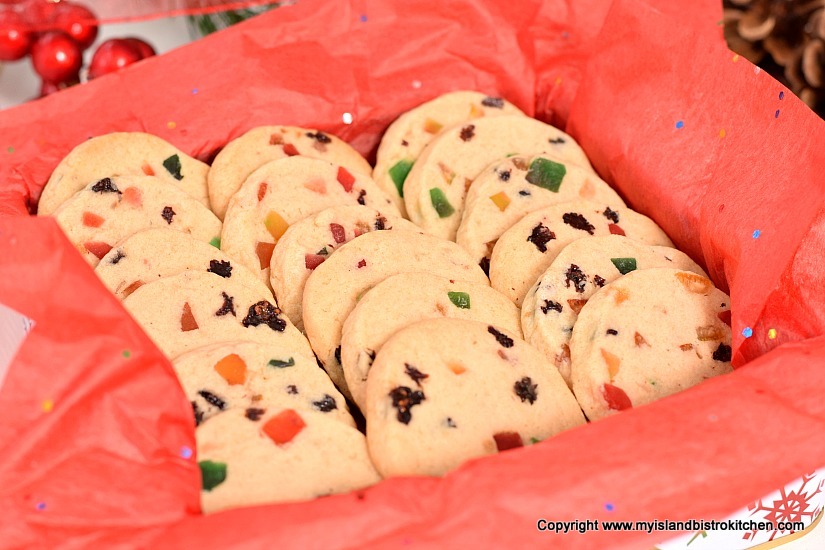
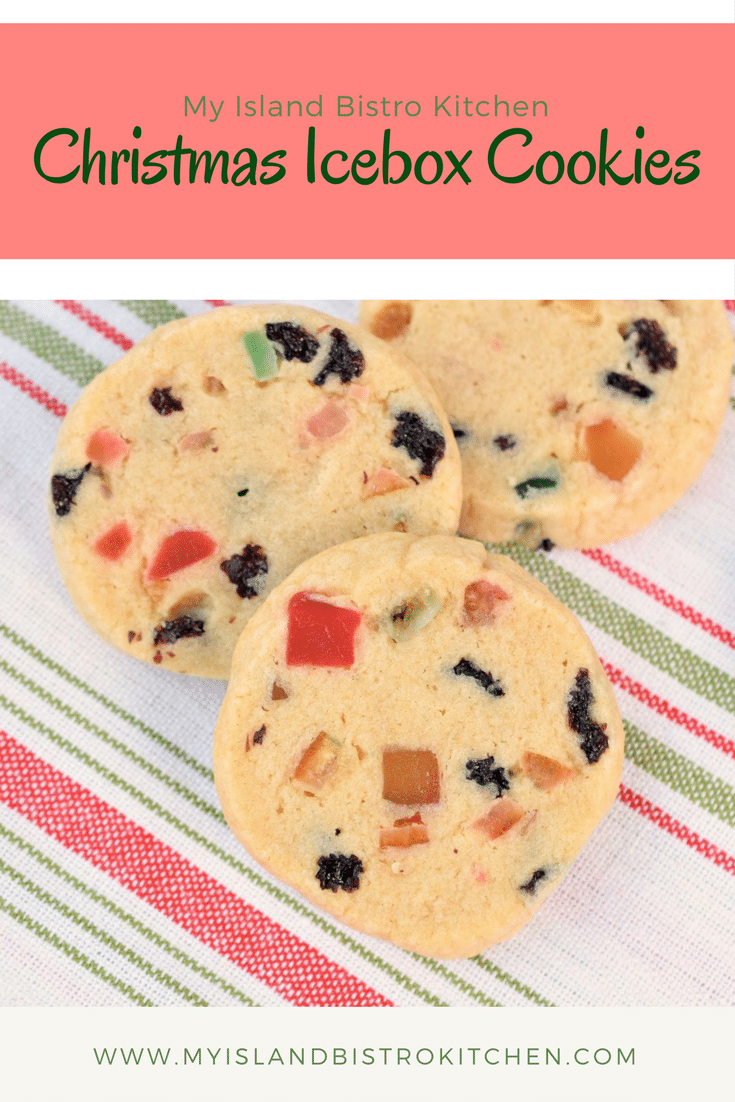
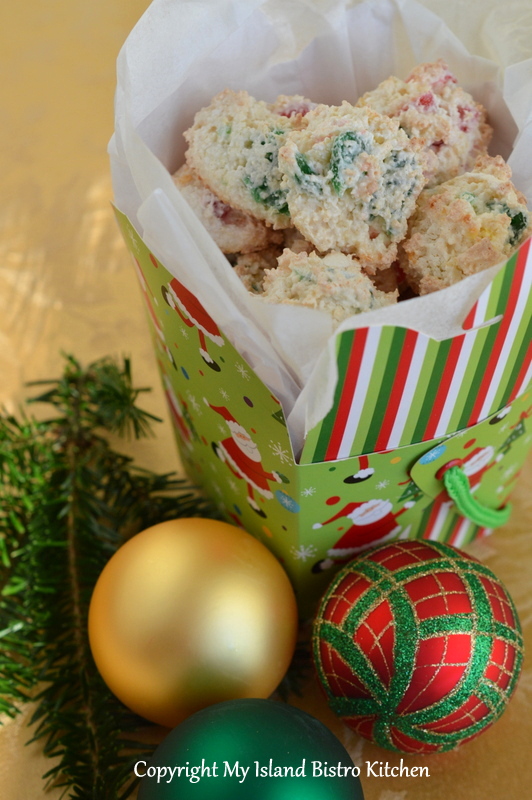
Christmas Icebox Cookies are a tradition in my household. There are many varieties of cookies that beg to be made, shared, and eaten over the holiday period and these are always a perennial favorite.
The richness of the butter and sugar combined with the slight chewiness of the mixed glazed fruit and currants results in a tasty and flavorful cookie. Use finely chopped fruit and the small currants for these delicate cookies.
Christmas Icebox Cookies
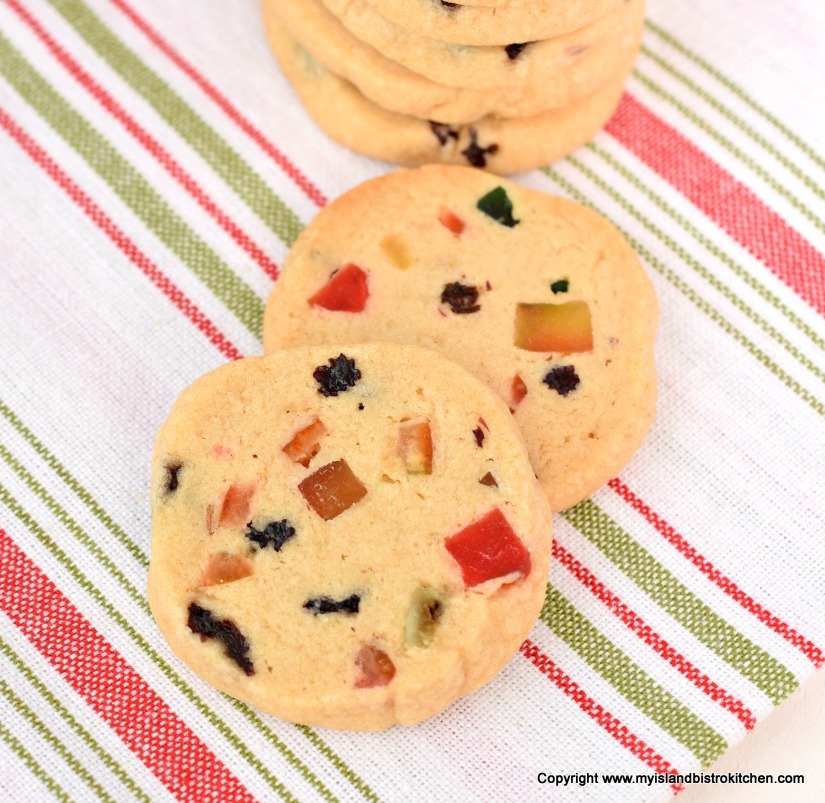
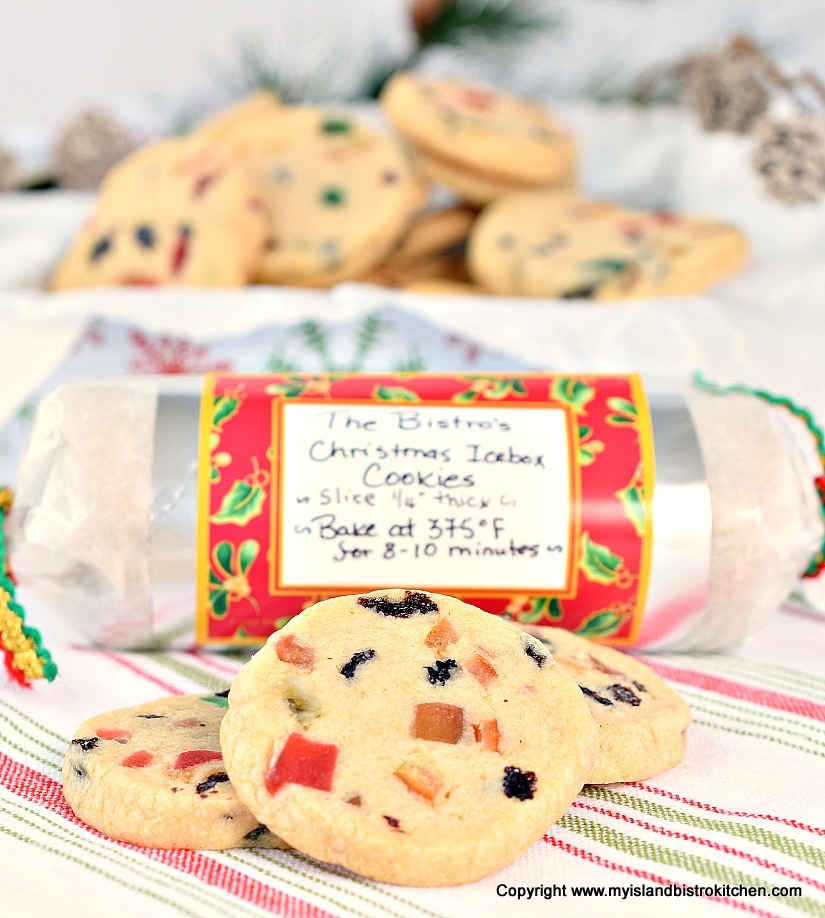
Icebox cookies are very easy to make and don’t take any unusual or difficult-to-find ingredients. The dough gets divided into thirds and then each third is formed into a round log shape, wrapped tightly in plastic wrap or waxed paper and refrigerated for at least 3-4 hours before slicing and baking. This is because the dough needs time to firm up enough to be able to cut clean-edge slices.
Plan ahead and save three empty paper towel cardboard cylinders. Slit up the length of the cylinders, these make great “sleeves” for the cookie logs and help to keep the shape of the logs round, or reasonably so. Secure the cylinders closed with tape.
Make sure to rotate the cylinders every hour or so during the 3-4 hours of dough chilling as this will help to distribute the weight of the dough and aid in keeping the cookie log round. When ready to bake the cookies, simply unwrap the chilled logs and, with a sharp flat-bladed knife, cut the logs into 1/4″ slices, place on parchment-lined baking sheets, and bake for 8-10 minutes. These cookie logs can be made two to three days in advance of baking and kept in the refrigerator so they are a great make-ahead cookie dough.
Christmas Cookies
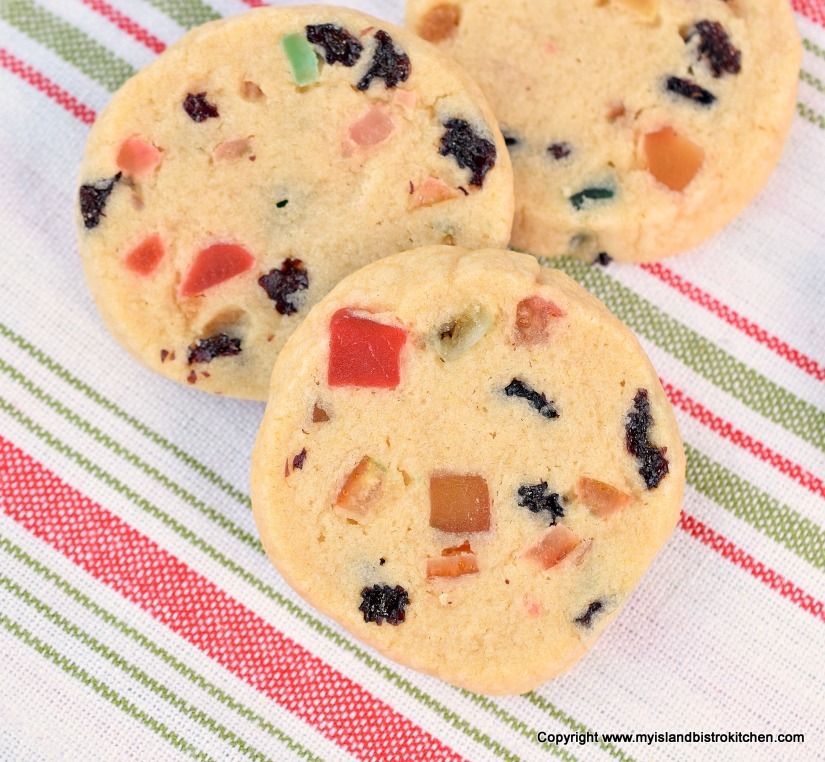
One of the great things about icebox cookies is that they can be made ahead and frozen, either before or after baking. Store the unbaked cookie logs in sealed bags in the freezer until they are needed. Simply let the dough sit at room temperature for approximately 30 minutes or so before slicing and baking. They’re also great to have on hand if unexpected guests drop by – you can pop a pan of the cookies in the oven and have your house smell tantalizing while your guests await fresh-from-the-oven cookies!
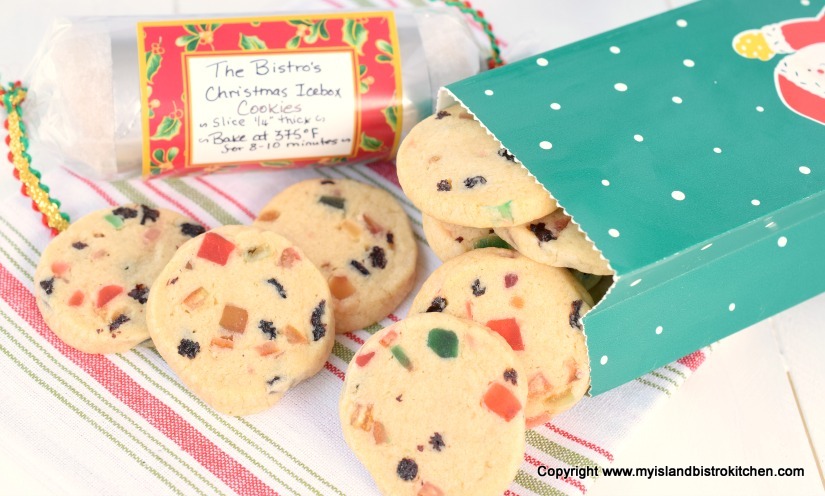
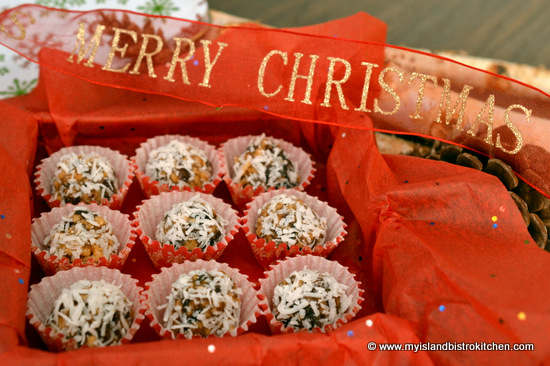
These make great host/hostess gifts, too, either baked or unbaked. A festive tin filled with these delectable cookies will be a sure hit with anyone.
Christmas Tin of Icebox Cookies
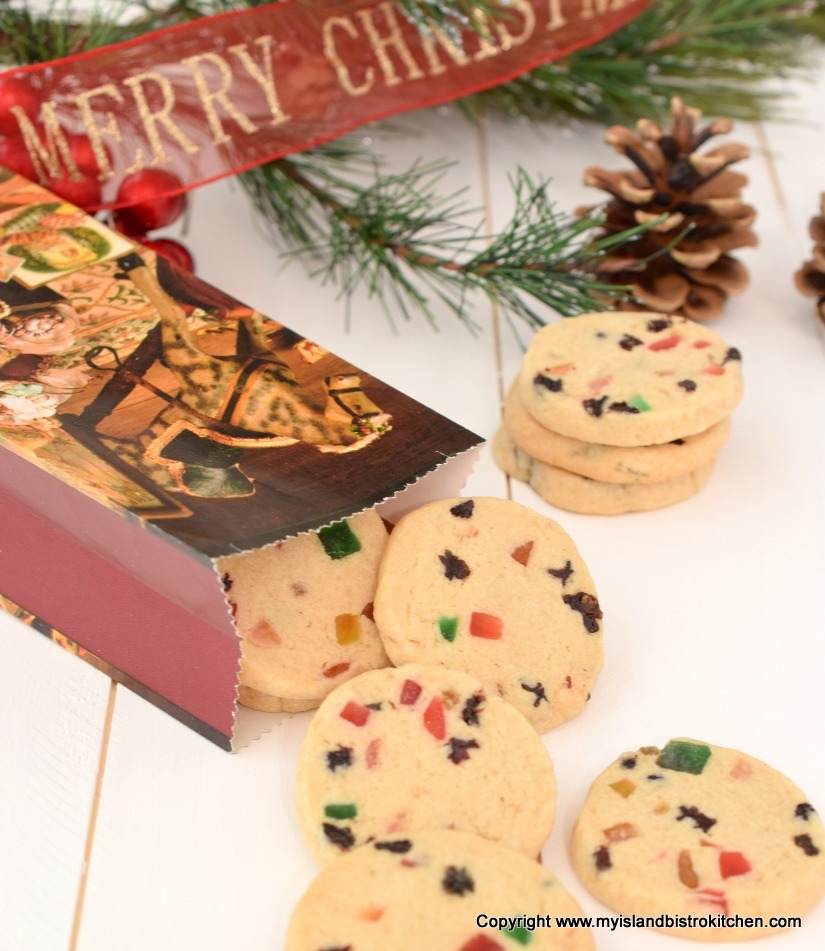
They’re also fun to package in cute little bags. Who doesn’t love to get a bag with homemade cookies inside!
If you wish to let the host/hostess bake the cookies when they so desire, simply wrap a chilled or frozen cookie log decoratively and include the baking instructions.
Christmas Cookies
Sometimes, I’ll enclose a small log of unbaked cookies in a little decorative bag and add a few of the baked cookies just to whet the recipient’s appetite!
Icebox Cookies
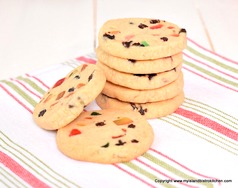
These are easy-to-make, flavorful cookies that are very versatile – they look great on sweet trays, are easy to package in boxes, tins, or bags for gifts, and they are also wonderful treats in lunch bags, too!
[Printable recipe follows at end of posting.]
Christmas Icebox Cookies
Ingredients:
1 cup butter, softened at room temperature
1 2/3 cups brown sugar, lightly packed
2 extra large eggs
1 tsp vanilla
3¼ cups all-purpose flour
1 tsp baking powder
1/8 tsp baking soda
¼ tsp salt
1 cup mixed glazed fruit
½ cup currants
Method:
Cream butter and sugar until smooth. Beat in eggs, one at a time, beating well after each addition. Stir in vanilla.
Sift flour, baking powder, baking soda, and salt together. Beat into creamed mixture until dry ingredients are combined. Stir in cherries and currants until blended into dough.
Divide dough into thirds and shape each portion of dough into three separate logs, each approximately 2” in diameter. Wrap tightly in wax paper or plastic wrap. Slit open 3 empty paper towel cardboard cylinders and place one cookie log in each cylinder. Draw cylinder sides together and secure the cylinders with masking tape. Refrigerate cookie logs for 3-4 hours, turning rolls every hour or so to distribute the weight of the logs and to keep the shape round. (Unbaked cookie logs may be stored for 2-3 days in the refrigerator before baking, provided they are stored in sealed plastic bags or airtight containers.)
Preheat oven to 375°F. Line baking sheets with parchment paper. With a sharp knife, slice cookie logs into ¼” thick slices. Place cookies on prepared baking sheets, spacing the cookies about 1½” apart. Bake for 8-10 minutes, until lightly browned. Let cookies cool on sheets for 3-4 minutes and then transfer to wire rack to finish cooling completely.
Store in airtight container at room temperature for up to 2 weeks or freeze for longer storage.
Unbaked cookie logs may be frozen in tightly sealed bags or containers for up to 2 months. Remove logs from freezer and let stand at room temperature for 30 minutes or so before slicing and baking as above.
Traditional buttery-rich Christmas icebox cookies filled with mixed glazed fruit and currants.
Ingredients
1 cup butter, softened at room temperature
1 2/3 cups brown sugar, lightly packed
2 extra large eggs
1 tsp vanilla
3¼ cups all-purpose flour
1 tsp baking powder
1/8 tsp baking soda
¼ tsp salt
1 cup mixed glazed fruit
½ cup currants
Instructions
Cream butter and sugar until smooth. Beat in eggs, one at a time, beating well after each addition. Stir in vanilla.
Sift flour, baking powder, baking soda, and salt together. Beat into creamed mixture until dry ingredients are combined. Stir in cherries and currants until blended into dough.
Divide dough into thirds and shape each portion of dough into three separate logs, each approximately 2” in diameter. Wrap tightly in wax paper or plastic wrap. Slit open 3 empty paper towel cardboard cylinders and place one cookie log in each cylinder. Draw cylinder sides together and secure the cylinders with masking tape. Refrigerate cookie logs for 3-4 hours, turning rolls every hour or so to distribute the weight of the logs and to keep the shape round. (Unbaked cookie logs may be stored for 2-3 days in the refrigerator before baking, provided they are stored in sealed plastic bags or airtight containers.)
Preheat oven to 375°F. Line baking sheets with parchment paper. With a sharp knife, slice cookie logs into ¼” thick slices. Place cookies on prepared baking sheets, spacing the cookies about 1½” apart. Bake for 8-10 minutes, until lightly browned. Let cookies cool on sheets for 3-4 minutes and then transfer to wire rack to finish cooling completely.
Store in airtight container at room temperature for up to 2 weeks or freeze for longer storage.
Unbaked cookie logs may be frozen in tightly sealed bags or containers for up to 2 months. Remove logs from freezer and let stand at room temperature for 30 minutes or so before slicing and baking as above.
If you have made this recipe and enjoyed it and/or wish to share it with your friends and family, please do so on social media but be sure to share the direct link to this posting from my website.
Connect with My Island Bistro Kitchen on Social Media
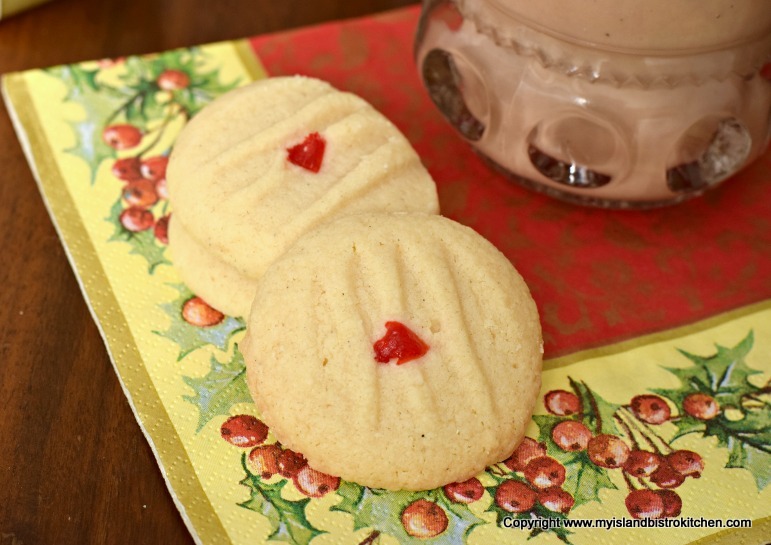
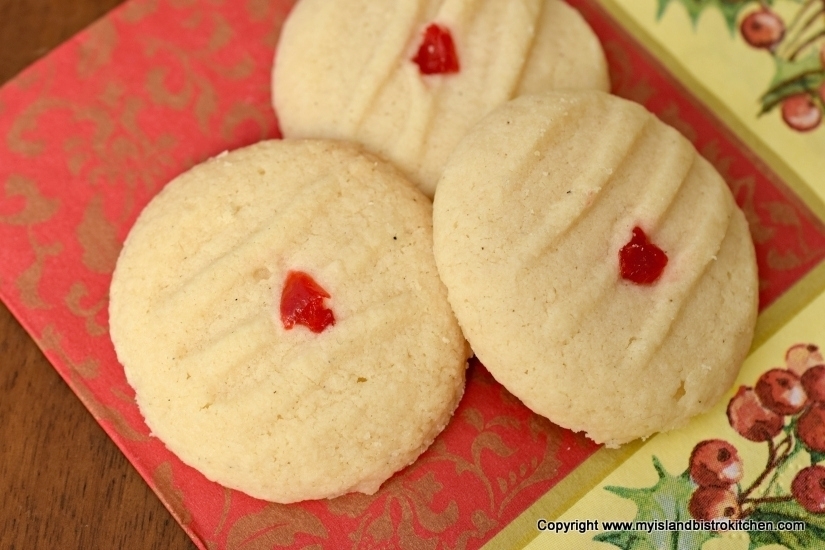
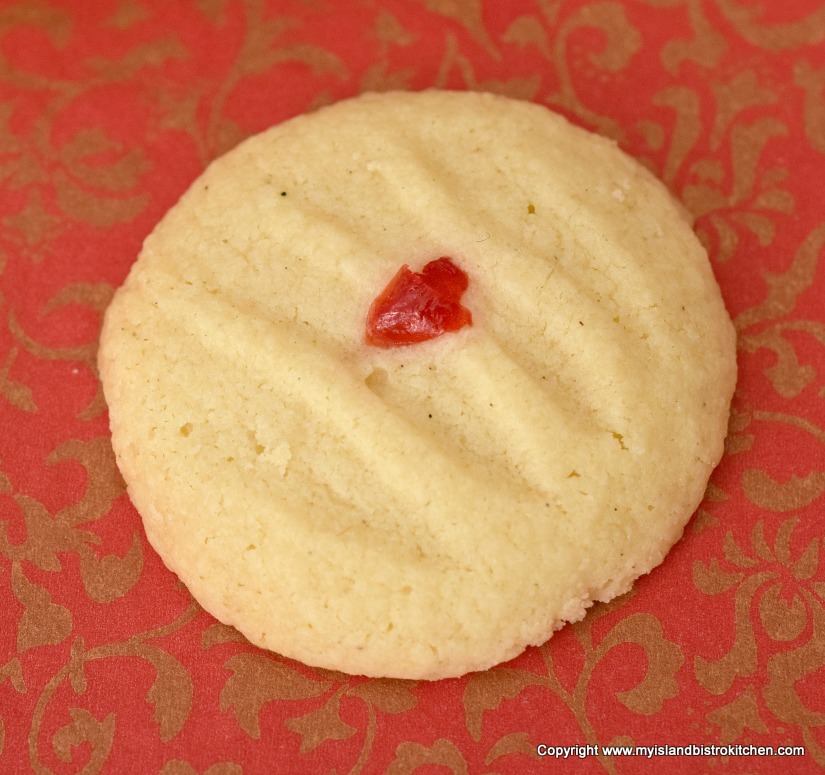
How can a cookie with only 6 simple ingredients taste this good!!! Well, they’re not called Marvelous Melting Moments without good reason. One bite of these sweet temptations and, from the rich, tender crumb of the cookie, you’ll find they quickly melt in your mouth. Continue reading Marvelous Melting Moments Recipe→
Sugar and spice and everything nice! That pretty much sums up the smell in the kitchen when these Molasses Spice Cookies are baking. These cookies have a lovely blend of spices that make them a real taste treat, especially with a tall glass of cold milk. Continue reading Molasses Spice Cookies→
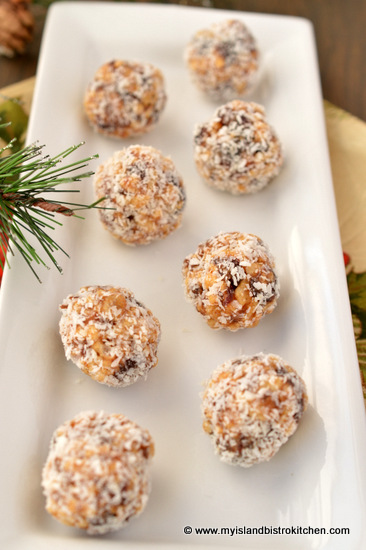
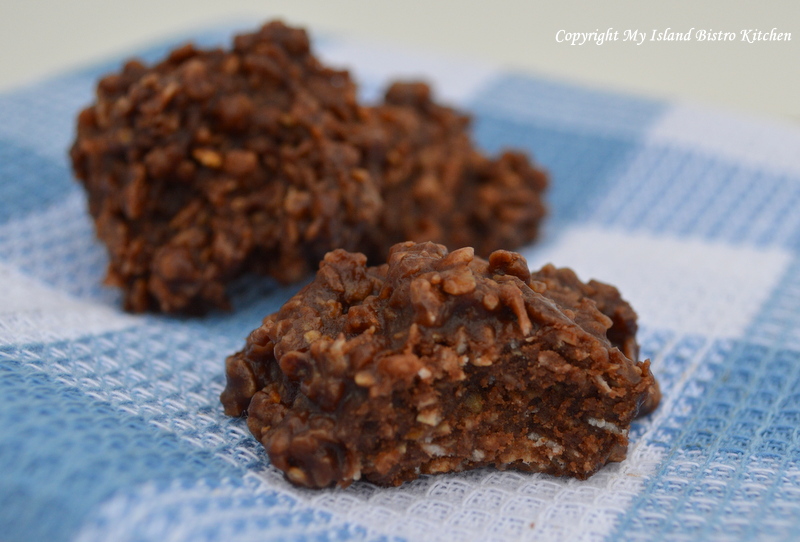
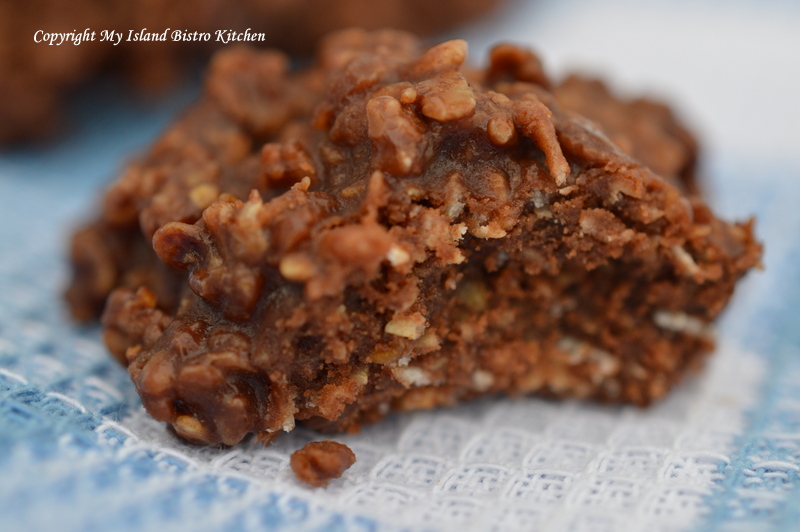
I have no idea why these tasty morsels are called cookies because, in my view, they in no way resemble my definition of a cookie! Nonetheless, they have always been called Frypan Cookies in my family and, regardless their name, they are mighty tasty. In fact, I think they’re actually more like candy than cookies.
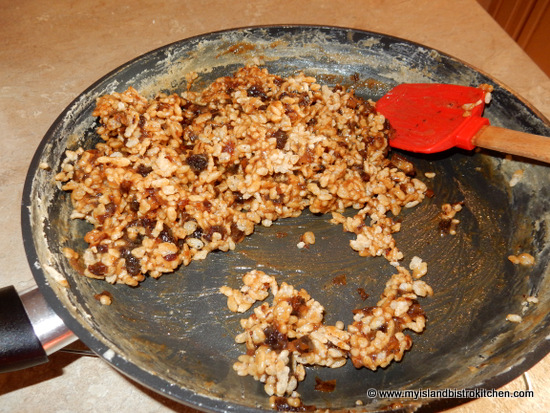
Why they are called “Frypan Cookies” is a mystery to me but that’s what I’ve always known them as and my mother has been making them since I was a wee child (and probably even longer ago than that). My best guess is that, somewhere back in time, someone picked up a frypan and used it to cook the date, sugar, and egg mixture and simply named the result “Frypan Cookies”. In any event, we’ve continued the tradition of using a frypan which, I must admit due to its shallow depth, is easier to scoop the mixture from to make the balls than would be a deeper saucepan.
While these treats don’t take a lot of ingredients or any difficult-to-find ones, I tend to only make them once a year – at Christmas – probably because that was the only time of the year my mother made them and they were always considered to be a special Christmas treat.
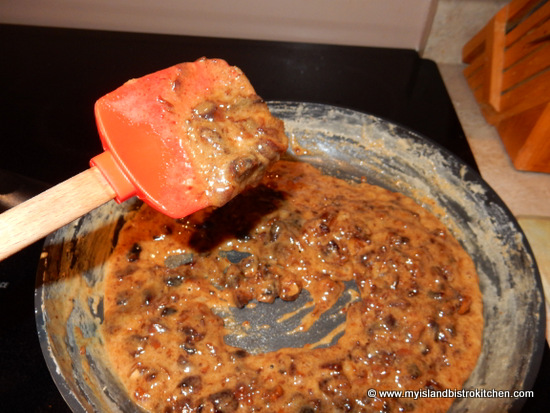
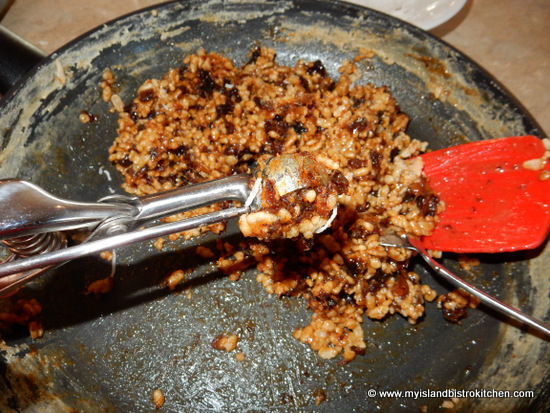
The trick to making these balls is in the thickening of the egg, sugar, and date mixture. It is important to stir the mixture continuously as it cooks to avoid scorching. Once the mixture starts to thicken, it’s done. This generally takes about 5-7 minutes.
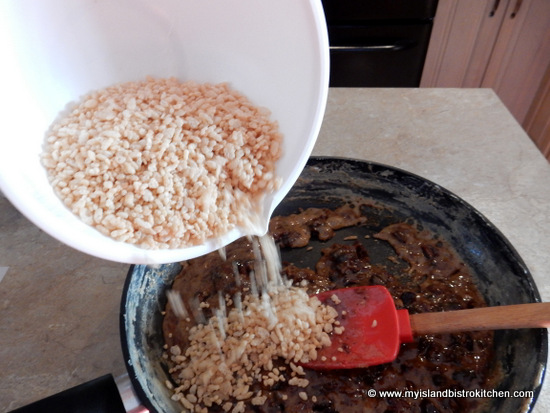
Don’t let the mixture get too thick as it will then be difficult to incorporate the rice cereal into the mixture.
Adding nuts, such as chopped walnuts or pecans, is optional in this recipe. I generally do not add them. One-half cup of chopped glazed red cherries can also be added, if desired.
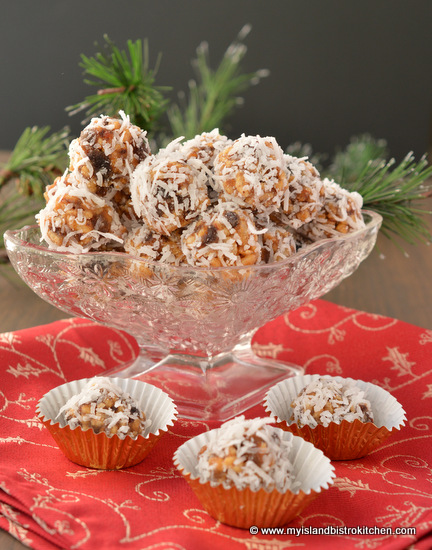
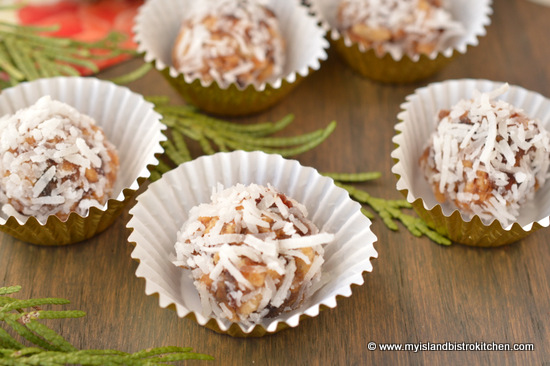
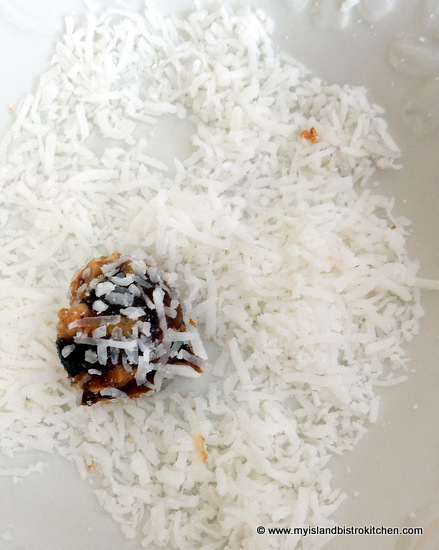
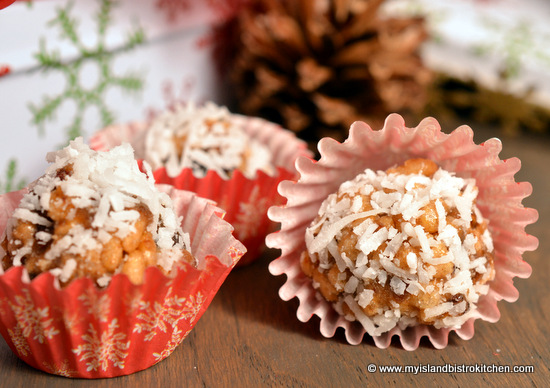
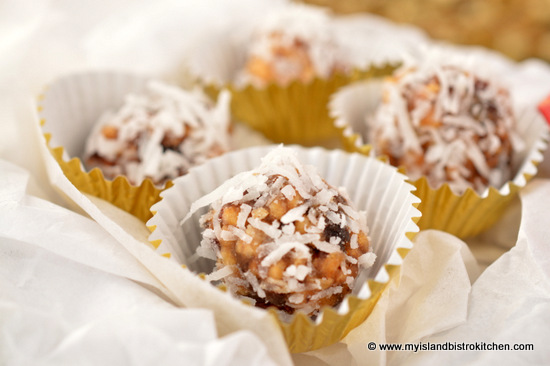
There are a couple of options when it comes to the coconut coating for frypan cookie balls. Traditionally, sweetened shredded coconut is used – this is the long stringy kind of coconut.
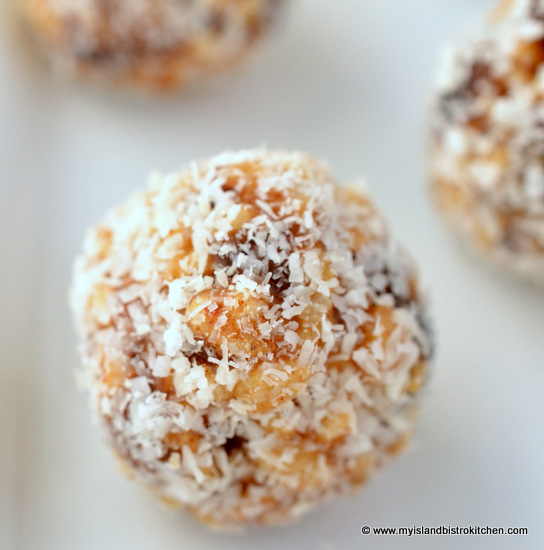
While, sometimes, it is tricky to get the coconut to stick to the balls, this coconut makes a more showy frypan cookie ball.
The shorter, more fine-textured, macaroon coconut may also be used.
It makes a neater looking ball but is not quite as interesting and showy looking.
I often choose the macaroon coconut if I am making these balls for trays for an afternoon tea since they are more dainty and the coconut adheres better and does not tend to fall off the balls.
Choice of coconut in which to roll the balls is, of course, a matter of personal preference.
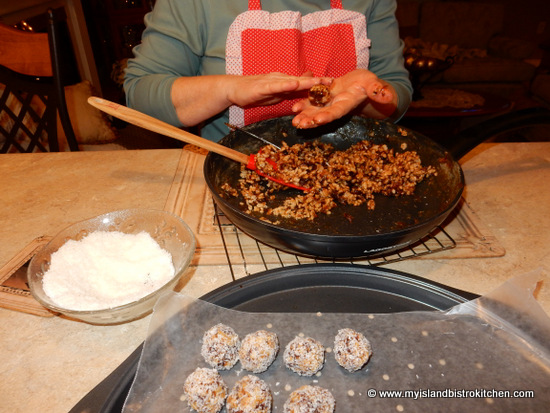
The mixture needs to be quite warm in order for the coconut to stick to the balls. So, it’s important to work quickly when making the balls. If the mixture gets too cool, you can transfer it to a microwave-safe bowl and heat the mixture for just a very few seconds (i.e., 7-8 seconds) to warm it up.
The balls can be formed by hand but it’s a sticky process (although spraying the hands with cooking spray helps).
The best method is to use a small 1″ cookie scoop. This will also ensure that the balls are of consistent size.
These balls need to be kept chilled and will keep in the refrigerator for about a week. They also freeze really well if longer storage is needed. Whether refrigerating or freezing, just ensure that the balls are stored in an airtight container and are separated between layers of wax paper.
Frypan Cookies
Frypan Cookie Balls
Ingredients:
2 tbsp butter
2 eggs, beaten until light
1 tsp. vanilla
1 cup granulated sugar
1½ cups pitted dates, chopped
2 cups crisped rice cereal (such as Rice Krispies)
½ cup chopped nuts (optional)
Apx. 1½ – 2 cups sweetened shredded coconut or apx. 2/3 – 1 cup macaroon coconut
Method:
Line large baking sheet with wax paper.
In large frypan, over medium heat, melt the butter. Whisk the eggs, vanilla, and sugar together. Add the liquid mixture along with the dates to the frypan and reduce heat to medium low. Cook mixture, stirring constantly to avoid scorching, for approximately 5-7 minutes or until mixture thickens. Remove from heat and stir in the rice cereal and nuts.
Place coconut in bowl. Using a 1” cookie scoop, form the mixture into balls then drop balls into coconut; roll to coat then place on cookie sheet. Refrigerate until firm. Keep refrigerated in an airtight container or freeze for longer storage.
Yield: Apx. 56 balls
If you have made this recipe and enjoyed it and/or wish to share it with your friends and family, please do so on social media but be sure to share the direct link to this posting from my website.
Connect with My Island Bistro Kitchen on Social Media
2 cups crisped rice cereal (such as Rice Krispies)
½ cup chopped nuts (optional)
Apx. 1½ - 2 cups sweetened shredded coconut or apx. 2/3 - 1 cup macaroon coconut
Instructions
Line large baking sheet with wax paper.
In large frypan, over medium heat, melt the butter. Whisk the eggs, vanilla, and sugar together. Add the liquid mixture along with the dates to the frypan and reduce heat to medium low. Cook mixture, stirring constantly to avoid scorching, for approximately 5-7 minutes or until mixture thickens. Remove from heat and stir in the rice cereal and nuts.
Place coconut in bowl. Using a 1” cookie scoop, form the mixture into balls then drop balls into coconut; roll to coat then place on cookie sheet. Refrigerate until firm. Keep refrigerated in an airtight container or freeze for longer storage.
Old-fashioned Oatcakes served with Brie and J.J. Stewart’s Cranberry Champagne and Crystalized Ginger Preserves
Oatcakes are very versatile and take such basic, simple ingredients. A cross between a cookie and a cracker, they are savory bites and are not overly sweet. In fact, I would describe these artisan cookies/crackers as having a nice short, crisp texture. Scottish in origin, oatcakes probably made their debut in Canada when they arrived along with Scottish immigrants. Continue reading Old-Fashioned Scottish Oatcakes→
Those who regularly follow my blog will recall that I made the commitment back in January 2013 to post one cookie recipe a month for the entire year. So, for ease of retrieval, I thought I would do a year-end round-up of all 12 cookies.
In January, just in time for Robbie Burns Day, I shared my recipe for Shortbread.
Shortbread
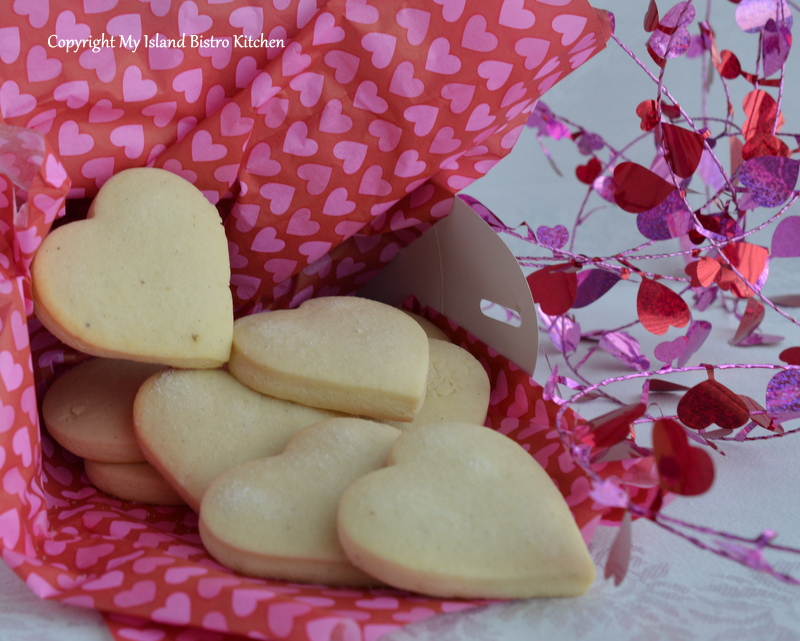
In February, with sweet Valentine’s Day, old-fashioned Sugar Cookies topped the list.
In May, old-fashioned Cherry Winks proved they are still a perennial favorite.
Cherry Wink Cookie
In June, the no-bake Spider Cookies proved they are just as much a favorite today as they were when I was growing up!
Spider Cookies
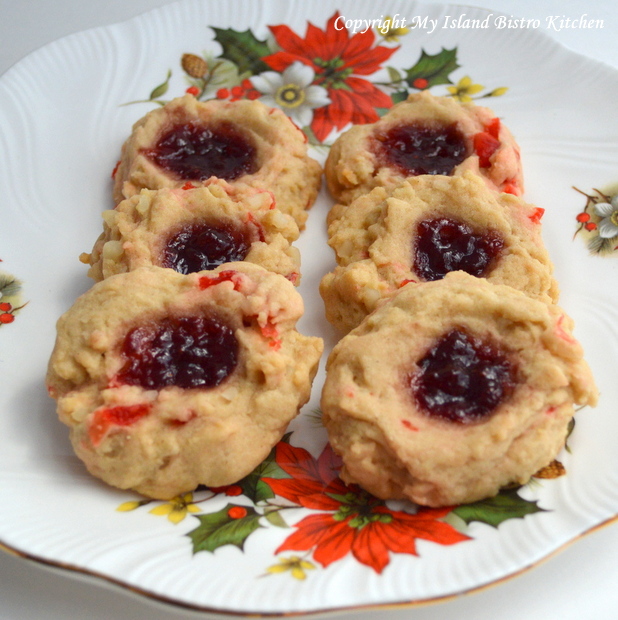
In July, as we celebrated “Christmas in July”, the Brown Sugar Jam-Filled Cookies brought back memories of the kinds of cookies often found in grandma’s cookie jar.
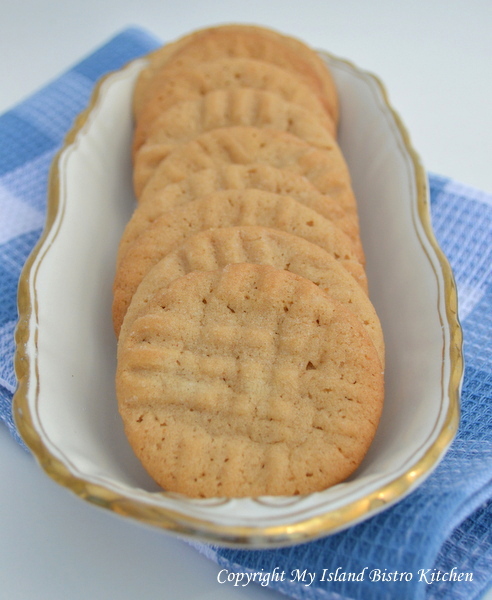
In September, crisp and light-textured Peanut Butter Cookies made it on to the cookie of the month roster.
Peanut Butter Cookies
In October, the substantial and tasty raisin-filled Plum Puff Cookies heralded the fall season.
Plum Puff Cookies
In November, when the days turned cooler and thoughts turned to the sweet smell of cooking with spices, the old-fashioned icebox Gingersnaps made their debut.
Gingersnaps
In December, these Coconut Cherry Macaroons made a fine addition to trays of sweets and to gift boxes.
Coconut Cherry Macaroons
I hope you have enjoyed some of my favorite cookie recipes. Do you have a favorite cookie?
Barbara
Thank you for visiting “the Bistro” today.
Be sure to visit my Facebook page atMy Island Bistro Kitchen.You may also wish to follow me on twitter @PEIBistro, on Pinterest at “Island Bistro Kitchen”, and on Instagram at “PEIBistro”.
Today, I am sharing my recipe for old-fashioned Gingersnaps. These wafer-thin, crisp cookies are flavoured with ginger, cinnamon, and cloves, all scents that make the kitchen smell divine when they are baking. Continue reading Gingersnaps→
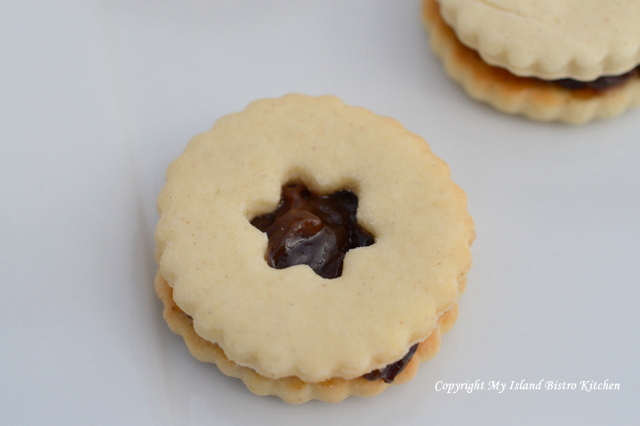
Plum Puff Cookies are hearty cookies because each one is actually two cookies sandwiched together with a tasty raisin filling. If desired, these cookies can, alternatively be filled with your favorite jam, date filling, or even a favorite curd such as either my lemon, rhubarb, or cranberry curd. Continue reading Plum Puff Cookies→
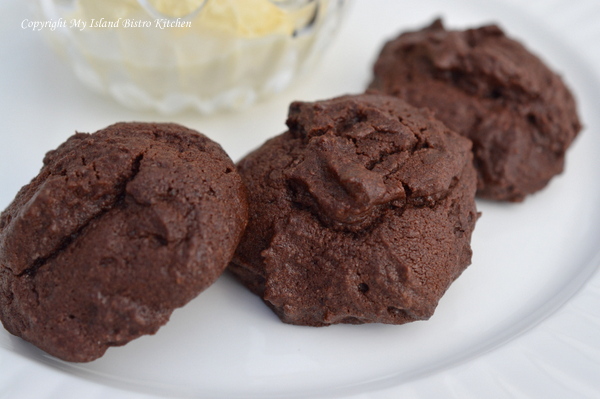
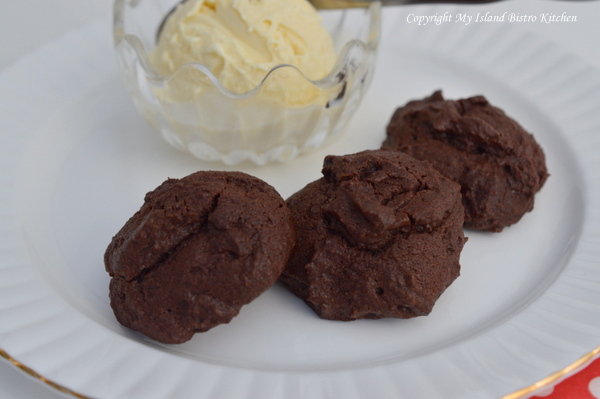
I have always been a chocolate lover. These chocolate cookies were ones my Mother often made when I was a child. I like the rich chocolate flavour and somewhat chewy center they have. These cookies don’t take any uncommon ingredients or ones most serious bakers wouldn’t have in their cupboards. Of course, using the best cocoa you can find will make for a richer, more flavourful cookie.
This cookie recipe calls for shortening (as opposed to butter). While some think that butter is the only fat to use in baking, I would disagree. There are times when the flavorless shortening can actually produce a better quality baked good with sought-after attributes.
For these cookies, I wanted puffy cookies with a soft, tender texture so shortening was my fat ingredient of choice. This is because shortening has no water content so, unlike butter with its water content, there is no water to create steam. Less steam means less gluten is likely to be formed thus giving the cookies their soft, tender texture.
In addition, shortening has a higher melting point that does butter. This gives the cookie dough a longer chance to set and establish its shape before the fat melts and spreads the cookies out flat. The result? Cookies with a higher rise and a softer, more tender texture. You can read more about the choice of using butter and/or shortening in cookie baking by clicking here.
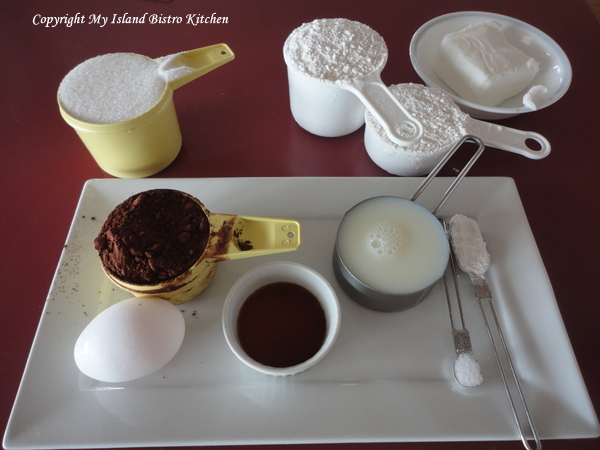
These cookies are very easy to make and, being drop cookies, there is no rolling the dough and cutting out shapes and no need for any icing. Simply scoop up some dough with a teaspoon and use another to slide the dough off the spoon and on to the cookie sheet. These cookies can be dressed up with 1/2 cup of either chopped nuts, dates, raisins, or even chocolate chips. However, I don’t add any extras to them as I like the smooth texture and flavour they have on their own without any further additions.
[Printable recipe follows at end of posting]
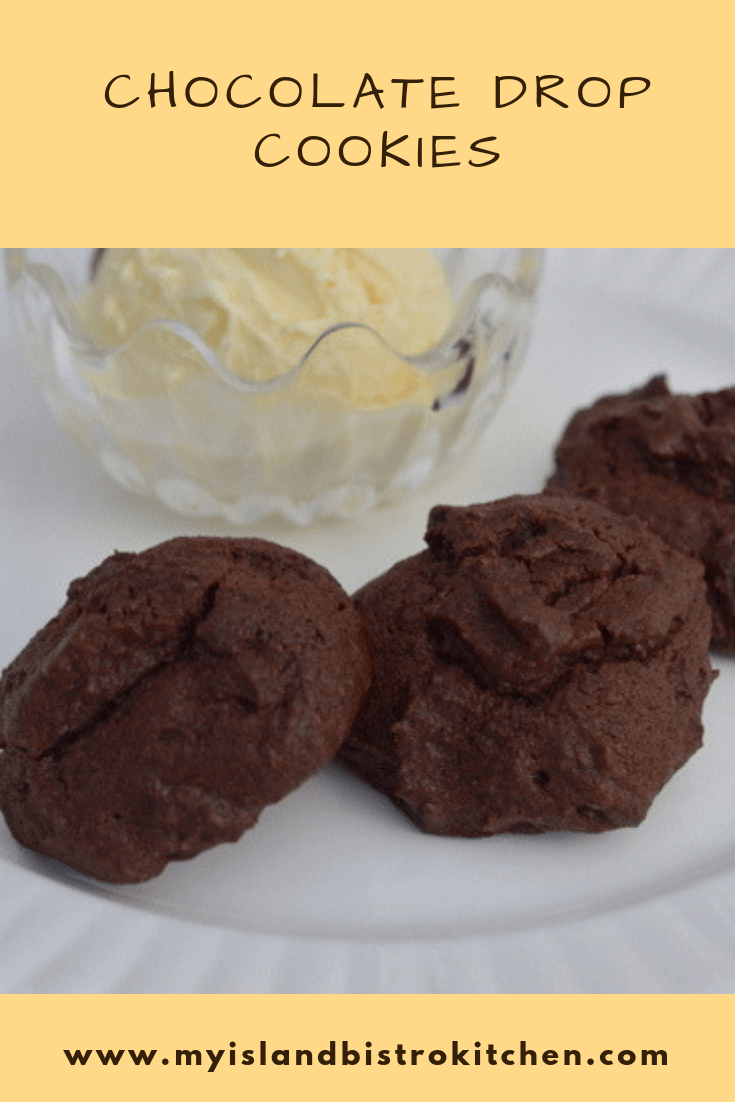
Chocolate Drop Cookies
Ingredients:
1/2 cup shortening, softened
1 cup white sugar
1 egg
1 tsp vanilla
1/2 cup milk
1 1/2 cups flour
1/2 cup cocoa
1 tsp baking powder
1/4 tsp salt
Method:
Preheat oven to 375F.
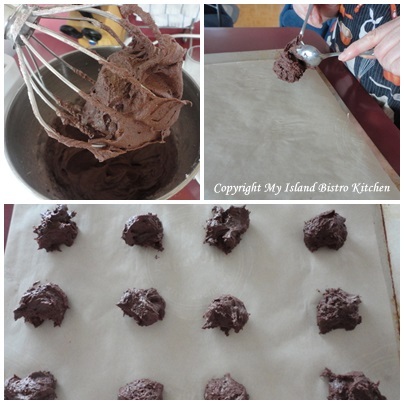
With electric mixer, beat shortening and sugar together until light and fluffy (1-2 minutes). Beat in egg, vanilla, and milk.
Into separate bowl, sift together the flour, cocoa, baking powder, and salt. Add to wet ingredients and stir just until dry ingredients are incorporated.
Drop by teaspoonfuls onto parchment-lined baking sheet.
Bake 10-11 minutes. Do not overbake or cookies will be dry.
Yield: Apx. 3 dozen
These cookies are good any time and make good lunch box treats as well as picnic basket fare. They are especially good with a dish of vanilla ice cream!
If you have made this recipe and enjoyed it and/or wish to share it with your friends and family, please do so on social media but be sure to share the direct link to this posting from my website.
Connect with My Island Bistro Kitchen on Social Media
Follow “the Bistro” on Pinterest at https://www.pinterest.ca/peibistro/ and pin the Pinterest-ready photo found at the end of this post to your favorite Pinterest boards.
Chocolate lovers will love these easy-to-make rich Chocolate Drop Cookies with their slightly chewy interior
Course
Cookies
Keyword
chocolate cookies, cookies,
My Island Bistro KitchenBarbara99
Ingredients
1/2cupshortening, softened
1cupwhite sugar
1egg
1tspvanilla
1/2cupmilk
1 1/2cupsflour
1/2cupcocoa
1tspbaking powder
1/4tspsalt
Instructions
Preheat oven to 375F. Line baking sheet with parchment paper.
With electric mixer, beat shortening and sugar together until light and fluffy (1-2 minutes). Beat in egg, vanilla, and milk.
Into separate bowl, sift together the flour, cocoa, baking powder, and salt. Add to creamed mixture and stir just until dry ingredients are incorporated.
Drop by teaspoonfuls onto prepared baking sheet.
Bake 10-11 minutes. Do not overbake or cookies will be dry. Let cookies rest on baking sheet for 3-4 minutes then transfer to wire rack to cool completely.
Oh, these bring back sweet childhood memories! I grew up knowing these as “Spider Cookies” though they are known by a host of other names, too. Sometimes, they are simply called “Uncooked Chocolate Cookies”. Regardless their name, they are simple to make and very tasty; in fact, I’d say they are a close neighbour to candy. Continue reading Spider Cookies Recipe→
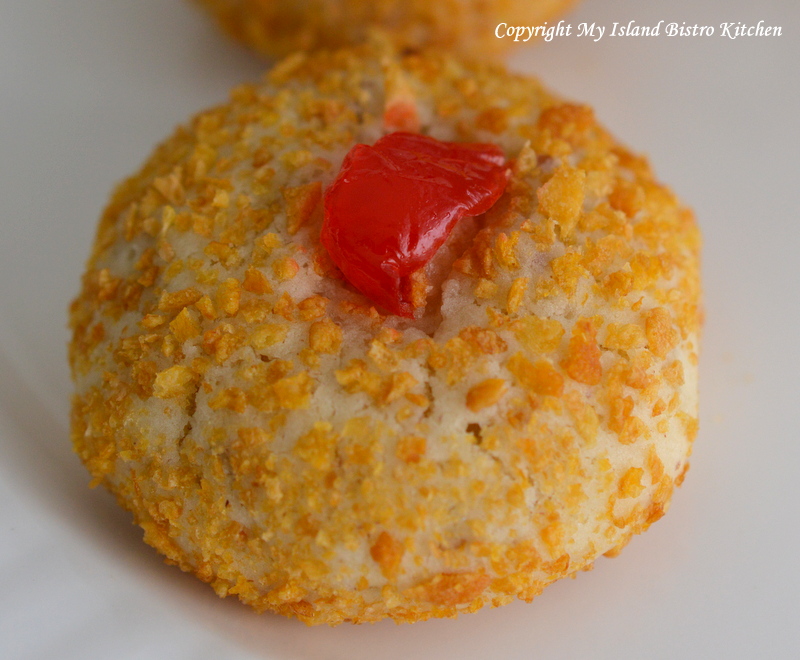
My Mother often made Cherry Wink Cookies when I was a small child so they have been a family favorite for many years. They are not difficult to make and don’t take any hard-to-find or unusual ingredients.
[Printable recipe follows at end of posting]
Cherry Winks
Ingredients:
3/4 cup shortening or butter, softened at room temperature
1 cup white sugar
2 eggs, unbeaten, room temperature
4 tbsp milk, room temperature
1 tsp vanilla
2 1/4 cups all-purpose flour
1 tsp baking powder
1/2 tsp soda
1/2 tsp salt
1 cup chopped dates
3/4 cup chopped pecans
apx. 2 1/2 – 3 cups cornflakes
apx. 15 maraschino cherries, blotted dry in paper towel, and cut into quarters
Method:
Preheat oven to 375F.
In bowl of stand mixer, cream shortening or butter. Add sugar and cream until light and fluffy. Add eggs, one at a time, and beat well after each addition. Beat in milk and vanilla.
In separate bowl, combine flour, baking powder, soda, and salt. Whisk together to blend. Mix in the dates and pecans. Add to creamed mixture and stir until well combined.
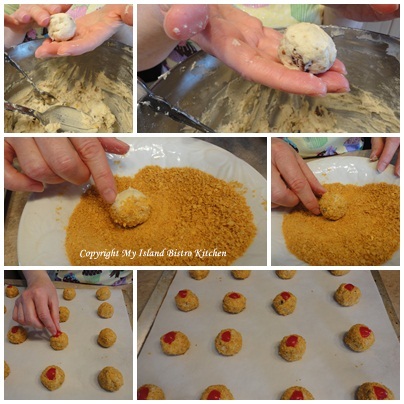
Crush cornflakes crumbs by placing in a sealed ziplock bag and crushing with a rolling pin.
Transfer crumbs to shallow bowl. Shape dough into small balls. Roll each cookie ball in the crumbs to coat. Place on parchment-lined baking sheets. Top each cookie with piece of cherry.
Bake for 10-12 minutes. Do not overbake. Let cool on cookie sheet for 2 minutes then transfer to wire rack to finish cooling.
Makes approximately 4 dozen cookies.
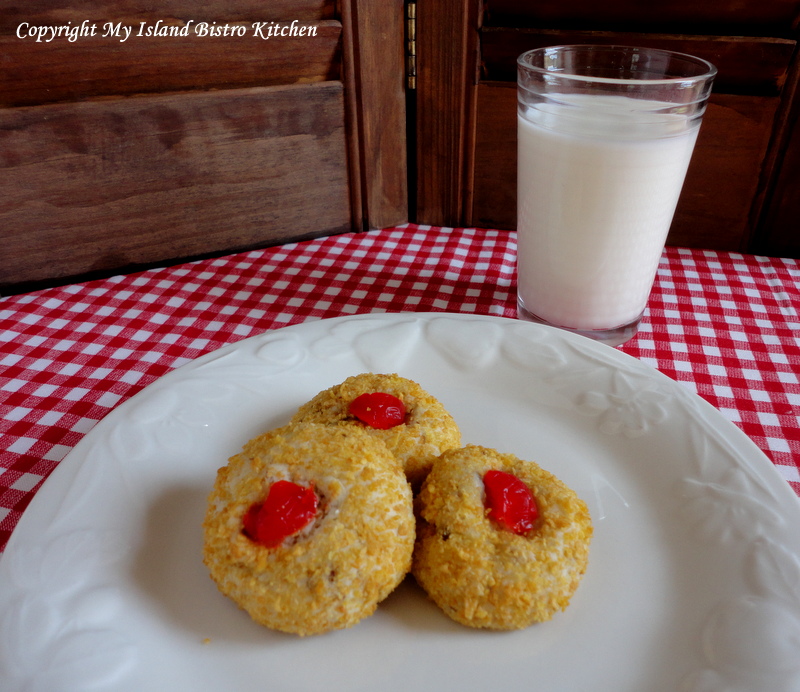
These cookies go especially well with a glass of cold milk!
…and one is never enough!
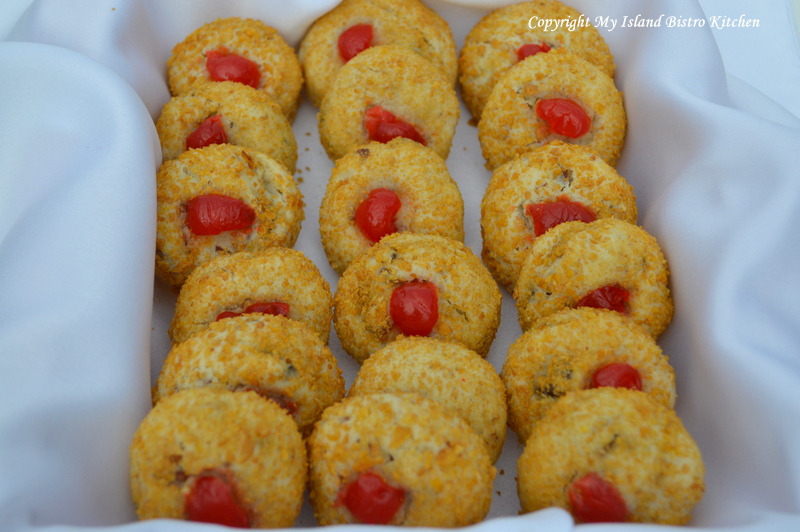
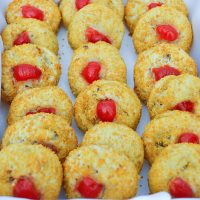
A box of these cookies makes a wonderful, tasty gift!
Cherry Winks are a cookie jar favorite! Cookies are coated in crushed cornflake crumbs and topped with a cherry. Both showy and tasty!
Course
Snack
Keyword
cherry winks, cookies,
My Island Bistro KitchenMy Island Bistro Kitchen
Ingredients
¾cupshortening or butter, softened at room temperature
1cupwhite sugar
2eggs, unbeaten (room temperature)
4tbspmilk, room temperature
1tspvanilla
2¼cupsall-purpose flour
1tspbaking powder
½tspsoda
½tspsalt
1cupchopped dates
¾cupchopped pecans
apx. 2½ - 3 cups cornflakes
apx. 15 maraschino cherries, blotted dry in paper towel, and cut into quarters
Instructions
Position oven rack in center of oven and preheat oven to 375°F.
In bowl of stand mixer, cream shortening or butter. Add sugar and cream until light and fluffy. Add eggs, one at a time, and beat well after each addition. Beat in milk and vanilla.
In separate bowl, combine flour, baking powder, soda, and salt. Whisk together to blend. Mix in the dates and pecans. Add to creamed mixture and stir until well combined.
Crush cornflake crumbs by placing in a sealed ziplock bag and crushing with a rolling pin.
Transfer crumbs to shallow bowl. Shape dough into small balls. Roll each cookie ball in the crumbs to coat. Place on parchment-lined baking sheets. Top each cookie with piece of cherry.
Bake for 10-12 minutes. Do not overbake. Let cool on cookie sheet for 2 minutes then transfer to wire rack to finish cooling.
Recipe Notes
Yield:Apx. 4 dozen cookies.
[Copyright My Island Bistro Kitchen]
Pin Me To Pinterest!
Cherry Winks
If you have made this recipe and enjoyed it and/or wish to share it with your friends and family, please do so on social media but be sure to share the direct link to this posting from my website.
Connect with My Island Bistro Kitchen on Social Media
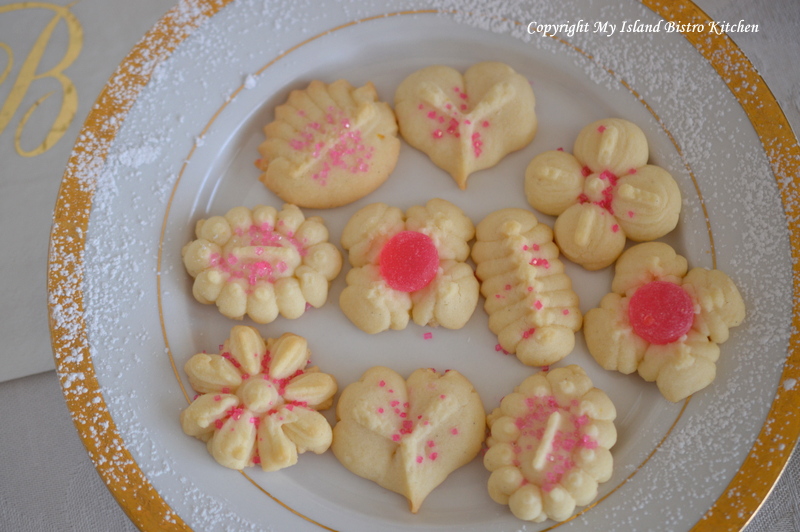
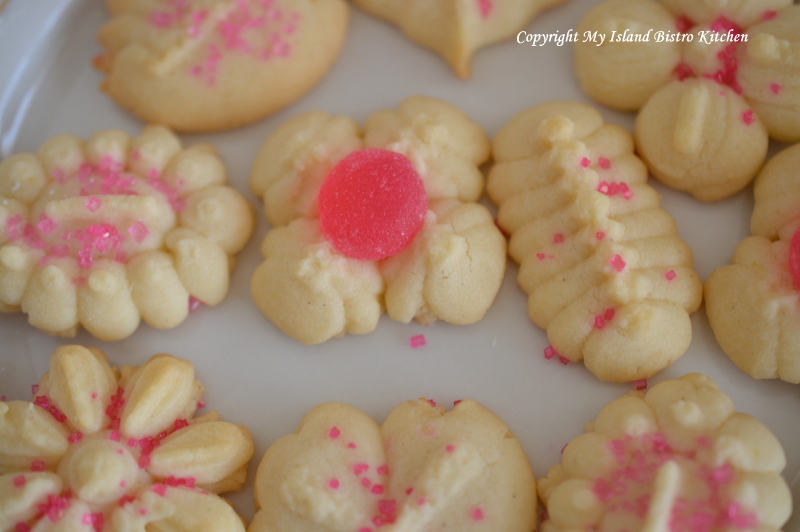
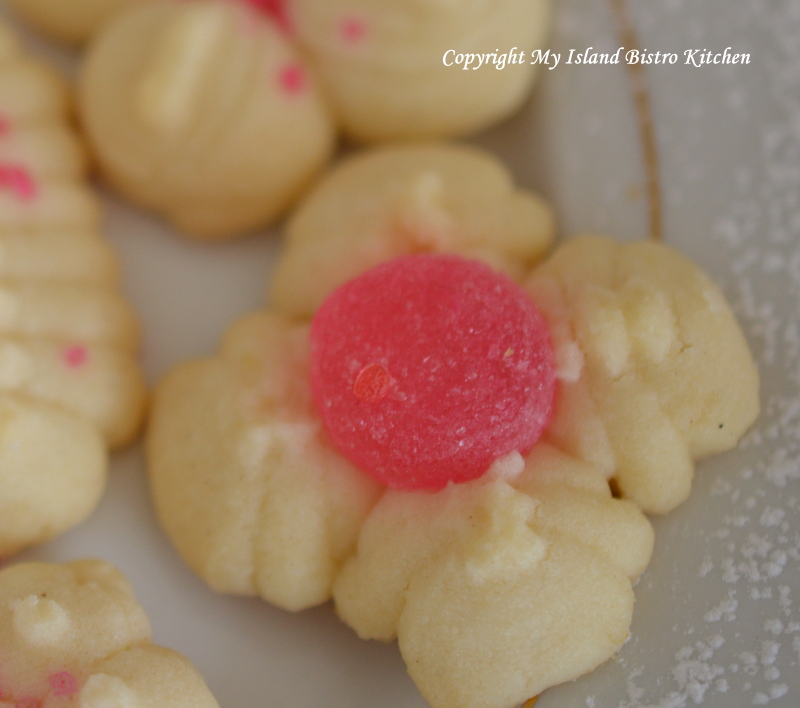
Spritz cookies are dainty-shaped cookies that are crisp and buttery. They are made by pushing soft cookie dough through a cookie press which is a cylinder fitted with a decorative disk that has patterned holes through which the dough is “squirted” or pressed into shapes. Typically, cookie presses come with many different decorative disks – mine has probably 20 or more.
These cookies are popular at Christmas, special occasions, and are very suitable for afternoon teas as they can be made in so many different shapes and colors and can be further embellished with icing, colored sugar, miniature gumdrops, or dragées.
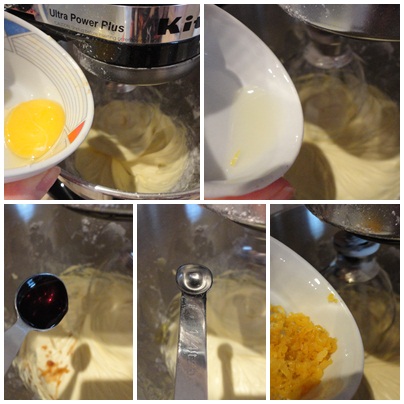
My recipe for Lemon Spritz Cookies is buttery rich and delicate. I like the flavour burst of lemon juice and zest in these petite cookies.
This recipe does best when the dough is chilled for 24 hours to allow the egg yolk to get fully incorporated and absorbed into the other ingredients. Unlike most liquids, such as water or milk, for example, eggs take a lot more time to become incorporated into the dry ingredients. When the dough comes out of the refrigerator, it will be too hard to push through the cookie press so let the dough sit at room temperature for about an hour or so until it becomes pliable enough that it can be formed into a roll that can be inserted into the cookie press cylinder. You’ll notice this recipe has no baking powder or soda. This is because that would cause the cookies to raise which, in turn, would result in them losing their shape and design that makes them spritz cookies.
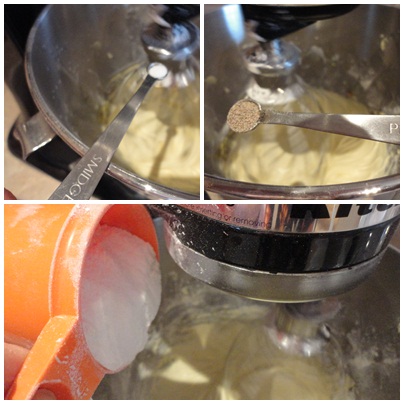
Add the flour, salt, and cardamom to creamed mixture, stirring until well combined.
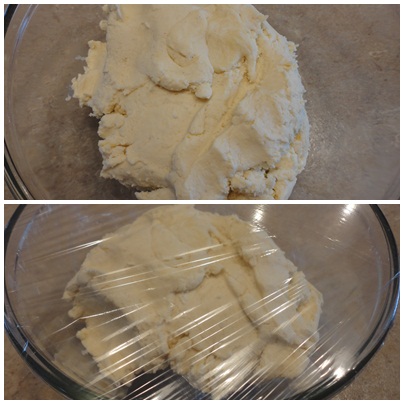
Cover dough tightly with plastic wrap and place in refrigerator for 24 hours.
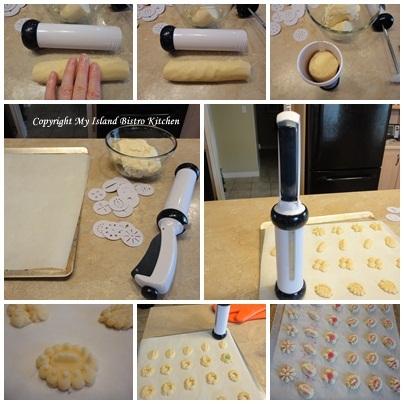
Remove dough from refrigerator and let sit at room temperature for apx. 1 hour. Form dough into a roll that will fit inside the cookie press cylinder. Insert dough roll into the cookie press.
Line cookie sheets with parchment paper. Follow manufacturer’s directions for your cookie press to form the cookies into decorative shapes. Decorate with colored sugar, if desired. Bake at 400F for 7-8 minutes. Watch the cookies closely as their high butter content and small size means they will burn easily and quickly. Let cookies cool on baking sheets for 2-3 minutes then transfer them to wire racks to finish cooling.
Thank you for visiting “the Bistro” today. There are lots of ways to connect with “the Bistro” through social media:
Join My Island Bistro Kitchen on Facebook
Follow the Bistro’s tweets on twitter @PEIBistro
Find the Bistro on Pinterest at “Island Bistro Kitchen”
Follow along on Instagram at “peibistro”
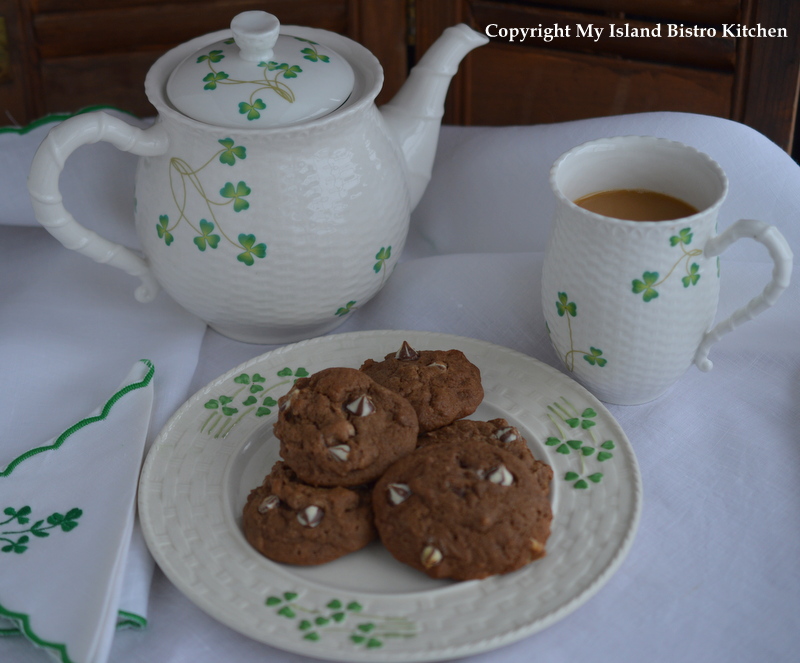
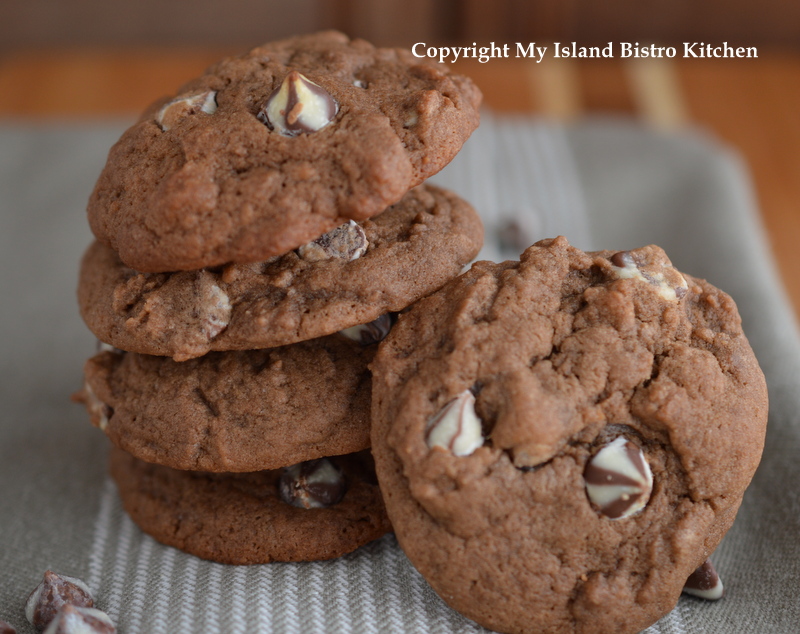
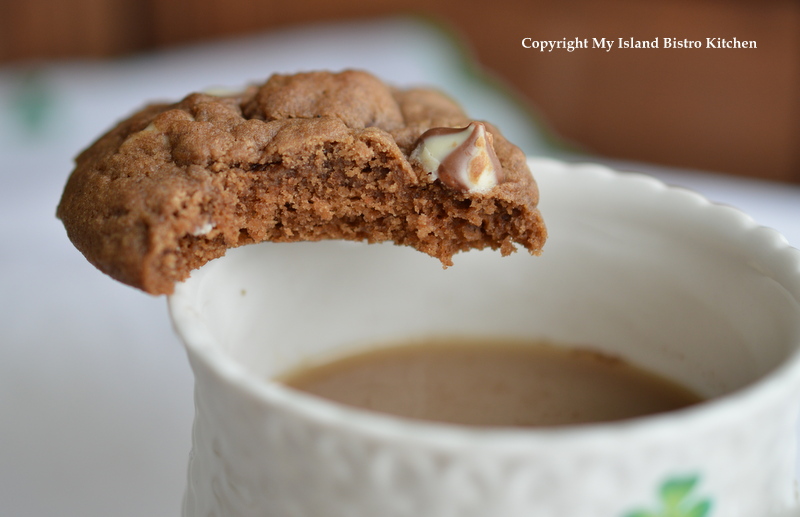
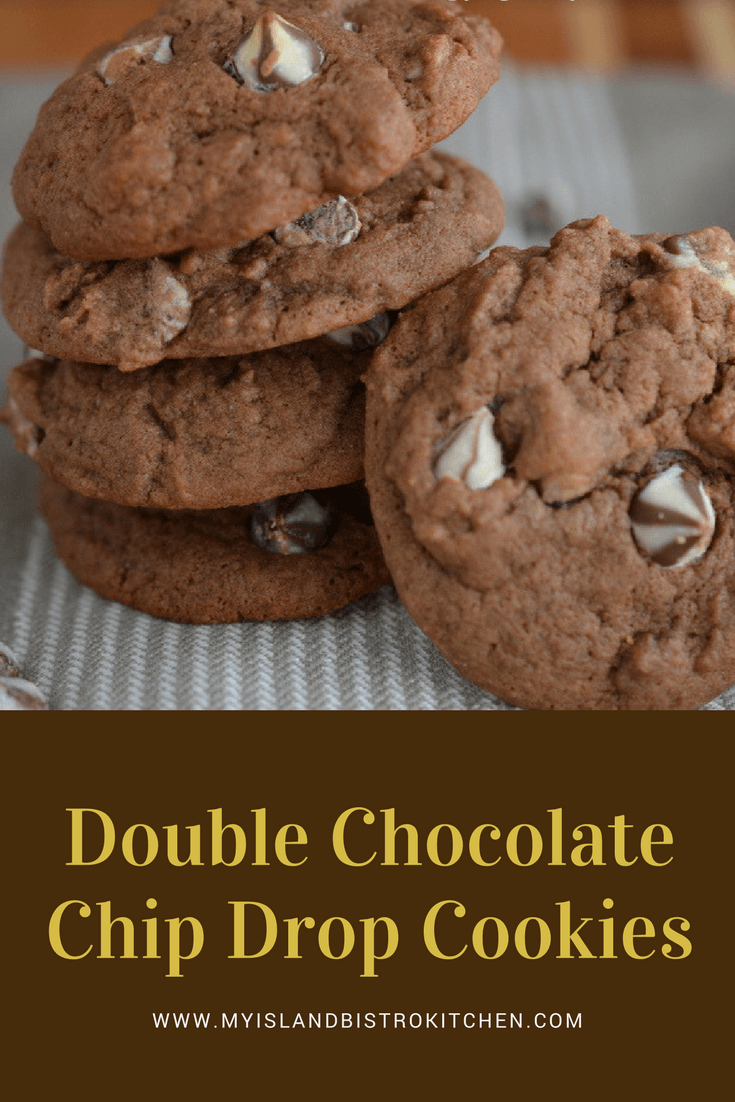
Double Chocolate Chip Drop Cookies Made with Stout
Well, for my Cookie of the Month for March, I tried to find out if there is a cookie recipe that traces its origins to Ireland or, alternatively, a cookie that is particularly popular on the Emerald Isle. However, I had no luck in tracking down any (maybe it was lack of Irish luck!)
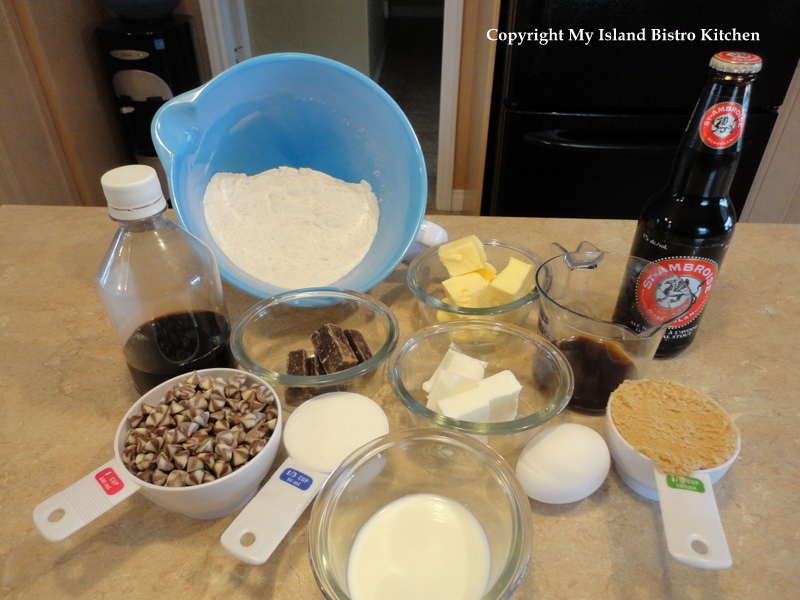
I decided to create a special recipe and give it a distinctly Irish flavour using stout in honour of St. Patrick’s Day on March 17th. As you know, whenever possible, I like to feature Island products in my cooking and baking. At the time of writing, PEI does have a brewing company that produces stout – The Island Brewing Company produces Gahan Sydney Street Stout. However, it is apparently a limited edition and is not available in local liquor stores year-round — at least I couldn’t track down any. So, instead, I opted to use Montreal-brewed St. Ambroise Oatmeal Stout because it boasts hints of espresso and chocolate.
I knew I was going to be making a chocolate cookie with a hint of coffee flavour so a stout with both chocolate and coffee flavour could only enhance the cookie’s taste. Like any ingredient, moderation is the trick. My goal was to flavour the cookie with the stout and bring out the chocolate flavour – I wasn’t aiming for a beer-tasting cookie. Therefore, I used only 1 1/2 tablespoons of stout as part of the liquid ingredients.
This recipe calls for both butter and shortening in the ingredients and I recommend both be used. For more information on why some cookie recipes call for both types of fat, click here.
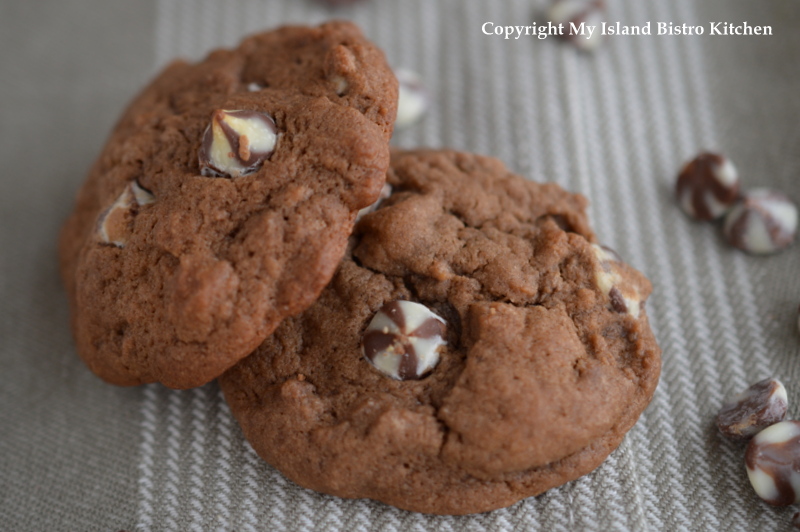
For the chocolate, I chose to use semi-sweet squares of chocolate because I find the flavour a bit more intense than powdered cocoa. Using some brewed coffee gives these cookies a distinct mocha flavour. For interest, color, and texture, I used swirled milk and white chocolate chips.
This dough does well when it is chilled and allowed to “rest” for 24 hours after mixing and before baking the cookies. The purpose of letting the dough “rest” is to allow the liquid ingredients, including the egg, to get fully incorporated and absorbed into the other ingredients. The “resting” period makes for a drier and firmer cookie dough and this controls its spread while baking so you don’t end up with a really flat cookie.
Refrigerating the cookie dough also allows the fat content in the dough to firm up, and cold, firm butter/shortening takes longer to melt in the oven. This delay in melting gives the cookies a chance to rise up instead of immediately spreading out. As a result, the cookies begin to bake, create structure, and are able to hold their shape before the butter, in particular, breaks down and flattens and spreads them out. I do not recommend skipping the dough chilling step for these cookies.
If the dough is particularly hard when it comes out of the refrigerator to the point that it can’t be scooped or spooned without chibbling it, let it rest at room temperature for 10 – 15 minutes. Do not, however, bring the dough completely back to room temperature and soften as that will defeat the objective of having the butter and shortening firm up in the dough before the cookies enter the hot oven and start spreading out.
I like the drop cookies to be soft and somewhat chewy and, of course, the key to that texture is to slightly underbake the cookies – bake these no more than 10-12 minutes at 350F and let them cool on the baking sheet for 2-3 minutes before moving them to a wire rack to finish cooling.
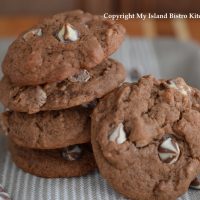
My Island Bistro Kitchen’s Double Chocolate Chip Drop Cookies
Ingredients:
1/2 cup butter, softened
1/4 cup shortening, softened
1/2 cup brown sugar
1/3 cup white sugar
1 egg
2 tbsp. cold brewed coffee
1 1/2 tbsp stout
2 tbsp milk
1 tsp vanilla
2 1/2 squares of semi-sweet chocolate, melted
2 cups flour
1/2 tsp. salt
1/2 tsp baking soda
1/2 tsp baking powder
1 cup chocolate chips
Method:
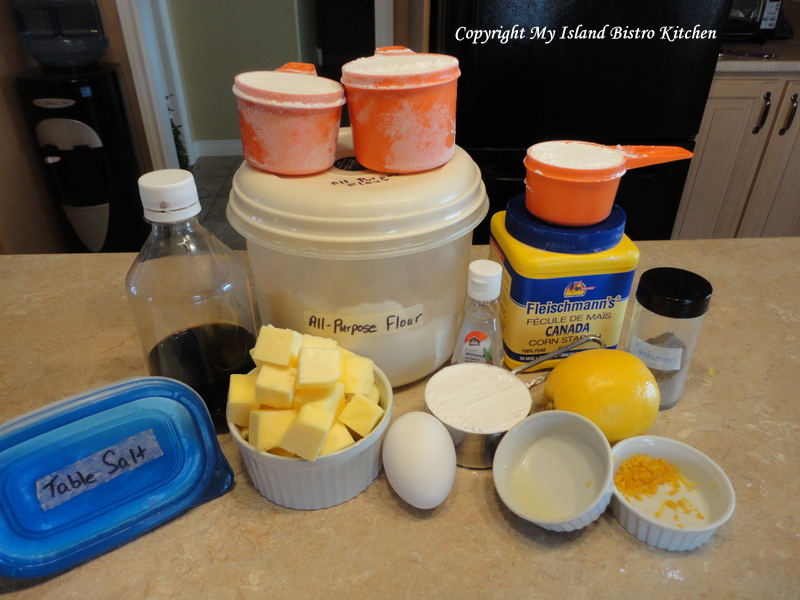
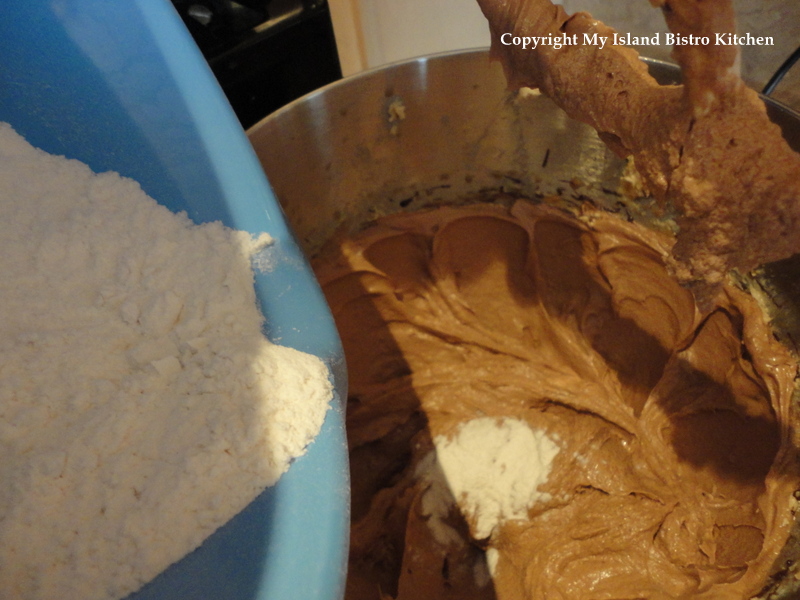
Assemble ingredients.
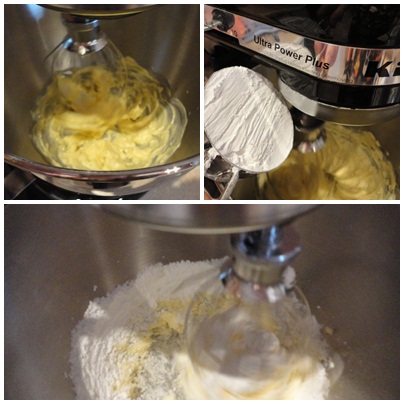
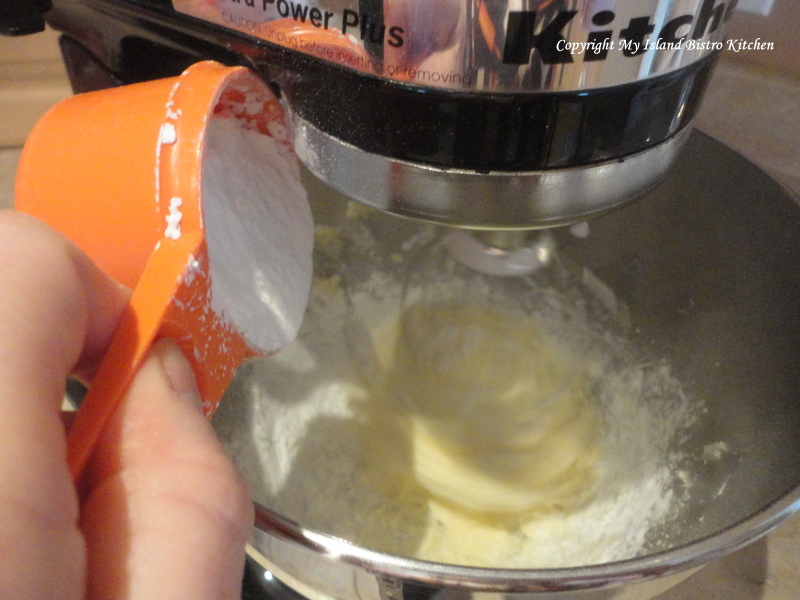
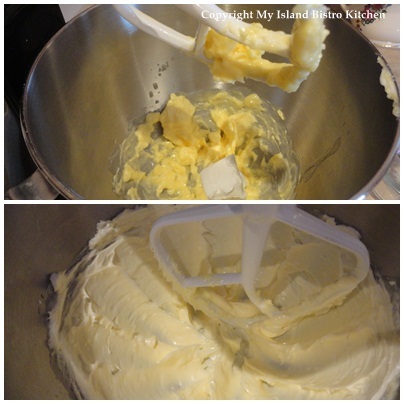
Cream butter and shortening.
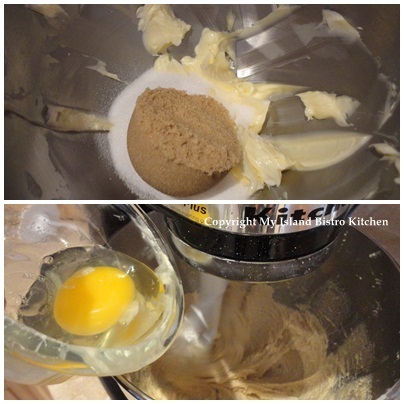
Add brown and white sugars. Beat until light and fluffy. Add egg and beat until blended.
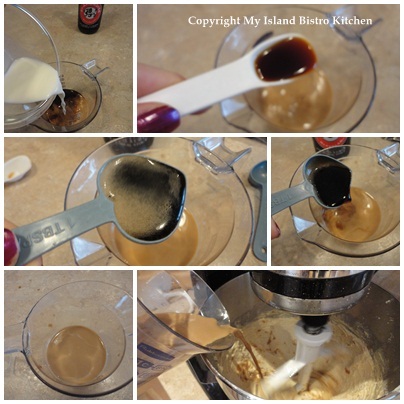
In separate bowl, or large measuring cup, mix coffee, stout, milk, and vanilla. Stir to combine. Add to mixture. Mix well.
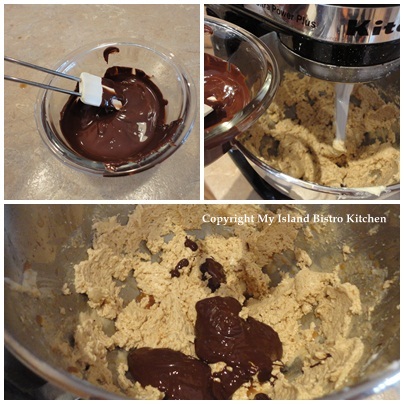
Add melted chocolate and mix to blend.
Combine dry ingredients. Add to mixture and stir just until flour is incorporated.
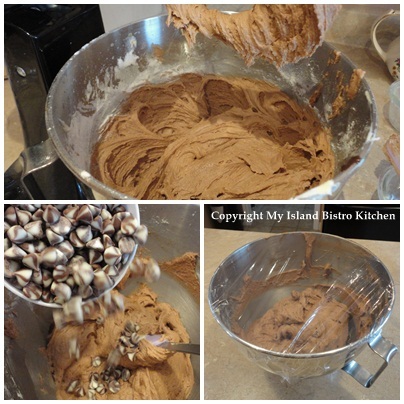
Stir in chocolate chips. Cover bowl with plastic wrap and refrigerate dough for 24 hours.
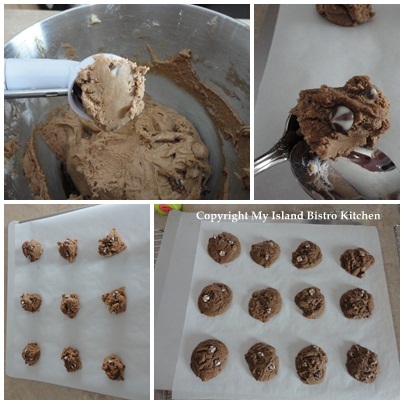
Line baking sheets with parchment paper. Drop by cookie scoop or spoonfuls onto baking sheet, leaving about 2 inches between the cookies. Bake at 350F oven for 10-12 minutes. Let cookies cool on baking sheet for 2-3 minutes then transfer them to a wire rack to finish cooling.
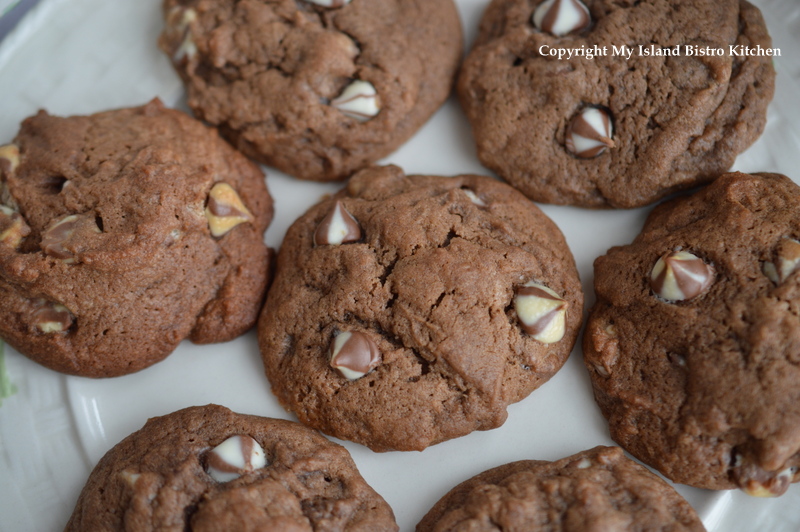
These make a fine treat for St. Patrick’s Day (but are just as good any time of the year!)
My Island Bistro Kitchen's Double Chocolate Chip Drop Cookies
These Double Chocolate Chip Drop Cookies are both tasty and showy. Flavoured with a wee bit of stout. A treat anytime but especially good for a St. Patrick's Day treat!
Course
Snack
My Island Bistro KitchenMy Island Bistro Kitchen
Ingredients
1/2cupbuttersoftened
1/4cupshorteningsoftened
1/2cupbrown sugar
1/3cupwhite sugar
1egg
2tbsp.cold brewed coffee
1 1/2tbspstout
2tbspmilk
1tspvanilla
2 1/2squares of semi-sweet chocolatemelted
2cupsflour
1/2tsp.salt
1/2tspbaking soda
1/2tspbaking powder
1cupchocolate chips
Instructions
Assemble ingredients.
Cream butter and shortening.
Add brown and white sugars. Beat until light and fluffy. Add egg and beat until blended.
In separate bowl, or large measuring cup, mix coffee, stout, milk, and vanilla. Stir to combine. Add to mixture. Mix well.
Add melted chocolate and mix to blend.
Combine dry ingredients. Add to mixture and stir just until flour is incorporated.
Stir in chocolate chips. Cover bowl with plastic wrap and refrigerate dough for 24 hours.
Line baking sheets with parchment paper. Drop by cookie scoop or spoonfuls onto baking sheet, leaving about 2 inches between the cookies. Bake at 350F oven for 10-12 minutes. Let cookies cool on baking sheet for 2-3 minutes then transfer them to a wire rack to finish cooling.
Recipe Notes
[Copyright My Island Bistro Kitchen]
If you have made this recipe and enjoyed it and/or wish to share it with your friends and family, please do so on social media but be sure to share the direct link to this posting from my website.
Connect with My Island Bistro Kitchen on Social Media
Follow “the Bistro” on Pinterest at https://www.pinterest.ca/peibistro/ and pin the Pinterest-ready photo found at the end of this post to your favorite Pinterest boards.
These Old-fashioned Sugar Cookies are one of the plainest cookies yet they have endured throughout time and are often counted among the favorites in many families. The cookies are aptly named given the amount of sugar in them in proportion to the amounts of other ingredients. Despite the amount of sugar in most sugar cookie recipes, they are not really an overly sweet or rich cookie.Continue reading Old Fashioned Sugar Cookies→
While some will argue that Shortbread is not a cookie per se, I chose to include it in my Cookie of the Month series I ran a few years ago and, at the time of original writing, featured it for January given that is the month Robert Burns Day is celebrated. There are so many recipes and versions (and opinions!) of Shortbread and what follows is mine. Continue reading Shortbread Recipe→
(Mostly) PEI and Maritime Food – Good Food for a Good Life!