These Cranberry and Lemon Scones are a lovely treat any time of the year but, with their bright red cranberries, are especially seasonal over the Christmas period. Serve them with a favorite jam or curd, such as either my Cranberry Curd or Lemon Curd. Continue reading Cranberry and Lemon Scones→
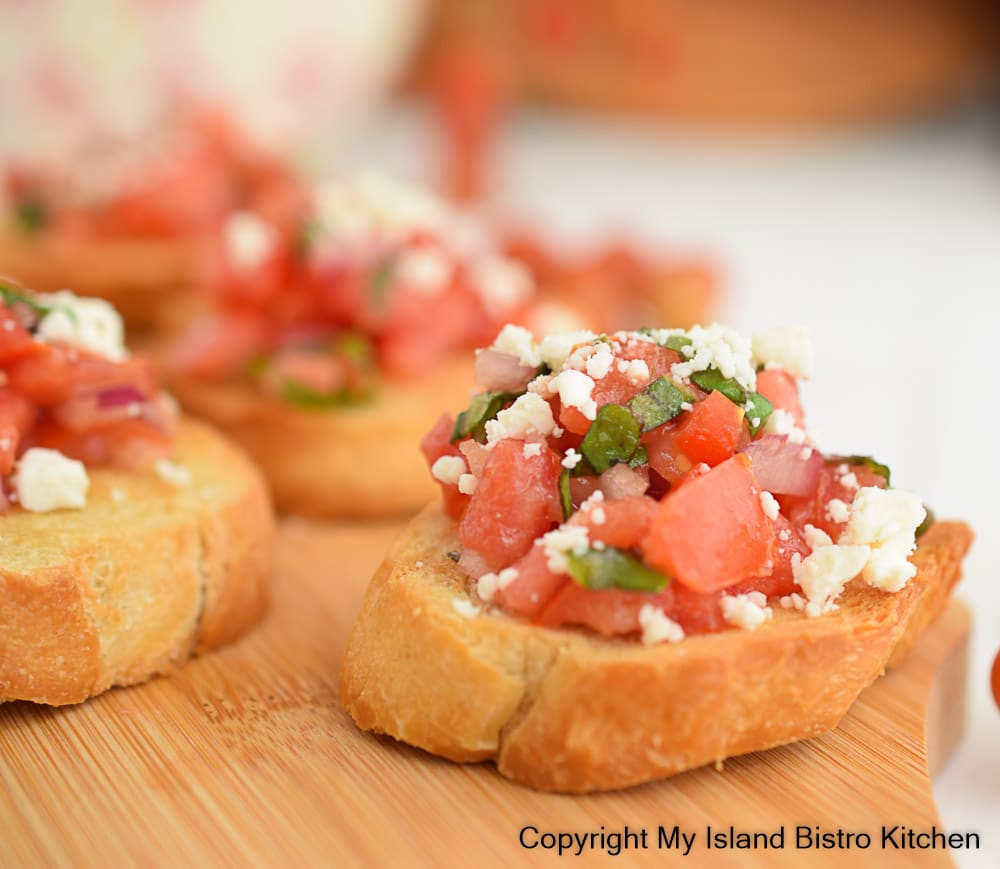
Bruschetta is simply an appetizer that consists of a tomato-basil topping served on crostini toasts. It is best made with the freshest tomatoes possible (i.e., from the garden) but can certainly be made year-round with good quality supermarket tomatoes. Continue reading Classic Bruschetta with Balsamic Reduction→
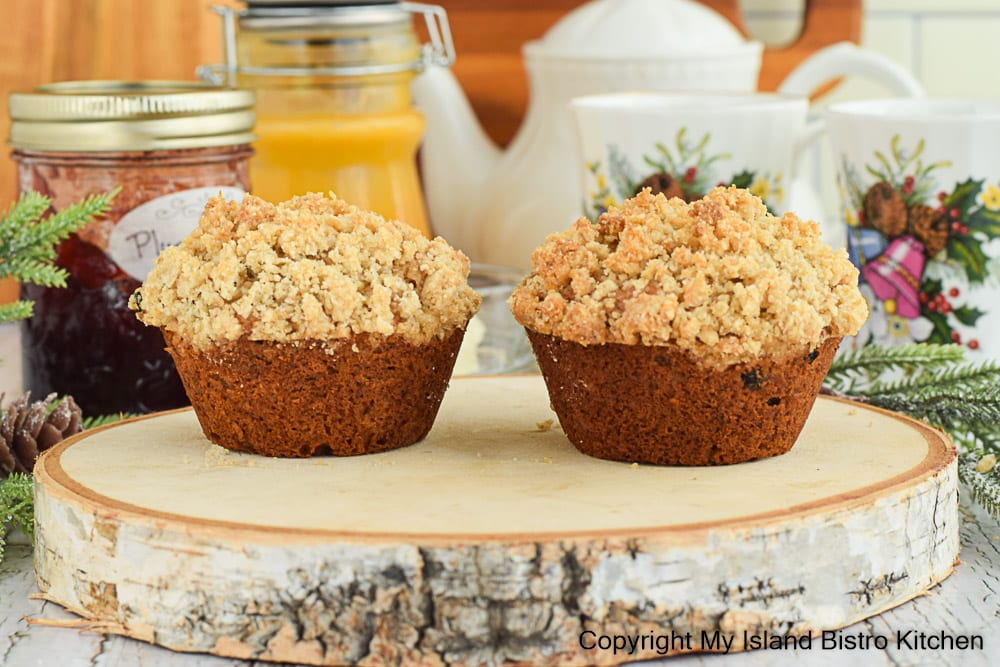
These decadent Gourmet Deli-style Mincemeat Muffins with their lovely crumble topping are a fabulous way to enjoy mincemeat. Good any time of the year, they are an especially wonderful treat around the Christmas holiday period. Continue reading Gourmet Deli-style Mincemeat Muffins→
Inspired by the famous Italian sweet fruit bread/cake, these Panettone Scones (or, perhaps, more aptly “Panescone”) are divine served with clotted cream or English double cream, and your favorite fruit jam or curd. They are particularly tasty served with any of my homemade jams or jellies and either my clementine curd or cranberry curd. Continue reading Panettone Scones Recipe→
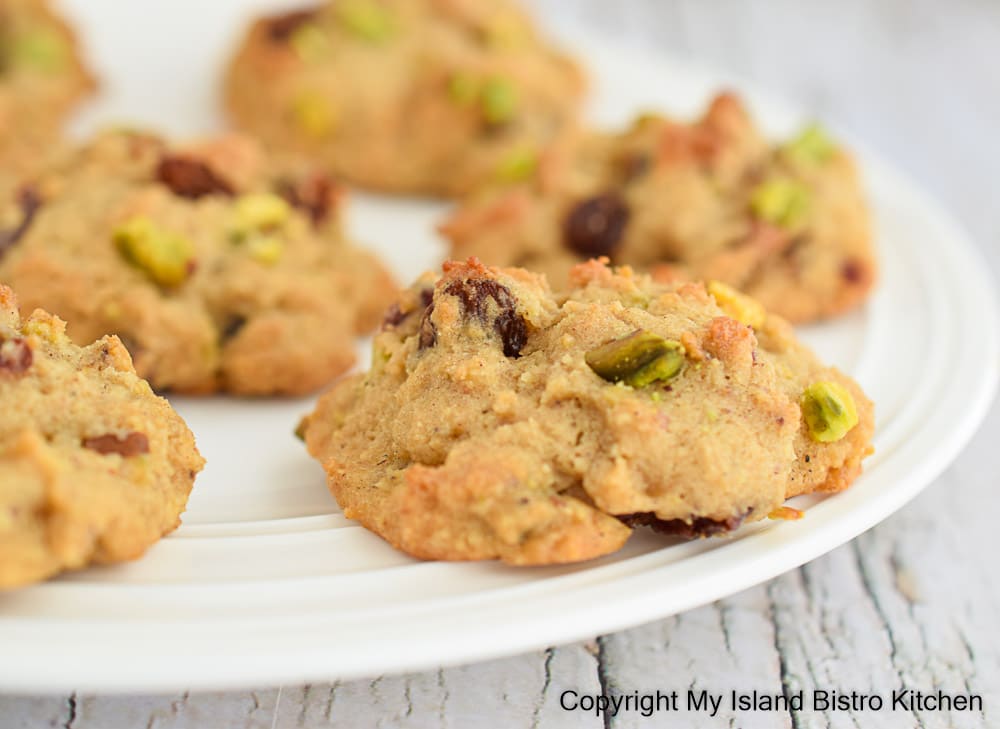
Hermit Cookies are hearty old-fashioned lightly spiced drop cookies with additions of dried fruits and nuts. There are various recipes for Hermits that call for different add-ins. I add dates, raisins, dried cranberries, and nuts in my recipe. Continue reading Hearty Hermit Cookies Recipe→
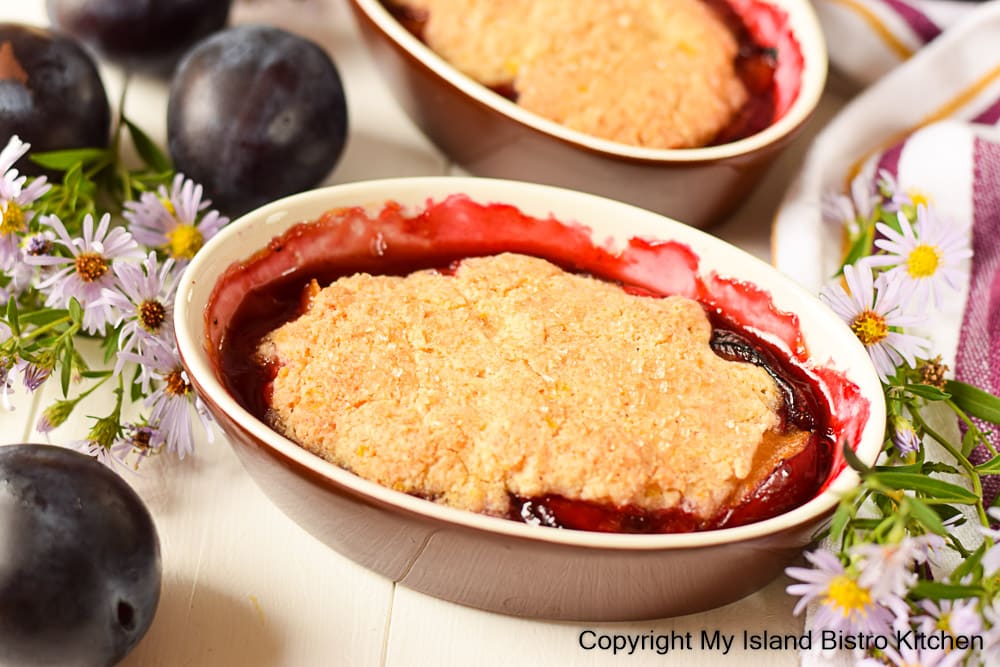
This Plum Cobbler is a dessert I place in the comfort food category. It does not take any odd or hard-to-find ingredients and makes a lovely finale to dinner. Continue reading Plum Cobbler→
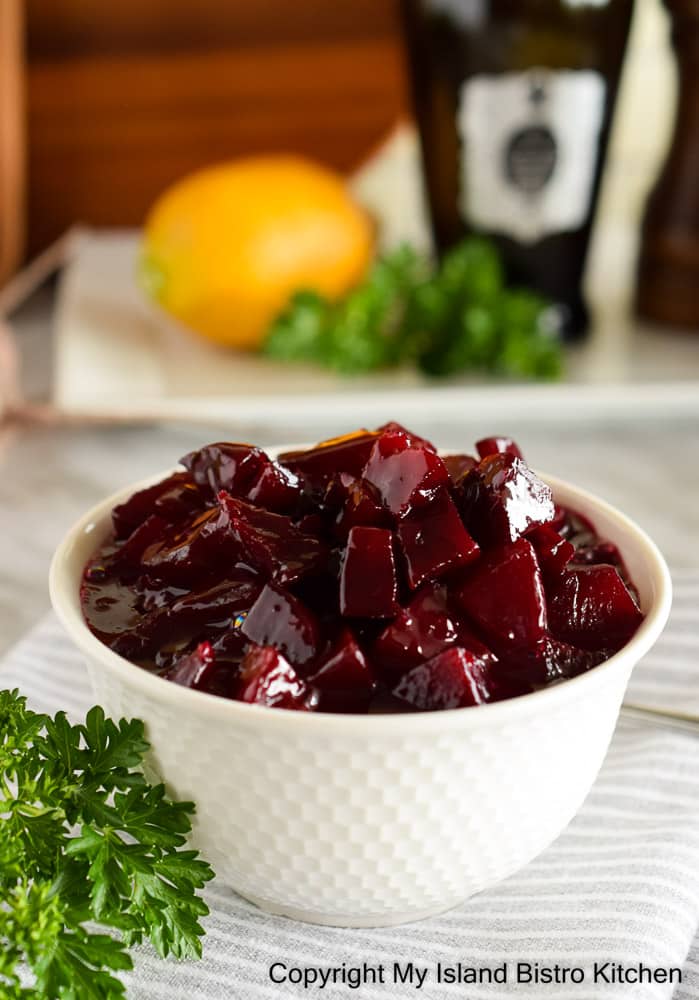
Harvard Beets are simply a side dish of cooked beets that have been diced or sliced and reheated in a sweet and slightly tangy sauce made primarily with sugar, vinegar, and thickener. Some refer to these beets as glazed beets. Harvard Beets may be eaten hot, lukewarm, or cold. Continue reading Delicious Harvard Beets Recipe→
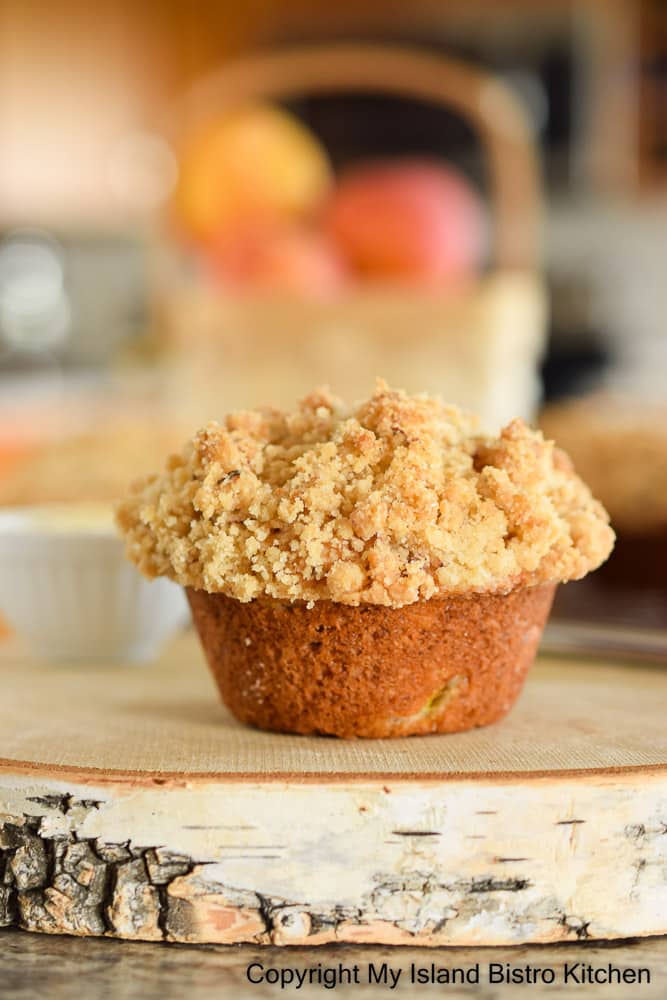
These Deli-style Peach Pecan Muffins, with their tasty crumble topping, have a lightly spiced batter to complement the peaches and pecans. While they can be made with frozen peaches, these muffins are an extra-special treat to make when fresh peaches are on the market. Continue reading Deli-style Peach Pecan Muffins→
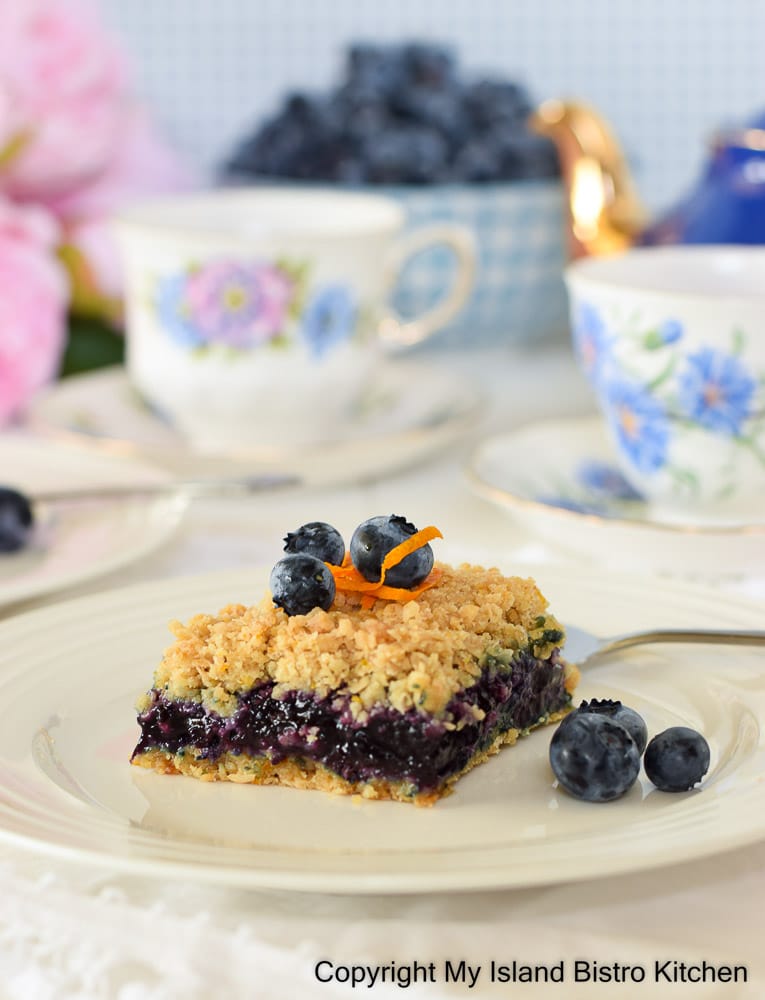
Modelled after, and made with the same method as, a traditional Date Square, this wholesome Orange-Scented Blueberry Oat Square features a delectable blueberry filling sandwiched between a sweet and buttery orange-scented oatmeal crumb base and topping. Continue reading Orange-scented Blueberry Oat Square→
As I write this post on August 7, 2022, the forthcoming week of August 8-14th marks National Afternoon Tea Week in the UK. This is a week set aside to celebrate the wonderful leisurely genteel activity of afternoon tea. As those of you who are regular followers of my food blog know, afternoon tea is a passion of mine and I never pass up an opportunity to indulge in the menu of savory bites, toothsome scones with jam and clotted or English double cream, and an array of tantalizing desserts. Continue reading National Afternoon Tea Week→
Living in PEI, we have access to fresh locally-fished lobster during the Island’s two lobster fishing seasons, commonly known as the spring and fall fisheries.
Lobster Fishing Boats Loaded with Traps for Setting Day, North Rustico, PEI
The first season begins in late April/early May and goes until the end of June. The second season runs from August to October.
Lobster Fishing Boat Loaded with Traps, French River, PEI
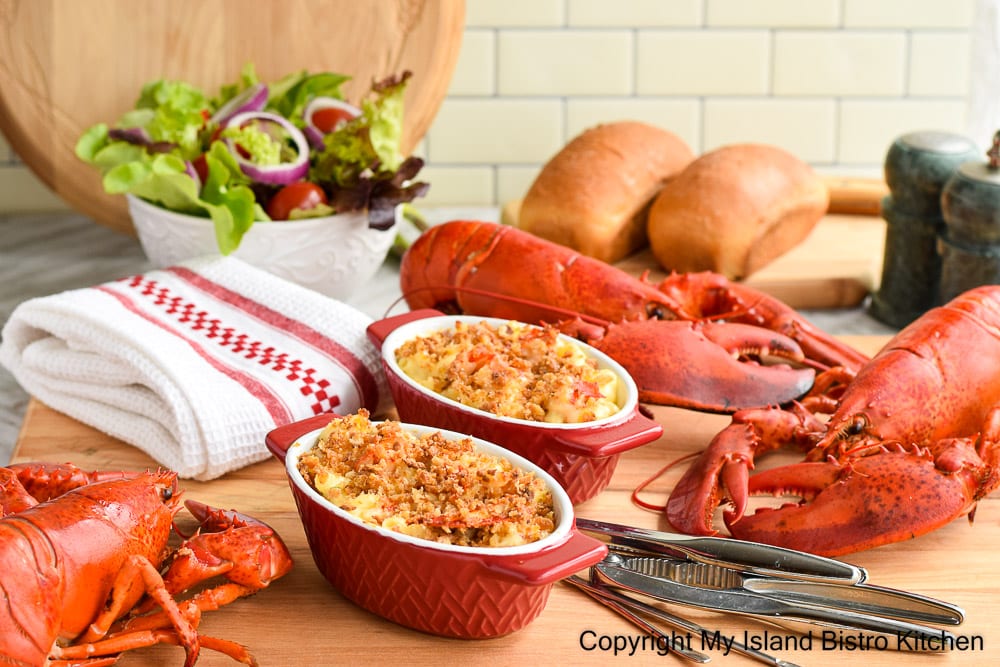
After a few good “feeds” of lobster straight from the shell, I am ready to incorporate lobster as an ingredient in other dishes such as in this tasty Lobster Macaroni and Cheese. This is not your usual weeknight Mac ‘n Cheese dish. Rather, I refer to it as a more extravagant grown-up version of an old family classic. Continue reading Lobster Macaroni and Cheese Recipe→
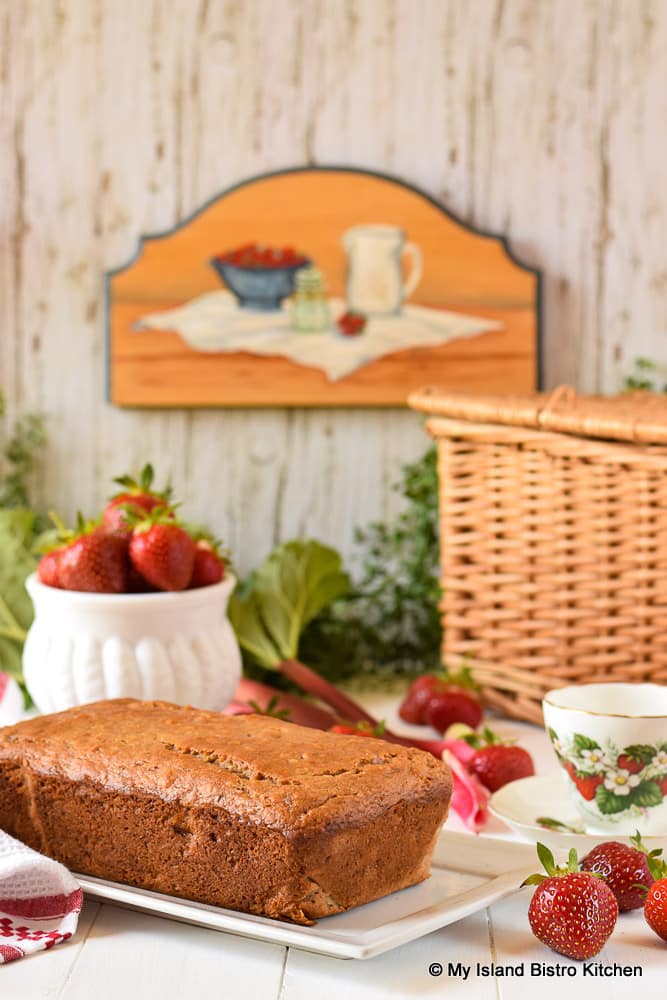
Quick breads are easy to make and are lovely for tea or coffeebreaks. Today’s quick bread combines strawberry and rhubarb with some flavorful spices (nutmeg and cardamom) to make a delightful treat. While this Strawberry Rhubarb Quick Bread can certainly be made with frozen strawberries and rhubarb since they are cooked into a sauce before being added to the bread batter, it is an extra-special treat to make when both are in season locally. Continue reading Strawberry Rhubarb Quick Bread Recipe→
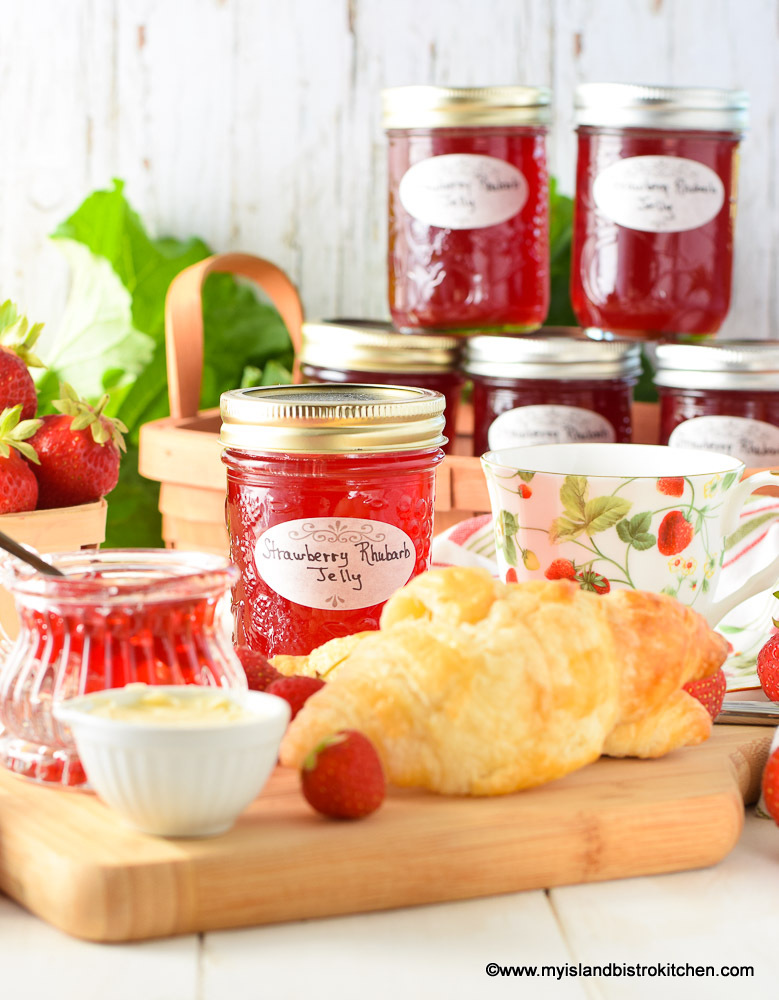
Strawberry and rhubarb are two of my favorite flavor combinations. It should come as no surprise, then, that I would create a Strawberry Rhubarb Jelly recipe. With its stunning color and beautiful flavor, this jelly is sure to become a family favorite. Continue reading Strawberry Rhubarb Jelly Recipe→
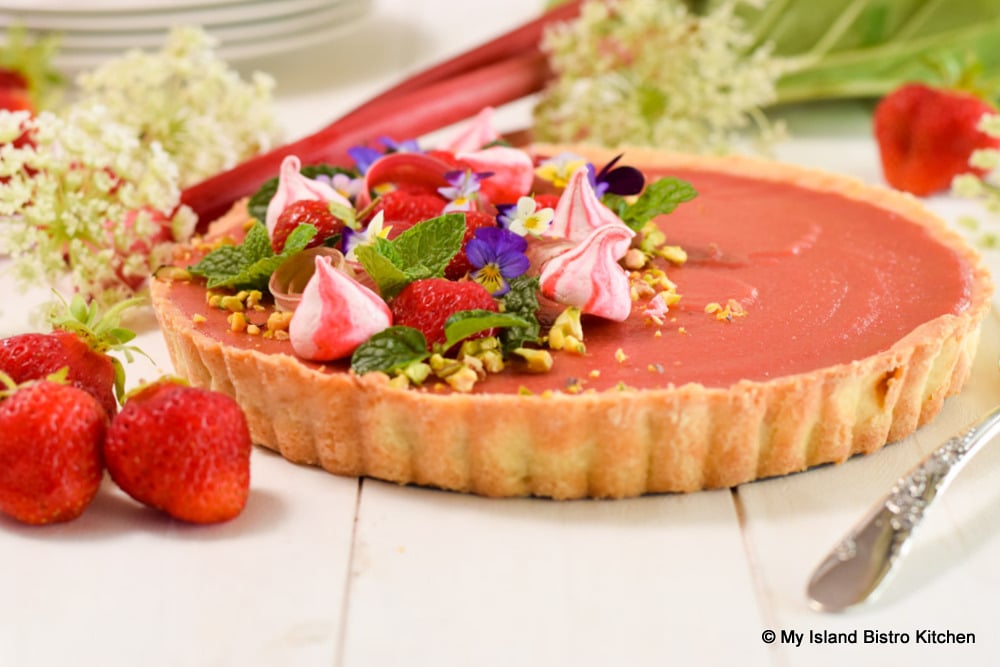
Today’s dessert is the lovely Strawberry Rhubarb Tart modeled after the famous French Lemon Tart. This divine tart combines two of the season’s best flavors into a silky-smooth filling which is then placed in a buttery rich and tender Pâte Sucrée shell. Simply, this is a decadent dessert of restaurant quality that can be made at home!
While a “Jump to Recipe” button has been activated on this post, it is highly recommended that the entire text of this post be read before making the Strawberry Rhubarb Tart as it contains additional information that is not included in the printable version of the recipe. Continue reading Strawberry Rhubarb Tart Recipe→
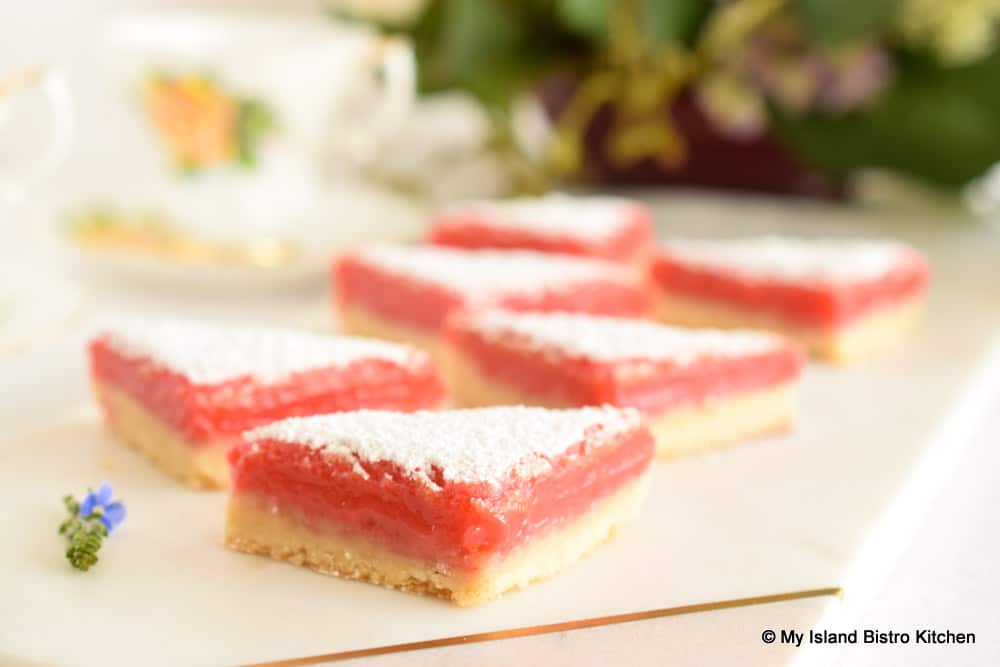
Two of the season’s best treats – strawberries and rhubarb – combine to make a luscious topping for Scrumptious Strawberry Rhubarb Bars with a rich buttery shortbread base. Continue reading Scrumptious Strawberry Rhubarb Bars→
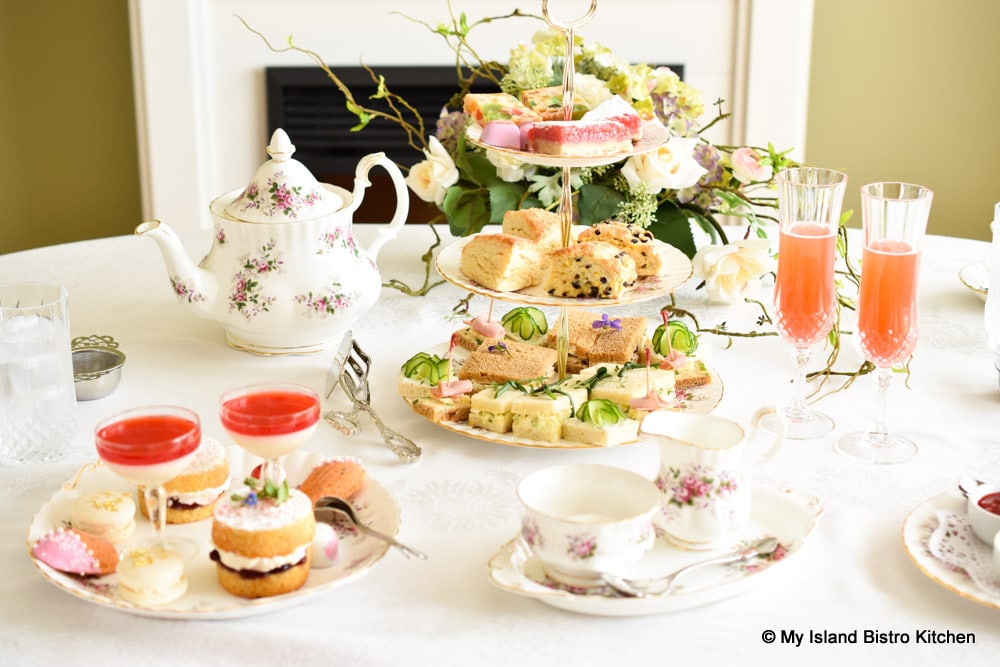
Today, we enjoyed a Celebratory Platinum Jubilee Afternoon Tea. It’s not many people who can say they worked in the same job for 70 years and probably even fewer can boast of still being on the job every day with plans to continue! As I write this post, it is June 2, 2022, the actual 70th anniversary of the formal coronation of Her Majesty Queen Elizabeth II (now aged 96) which took place on June 2, 1953. Continue reading Celebratory Platinum Jubilee Afternoon Tea→
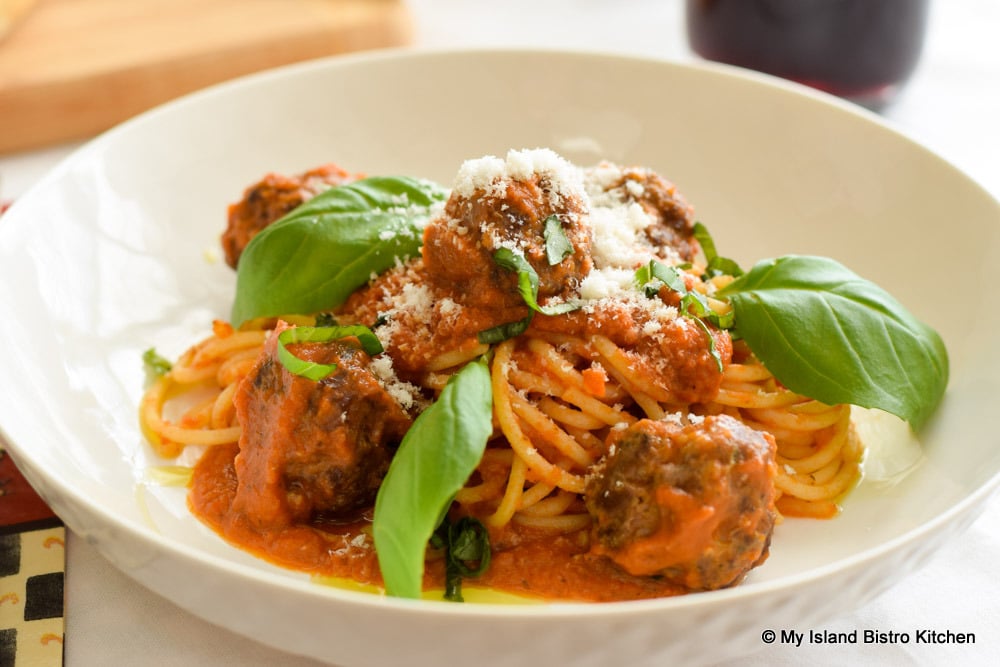
Homemade Spaghetti and Meatballs make a super tasty meal. Spaghetti sauce is not difficult to make and this sauce freezes very well so it is great to have on hand when needed. Likewise, meatballs are not difficult to make either and they also freeze well. So, this is a great make-ahead meal to have on hand when the tastebuds crave a Spaghetti and Meatballs meal. It’s simply a matter of thawing and reheating the sauce and meatballs and cooking up a pot of spaghetti. Continue reading Bistro Style Spaghetti and Meatballs Recipe→
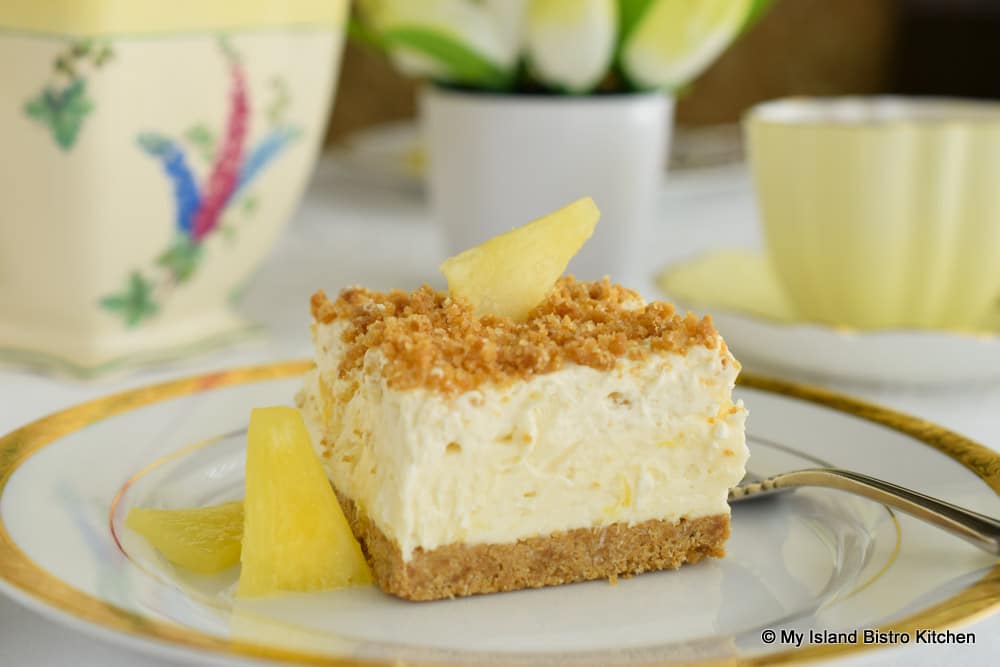
Who doesn’t love a no-bake dessert! This delectable Pineapple Cheesecake Dessert is very easy to make and does not take a lot of ingredients. While no baking is required, some refrigerator time in between steps is needed for the dessert to set. Continue reading No-Bake Pineapple Cheesecake Dessert→
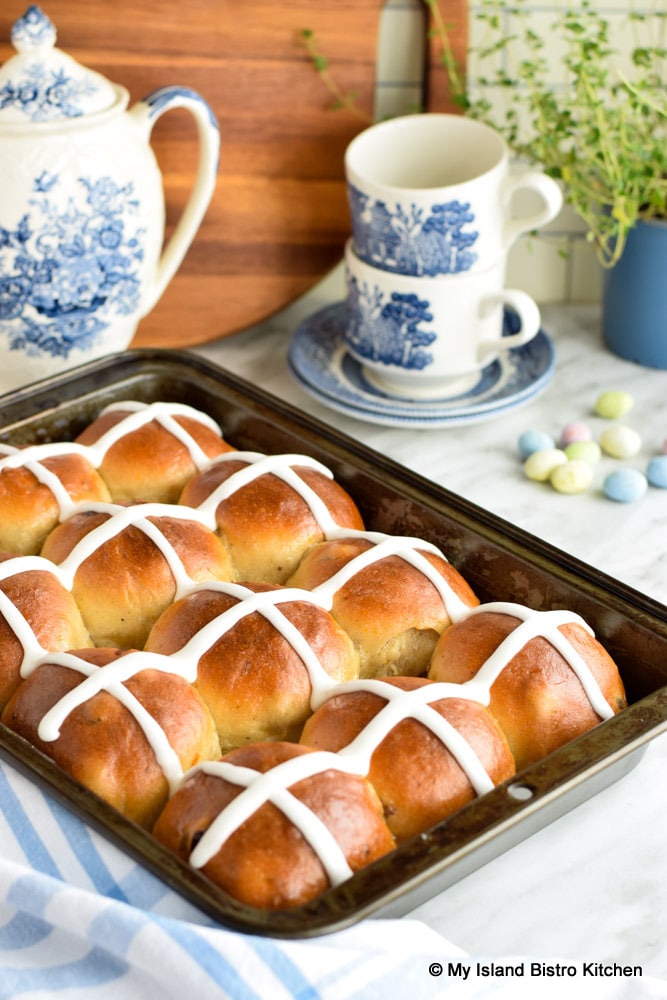
Hot Cross Buns are made with a yeasted enriched dough that is fragrant with warm spices. Usually, dried fruit is added. These buns are an Easter tradition in many homes. Traditionally eaten on Good Friday, and marking the end of Lent, Hot Cross Buns, with their signature cross on the top, carry the symbolism of the crucifixion of Jesus. Continue reading Billowy Soft Hot Cross Buns→
(Mostly) PEI and Maritime Food – Good Food for a Good Life!